
Setup Buttondown DKIM, DMARC, and Bounce Records
Check your domain for DMARC, DKIM, SPF and MX records. Get a free report.
How to Setup Buttondown Domain Authentication Records?
This article will guide you on how to setup buttondown DKIM, Bounce, and DMARC records. As long as the bounce record is in place and DKIM is configured, SPF becomes less critical, since DKIM and Return-Path alignment provide sufficient authentication.
With the help of these DNS records, you can improve email deliverability and prevent email scams. When your email domain is authenticated, inbox providers like Google, Outlook, and Yahoo trust you as a legitimate sender, hence, allowing your emails to the customers' inboxes.
SPF (Sender Policy Framework) specifies which servers are allowed to send emails on your behalf.
DKIM (DomainKeys Identified Mail) makes sure that the email message has not been forged in its transit.
DMARC (Domain-based Message Authentication, Reporting, and Conformance) checks the SPF and DKIM alignment and decides what to do with emails that fail the authentication check.
Configure Buttondown DNS Records:
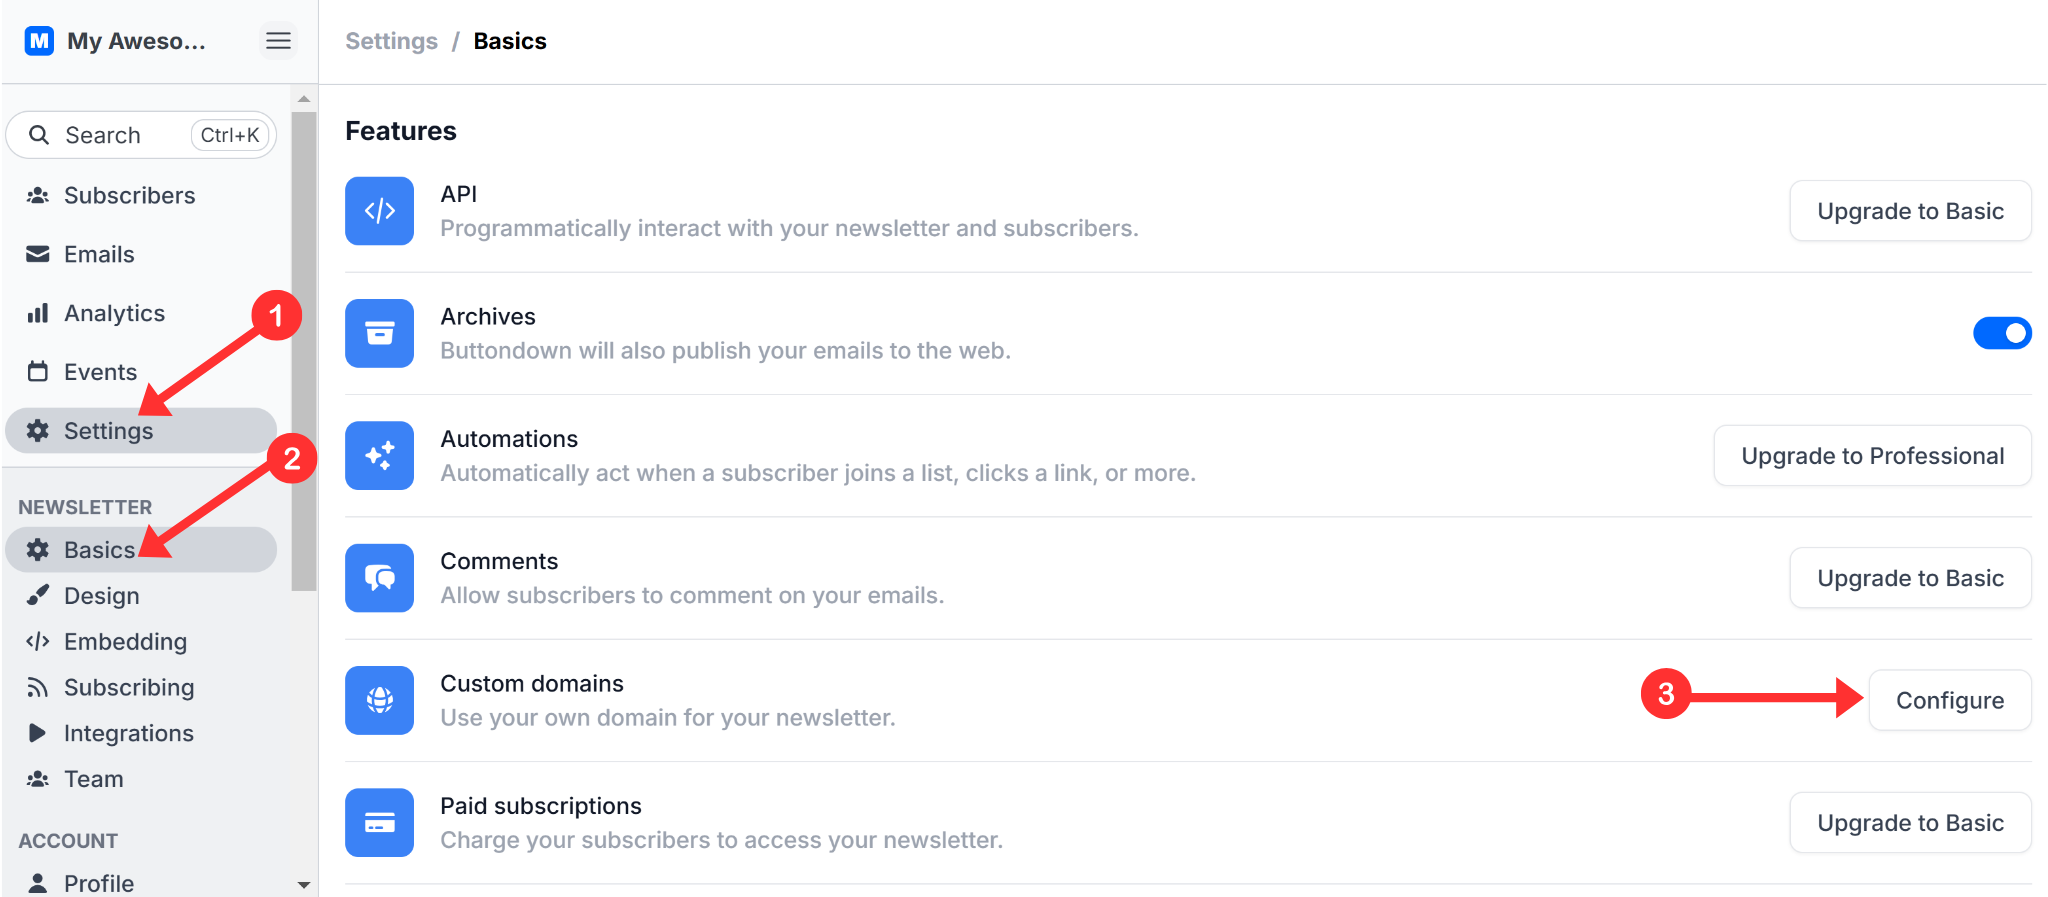
On the buttondown dashboard, navigate to Settings in the left side panel.
In the Basics tab, scroll down to Features.
-
Click Configure next to Custom Domain.
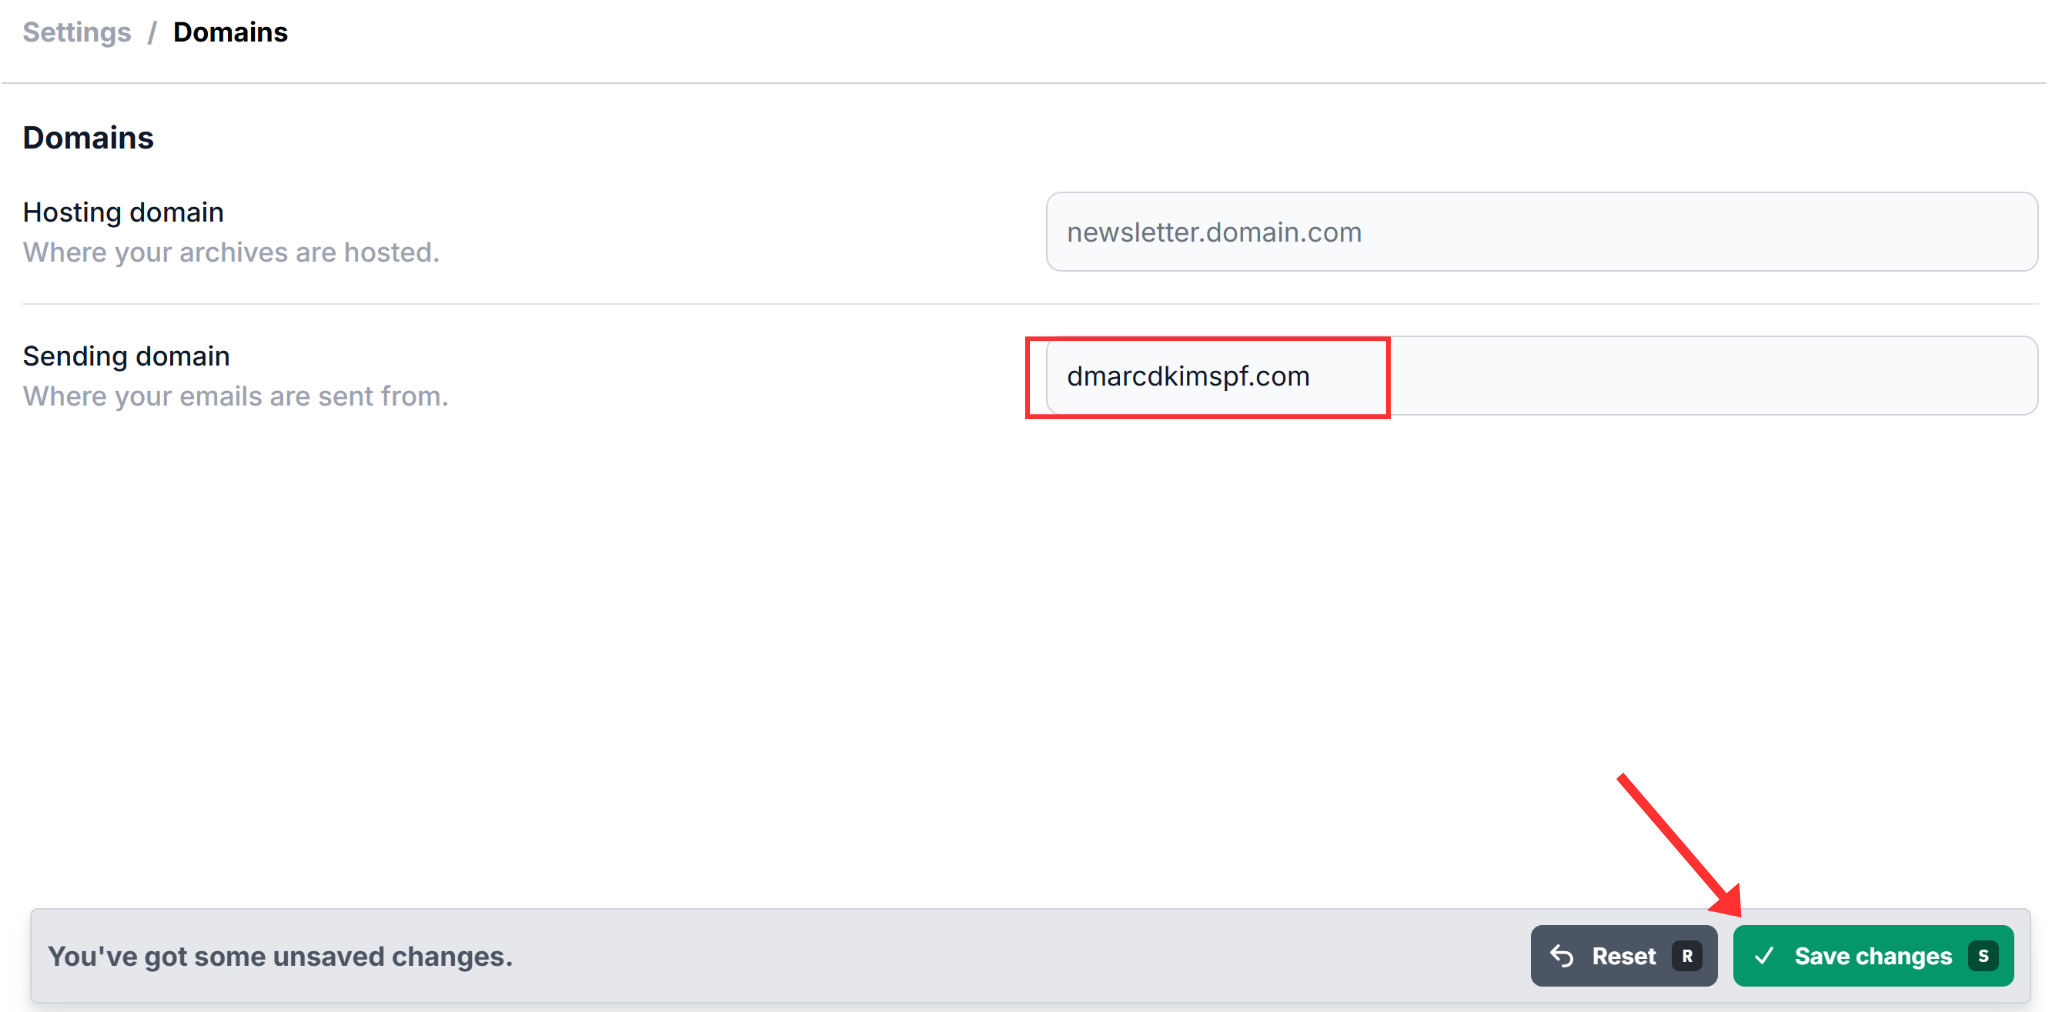
Write your domain name in the Sending Domain field.
-
Click Save Changes.
-
A yellow bar is displayed at the top, click "Learn more."

-
The next page displays the DKIM, Bounce, and DMARC records.

NOTE: Add the DKIM and Bounce records to your DNS provider and see the last section of this guide for DMARC setup instructions.
Setup Buttondown DKIM Record:
Login to your DNS provider. We are using Cloudflare for this tutorial.
Open DNS settings and look for the option to add a record.
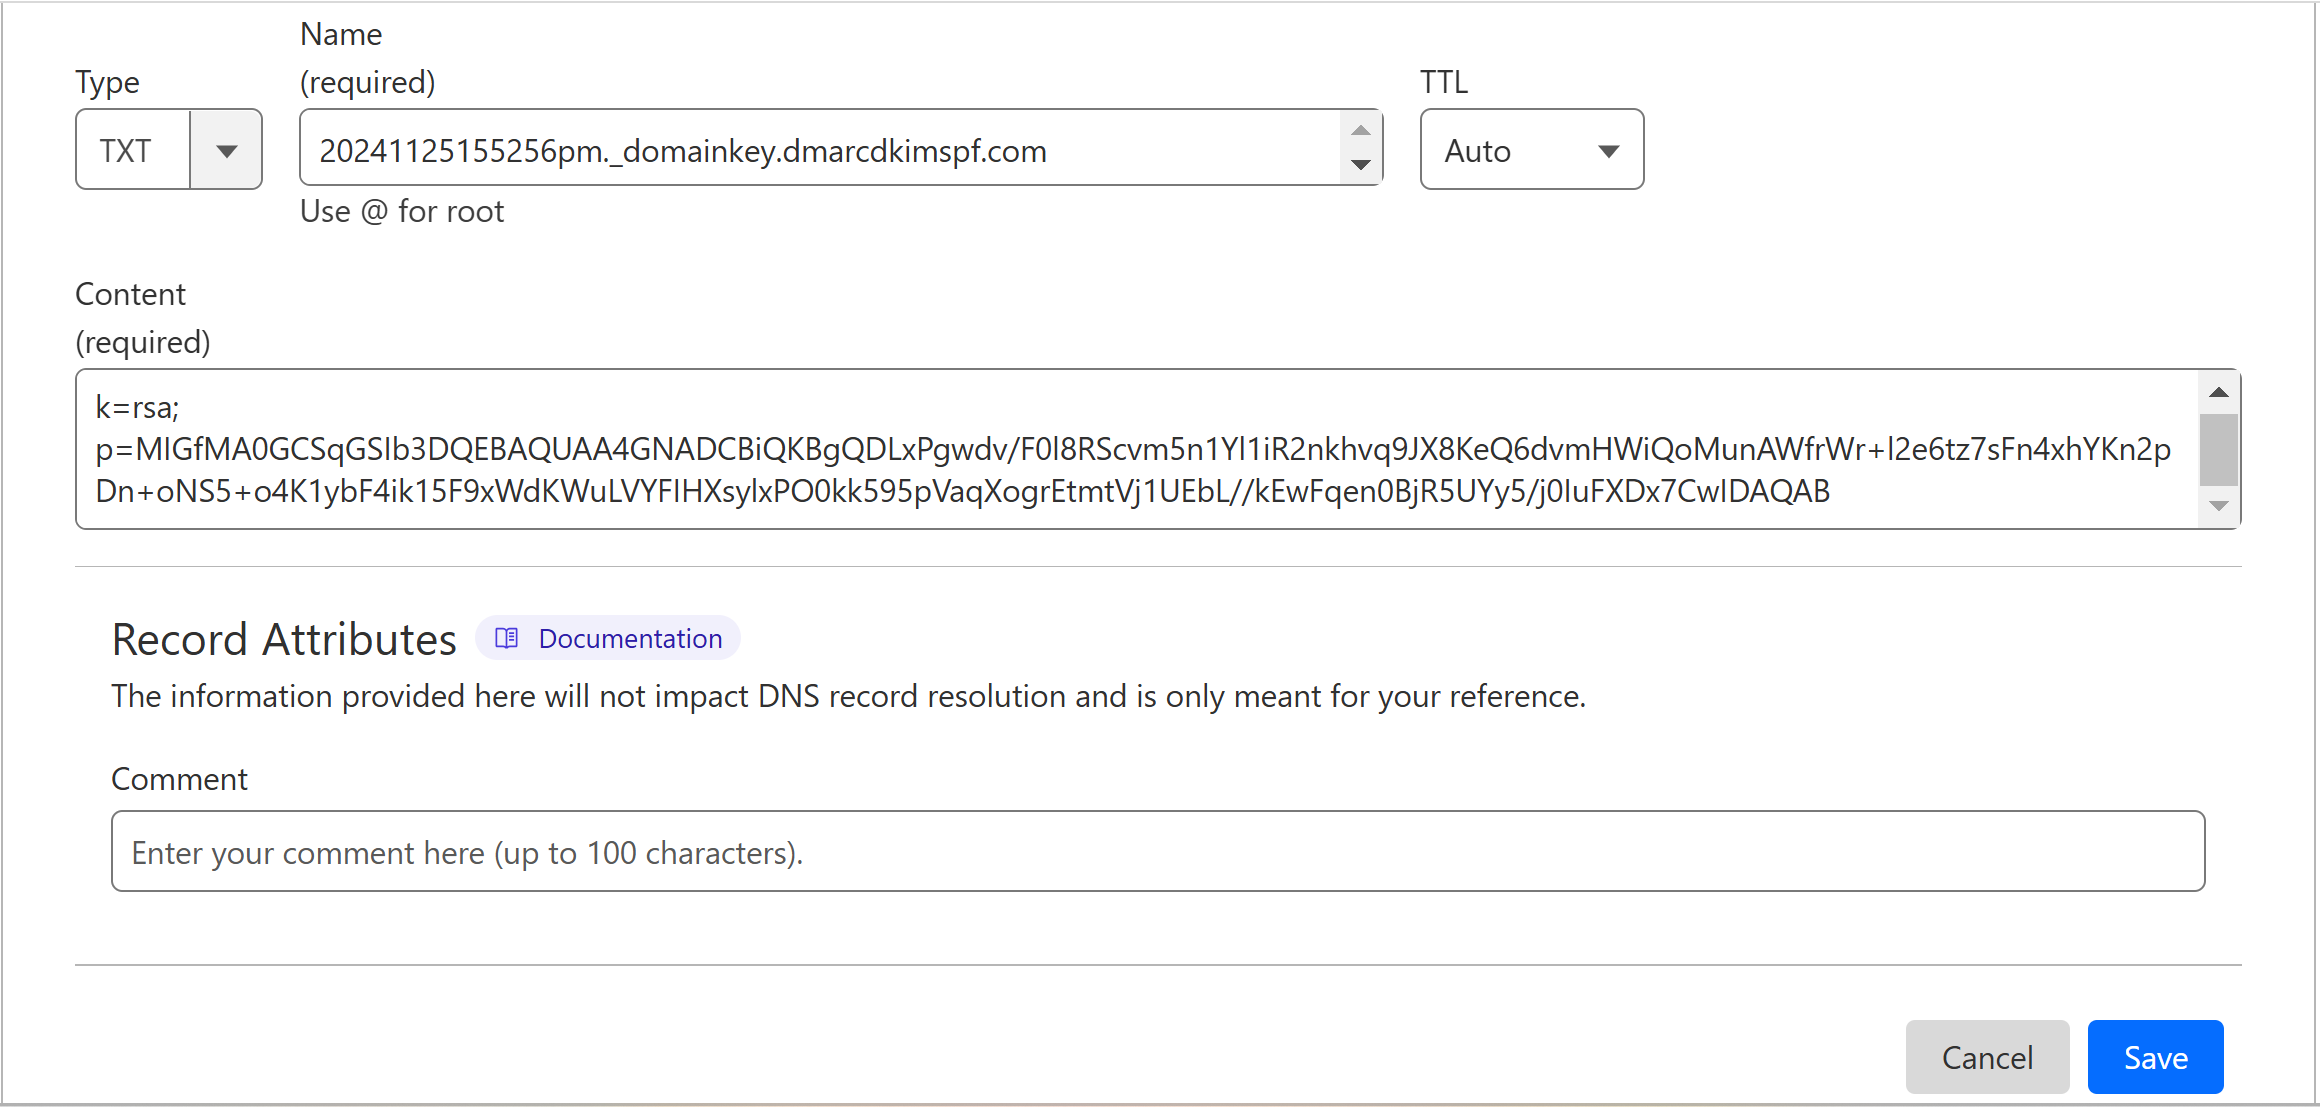
Select record type TXT.
Copy the record name and put it in the name field of your DNS dashboard.
Now copy and paste the record value into the content field.
-
Click the Save button.
Setup Buttondown Bounce Record:
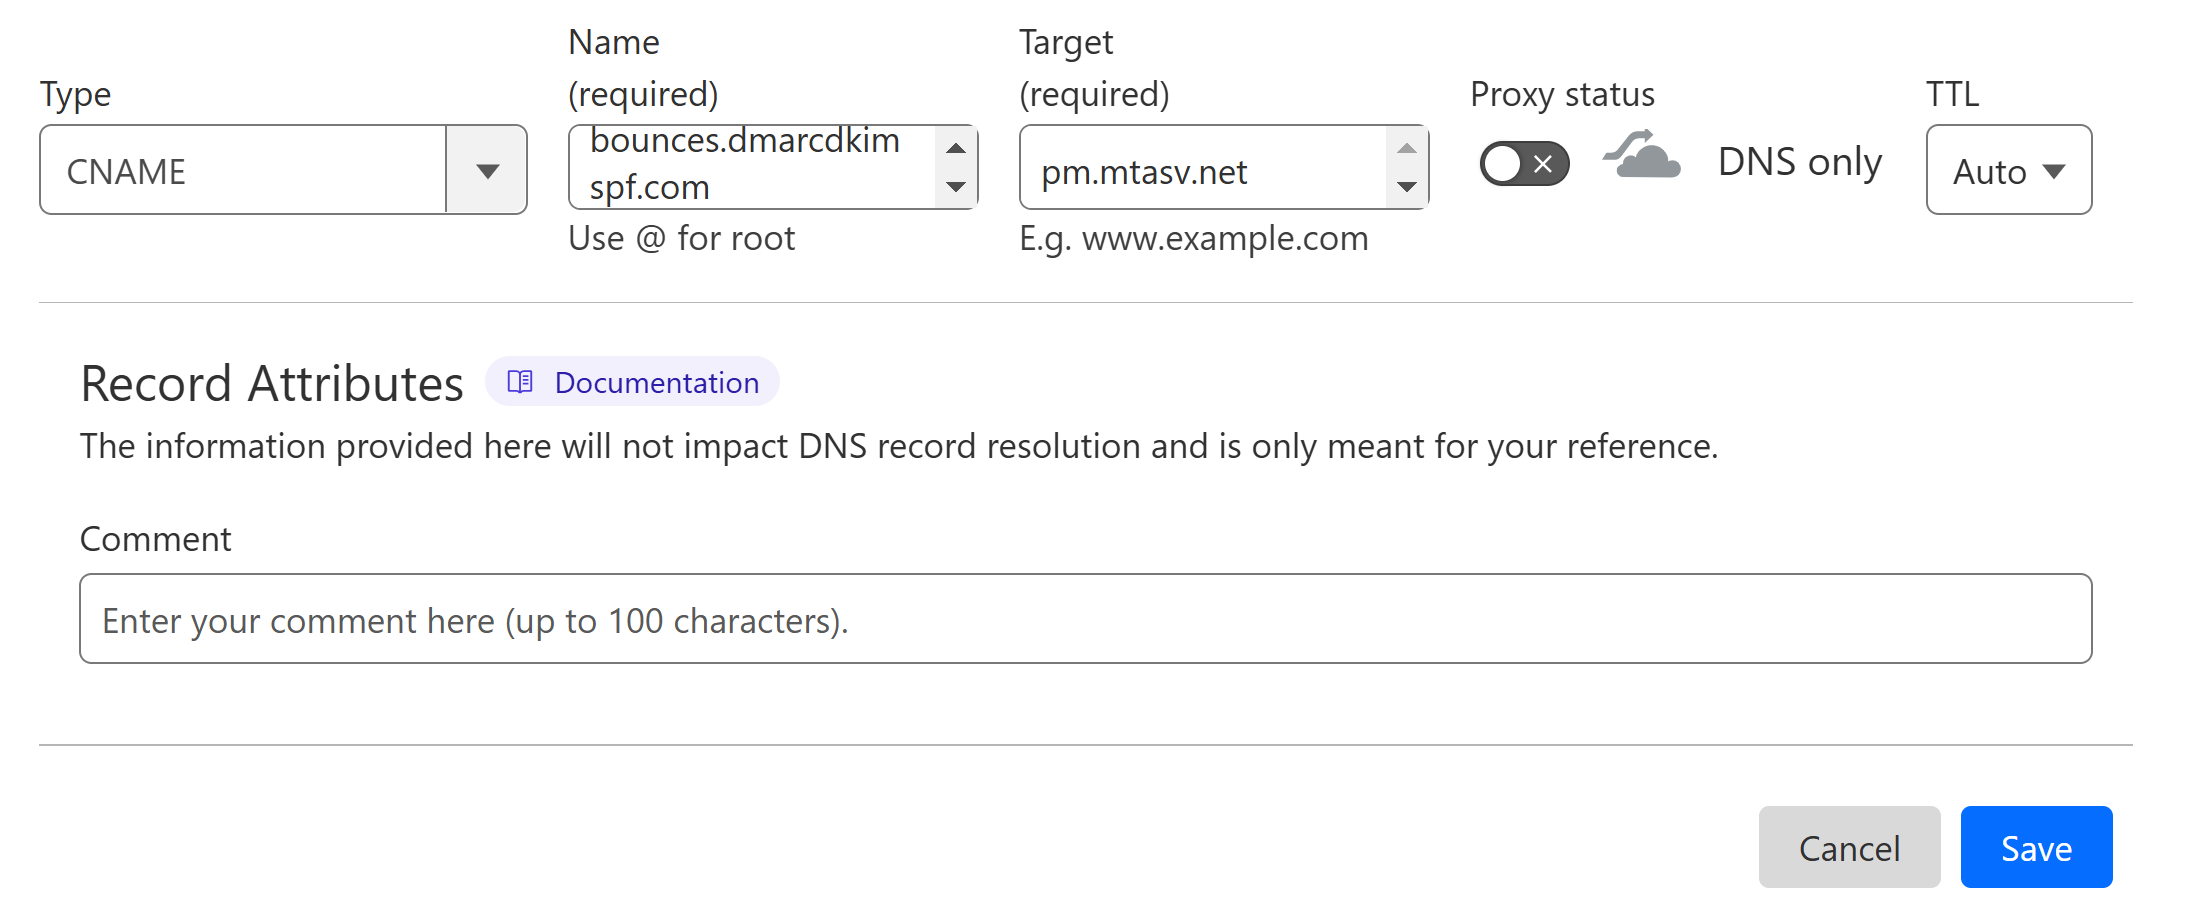
Select record type CNAME.
Add the record name and value in the dedicated field of the DNS provider.
-
Turn off the proxy toggle and click Save.
Setup Buttondown DMARC Record:
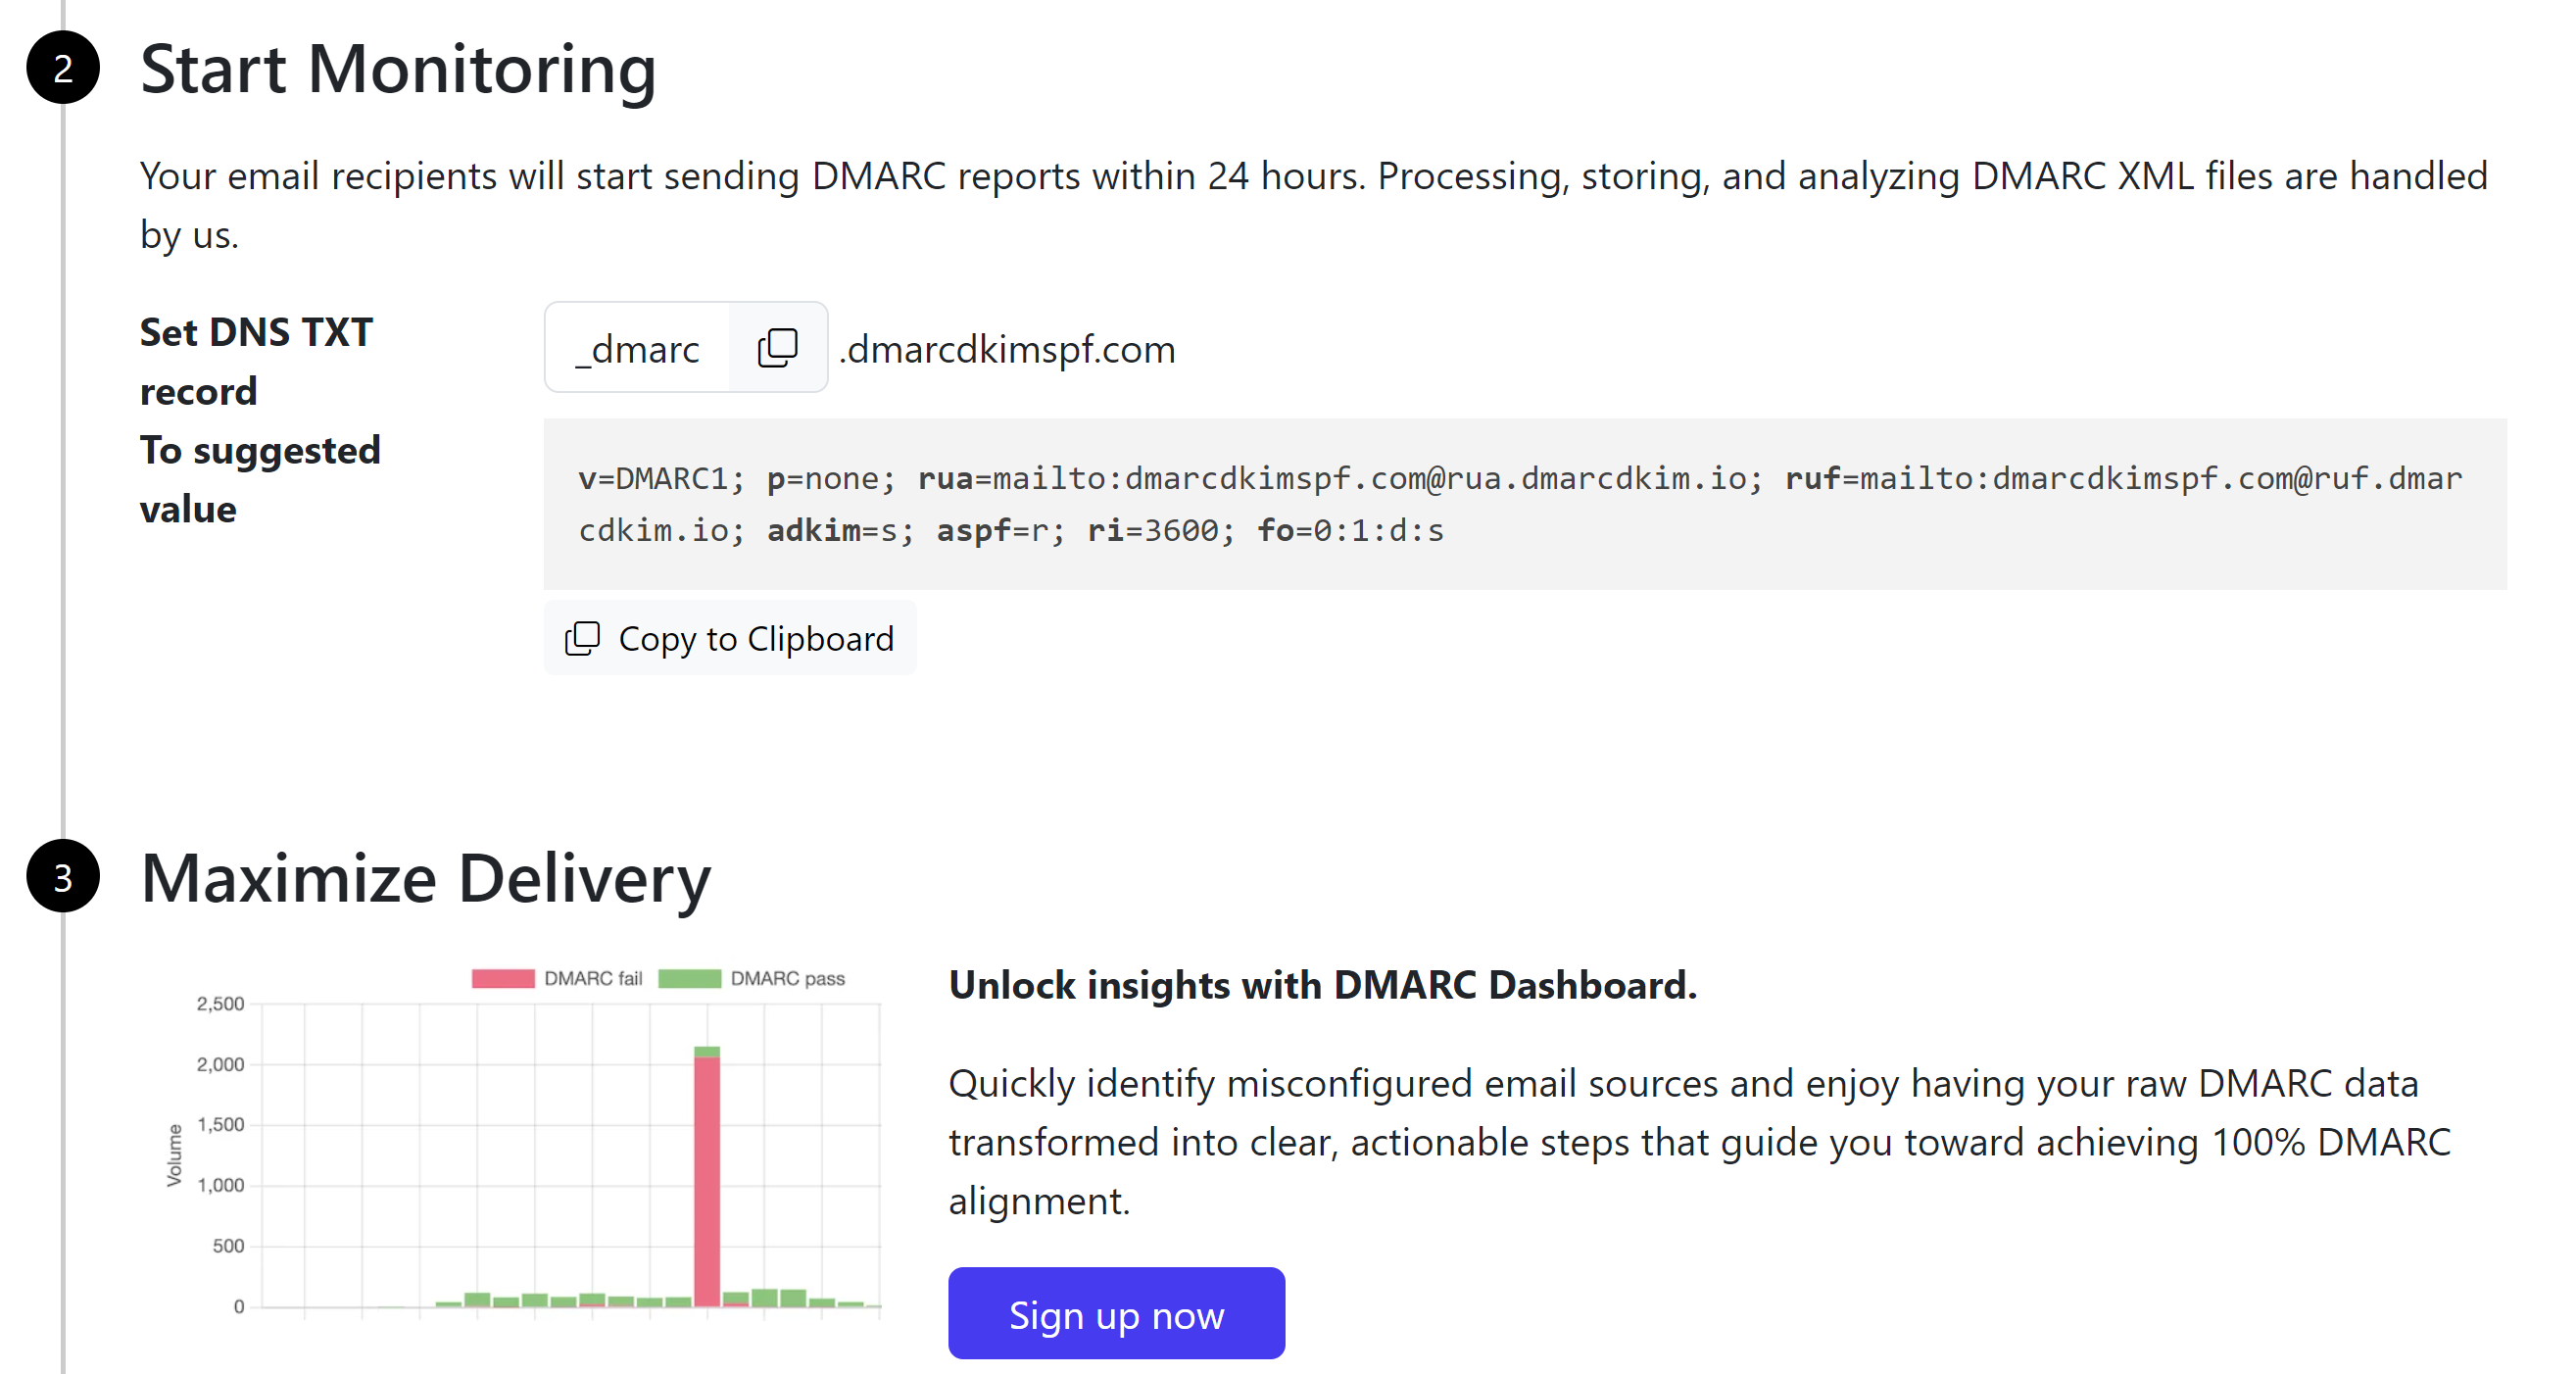
DmarcDkim.com DMARC Check tool allows you to take full control over your DMARC policy and gives you actionable insight at every step of the way. The user-friendly interface helps you manage much more to stay one step ahead of the scammers.
Go to the DMARC Check tool.
-
Add your domain name and click Check DMARC.

The tool gives you an initial monitoring value - add it to your DNS provider.
After monitoring all incoming emails, it guides you to setup a strict policy to block unauthorized emails.
-
Sign up for the tool to get actionable insights and DMARC reports.
Verify Buttondown DNS Records:
-
Once DKIM, Bounce, and DMARC records are added, click Check Records.

If the records are authenticated, a green badge is displayed next to the records.
If the records are not authenticated immediately, wait for 24 hours.
NOTE: If DNS validation fails after 24 hours, it points to a potential misconfiguration in the DNS setup. Look for any typos in the DNS values and make sure there are no conflicting records.
If you are unable to find the underlying issues, hire a DmarcDkim.com expert to handle your domain authentication hassles for you.
Check domain and follow the instructions to nail down your DMARC configuration.
No expert knowledge needed!


