Setup Keap DMARC, DKIM, SPF Records - Configure Domain Authentication
Check your domain for DMARC, DKIM, SPF and MX records. Get a free report.
How to Configre Keap DMARC, DKIM, SPF Records?
This article guides you on how to setup SPF, DKIM, and DMARC records for Keap email domain authentication.
Domain authentication protects your domain against spamming and spoofing. Moreover, inbox service providers (ISPs) require proof that the emails are coming from an authentic source and are safe to open. Domain authentication helps ISPs to recognize you as a legitimate sender.
SPF, DKIM, and DMARC are commonly used standards to authenticate sender domains.
SPF (Sender Policy Framework) specifies which servers are allowed to send emails on your behalf. This email validation system blocks emails sent from unauthorized sources.
DKIM (Domain Identified Keys) adds a unique signature to your emails to make sure they have not been forged.
DMARC (Domain-based Message Authentication, Reporting, and Conformance) is applied after the SPF and DKIM records are added. DMARC helps with domain authentication and gives you reports about email performance.
NOTE: When sending emails with Keap, you need not worry about adding the SPF record. Their team manages SPF record setup to authenticate and secure your emails. Follow the steps below to setup Keap DKIM and DMARC records.
Configure Keap DNS Records:
Login to your Keap account.
-
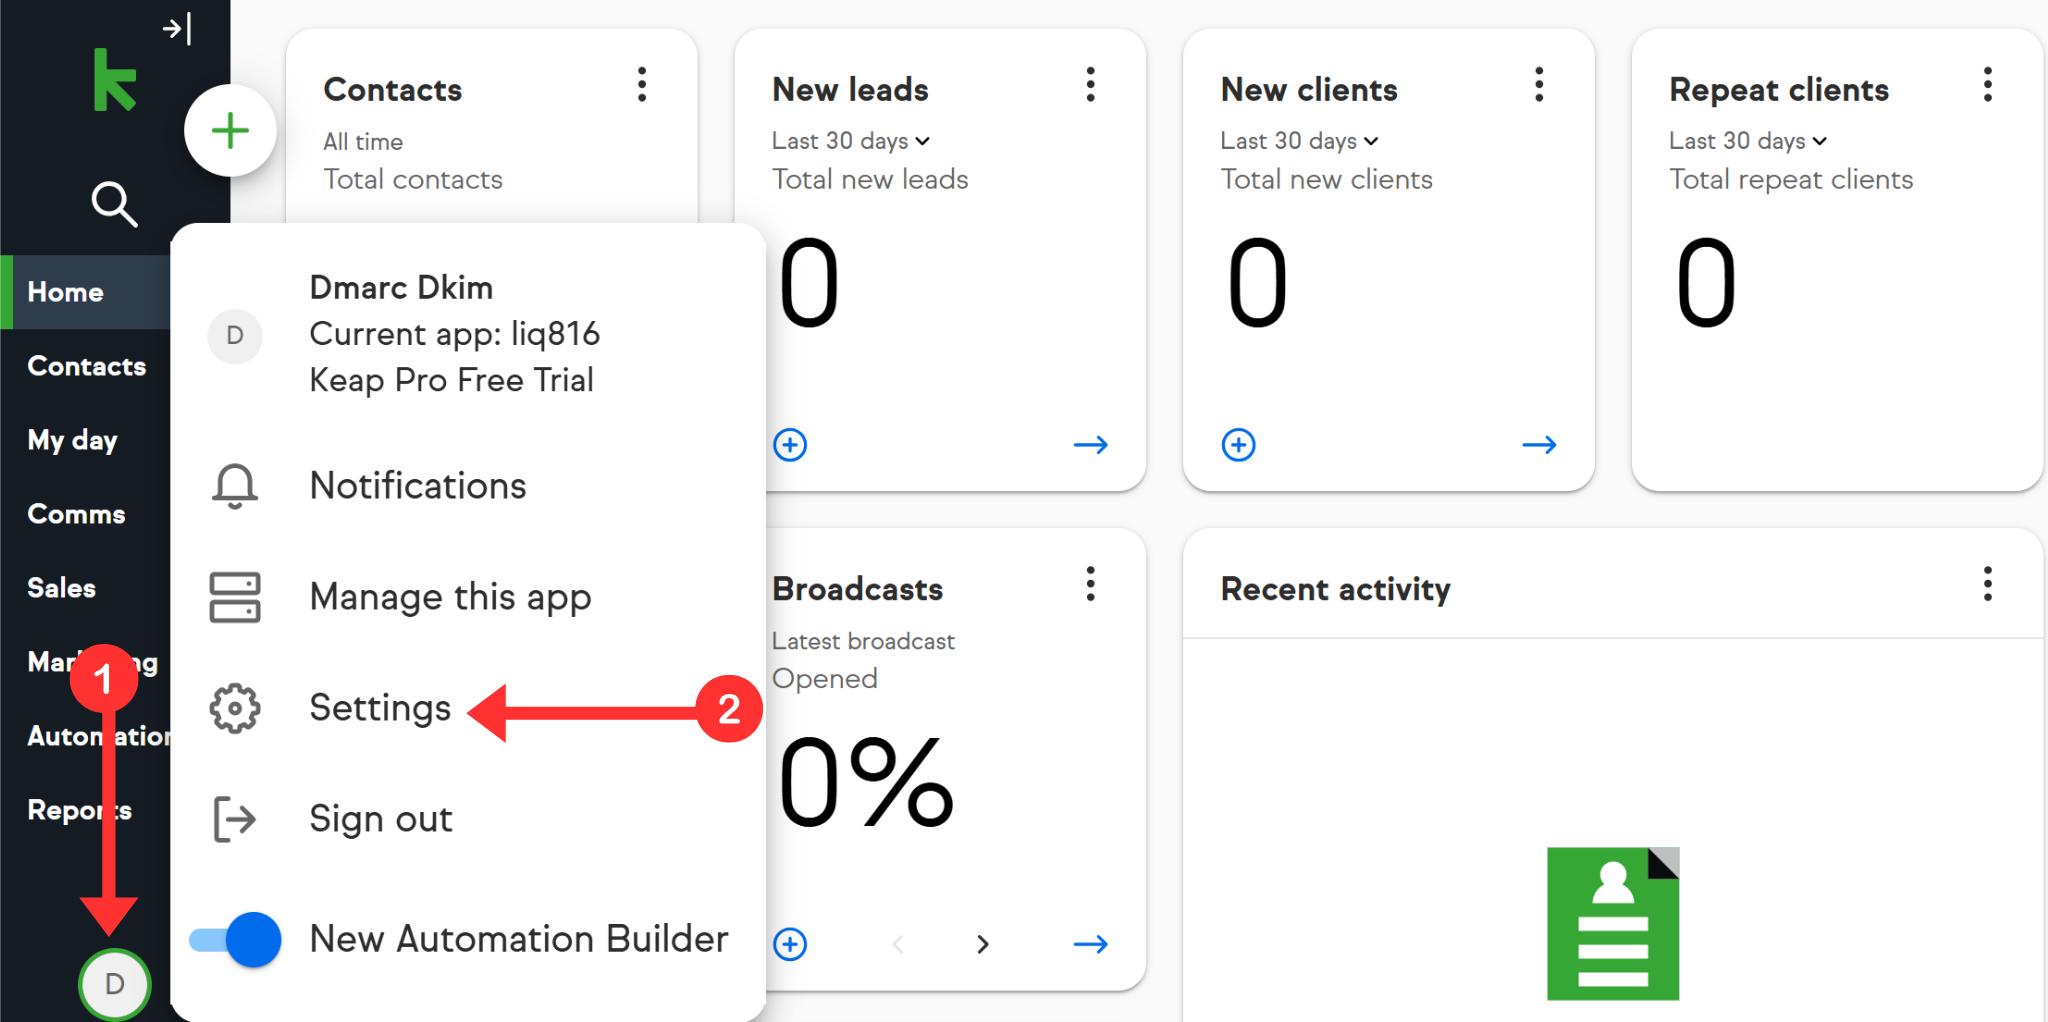
On the dashboard, click your Profile icon and go to Settings.
-
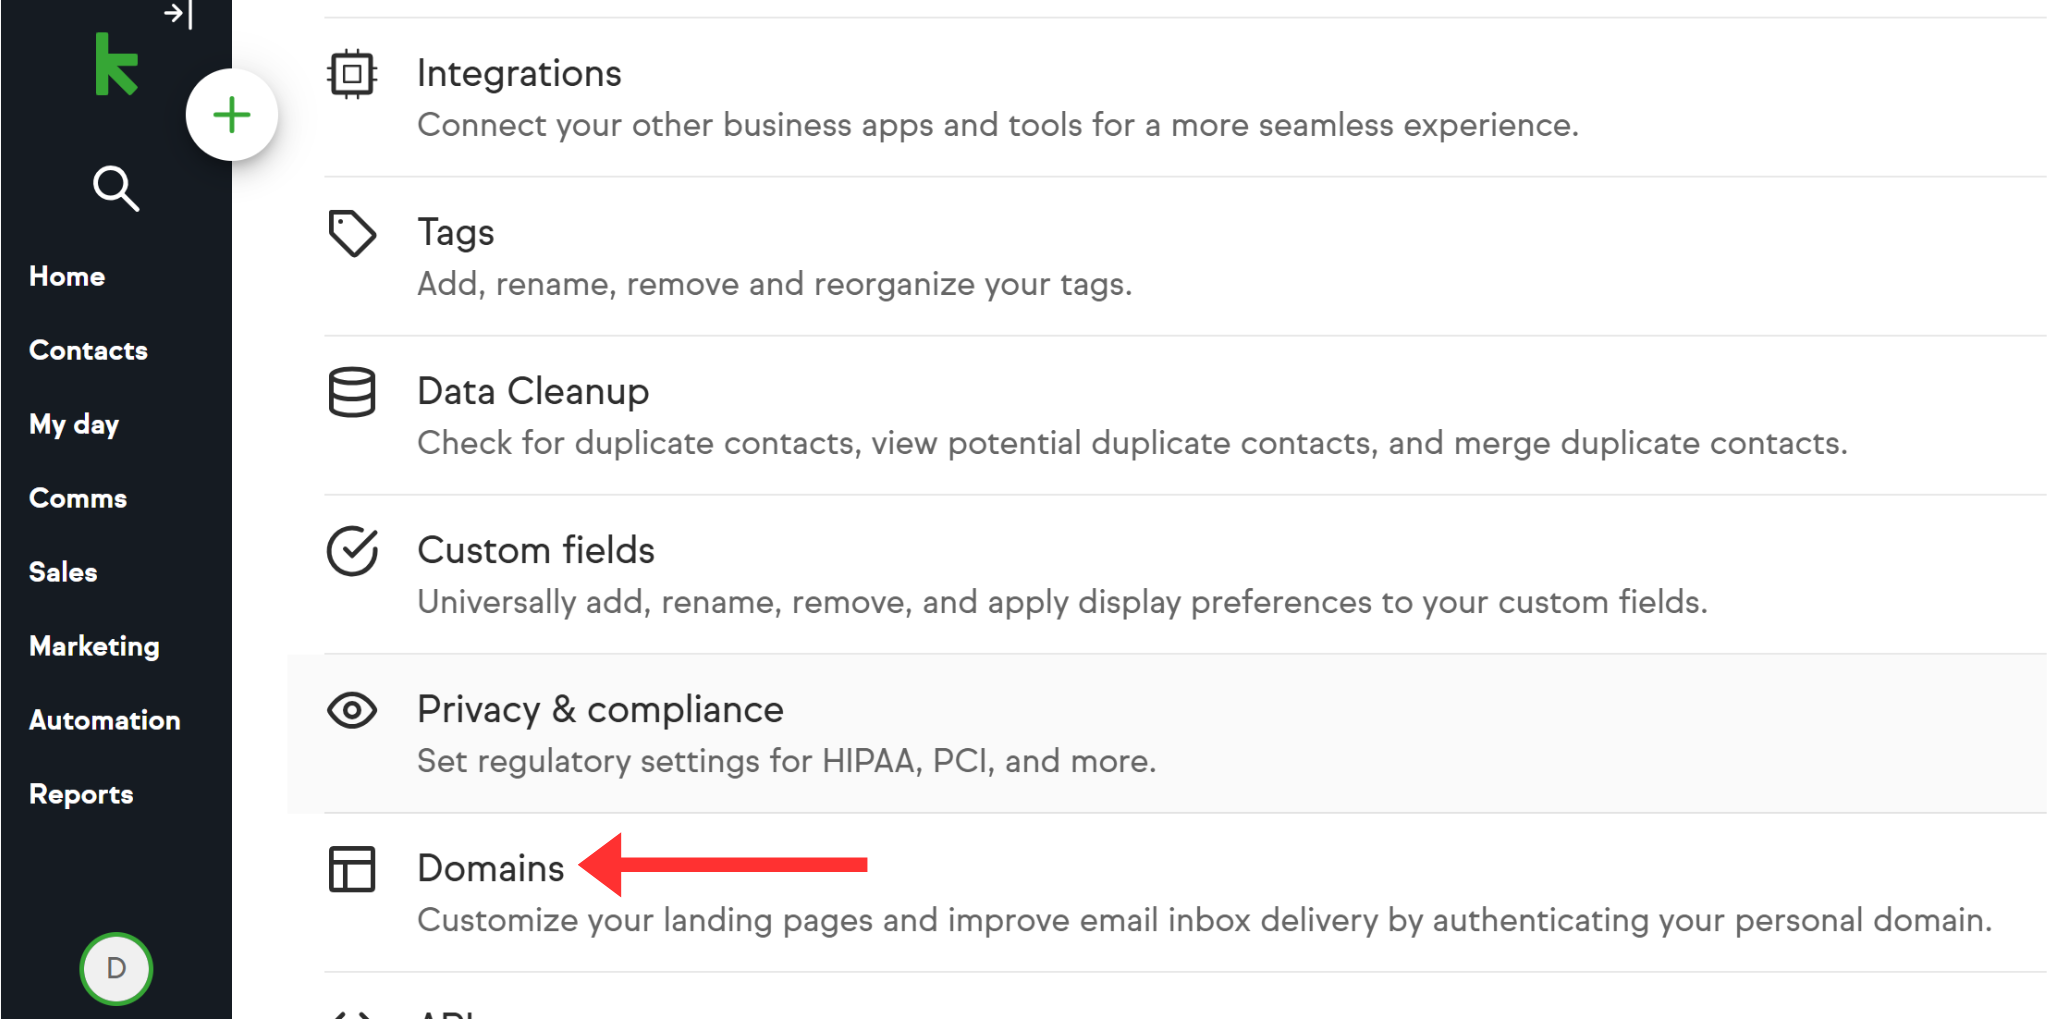
Scroll down and click the Domains option.
-
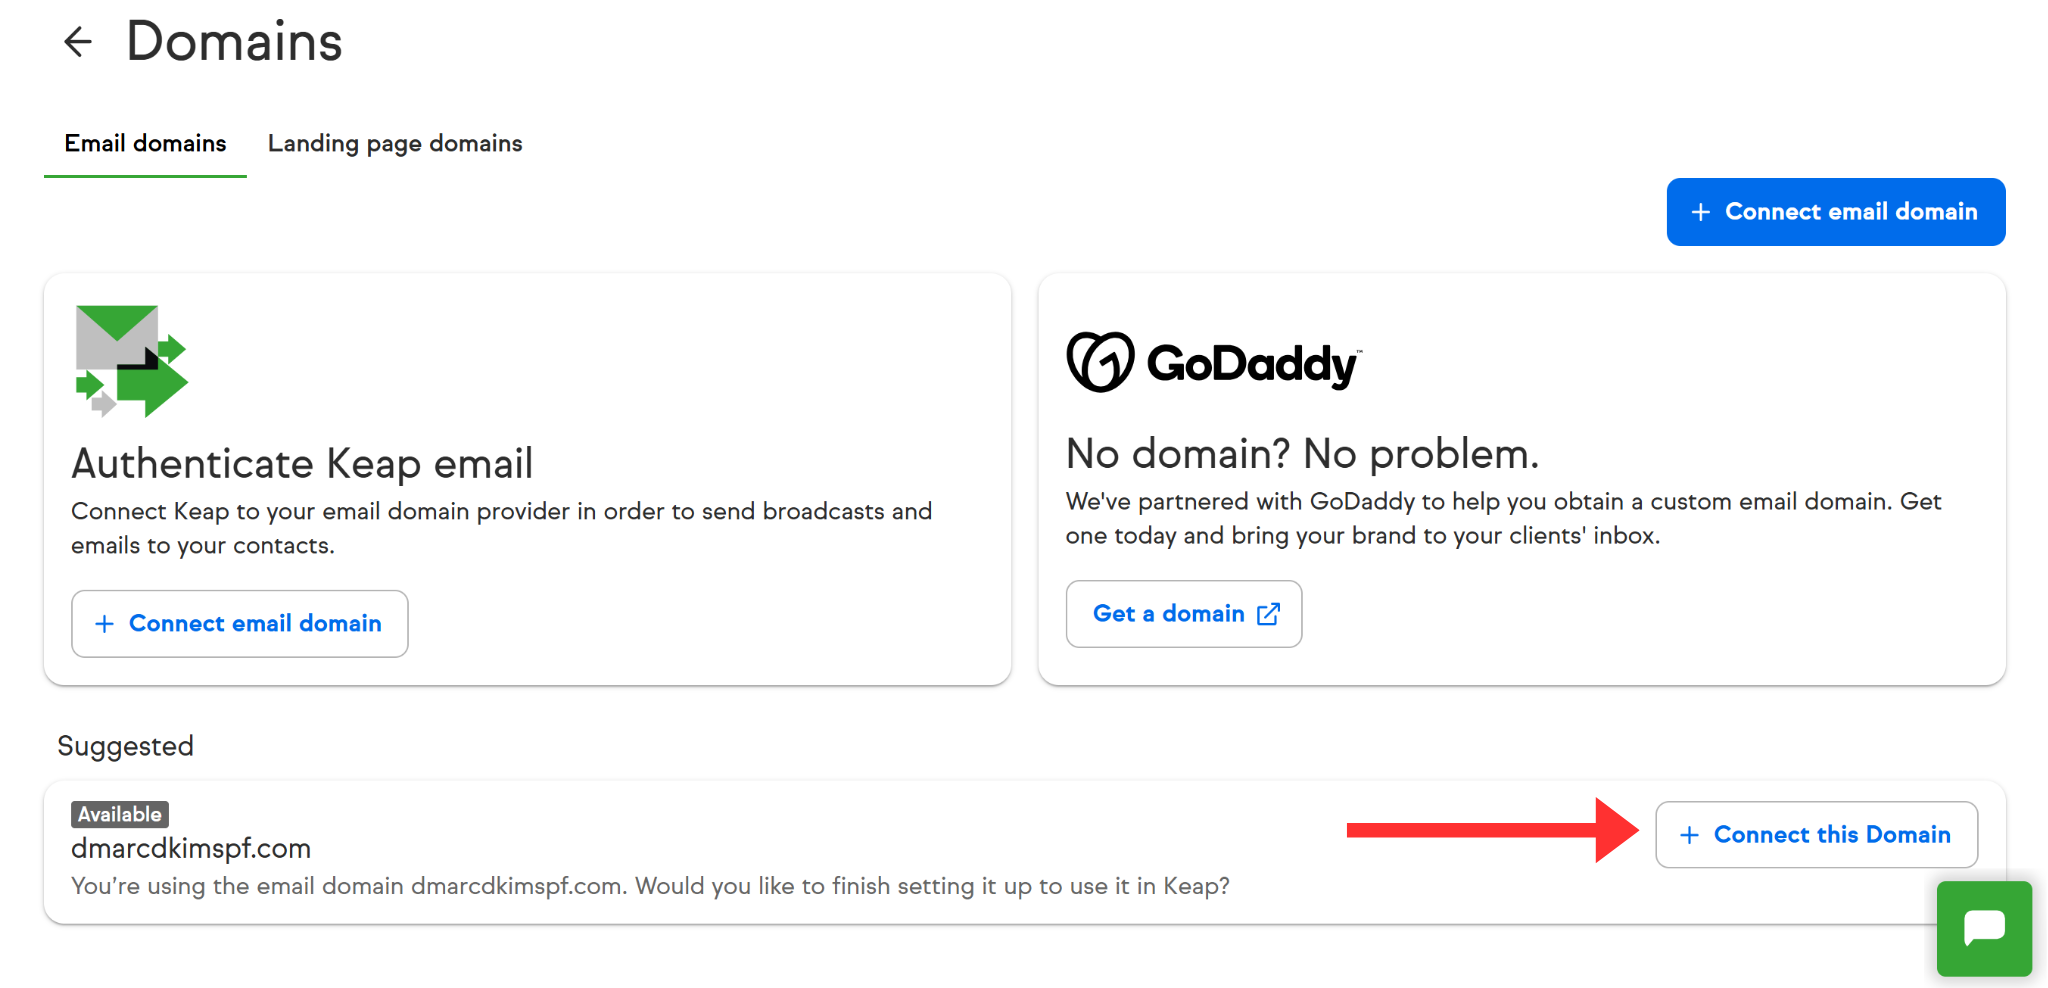
The signup email domain will be added here already. Click "Connect this domain" next to your domain.
-
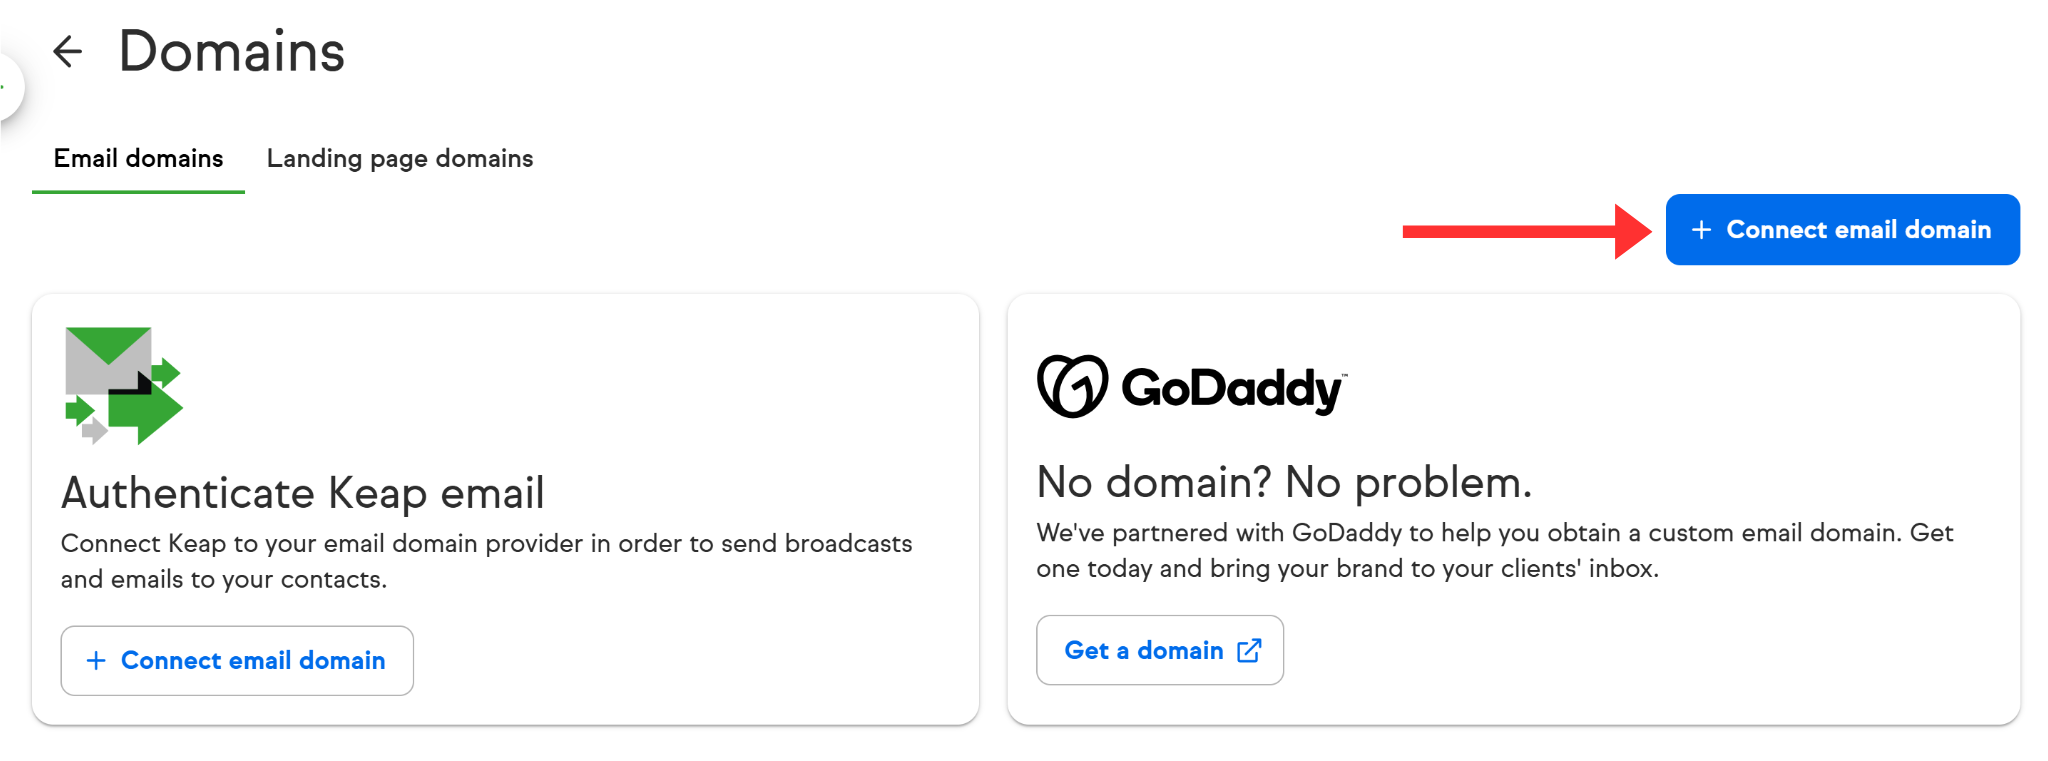
If you want to add a new domain, click the blue "Connect email domain" button at the top of the screen.
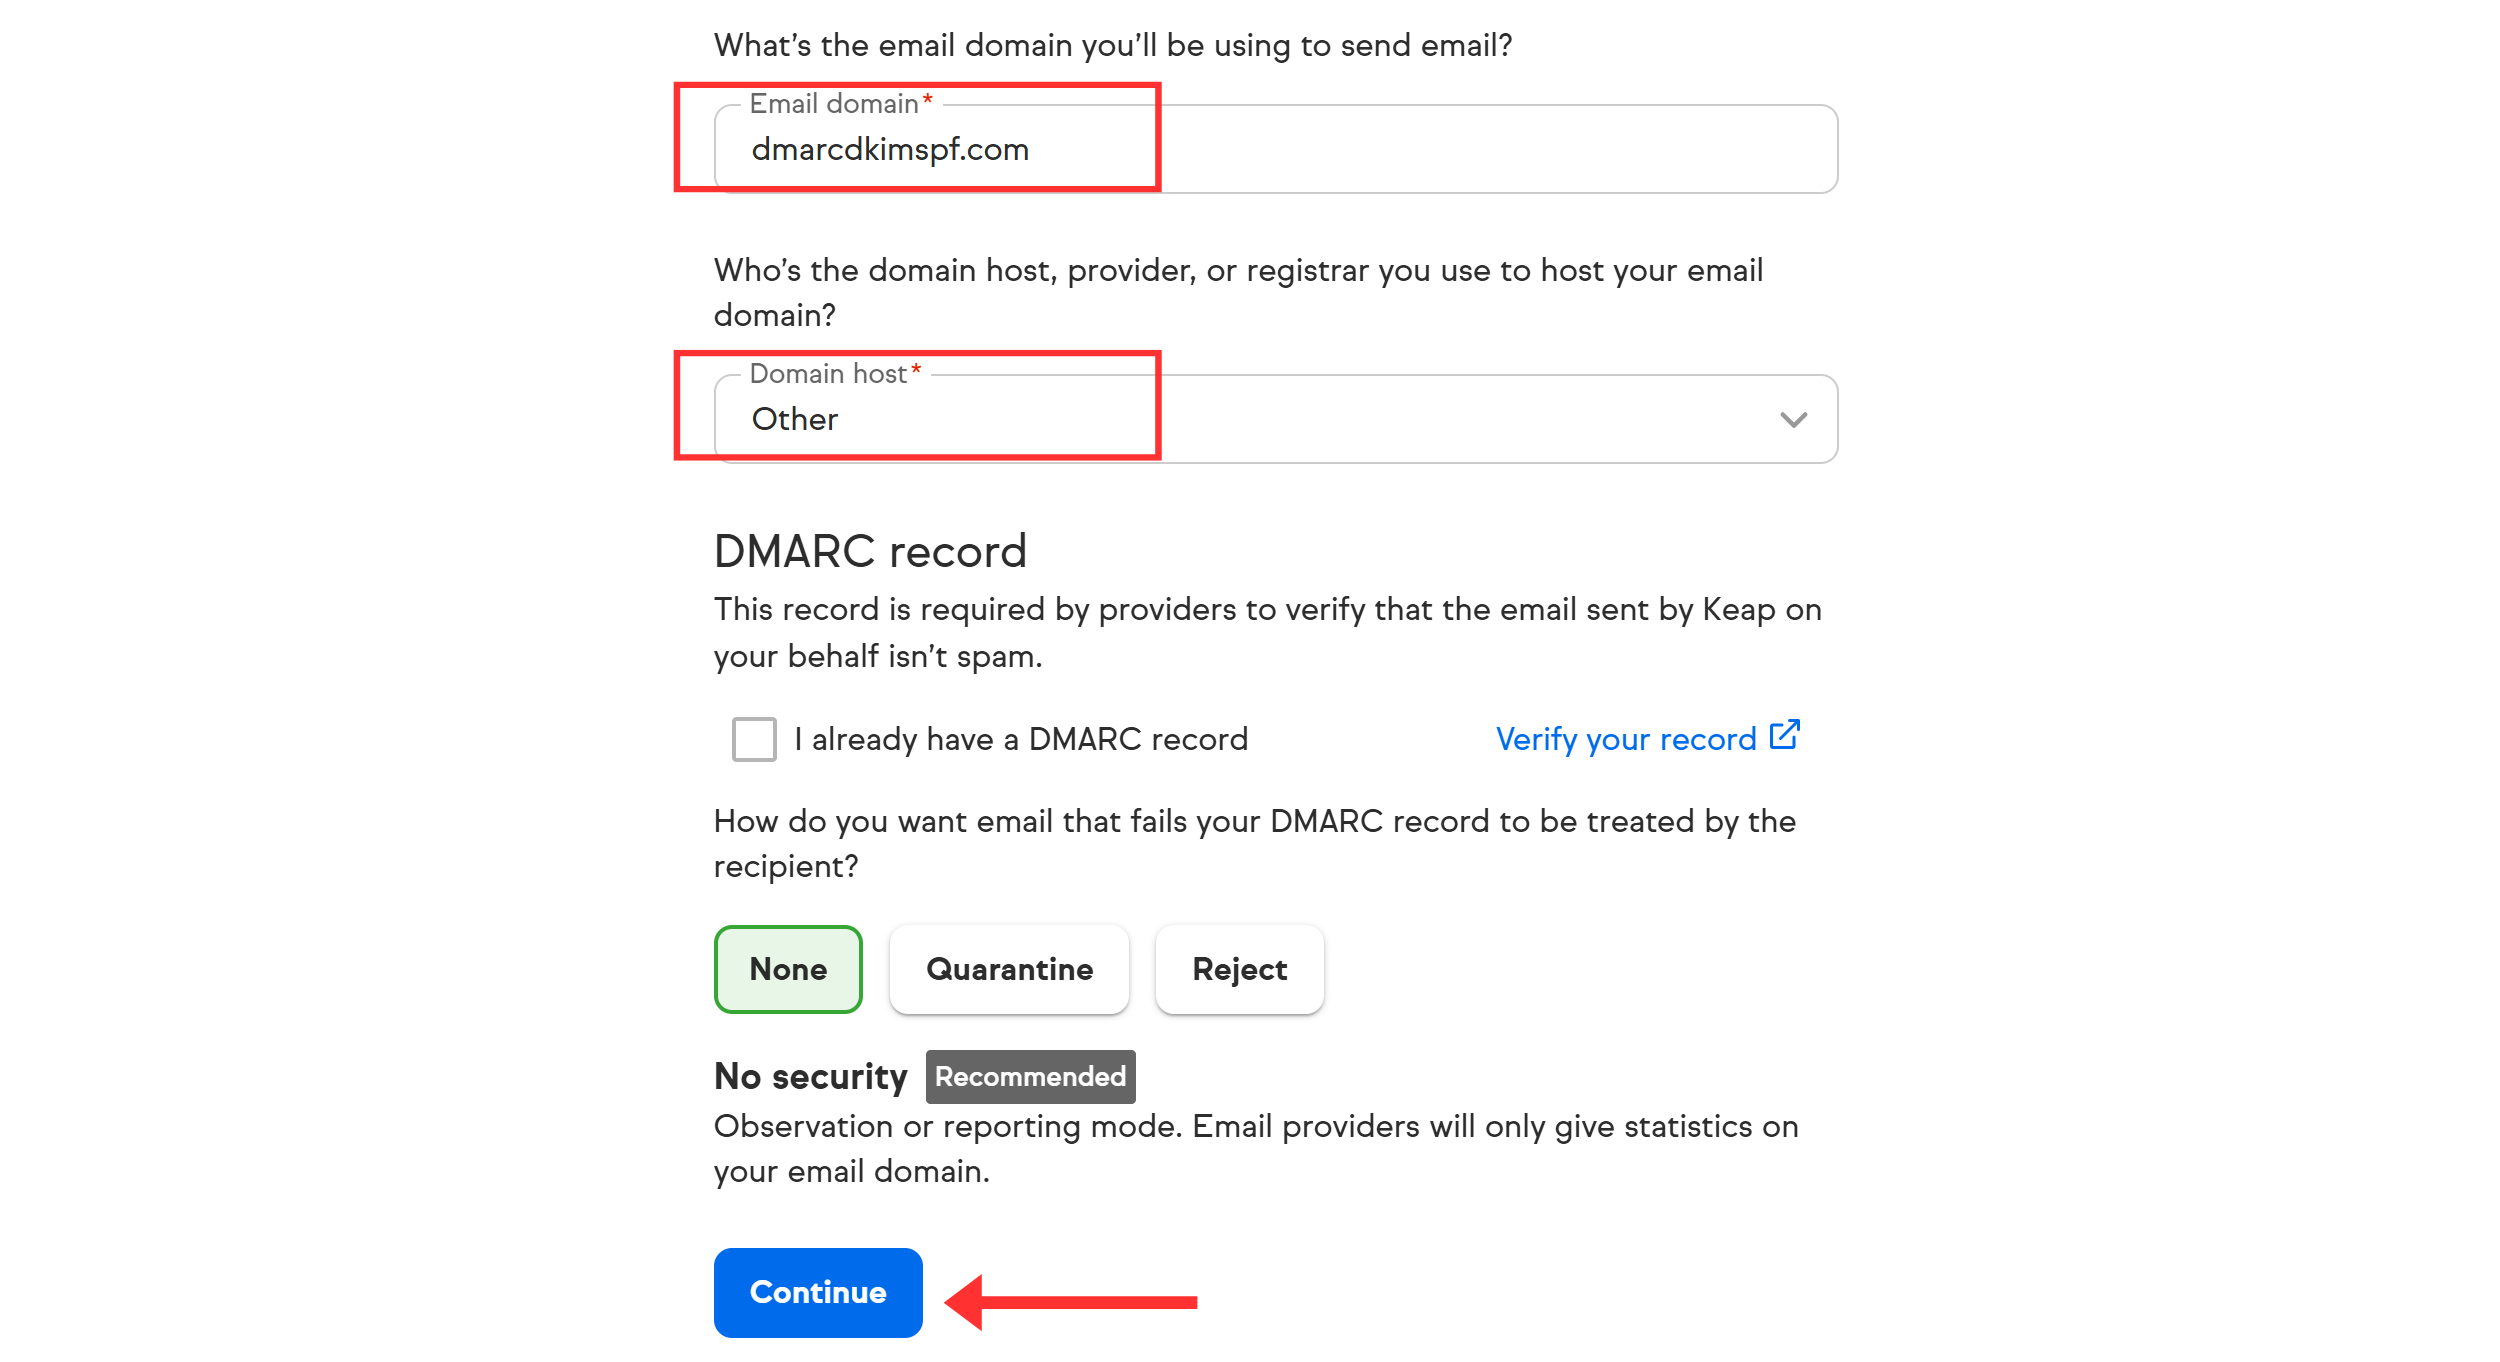
Add your domain name and select the domain provider. If it's not available in the list, select "Other."
-
Check the box for "I already have a DMARC record" and click Continue.
NOTE: The steps for setting up an effective DMARC Record are mentioned later in this guide.
-
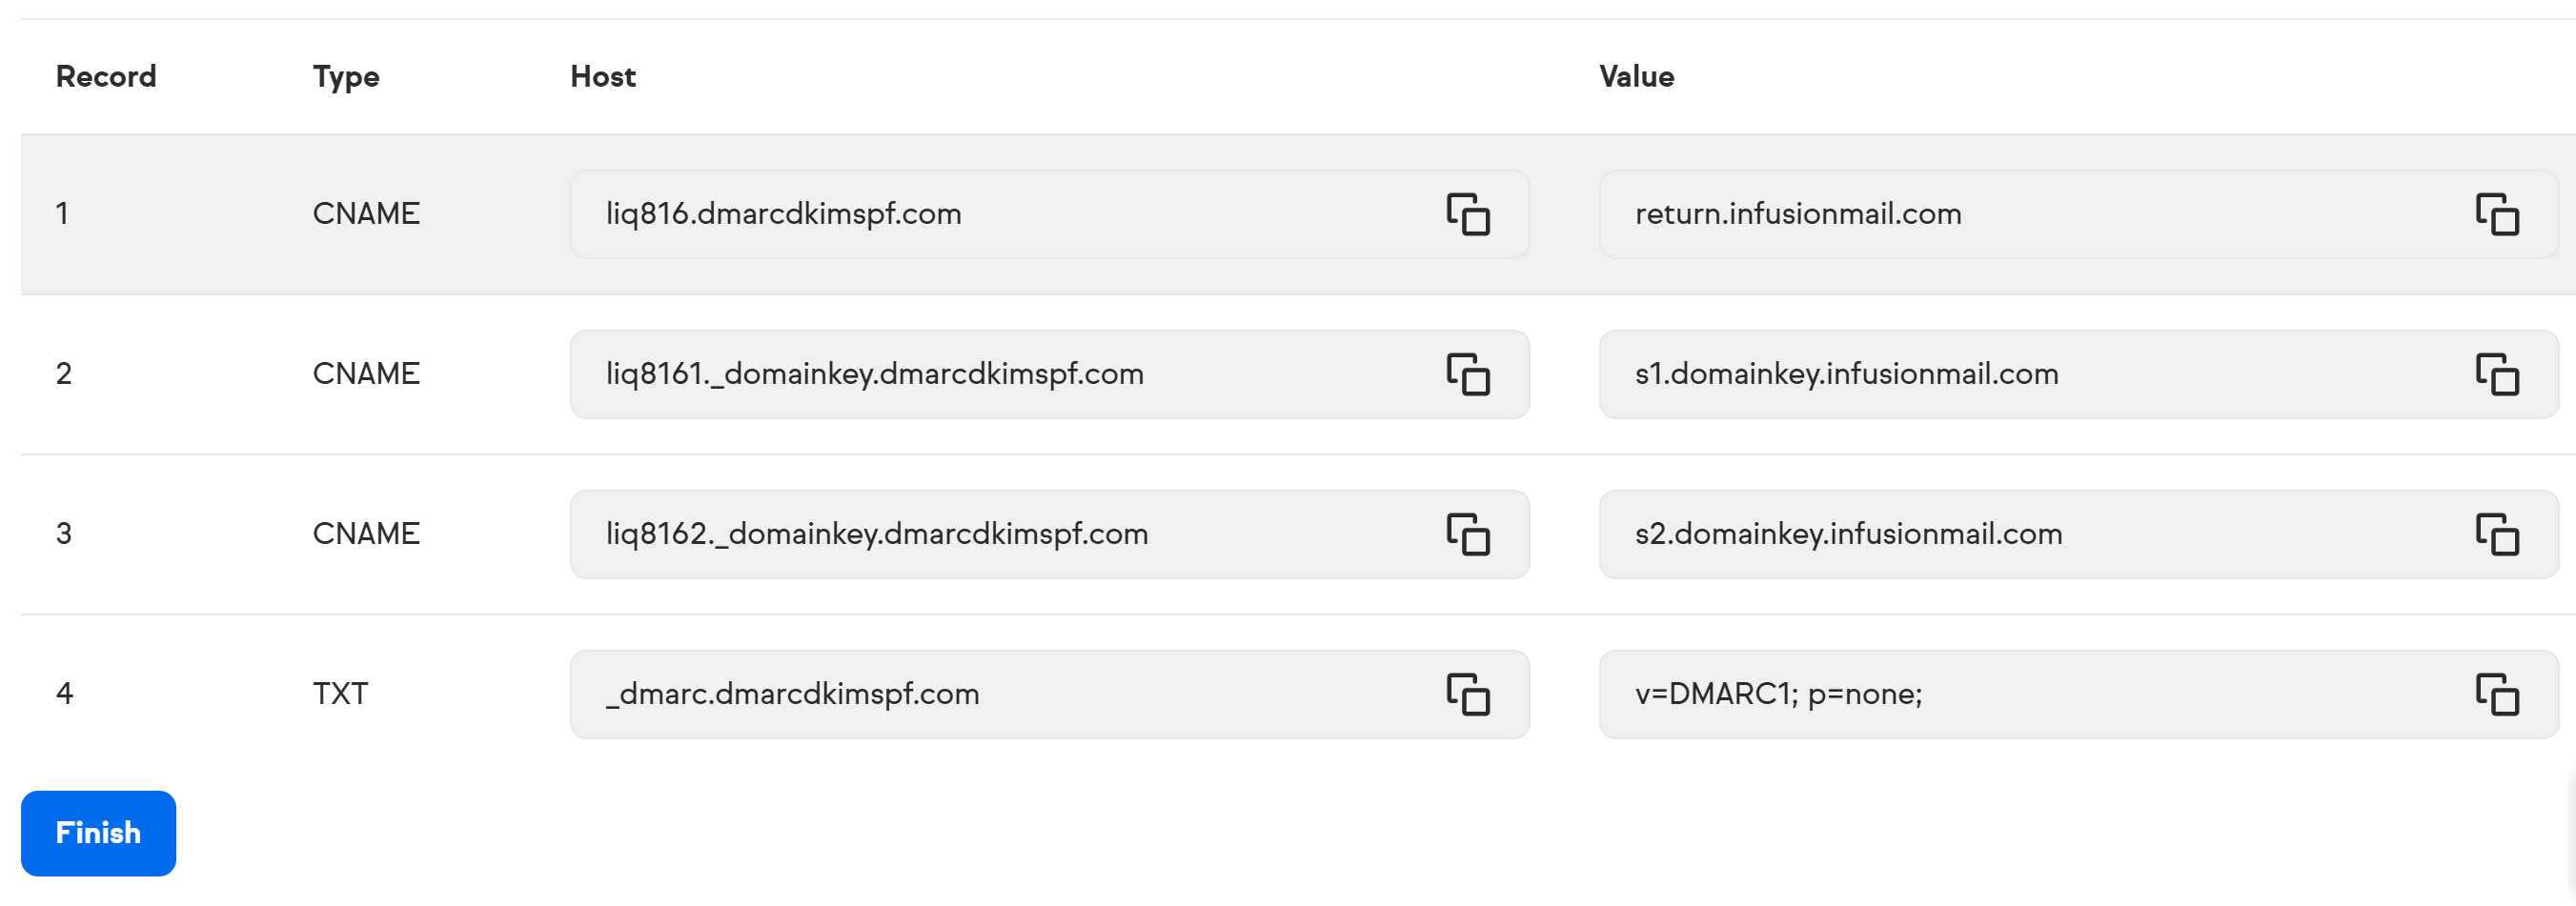
On the next page, you will have three CNAME records — DKIM and a Return Path. Add them to your DNS provider.
Setup Keap Return Path Record:
-
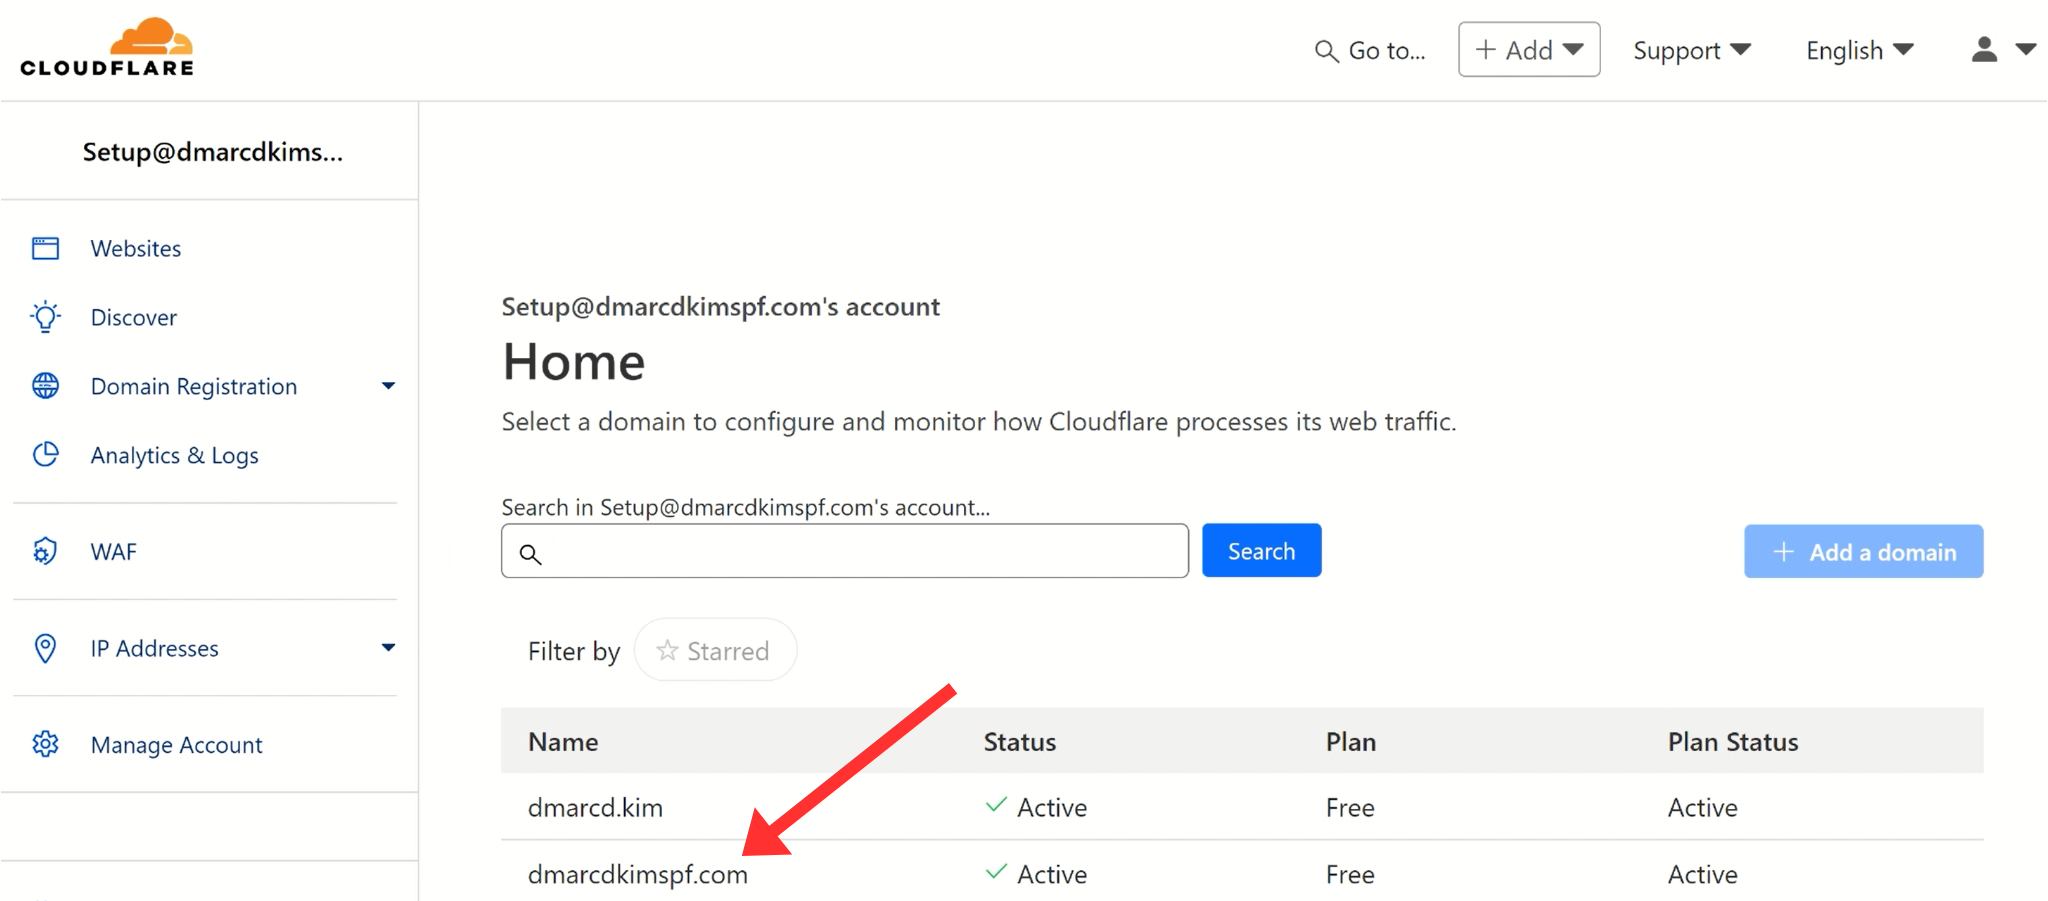
Login to your DNS provider and select your domain.
-
Head to DNS and click Add Record.

Select record type CNAME.
Copy the Record Name from the Keap DNS page and paste it into the DNS provider's Host/Name field.
Copy the Record Value and paste it into the Target/Value field.
-
Turn off the proxy and click Save.
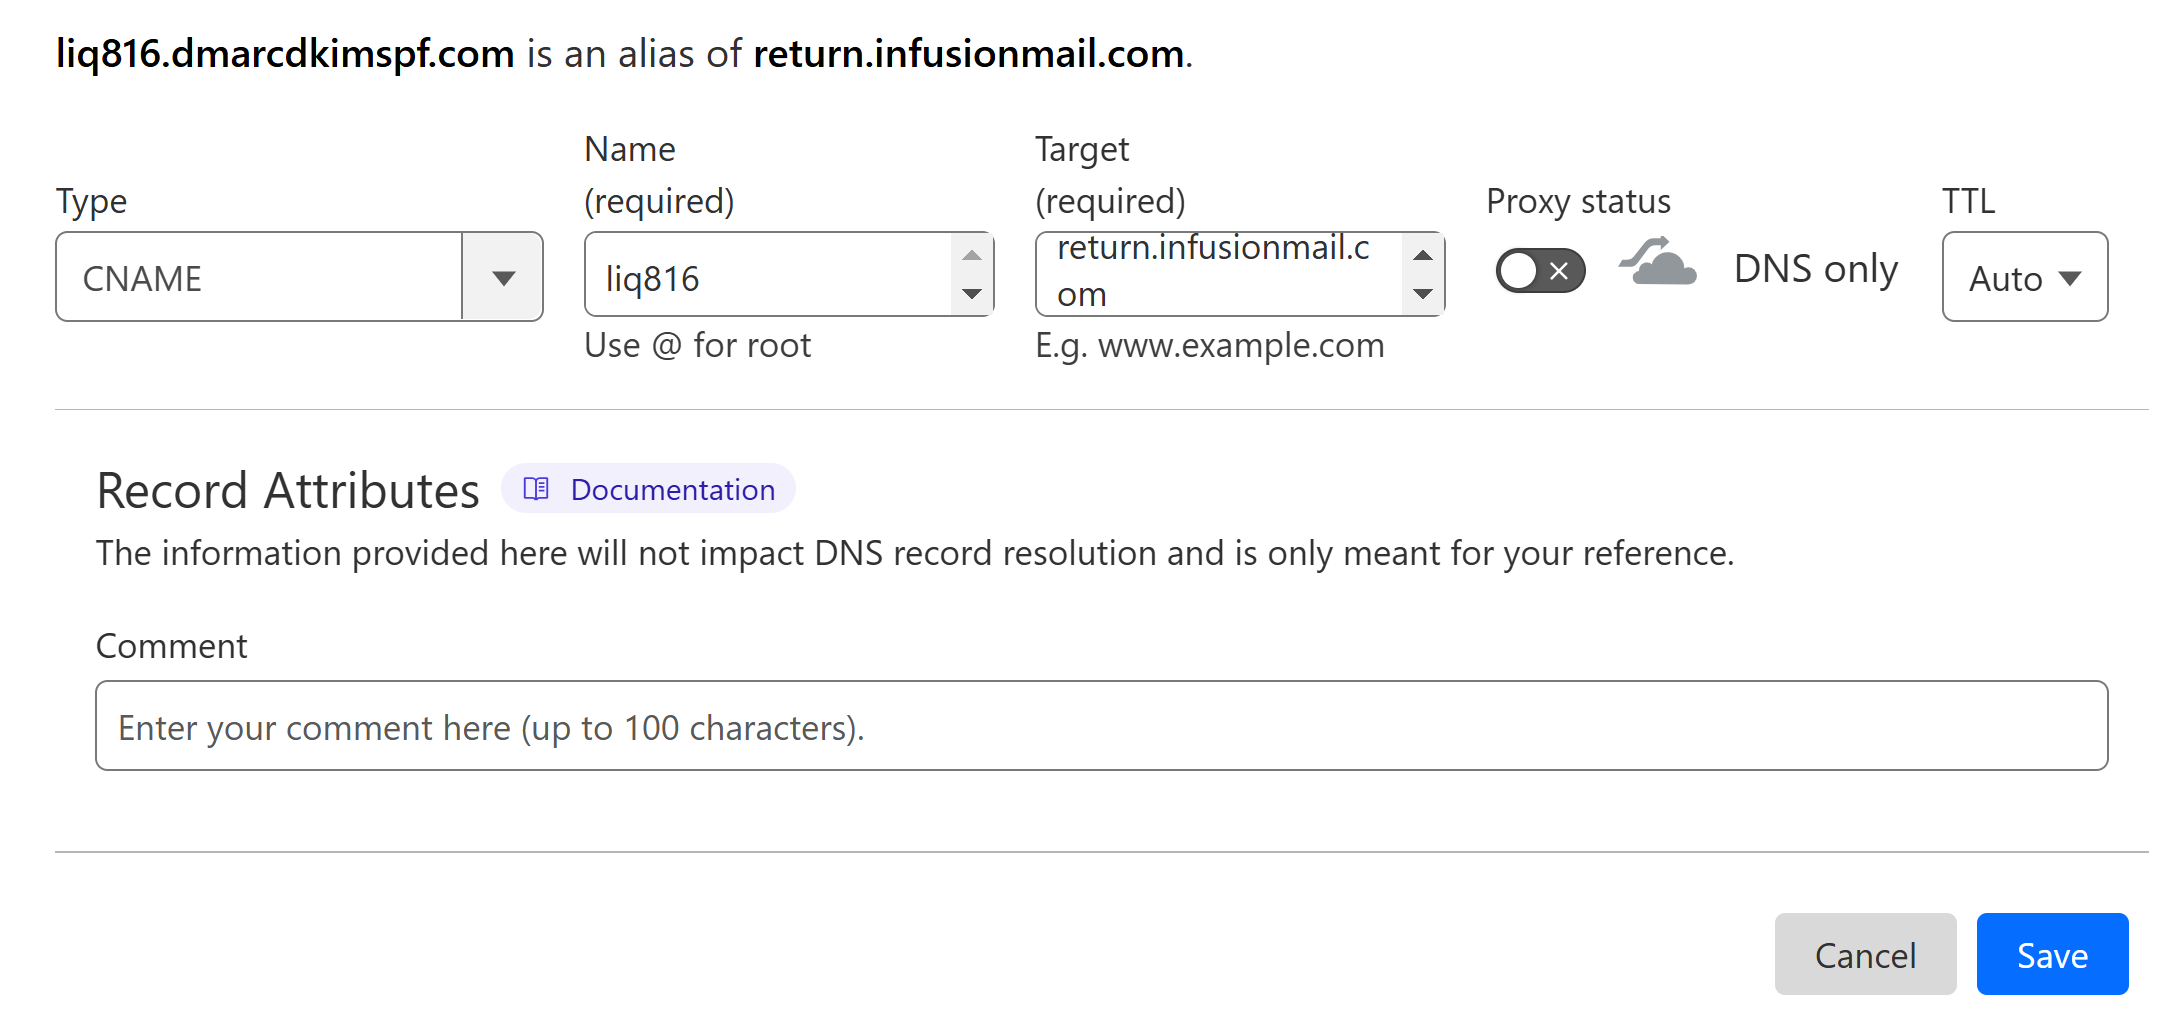
NOTE: Always turn off the Proxy toggle (if available). Otherwise, the record verification will fail.
Setup Keap DKIM Record:
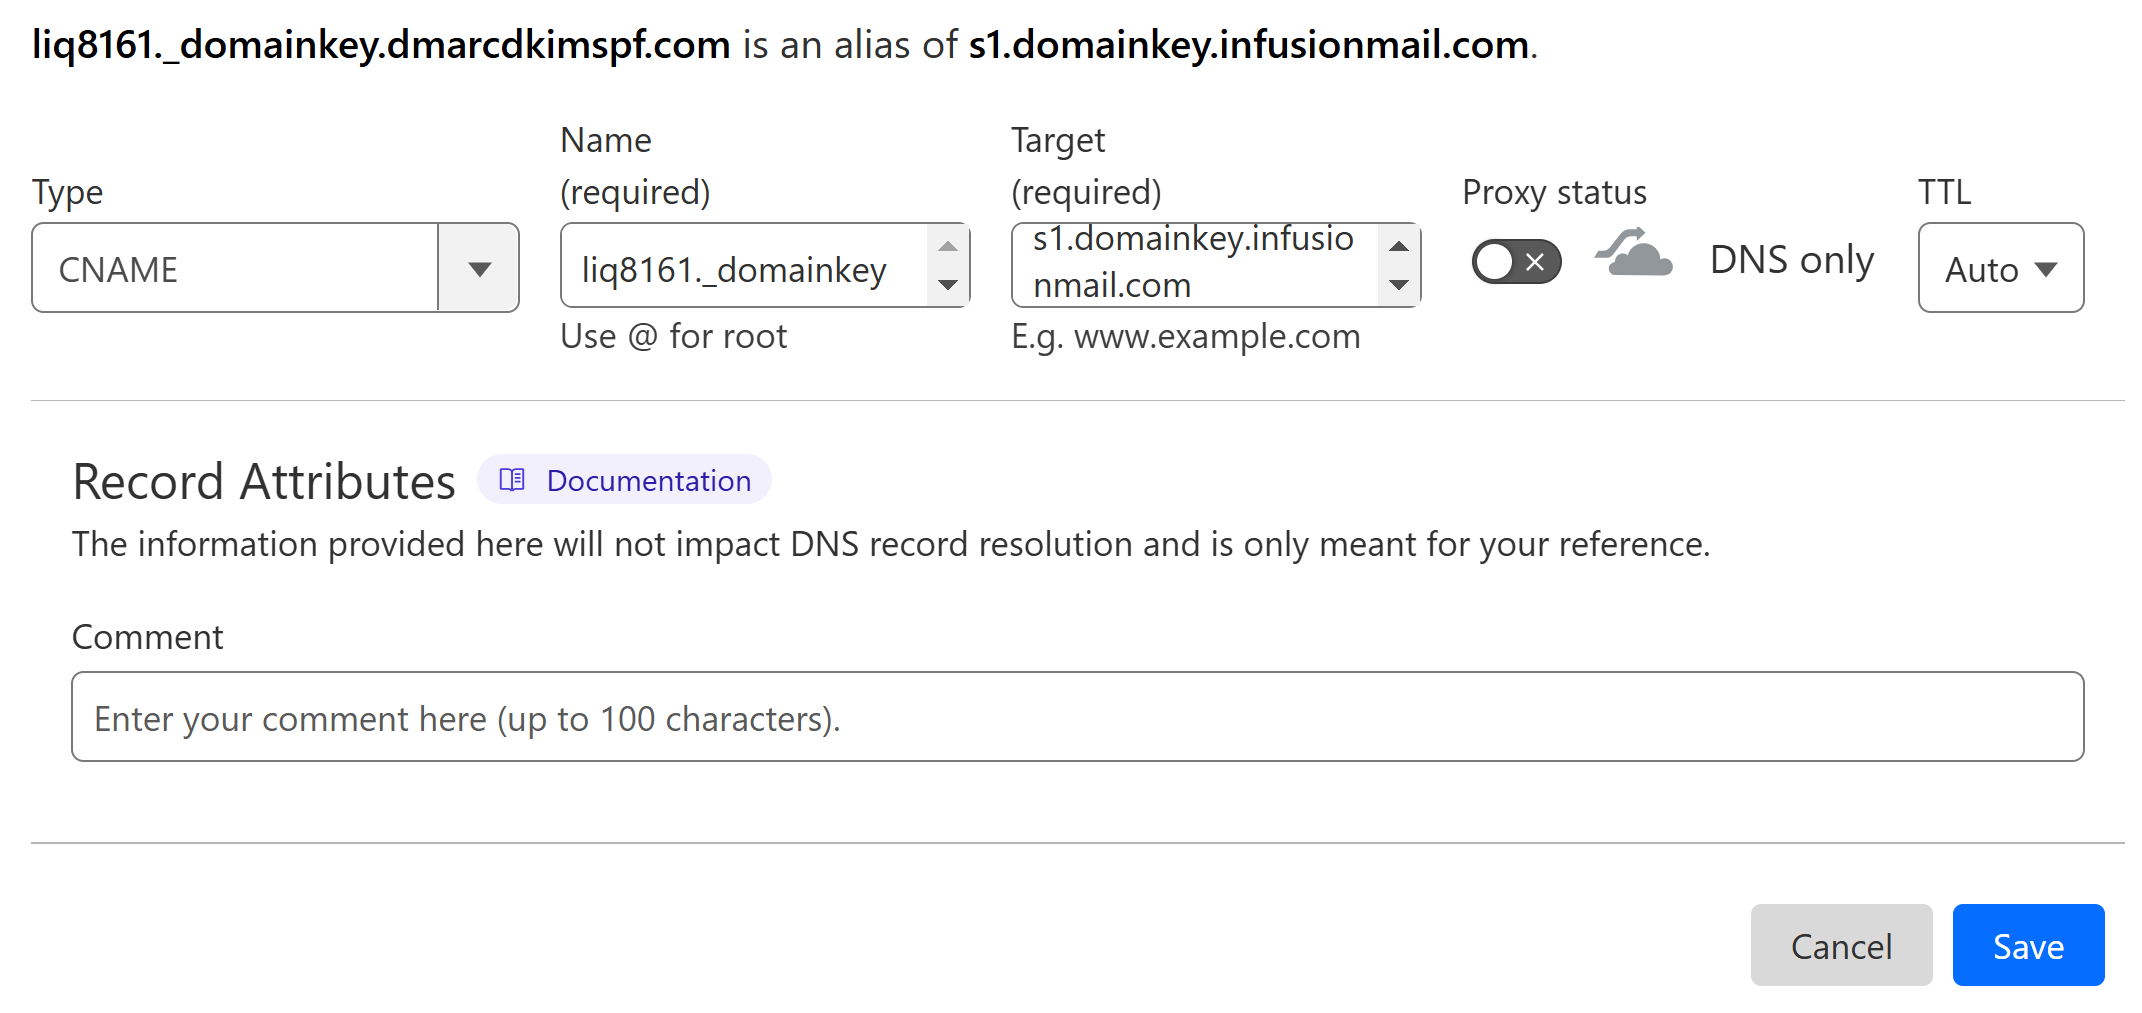
In the DNS provider, select type CNAME.
Copy the DKIM host and value, and add them to the dedicated fields.
-
Turn off the proxy and click Save.
Setup DMARC Record for Keap:
To setup a strict DMARC policy, you can use the DmarcDkim.com DMARC check tool. It gives you DMARC analytics and reports to protect your domain against spoofing.
Go to the DMARC Check Tool.
-
Enter your domain name and click Check.
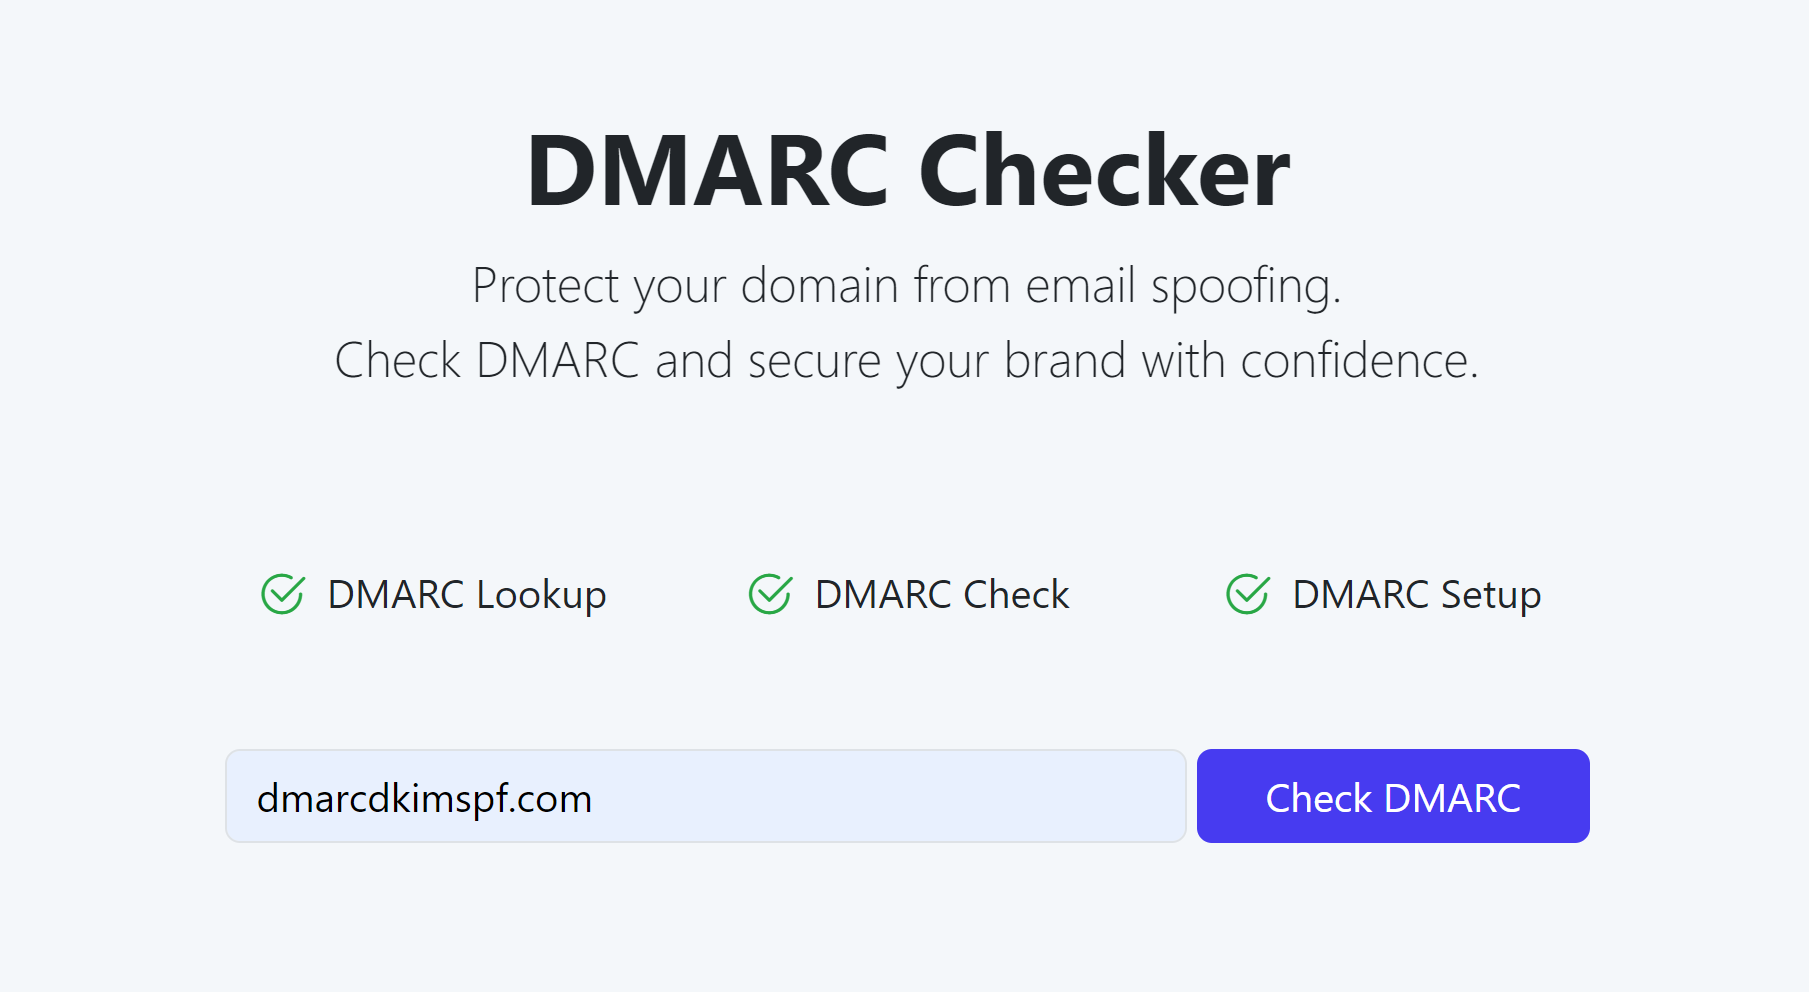
The tool analyzes your domain for existing DMARC records and errors.
-
After analysis, it provides you with an initial monitoring value.
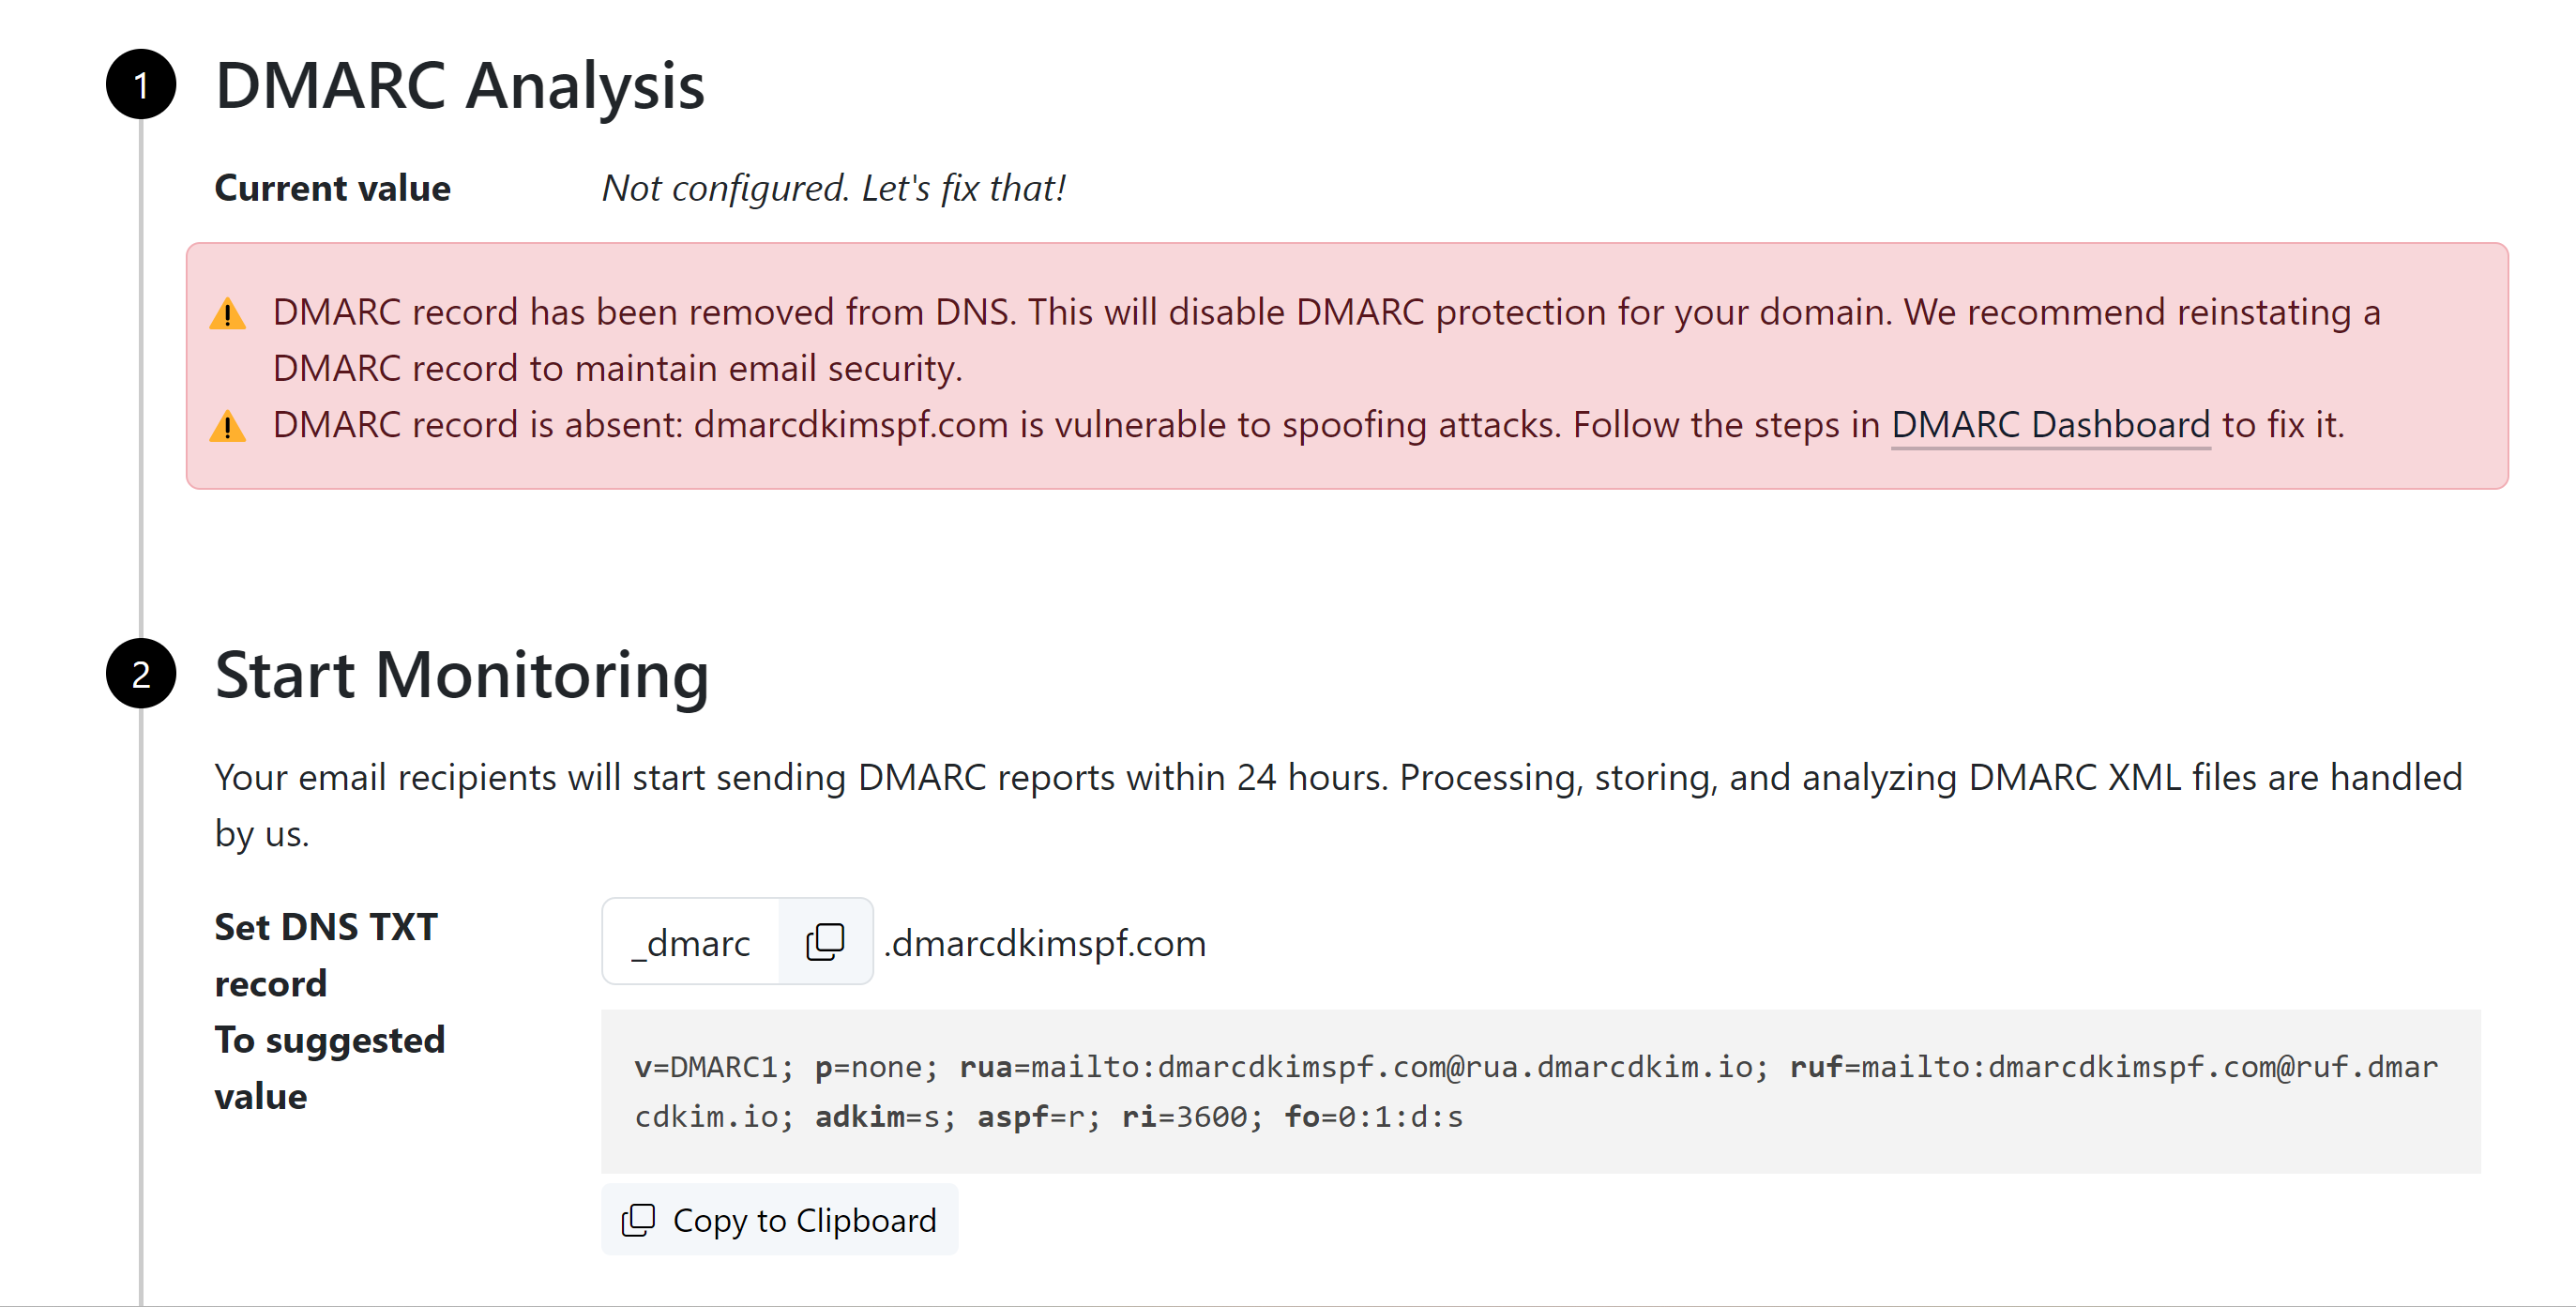
Add this DMARC value to your DNS provider.
-
Click the Sign-up button to get DMARC reports and analytics.
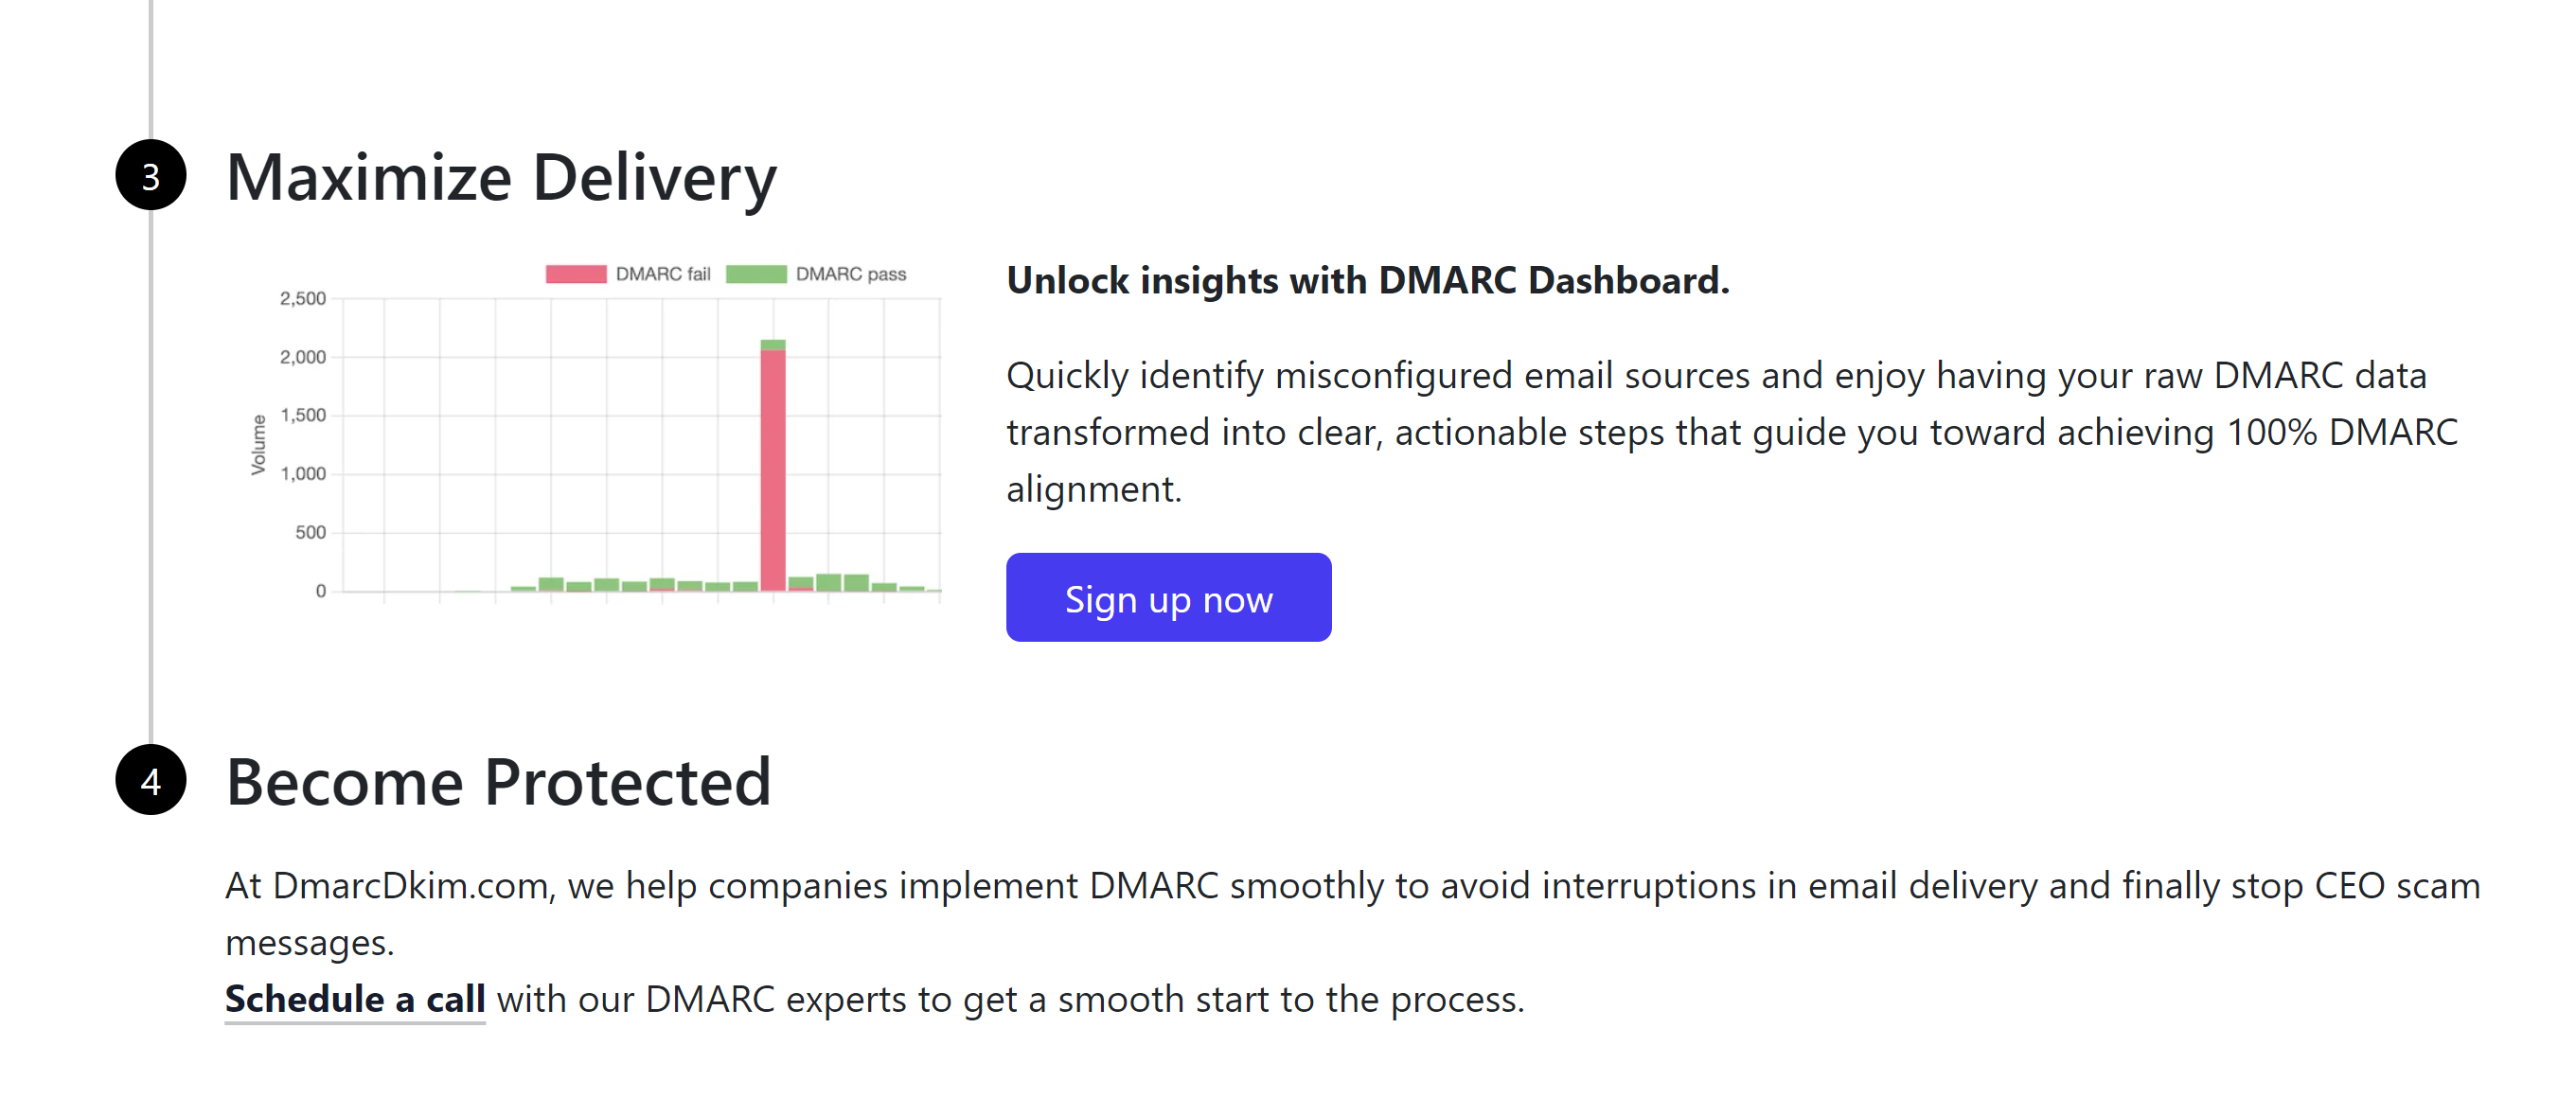
After monitoring all incoming emails, the tool guides you through setting up a strict DMARC policy to block unauthorized senders.
Verify Keap DNS Record:
-
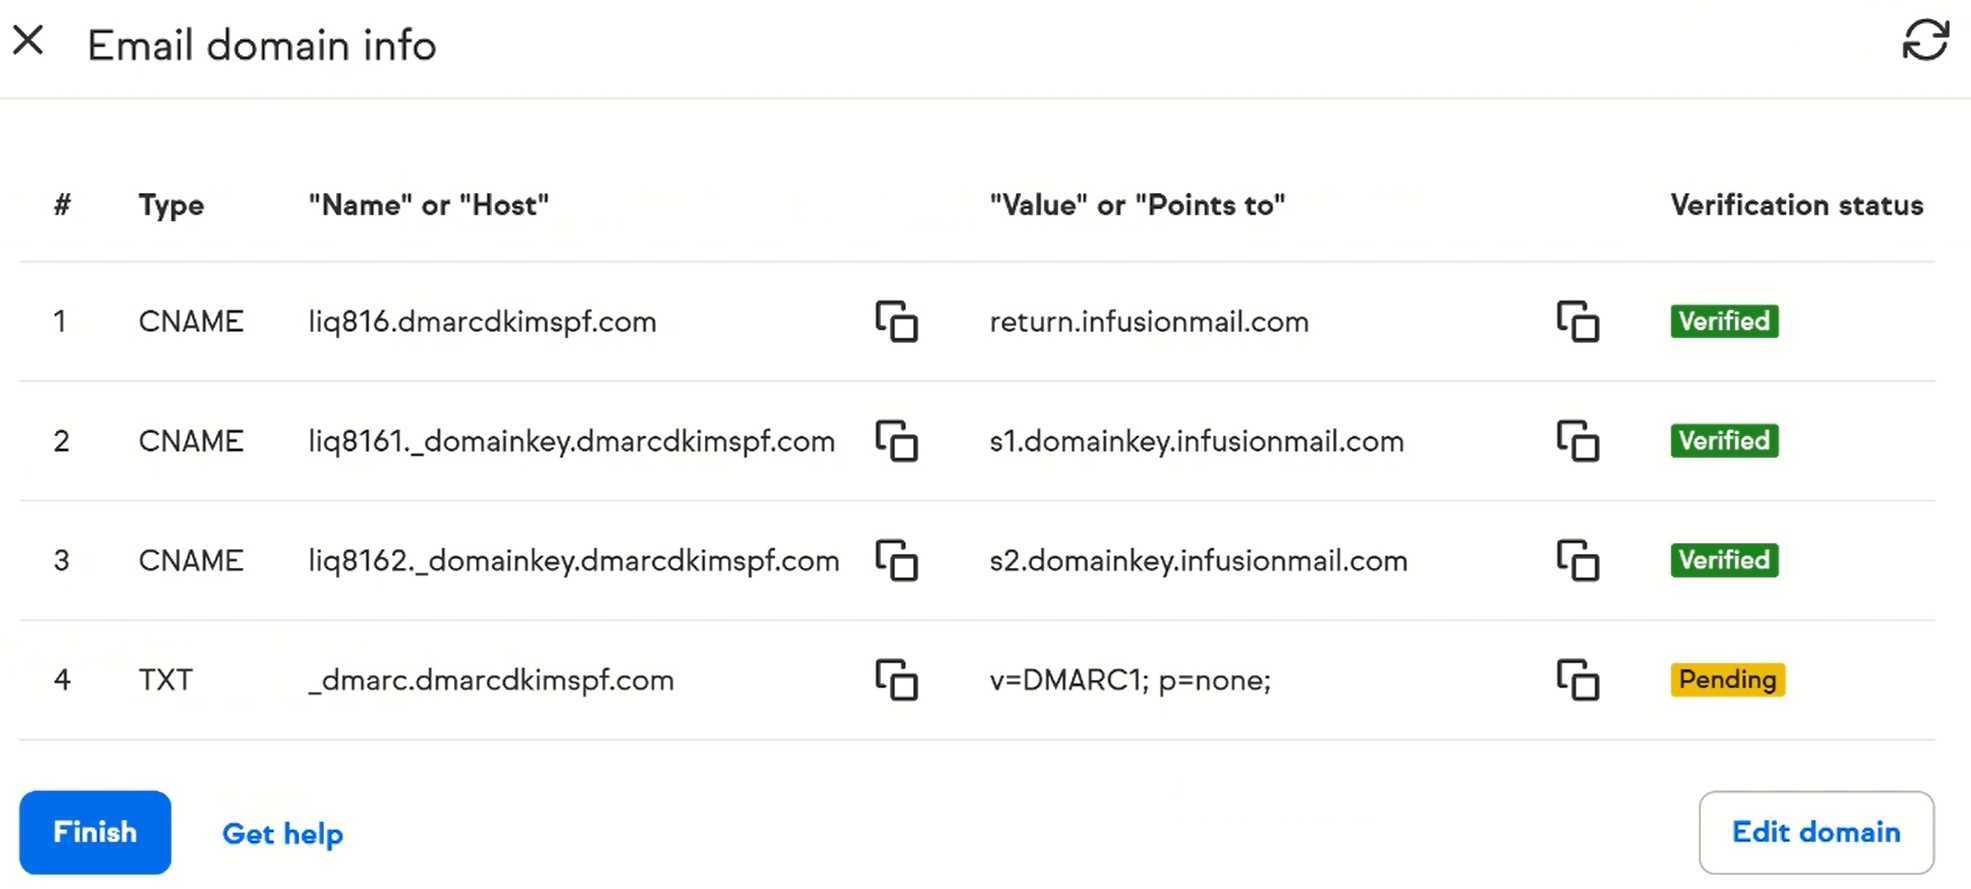
Once you have set up all DNS records, return to the Keap DNS page and click the Finish button.

If the records are verified, a green "verified" badge will be displayed next to each record.
-
If you see a yellow "pending" badge with a record or the domain, wait up to 48 hours for verification to complete.
-
When all records are verified, the domain will be displayed as "Connected."

If the records are not verified and the domain is not authenticated after 48 hours, there might be a misconfiguration in your DNS setup. Check for typos in the DNS entries or conflicting records.
For troubleshooting domain authentication errors, contact a DmarcDkim.com expert.
Check domain and follow the instructions to nail down your DMARC configuration.
No expert knowledge needed!


