Configure Hostpoint DMARC, DKIM, SPF - Email Domain Authentication Guide
Check your domain for DMARC, DKIM, SPF and MX records. Get a free report.
How to Setup DMARC, DKIM, SPF Records for Hostpoint Domain Authentication?
In this article, you will learn how to setup SPF, DKIM, and DMARC records for Hostpoint to authenticate email domains.
Authenticating and securing email communication is crucial for businesses to prevent spoofing and improve deliverability.
Three commonly used protocols for authenticating emails are SPF (Sender Policy Framework), DKIM (DomainKey Identified Mail), and DMARC (Domain-based Message Authentication, Reporting, and Conformance ).
Configure Hostpoint DKIM Record:
-
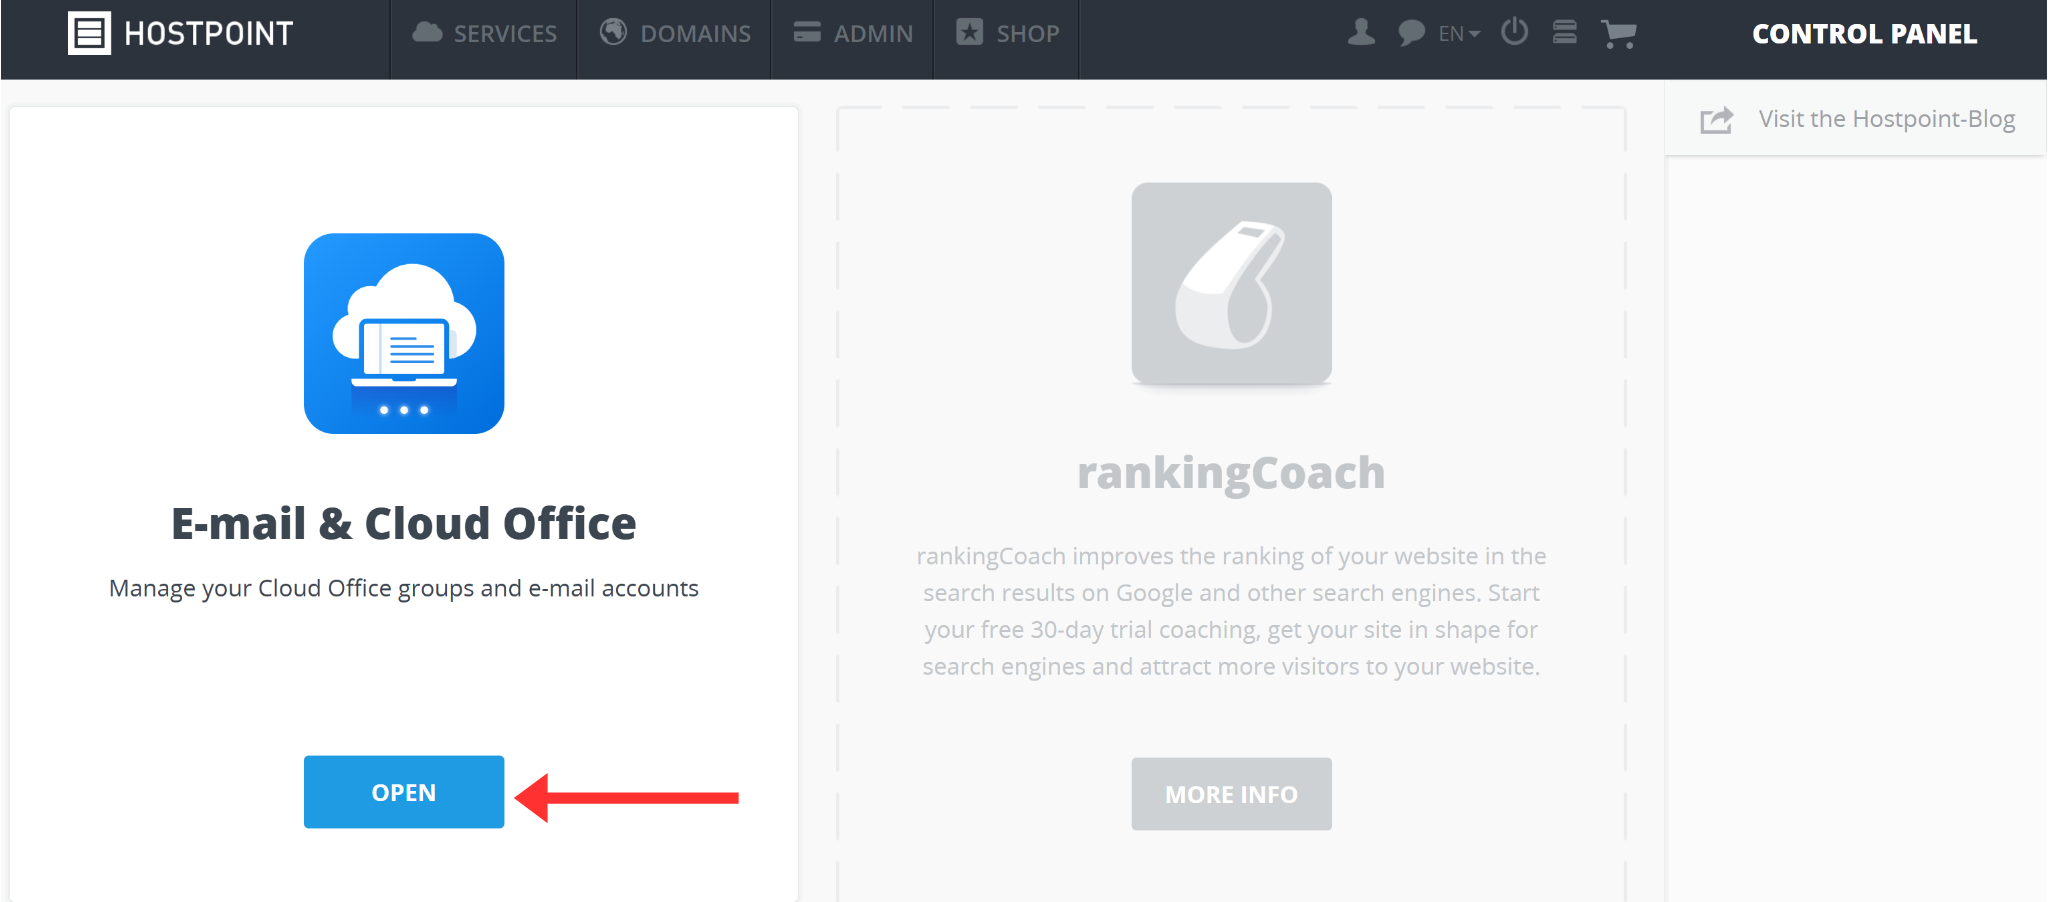
Go to Hostpoint Control Panel and click Email & Cloud Office.
-
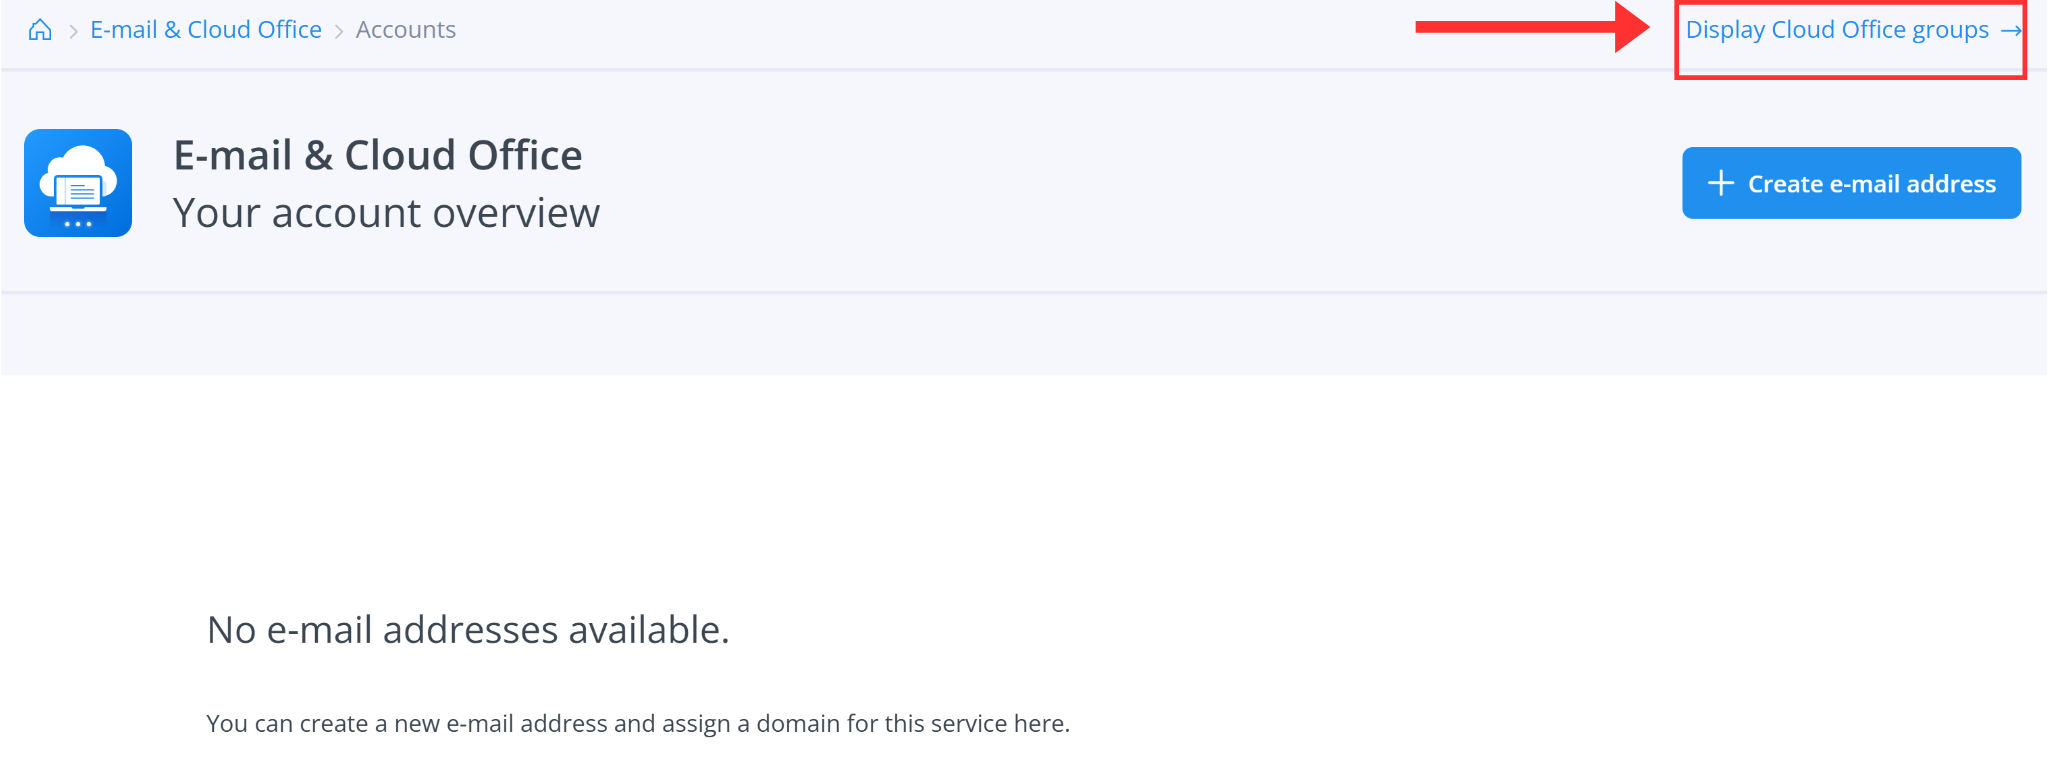
Go to "Display Cloud Office Groups".
-
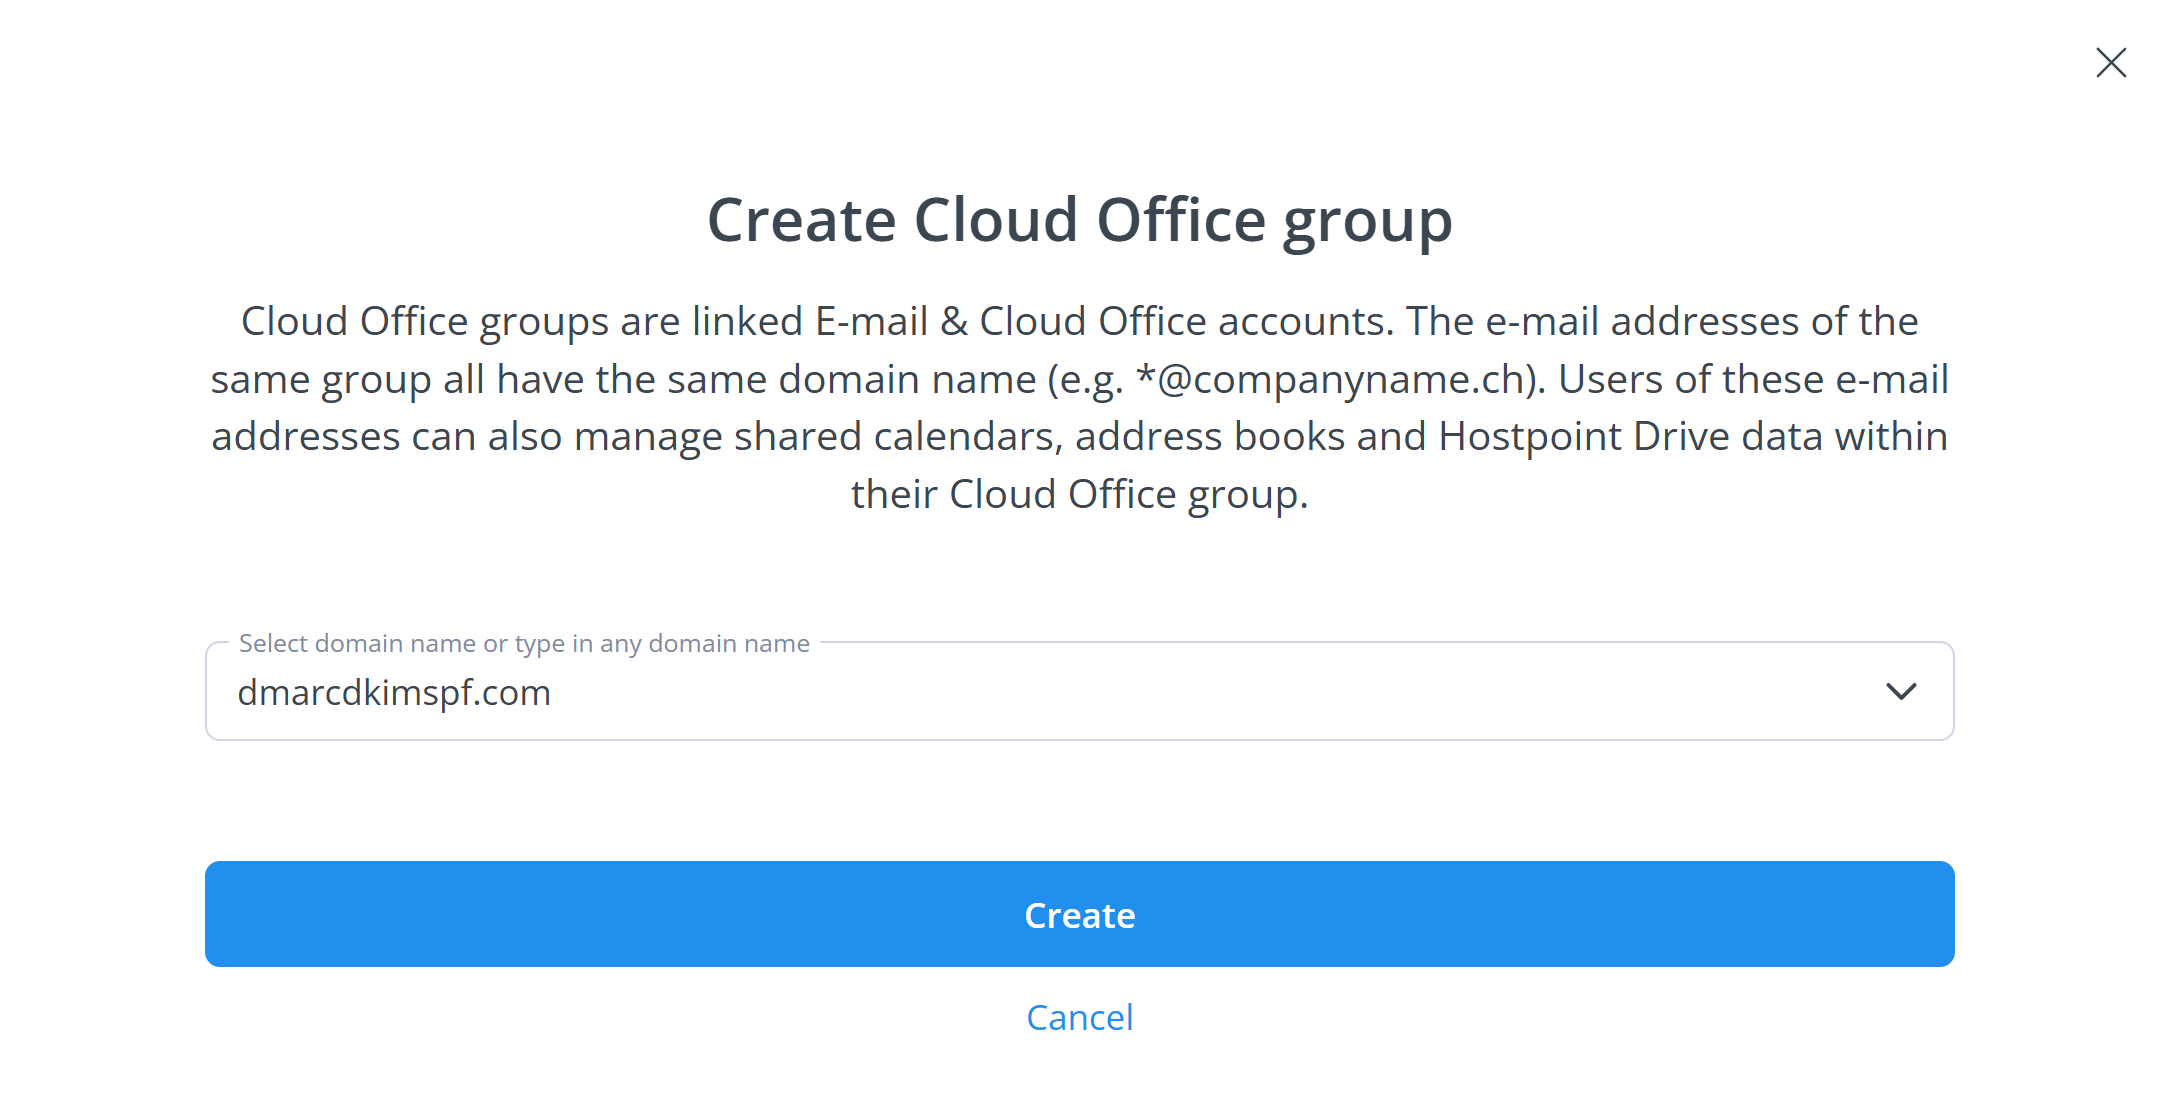
Click "Create Cloud Office Group".

-
Write your Domain name and click Create.
-
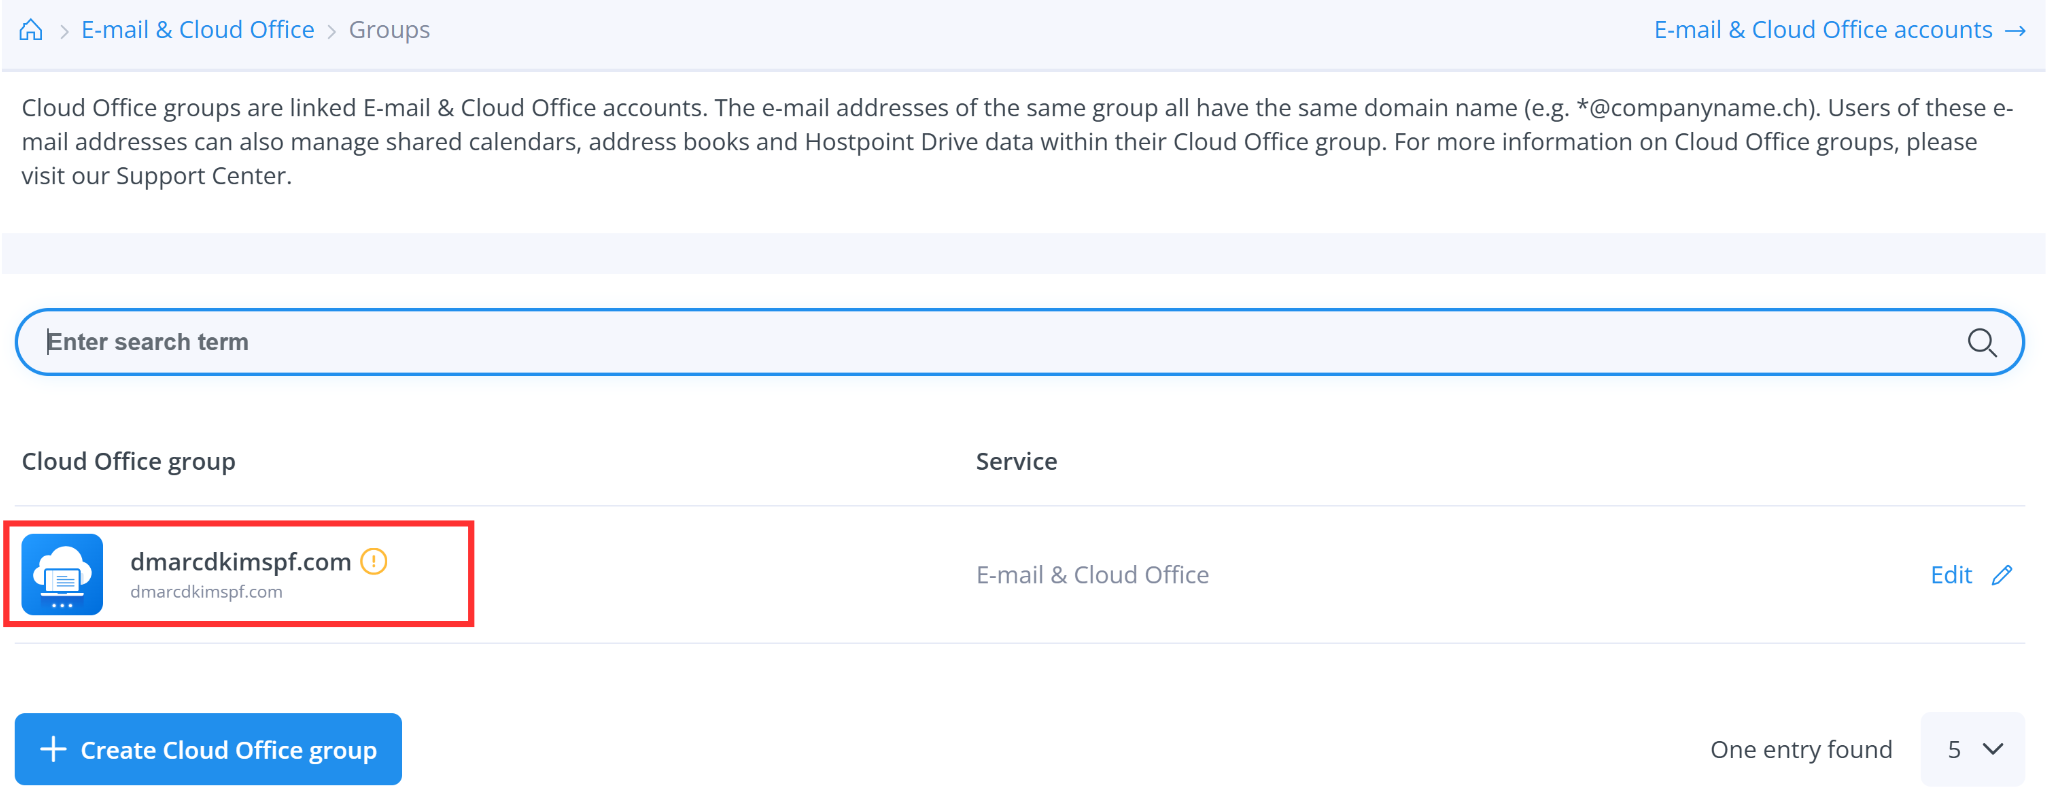
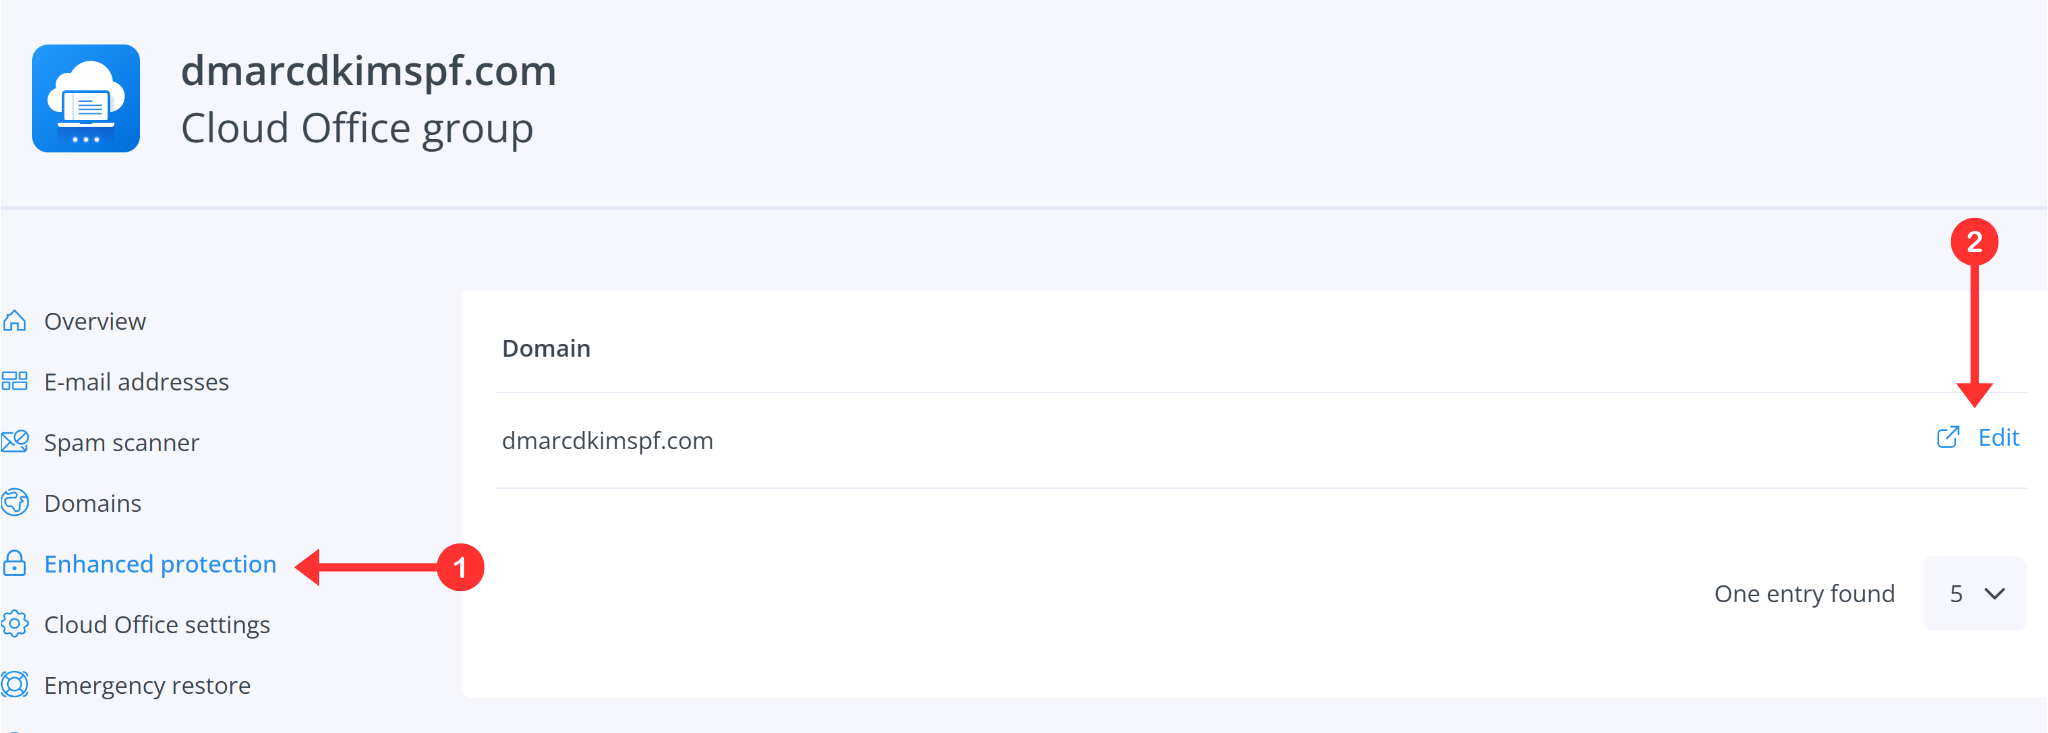
Now click your domain in the Groups list.
-
Go to Enhanced Protection and click the Edit icon.
-
Turn on the toggle for DKIM.

-
Wait for a few minutes and 3 DKIM records will be displayed on your screen.

Setup Hostpoint DKIM Records in your DNS Provider:
-
Login to your DNS provider and select your domain.
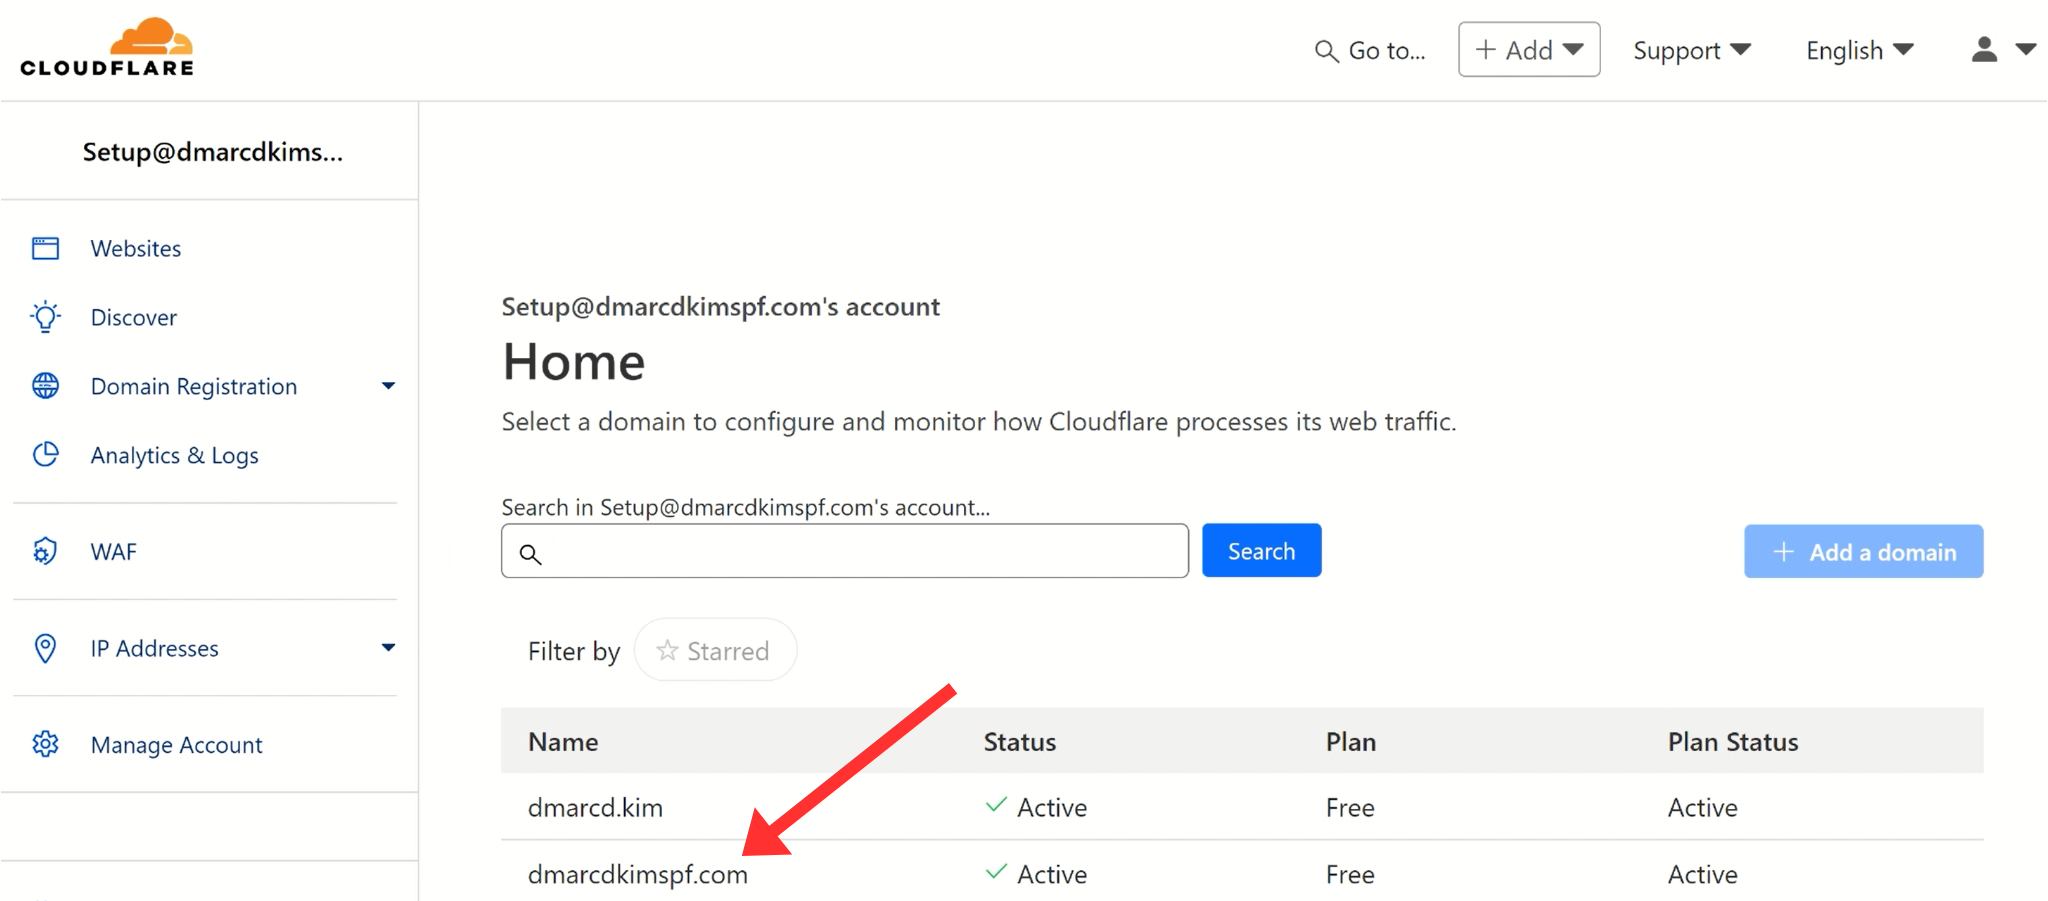
-
Go to the DNS section and click Add Record.

Select record type TXT.
Copy the Domain text from Hostpoint and paste it into the Name field of your DNS provider.
Copy the Value and paste it into the Content field.
-
Click the Save button to save the record.
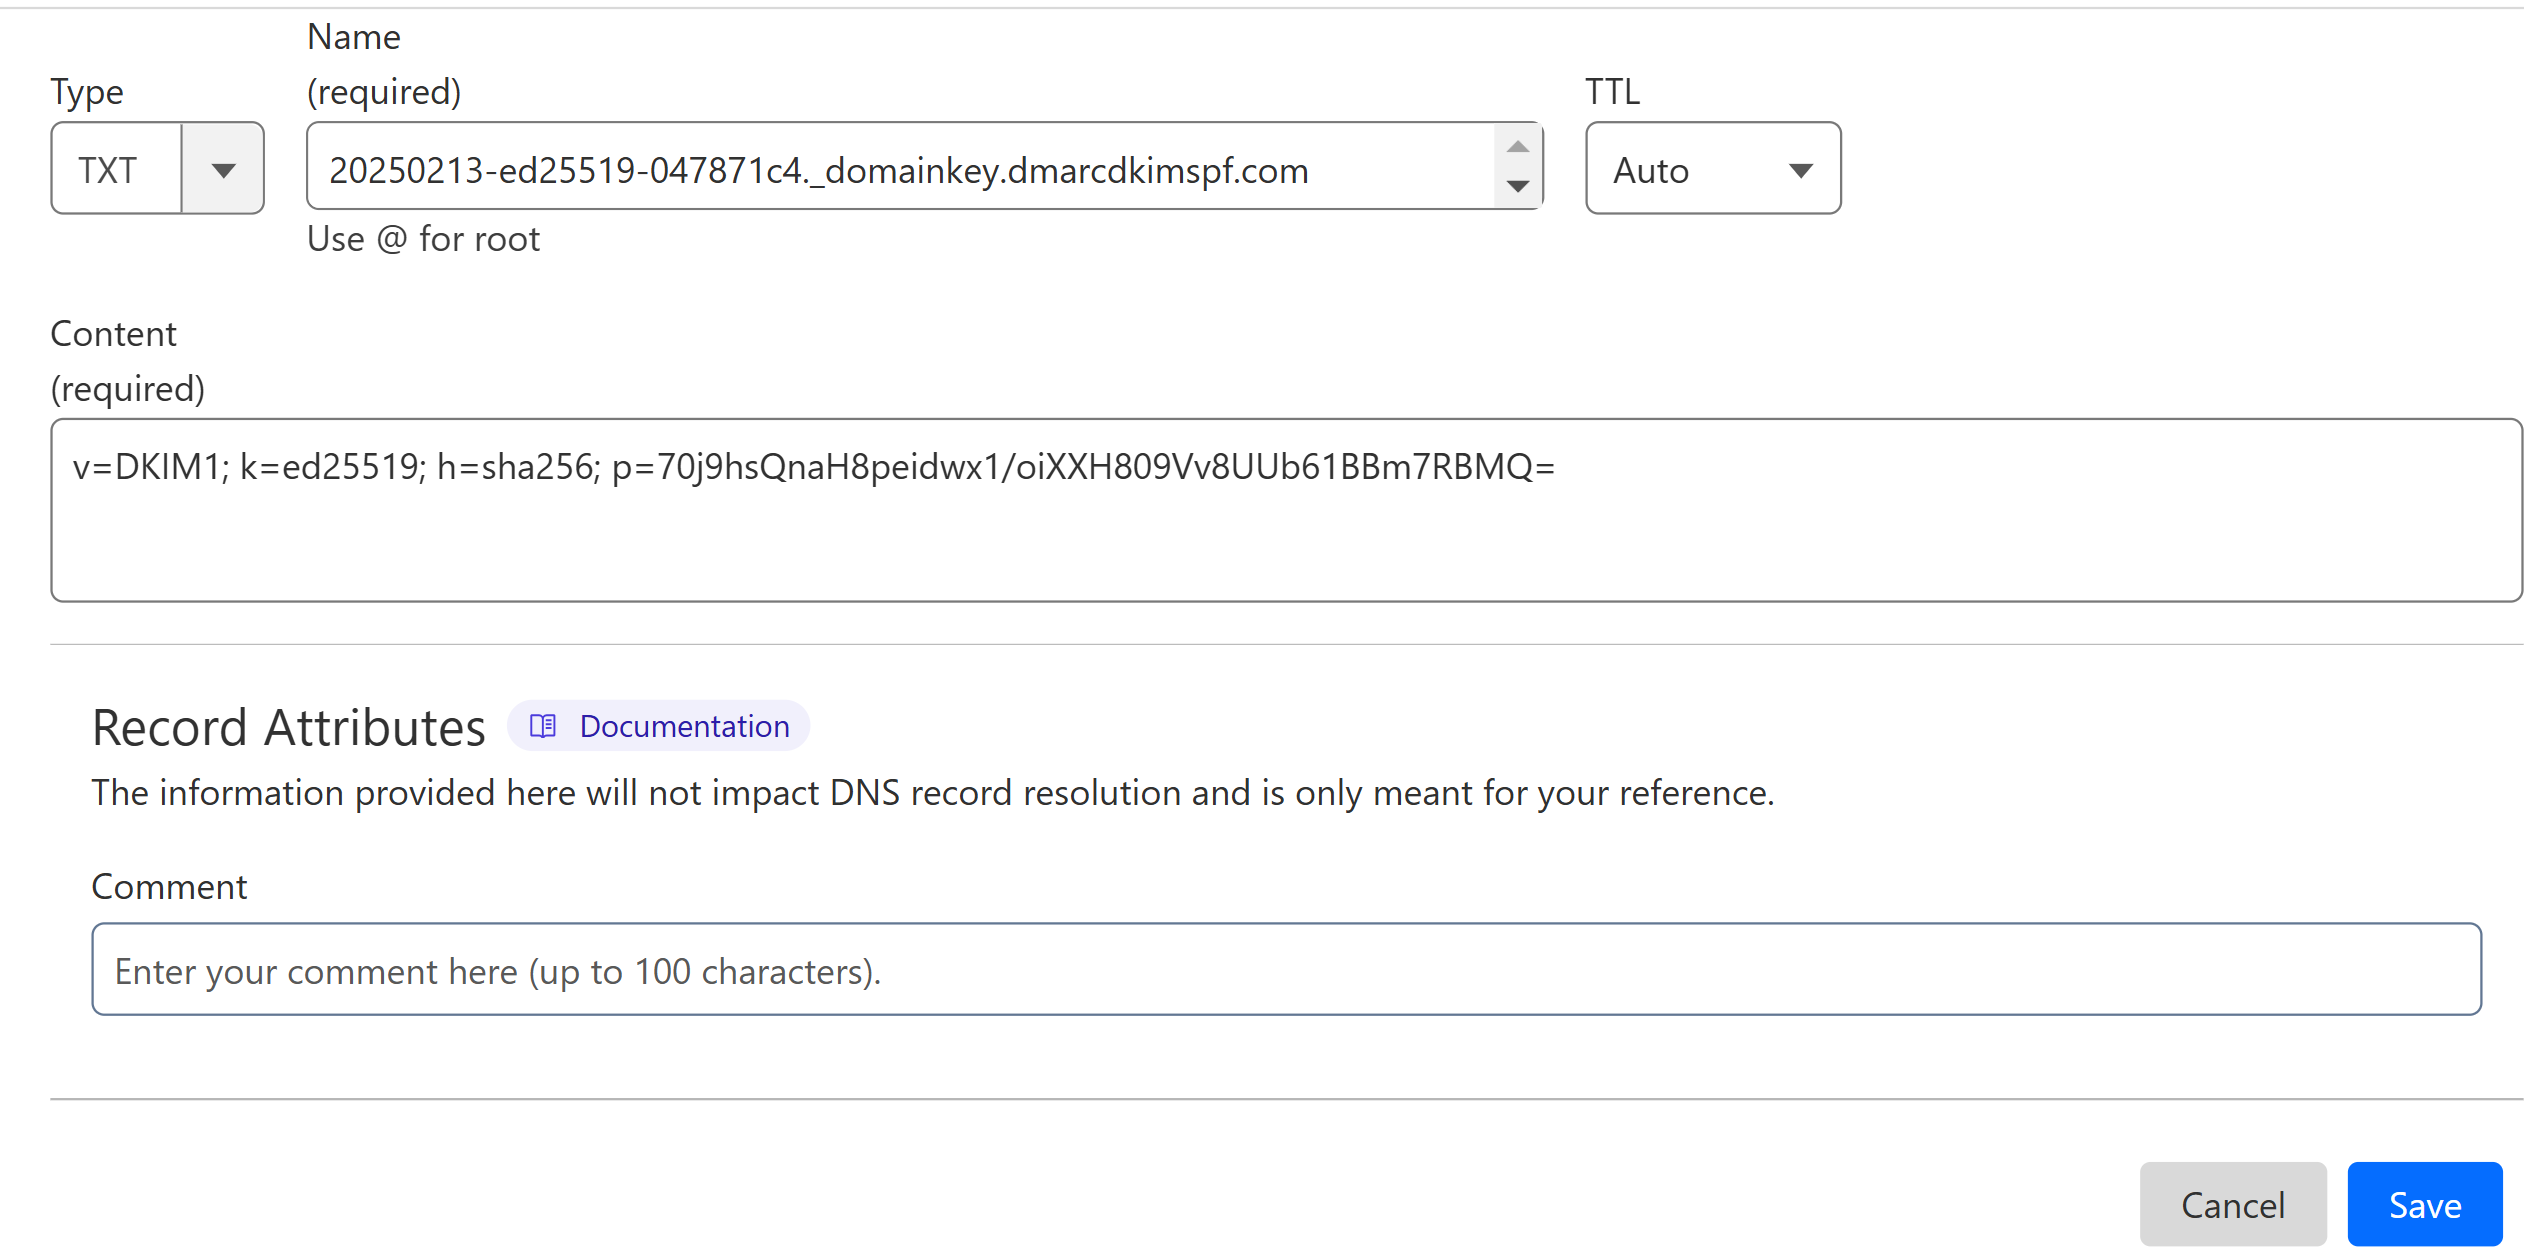
Repeat the same steps to add all three DKIM records.
Setup Hostpoint SPF Record:
When you register a new domain in the Hostpoint control panel—whether through a domain transfer or a new registration—the required SPF record is automatically generated and added for you.
However, if your domain is externally registered, add the following SPF record in your DNS dashboard.
| Record Type | Hostname | Value |
|---|---|---|
TXT |
@ |
v=spf1 redirect=spf.mail.hostpoint.ch |
How to Combine Multiple SPF Records?
DNS providers allow only one SPF record per domain. If your domain already has an SPF record, merge it with Hostpoint SPF using the DmarcDkim.com SPF Merge tool to get a combined value.
Go to the SPF Merge tool.
Add your domain name and Hostpoint SPF value.
Click the Merge SPF Values button.
The tool merges both SPF records and gives a single value.
Add this merged value to your DNS provider.
Setup DMARC Record for Hostpoint:
To setup a strict DMARC policy, you can use the DmarcDkim.com DMARC Check tool. It gives you DMARC analytics and reports to protect your domain against spoofing.
Go to the DMARC Check Tool.
-
Enter your domain name and click Check.
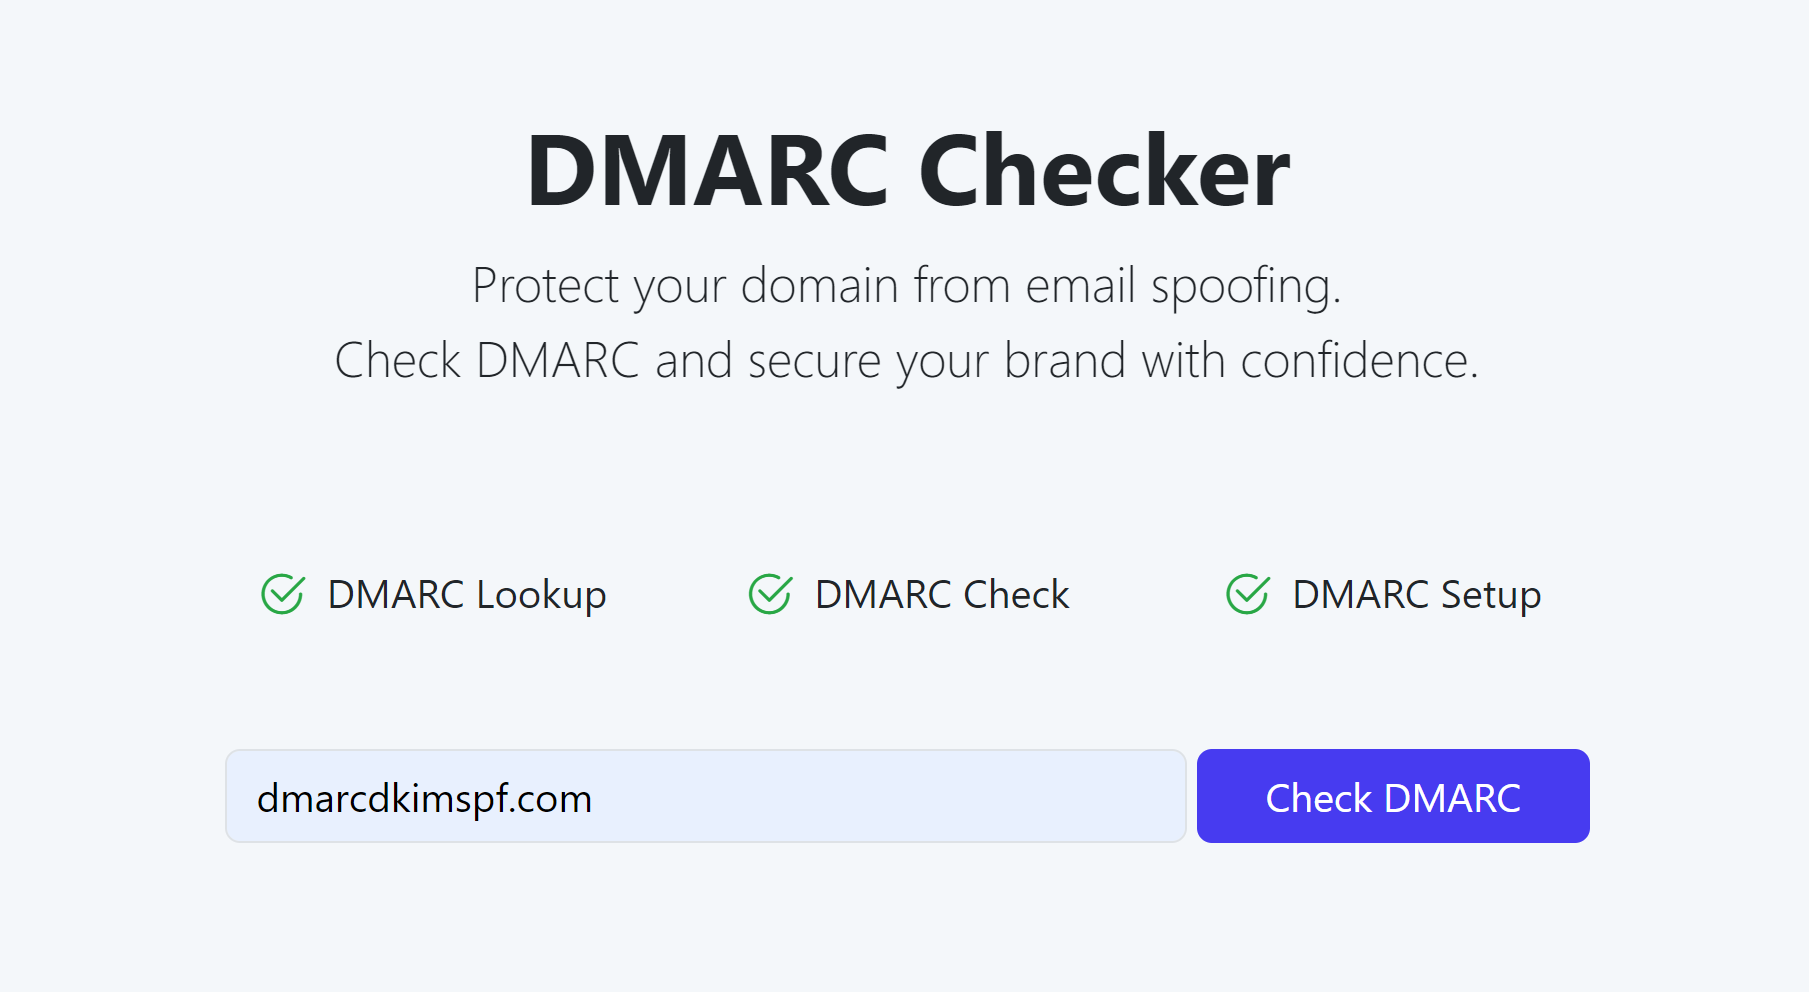
The tool analyzes your domain for existing DMARC records and errors.
-
After analysis, it provides you with an initial monitoring value.
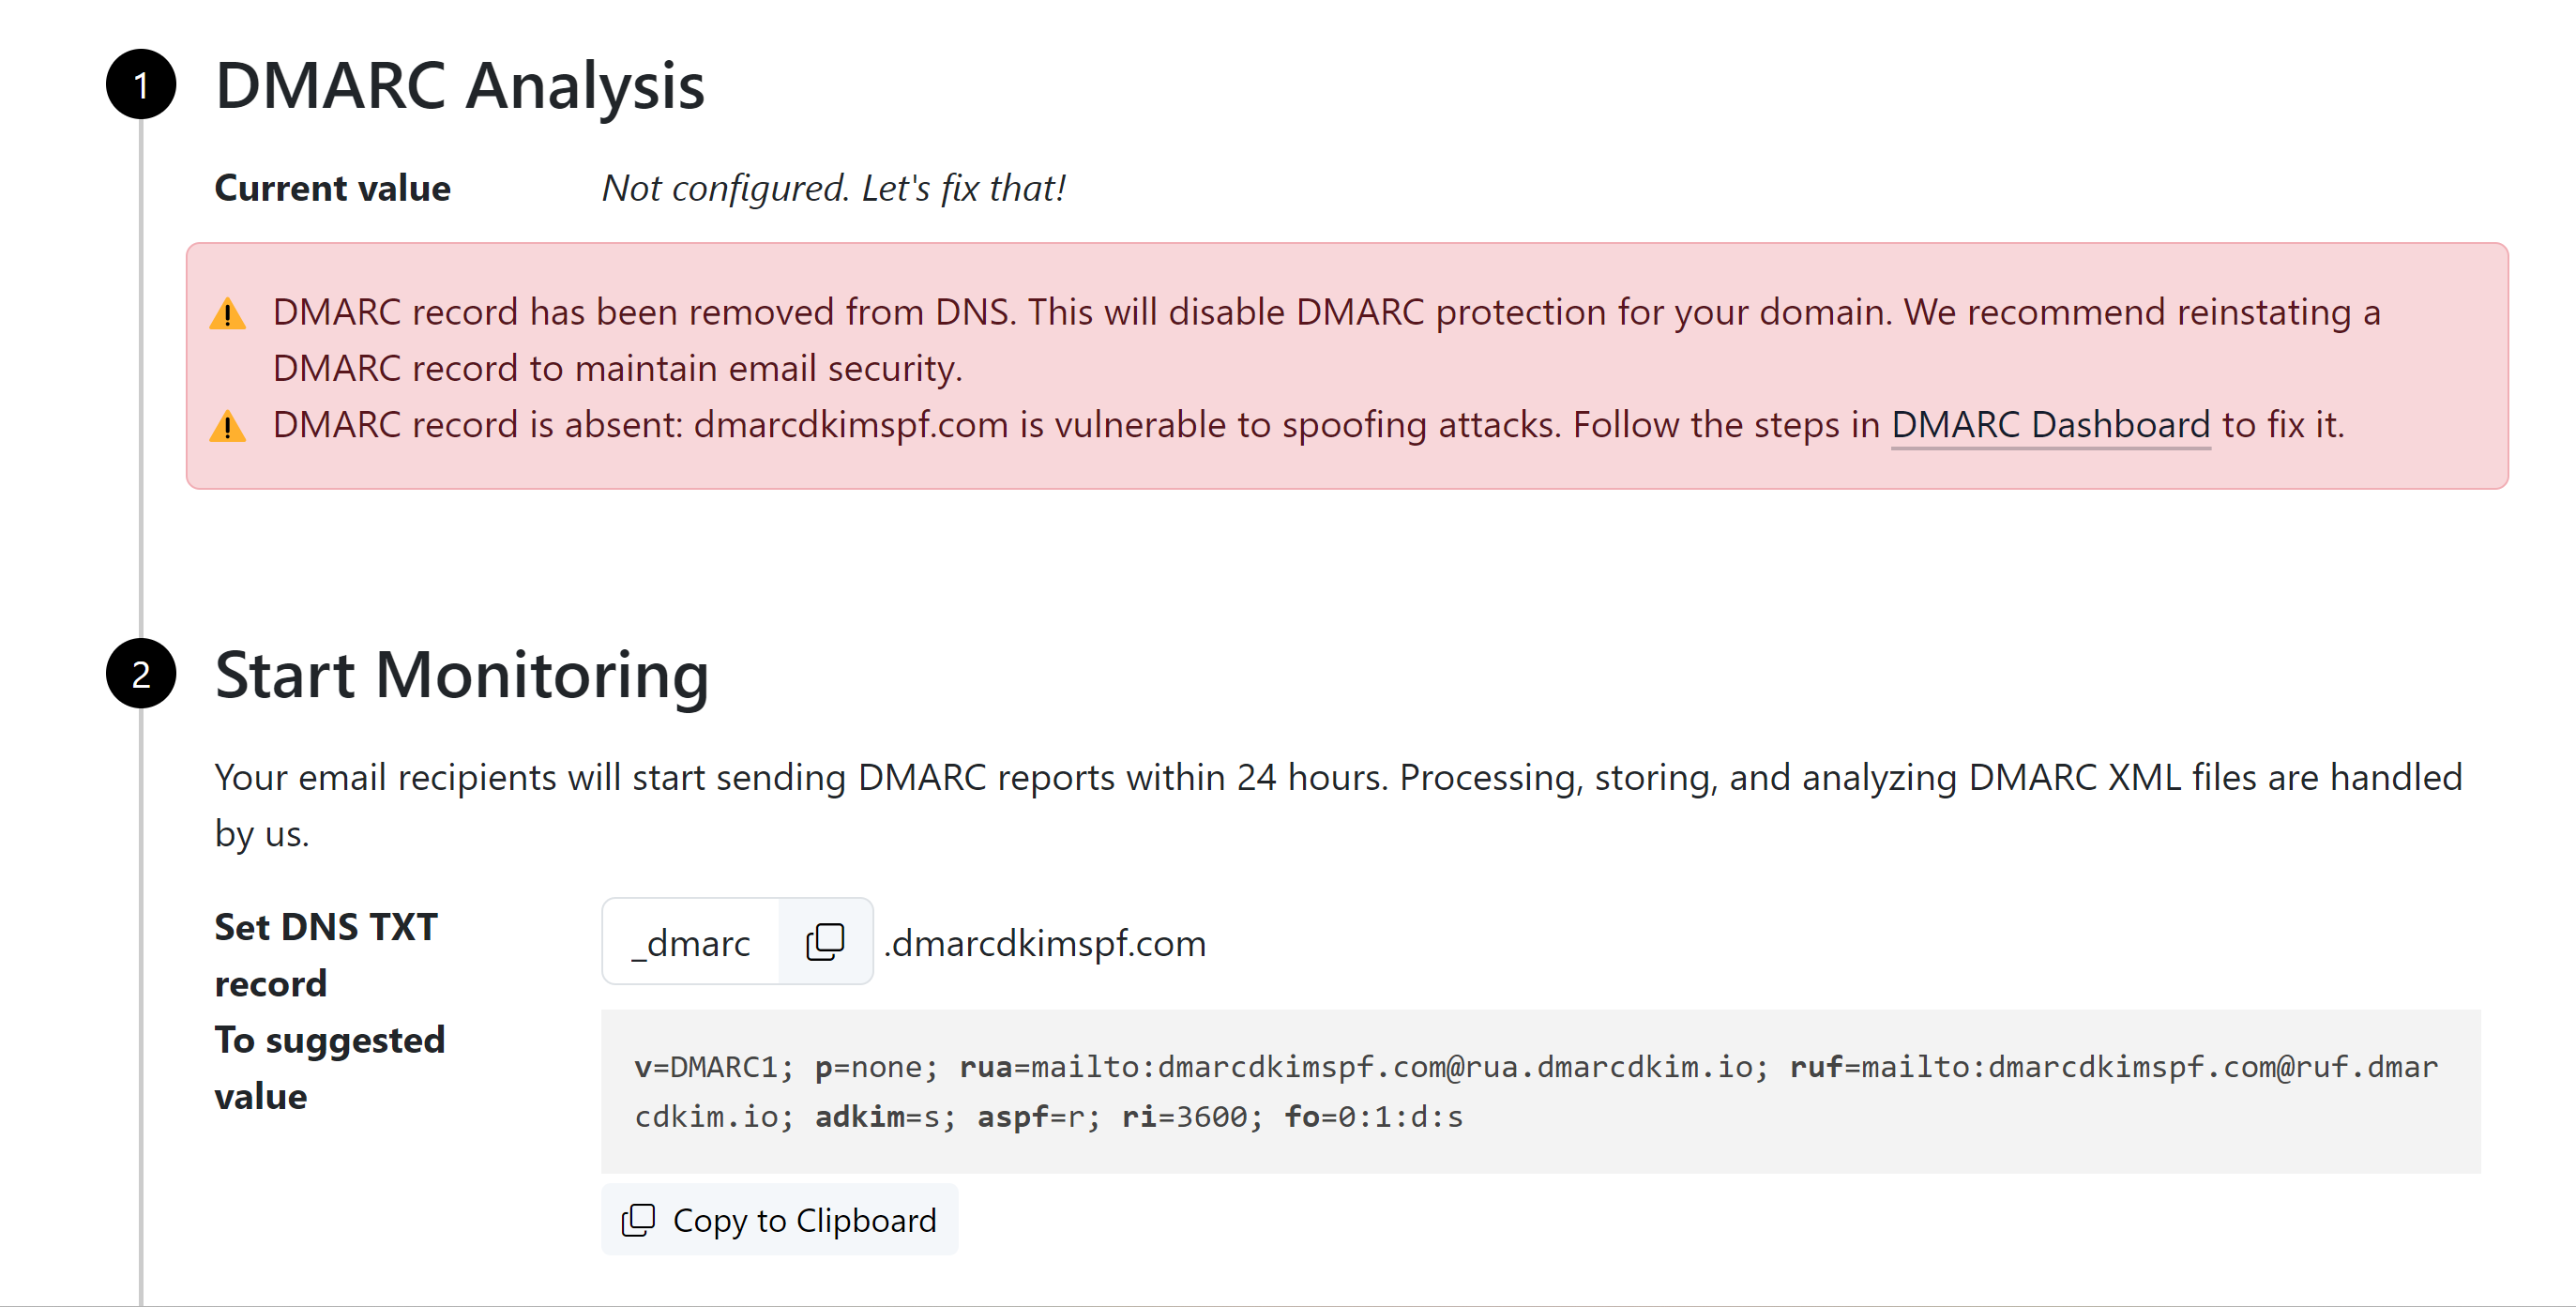
Add this DMARC value to your DNS provider.
-
Click the Sign-up button to get DMARC reports and analytics.
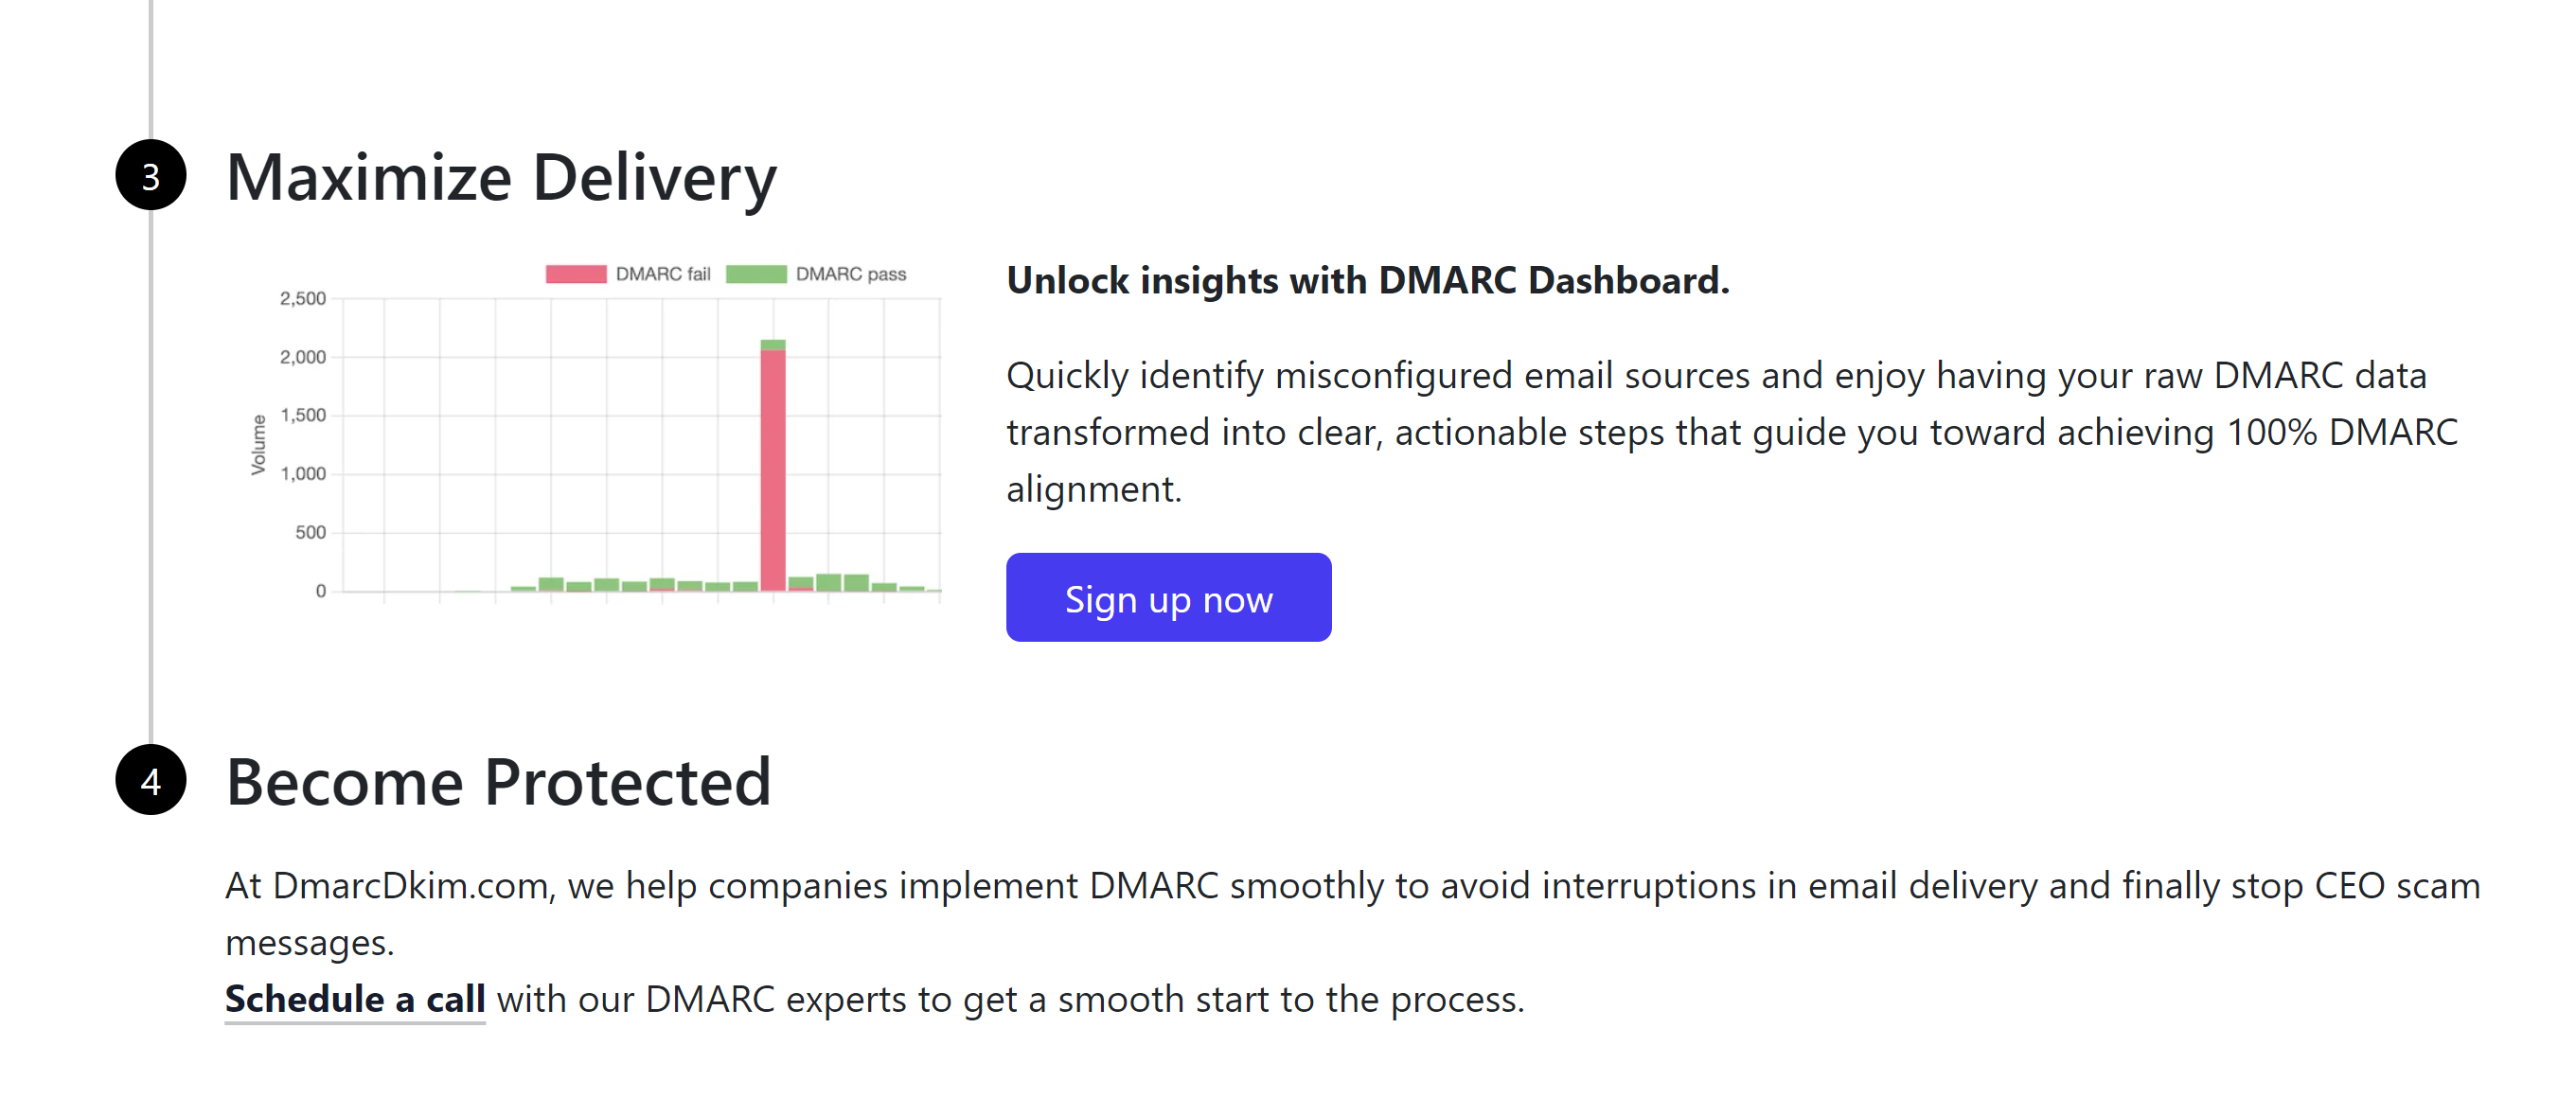
After monitoring all incoming emails, the tool guides you through setting up a strict DMARC policy to block unauthorized senders.
After setting up the DNS records, wait up to 24 hours for servers to update and publish DNS changes.
If you face authentication issues, contact a DmarcDkim.com expert for assistance.
Check domain and follow the instructions to nail down your DMARC configuration.
No expert knowledge needed!


