Atlassian SPF, DKIM, DMARC Configuration - Authenticate Email Domain
Articles
- DMARC Enforcement in 2026
- 🇩🇪 Welche Hosting Anbieter unterstützen DMARC
- DNS records
- ARC - Authenticated Received Chain
- Reverse Engineering Phishing
- Click/Link Tracking
- Email impersonation scams explained
- Cyber Insurance and DMARC Enforcement
- Manual DMARC Monitoring vs Automated Monitoring
- SMTP Smuggling
- DNS and NS
- DMARC for non sending domains
- MX records
- TLS-RPT Record
- DMARC record
- The impact of Business Email Compromise
- A quiet Google update just made SPF more forgiving
- CEO Scam
- Domain Authentication
- Email Verification
- DMARC2 vs DMARC1
- DNS Leak
- DNS Check
- Return-path record
- CNAME record
- DARA Records
- SOA records
- CNAME vs. A Records
- DNS Lookup
- Reverse DNS Lookup
- Cracking a 1024-bit DKIM Key
- Top 7 SPF Check Tools Compared 2026
- Der deutsche Bundestag hat ein Spoofing-Problem
How to Setup Atlassian SPF, DKIM, and DMARC Records for Domain Authentication?
The email inbox service providers (ISPs) require proof that you are who you say and your emails are safe to open. That's where domain authentication comes in.
By authenticating your sender email domain, the ISPs recognize you as a legitimate source and flag your emails as spam.
SPF, DKIM, and DMARC are commonly used authentication protocols. They ensure that your emails are not forged in transit and your domain is not used by scammers.
You can obtain these DNS records from an authorized platform like Atlassian. This post will guide you on how to setup the Atlassian domain authentication records (SPF, DKIM, DMARC, and Bounce records) in your DNS provider. Read till the end to learn all the ins and outs of email authentication.
Add your Domain in Atlassian:
Before sending emails, add your domain to Atlassian and setup the verification records in your DNS provider.
-
At the dashboard, click the menu icon and go to Administration.

-
Open Settings and go to the Domain tab in the left navigation menu.

Here, click Verify Your Company Domain.
-
Click Next, and you will land on the domain verification record page. Add this record to your DNS provider.


Setup the Verification Record in DNS provider:
-
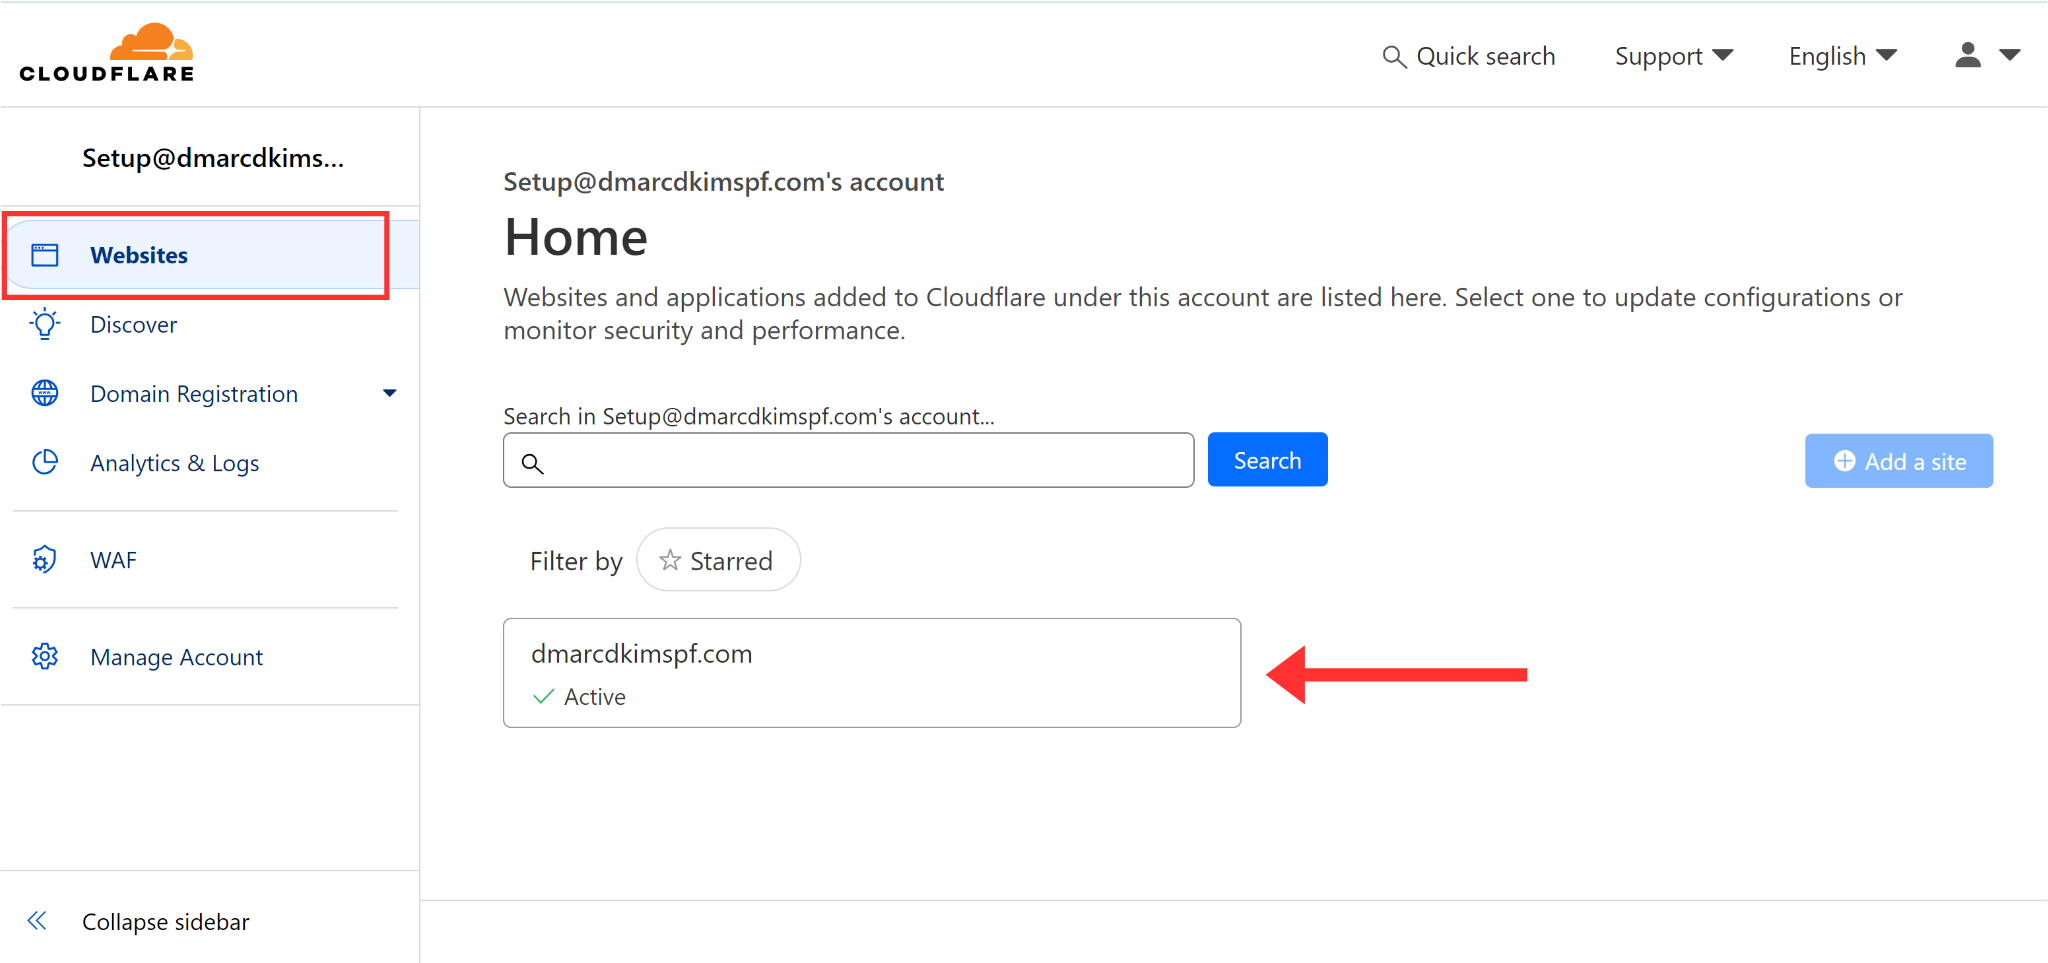
Login into your DNS provider and click your domain.
-
In the DNS tab, click Add Record.
Select type TXT.
In the Name field, write "@."
Copy the verification value and paste it into the Content field.
-
Lastly, click Save.


Verify the Domain:
Return to Atlassian and click Verify Domain.
Wait for the DNS record to propagate.
-
When the domain is verified, you will see the Active status highlighted in green.


Configure Atlassian SPF, DKIM, Bounce, and DMARC Records:
Head to the Email tab and click Add Domain.
-
Write your domain name and click Next.

-
Next, you get DKIM, Bounce, and Domain verification records.

Add these records to the DNS provider.


Setup Atlassian DKIM and Bounce Record in DNS Provider:
On your DNS dashboard, select type CNAME.
Copy the Record Name from Atlassian and paste it into the Name Field of your DNS dashboard.
Copy the Record Value and add it to the Target Field.
-
Disable Proxy and click Save.


NOTE: Turning off the proxy toggle for every CNAME record is important. When enabled, it diverts the traffic to your DNS server instead of your email server. This can cause authentication issues.
Setup Atlassian SPF Record in DNS Provider:
Select the record type TXT.
In the Name Field, write
@.In the Content Field, add the following SPF value:
v=spf1 include:spf1.atlassian.com include:spf3.atlassian.com ~all.-
Click Save.


What to do if there are multiple SPF records?
Having more than one SPF record for a single domain can cause conflicts, and one will stop working. If your domain already has SPF records from any other source, merge it with the Atlassian SPF record.
For merging, use the SPF merge tool.
Add your domain name and Atlassian SPF value.
Click Merge SPF Values.
-
The tool detects your current SPF value and merges it with the Atlassian SPF.

Copy the merged value and add it to your DNS provider.

Verify Records:
After adding the DKIM, Bounce, and verification records, click Run DNS Records Check.
Wait for a while till servers update the DNS changes.
-
When records are verified, you will see green checkmarks with each record.


Setup Atlassian DMARC Record:
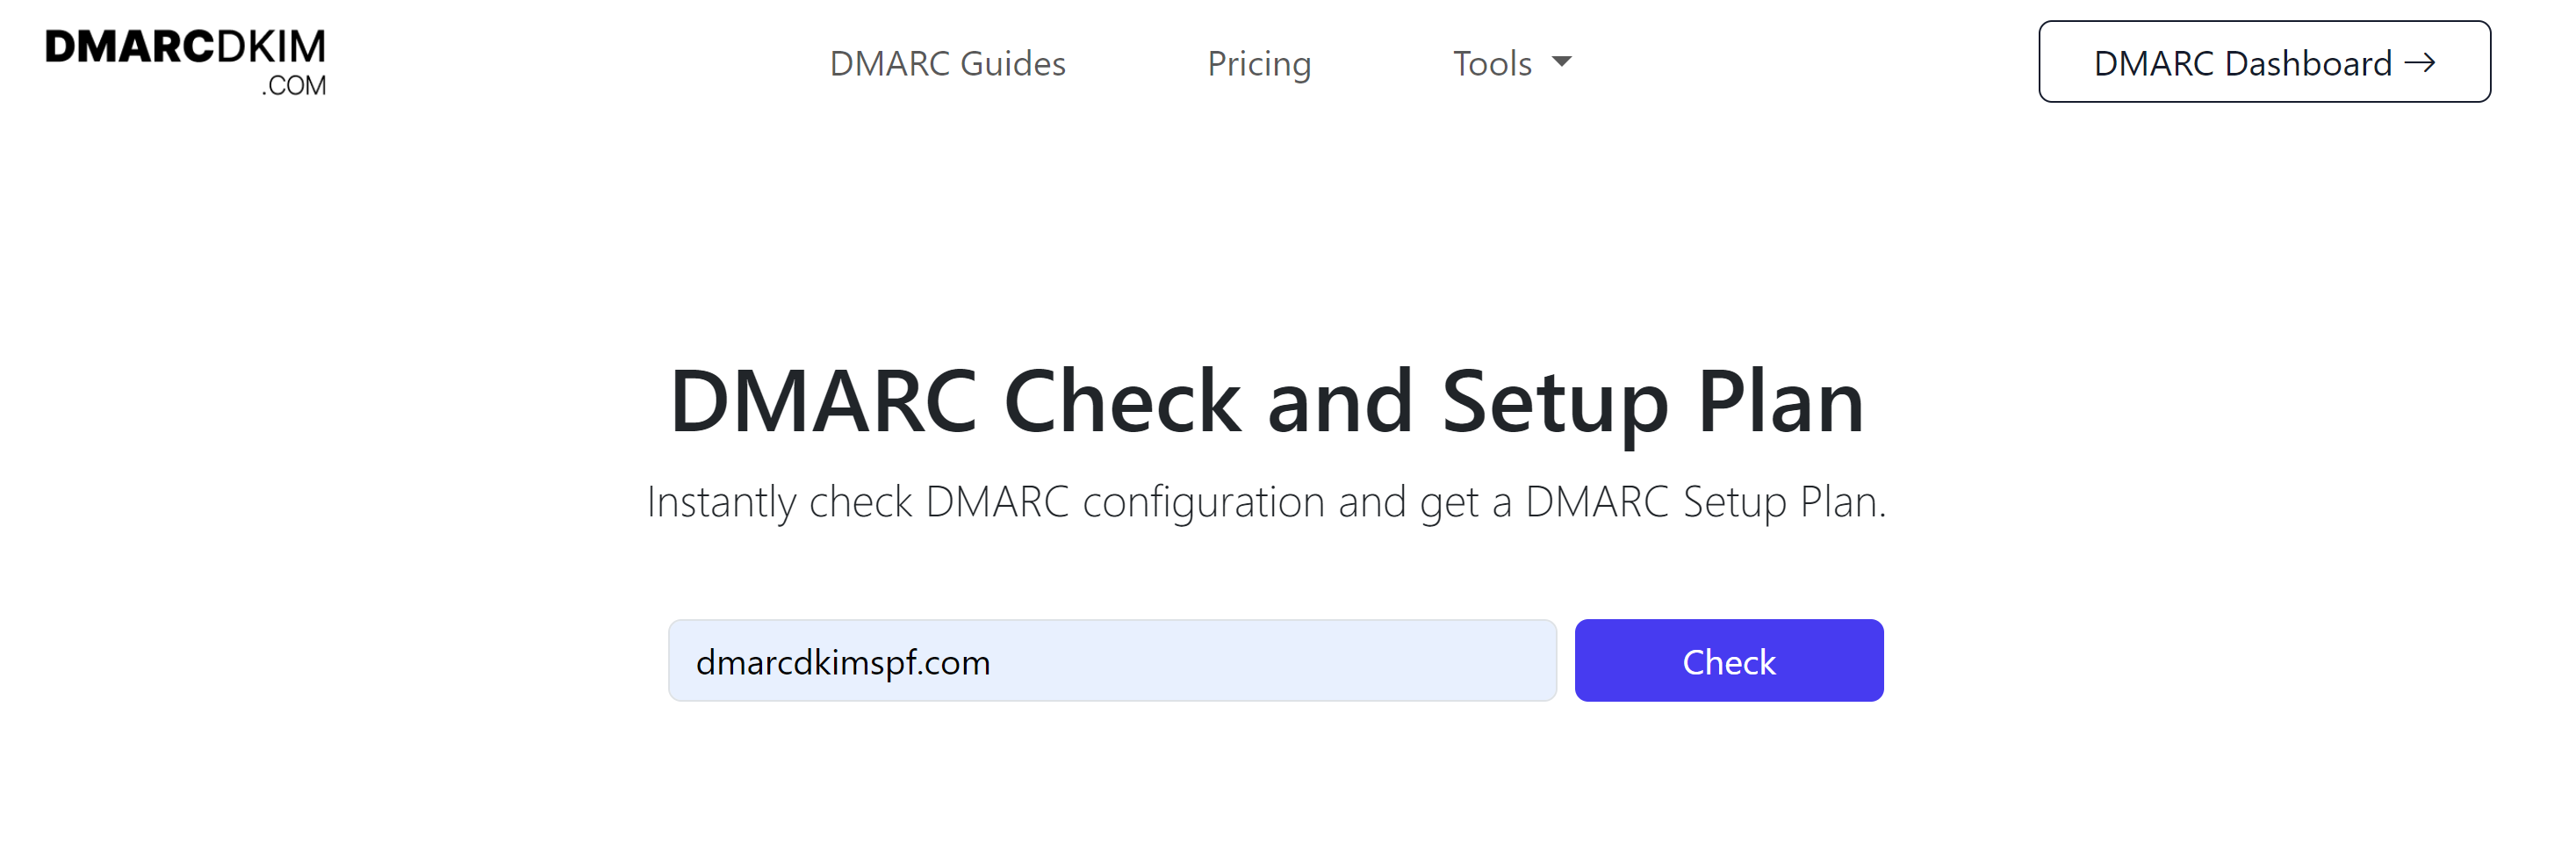
To implement a strict DMARC policy, go to the DmarcDkim.com DMARC check tool. It guides you through every step of setting up your DMARC policy and gives you actionable insights into DMARC reports.
Open the DMARC check tool.
-
Add your domain name and click Check.
-
Copy the Suggested DMARC value and add it to your DNS provider.
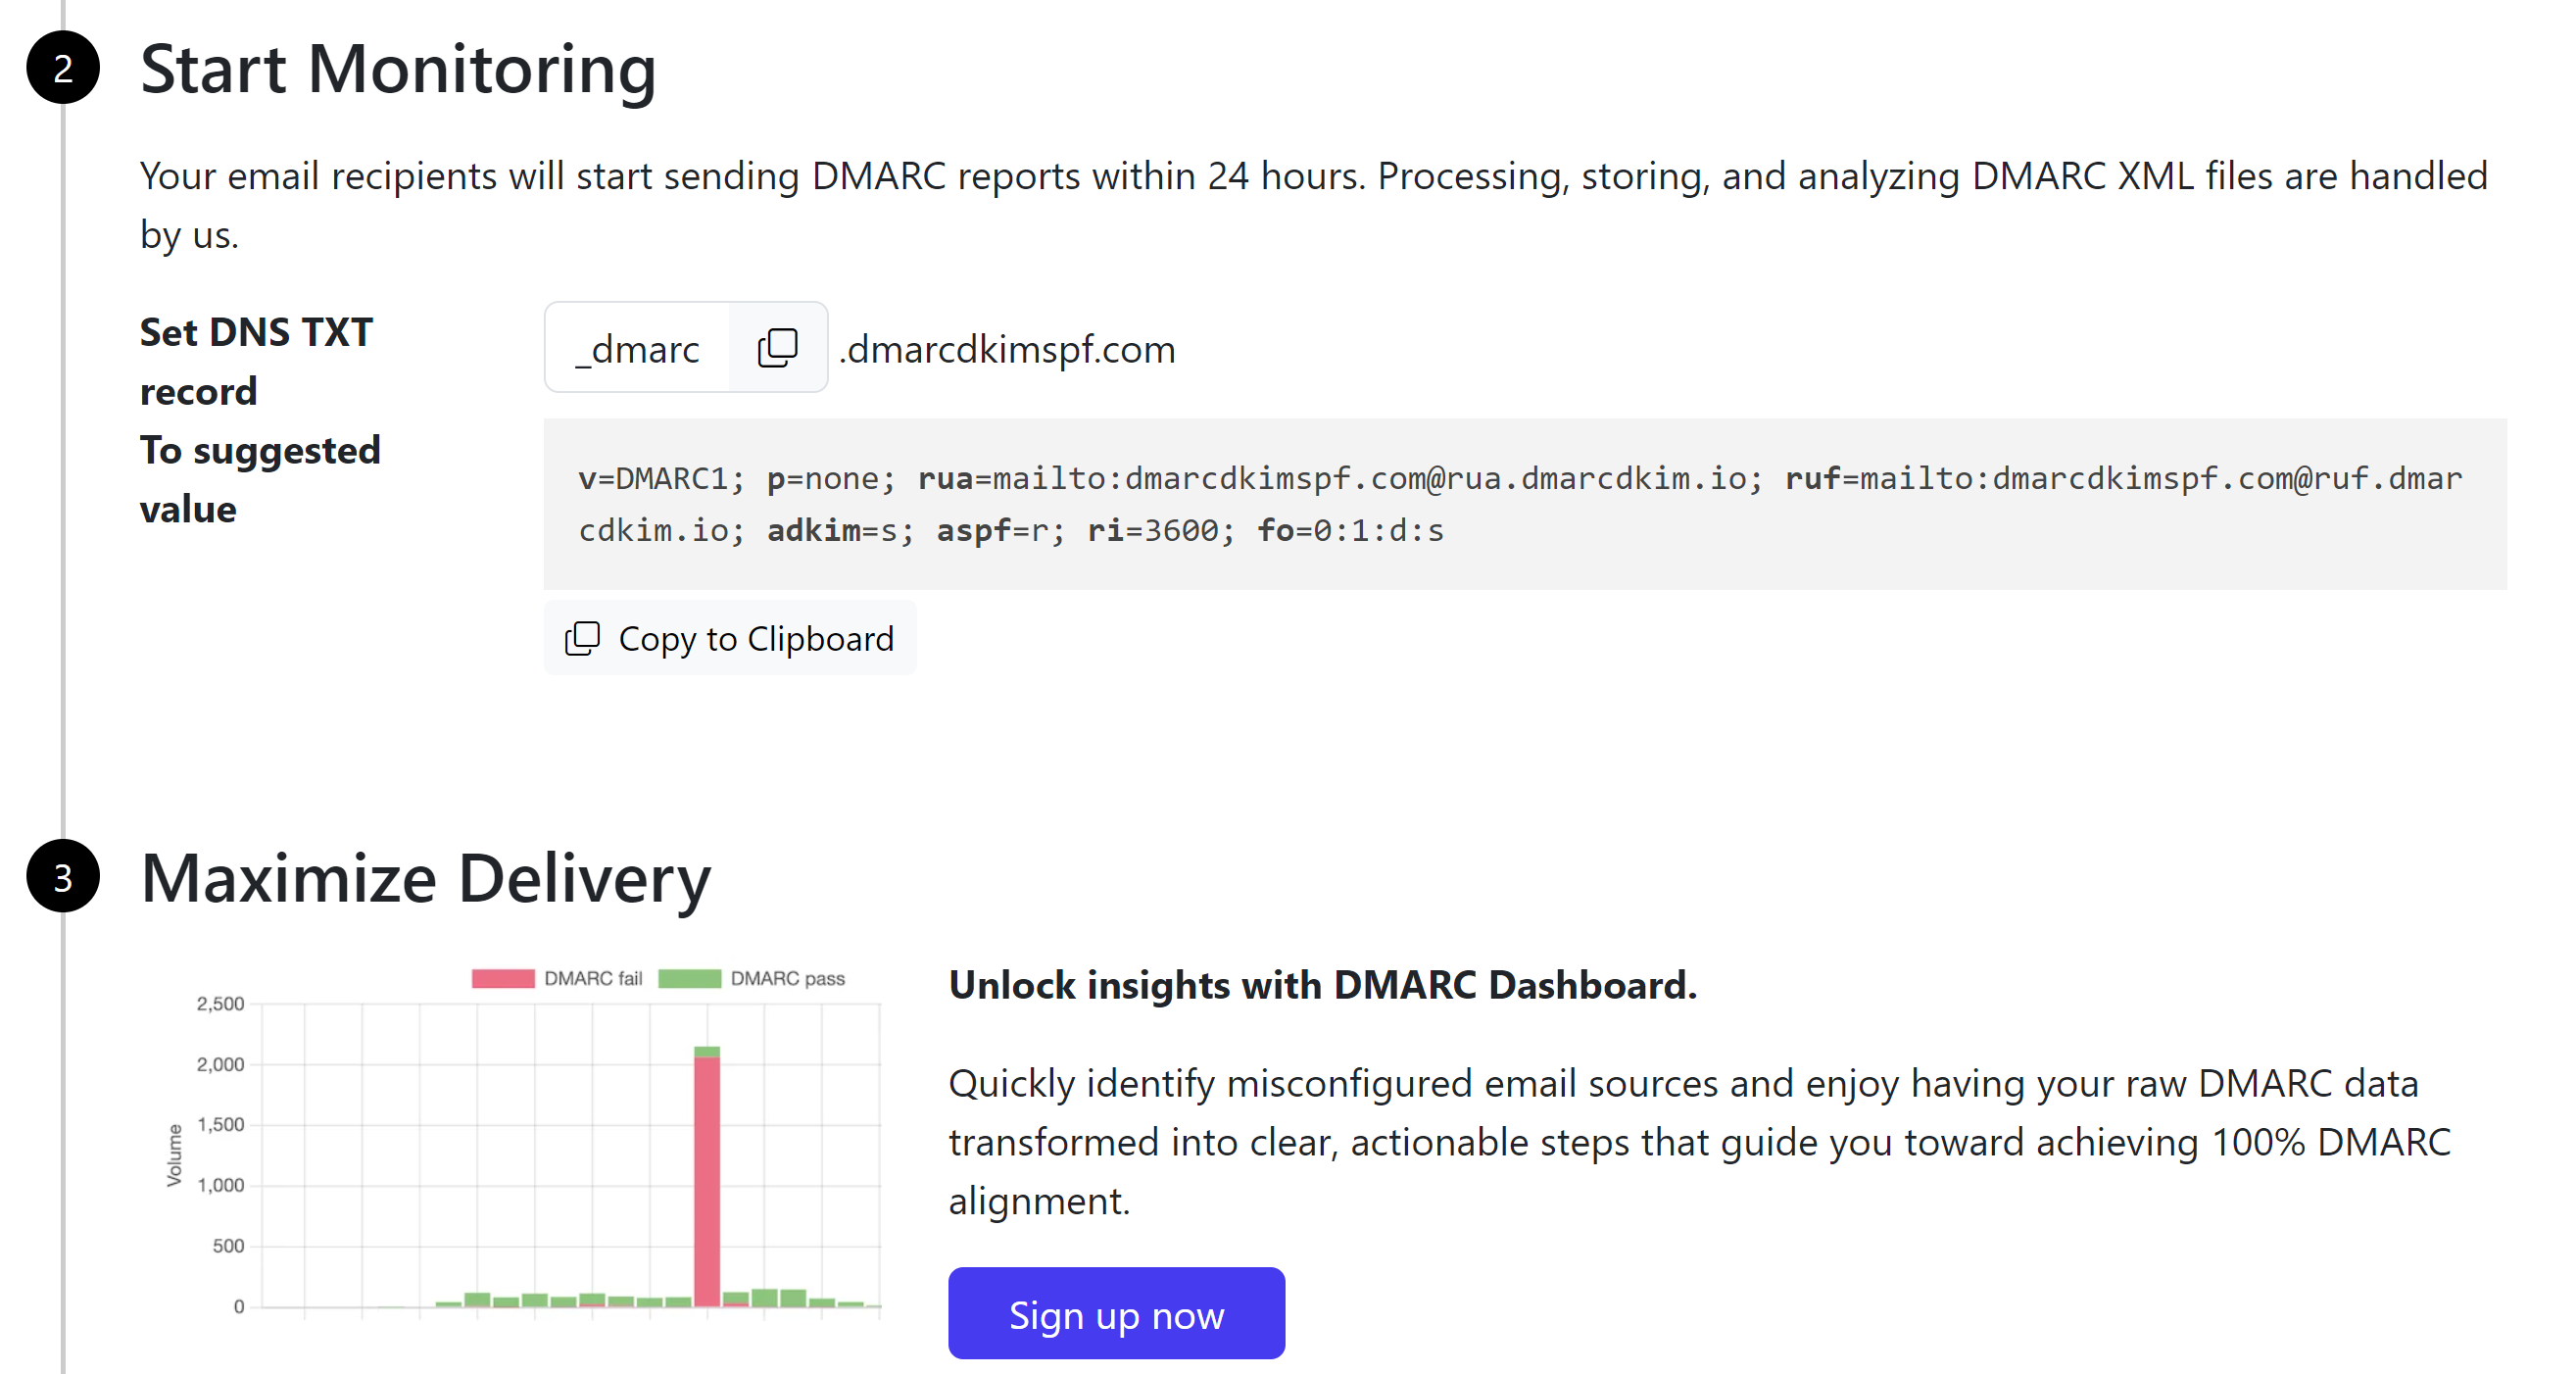
Sign up for the tool to get actionable insights into DMARC reports.


After adding all records, wait 24 hours for the records to get verified. If DNS authentication doesn't happen after 24 hours, it points to a potential misconfiguration in your DNS setup.
To troubleshoot the domain authentication issues, contact the DmarcDkim.com expert.
Check domain and follow the instructions to nail down your DMARC configuration.
No expert knowledge needed!