How to authenticate domain with Zoho DMARC, DKIM and SPF?
Check your domain for DMARC, DKIM, SPF and MX records. Get a free report.
Zoho Domain Authentication - DMARC, DKIM, SPF (2024 Guide)
DMARC (Domain-based Message Authentication, Reporting, and Conformance) is like a security stamp on your emails that tells email providers they're really from you and what to do if they're not.
DKIM (DomainKeys Identified Mail) adds a digital signature to your emails so recipients can check if they've been tampered with during delivery. SPF (Sender Policy Framework) is like a guest list for your emails, specifying which servers are allowed to send emails on your behalf to prevent spoofing and spam. By utilizing Zoho CRM's domain authentication services, you can generate DNS records that provide a distinct signature to your emails, effectively fortifying them against spam filters. In this guide, we'll walk you through the step-by-step process of setting up domain verifications in your Zoho CRM account.
-
After logging in to Zoho CRM, click on the Settings icon and go to Emails in the Channels box.
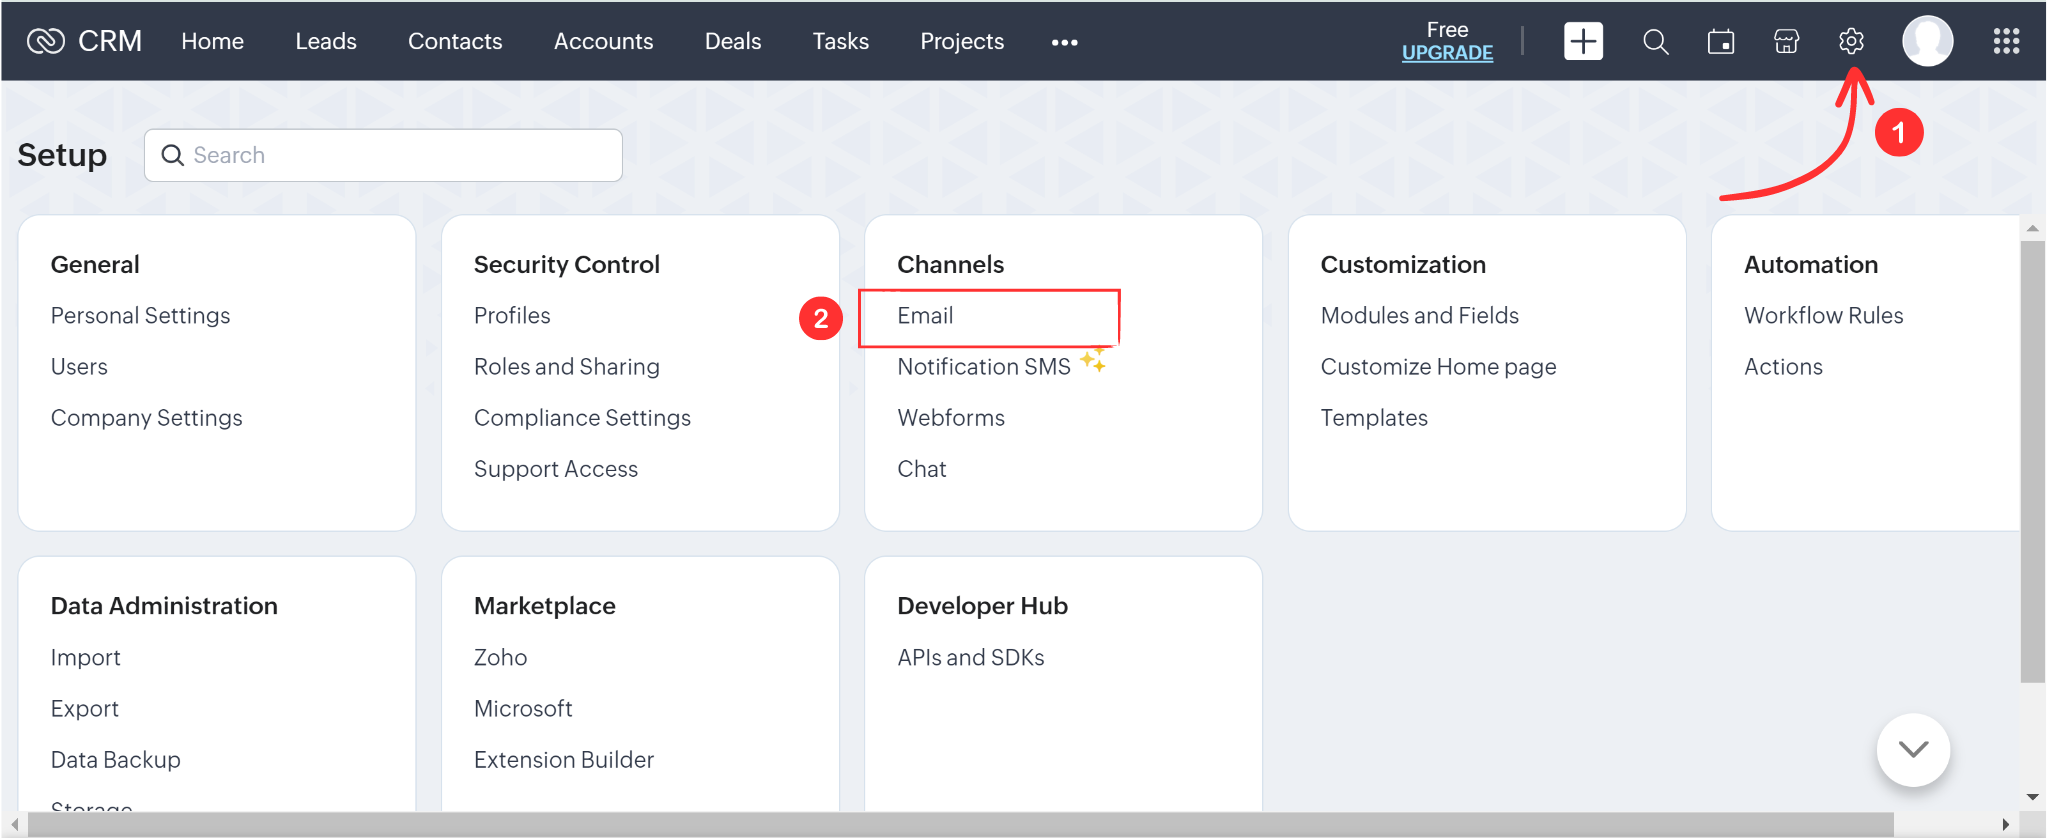
Head over to the Email Deliverability tab in the top menu.
-
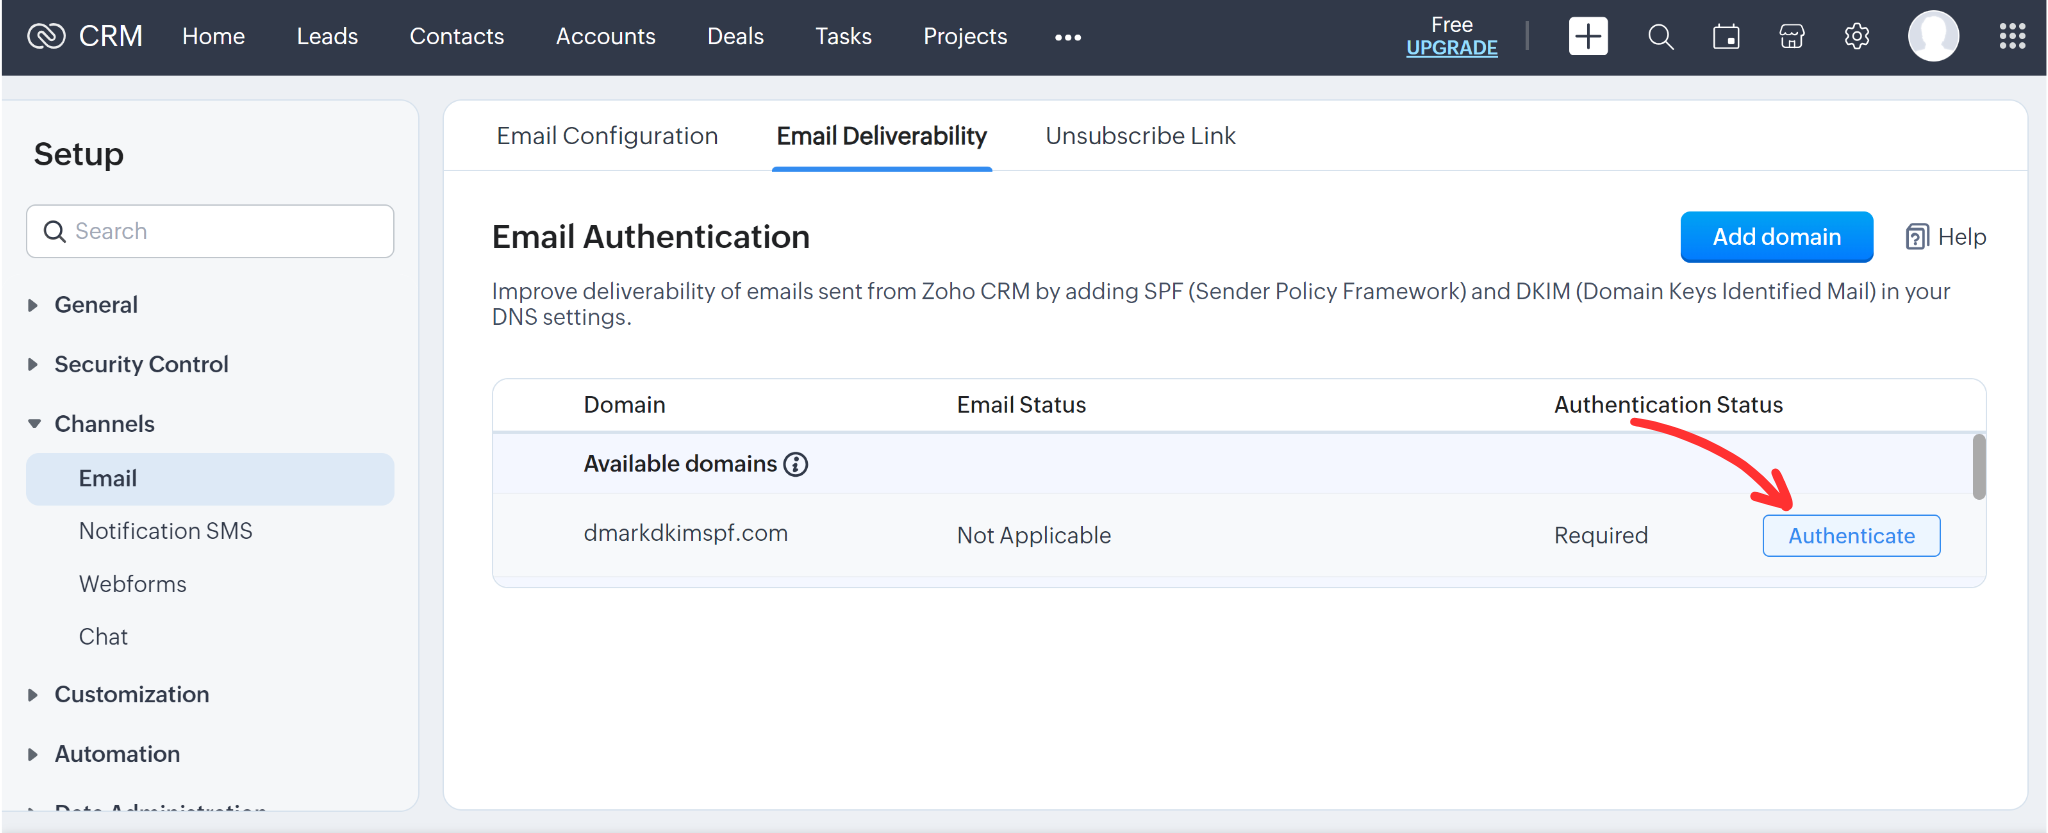
Here you'll see the email domain you used to sign up for the account. Hover the cursor over this domain and click Authenticate. (You can also add any other domain by clicking Add Domain highlighted in blue)
-
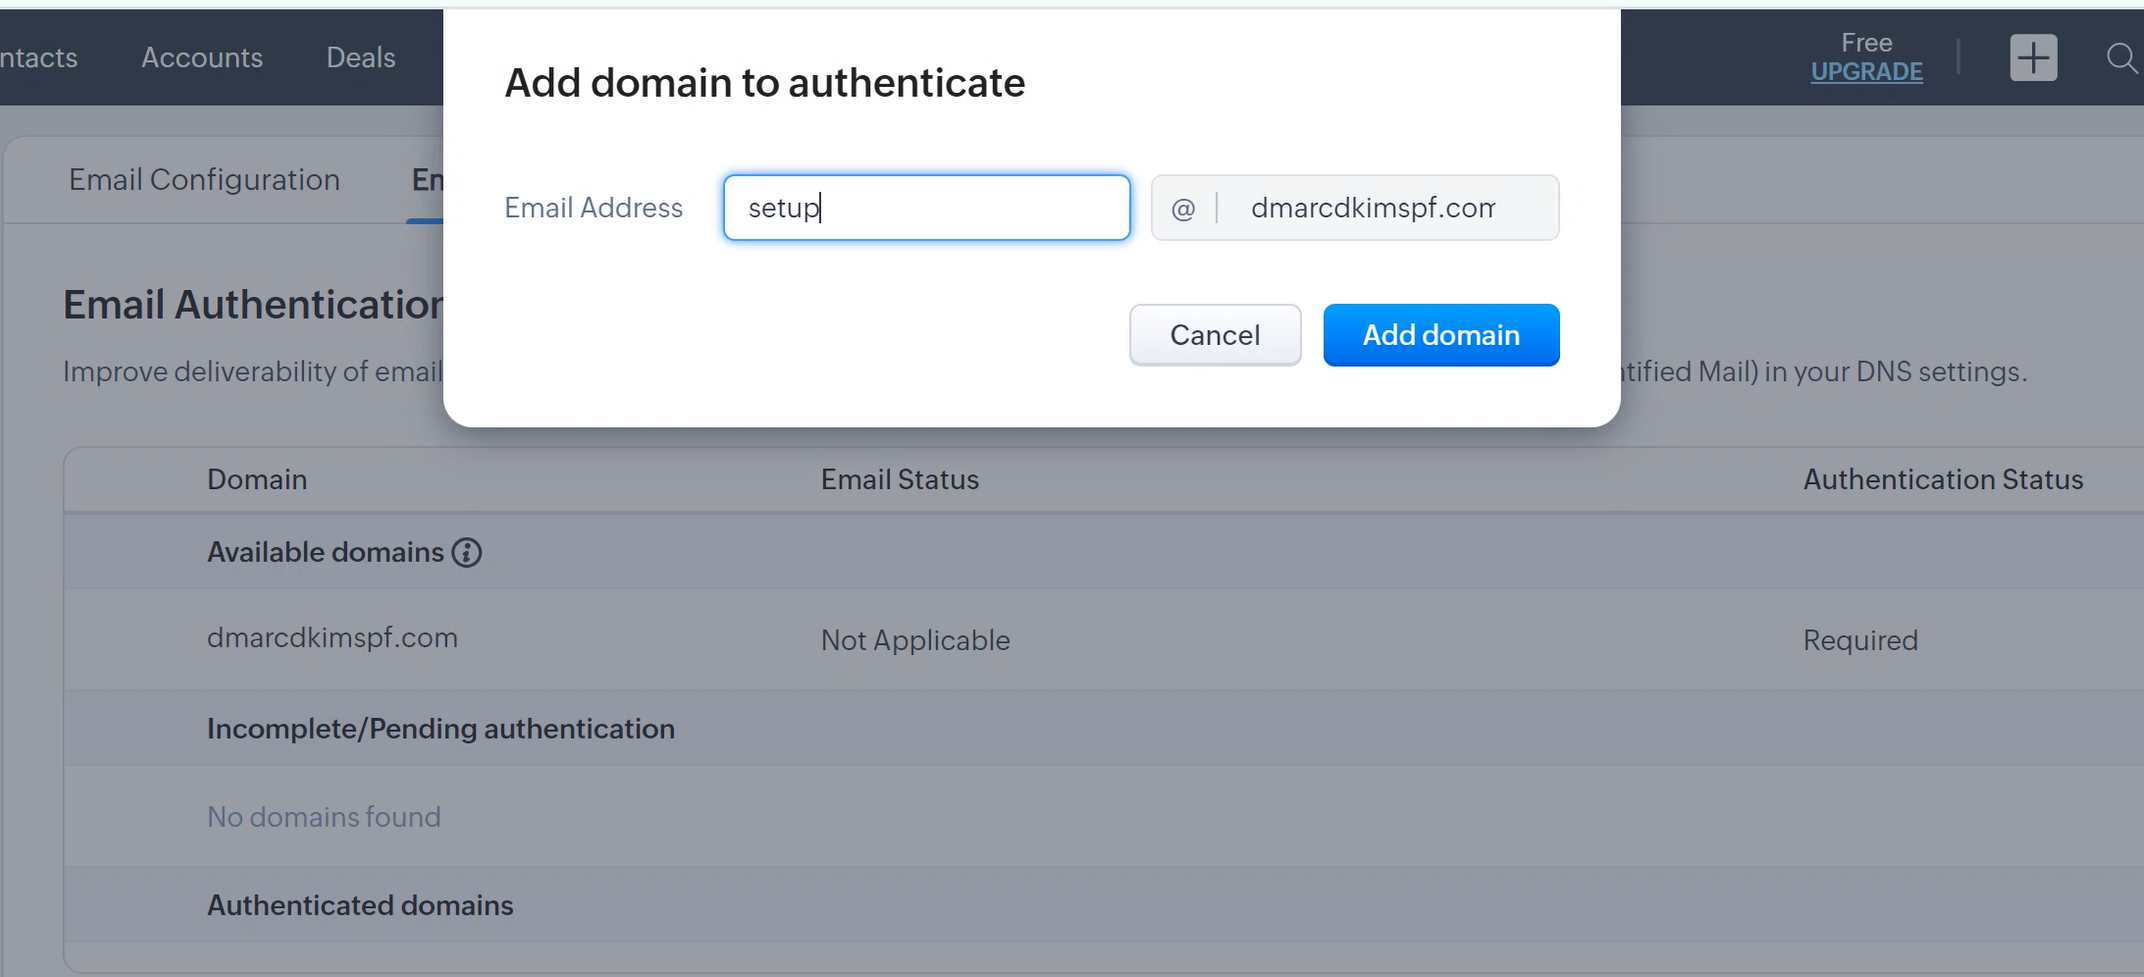
Next, enter your email (the part of your webmail before "@") in the pop-up window and click Add Domain.
-
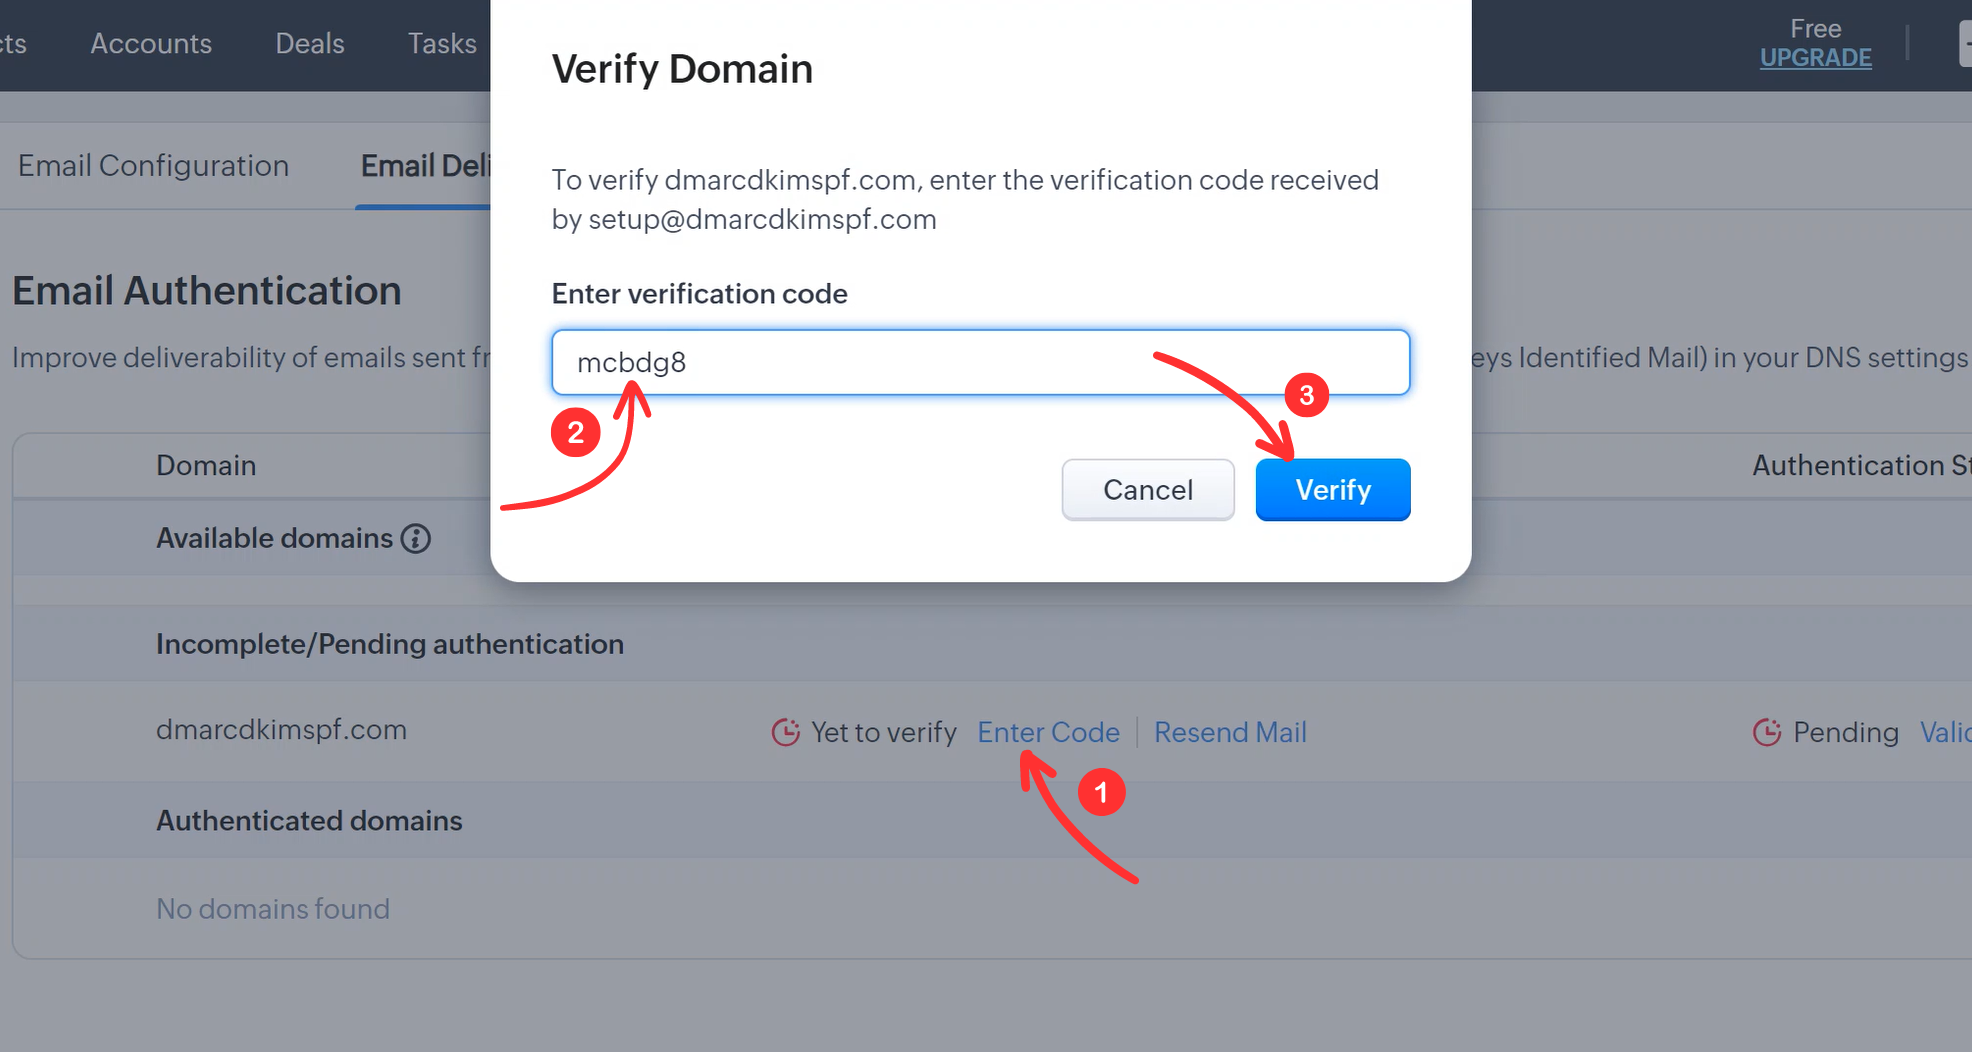
Zoho CRM will send a verification code to this email address. Copy the code from the email, click on "Enter code", paste this code, and click Verify. Your email status will be shown as "Verified" straight away.
-
Now click on "Validate records" under Authentication status.
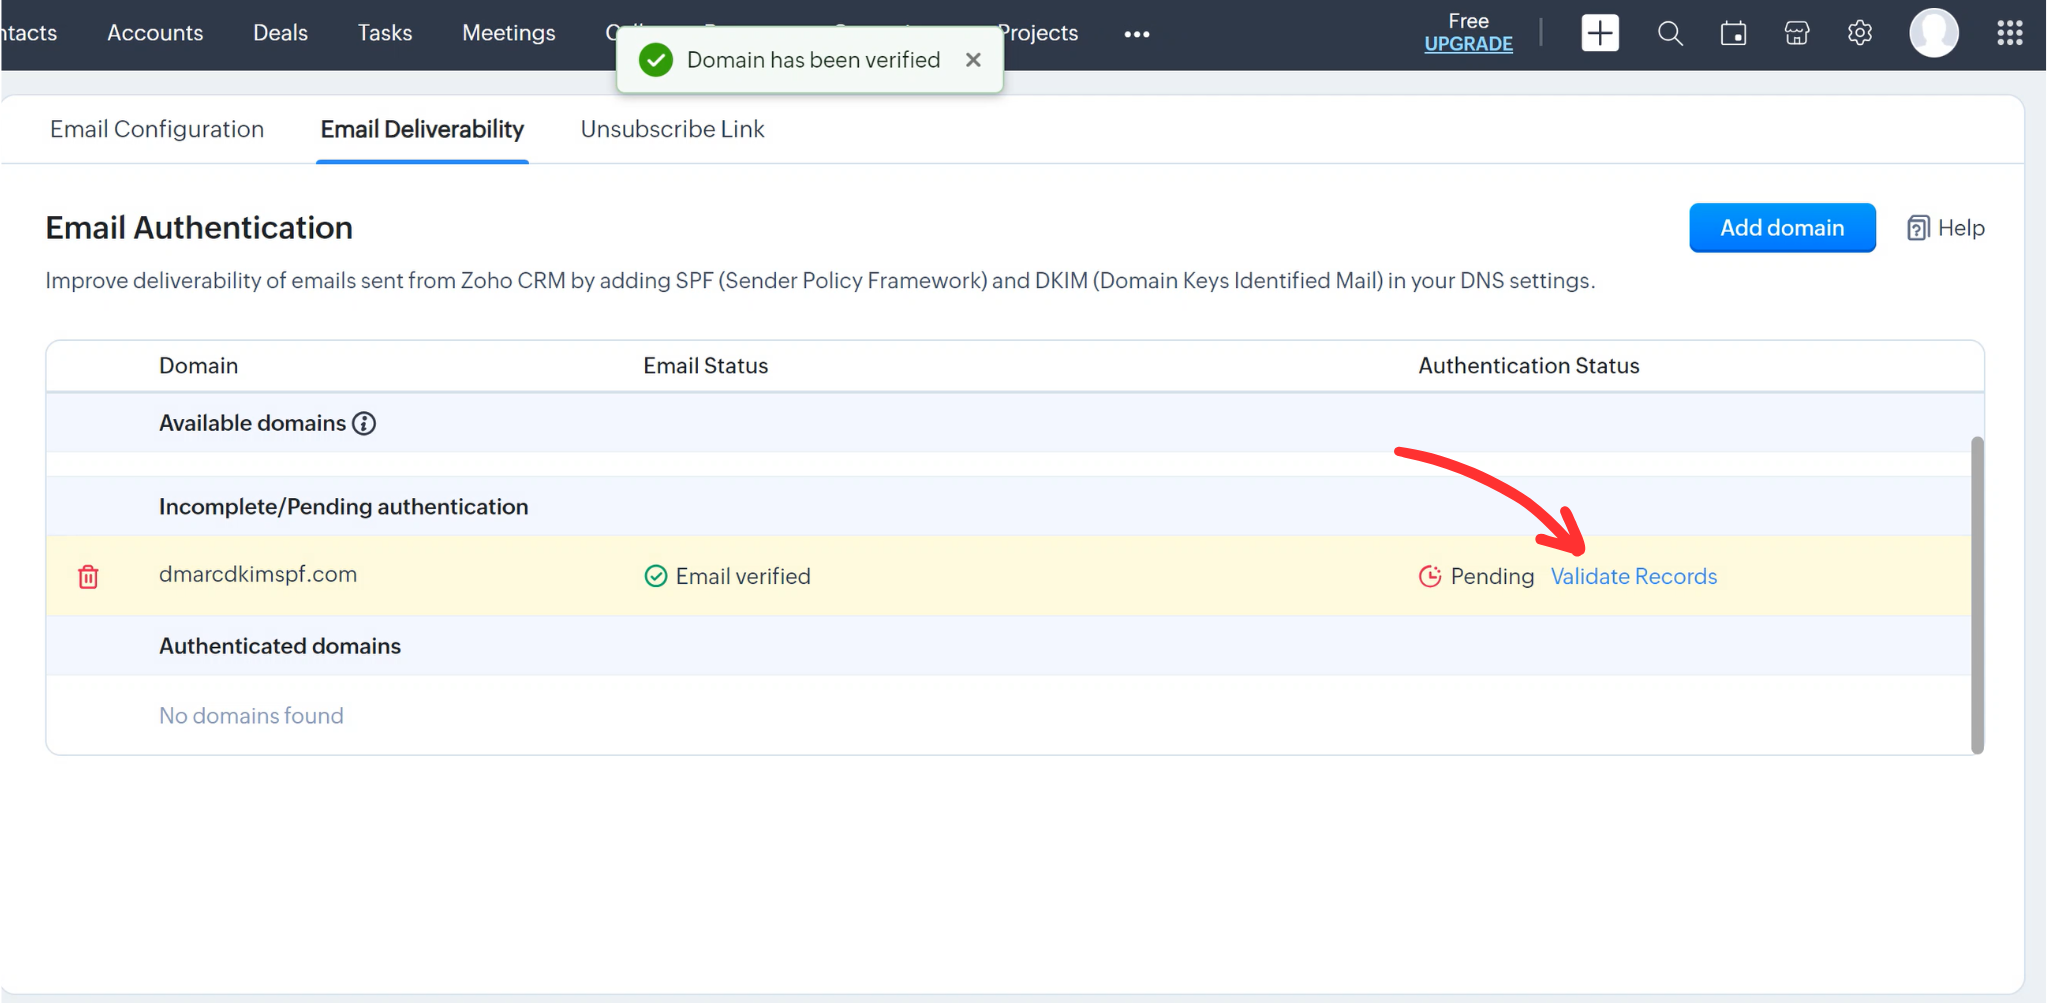
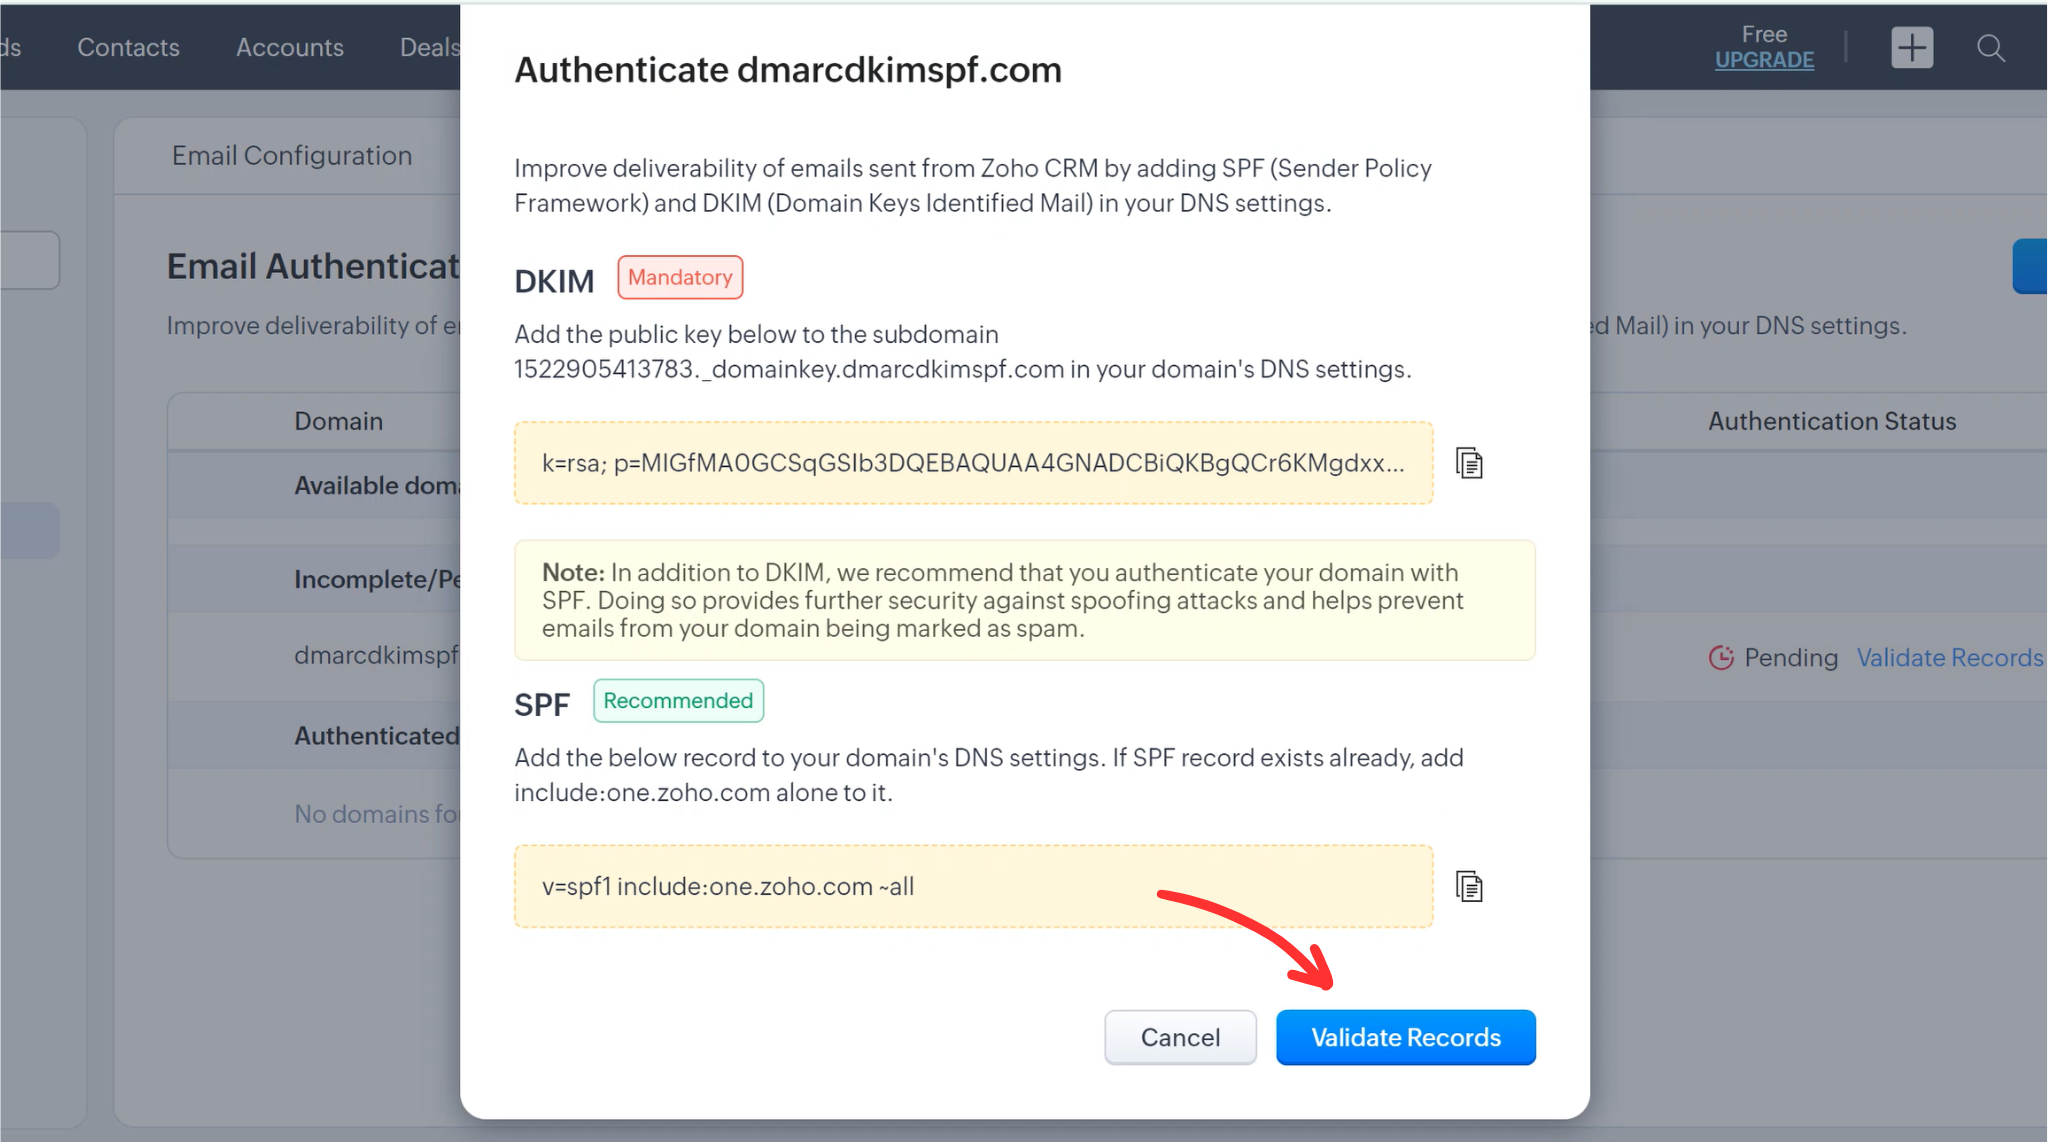
After that, you'll see Zoho DKIM and SPF records on a pop-up window. Copy these records and add them to your DNS provider.
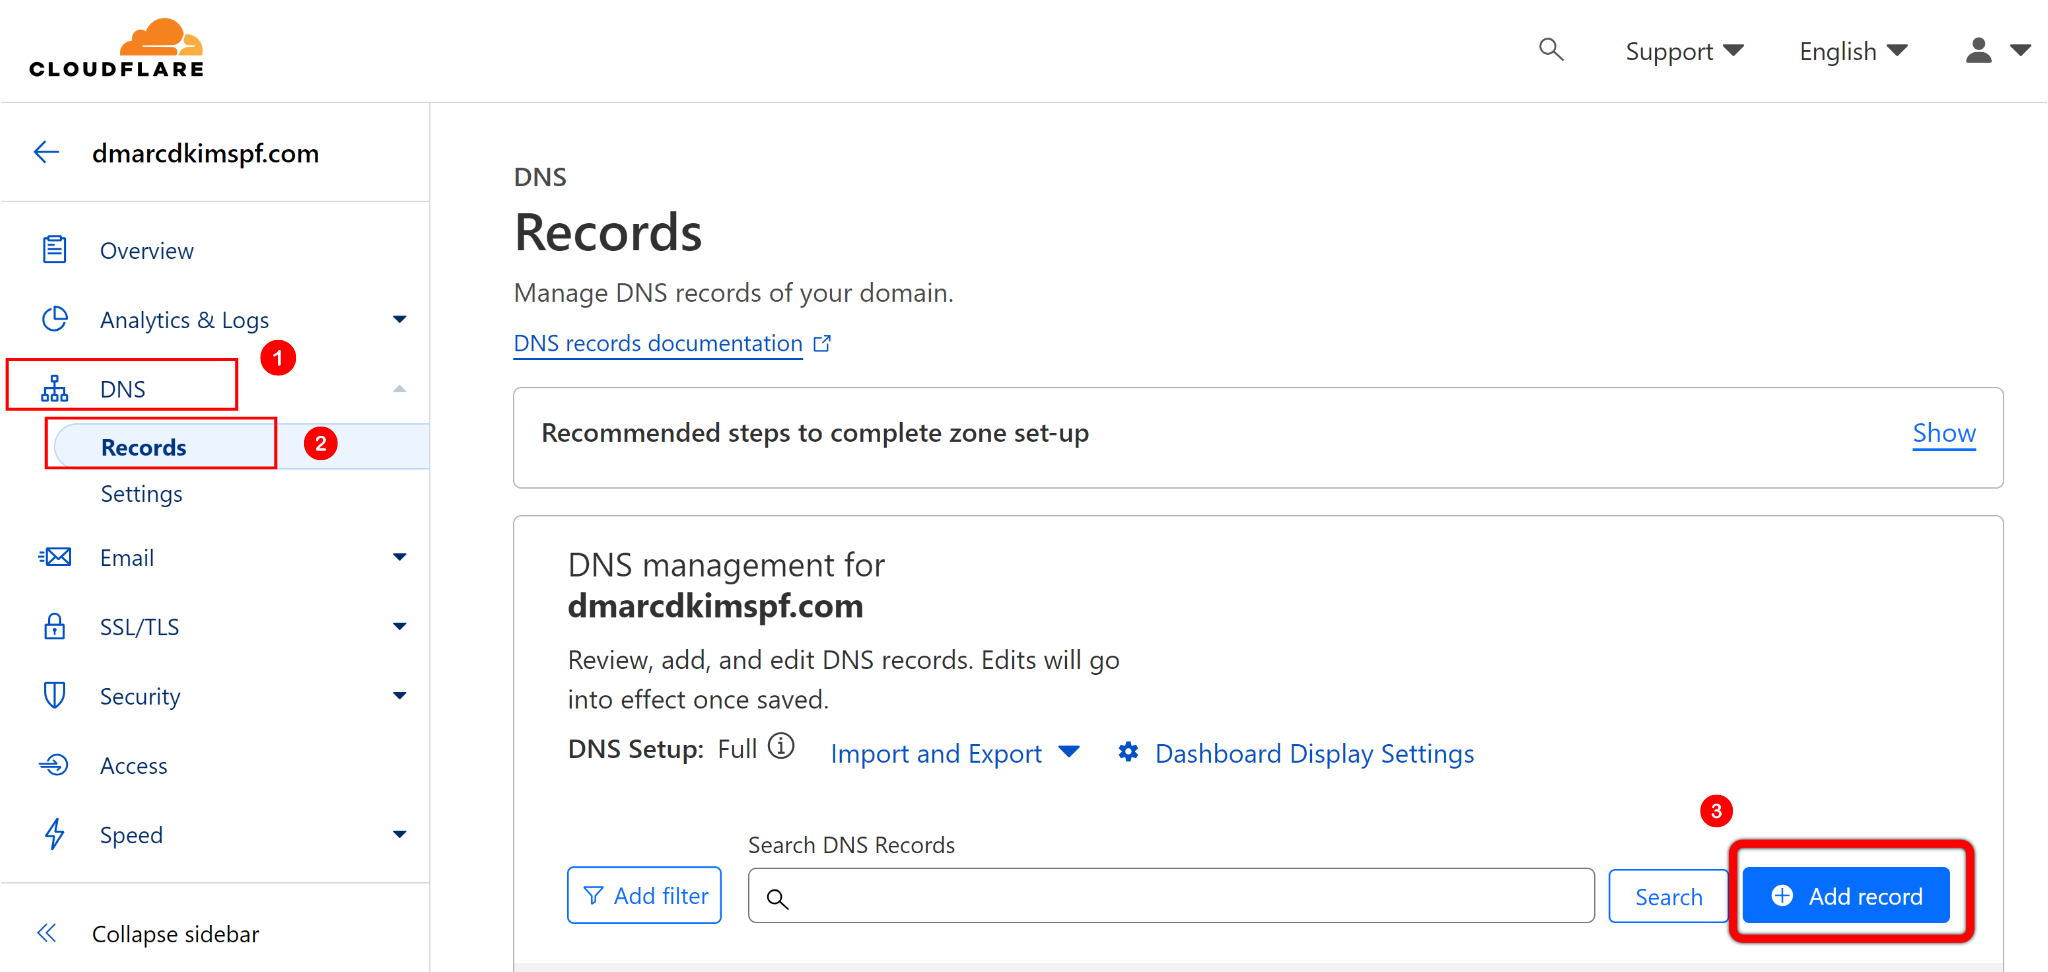
On the Cloudflare dashboard, go to the Home tab, and click on your Website.
Here, open DNS, select Records and click Add Record.
-
Write the SPF and DKIM record name and value here and click Save.
NOTE: Because Zoho CRM uses its own domain for the "Envelope From" address, SPF alignment might fail with the sender's actual "From address" domain during DMARC checks. To sort out this issue, use the DMARC Check tool.
-
Enter your domain in this tool and click Check. It will give you a suggested DMARC value that prevents SPF misalignment.

Copy this DMARC record name and value, and add it to your DNS provider.
-
Now go back to Zoho CRM and click on Validate Records.
-
After validation, you'll see your domain status as "Authenticated."

Check domain and follow the instructions to nail down your DMARC configuration.
No expert knowledge needed!


