Configure SMTP2GO DMARC, DKIM, SPF DNS Records For Domain Authentication
Check your domain for DMARC, DKIM, SPF and MX records. Get a free report.
- The impact of Business Email Compromise
- A quiet Google update just made SPF more forgiving
- Cyber Insurance and DMARC Enforcement
- Email impersonation scams explained
- TLS-RPT Record
- SMTP Smuggling
- 🇩🇪 Welche Hosting Anbieter unterstützen DMARC
- Manual DMARC Monitoring vs Automated Monitoring
- Reverse Engineering Phishing
- DMARC Enforcement in 2026
- DMARC for non sending domains
SMTP2GO DMARC, DKIM, SPF Domain Authentication - Step by Step Guide 2024
SMTP2GO provides the CNAME Return path, DKIM, and Tracking domain records to add security to your email marketing. You can configure these records in the Verified Senders tab and add them to your domain's DNS setup for verification.
You don't need to add an SPF record for domain authentication. It is covered by the first CNAME record, a subdomain used for the return-path address set up by SMTO2GO.
The platform adopted the VERP technology which enables it to skip the SPF requirement. Also, you don't have to update the existing SPF record in your DNS provider.
Follow this step-by-step guide to learn how to set up DNS records for SMTP2GO in Cloudflare (you can setup records in any DNS provider you use).
Configure DNS Records in SMTP2GO:
-
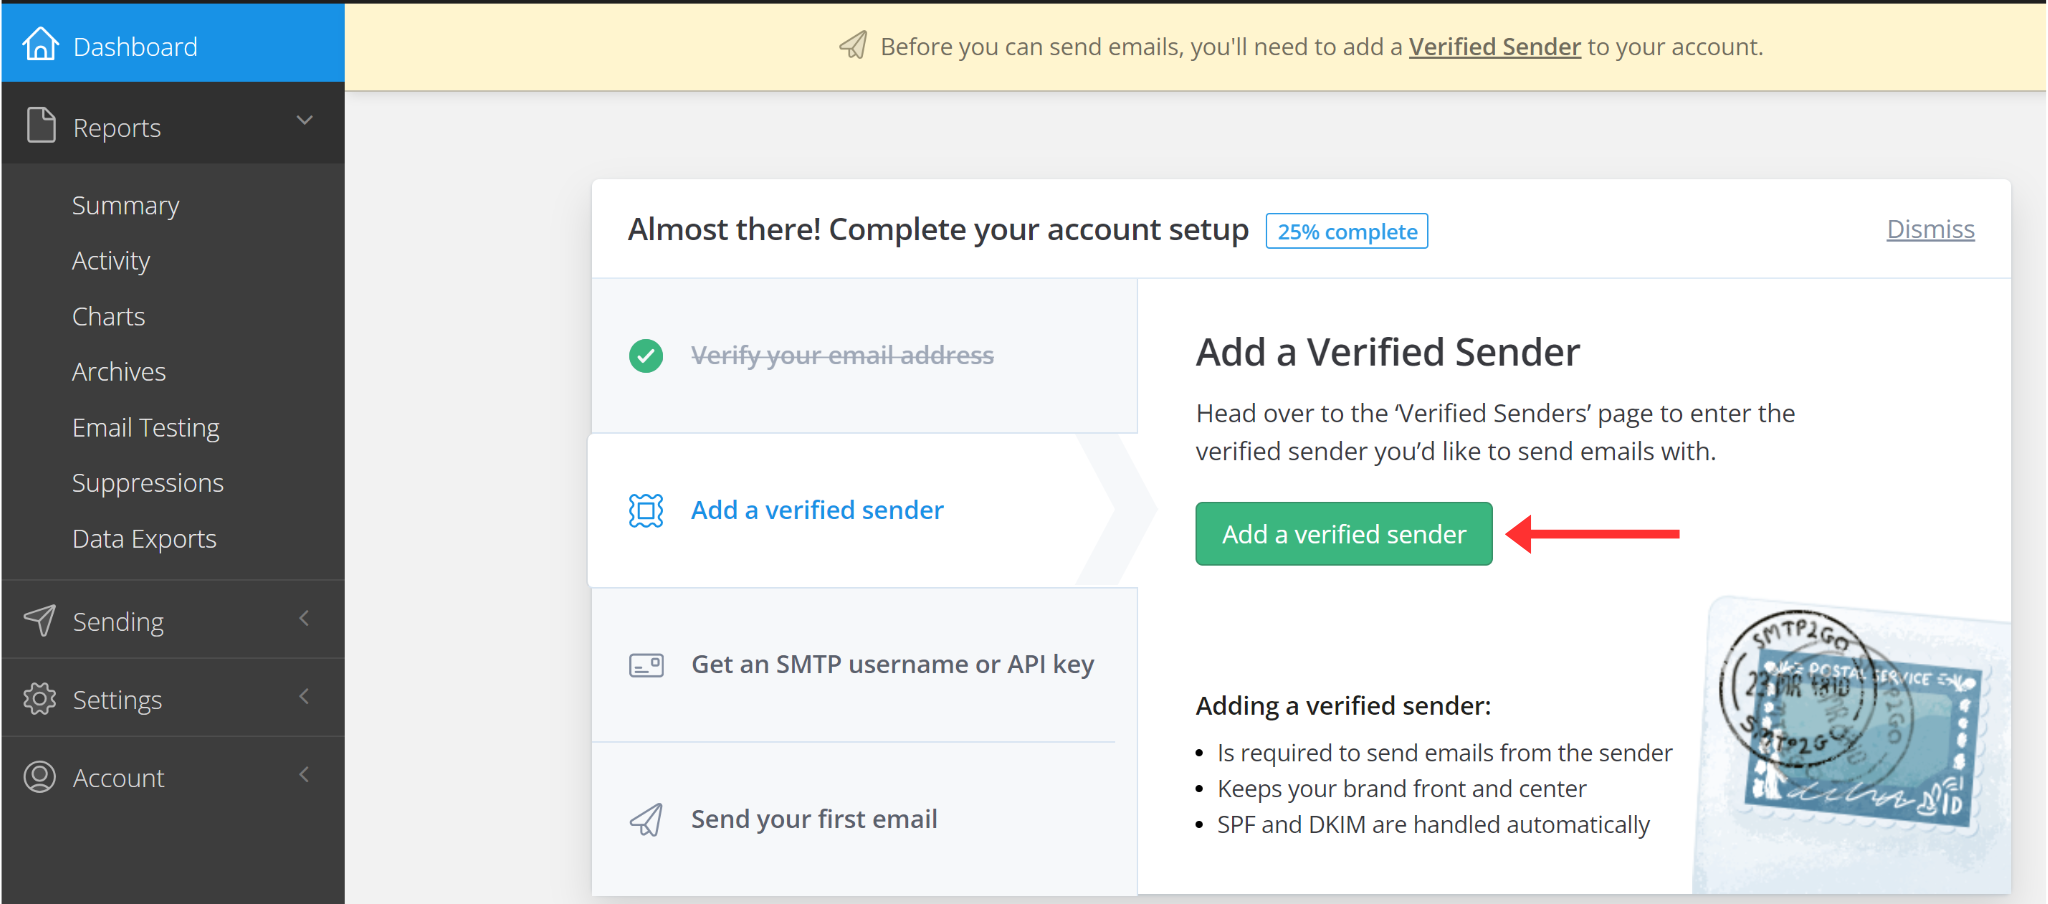
Login to your SMTP2GO account and click Add a Verified Sender on the dashboard.
-
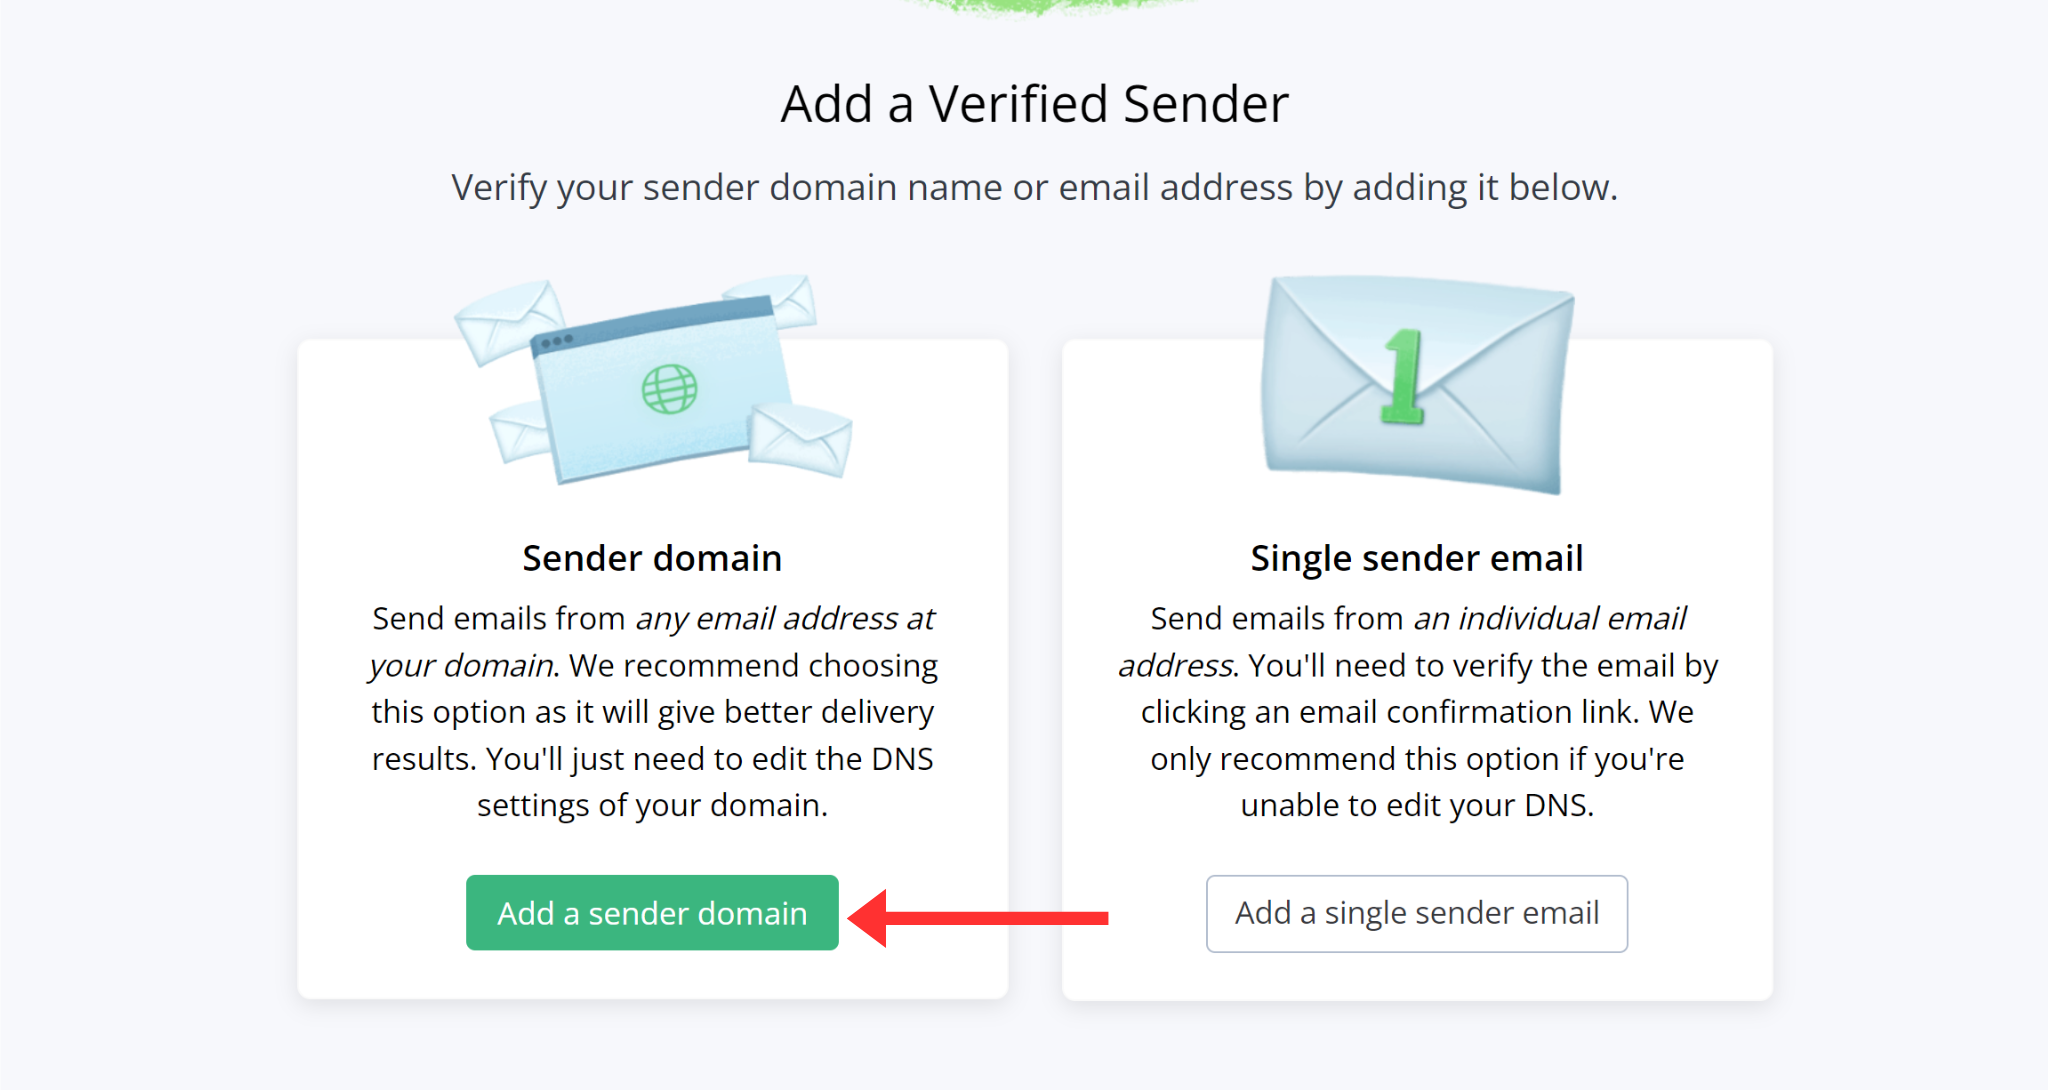
Click "Add a Sender Domain" in the Sender Domain section.
-
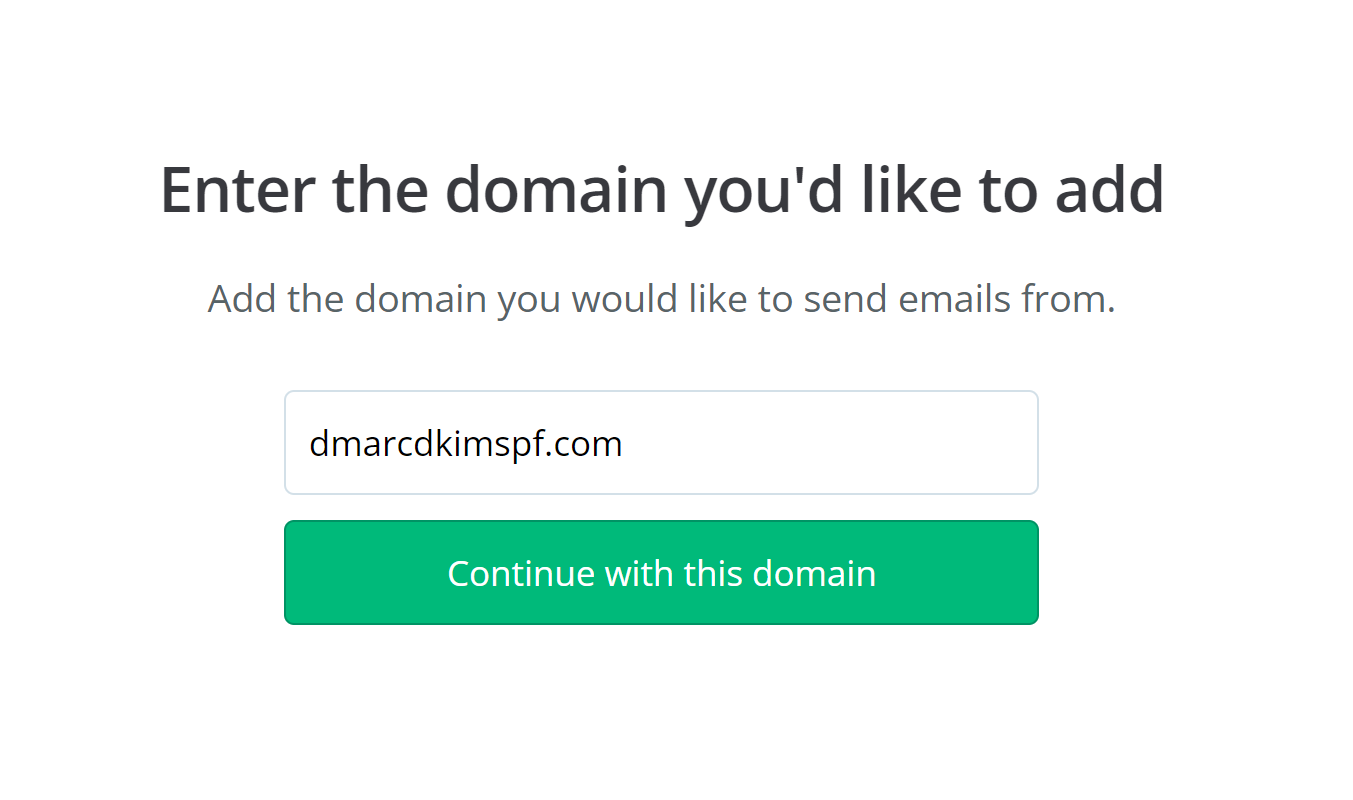
Write your domain name and click "Continue with this domain."
-
It will redirect you to the DNS page with three CNAME records.
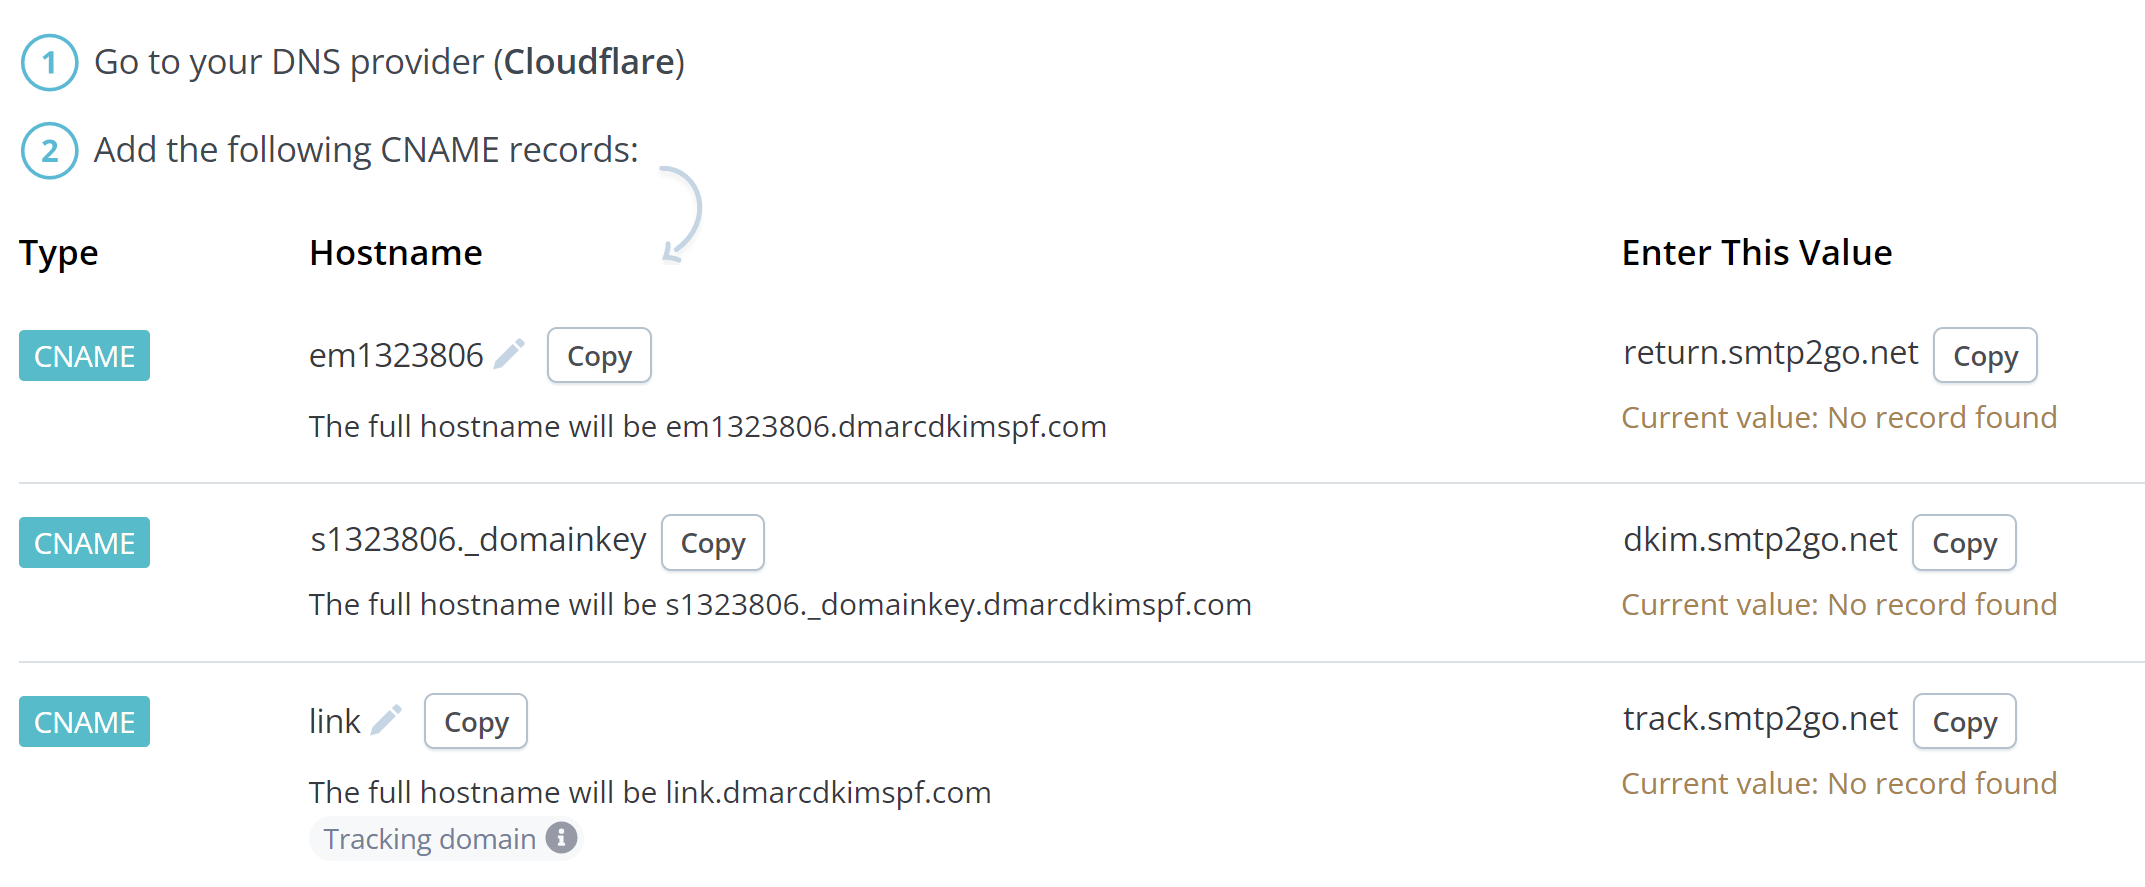
Add these records to your DNS provider. We are using Cloudflare for this instant.
Adding SMTP2GO CNAME DKIM Records to DNS Provider:
-
Login to your DNS provider, and click your Website in the Home tab.
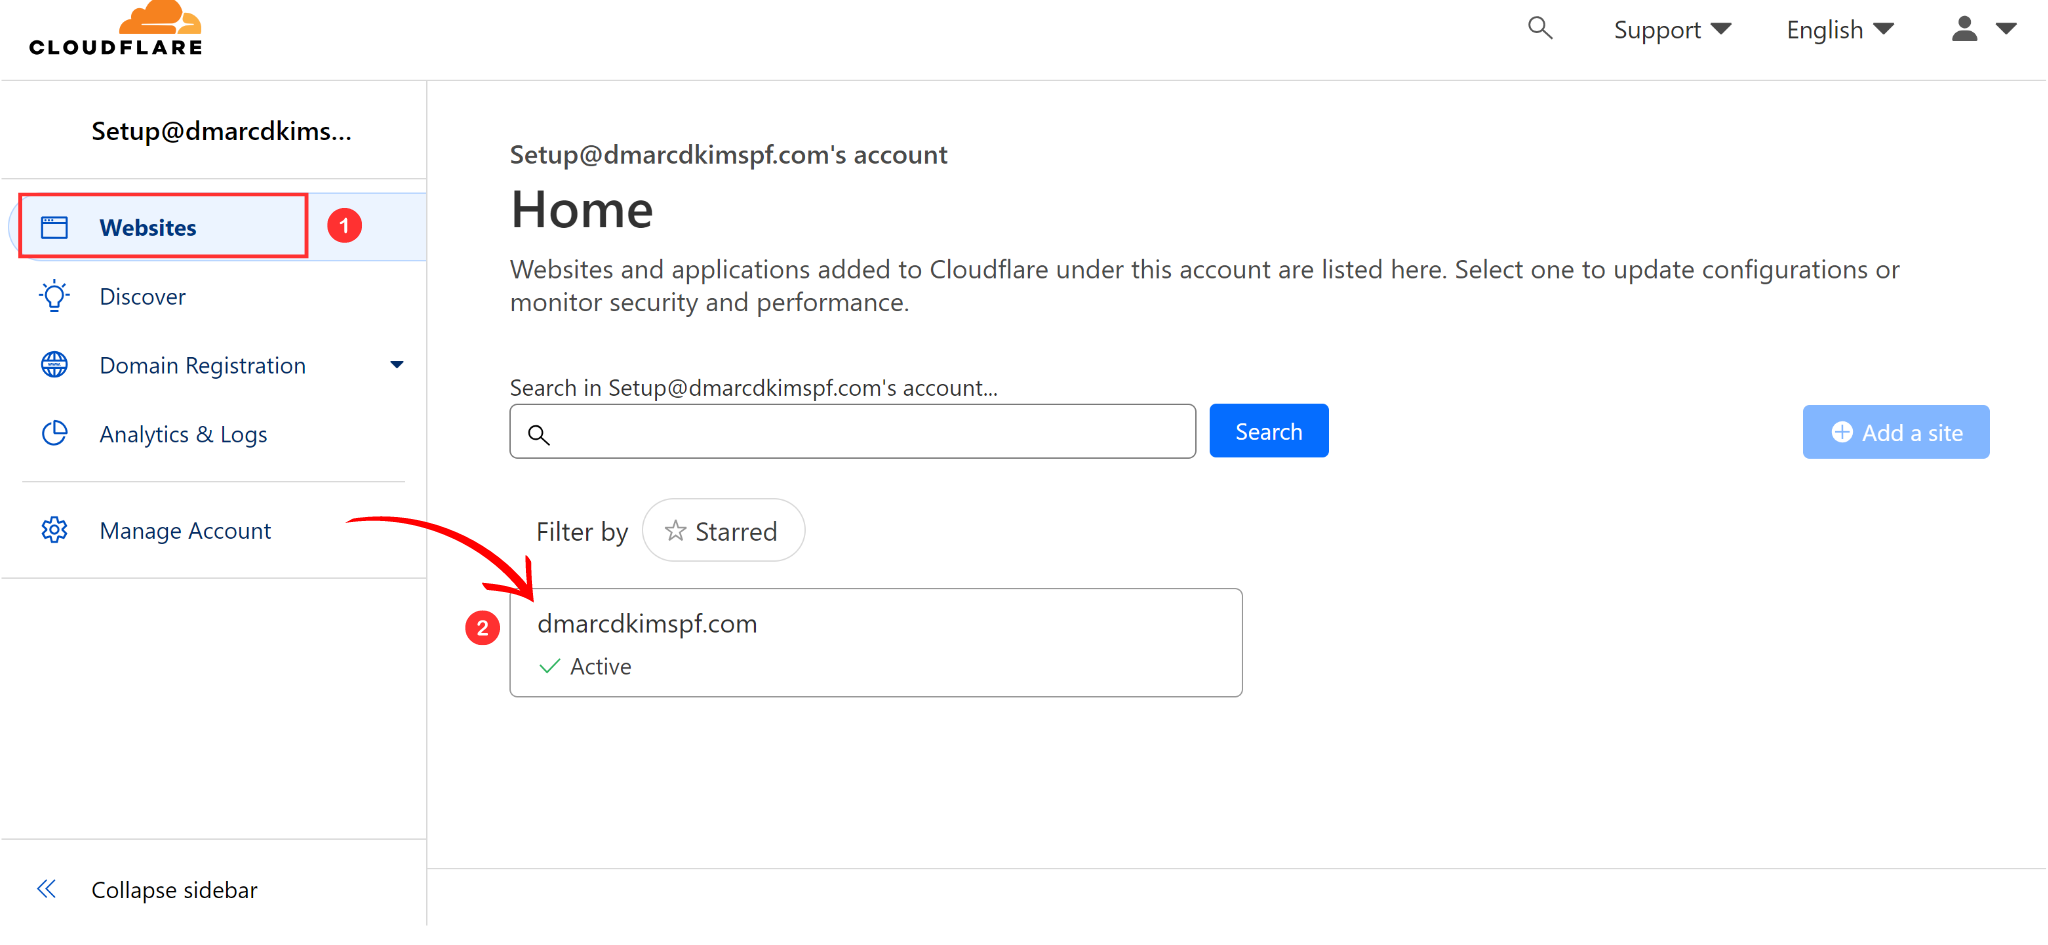
-
Click DNS and select Records. Click Add Record to add CNAME records.
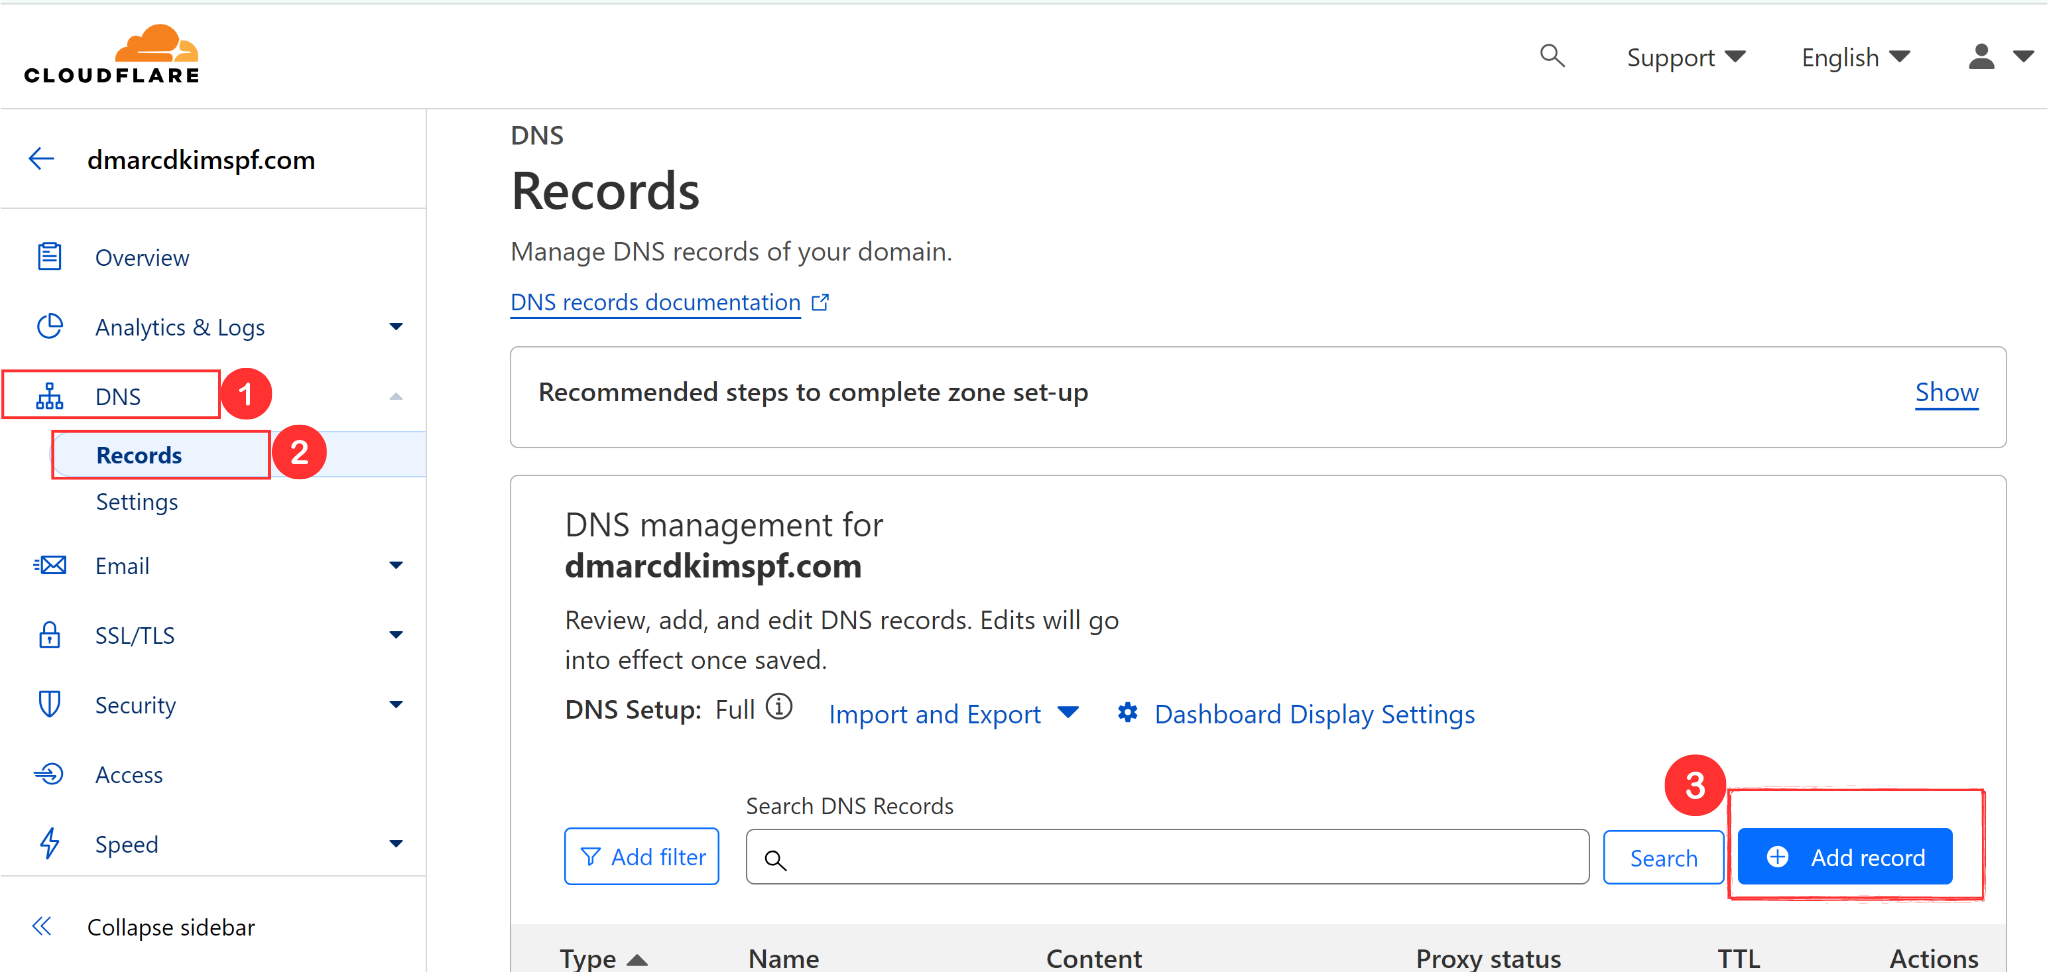
Copy the record name and add it to the Name section.
Copy the record value and add it to the Target/Content section.
Turn off proxy for the CNAME record. When it is enabled, the traffic diverts to Cloudflare Server instead of the email server which can cause verification issues.
-
Click Save to add the record.
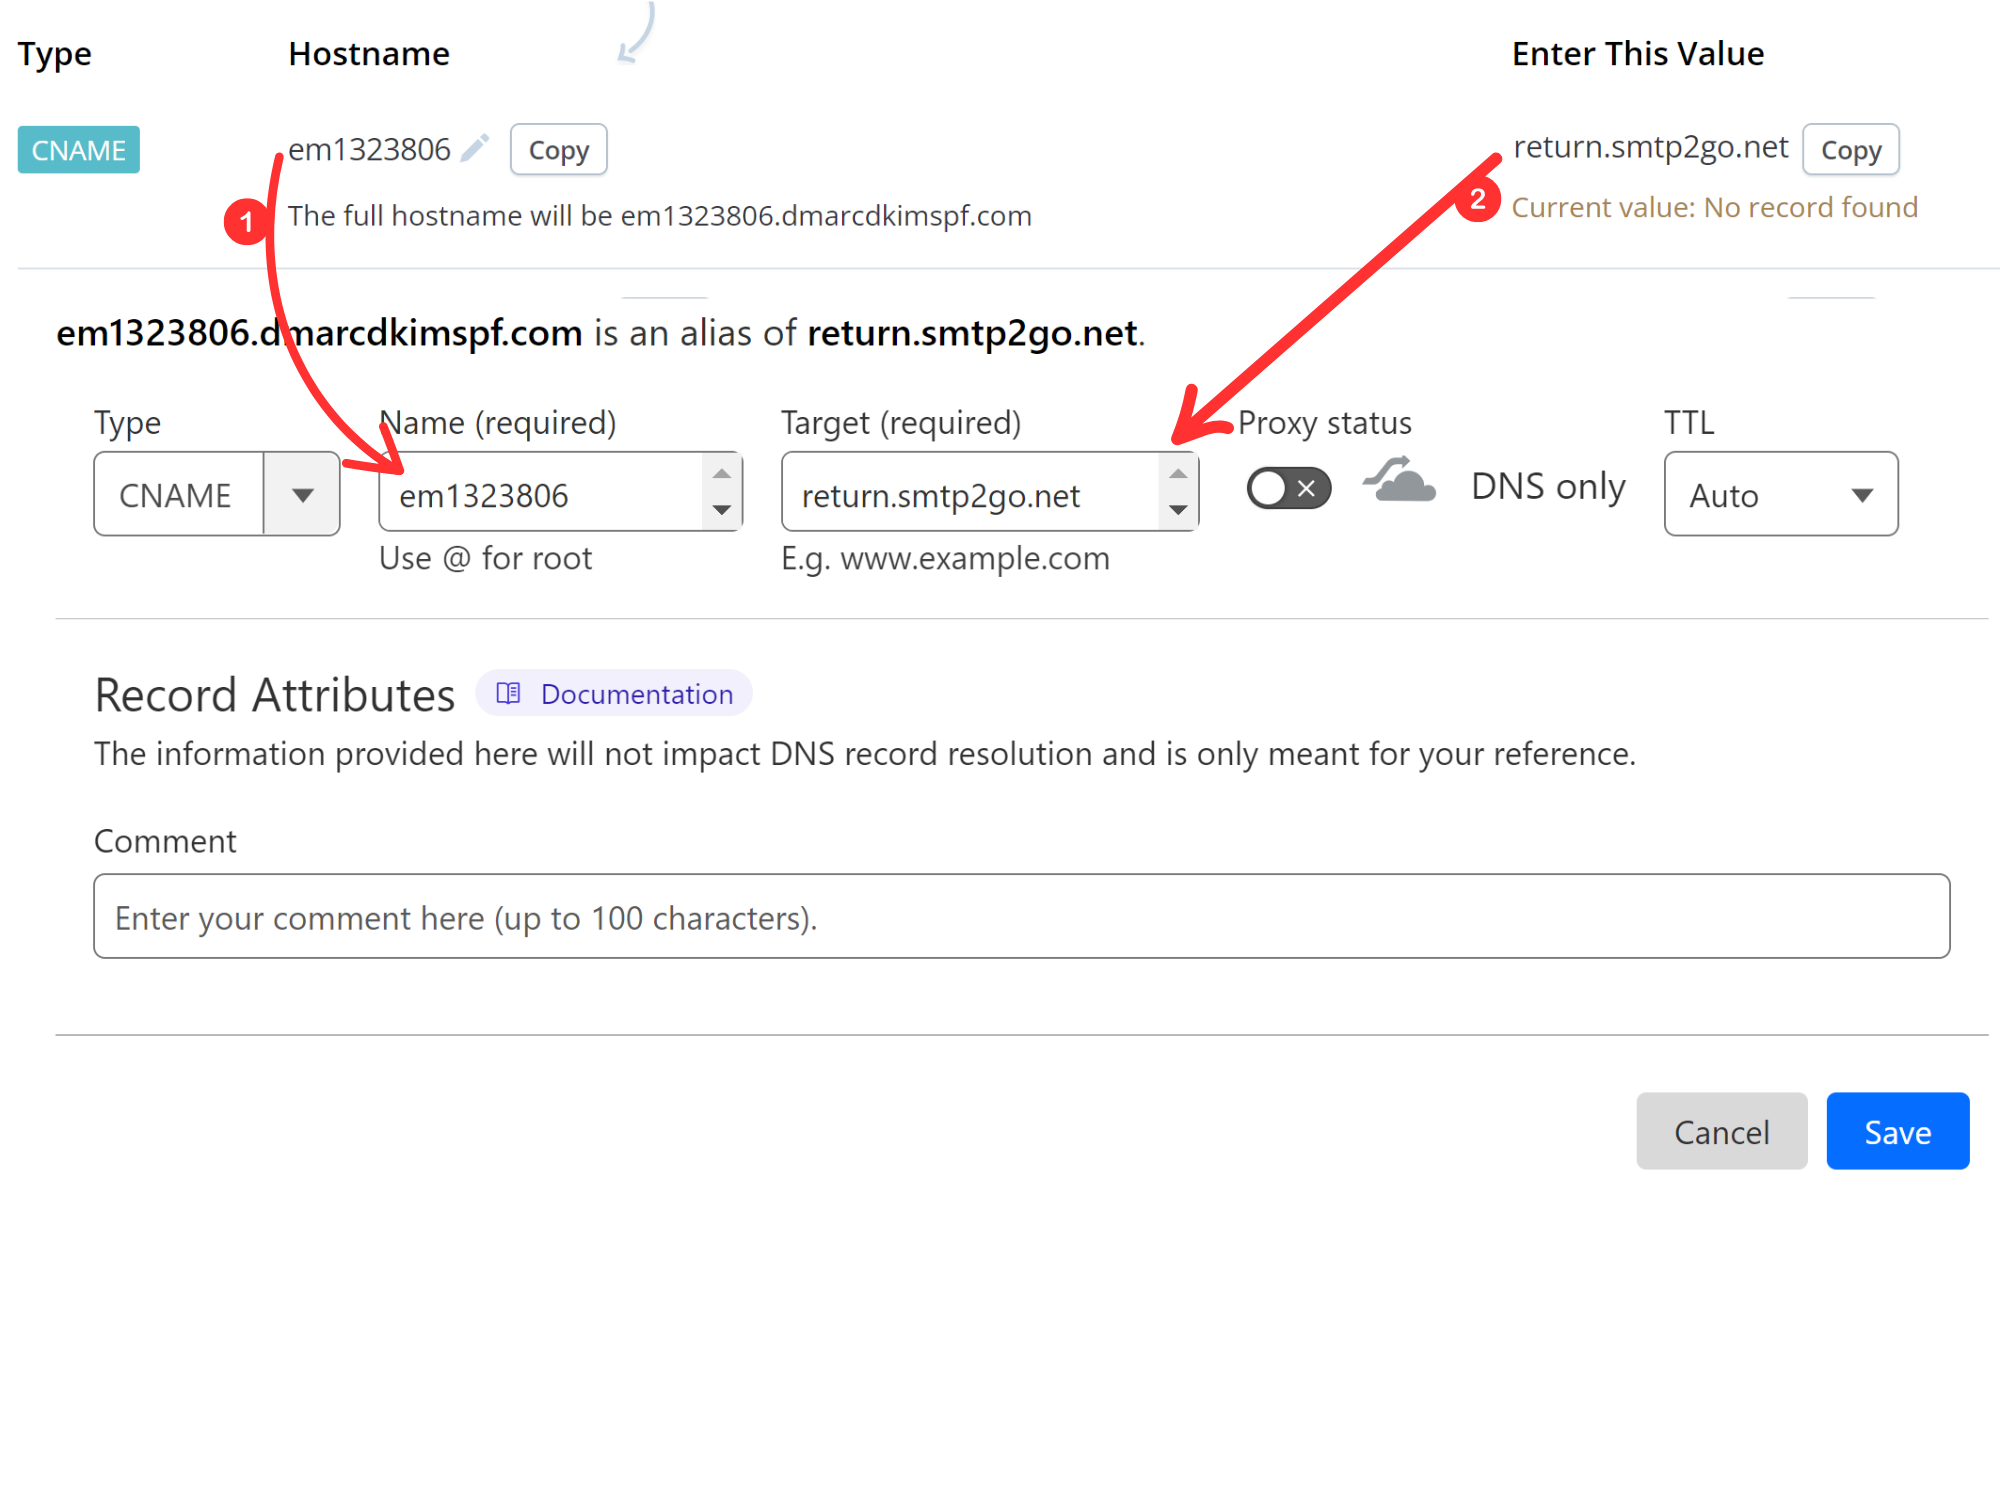
Follow the same process for each CNAME record.
Generate SMTP2GO DMARC Value:
DMARC helps authenticate emails by allowing the sender domain to determine how it wants unauthenticated emails to be handled.
With DMARC, you can specify policies for handling emails that fail authentication checks. These policies can range from monitoring and reporting (p=none), quarantining suspicious emails (p=quarantine), to rejecting unauthorized emails outright (p=reject).
You can use the DmarcDkim.com Doman Check Tool to generate a custom DMARC value to have detailed reporting on email delivery and authentication results.
-
Go to the DMARC Check Tool, write your domain name, and click Check.
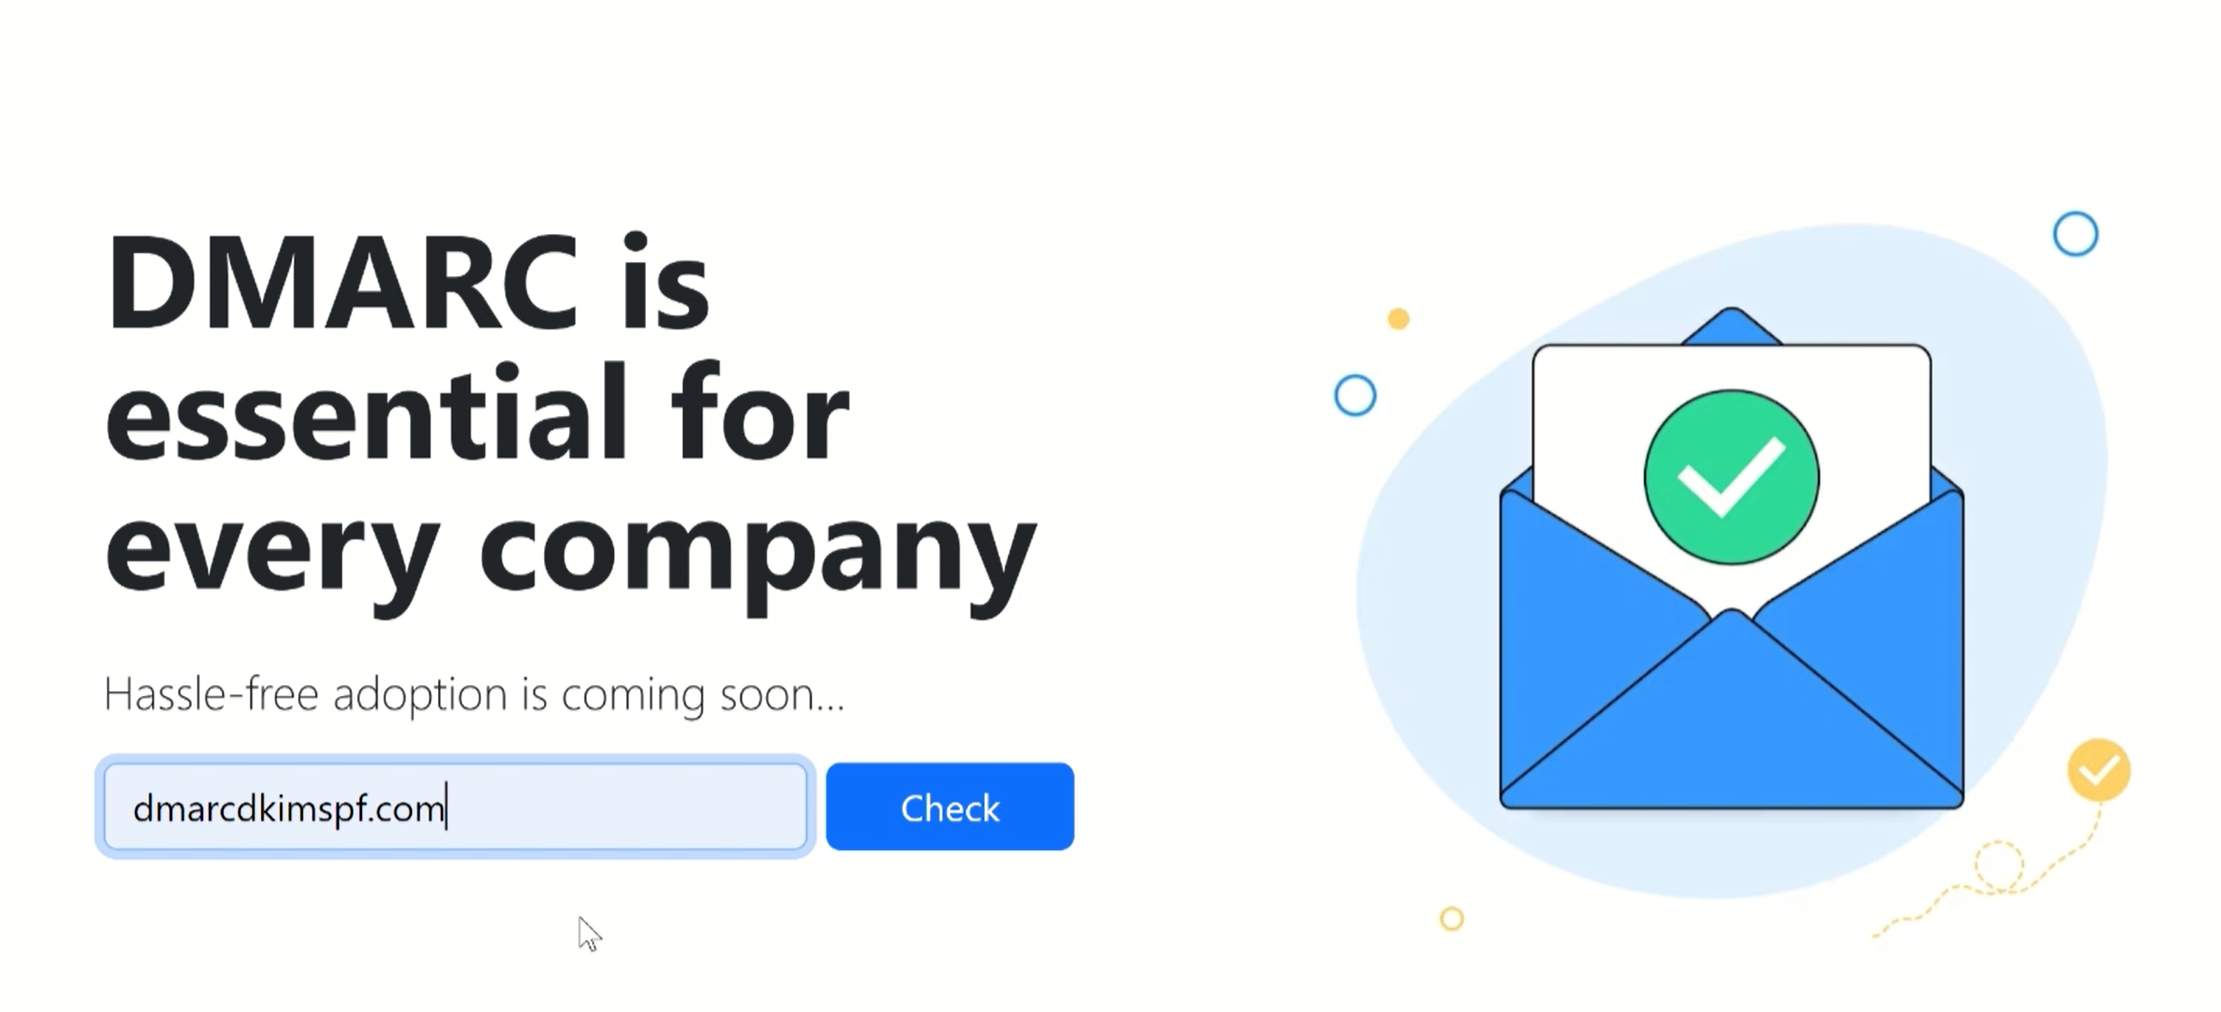
-
The tool gives you a suggested value with destinations for reports.
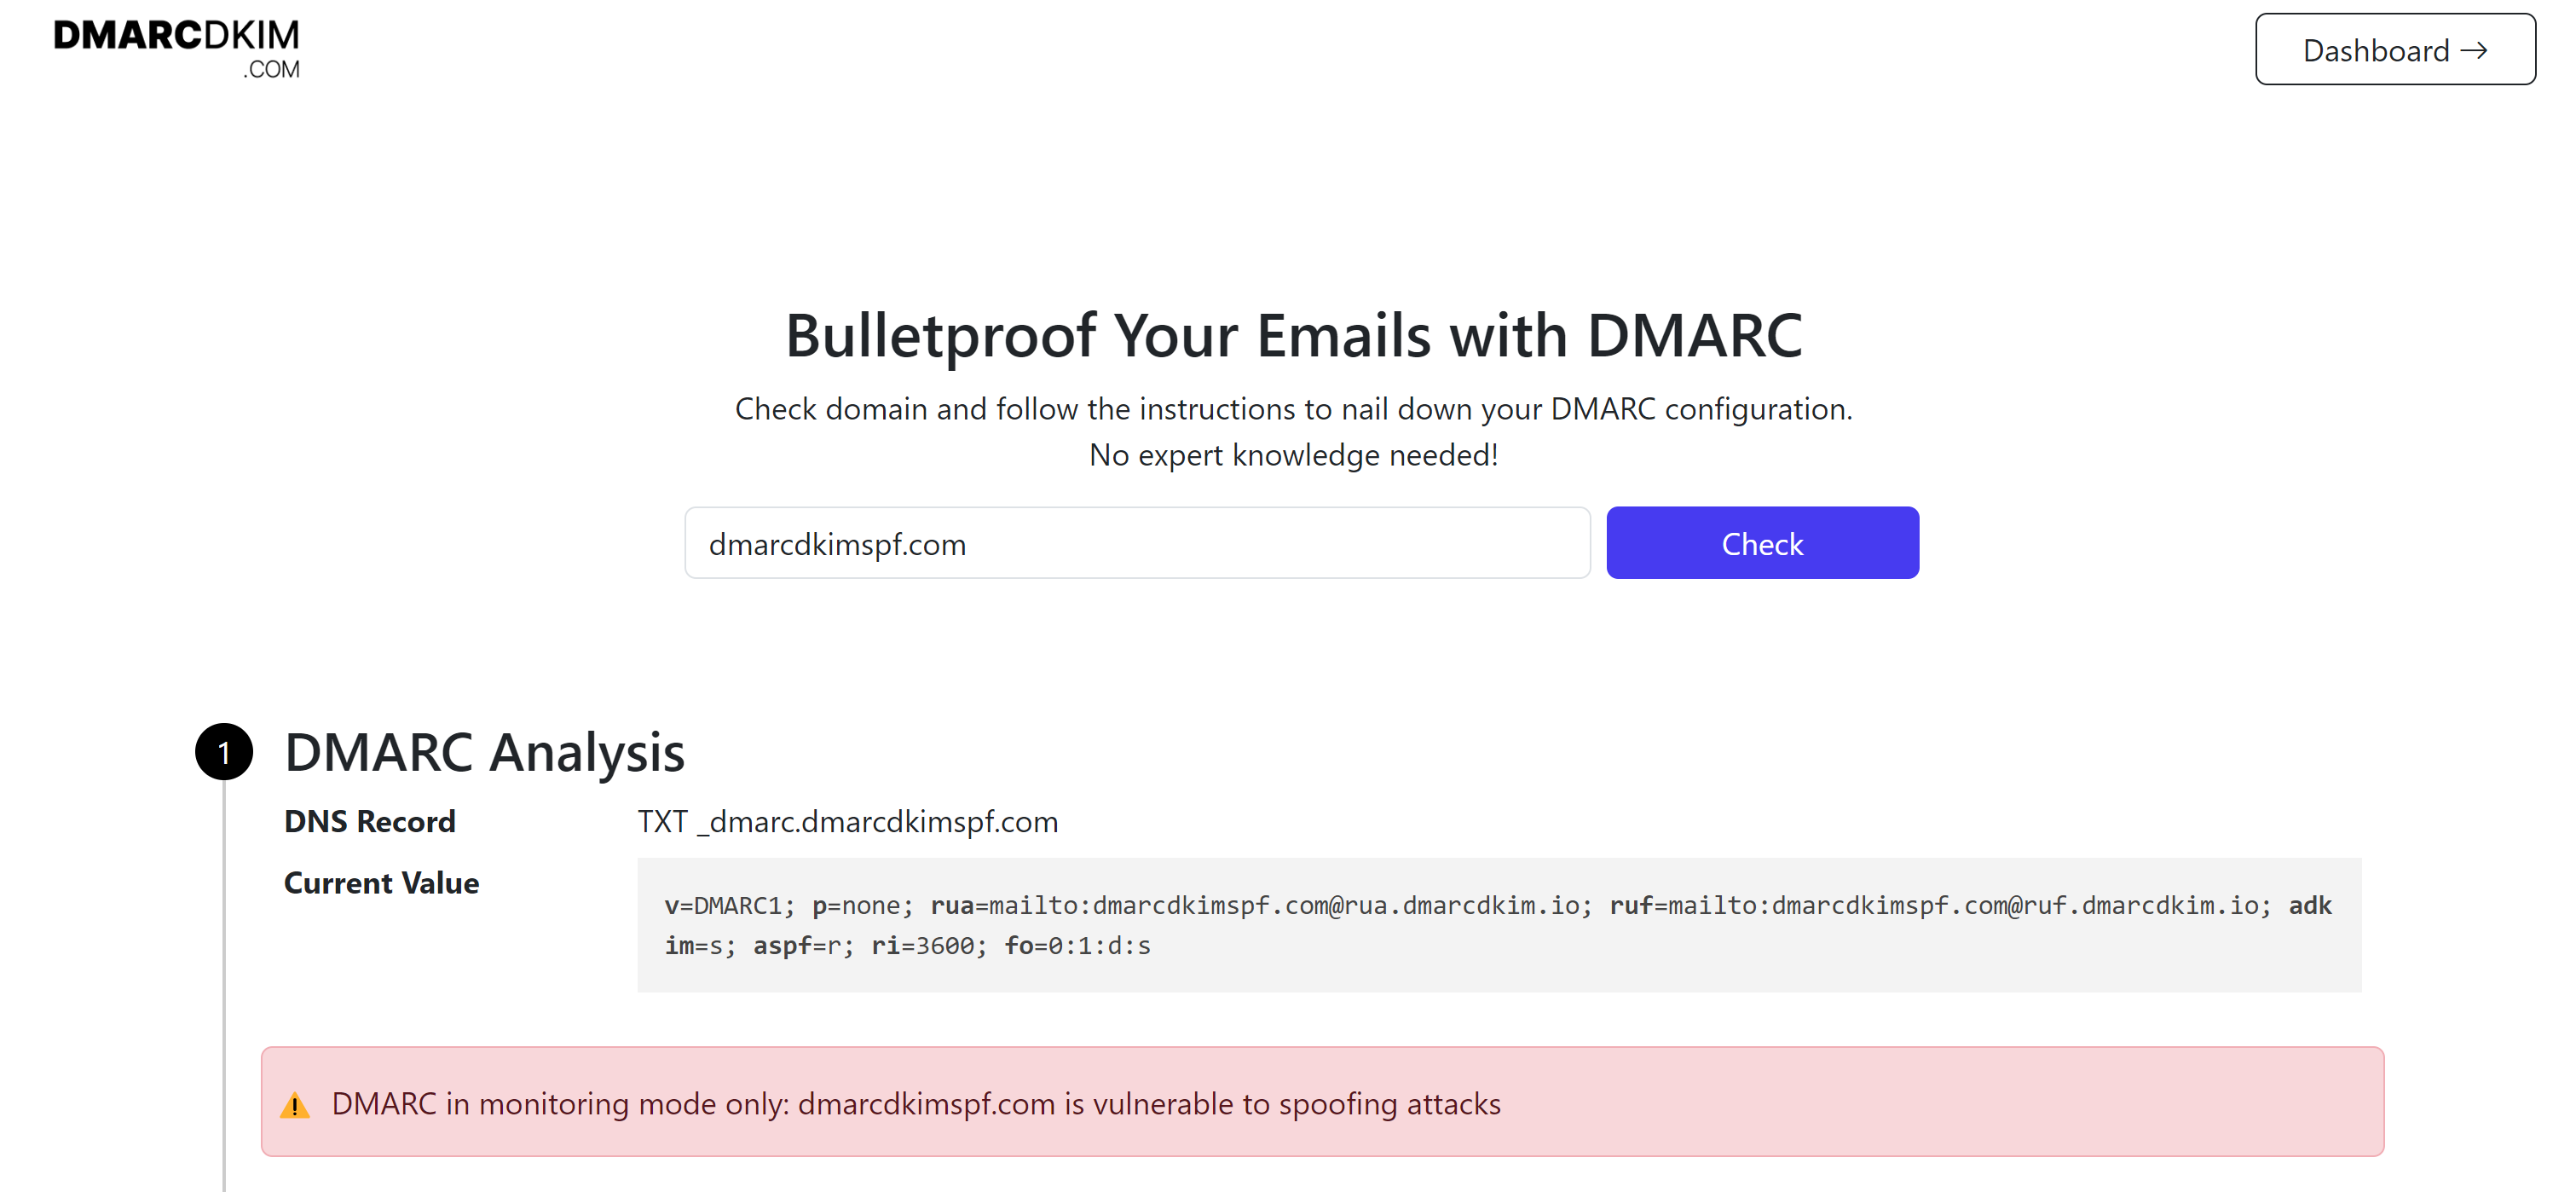
Sign up at DmarcDkim.com to get access to the reports dashboard.
Add the DNS Record (record name) and the Suggested value to your DNS provider.
Select record type TXT and click Save.
Verify SMTP2GO DNS Records:
Once all records are added to the DNS dashboard, come back to the SMTP2GO DNS page and click Verify.
You'll see green tick marks with each record, which means the DNS setup was successful and the domain is now authenticated.
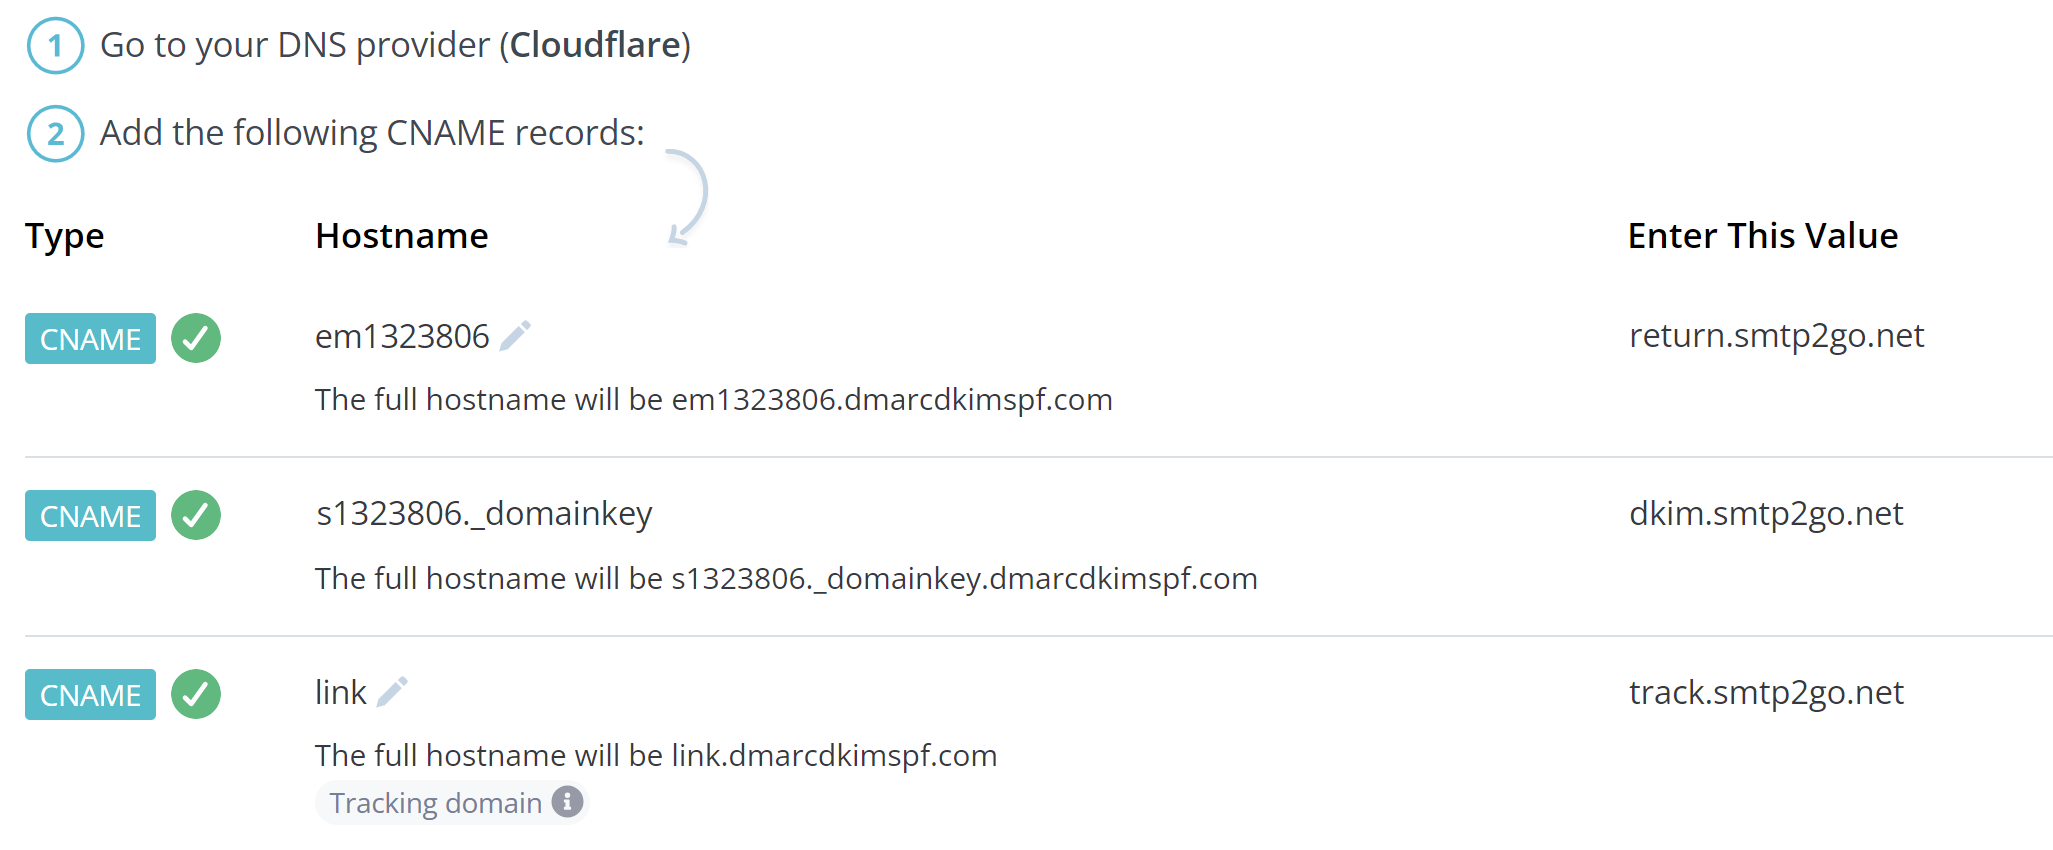
If you don't see a verification success message, there can be a potential misconfiguration in the DNS setup. To troubleshoot the sending domain errors, hire a DmarcDkim.com expert so you can sit back and relax, while we handle your DNS setup configuration.
Check domain and follow the instructions to nail down your DMARC configuration.
No expert knowledge needed!


