Configure SPF, DKIM, Return-path records in MailerSend
Is your domain really protected?
Enter your domain to run a live DMARC check and see how easy it for others to spoof your domain.
No sign-up required. Safe to try on any domain.
Articles
- DMARC for non sending domains
- ARC Is Being Retired
- Manual DMARC Monitoring vs Automated Monitoring
- Reverse Engineering Phishing
- ARC - Authenticated Received Chain
- Email impersonation scams explained
- Click/Link Tracking
- DMARC Enforcement in 2026
- Cyber Insurance and DMARC Enforcement
- TLS-RPT Record
- SMTP Smuggling
- DMARC record
- DNS and NS
- 🇩🇪 Welche Hosting Anbieter unterstützen DMARC
- MX records
- Domain Authentication
- The impact of Business Email Compromise
- CEO Scam
- DNS records
- Email Verification
- DMARC2 vs DMARC1
- DNS Leak
- DNS Check
- Return-path record
- CNAME record
- What Is MTA-STS and Why It Matters Now
- A quiet Google update just made SPF more forgiving
- DMARC Dashboard now available on Azure Marketplace
- DARA Records
- DKIM2 vs DKIM
- DMARC-Überwachung: Anbieter im Vergleich
- Understanding DMARC Reports
- DMARC Built for Europe. Hosted in Germany.
- SOA records
- CNAME vs. A Records
- Beste DMARC-Lösungen für kleine Unternehmen
- Die erste deutsche dedizierte DMARC-Plattform
- Cracking a 1024-bit DKIM Key
- Top 7 SPF Check Tools Compared 2026
- DNS Lookup
- Reverse DNS Lookup
- Der deutsche Bundestag hat ein Spoofing-Problem
Setting up Domain Authentication with MailerSend
Friendly for users, hard on spammers - MailerSend has earned it's spot among top reliable email delivery platforms. Not only email delivery, MailerSend also provides domain authentication services. It generates DNS records that give your emails a unique signature, making it spam proof.
With a few simple steps, you can elevate your email communication significantly. This post will guide you through the exact configuration process of setting up SPF, DKIM, and Return-path verifications in MailerSend account. Say goodbye to spam folder and authenticate your domain by following the steps below:
-
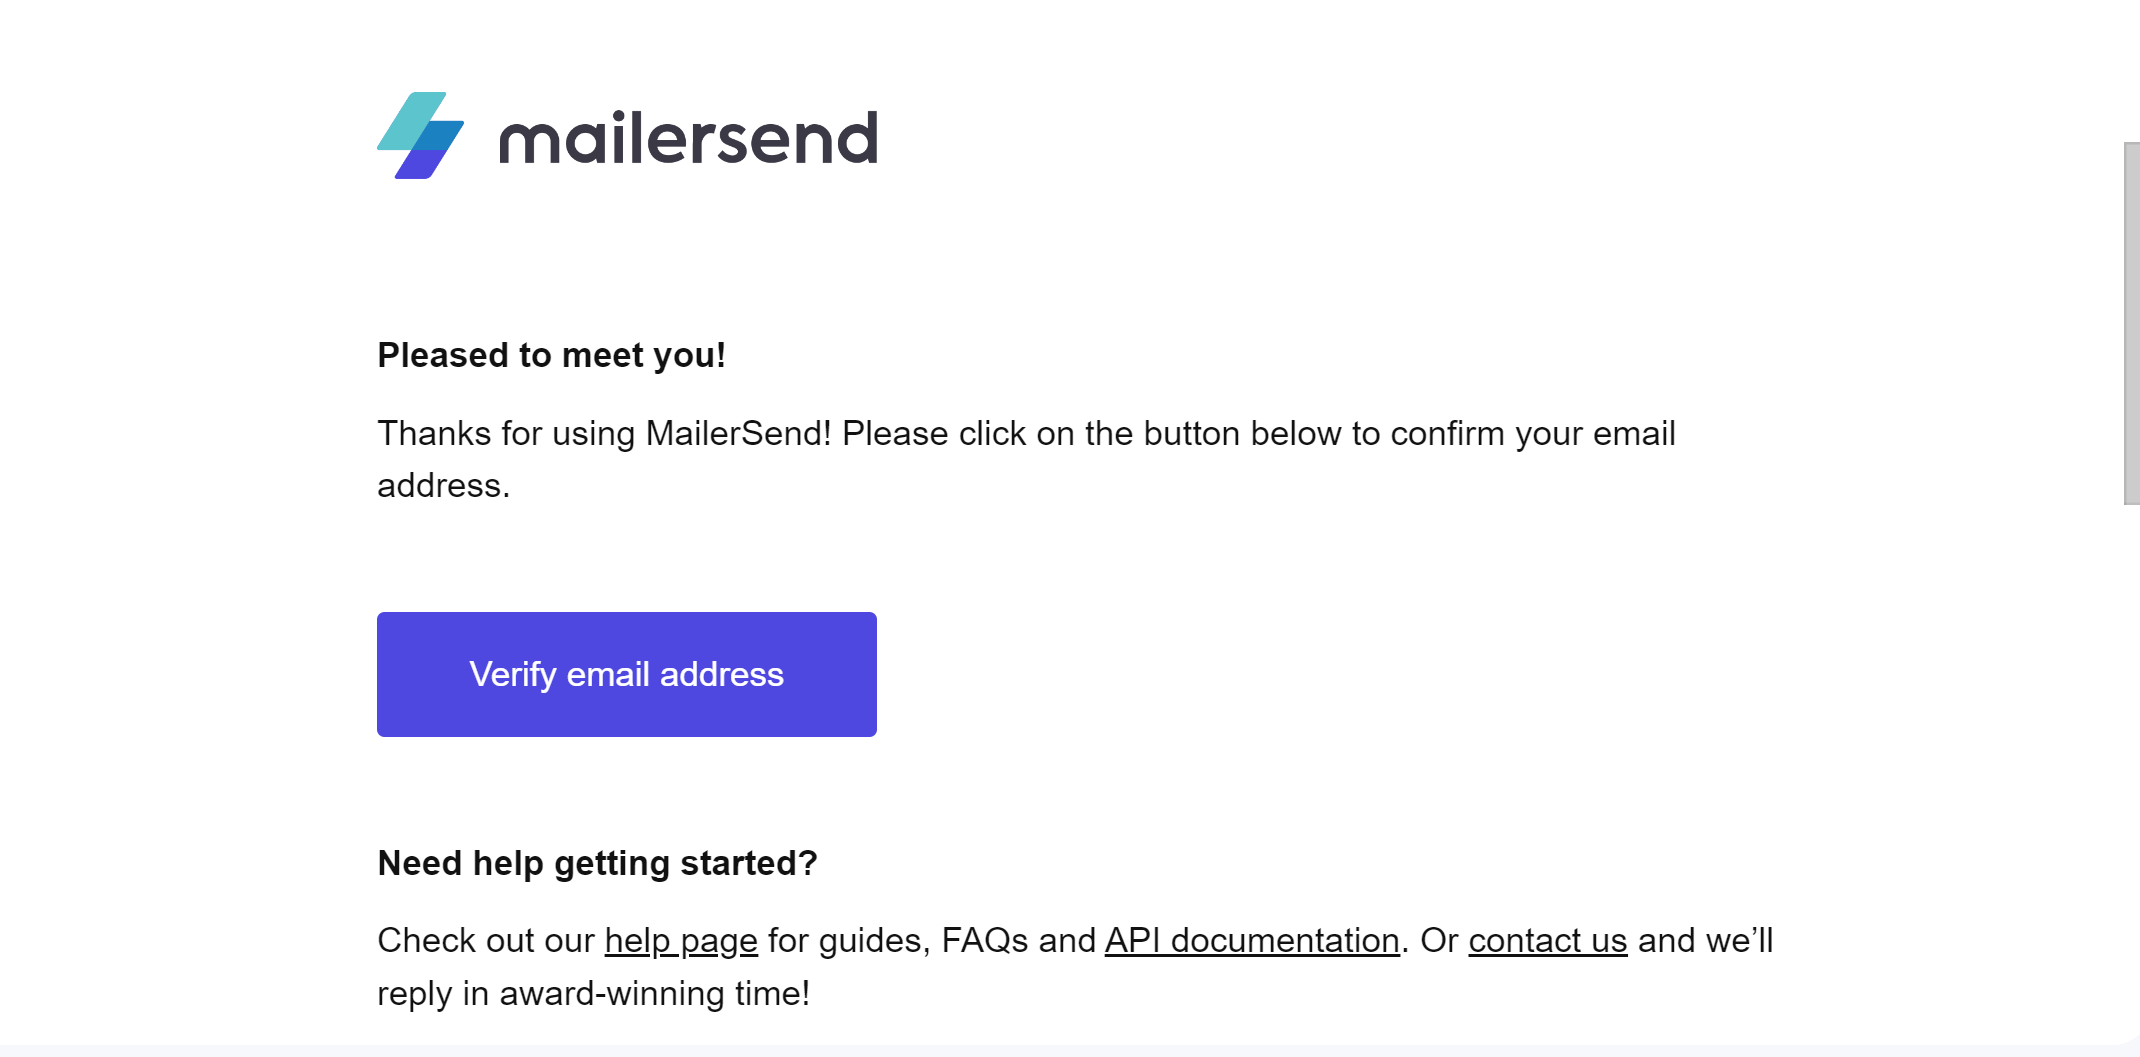
After creating your account on MailderSend, you'll receive a verification email on the email address you used to sign up. Here, click Verify Email Address and it will take you back to MailerSend dashboard.
-
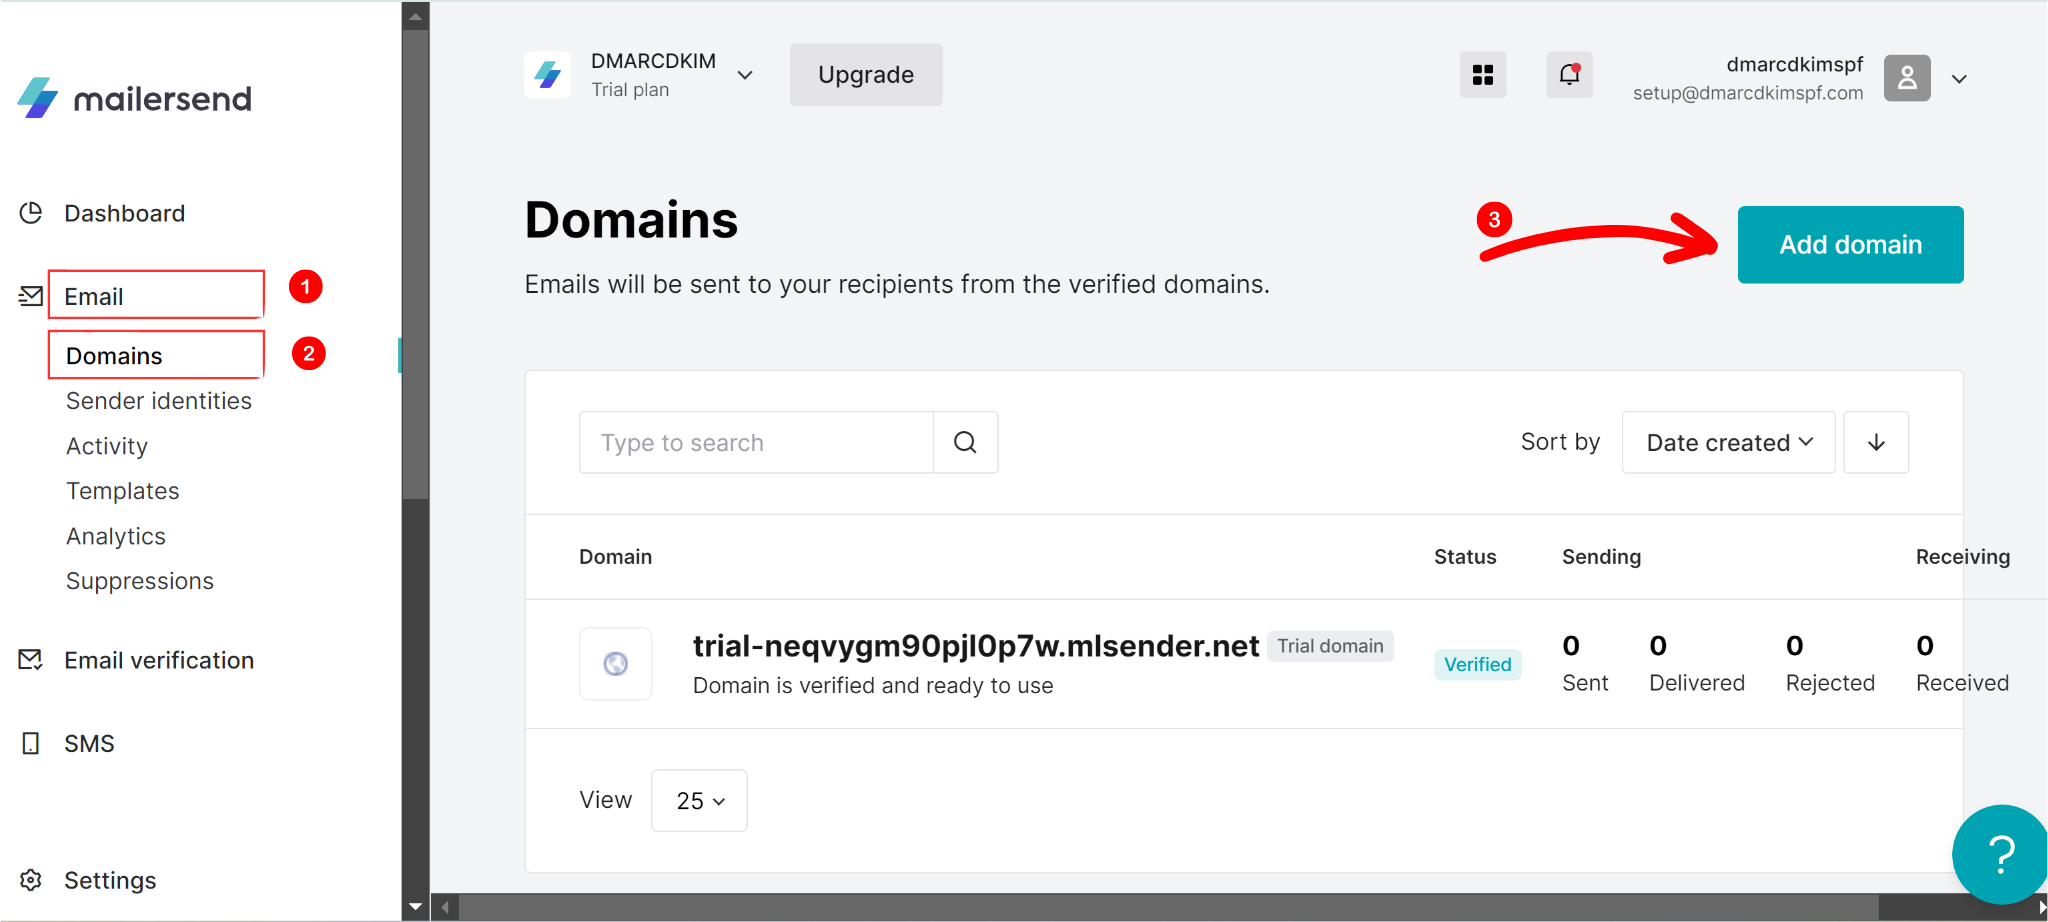
On the left panel, click on Email > Domains > Add Domain.
-
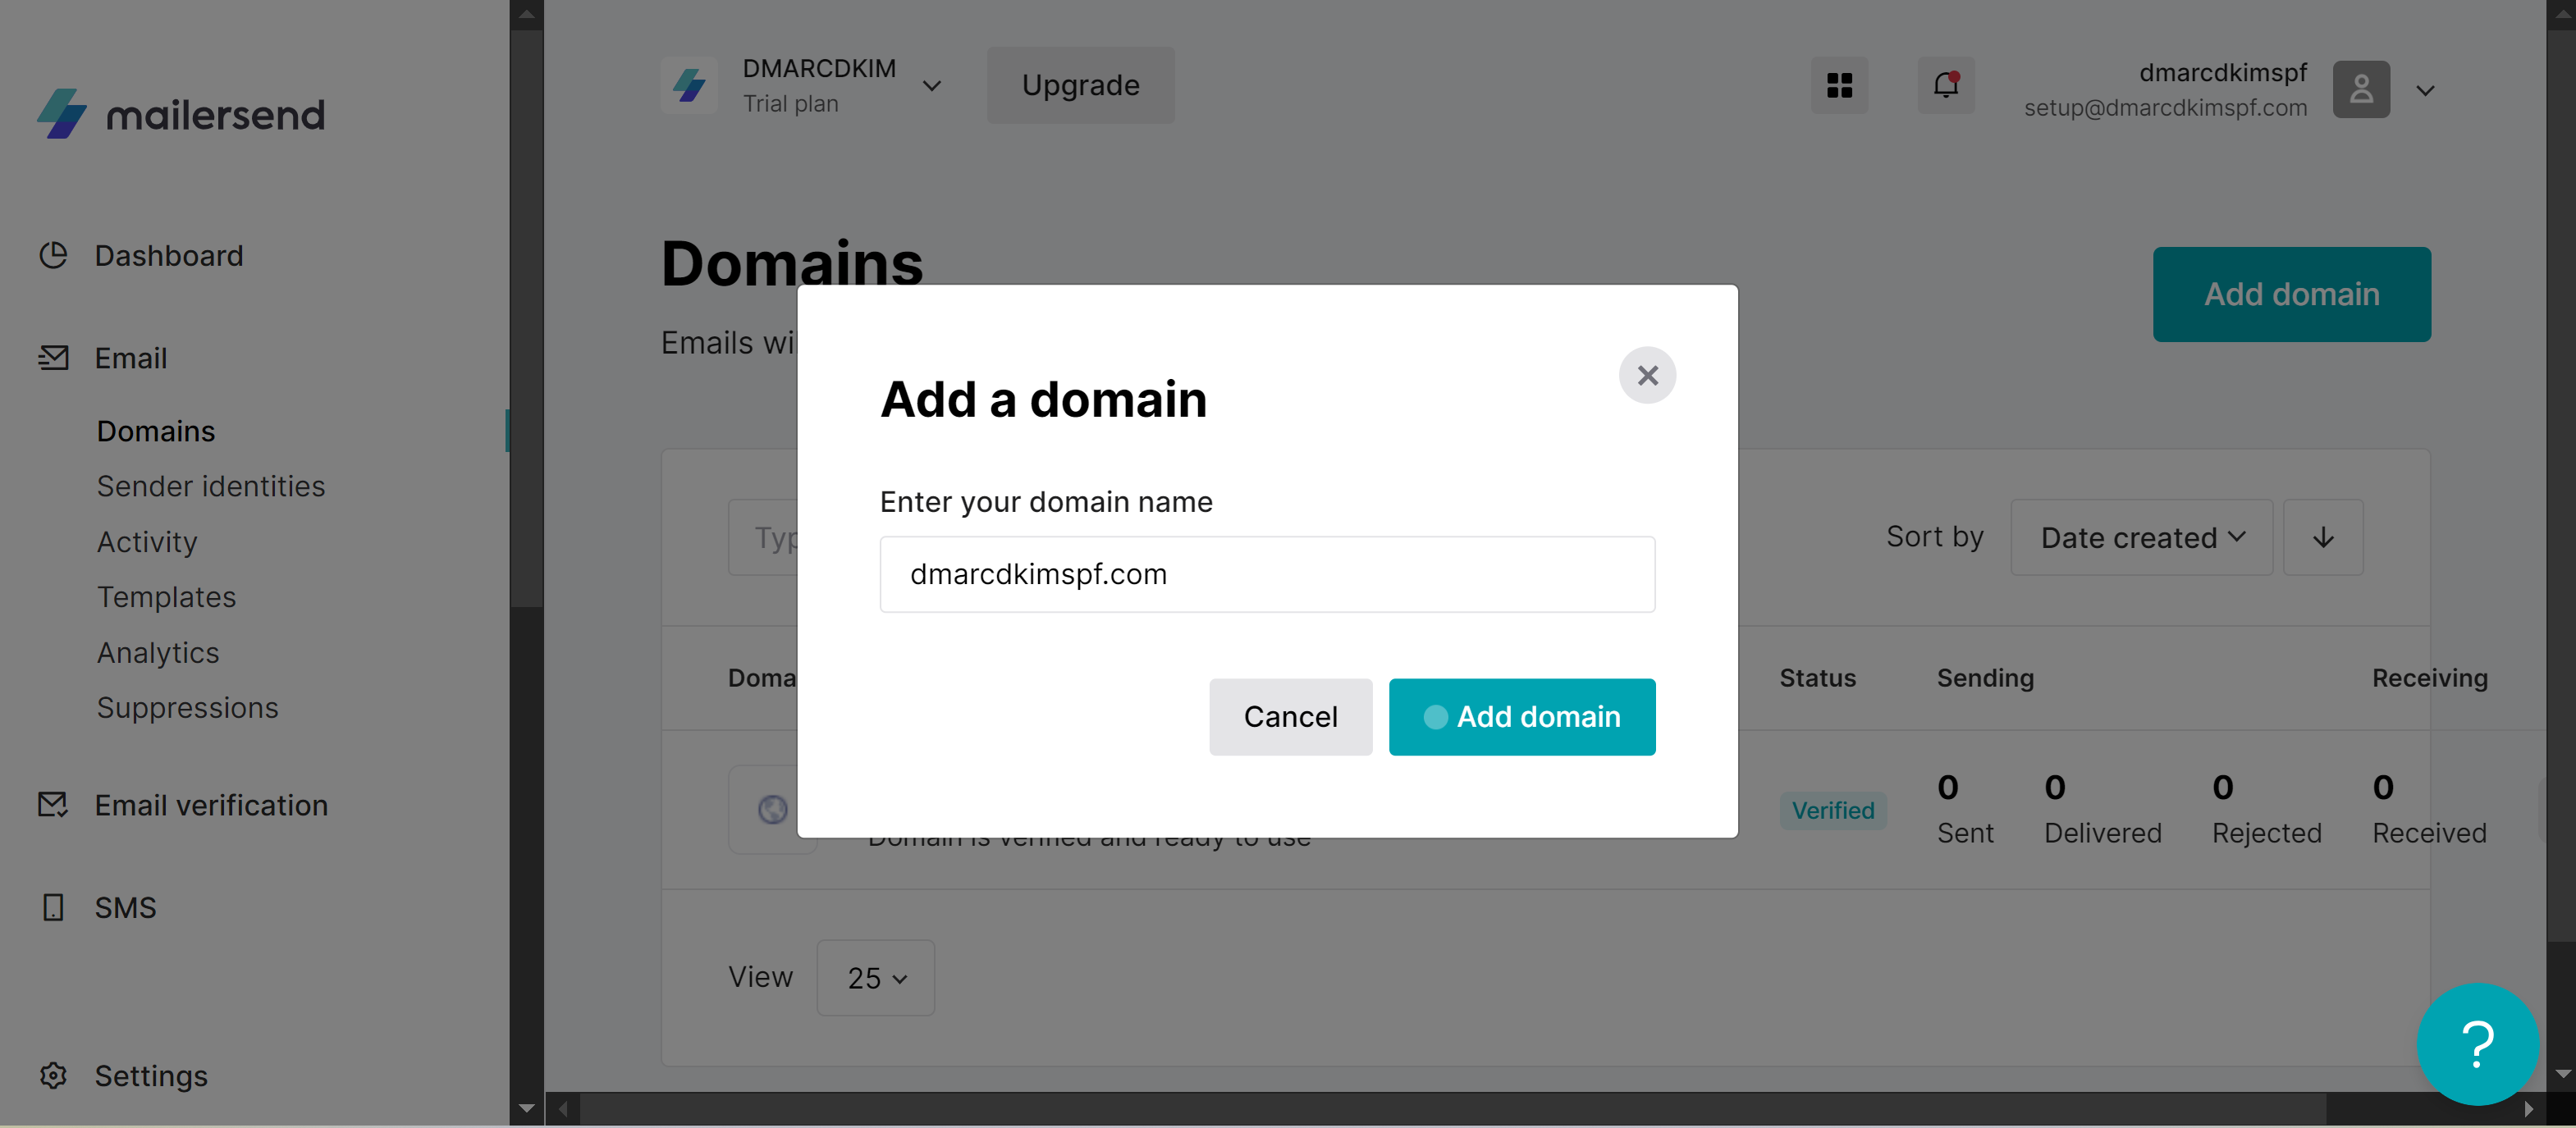
Now write your domain name and click Add.
-
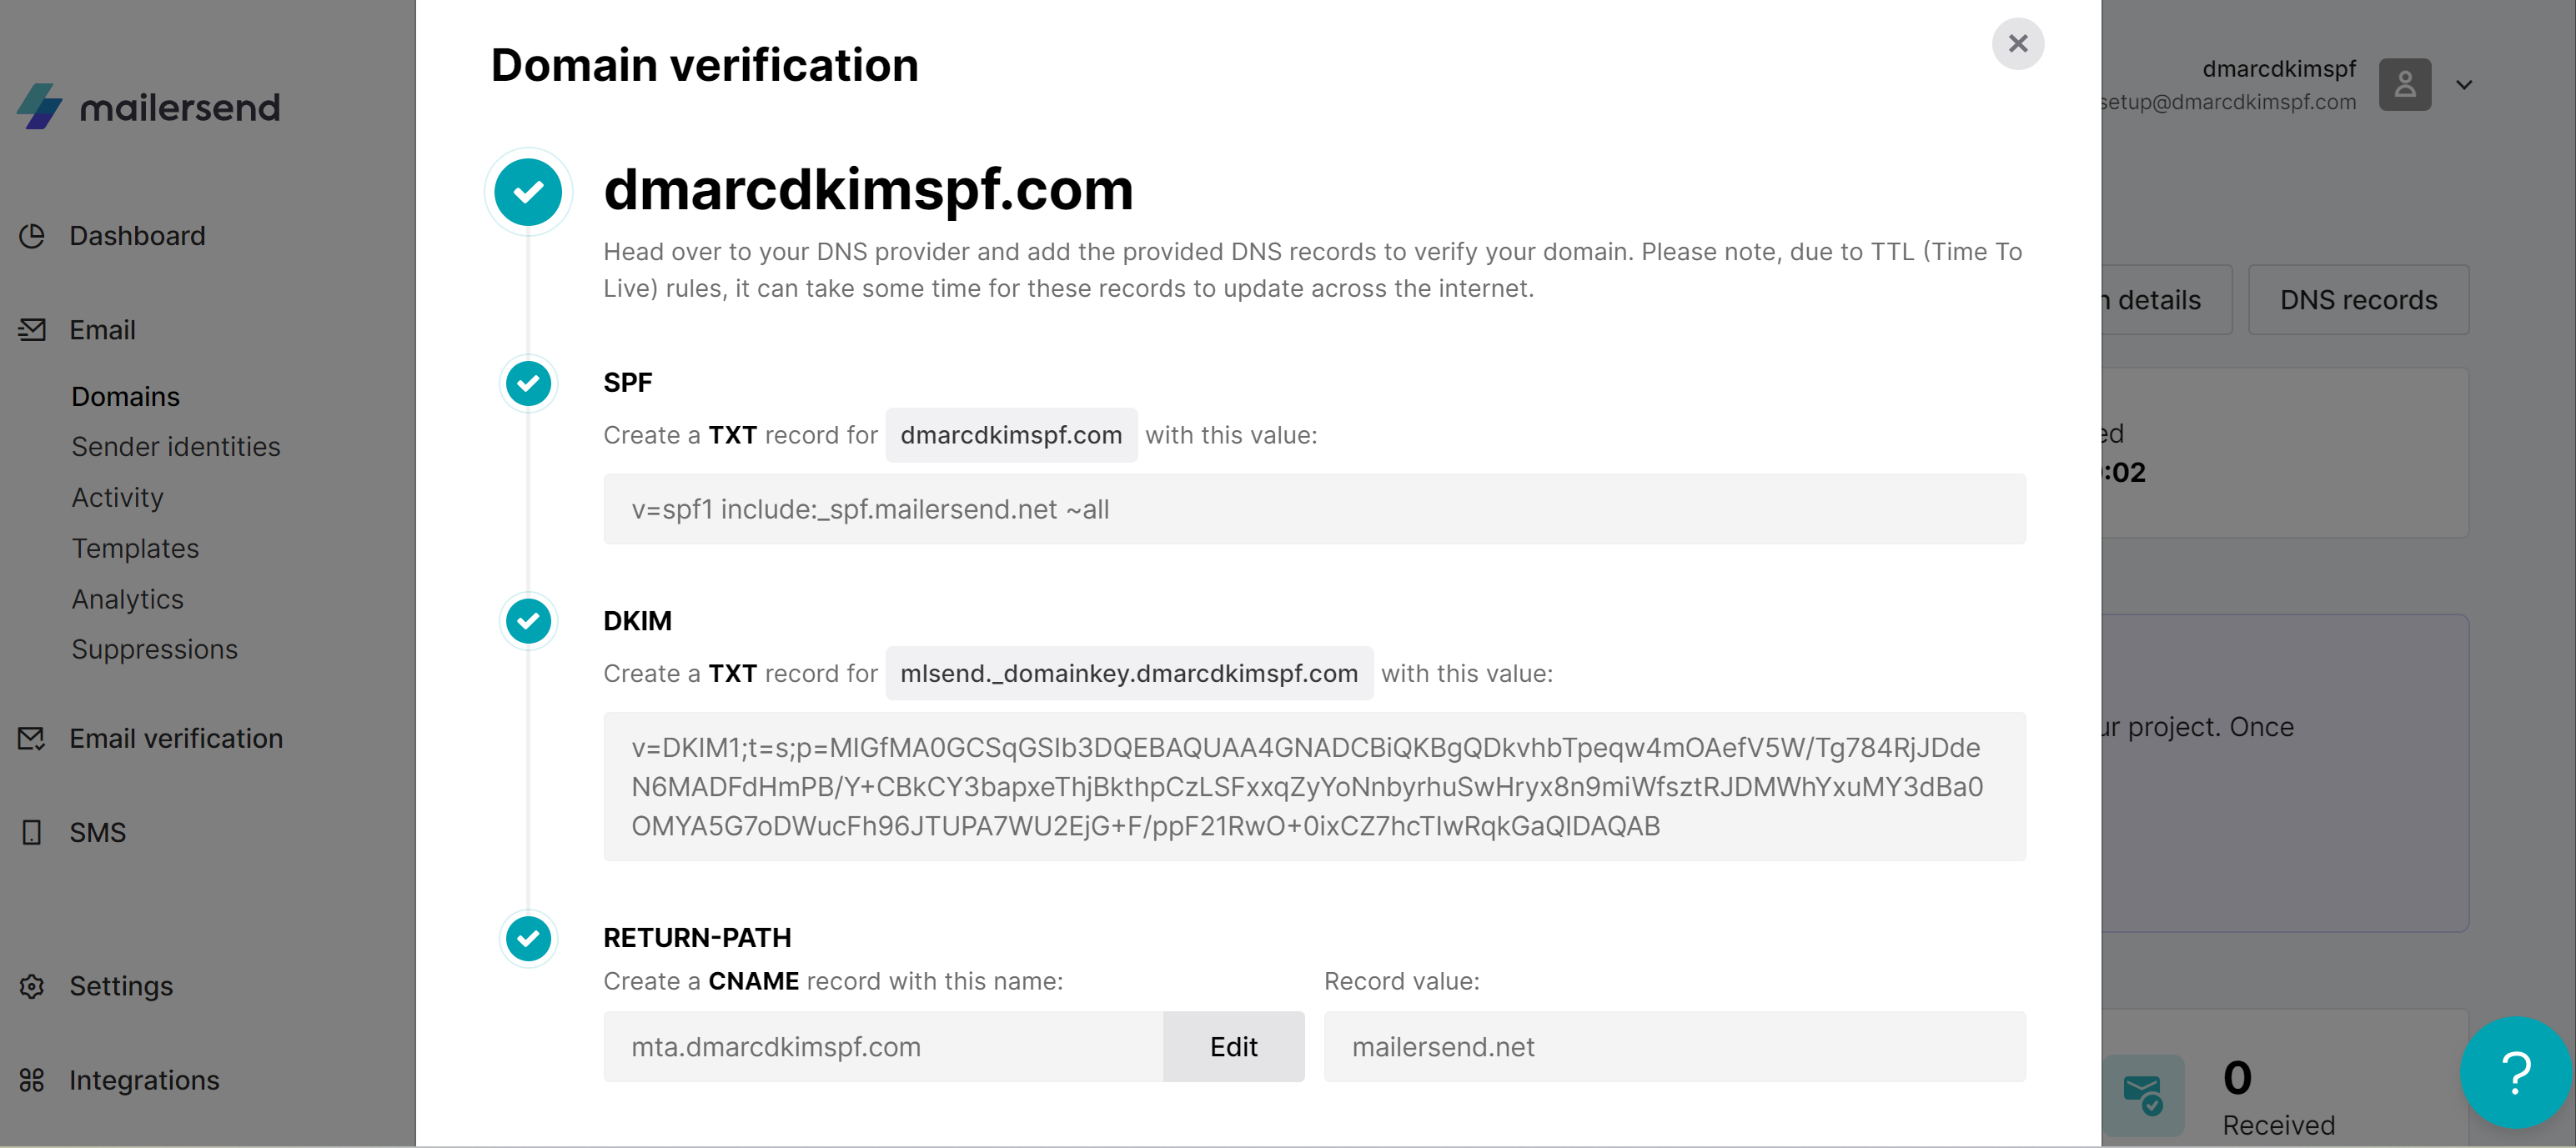
Next, MailerSend will generate SPF, DKIM, and Return-path records for domain authentication.
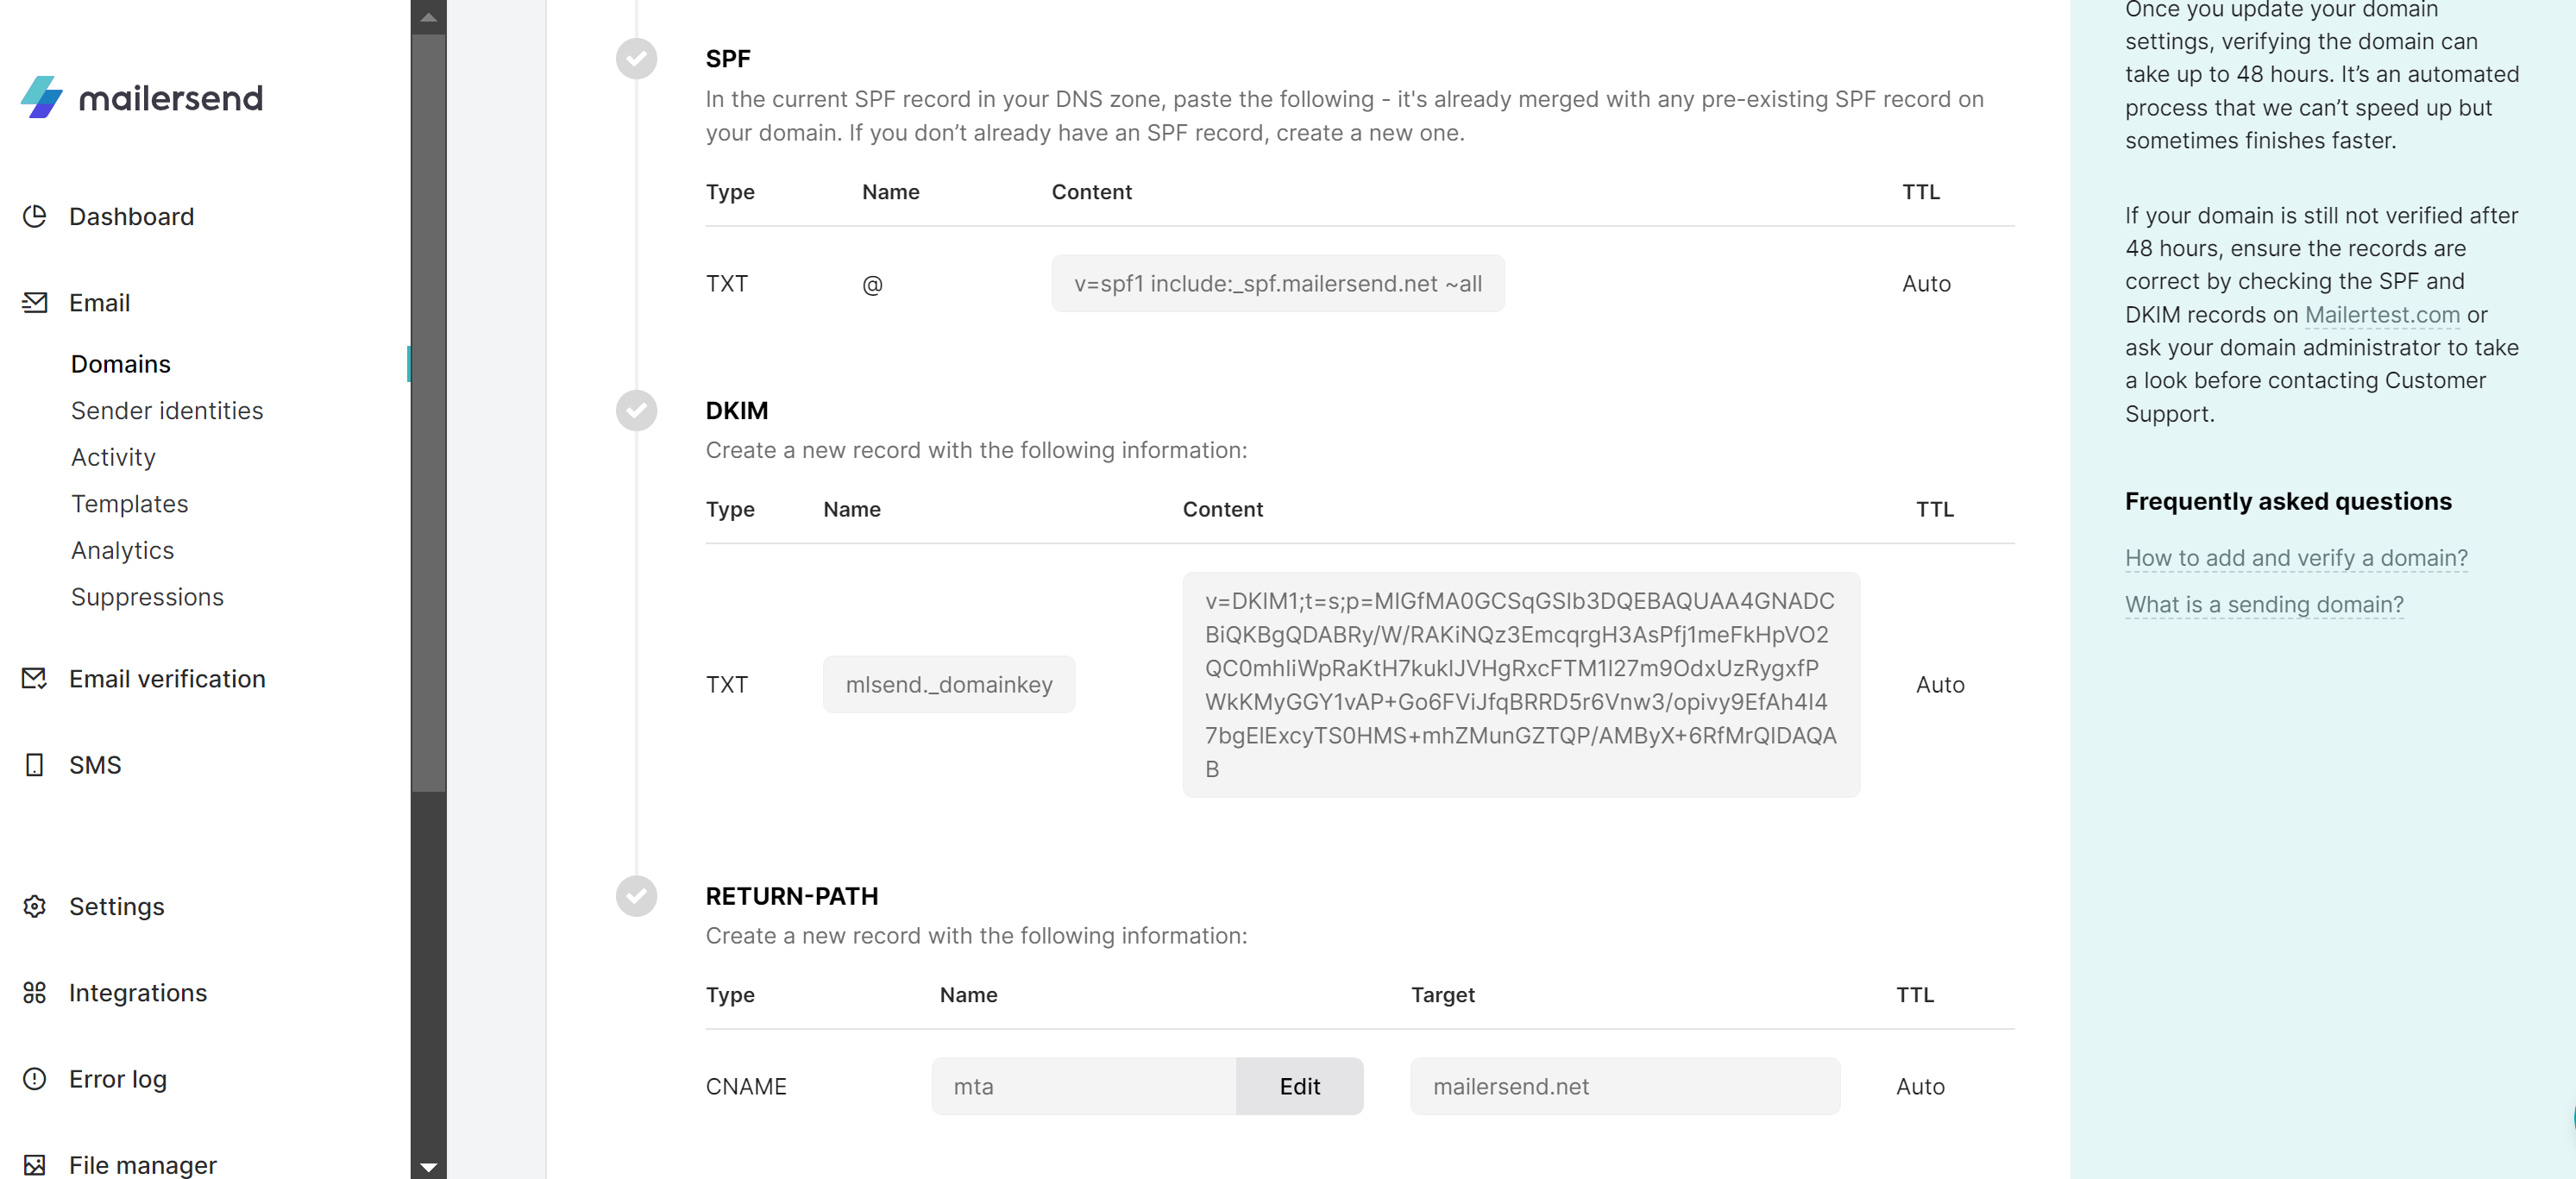
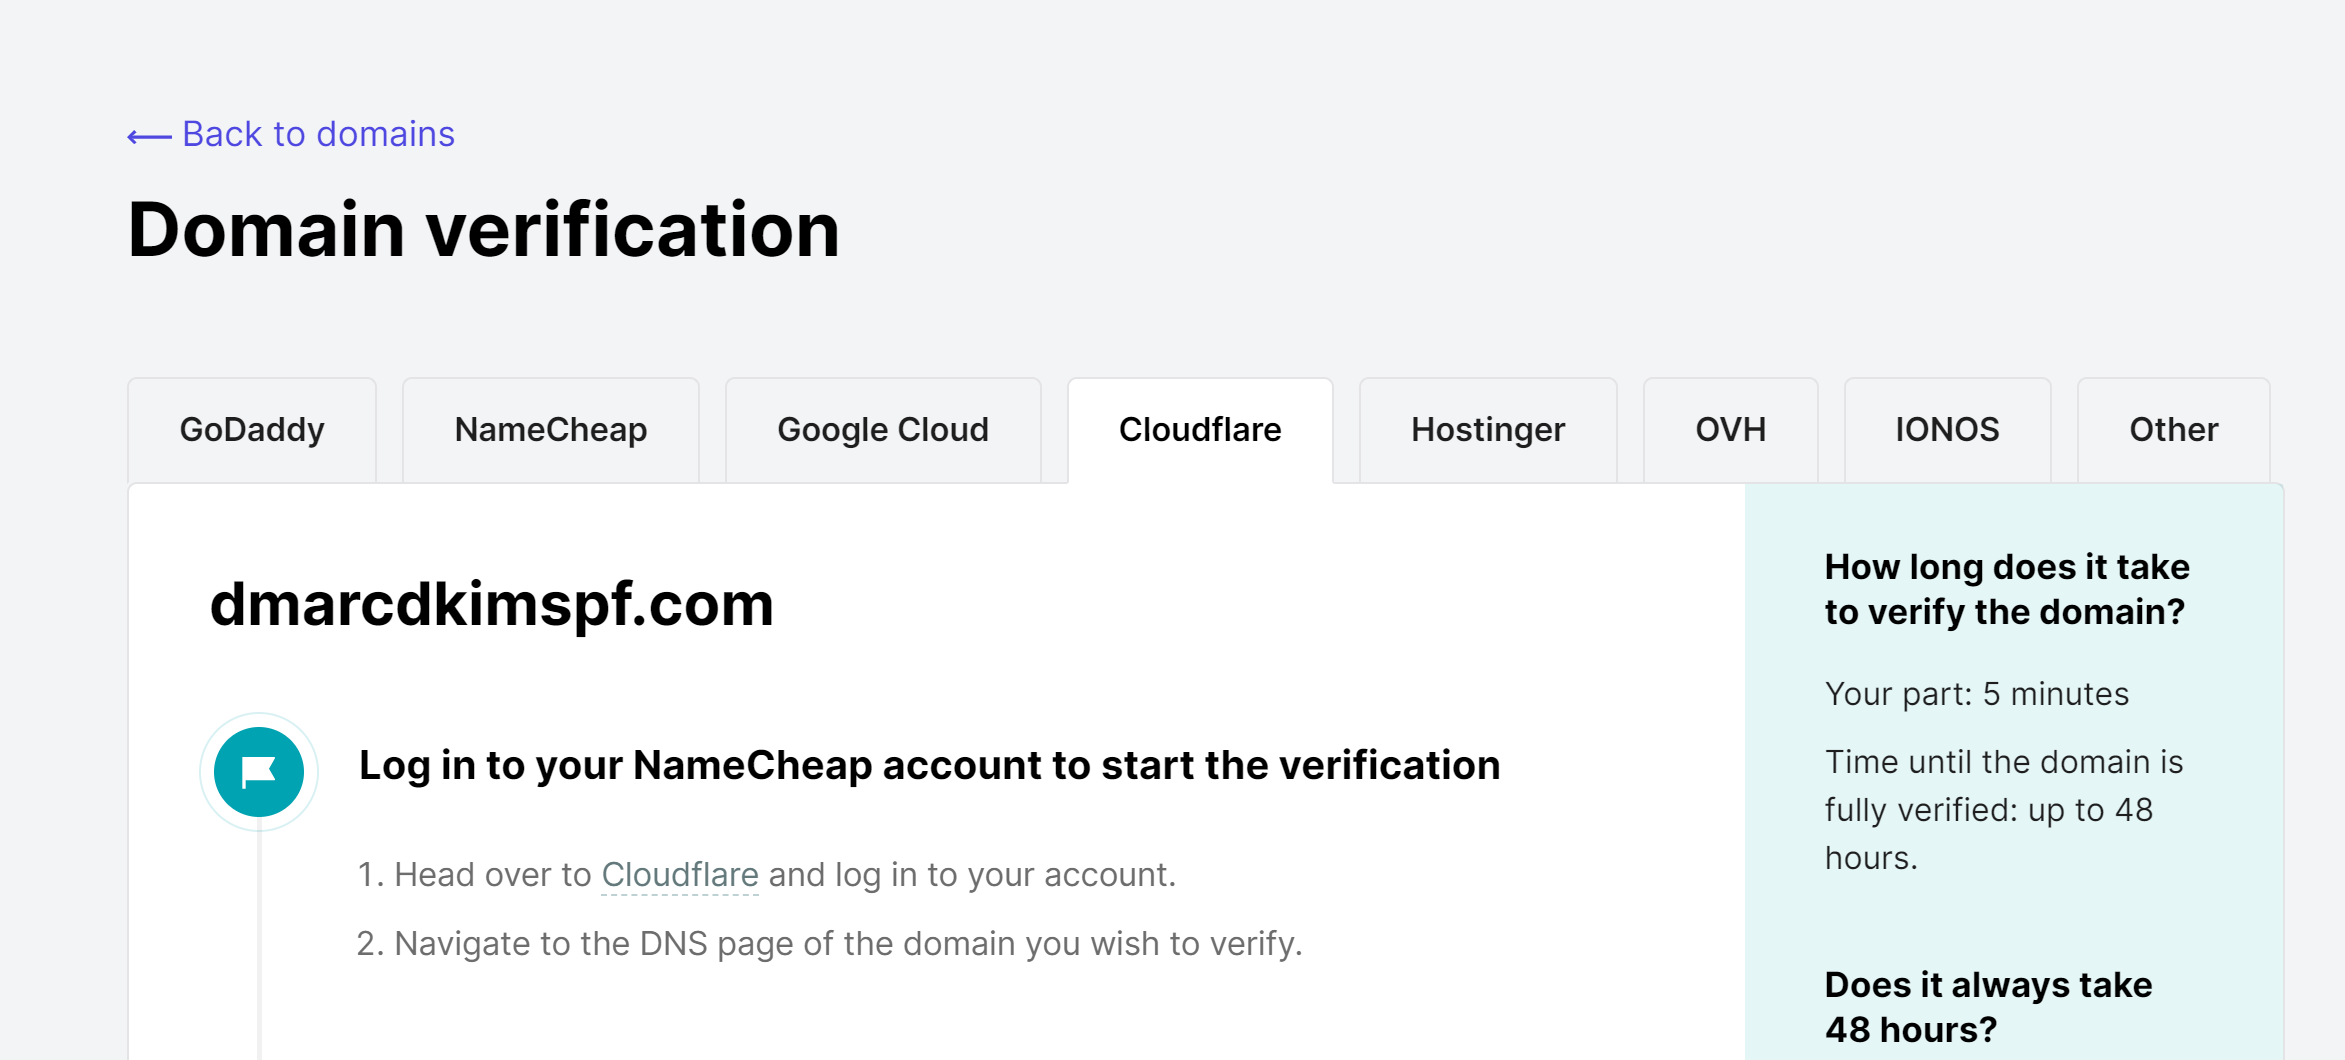
Copy these records and paste in your DNS provider. We are using Cloudflare for this tutorial but you can add them to any DNS provider you use.
-
On top of DNS records, you'll see various hosting services. Select the one you're using and a step by step process will drop down for you to configure DNS record settings in your particular hosting platform.
-
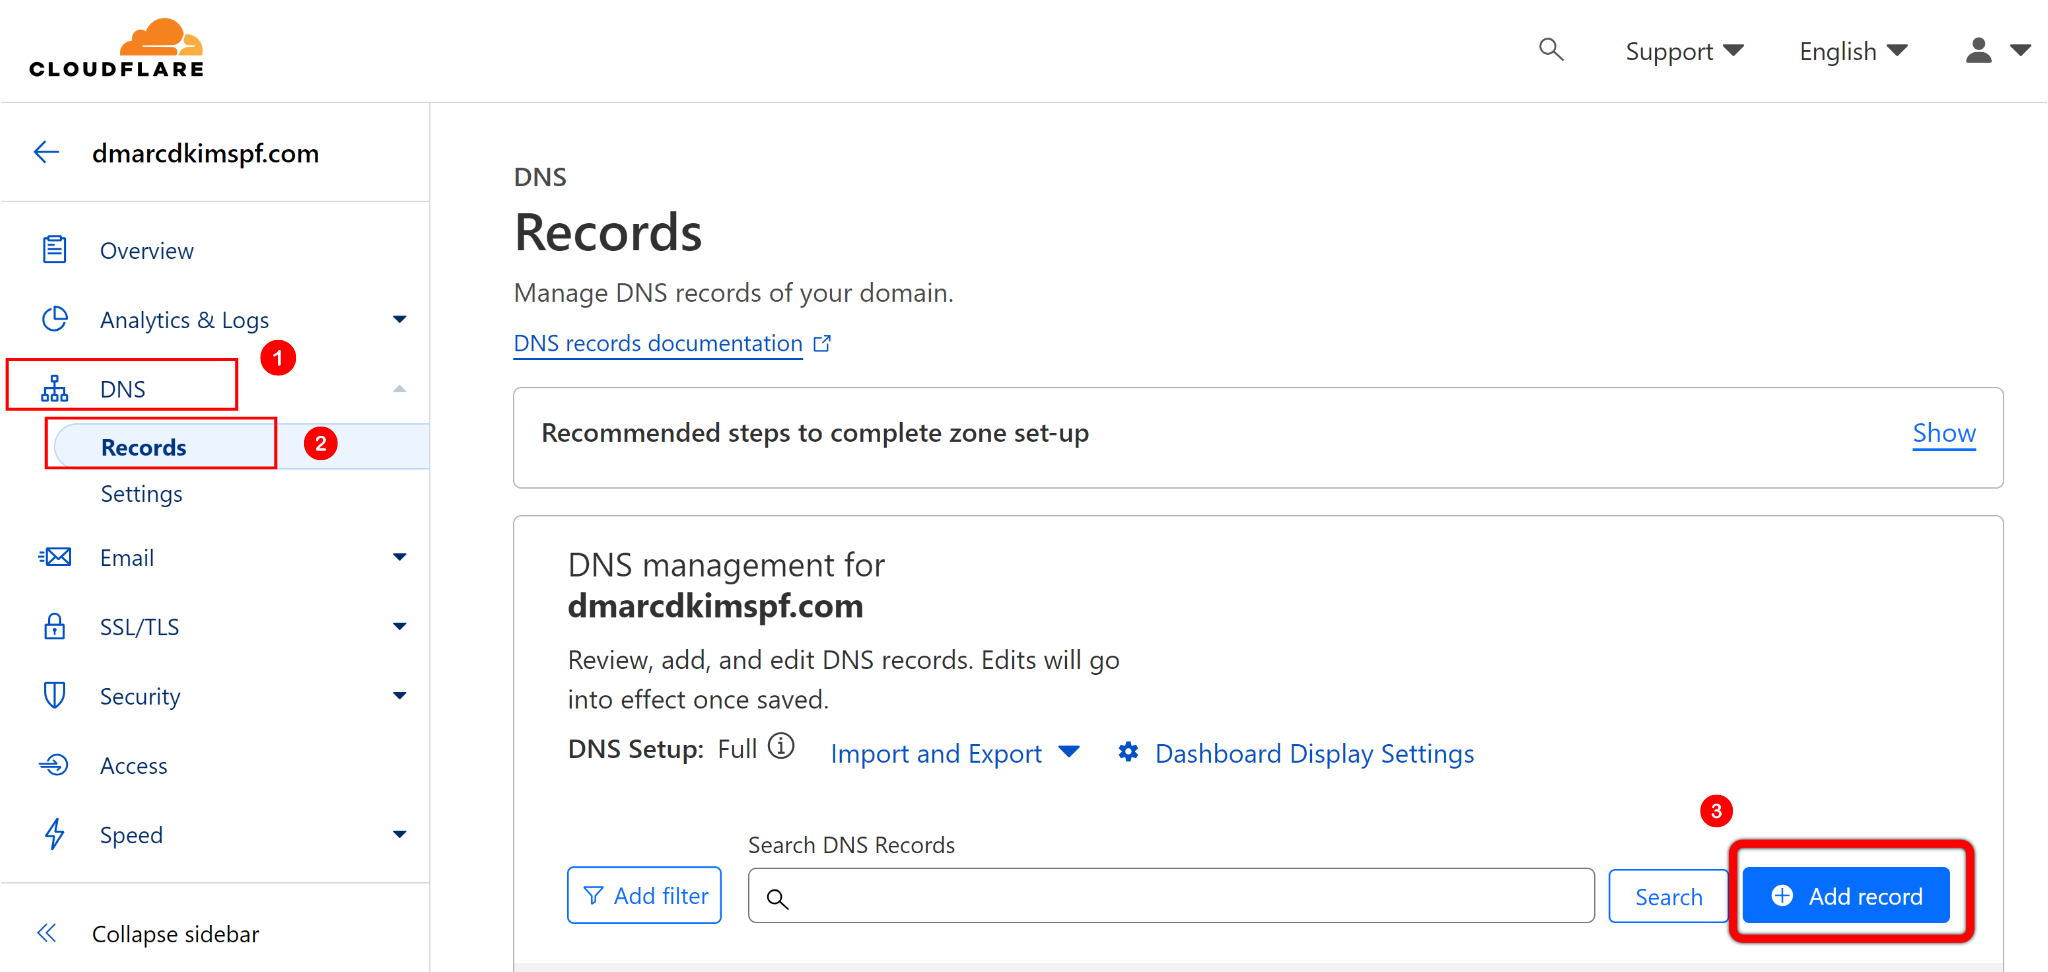
If using Cloudflare, click on your Website > DNS > Records > Add record, paste the DNS records here and click Save.
Once all records are added, go back to MailerSend, scroll down the DNS records page, turn on the toggle for "I have added DNS records" option and hit the Check button.
-
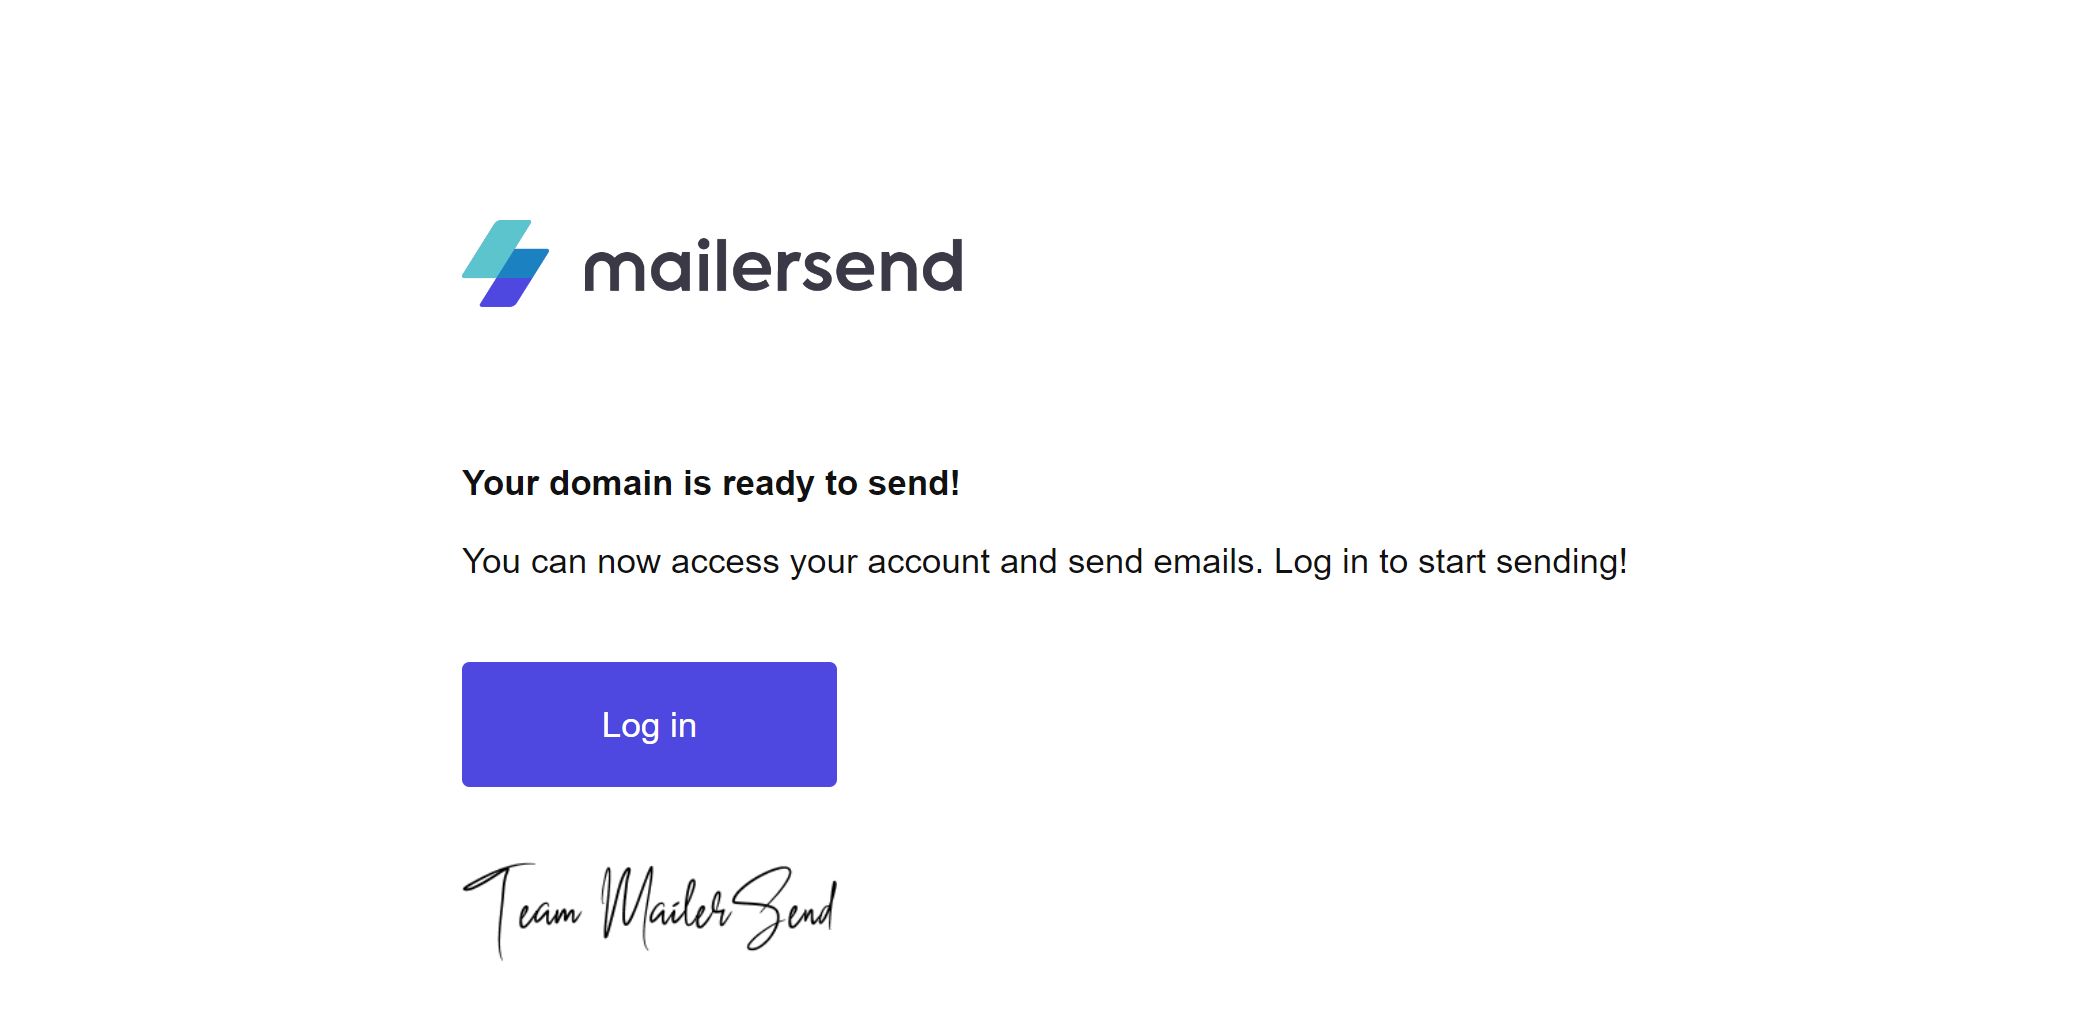
Next, you'll receive a Confirmation Email about your domain authentication.


Once your domain is authenticated, you'll see all records, SPF, DKIM and Return-path checked with green ticks. This means all steps are completed for domain authentication and your webmail is now ready for smooth and secure email campaigns.
Happy emailing!
Check domain and follow the instructions to nail down your DMARC configuration.
No expert knowledge needed!