How to Configure DMARC, DKIM & SPF Records in SendPulse?
Check your domain for DMARC, DKIM, SPF and MX records. Get a free report.
SendPulse DMARC, DKIM & SPF records - Sender Domain Authentication
These days, it's easy for people to pretend to be someone else in emails. That's why email service providers want to be sure that the emails they get are from real and honest sources. This is where domain authentication becomes important. If you want email companies to trust your business emails, you need to prove they're real using a good and trustworthy system. Otherwise, they might think your emails are spam. With SendPulse, you can authenticate your emails within a few clicks. It has a user-friendly interface which makes the DNS configuration process very simple. Follow the steps below to add DKIM and SPF records to your DNS provider and authenticate your sending domain.
-
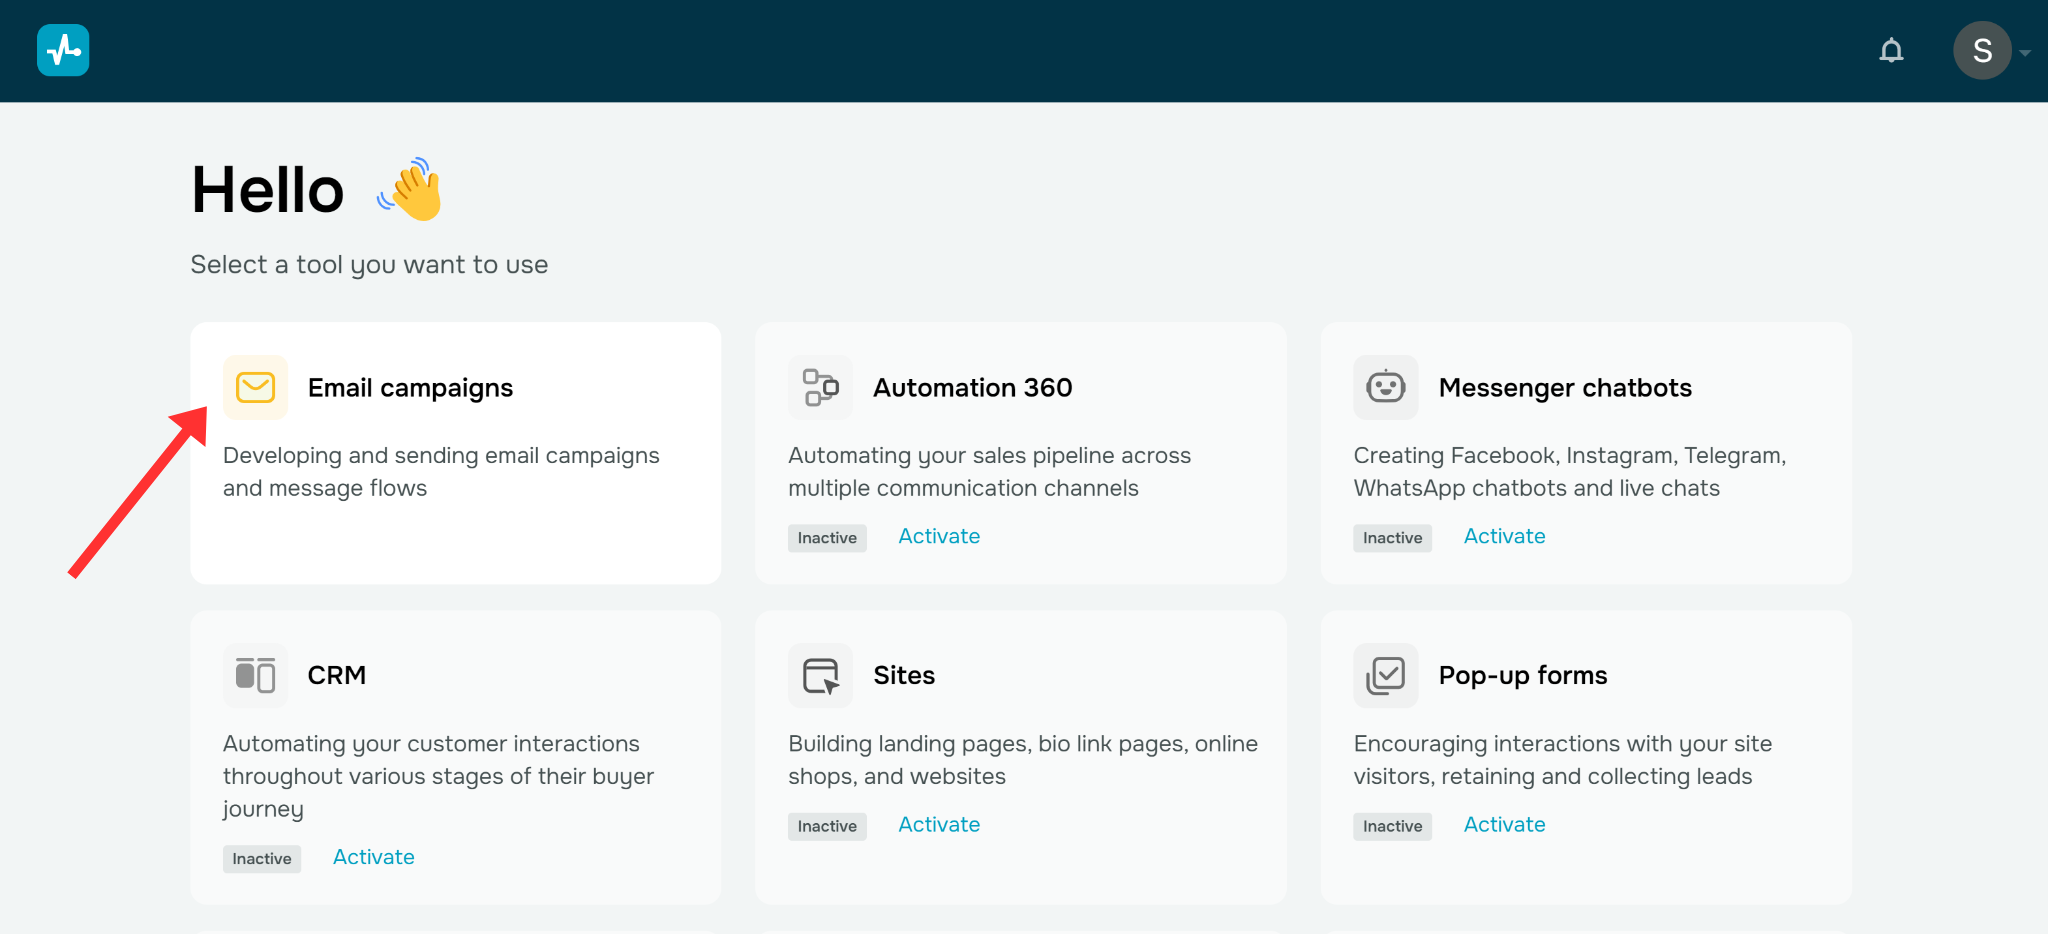
Log in SendPulse account and go to the Email Campaigns option.
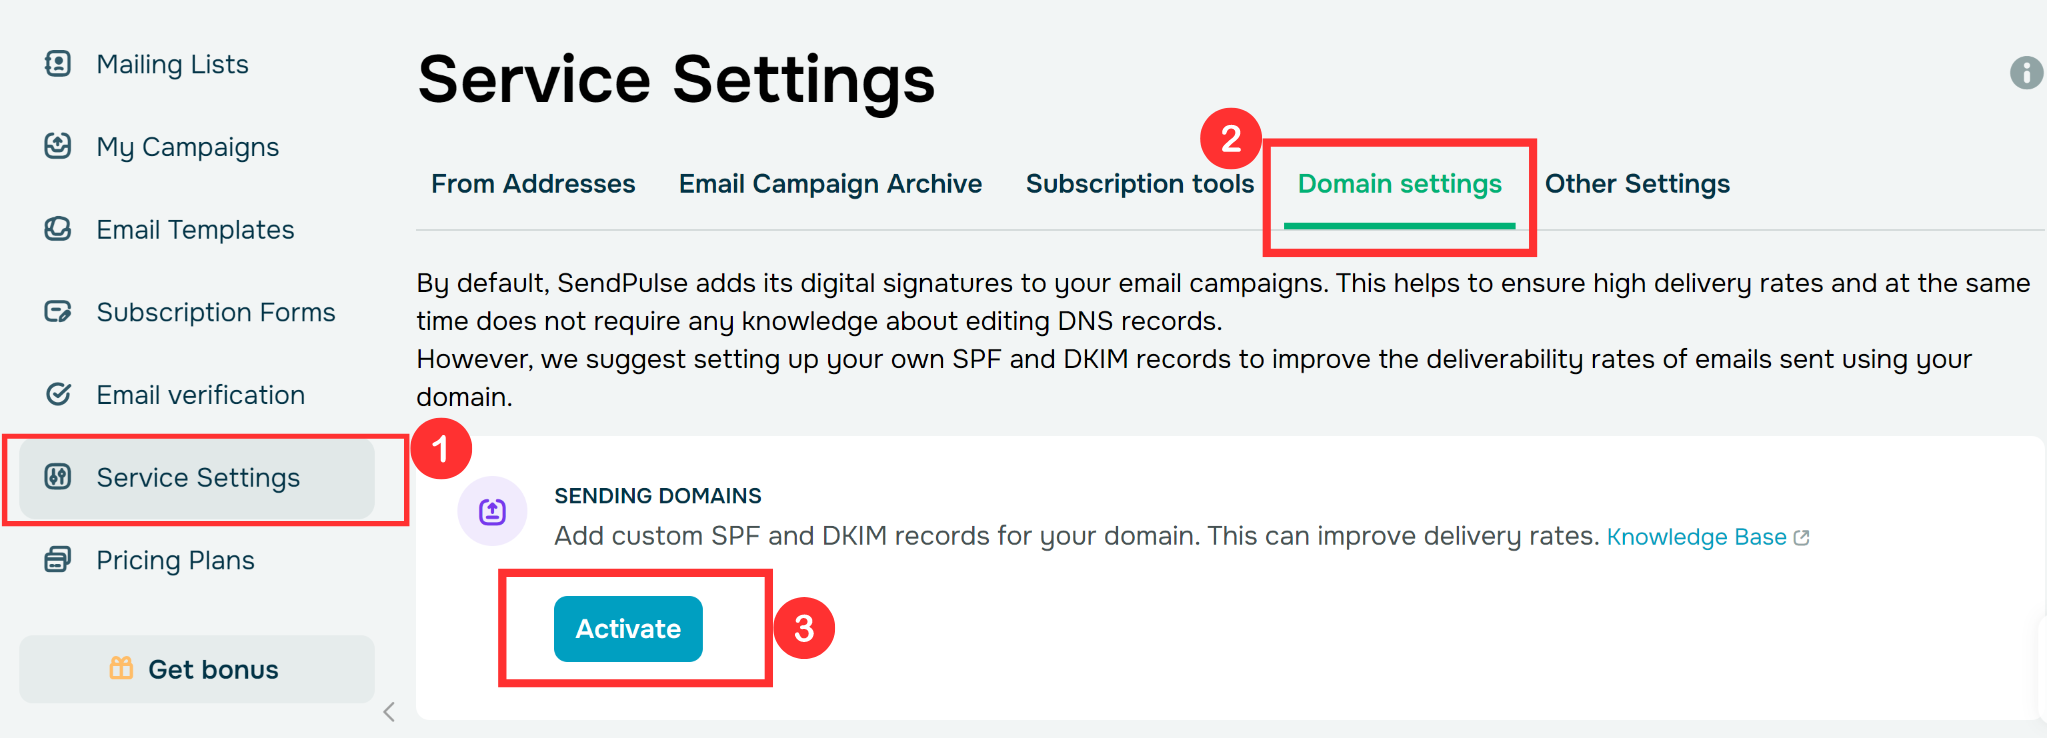
Click Service Settings in the bottom left corner of your screen.
-
Go to the Domain Settings tab, and click Activate under the Sending Domains section.
-
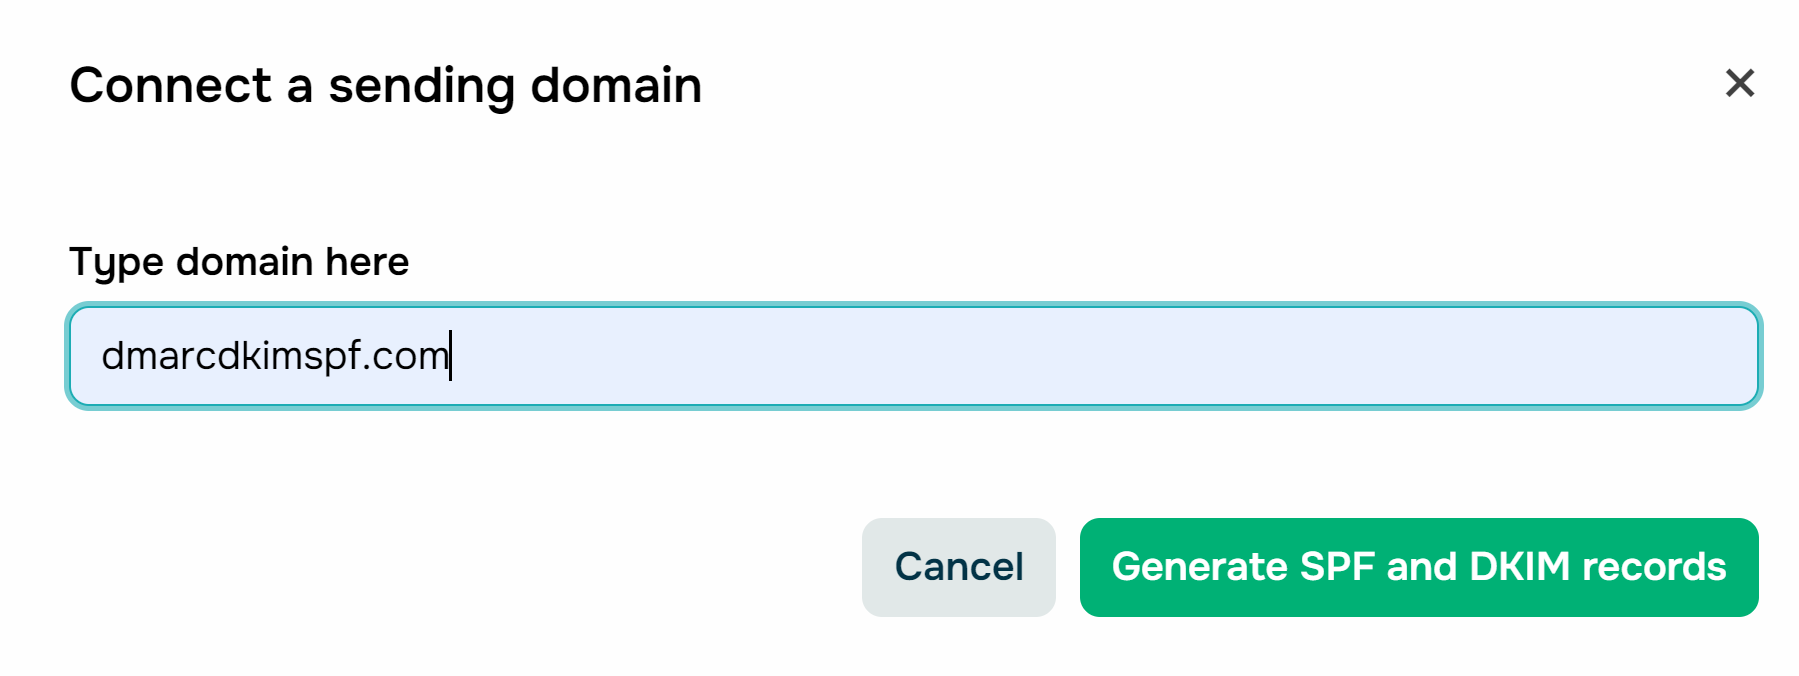
Write your domain name and click "Generate SPF and DKIM Records."
-
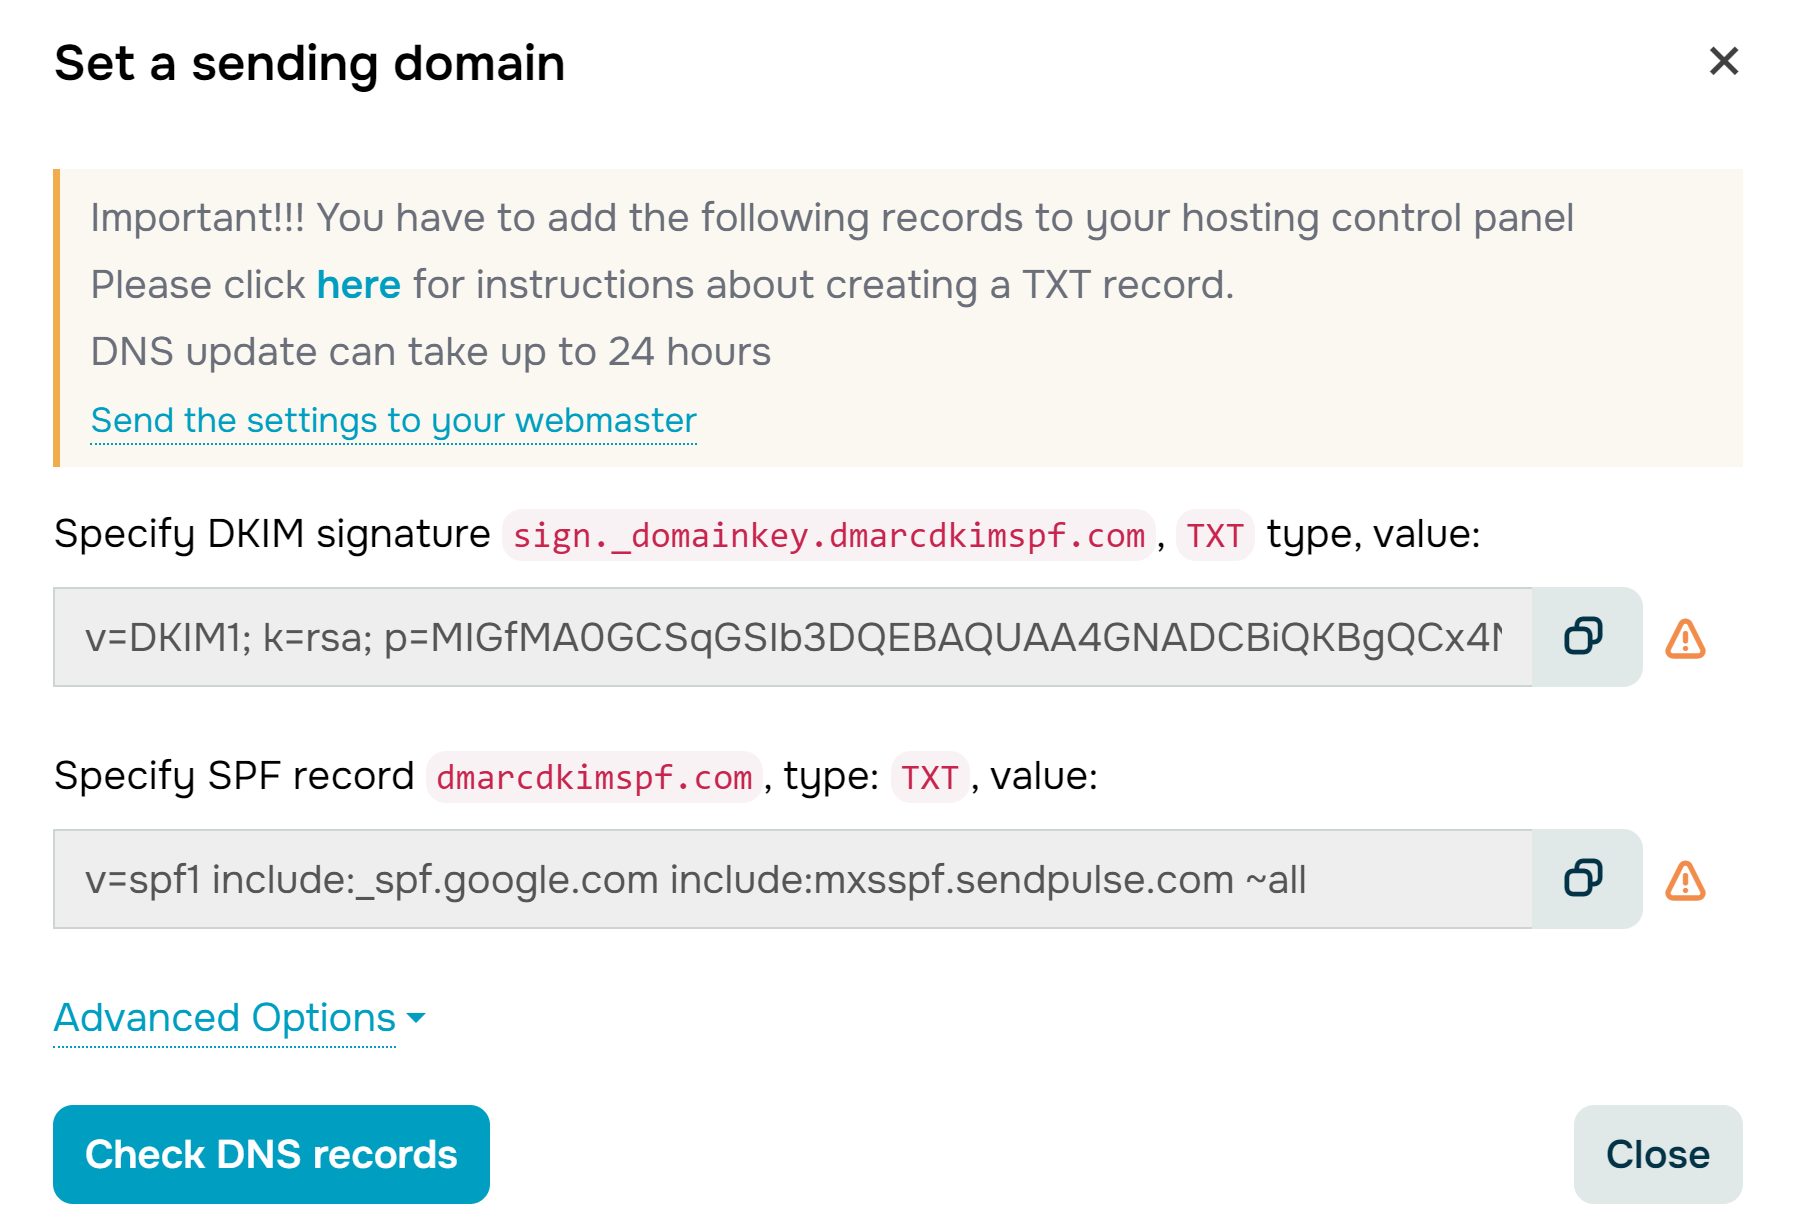
Now you'll see SendPulse DKIM and SPF records on your screen. Copy each record and add it to your DNS provider one by one.
-
Open your DNS provider, go to the Websites tab, and click on your domain. (We are using Cloudflare in this tutorial but you can add DNS records to any DNS provider you use.)
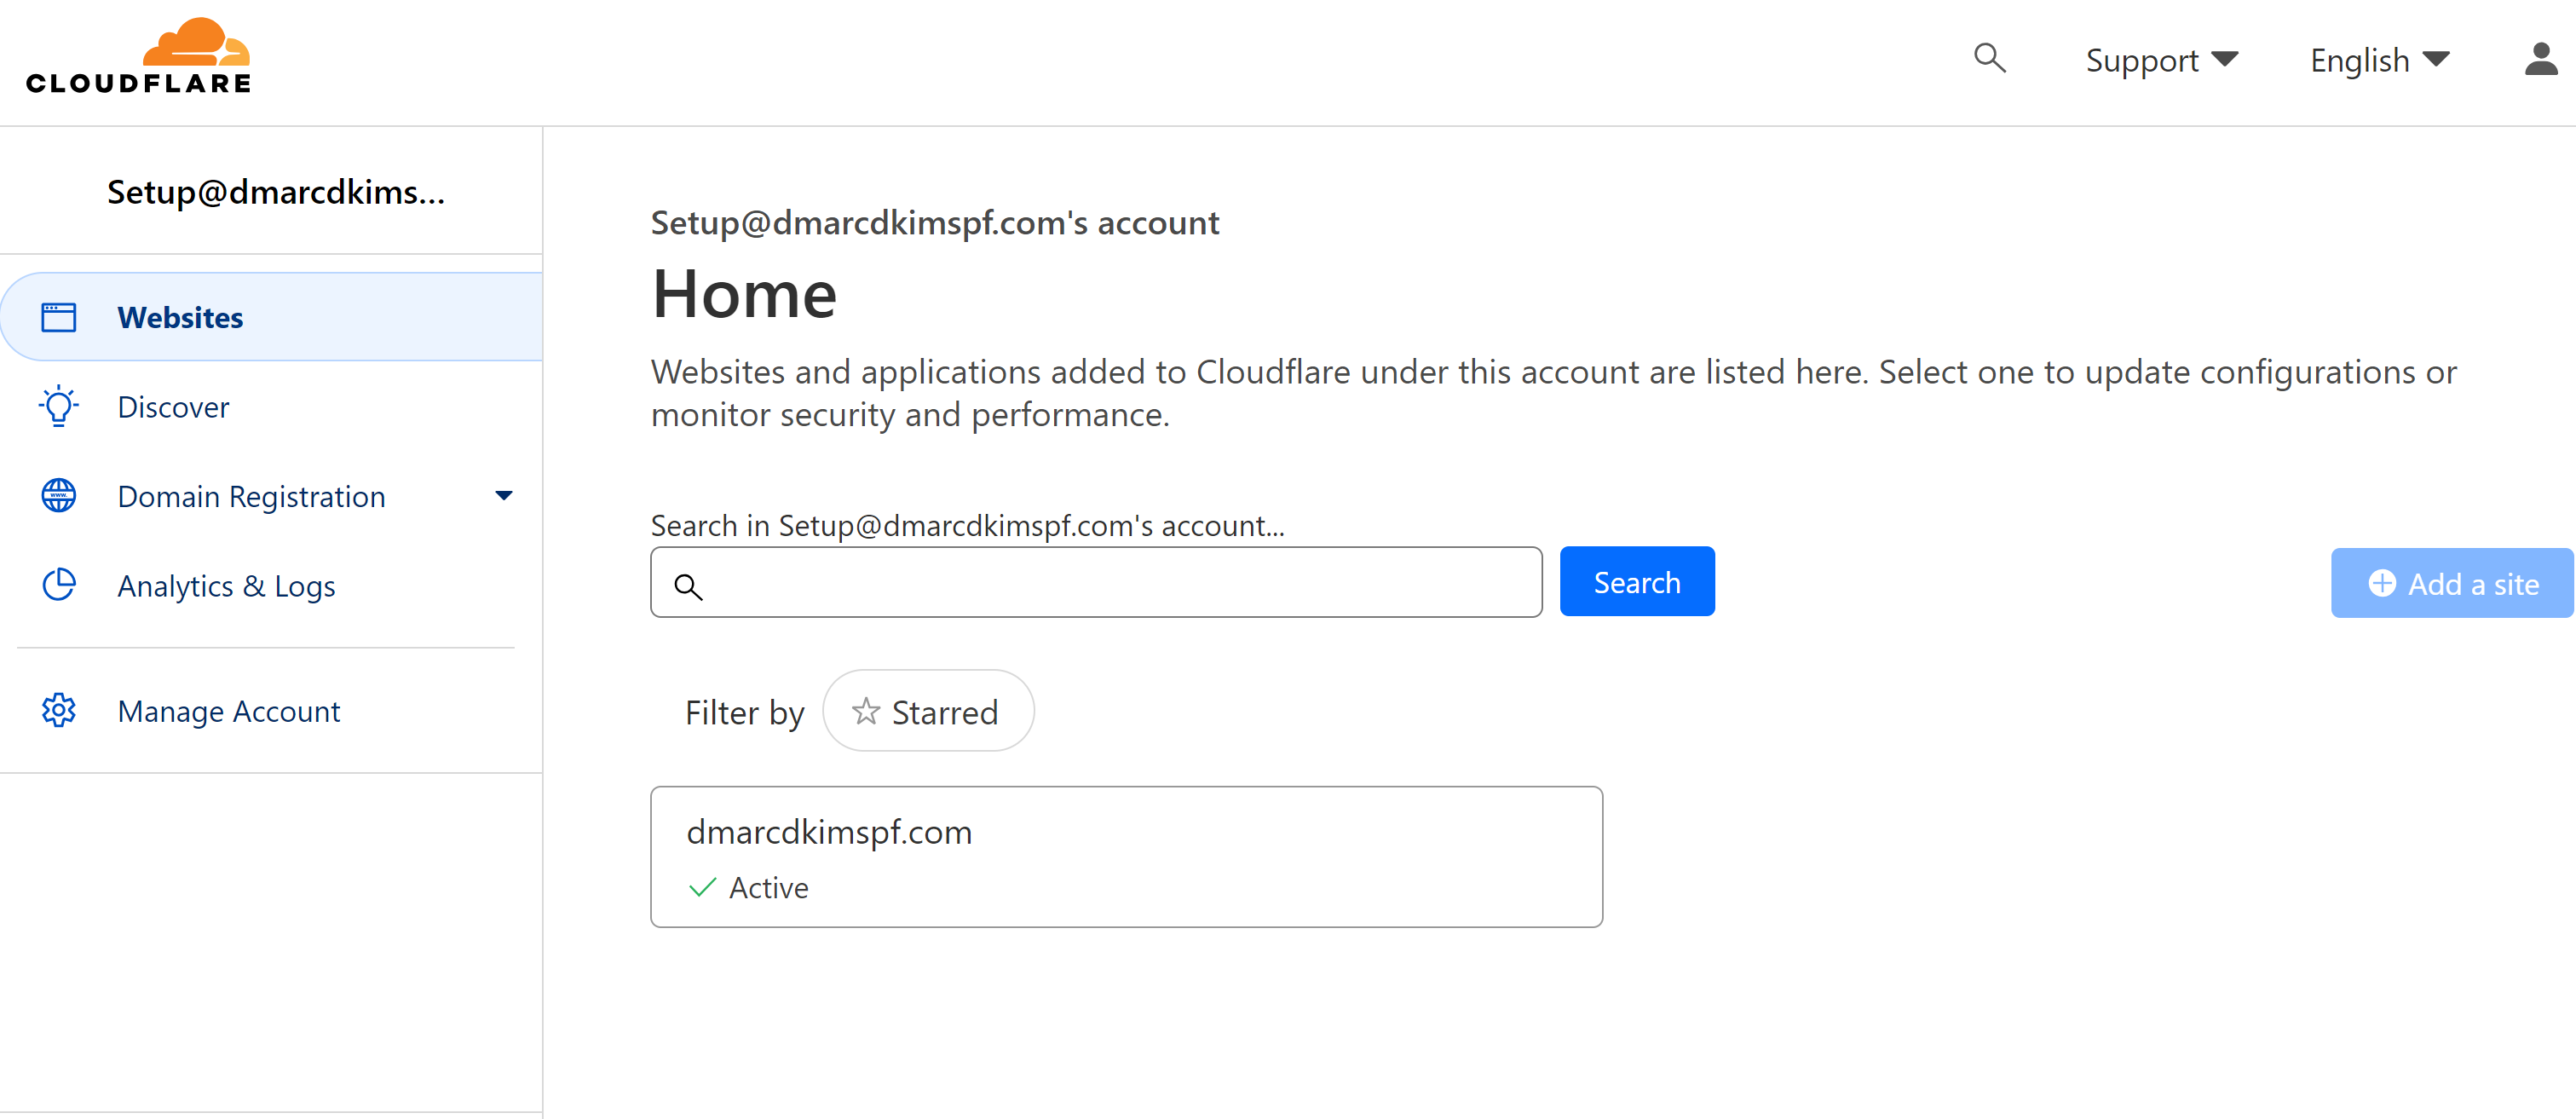
Go to DNS and click Records. Here hit the Add Record button.
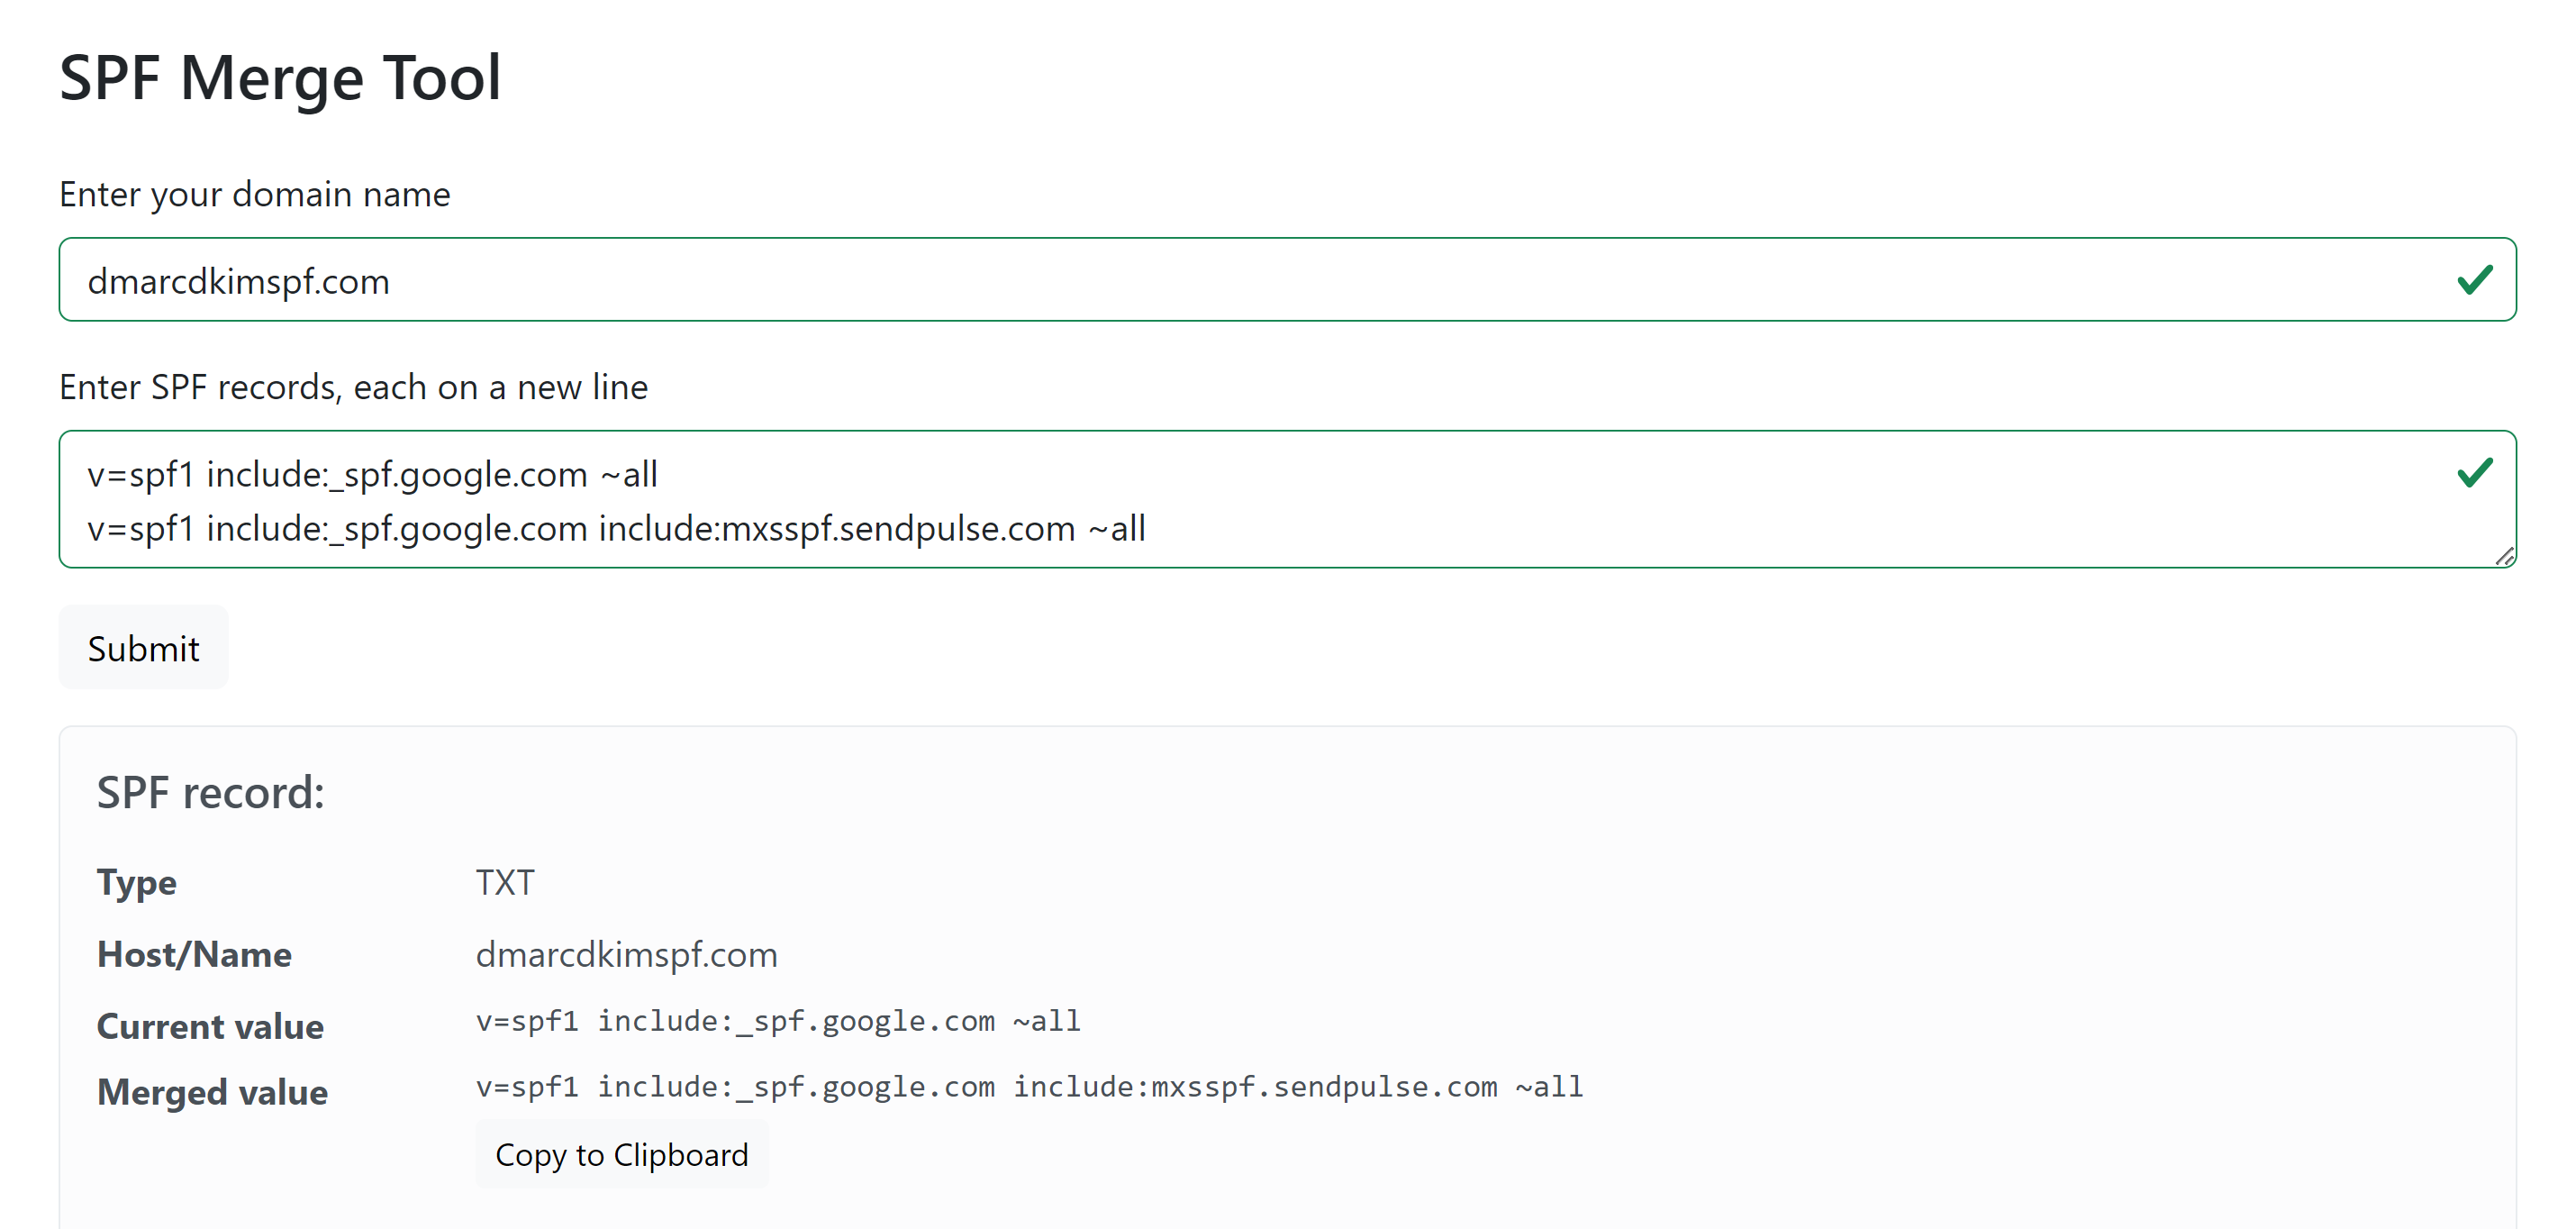
Having multiple SPF records in a DNS provider can cause conflicts, leading to one of them not working properly. To prevent such issues - use SPF Merge Tool to combine two or more records into a single SPF record.
Write each SPF record on a single line and click Submit.
-
Copy Merged SPF Value and add it to the DNS settings.
-
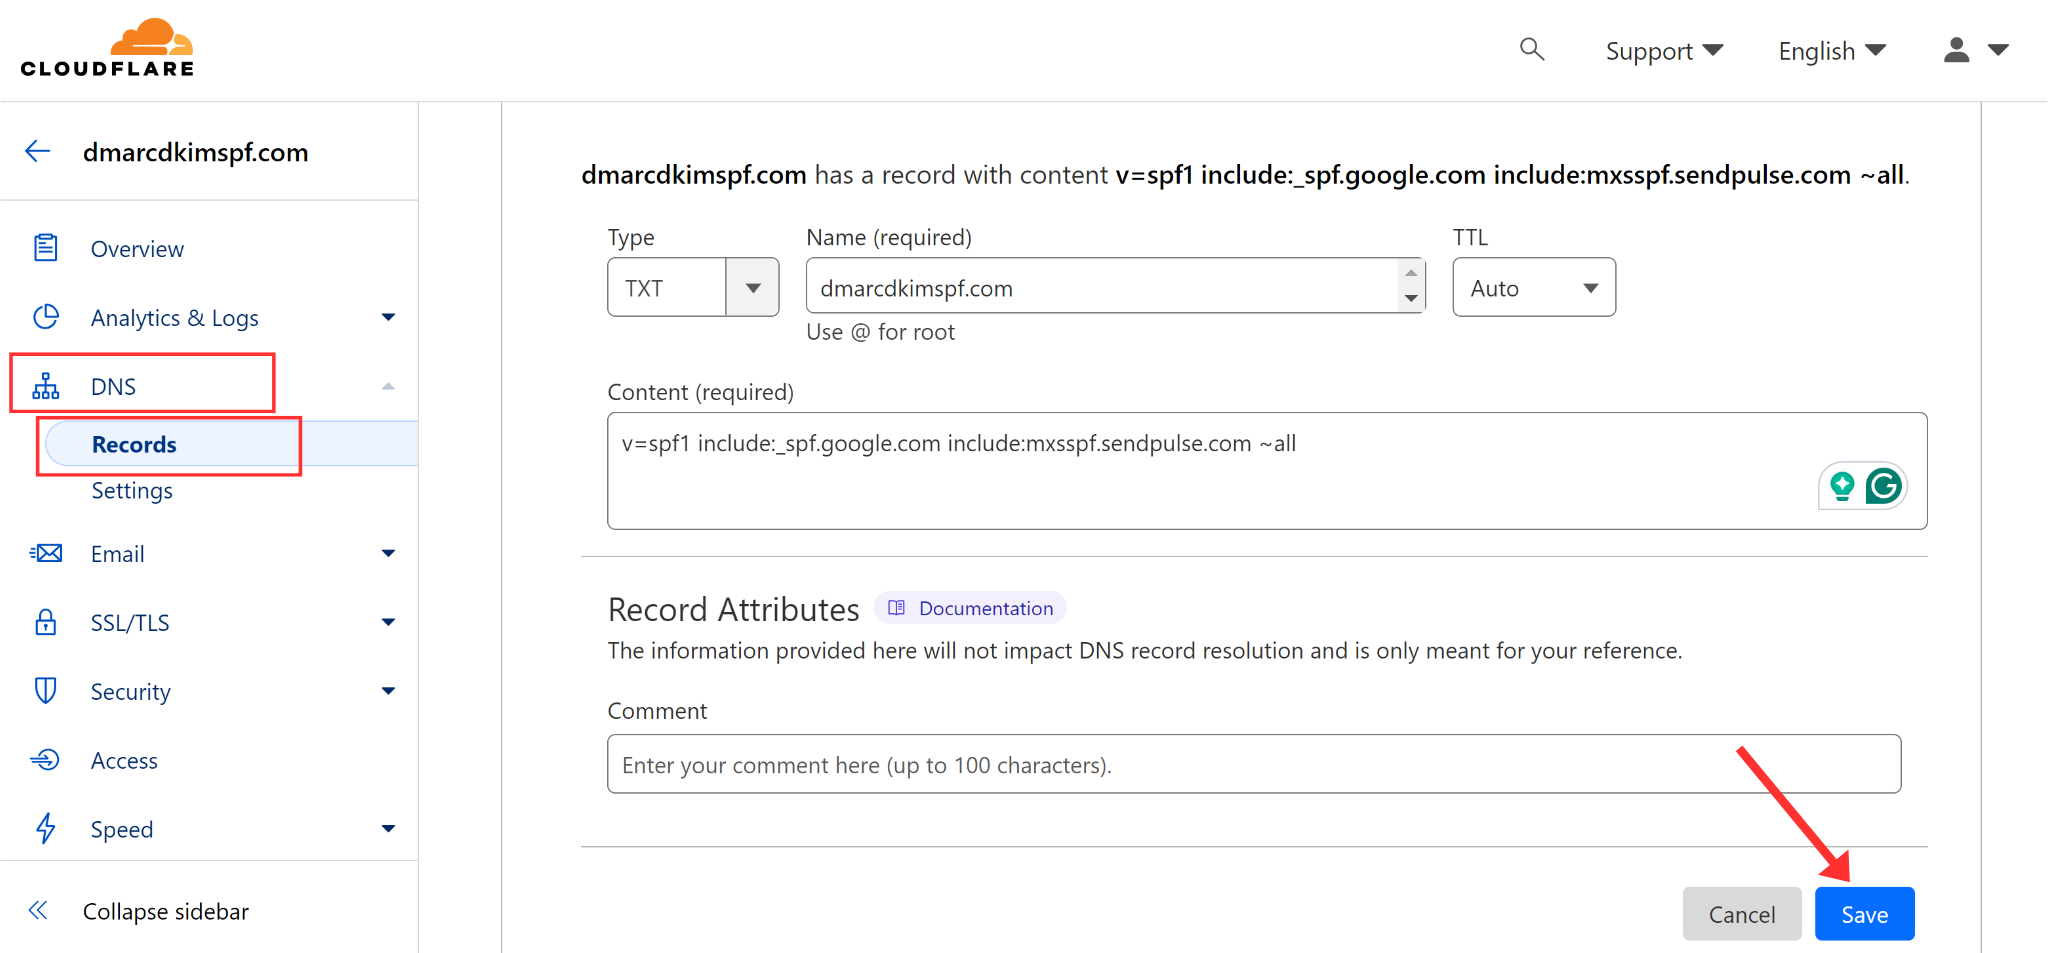
Select the record type TXT as mentioned, add the Hostname and record Value in designated fields, and click Save.
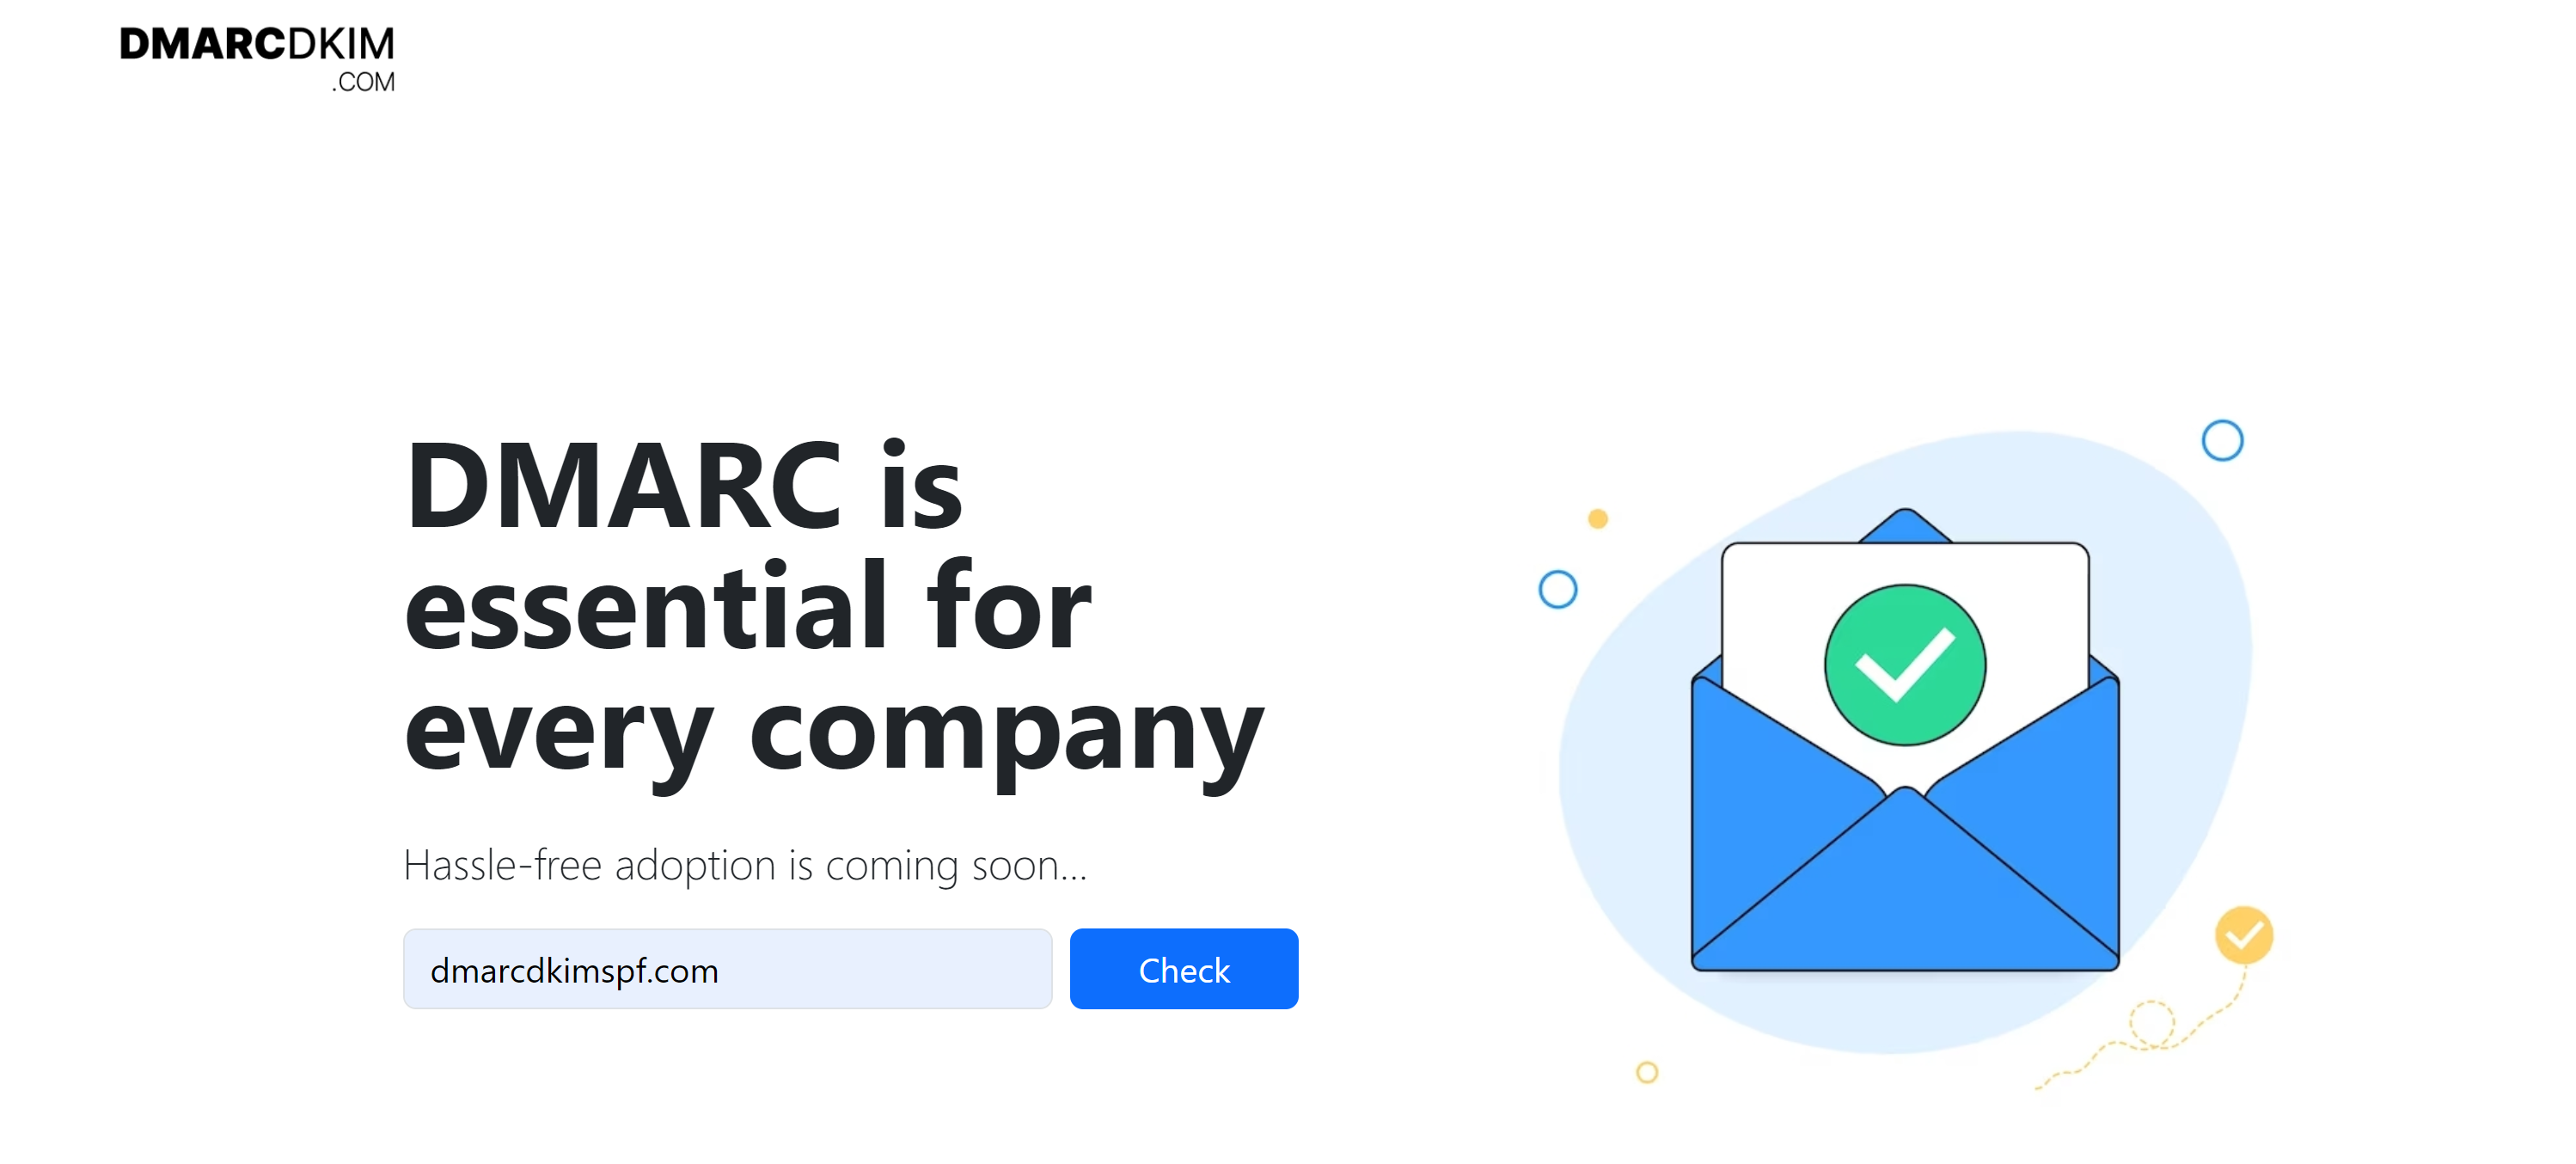
For the DMARC record, use DMARC Lookup Tool which analyzes data behind DMARC reports and acts on it to allow you deploy strict policy (p=reject). Only a strict DMARC policy provides better deliverability and protection from email spoofing.
-
Open the DMARC tool, write your domain name here, and click Check.
-
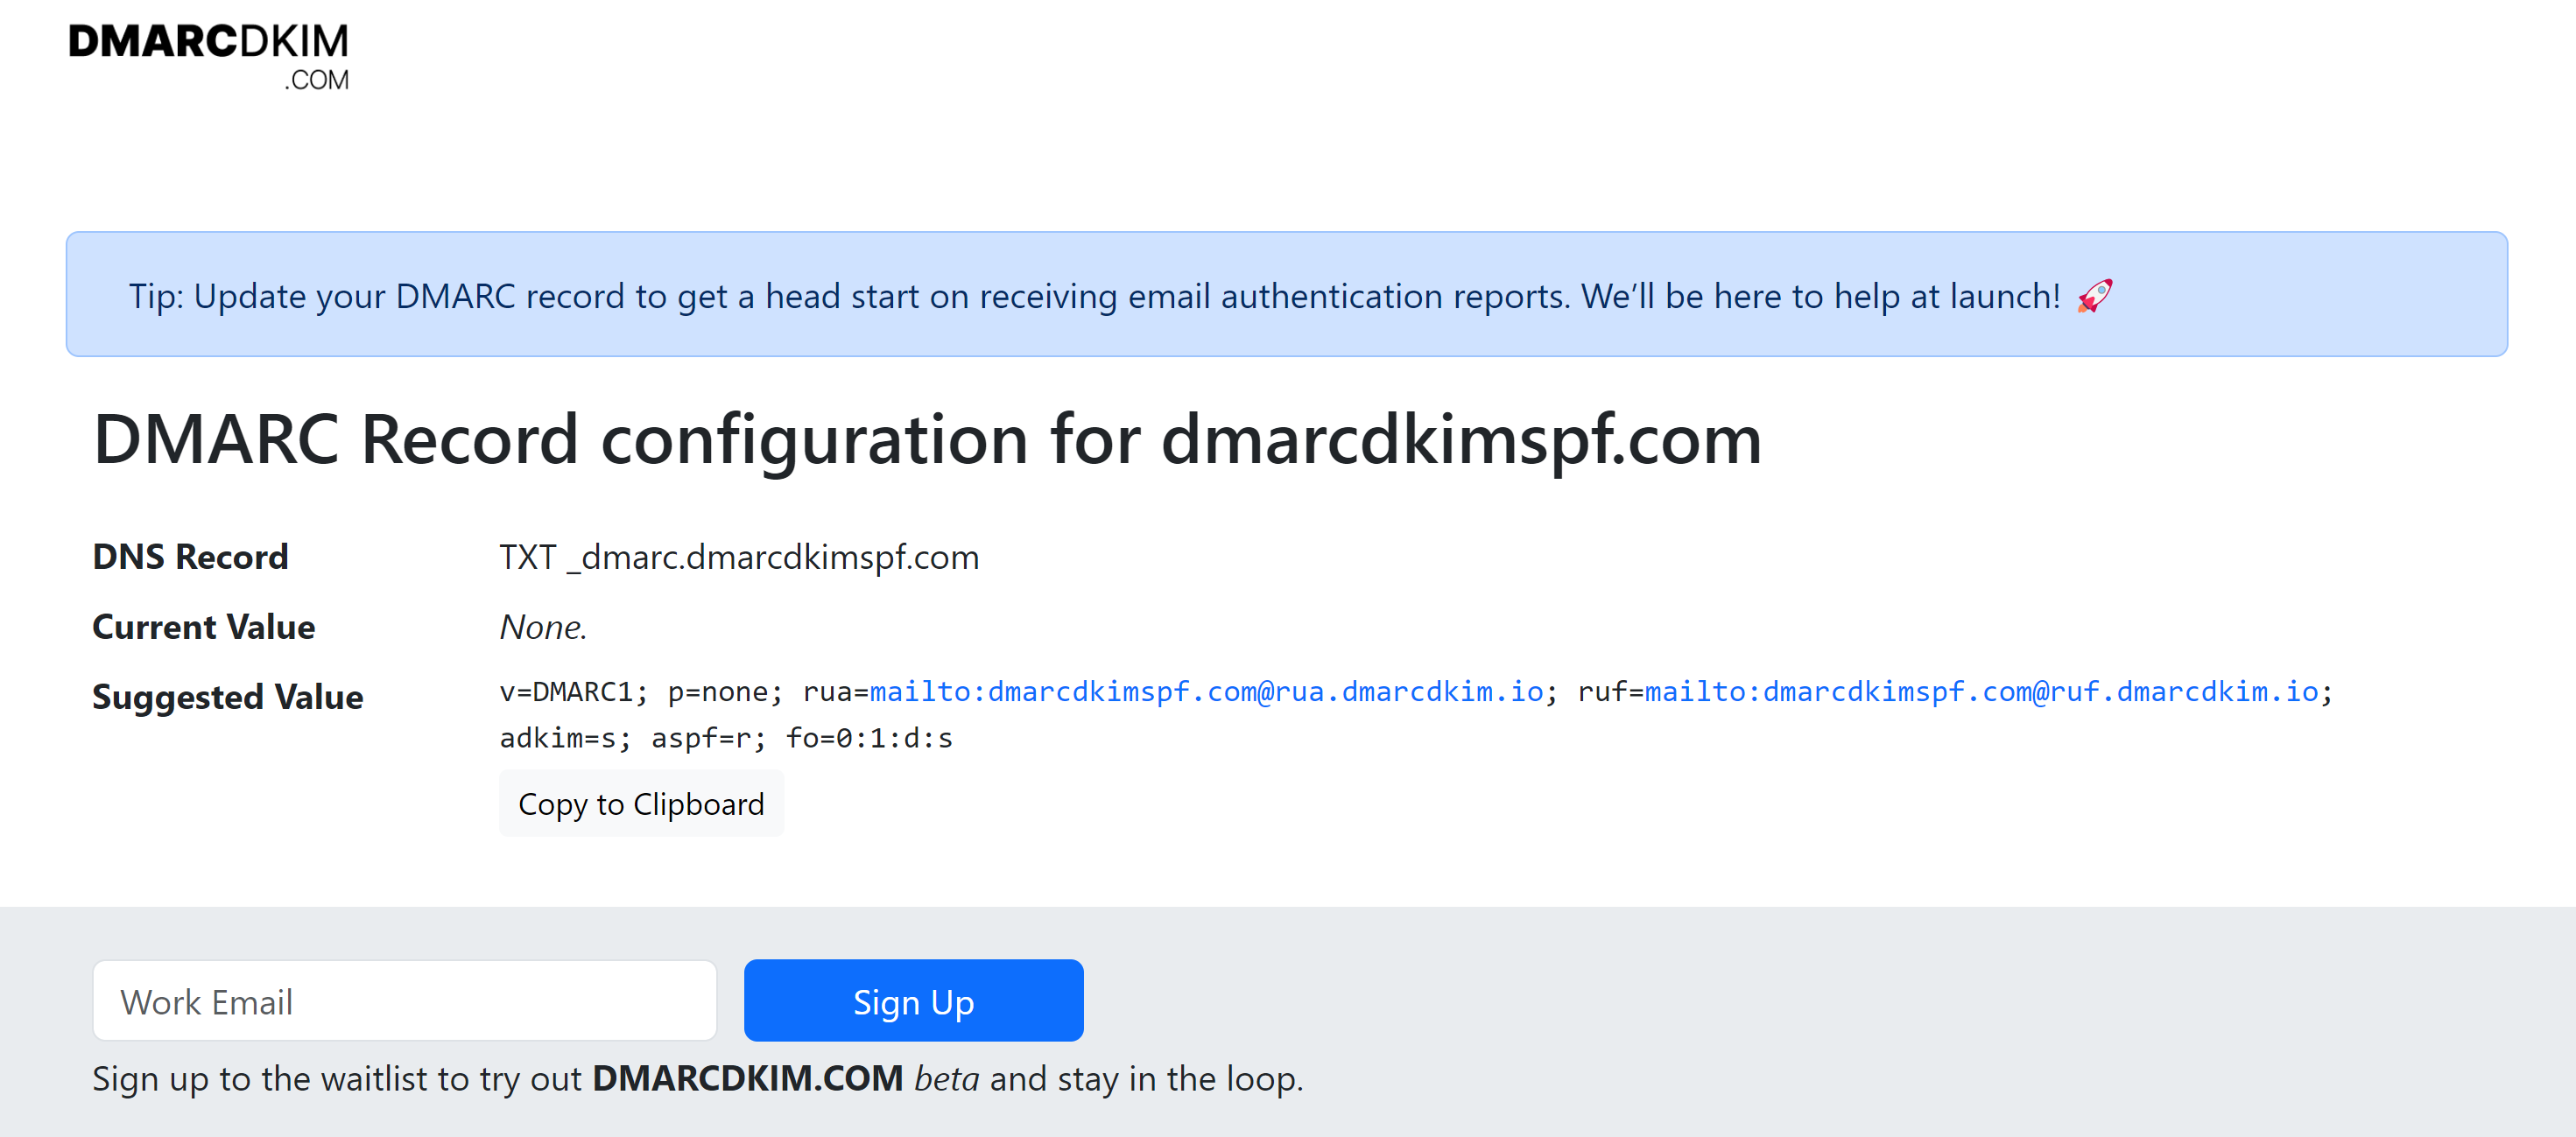
The tool gives you a suggested value. Copy the record name and value and paste them into the DNS provider.
Return to SendPulse and click Check DNS Records.
If the records were added successfully, you will see green checkmarks next to both the records and DKIM. SPF will be highlighted in green next to your domain in the Sending Domain tab.

If you don't see the authentication confirmation right away, don't worry; this is normal. SendPlus advises waiting up to 24 hours for authentication, as it may take some time for servers to update changes.
Check domain and follow the instructions to nail down your DMARC configuration.
No expert knowledge needed!


