How to Authenticate Emails with Sender DMARC, DKIM, SPF?
Check your domain for DMARC, DKIM, SPF and MX records. Get a free report.
- The impact of Business Email Compromise
- A quiet Google update just made SPF more forgiving
- Cyber Insurance and DMARC Enforcement
- Email impersonation scams explained
- TLS-RPT Record
- SMTP Smuggling
- 🇩🇪 Welche Hosting Anbieter unterstützen DMARC
- Manual DMARC Monitoring vs Automated Monitoring
- Reverse Engineering Phishing
- DMARC Enforcement in 2026
- DMARC for non sending domains
Sender DMARC, DKIM, SPF - Configure DNS records
Sender makes it easy for business to manage their emails. Not only it provides tools for email campaigns but also ensures your emails are landing in your customers' inboxes. You can get your domain authenticated with Sender, by adding the SPF, DKIM, DMARC records in your DNS provider.
Domain authentication is a crucial step before launching email campaigns as it gives your emails a unique signature that tells email service providers you are a legit source. If you are launching your email campaign, get your domain authenticated first, by following the configuration steps below:
-
On the left side panel of Sender dashboard, click on Settings > Domains > Add your first domain.
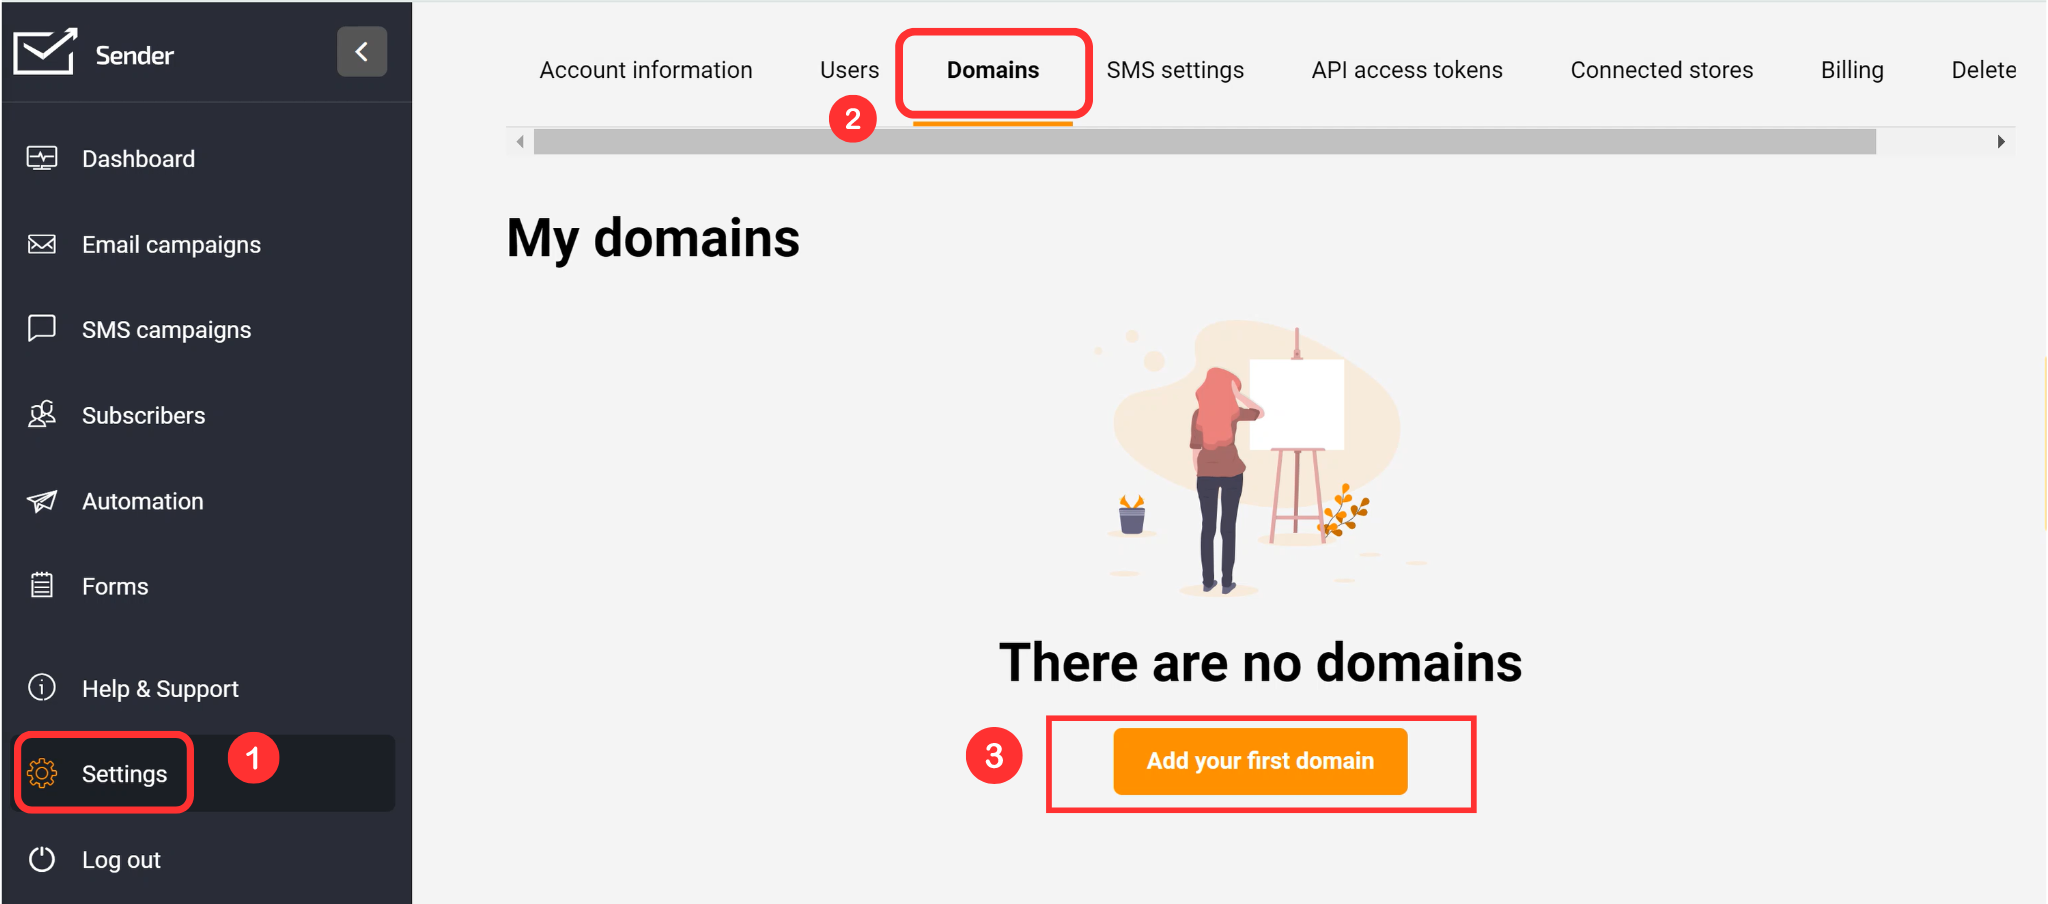
Write your domain name in the field and click Next.
-
Then add your email attached to that domain and click Add.

-
Now you'll receive a verification email, click on the confirmation link to verify email.
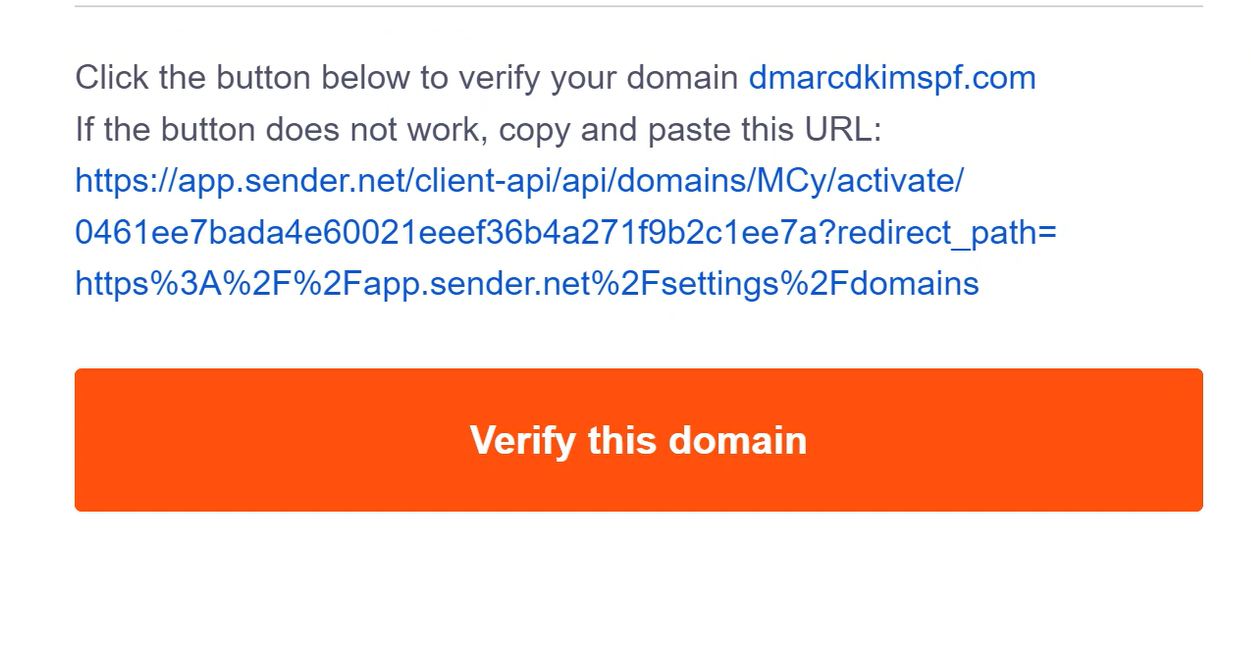
-
This link will take you back to Sender dashboard where you'll see two options. First one adds DNS records to your DNS provider automatically and the second one require you to manually add DNS records. You can opt for any of these.

For Automatic domain authentication, click on "Connect domain to DNS provider."
-
It will take you to your DNS provider dashboard with DNS records already added. You have to click Authorize to save these records.

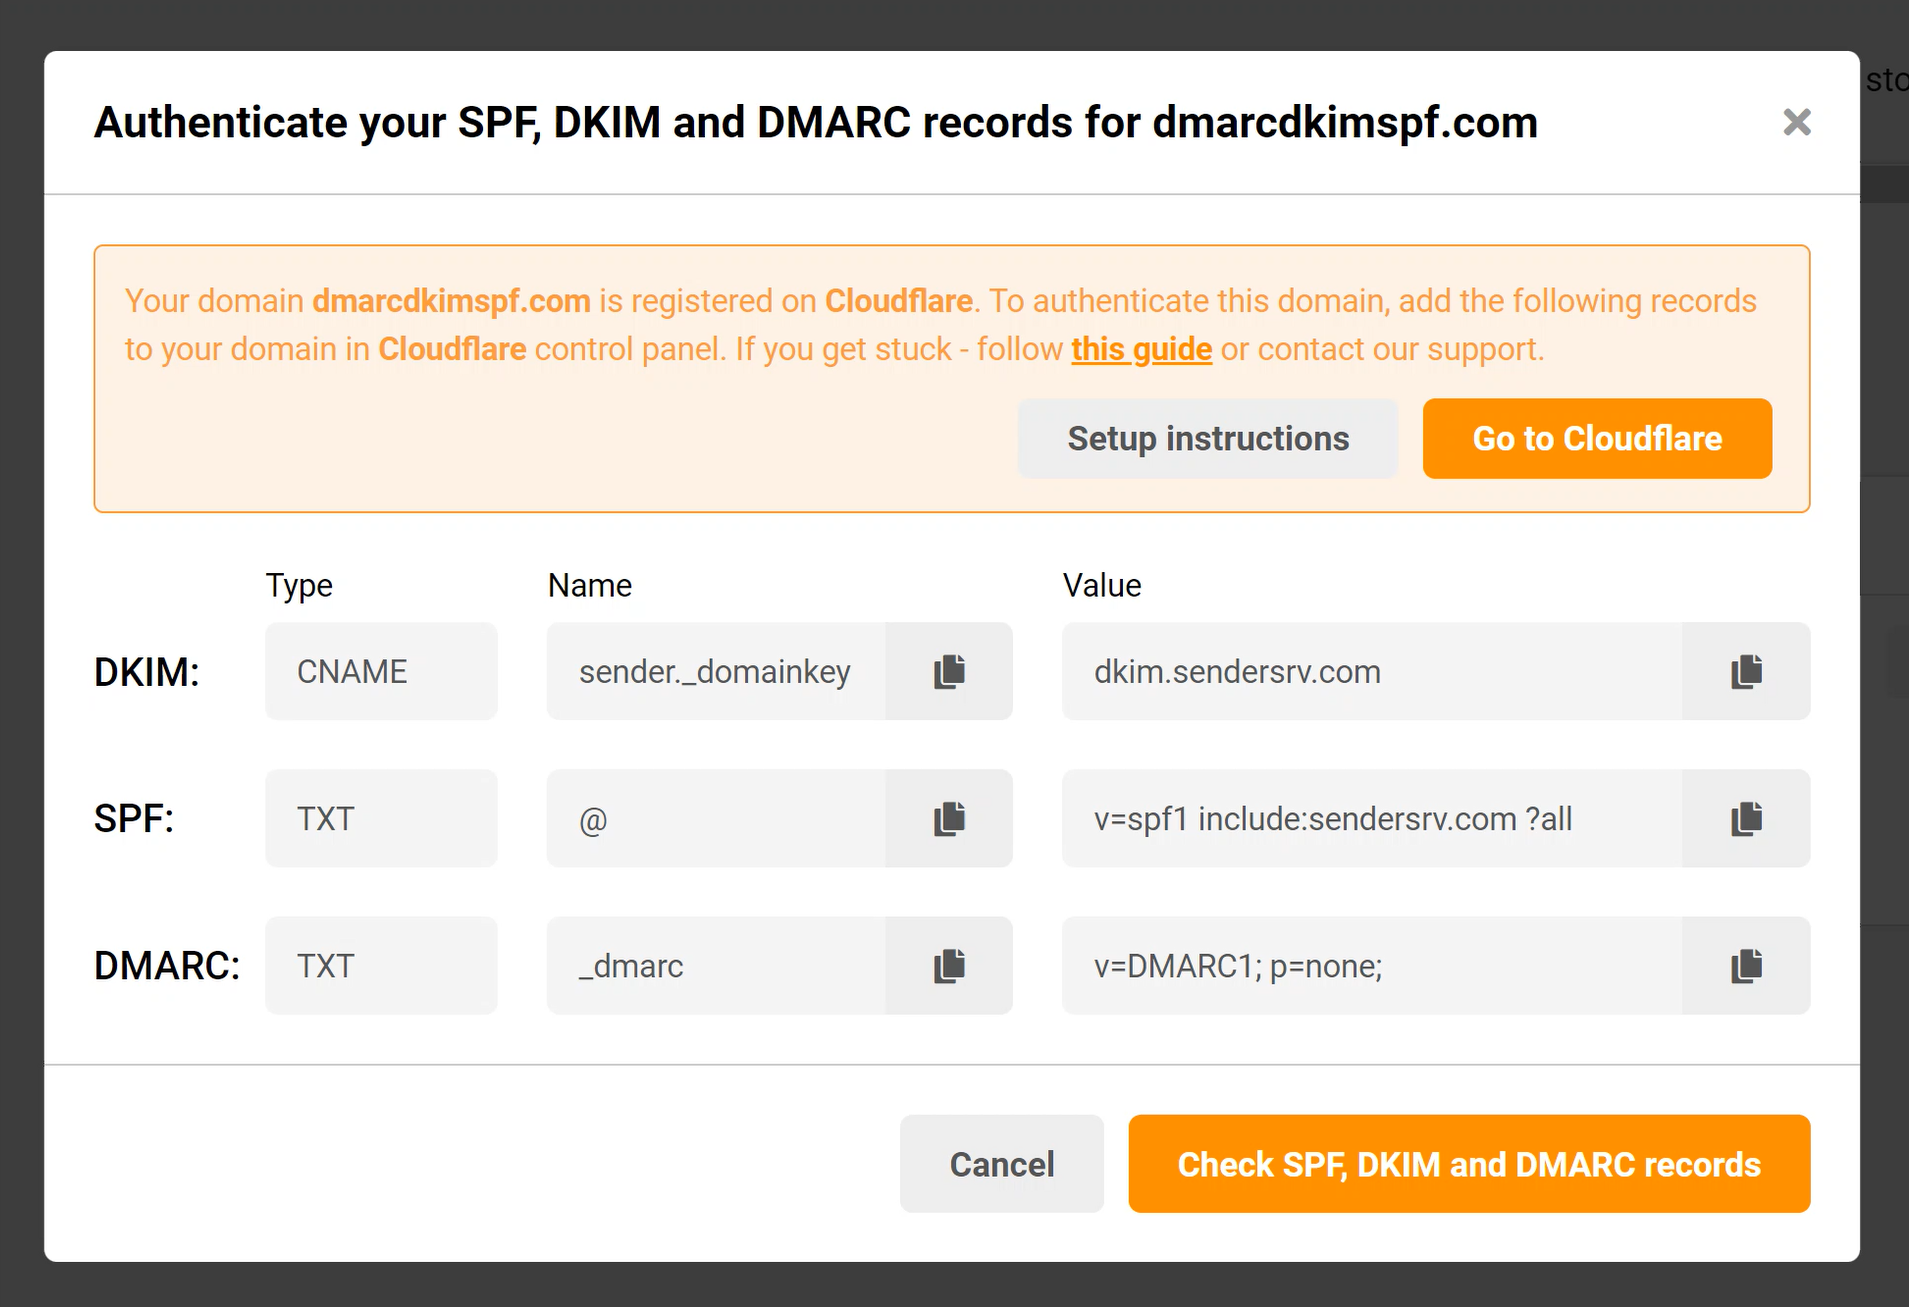
For Manual domain authentication, click on "Manual setup instructions" and Sender will give a list of DKIM, SPF, DMARC records. Copy these records one by one and add in your DNS provider. We are using Cloudflare for the instance but you can add these records to any DNS provider you use.
-
On Cloudflare home tab, click on your Website > DNS > Records > Add record.
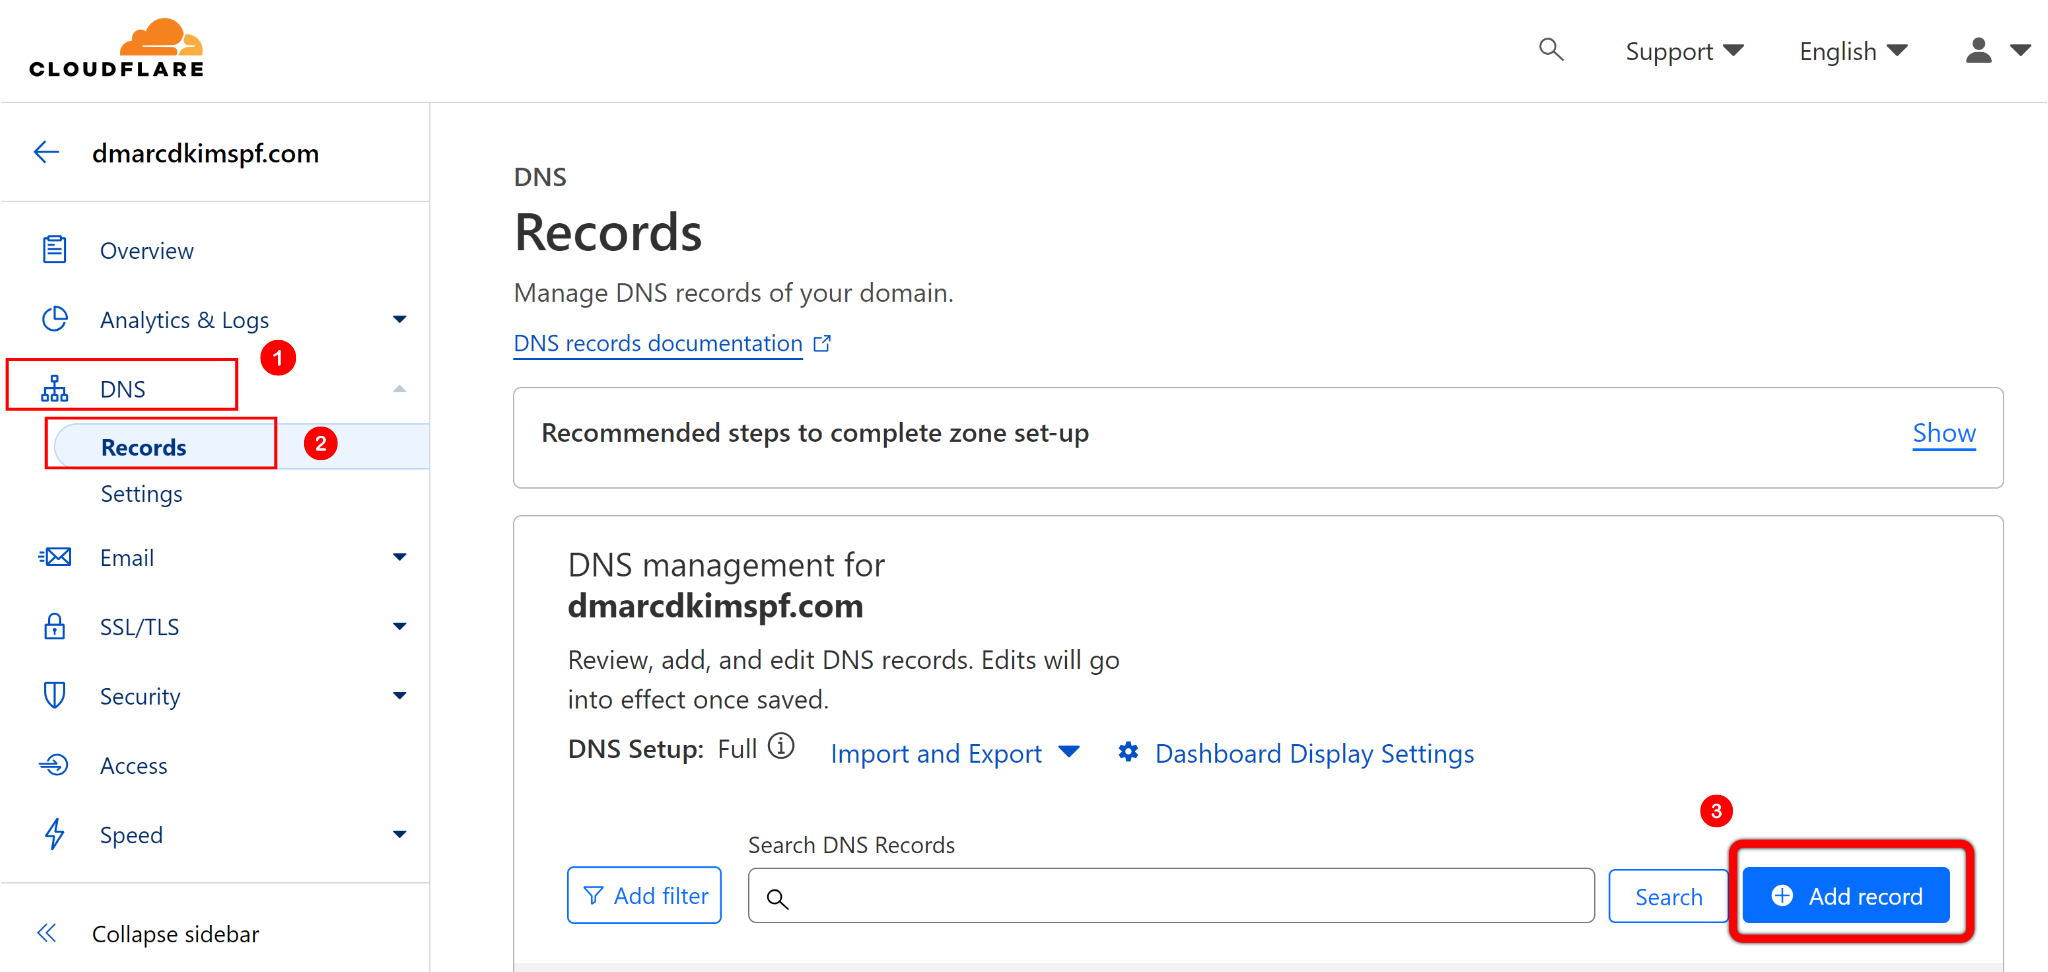
-
Paste the records in designated fields and click Save. NOTE: Always turn off proxy (orange taggle) for CNAME record. If proxy is enabled, the traffic will go to Cloudflare server and not to the Sender.

However, Sender's DMARC value with
p=noneis just a placeholder. Use DMARC Check Tool which analyzes data behind DMARC reports and allow you to act on it to deploy strict policy. Only a strict DMARC policy provides better deliverability and protection from email spoofing.-
Open the DMARC tool, write your domain name here, and click Check.
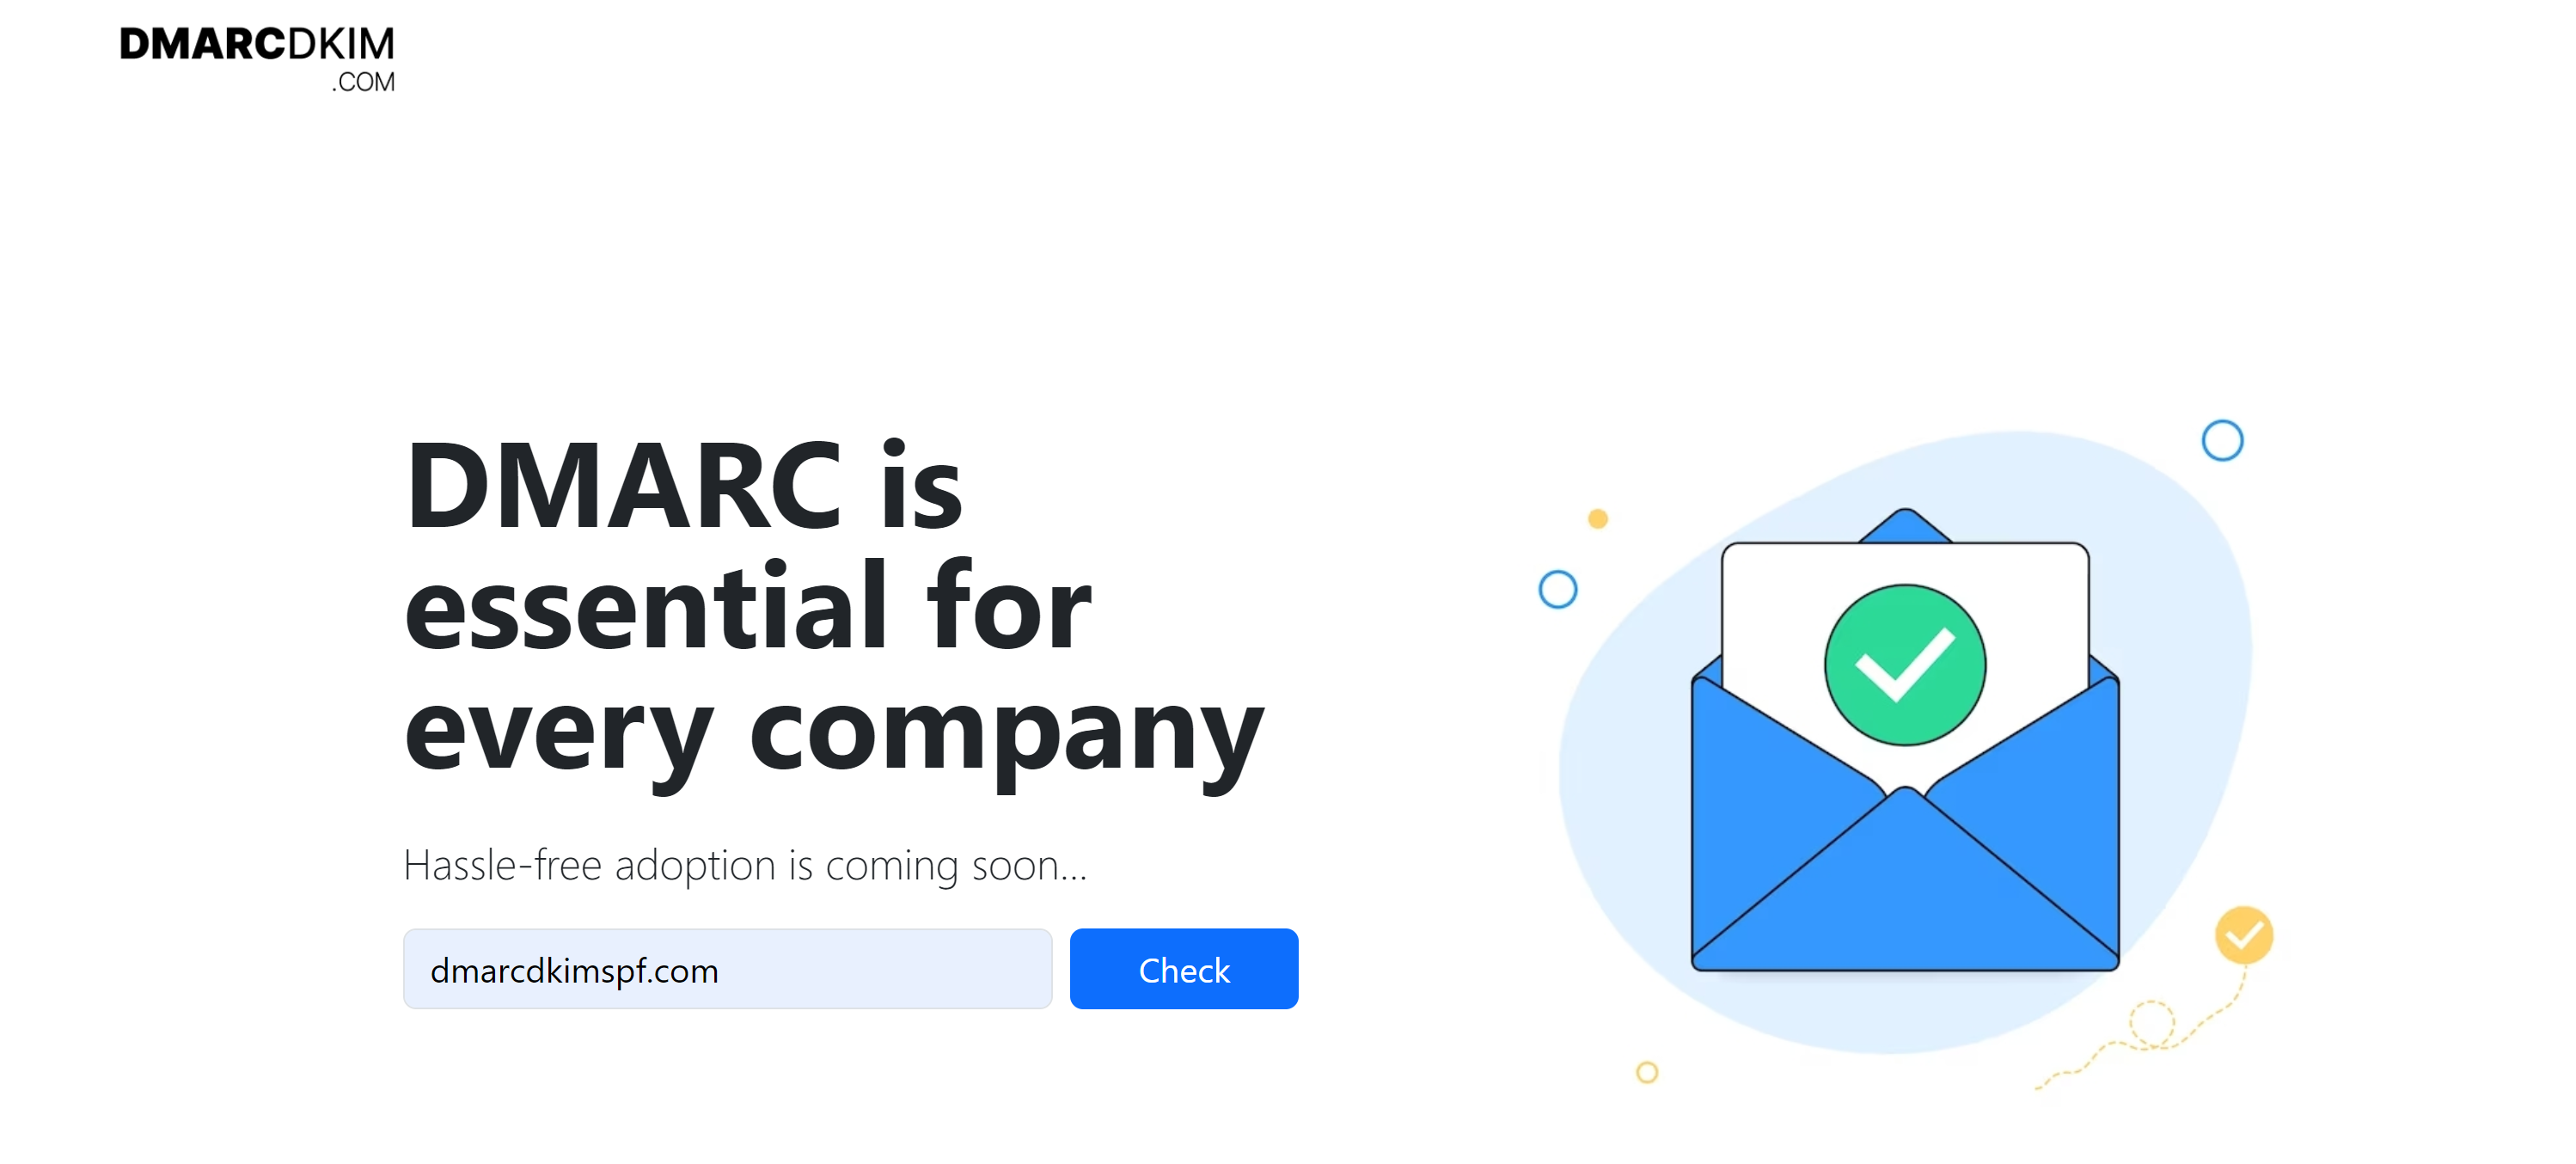
Replace
_dmarcrecord value with suggested DMARC value in your DNS settings.-
After adding all records to Cloudflare, go back to Sender and click on "Check SPF, DKIM, and DMARC records."
-
If domain authentication is successful, you'll see green check marks under DKIM, SPF, and DMARC.

Check domain and follow the instructions to nail down your DMARC configuration.
No expert knowledge needed!


