A Step-by-Step Guide to Ortto DMARC, DKIM, SPF Domain Authentication
Check your domain for DMARC, DKIM, SPF and MX records. Get a free report.
Ortto DMARC, DKIM, SPF configuration (formerly AutoPilot)
When talking about email campaign success, domain authentication is the number one step that determines how many emails land in your customers' inboxes. Your business emails need to be authenticated with a trustworthy email delivery platform.
Ortto is one such platform that generates DNS records to add a unique signature to your emails and specify which servers are allowed to send emails on your behalf.
DNS configuration may sound complex but DMARCDKIM is here to break it down into digestible and easy-to-follow steps.
-
On your Ortto account, open Settings and click the Email option.

-
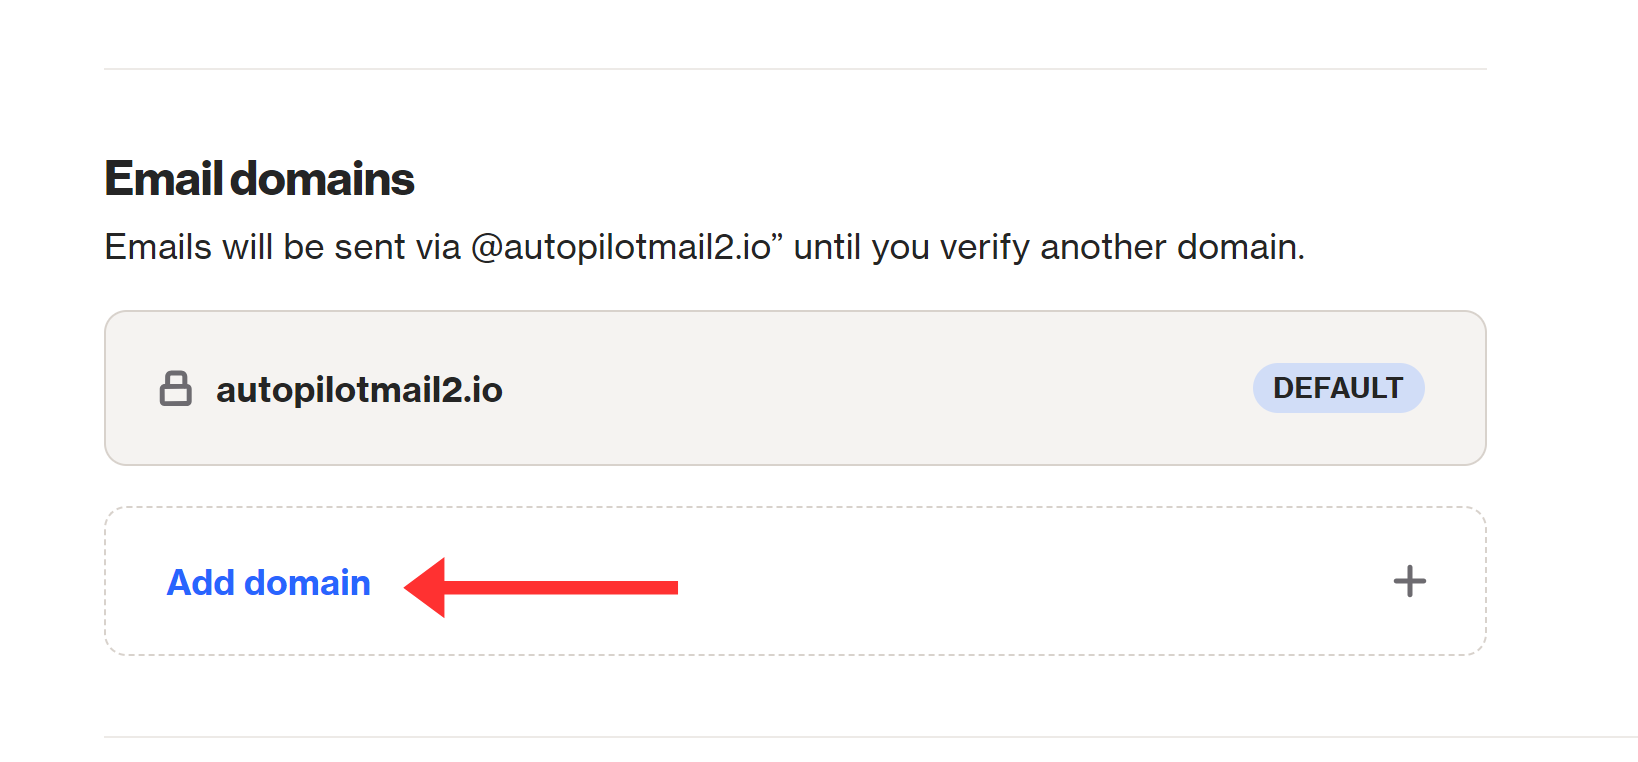
Again select Email and scroll down to Add Domain.
-
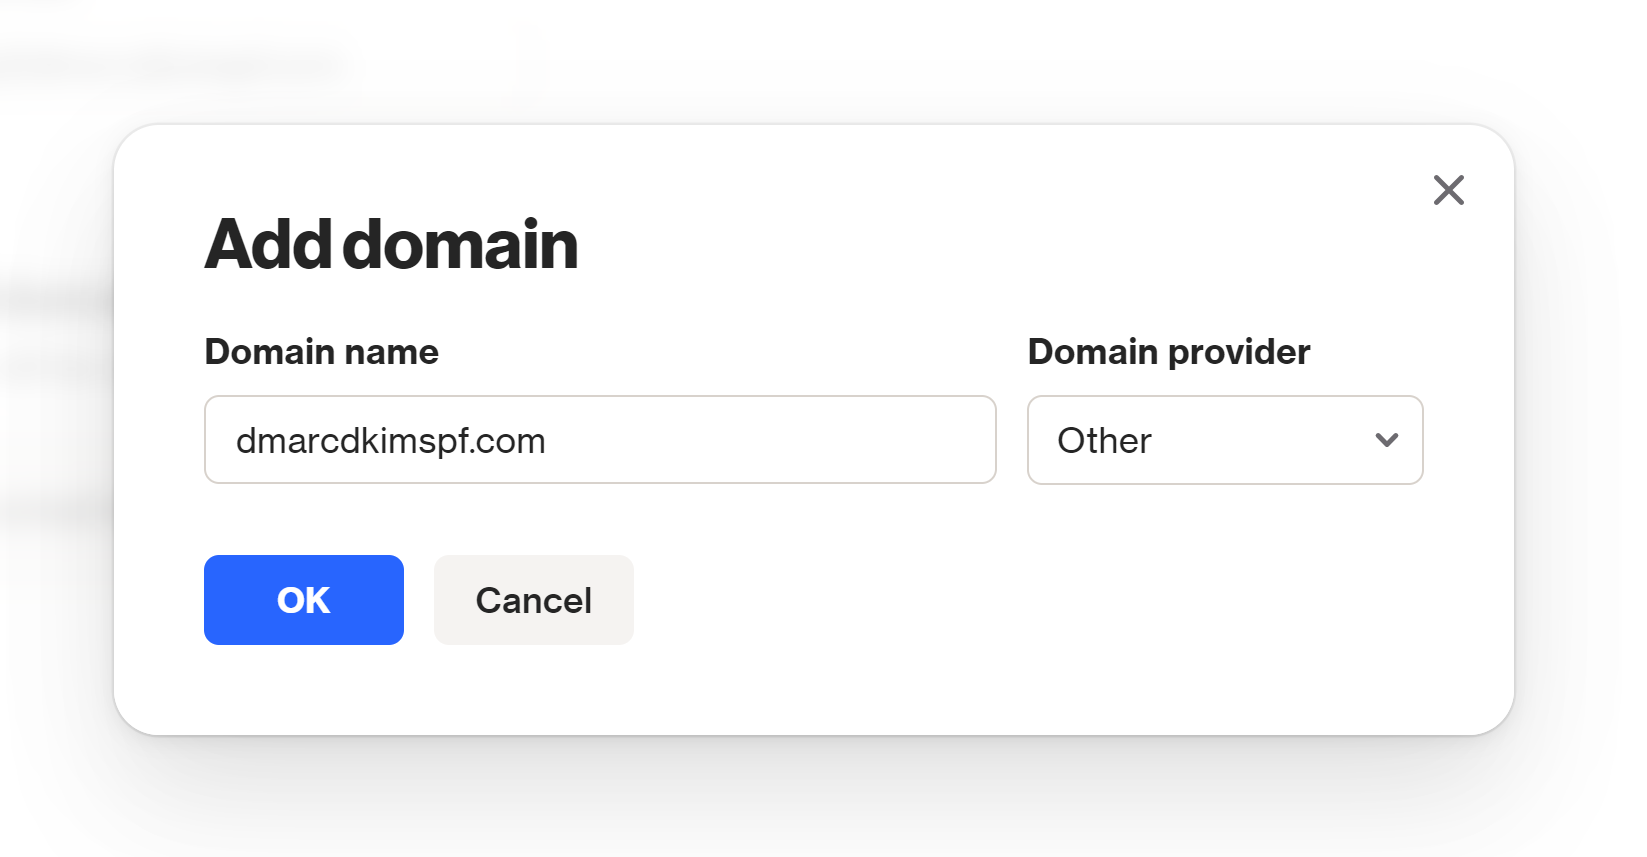
Enter your domain here and select your DNS provider. If your DNS provider is not on the list then choose Other.
-
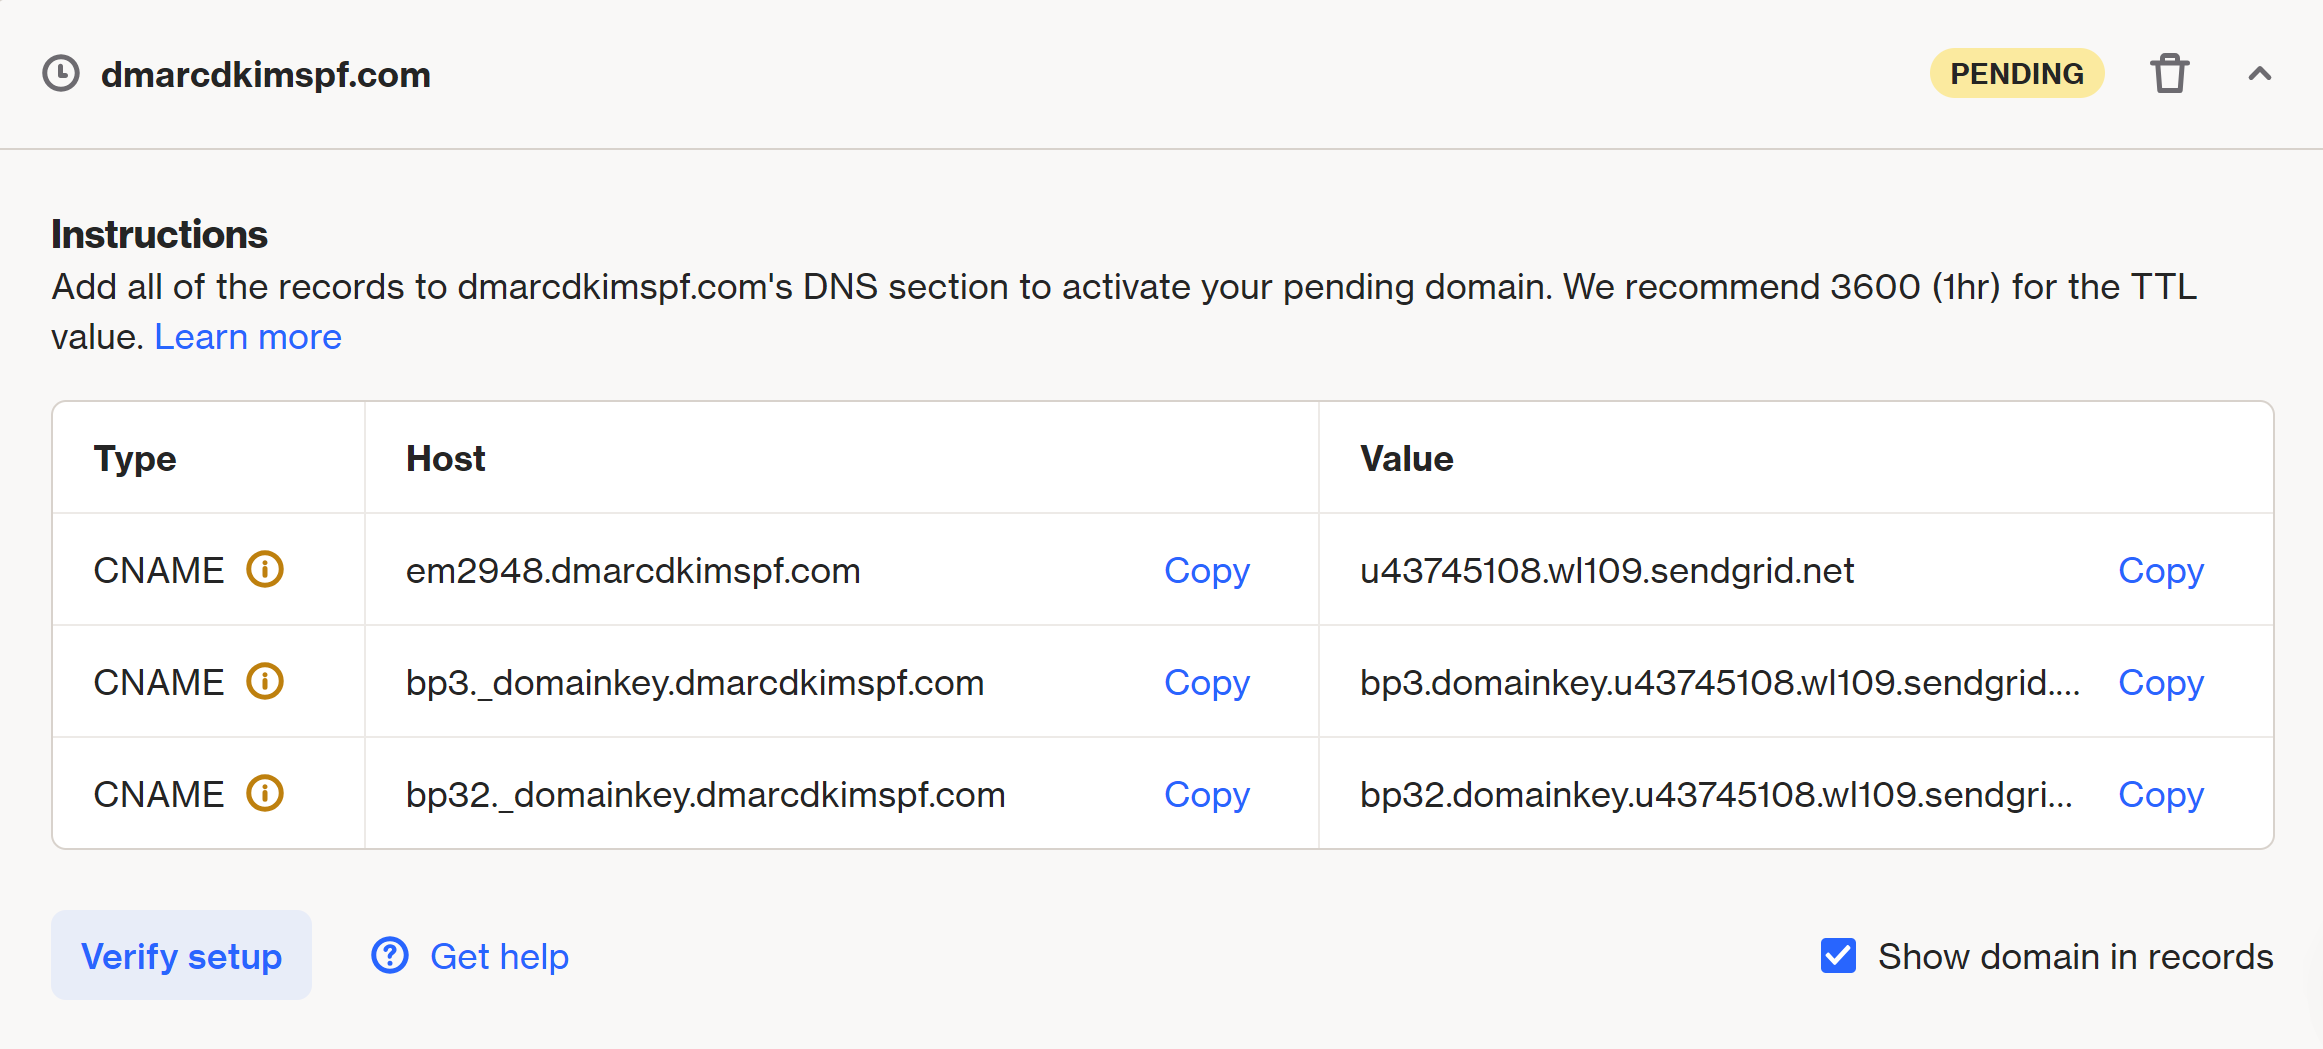
Now you have Ortto DNS records displayed on your screen. Copy each record and add it to your DNS provider. For this instance, we're using Cloudflare.
-
Open the Cloudflare Home tab and go to your Website.
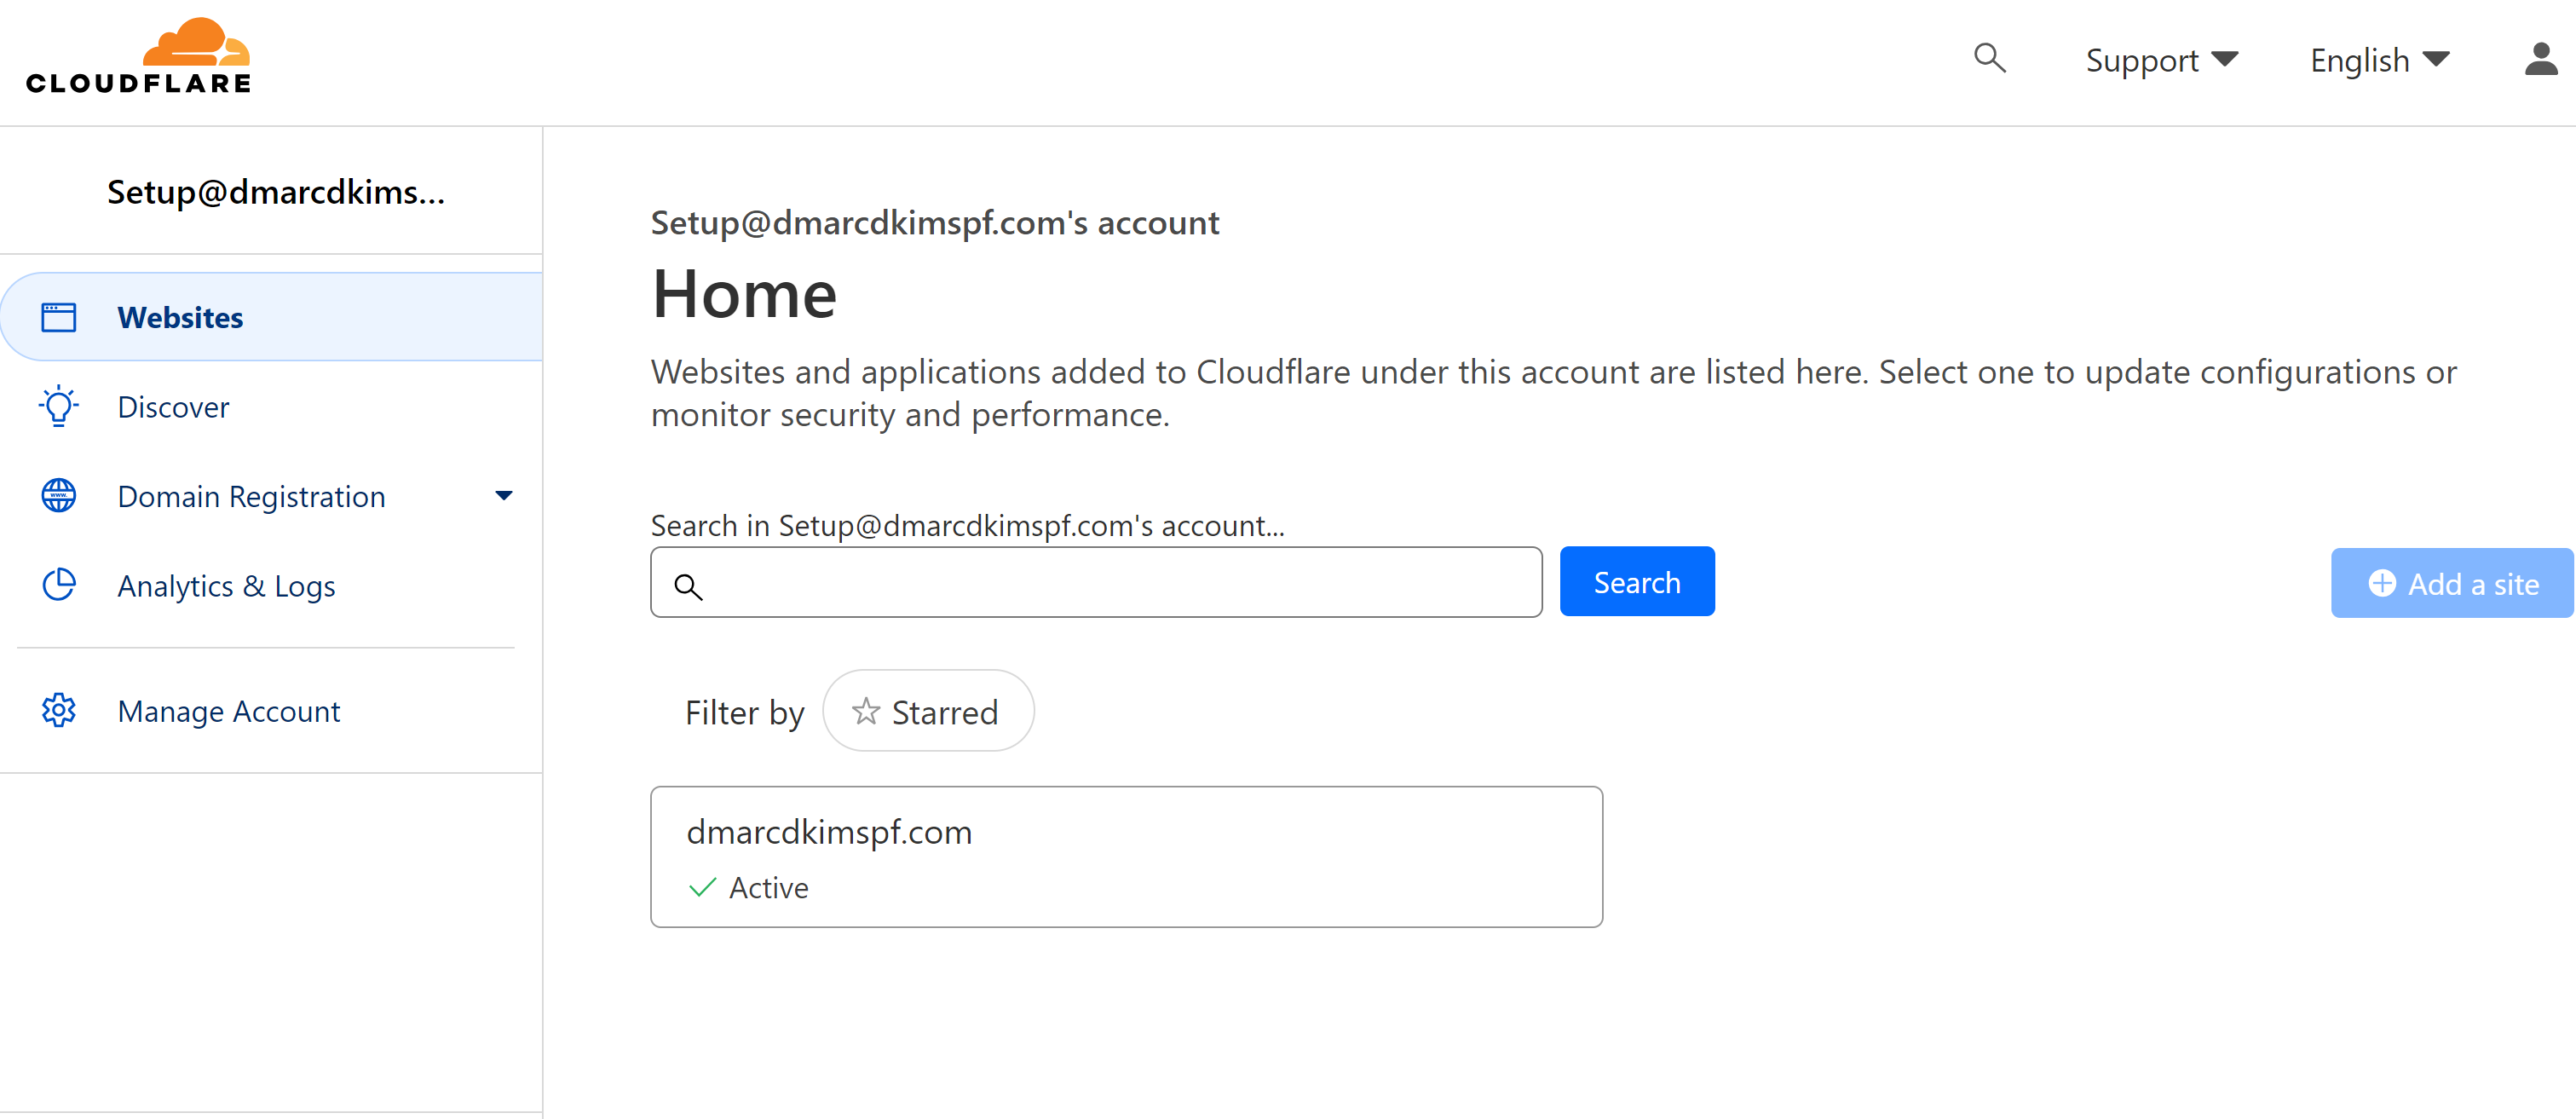
Click DNS and go to Records. Here click Add Record.
-
Select record type CNAME as mentioned, add the record Name and Value in designated fields, and click Save.
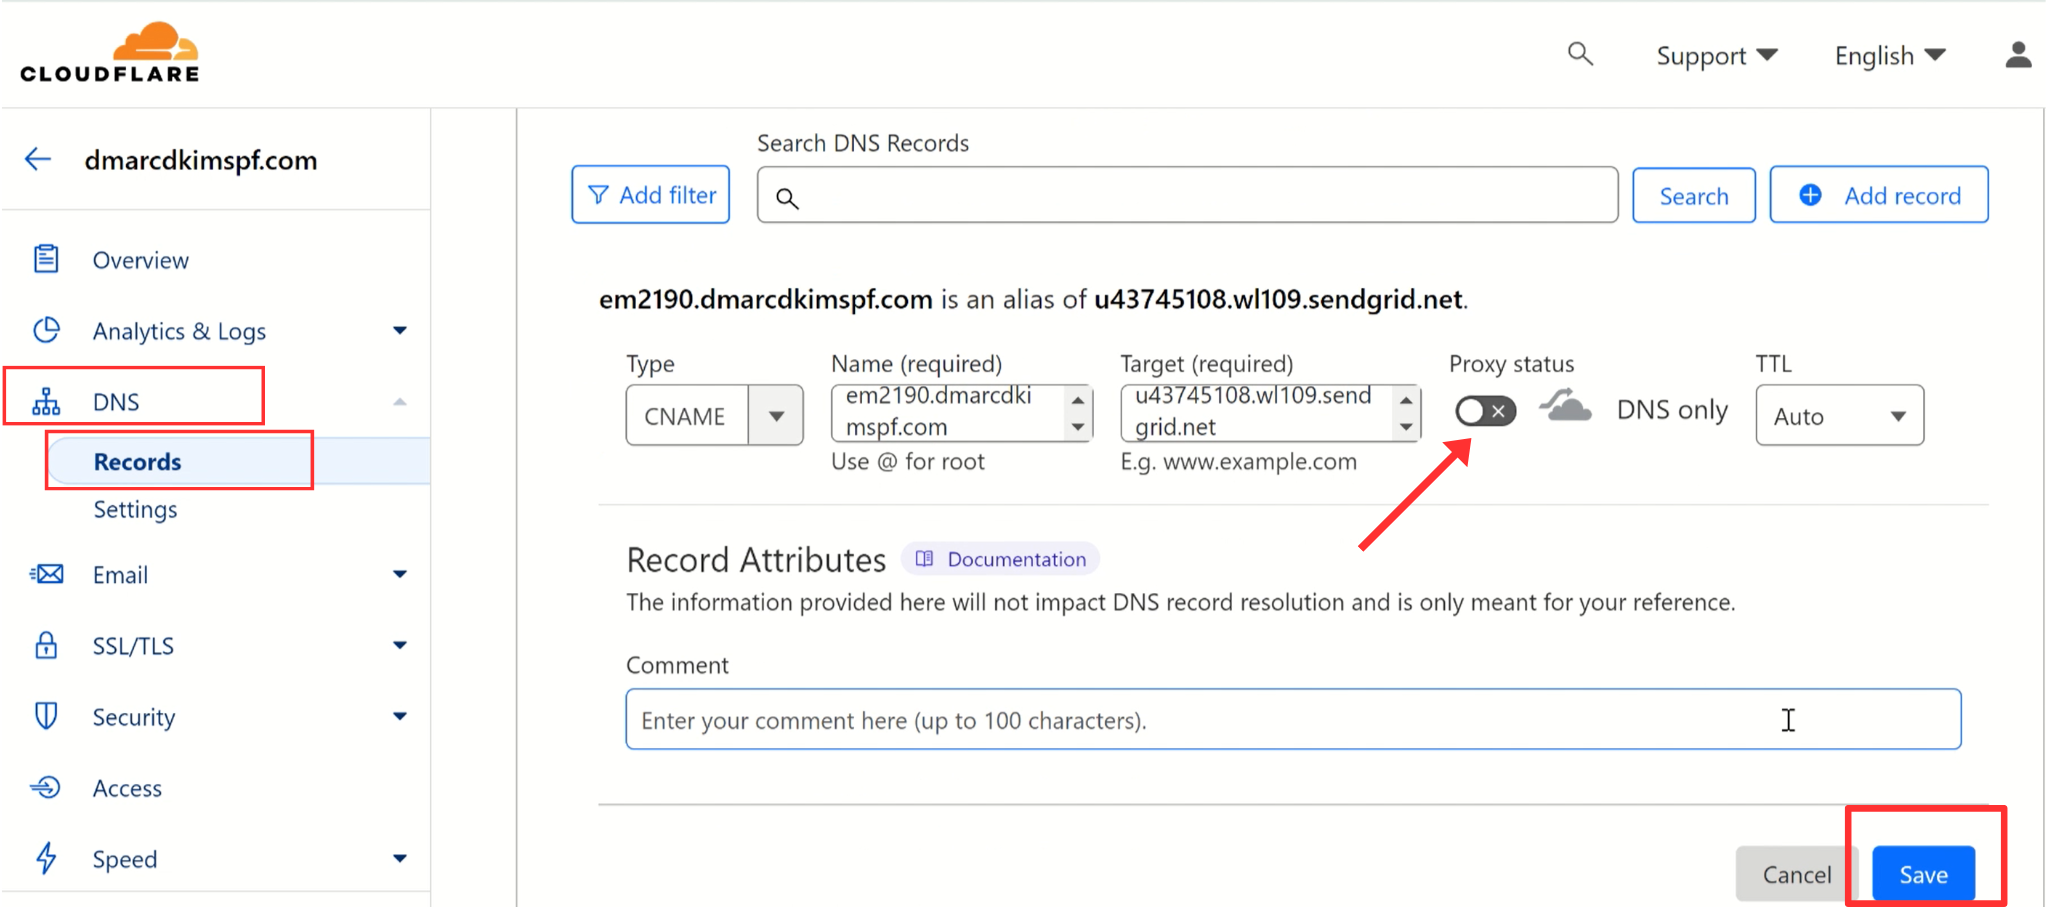
NOTE: Turn off proxy (orange toggle) for CNAME records. When enabled, the verification process will most likely fail because the actual server is hidden behind Cloudflare's network.
For the Ortto DMARC record, use DMARC Checker which analyzes data behind DMARC reports and acts on them to allow you deploy strict policy (p=reject). Only a strict DMARC policy provides better deliverability and protection from email spoofing.
-
Open the DMARC tool, write your domain name here, and click Check.
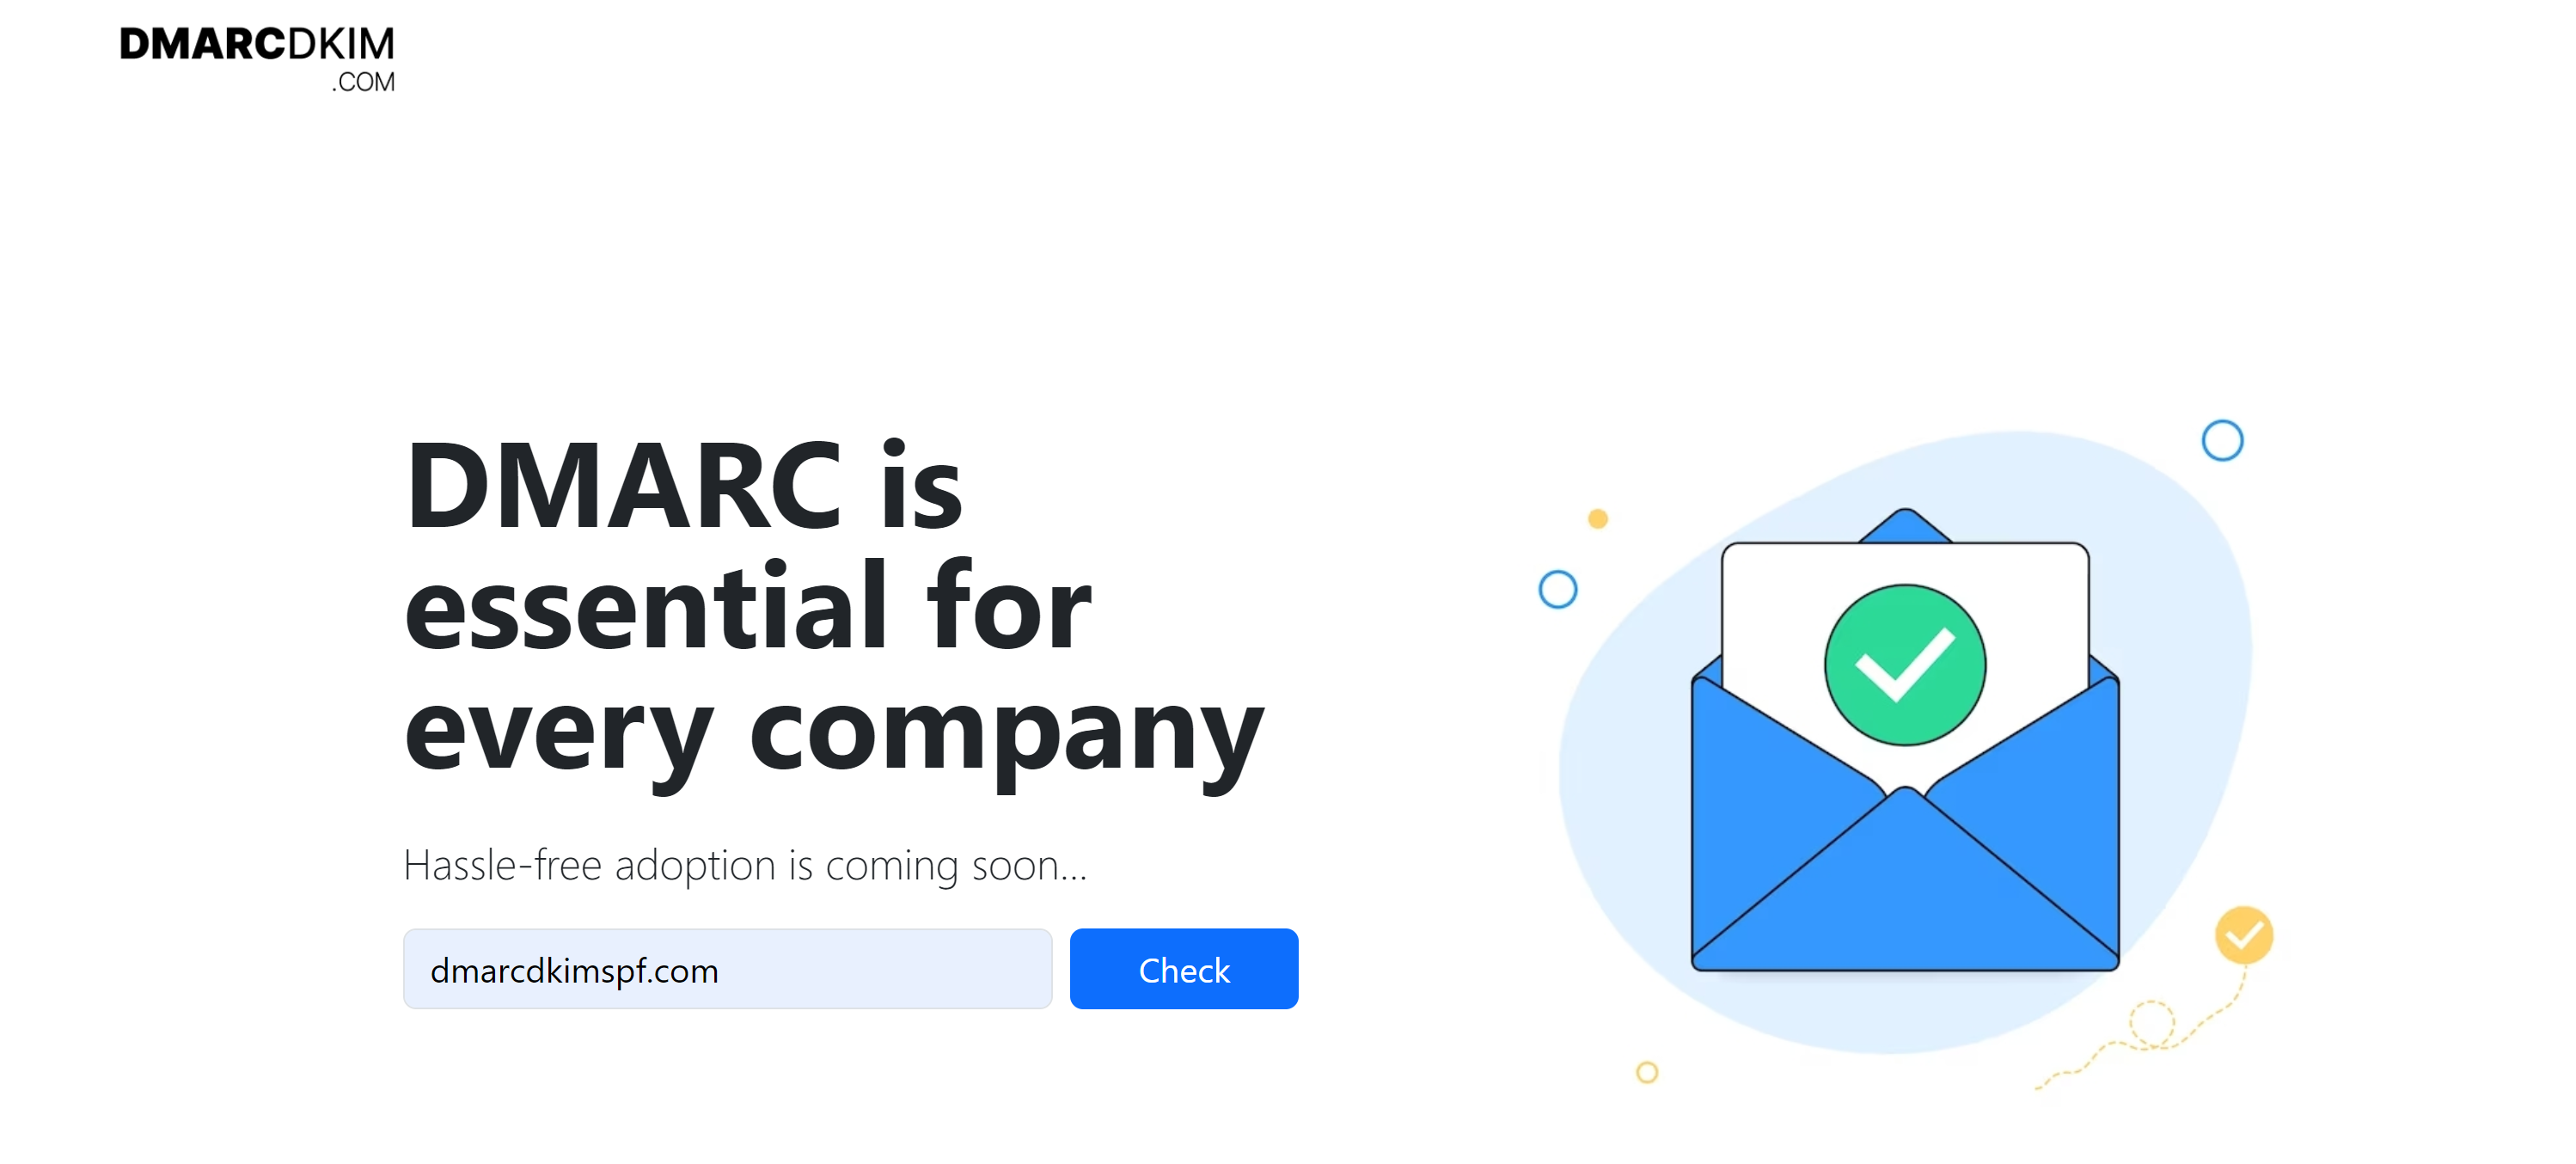
The tool gives you a suggested DMARC value. Copy the record name and value and paste them into the DNS provider.
Return to the Ortto tab and click Verify Setup.
After successful domain authentication, you'll see green checkmarks with CNAME DNS records and a tick with your domain.
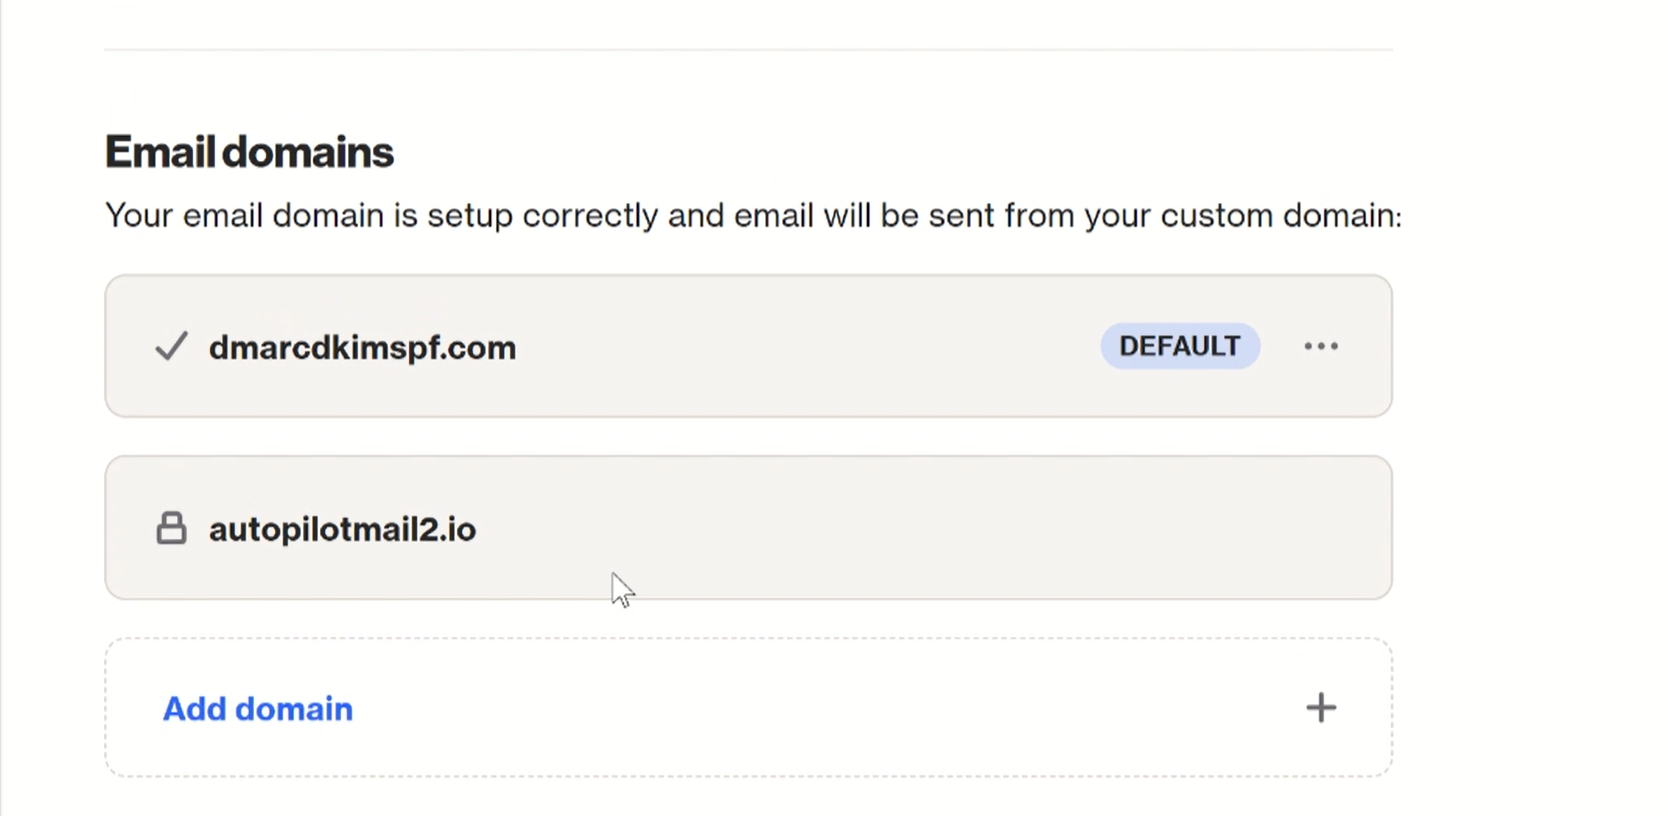
However, if you don't see authentication success, wait for 24 hours so that servers can update DNS records.
Check domain and follow the instructions to nail down your DMARC configuration.
No expert knowledge needed!


