Setup Microsoft 365 DMARC, DKIM, SPF for Domain Authentication
Check your domain for DMARC, DKIM, SPF and MX records. Get a free report.
How to Setup Microsoft 365 DMARC, DKIM and SPF DNS Records?
Email authentication is a set of standards that ensure your emails come from a legitimate source and are safe to open by the recipient. This method prevents your domain from being spoofed and scammed.
Microsoft 365 blocks emails coming from forged senders with the help of email domain validation. Setting up Microsoft DMARC, DKIM, SPF, and other authentication standards can help secure domains and prevent scams.
To fix the error "550 5.7.515 Access denied, sending domain *.com does not meet the required authentication level" you need to configure DMARC, DKIM and SPF for all your email sources. Add your domain(s) to DMARC Dashboard to start analyzing your DMARC reports and improve email delivery.
In this article, we will guide how to setup the Microsoft 365 DNS records for domain authentication and email validation.
ℹ️ For existing Microsoft 365 users scroll to Setup Microsoft 365 DKIM Record in Defender
Add Domain in Microsoft 365
-
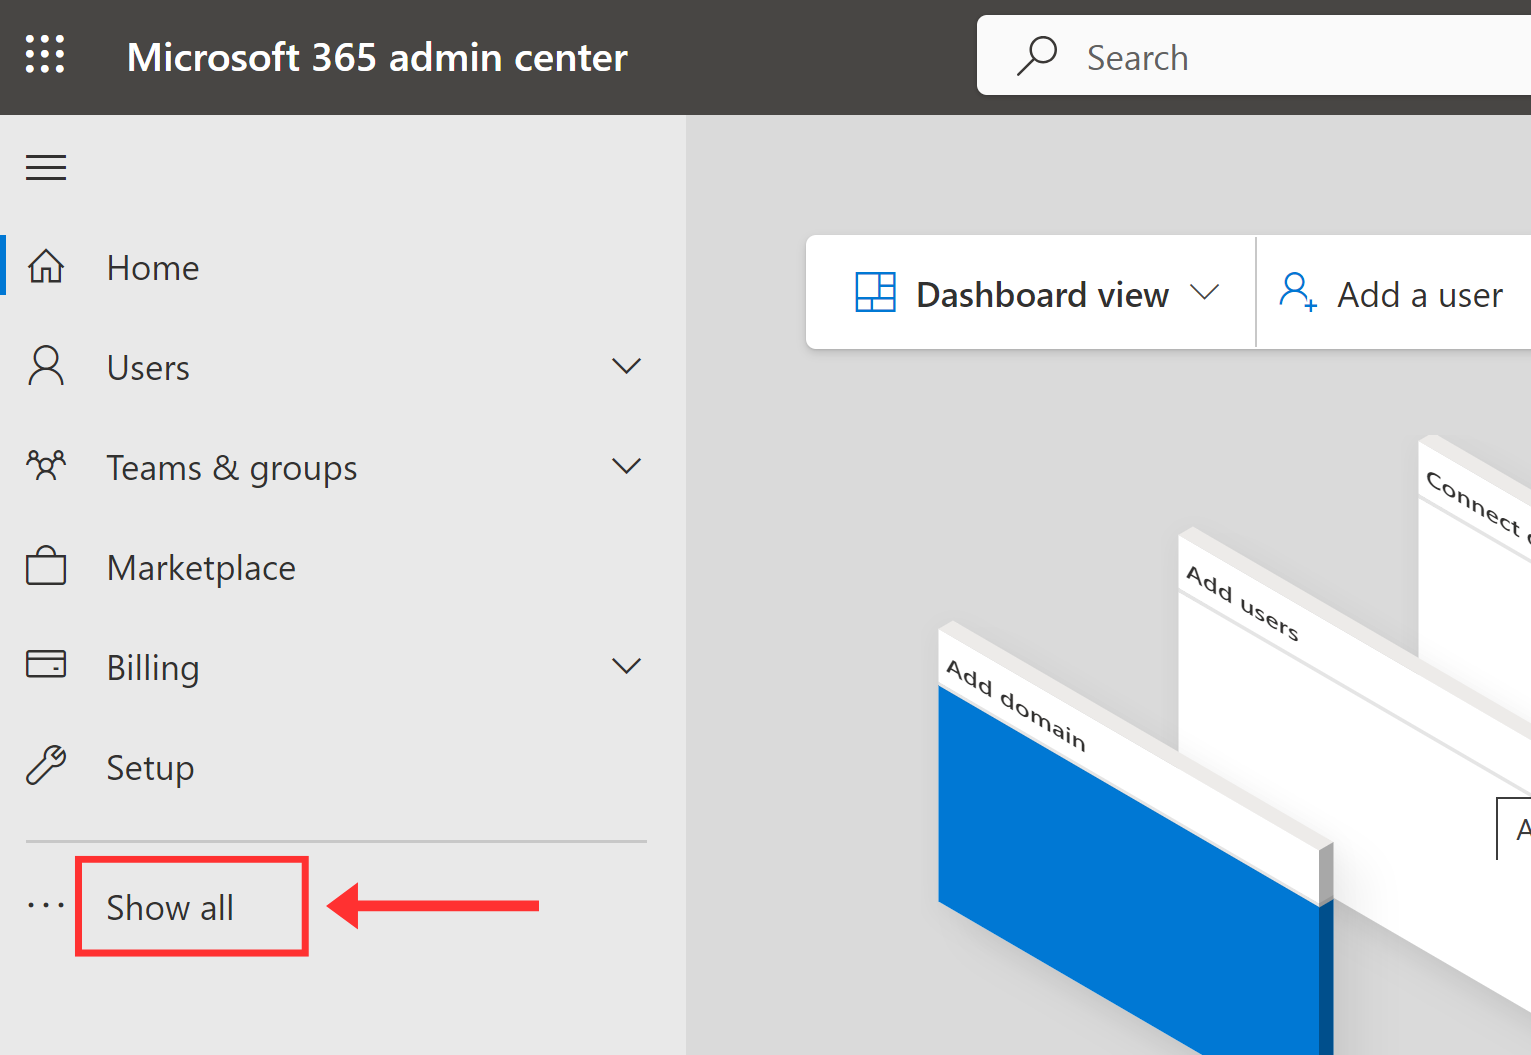
In Microsoft Admin Center, click Show All
-
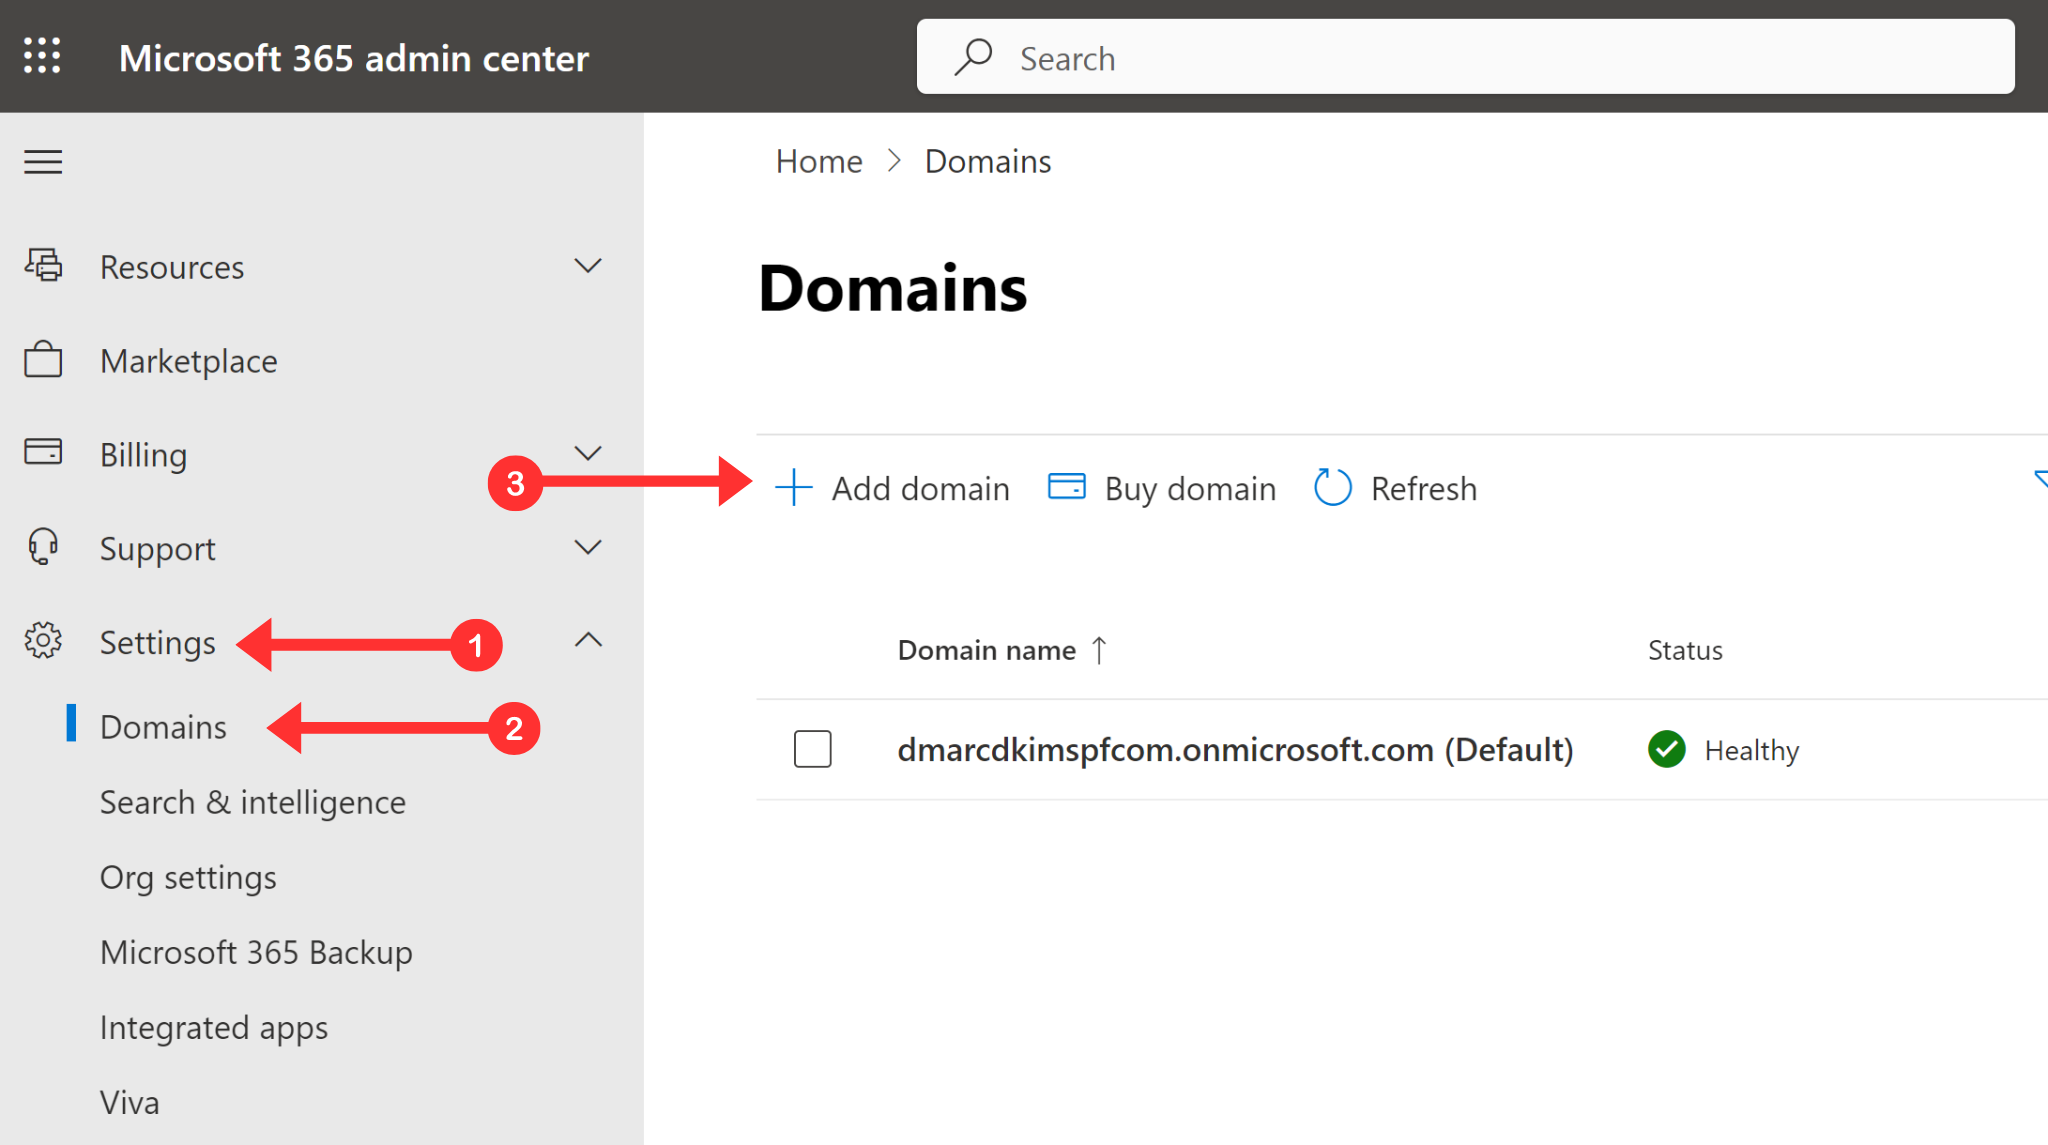
Expand the Settings option, go to Domains, and click Add Domain.
-
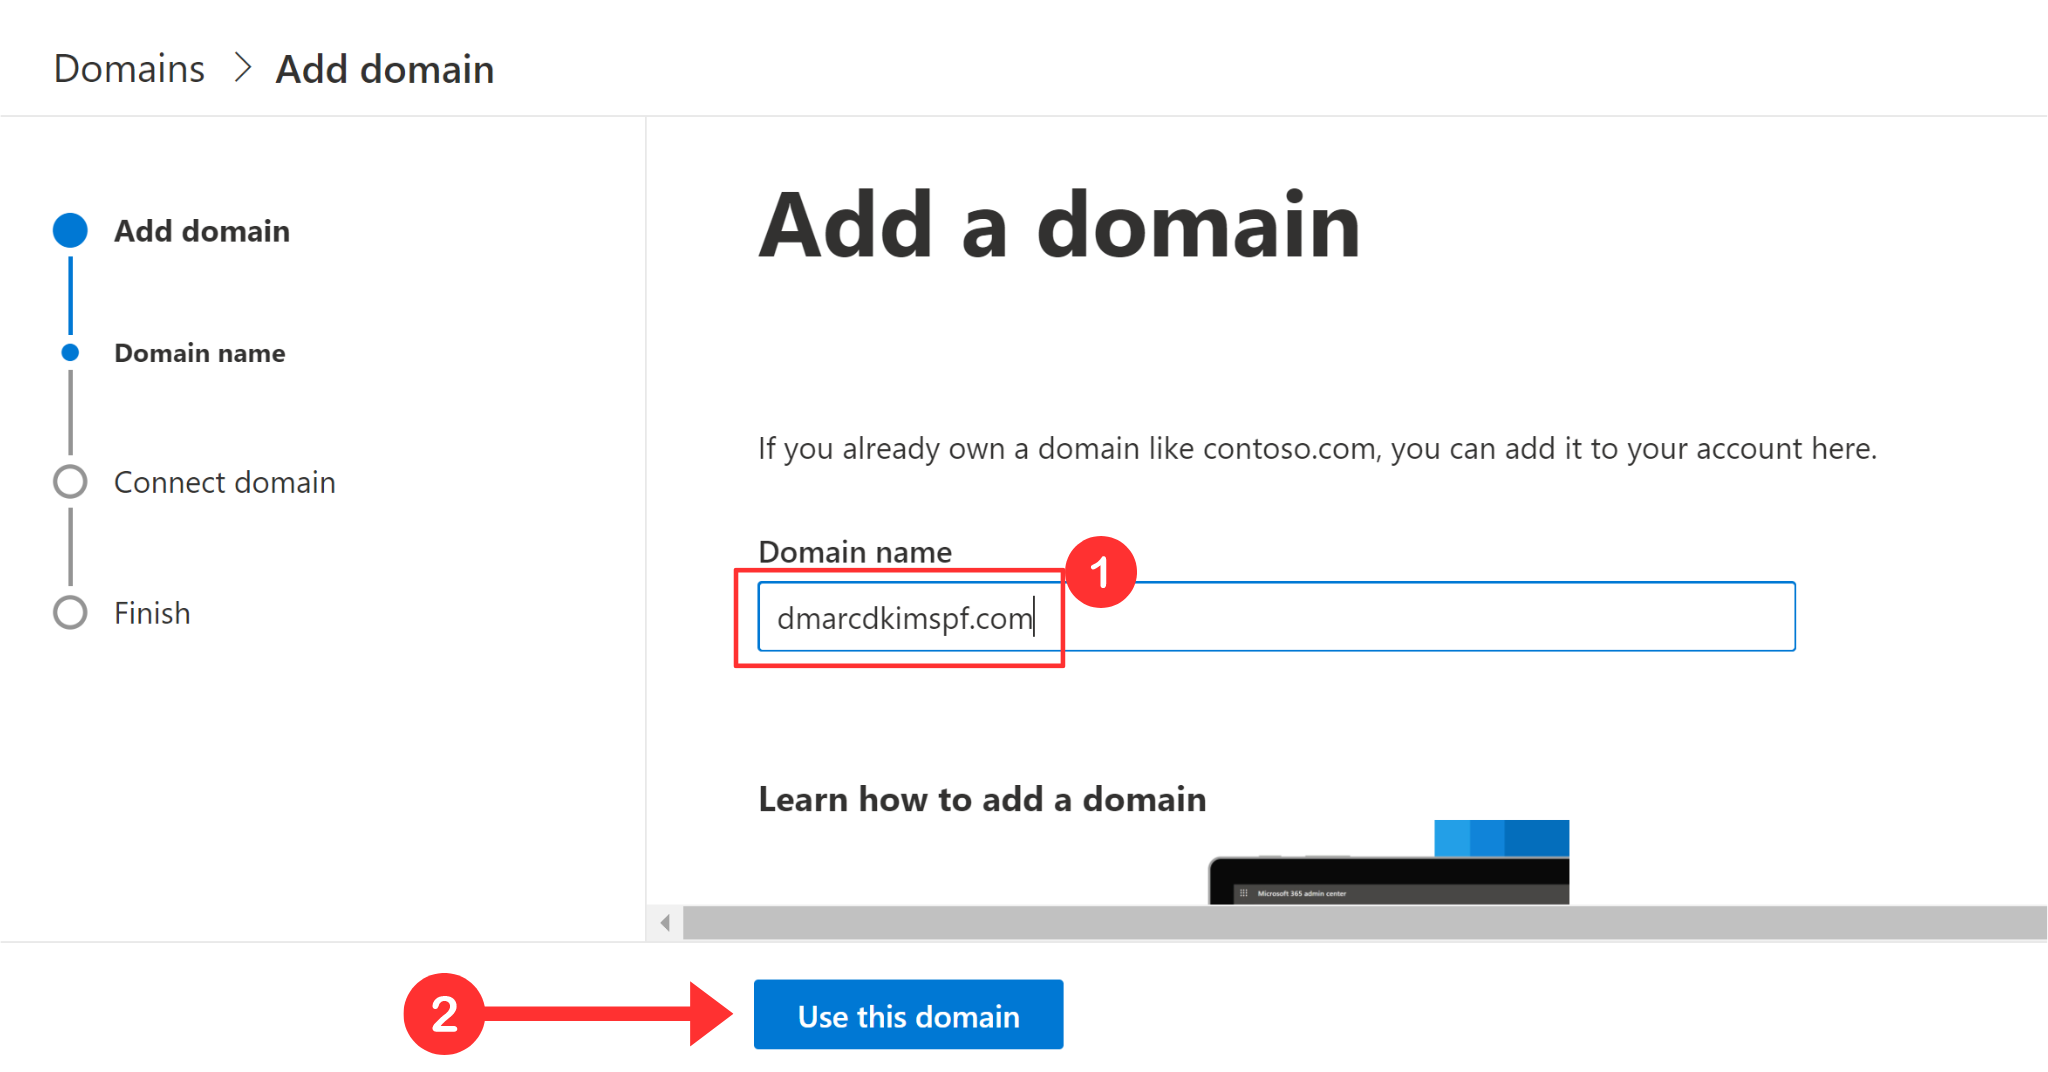
Write down your domain name, click Use This Domain, and hit the Verify button.
-
Microsoft server automatically detects your DNS provider and adds the domain ownership record to your DNS dashboard - click Authorize to complete the action.
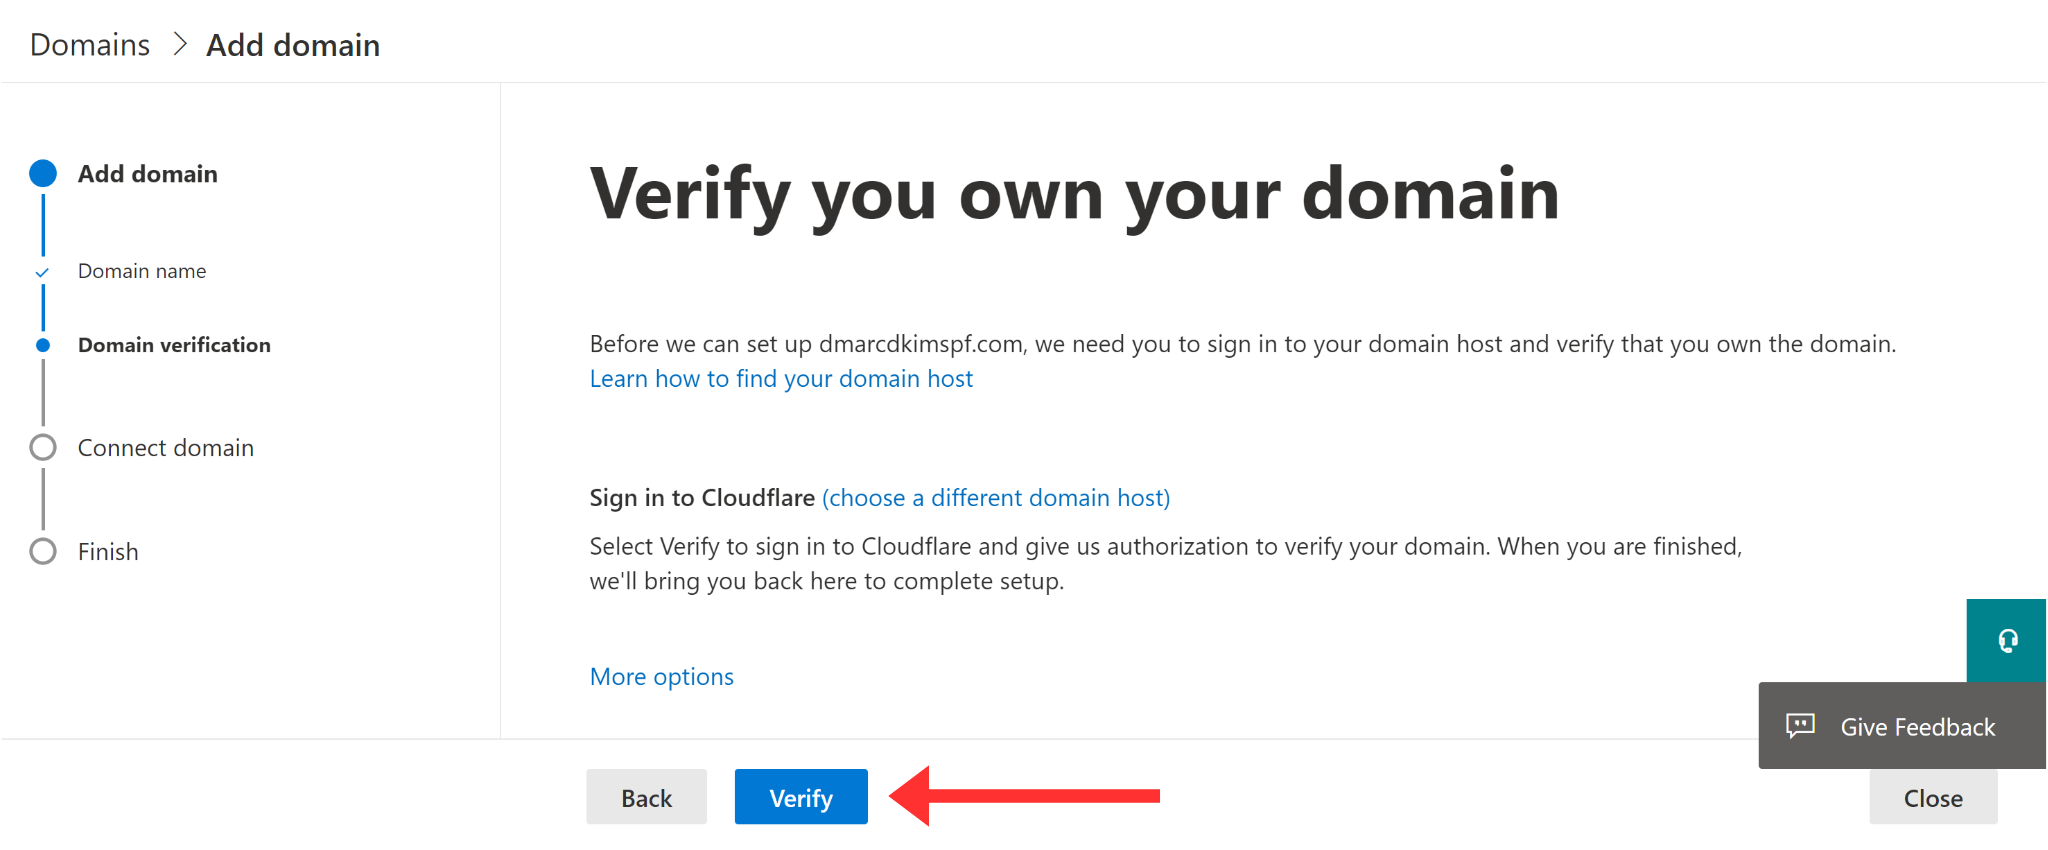
Your domain is now added to Microsoft 365.
Connect Domain Automatically
After verifying domain ownership, click Continue and connect the domain by adding Microsoft SPF, DKIM, and MX records to your domain provider.
-
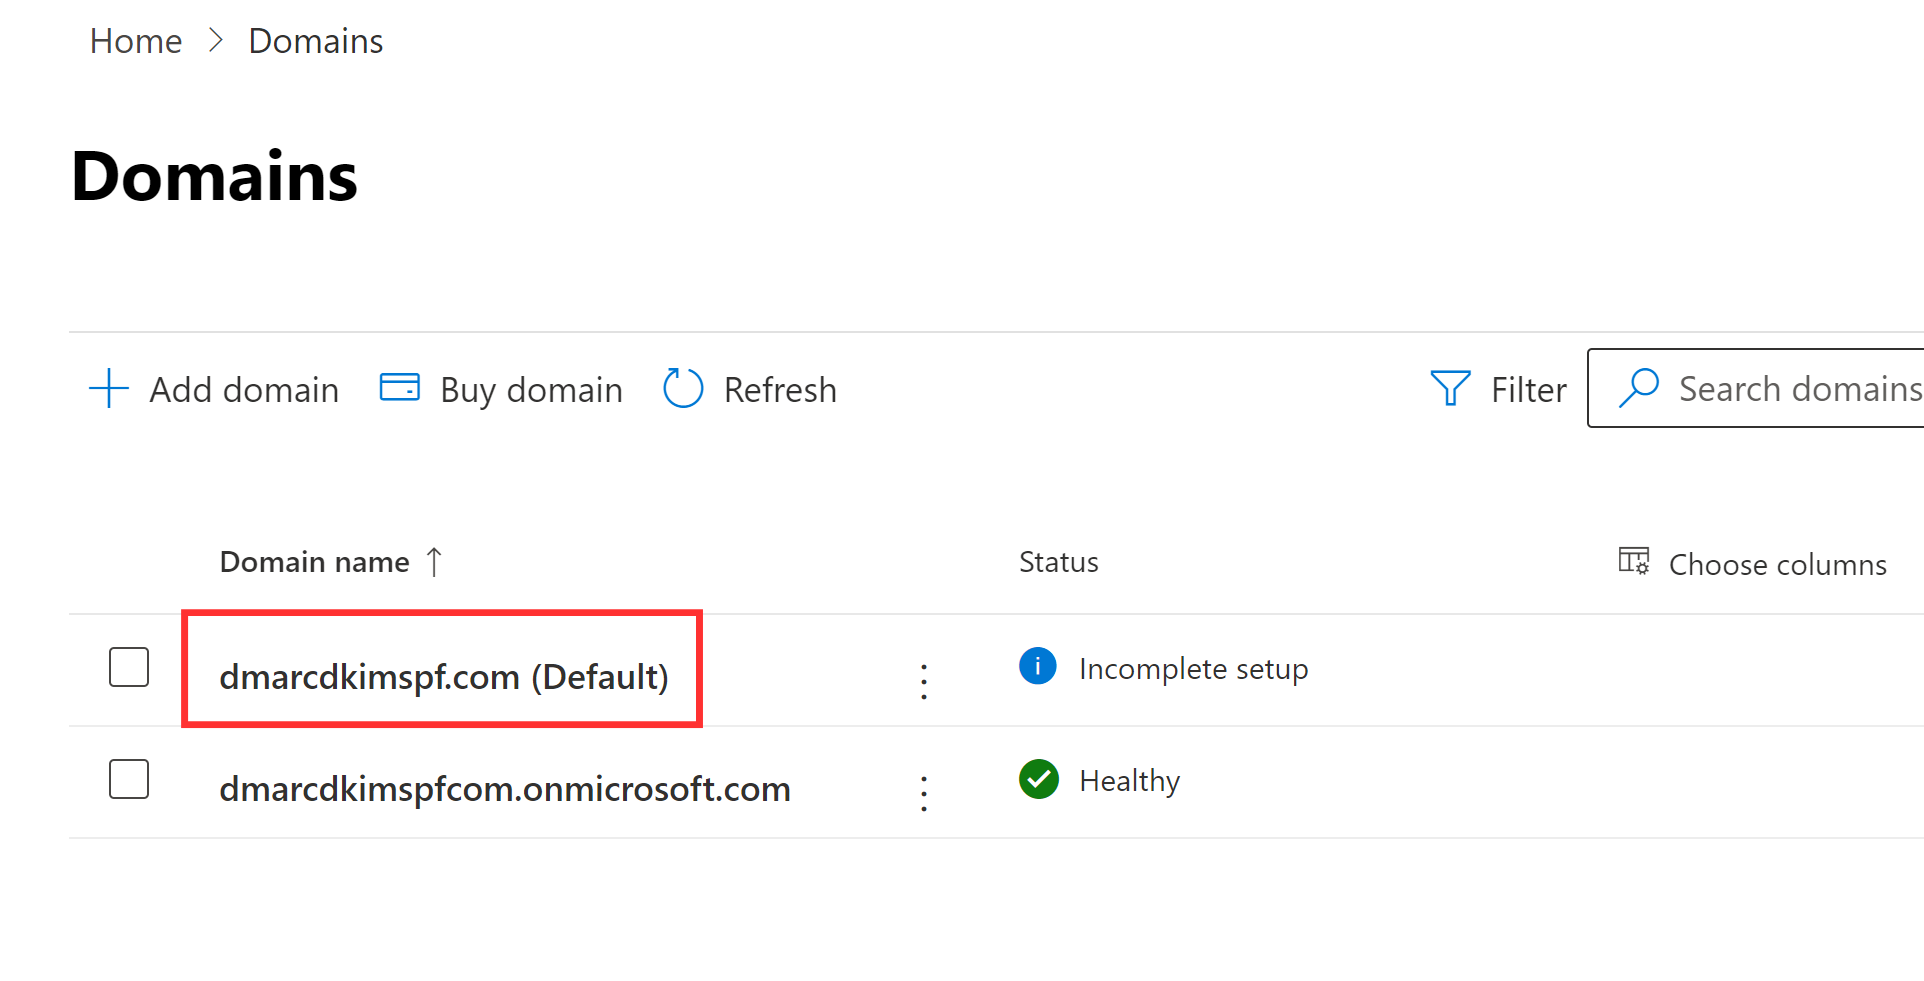
In the Domain tab, click on your custom domain.
-
Click the Continue Setup option in the top menu bar.
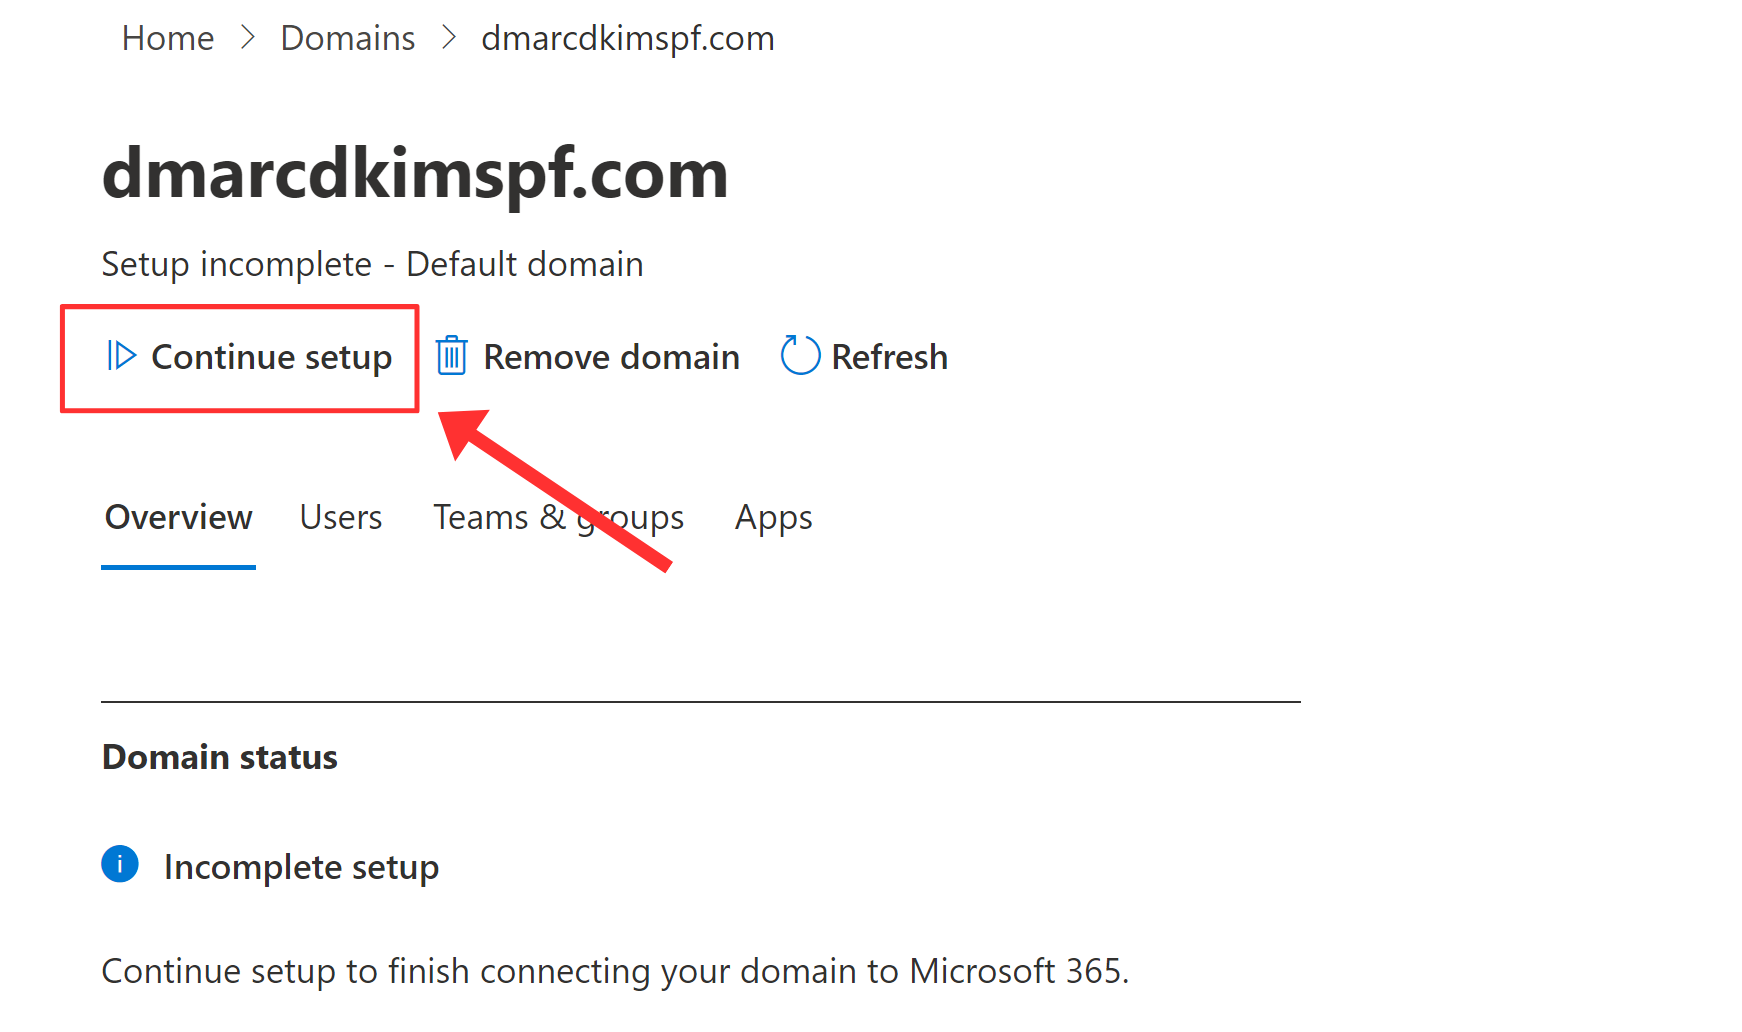
Check the boxes for each record you want to add to your DNS dashboard.
-
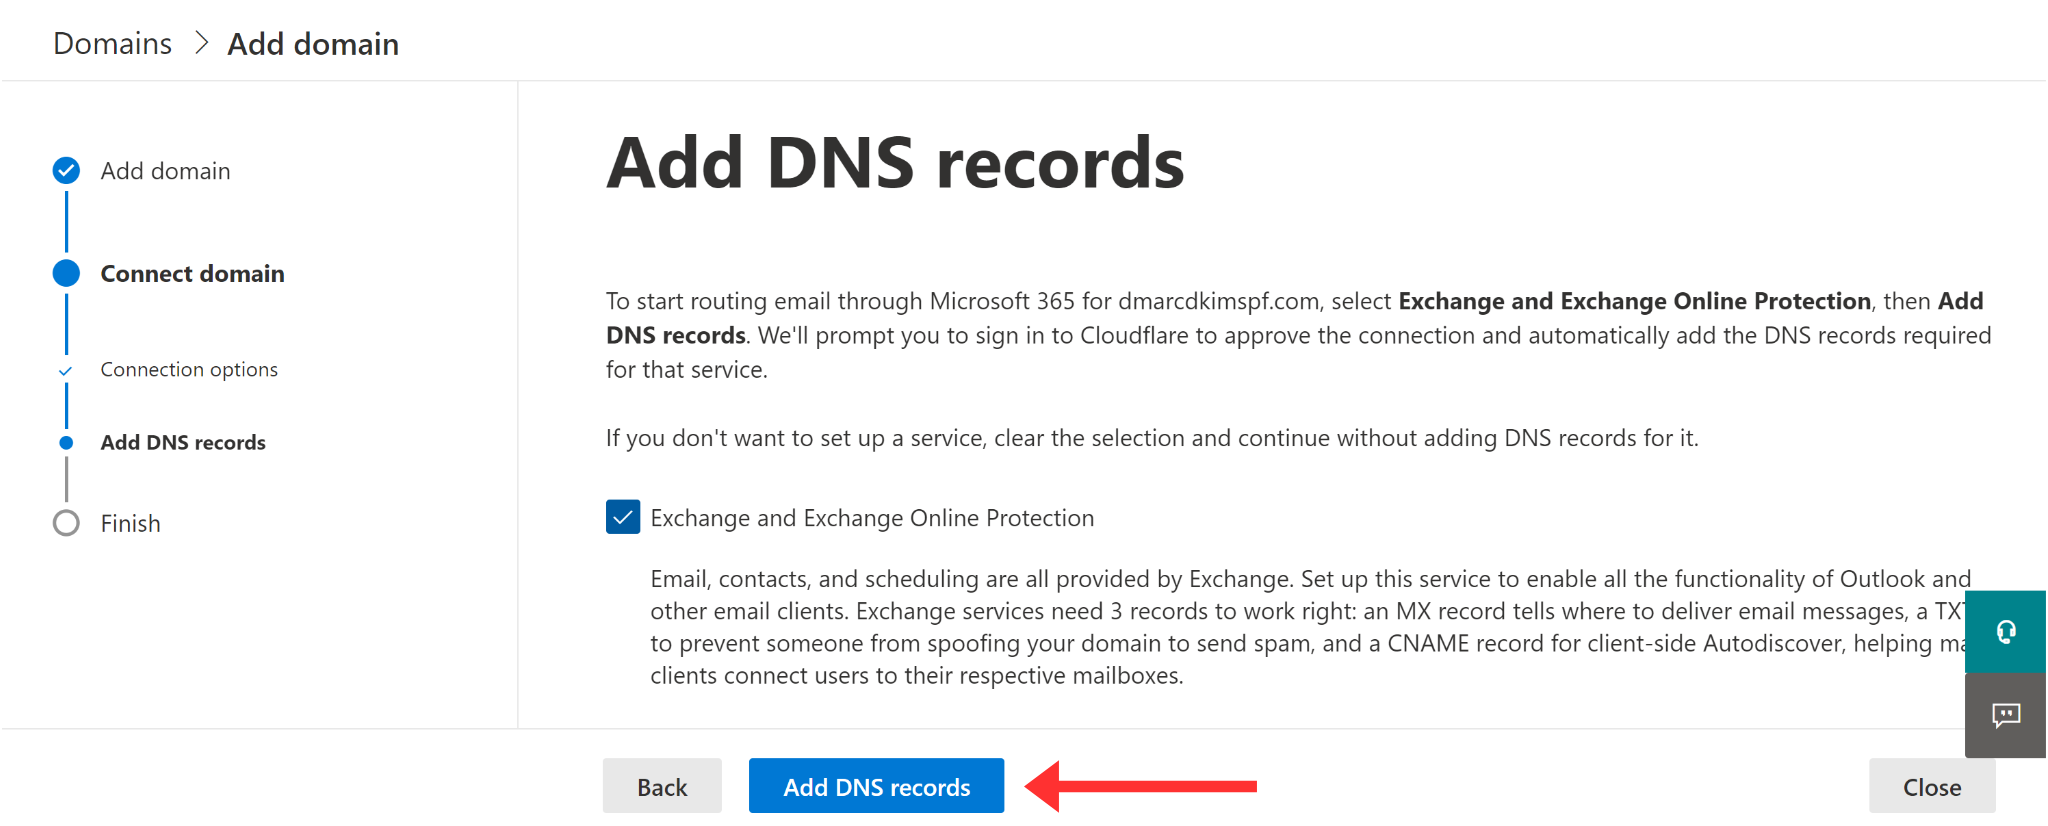
Click the "Add DNS Records" button.
-
Microsoft automatically adds the selected records to your DNS dashboard - click Authorize to confirm your action.
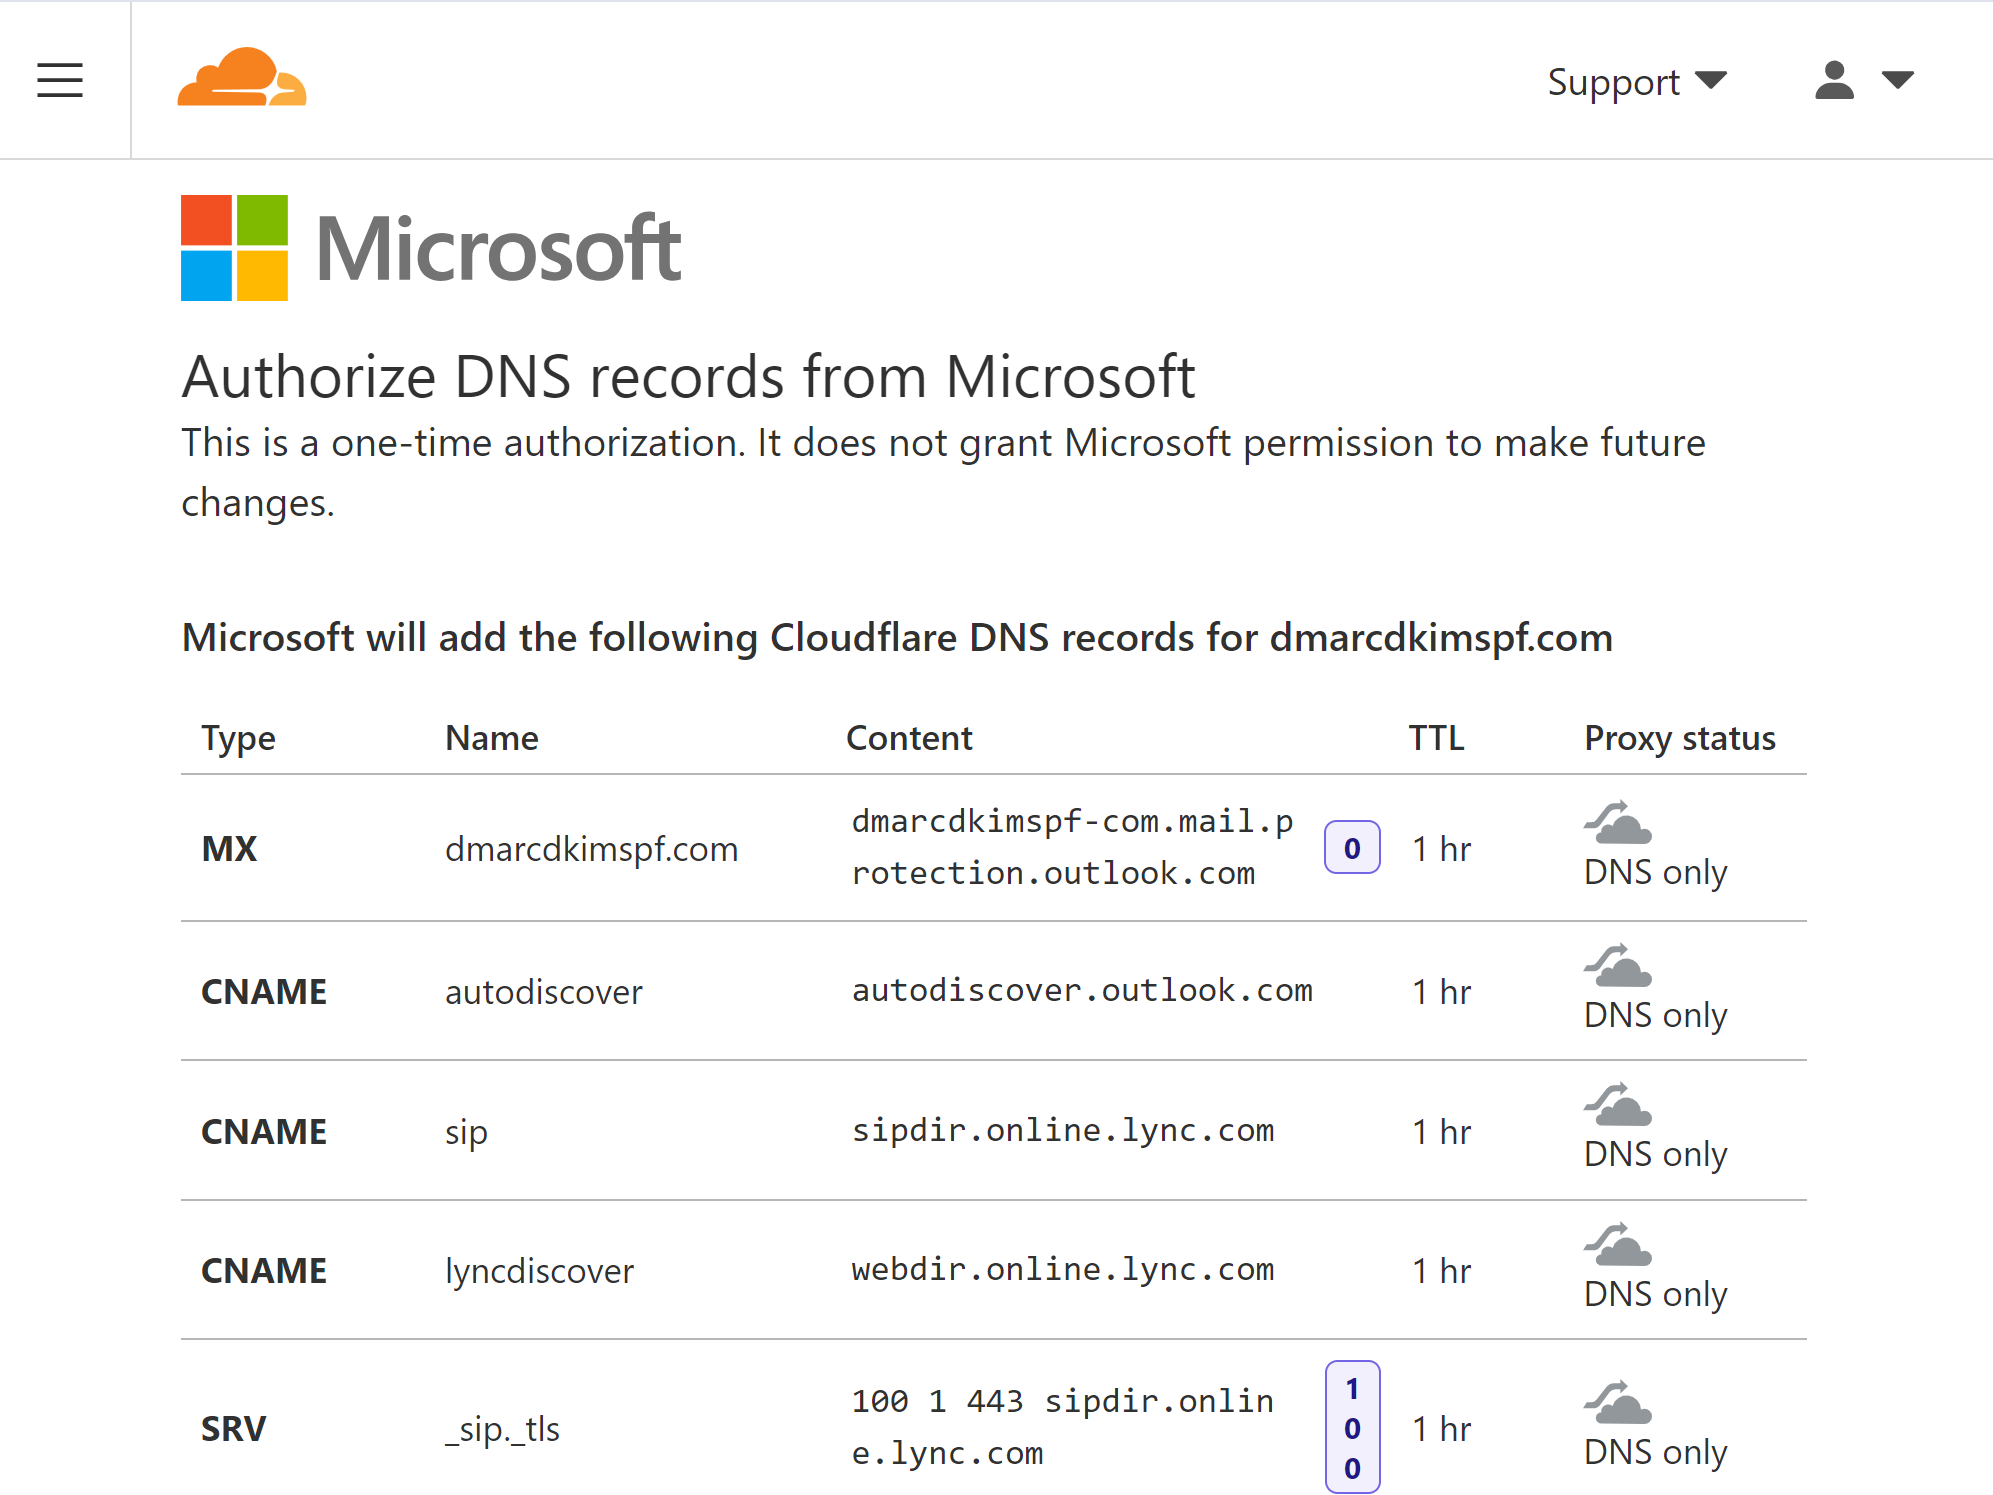
-
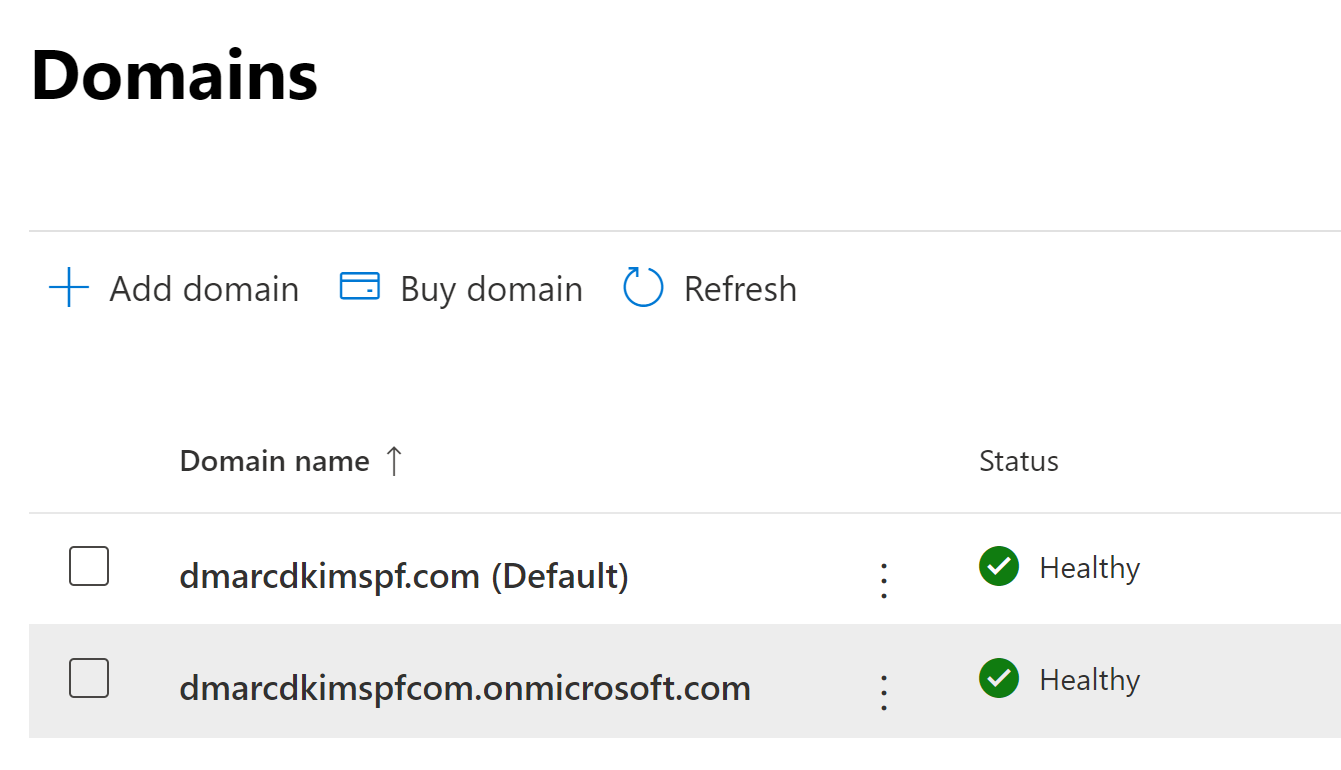
The green tick-mark next to your domain indicates that the setup is now complete.
Setup Microsoft 365 SPF Record
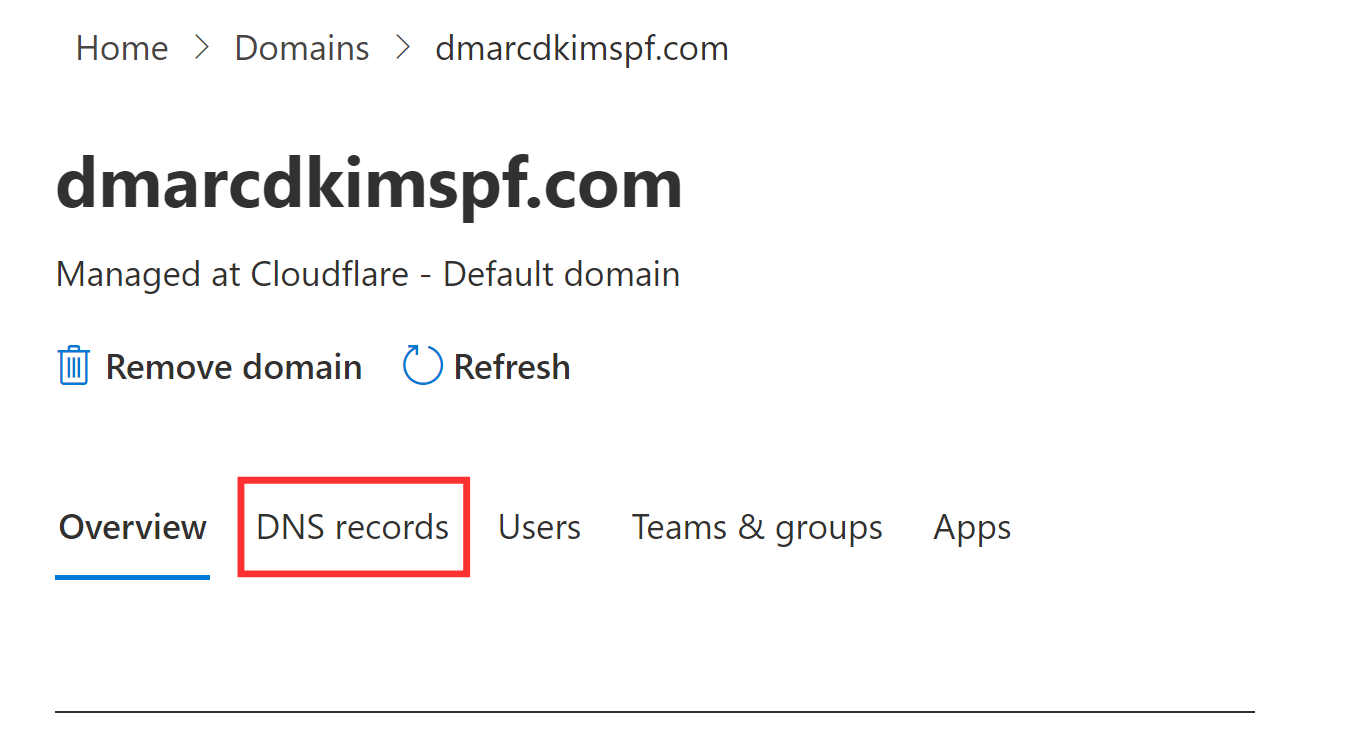
Click on the domain name and go to the DNS Records tab.
Scroll down to the Microsoft Exchange section and copy the SPF value.
-
Login to your DNS provider and go to the DNS dashboard.
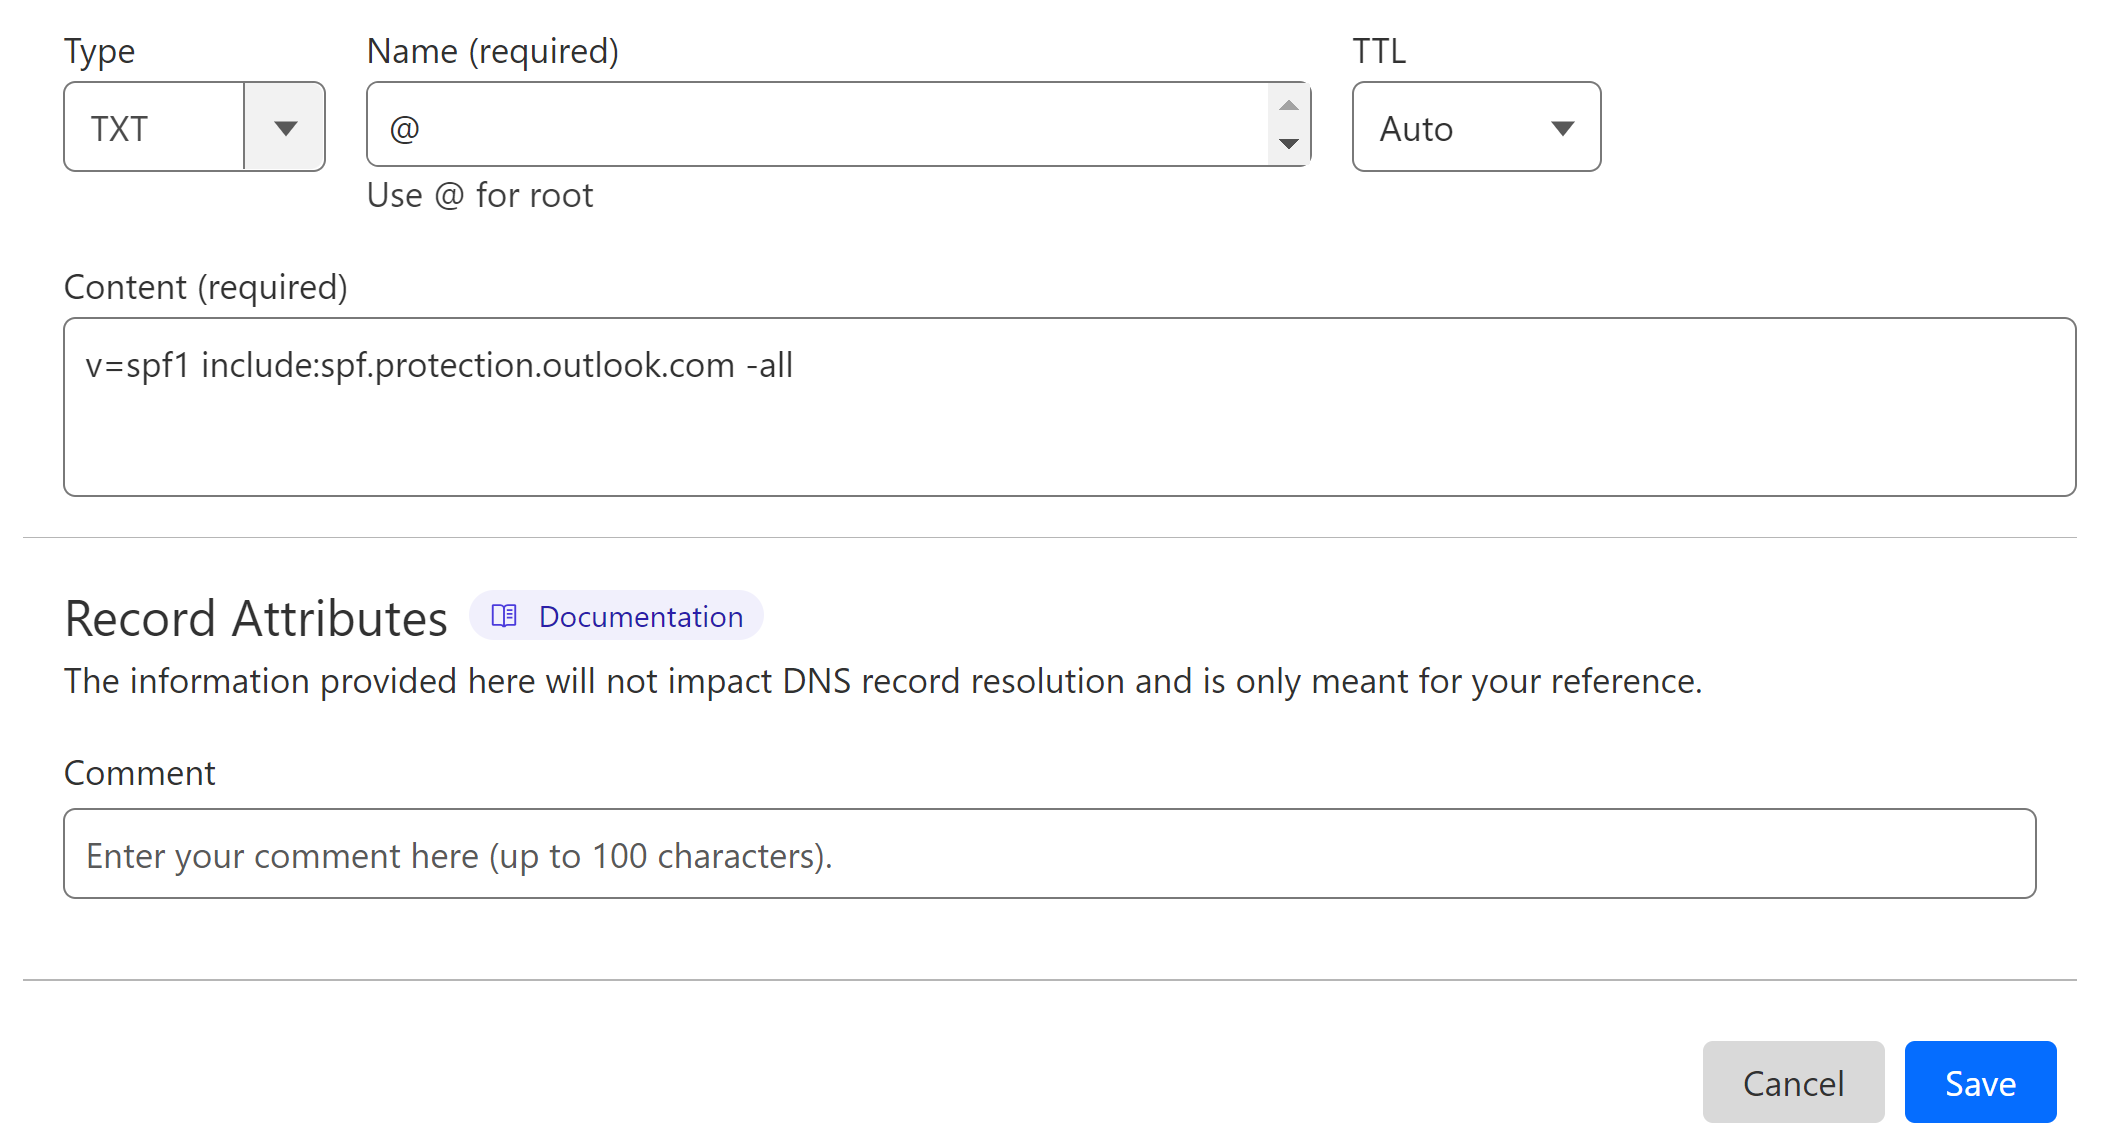
Click Add Record and select record type
TXTIn the Name field, write
@In the Content field, add the SPF value:
v=spf1 include:spf.protection.outlook.com -all-
Select TTL 1 Hour and click Save.
Merge Multiple SPF Records
Adding more than one SPF record can cause conflicts and validation errors. If your domain has an existing SPF record from any other source, merge it with Microsoft SPF value.
Open the SPF merge tool.
Write your domain name and Microsoft 365 SPF value.
-
Click Merge SPF Values and the tool will combine both values.
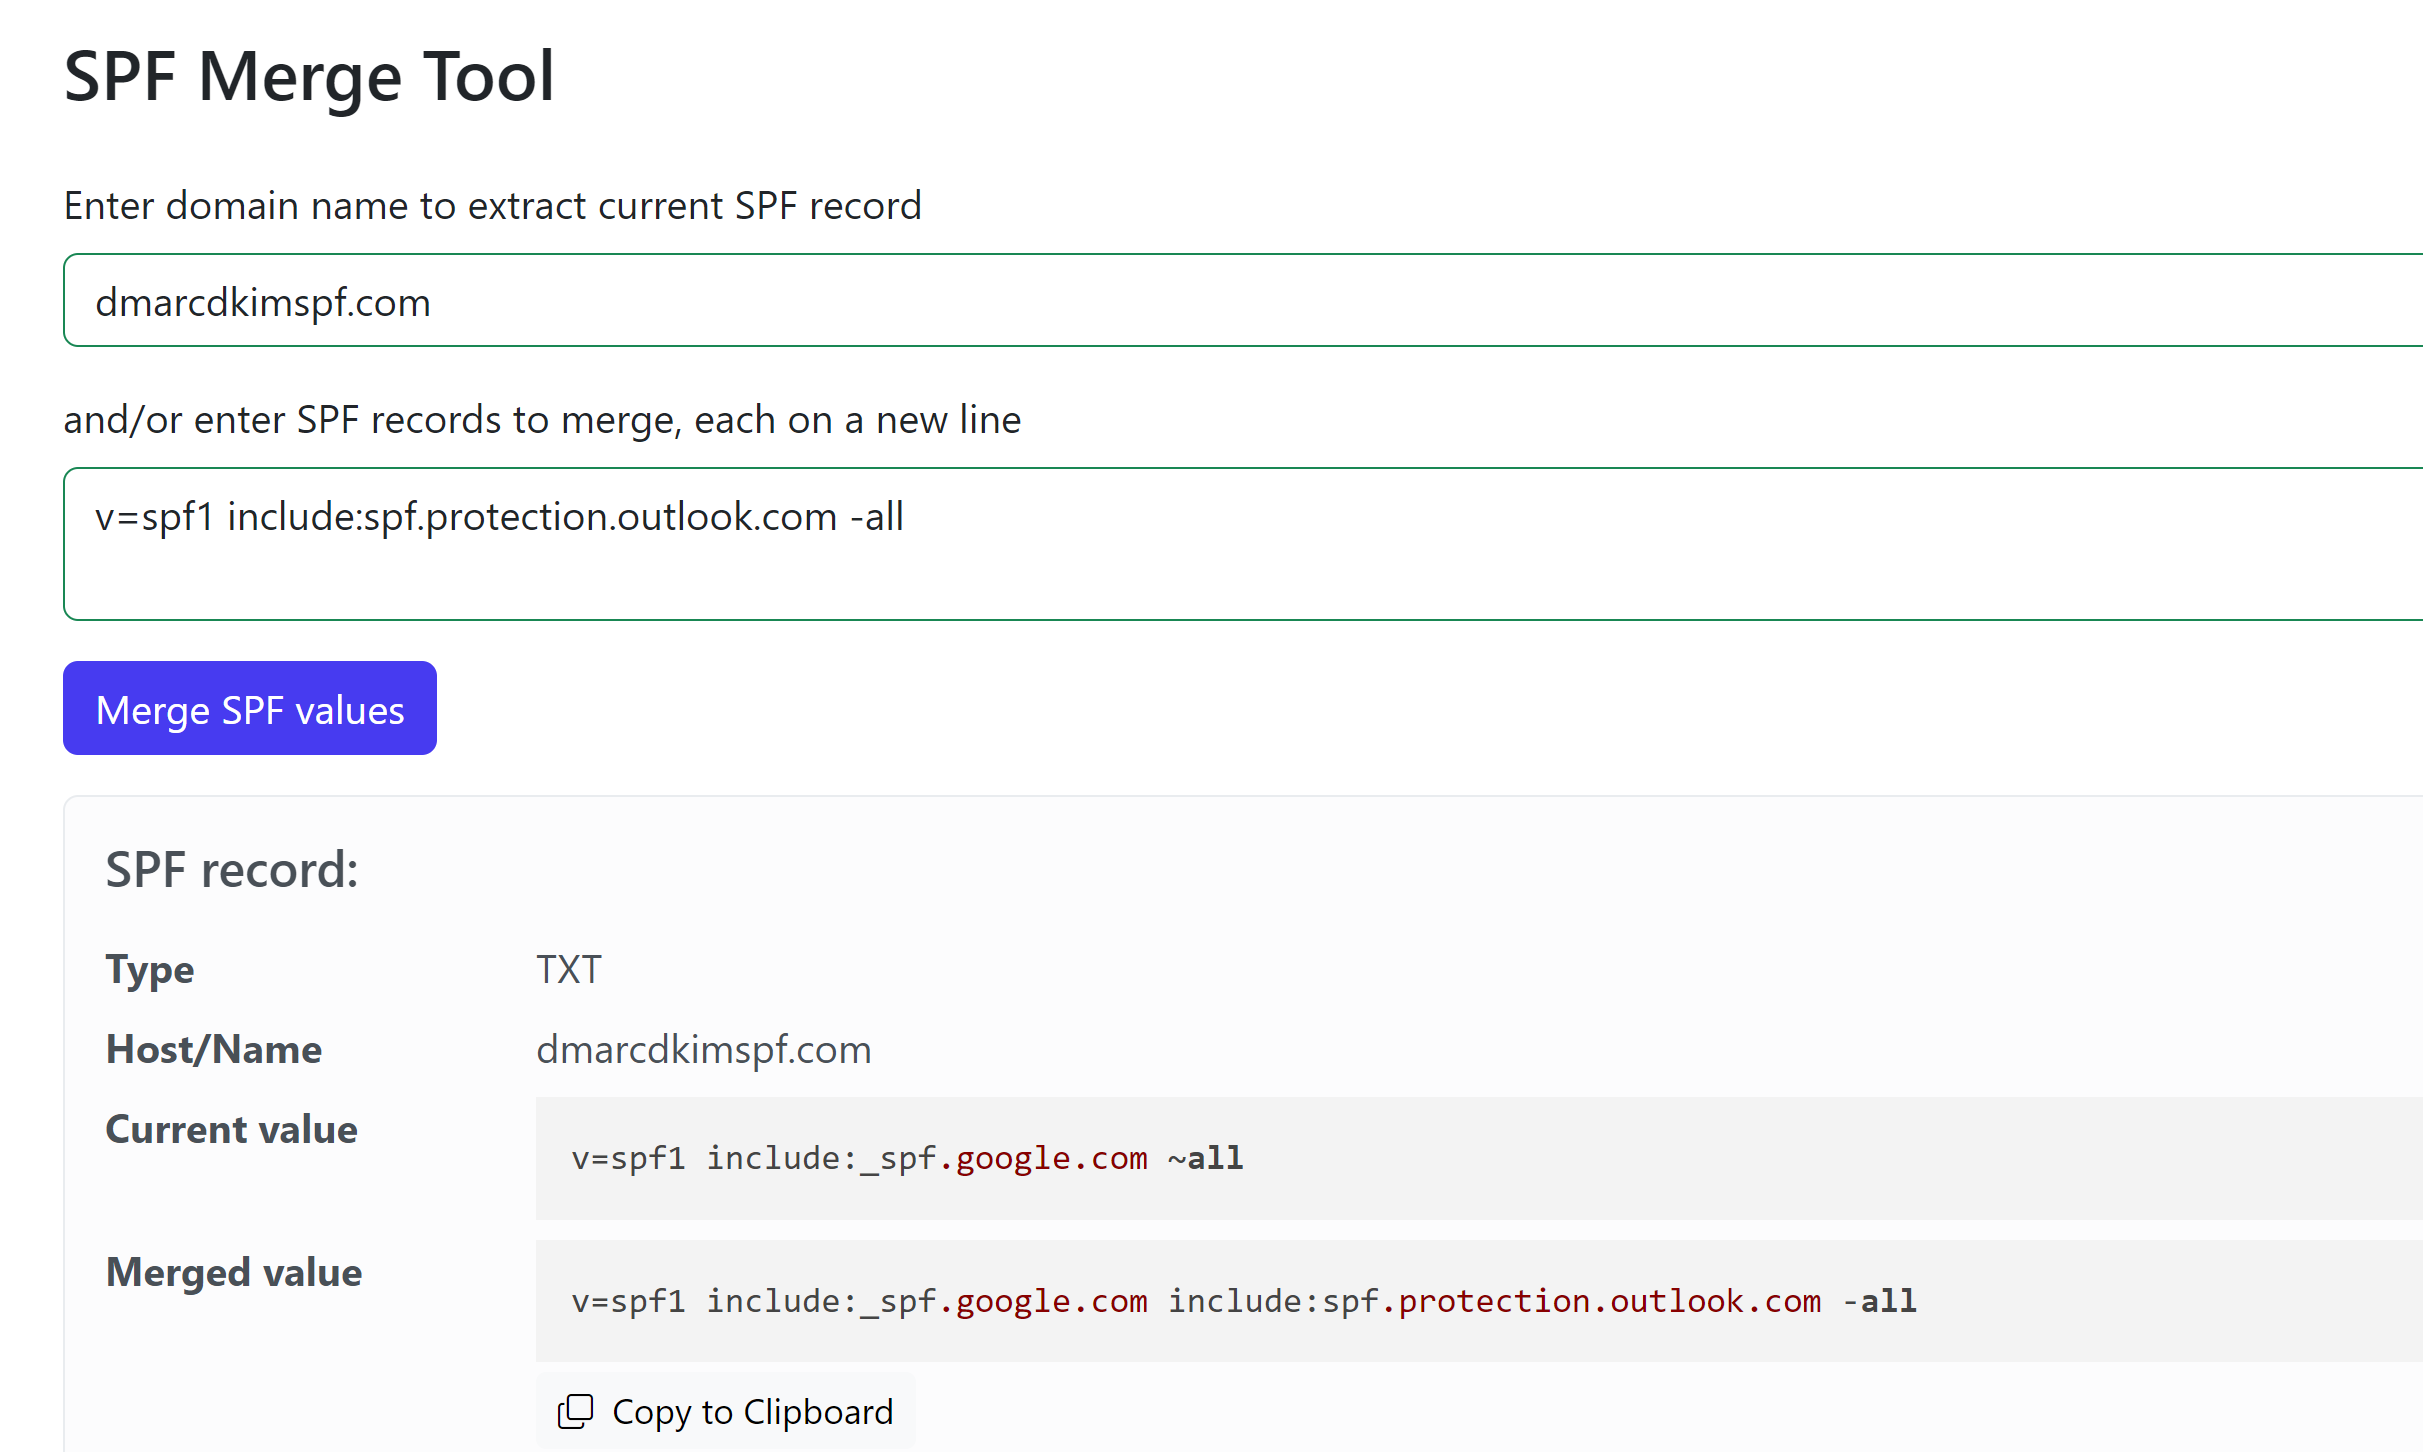
Edit your existing record by replacing the previous value with the merged SPF value.
Setup Microsoft 365 DKIM Record in Defender
Note: DKIM option available in Microsoft 365 Business plans only.
-
Navigate to security.microsoft.com/dkimv2 or type "DKIM" in the Microsoft 365 Admin Center search bar and select "DKIM in Microsoft 365 Defender".

-
You'll see the status of your DKIM records.

-
First, toggle Enabled for the ".onmicrosoft.com" domain.

-
Then, toggle Enabled for your custom domain to view the required Microsoft 365 DKIM CNAME records.
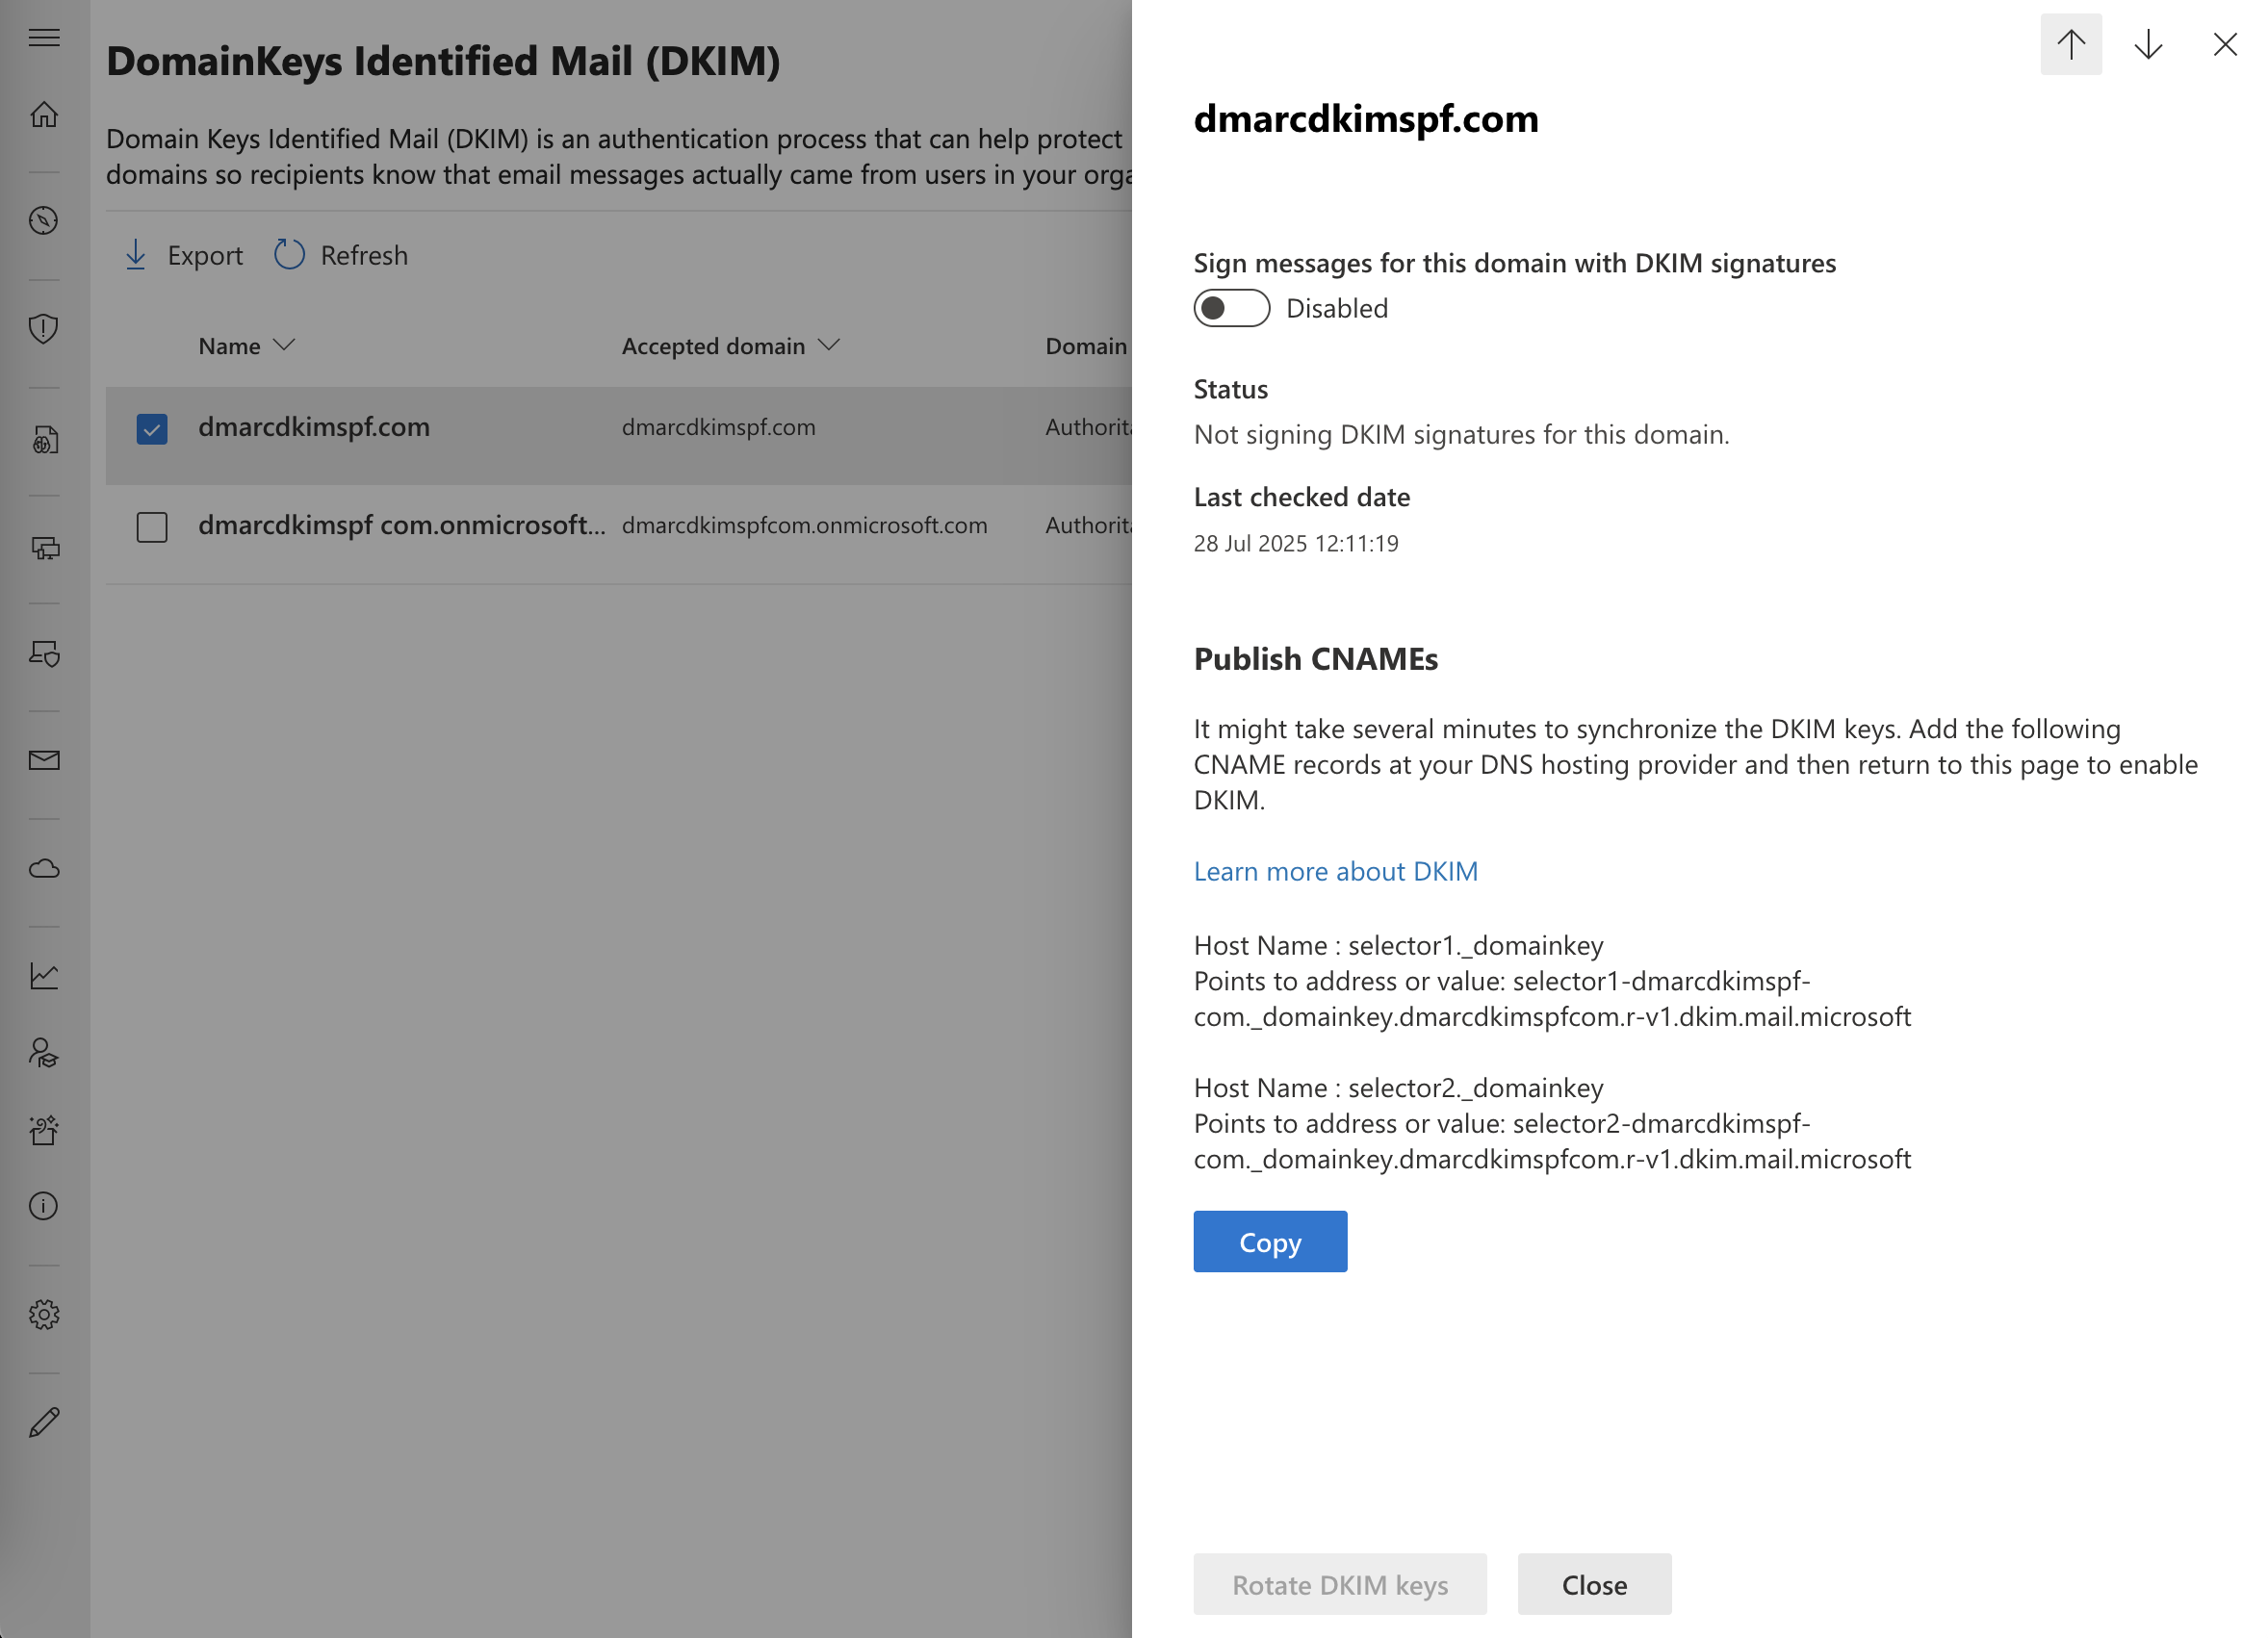
In the DNS provider, select record type CNAME.
Copy the record name and paste it into the Name field in the DNS dashboard.
Copy the record value and add it to the Target field.
For M365 it's important to select TTL 1 Hour (3600).
-
Turn off the proxy status and click Save.
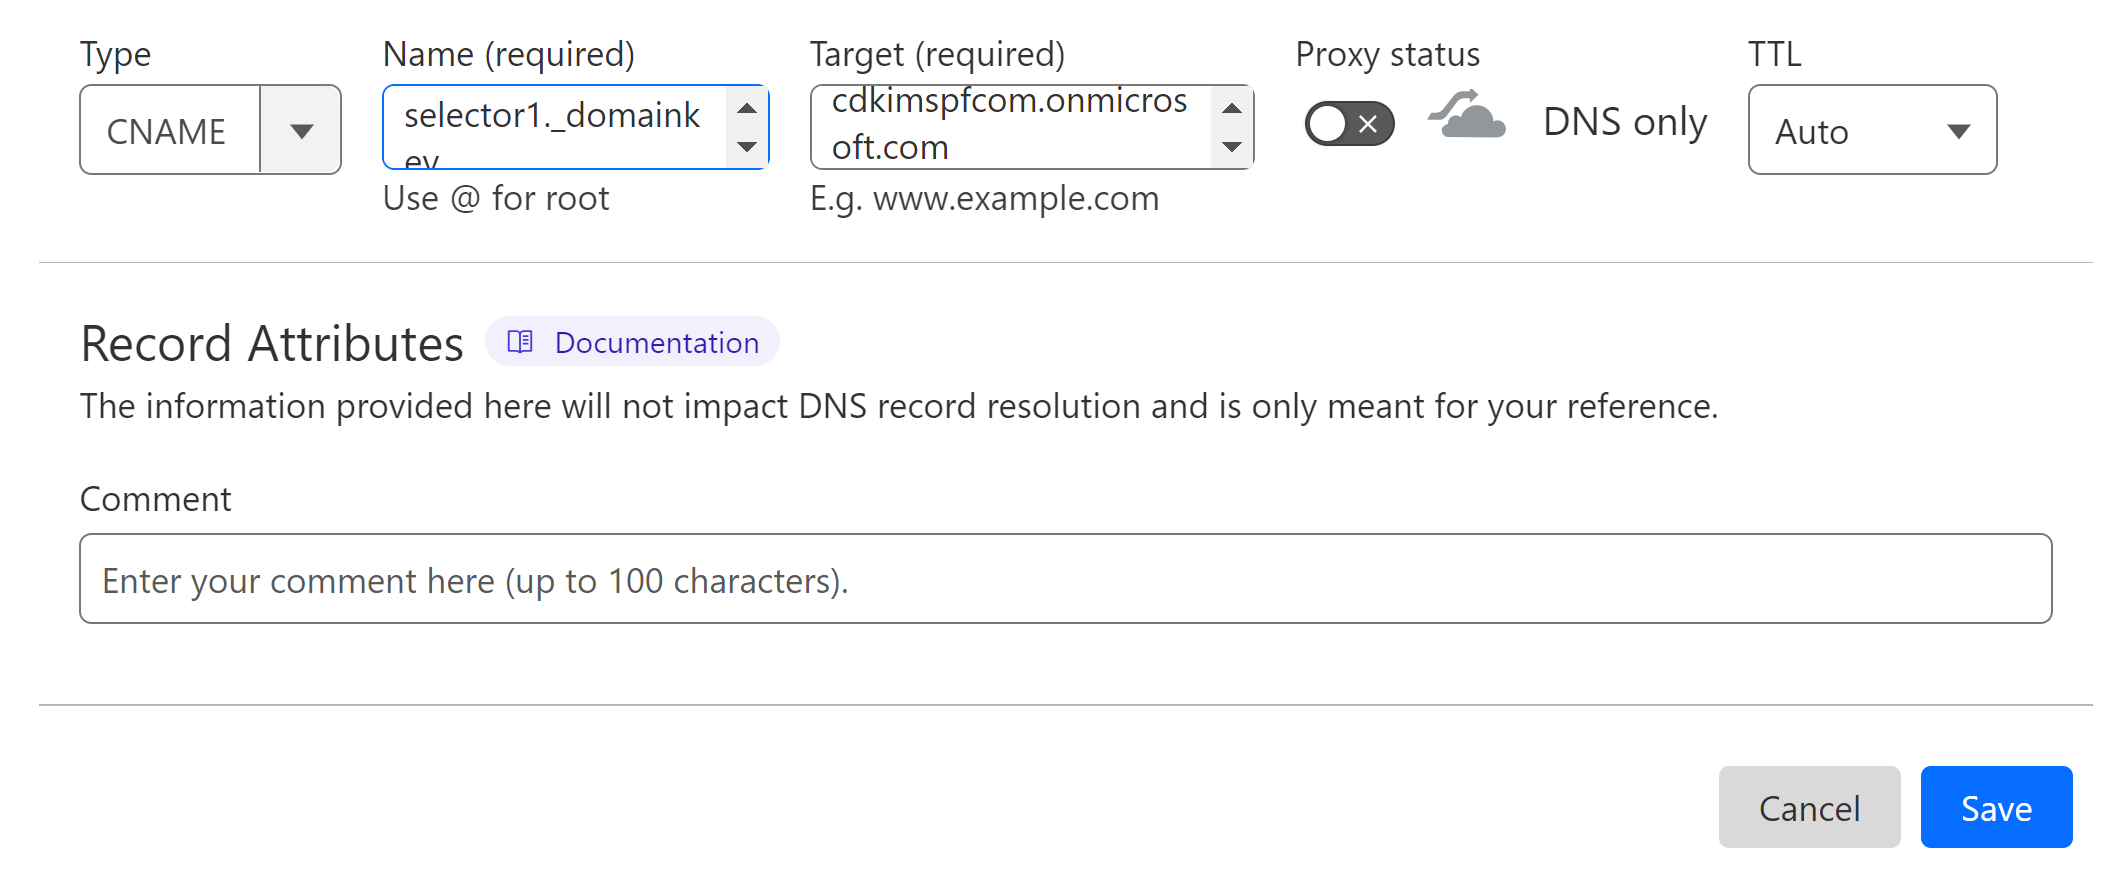
Once the DKIM CNAMEs are added and saved, give your nameservers a few minutes to propagate the changes.
-
Return to the Microsoft Defender DKIM settings and toggle Enabled for your domain.

Setup Microsoft 365 DMARC Record
When connecting your domain to Microsoft 365, you can utilize the DmarcDkim.com DMARC check tool. It helps you implement a strict policy and gives insights into your email activity. You can sign up at the portal to access the DMARC Reports and Analytics dashboard.
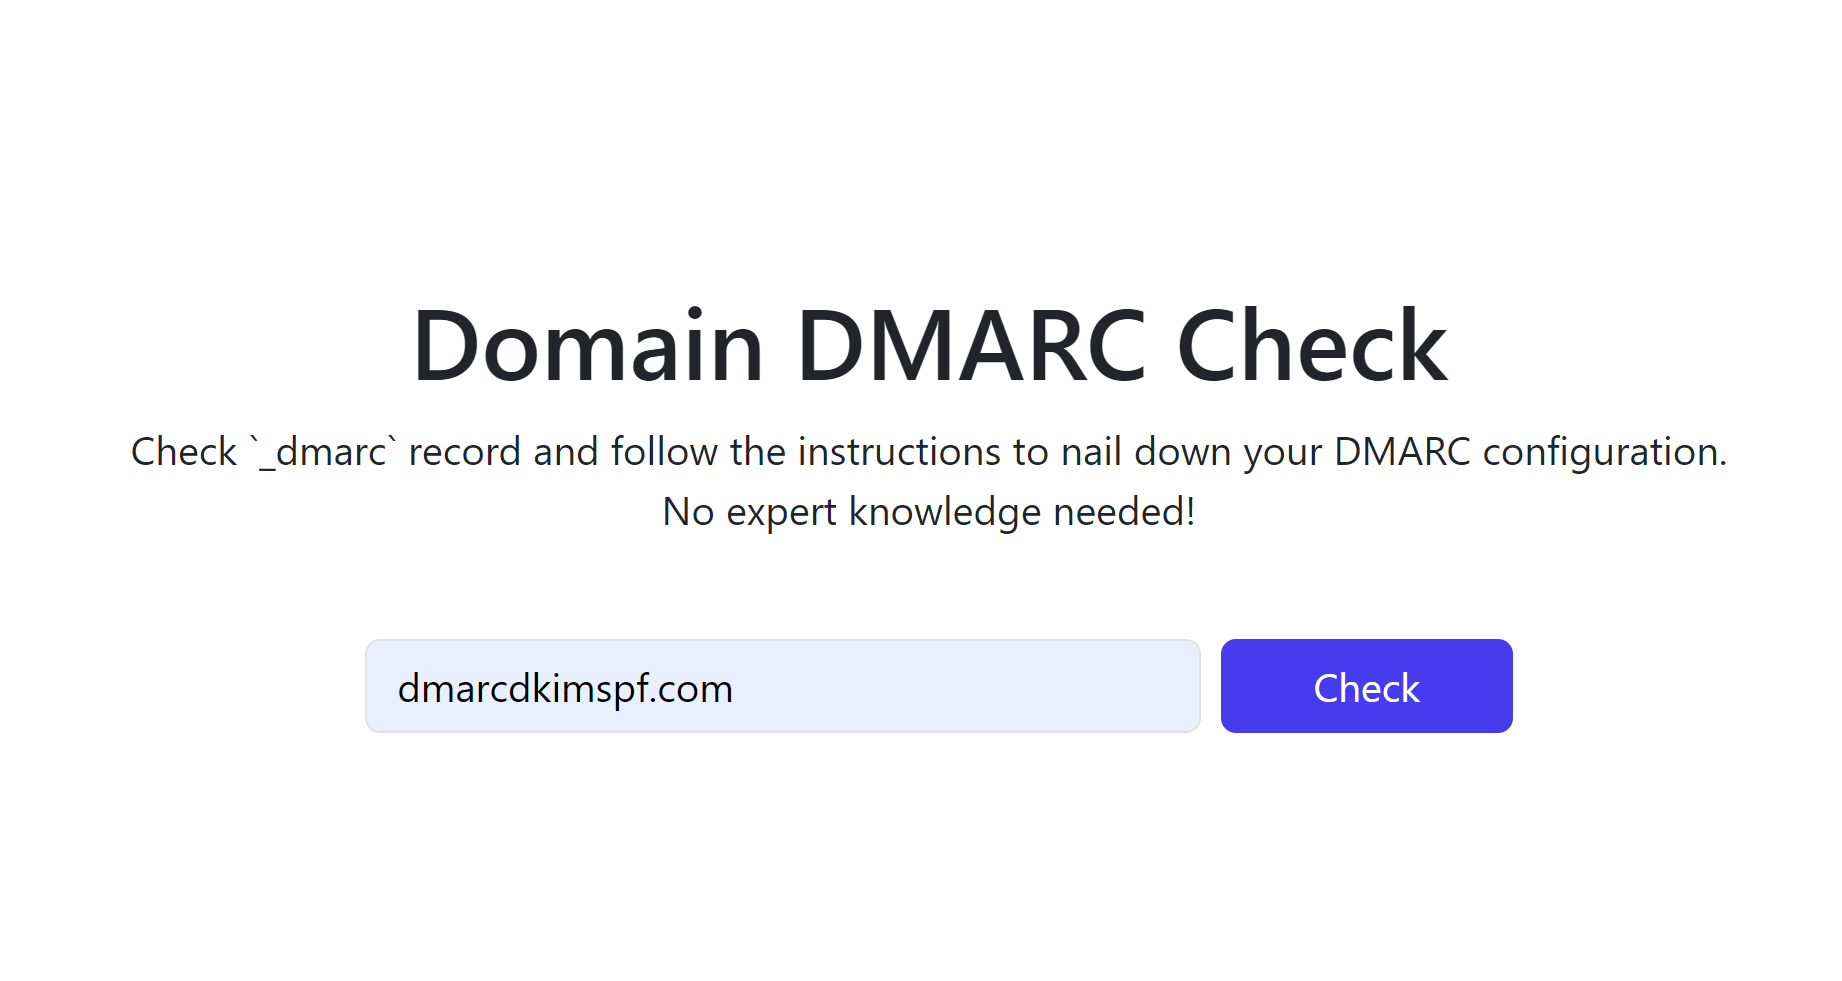
Go to DMARC Check Tool.
-
Add your domain name and click Check.
-
Copy the Record name and Suggested value and add them to your DNS dashboard.
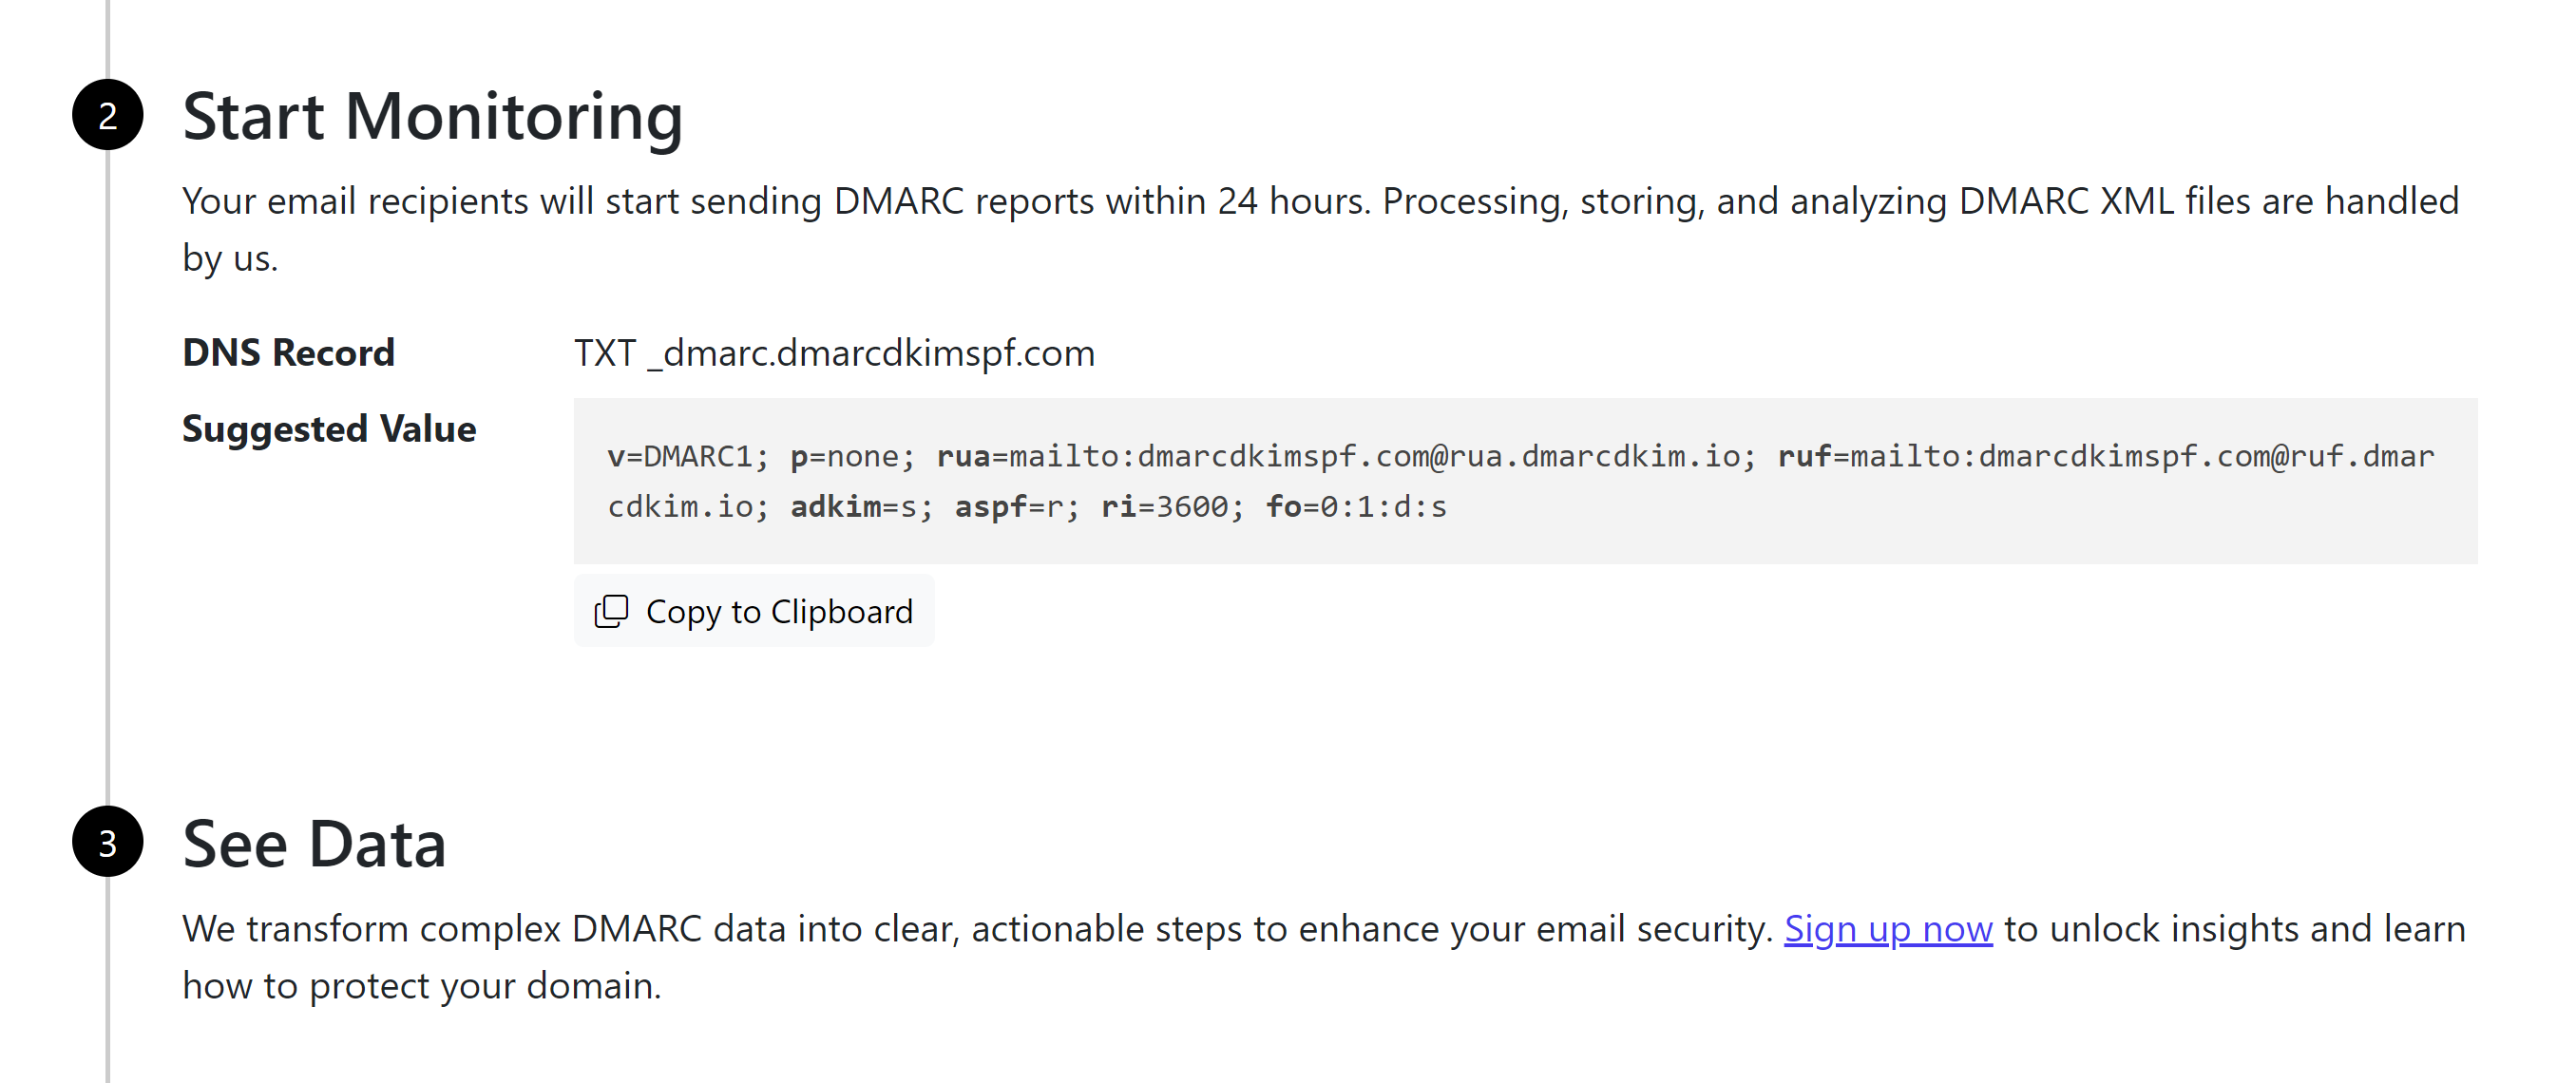
Click DMARC Dashboard to access the DMARC reports.
For support and assistance, contact DmarcDkim.com experts.
Check domain and follow the instructions to nail down your DMARC configuration.
No expert knowledge needed!


