Setup Mailmodo DKIM, DMARC, and Bounce Recrords
Check your domain for DMARC, DKIM, SPF and MX records. Get a free report.
Mailmodo Domain Authentication Guide - DNS Configuration
DMARC, DKIM, and SPF are essential email security standards used by inbox providers like Google and Yahoo. These DNS records verify that your emails come from a legitimate source and are safe to open.
Authenticating your domain ensures that your emails are not marked as spam. Mailmodo provides DKIM, Bounce, and DMARC records for sender domain authentication.
SPF record is not required when sending emails from Mailmodo as the DKIM and bounce record do the work to secure your emails. This article will guide you on how you can setup the Mailmodo domain authentication records in your DNS provider.
Configure Mailmodo DNS Records:
Login to your Mailmodo account.
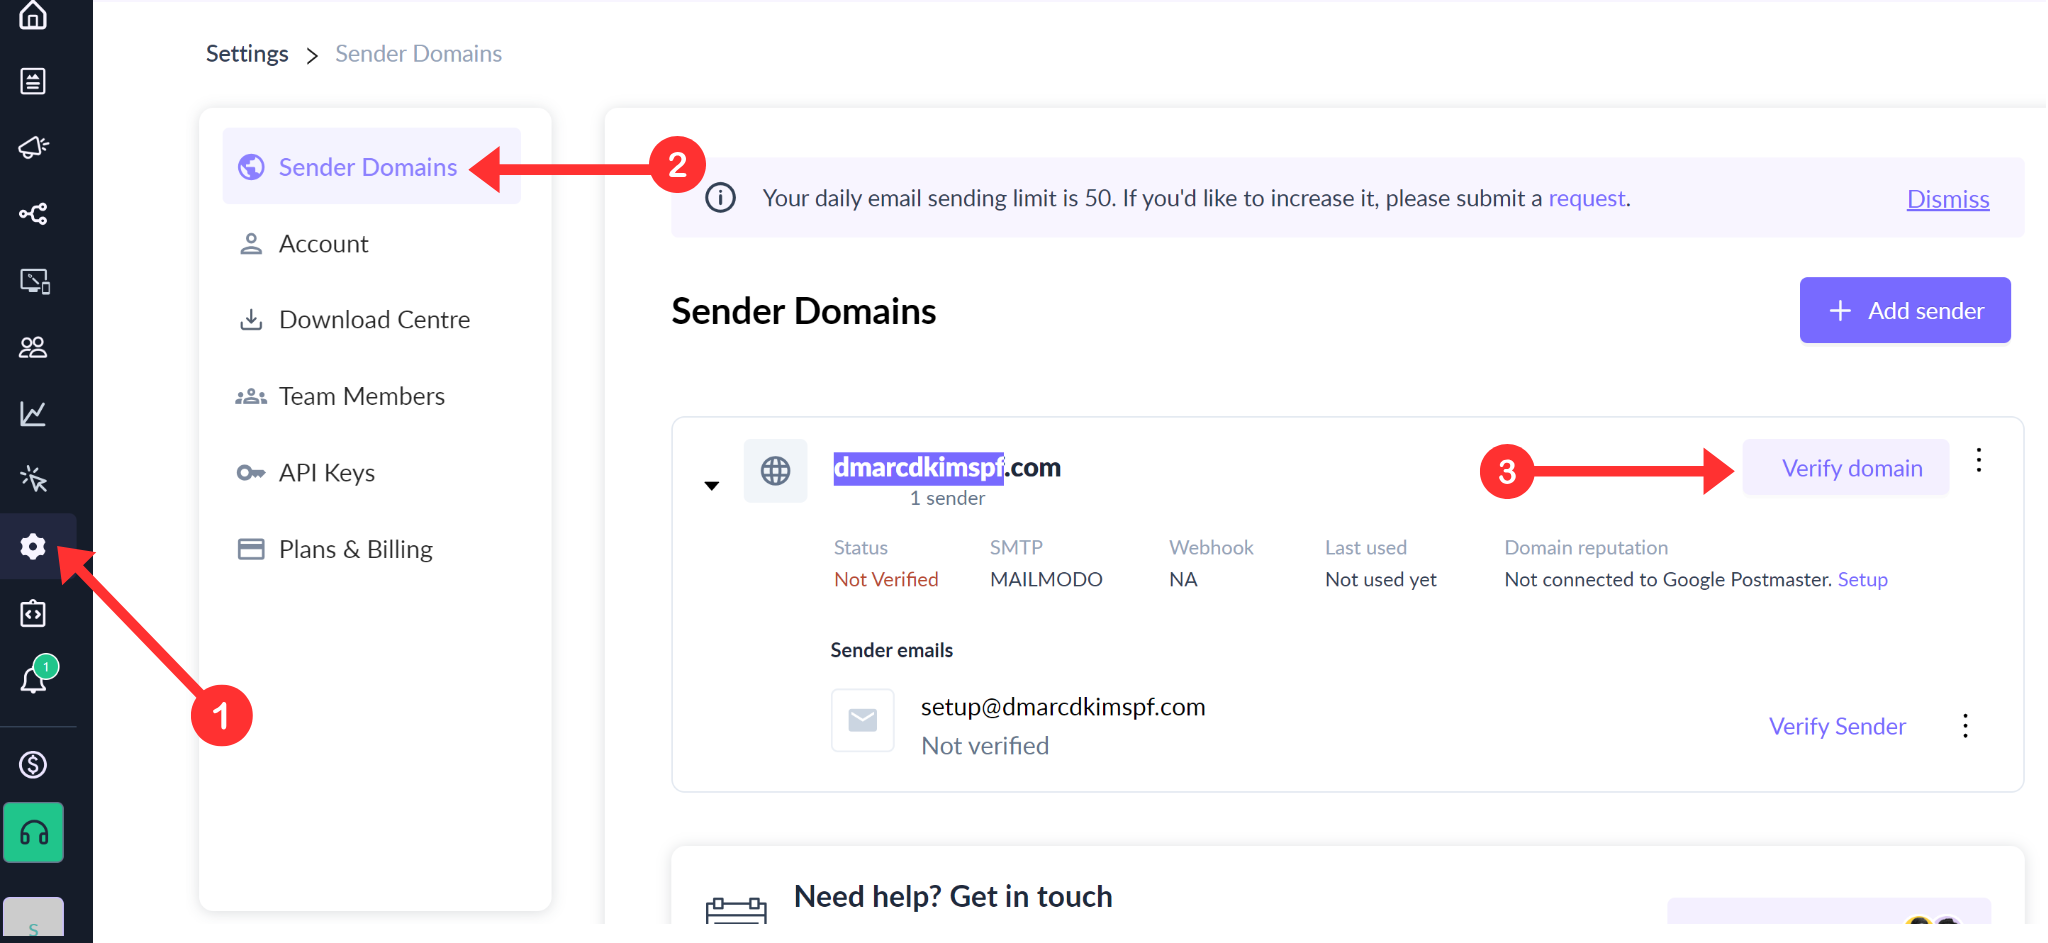
Go to Settings in the left navigation menu.
In the Sender Domains tab, your sign-up email domain will be added by default.
-
Now, click the Verify Domain option next to your domain.
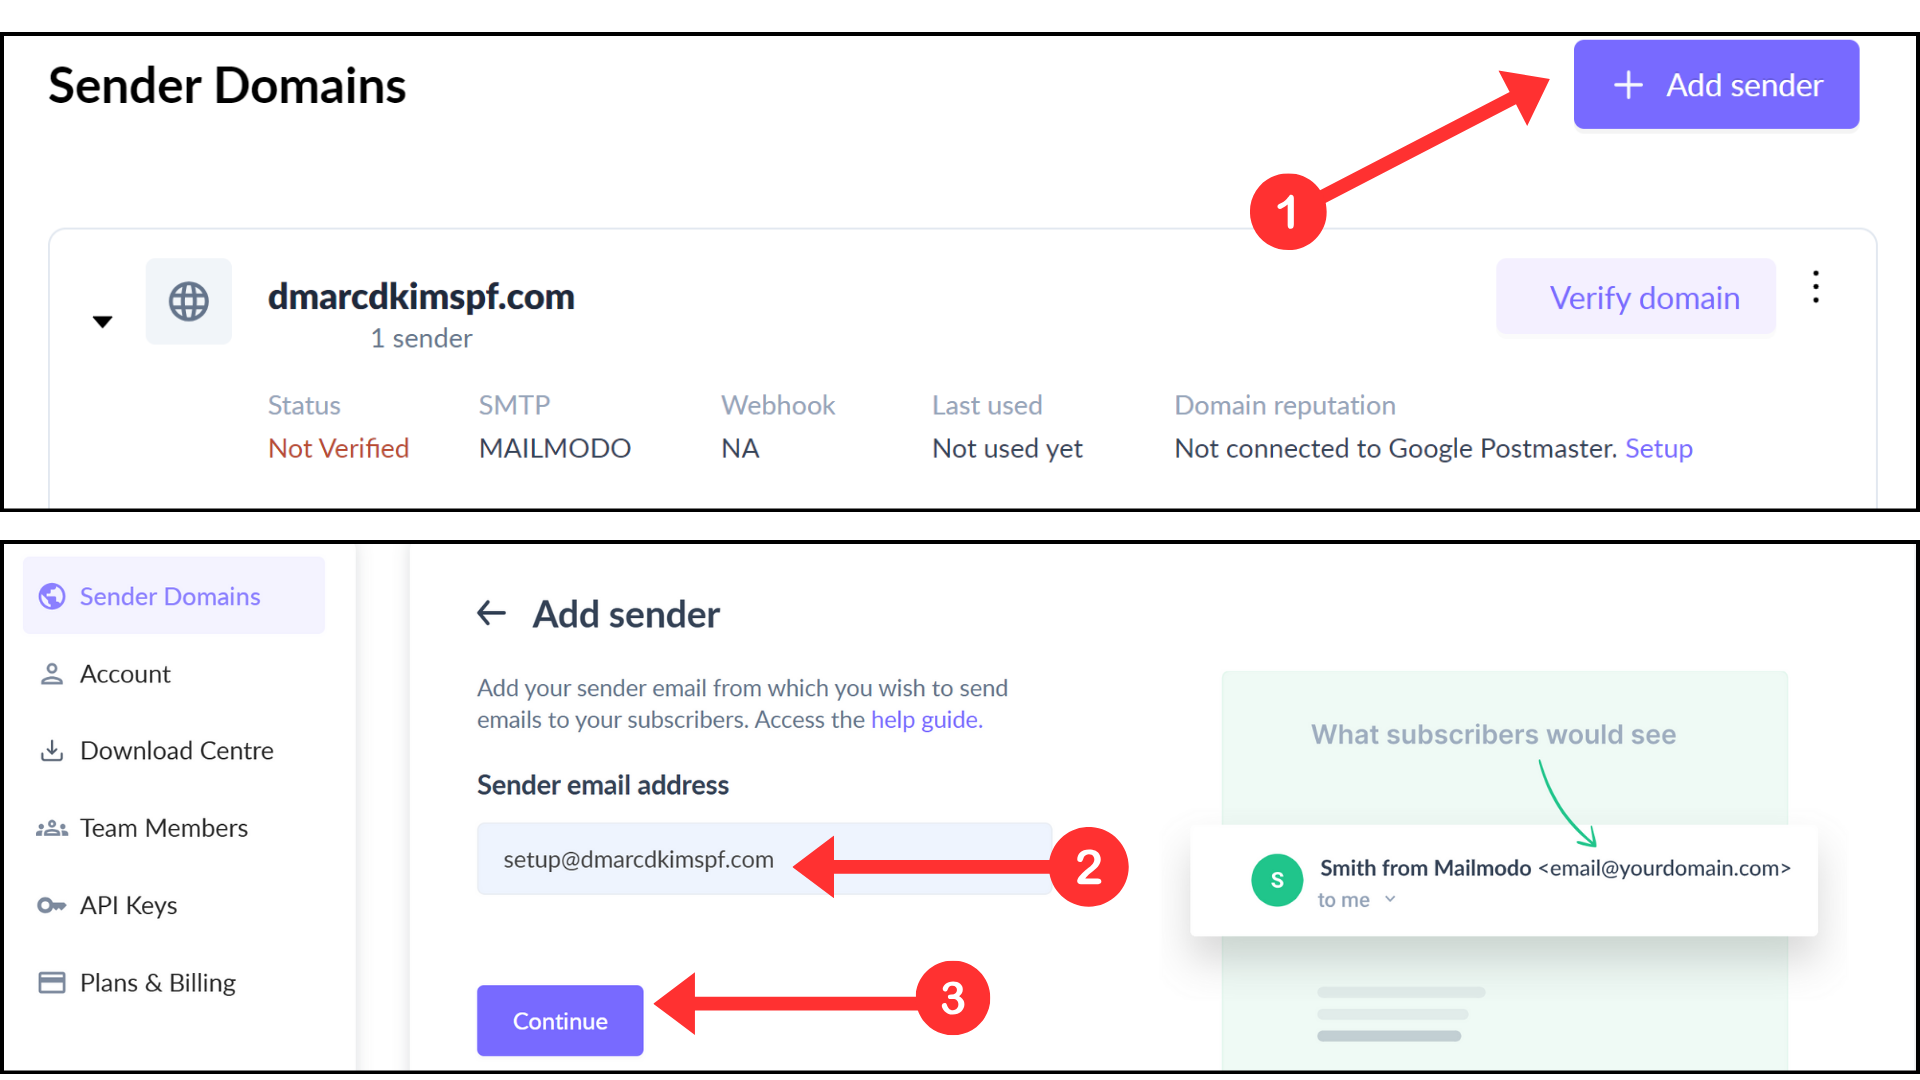
If you want to add another email, click the Add Sender button.
-
Write down your business email and click Continue.
-
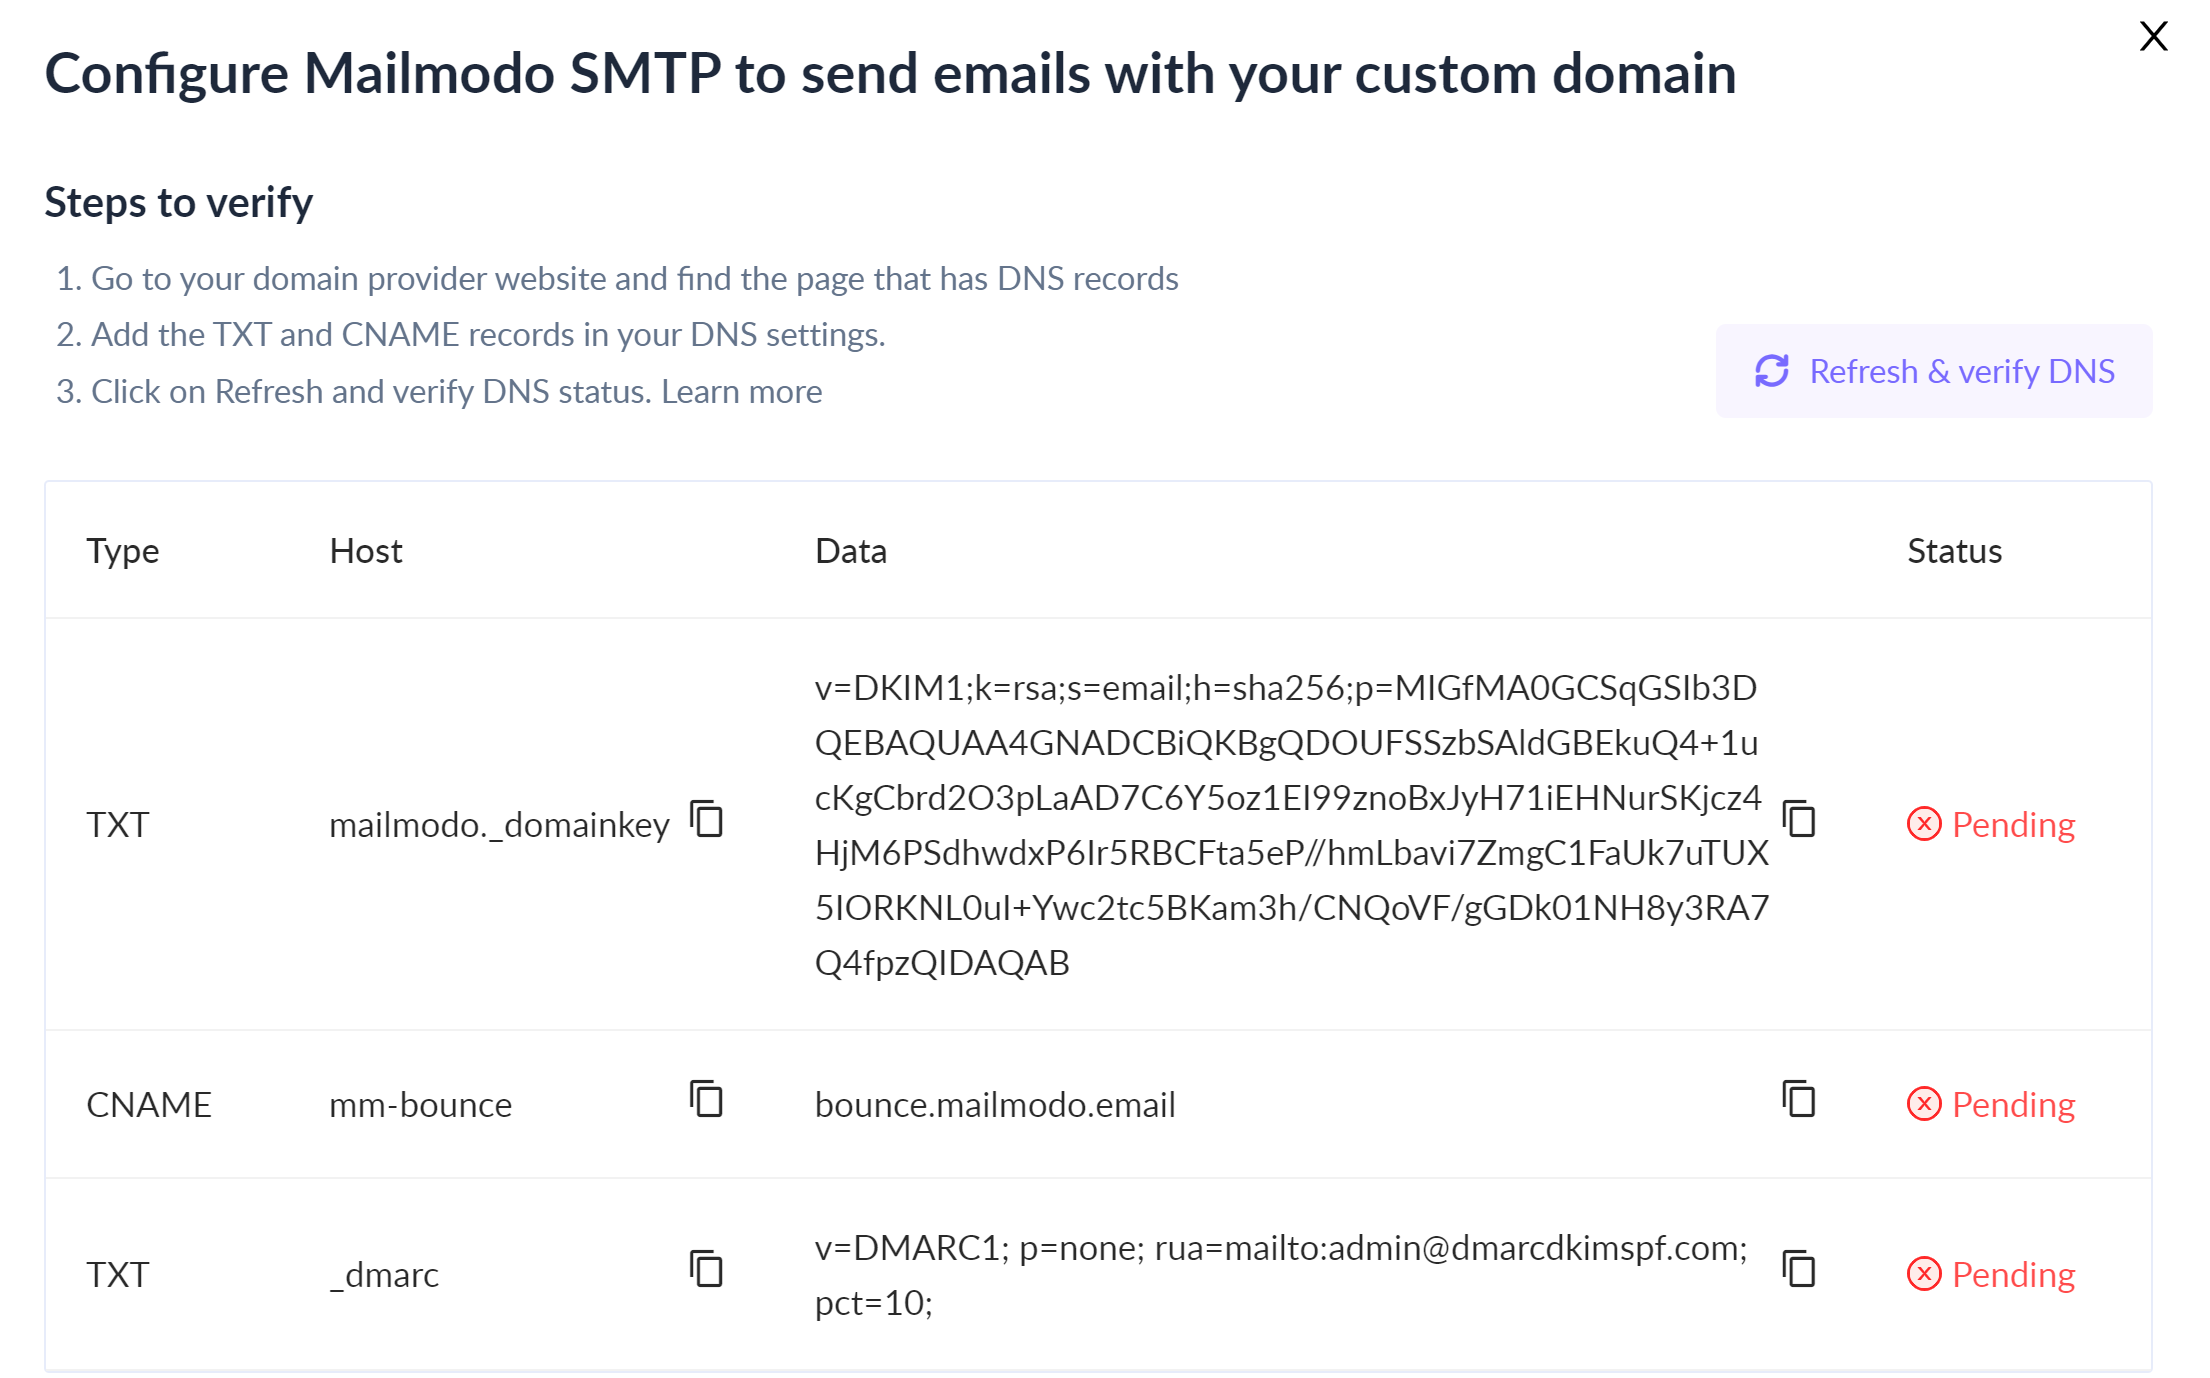
It will take you to the DNS records page with a DKIM, Bounce, and DMARC record.
Setup Mailmodo DKIM Record:
Login to your DNS provider. We are using Cloudflare for this tutorial.
Click your domain and go to the DNS tab.
In the Records tab, click Add Record.
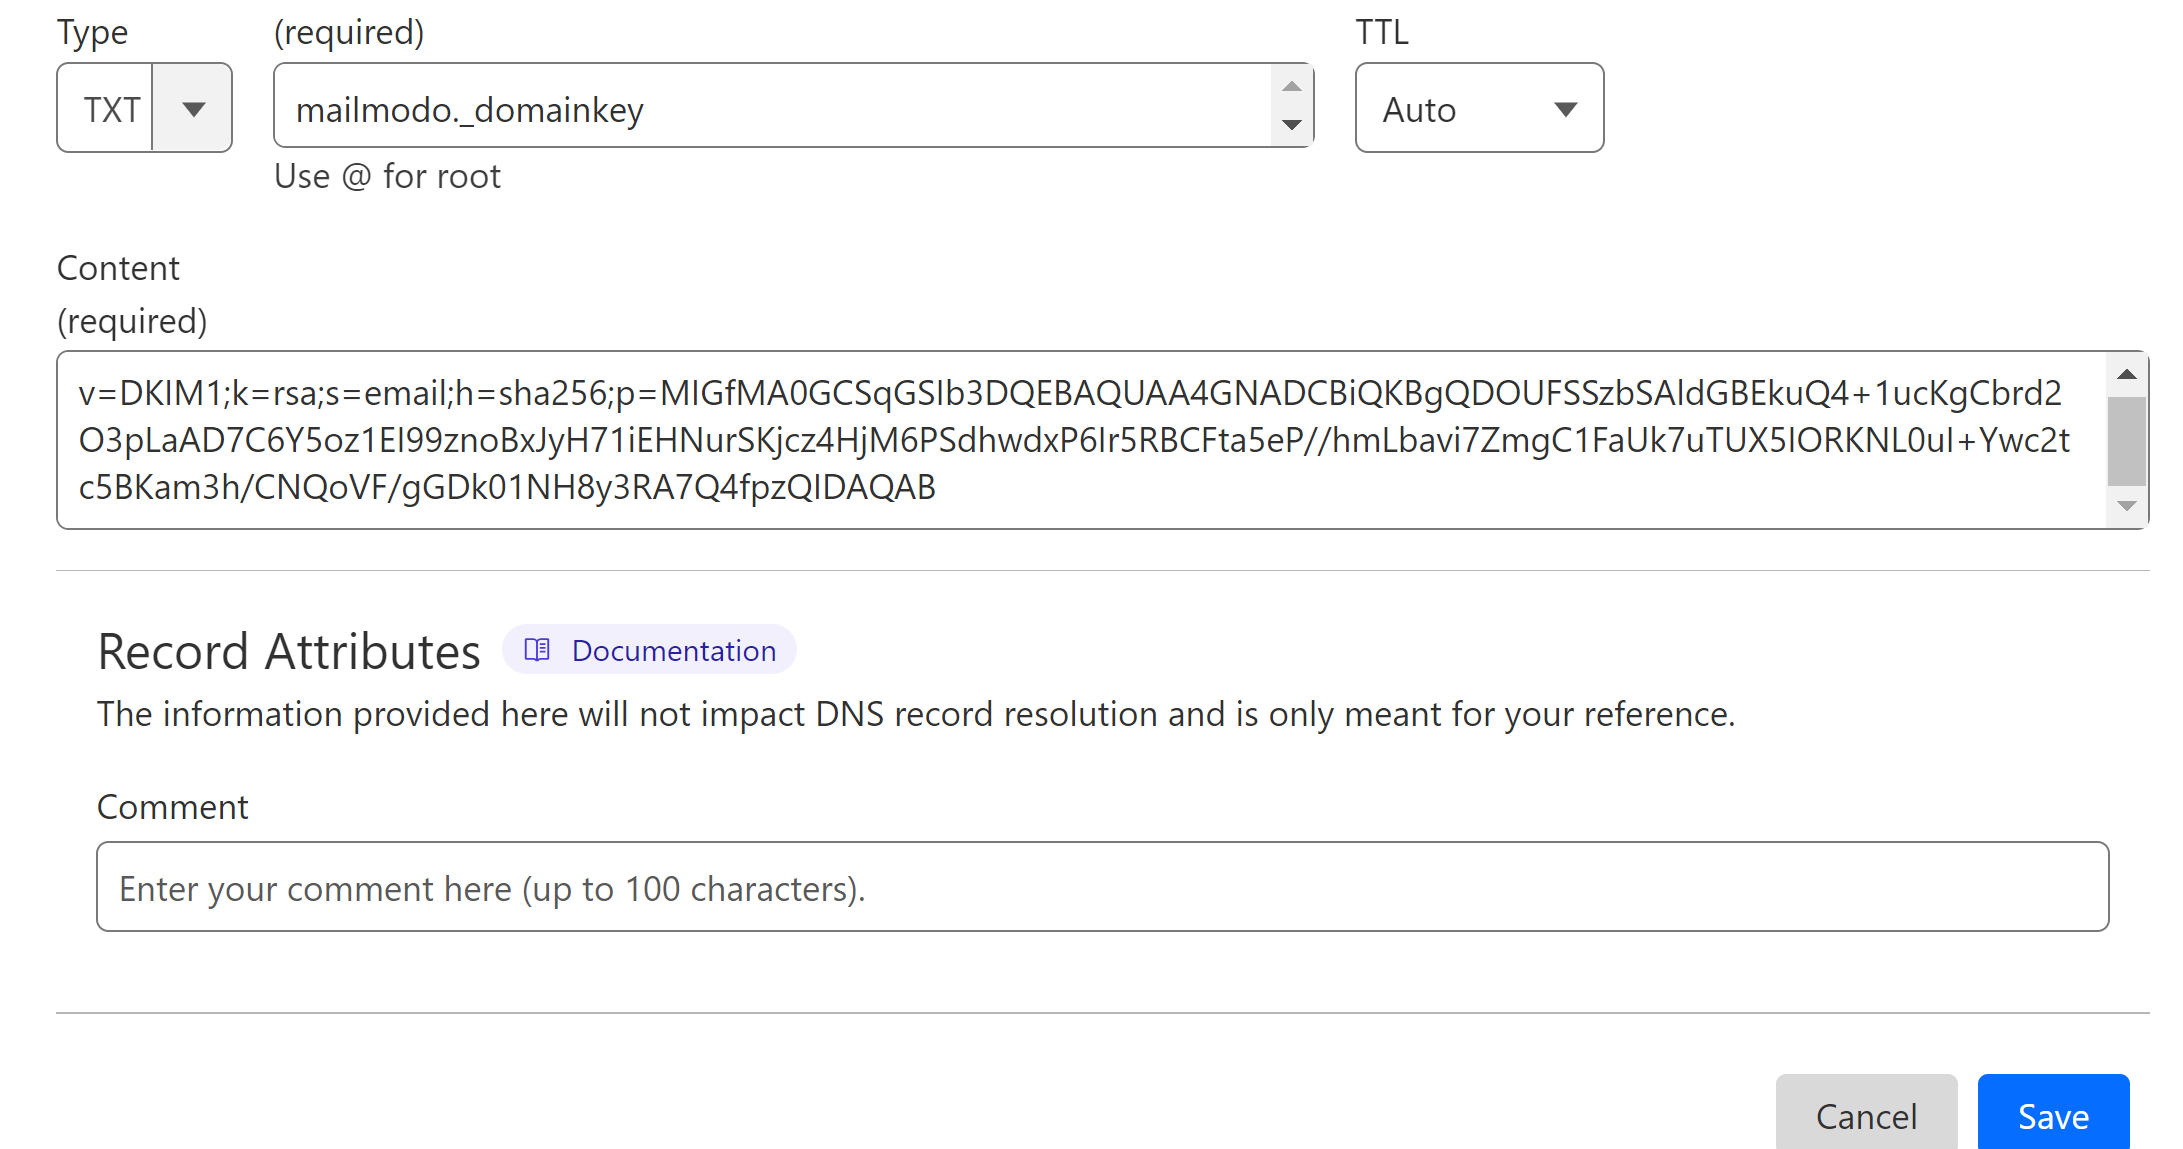
Select type TXT.
Copy the Host name from Mailmodo and paste it into the Name field in the DNS dashboard.
Copy the Data value and add it to the Content field.
-
Finally, click Save.
Setup Mailmodo Bounce Record:
Select the record type CNAME.
Add the Host name in the Name field.
Add the Data value in the Target field.
-
Turn off the proxy toggle and click Save.
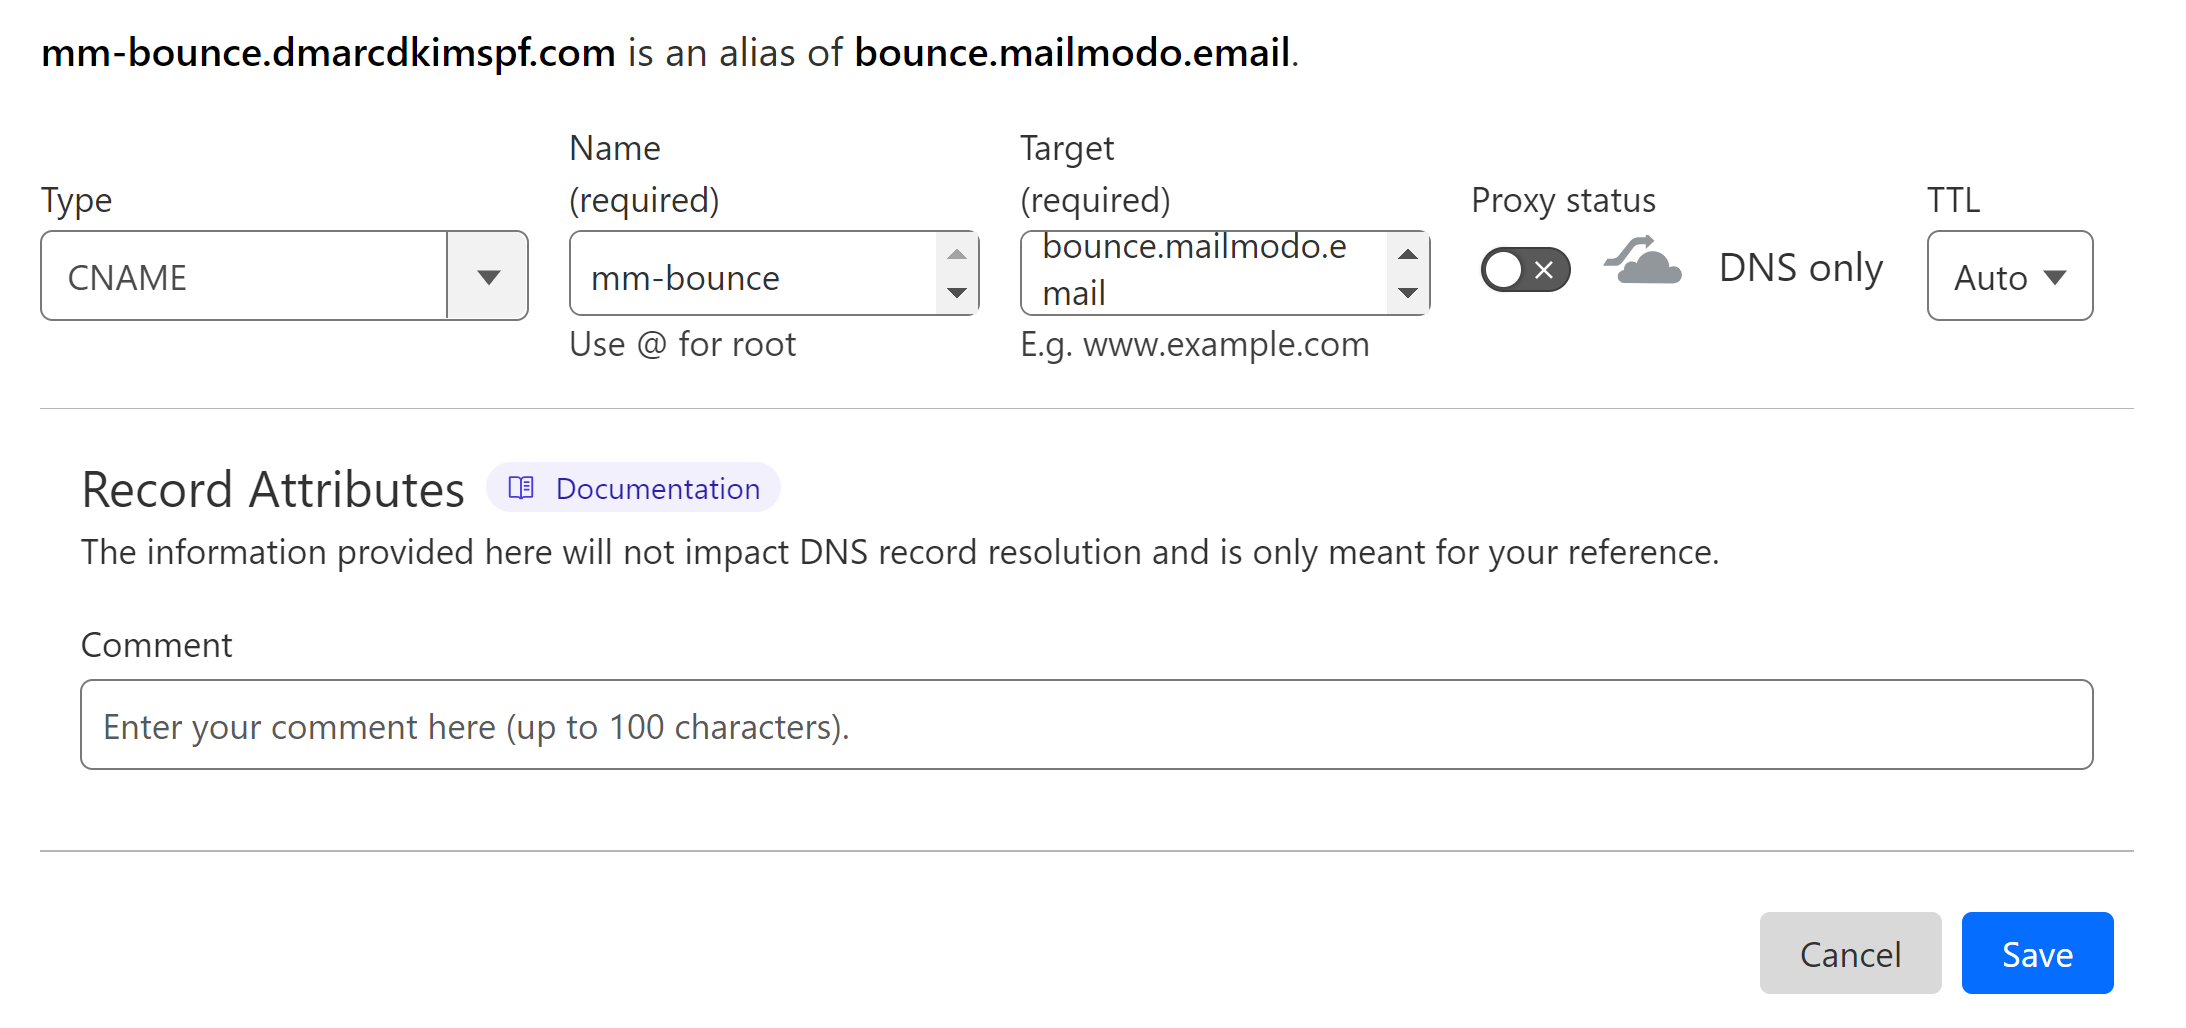
NOTE: Always turn off the proxy for CNAME records. When enabled, it directs the traffic to DNS server instead of email server.
Setup Mailmodo DMARC Record:
The DMARC value provided by Mailmodo is a p=none value which only provides email monitoring. It does not block emails coming from unauthorized sources. Moreover, with this DMARC value, you will be receiving complex DMARC report data in your email which is hard to understand by a layman. DmarcDkim.com has introduced a tool that guides you step by step on implementing a strict DMARC policy and it breaks down the complex data into actionable insights. To generate an effective DMARC policy, follow the steps below:
Go to the DMARC check tool.
-
Add your domain name and click Check.

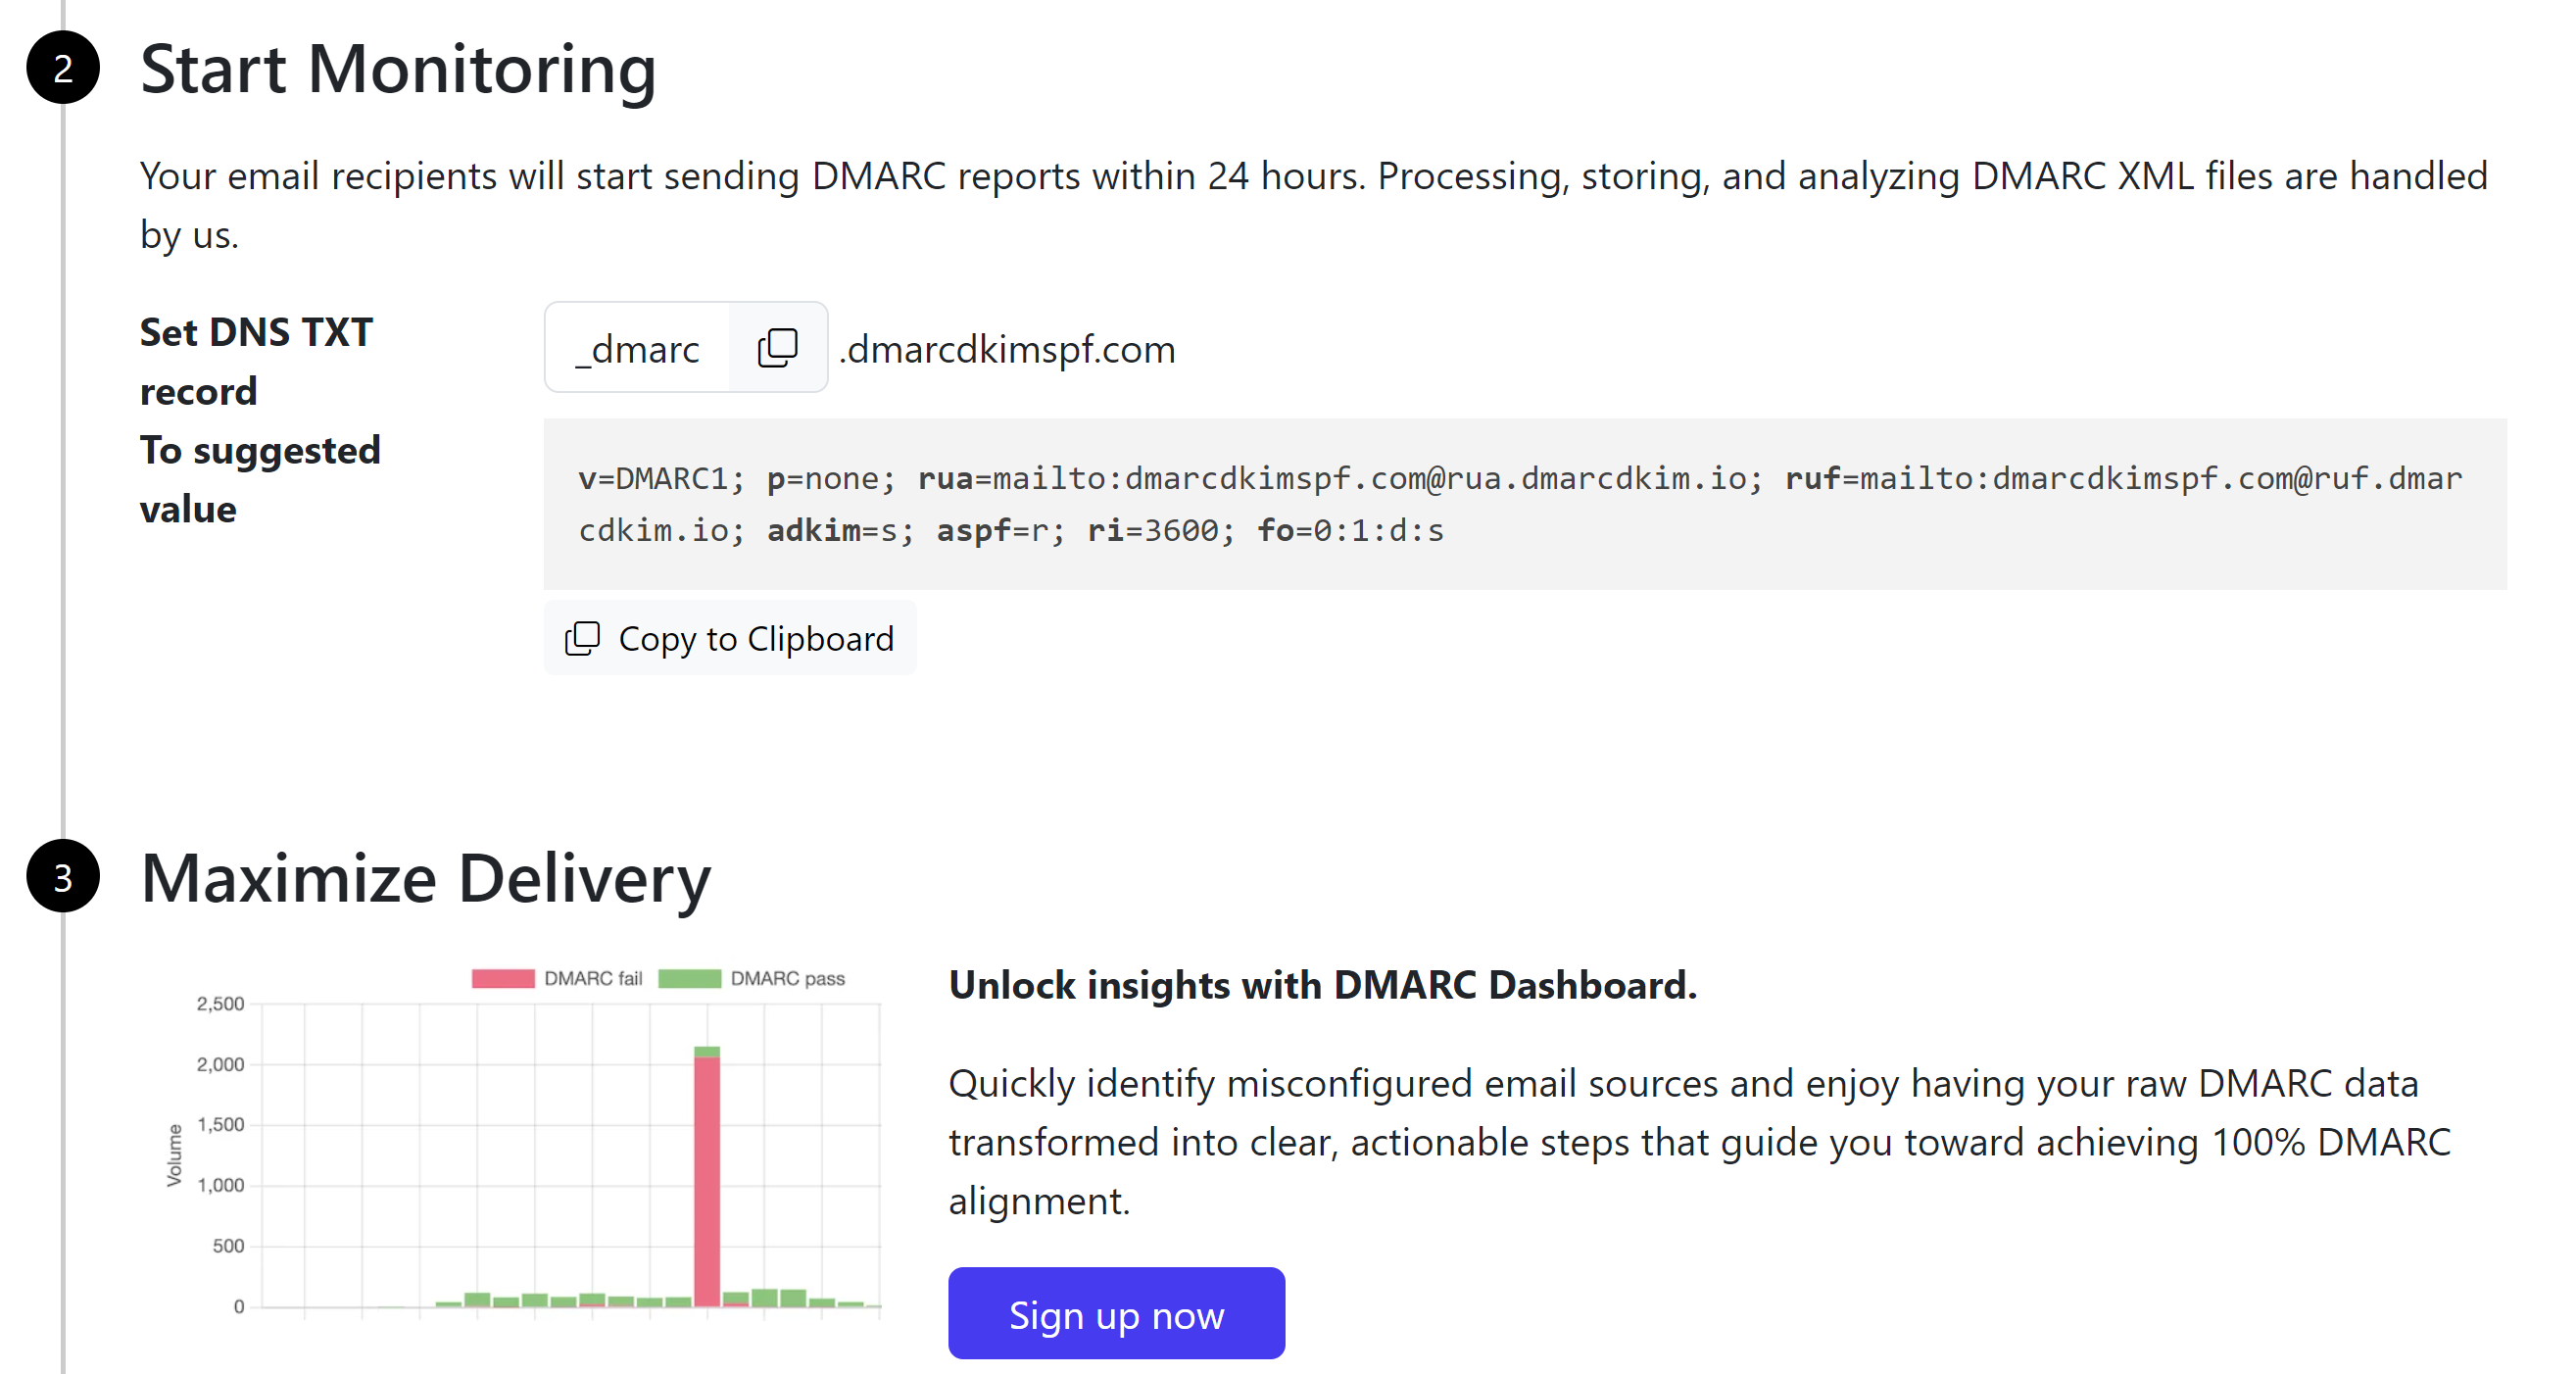
The tool suggests an initial monitoring value and after monitoring all emails, it guides you through setting a strict policy.
Add this suggested value to your DNS provider.
-
Click Sign up now to get access to the DMARC reports and analytics dashboard.
Verify Mailmodo DNS Records:
-
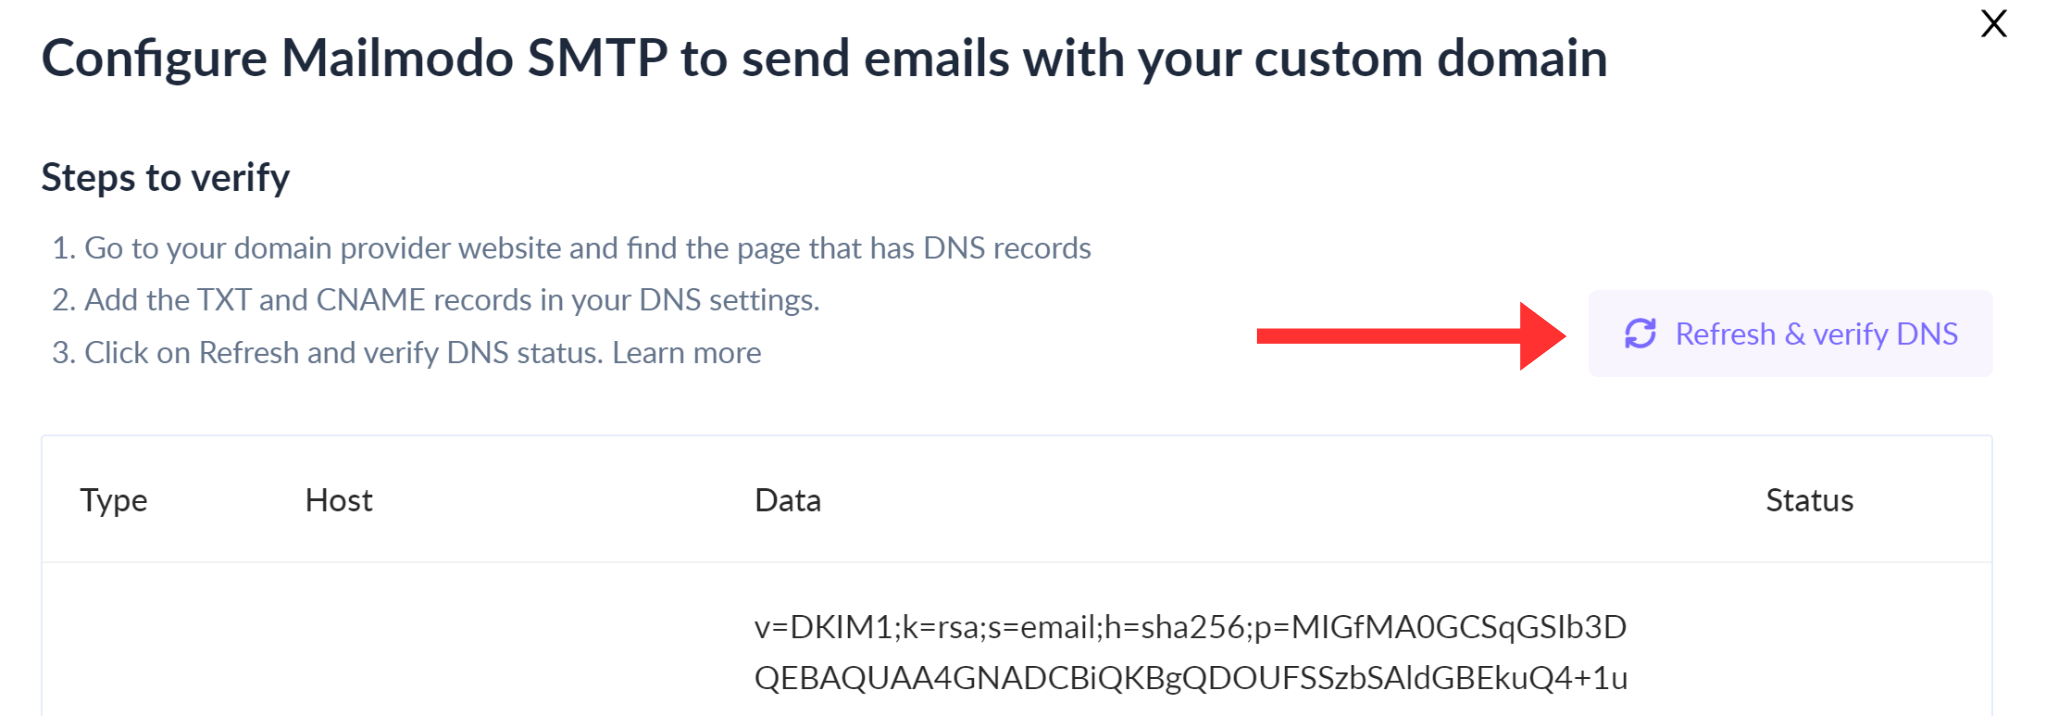
After adding all records, click the Refresh & Verify DNS button.
-
If records are authenticated, you will see "Verified" written in green with each record.
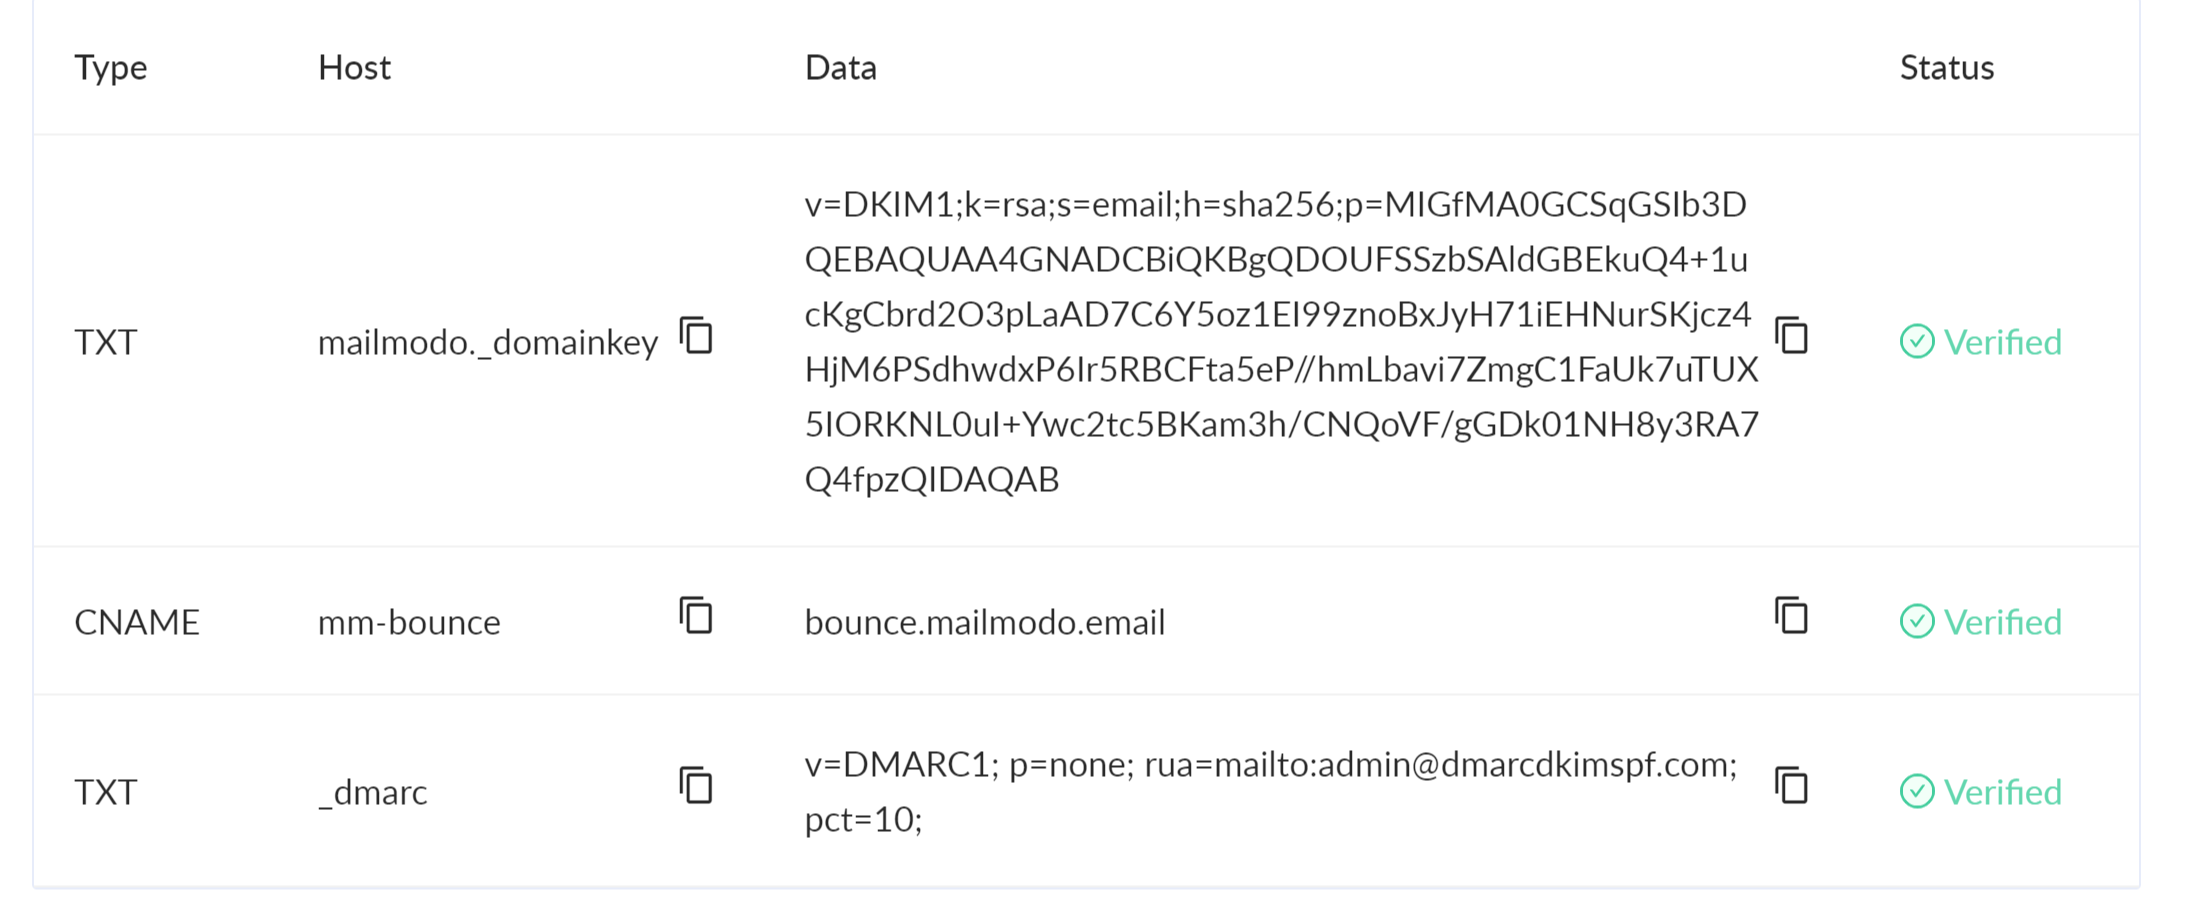
If records are not verified immediately, wait for 24 hours for the DNS status to update.
If DNS verification fails after 24 hours, contact the DmarcDkim.com support team for assistance.
Check domain and follow the instructions to nail down your DMARC configuration.
No expert knowledge needed!


