How to Achieve Mailjet DMARC Alignment with SPF & DKIM?
Check your domain for DMARC, DKIM, SPF and MX records. Get a free report.
Mailjet DMARC Alignment, DKIM, SPF and Domain Authentication
Authenticating and securing email communication is crucial for businesses to prevent spoofing and improve deliverability. There are two commonly used methods to authenticate emails - SPF (Sender Policy Framework) and DKIM (DomainKey Identified Mail). You can get the SPF/DKIM values from the email service provider and add them to the domain hosting server to authenticate your webmail.
Various email delivery services provide SPF & DKIM authentication for your domains. In this article, we’ll dive deep into SPF/DKIM authentication using Mailjet (an email service provider) and Cloudflare (a DNS management server).
NOTE: Open your Cloudflare and Mailjet accounts side by side on two different tabs for a smooth process. Moreover, follow the given steps in chronological order.
Mailjet Domain Authentication Process:
Before adding SPF and DKIM authentication to your webmail, you need to validate/authenticate it first.
-
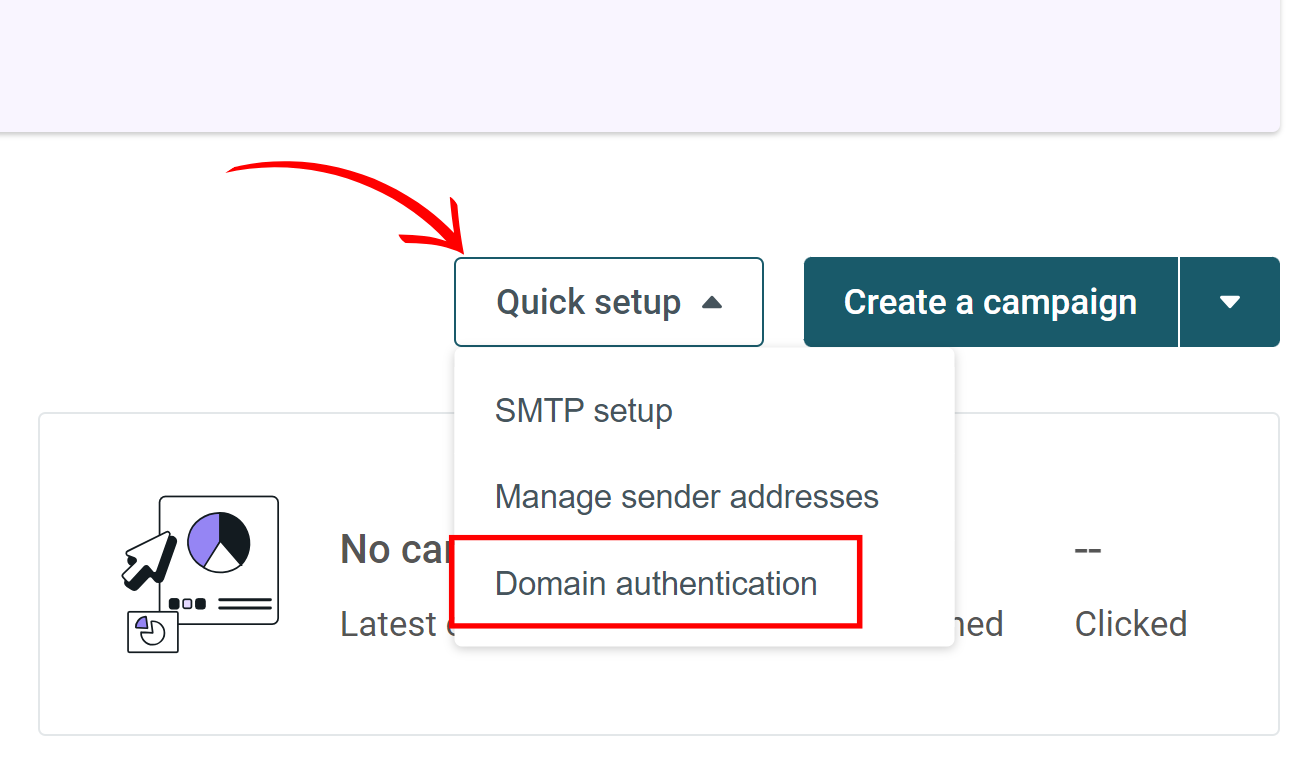
On your Mailjet account home screen, click Quick Setup and select Domain authentication from the drop-down menu.
-
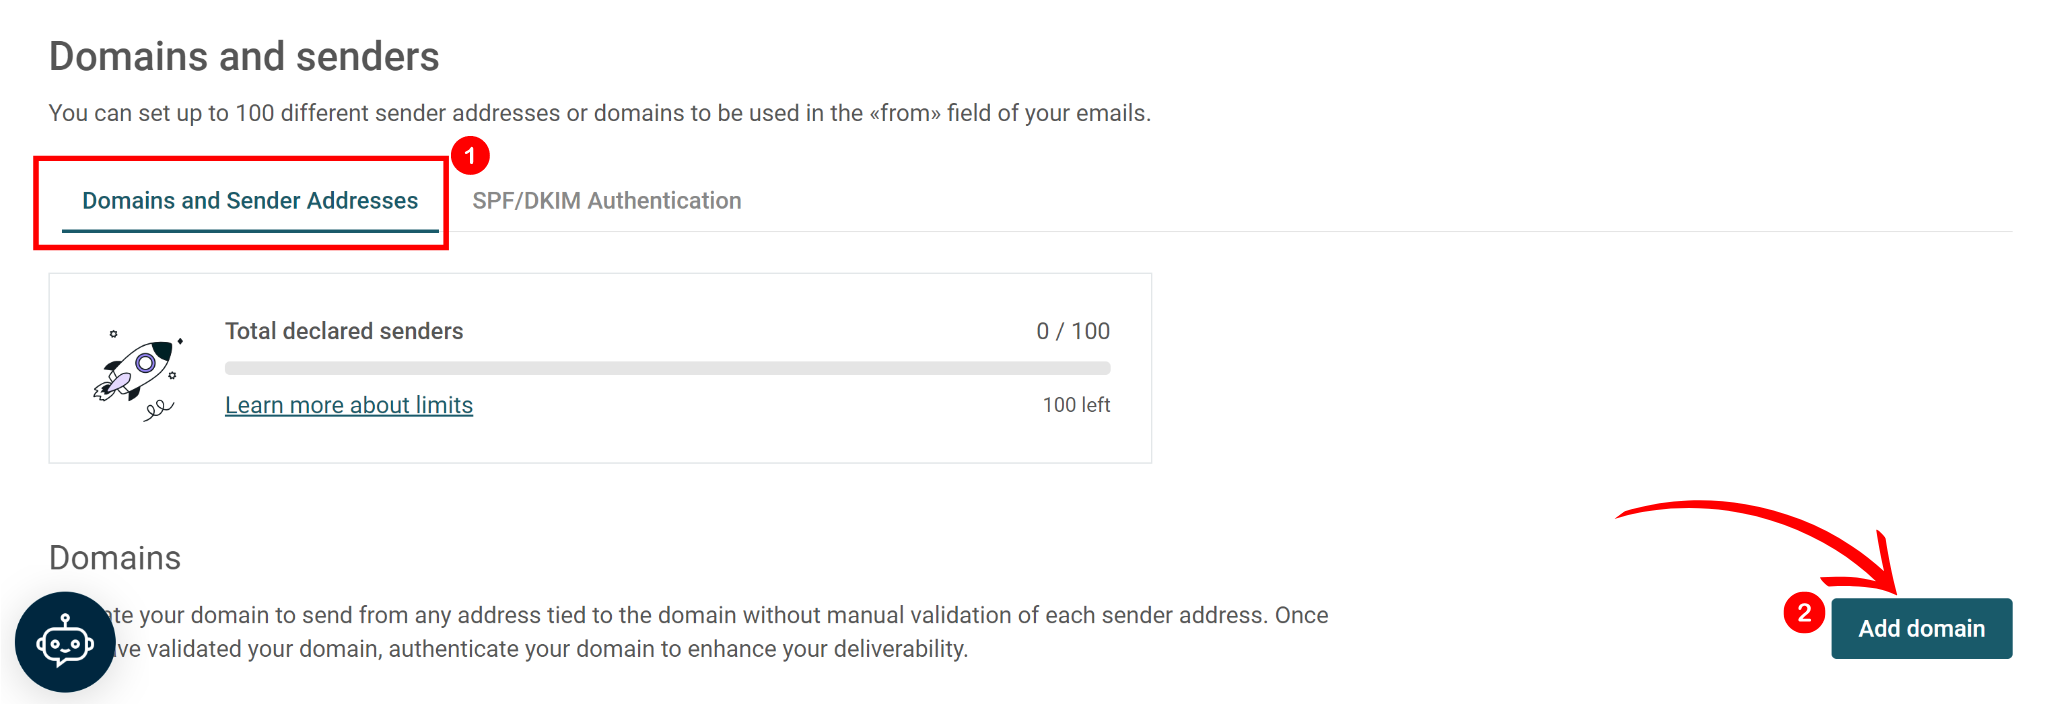
While you are in the “Domain and sender Addresses” tab, click on Add Domain.
-
Now add the web domain under the “Domain”, the website name under “Label” and hit the “Add” button.

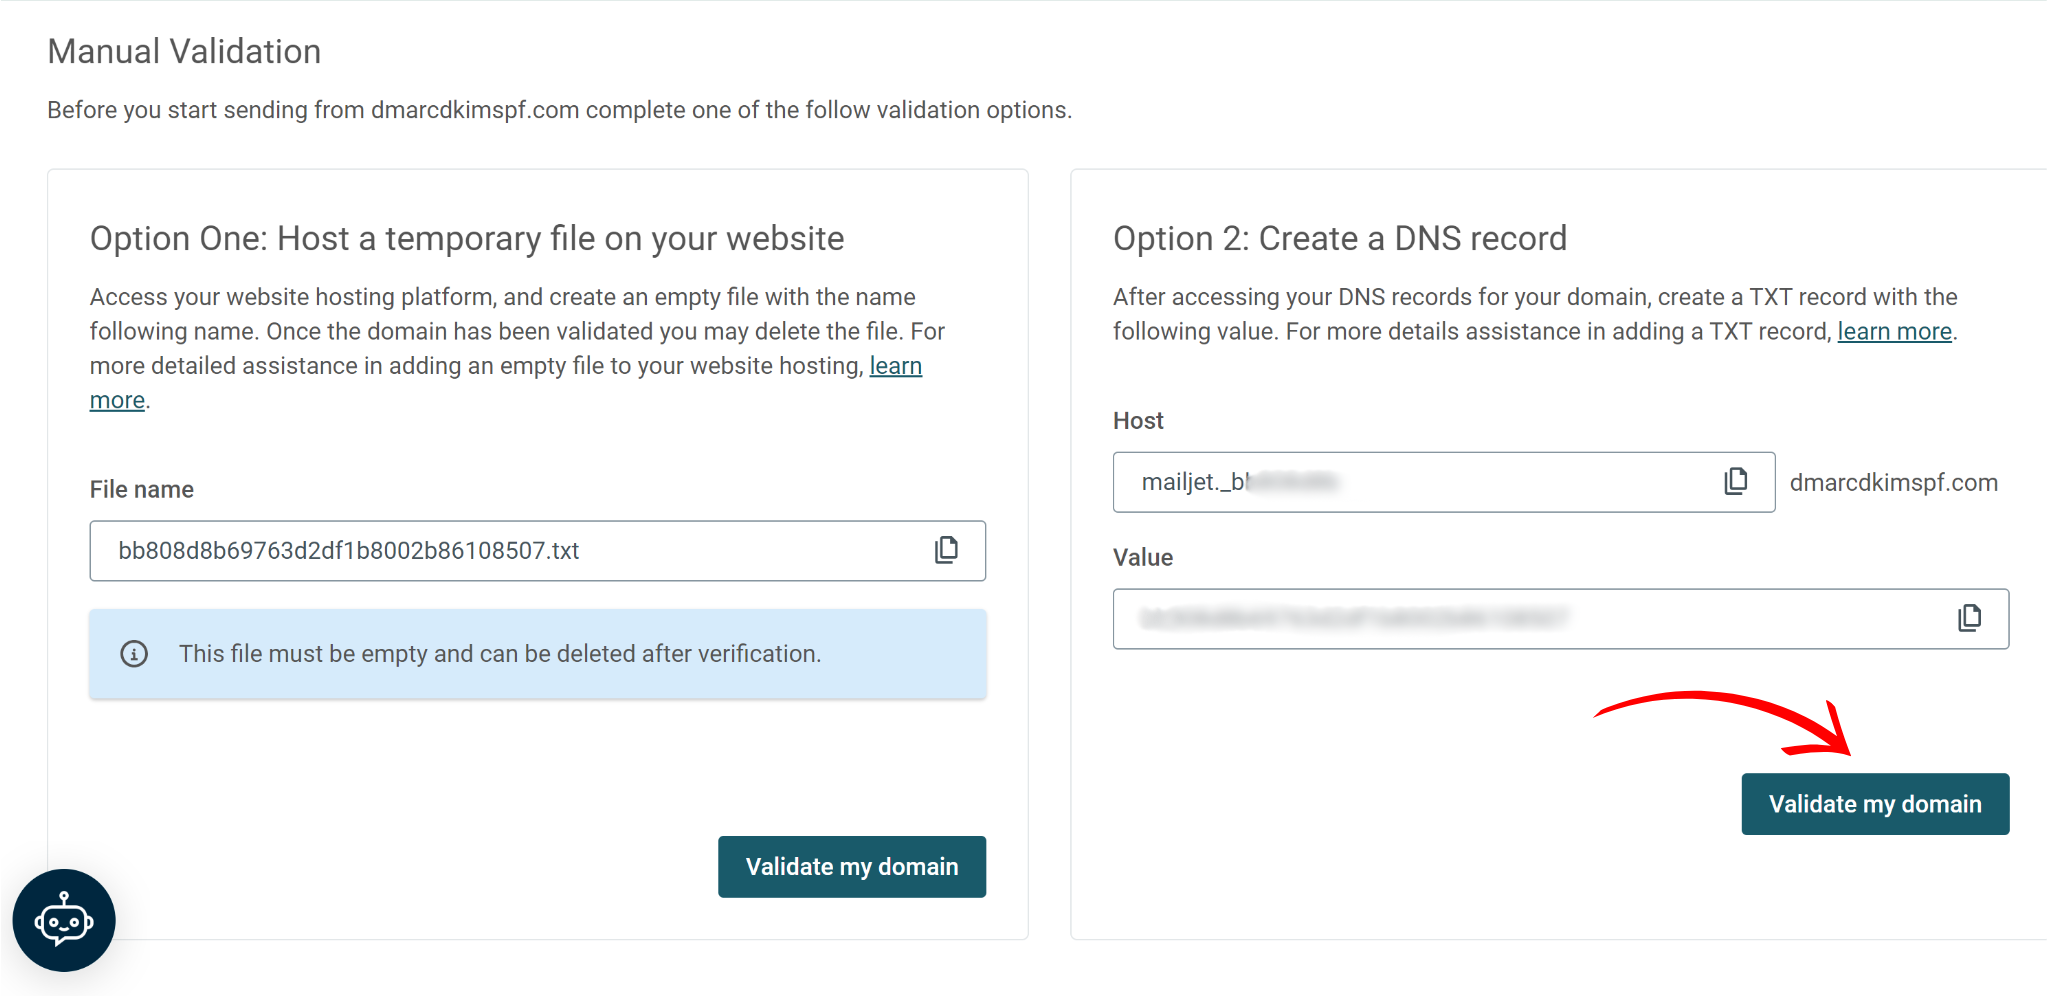
Next, you’ll see two options side by side on your screen. We’ll proceed with Option 2: Create a DNS Record in the right column.
In this column, copy the text written in the “Host” and “Value” fields.
-
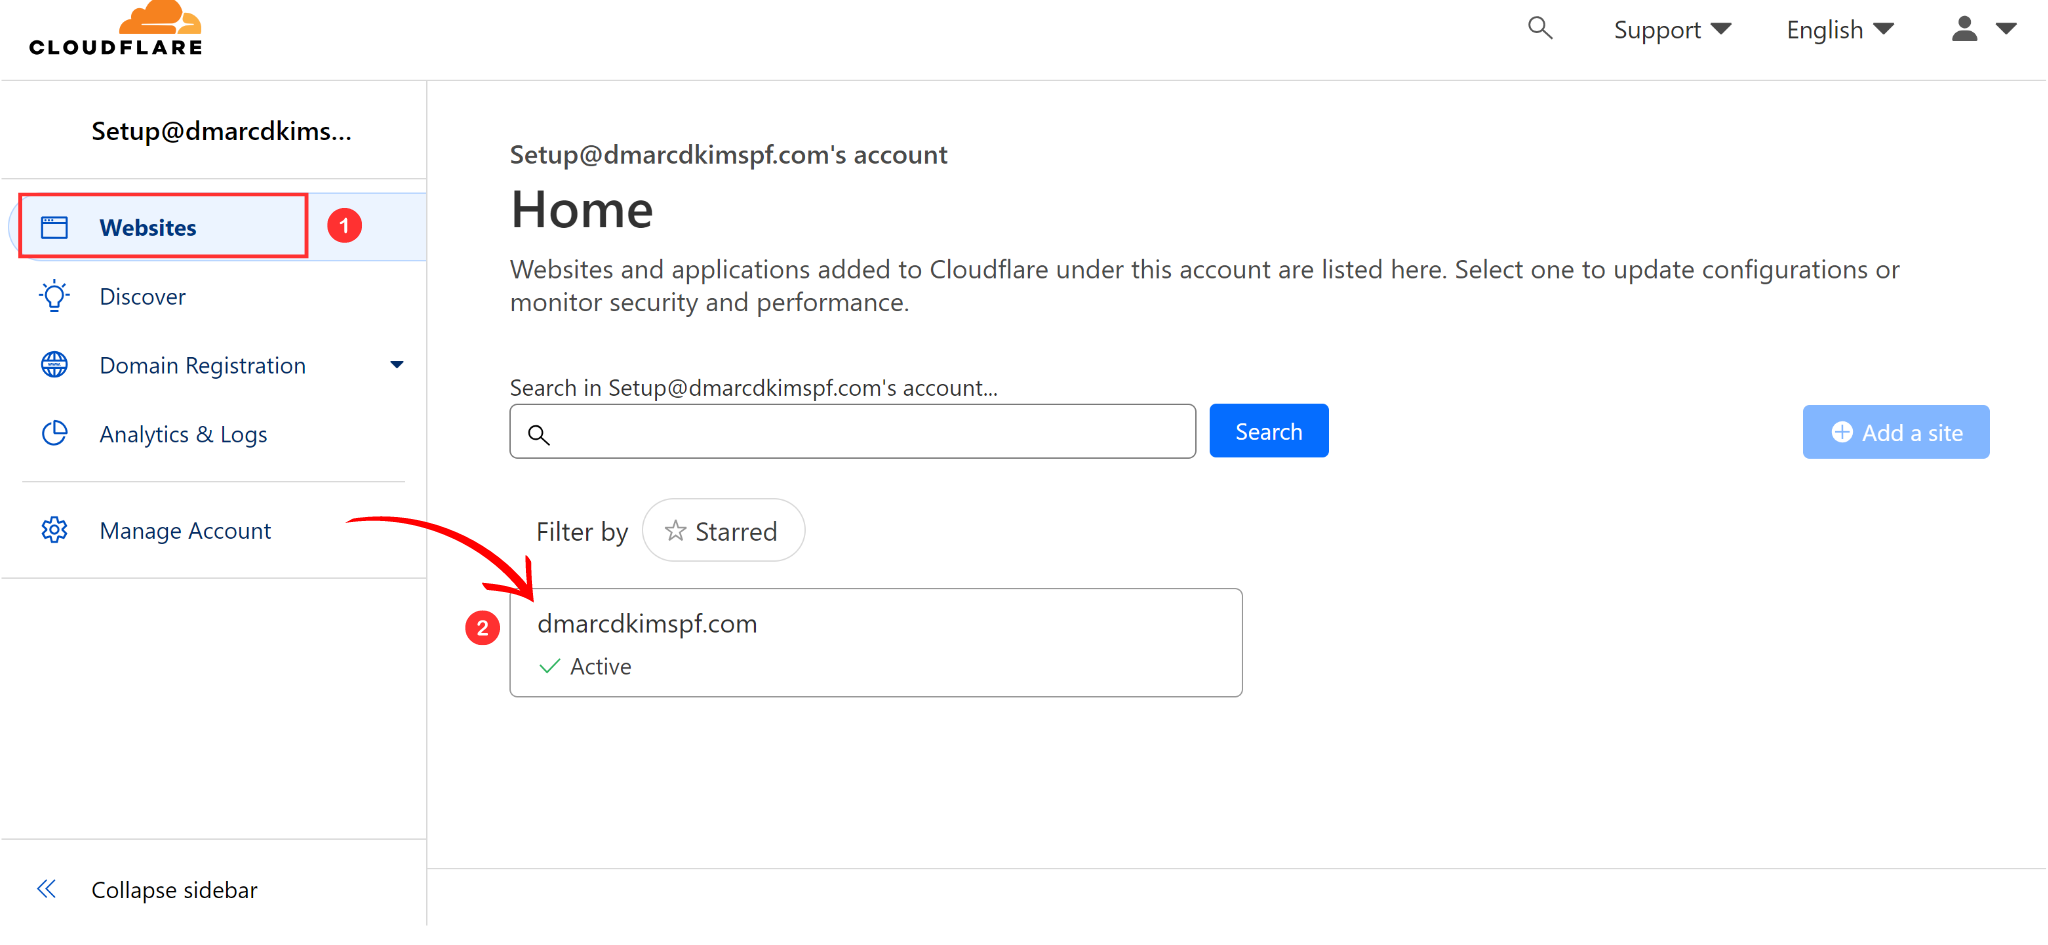
Now go to your Cloudflare dashboard in the second tab, click on Website in the left panel and select your particular website.
-
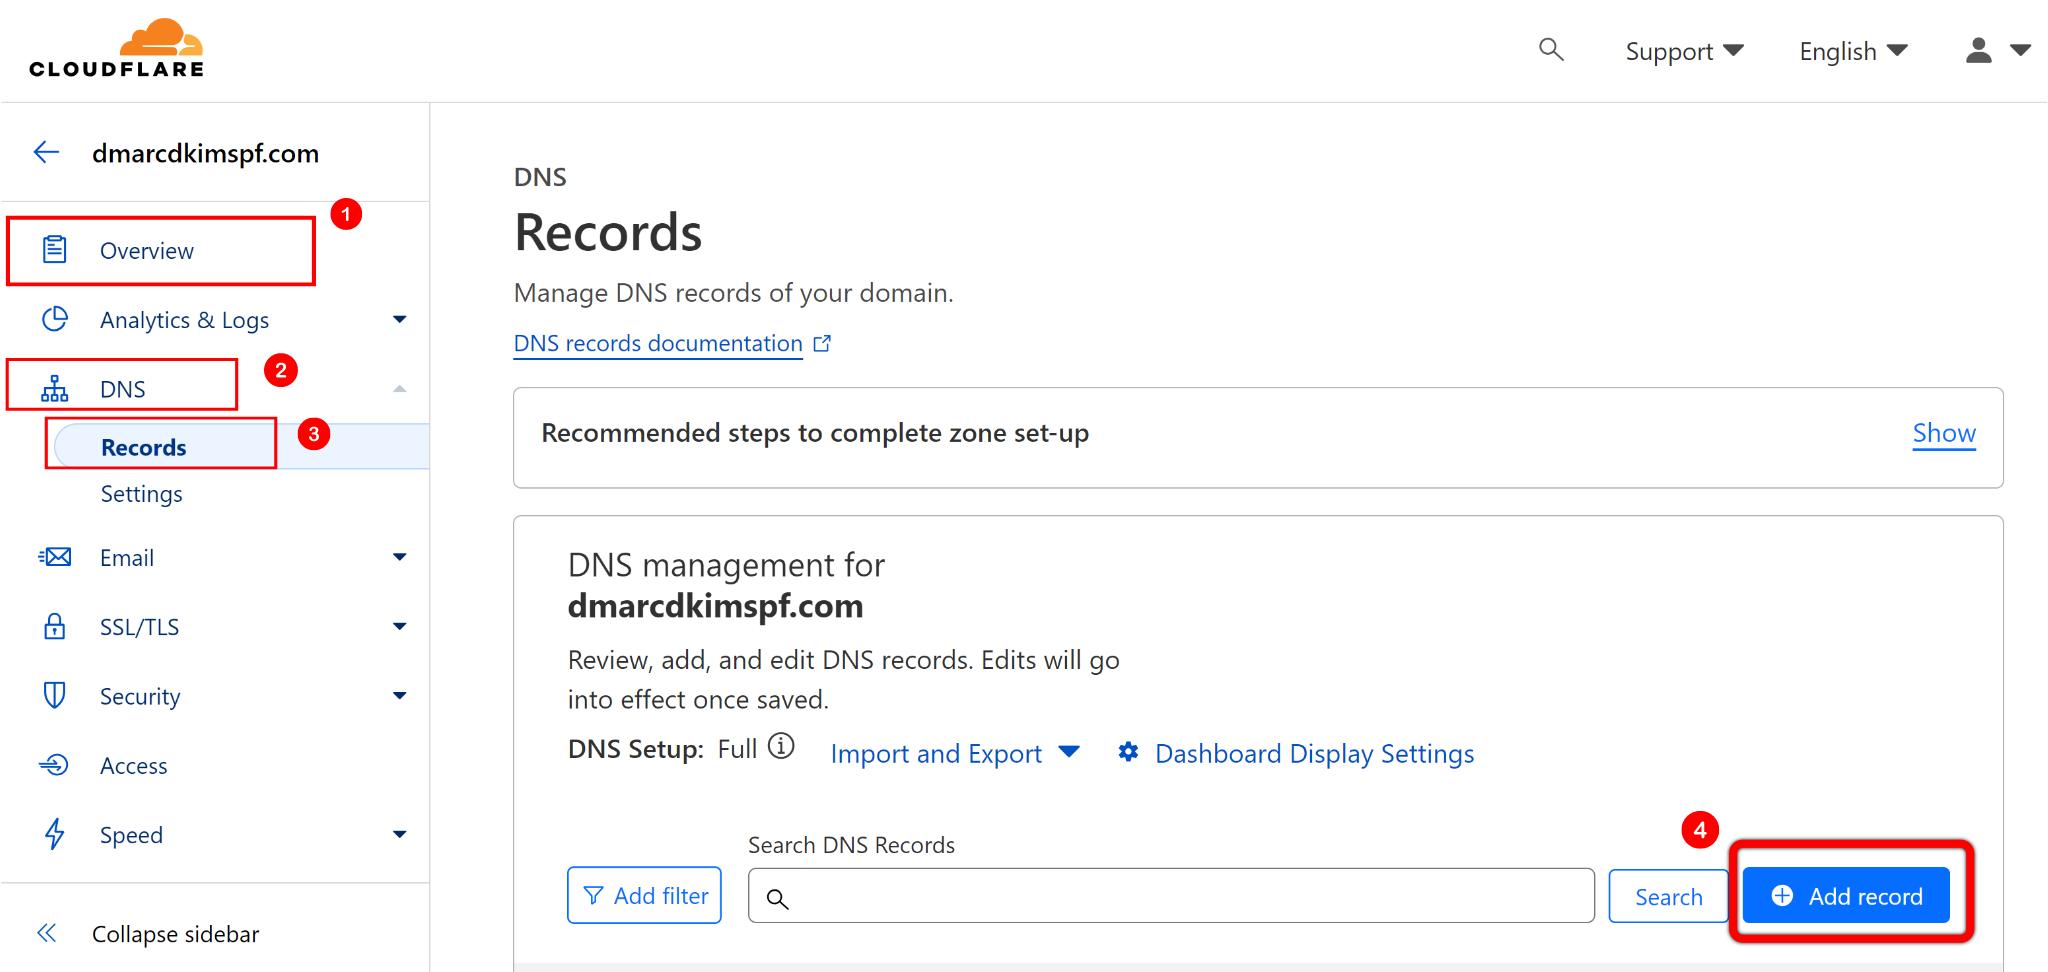
Click on Overview > DNS > Records > Add Record.
-
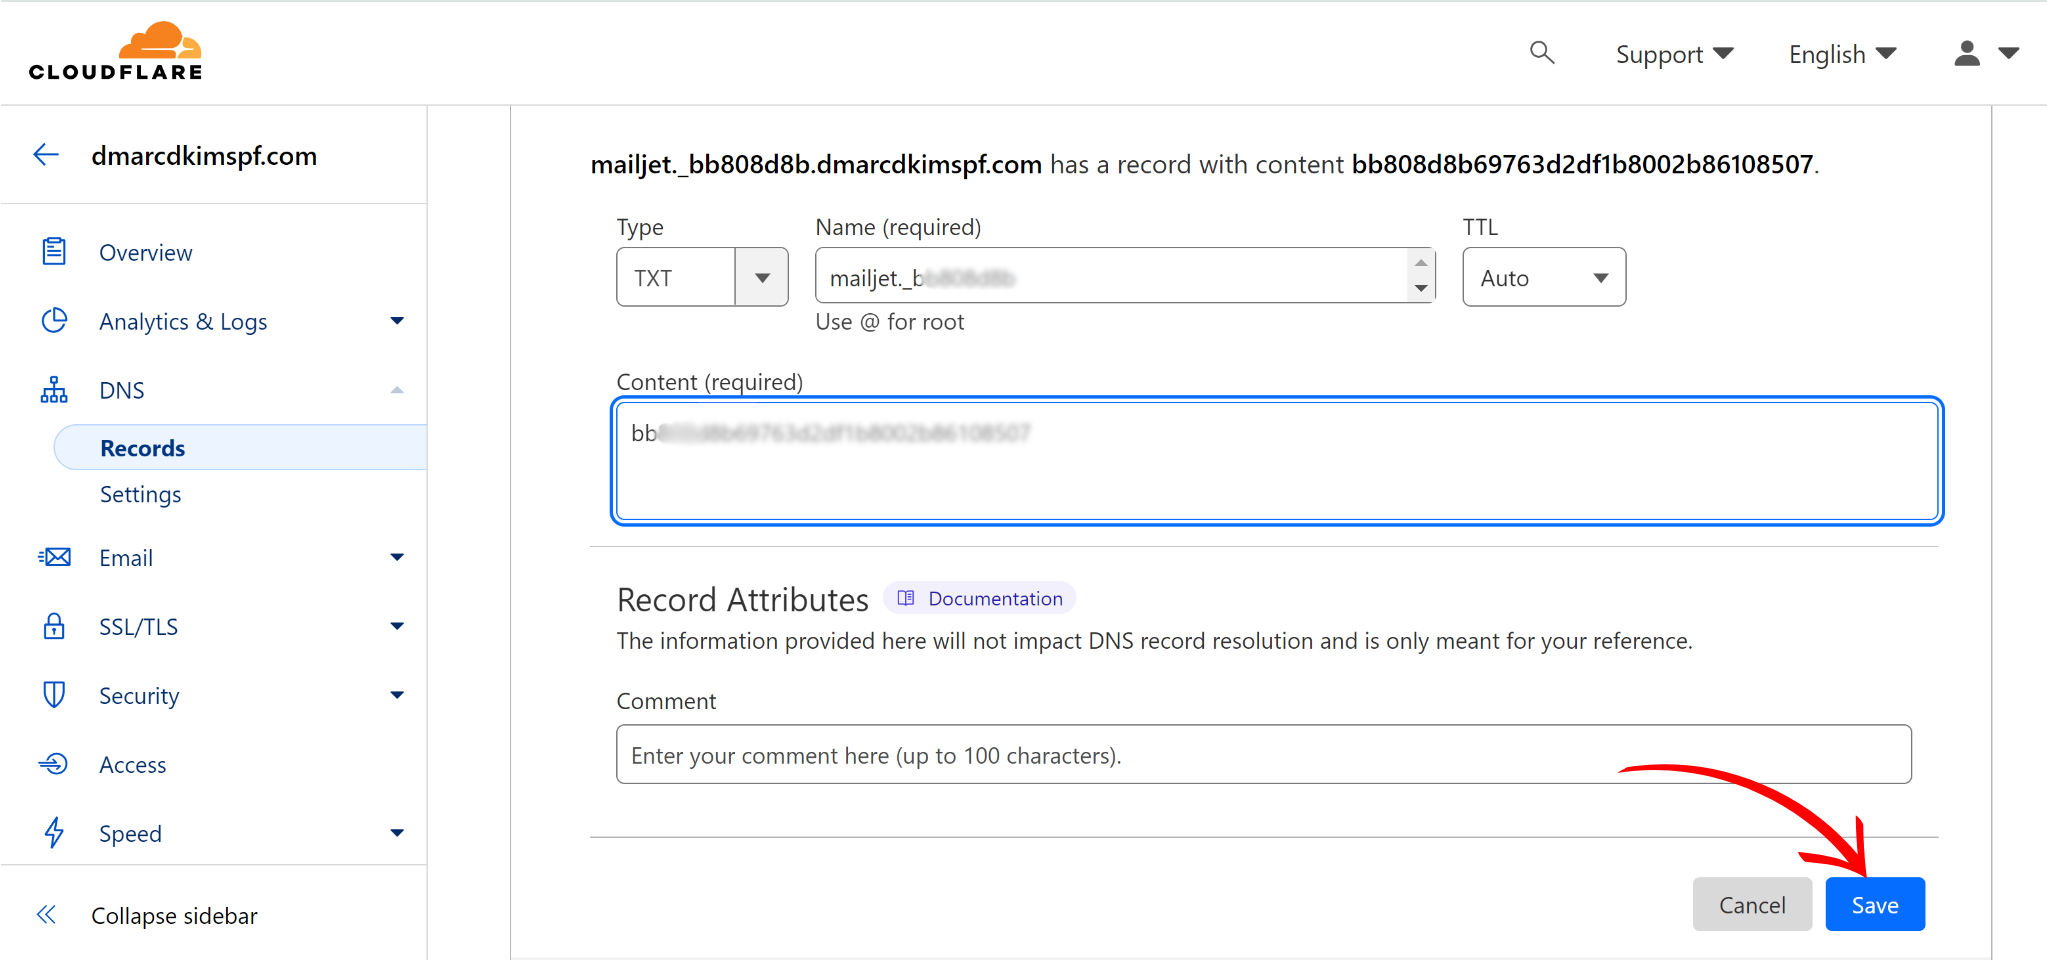
Select TXT in the “Type” field, paste host text in the “Name” field and value text in the “IPv4 Address” field (copied from Mailjet) & click Save.
-
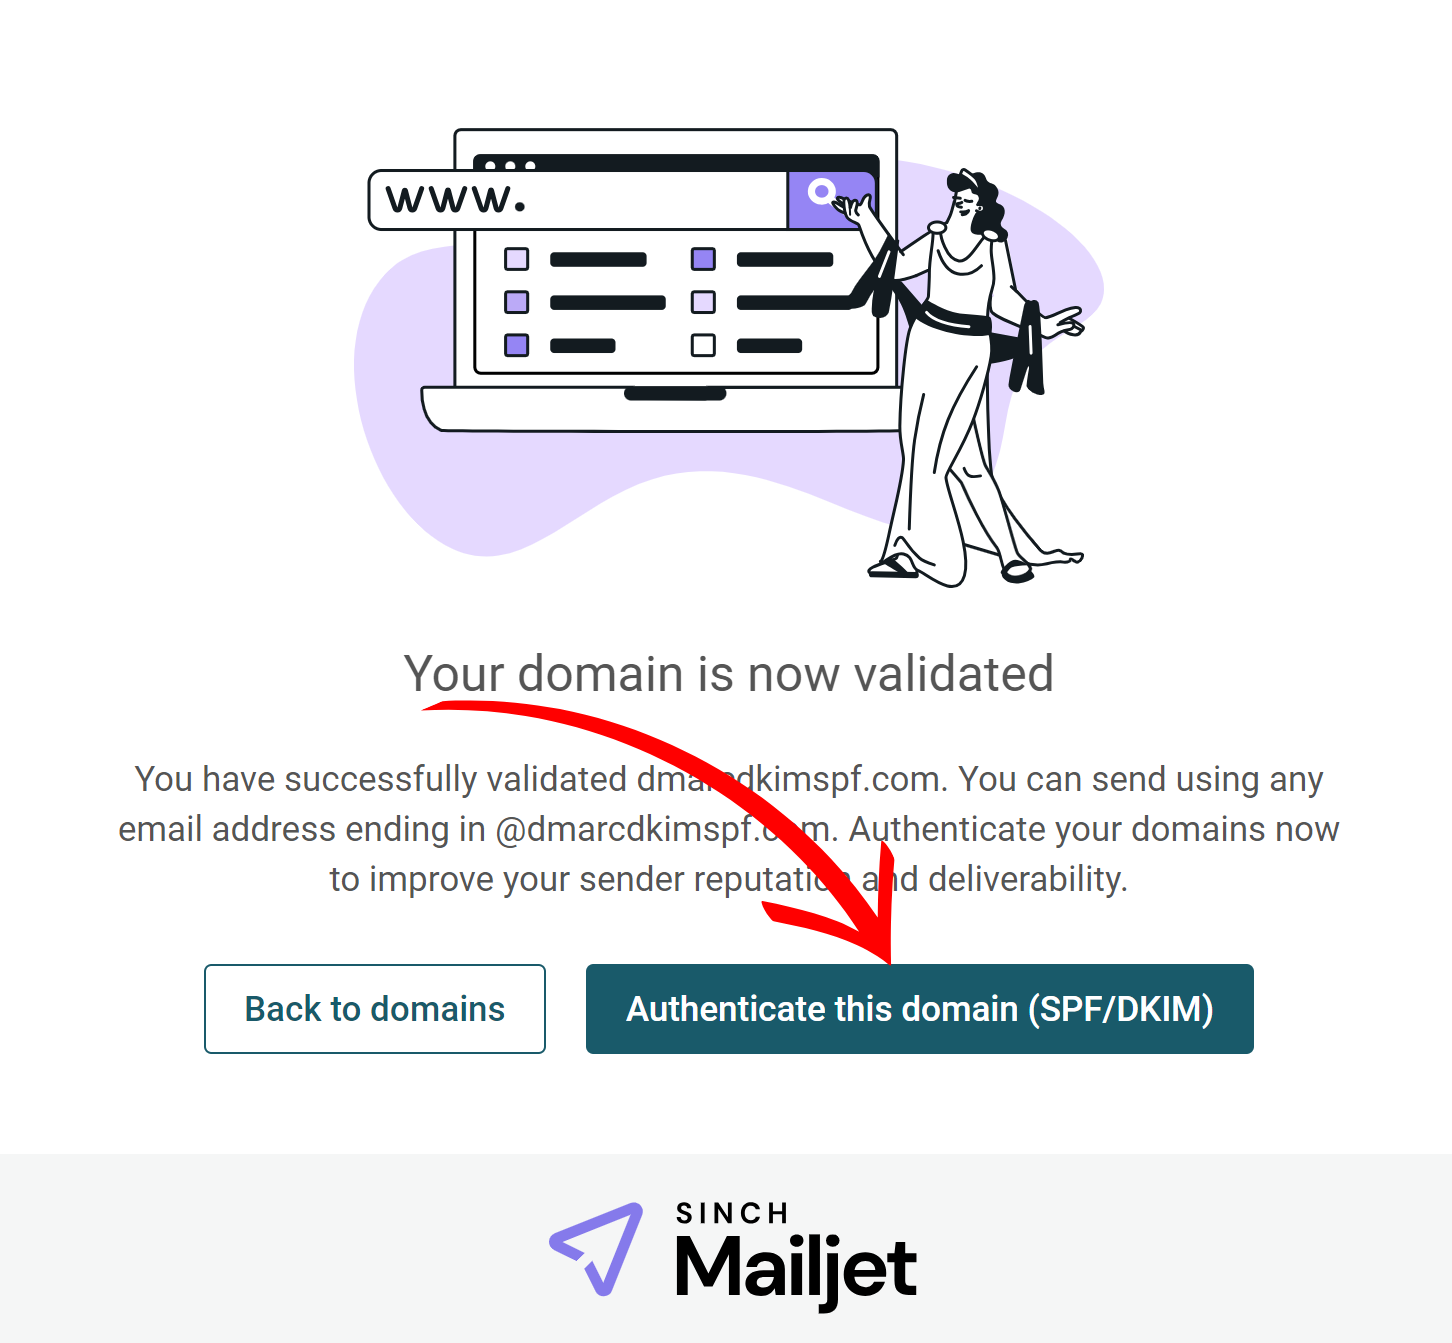
Afterwards, open Mailjet and click “Validate my domain” under the Create a DNS record field. You’ll see a confirmation message “Your domain has now validated.”
Mailjet SPF & DKIM Authentication Process:
Once the domain has been validated, we move toward the DKIM and SPF authentication process.
-
Click the “Authenticate this domain (SPF/DKIM)” button under the confirmation message.
One by one, copy both records’ values (SPF & DKIM) and paste them into Cloudflare to add two new TXT records. (follow step #8 of the domain validation process).
-
After adding both TXT records in Cloudflare, open Mailjet and click the Refresh option under SPF/DKIM set-up.

Mailjet DMARC Alignment:
Mailjet DMARC gives
p=nonevalue which is just a placeholder. Use DMARC Check Tool which analyzes data behind DMARC reports and allow you to act on it to deploy strict policy. Only a strict DMARC policy provides better deliverability and protection from email spoofing.-
Open the DMARC tool, write your domain name here, and click Check.
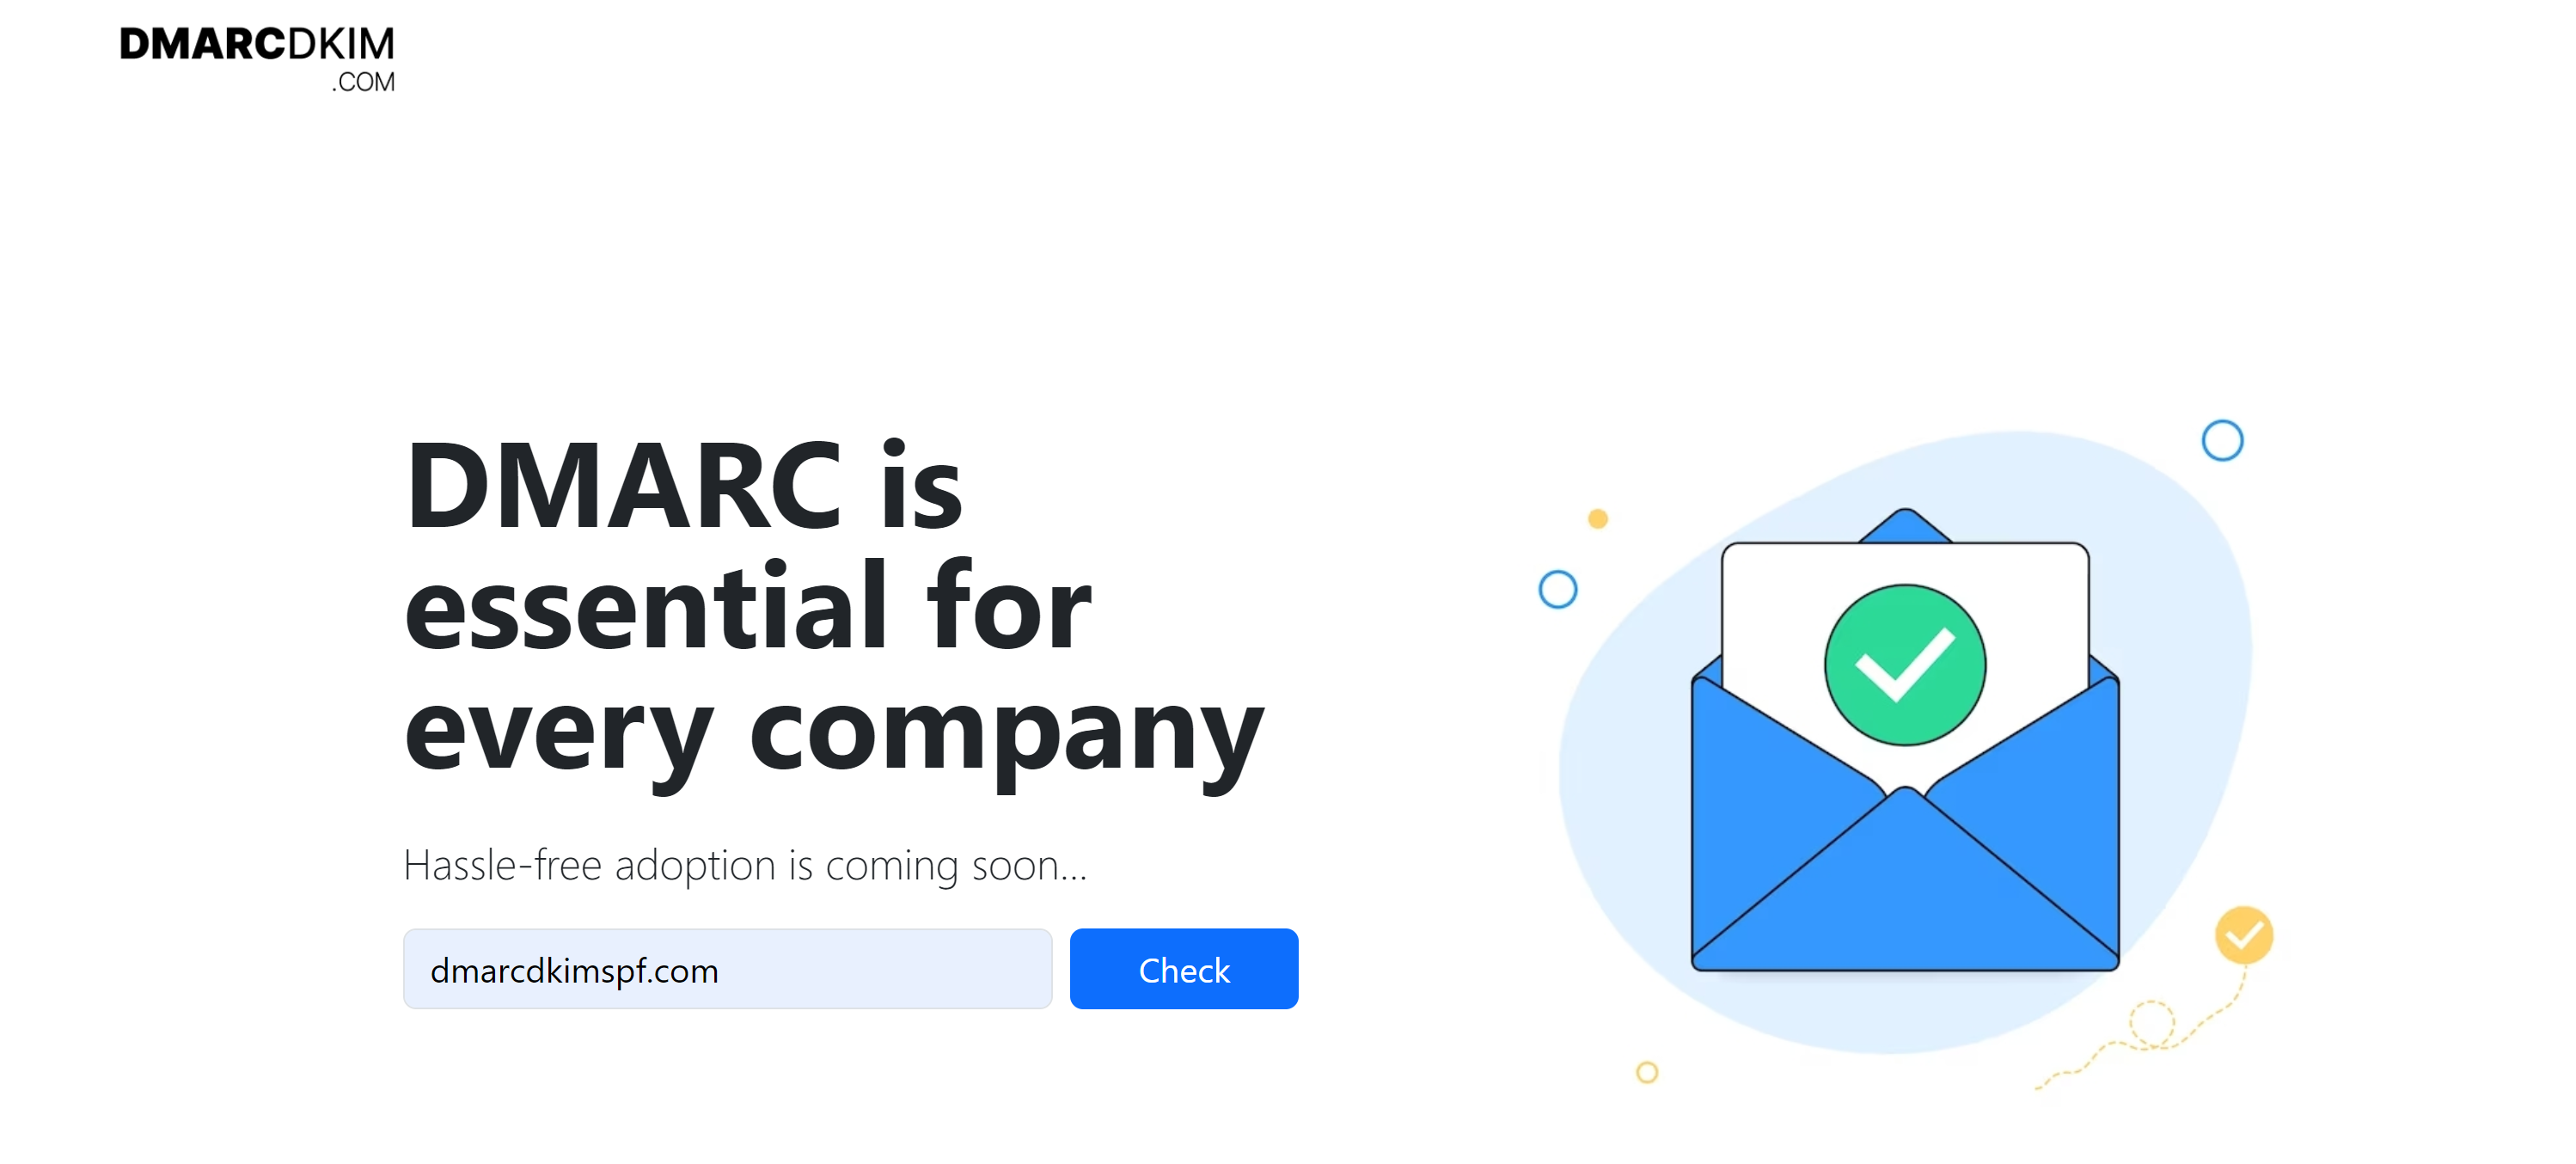
Take suggested DMARC value to replace the one in
_dmarcTXT record value.Get access to your DMARC Analytics and follow further steps there to achieve alignment
That’s it! You have successfully set up DMARC, DKIM and SPF authentication. You’ll see green bars with “looks good” text on them, meaning the authentication has been successful.
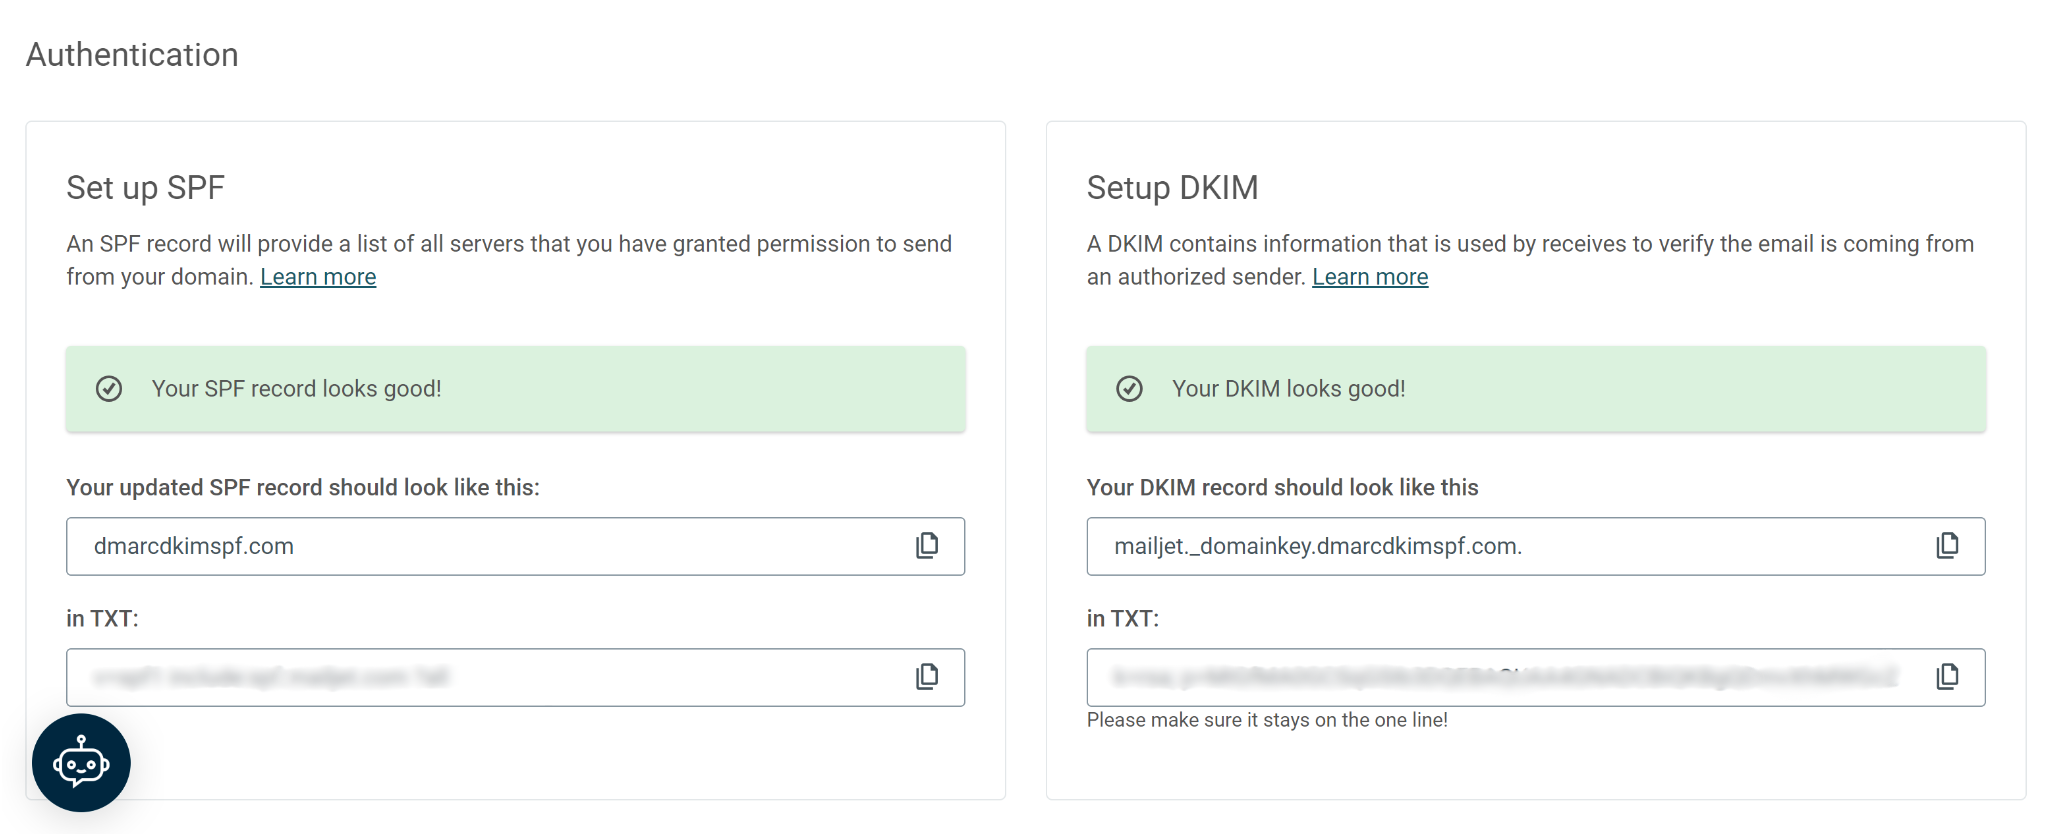
You can also look up your domain and DKIM/SPF status by going to the Account > Domains and Senders tab.
See your domain status under “Domain and Senders Address” and DKIM/SPF status under “SPF/DKIM Authentication.”
If you don't see your domain authentication activated after the Refresh, wait up to 24 hours as Mailjet may take some time to process it. However, if it's not authenticated after 24 hours, contact your domain hosting provider for further assistance.
Mailjet SPF Alignment for DMARC
Mailjet does not provide a built-in interface to set up a custom Return-Path domain for SPF alignment. However, you can achieve SPF alignment manually by following these steps:
-
Create a CNAME Record. Open your DNS dashboard, navigate to DNS > Records > Add Record, and select
CNAMEin the Type field.Enter
bnc3in the Name field.Enter
bnc3.mailjet.comin the Target field.Click Save to create the record.
Take a Screenshot. After adding the record, take a screenshot showing the newly created bnc3 CNAME record in your DNS settings.
-
Submit a Support Ticket. Navigate to the Mailjet Support Center to open a ticket:
Attach the screenshot of your
bnc3CNAME record.In your ticket, request "activation of a personalized Return-Path domain for SPF alignment".
Include the API key associated with the domain for which you want to set up the custom Return-Path domain.
Important Notes:
The SPF alignment feature is only available for paid Mailjet accounts.
You can have only one active Return-Path domain per API key.
By completing these steps, Mailjet will activate the custom Return-Path domain, enabling SPF alignment and improving your DMARC compliance.
Check domain and follow the instructions to nail down your DMARC configuration.
No expert knowledge needed!


