How to Configure DKIM, SPF and DMARC records in MailerLite?
Check your domain for DMARC, DKIM, SPF and MX records. Get a free report.
Configure MailerLite DMARC, DKIM and SPF for Domain Authentication
MailerLite ensures your emails are safe and secure. It generates DNS records to authenticate your domain and give your emails a unique signature. You can configure these records in MailerLite and add them to your DNS provider within a few steps. In this guide, we will walk you through the email authentication process with MailerLite. So let's begin!
On the dashboard tab, click Account Settings in the left side panel.
-
Now go to the Domains tab and hit the Add Domain button.

-
Here, write your email and click Save.

-
MailetLite sends a verification link to your webmail for owner confirmation. Head to your webmail and click the verification link.

The link will take you back to the Mailerlite Dashboard, and go to the Domains tab.
-
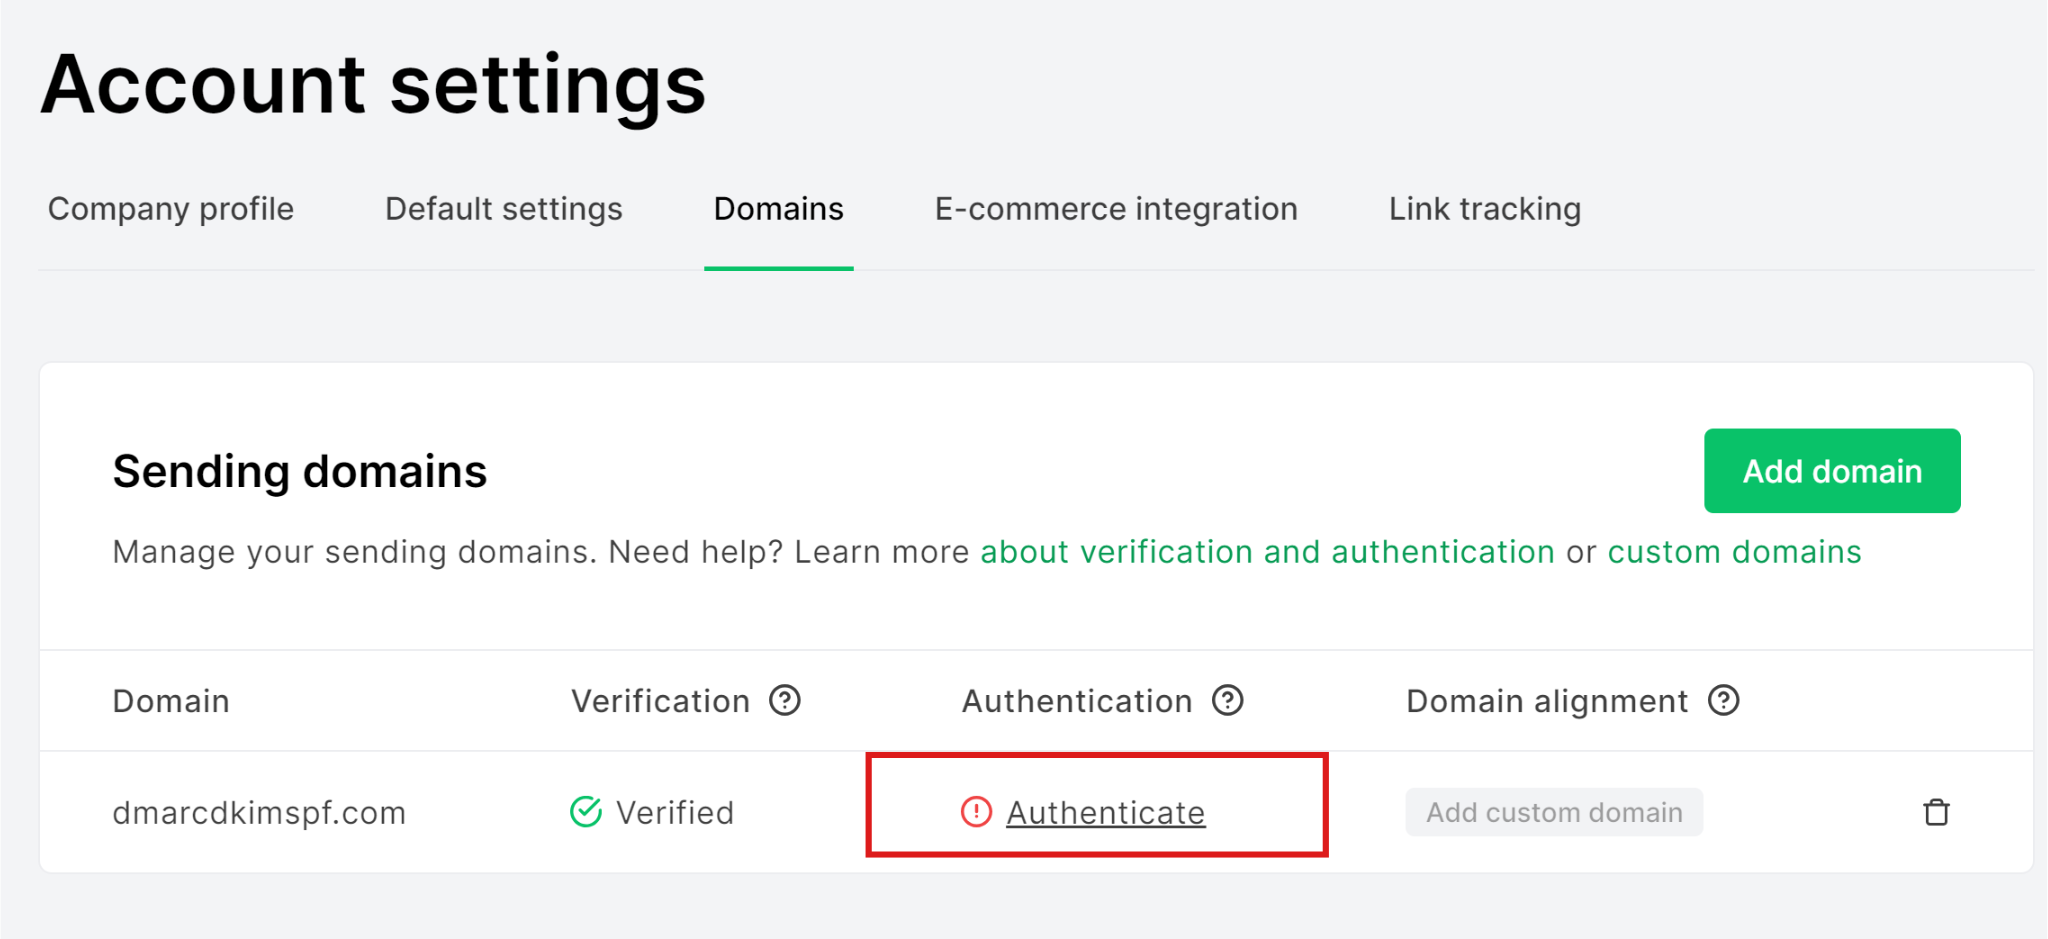
Here click on "Authenticate" written next to your domain name.

-
Now you'll see two options on your screen; one for Automatic domain authentication and the second for Manual.

-
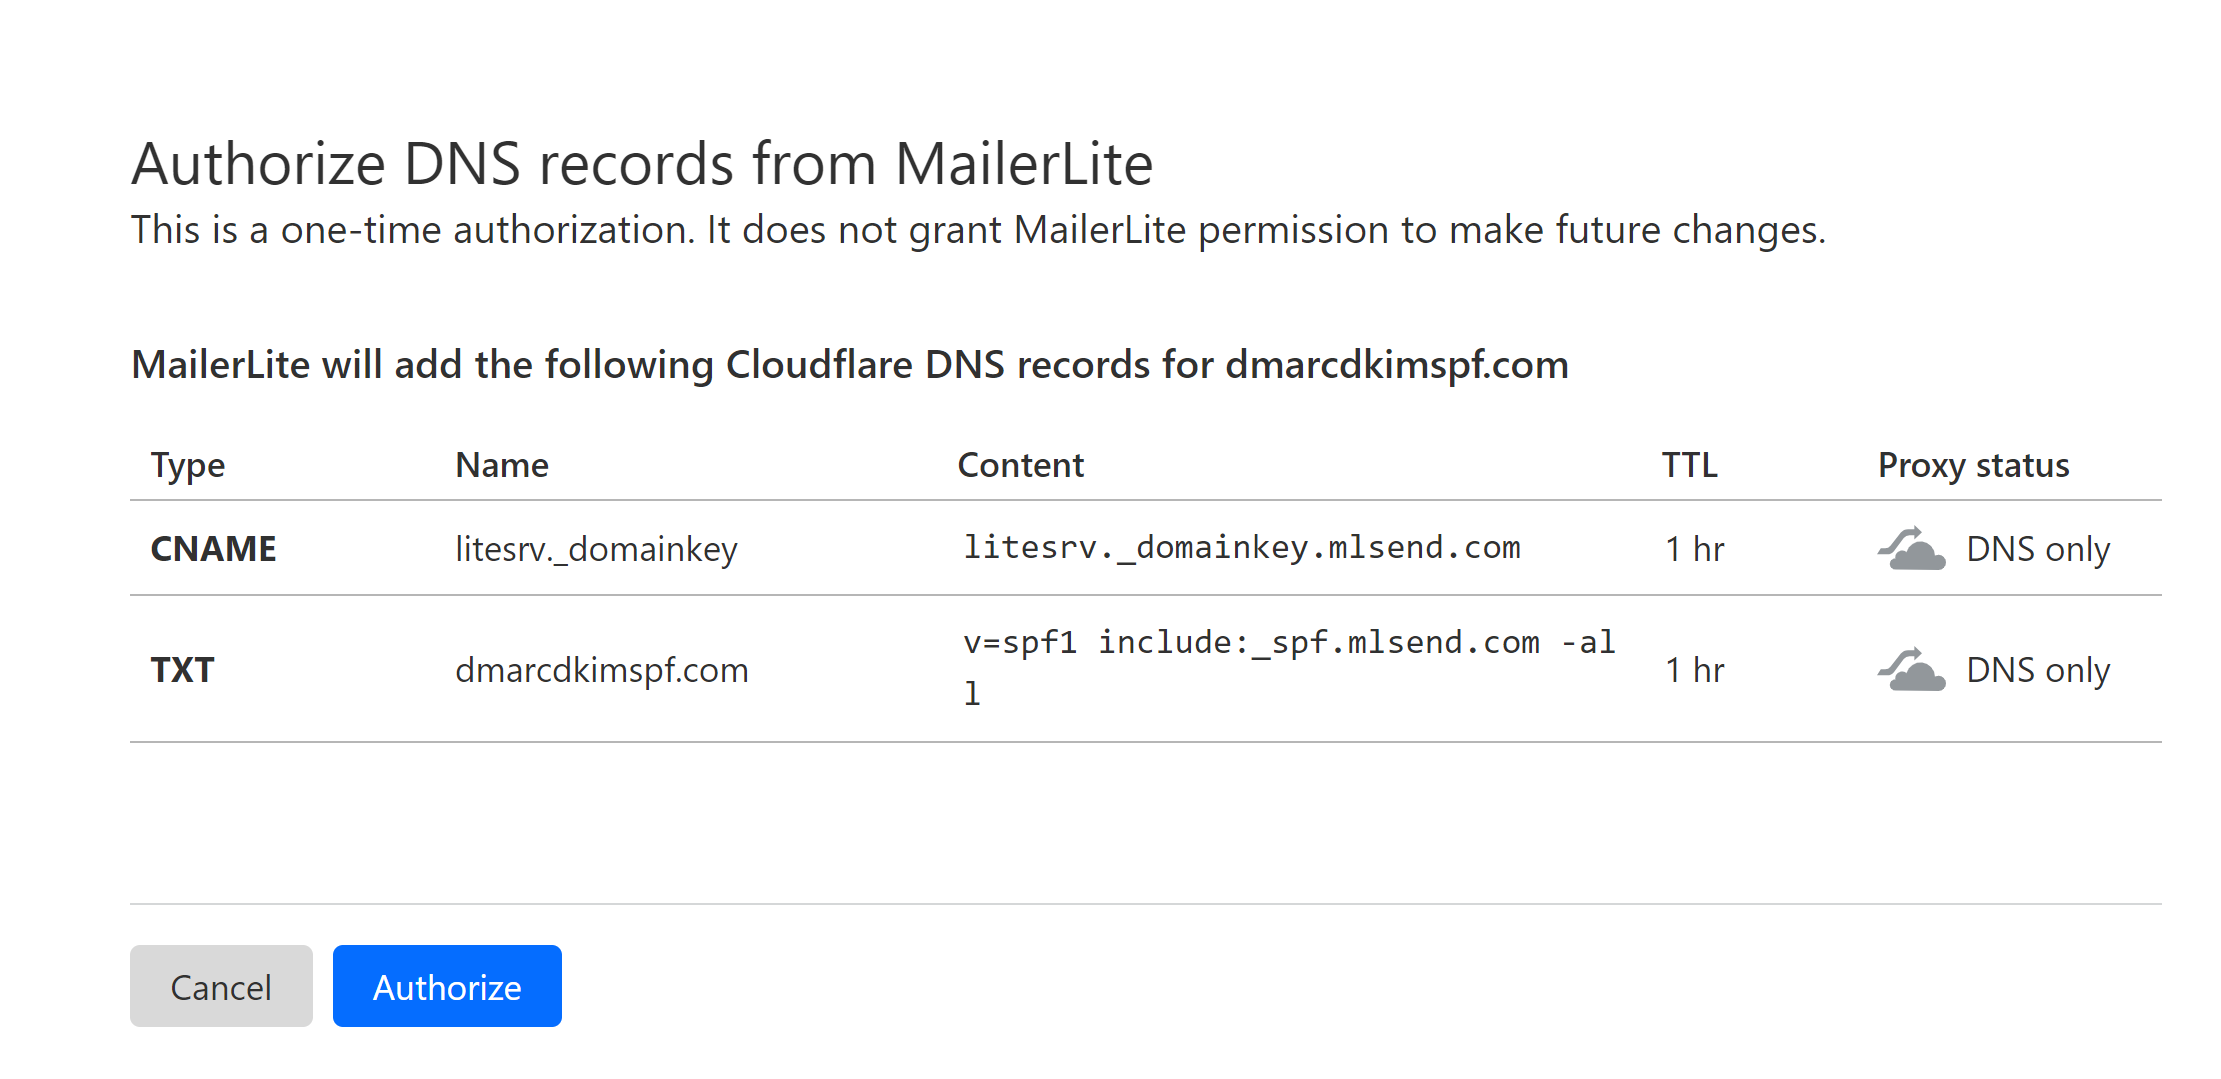
If you click on "Automatic," MailerLite will detect your domain provider and open the DNS dashboard for you. Here, all DNS records will be already added. Just click on Authorize to grant permission for adding DNS records.

-
If you opt for Manual domain authentication, click "Manual" and you'll see MailerLite DKIM and SPF records on your screen.

Copy these records and add them to your DNS provider. You can add them to any DNS provider you use. For this guide post, we are using Cloudflare. NOTE: If there is already an SPF record added to your DNS provider, adding MailerLite SPF might cause conflicts, resulting in one of them to stop working. To fix this issue, you can use the SPF merger tool to combine different SPF records and use them as one.
-
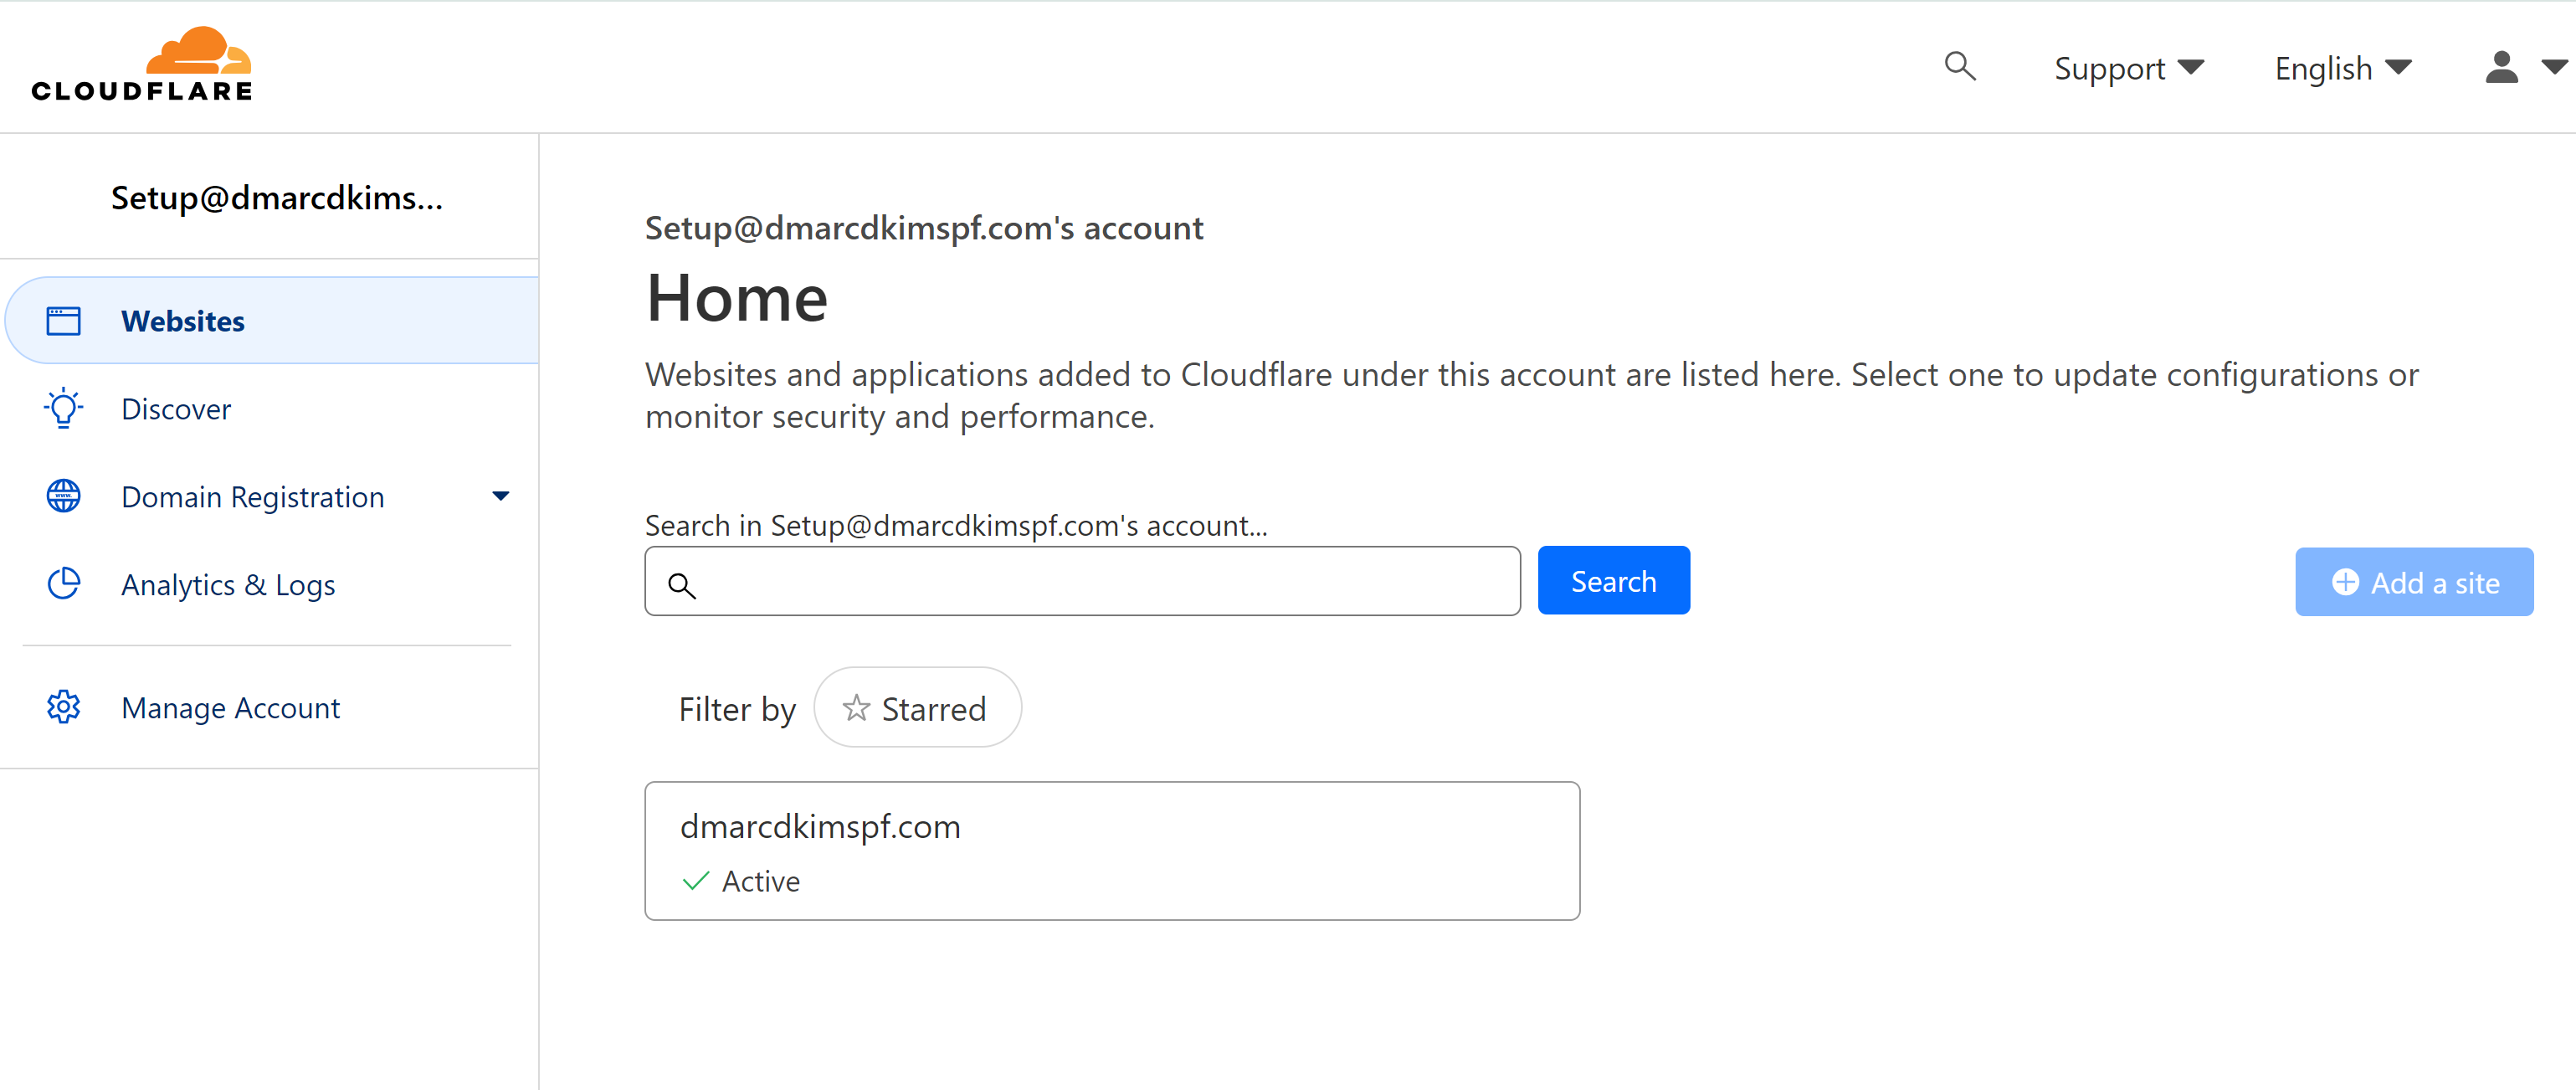
To add MailerLite DKIM and SPF records, log in to your DNS provider, head to the Home tab, and click on your Website.

-
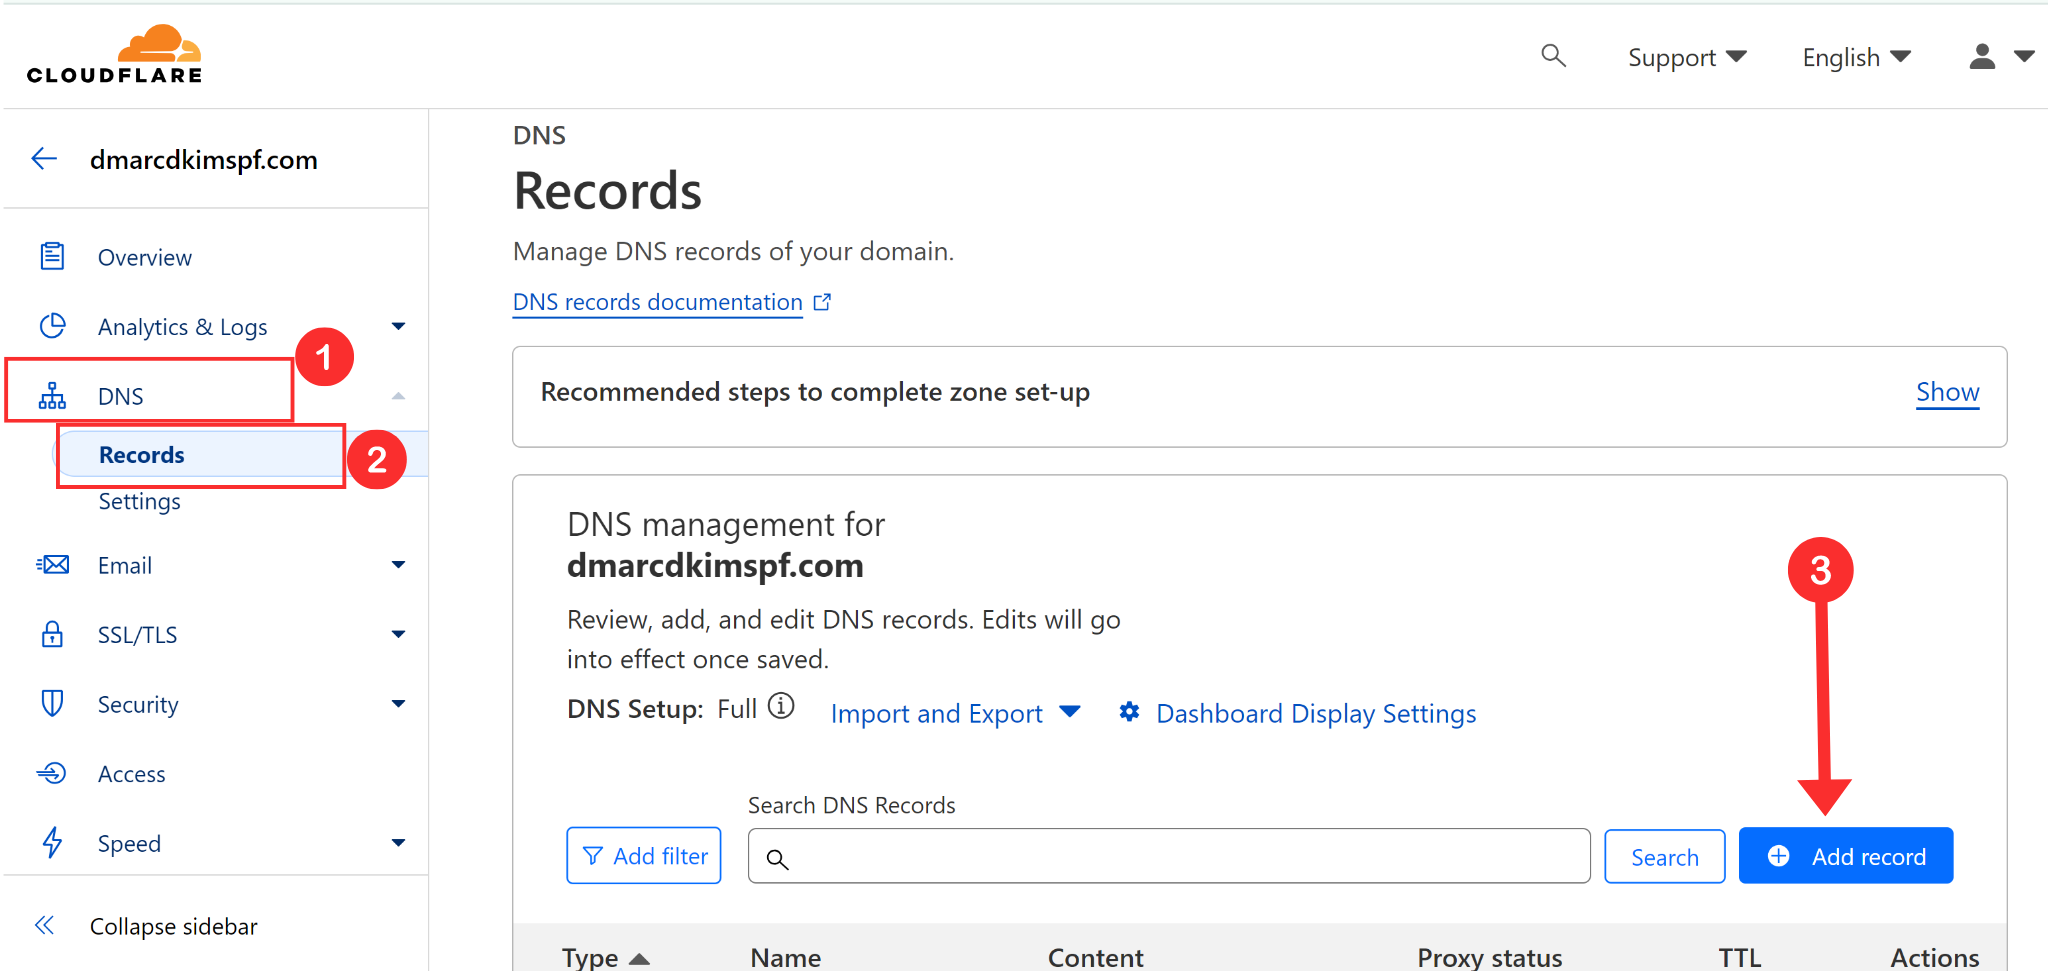
Click on the "DNS" option and select "Records" in the left-hand side panel.

-
Click on Add Record, select records type TXT, enter the record Hostname in the Name field and Record Value in the Content field. Click Save to add the record.

After adding both records, go back to MailerLite and click Check DNS Records.
-
If records were added successfully, the domain status would be shown as "Authenticated" with a green check mark.

-
Setup MailerLite DMARC Record: The DMARC value is not provided by MailerLite. DmarcDkim.com address this issue with a DMARC Analytics tool which allows you to implement a strict policy. So you can implement reject or quarantine policies to stop unauthorized emails and improve email deliverability. DMARC Dashboard have insights into your daily email activity to ensure your MailerLite and other DKIM and SPF records properly configured:
Go to the DMARC Check tool.
Add your domain name and click Check.
Add the Suggested
_dmarcvalue to your DNS dashboard.Sign up for the tool to access the DMARC reports dashboard.
Sometimes it may take up to 24 hours to update DNS records on the server. If you don't see your email domain authenticated immediately, wait for at least a day and check again. Contact MailerLite Customer Support if you don't see a confirmation message after 24 hours.
Check domain and follow the instructions to nail down your DMARC configuration.
No expert knowledge needed!


