Adding DNS records for Mailchimp DMARC, DKIM and SPF
Check your domain for DMARC, DKIM, SPF and MX records. Get a free report.
Setup Mailchimp DMARC, DKIM and SPF for Domain Authentication
MailChimp, one of the trusted email delivery services, helps with email campaigns and authenticates your domain to minimize spoofing. Domain authentication is the number one strategy to avoid emails ending in the spam folder.
The most common methods to authenticate domains are SPF, DKIM, and DMARC. MailChimp only provides DKIM and DMARC for authentication which are enough to protect your webmail.
You can either opt for automatic domain authentication or add records manually to the DNS server. In this article, we’ll discuss the step-by-step domain authentication process on MailChimp. So stay tuned!
Automatic Mailchimp Authentication:
-
Once you have signed up for your MailChimp account, go to your profile icon and click Account & Billing.

-
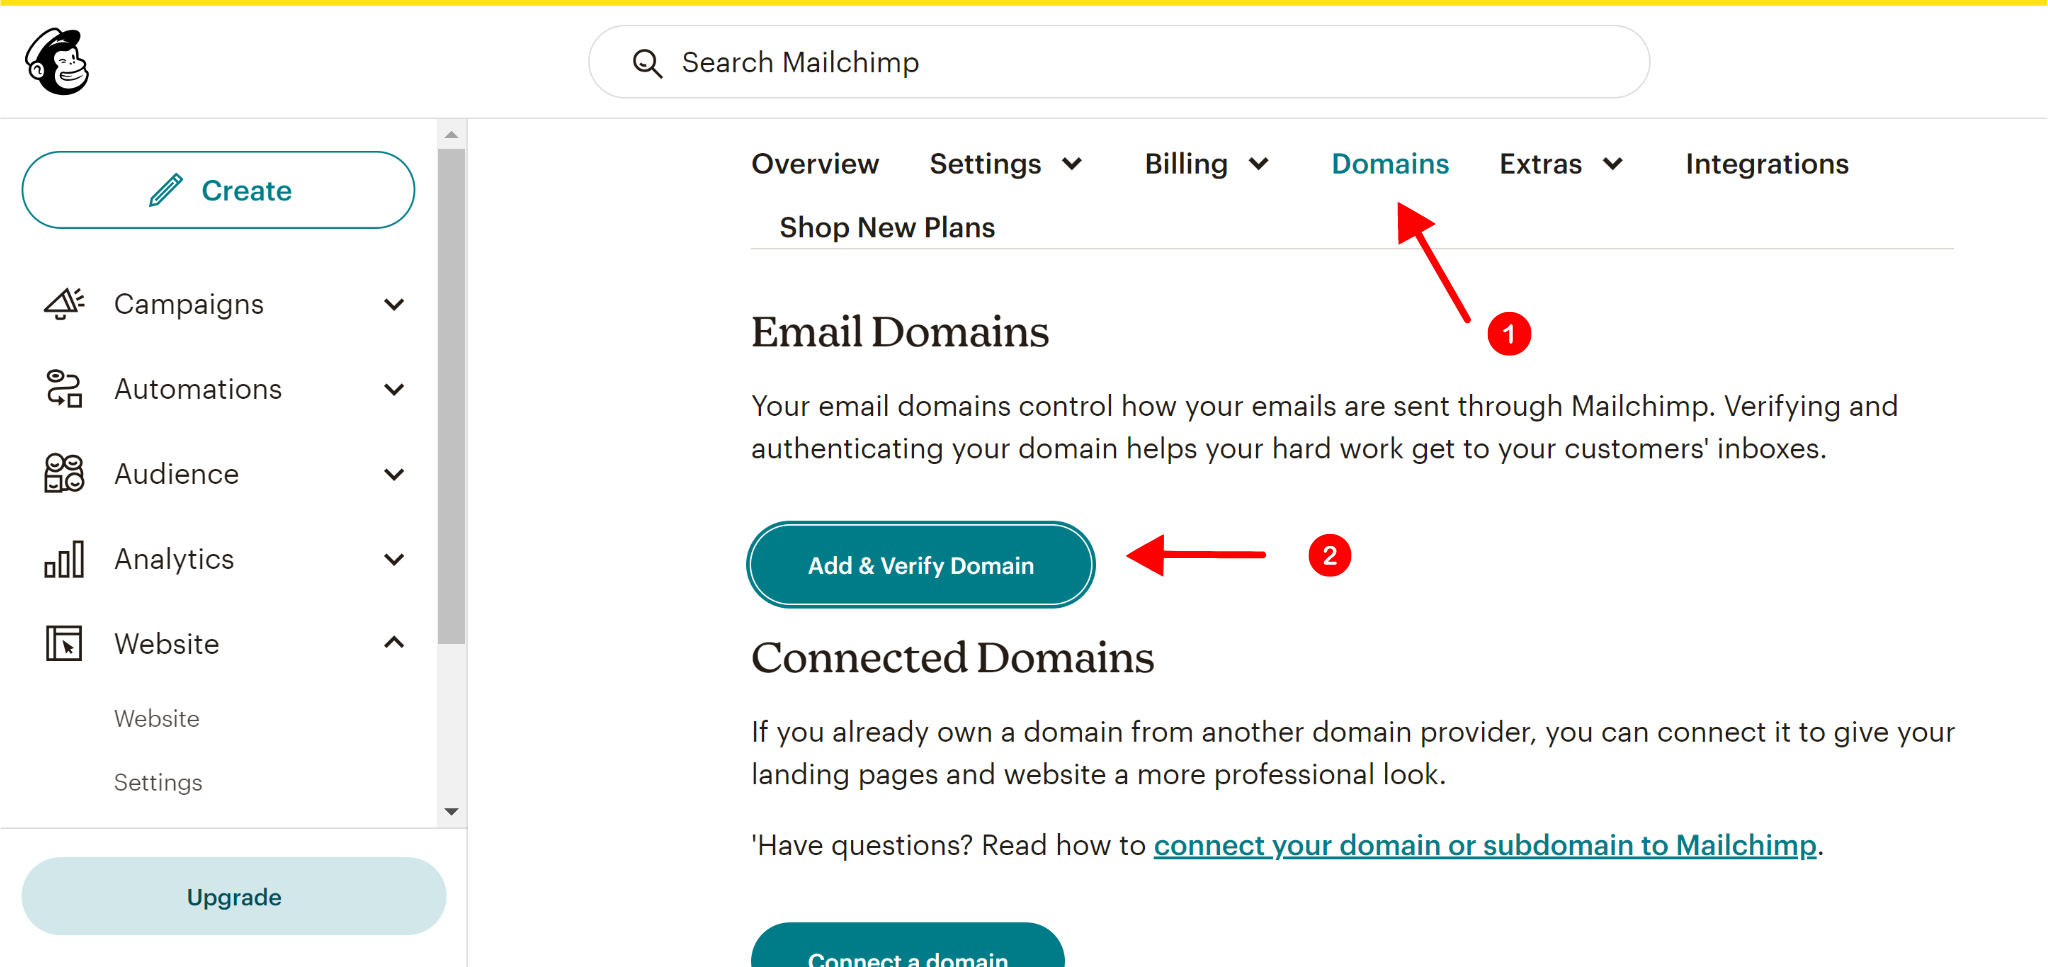
Next, go to Domain and select Add & Verify Domain.
-
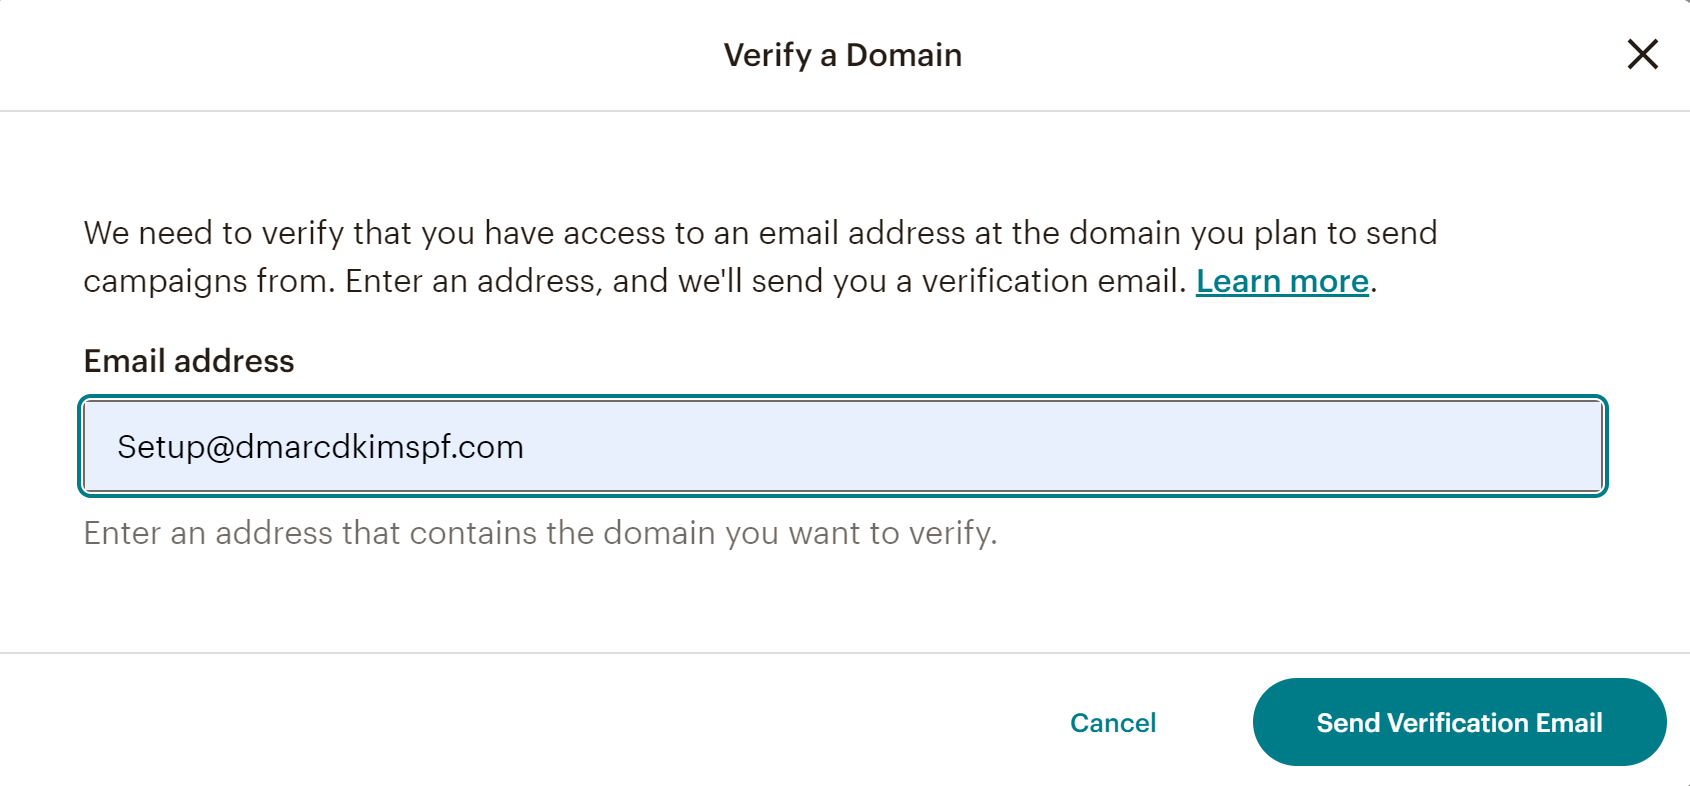
Enter your webmail and click Send Verification email.
-
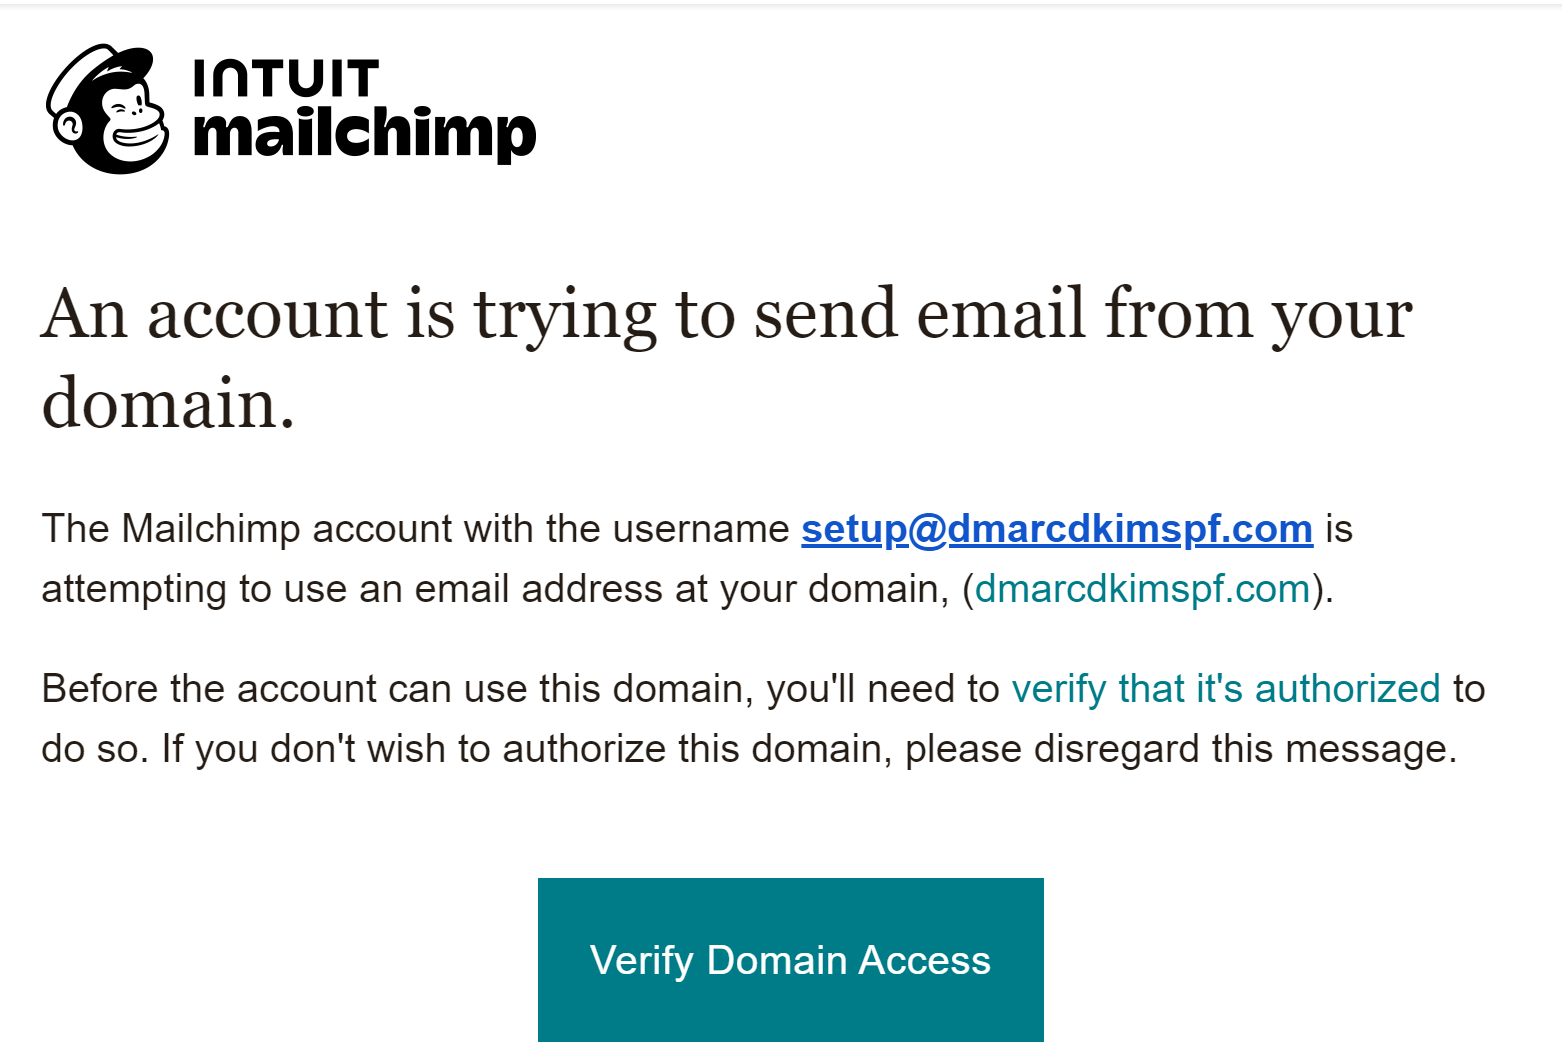
Go to Gmail, open the MailChimp verification email, and click Verify Domain Access.
-
The link will take you back to MailChimp. Here click on Start Authentication > Authentication in progress.

-
On the next screen, MailChimp will ask you whether you want automatic authentication or to add records manually, click on Continue for automatic authentication.

-
MailChimp will fetch details about the web host and pull up a window saying “Authorize with (your web hostname).”

-
It will take you to the Cloudflare dashboard, here click on Authorize under records.
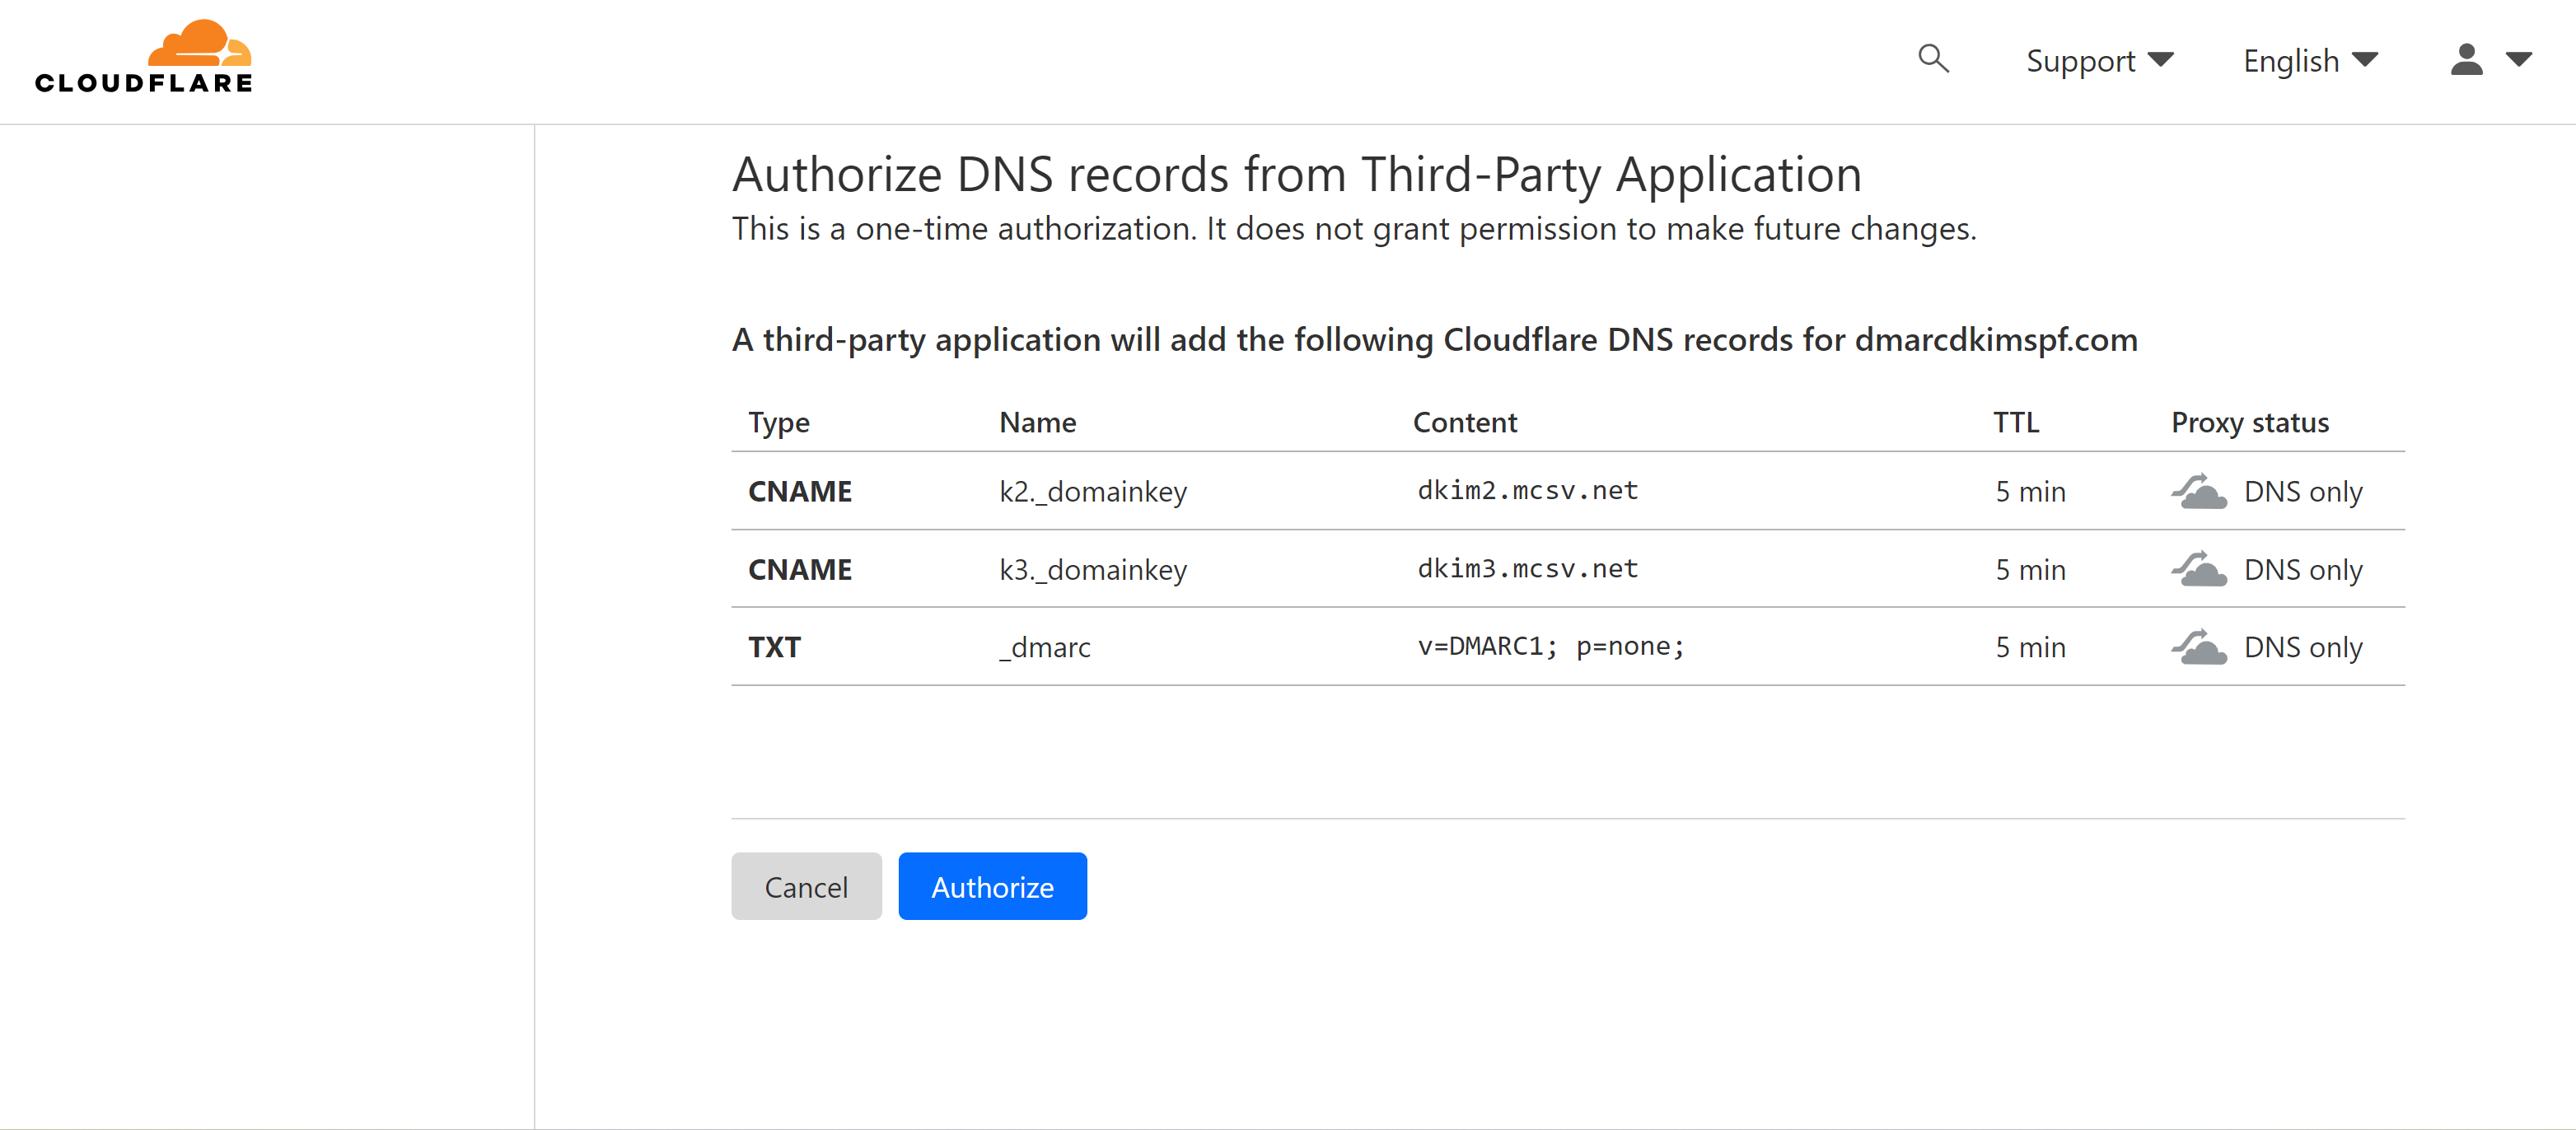
Finally, you’ll see a confirmation message saying your domain has been added successfully. However, it may take up to 48 hours to publish the changes.
Manual Mailchimp Authentication:
Follow steps 1 to 5 of the above method.
On the confirmation prompt, click on “or manually authenticate your domain.”
Now click on “Authentication in progress” highlighted in blue and six steps will show up on your screen.
-
Click step 1 and select your Domain Provider. If not found in the list, select “Other.”

-
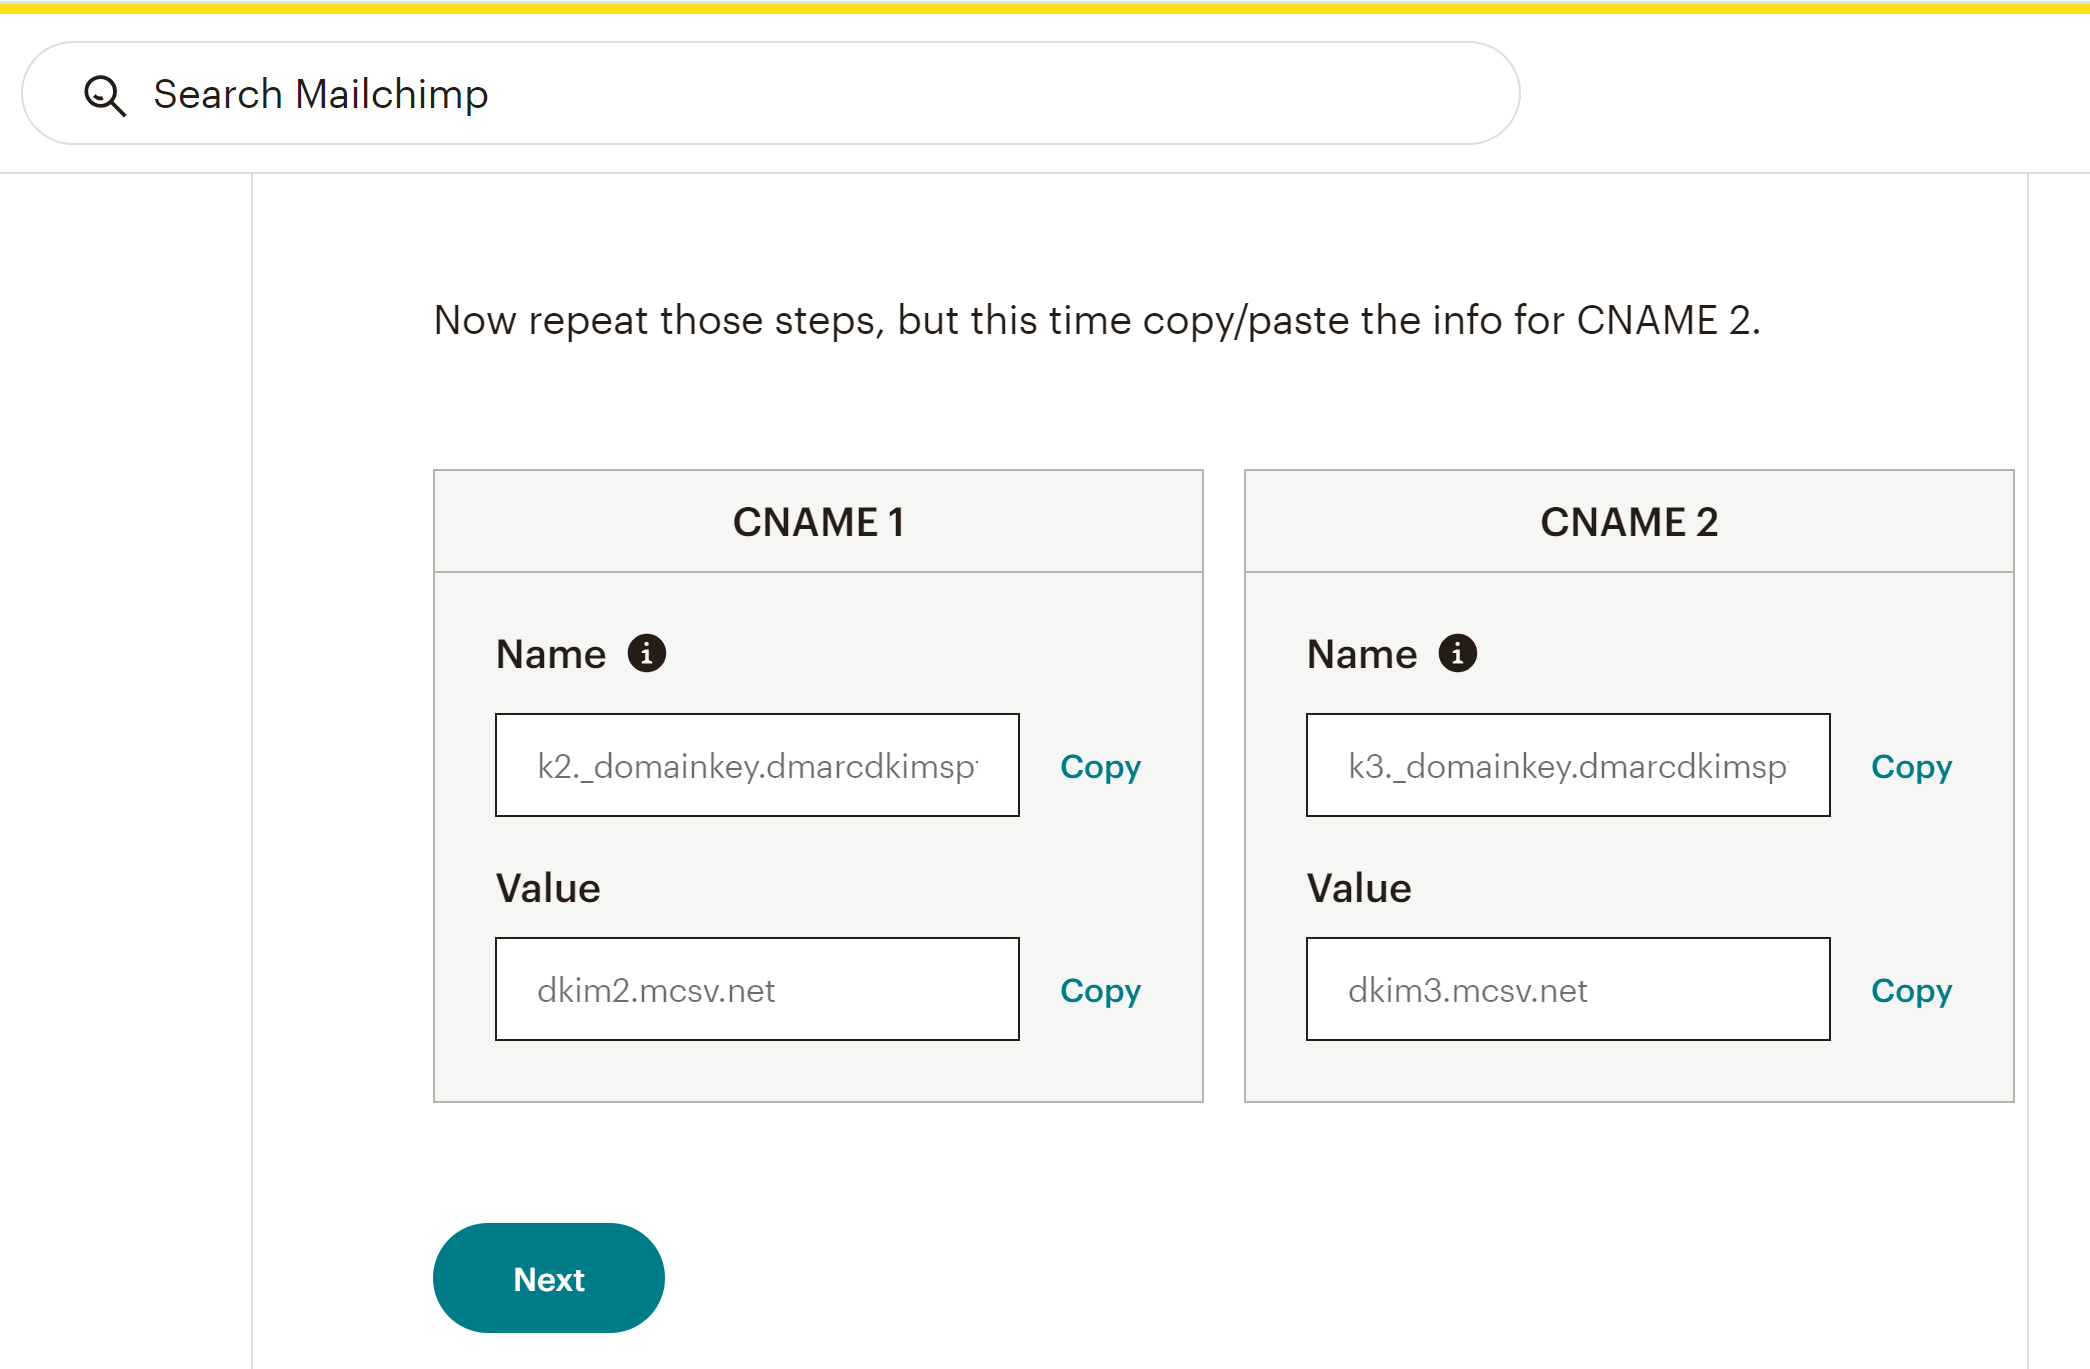
Hop to step 3, copy the CNAME records, and add them to your domain provider. (We are using Cloudflare as an example).
-
Click on your Website > DNS > Records > Add Record and add DKIM CNAME 1 & 2 records one by one. NOTE: Toggle the orange button to turn off the proxy. Else, traffic will divert to the hosting server and not the MailChimp.

-
Move to step 4 and copy/paste the DMARC TXT record to Cloudflare by following the same method.
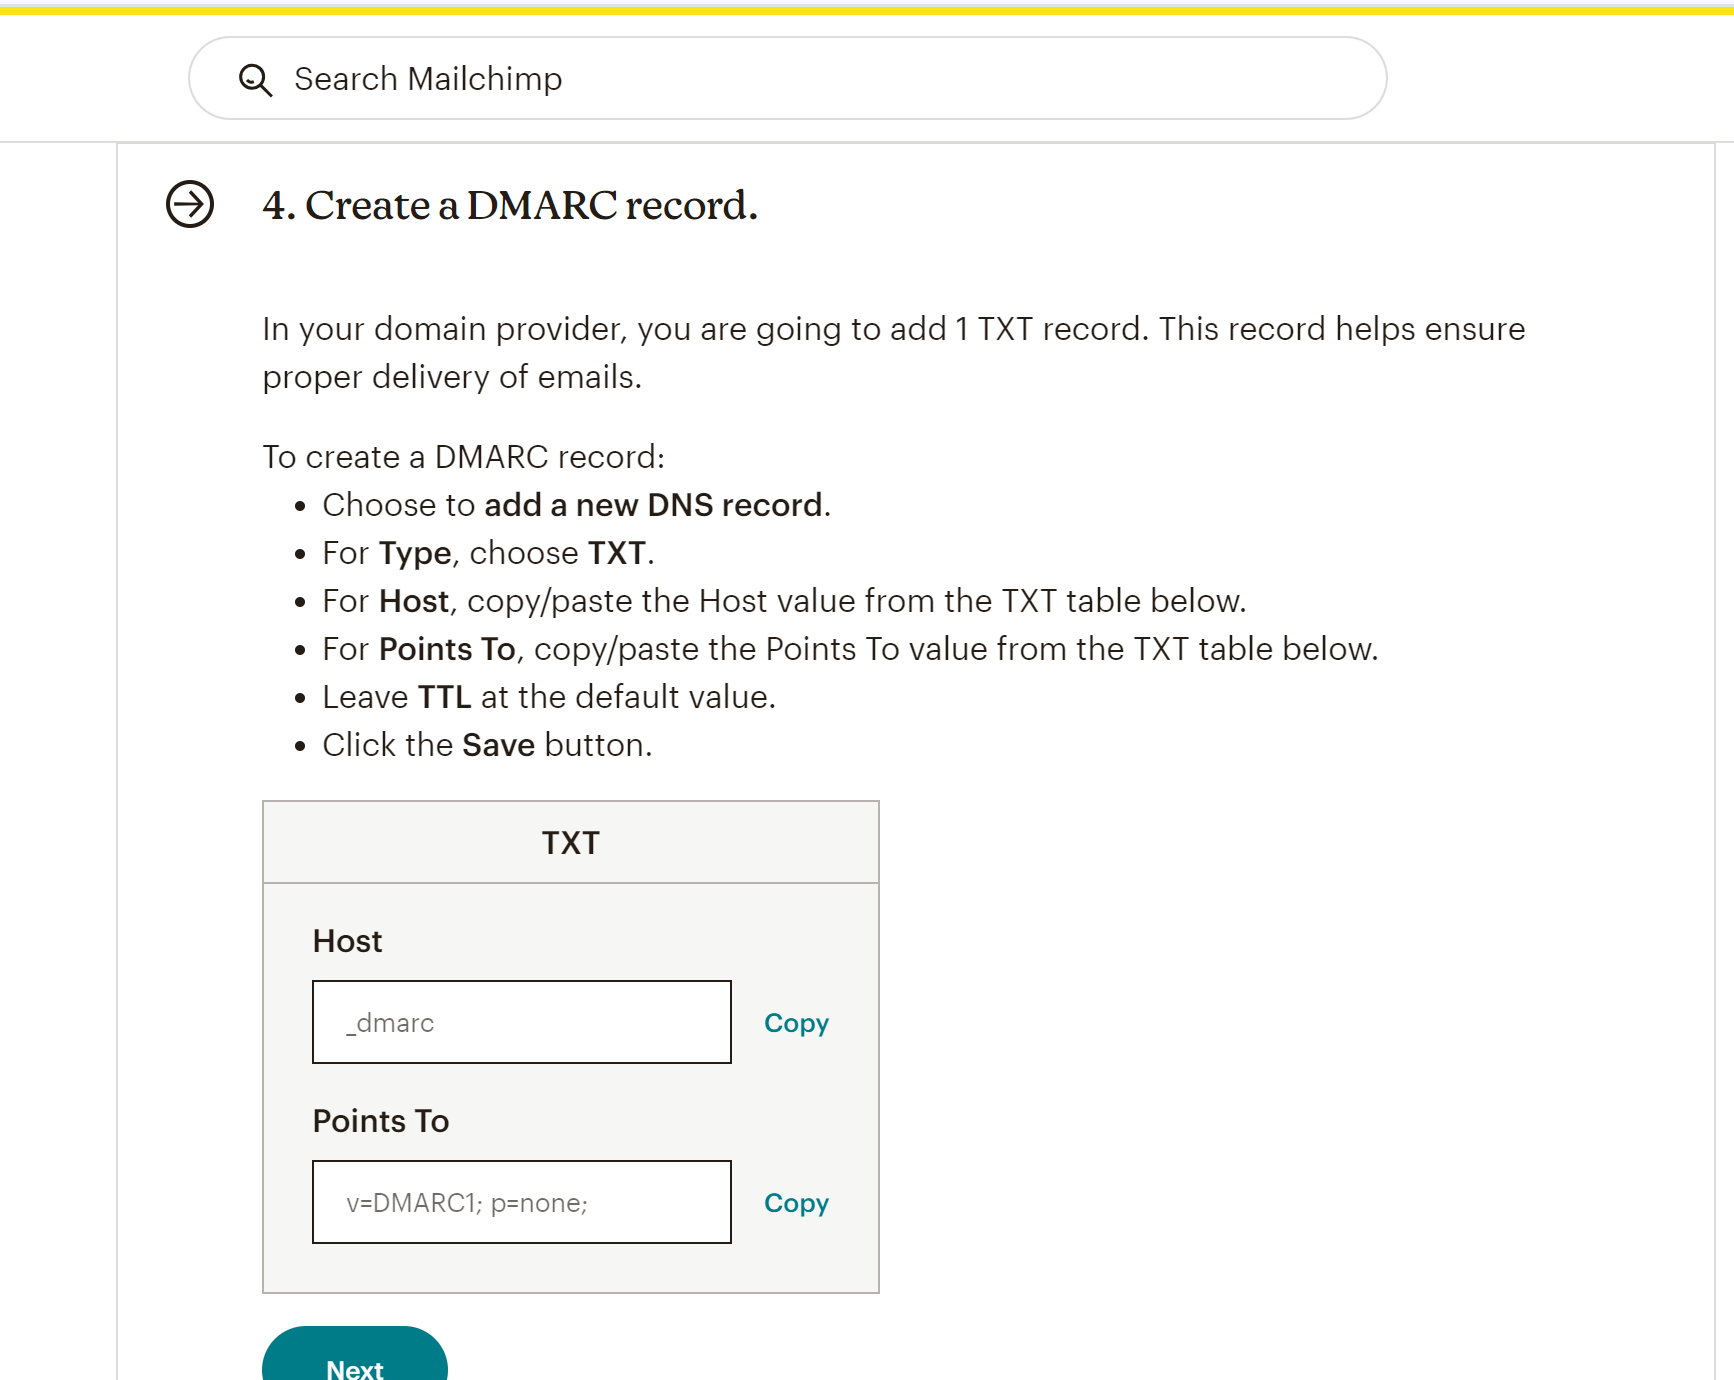
In step 5, you’ll be asked to wait for domain authentication. You can check the progress by clicking the “Status” option.
-
Once the domain is authenticated, you’ll see a confirmation message in step 6.

Setup Mailchimp DMARC Record:
The DMARC value provided by Mailchimp only a placeholder for actual _dmarc value. p=none does not reject or quarantine the unauthorized emails. Thus, your email communication is not fully secured and missing out on improved deliverability.
Moreover, there is no dashboard where you can have insight into your email activity. Without the insights, you can not stay ahead of the scammers. DmarcDkim.com addresses all these issues with an efficient DMARC tool which allows you to implement a strict policy and provides actionable DMARC reports.
Go to the DMARC check tool.
-
Add your domain name and click Check.
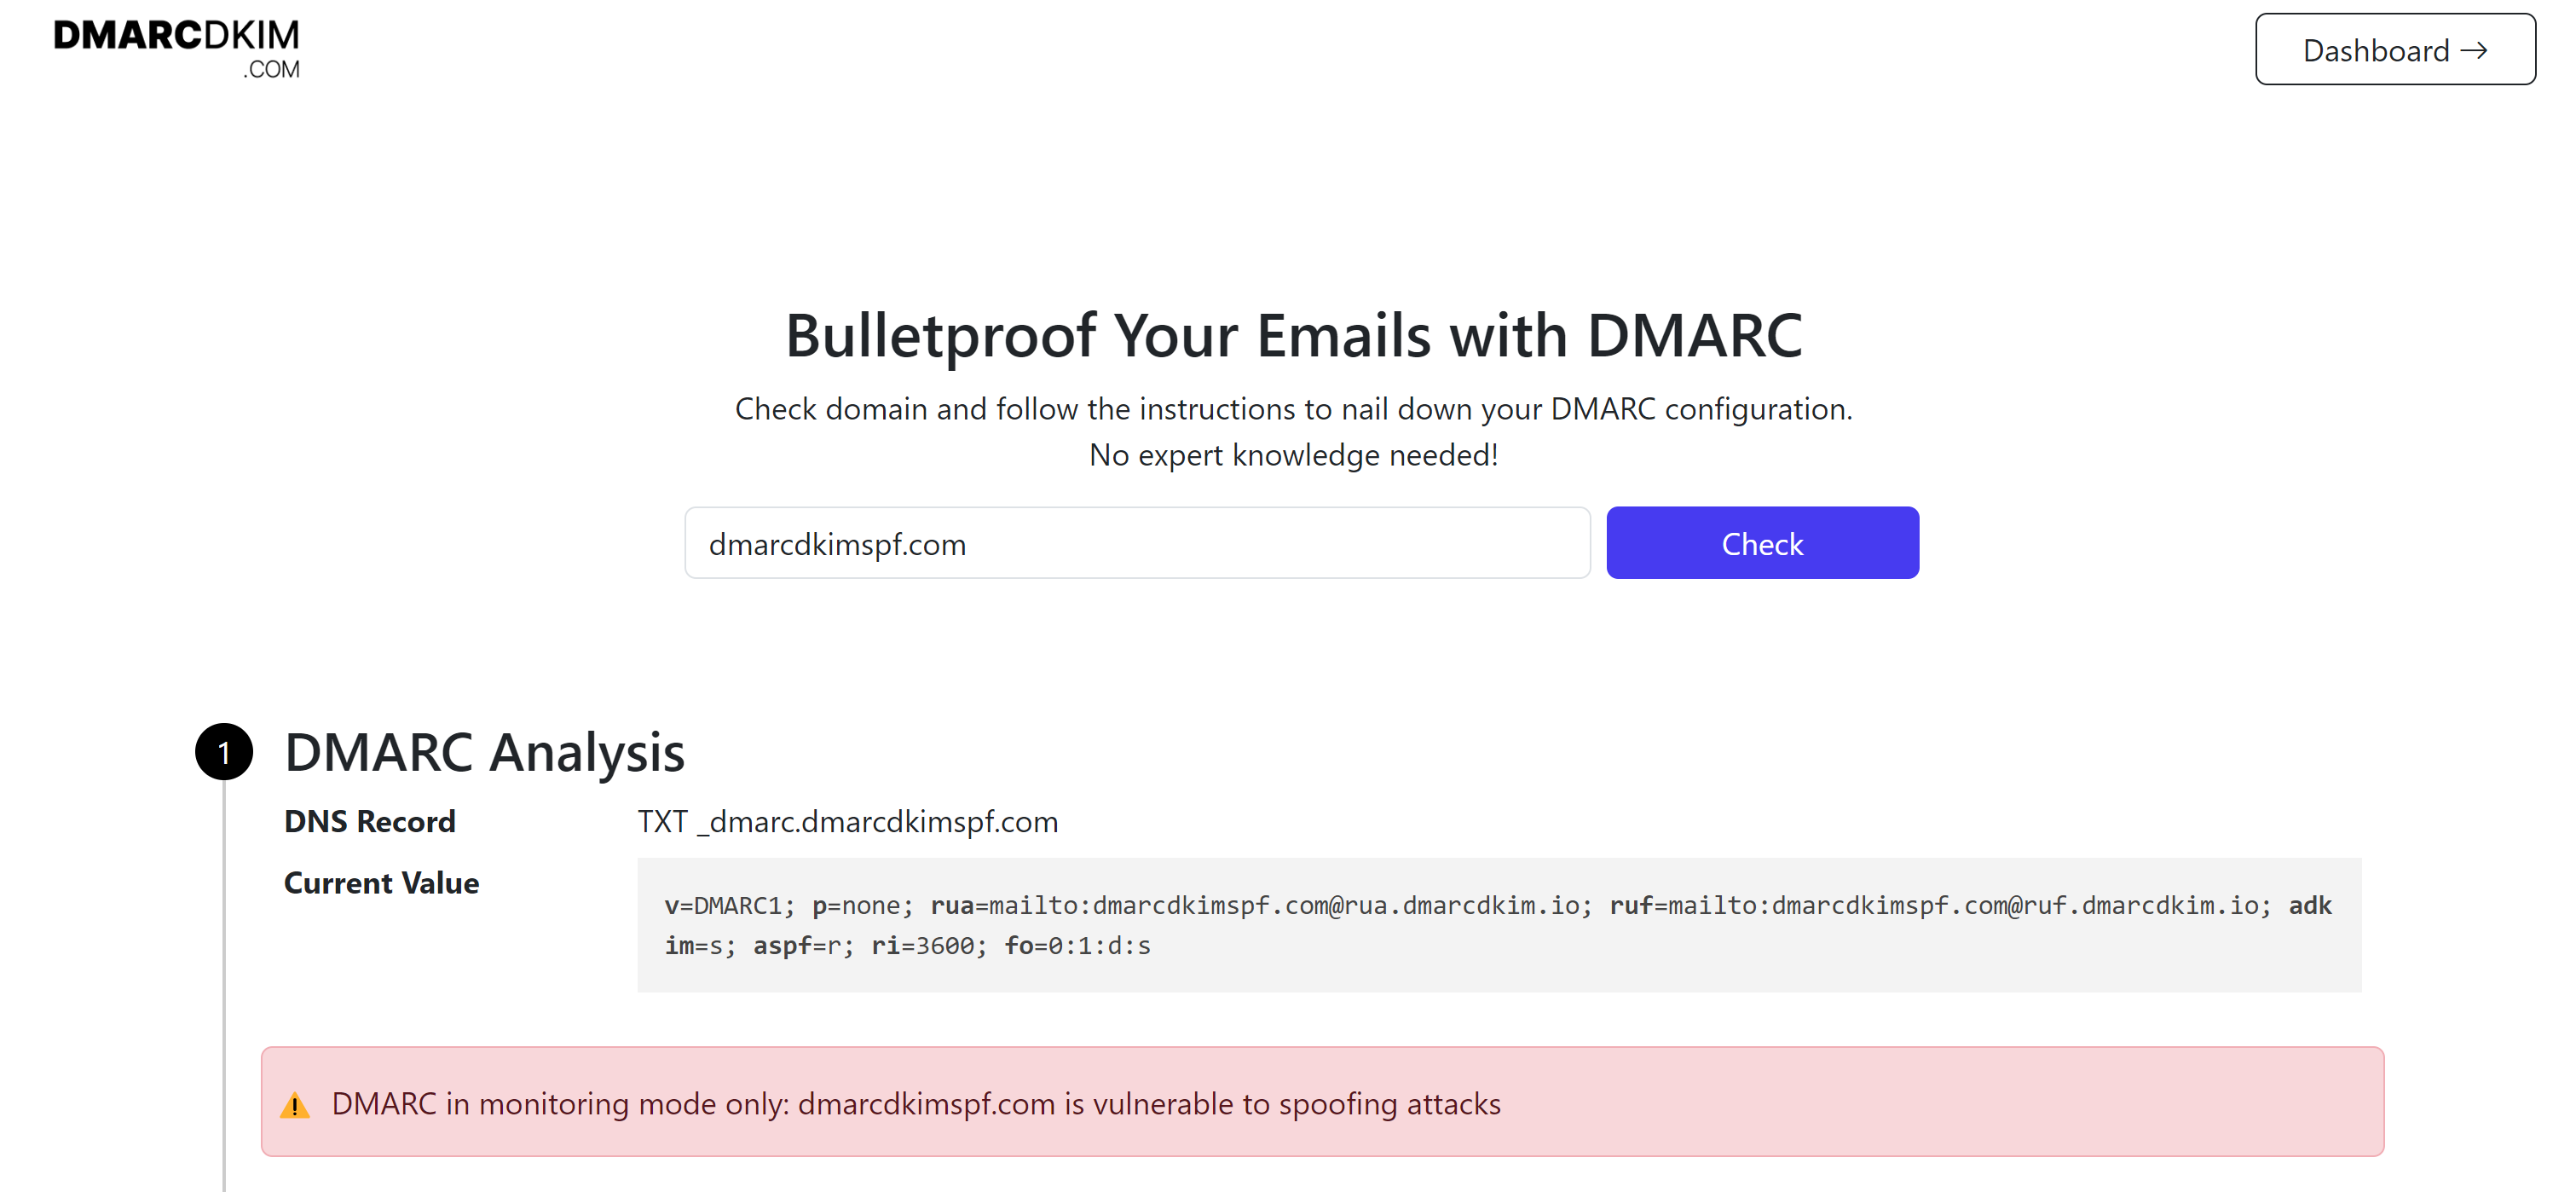
-
Add the Suggested value to your DNS dashboard.
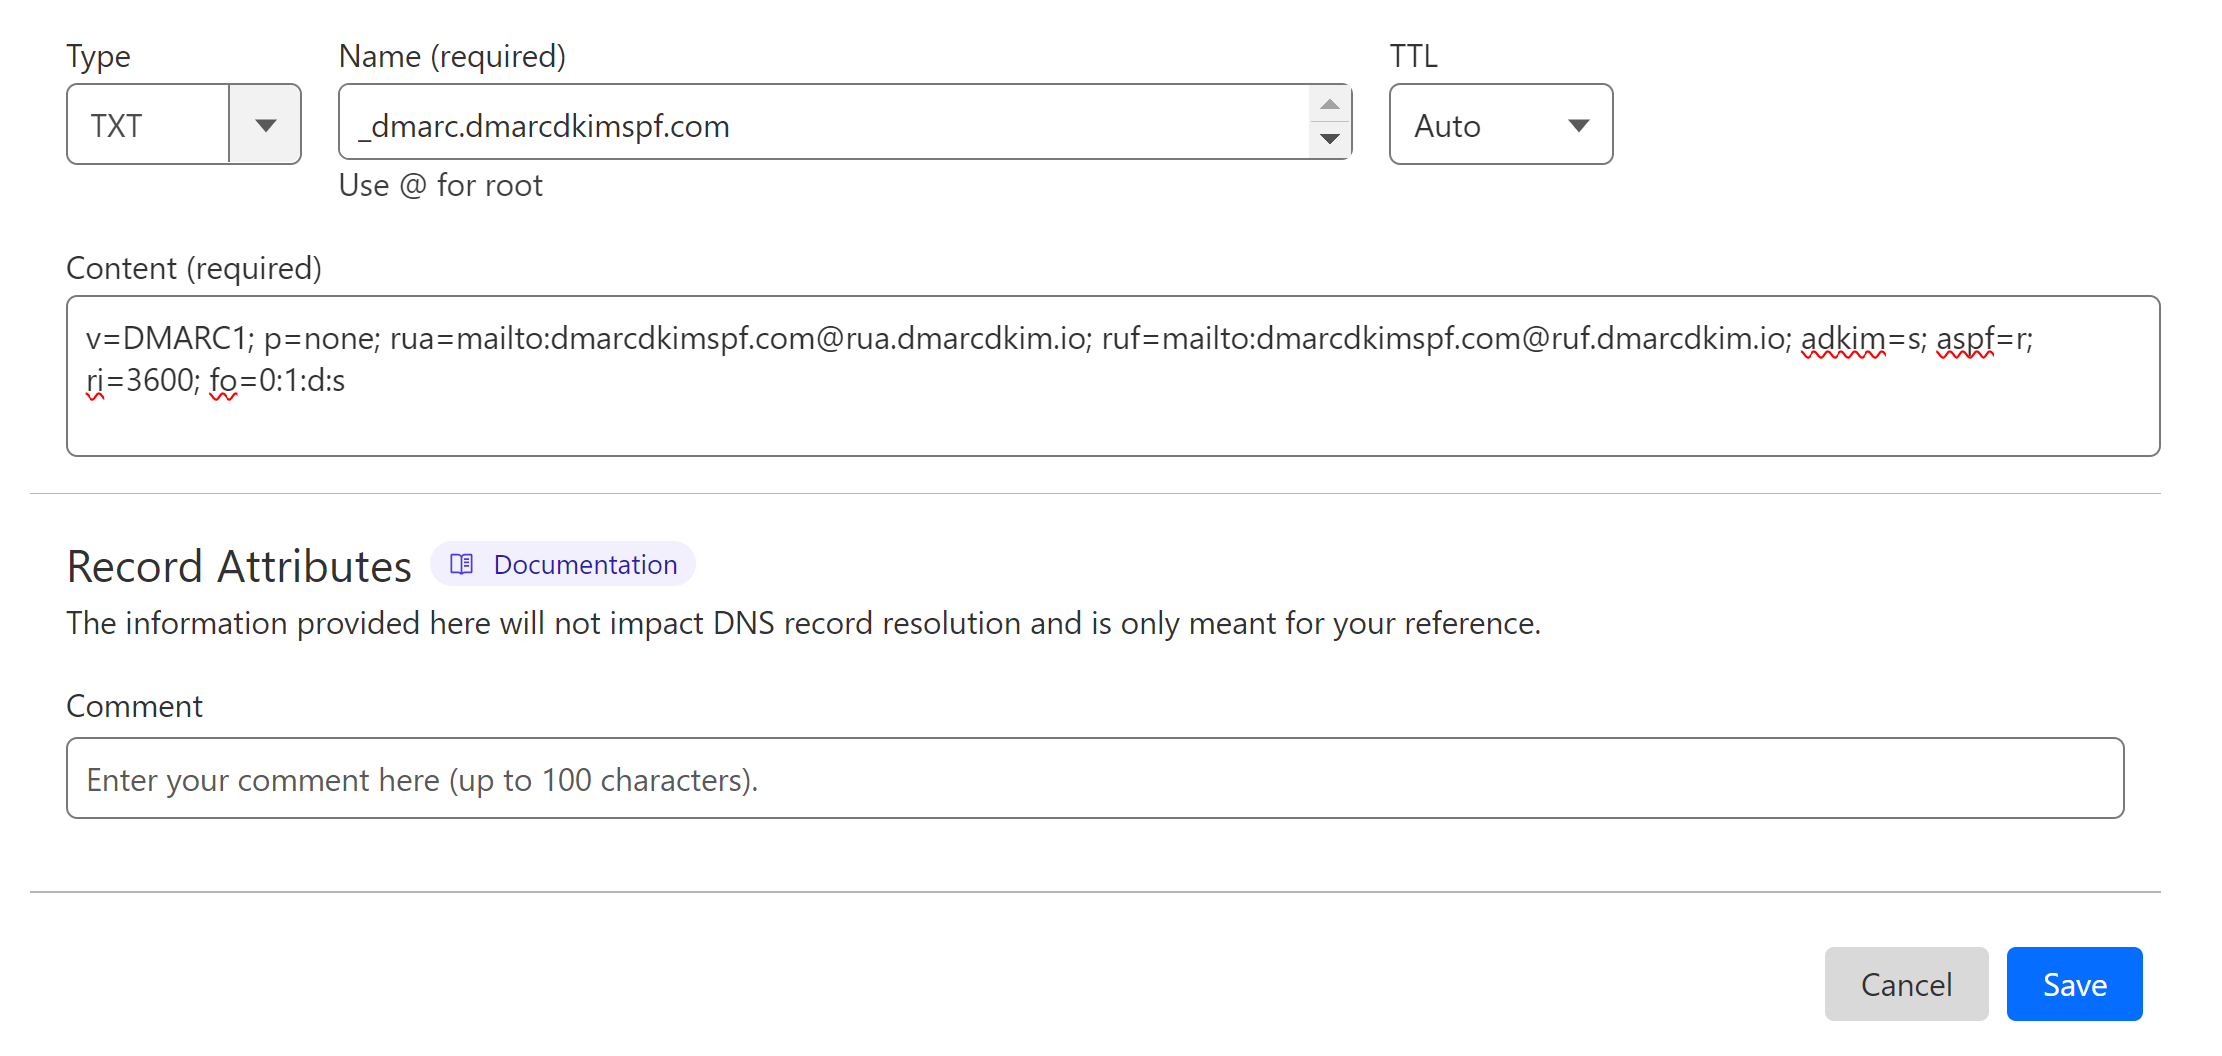
Sign up for the tool to access the DMARC reports dashboard.
Check domain and follow the instructions to nail down your DMARC configuration.
No expert knowledge needed!


