Listrak DMARC, DKIM, SPF DNS Records for Domain Authentication (2024 Guide)
Check your domain for DMARC, DKIM, SPF and MX records. Get a free report.
Listrak DMARC, DKIM, SPF and Domain Authentication - How to Setup DNS Records?
In this article, we will walk you through the step-by-step domain authentication process with the help of Listrak DNS records.
You can configure SPF, DKIM, and DMARC records in the Listrak help center. Add these records to your DNS provider for DNS verification. By doing this, you can prevent emails from going to the spam folder.
Setup Listrak Domain Alias Record:
Login to your DNS provider. For now, we are using Cloudflare.
-
Head to your Website and look for the DNS option.
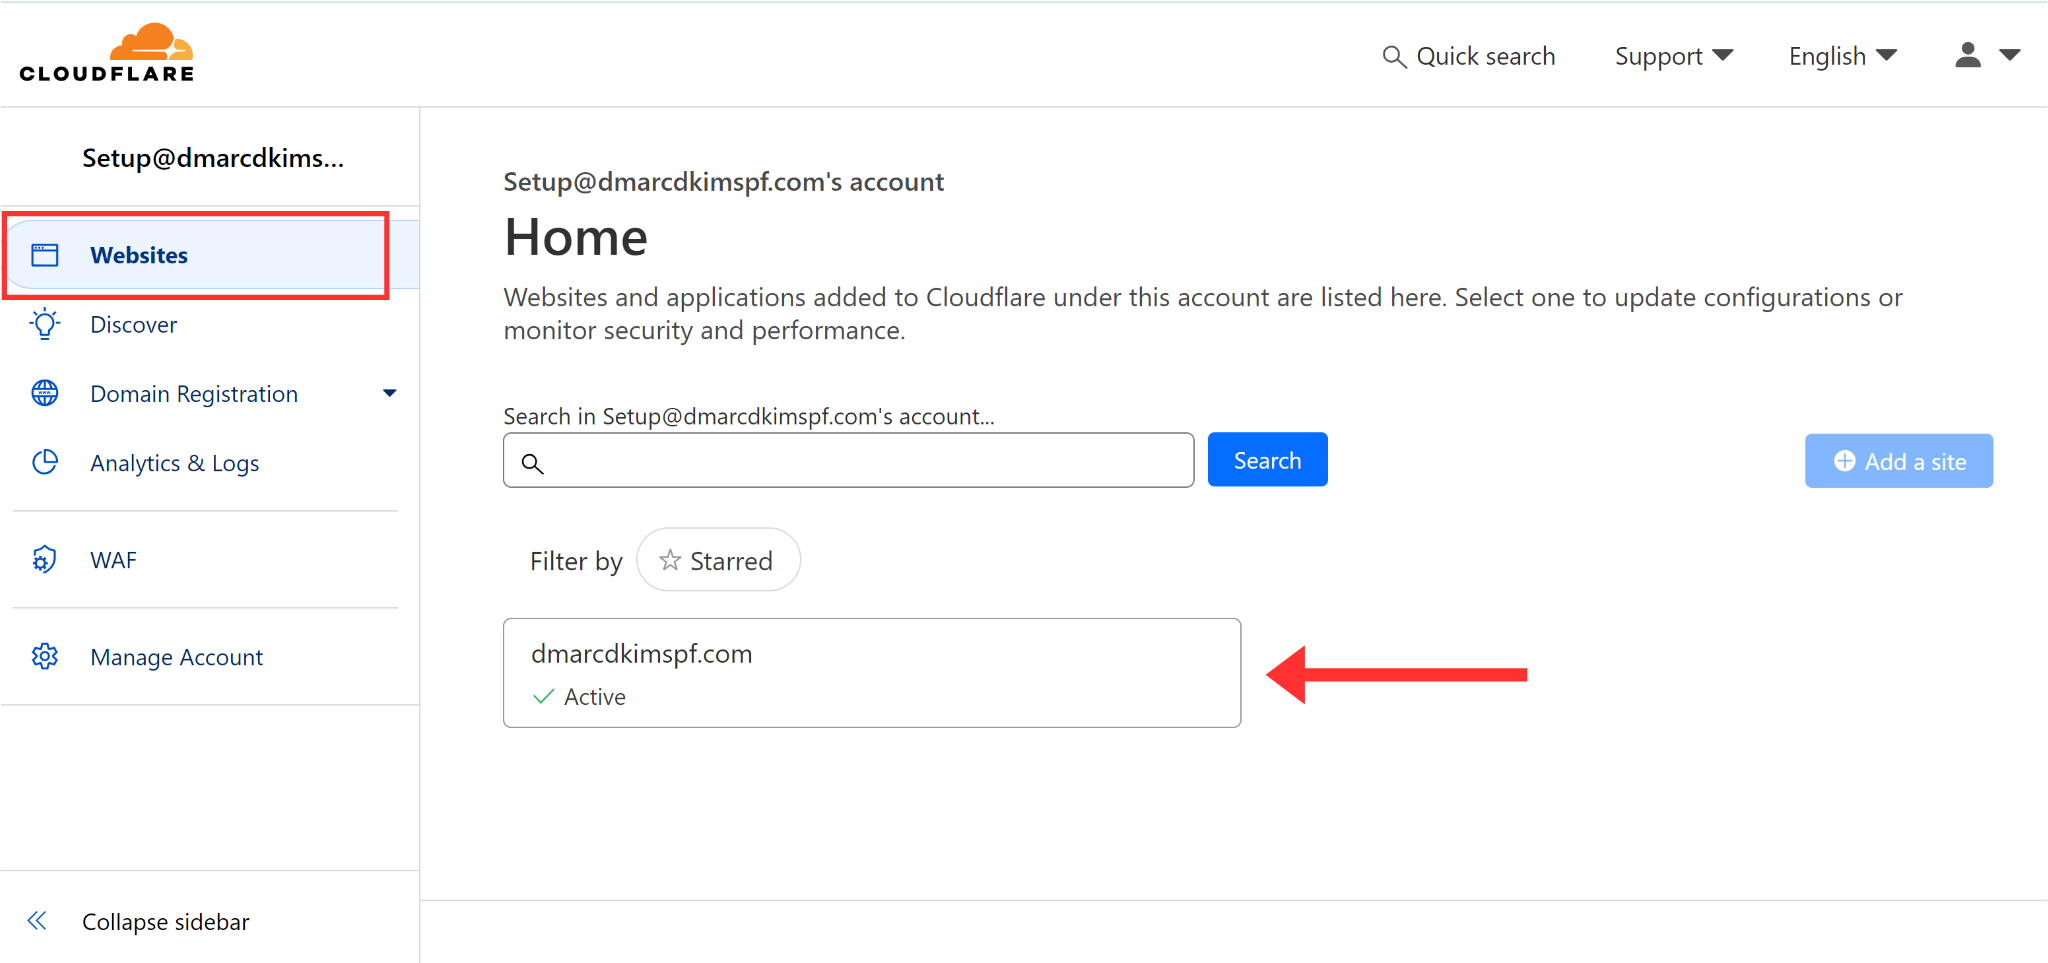
-
Go to the Records tab and click Add Record.
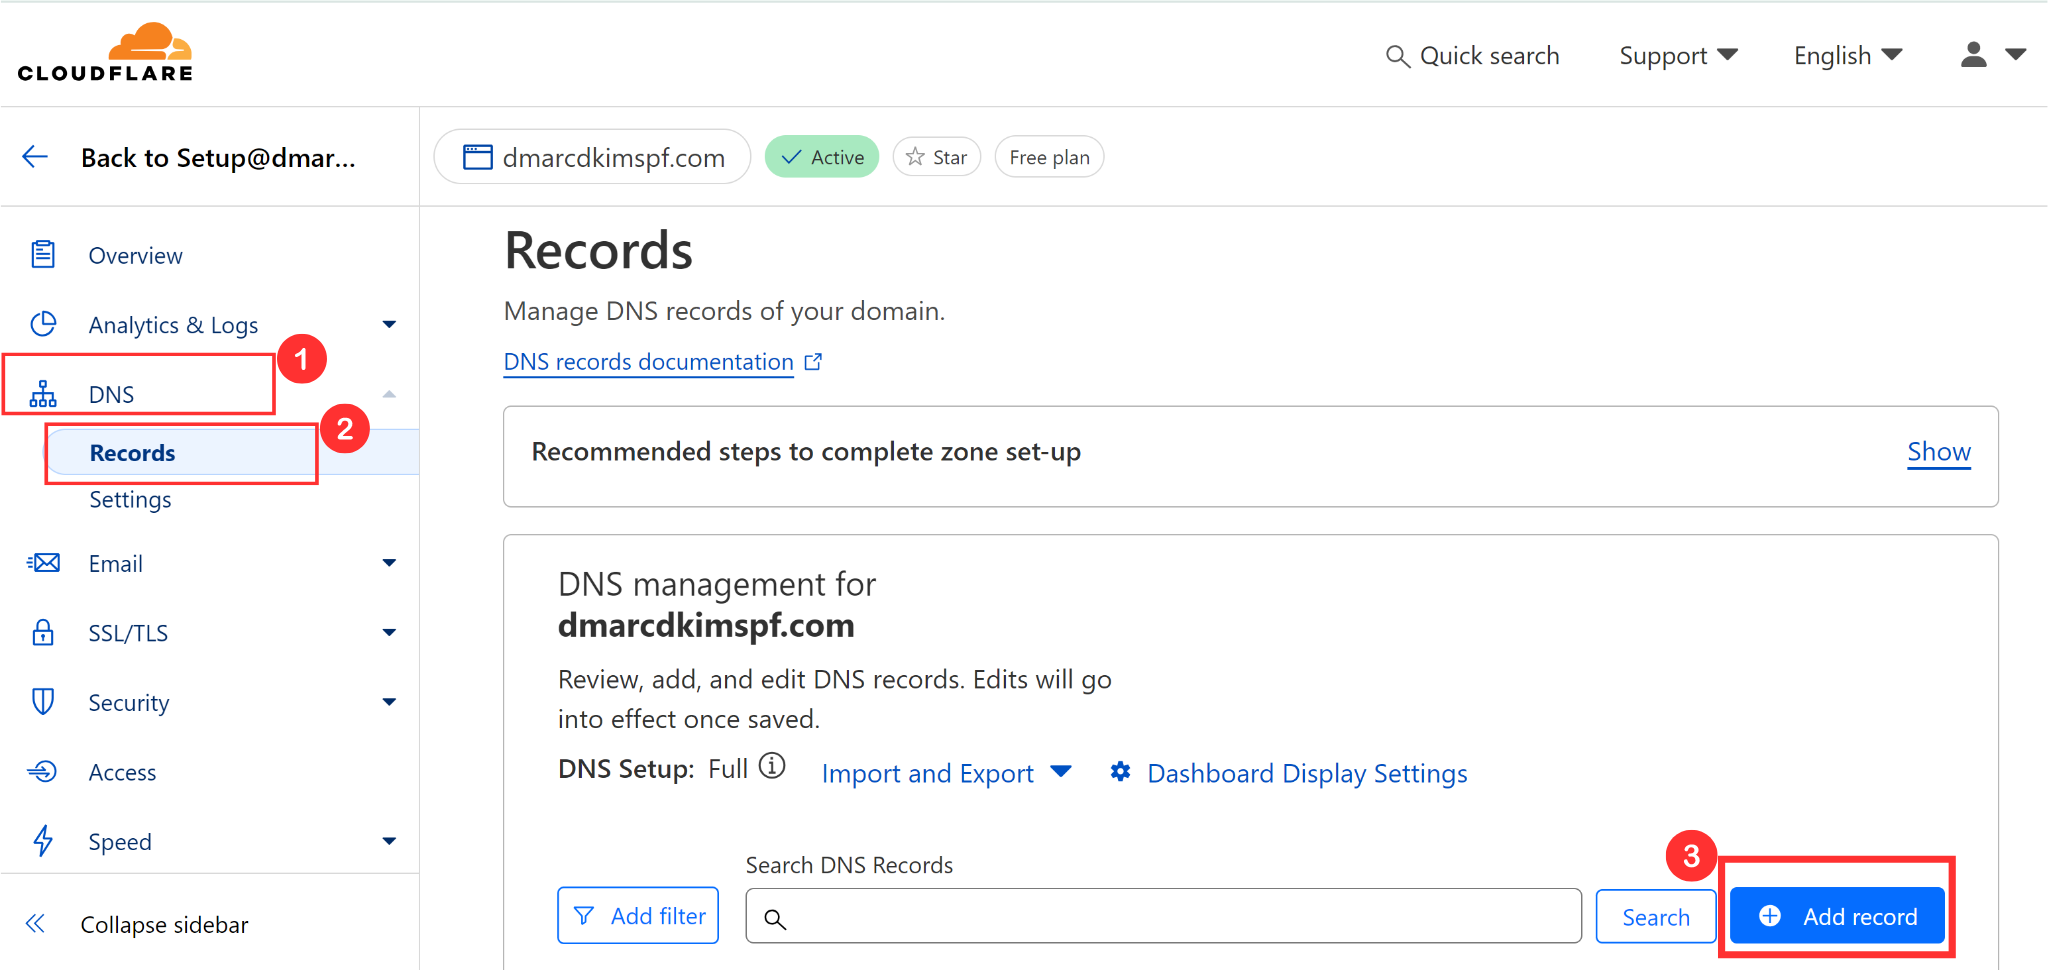
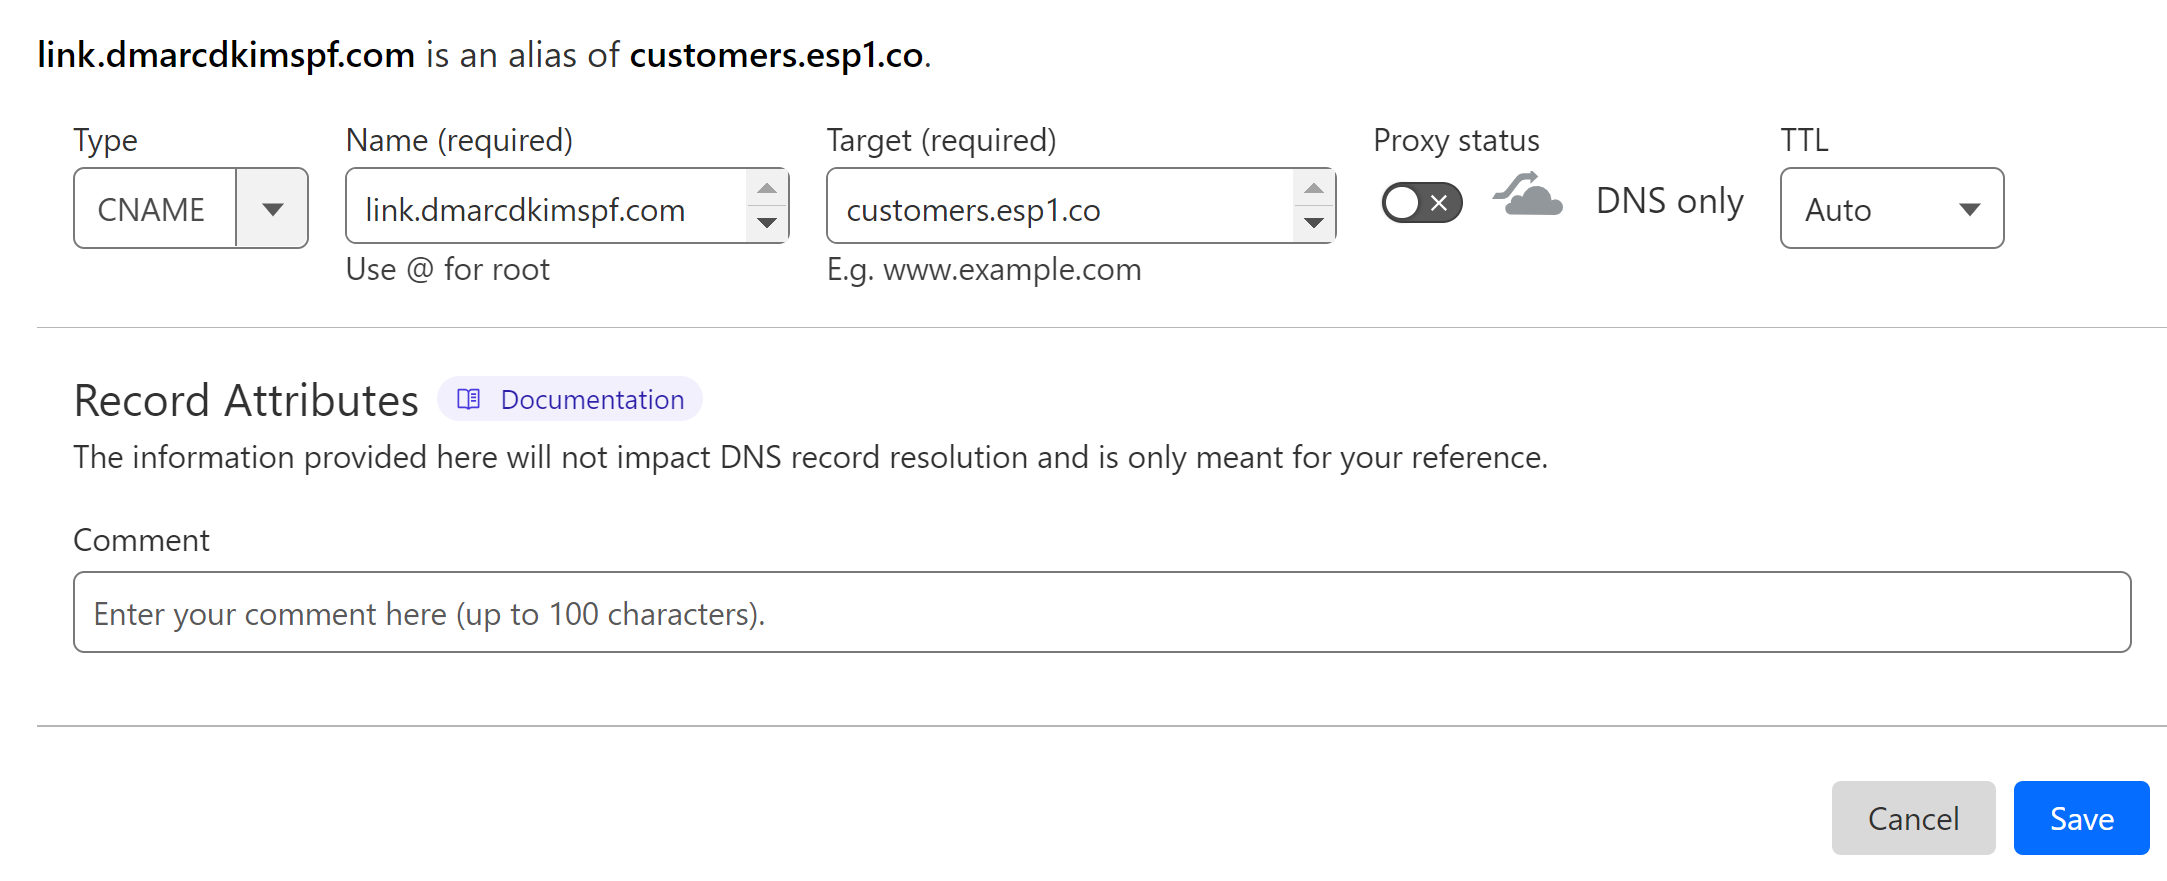
Select type CNAME.
In the Name field, add the record name: link.example.com. (Replace "example" with your "domain name."
In the Target field, add the record value: customers.esp1.co.
-
Disable proxy and click Save.
Setup Listrak SPF Record:
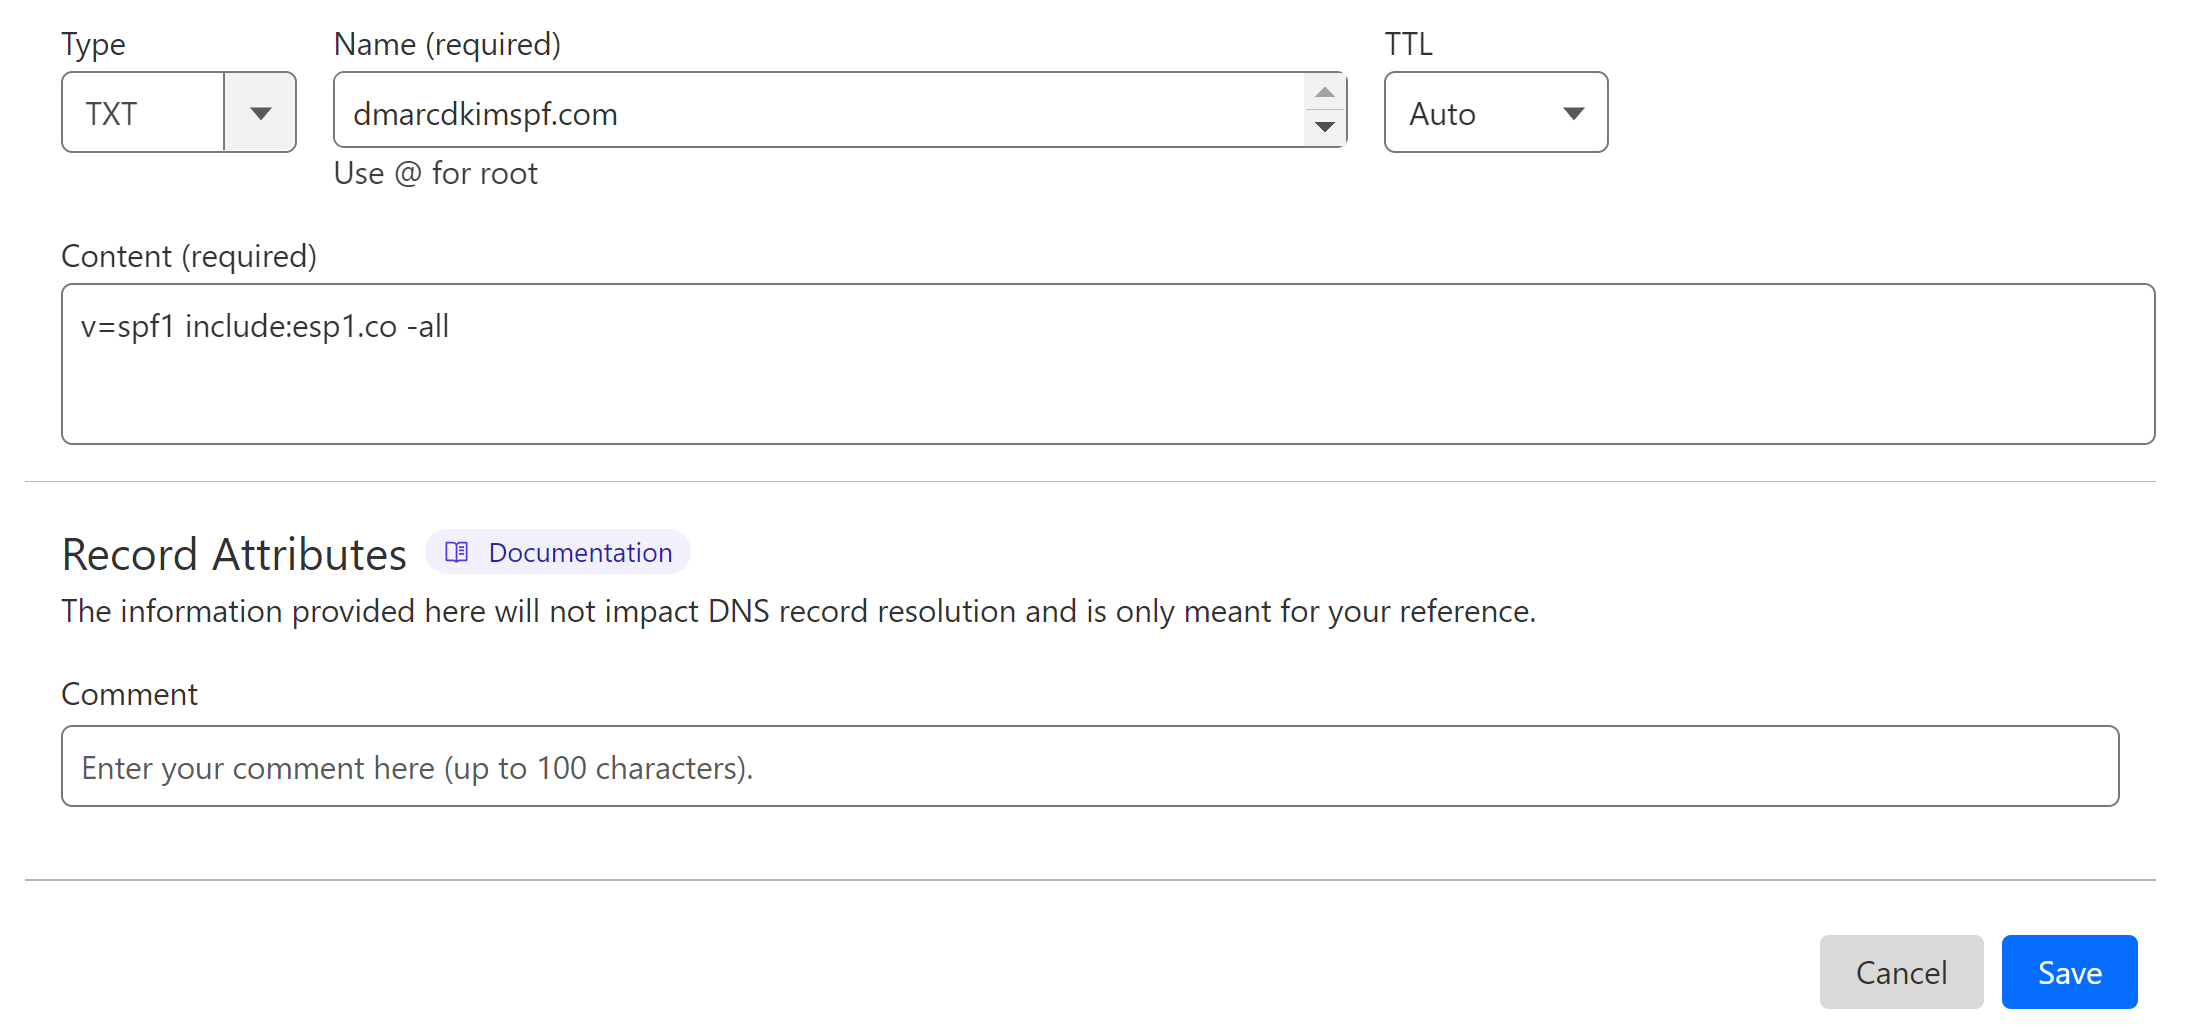
Select the record type TXT.
In the Name field, write your domain name or simply write
@In the Content field, add the SPF value:
v=spf1 include:esp1.co ~all-
Finally, click Save.
Merge Listrak SPF Record:
Due to the limitations of DNS providers, we can only add one SPF record for a domain. If your domain has an existing SPF record, merge it with the Listrak SPF to avoid conflicts.
Go to the SPF Merge Tool.
Add your domain name and Listrak SPF value.
Click Merge SPF Values.
-
The tool detects the existing SPF records and merges them with the Listrak SPF value.
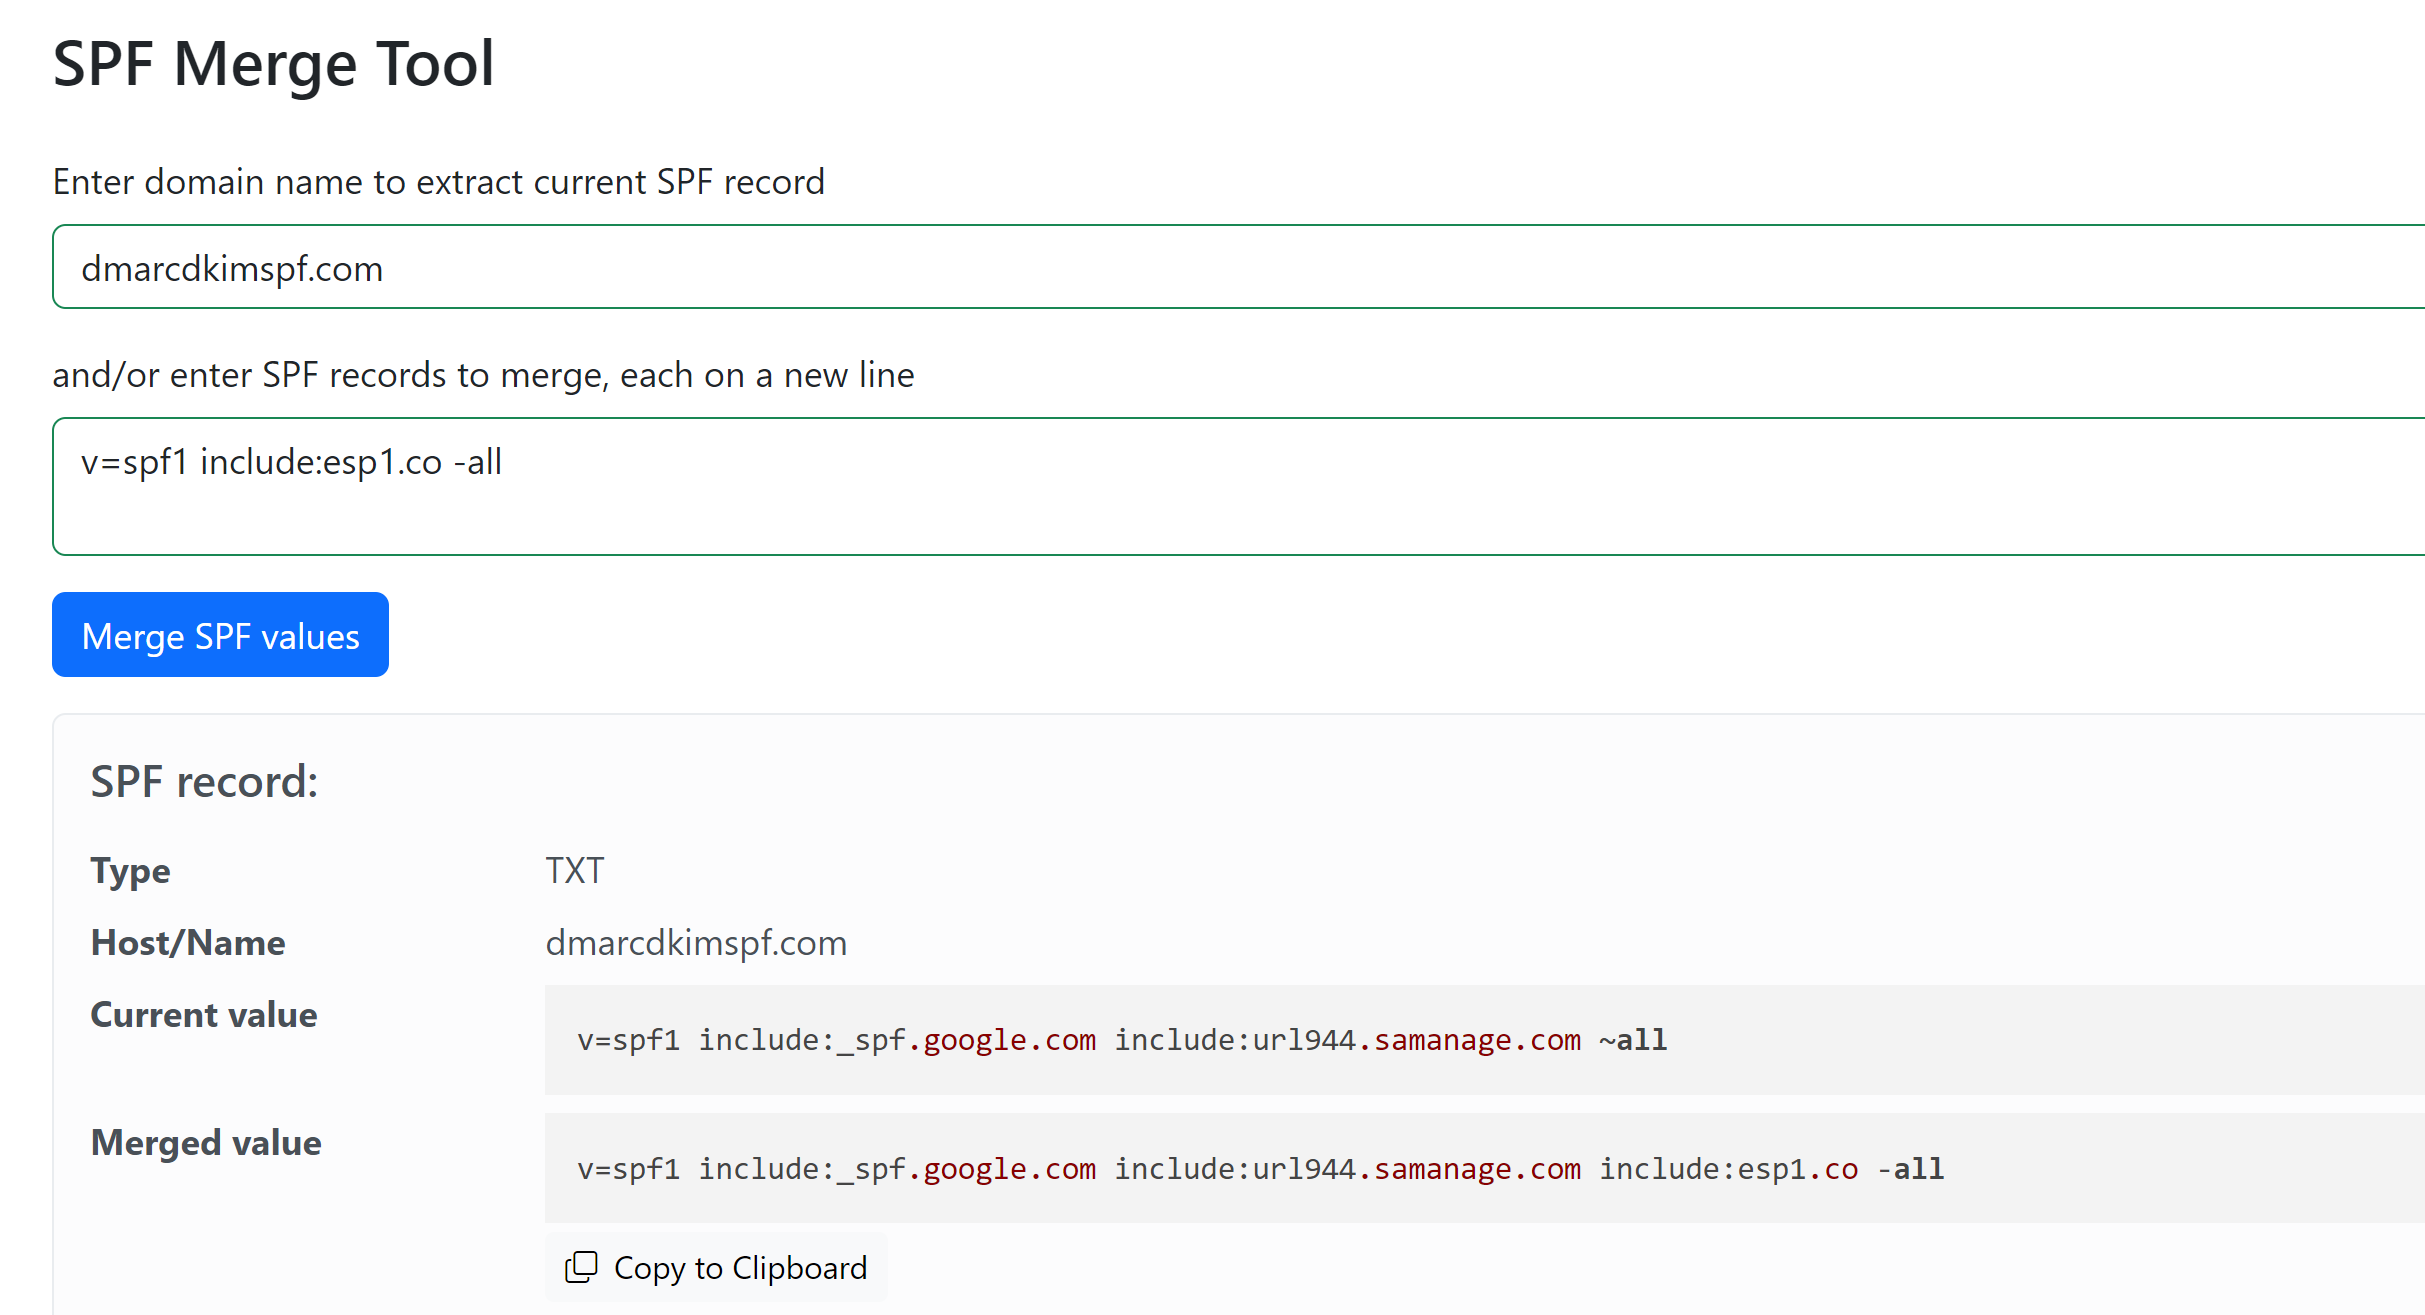
Replace your previous SPF value with the Merged value and save the record.
Setup Listrak DKIM Record:
To enable DKIM for your outbound messages, contact Listrak Support at support@listrak.com.
Setup Listrak Bounce Domain Record:
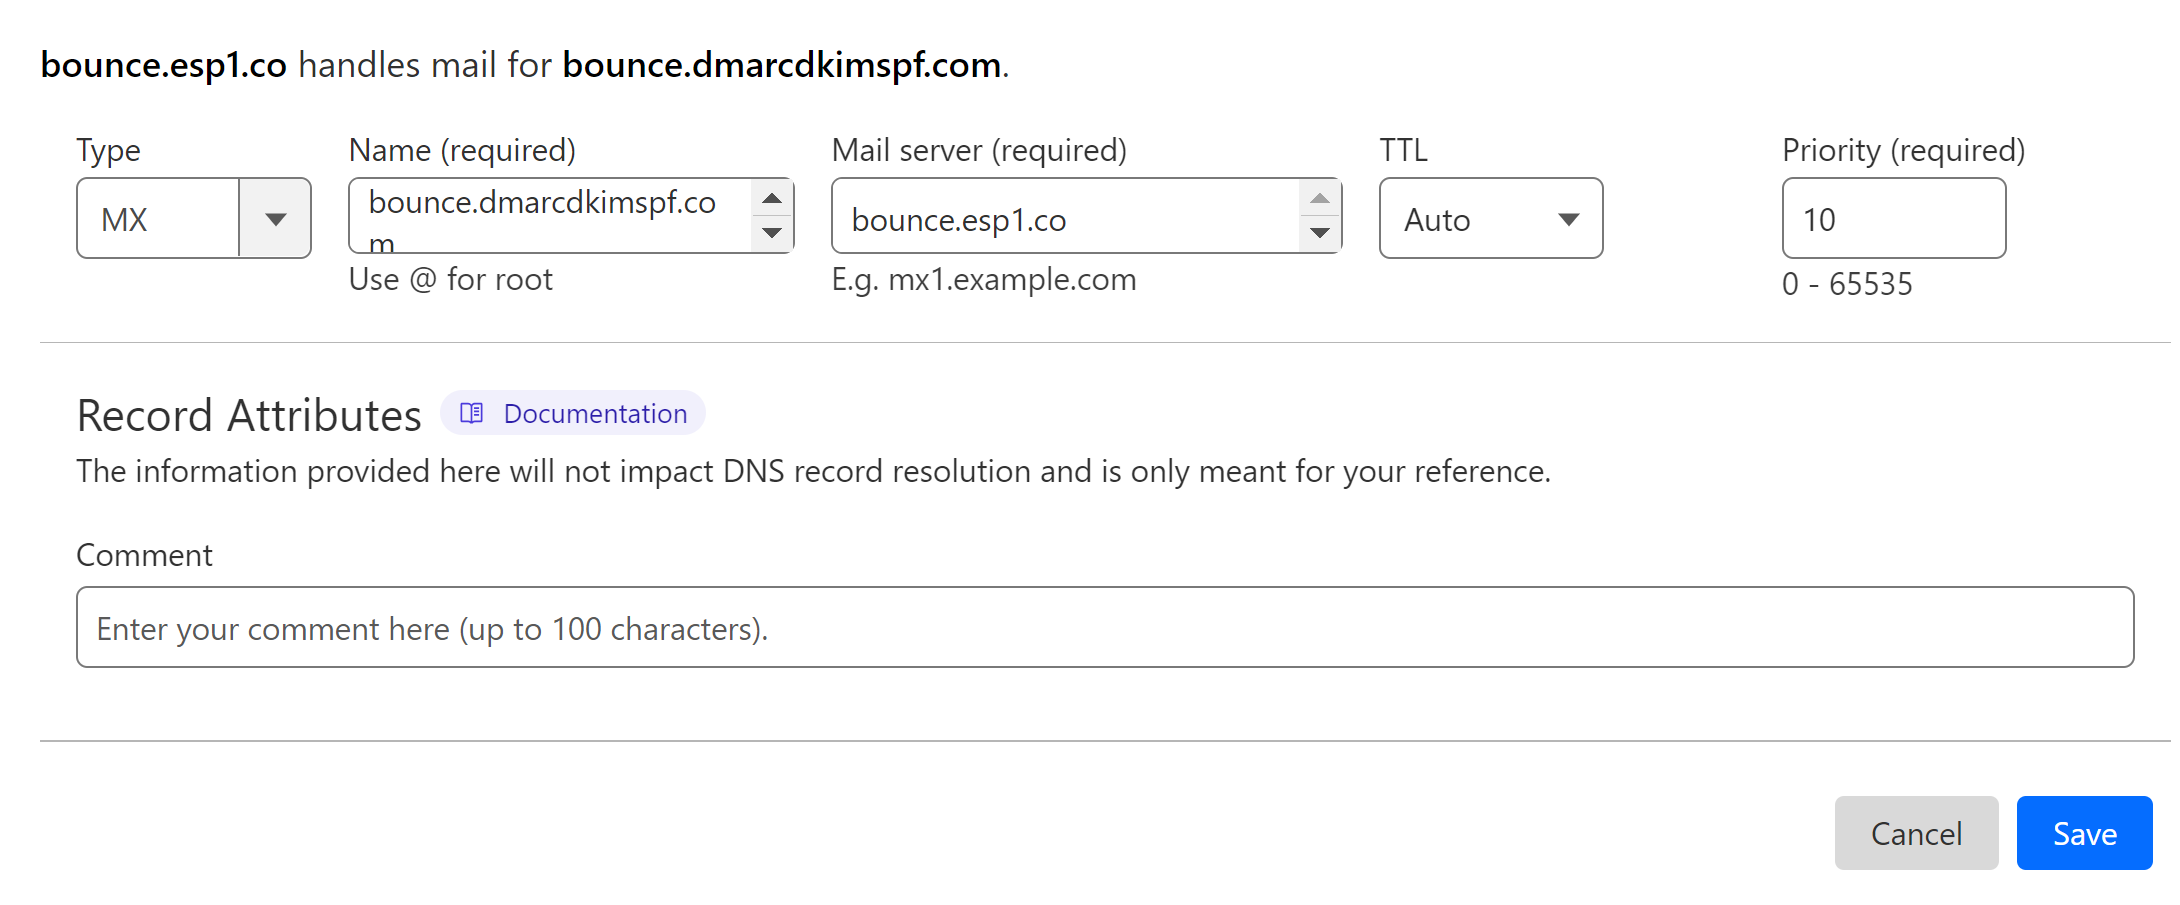
Create a subdomain for the bounce record, eg; "bounce."
In the DSN dashboard, select type MX.
Add the record name: bounce.example.com. (write your domain name in place of "example.")
Add the record value: bounce.esp1.co.
-
Set the priority to "10" and click Save.
Setup Listrak DMARC Record:
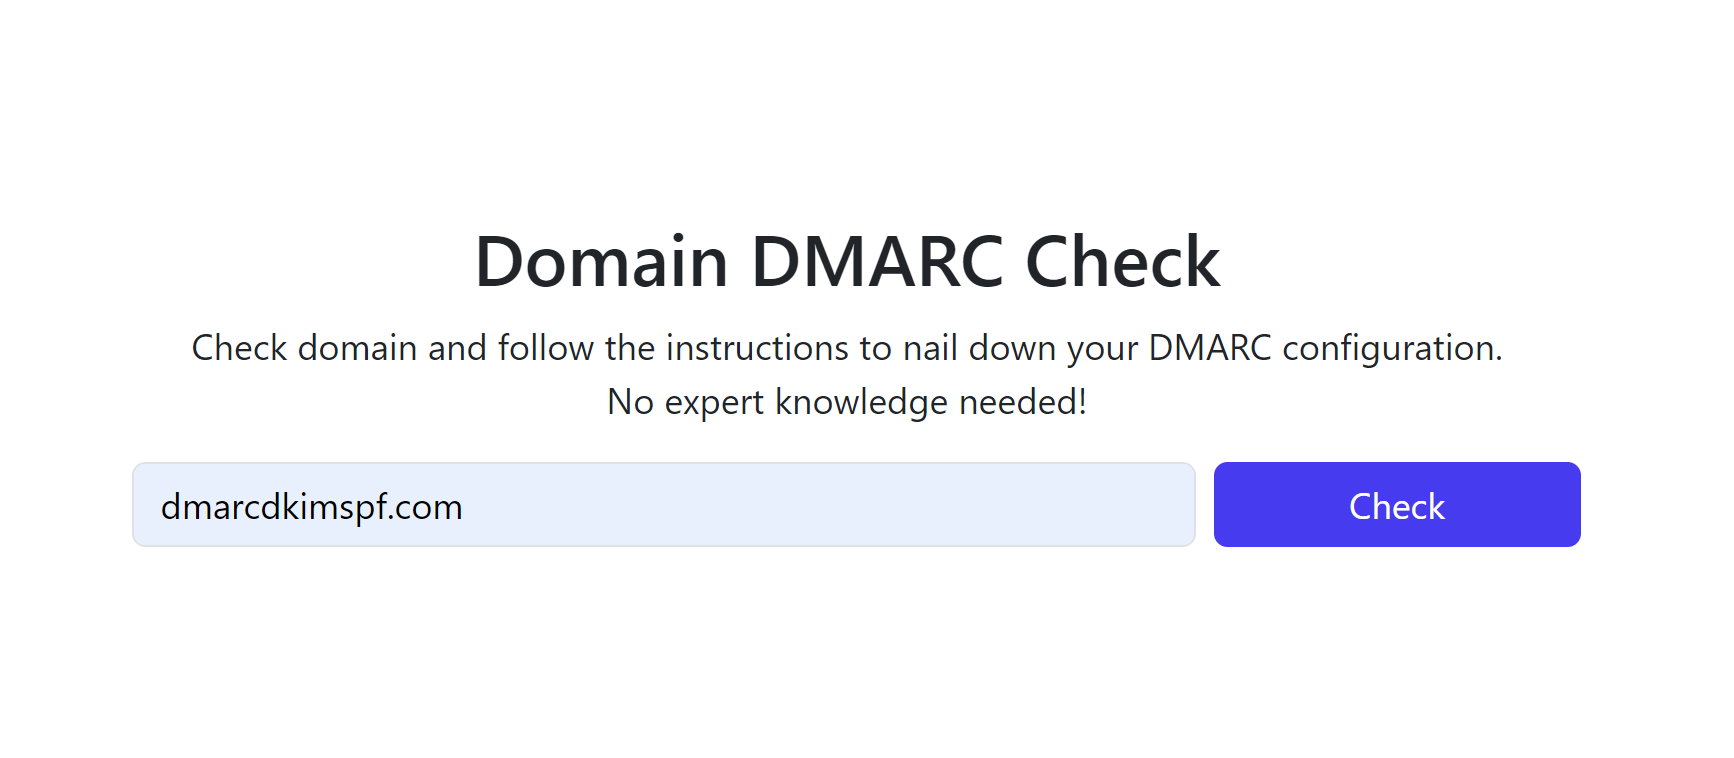
Go to DmarcDkim.com Domain Check Tool.
-
Write your domain name and click Check.
-
The tool analyses your domain name and gives a Suggested value.
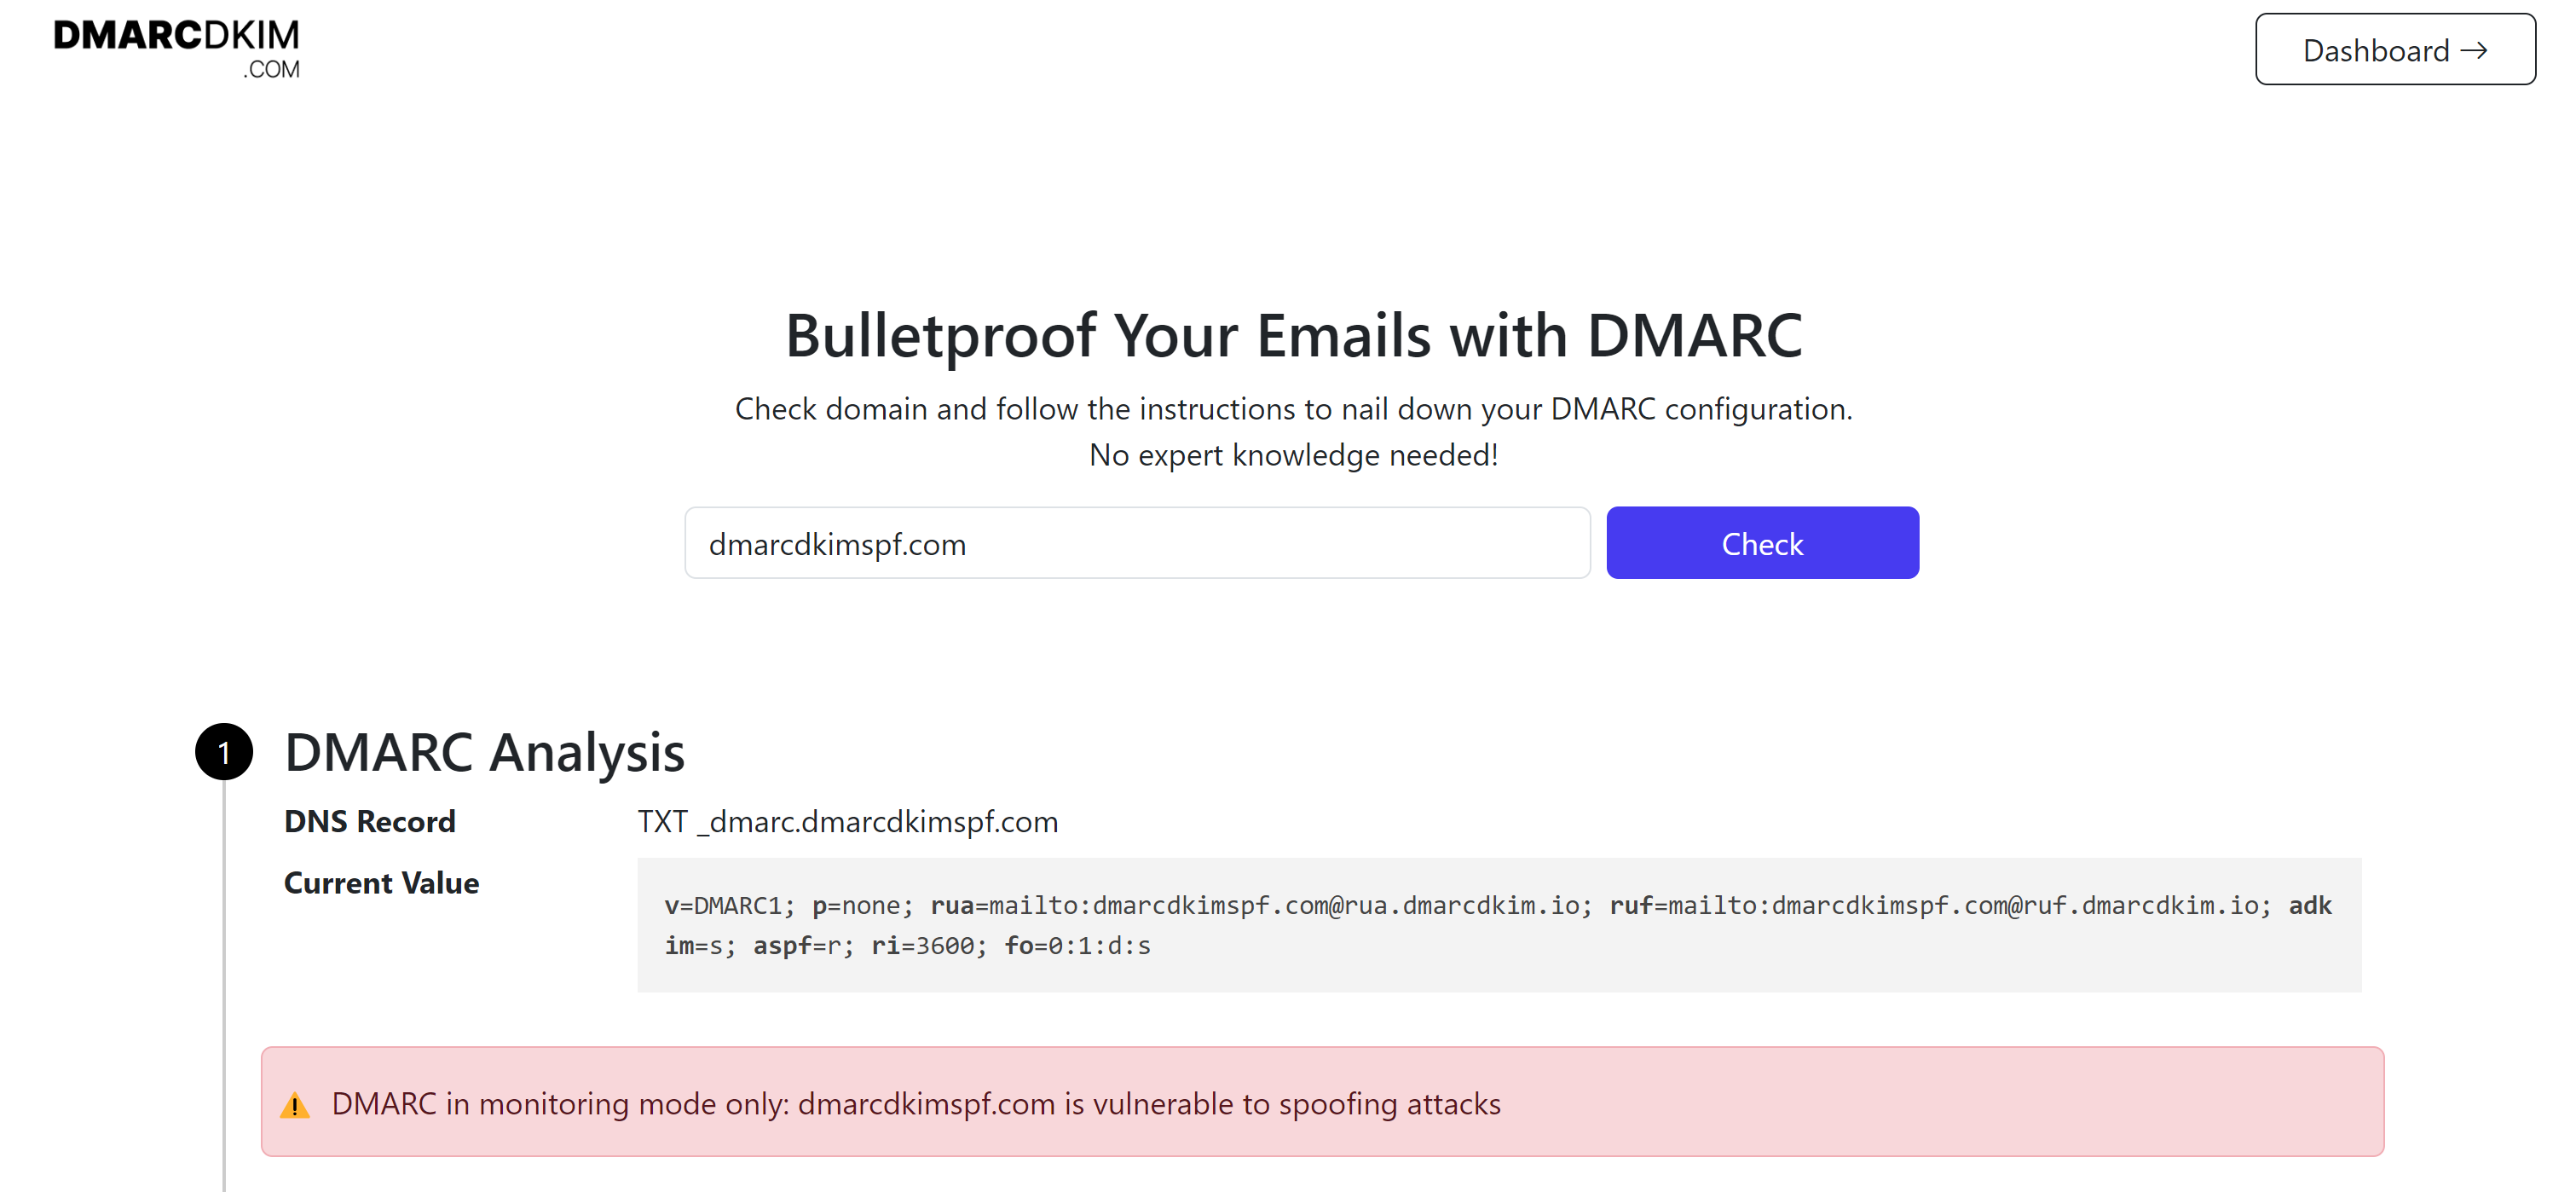
Add this value to your DNS provider.
Access your reports via DMARC Dashboard.
For assistance and support, book an expert from DmarcDkim.com.
Check domain and follow the instructions to nail down your DMARC configuration.
No expert knowledge needed!


