Configure DMARC, DKIM, SPF records in Klaviyo for Email Authentication
Check your domain for DMARC, DKIM, SPF and MX records. Get a free report.
Klaviyo DMARC, DKIM, SPF - Domain Authentication
Whether you want to launch a huge email campaign for your business, or just keep your subscribers informed of new updates, Klaviyo ensures a smooth and secure email communication. Within a few configuration steps, you can generate authentication keys and add to your domain provider for webmail authentication. From SPF and DKIM setup to DMARC implementation, we'll guide you through the step by step process of email authentication. Let's ensure your email campaigns land where they belong – in your customers' inboxes.
First, open Klaviyo home tab, go to your Account name in the bottom left corner and click Settings.
-
Go to the Email tab, select Domains and click on Add.

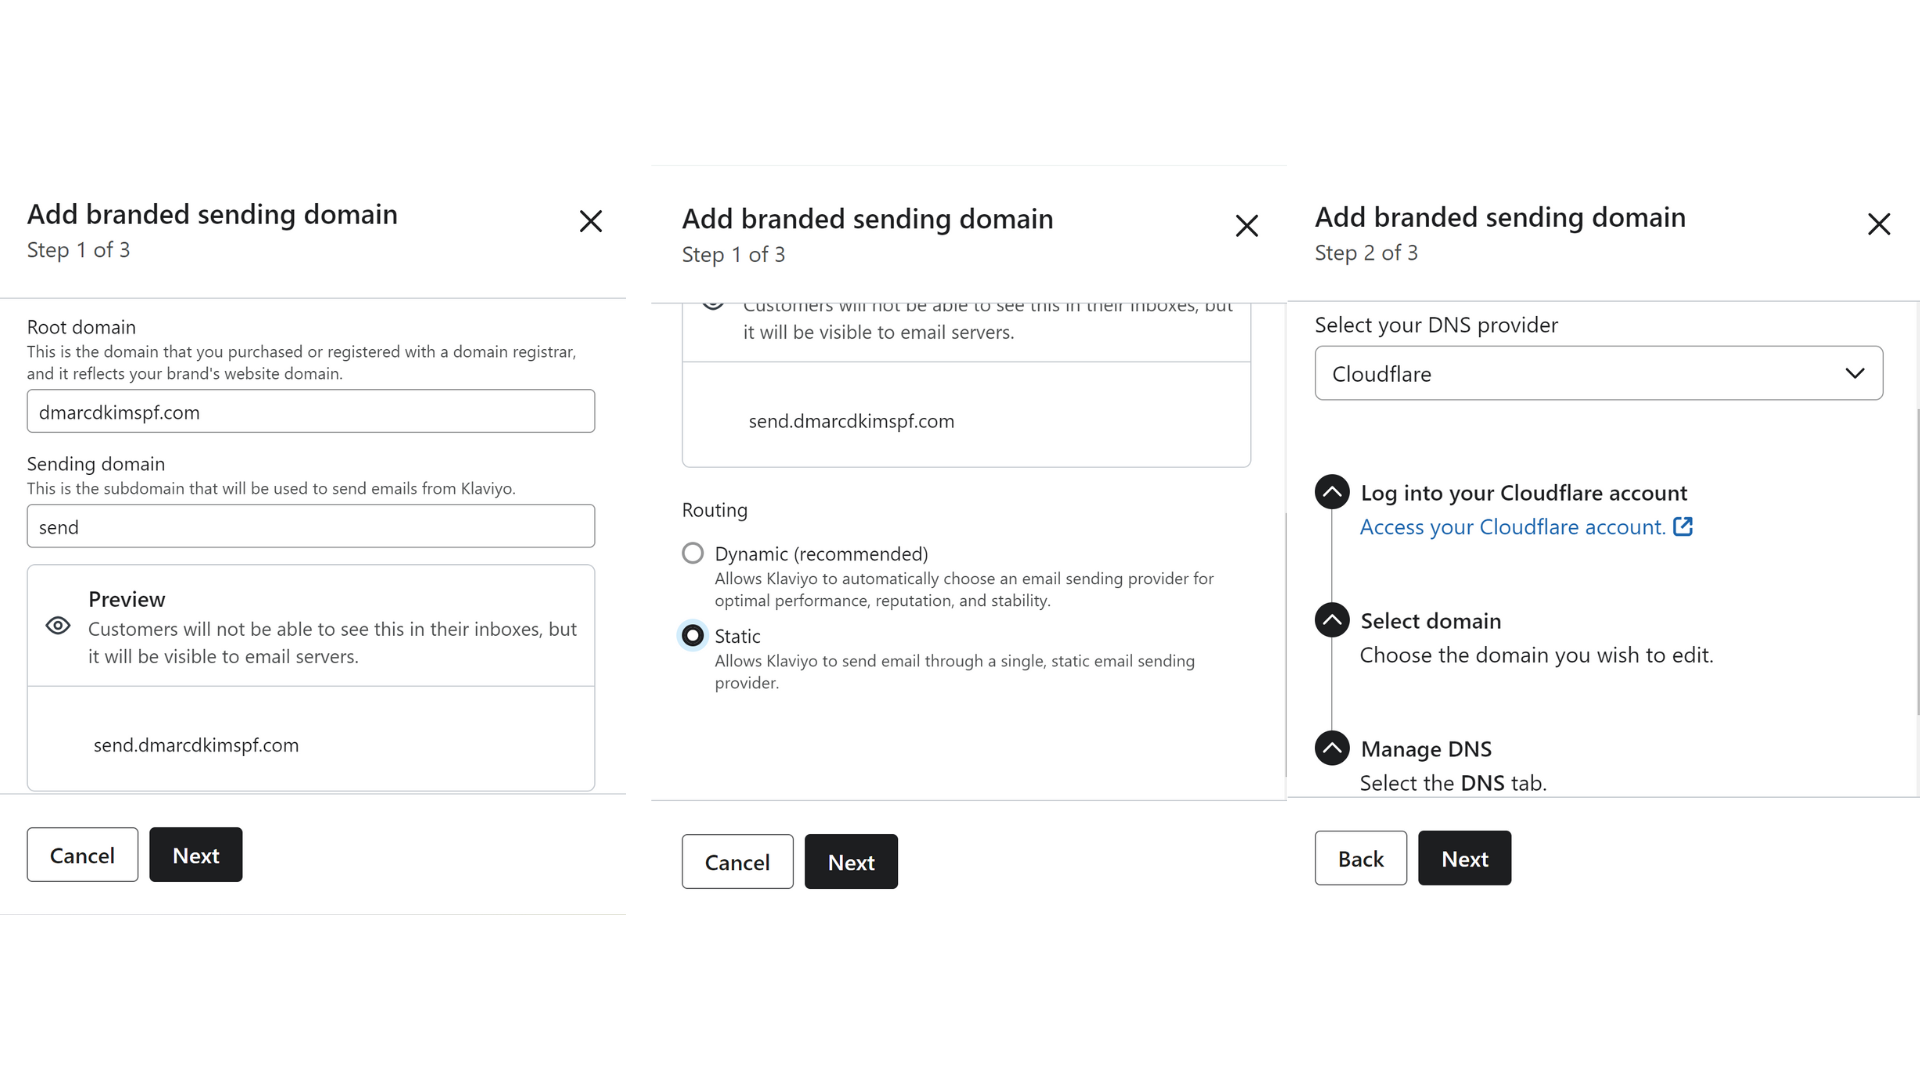
On the pop up window, you'll see your domain name already written under "Root domain" (the domain you added wile signing up the account). If you wish to add any other domain, you can also do so.
Also, you'll see a Subdomain (e.g, send) under Sending Domain. This subdomain is automatically generated by Klaviyo. It will not be visible to your customers, they'll see your root domain only. This subdomain is readable only by the email servers.
Scroll down the window, select Static under Routing, and hit the Next button.
-
At the next step, select your DNS Provider from drop down menu and click Next.

At step 3, Klaviyo will provide TXT and CNAME records to add in your DNS provider.
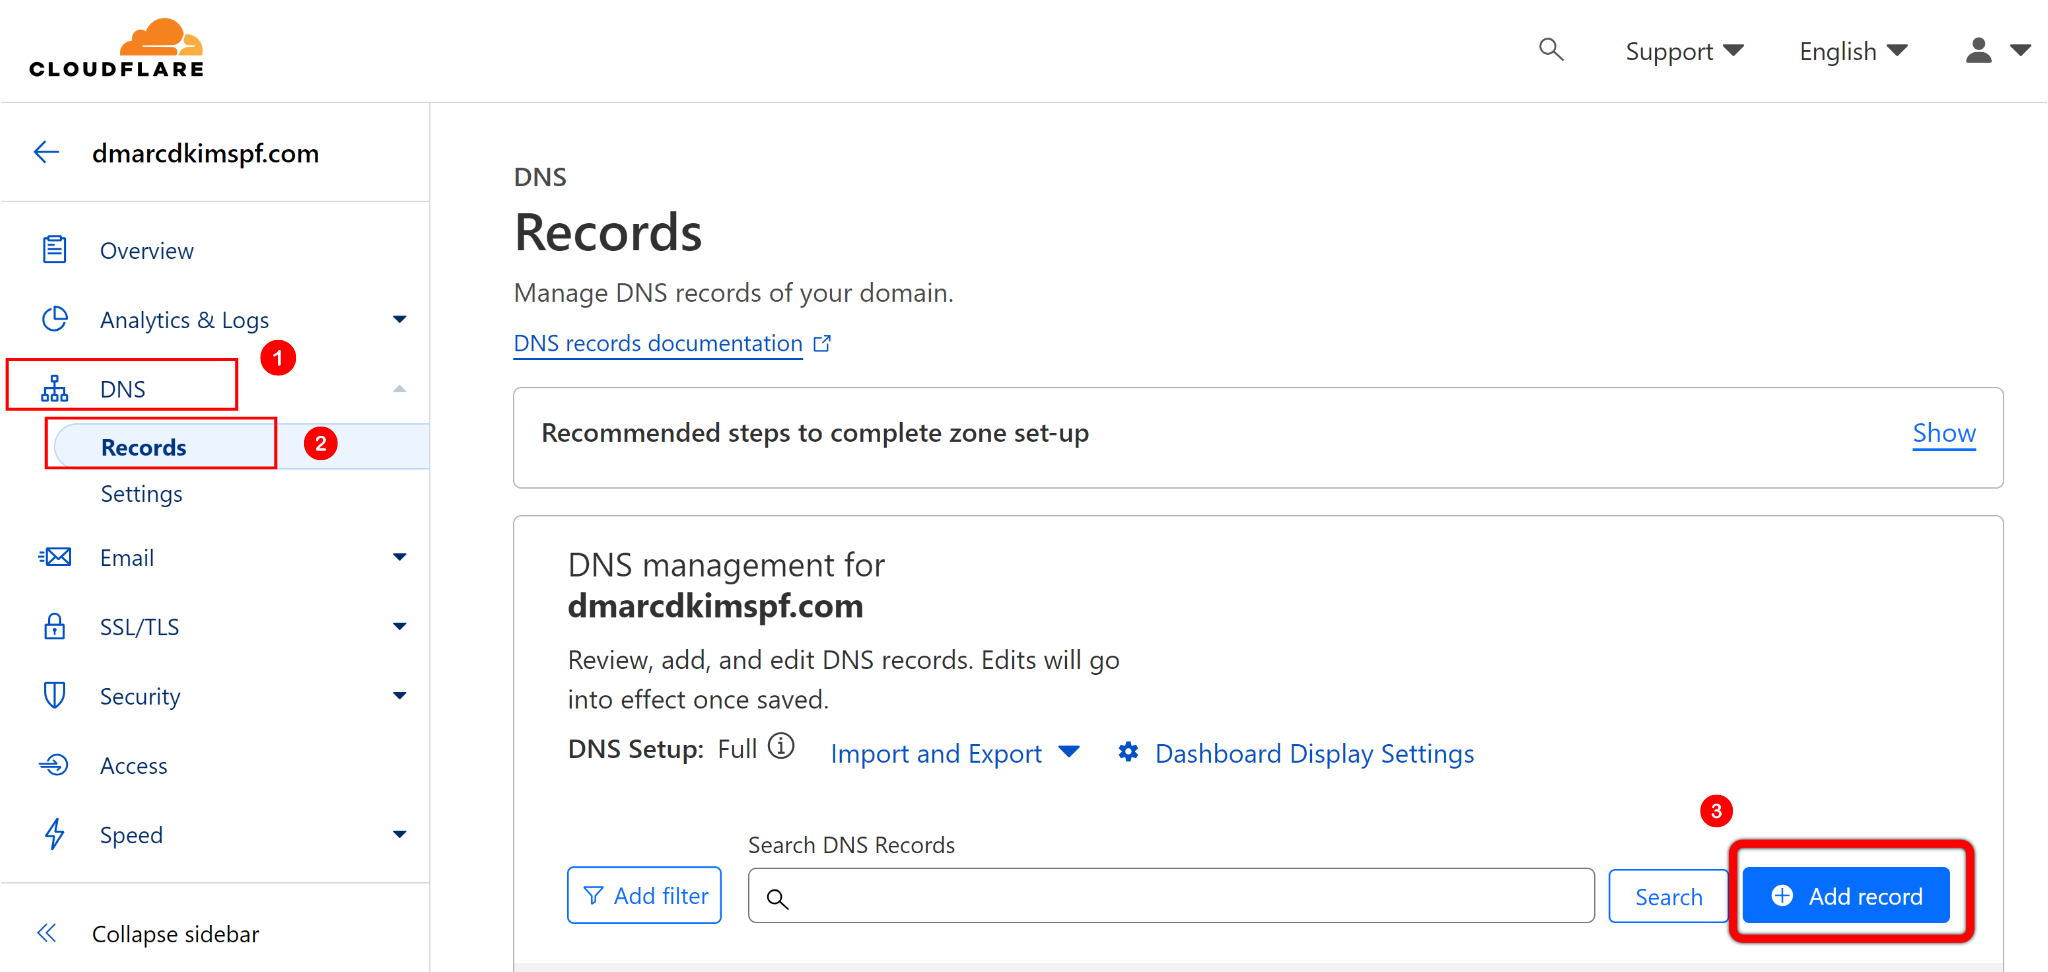
Move to your DNS provider Dashboard and add these records. We are using Cloudflare for instance.
-
In Cloudflare Home tab, click on your Website > DNS > Records > Add record > Save.

After adding records in DNS provider, go back to Klaviyo and click Verify Records.
It may take some time to authenticate records, refresh the page time to time. When records are authenticated, you'll see green tick marks before each records.
-
Then scroll down to check the box for "I understand..." and click Activate.

-
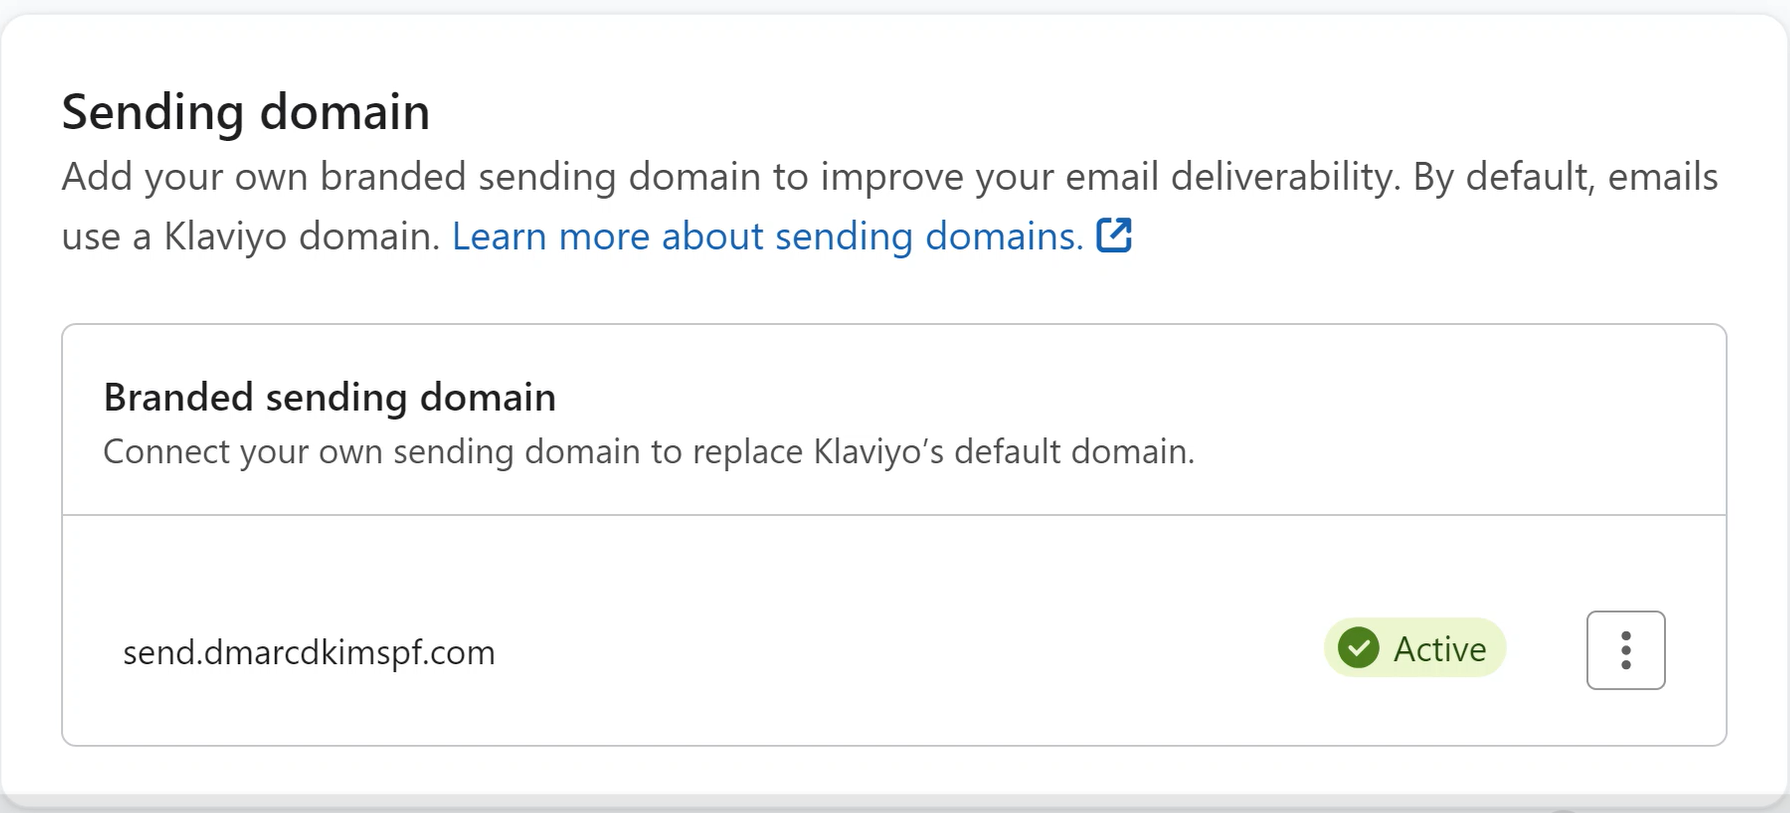
Finally, you'll see "Active" status next to your sending domain.

It may take up to 24 hours for Klaviyo to properly authenticate your DNS records. Usually the authentication happens automatically, but if it's taking longer, there is no need to worry. However, if authentication doesn't happen after 24 hours, then you need to contact Klaviyo Support team or your DNS provider.
Check domain and follow the instructions to nail down your DMARC configuration.
No expert knowledge needed!


