
WordPress SPF, DKIM, DMARC Setup for Domain Authentication
Check your domain for DMARC, DKIM, SPF and MX records. Get a free report.
How to Setup SPF, DKIM, DMARC Records for WordPress Email Domain?
If you are managing your email domain in WordPress and emails are going to spam, this article is for you. It will guide you on how to setup the SPF, DKIM, and DMARC records for WordPress emails.
With the help of WordPress DNS records, you can improve email deliverability and prevent email scams. When your email domain is authenticated, inbox providers like Google and Yahoo trust you as a legitimate sender, hence, allowing your emails to the customers' inboxes.
SPF (Sender Policy Framework) specifies which servers are allowed to send emails on your behalf.
DKIM (DomainKeys Identified Mail) makes sure that the email message has not been forged in its transit.
DMARC (Domain-based Message Authentication, Reporting, and Conformance) checks the SPF and DKIM alignment and decides what to do with emails that fail the authentication check.
These authentication records are already added for the domains provided by WordPress. However, if your domain provider is other than WordPress, you need to add the following records in your DNS management zone. First, connect your domain to WordPress and then add the SPF, DKIM, and DMARC records.
NOTE: Before proceeding, make sure you are on the WordPress Business Plan (and the Hosting Feature is activated), only then you will be able to access the email authentication feature.
Connect Domain to WordPress:
On your WordPress dashboard, go to the Domains tab.
-
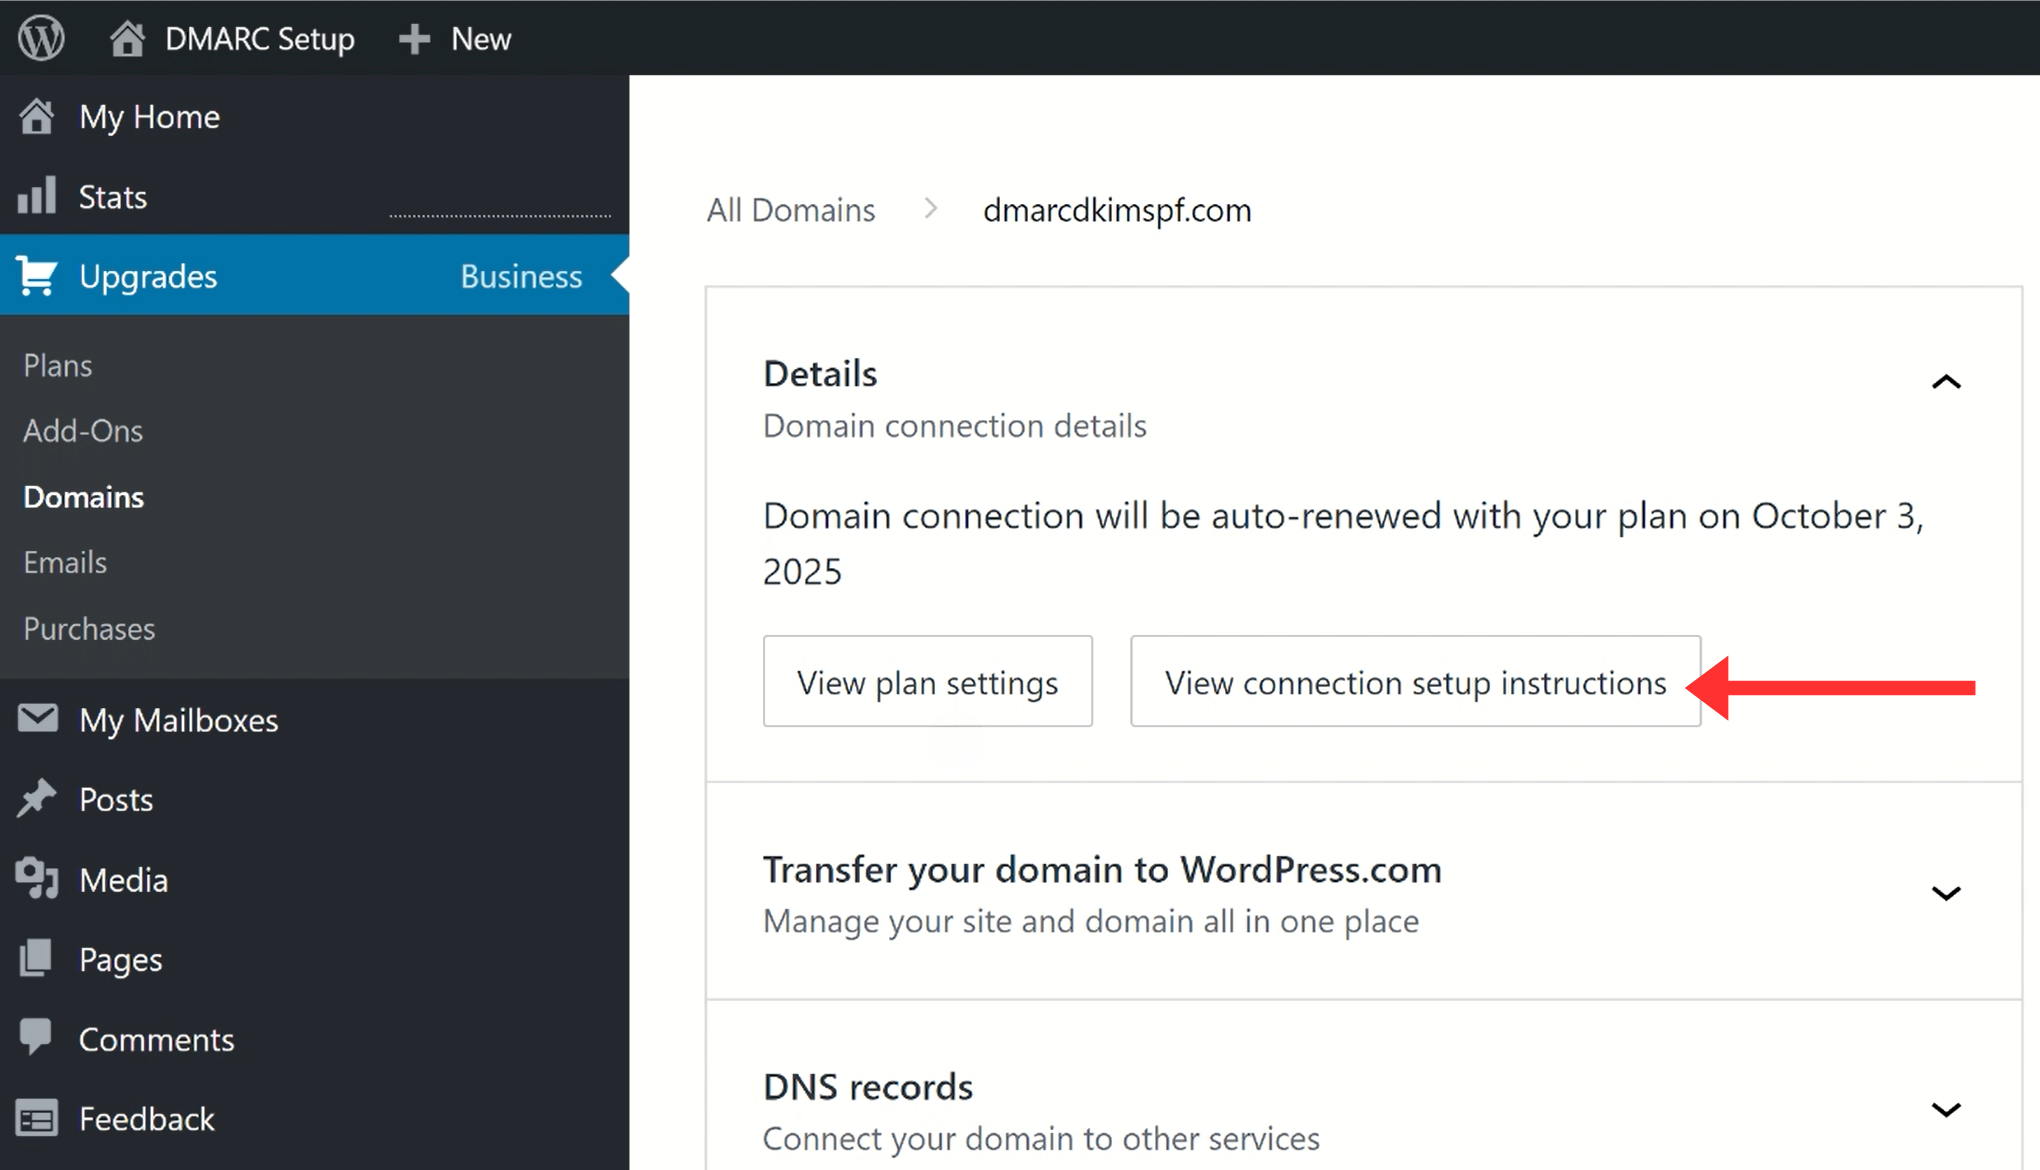
Click on your domain name.

-
Select "View connection setup instruction."
-
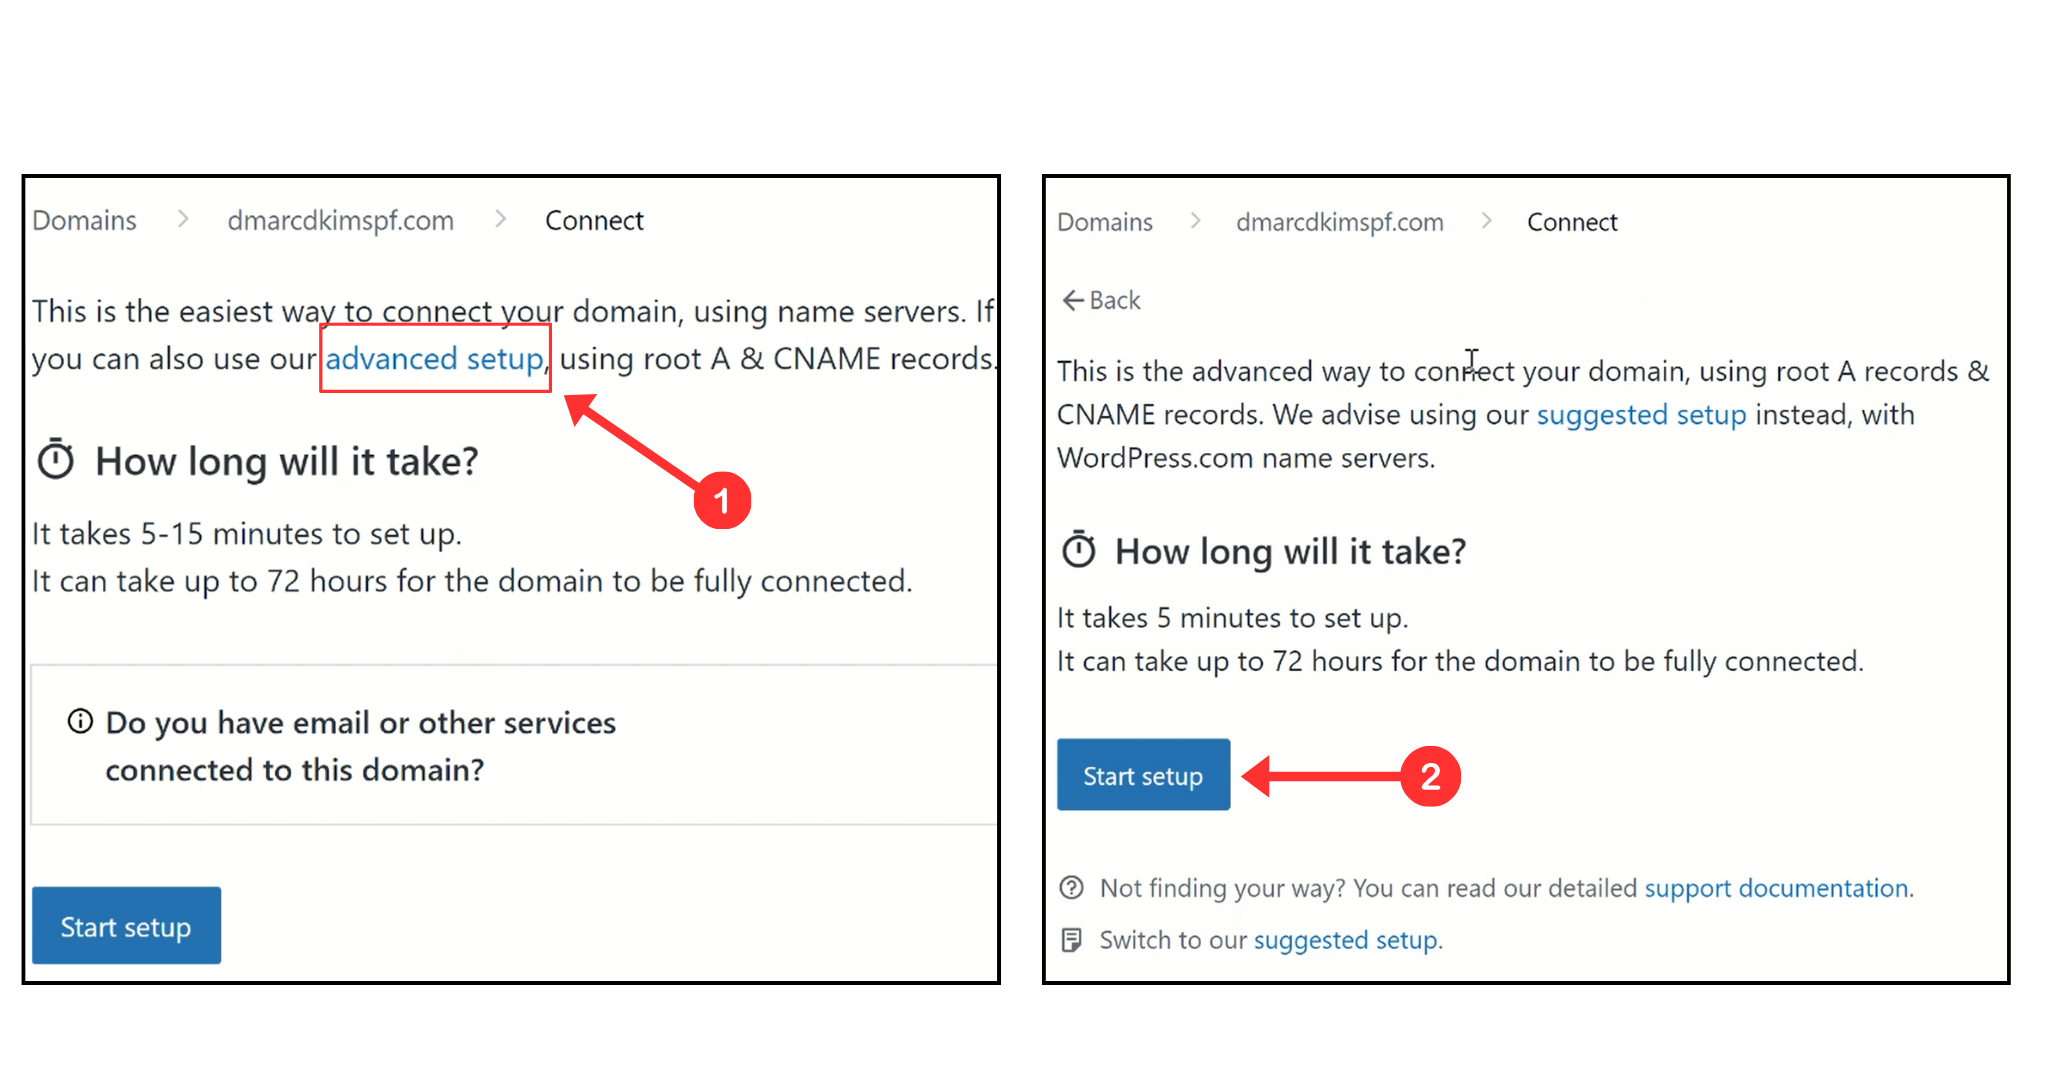
Now click on "Advanced Setup" and then hit the "Start Setup" button.
-
At step #1, you get the instructions for logging in to your DNS provider: click "I found the domain's setting page."

-
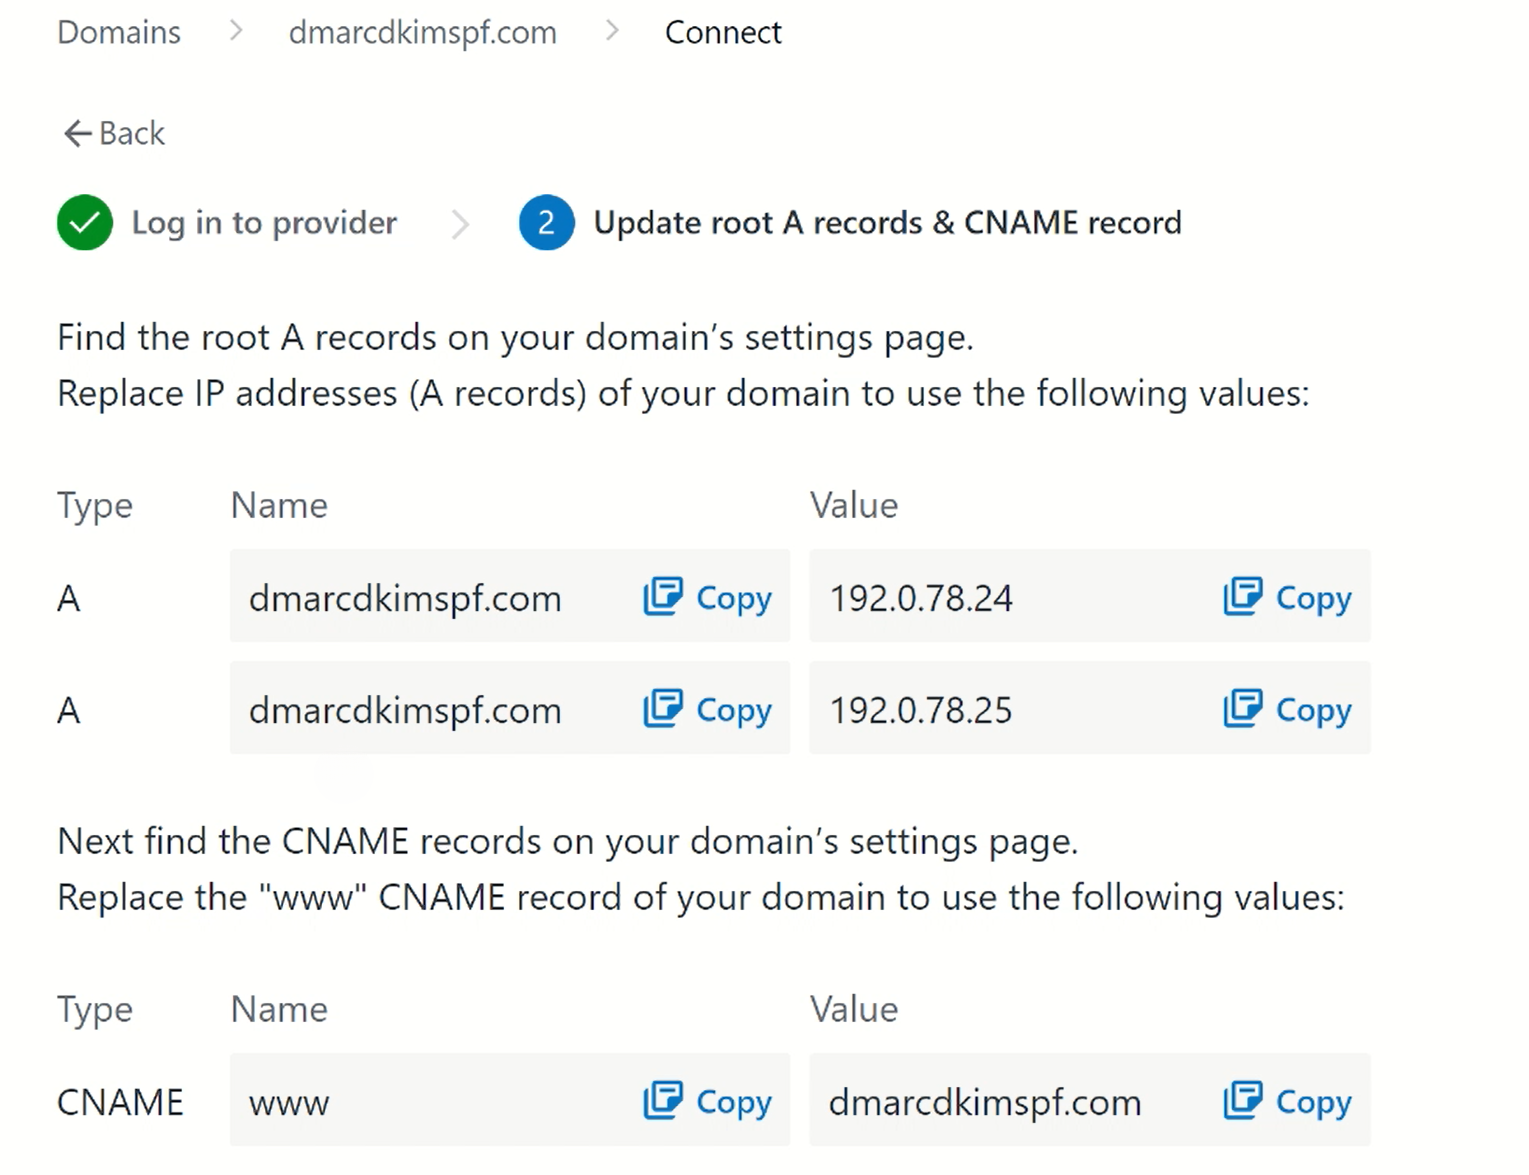
At step #2, WordPress gives you A and CNAME records for connecting your domain. Add these records to your DNS provider.
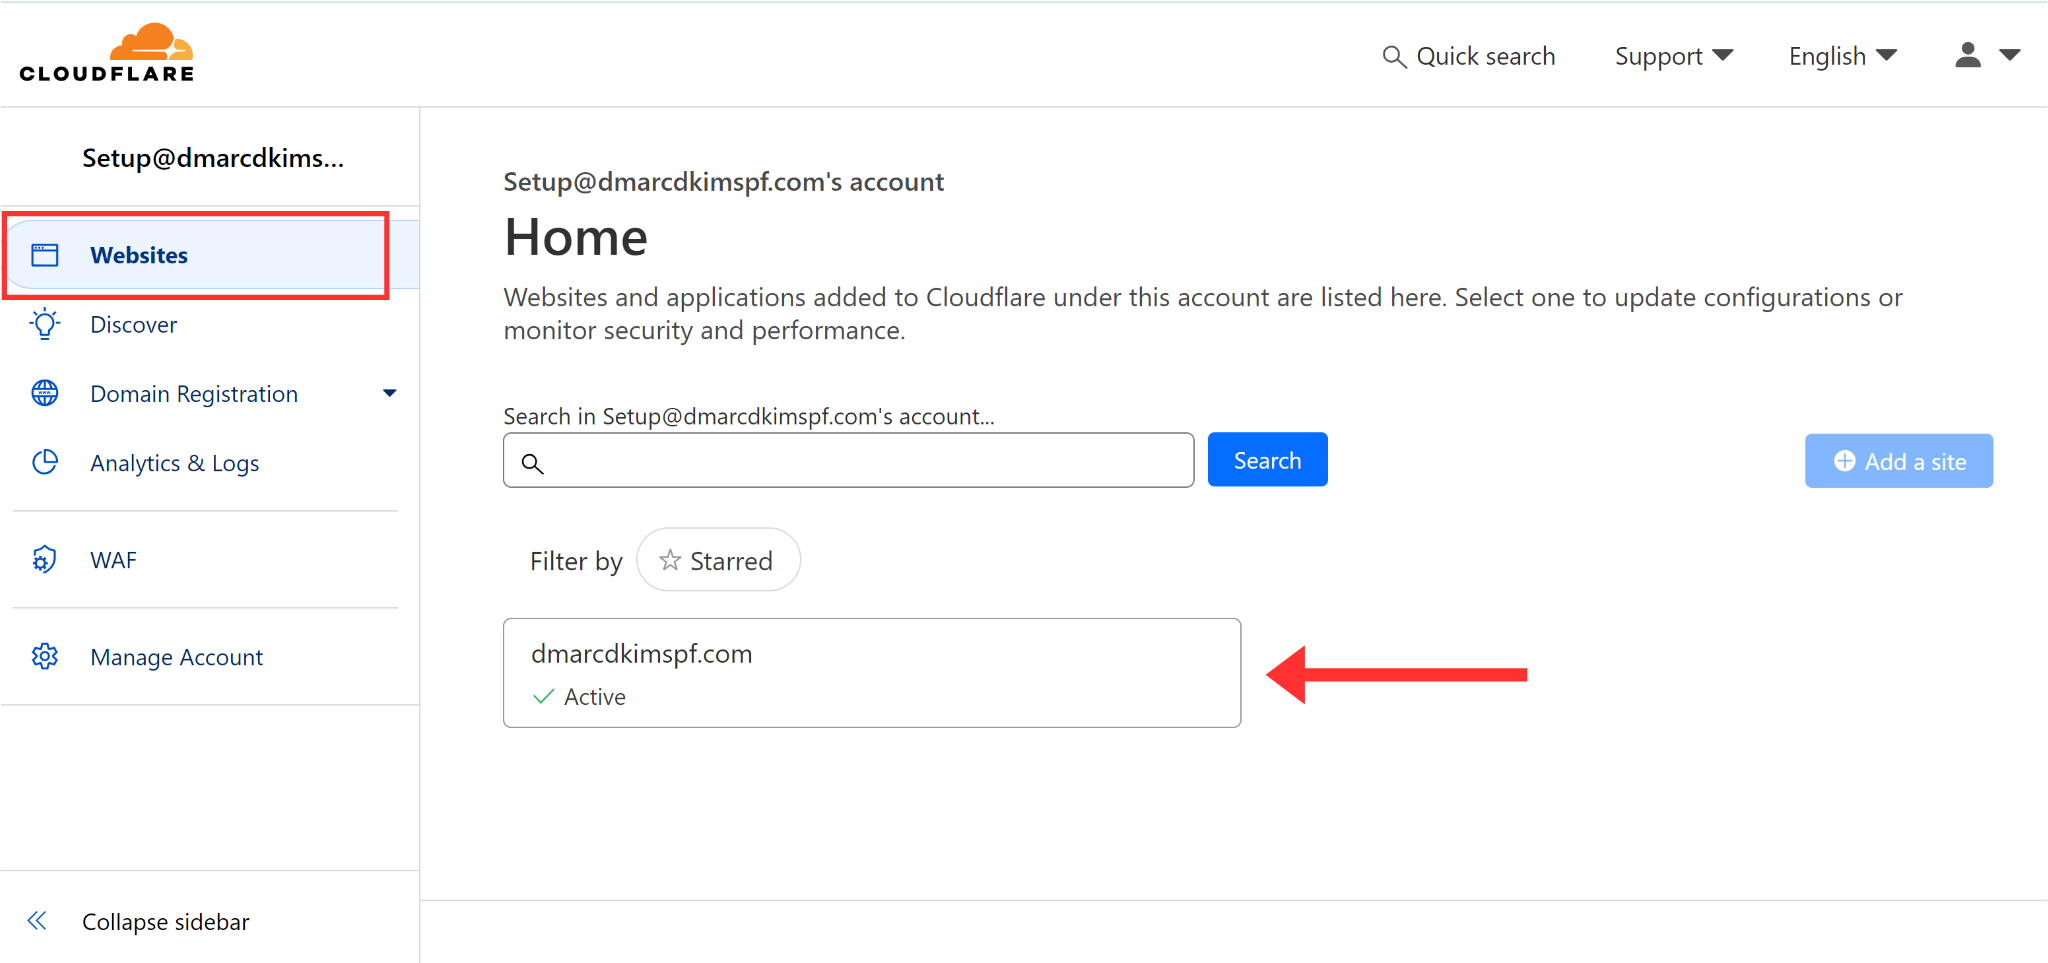
Login to your DNS provider. We are using Cloudflare for this instance.
-
In the Websites tab, select the domain.
-
Head to the DNS tab and click Add Record.
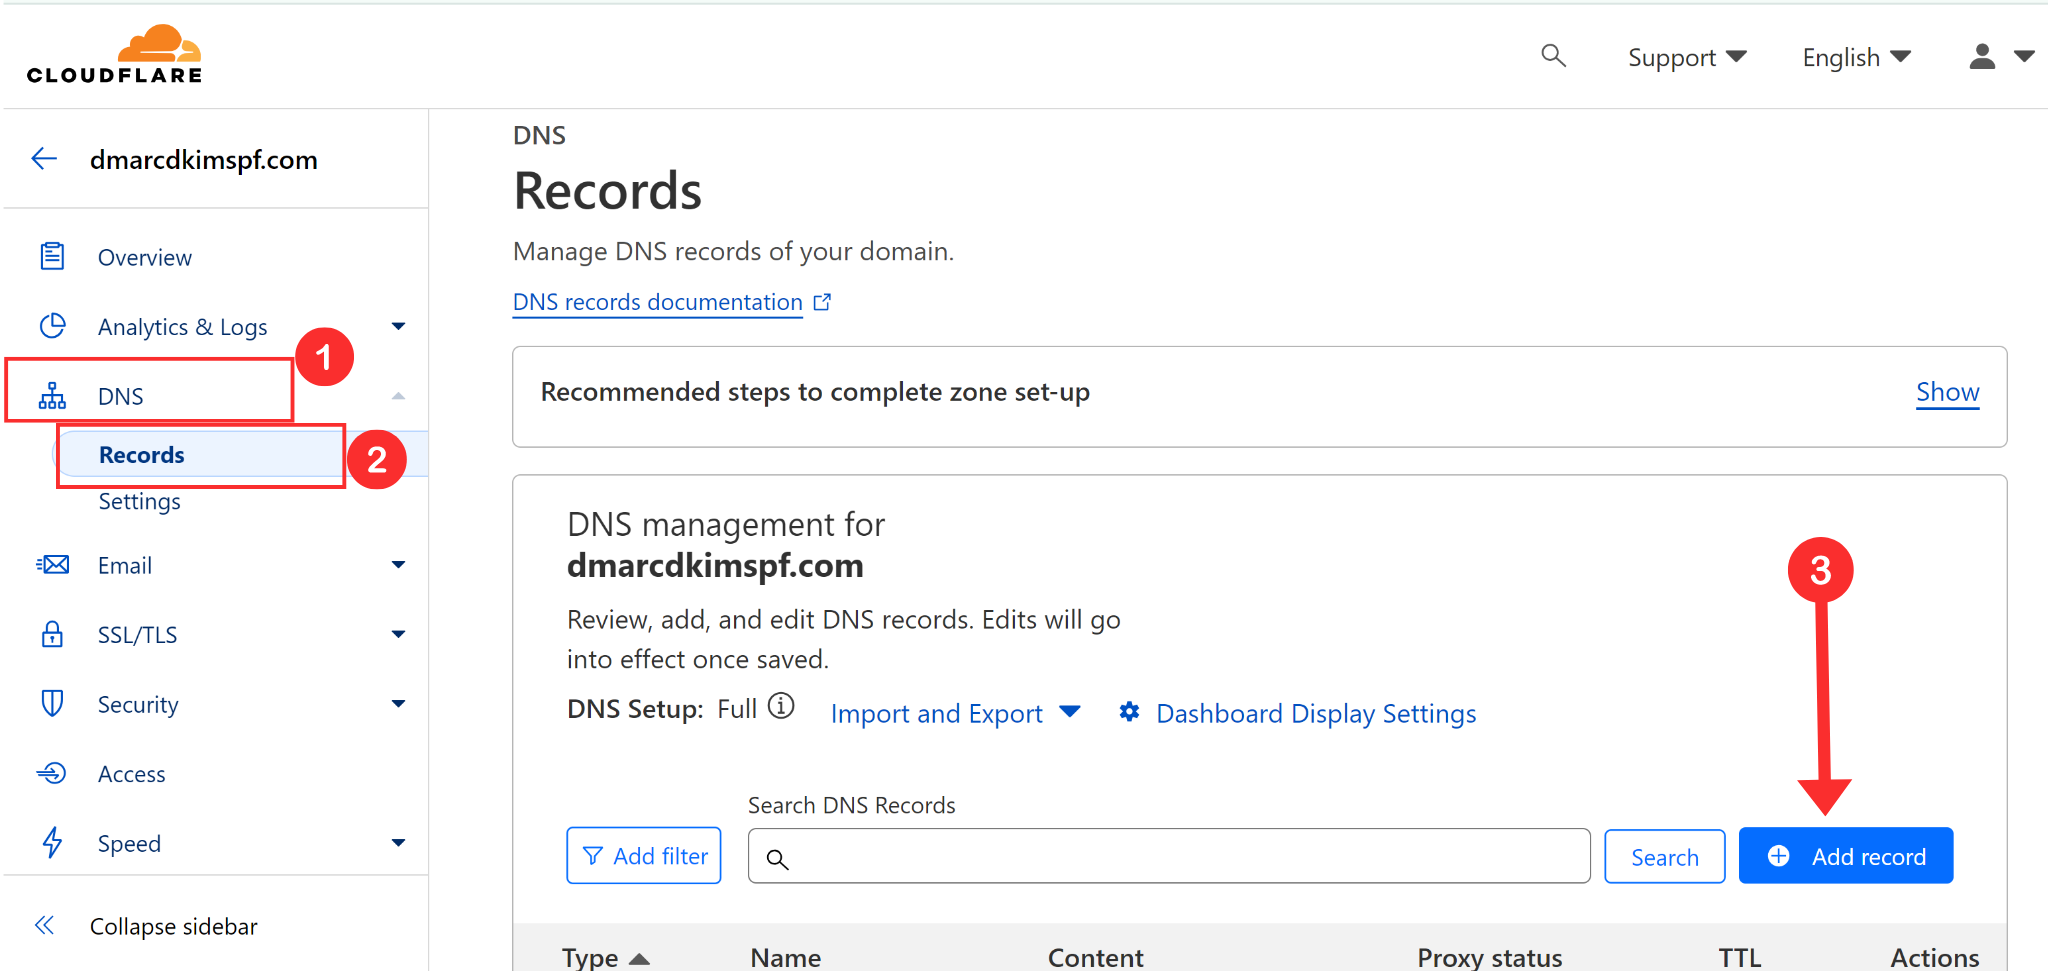
Now copy the A and CNAME records from WordPress and paste them into the DNS dashboard.
-
Turn off the proxy status for both record types and click the Save button.

After adding these records, return to the WordPress DNS page and click "Verify Connection."
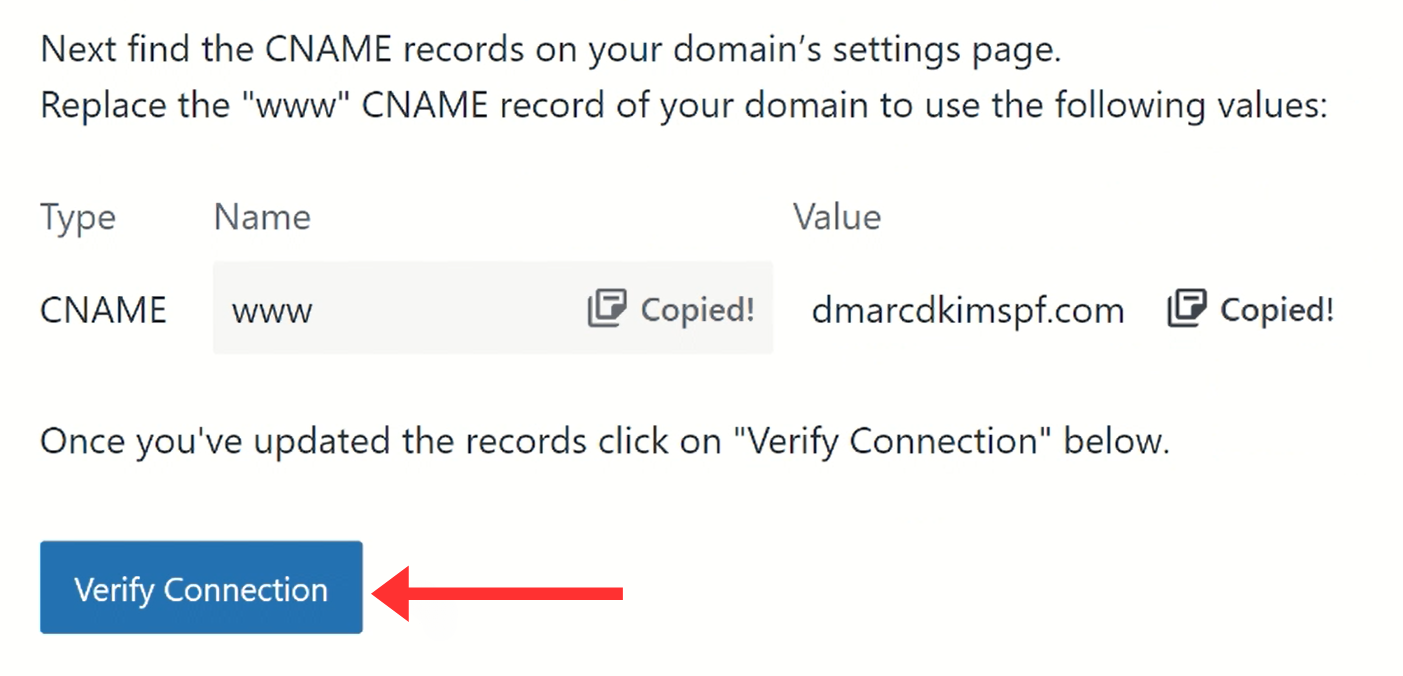
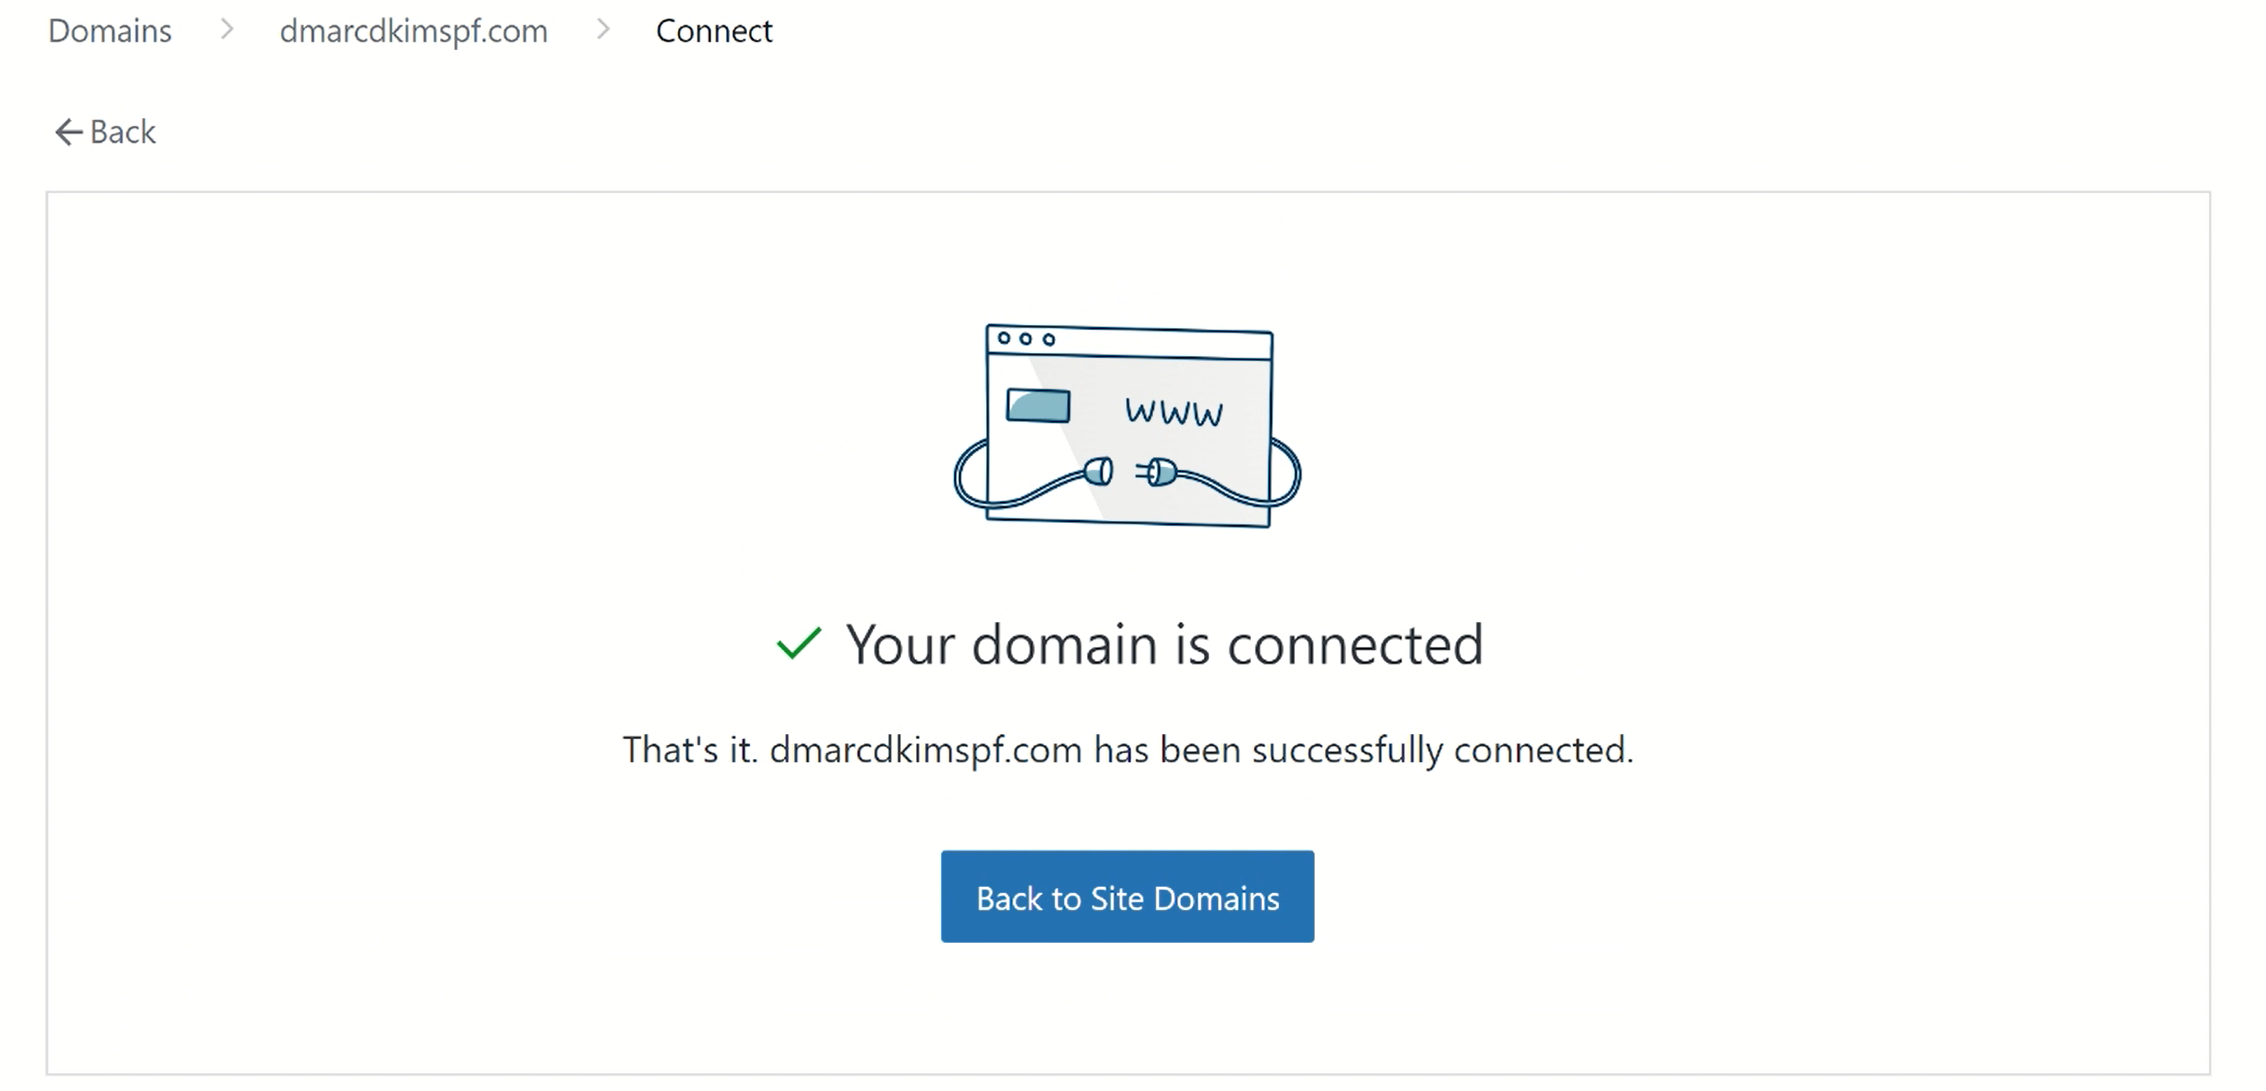
If your domain is connected to WordPress, you will see the confirmation message on your screen.
Configure WordPress SPF, DKIM, and DMARC Records:
You can only access the SPF, DKIM, and DMARC records if you have a Business Plan subscription. After purchasing the plan, you need to activate the hosting features to enable email authentication.
Activate the Hosting Features in Business Plan:
-
Open the Domains tab and click on your domain name.

Go to the Hosting Features tab.
-
Click the "Activate Now" button.

Configure DNS Records:
-
Now go to the Domains tab and click on your domain name.

-
On the next window, scroll down and expand the Diagnostics option. Here you will find the WordPress SPF, DKIM, and DMARC records.

Setup WordPress SPF Record:
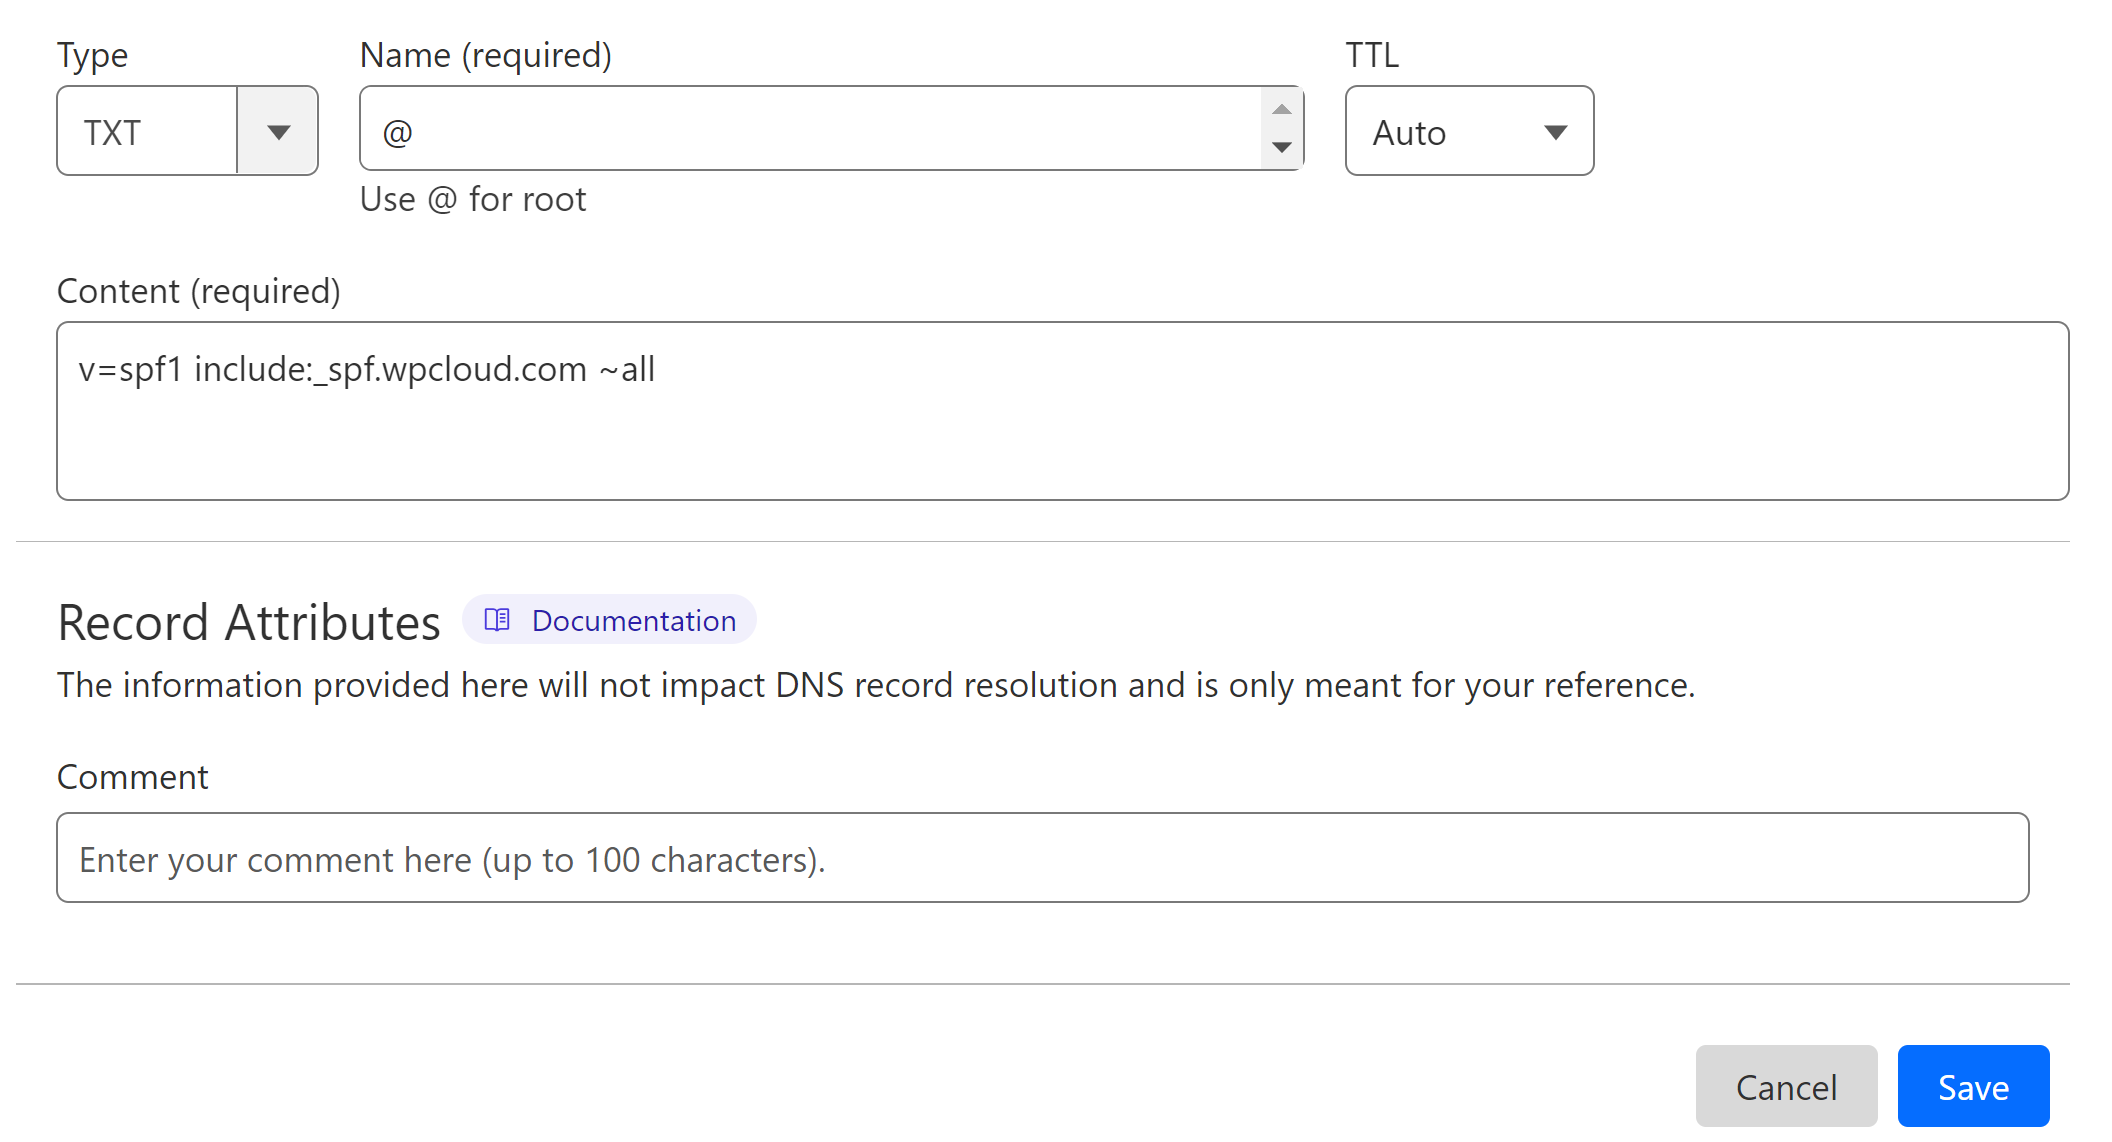
Open your DNS dashboard and select the record type TXT.
In the Name field, write "@" for rooting.
In the Content field, copy and paste this SPF value:
v=spf1 include:_spf.wpcloud.com ~all.-
Click the Save button.
If your DNS dashboard already has an SPF record from another source, WordPress will merge the previous value with its SPF record to give you a combined value. Replace your existing record with this merged value.
Is it ok to have multiple SPF records?
Adding more than one SPF record for a domain can cause one of them to stop working. If there is an existing SPF record, you need to merge it with the new SPF value to avoid conflicts.
DmarcDkim.com provides you with a reliable SPF merge tool that seamlessly merges up to 10 SPF records.
Setup WordPress DKIM Record:
In the Diagnostics tab, you have two DKIM values. Add both to your DNS dashboard.
Select the record type CNAME.
Copy the hostname and paste it into the Name field.
-
Copy the DKIM value and paste it into the Target field.

Repeat the same steps to add the second DKIM record.
IMPORTANT: Turn off the proxy toggle for CNAME records. If the proxy is enabled, it diverts the traffic to your DNS server instead of the email provider server.
Setup WordPress DMARC Record:
The DMARC value provided by Wordpress is just for monitoring the emails and it doesn't block or reject emails coming from unauthorized sources. Hence, your domain is not fully scam-proof.
To generate an effective DMARC policy, you can use the DmarcDkim.com DMARC Check tool.
This tool helps you setup a strict policy that protects your domain against spoofing attacks and provides you insights into the email performance so you can identify the imposters trying to malign your domain name.
Go to the DMARC Check Tool.
-
Add your domain name and click Check.

The tool analyzes your domain and provides an initial monitoring (p=none) value. Once it monitors the emails coming from unauthorized sources, it then guides you toward implementing a strict policy to block the imposters.
-
Copy the TXT DMARC record and paste it into the DNS dashboard.
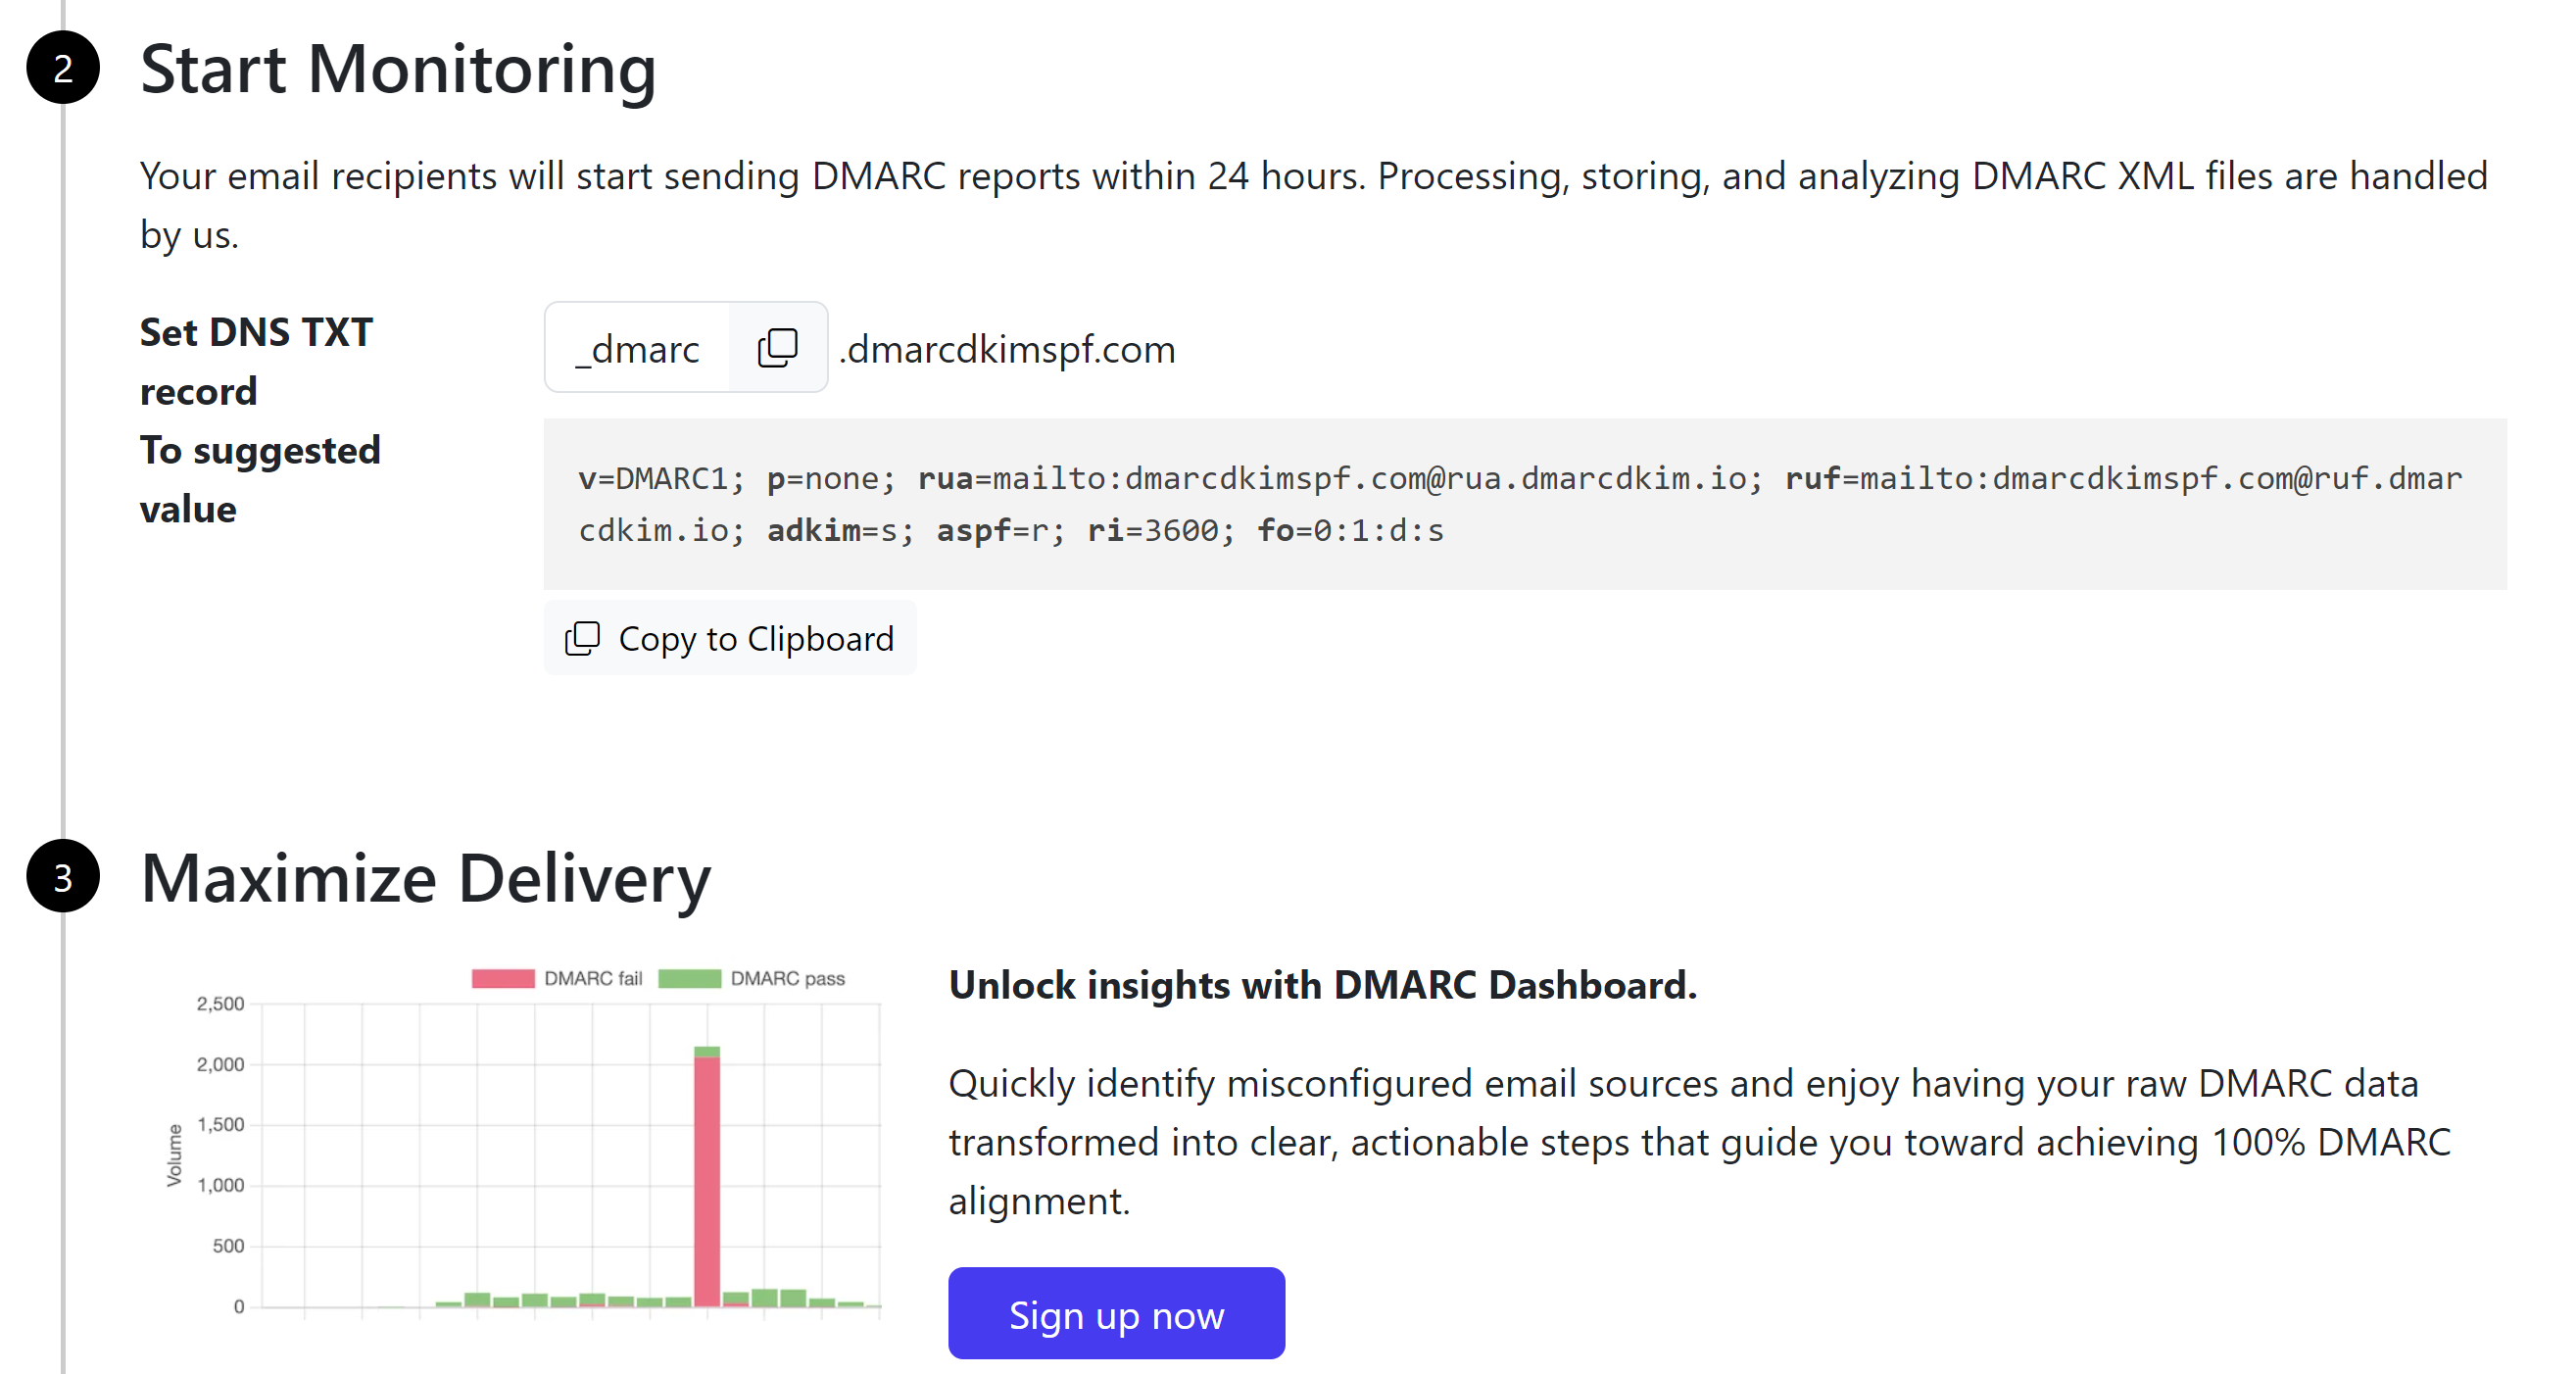
Sign up for the tool to get actionable insights and DMARC reports.
After adding the WordPress SPF, DKIM, and DMARC records, wait up to 24 to 48 hours for the servers to verify the DNS records.
If the records do not get verified after 48 hours, there might be a misconfiguration in your DNS setup.
To troubleshoot the email authentication issues, hire a DmarcDkim.com expert.
Check domain and follow the instructions to nail down your DMARC configuration.
No expert knowledge needed!


