Configure Firebase SPF, DKIM, DMARC Records for Domain Authentication
Check your domain for DMARC, DKIM, SPF and MX records. Get a free report.
How to setup Firebase DMARC, DKIM and SPF records for domain authentication?
Authenticating the sender domain helps you build trust with the email inbox providers so that your emails don't get flagged as spam. You can verify your email domain by adding DNS records to your DNS provider. Firebase is one such platform that provides you with SPF, DKIM, and domain verification records.
In this article, we'll configure DNS records in Firebase and add those records to the DNS setup.
-
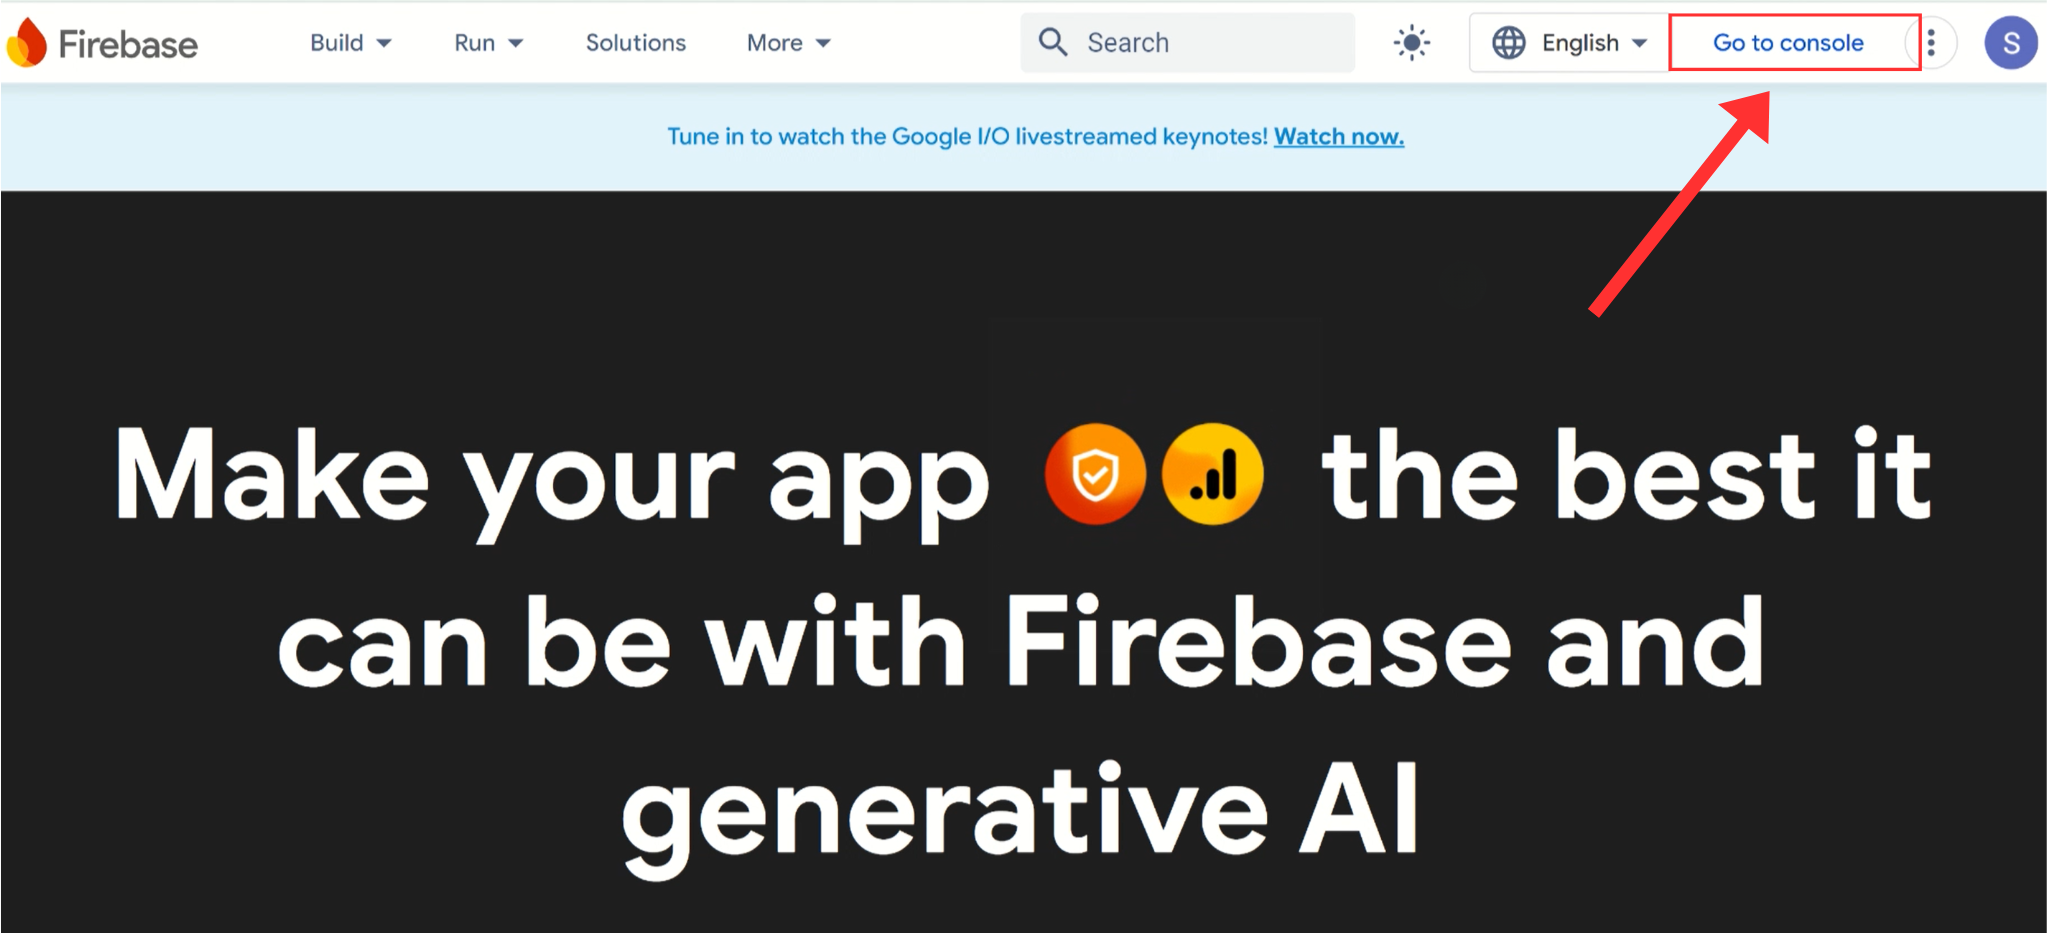
Open the Firebase account and click "Go to Console."
-
On the next page, click Create a Project.

-
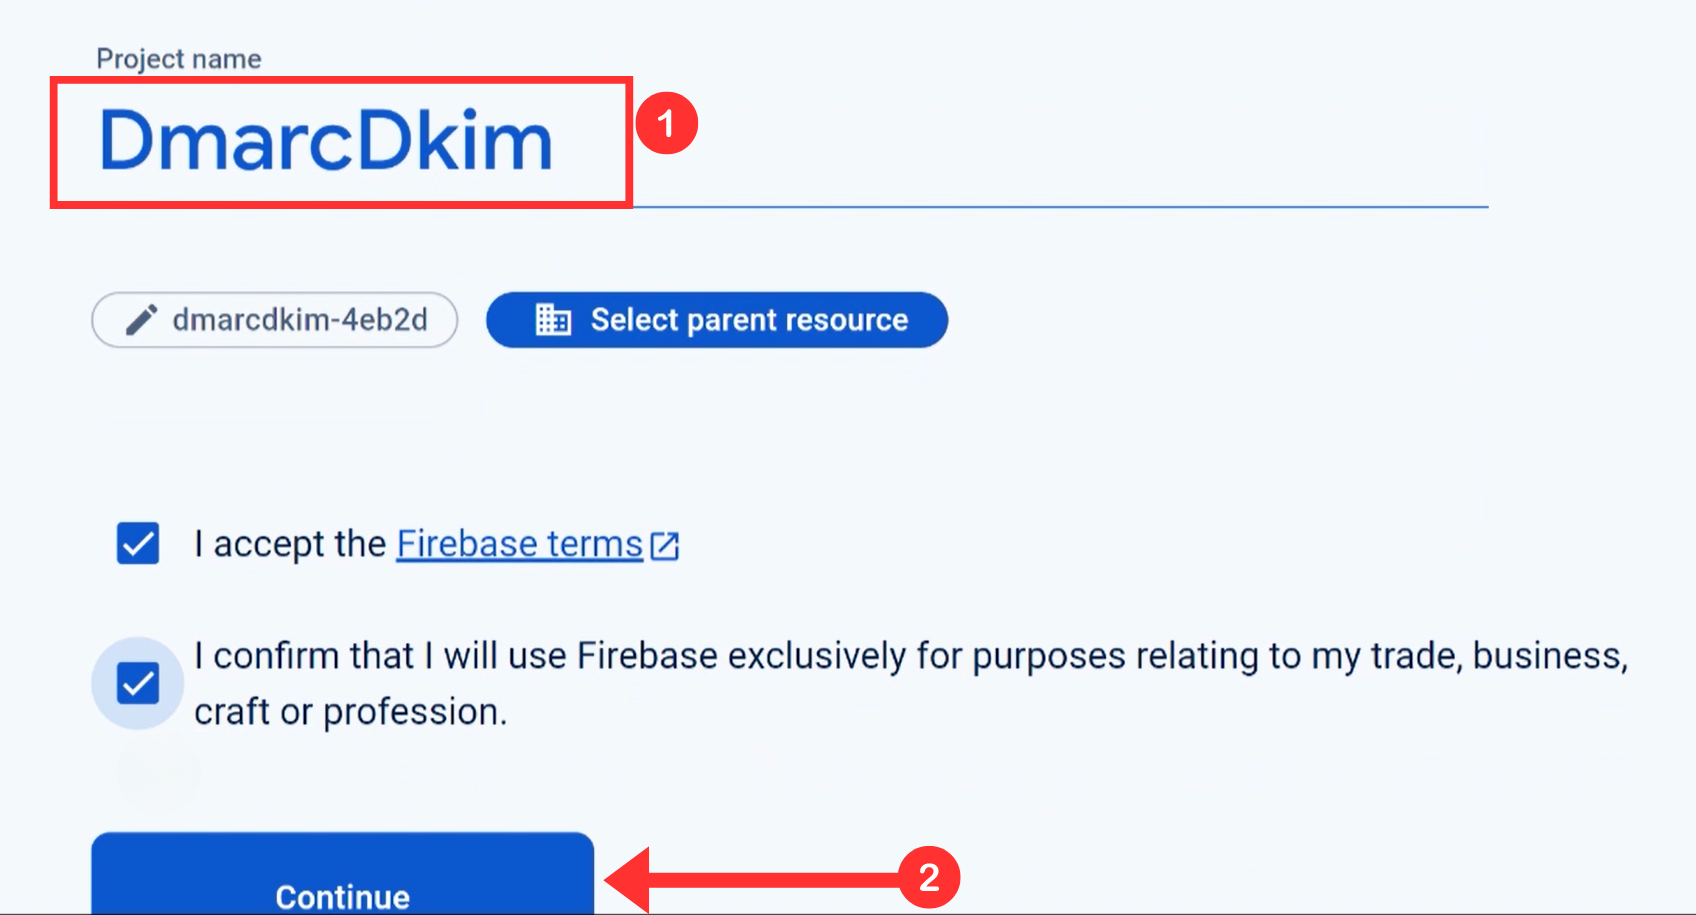
Write down the project name, accept the terms and conditions, and click Continue.
-
Finally, click Create a Project.
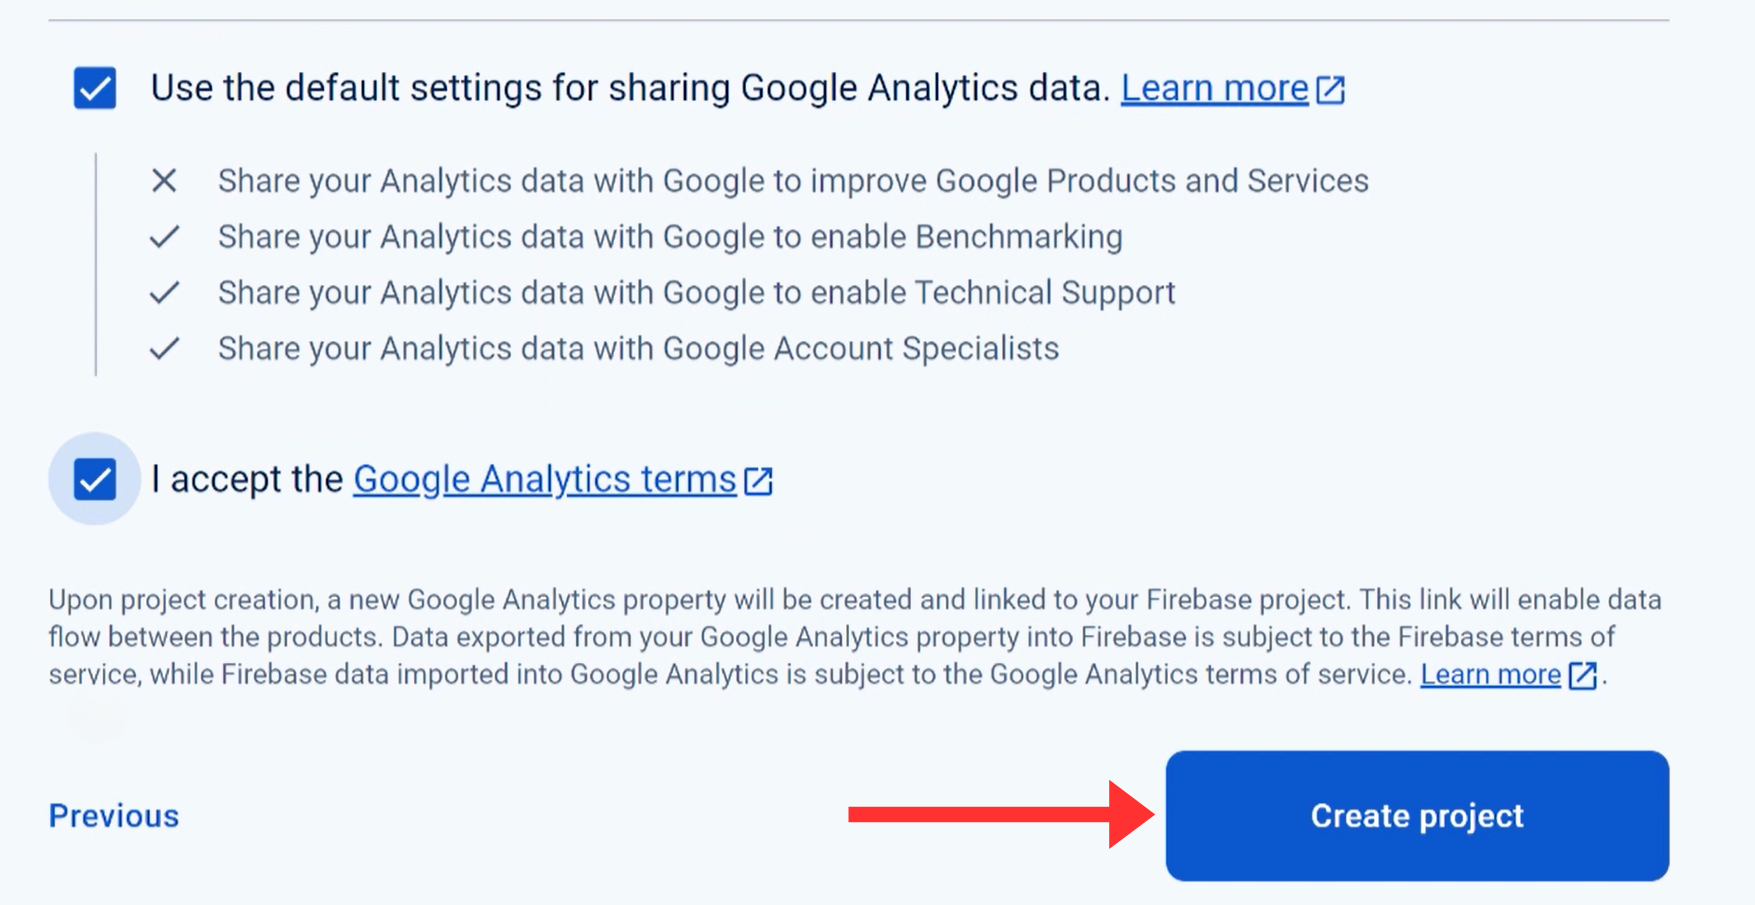
When the project is ready, click Continue to proceed.
-
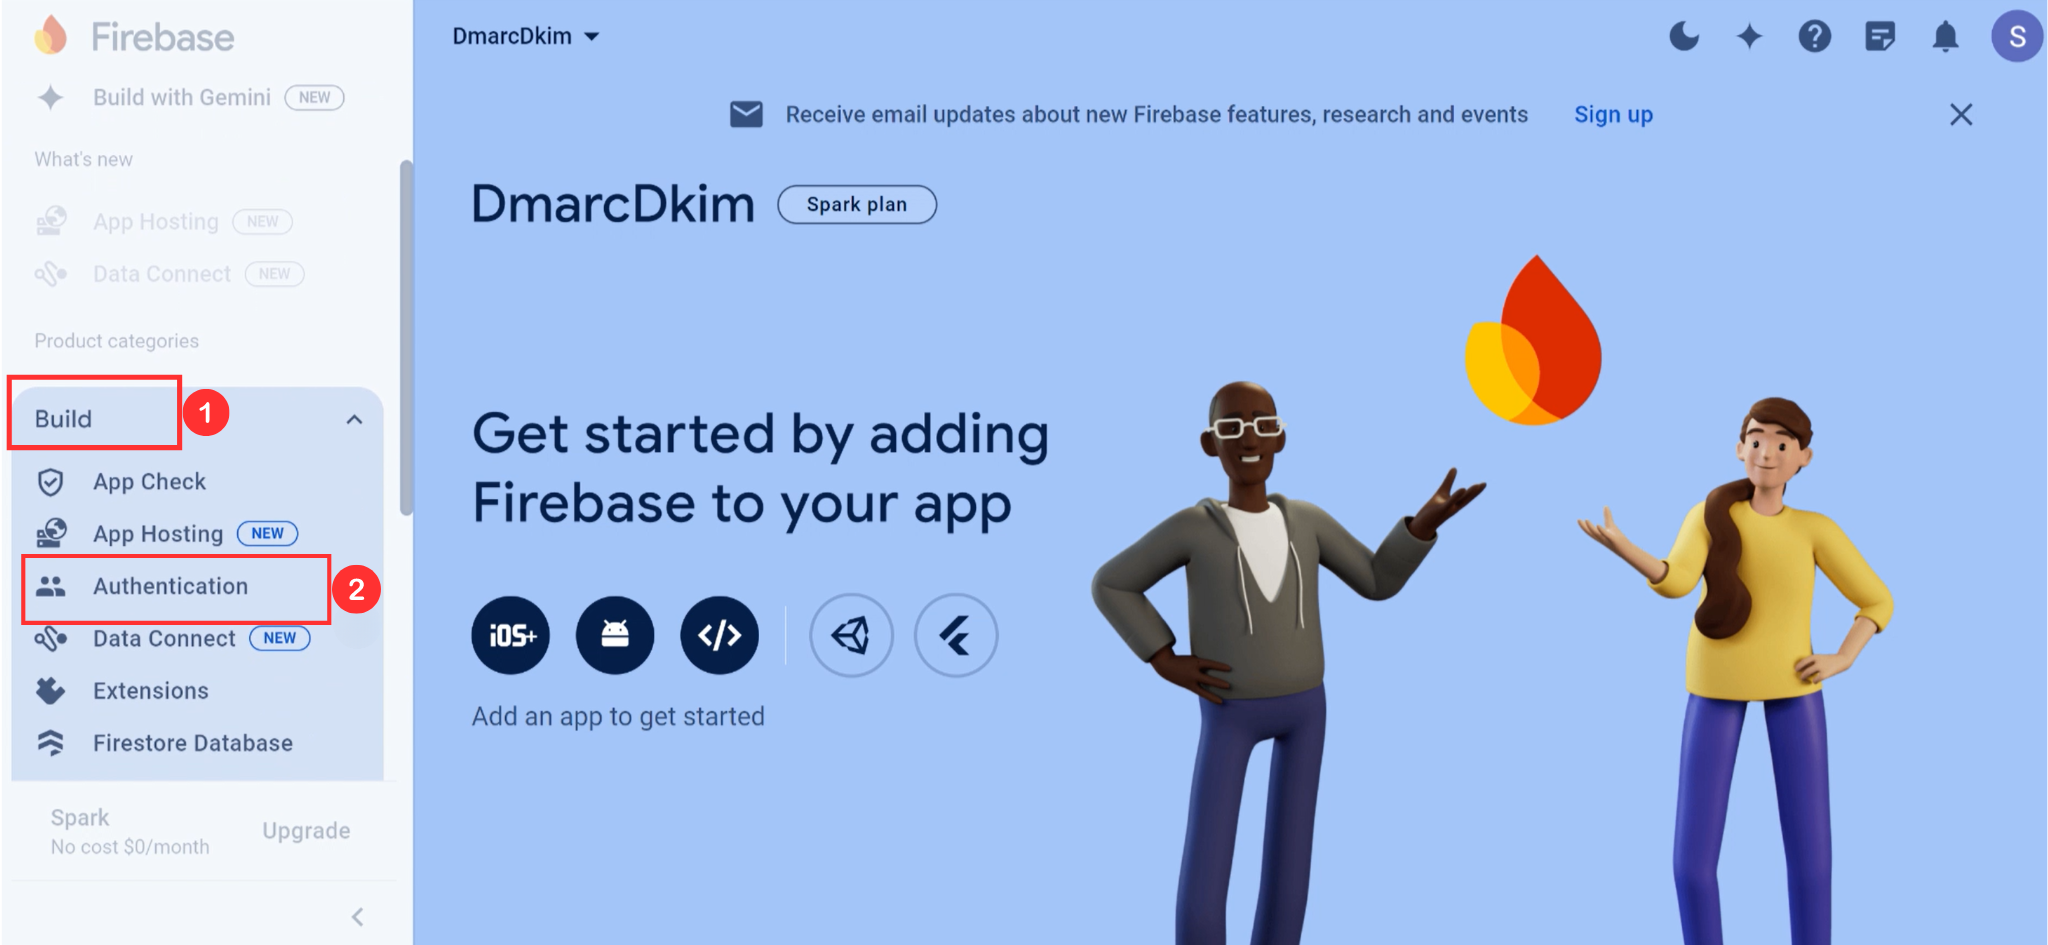
Click Build and go to the Authentication tab.
-
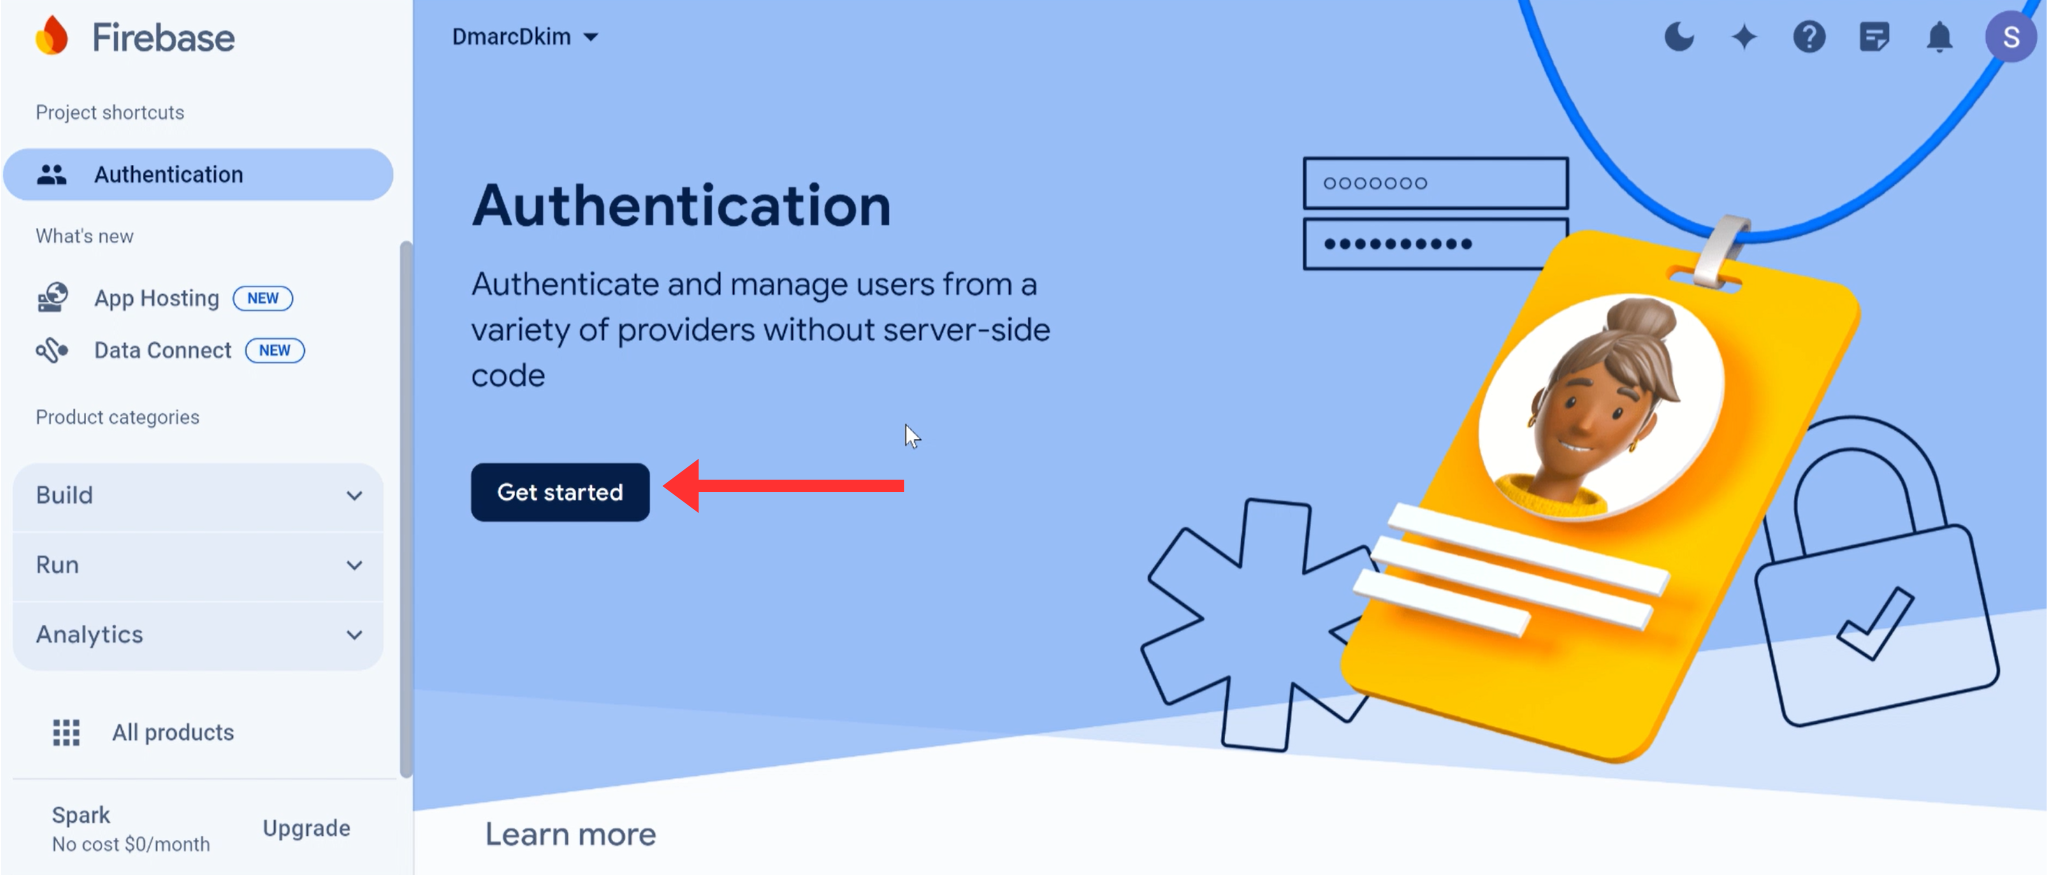
In the Authentication tab, click Get Started.
-
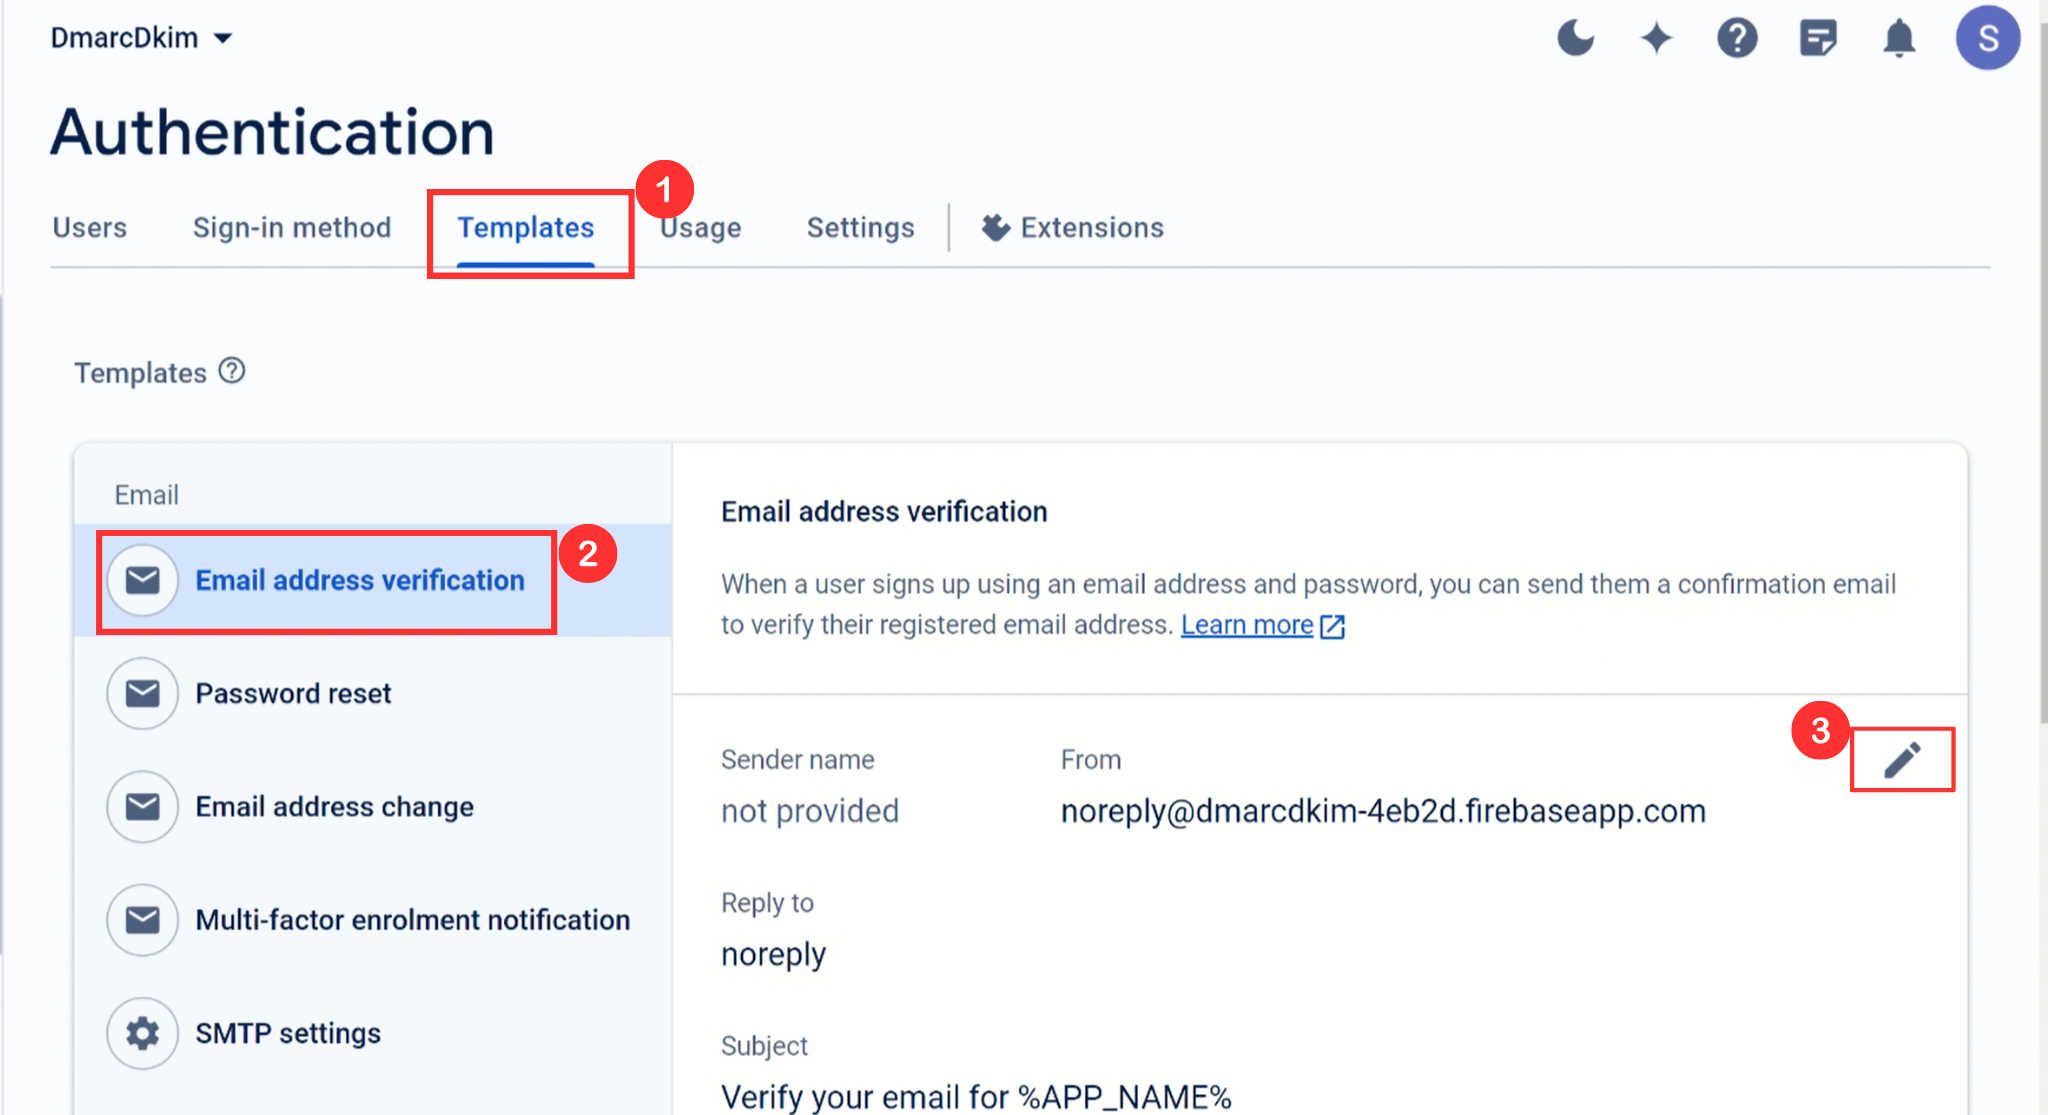
Next, go to Templates and click the edit icon in the Email Address Verification tab.
-
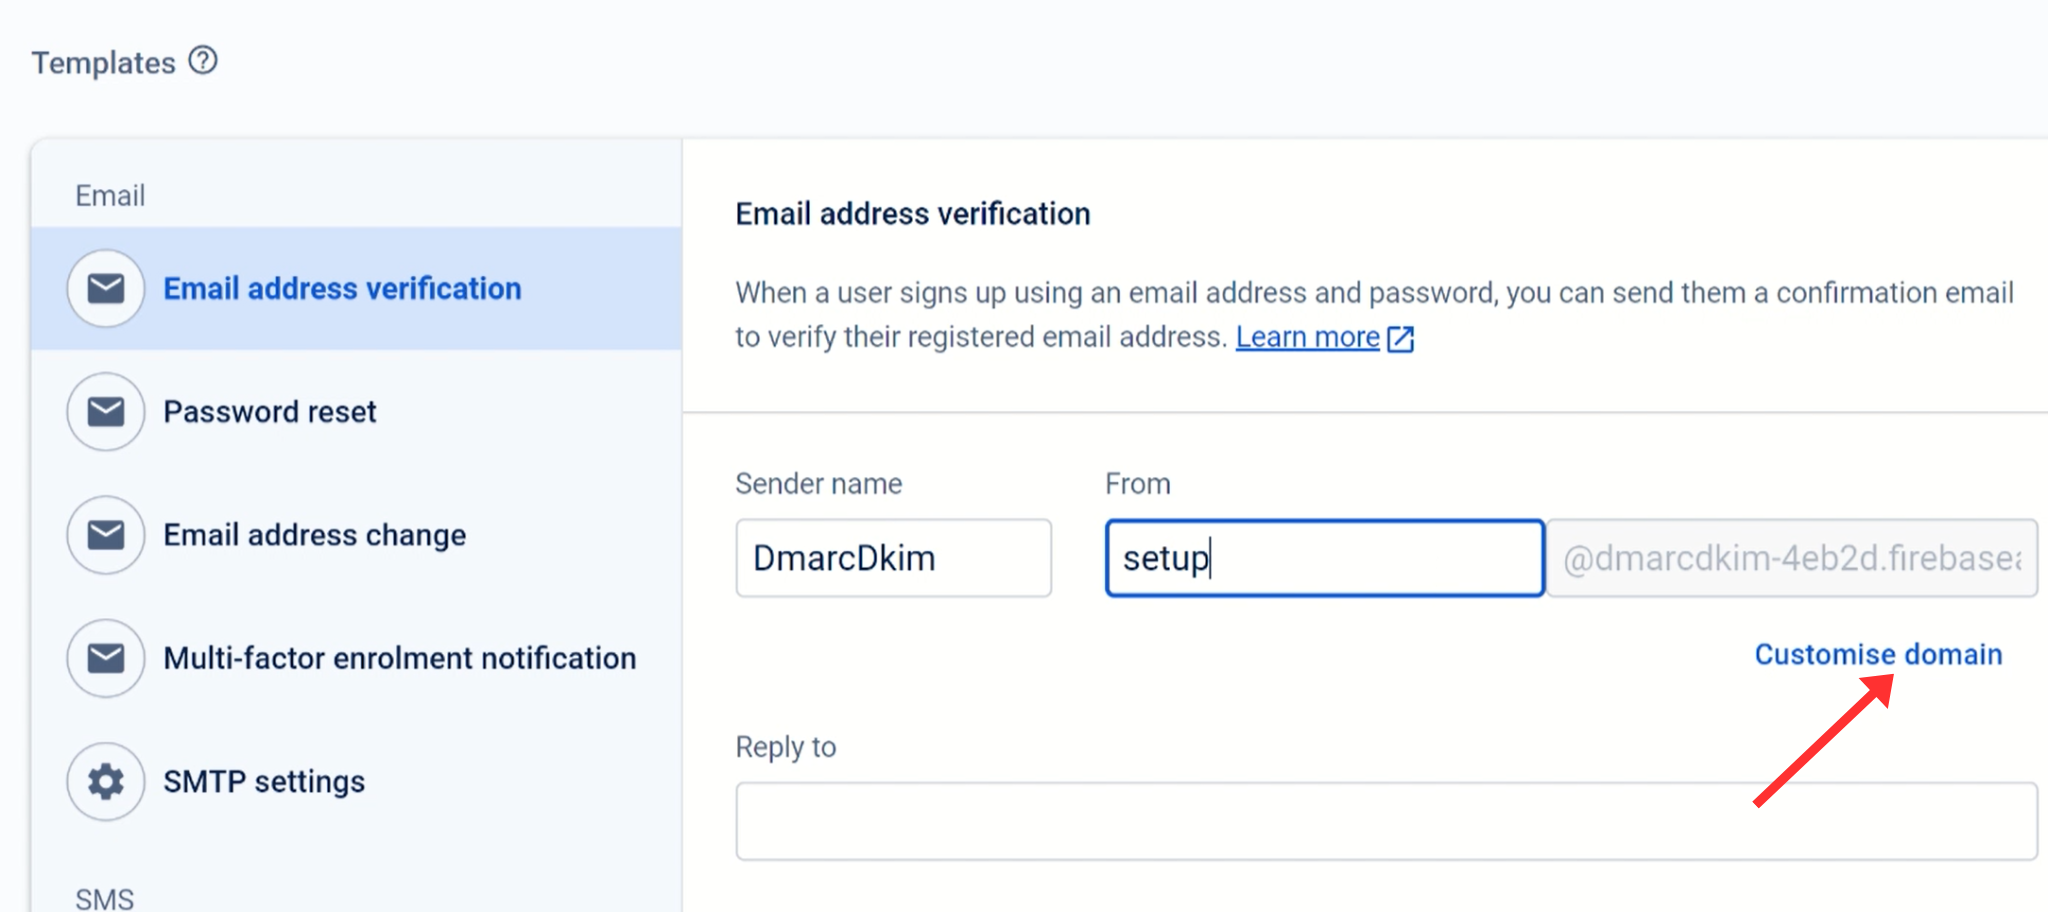
Add your Sender name, From address, and click Customize domain.
-
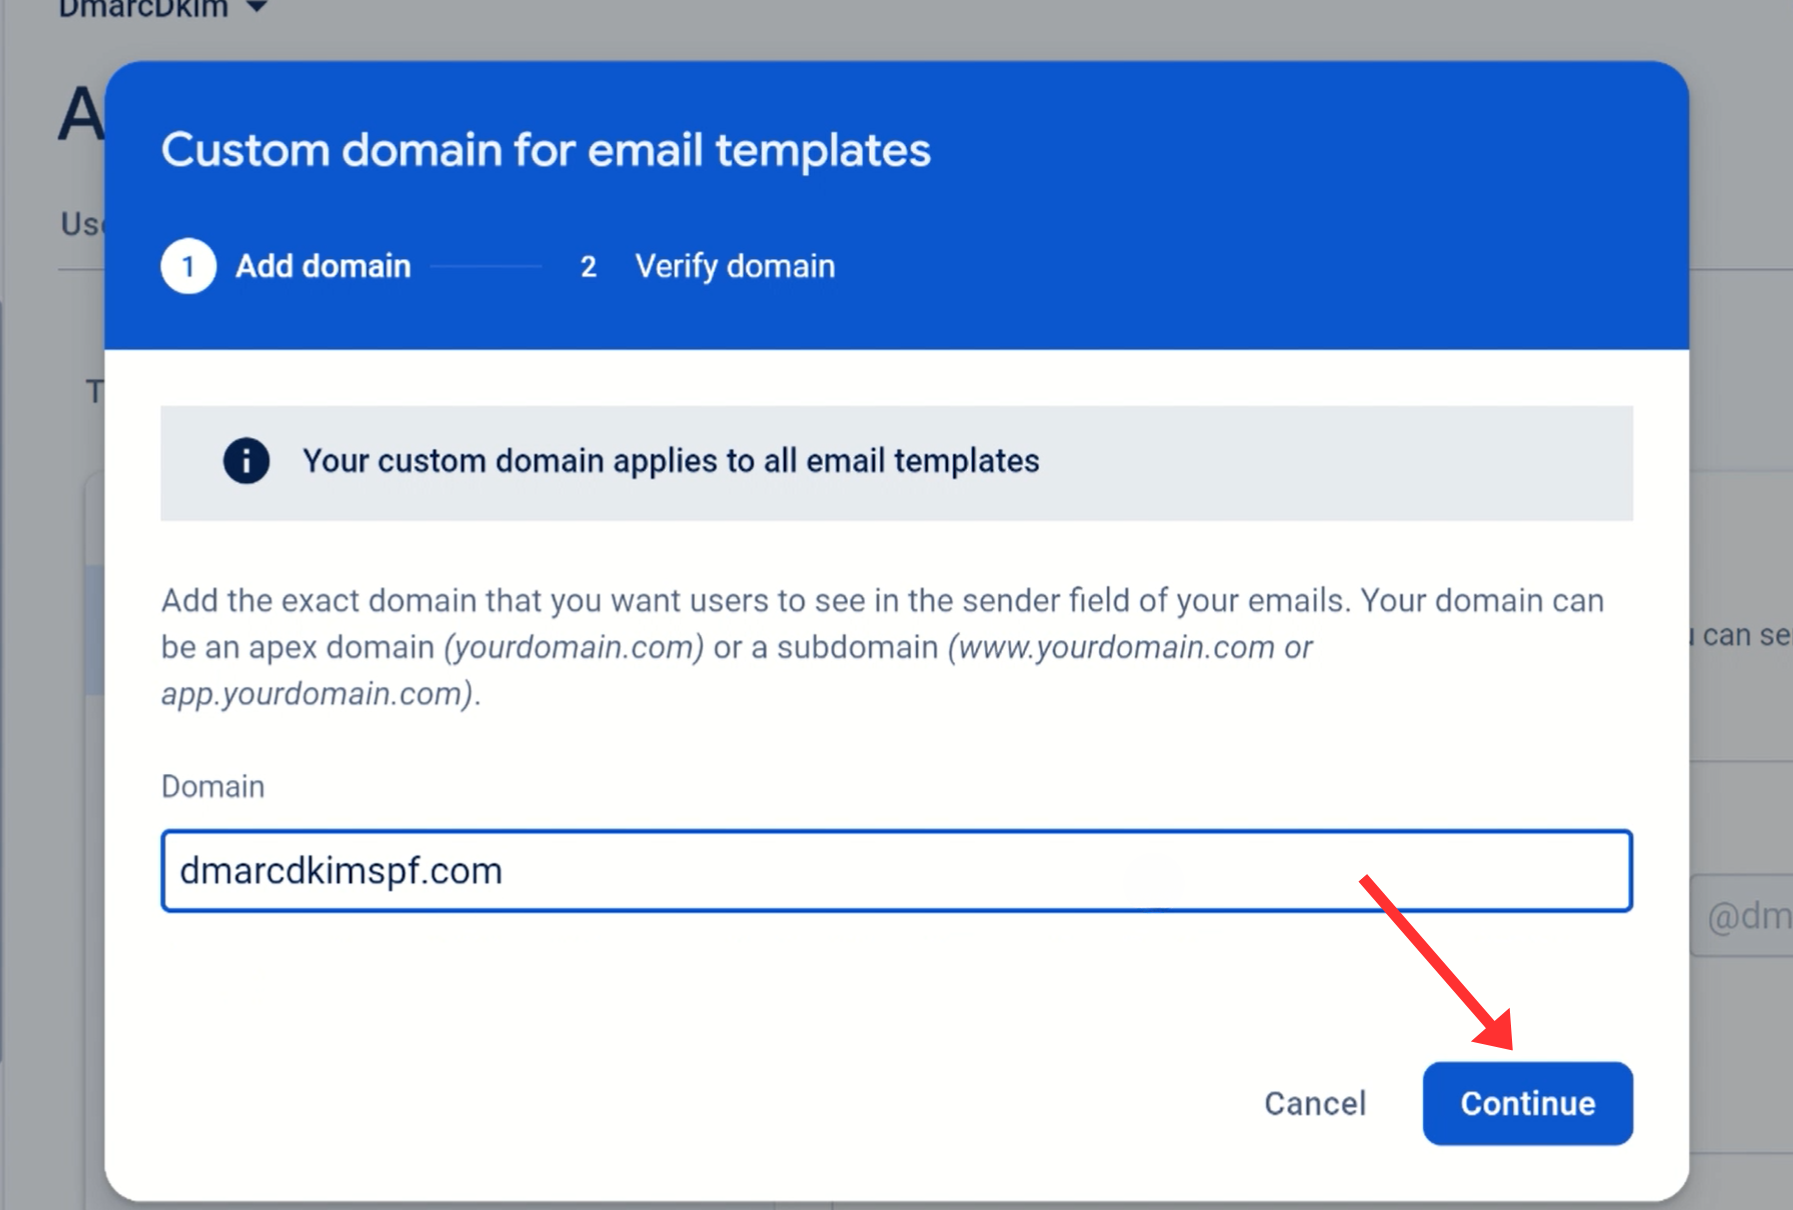
Write down your custom domain name and click Continue.
-
On the next page, you'll see Firebase DNS records, add these records to your DNS provider.
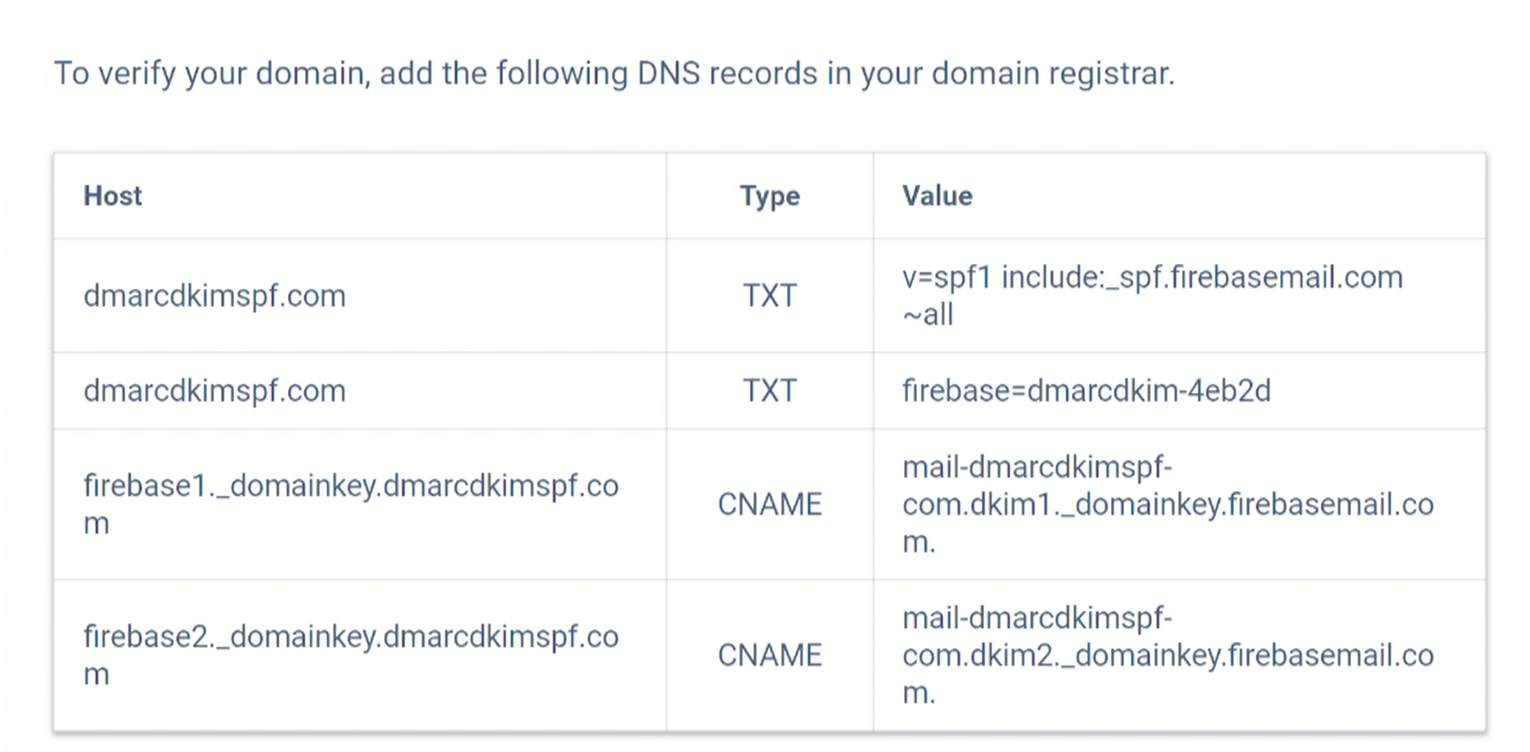
Open DNS Dashboard:
We are using Cloudflare for this guide post but you can add these records to any DNS provider you use.
Login to your DNS provider (Cloudflare).
-
Click on your website in the Home tab.
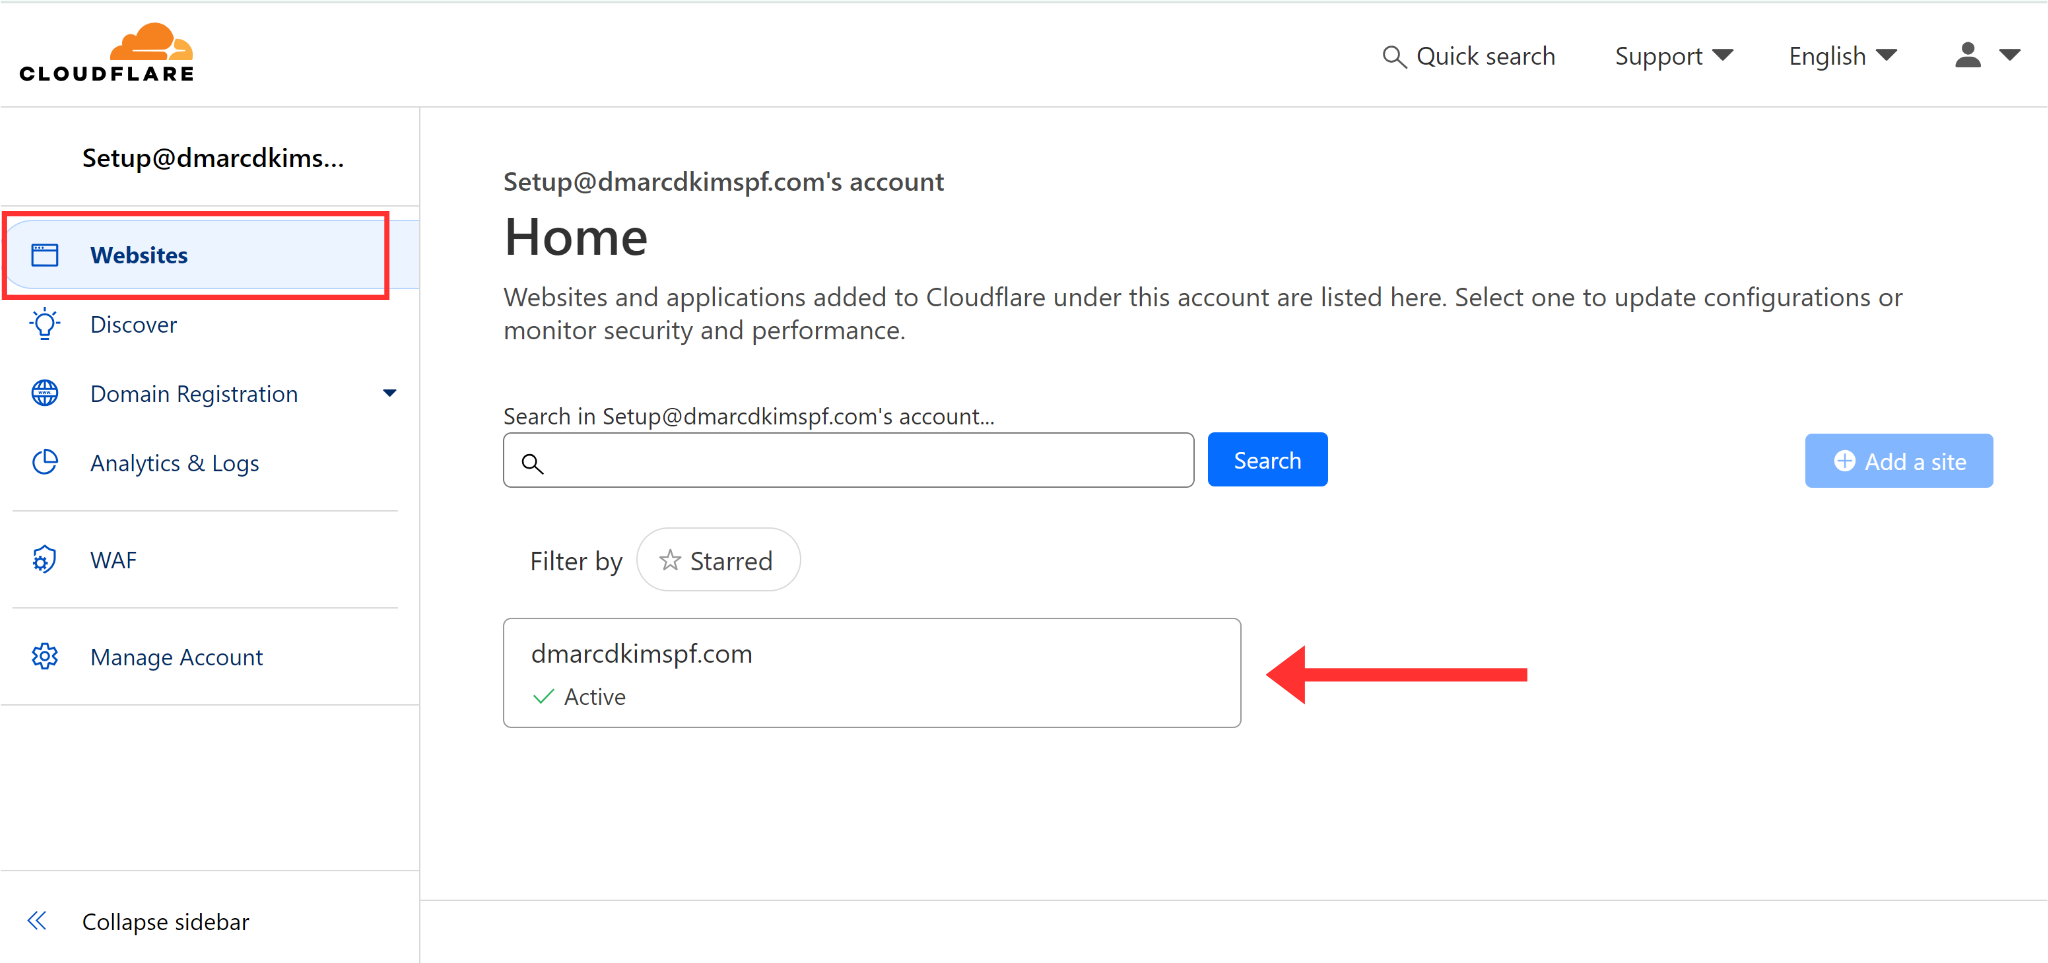
-
Click DNS, go to the Records tab, and click Add Record.
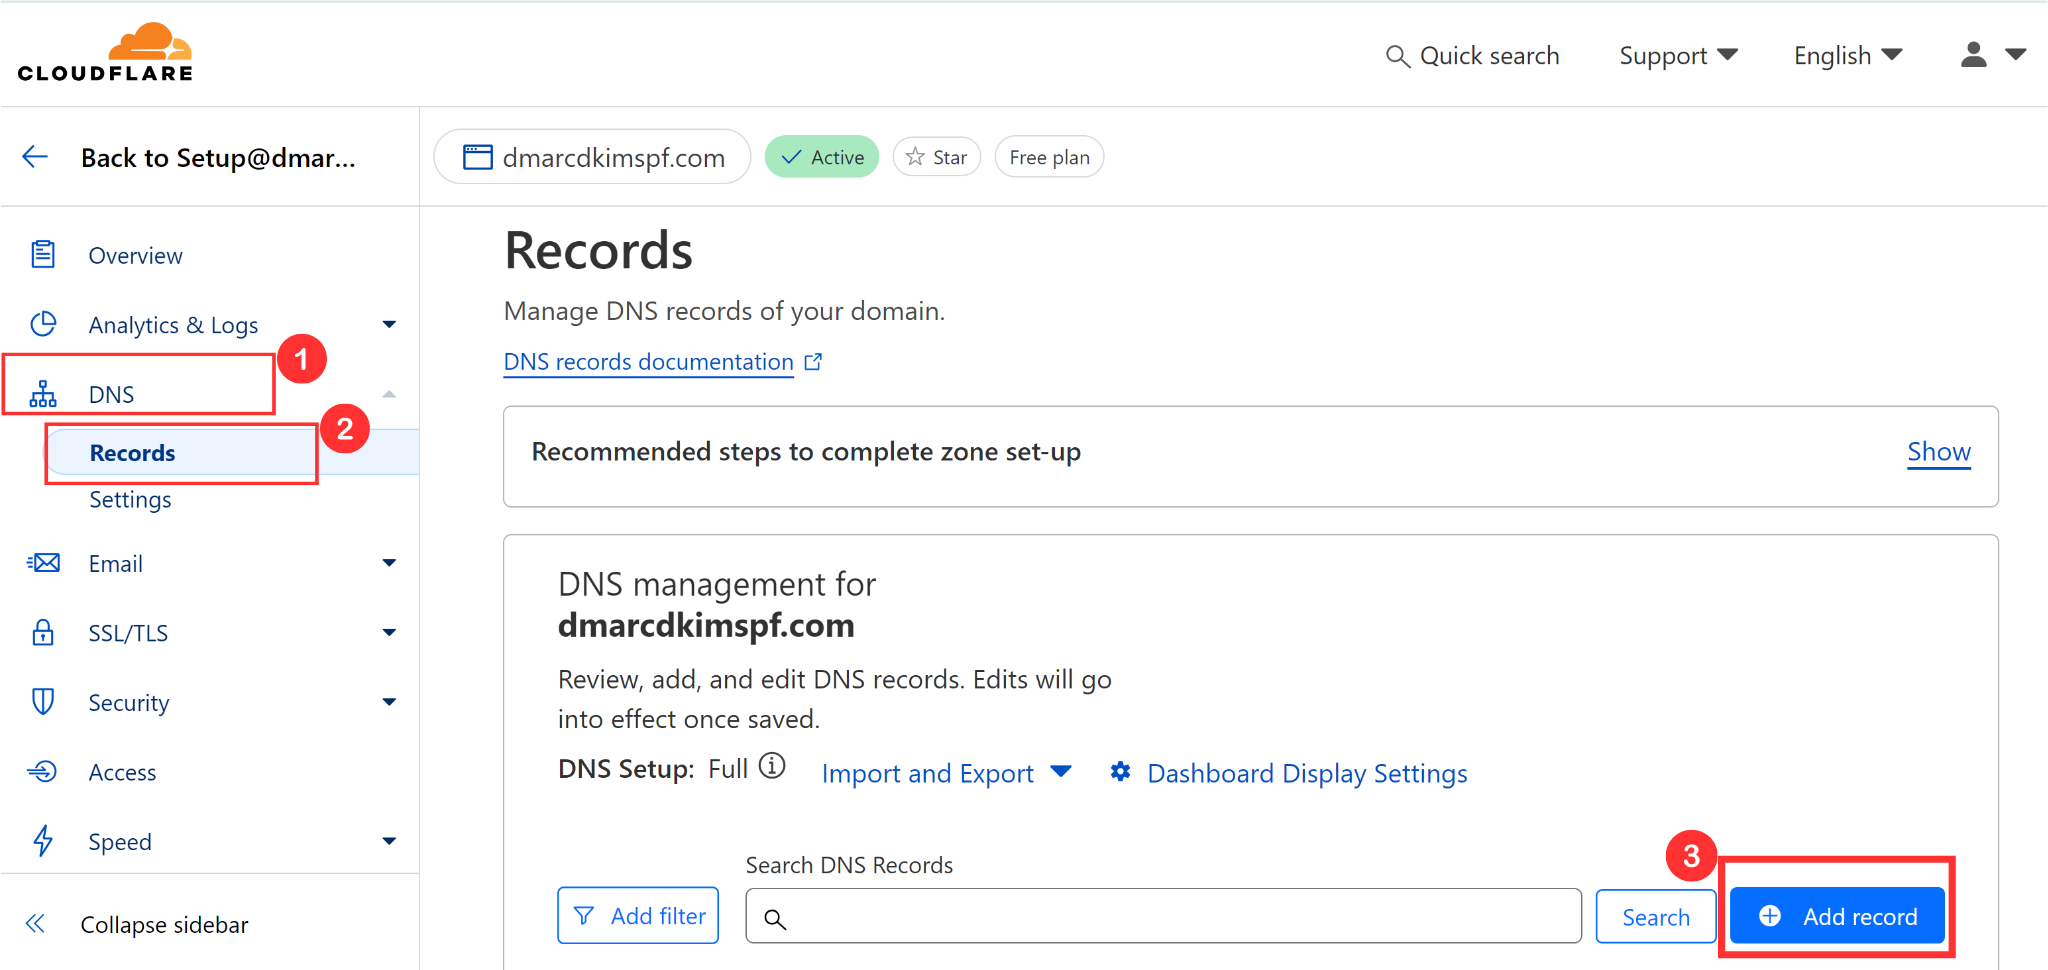
Adding Firebase SPF Record:
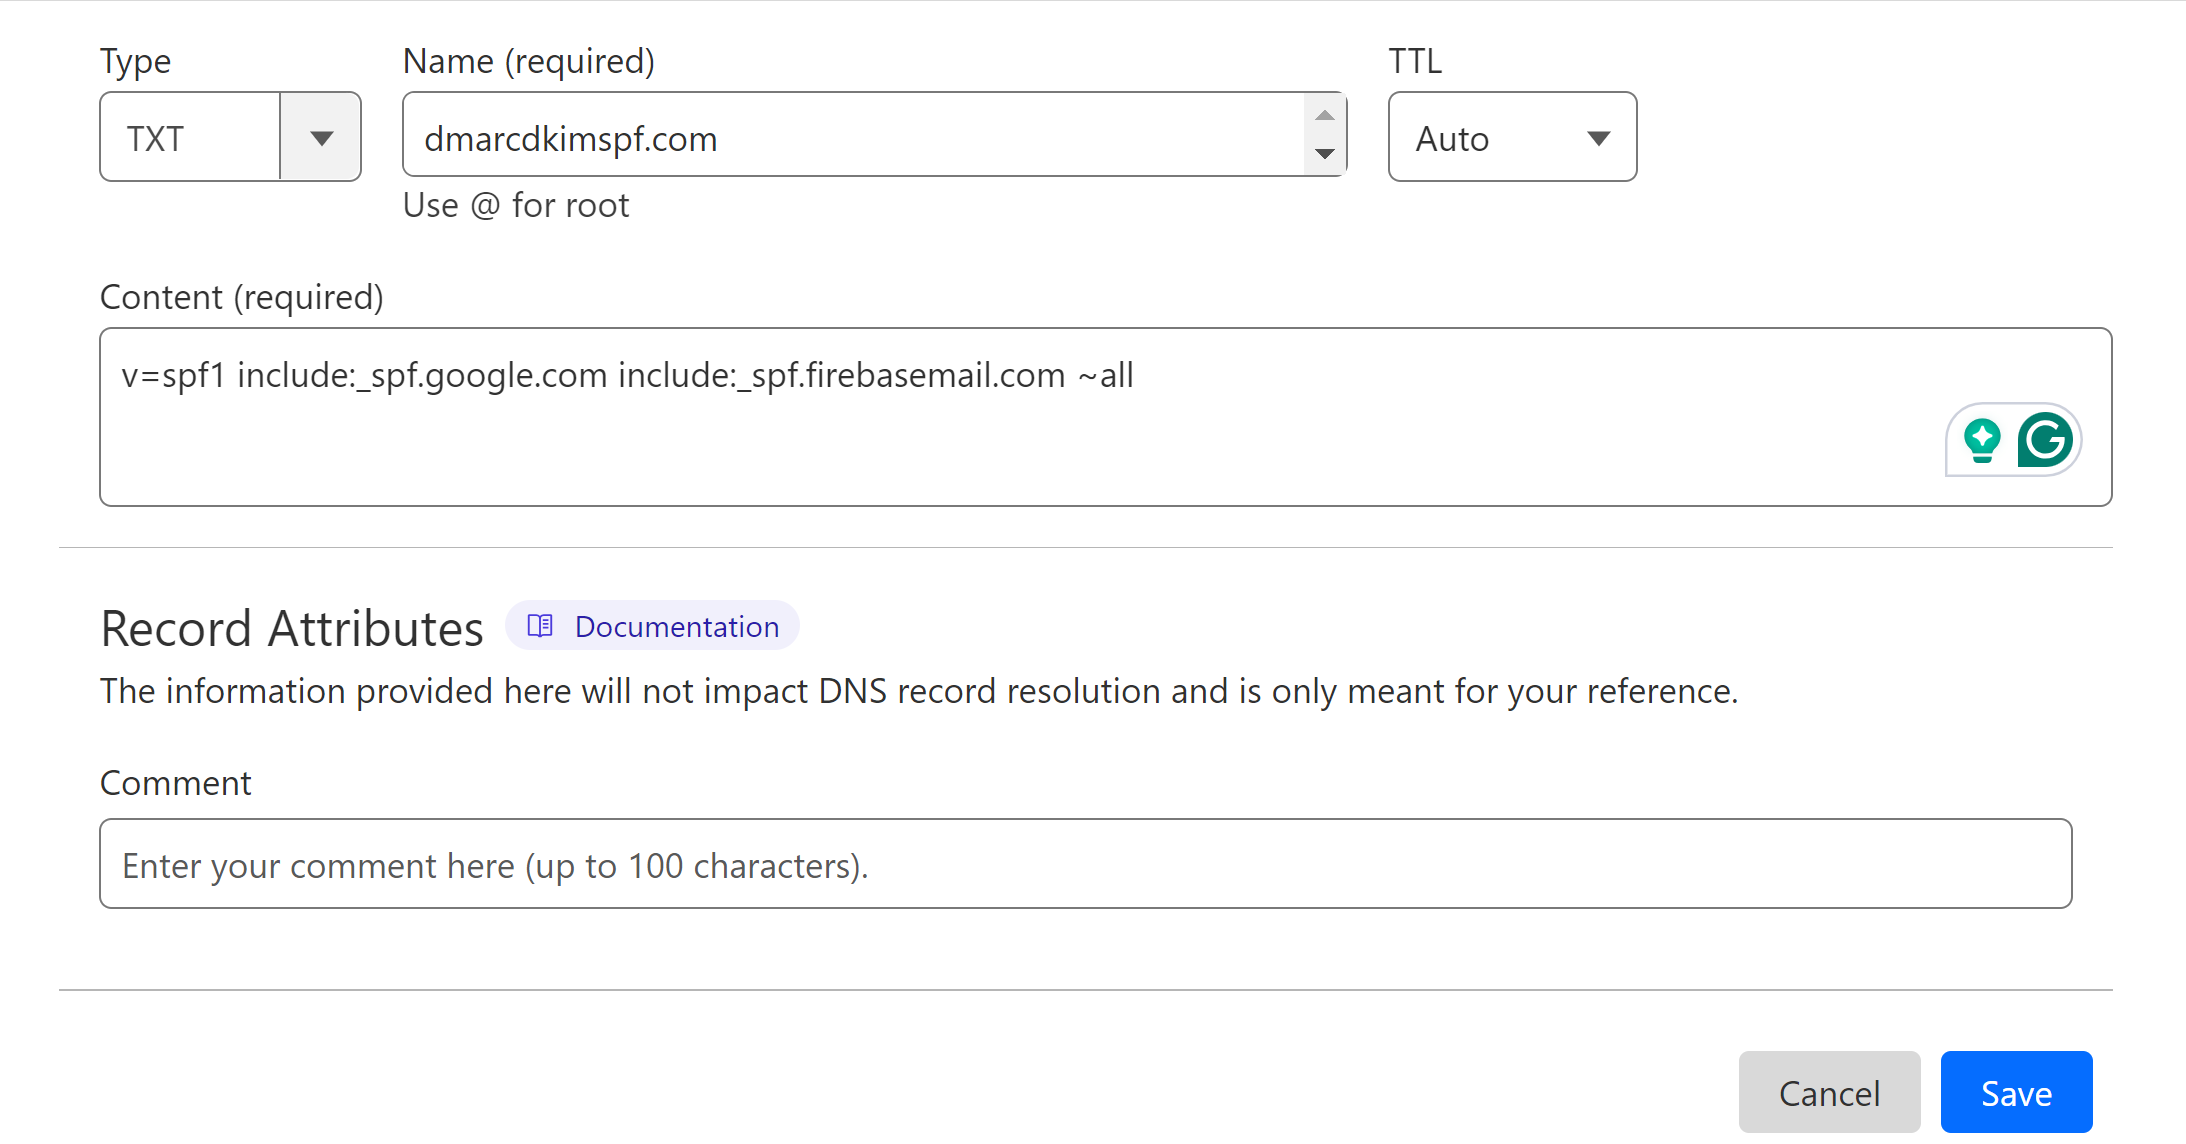
Before adding the SPF record, make sure your DNS provider doesn't have an existing SPF record. If there is an existing SPF, use the SPF Merge Tool to combine multiple SPFs into one.
-
Go to the SPF Merge Tool, write your domain name and Firebase SPF record, and click Merge SPF values.
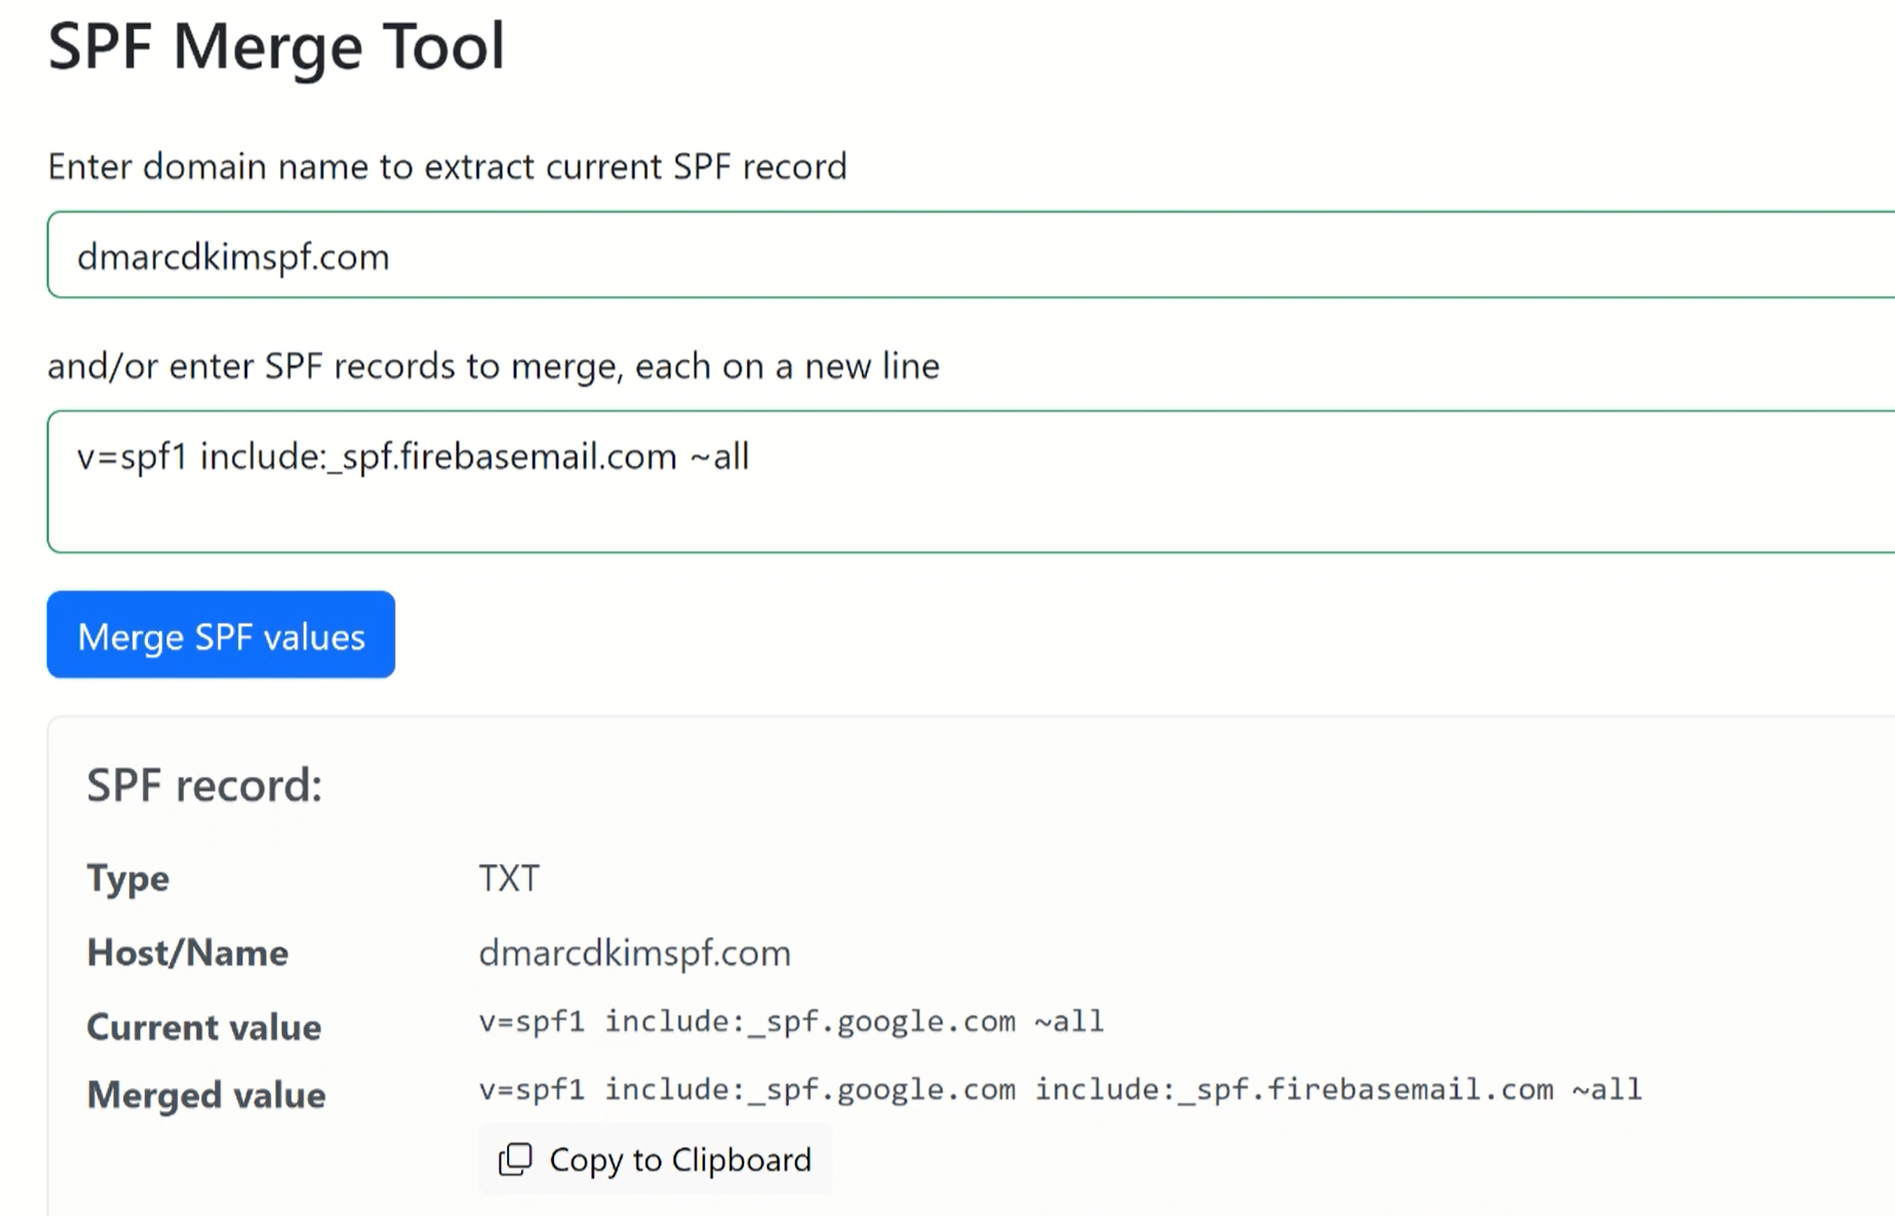
Add the record name and merged value to your DNS dashboard.
-
Select type TXT and click Save.
Adding Firebase DKIM and Domain Verification records:
Select type TXT or CNAME, as mentioned in the record.
Copy the record name and paste it into the name field in the DNS dashboard.
Copy the record value and add it to the Content or Target field.
-
Finally, click Save.

NOTE: Turn off the proxy for every CNAME record because when enabled, it diverts the traffic to the Cloudflare server instead of the email server, which causes authentication issues.
Adding Firebase DMARC Record:
DMARC record gives you more control over email security. With the help of DMARC value, you can determine rules for the emails that fail to pass the authentication check.
To have insights into your DMARC report, you can use a tool that helps you implement a strict policy.
-
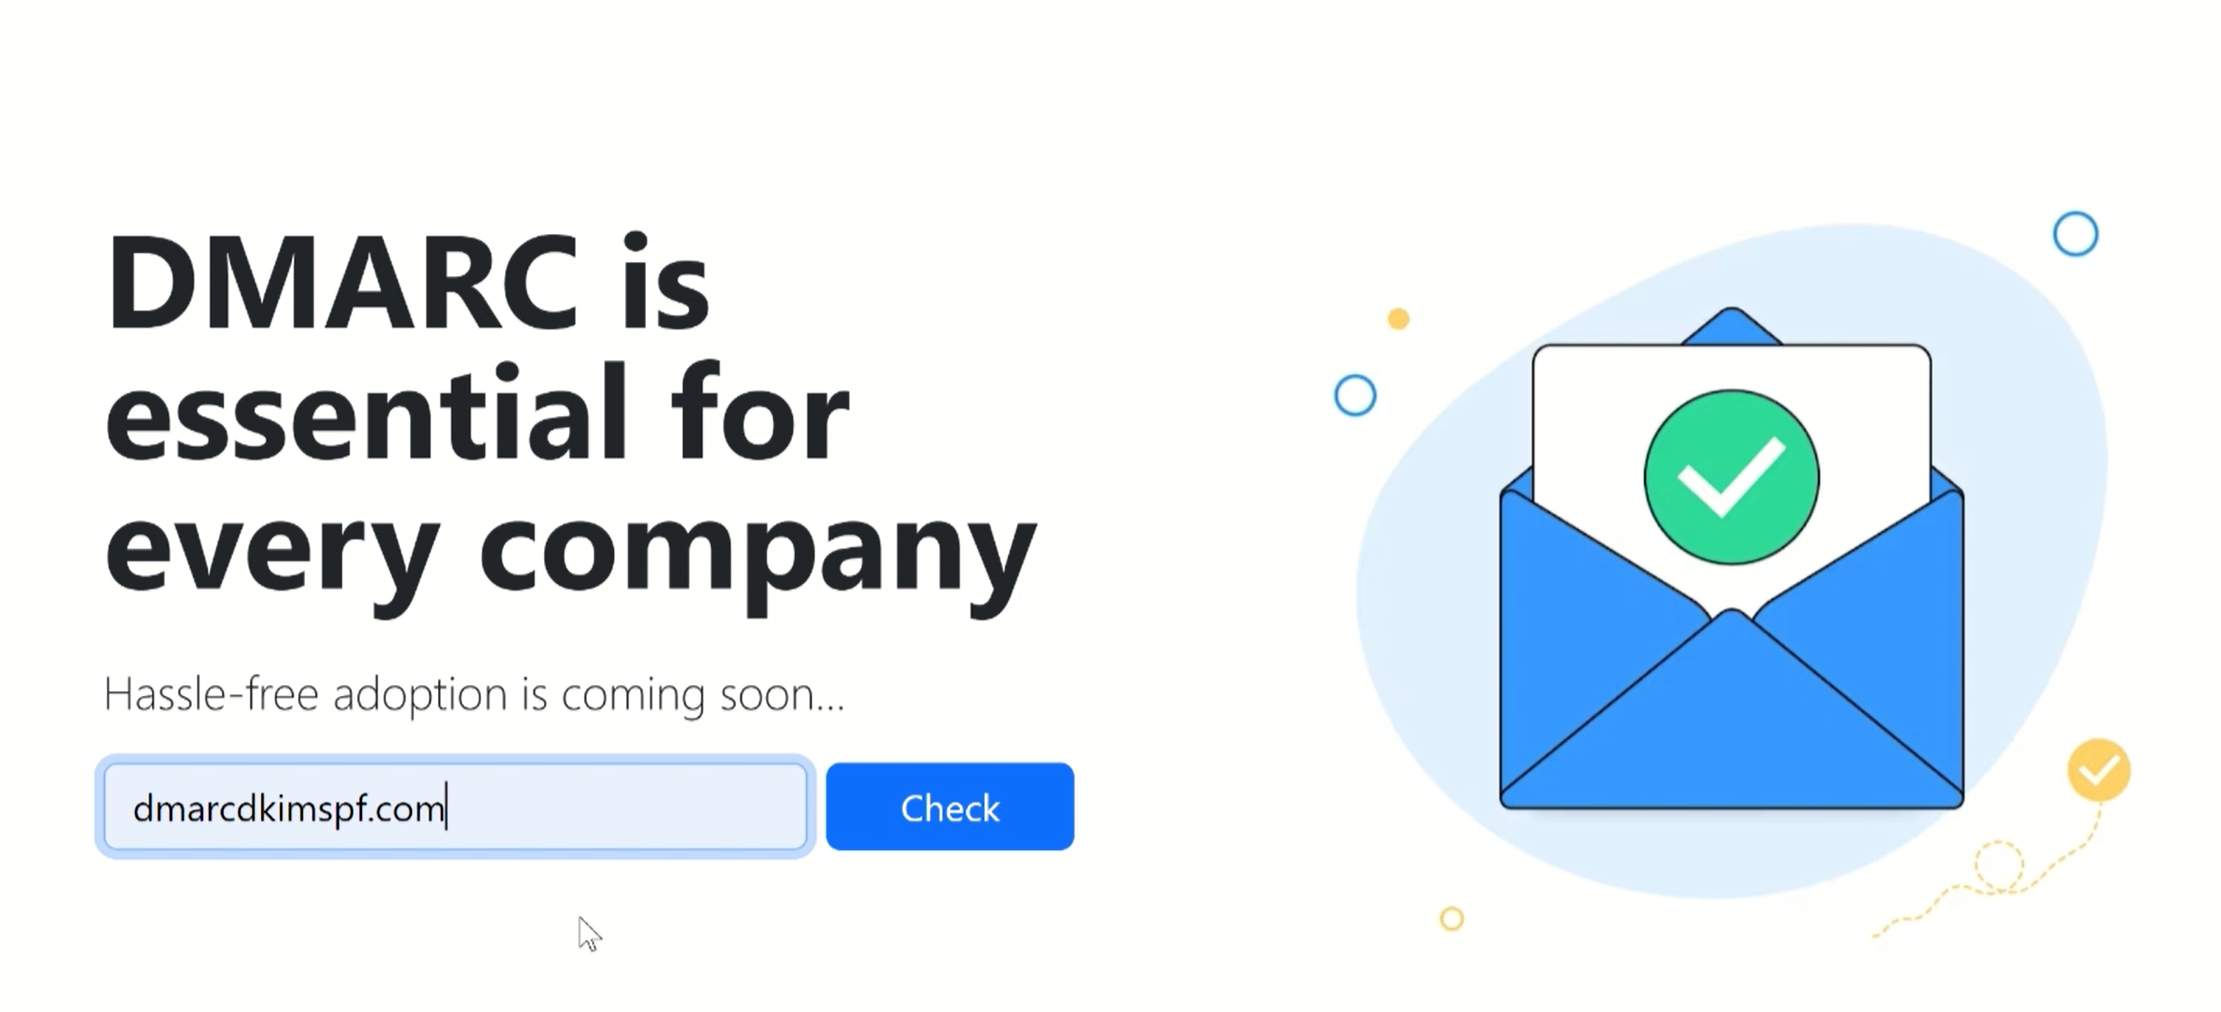
Open the DMARC Check Tool, write your domain name, and click Check.
-
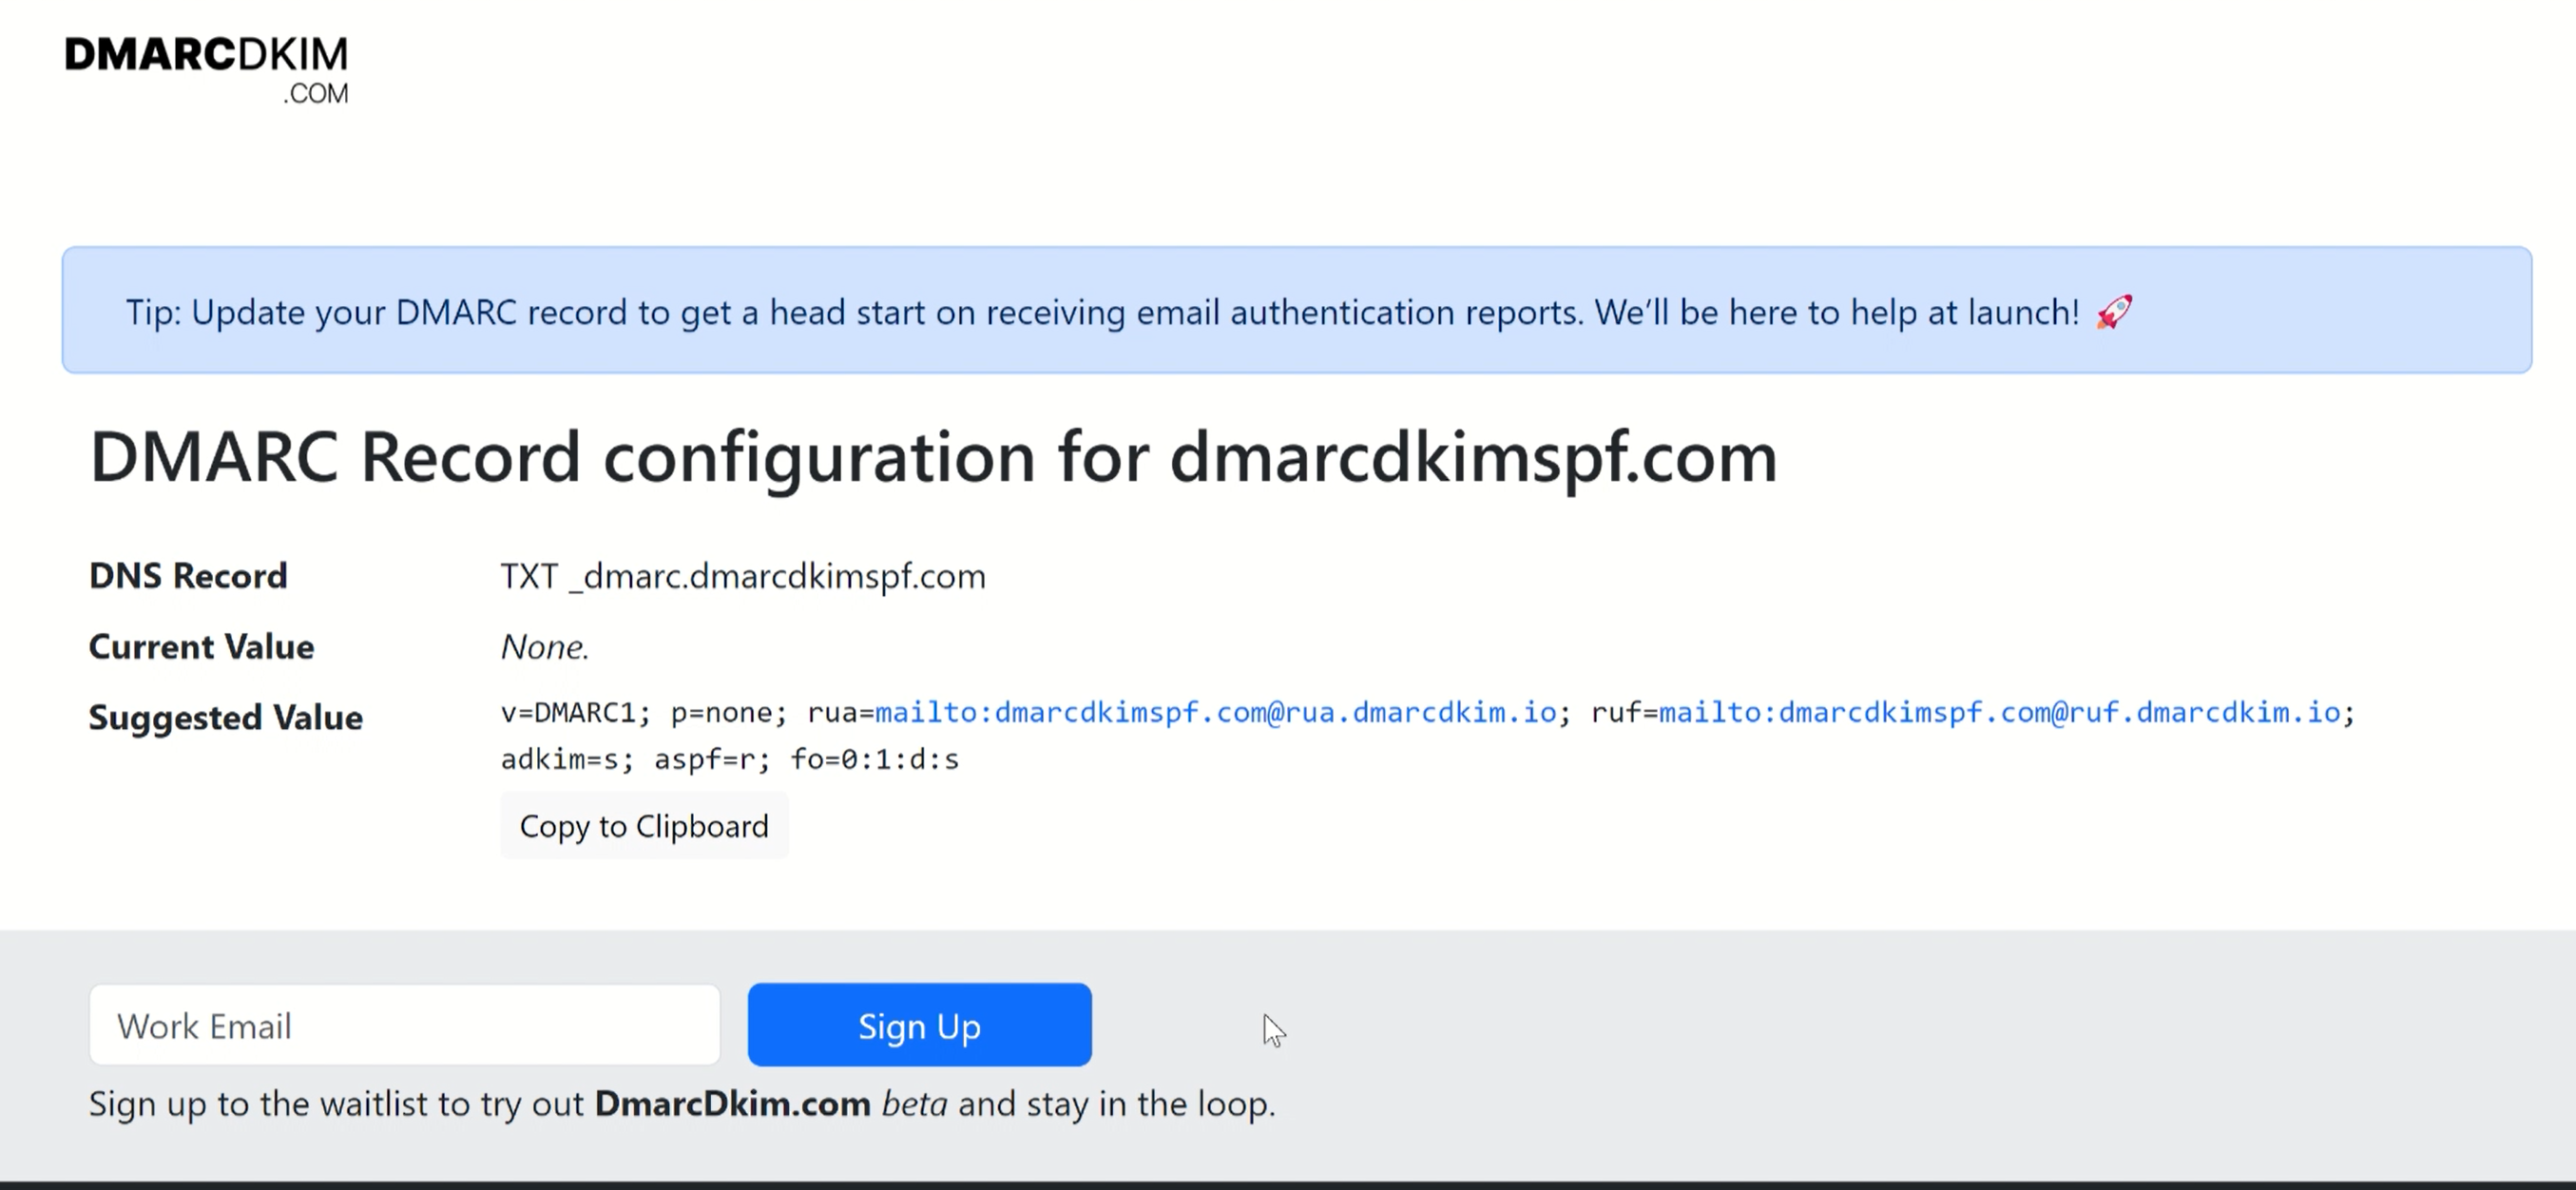
Copy the DNS record name and Suggested value, and add to the DNS provider.
Verifying Firebase DNS Records:
-
Once all records are added, return to the Firebase DNS records page and click Verify.

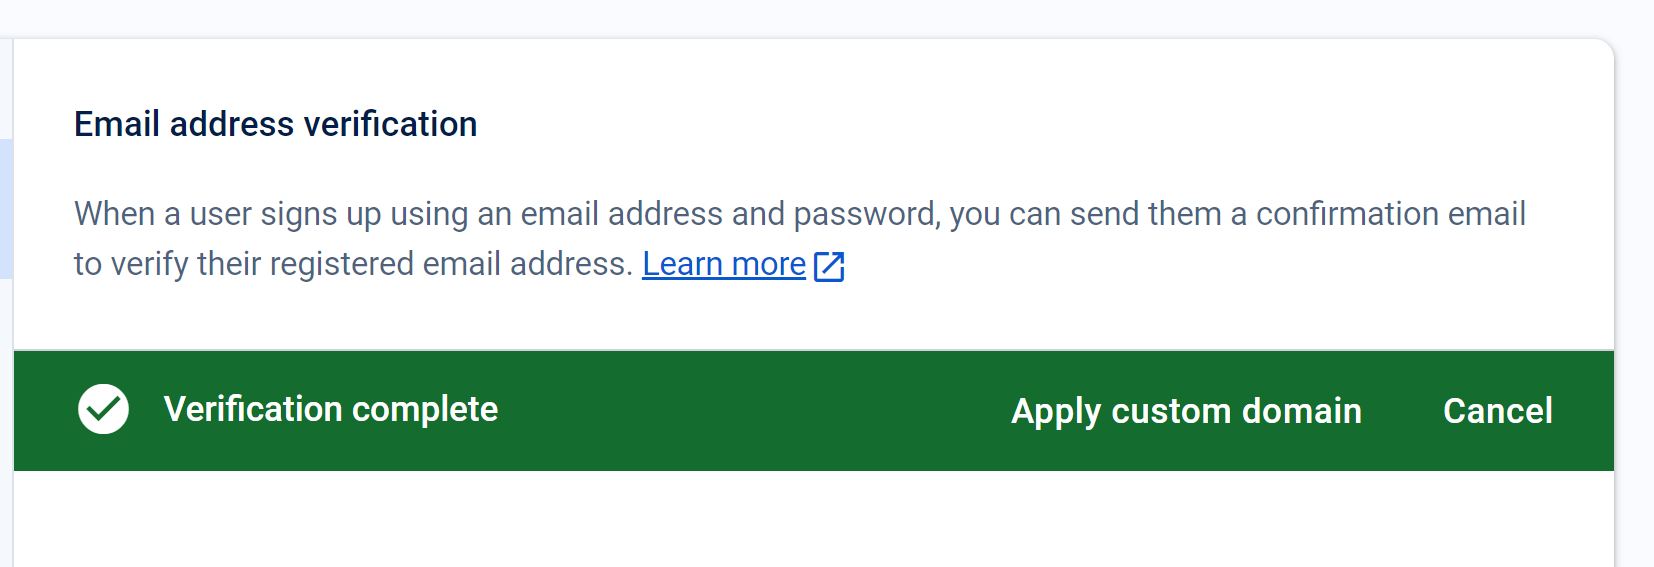
If all records were added correctly, you should see a green highlighted "Verification Successful" text.
-
Click "Apply custom domain" to complete the process.
If the records are not verified on the first try, click the Verify button again or try refreshing the page. It is suggested to wait up to 48 hours for the records to get verified, because, the servers take a while to propagate the DNS changes.
If there is no authentication success after 48 hours, it indicates a potential misconfiguration in your DNS setup. To troubleshoot the domain authentication issues, contact the Firebase support team or hire a DmarcDkim.com expert to help you.
Check domain and follow the instructions to nail down your DMARC configuration.
No expert knowledge needed!


