Customer.io SPF, DKIM, DMARC, and Tracking Record Configuration
Check your domain for DMARC, DKIM, SPF and MX records. Get a free report.
- The impact of Business Email Compromise
- A quiet Google update just made SPF more forgiving
- Cyber Insurance and DMARC Enforcement
- Email impersonation scams explained
- TLS-RPT Record
- SMTP Smuggling
- 🇩🇪 Welche Hosting Anbieter unterstützen DMARC
- Reverse Engineering Phishing
- DMARC Enforcement in 2026
- DMARC for non sending domains
How to setup SPF, DKIM, DMARC, and Tracking records for Customer.io?
This step-by-step guide will walk you through the domain authentication process with the help of Customer.io DSN records.
You can find the DKIM, SPF, DMARC, MX, and Link Tracking records in the Customer.io Sending Domains tab.
Read till the end to learn how to set up the DNS records in your DNS provider for email domain verification and protect it against spamming and spoofing.
Configuring Customer.io DNS Records:
-
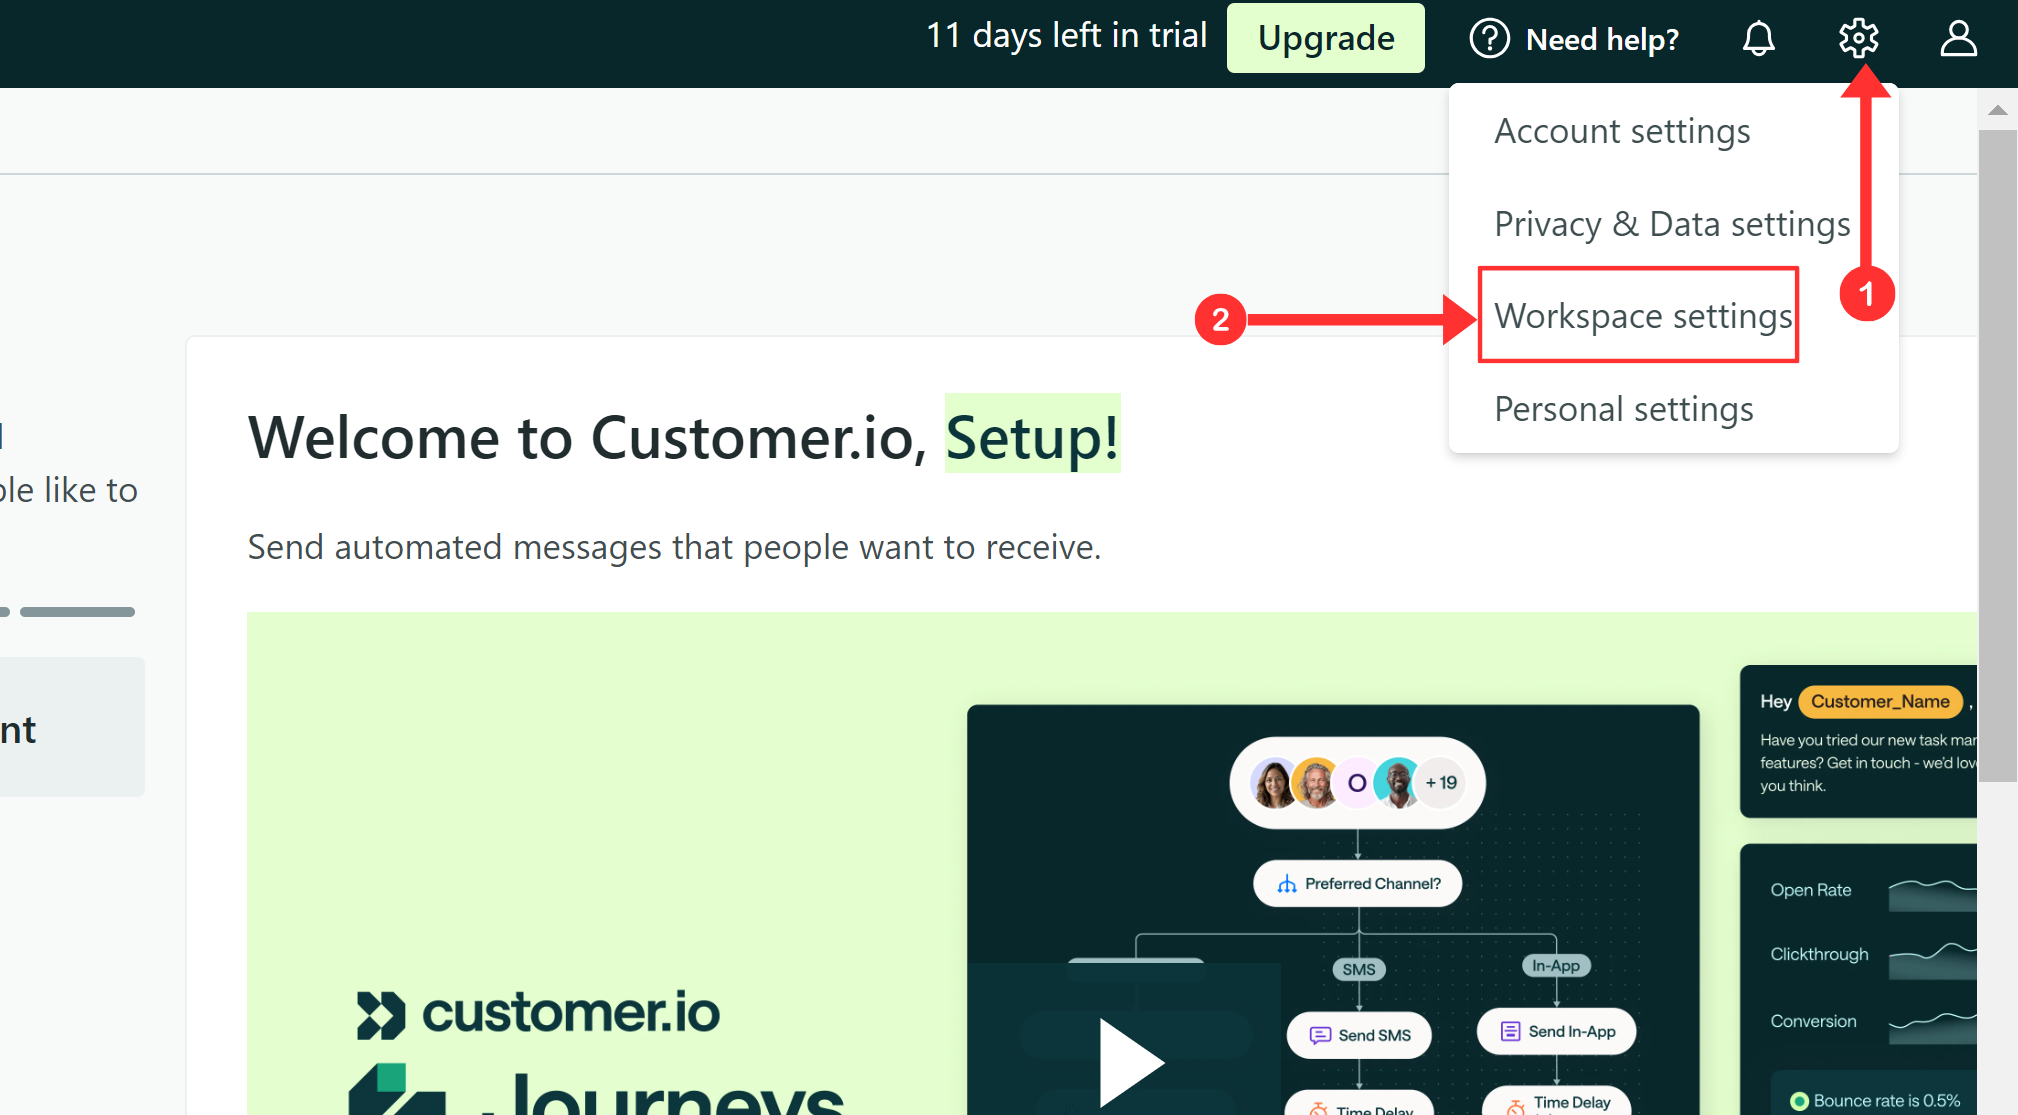
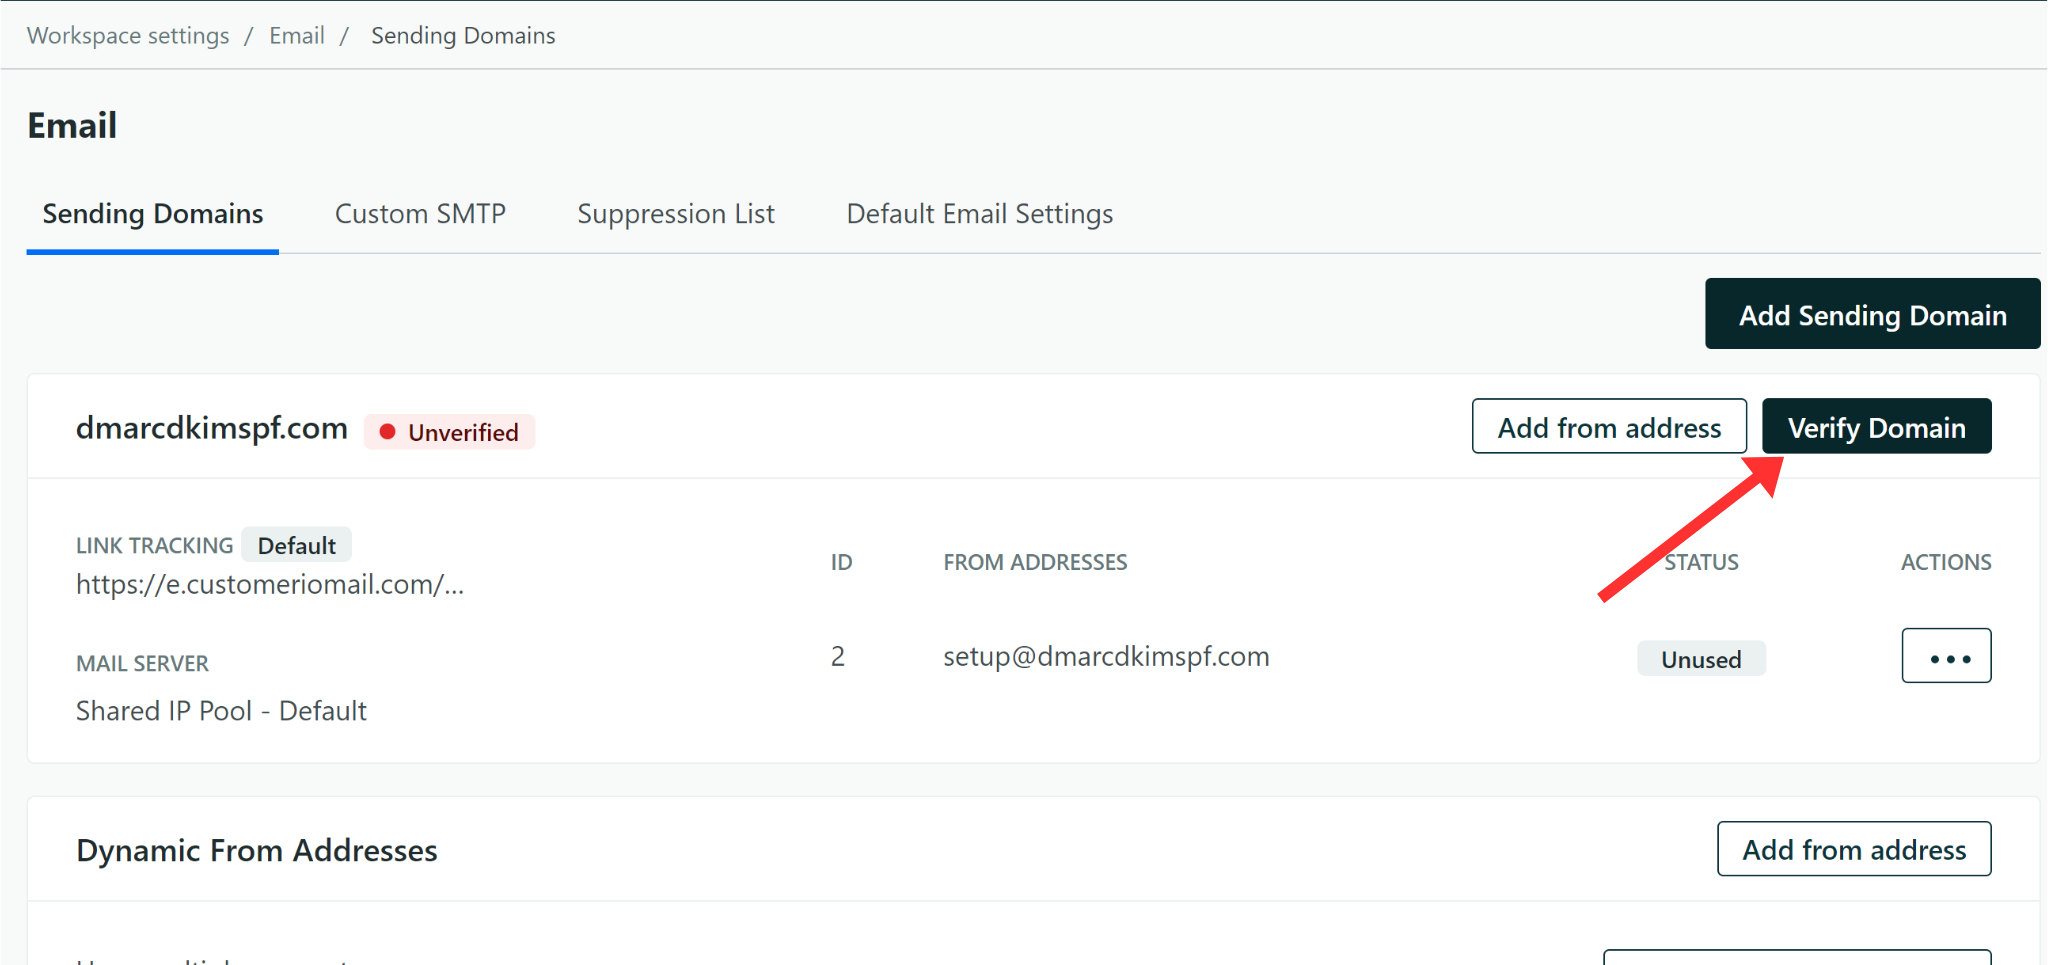
On the dashboard, click the Settings icon and go to Workspace Settings.
-
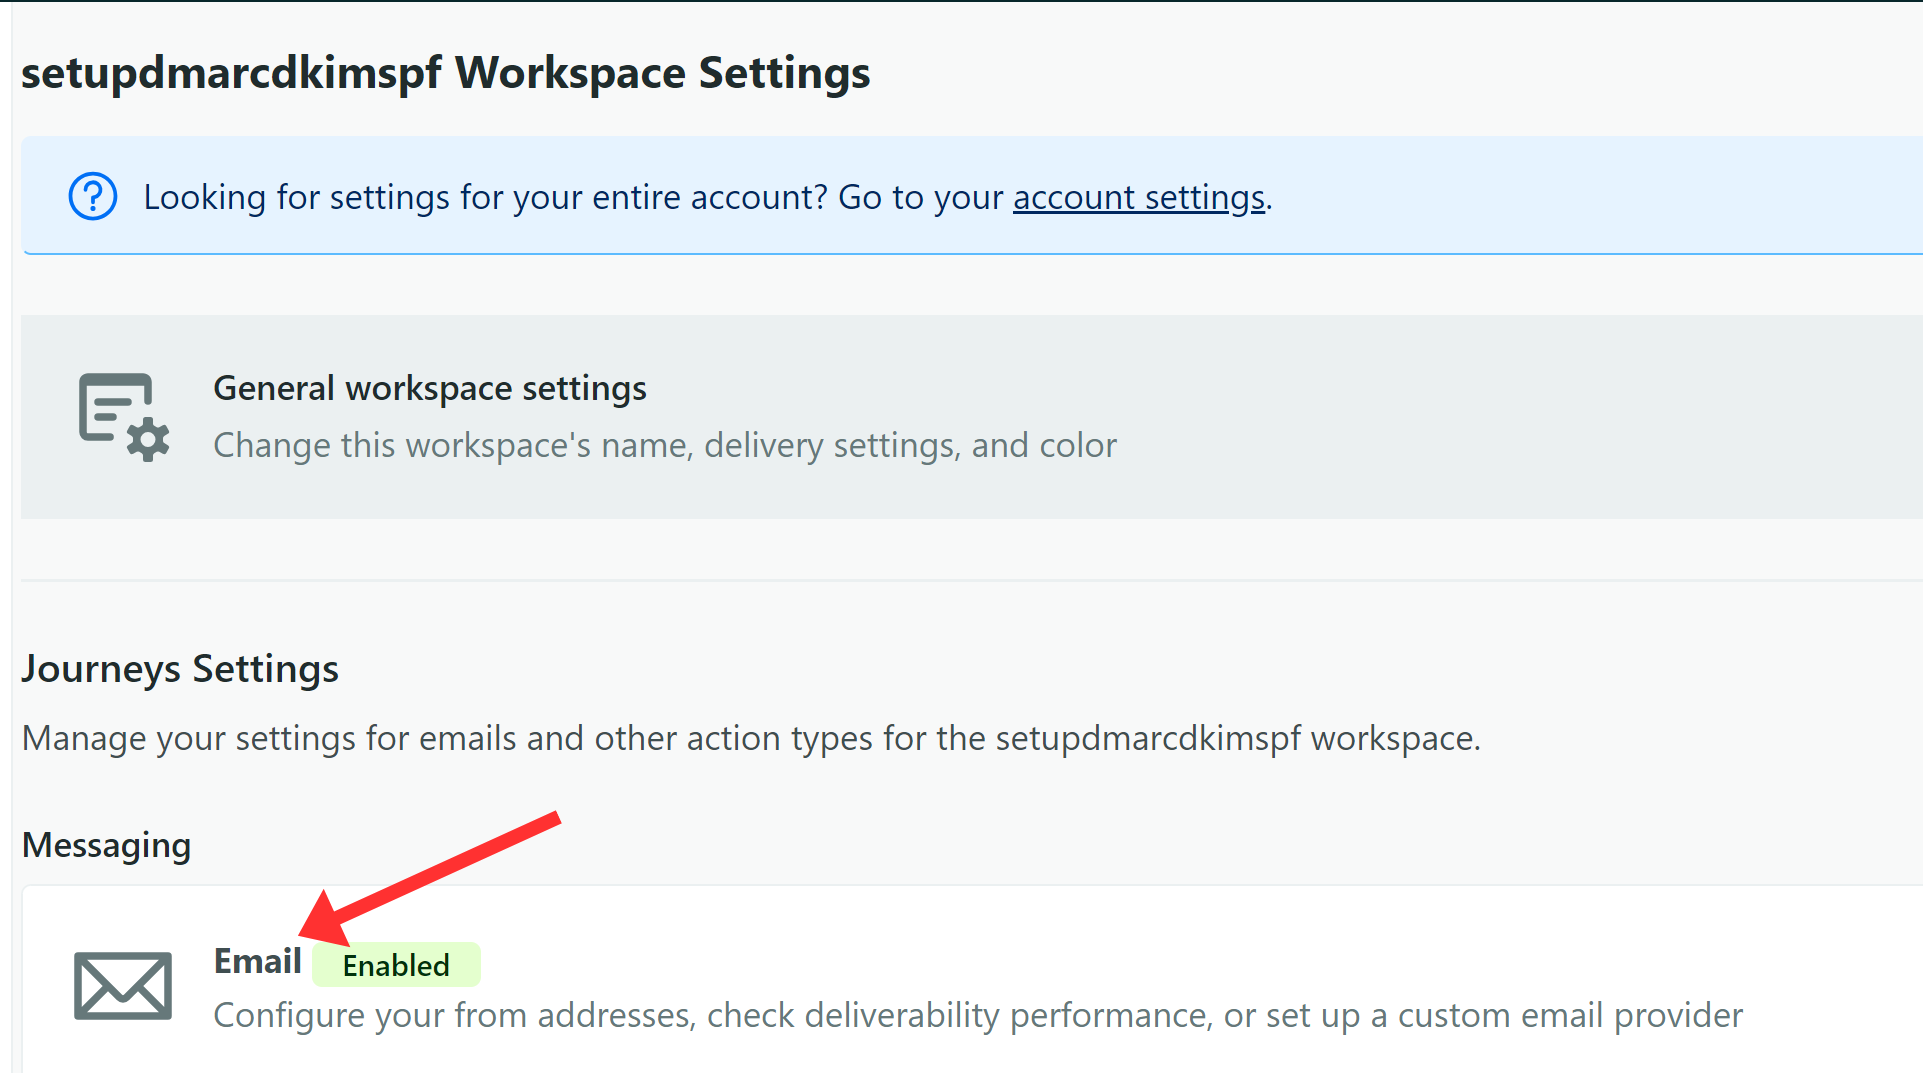
Go to the Email tab.
-
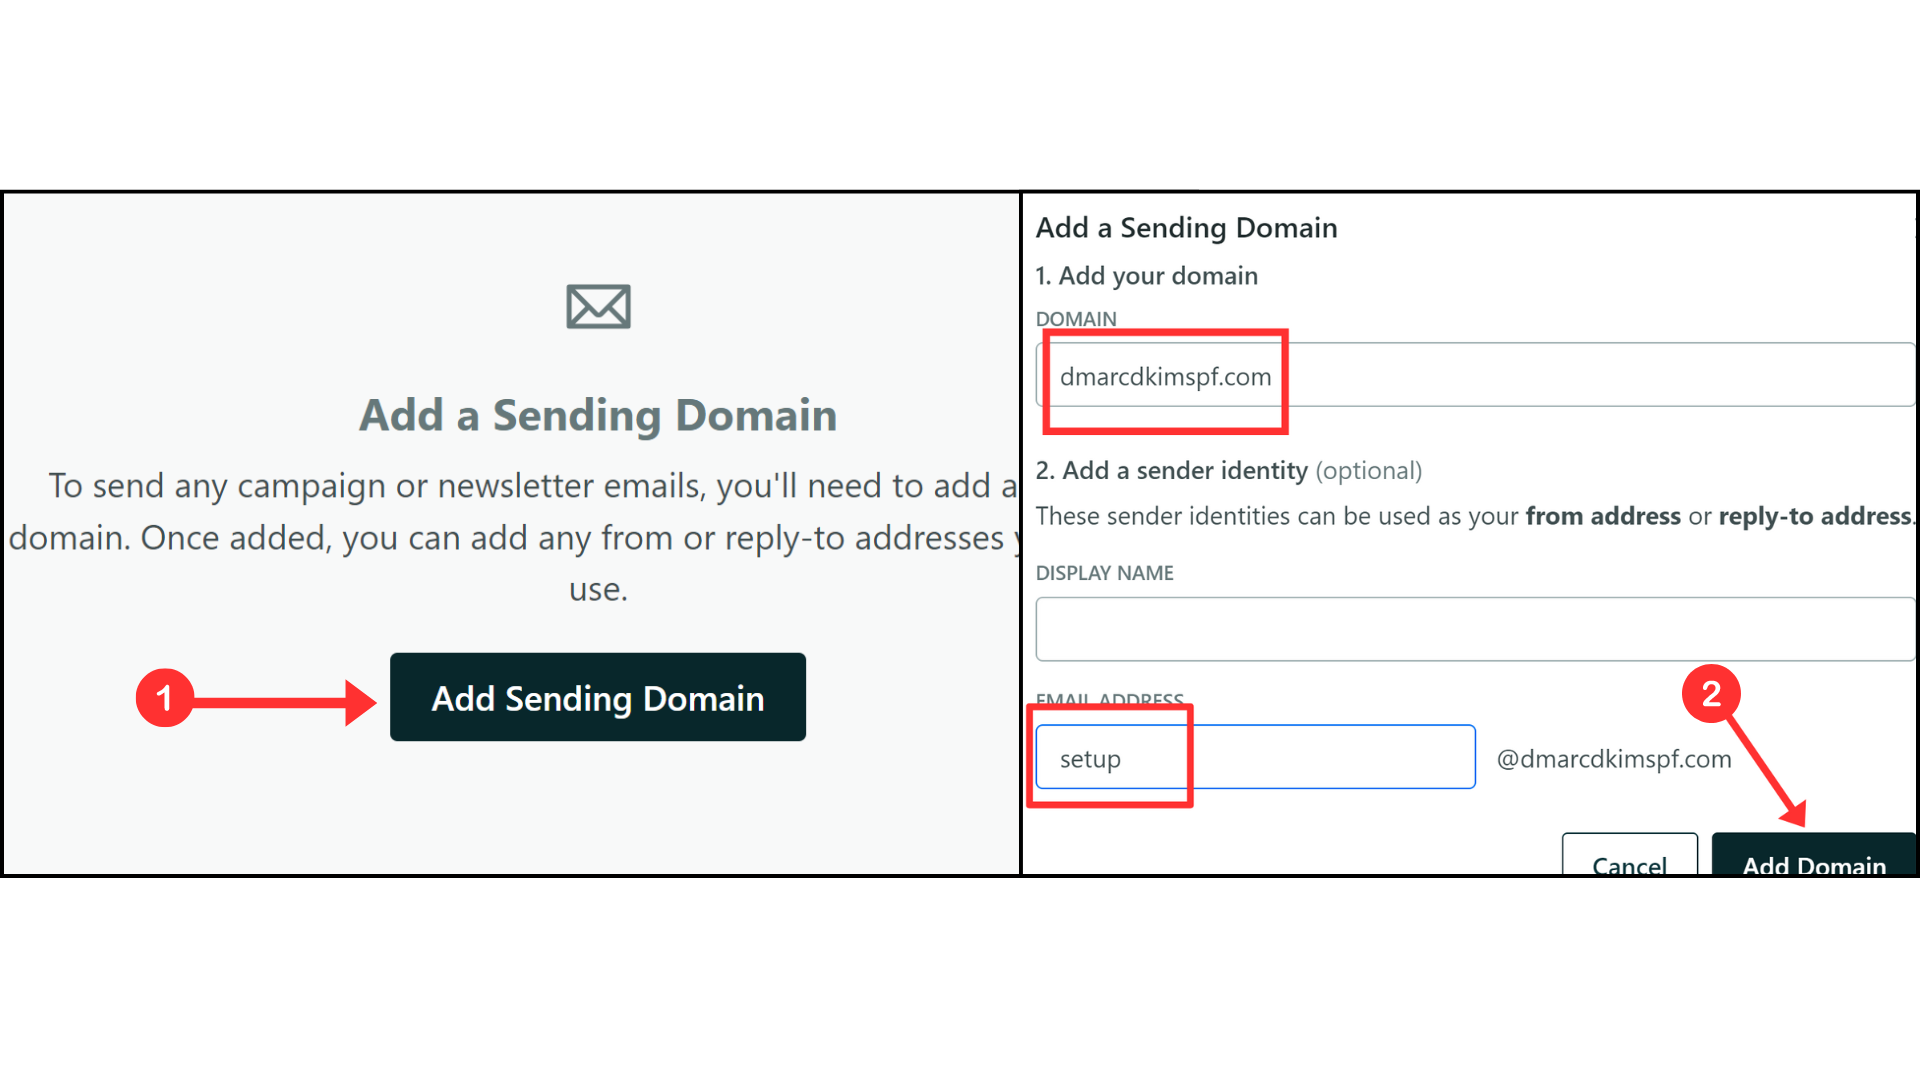
Click Add Sending Domain and add your domain name and email.
-
In the top right corner, click the Verify Domain option.
-
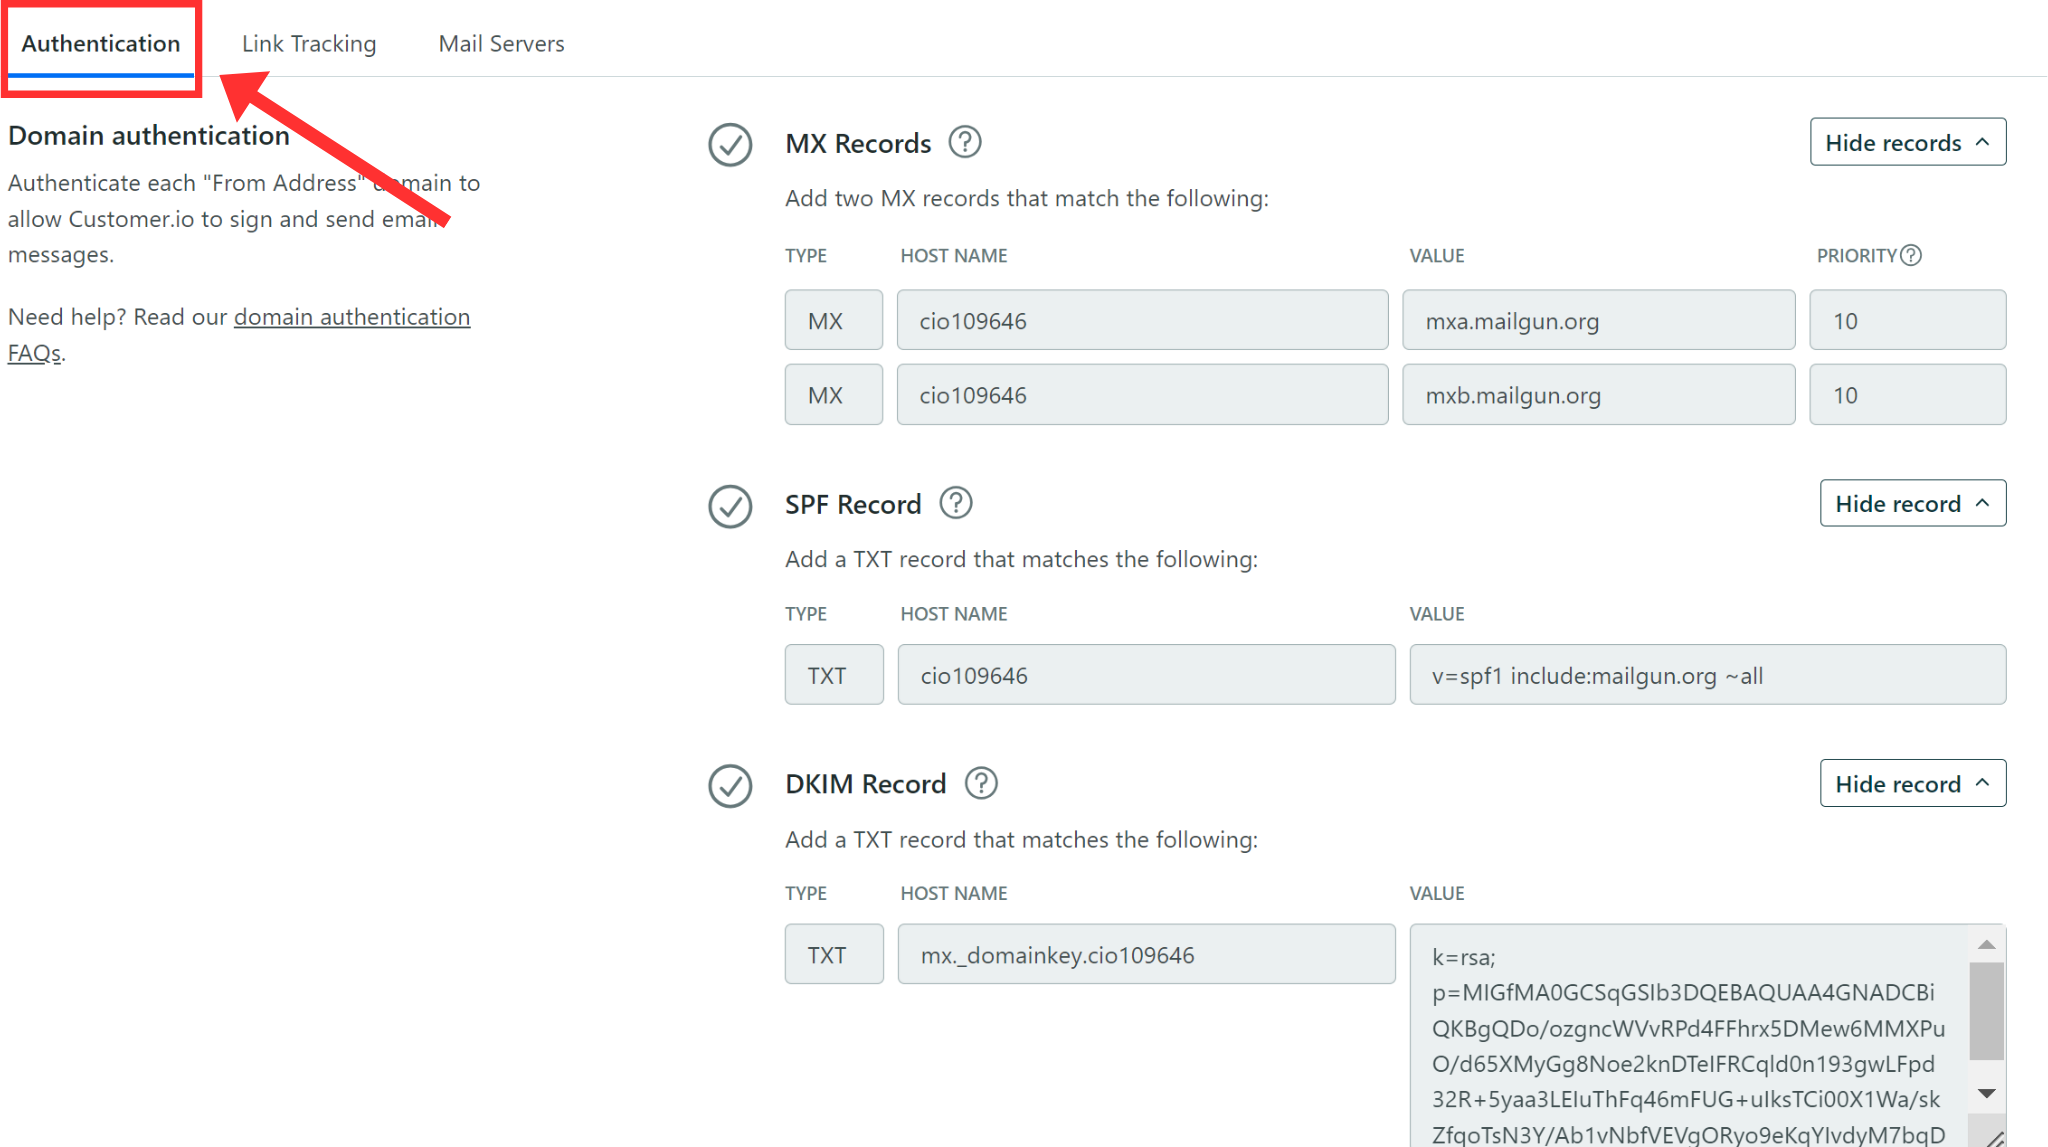
In the "Authentication" tab, you'll find the MX, DKIM, SPF, and DMARC records.
Adding Customer.io MX Records:
-
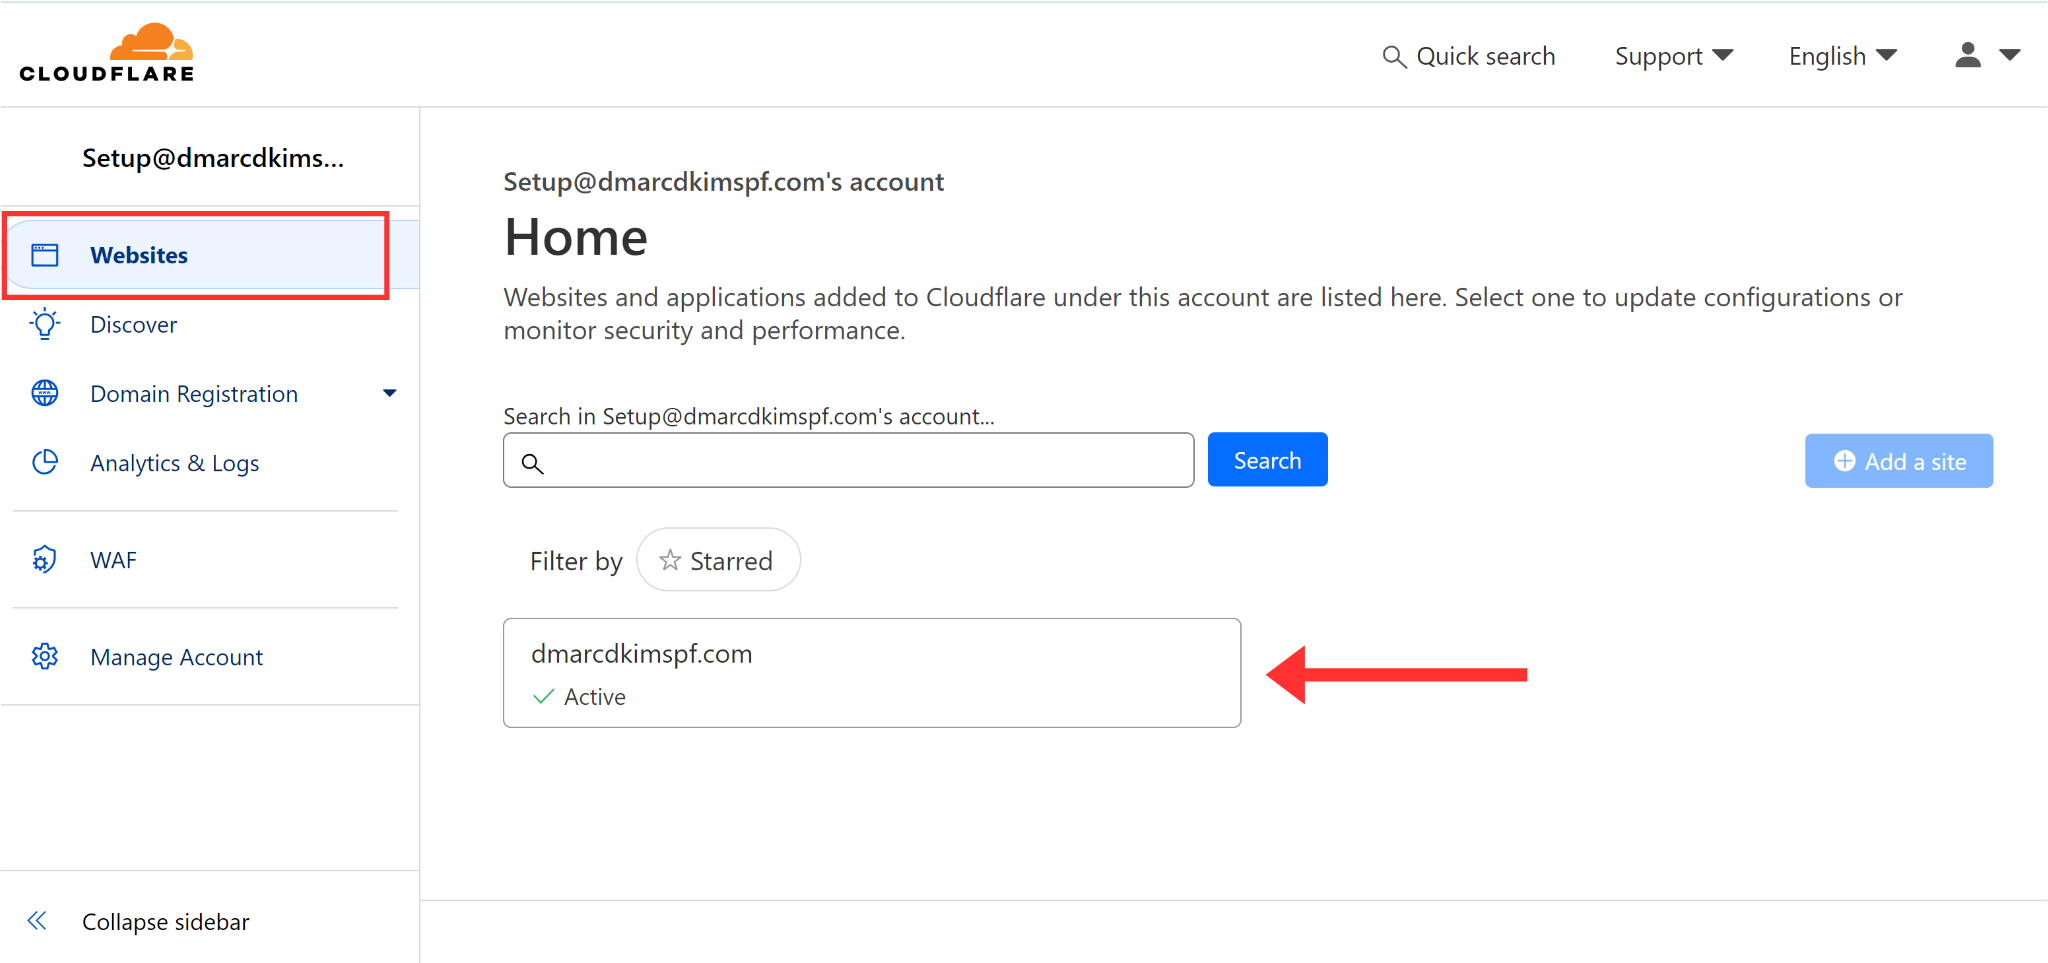
Login to your DNS provider and go to your website. We are using Cloudflare for this guide.
-
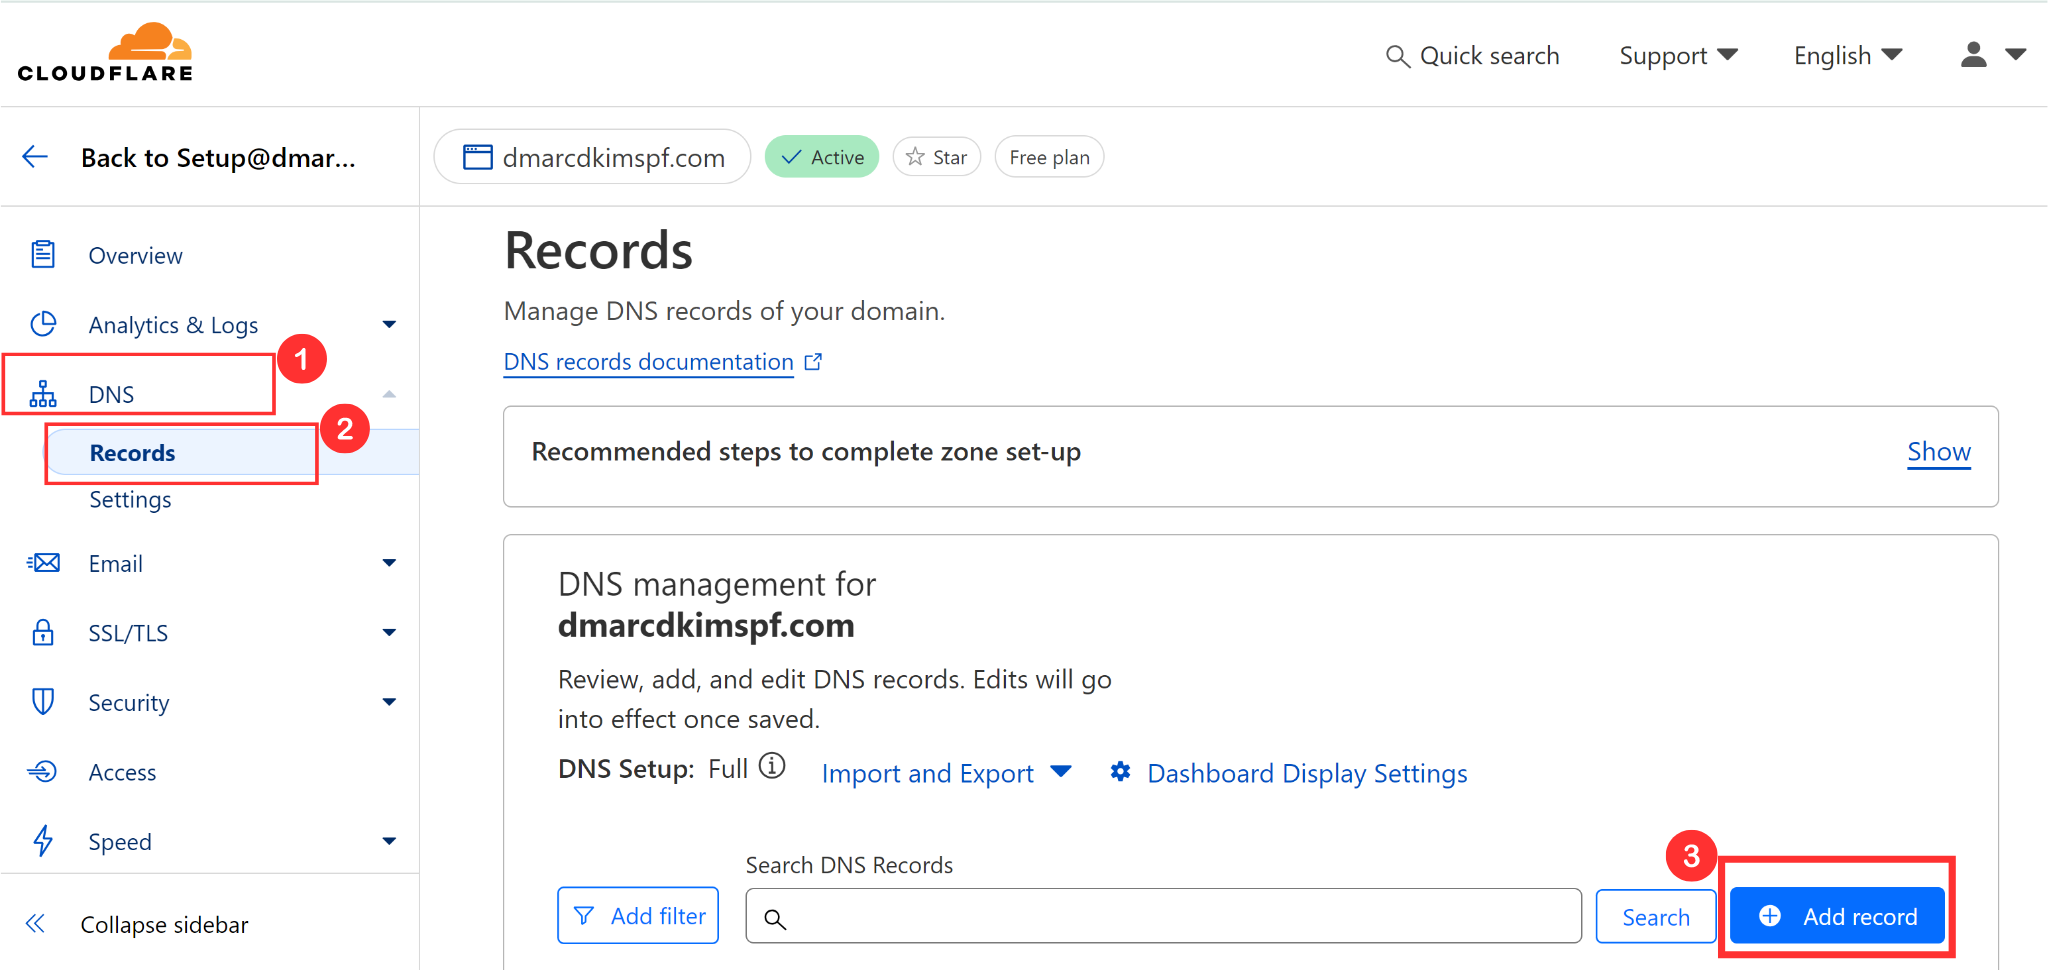
Click DNS, go to Records, and hit the Add Record button.
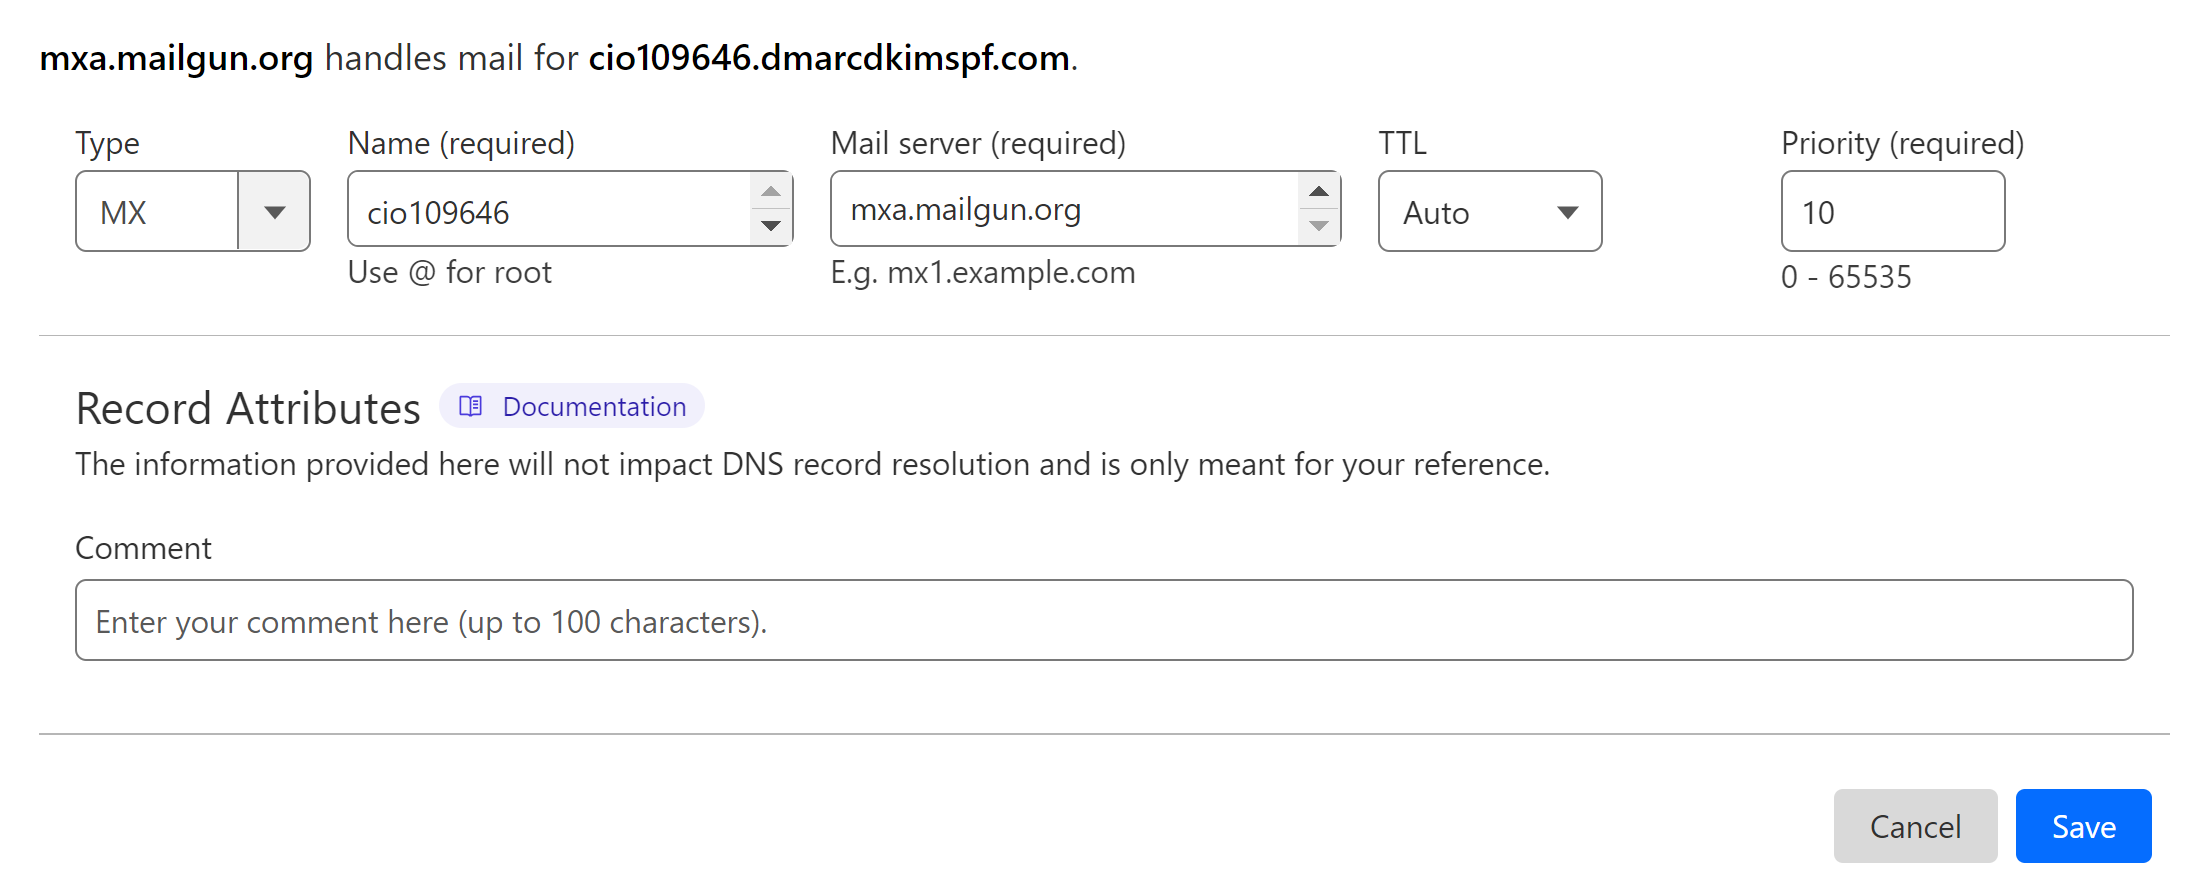
Select the record type MX.
Copy the Host name from Customer.io and add it to the Name field in your DNS dashboard.
Copy the record Value and add it to the Mail server field.
-
Select Priority "10" and click the Save button.
Adding Customer.io DKIM Record:
Select the record type CNAME.
Copy the Host name and Value and paste them into the dedicated field in your DNS dashboard.
-
Turn off proxy and click Save.
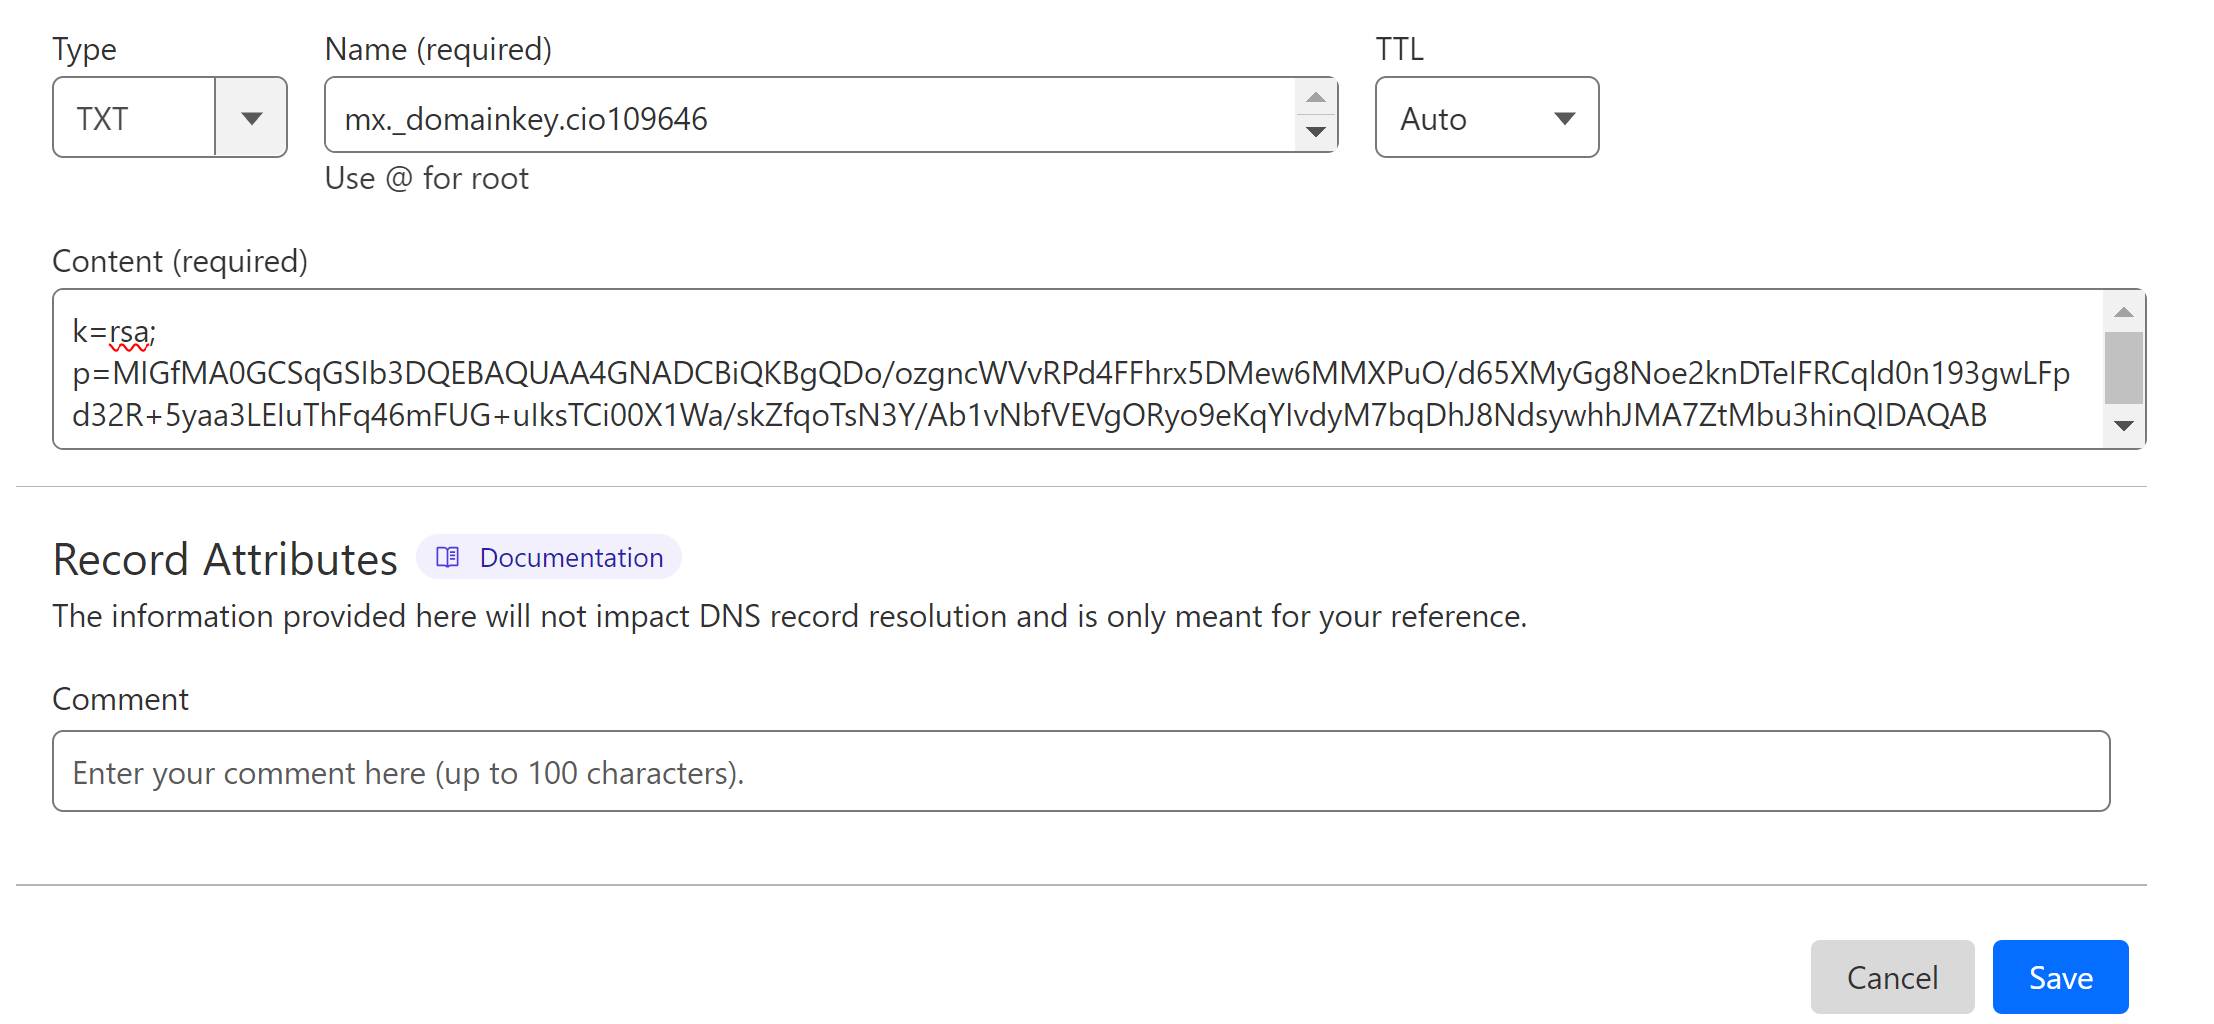
IMPORTANT: Always turn off proxy for CNAME records. When it is enabled, the traffic diverts to your DNS server instead of your email server.
Adding Customer.io SPF Record:
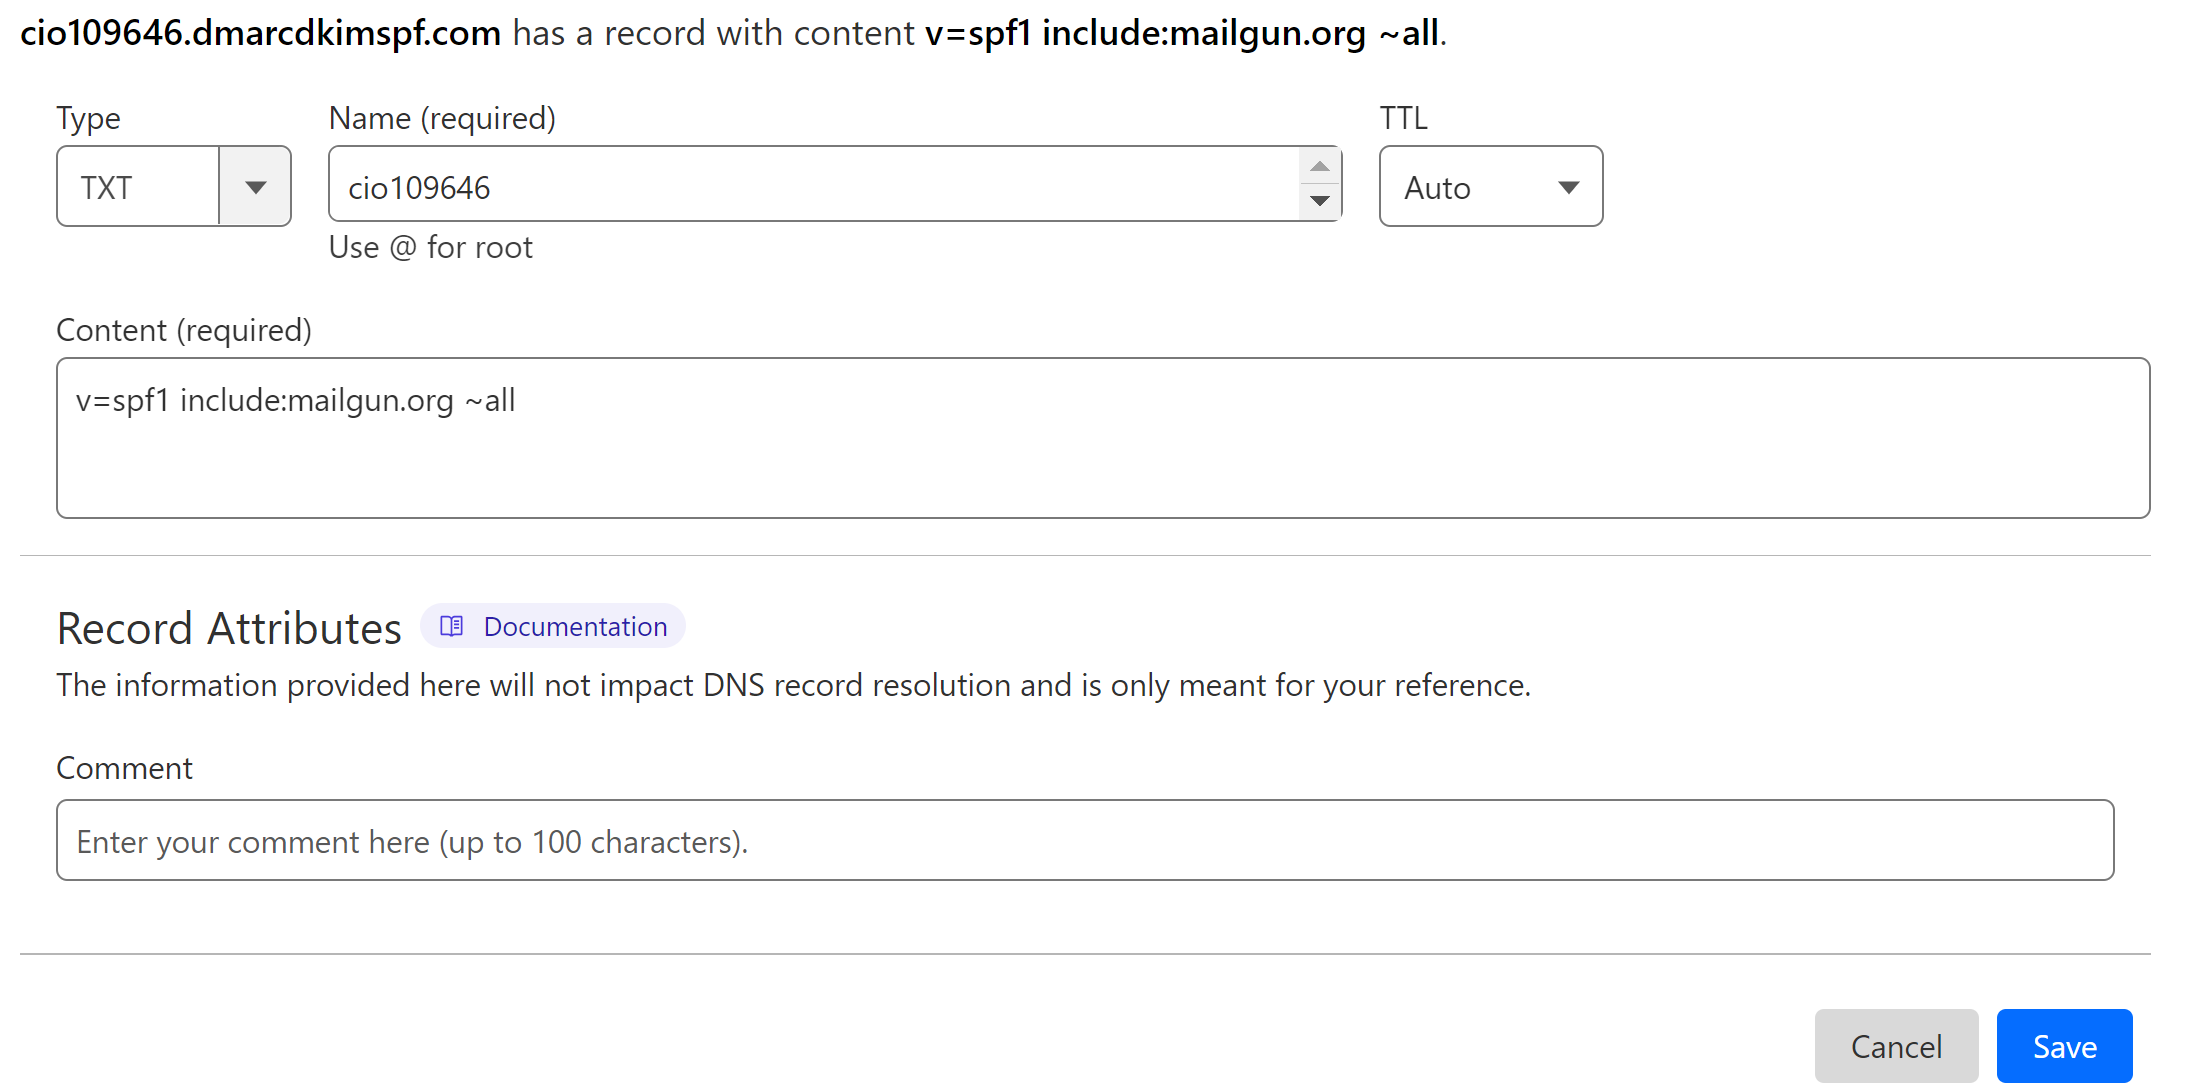
Select type TXT and add the host name and value.
-
Click the Save button.
Merge Multiple SPF Records:
Adding more than one SPF record to the DNS dashboard can cause conflicts and one of them will stop working. If your DNS dashboard has an existing SPF record, merge it with the Customer.io SPF record.
Go to the SPF Merge Tool.
Write down your domain name and add the Customer.io SPF record.
Click the Merge SPF Values button.
-
The tool detects and merges your existing SPF with the Customer.io SPF record.
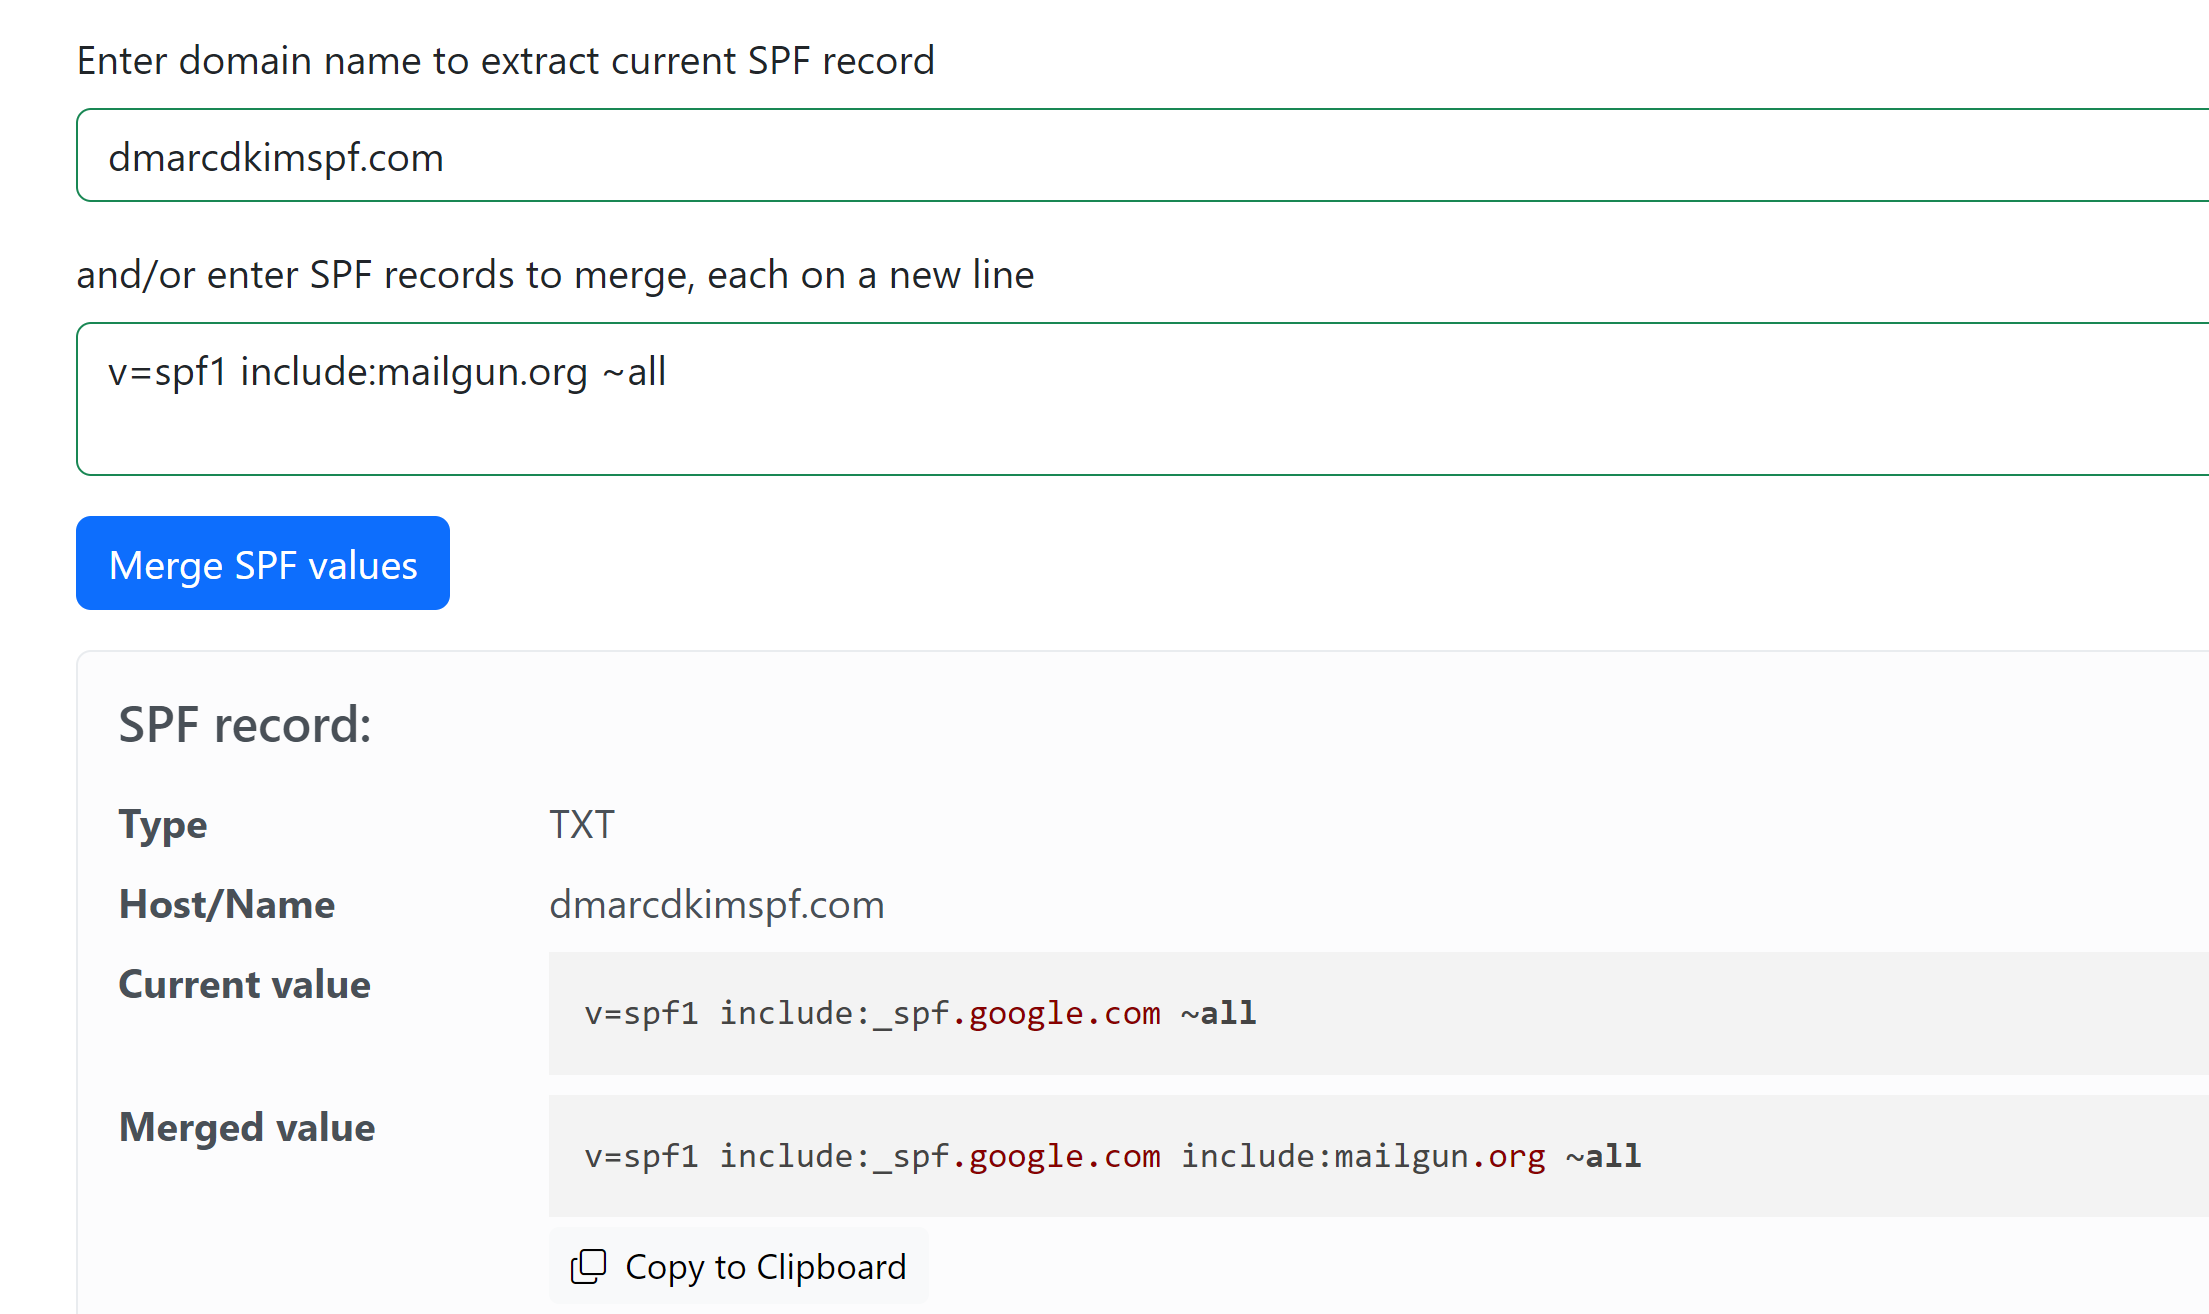
Edit your existing SPF record and replace the previous value with the merged value.
Adding Customer.io DMARC Record:
The DMARC record provided by Customer.io has a p=none value which doesn't provide a strict policy. Also, it doesn't have a destination where unauthorized emails will be going. Without destinations, you can not have insights about your DMARC reports.
To implement a strict DMARC policy with actionable insights, you can use a third-party tool.
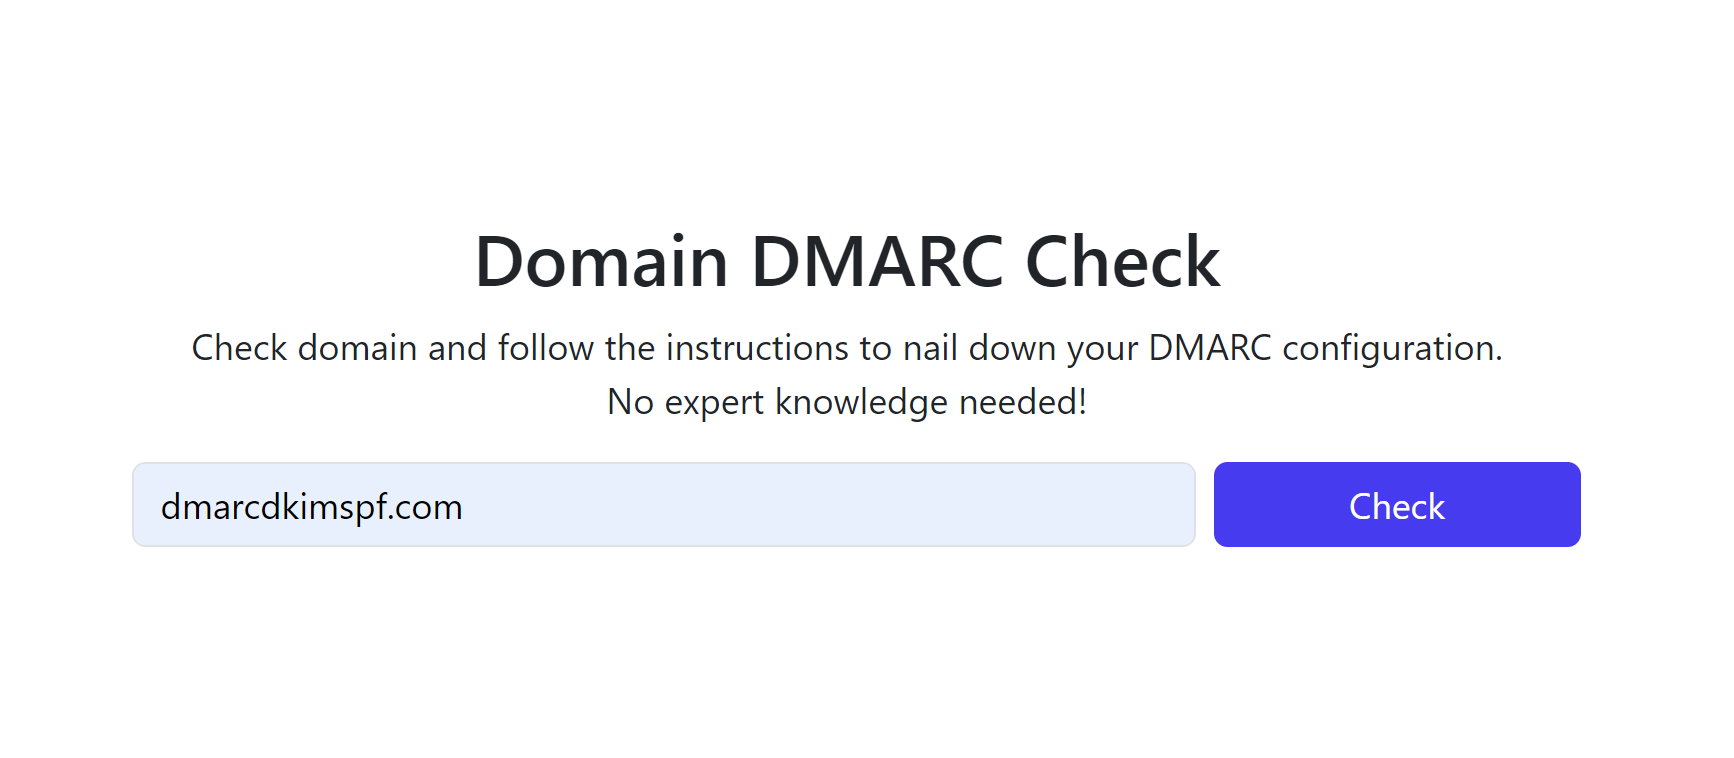
Open the DMARC Checker.
-
Write down your domain name and click Check.
-
Copy the Suggested value and add it to your DNS provider.
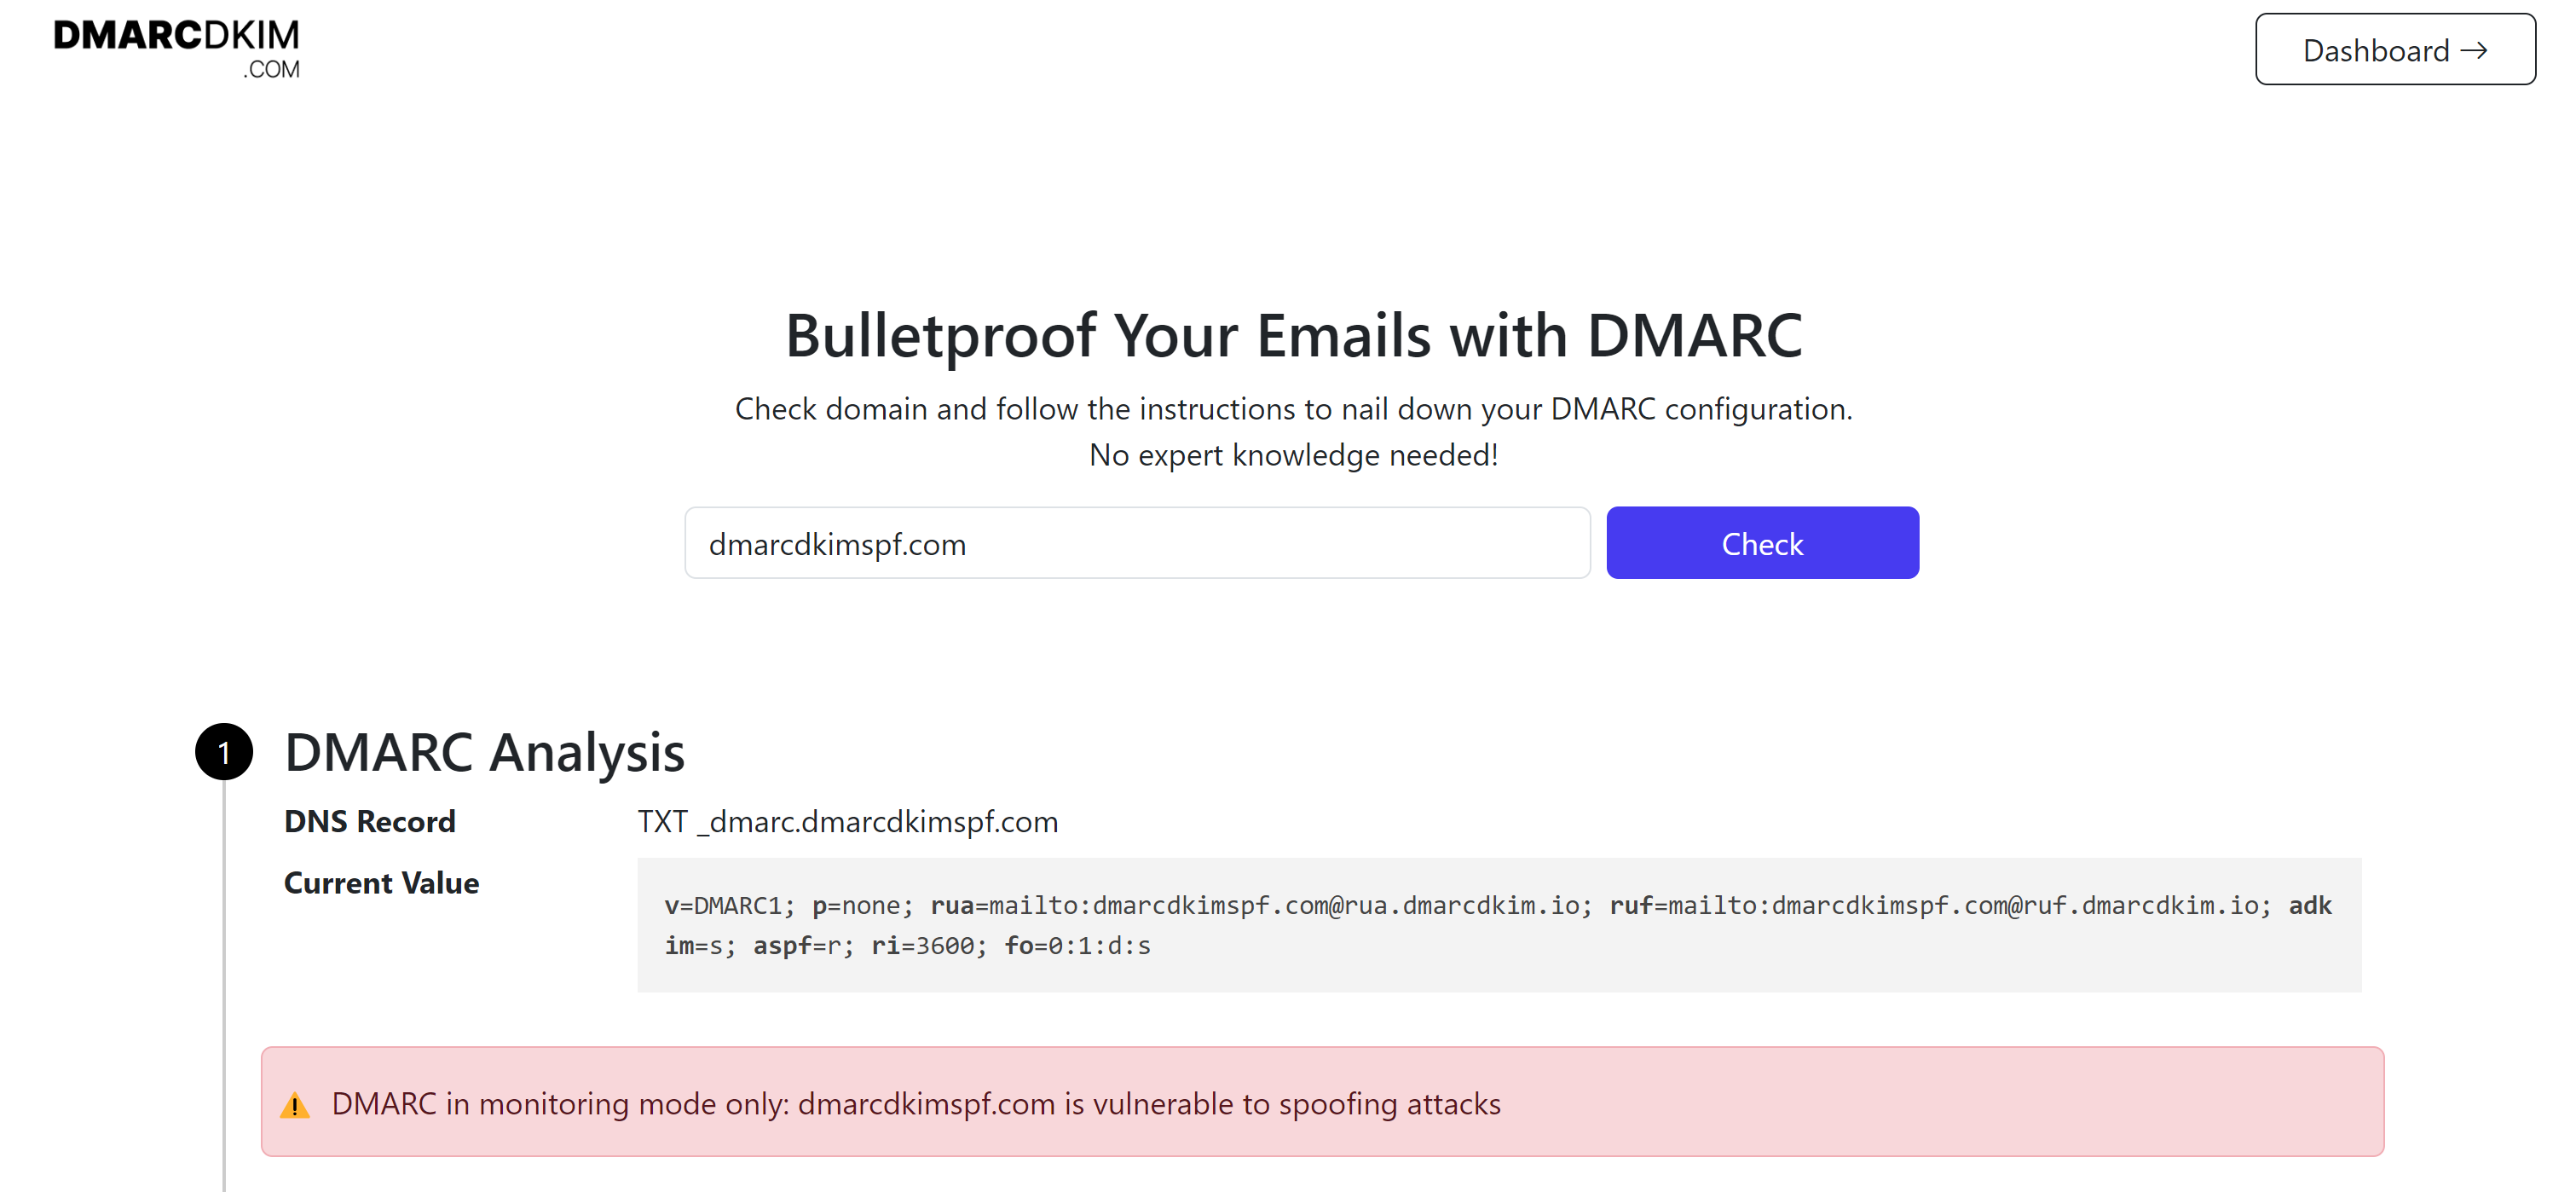
Sign up to get access to the Reports Dashboard.
After 24 hours, the tool starts generating your DMARC reports and guides you through implementing a strict policy.
Adding Link Tracking Record:
If you want to keep track of your email's clicks, opens, and un/subscribers, you can add a tracking record provided by Customer.io.
Go to the "Link Tracking" tab.
-
Add a subdomain (eg; email, track, etc) for your root domain.
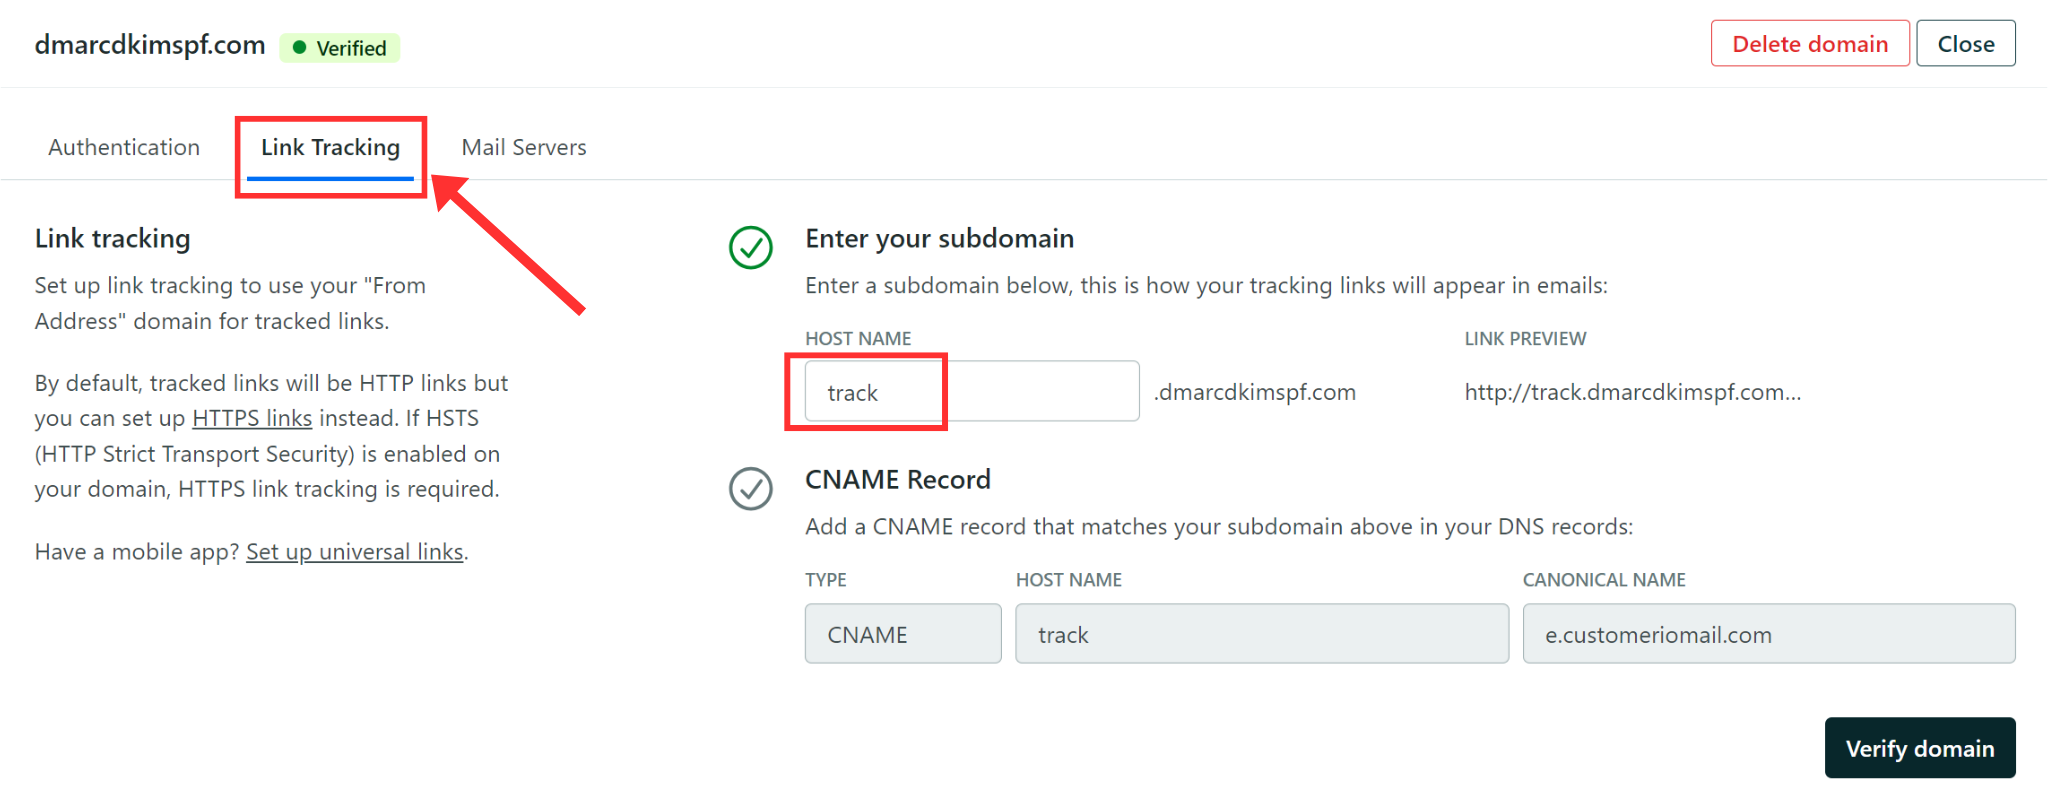
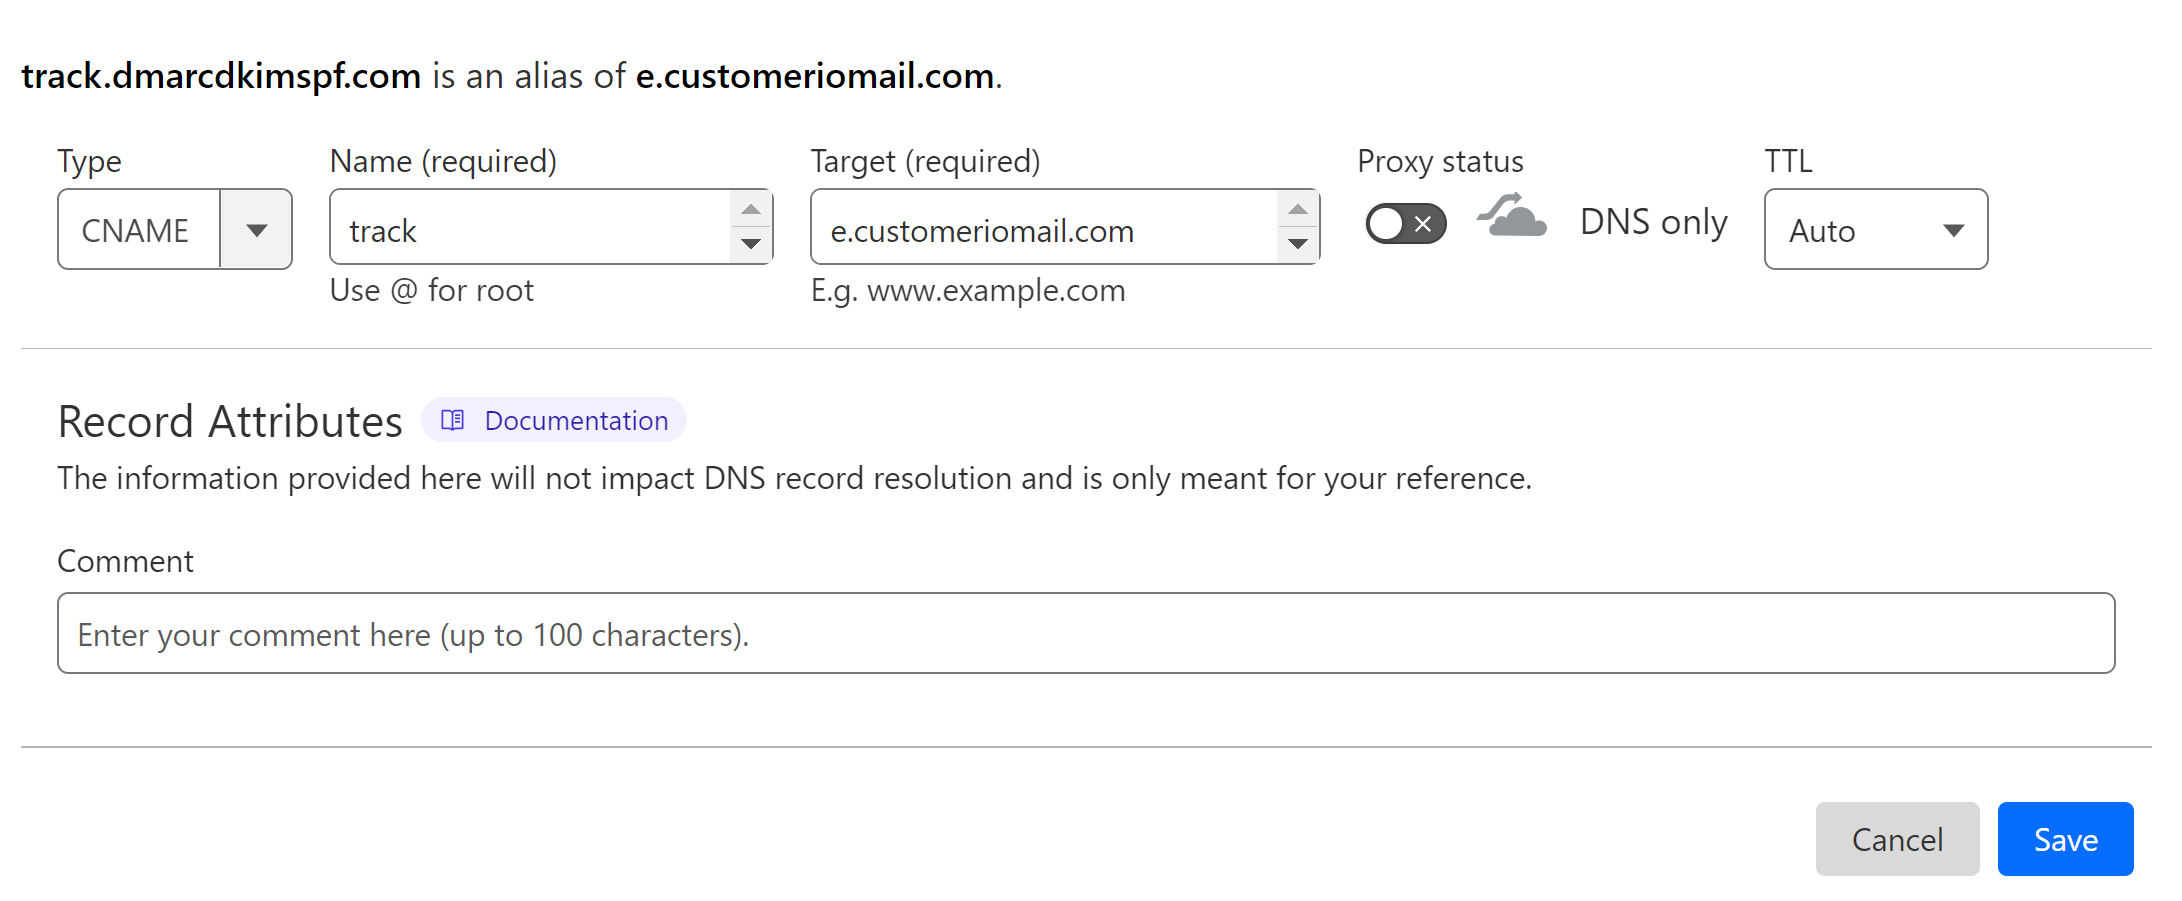
In the DNS provider, select type CNAME.
Add the Host name in the Name field.
Add the Canonical name in the Target field.
-
Turn off the proxy and click Save.
Verify DNS Records:
-
When you have added all records, click the Verify button below the DNS records (in both tabs, Authentication and Link Tracking).

If the records are verified, the grey tick marks should turn green.
If records are not verified, wait up to 24 hours for the servers to update DNS changes.
For assistance and support, hire a DmarcDkim.com expert.
Check domain and follow the instructions to nail down your DMARC configuration.
No expert knowledge needed!


