SolarWinds SPF, DKIM, and DMARC Records Configuration
Check your domain for DMARC, DKIM, SPF and MX records. Get a free report.
- The impact of Business Email Compromise
- A quiet Google update just made SPF more forgiving
- Cyber Insurance and DMARC Enforcement
- Email impersonation scams explained
- TLS-RPT Record
- SMTP Smuggling
- 🇩🇪 Welche Hosting Anbieter unterstützen DMARC
- Manual DMARC Monitoring vs Automated Monitoring
- Reverse Engineering Phishing
- DMARC Enforcement in 2026
- DMARC for non sending domains
How to Setup SPF, DKIM, and DMARC Records for SolarWinds?
DMARC, DKIM, and SPF are essential email security standards used by inbox providers like Google and Yahoo. These DNS records verify that your emails come from a legitimate source and are safe to open. Authenticating your domain ensures that your emails are not marked as spam. Solar Winds provides SPF, DKIM, and DMARC records for sender domain authentication. This article will guide you step-by-step through the domain authentication process. So, keep reading!
Setup SolarWinds SPF Record:
-
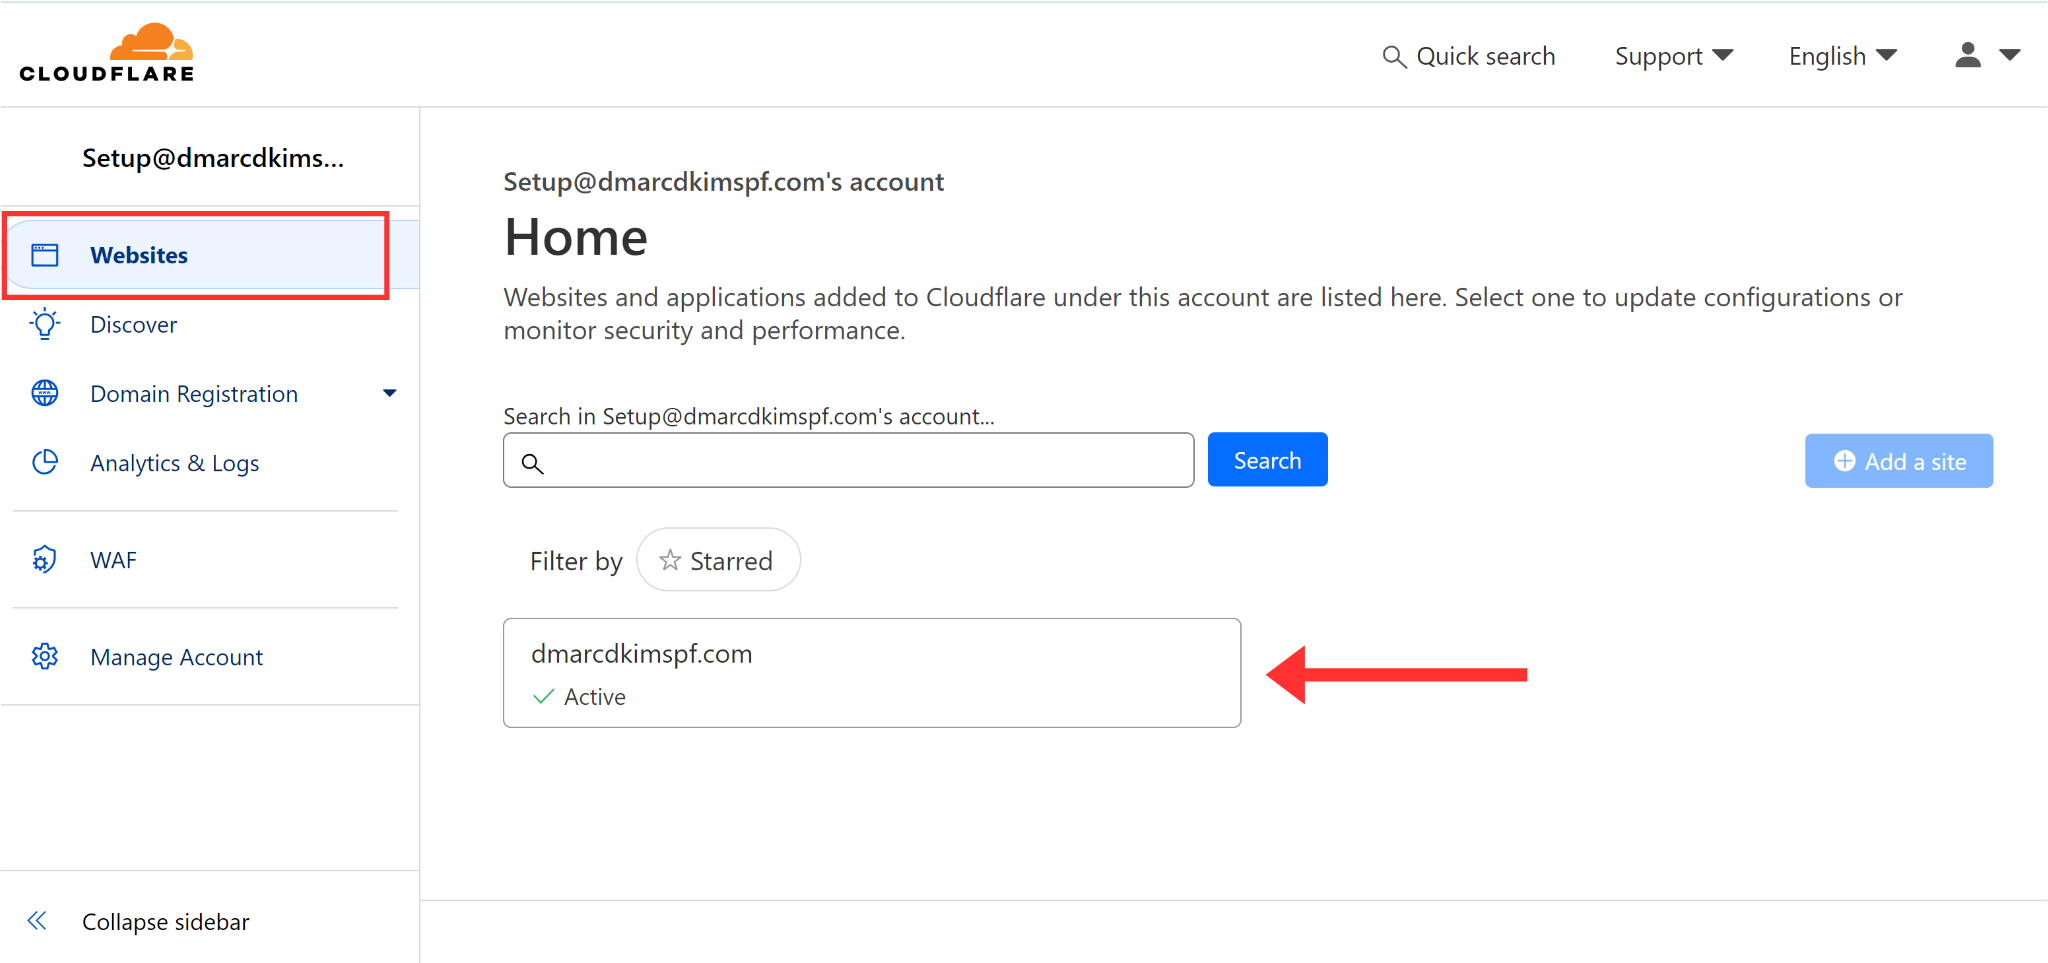
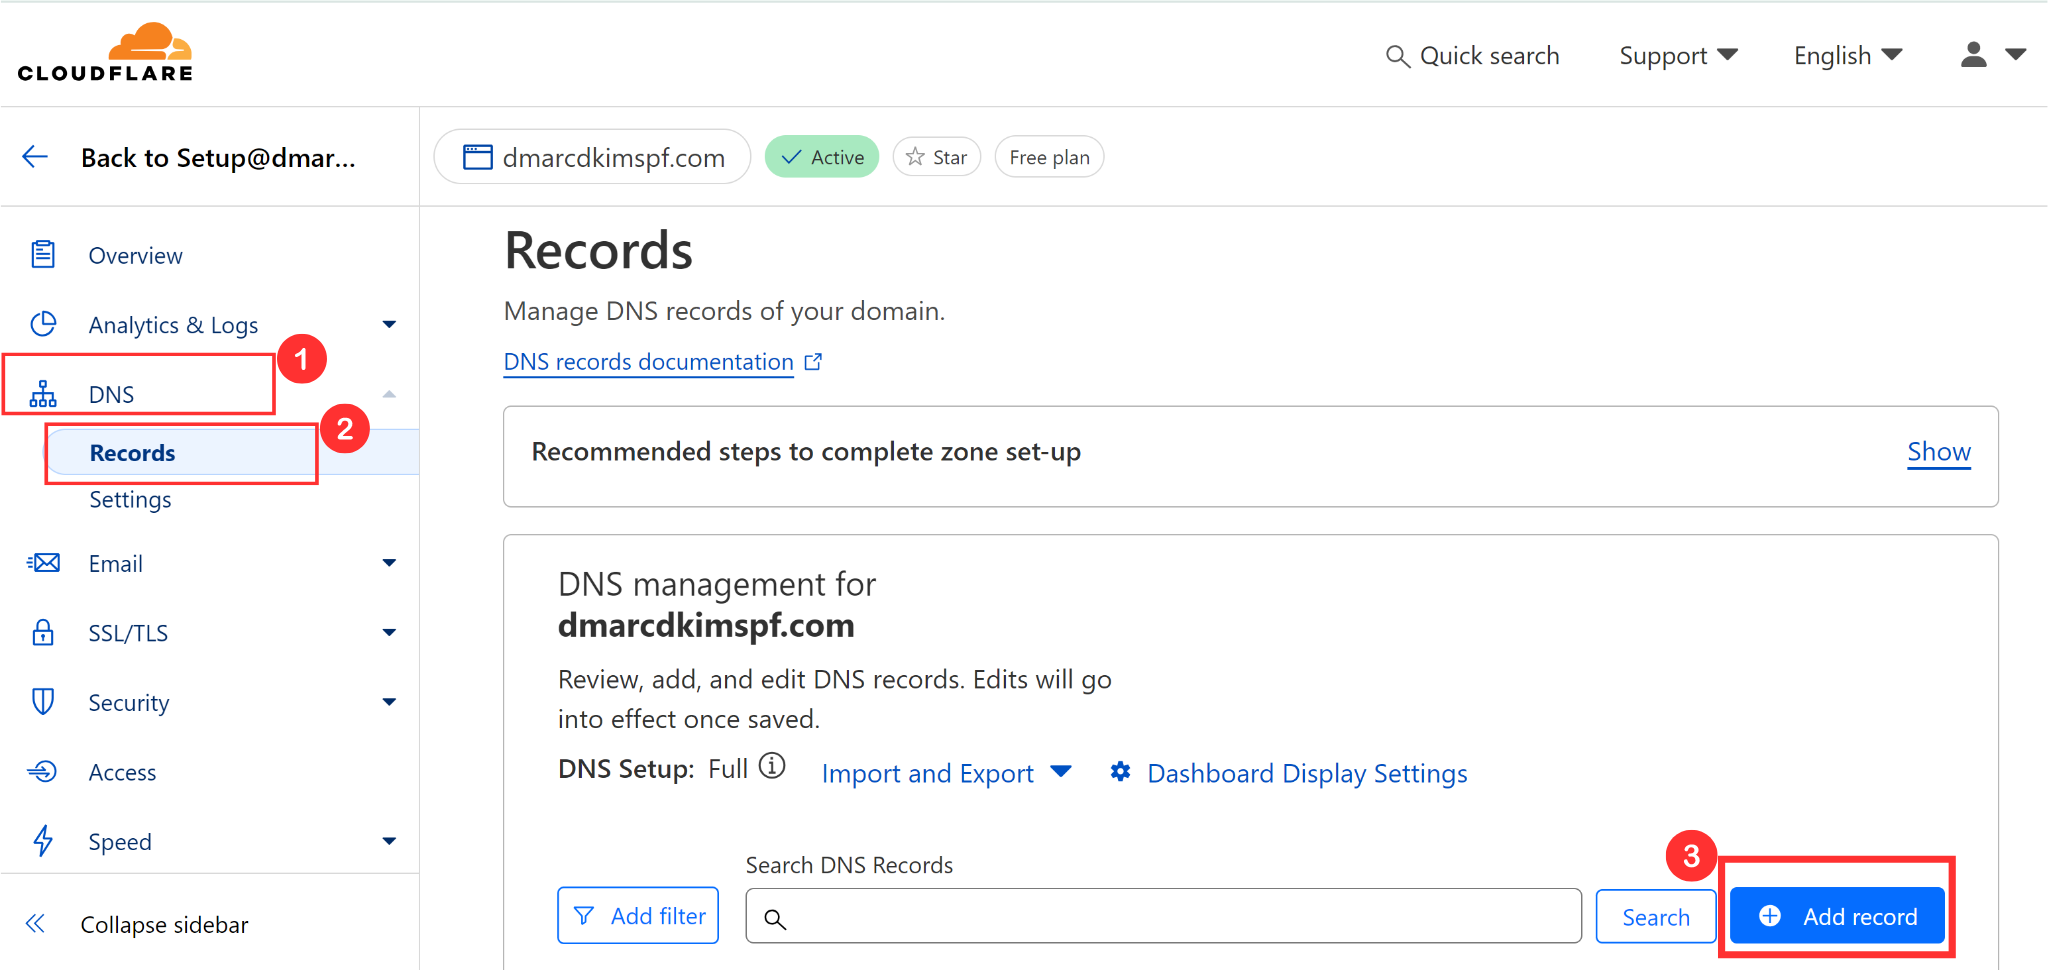
Open your Website and click DNS in the left navigation menu.
-
In the Records tab, click Add Record.
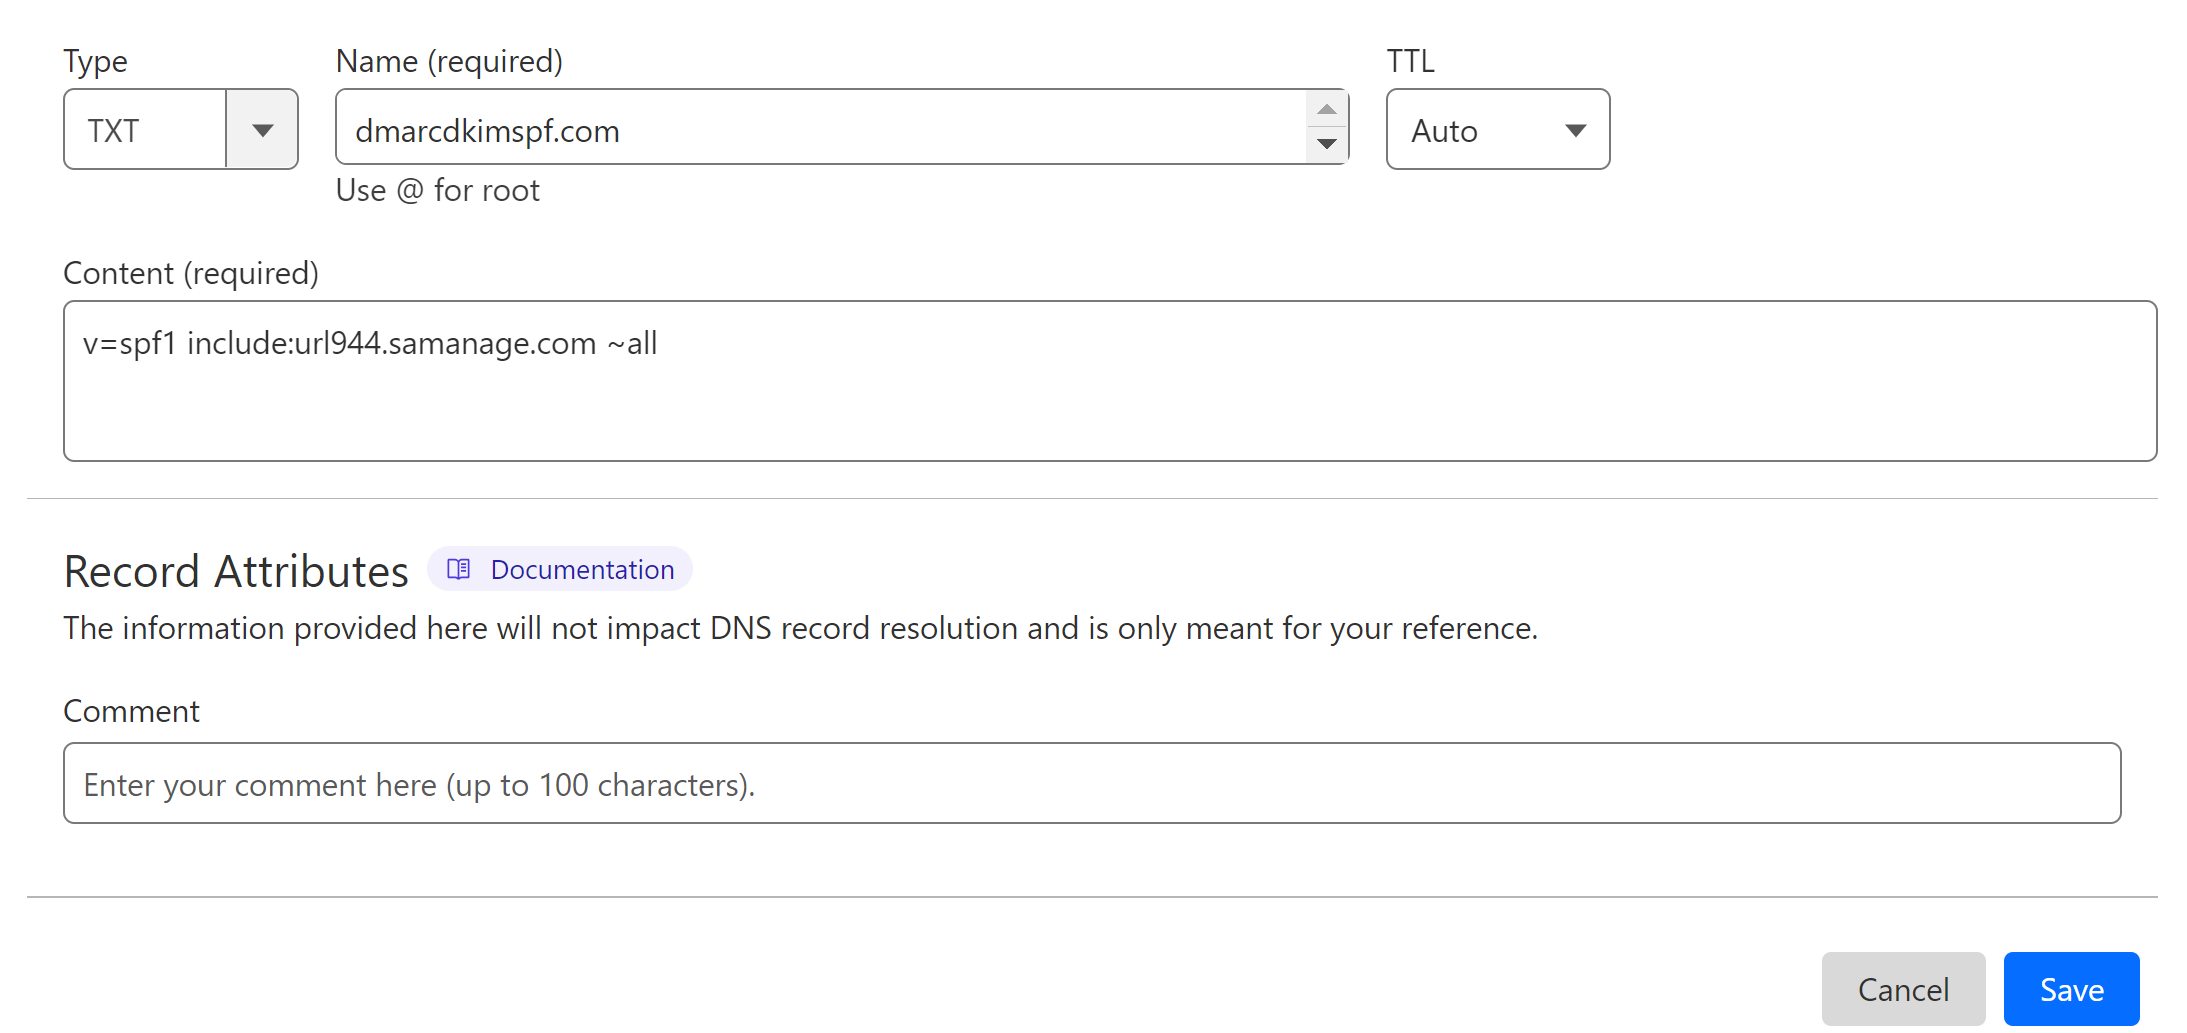
Select type TXT.
In the record Name field, write your domain name.
In the Content field, add the SPF value: v=spf1 include:url944.samanage.com ~all.
-
Click Save to add the record to the DNS dashboard.
Merge Multiple SPF Records:
Due to the limitations of the DNS dashboard, we can only add one SPF record for a domain. If you have an existing SPF record in your DSN dashboard, merge it with SolarWinds SPF to get a combined value.
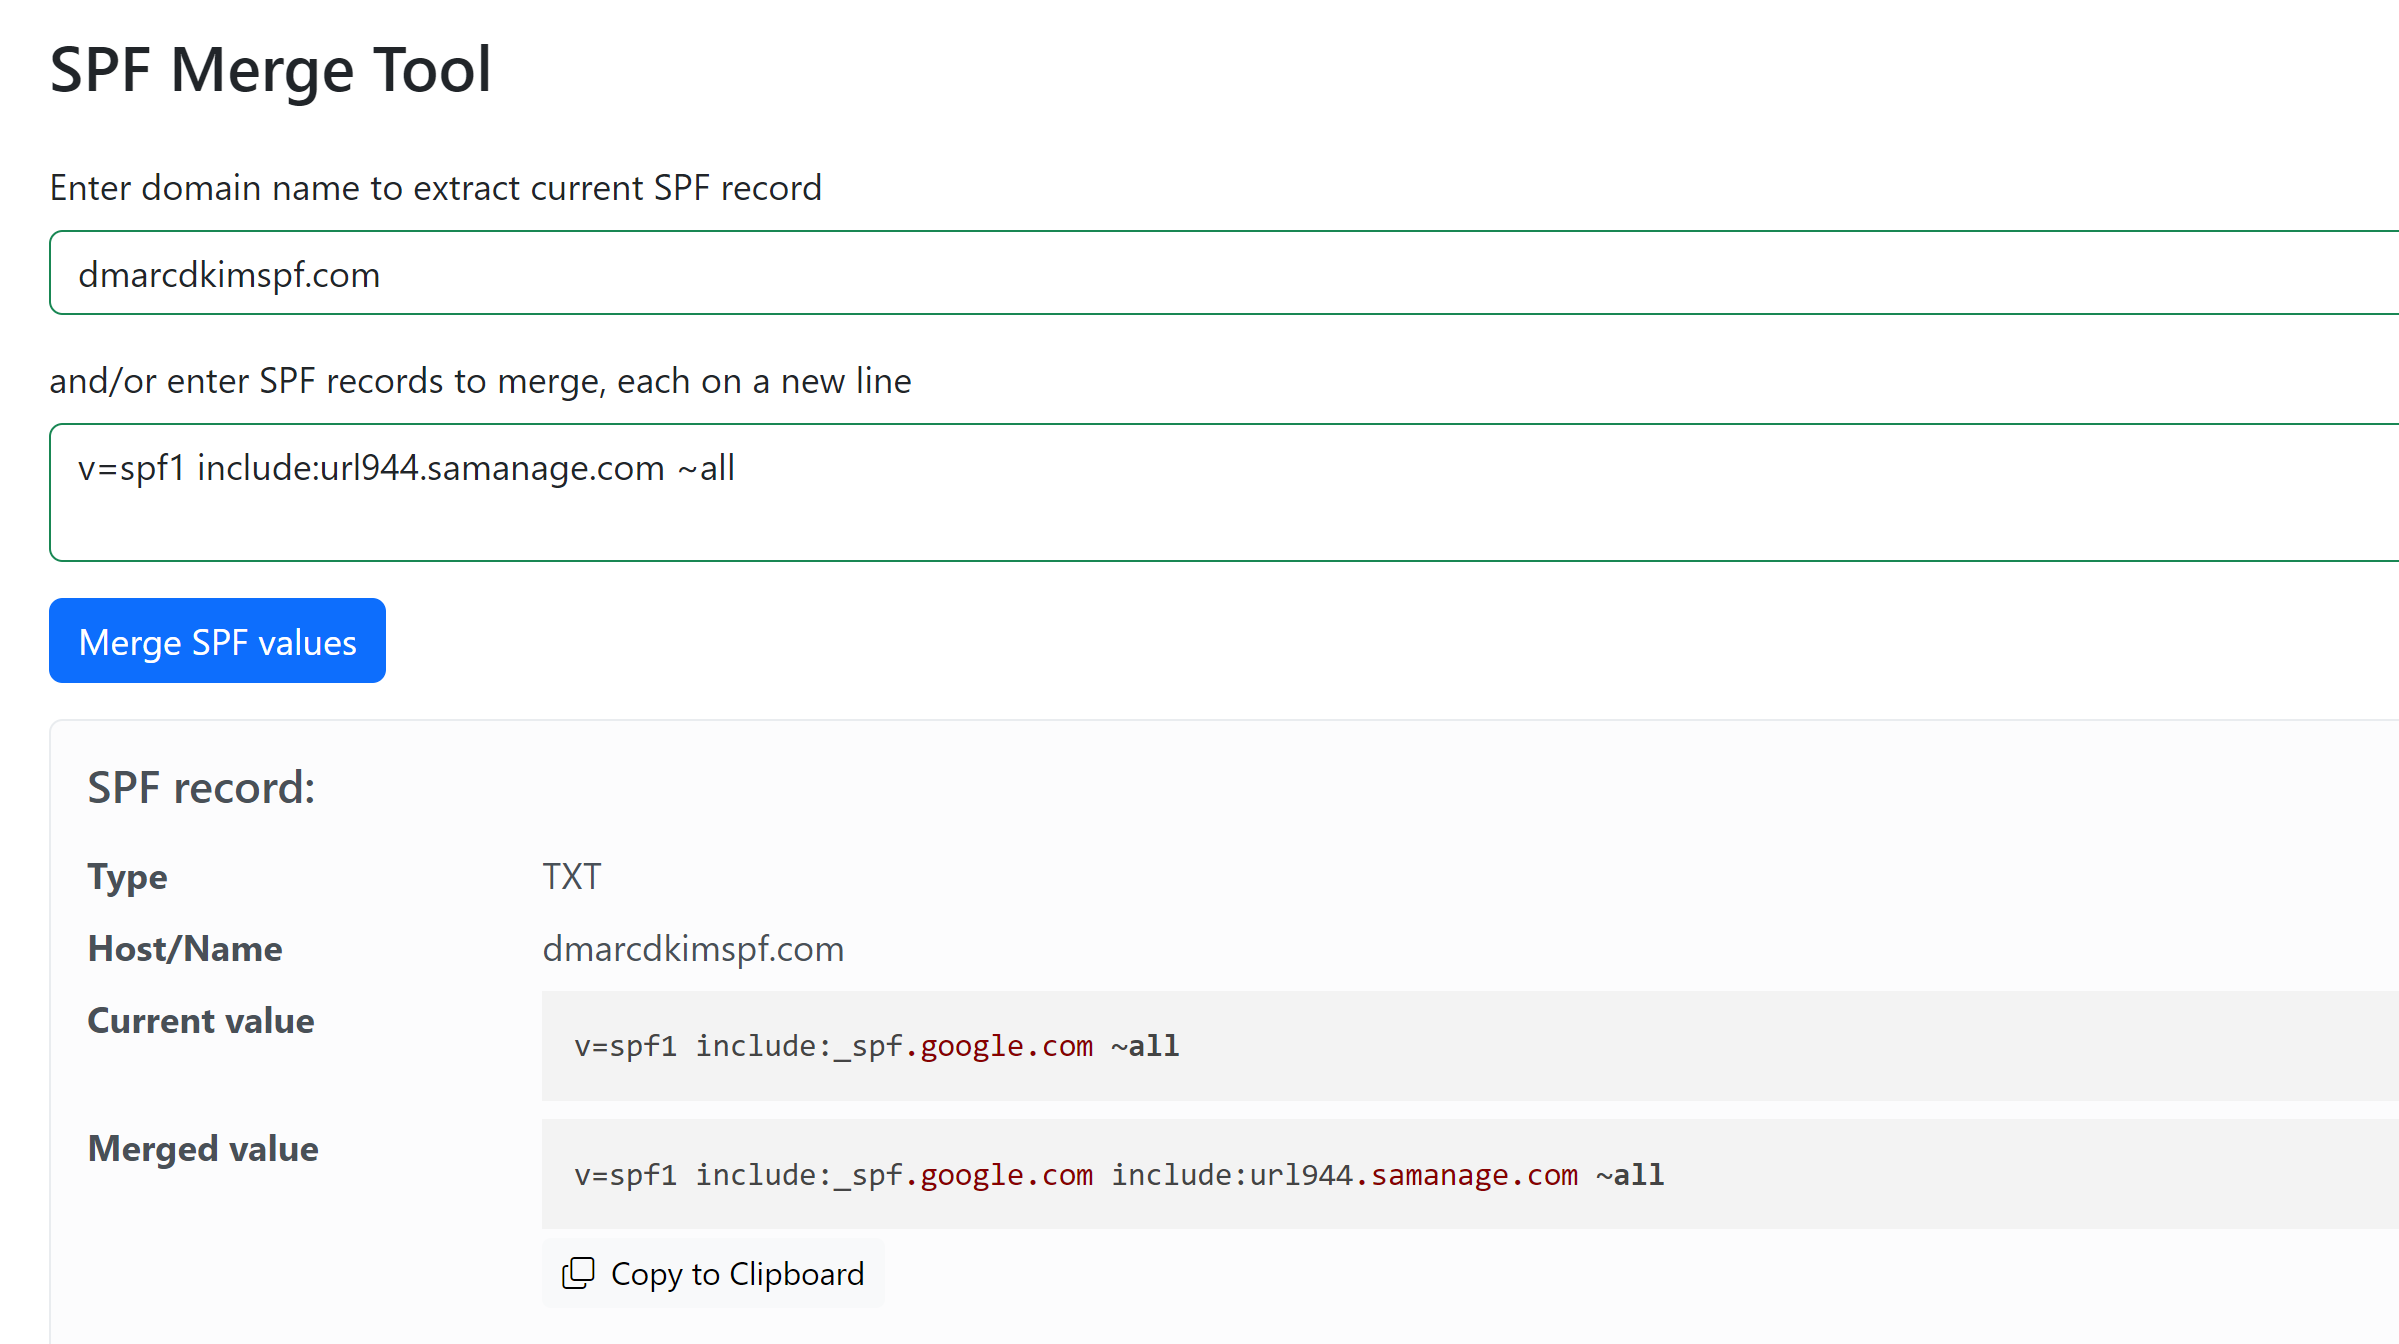
Go to SPF Merge Tool.
Add the SolarWinds SPF value and click Merge SPF Values. The tool detects your existing DNS records and merges them with new value.
-
Copy the Merged value and replace your previously added SPF value with it.
Hit the Save button to save your changes.
Setup SolarWinds DKIM Records:
Contact SolarWinds support to activate DKIM signing for your emails to provide you with a DKIM value. Once you set up the DKIM record in your DNS dashboard, SolarWinds will verify it.
Setup SolarWinds DMARC Record:
Go to DmarcDkim.com Domain DMARC Check Tool.
-
Add your domain name and click Check.
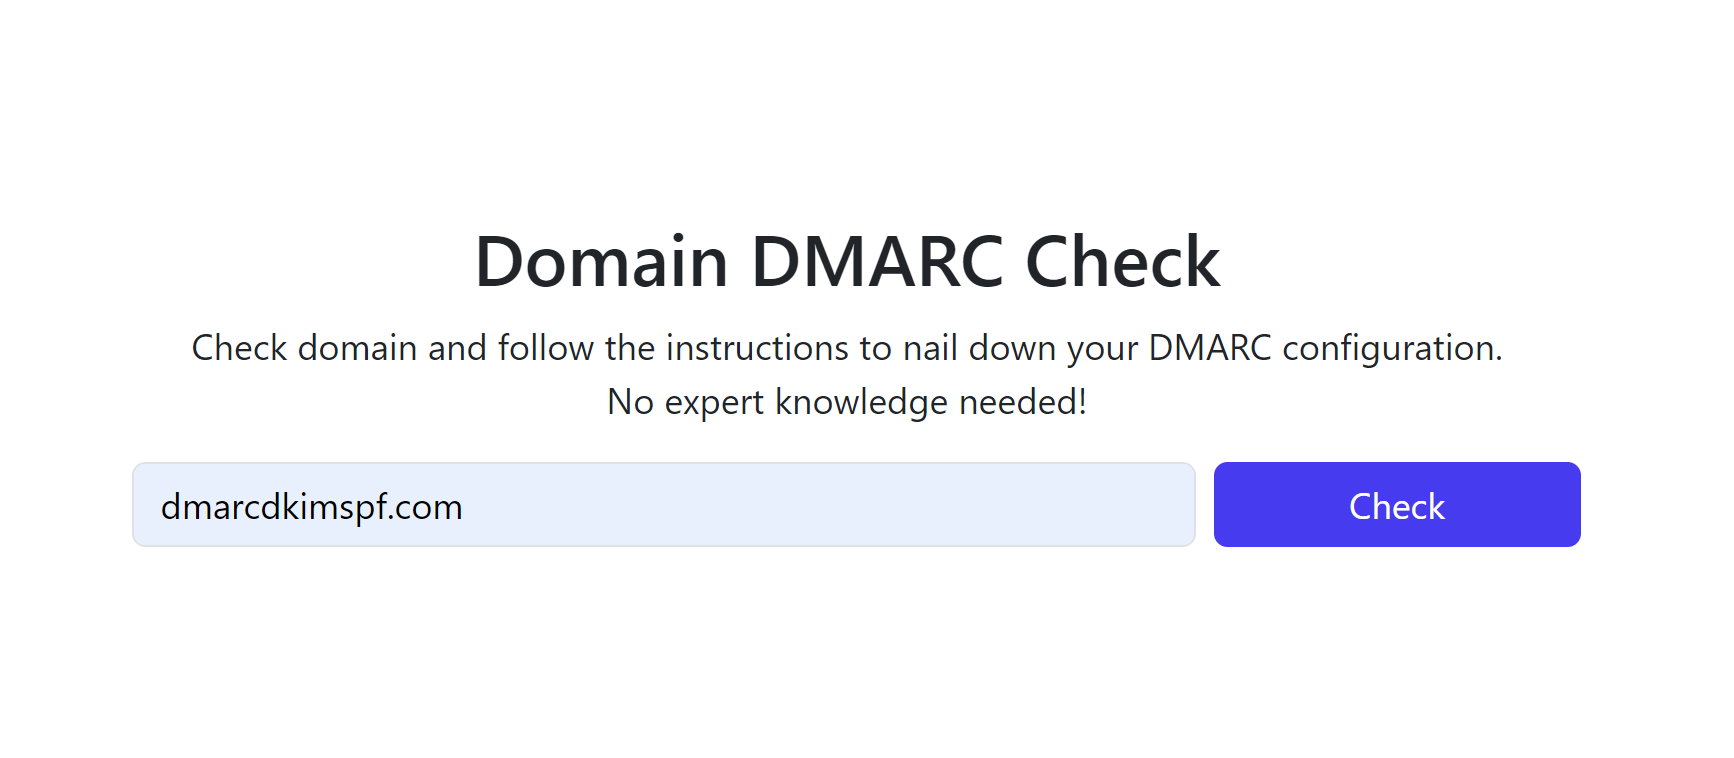
-
The tool gives you a Suggested value, add this value to your DNS provider.
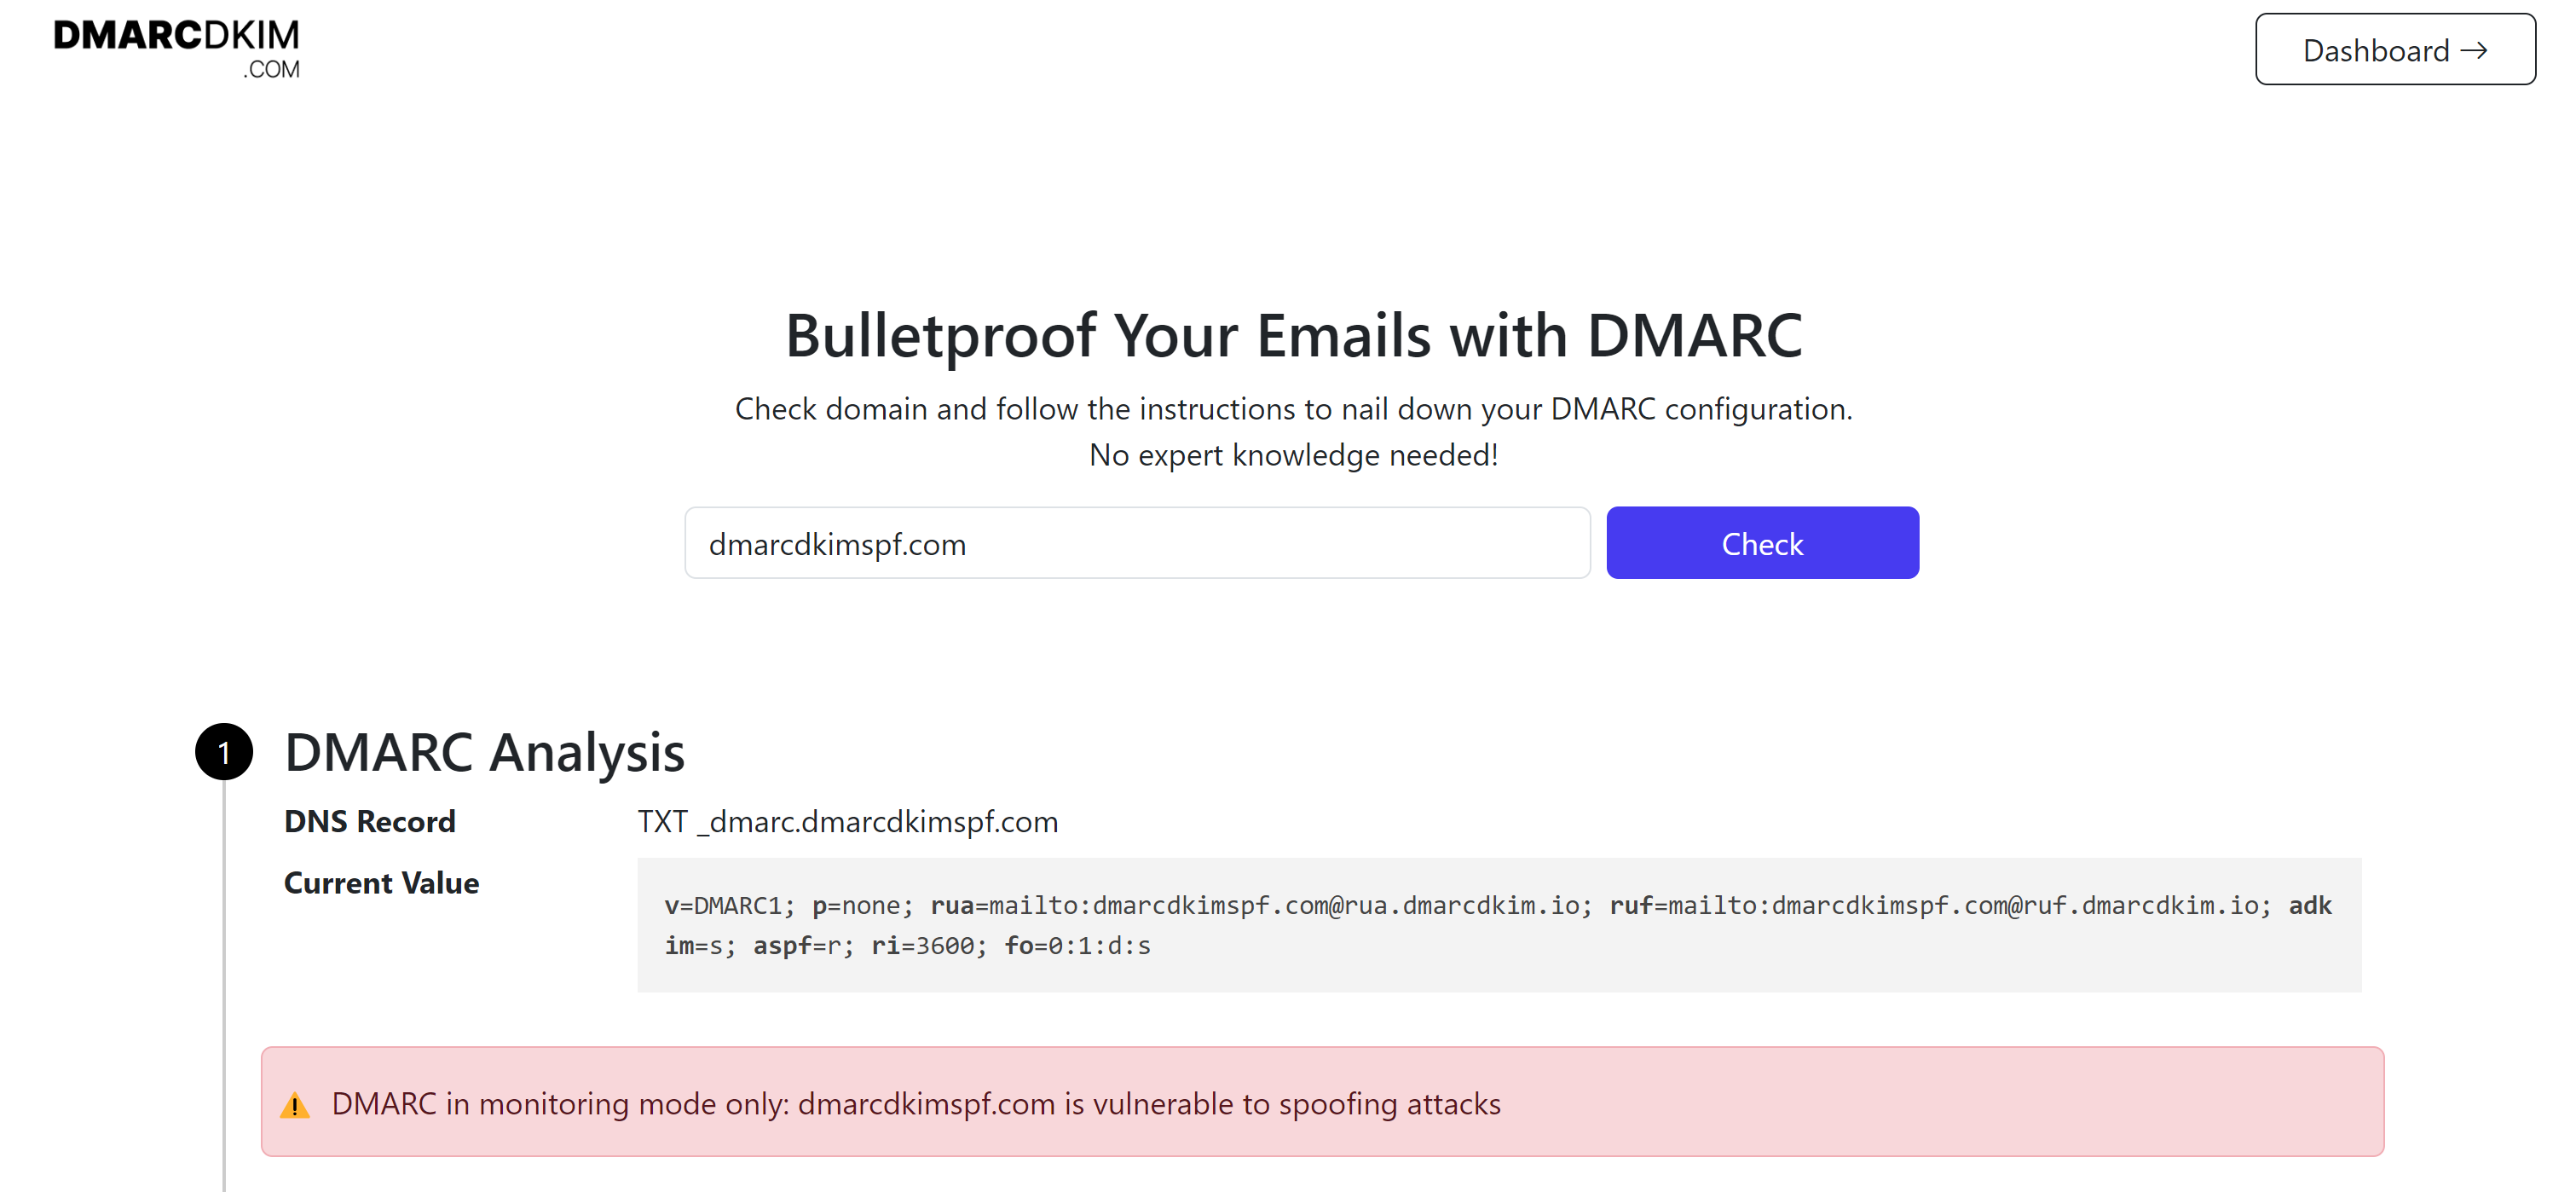
Sign up to get access to the DMARC Reports Dashboard where you can get actionable insight for implementing strict DMARC policy.
For assistance and support, hire a DmarcDkim.com expert.
Check domain and follow the instructions to nail down your DMARC configuration.
No expert knowledge needed!


