MailUp DNS Records Configuration - Setup SPF, DKIM, DMARC for Domain Authentication
Check your domain for DMARC, DKIM, SPF and MX records. Get a free report.
How to Setup MailUp DMARC, DKIM and SPF Records?
The leading cause of your emails ending up in the spam folders is the lack of sender authentication. Verifying the email domain requires you to generate DNS records from a trustworthy email delivery service like MailUp. Then you can add these records to your domain provider to authenticate the email domain. Authenticating sender domains may sound like a technical task but not when DmarcDkim.com is here to guide you. Follow this step-by-step guide to configure and setup MailUp DNS records.
Setup MailUp SPF Record:
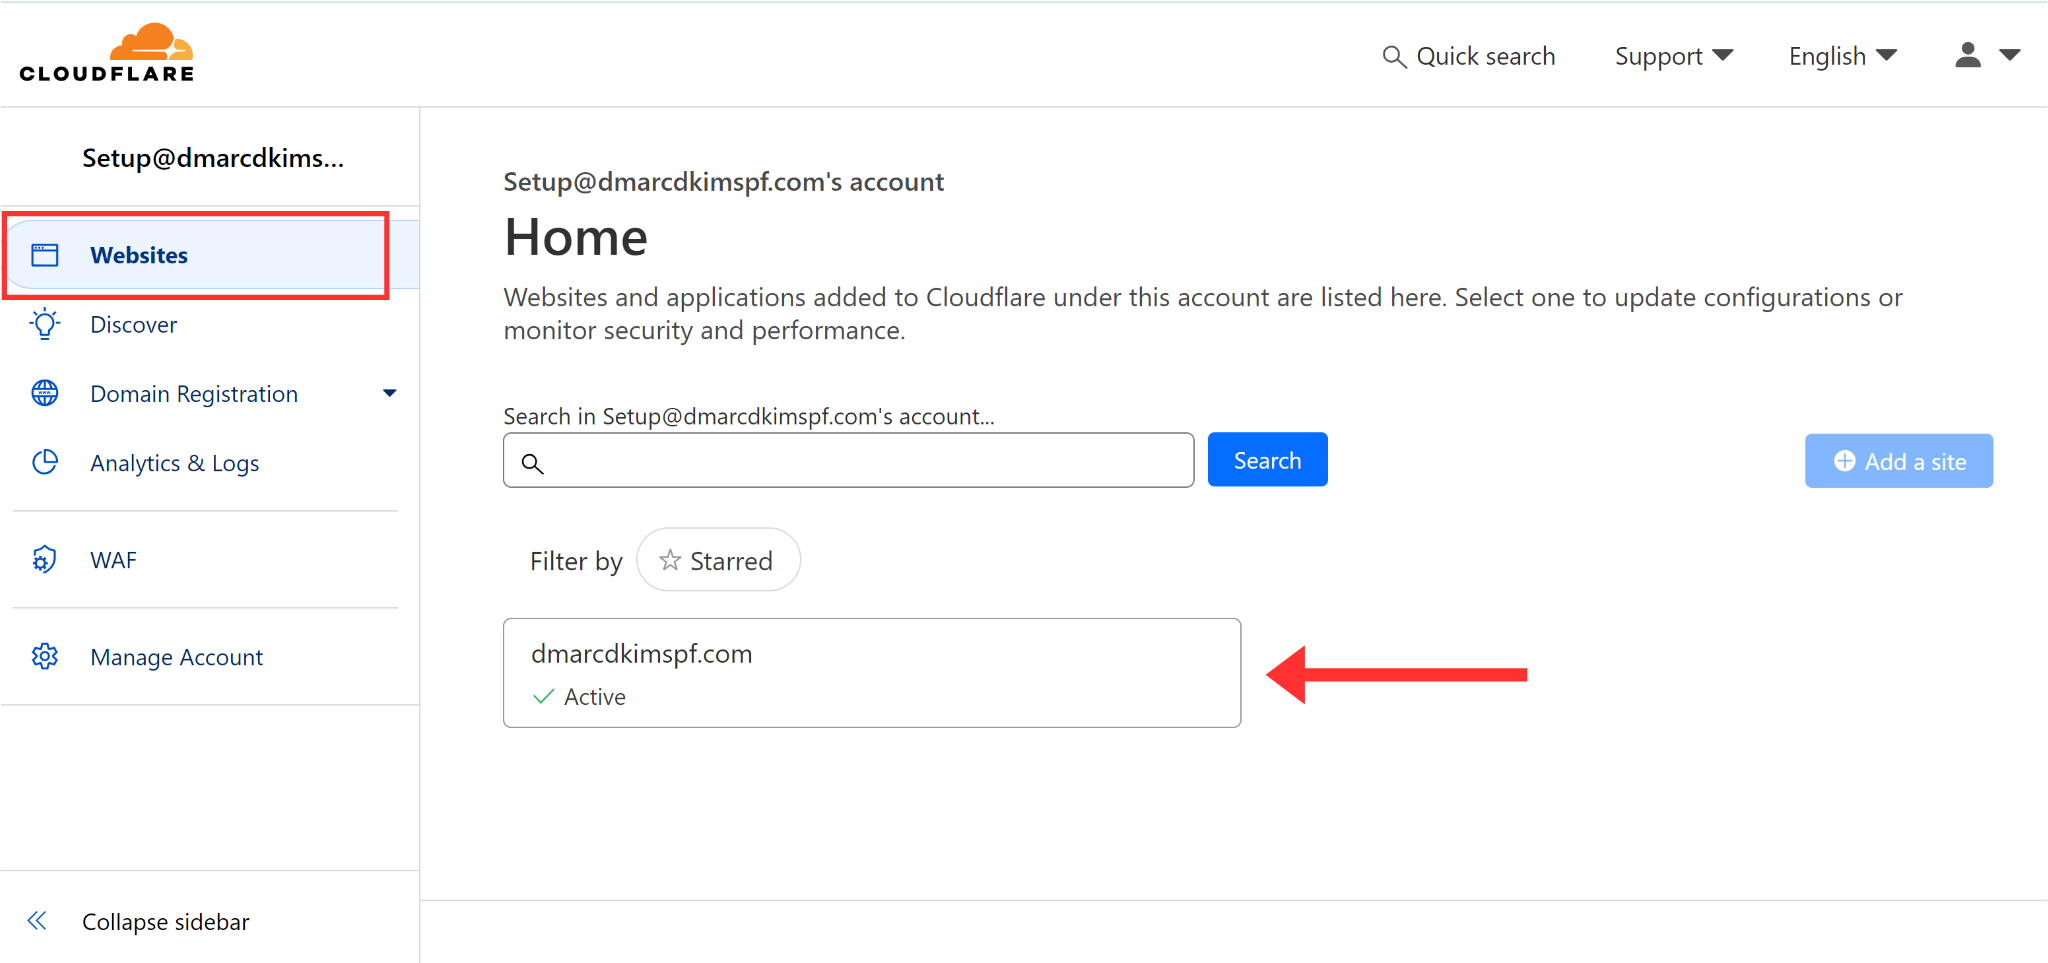
Login to your DNS provider. We are using Cloudflare for this guide.
-
Go to your Website.
-
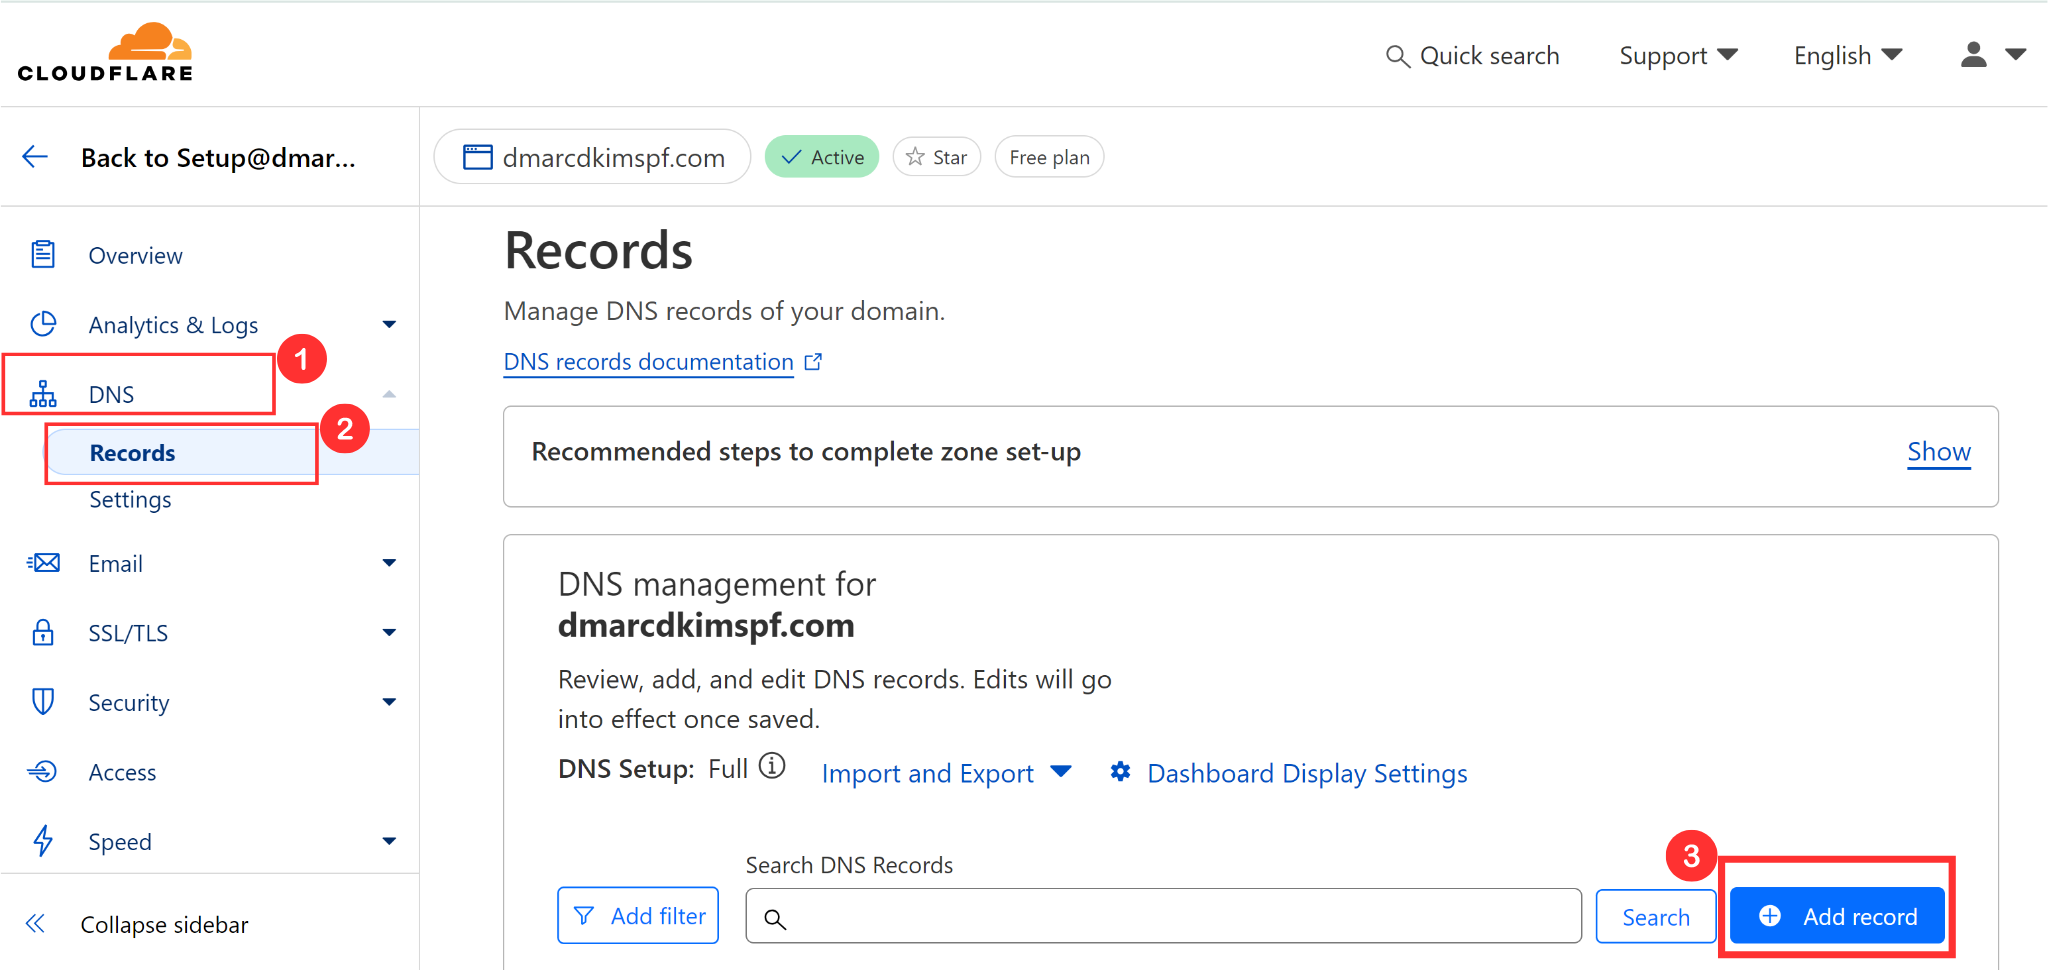
Click DSN, go to Records, and select Add Record.
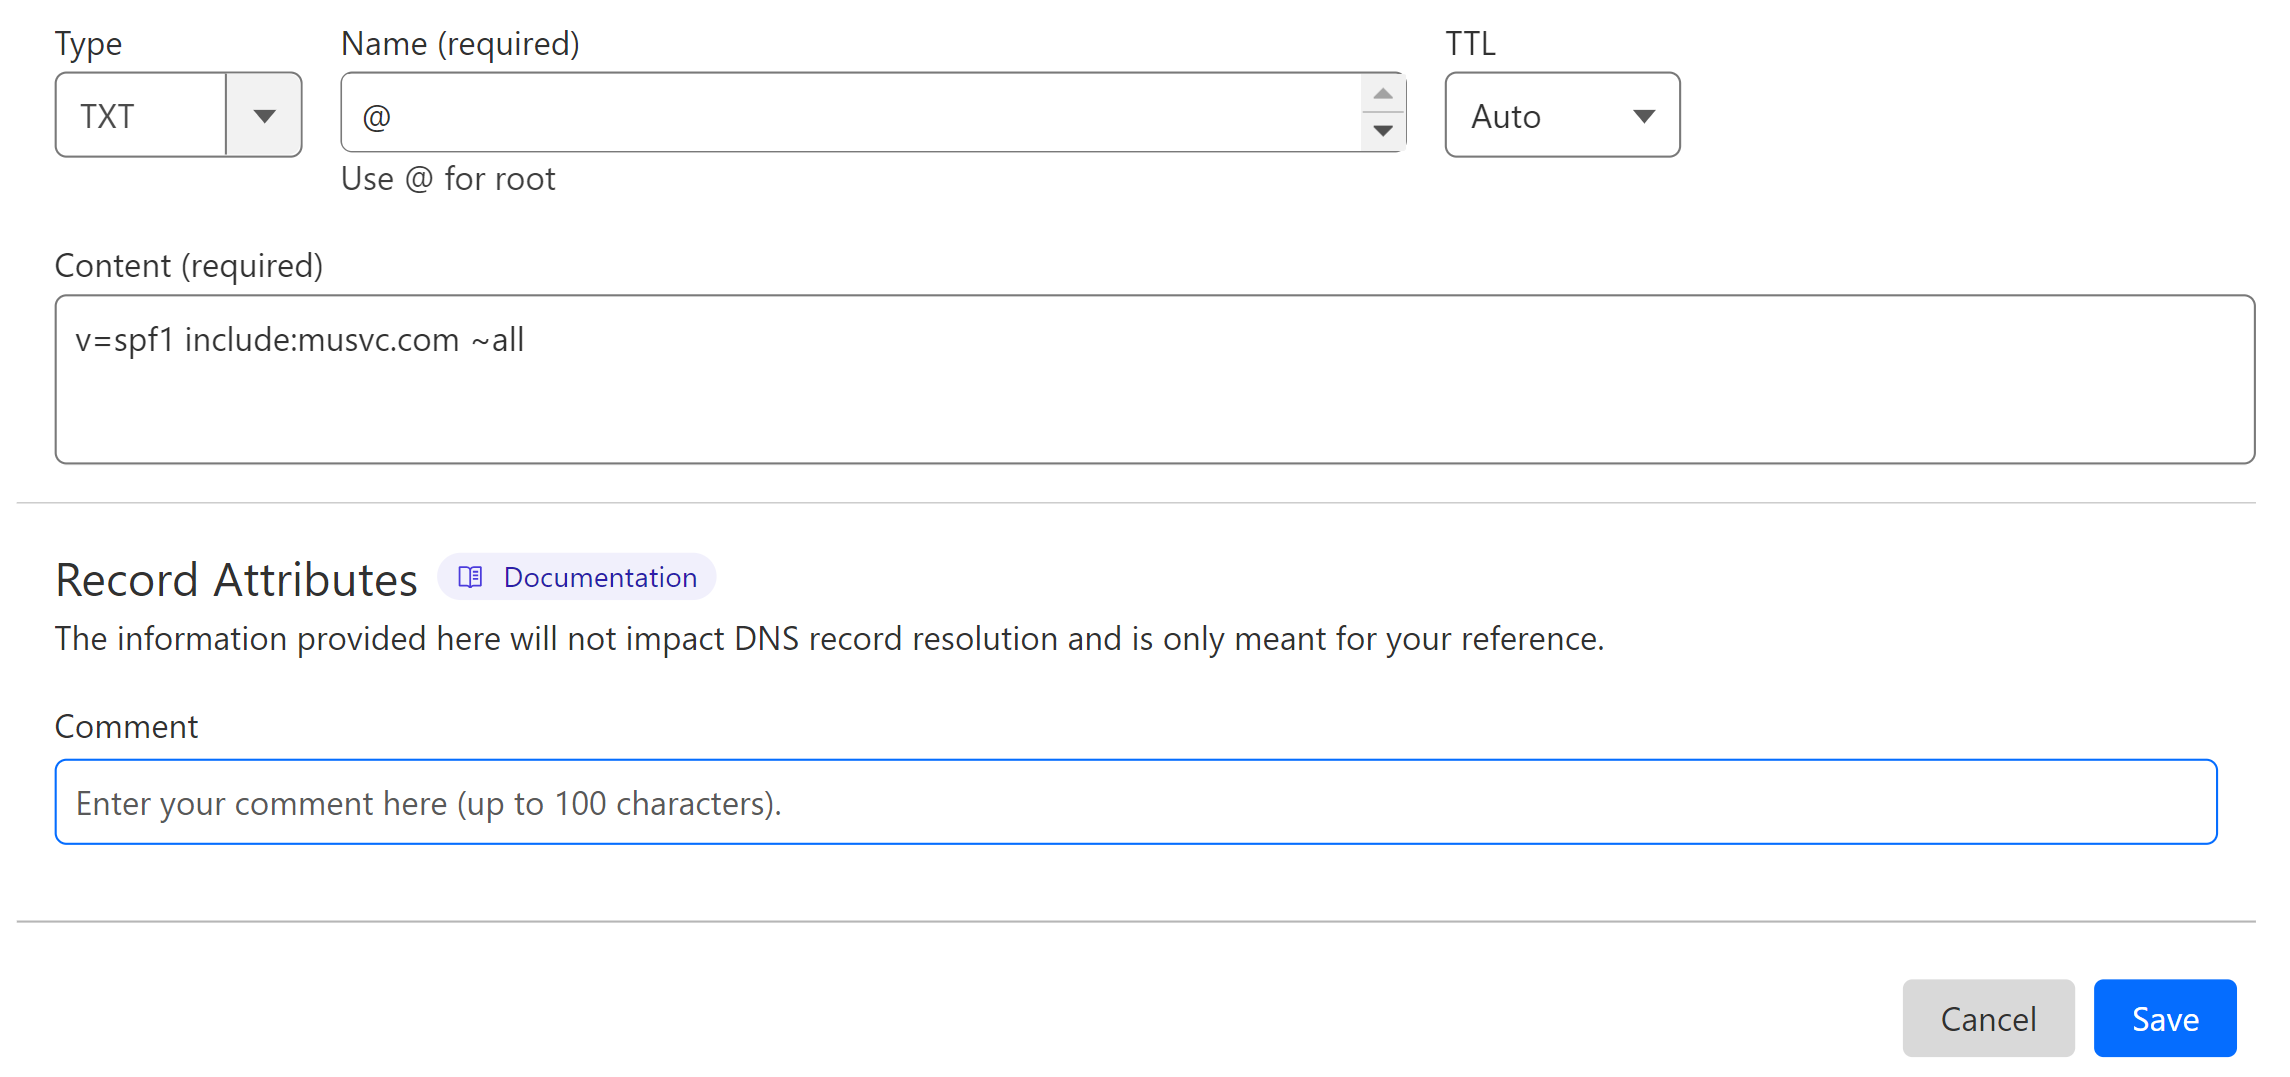
Select record type TXT.
In the Name field, add your domain name or simply write "@."
In the Content field, add the SPF value: v=spf1 include:musvc.com ~all.
-
Finally, click Save to add the record.
Merge MailUp SPF Record:
DNS providers allow you to add one SPF record to a domain. If your email domain has an existing SPF value, merge it with MailUp SPF to avoid conflicts.
Go to the SPF Merge tool.
Add your domain name and MailUp SPF value.
Click Merge SPF Values.
-
The tool detects the existing SPF values and merges them with MailUp SPF to give a combined value.
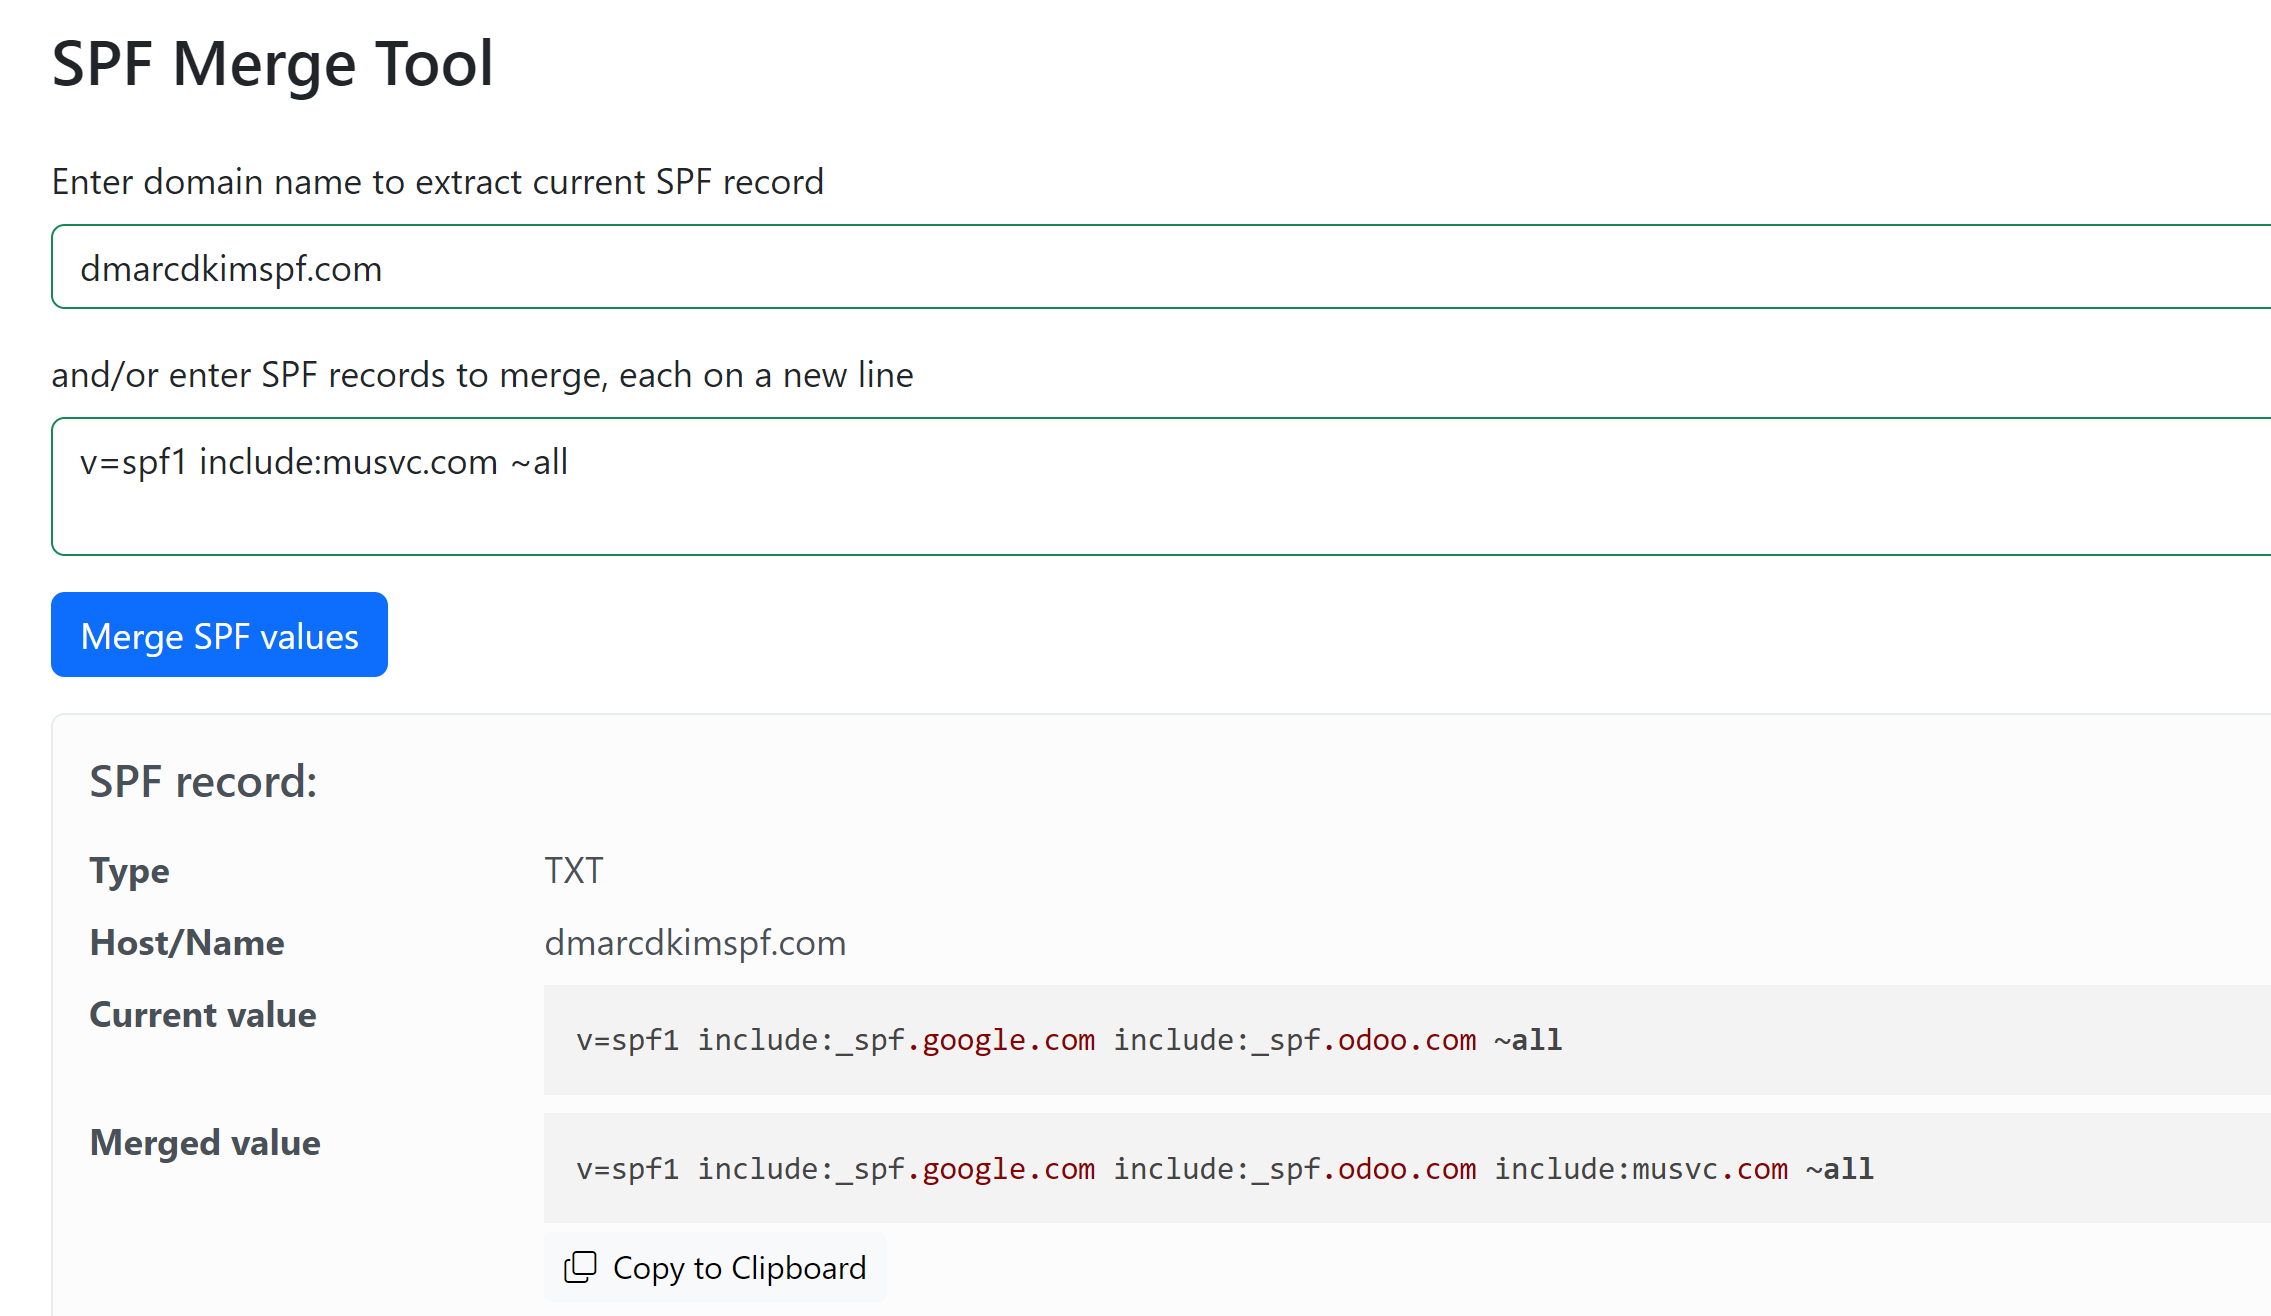
Add the Merged value to your DNS provider by replacing the previous one.
Setup MailUp DKIM Record:
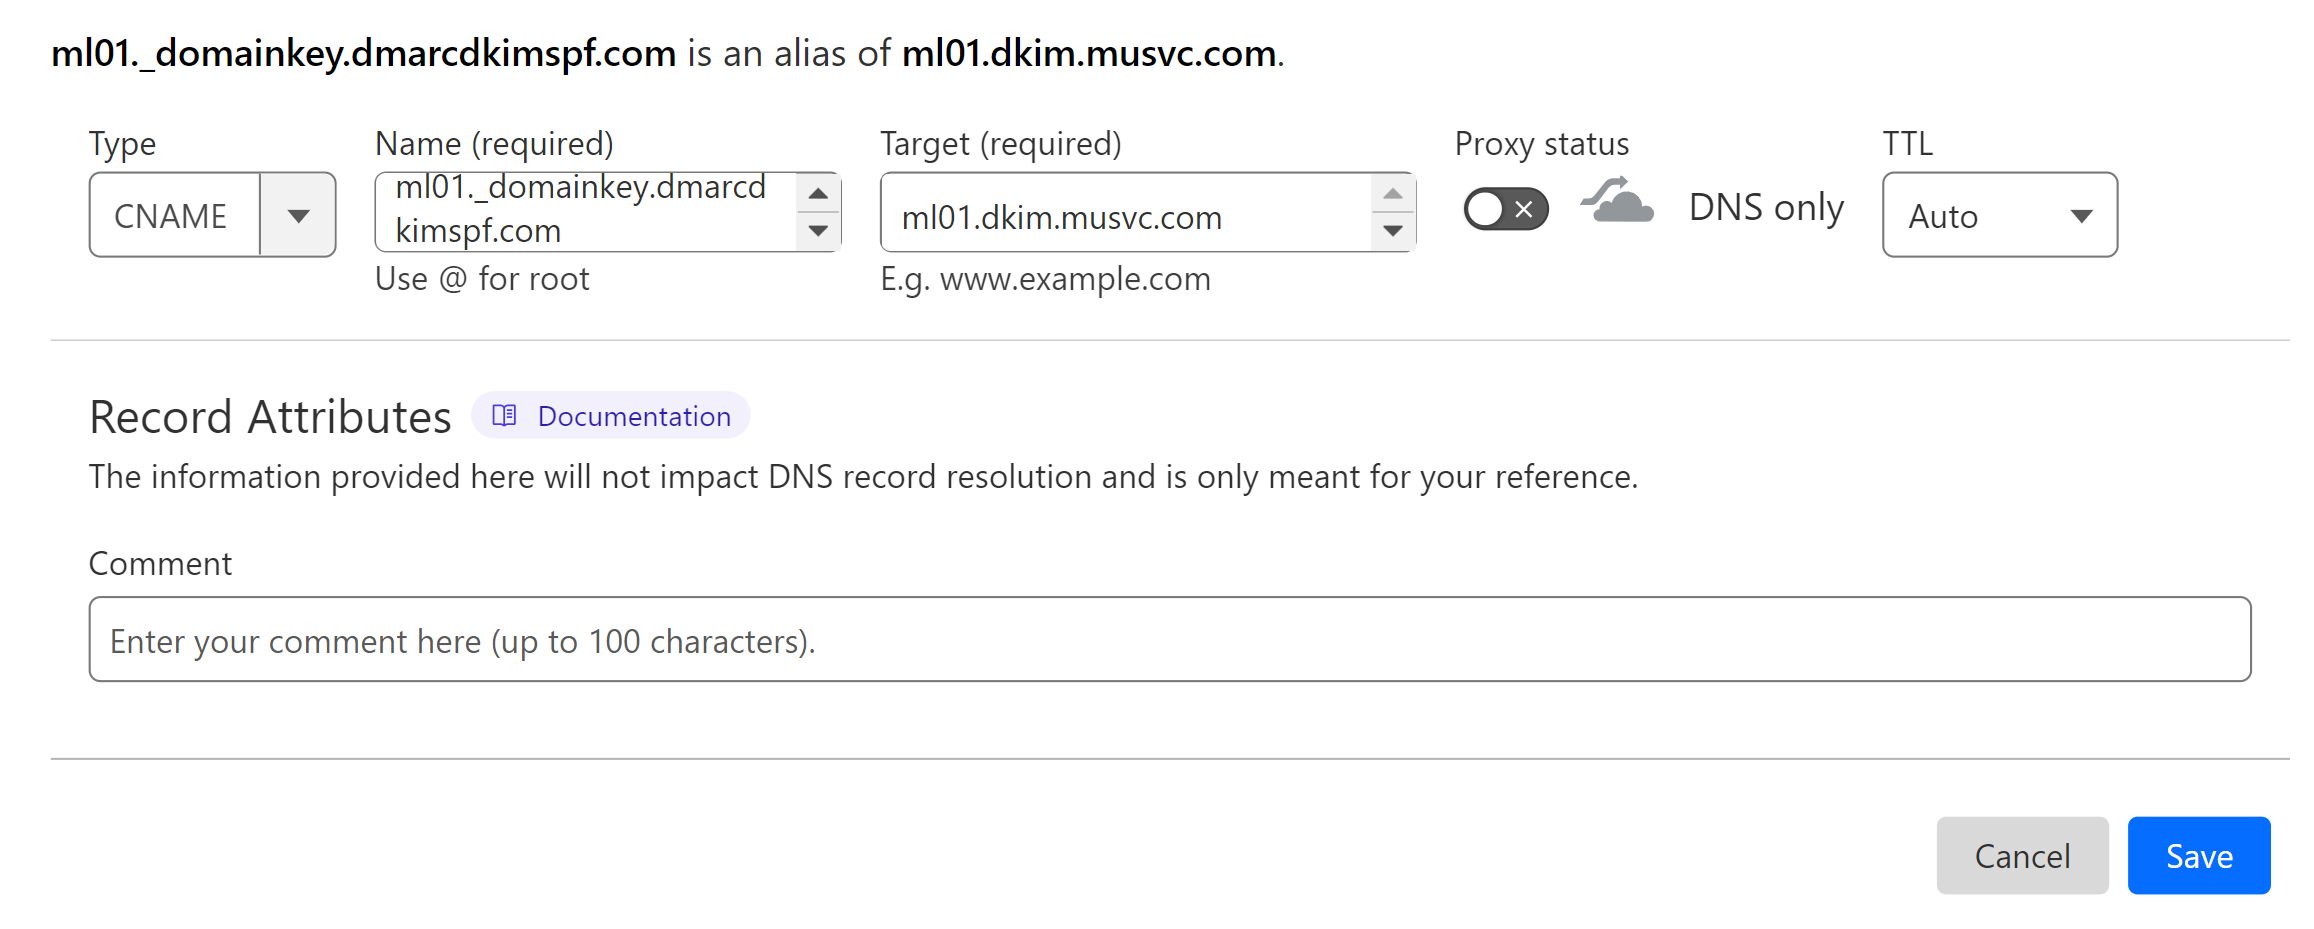
To DKIM sign your emails, add the following two CNAME records to your DNS dashboard.
MailUp DKIM 1:
Type: CNAME NAME: ml01._domainkey.mydomain.com (Replace "mydomain.com" with your domain name). Value: ml01.dkim.musvc.com.
MailUp DKIM 2:
Type: CNAME NAME: ml02._domainkey.mydomain.com (Replace "mydomain.com" with your domain name). Value: ml02.dkim.musvc.com.
NOTE: Turn off the proxy status for each CNAME record. When enabled, it diverts the traffic to the DNS server instead of the email server.
MailUp Envelop Sender Records:
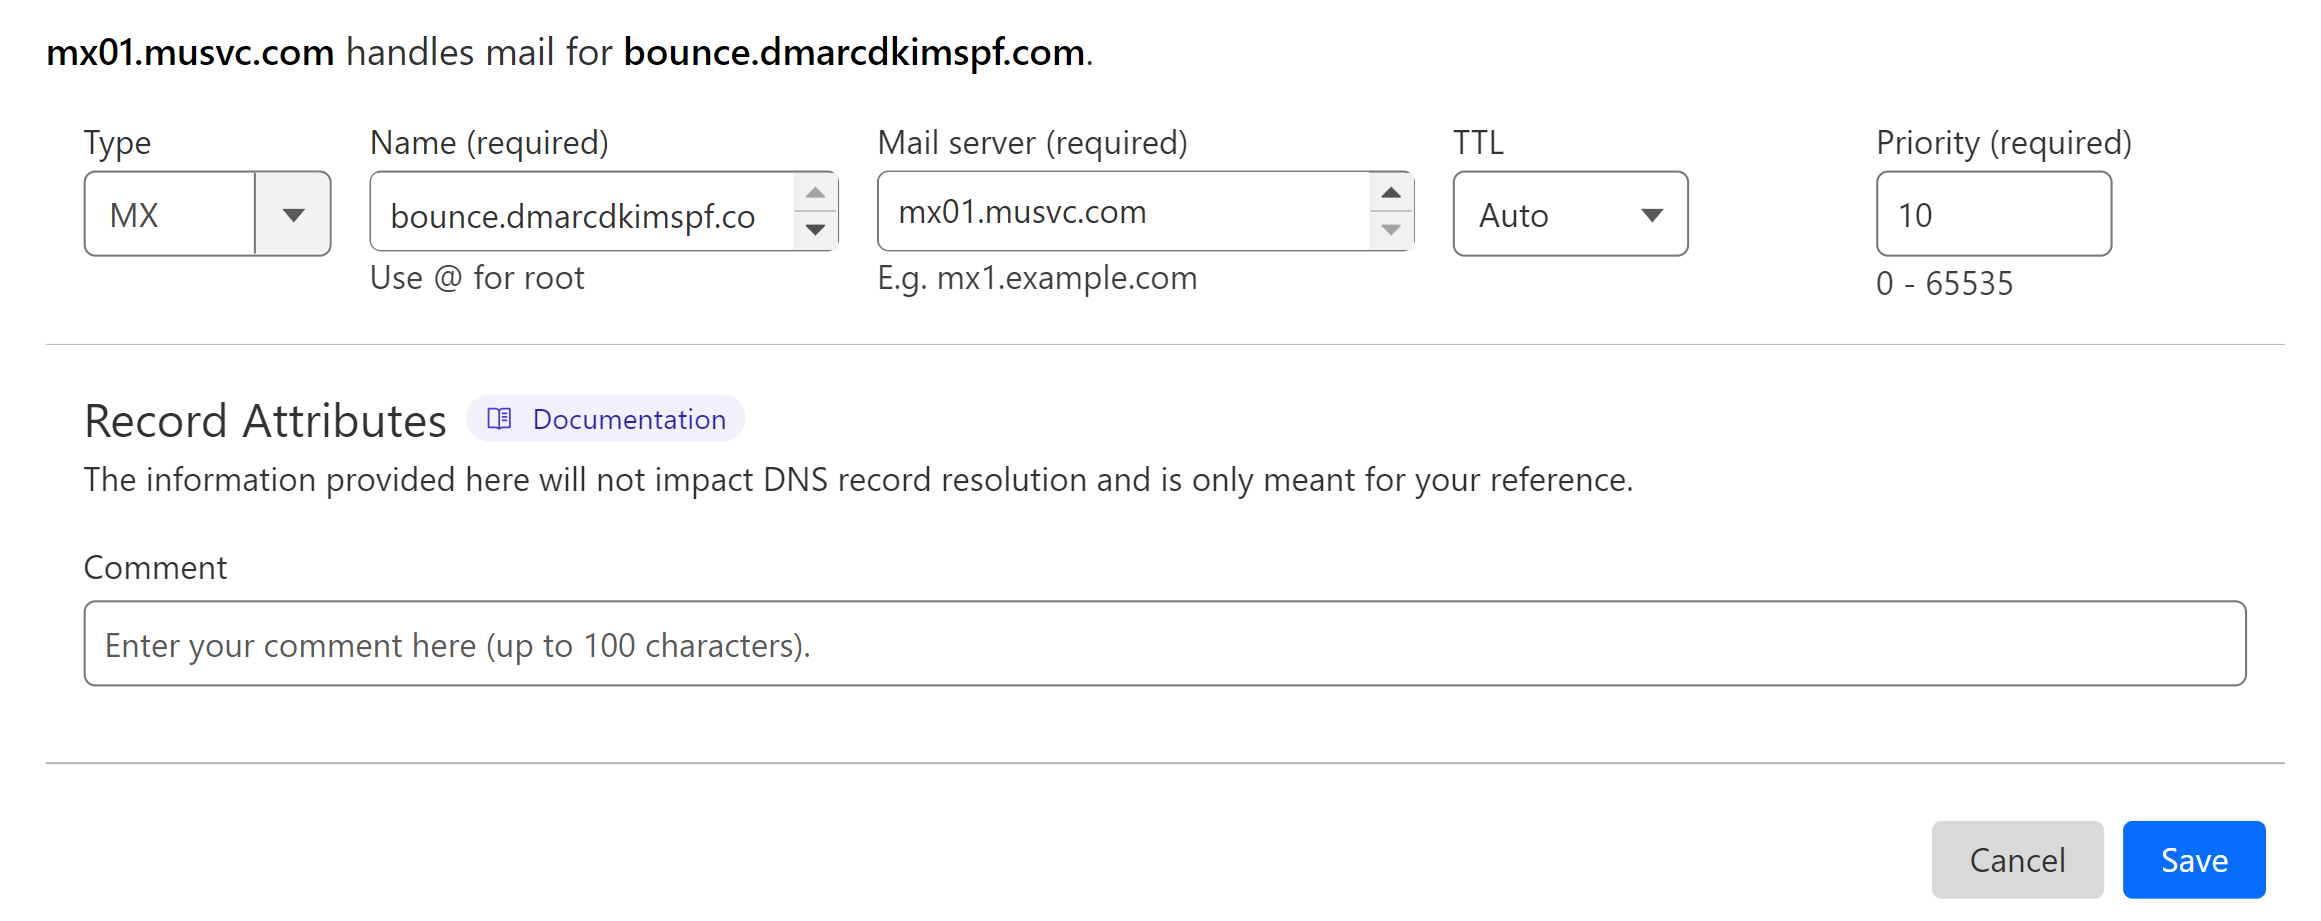
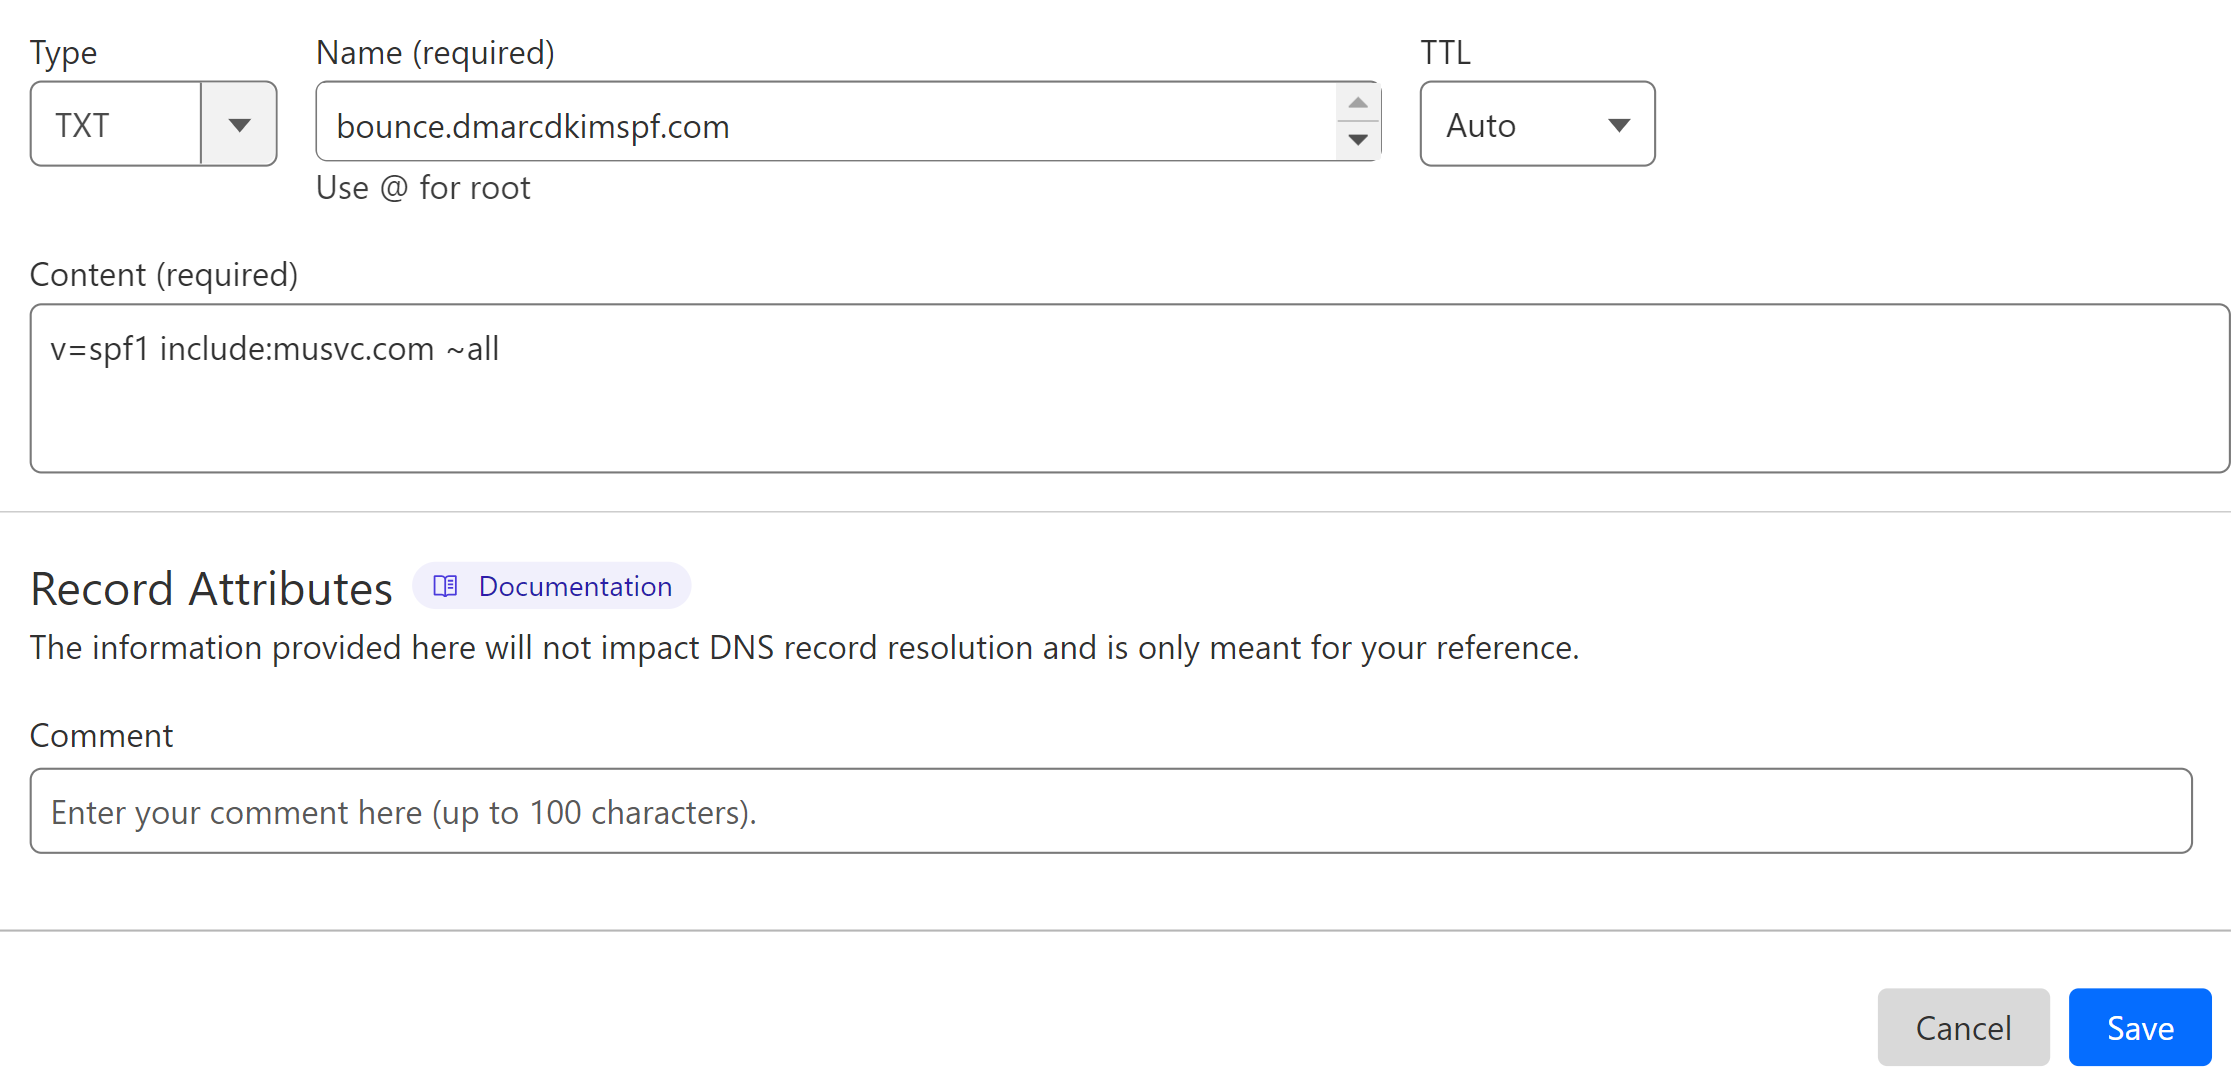
Setup the following records in your DNS provider to allow Mailup to process bounces for your domain.
-
Type: MX Name: bounce.mydomain.com (Replace "mydomain" with your "domain name.") Value: mx01.musvc.com Priority:10
-
Type: TXT Name: bounce.mydomain.com Value: v=spf1 include:musvc.com ~all
Setup MailUp DMARC Record:
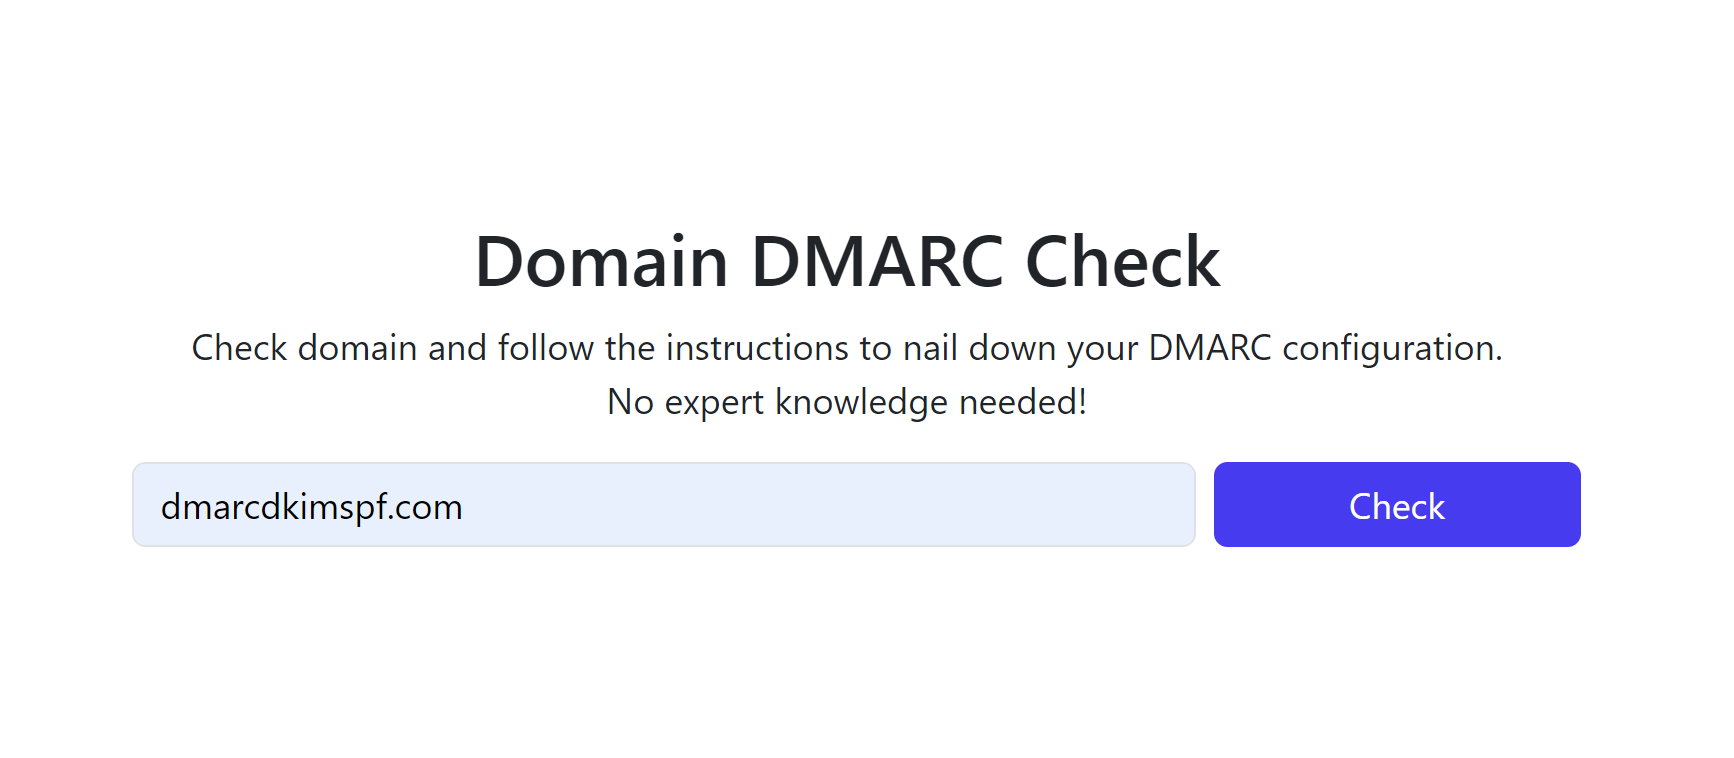
Go to DmarcDkim.com DMARC Check tool.
-
Add your domain name and click Check.
-
Copy the Record Name and Suggested Value and add it to your DNS dashboard.
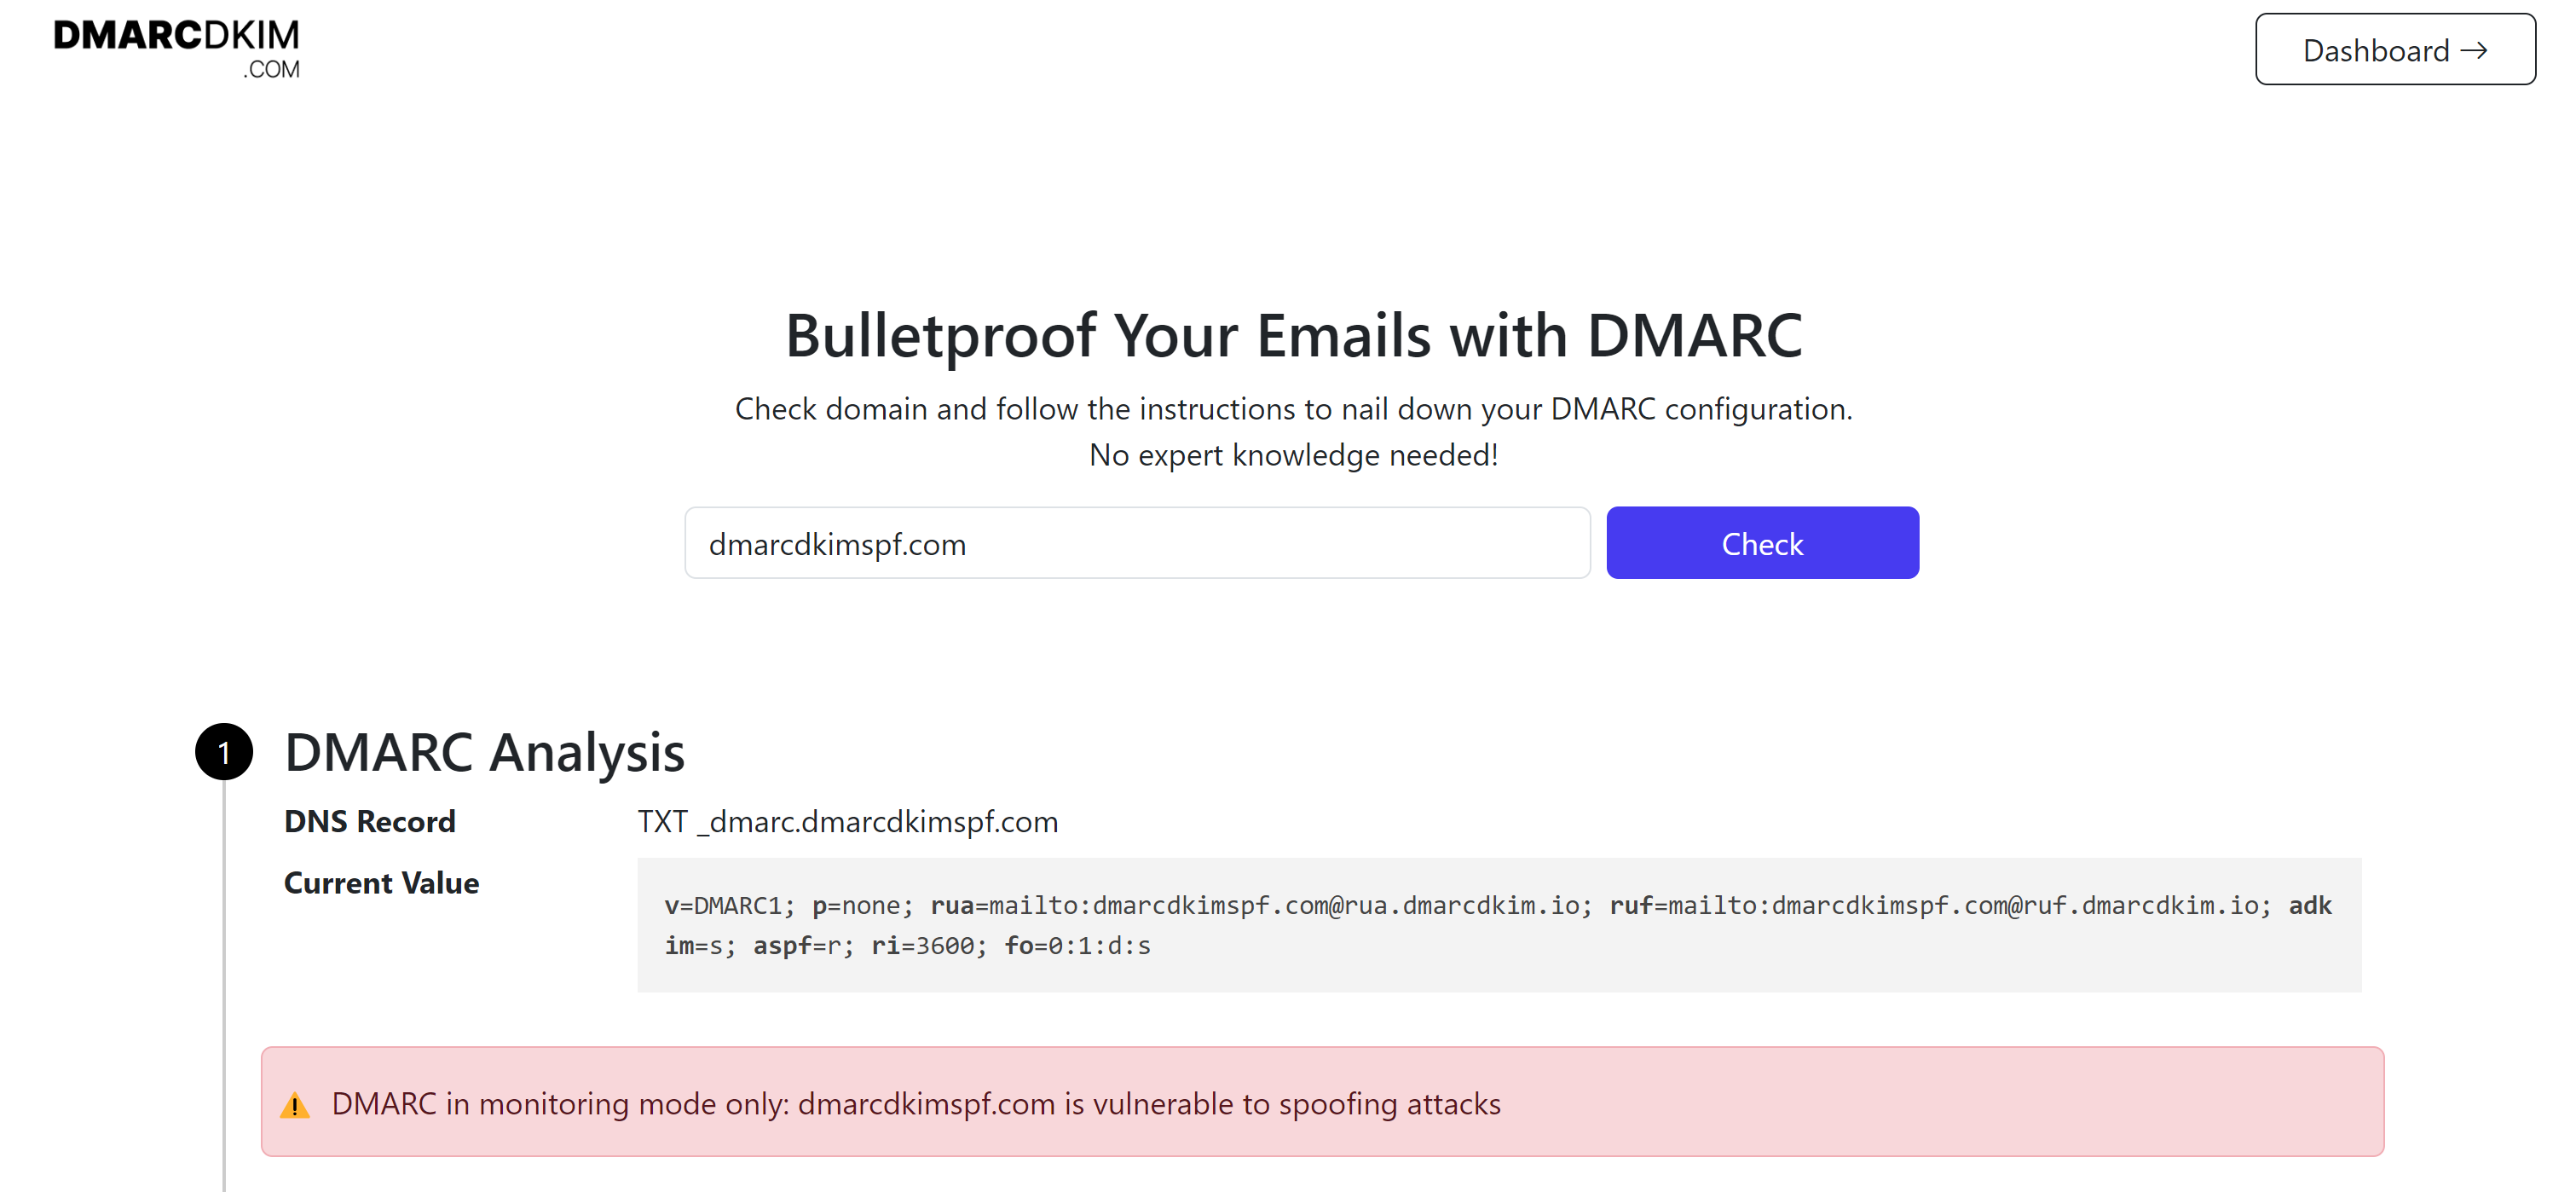
Sign up to get access to the DMARC Reports Dashboard.
For assistance and support, hire a DmarcDkim.com expert.
Check domain and follow the instructions to nail down your DMARC configuration.
No expert knowledge needed!


