Zendesk - DMARC, DKIM, SPF Configuration (Step-by-Step Guide)
Check your domain for DMARC, DKIM, SPF and MX records. Get a free report.
How to setup SPF, DKIM, and Zendesk DMARC records?
If you are tired of emails going to customers' spam folders, this article is for you. The inbox providers like Google and Yahoo only approve emails that pass their authentication check. Therefore, it is important to comply with the security standards to be trusted by inbox providers.
SPF, DKIM, and DMARC are commonly used authentication standards to verify your domain. You can find these records in the Zendesk Email tab. Follow the steps below to configure and add DNS records to the DNS provider.
Configuring Zendesk DKIM:
-
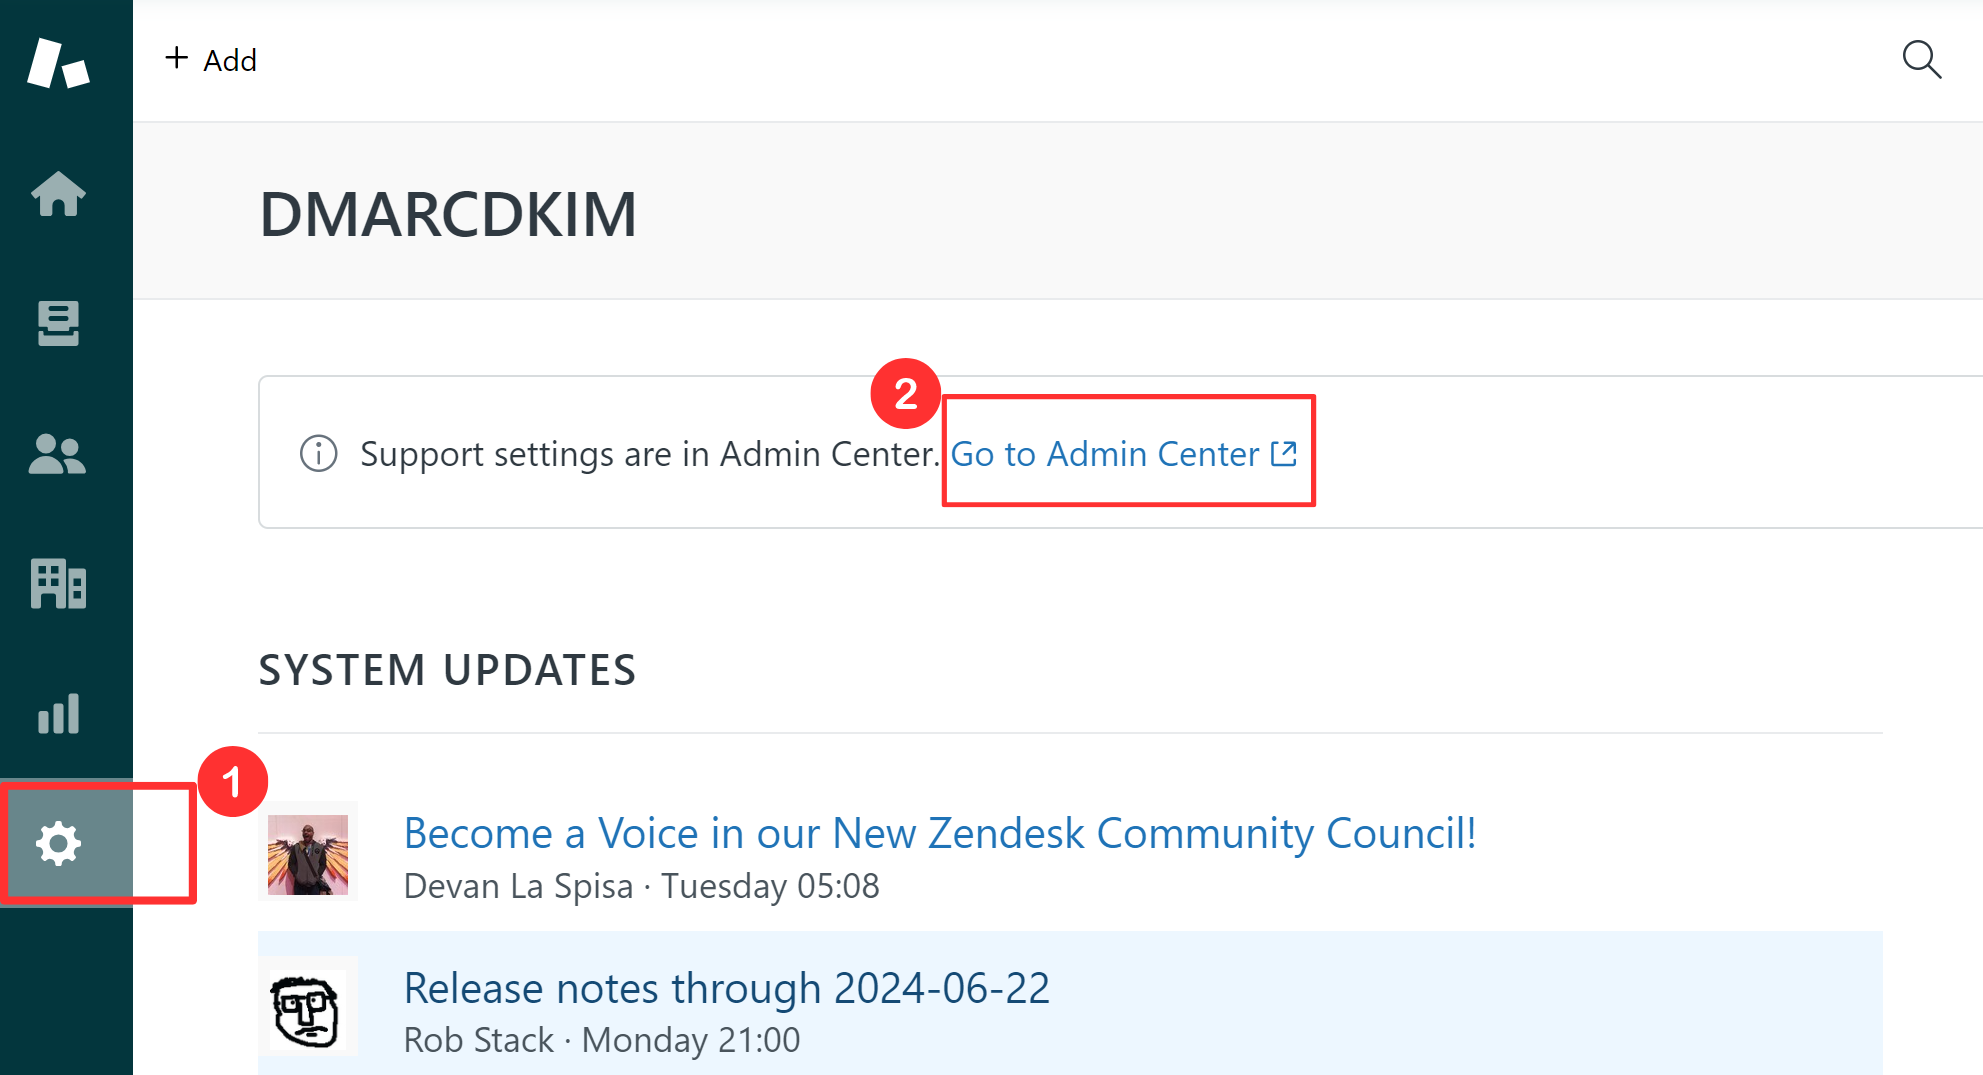
On the Zendesk dashboard, click the gear icon and go to Admin Center.
-
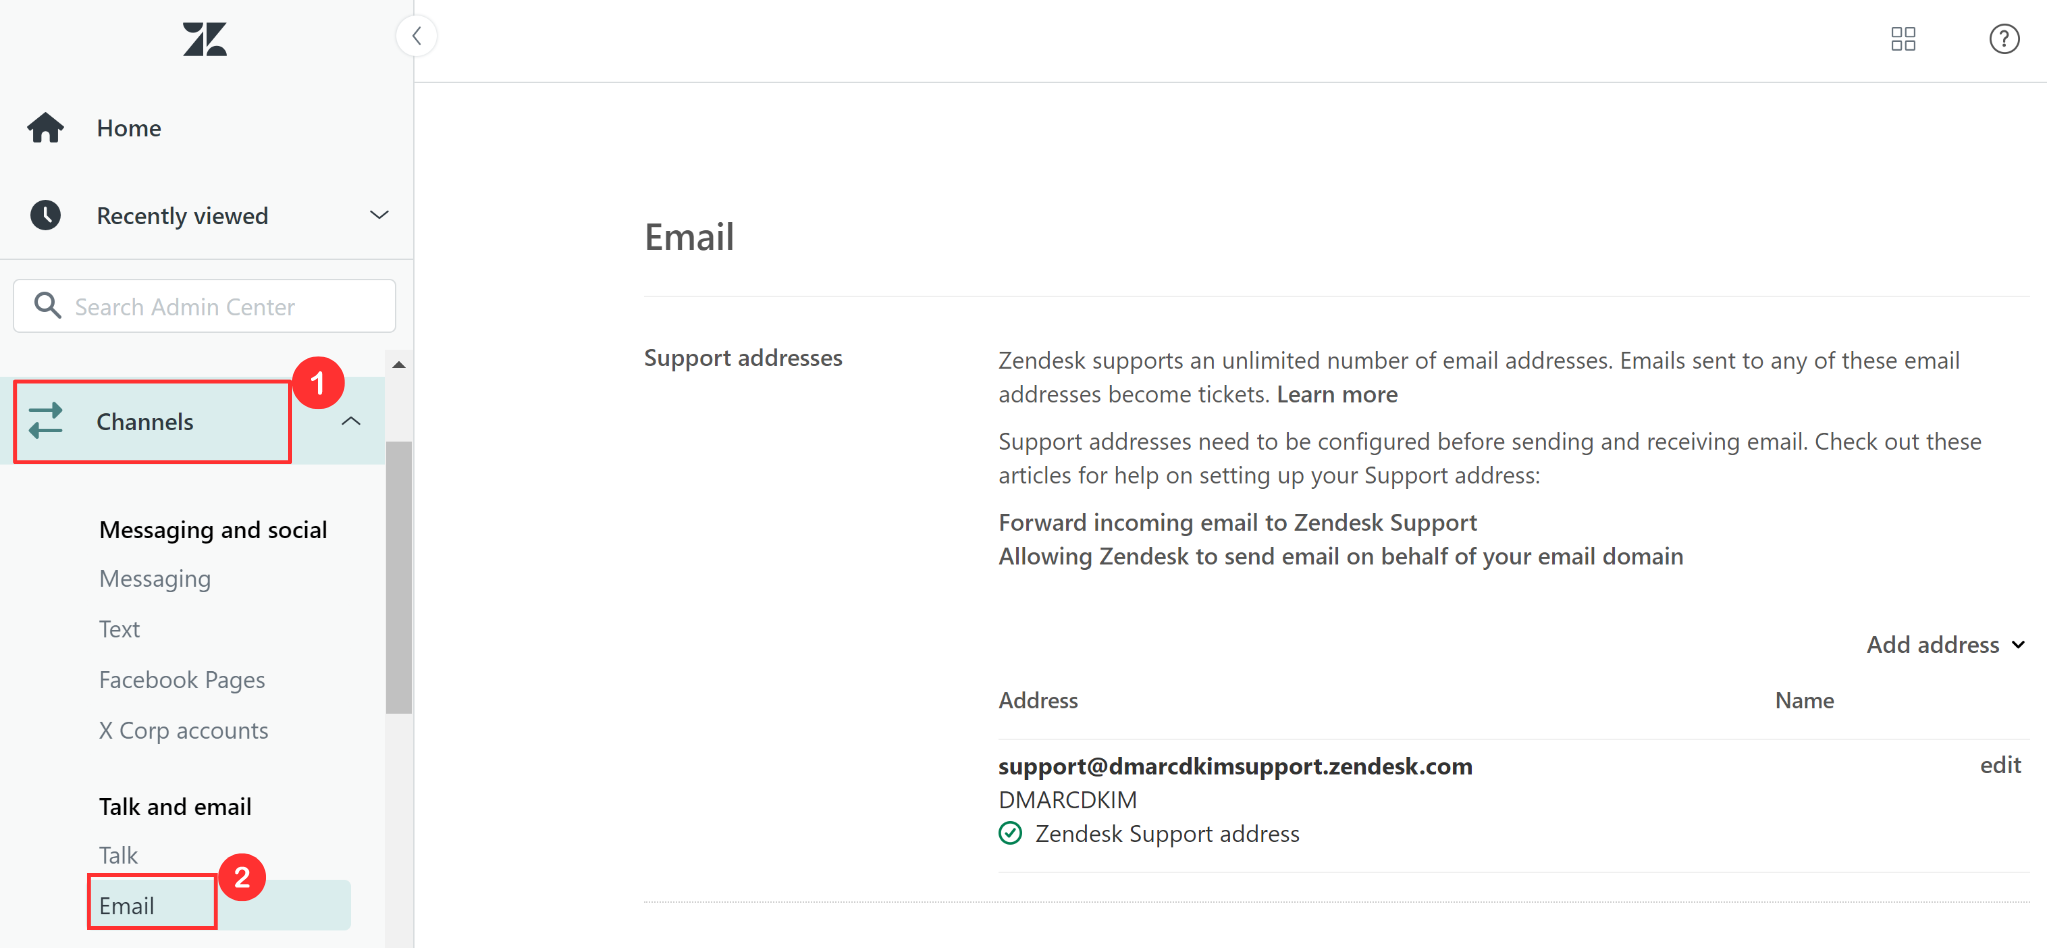
Click Channels and go to the Email tab in the left navigation menu.
-
On the next page, your signup email domain will be added as default. Scroll all the way down and there you'll find two CNAME DKIM records.

-
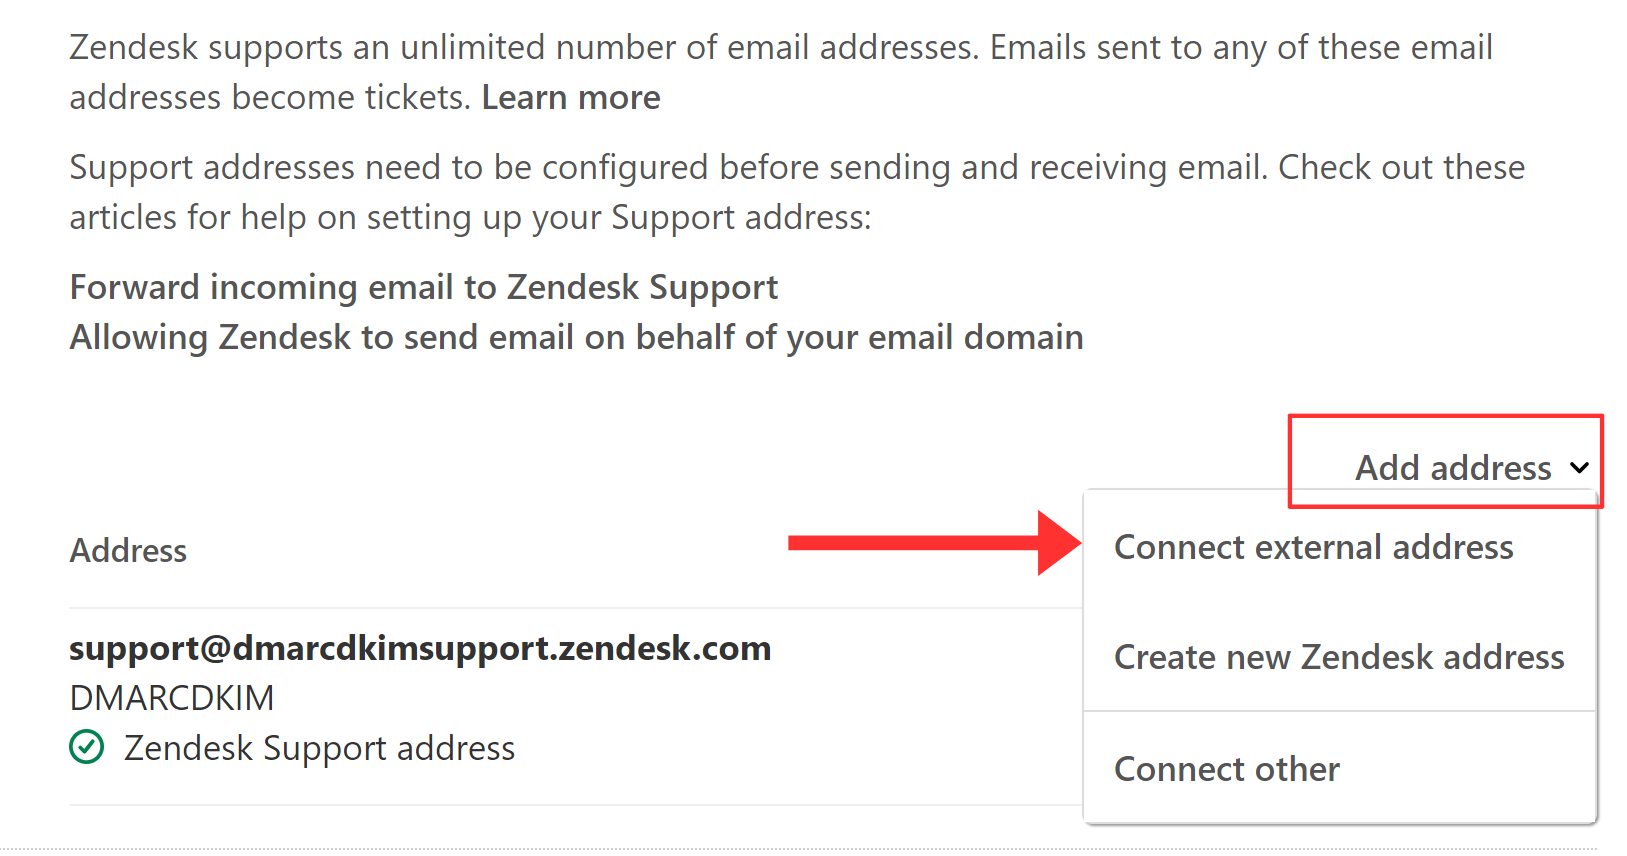
To add a new sender address, click "Add Address" and select "Connect External Address."
-
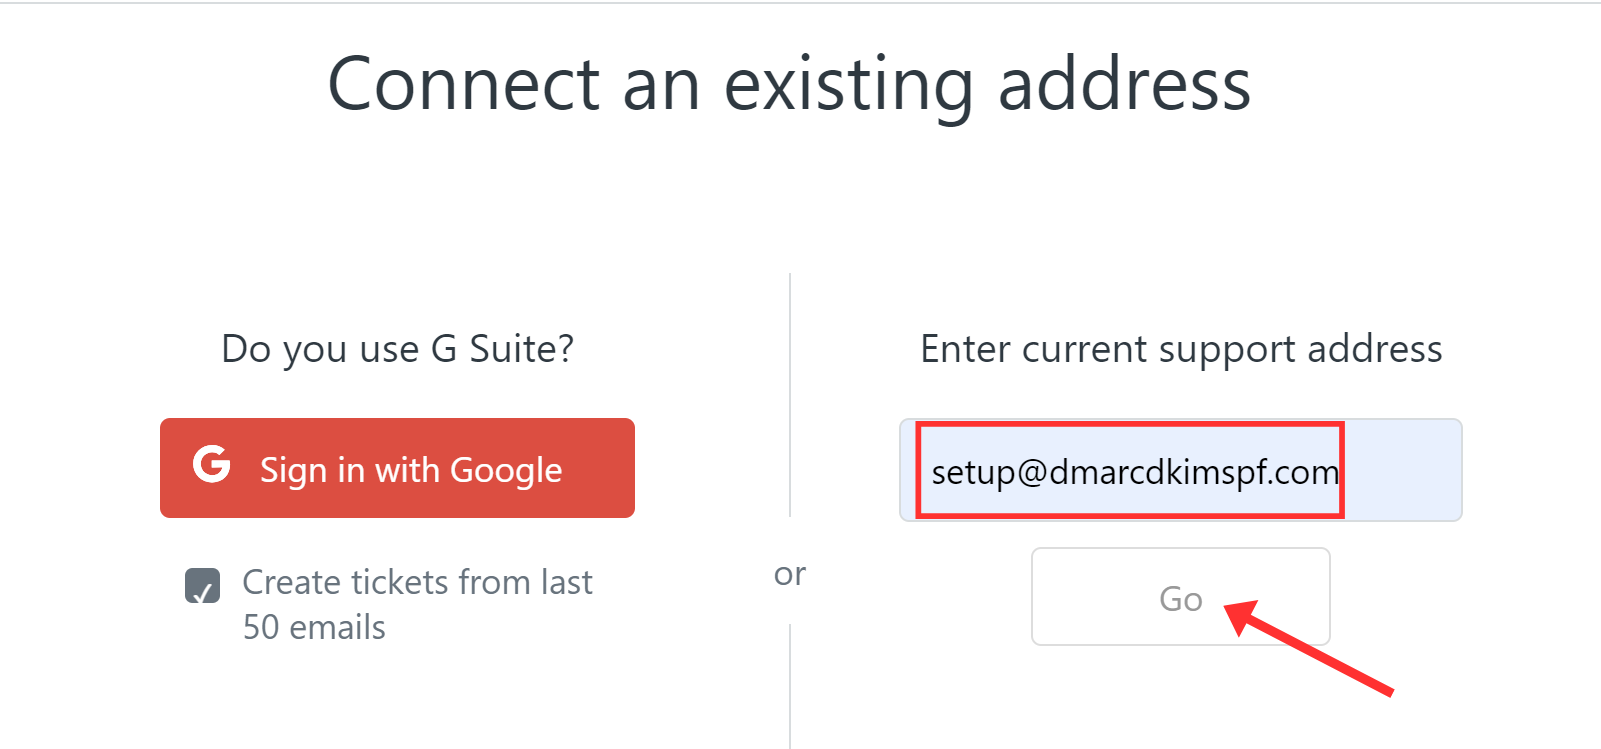
Write your email address and click "Go."
Adding Zendesk DKIM Records to DNS Provider:
Login to your DNS provider. We are using Cloudflare for this guide post.
-
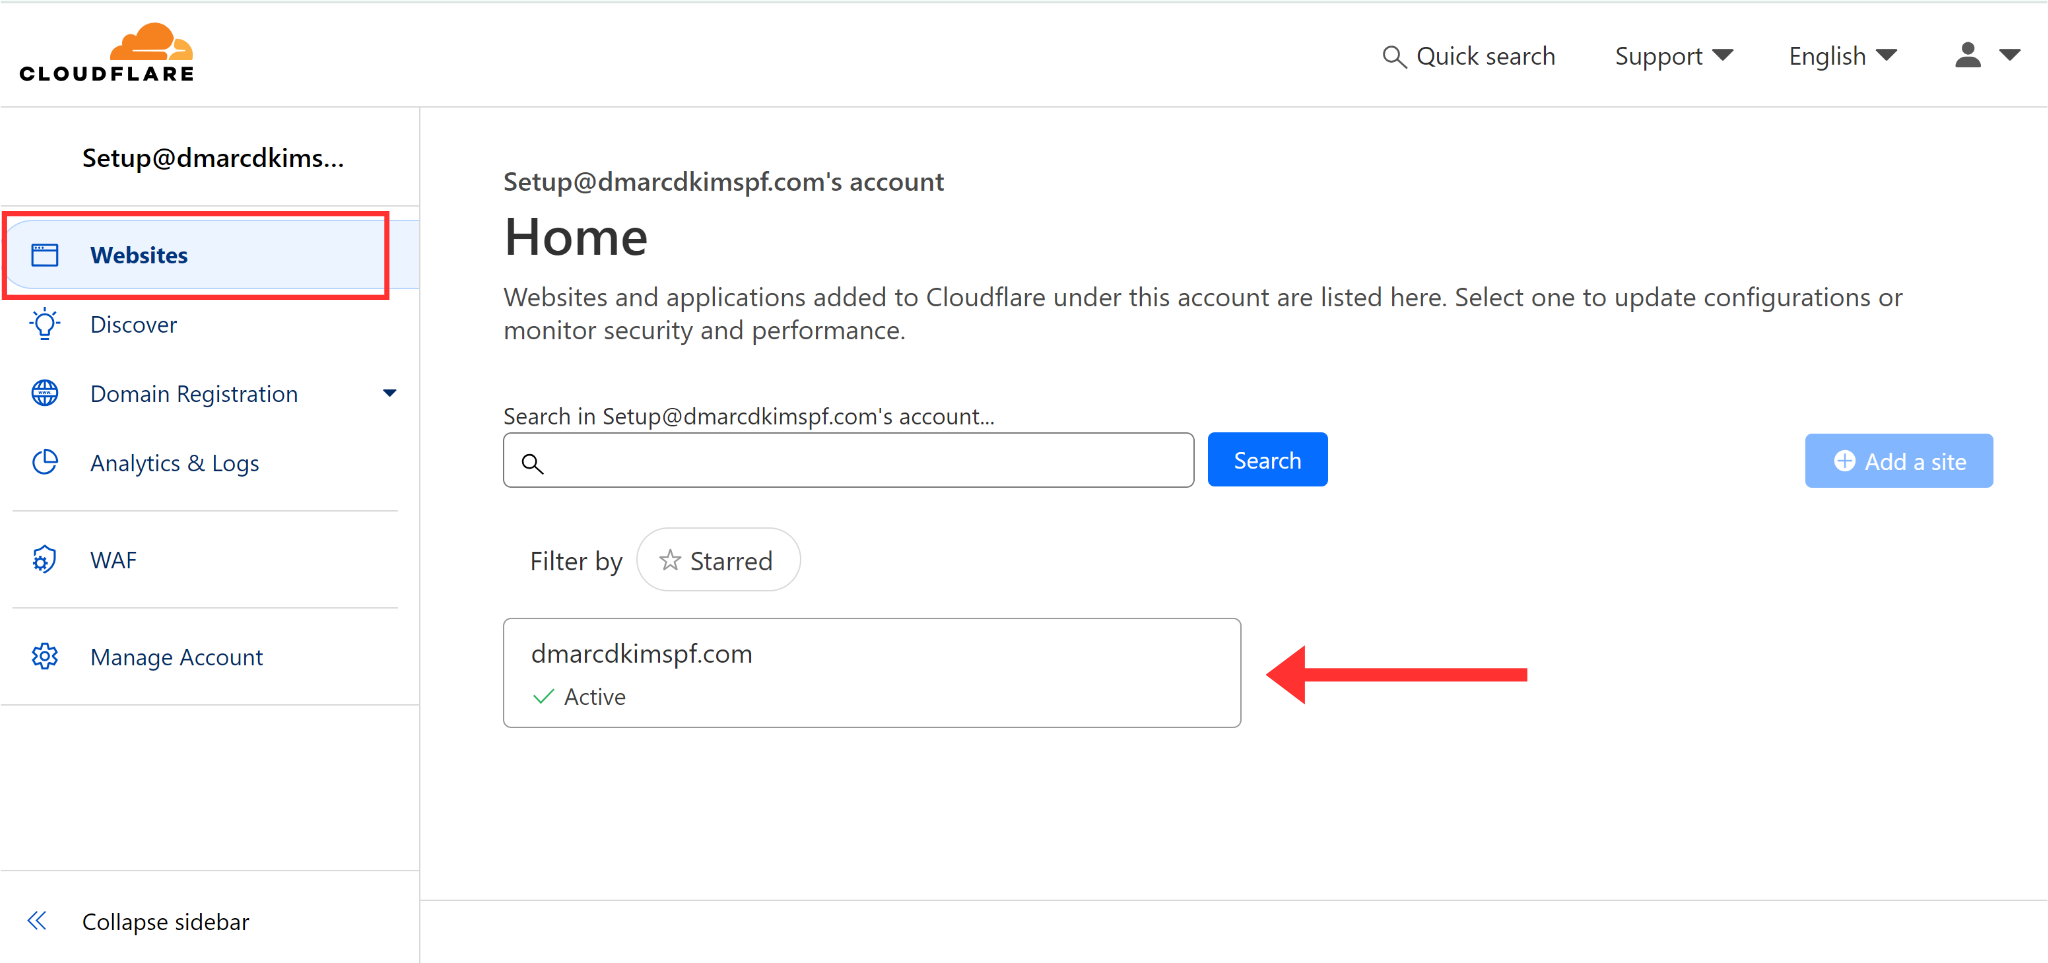
Go to the Websites tab and select the desired domain.
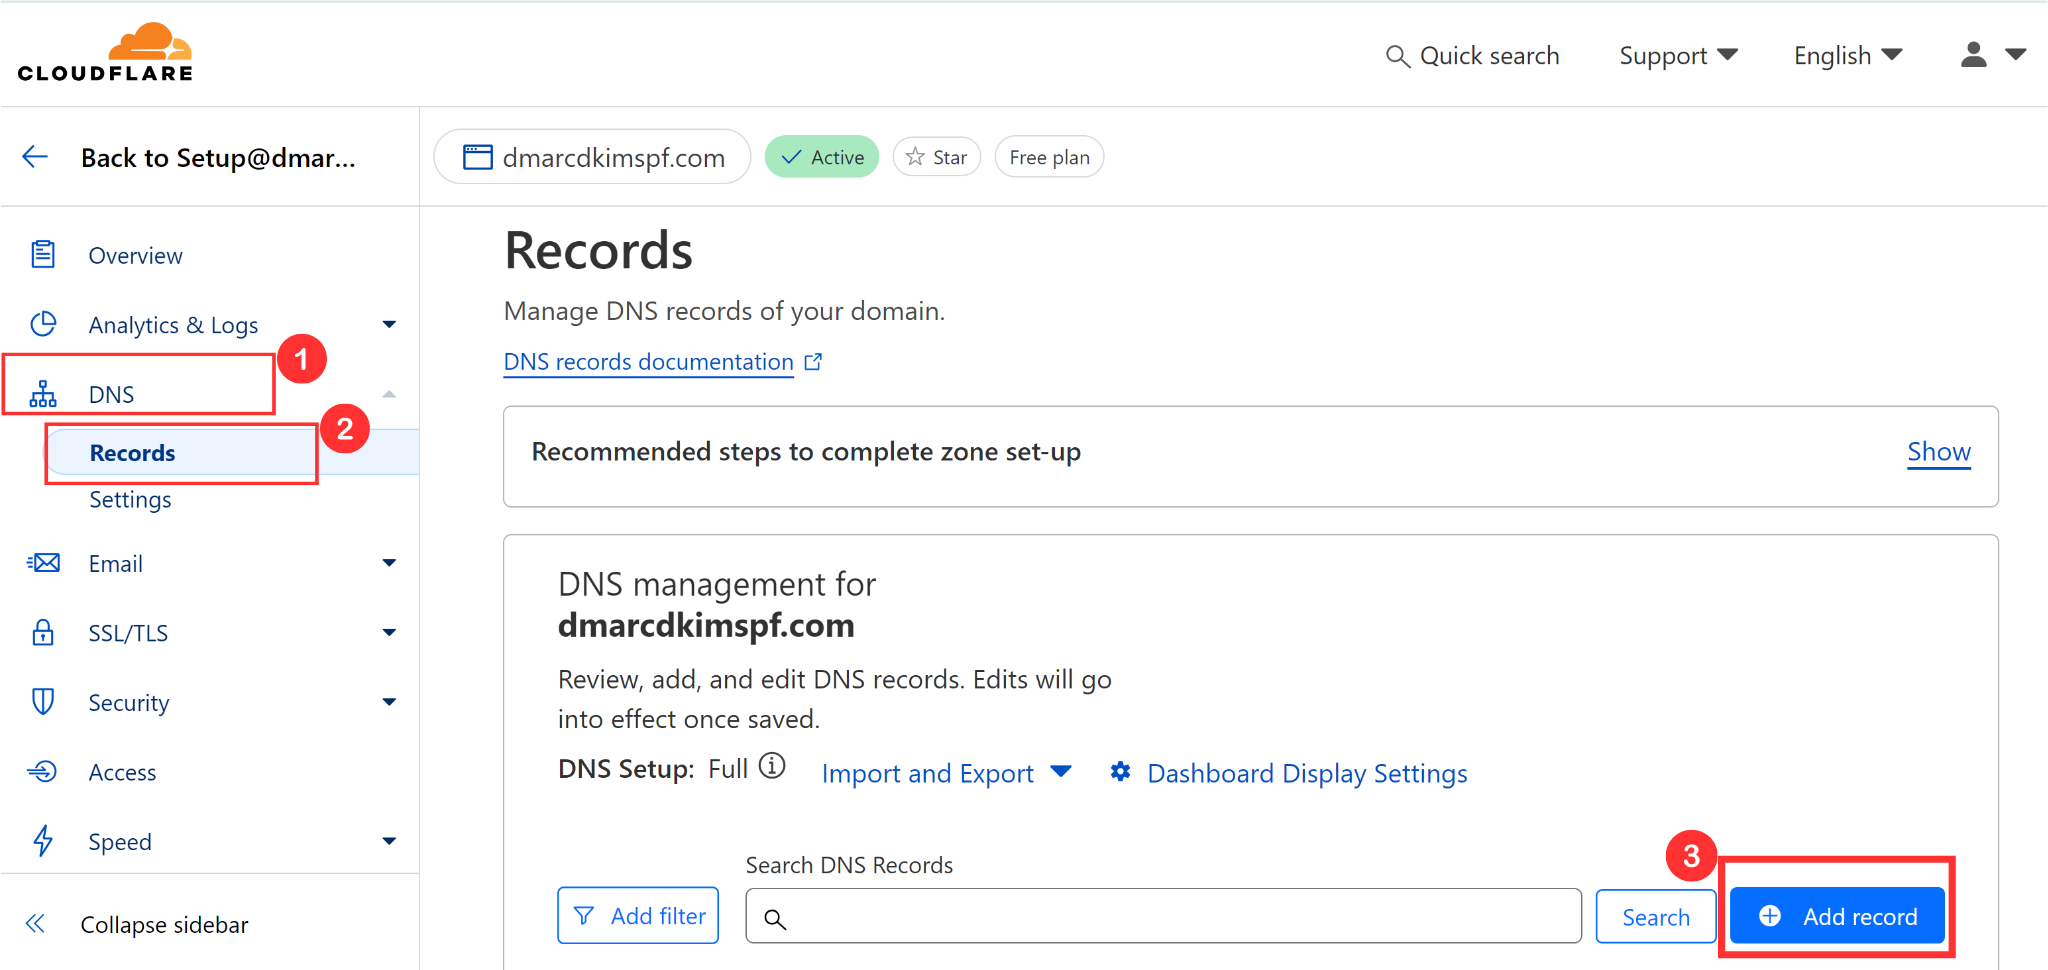
Click DNS and go to Records in the left navigation menu.
-
Click the Add Record button to enter new DKIM values.
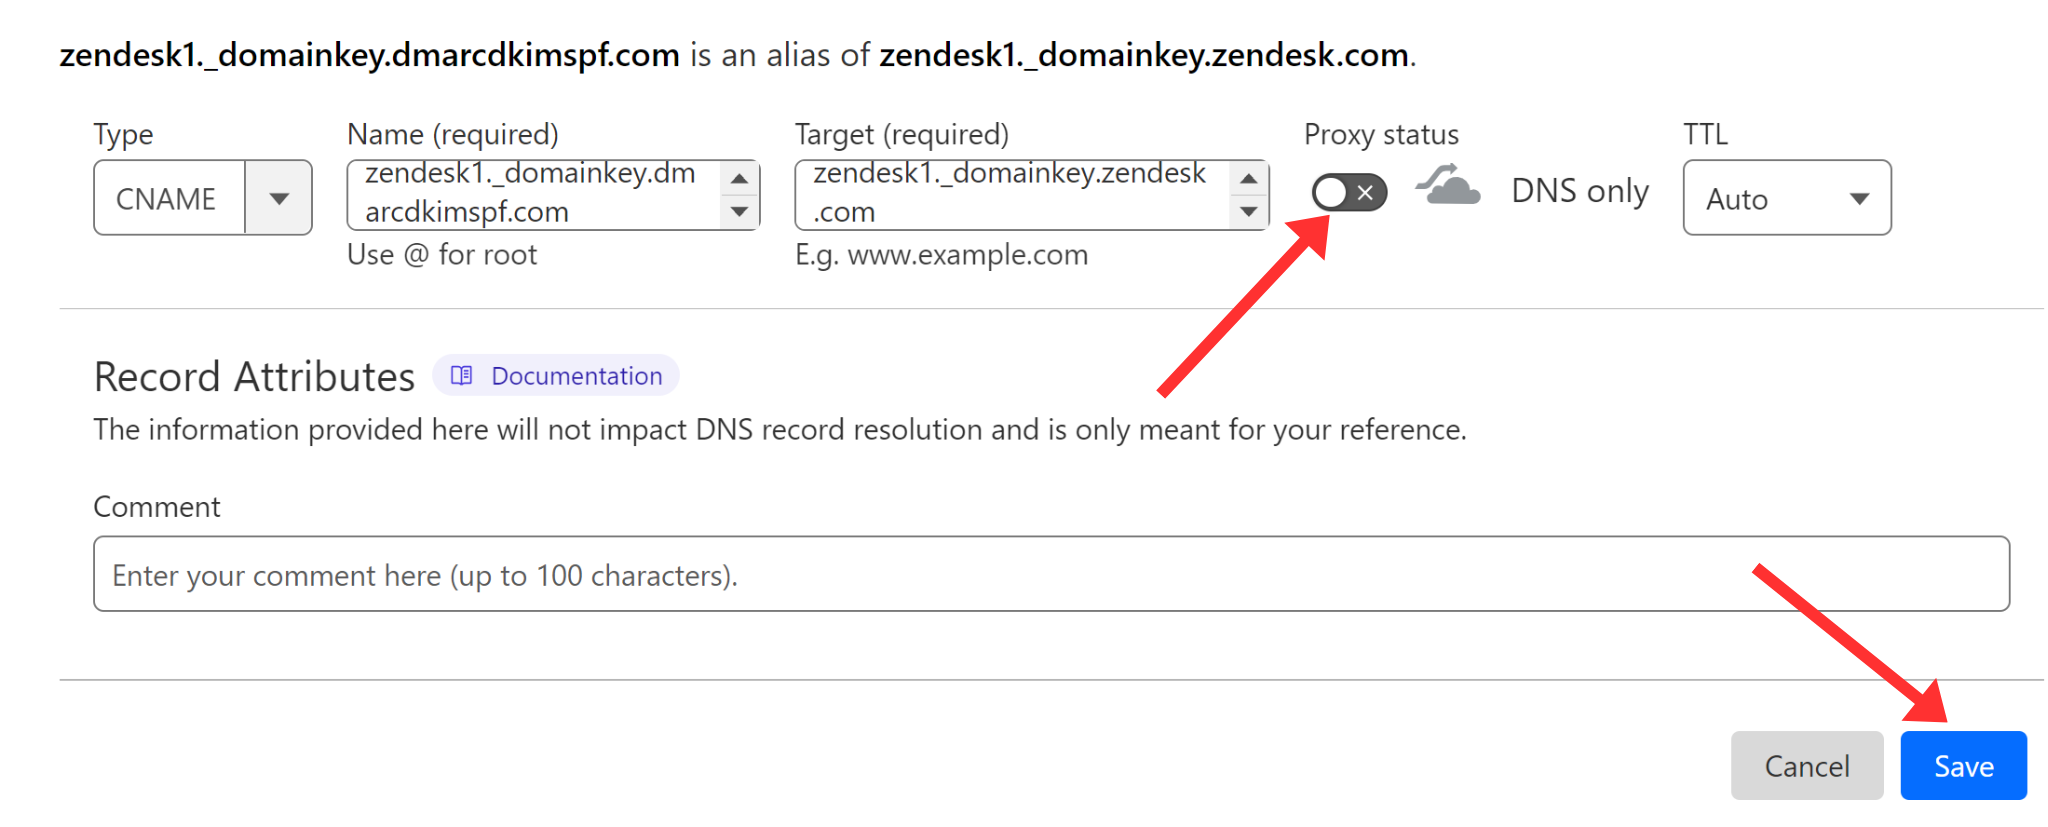
In the Name field, write the record name: zendesk1._domainkey.your_domain_name.com.
In the Target field, write the record value: zendesk1._domainkey.zendesk.com.
-
Select type CNAME and click Save.
Follow the same process for adding the second DKIM record.
Enable Zendesk DKIM Signing and Save Records:
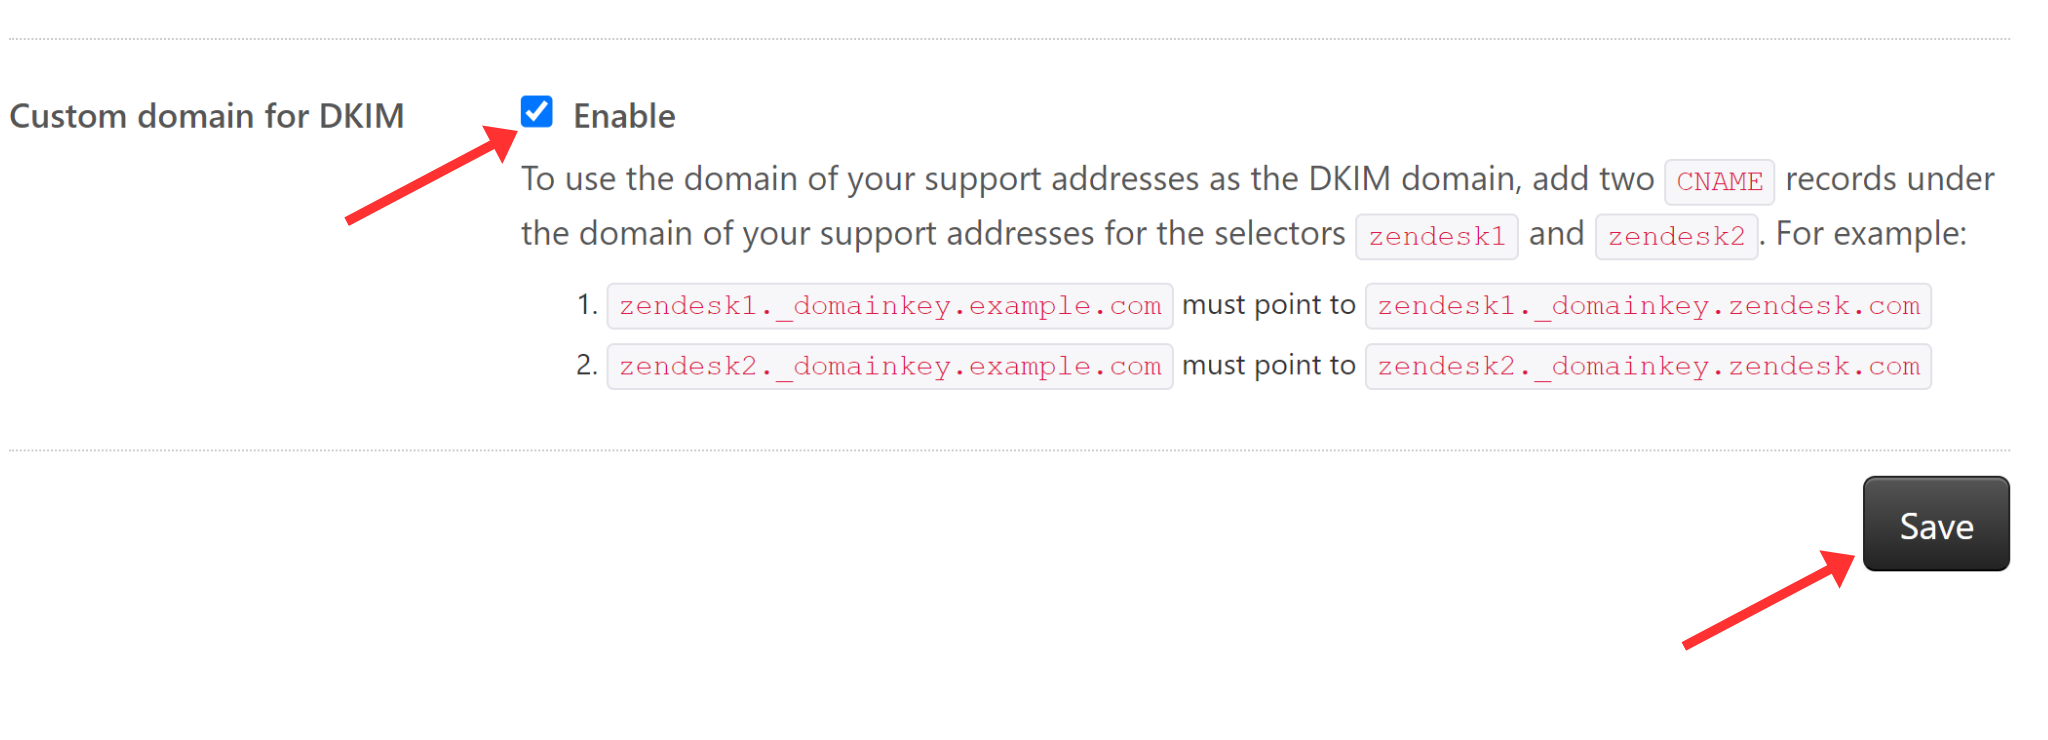
Return to the DNS records page in Zendesk and check the box for "Enable" above DKIM records.
-
Hit the Save button to update your DNS changes.
Adding Zendesk SPF Record:
You can find the SPF value at the Zendesk Help Center.
Login to the DNS provider and head over to the DNS dashboard.
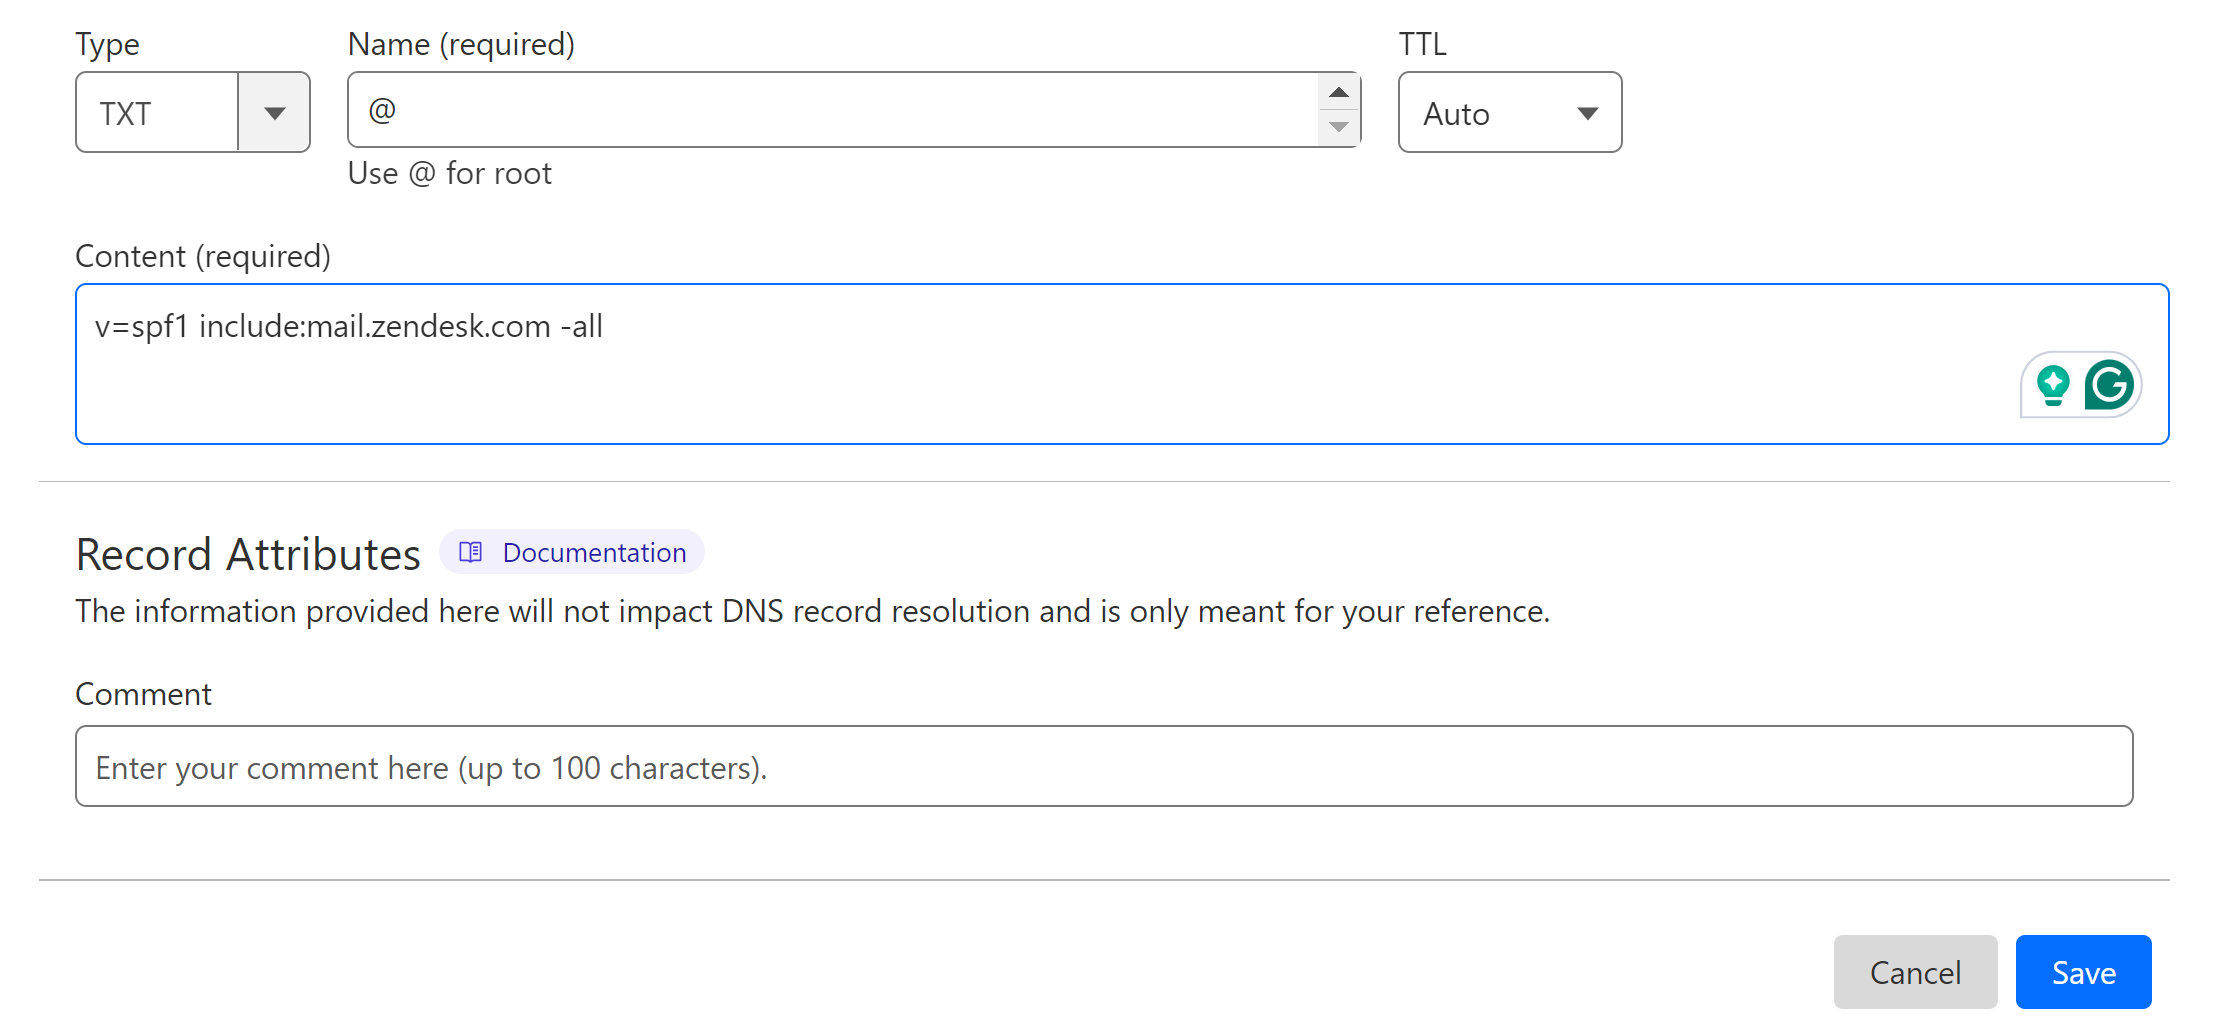
Add a new TXT record.
In the Name field, write your domain name or simply write "@."
In the Content field, write the SPF value: v=spf1 include:mail.zendesk.com -all.
-
Finally, click Save.
Merge Zendesk SPF Records:
If your DNS provider has an existing SPF record, adding another one can cause conflict, and one of them will stop working. Therefore, merge the existing SPF record with the Zendesk SPF to avoid conflicts.
Go to the SPF Merge Tool.
Write your domain name and enter the Zendesk SPF value.
Click the Merge SPF Values button.
-
The tool detects the existing SPF records in your DNS dashboard and merges them with Zendesk SPF to generate a single, combined value.
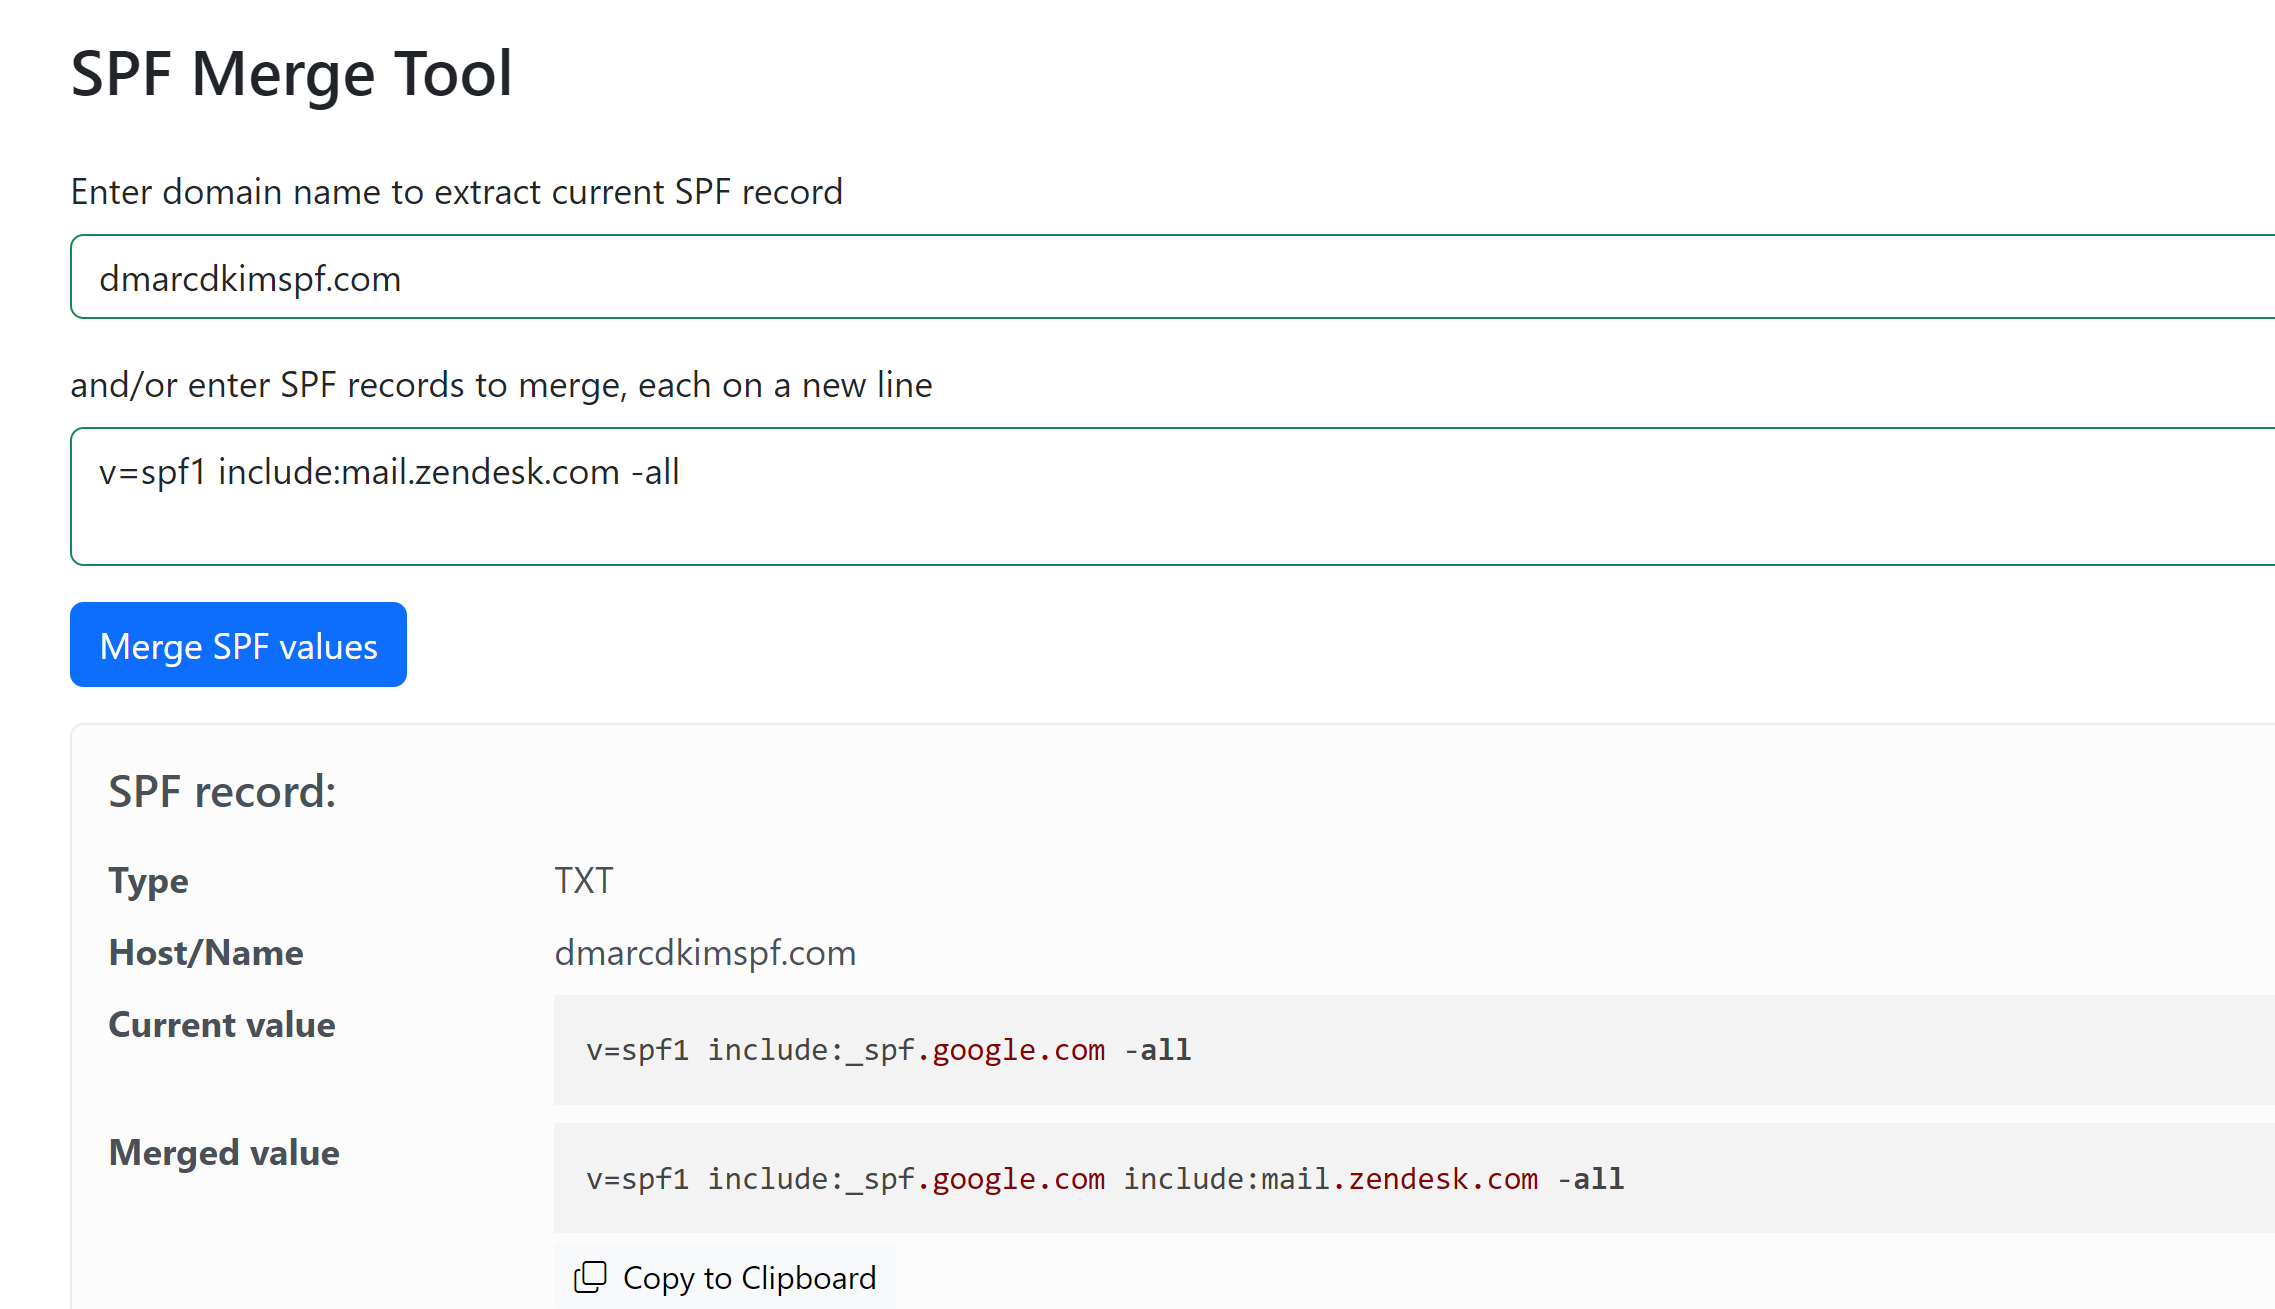
In the DNS dashboard, replace the existing SPF value with the merged value.
Adding Zendesk DMARC Record:
Adding a DMARC record is crucial to comply with the security standards of email inbox providers. Zendesk's authentication records are limited to SPF and DKIM only. Therefore, DmarcDkim.com has built a tool that helps you get a custom DMARC value.
This tool helps you specify rules for the emails that fail to pass the authentication check. It not only provides initial monitoring but also allows you to implement a strict policy over time.
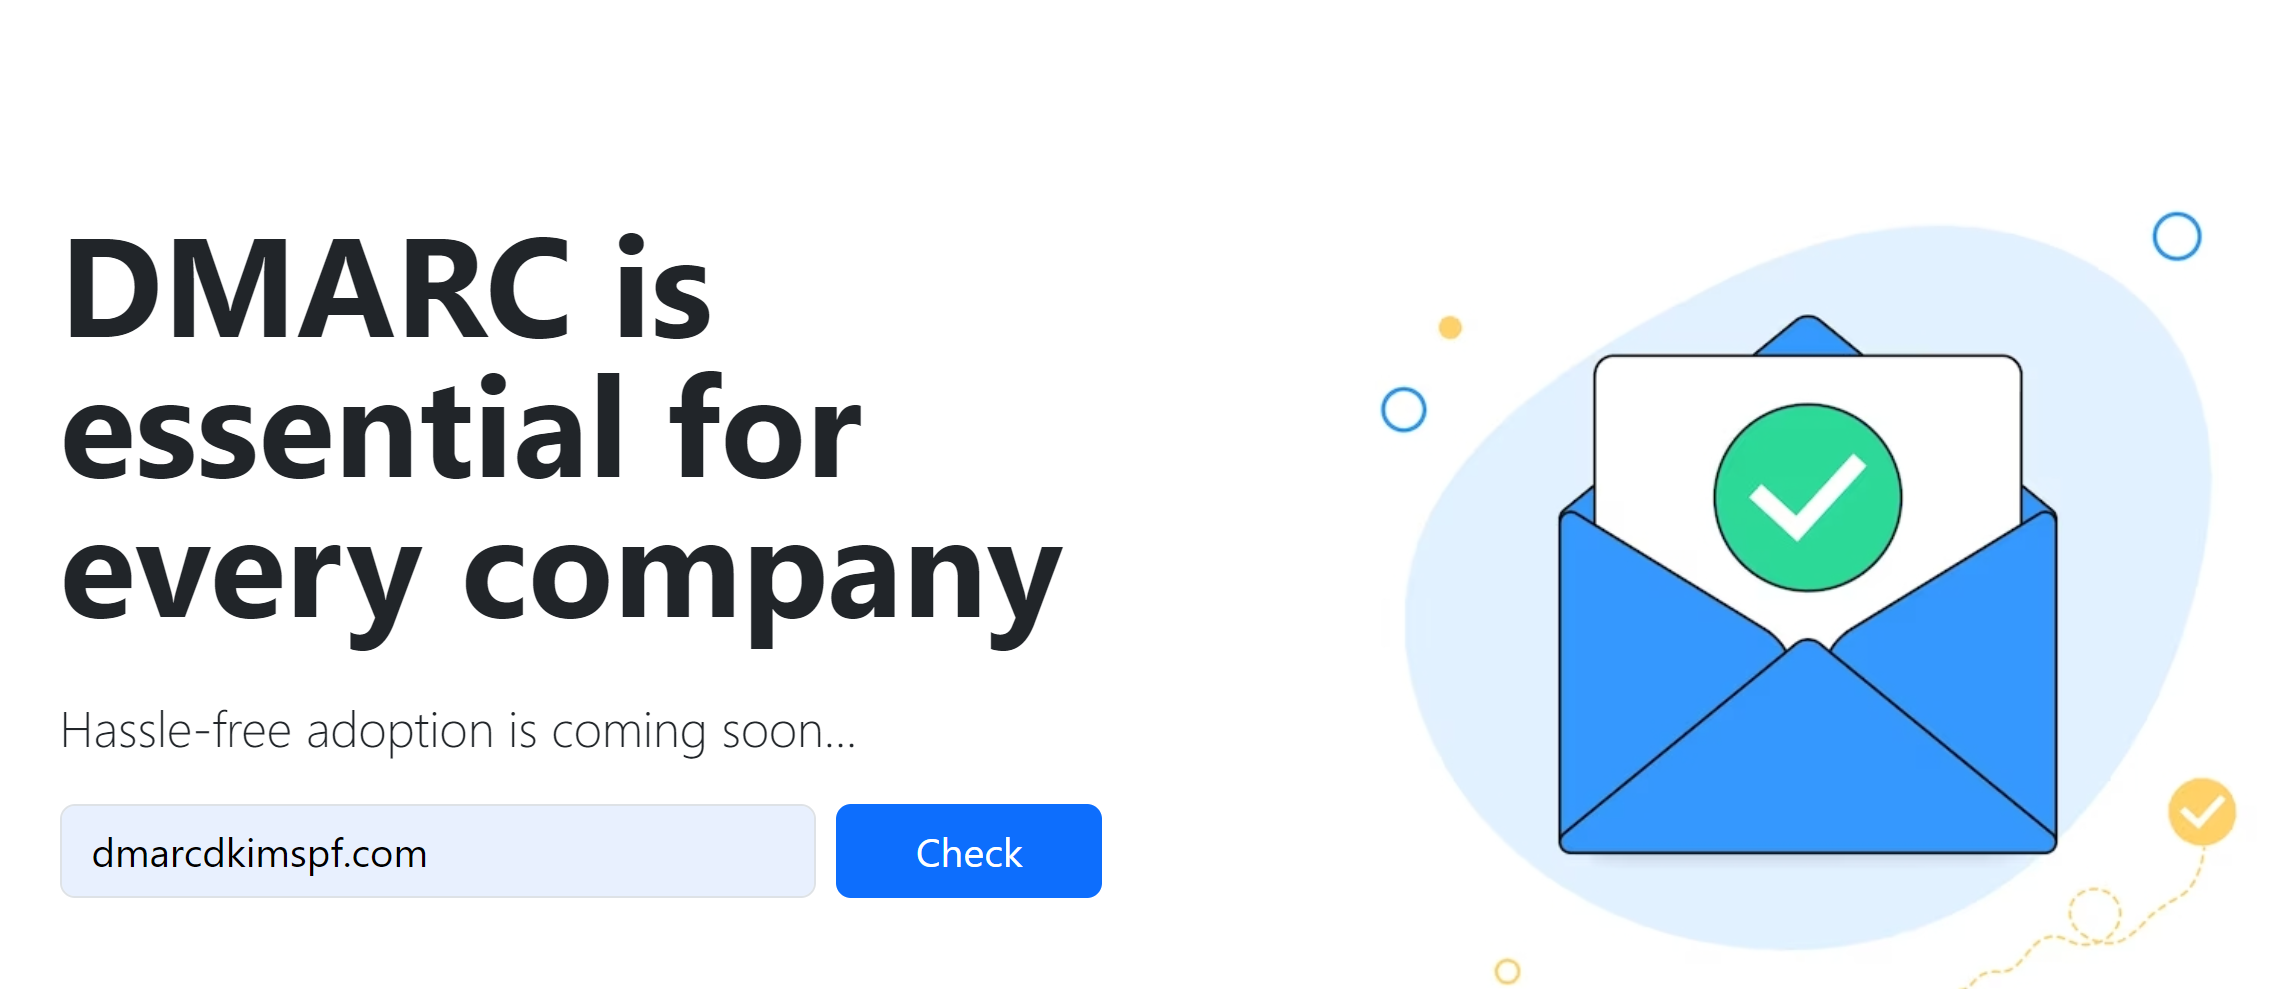
Go to the DMARC Checker.
-
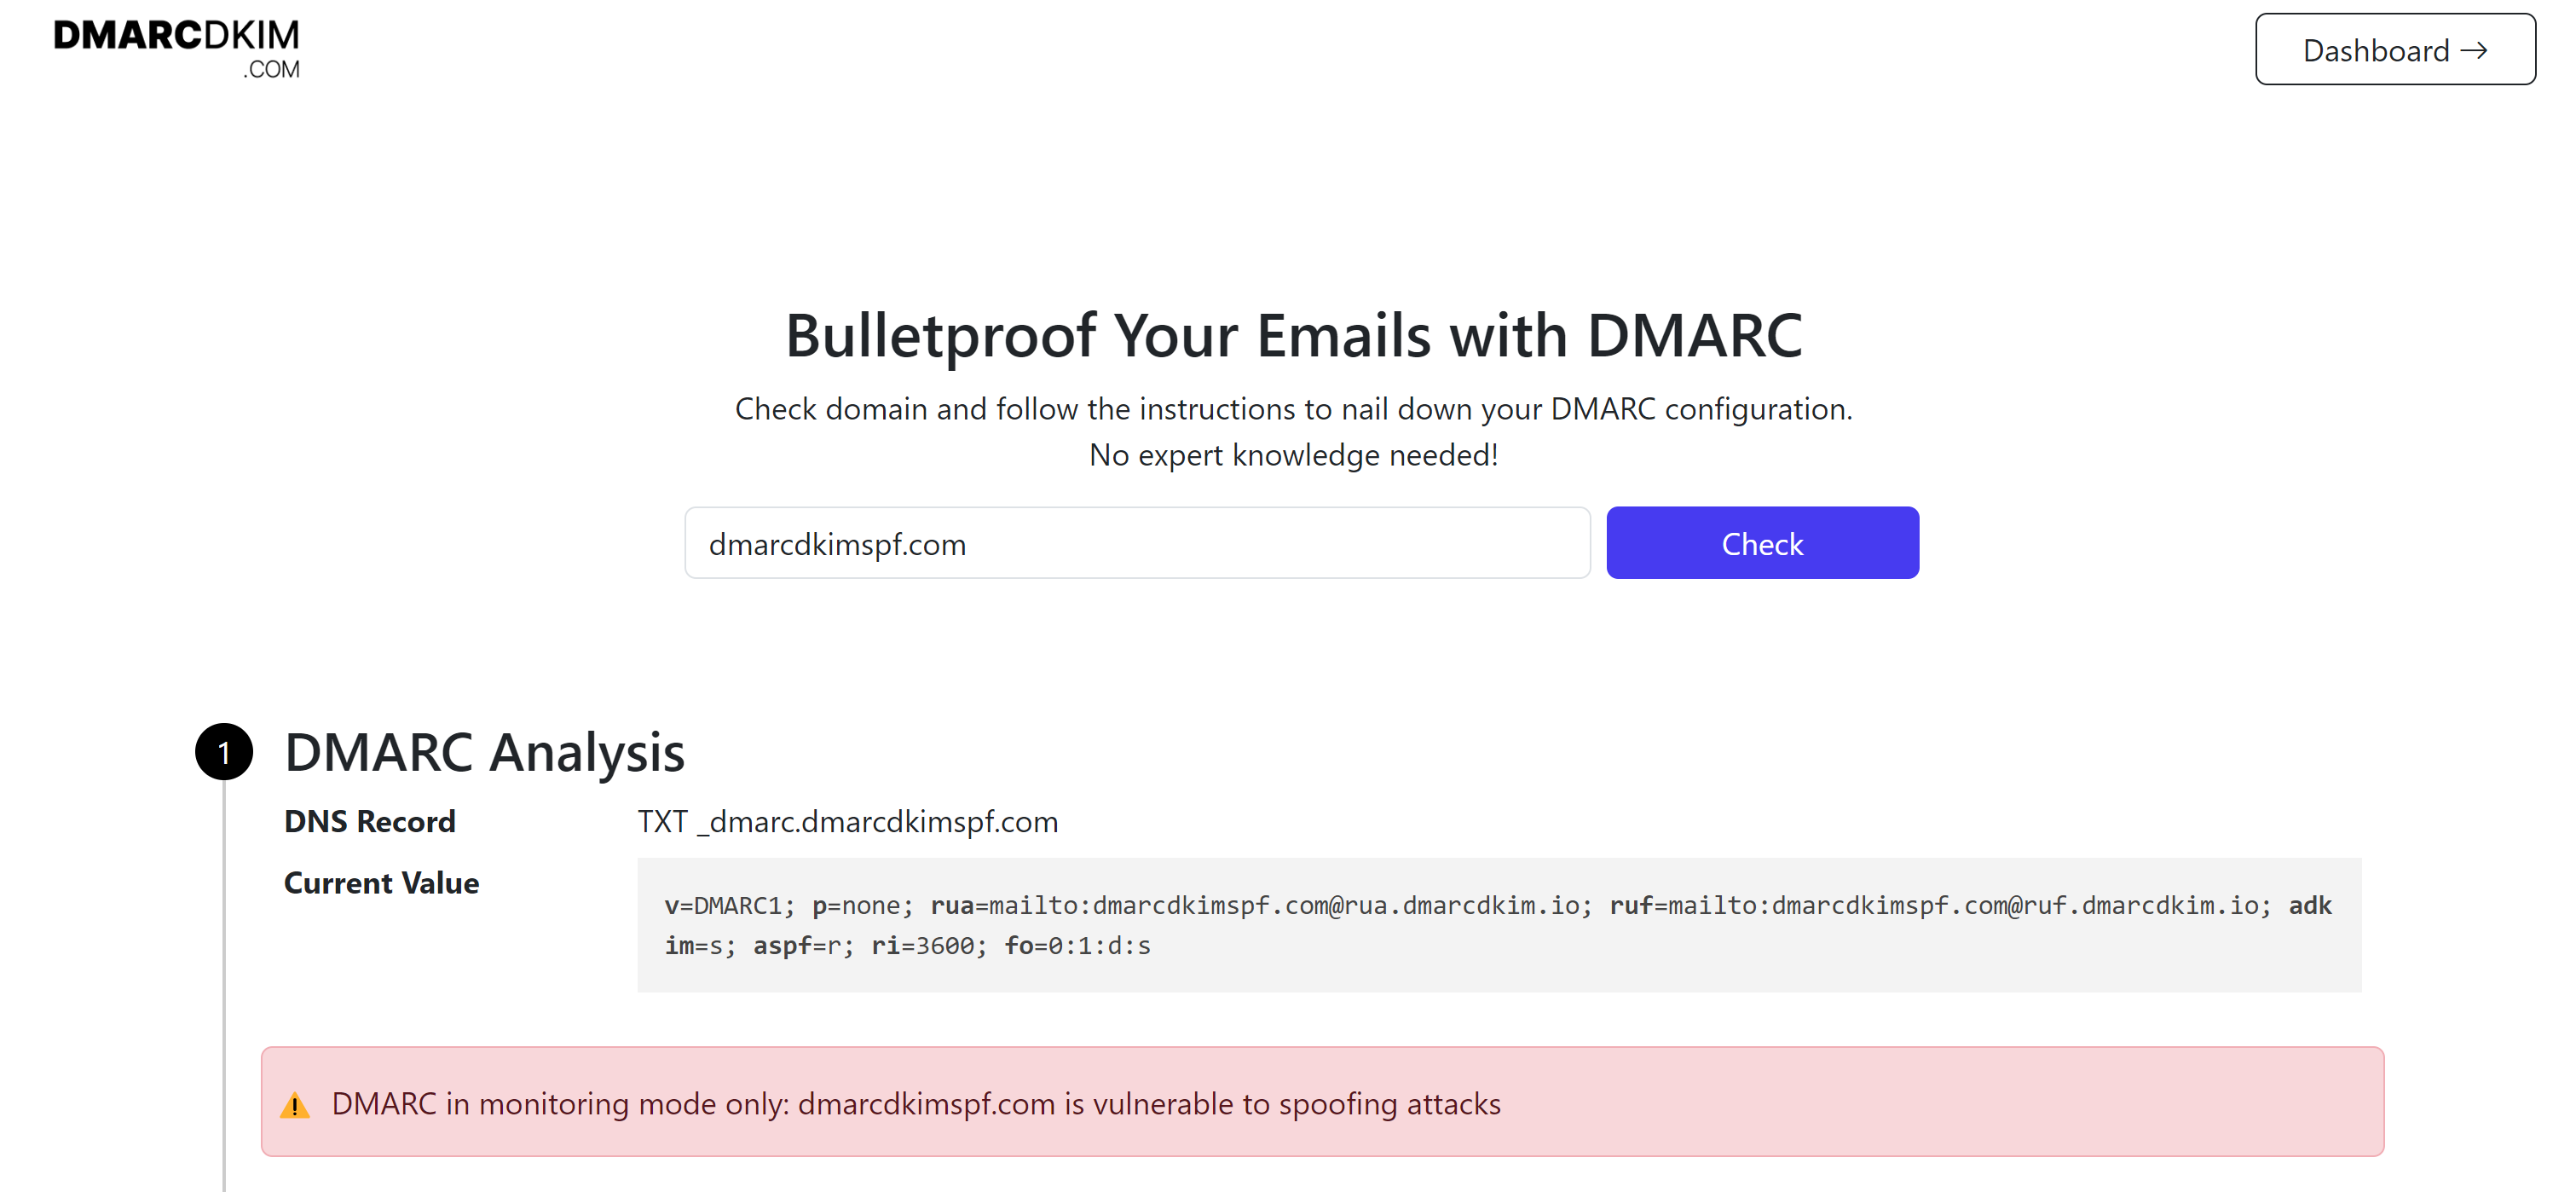
Write your domain name and click Check.
-
The tool generates a suggested value - add this value to your DNS provider.
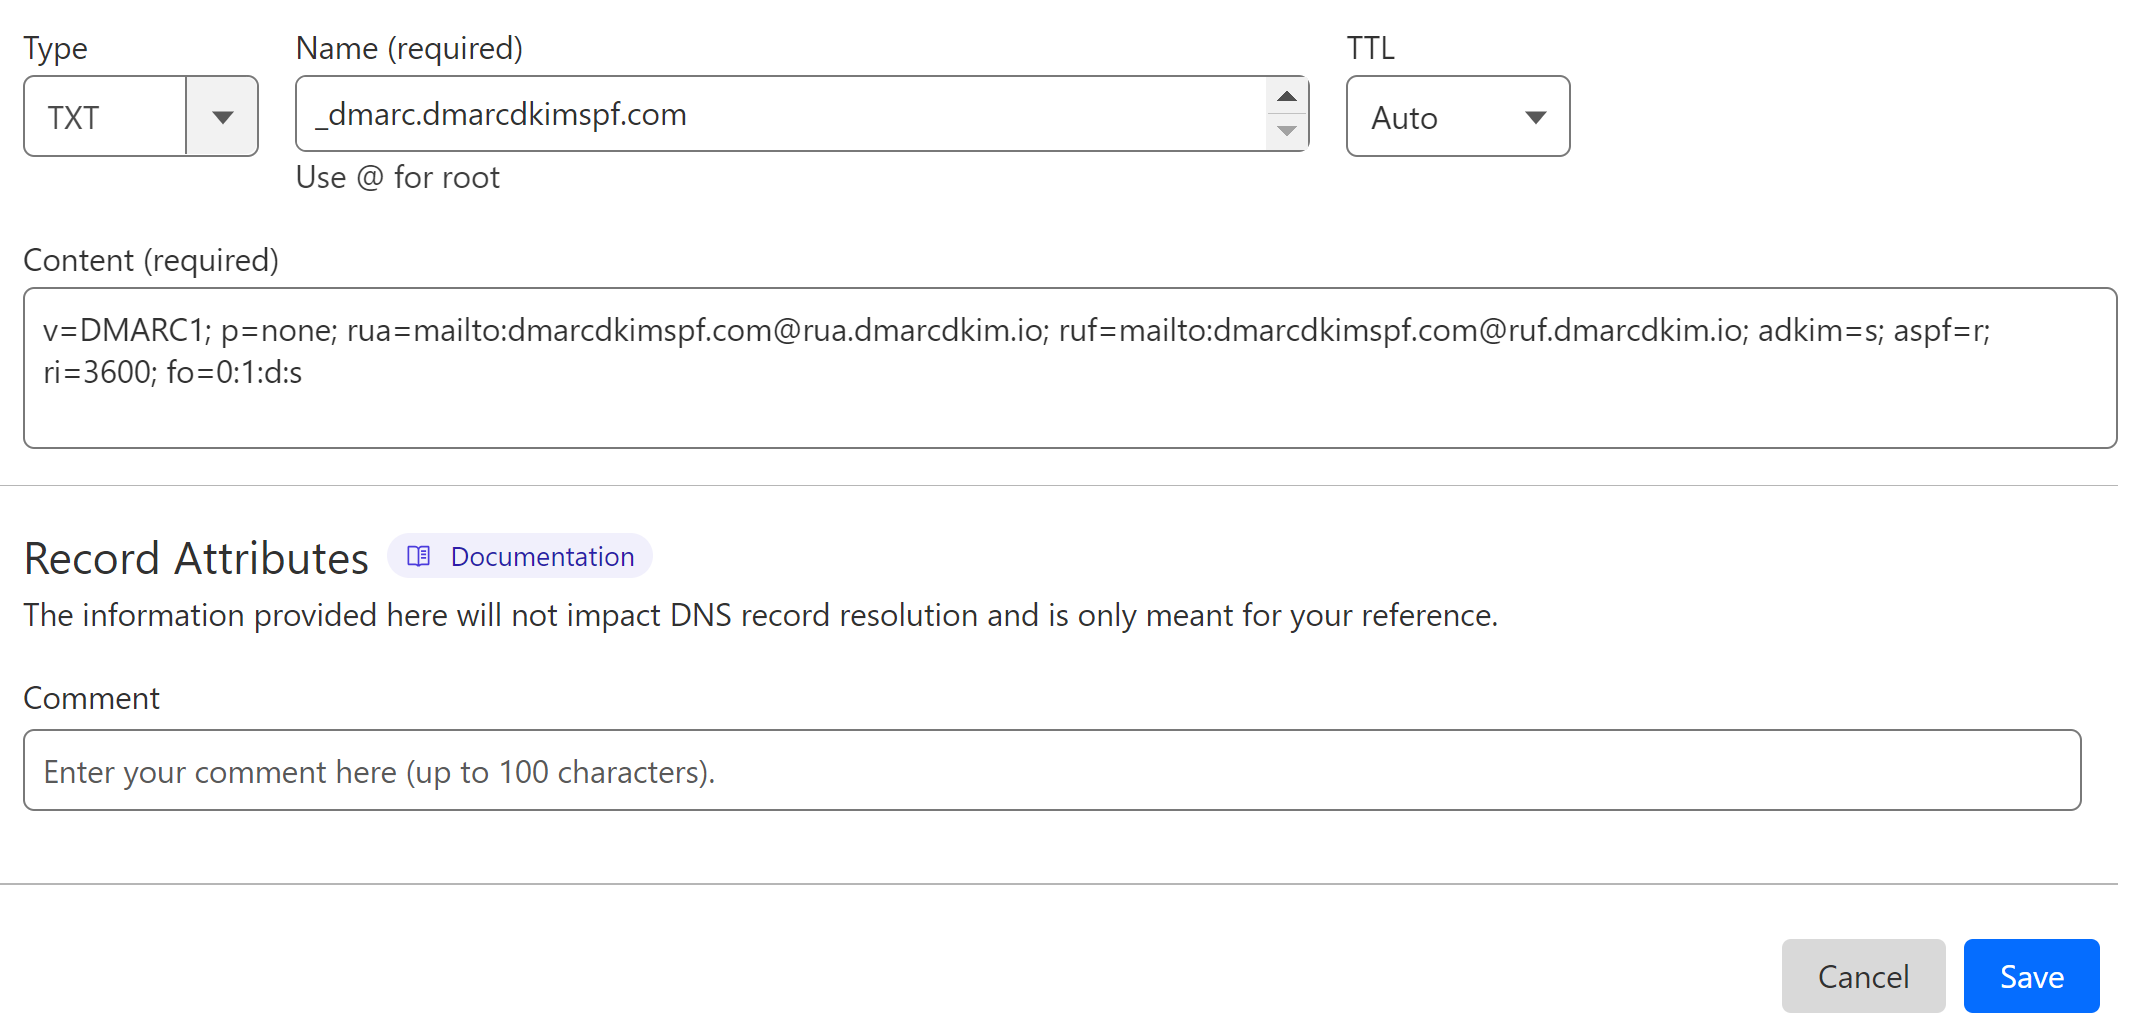
On the DNS dashboard, select record type TXT.
Write the DNS record (record name) in the Name field
Copy and paste the suggested value in the Content field.
-
Click Save to add this record to your DNS dashboard.
We transform complex DMARC data into clear, actionable steps to enhance your email security. Sign up now to unlock insights and start protecting your domain.
If you encounter any obstacles while authenticating your sender domain, hire a DmarcDkim.com specialist for assistance.
Check domain and follow the instructions to nail down your DMARC configuration.
No expert knowledge needed!


