
ChargeOver SPF, DKIM, and DMARC Records - Domain Authentication Guide
Check your domain for DMARC, DKIM, SPF and MX records. Get a free report.
How to Setup SPF, DKIM, and DMARC Records for ChargeOver?
Ensuring your emails are authenticated and trusted by inbox providers is crucial for maintaining a reputable online presence. SPF, DKIM, and DMARC are essential protocols for email authentication that help prevent email spoofing and ensure that your messages are delivered safely to recipients.
SPF (Sender Policy Framework) allows domain owners to specify which mail servers are authorized to send emails on their behalf.
DKIM (DomainKeys Identified Mail) adds a digital signature to email headers to verify the integrity and authenticity of the email.
DMARC (Domain-based Message Authentication, Reporting, and Conformance) builds on SPF and DKIM by allowing domain owners to specify how receiving mail servers should handle emails that fail authentication checks.
In this article, we will guide you through the process of setting up SPF, DKIM, and DMARC records for ChargeOver, ensuring your emails are protected against spamming and spoofing
Configure ChargeOver DNS Records:
-
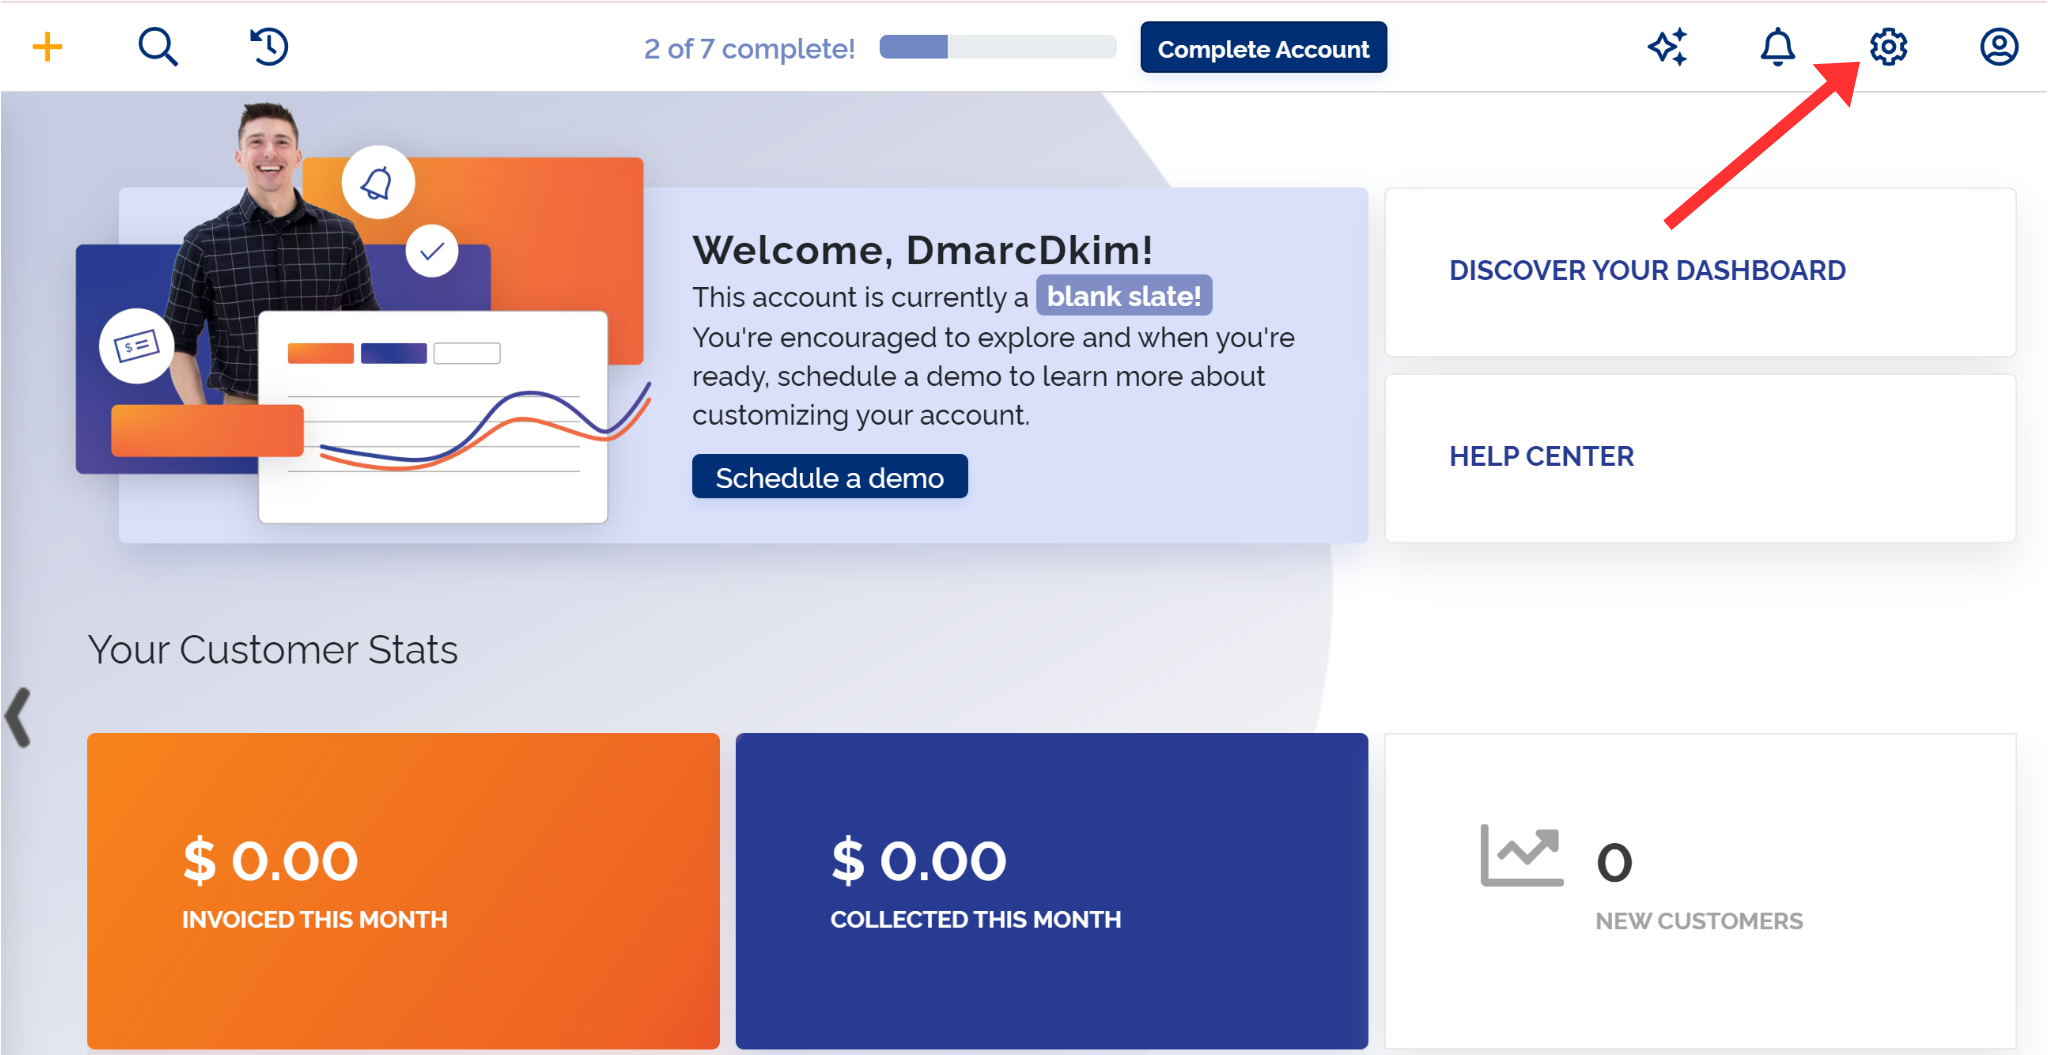
On the dashboard, click the Settings icon.
-
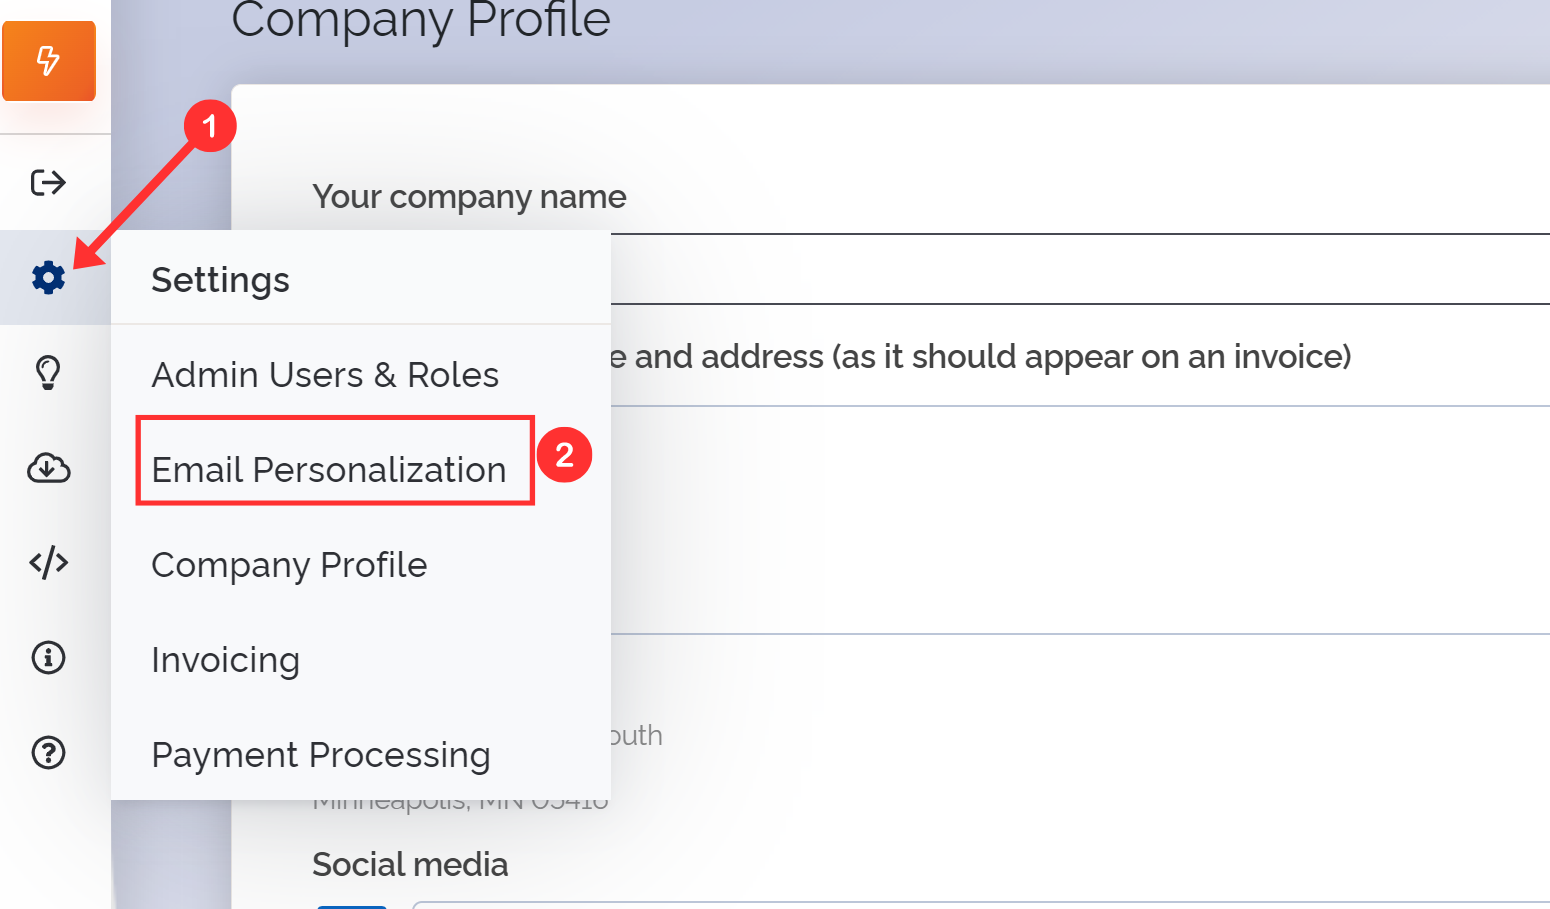
Hover over the setting icon and go to Email Personalization.
-
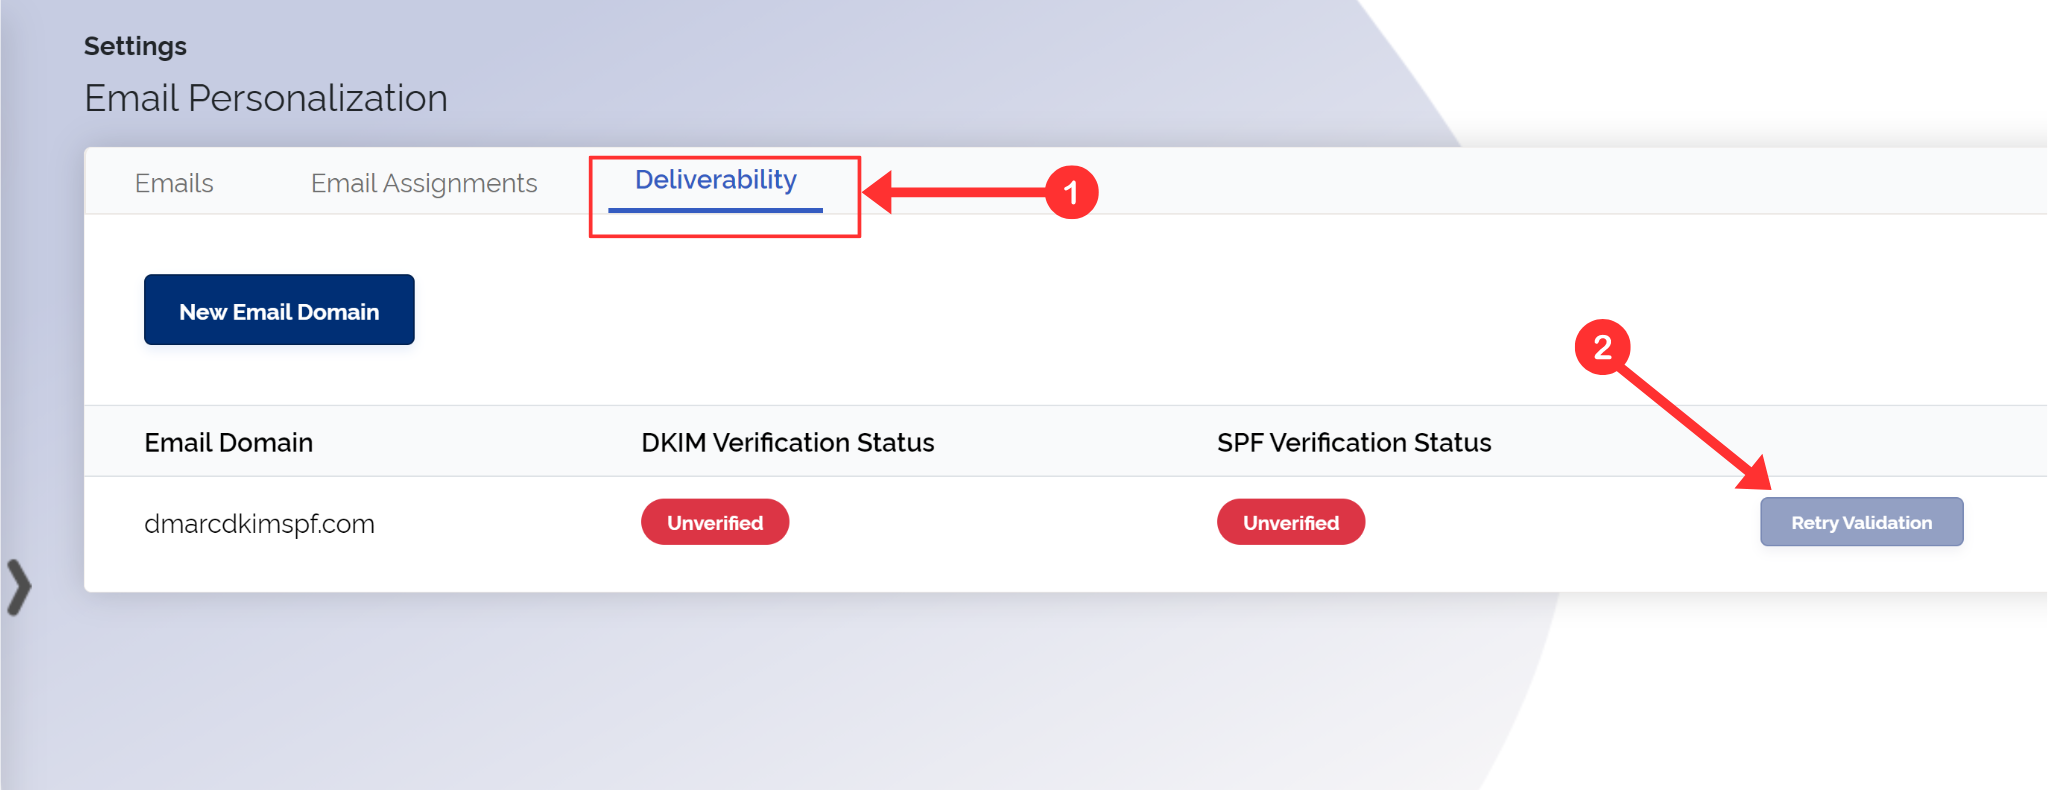
Go to the Deliverability tab and click Retry Validation.
-
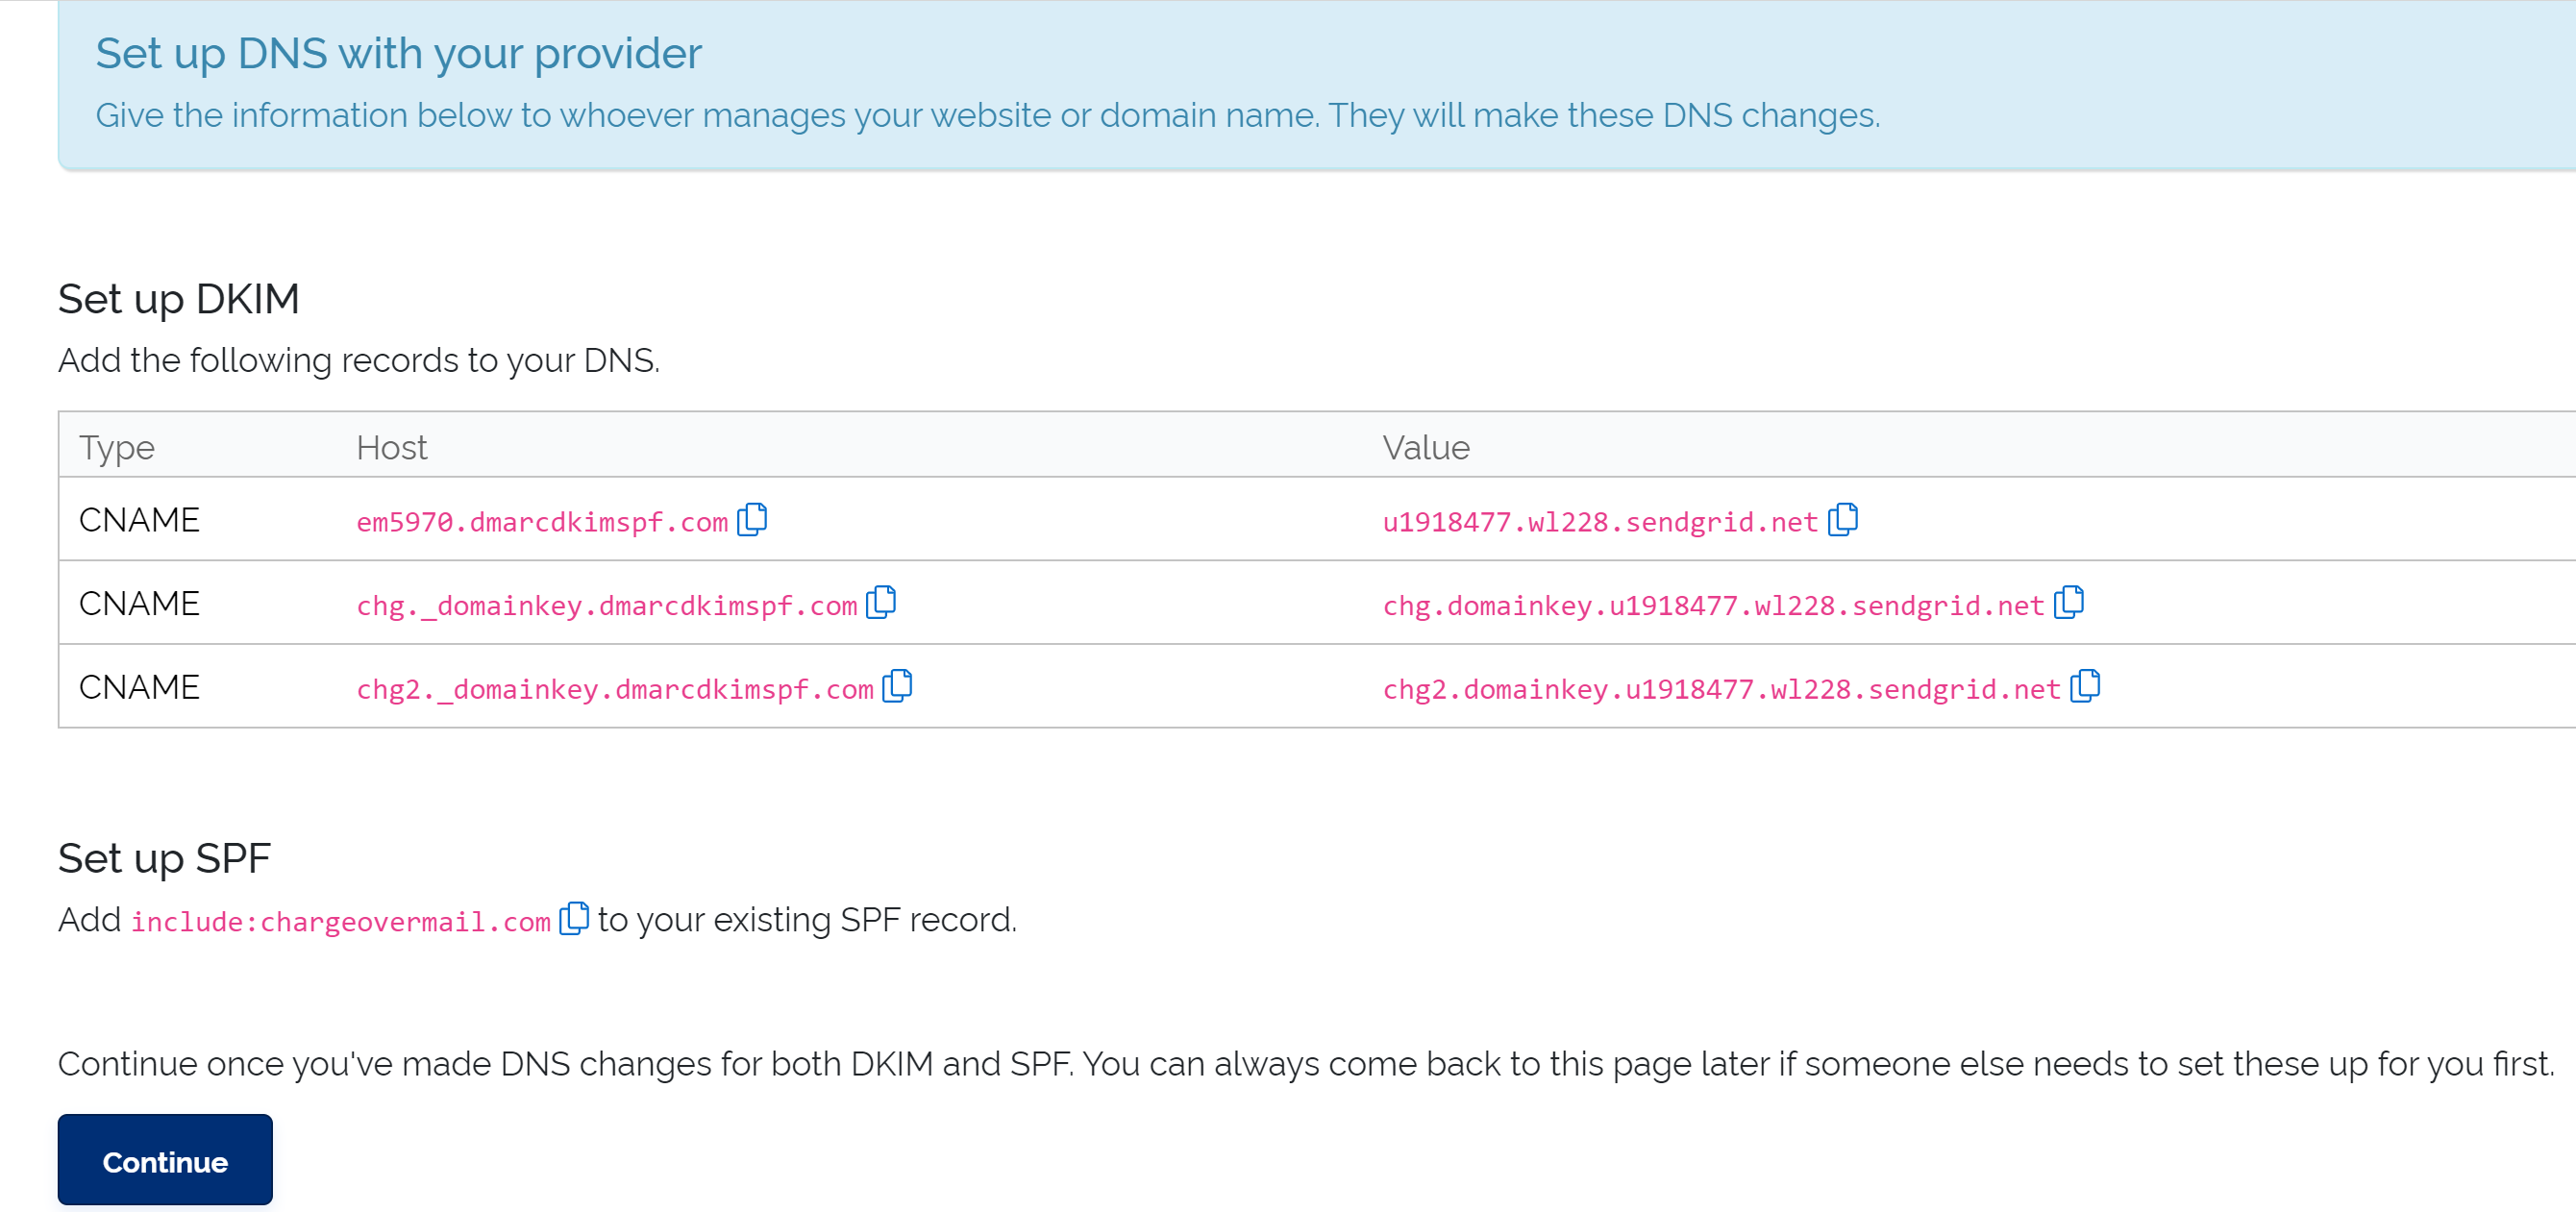
On the next page, you'll find the DKIM and SPF records.
Add ChargeOver DKIM to DNS provider:
-
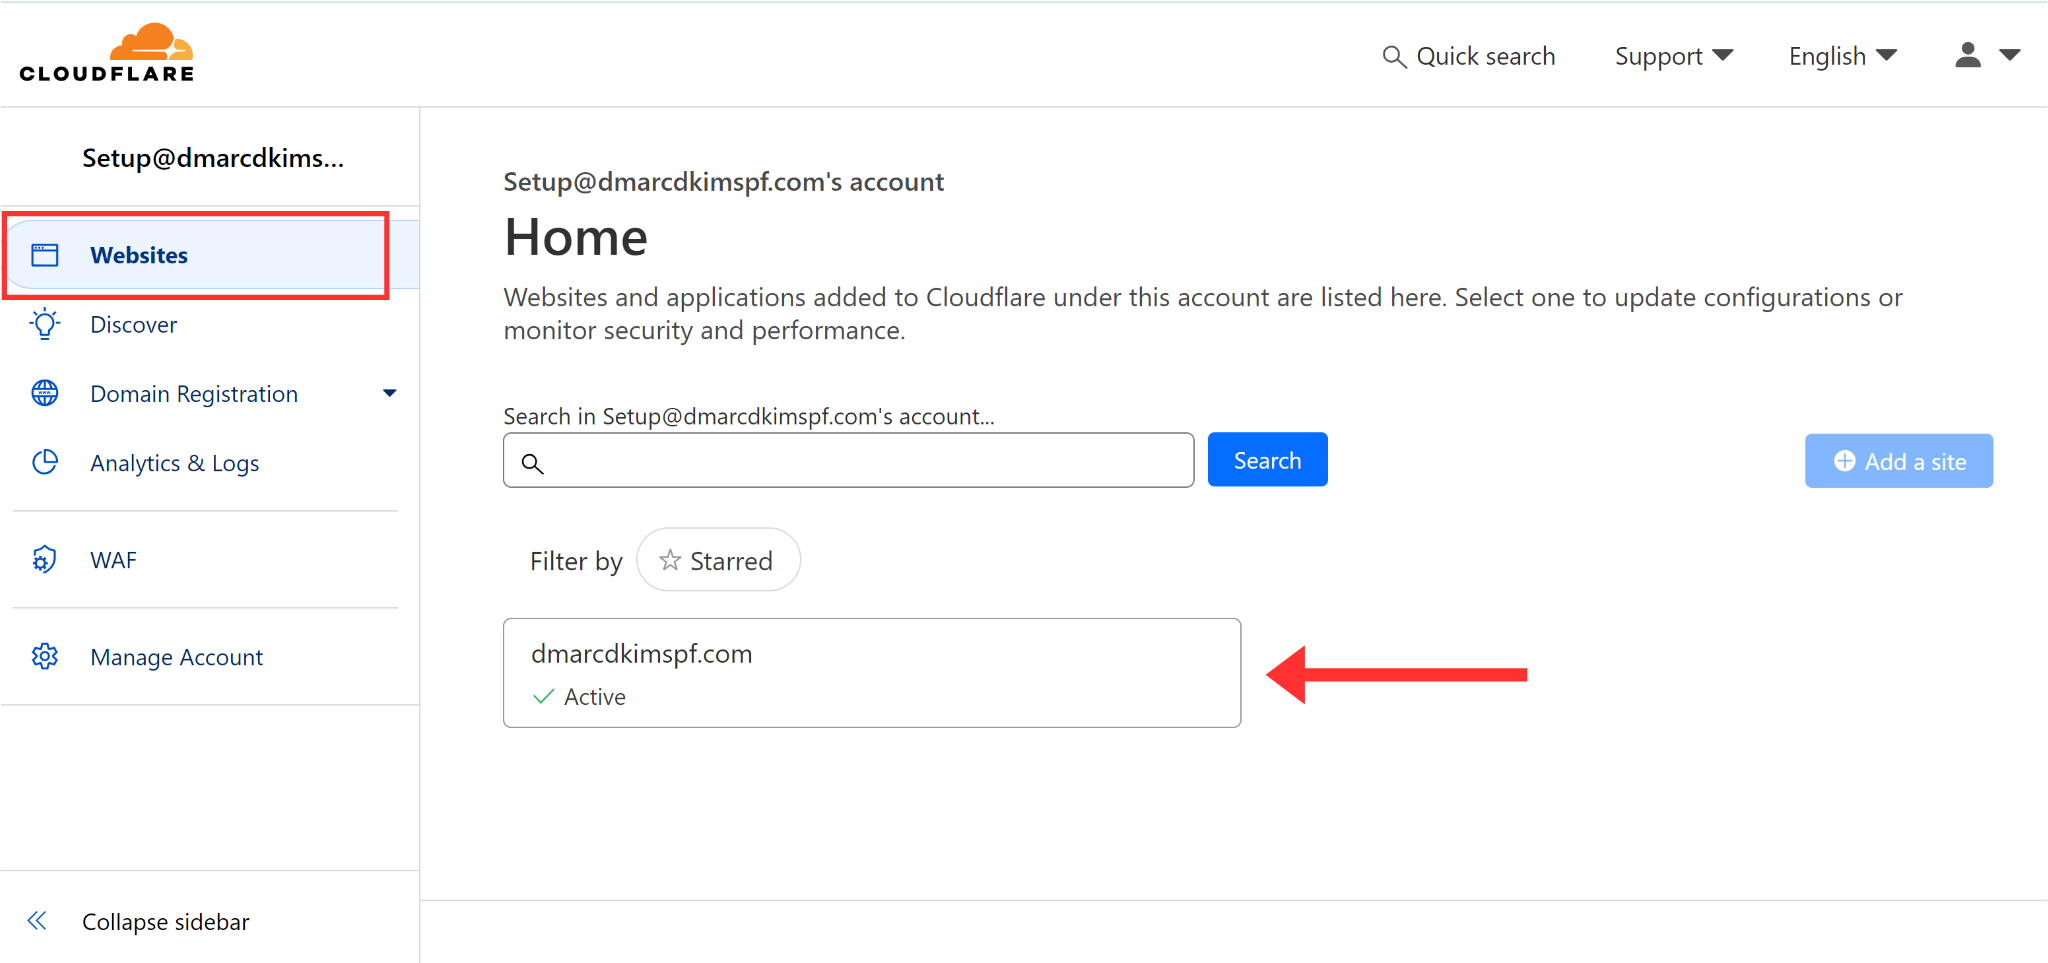
Login to your DNS provider and click your Website.
-
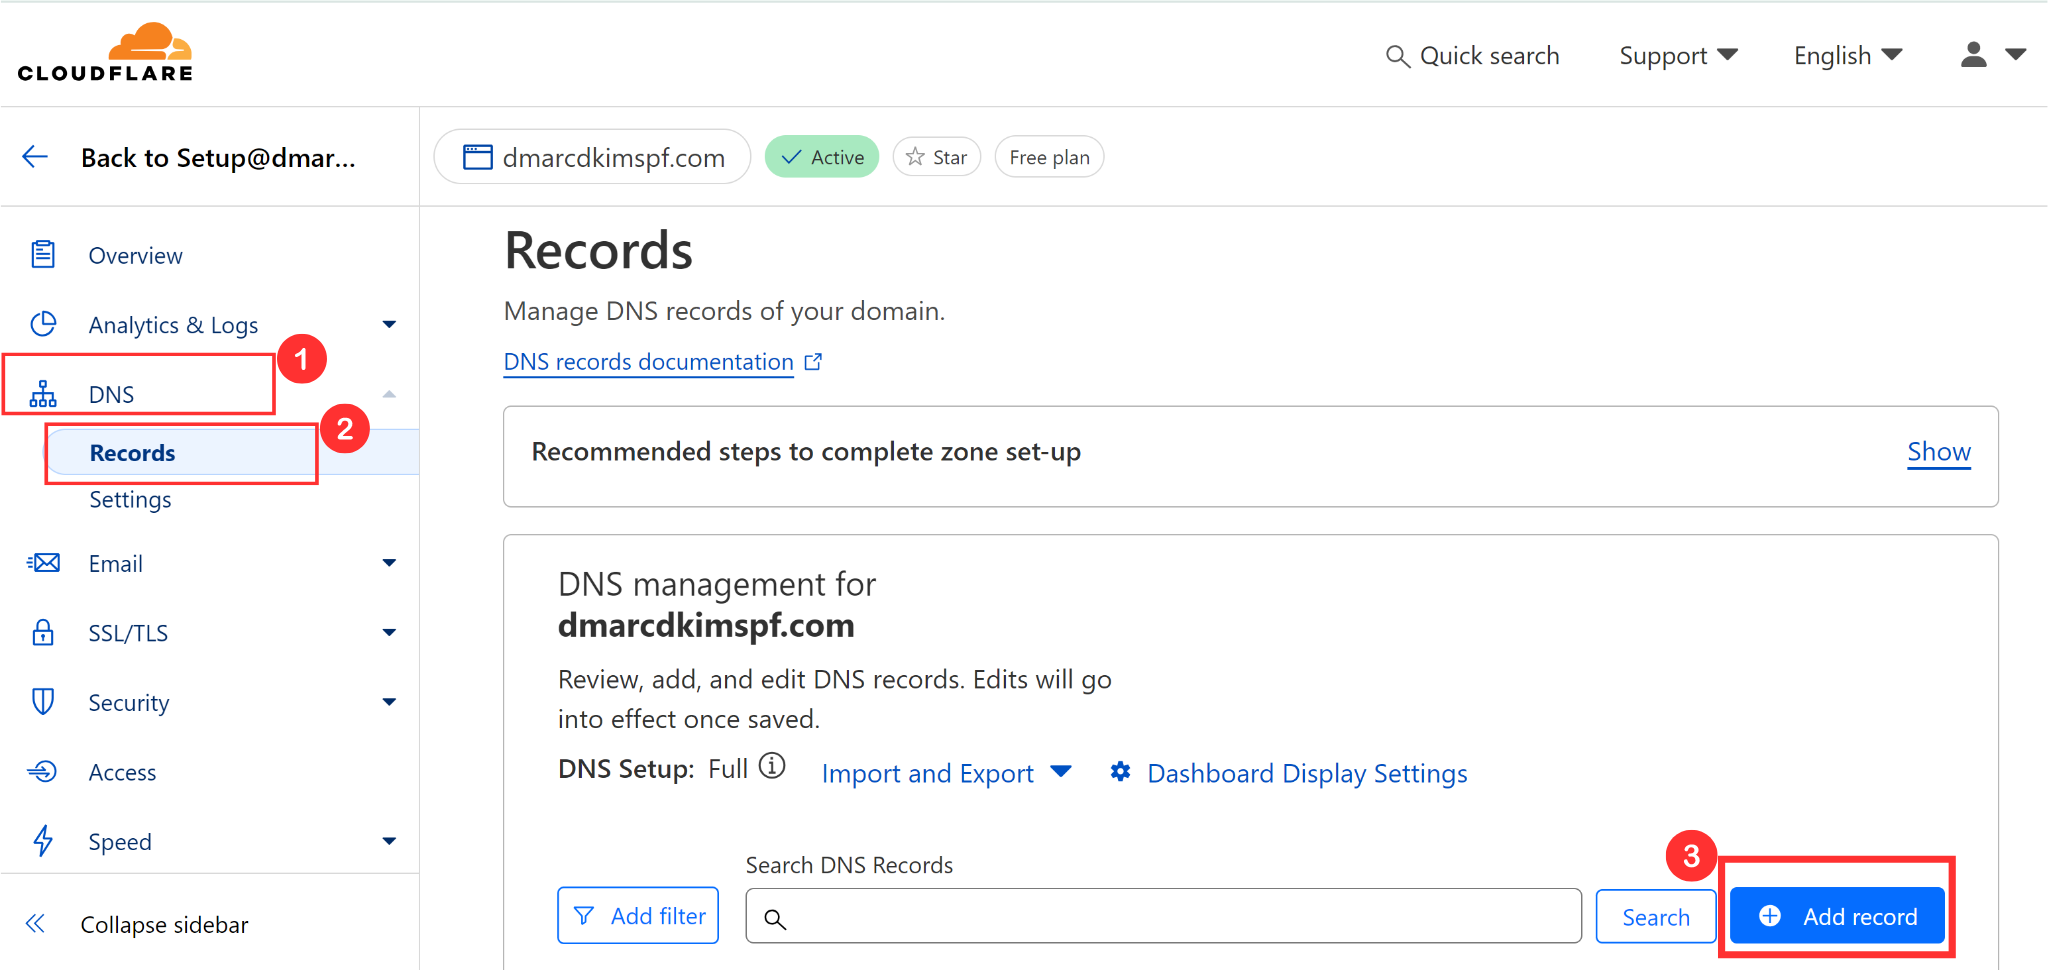
Go to DNS, select Records, and click "Add Records."
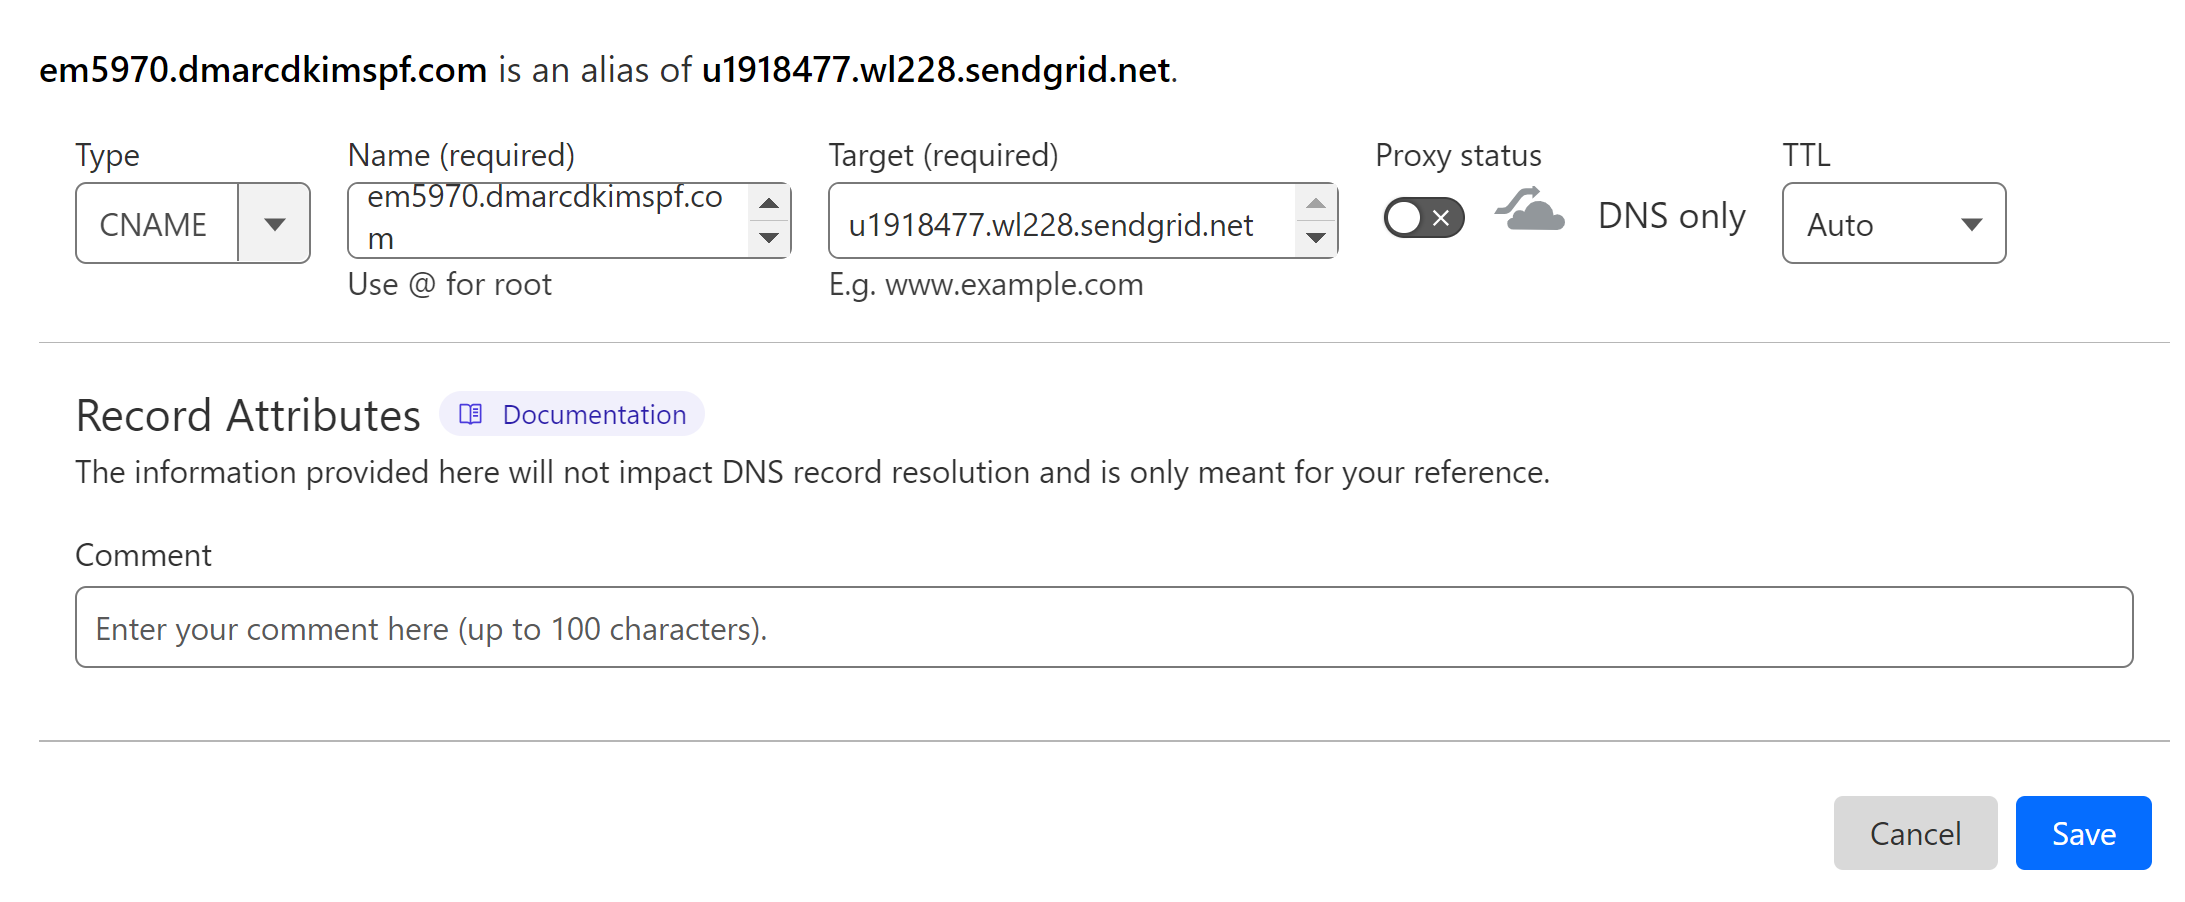
Select record type CNAME.
Copy the record name and paste it into the Name field.
Copy the record value and add it to the Target field.
-
Finally, click Save.
Add ChargeOver SPF Record:
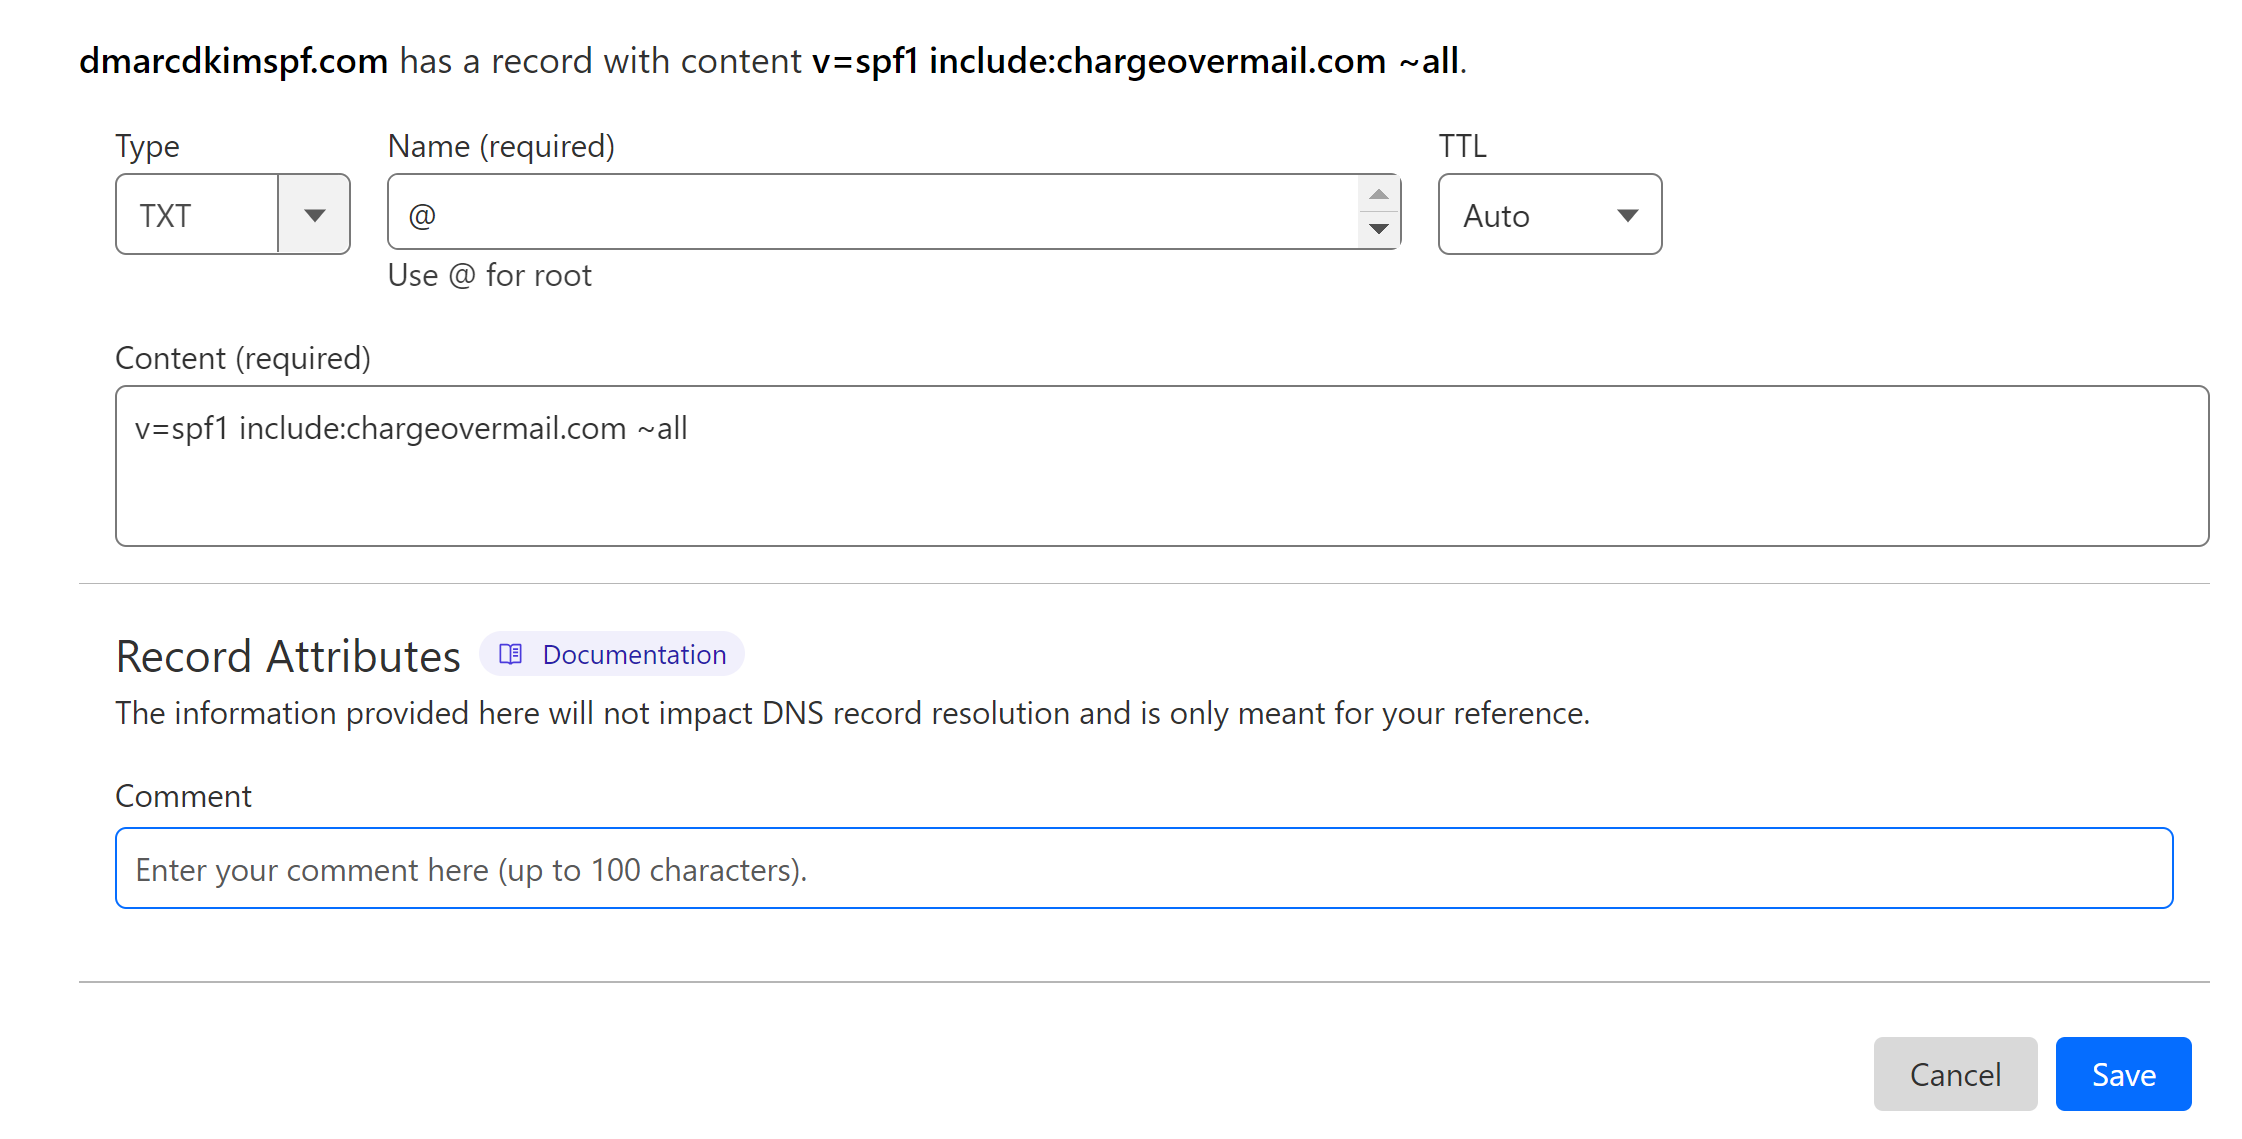
In your DNS dashboard, select type TXT.
In the Name field, write your domain name or write "@."
In the content field, write the SPF value: v=spf1 include:chargeovermail.com ~all.
-
Click the Save button.
Merge Multiple SPF Records:
Due to the limitations of your DNS provider, you can only add one SPF record to your domain. If your domain has an existing SPF record, merge it with ChargeOver SPF to get a combined value.
At DmarcDkim.com, open the SPF Merger tool.
Add your domain name and ChargeOver SPF value and click Megre SPF Values.
-
You will get a merged value that contains both records.
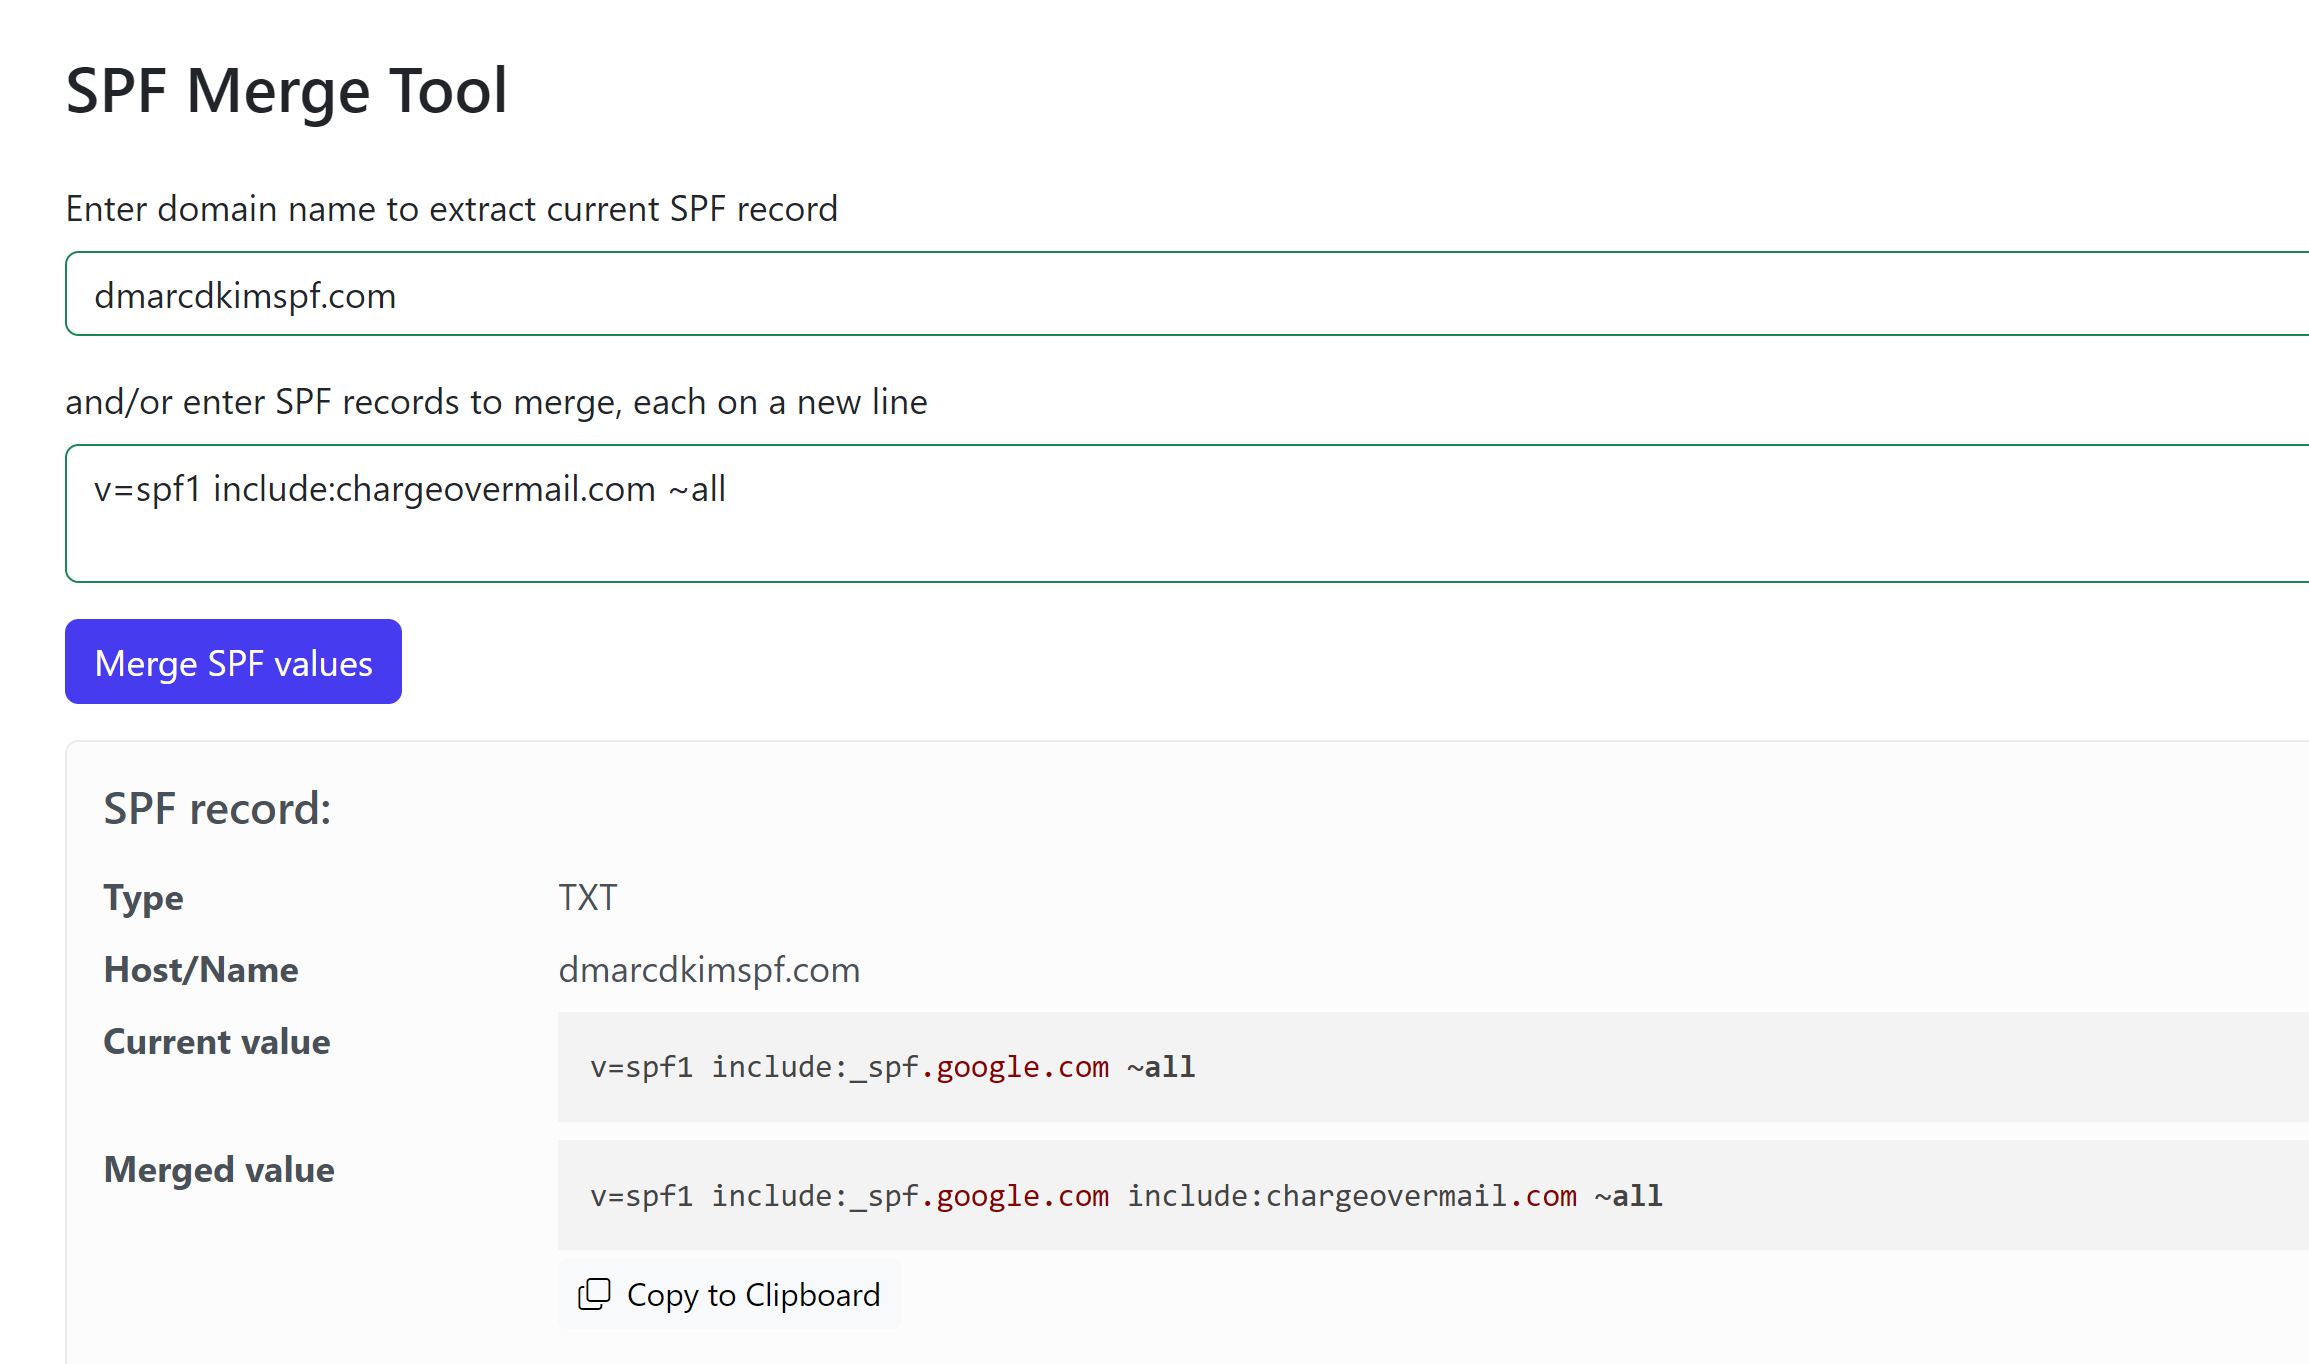
Replace the existing SPF value with the merged value in the DNS dashboard.
Verify Records:
-
Return to the DNS records page and click Continue.
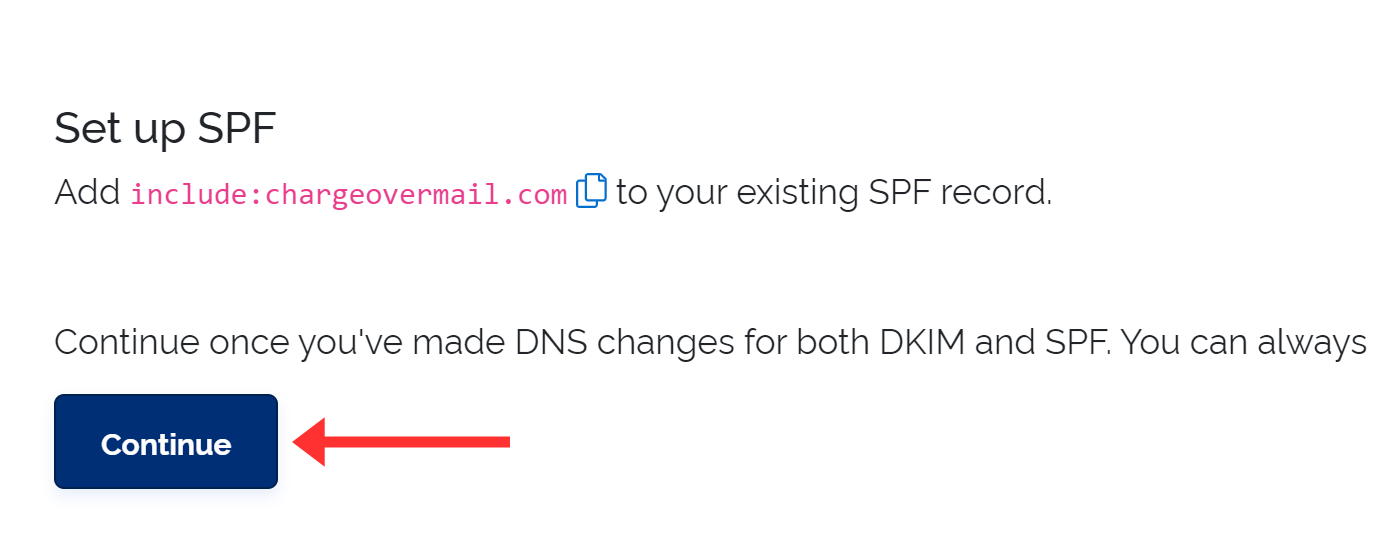
You should see green badges under DKIM and SPF if the records are added correctly.
NOTE: Records may take up to 24 hours to validate.
Add the ChargeOver DMARC Record:
To generate a strict DMARC policy, use the Dmarcdkim.com DMARC Check tool. It allows you to specify rules for unauthorized emails and have actionable insights into your email performance.
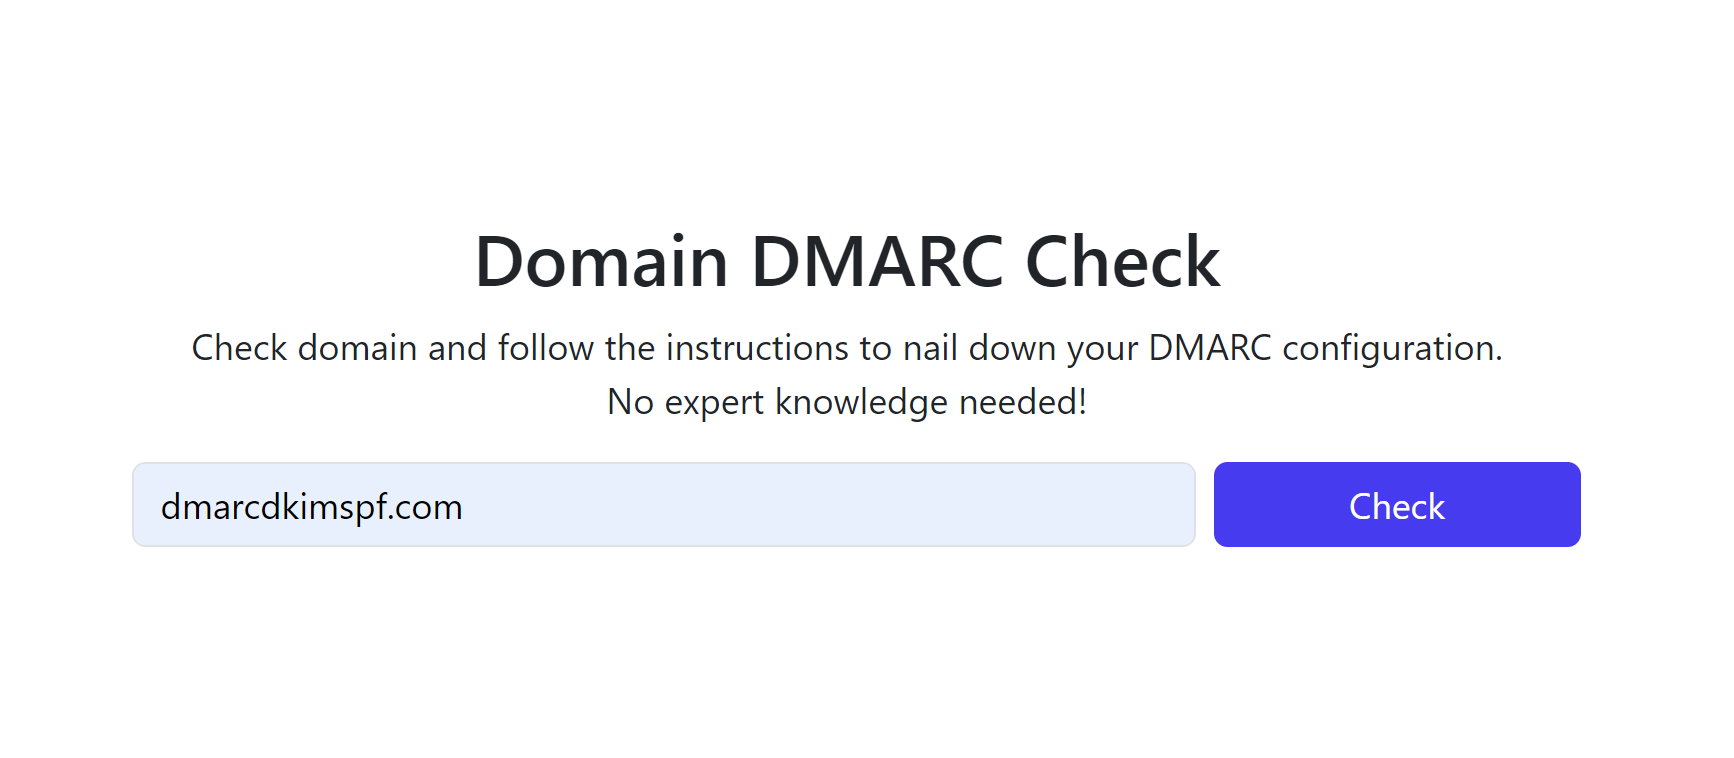
Go to the DmarcDkim.com DMARC Check tool.
-
Add your domain and click Check.
-
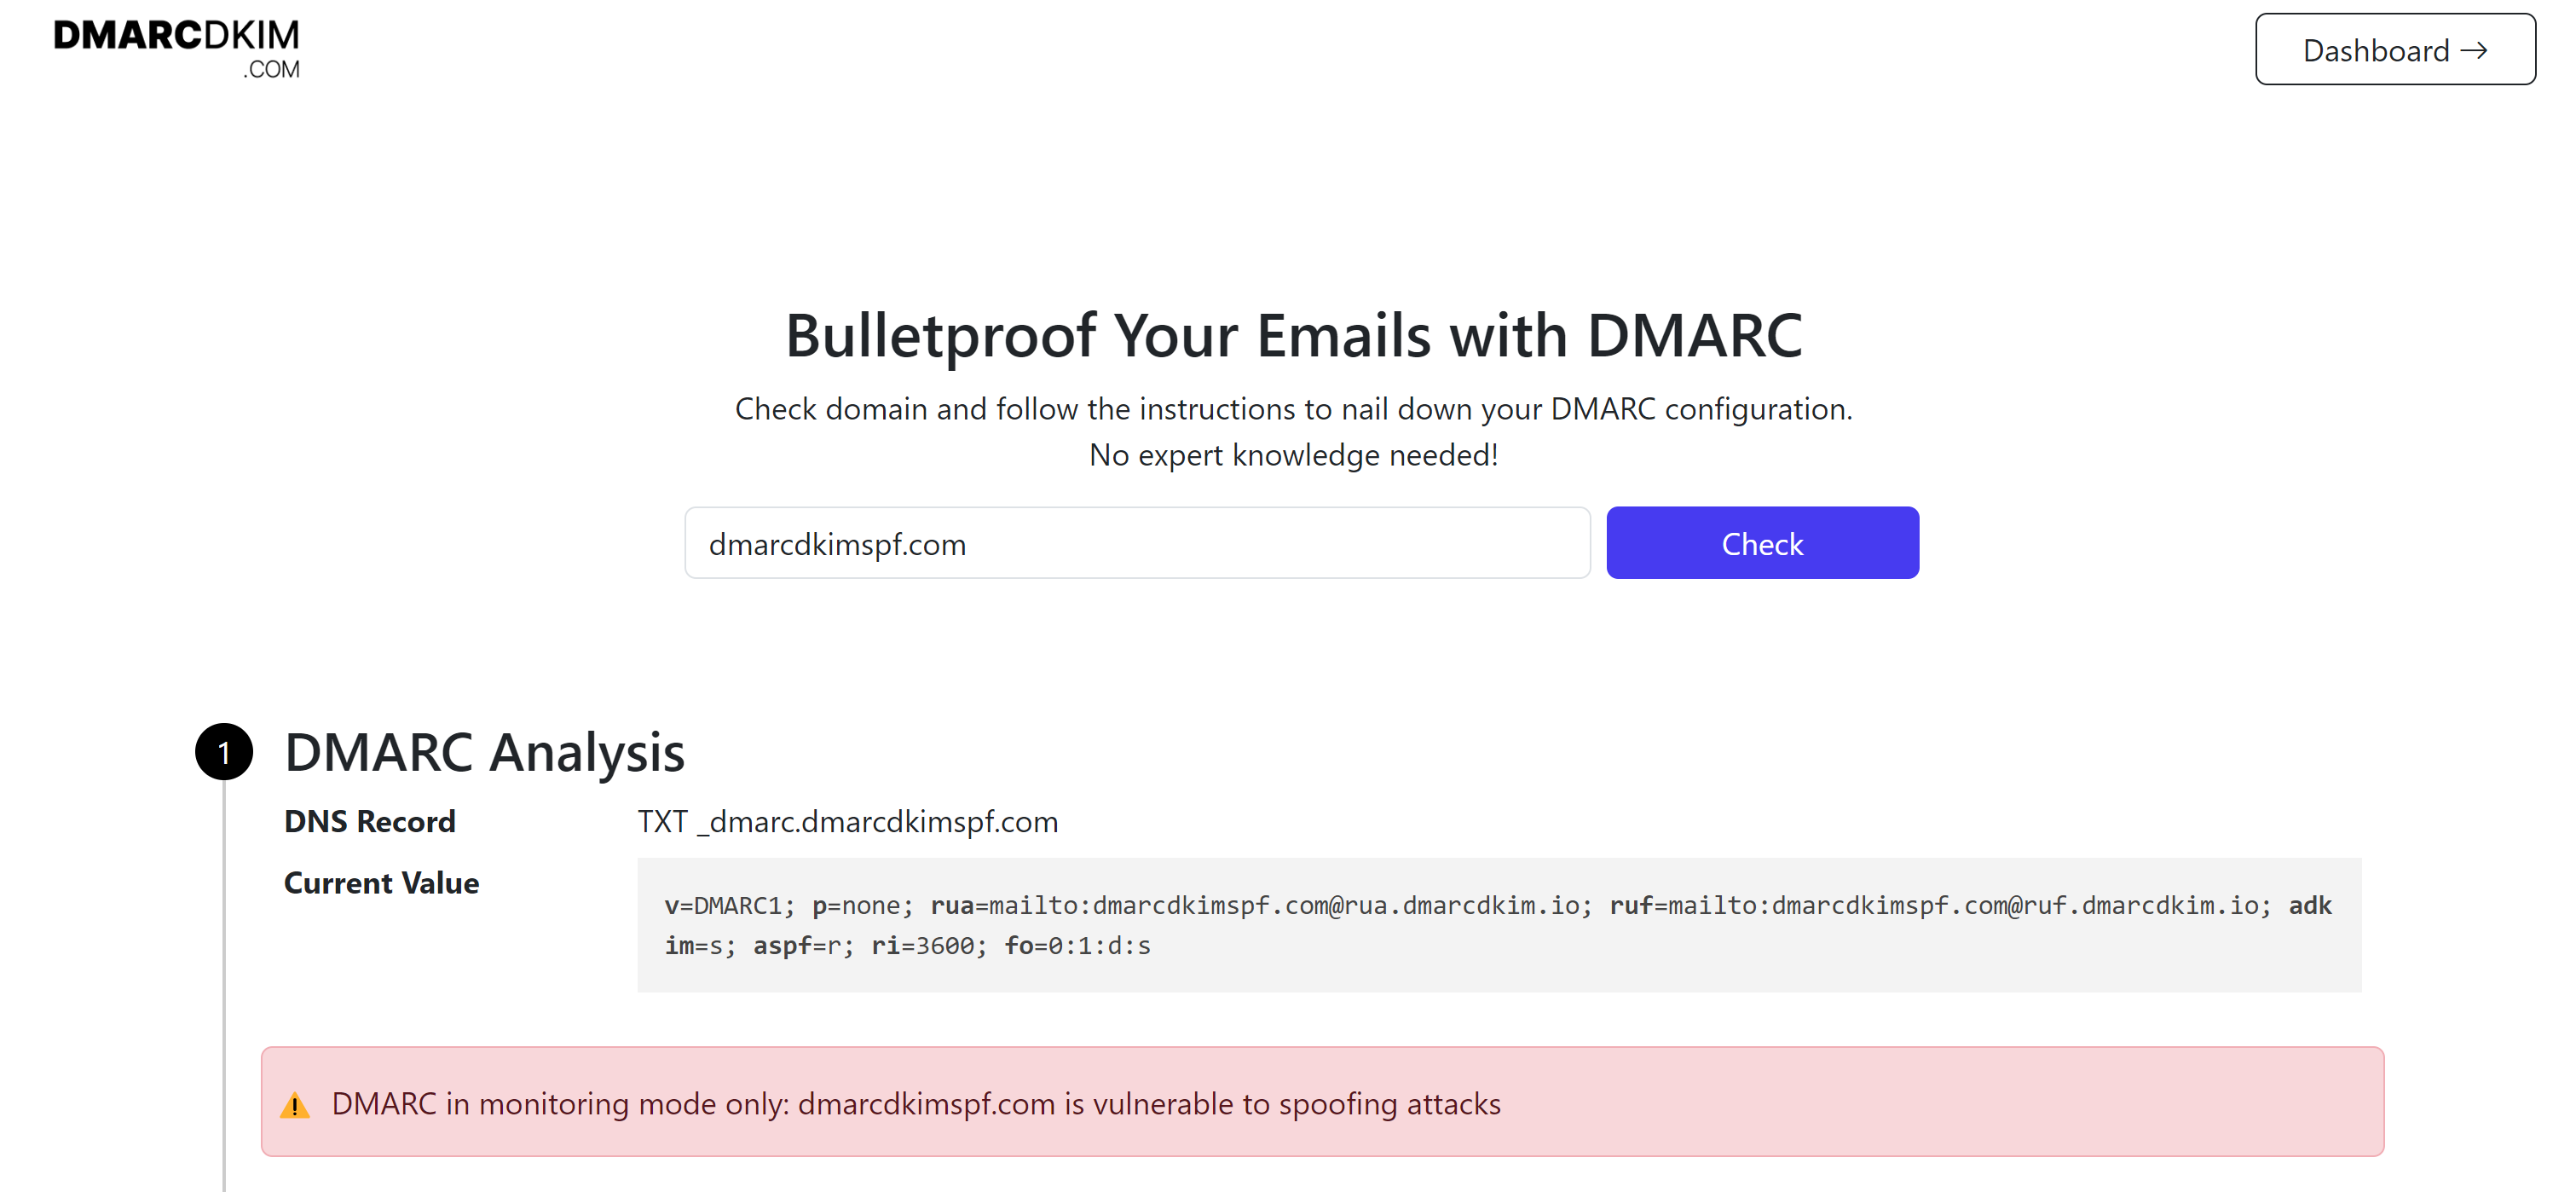
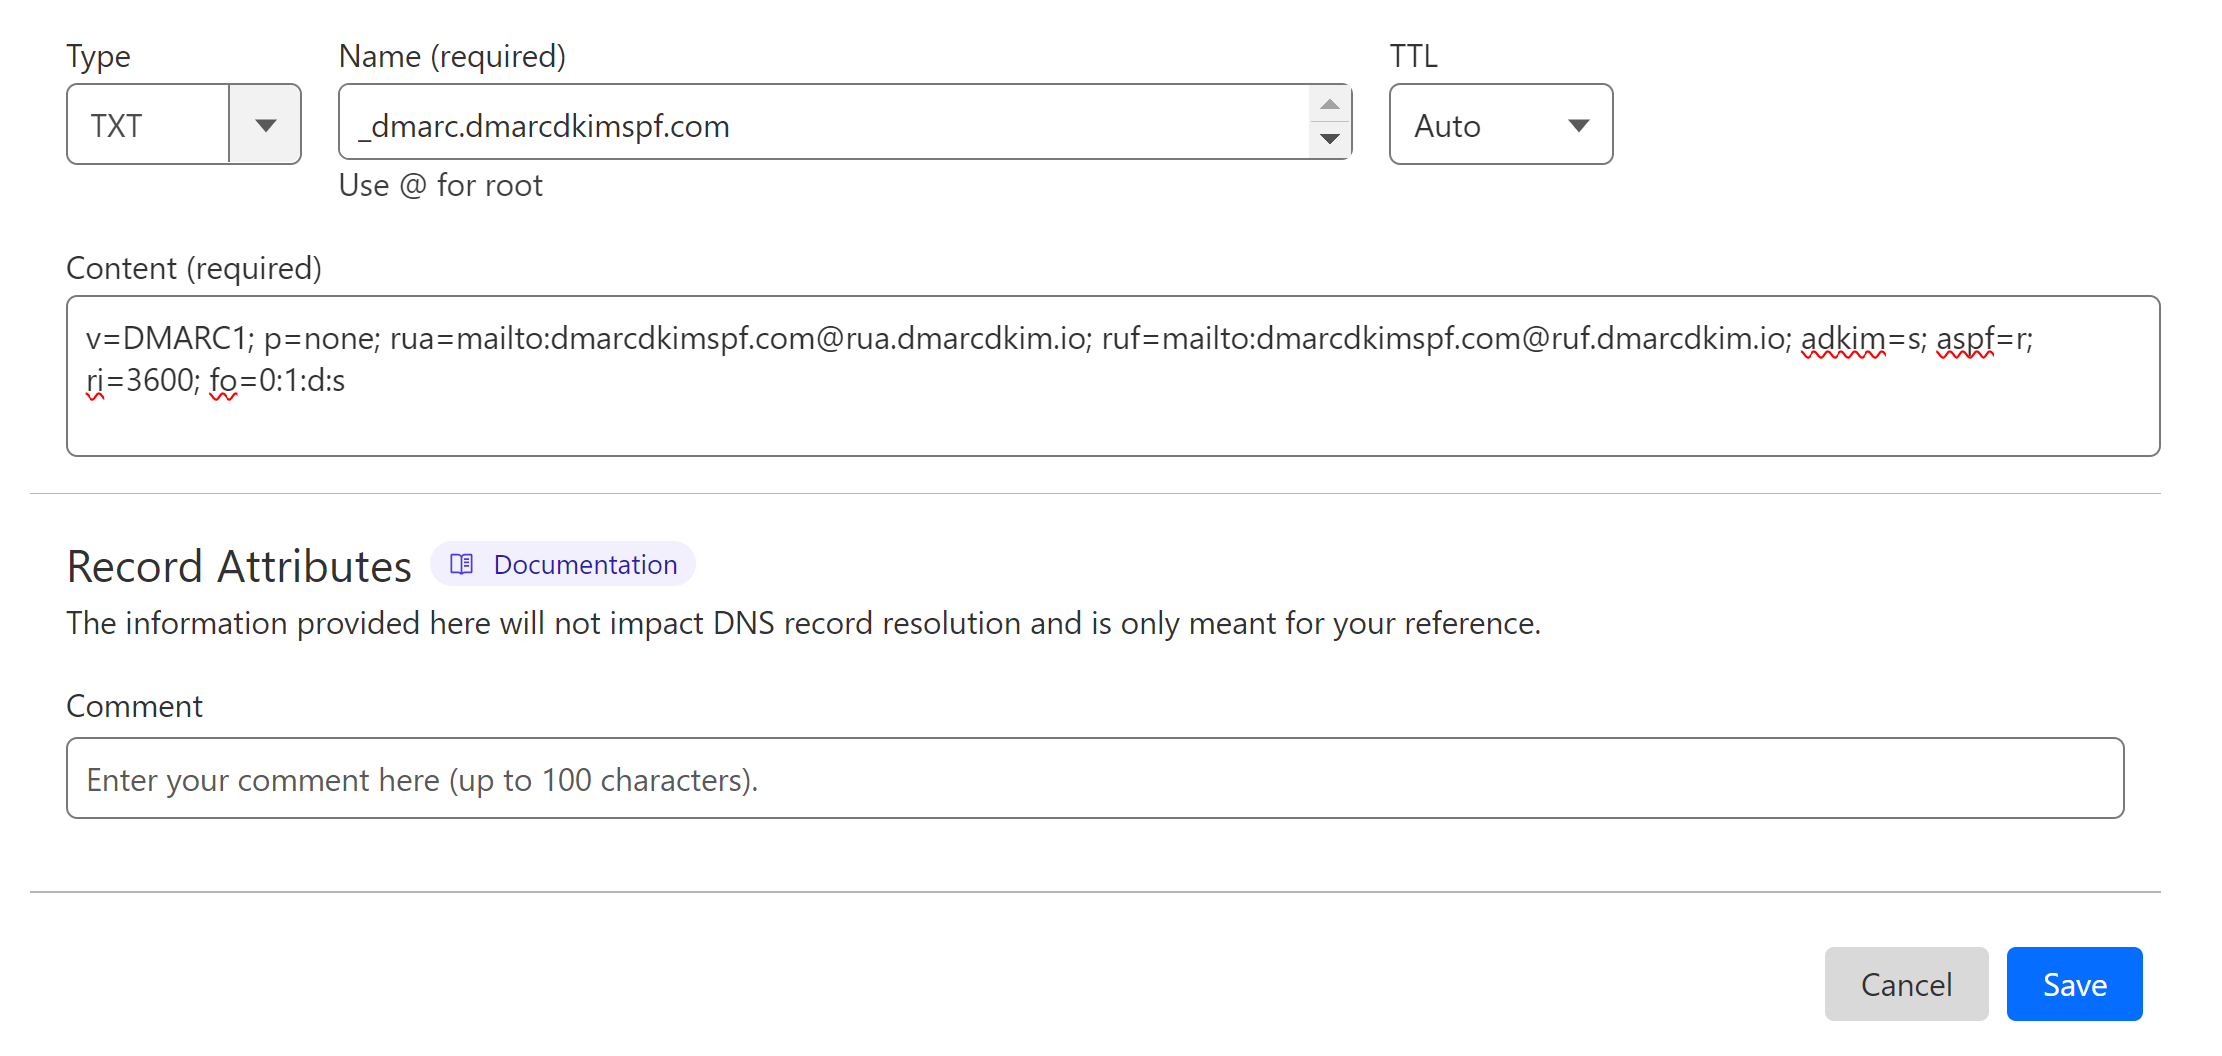
The tool generates a DMARC value tailored to your website.
-
Add this Suggested value to your DNS dashboard.
Click Sign up now to get access to the Reports Dashboard where you can have actionable insights.
If the records don't validate after 24 hours, there might be a misconfiguration in the DNS setup. To troubleshoot the domain authentication issues, hire a DmarcDkim.com expert.
Check domain and follow the instructions to nail down your DMARC configuration.
No expert knowledge needed!


