
Setup Intercom DNS Records for Domain Authentication
Check your domain for DMARC, DKIM, SPF and MX records. Get a free report.
How to Setup Intercom Domain Authentication Records - DKIM, DMARC
SPF, DKIM, and DMARC are the commonly used email authentication standards that are necessary to protect emails against spoofing and build trust with email inbox service providers (ISPs) like Google.
Without these authentications, your emails are likely to be marked as spam by the ISPs. Therefore, several email management platforms like Intercom, provide the DNS records that you can add to your DNS provider for verification.
This step-by-step guide will walk you through the complete DNS setup and domain authentication process. Read on to learn how to configure DNS records in Intercom.
Configure Intercom DNS Records:
-
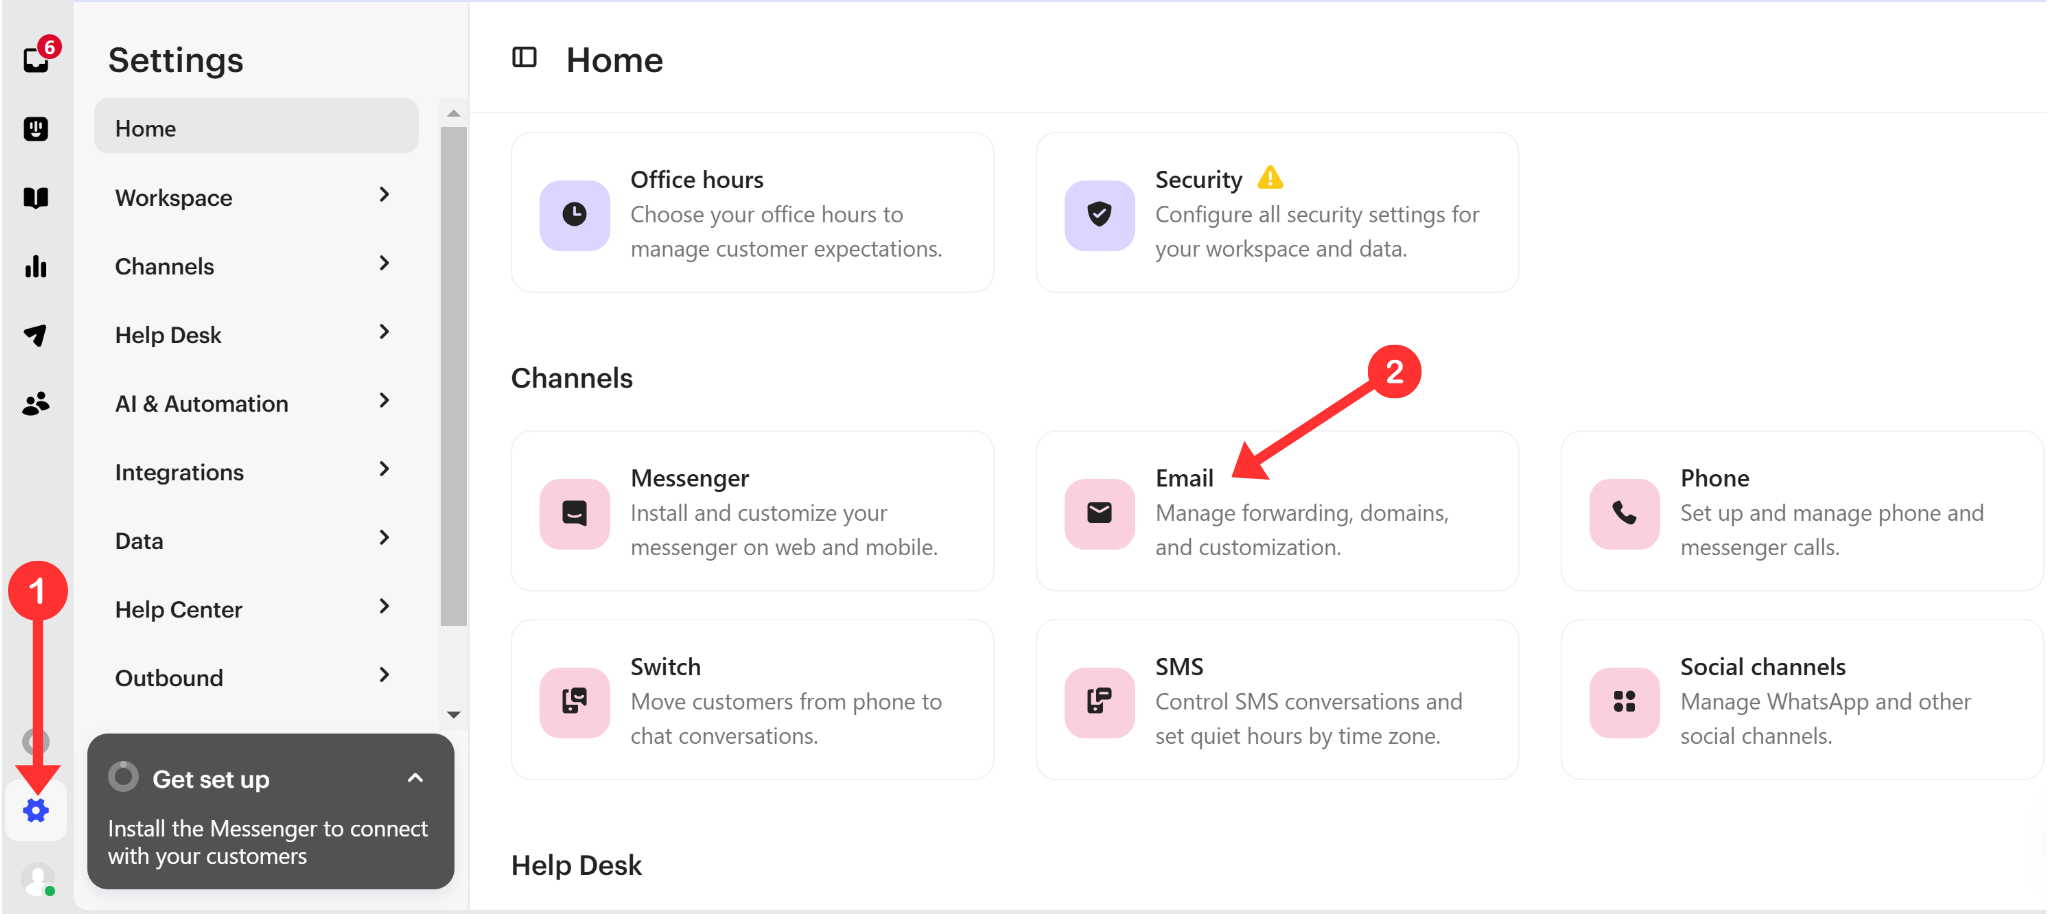
Go to Intercom Settings and open the Emails tab.
-
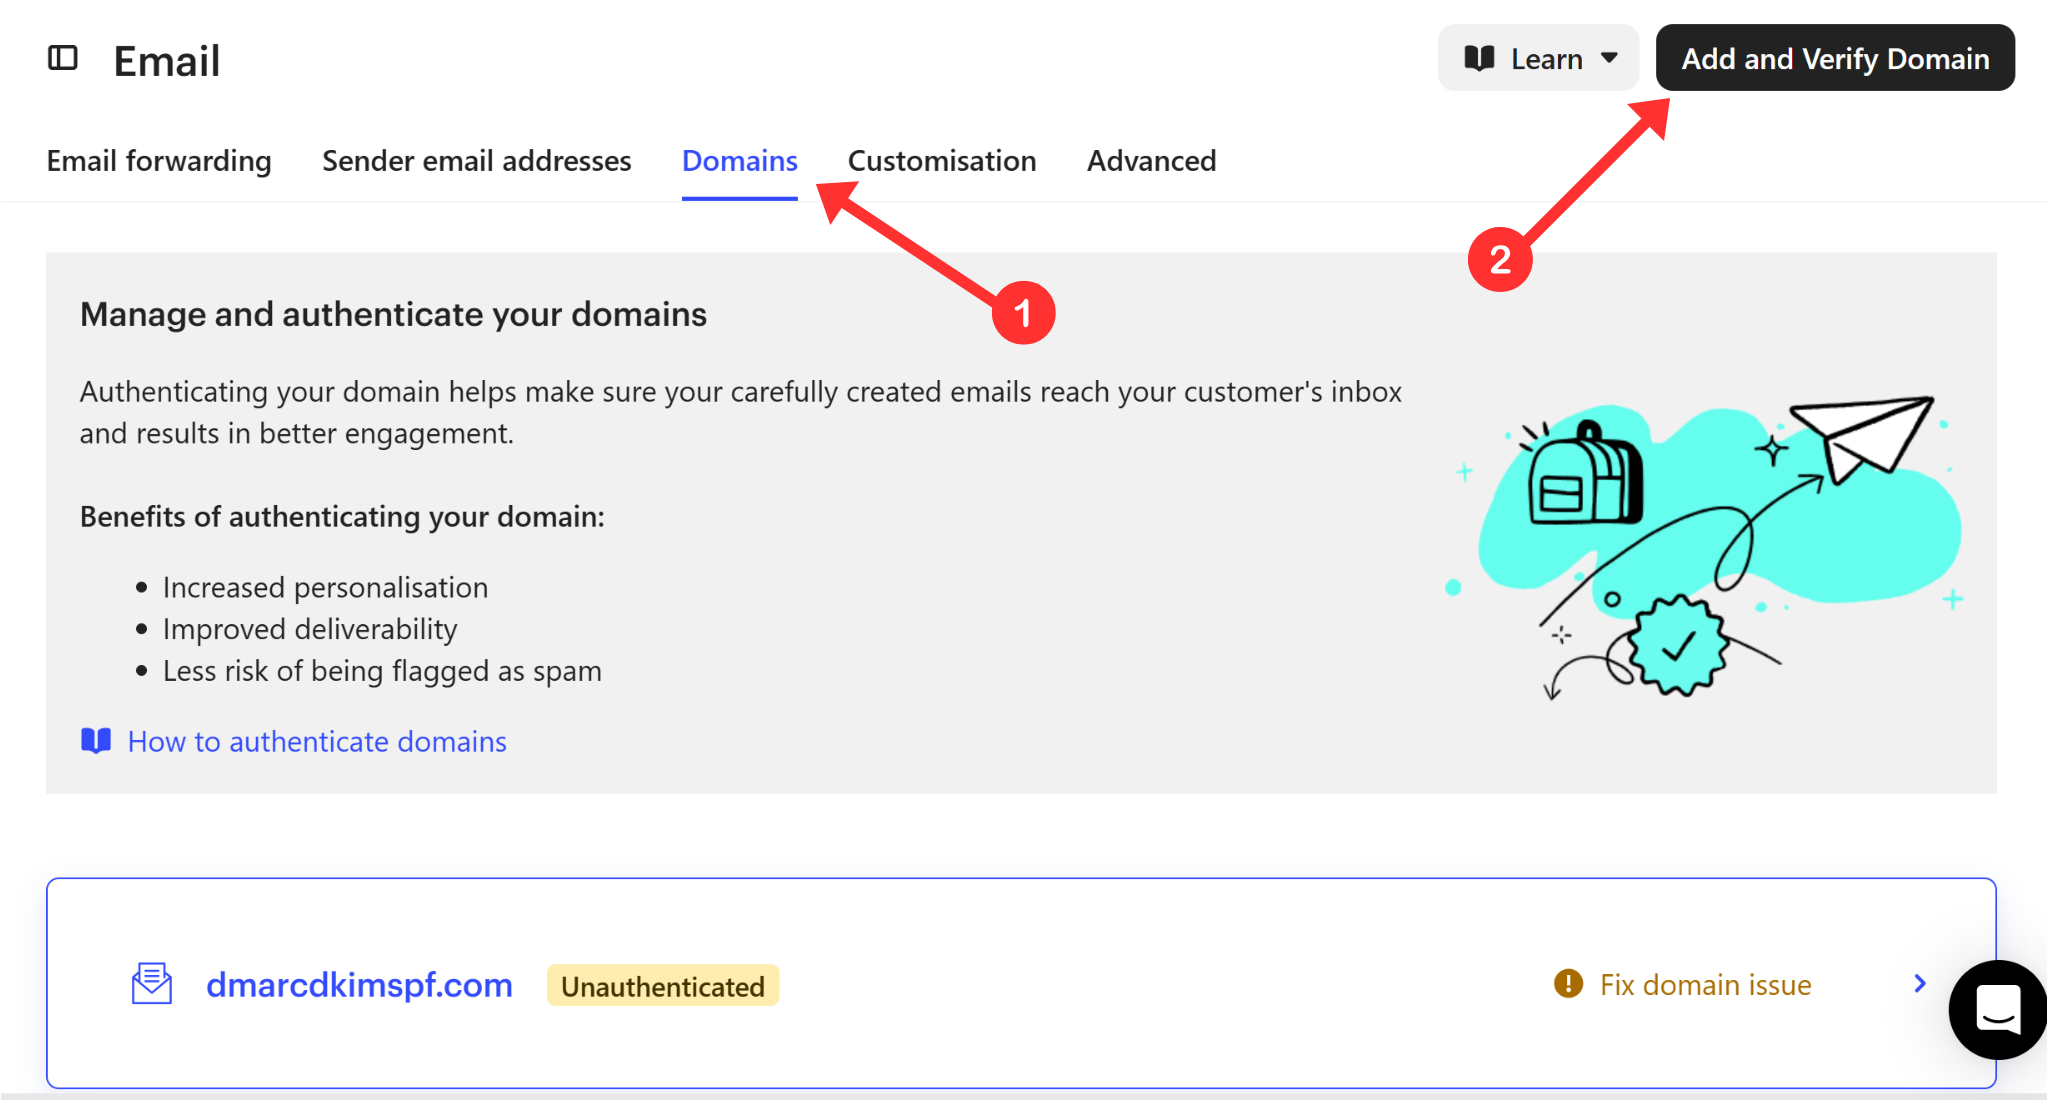
Open the Domains section and click Add and Verify Domain.
-
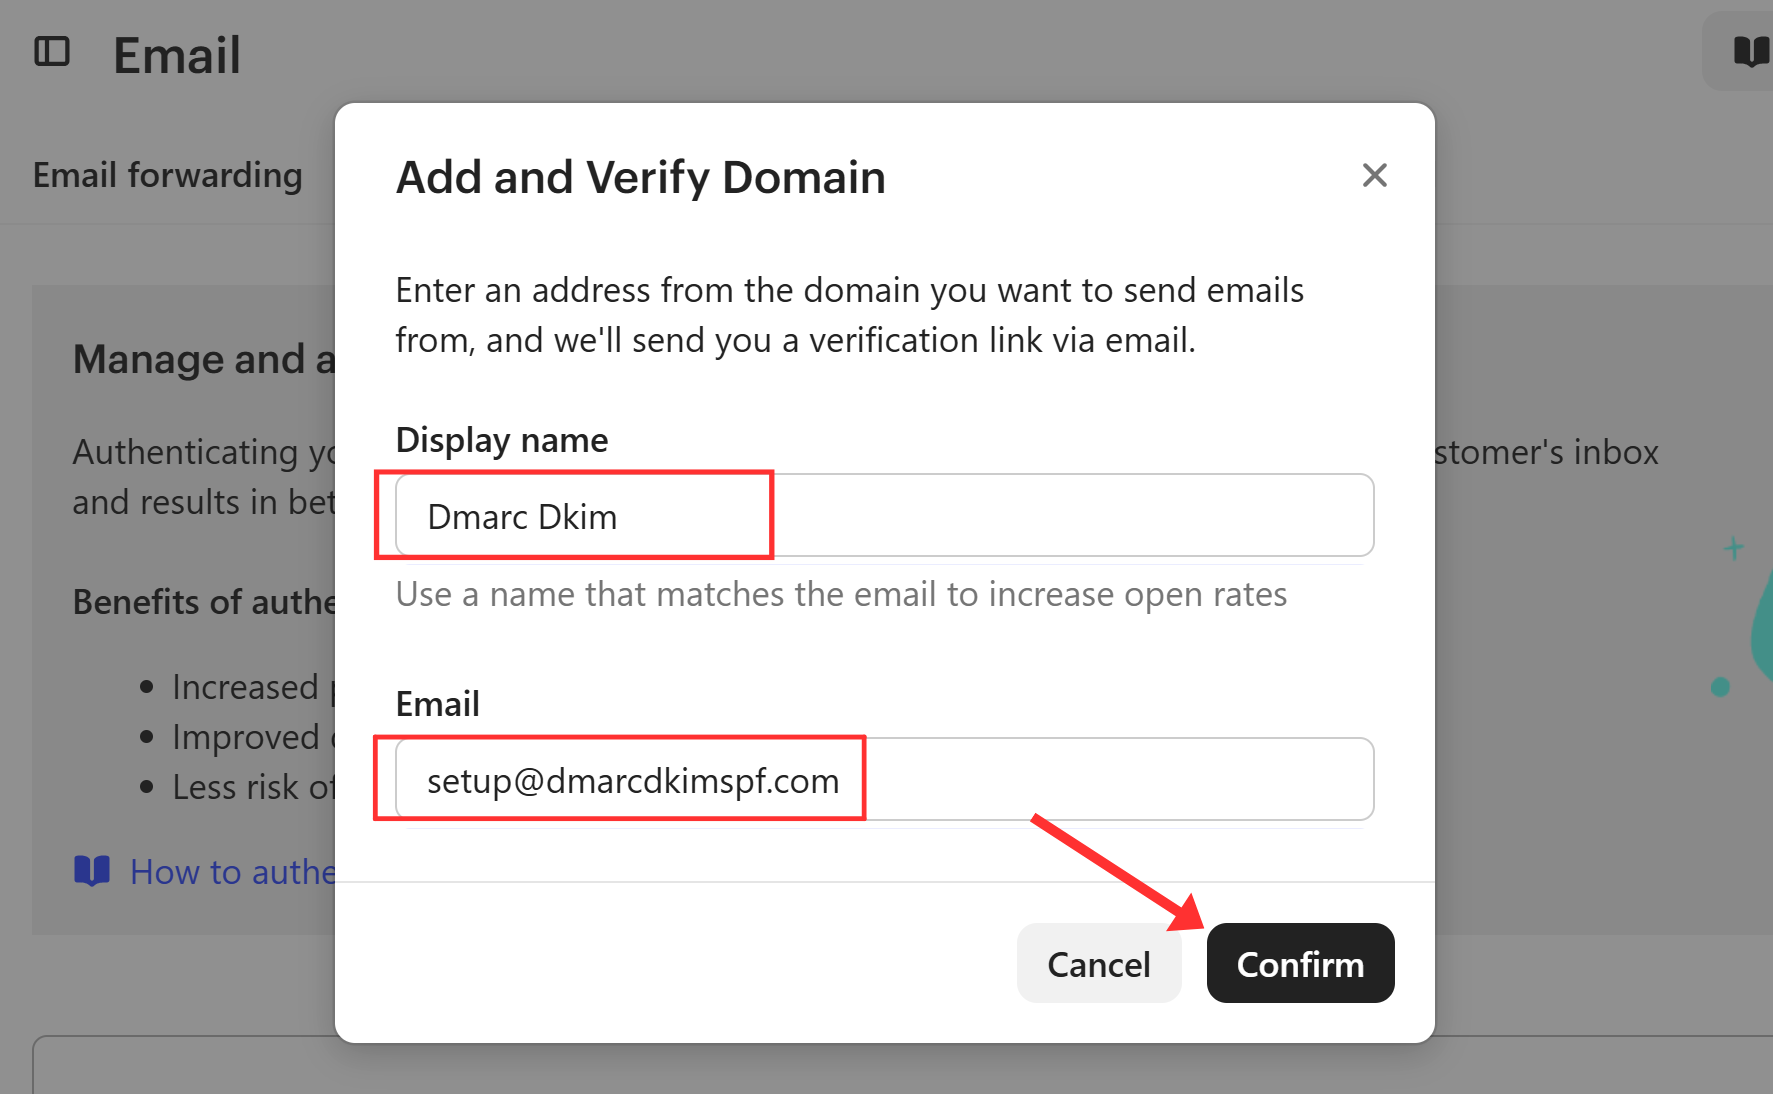
Write down the display name and your email, and click Confirm.
Open your email inbox and click the verification link sent by Intercom.
Return to the Intercom Domains tab and click on your domain name.
-
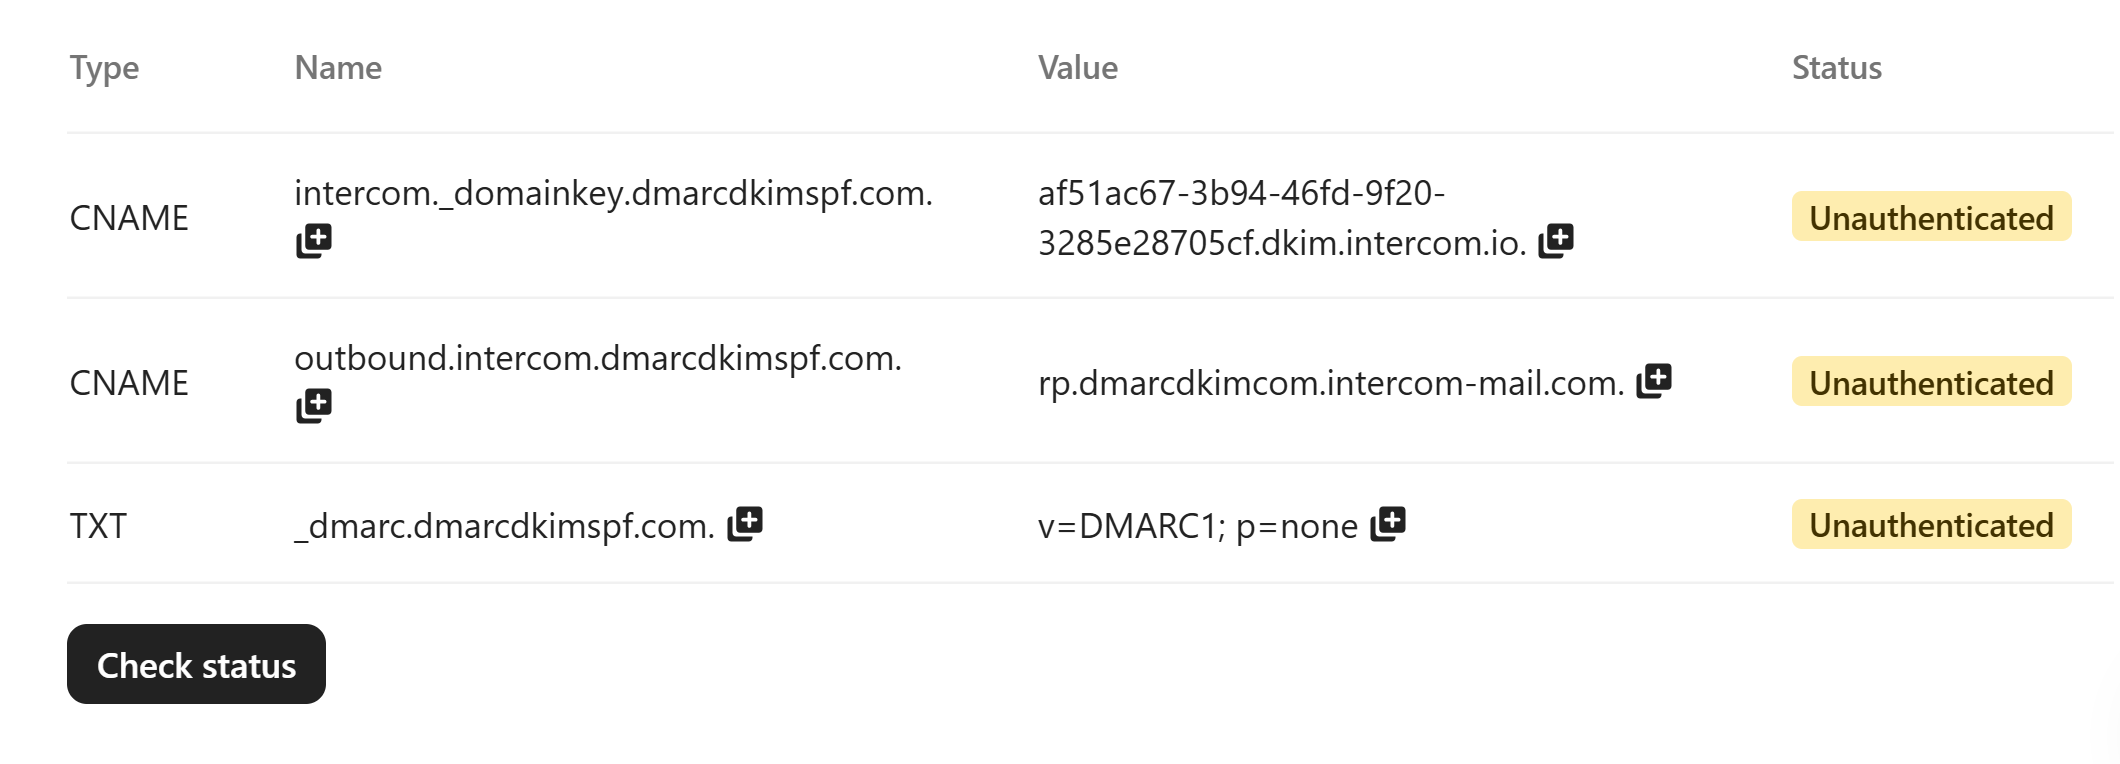
Now click "Copy your records."

It will lead you to the DNS records section where you can find two CNAME and one TXT record. Add these records to your DNS provider.
Setup Intercom DKIM CNAME Record in DNS Provider:
Login to your DNS provider. We are using Cloudflare for this tutorial.
-
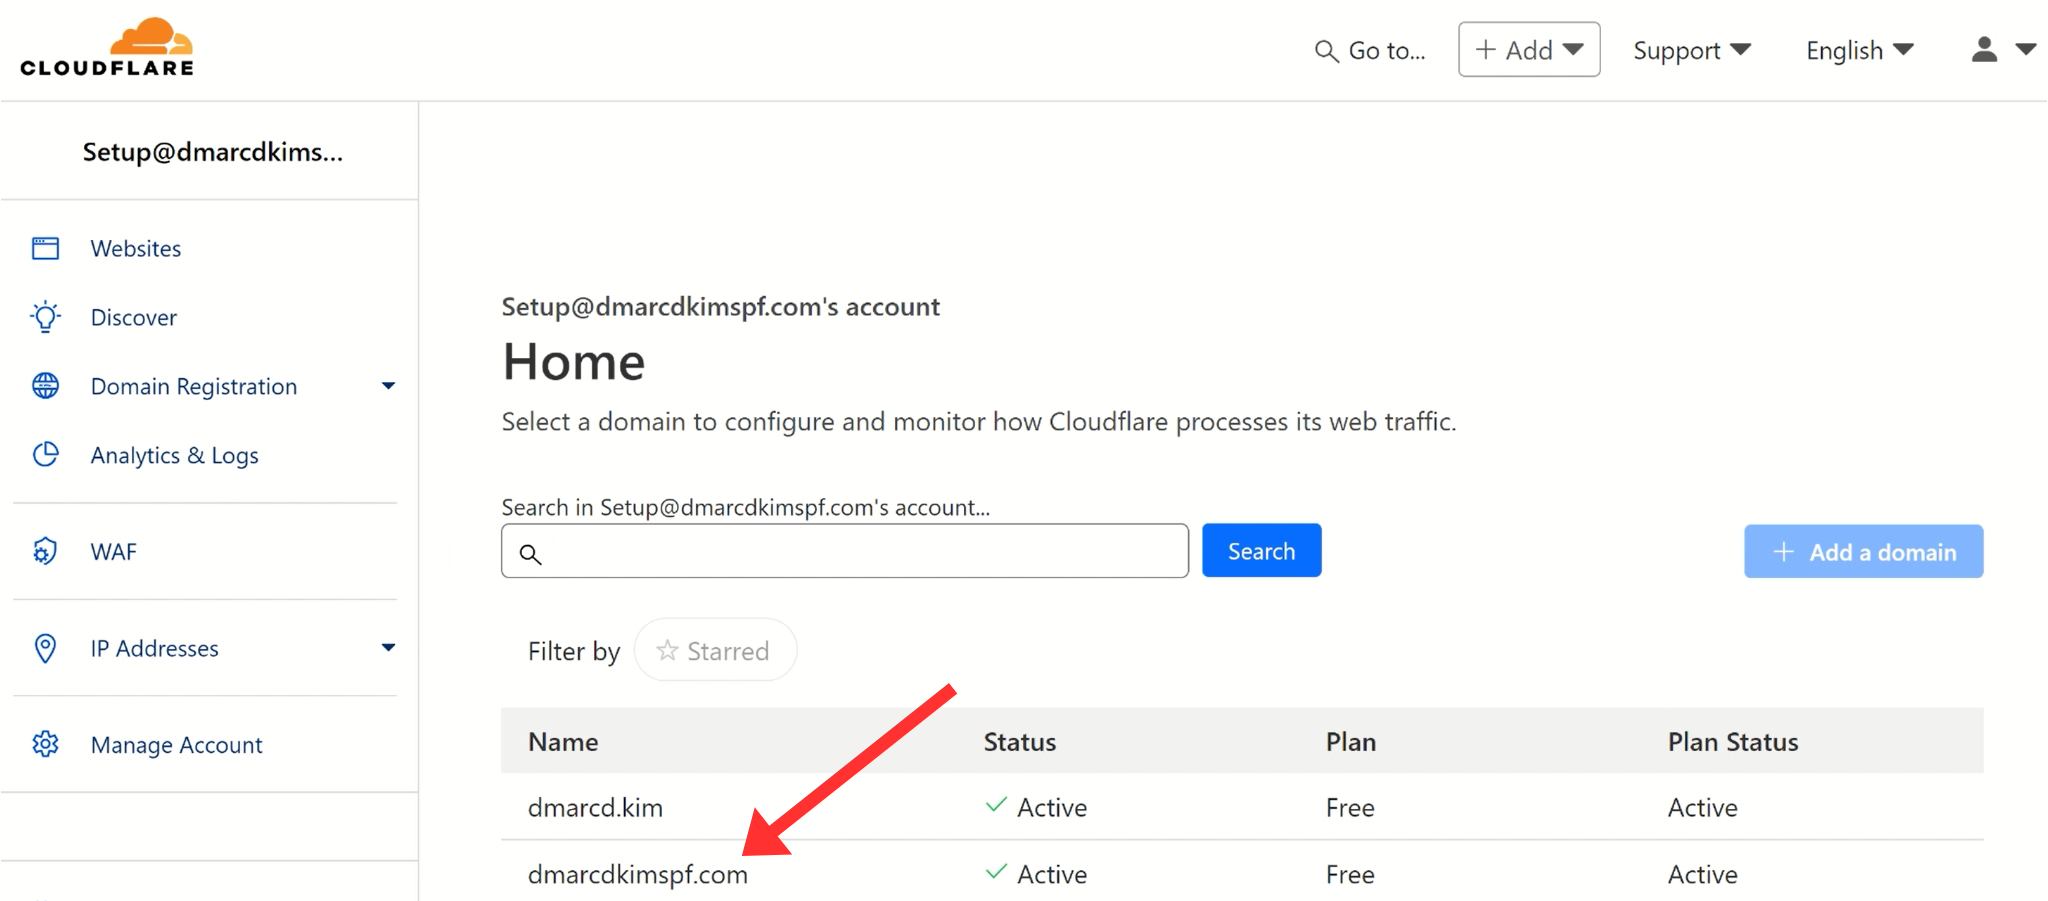
Open your domain and go to the DNS tab.
-
On the DNS dashboard, click Add Record.

Select type CNAME.
Copy the hostname from Intercom and paste it into the Name field in the DNS dashboard.
Now copy the record value and put it into the Target field.
-
Turn off the proxy status and click Save.
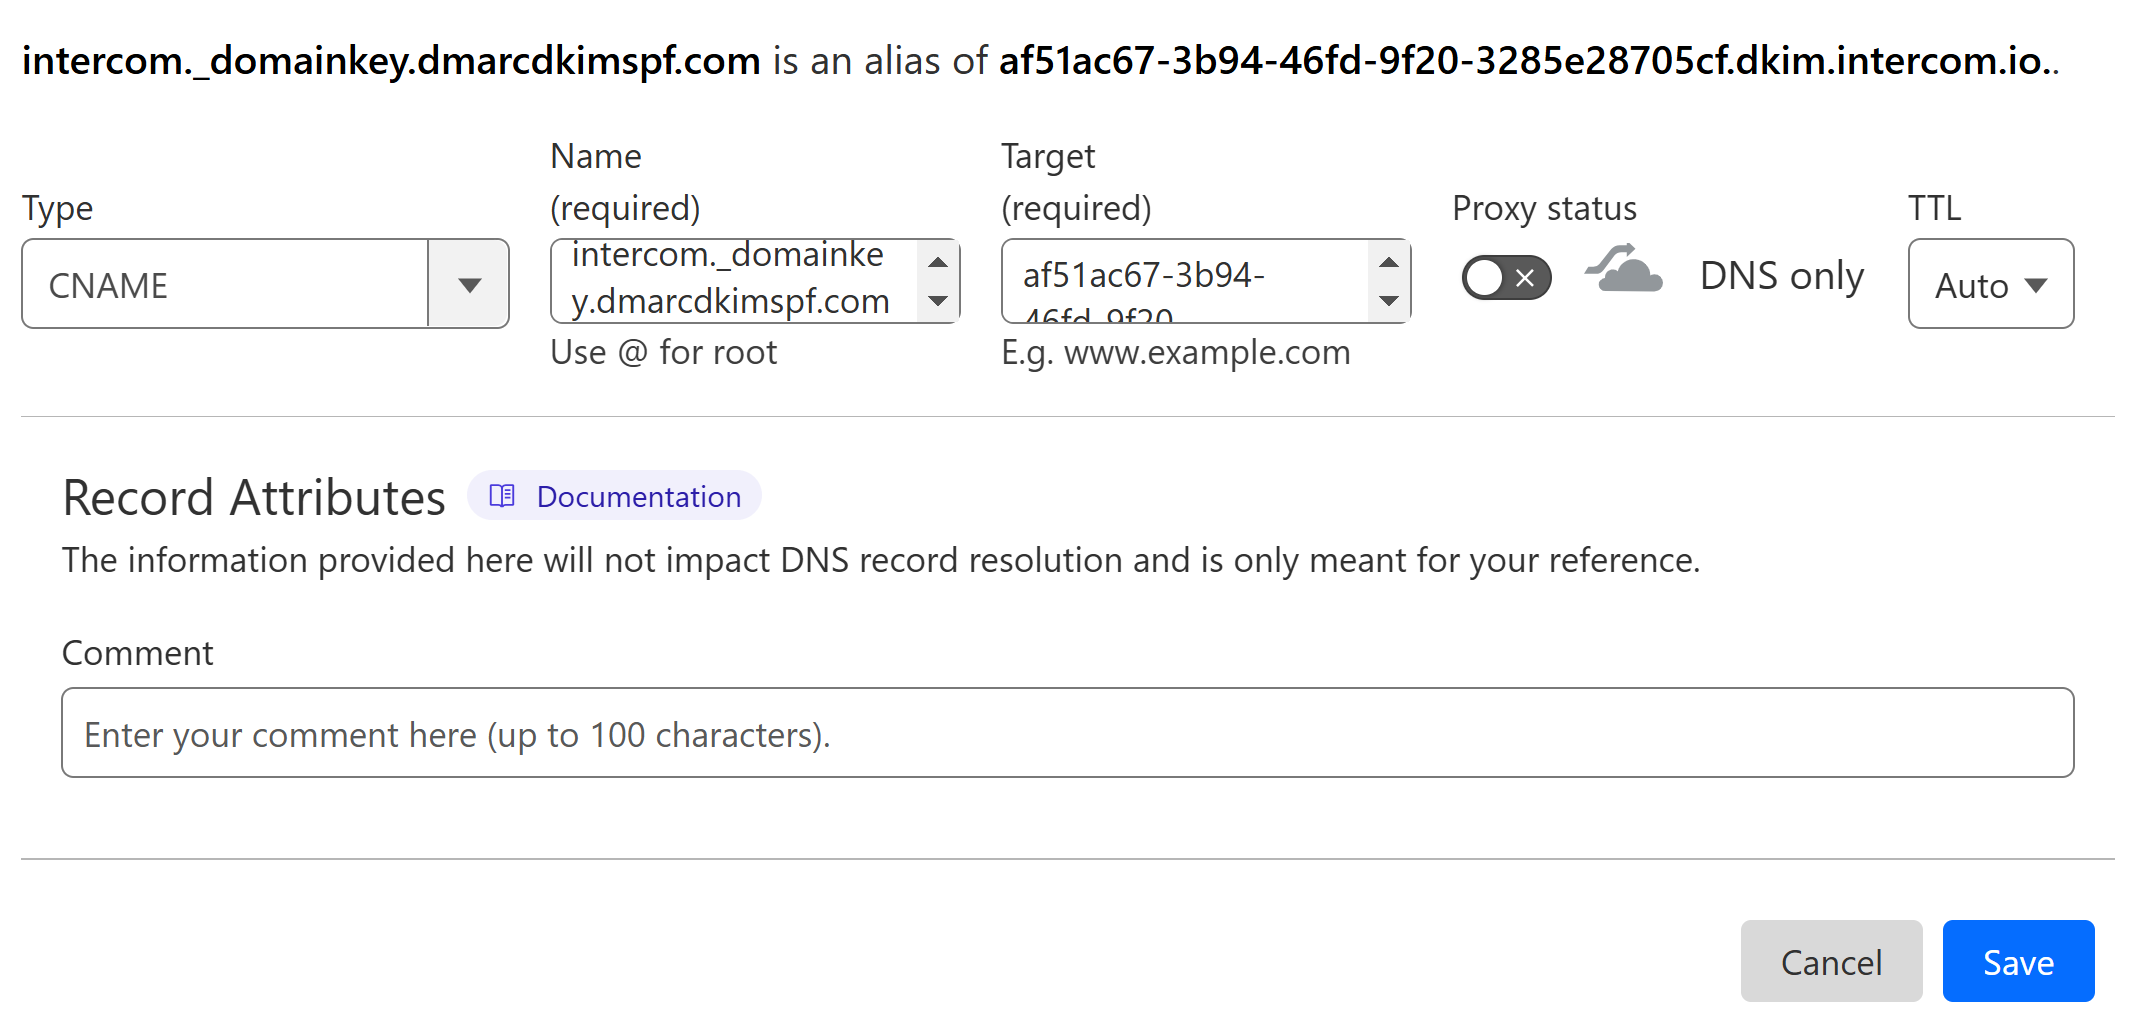
Follow the same steps to add the second CNAME record.
NOTE: Always turn off the proxy toggle for CNAME records. If enabled, it diverts traffic to the DNS server instead of the email server - which can cause authentication issues.
Setup Intercom DMARC Record:
The DMARC value provided by Intercom is a p=none value which only monitors emails. It doesn't block the emails coming from unauthorized senders. Without any action to block imposters, your email domain can easily be misused for scams. Moreover, this record doesn't provide you with DMARC reports and analytics. To implement a strict DMARC policy and see the DMARC reports, you can use the DmarcDkim.com DMARC check tool. It guides you through every step in setting up a strict DMARC record and protecting your domain.
Open the DMARC Check tool.
-
Add your domain name and click Check.

-
Now copy the DMARC record and add it to your DNS provider.
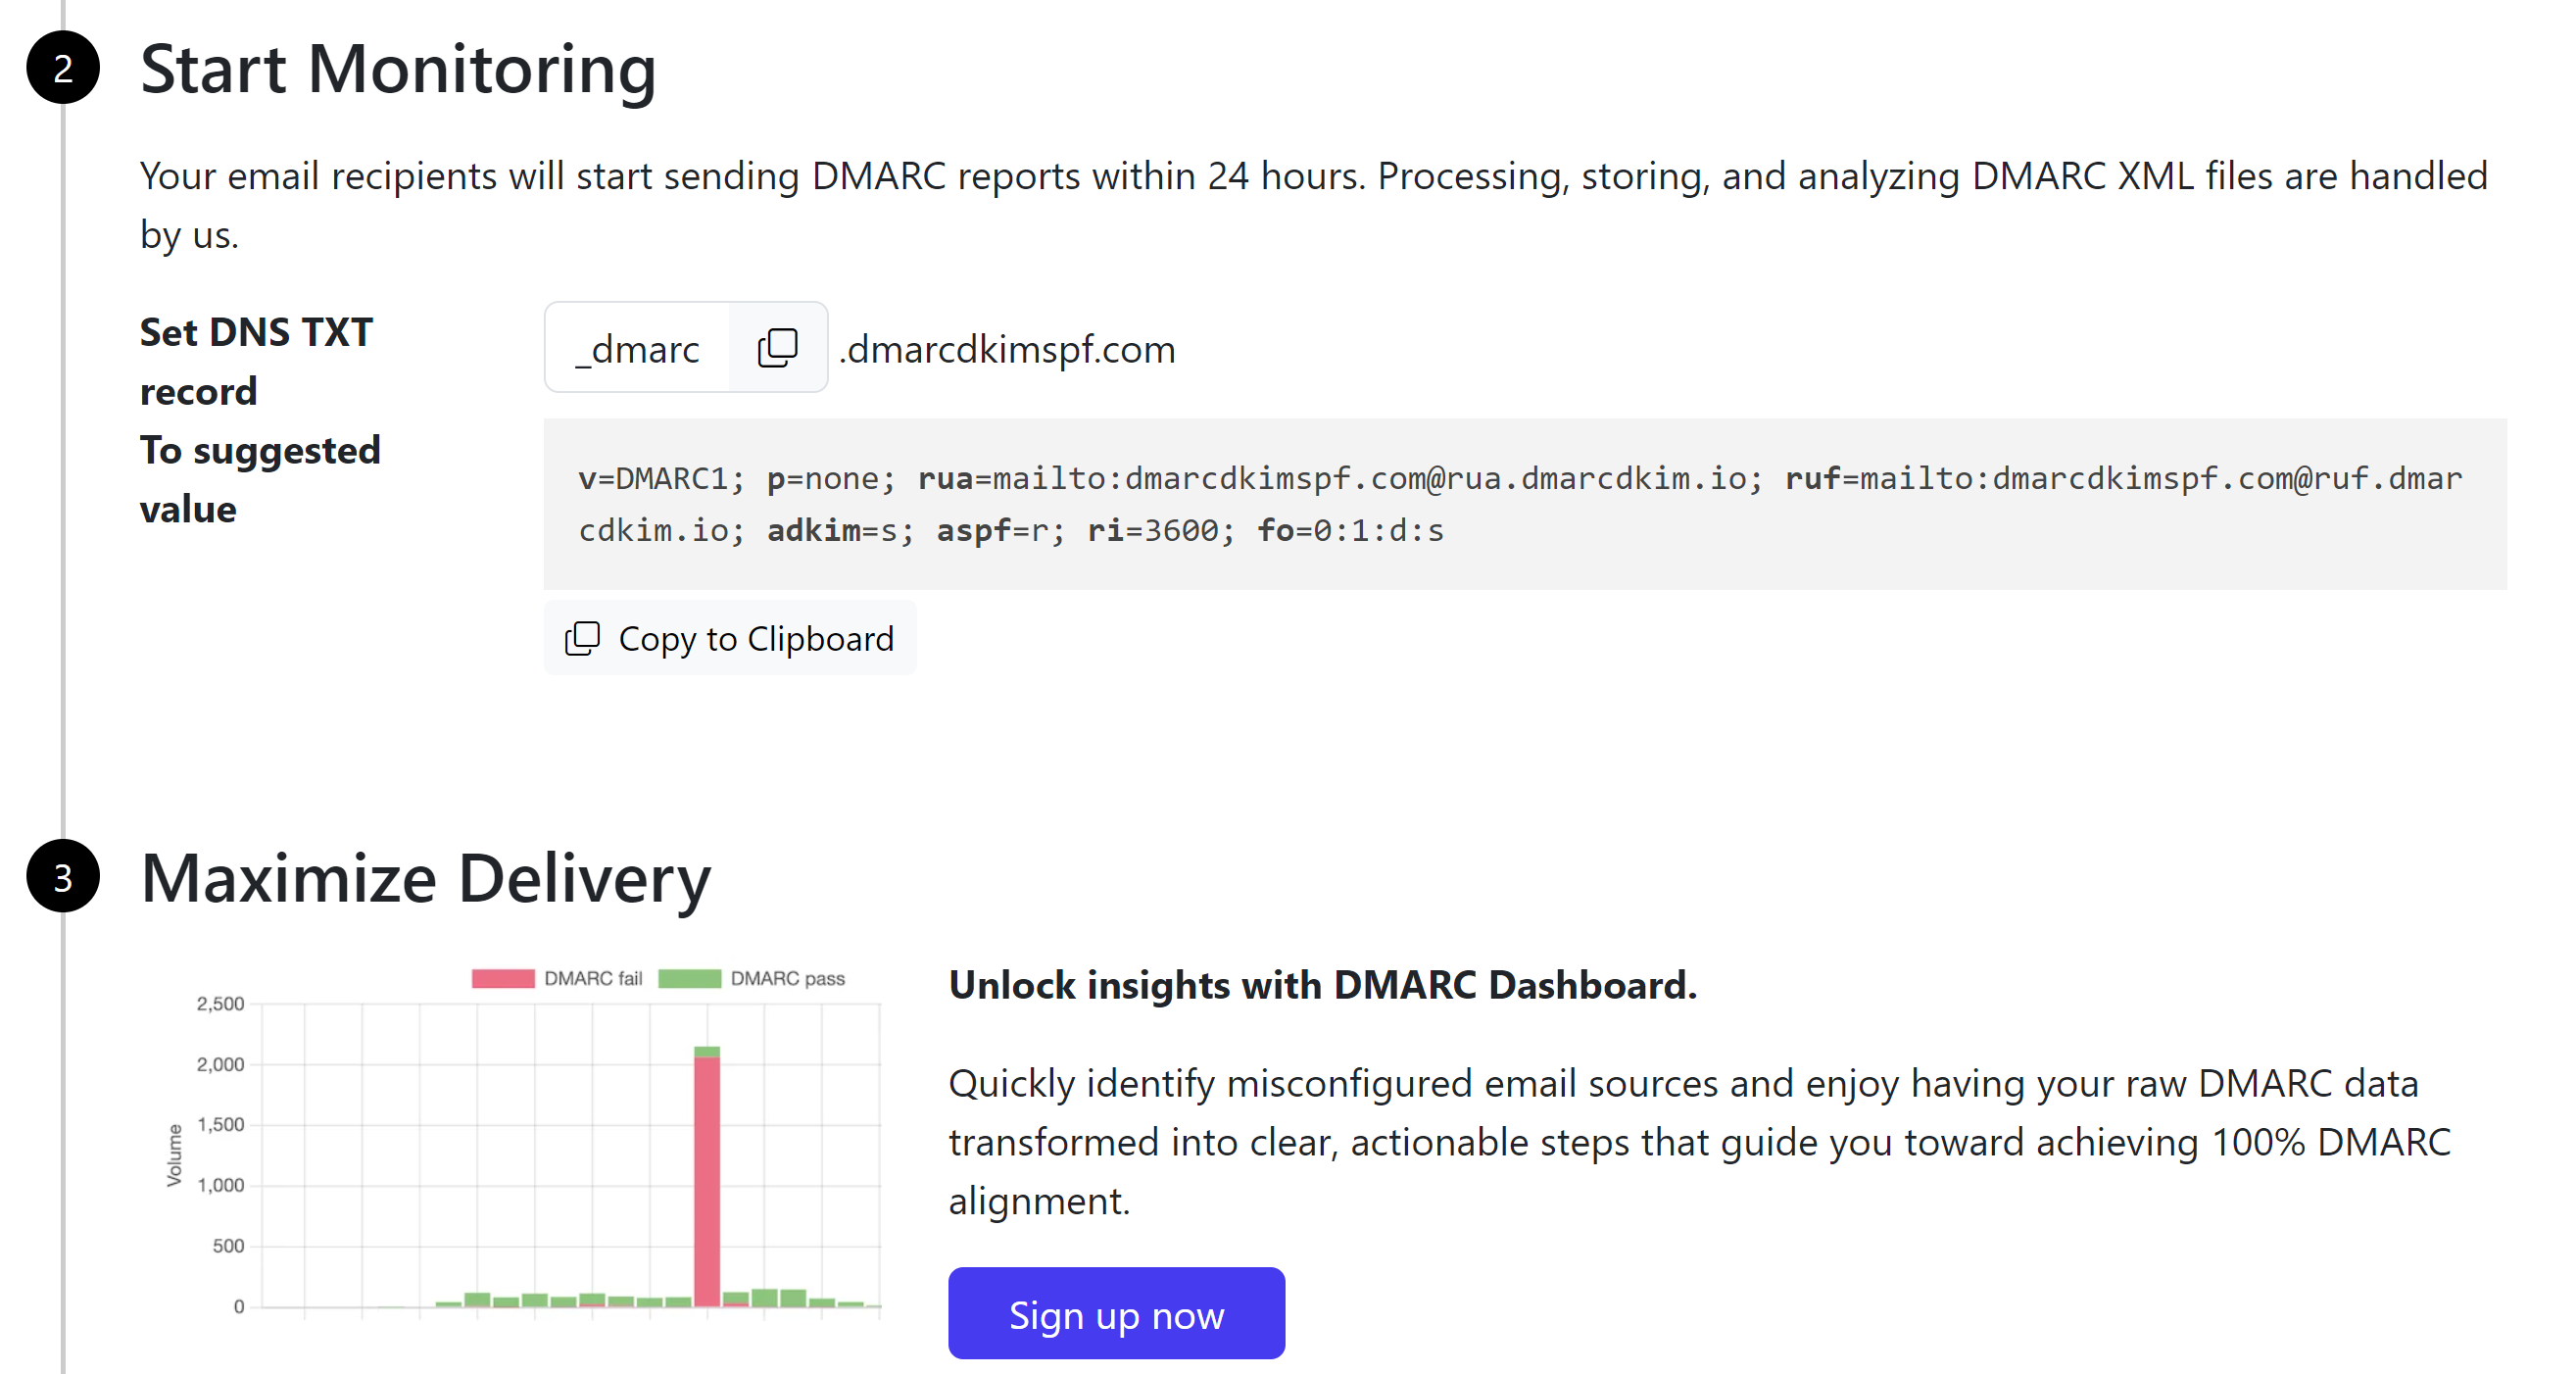
Select type TXT, write "_dmarc" in the Name field, copy/paste the Suggested DMARC value, and hit the Save button.
To get access to the reports dashboard, click Sign up now and follow the on-screen instructions to unlock additional features of the tool.
Verify Intercom DNS Records:
-
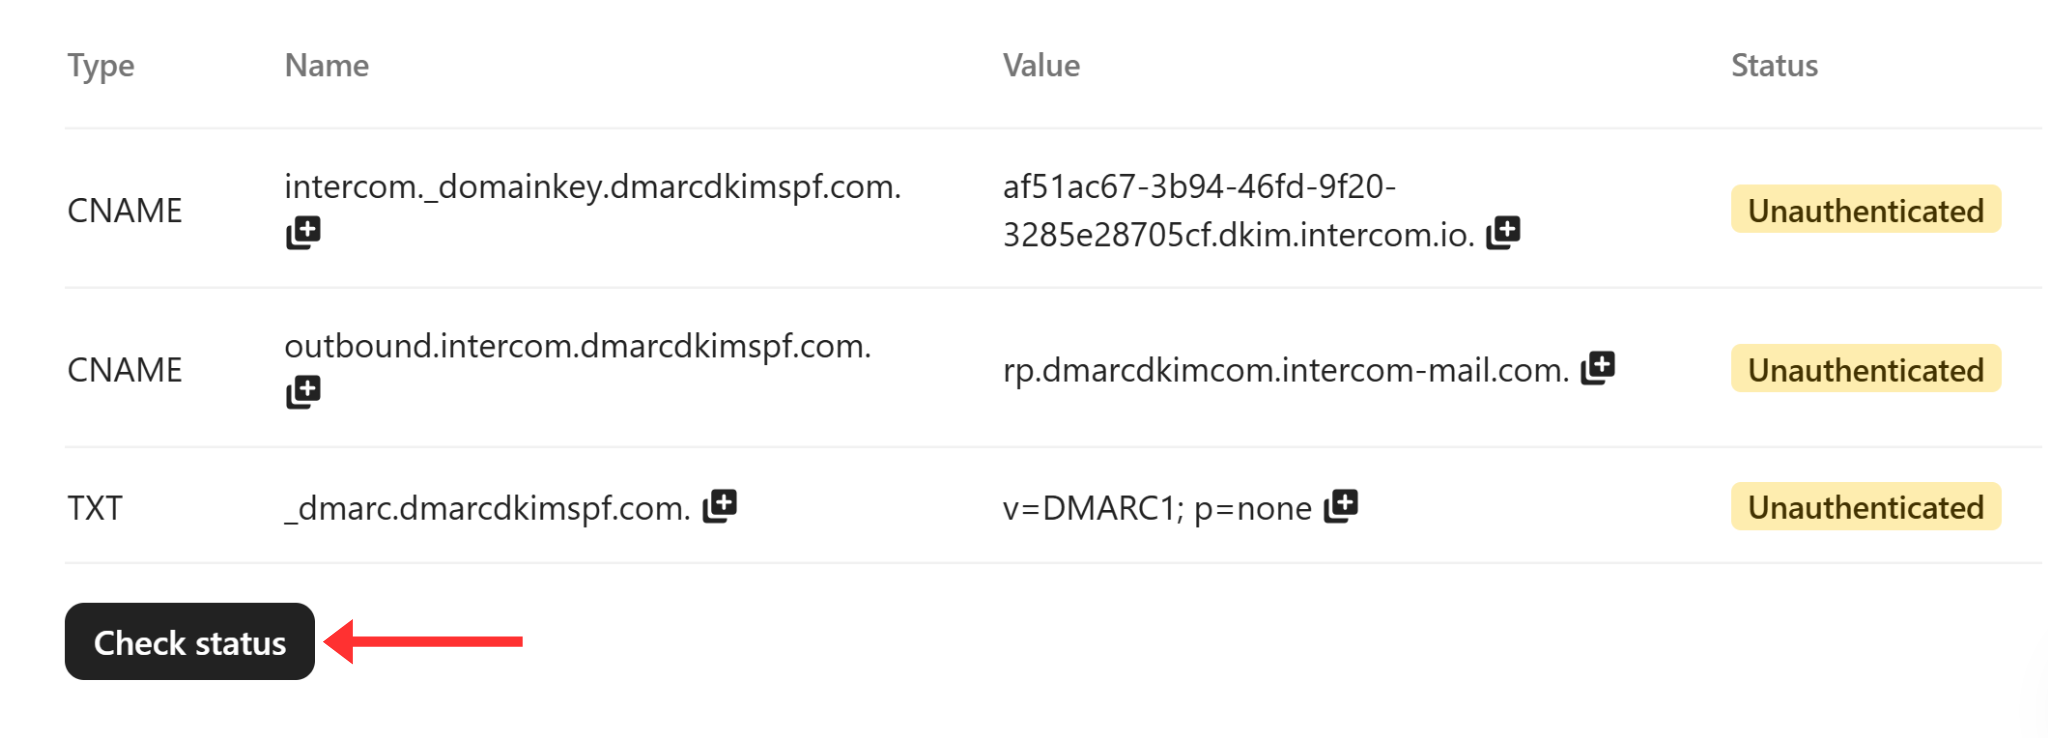
Click the Check Status button under the DNS records.
-
If the records are verified, you will see "Authenticated" written with each record.

NOTE: DNS records may take longer to authenticate. It is recommended to wait 24-48 hours. If authentication fails after 48 hours, there might be a misconfiguration in your DNS setup. Contact DmarcDkim.com for professional support.
Enable Custom Sender Option:
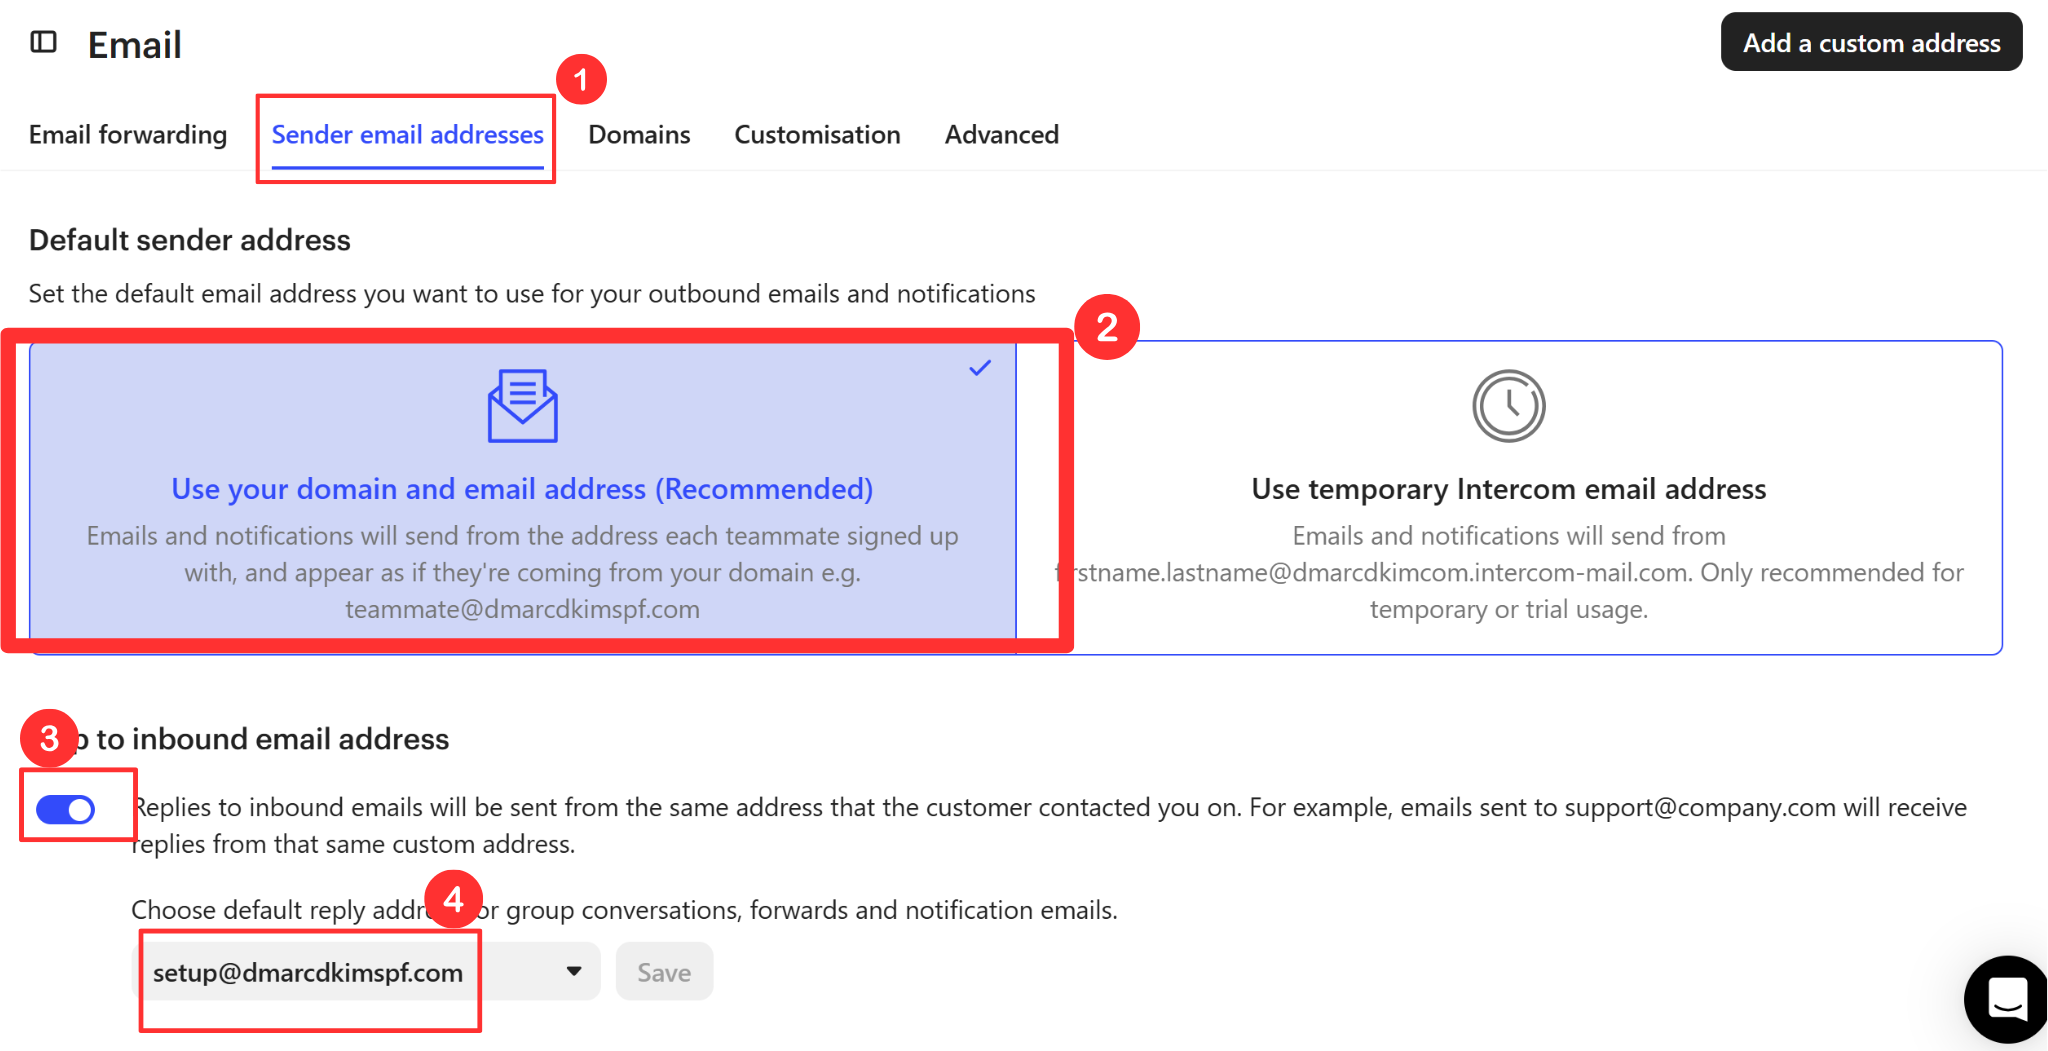
Once you are done with authenticating the domain, go to the Sender Email Address tab.
Select the "Use your domain and email address" option.
Turn on the toggle under "Map to inbound email address."
-
Click the drop-down arrow and select your email address.
If you face any hurdle in authenticating your domain, contact a DmarcDkim.com expert to help you with the DNS setup process.
Check domain and follow the instructions to nail down your DMARC configuration.
No expert knowledge needed!


