FreshWorks (FreshMarketer) DNS Records Configuration - Domain Authentication
Check your domain for DMARC, DKIM, SPF and MX records. Get a free report.
How to Setup FreshWorks (FreshMarketer) SPF, DKIM, DMARC and Tracking Records?
SPF (Sender Policy Framework) helps prevent email spoofing by allowing domain owners to specify which mail servers are authorized to send email on behalf of their domain.
DKIM (DomainKeys Identified Mail) adds a digital signature to your email headers, enabling the recipient's server to verify that the email has not been altered during transit and that it indeed comes from your domain.
DMARC (Domain-based Message Authentication, Reporting, and Conformance) builds on SPF and DKIM. It allows domain owners to specify how receiving mail servers should deal with emails that fail SPF or DKIM checks. You can configure these DNS records in the FreshWorks (FreshMarketer) Email Sending Domain tab. Add them to your DNS provider for verification. By doing this, you can prevent emails from going to the spam folder.
Configure FreshWorks DNS Records:
-
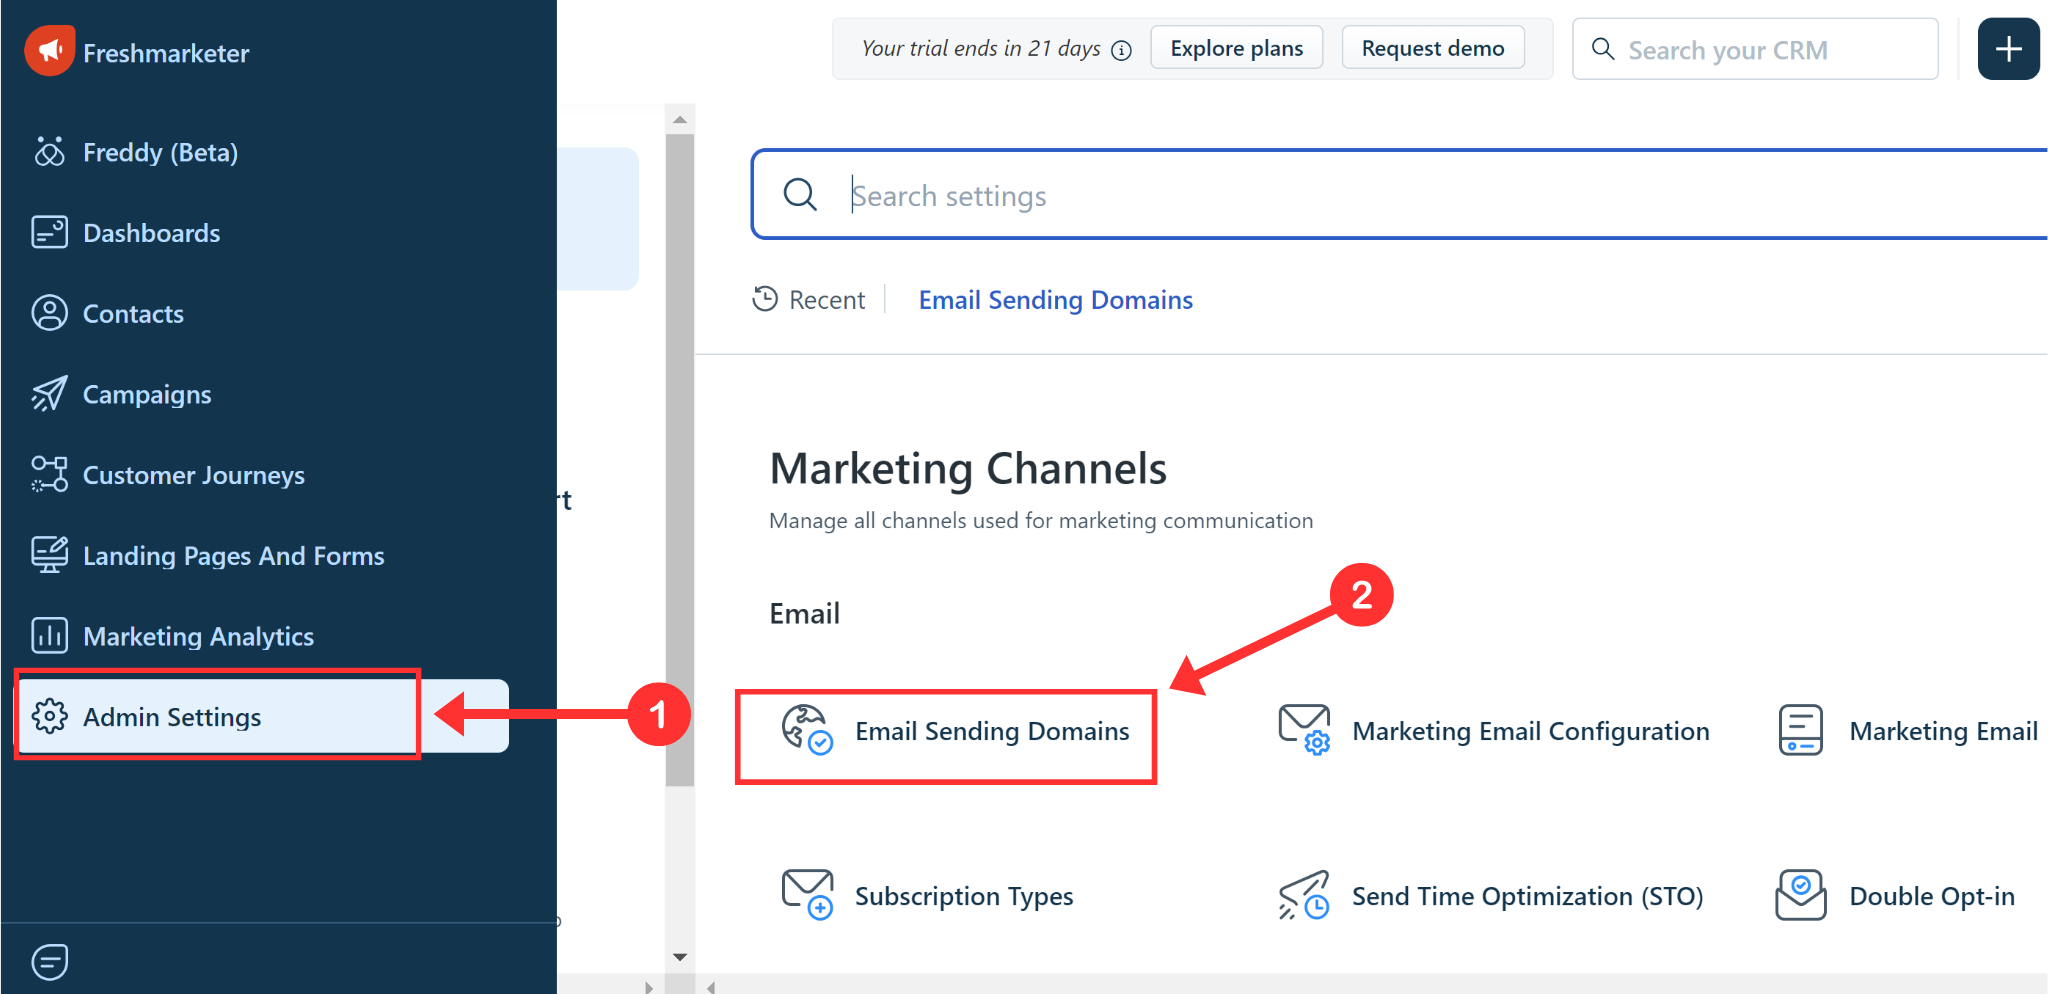
Go to Admin Settings and click the Email Sending Domain tab.
-
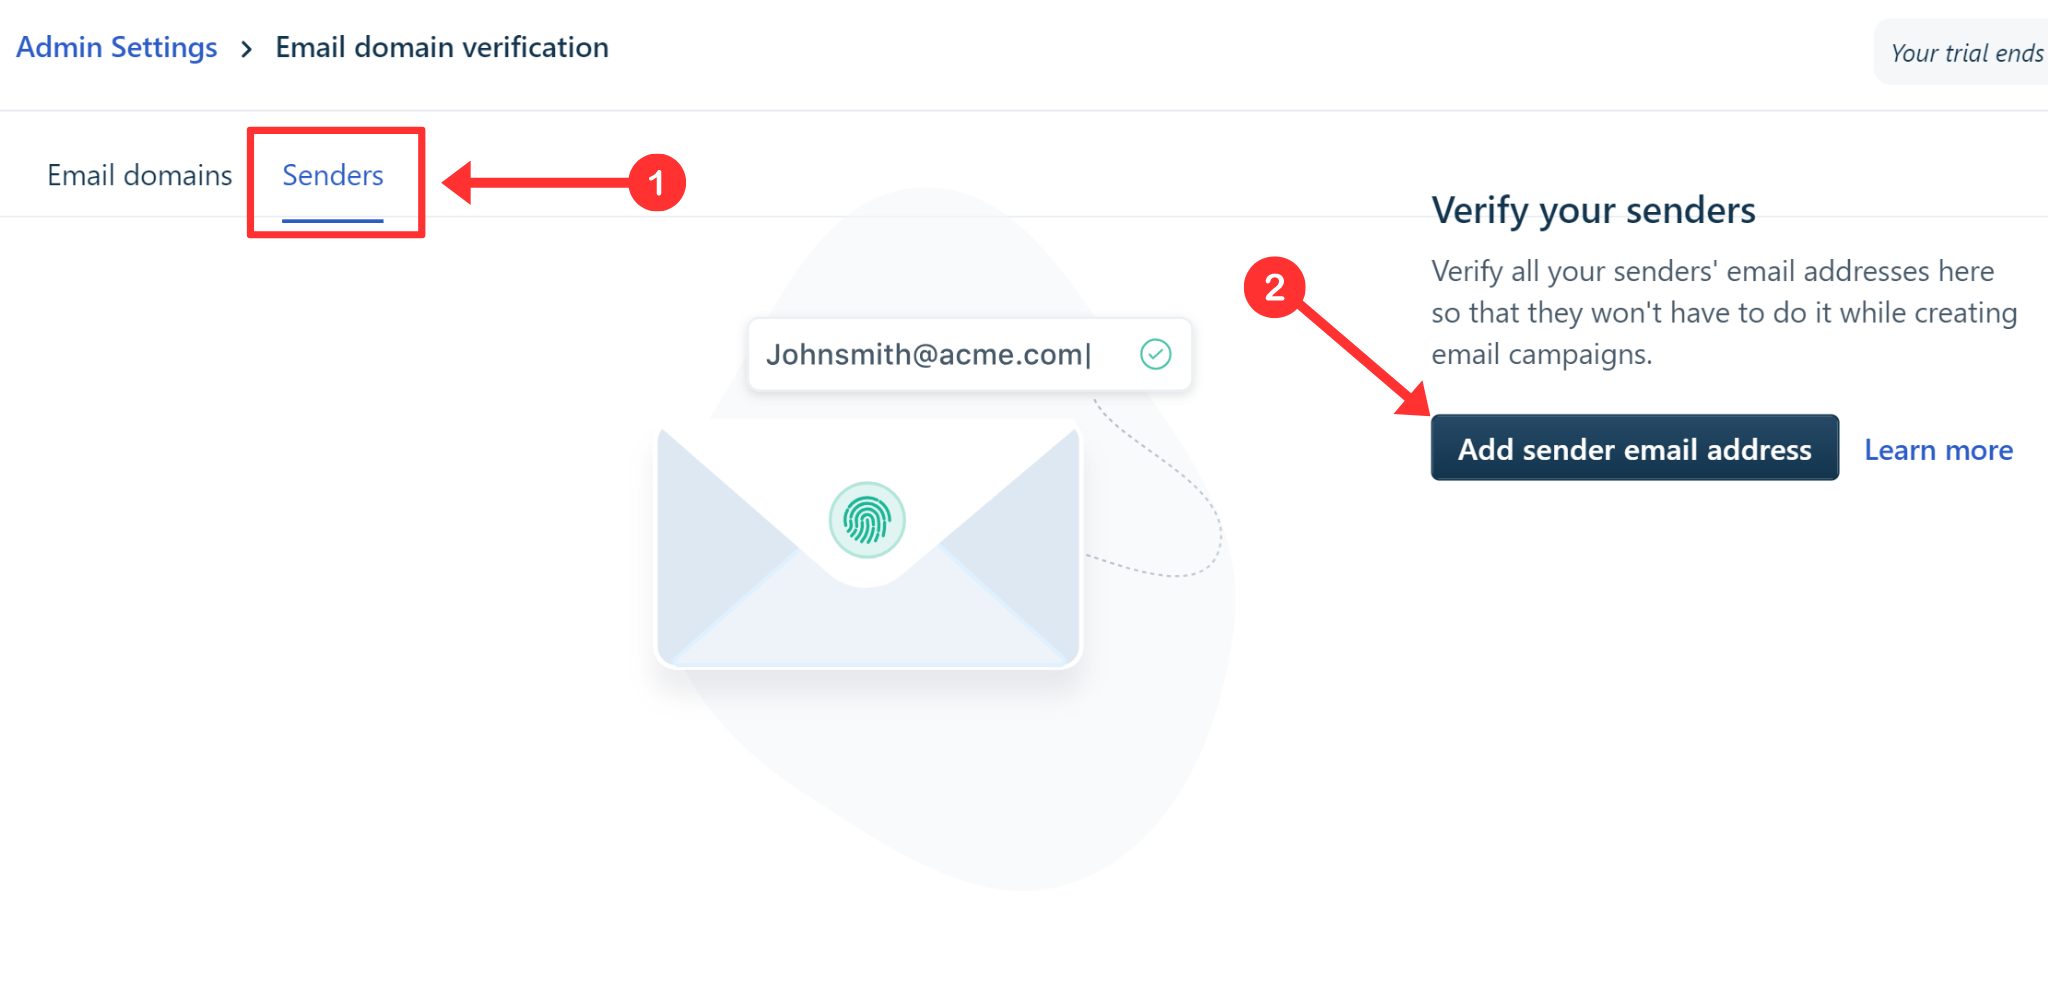
In the Sender tab, click Add Sender Email Address.
-
Write down your domain and sender email address, and click Add.
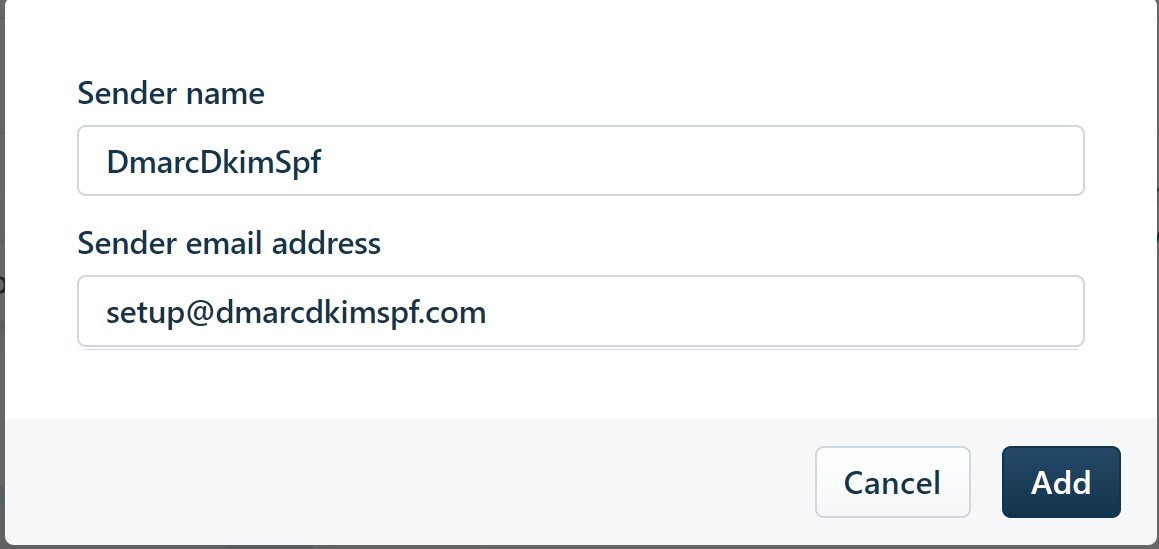
Verify this sender email by clicking the verification link sent to your email.
-
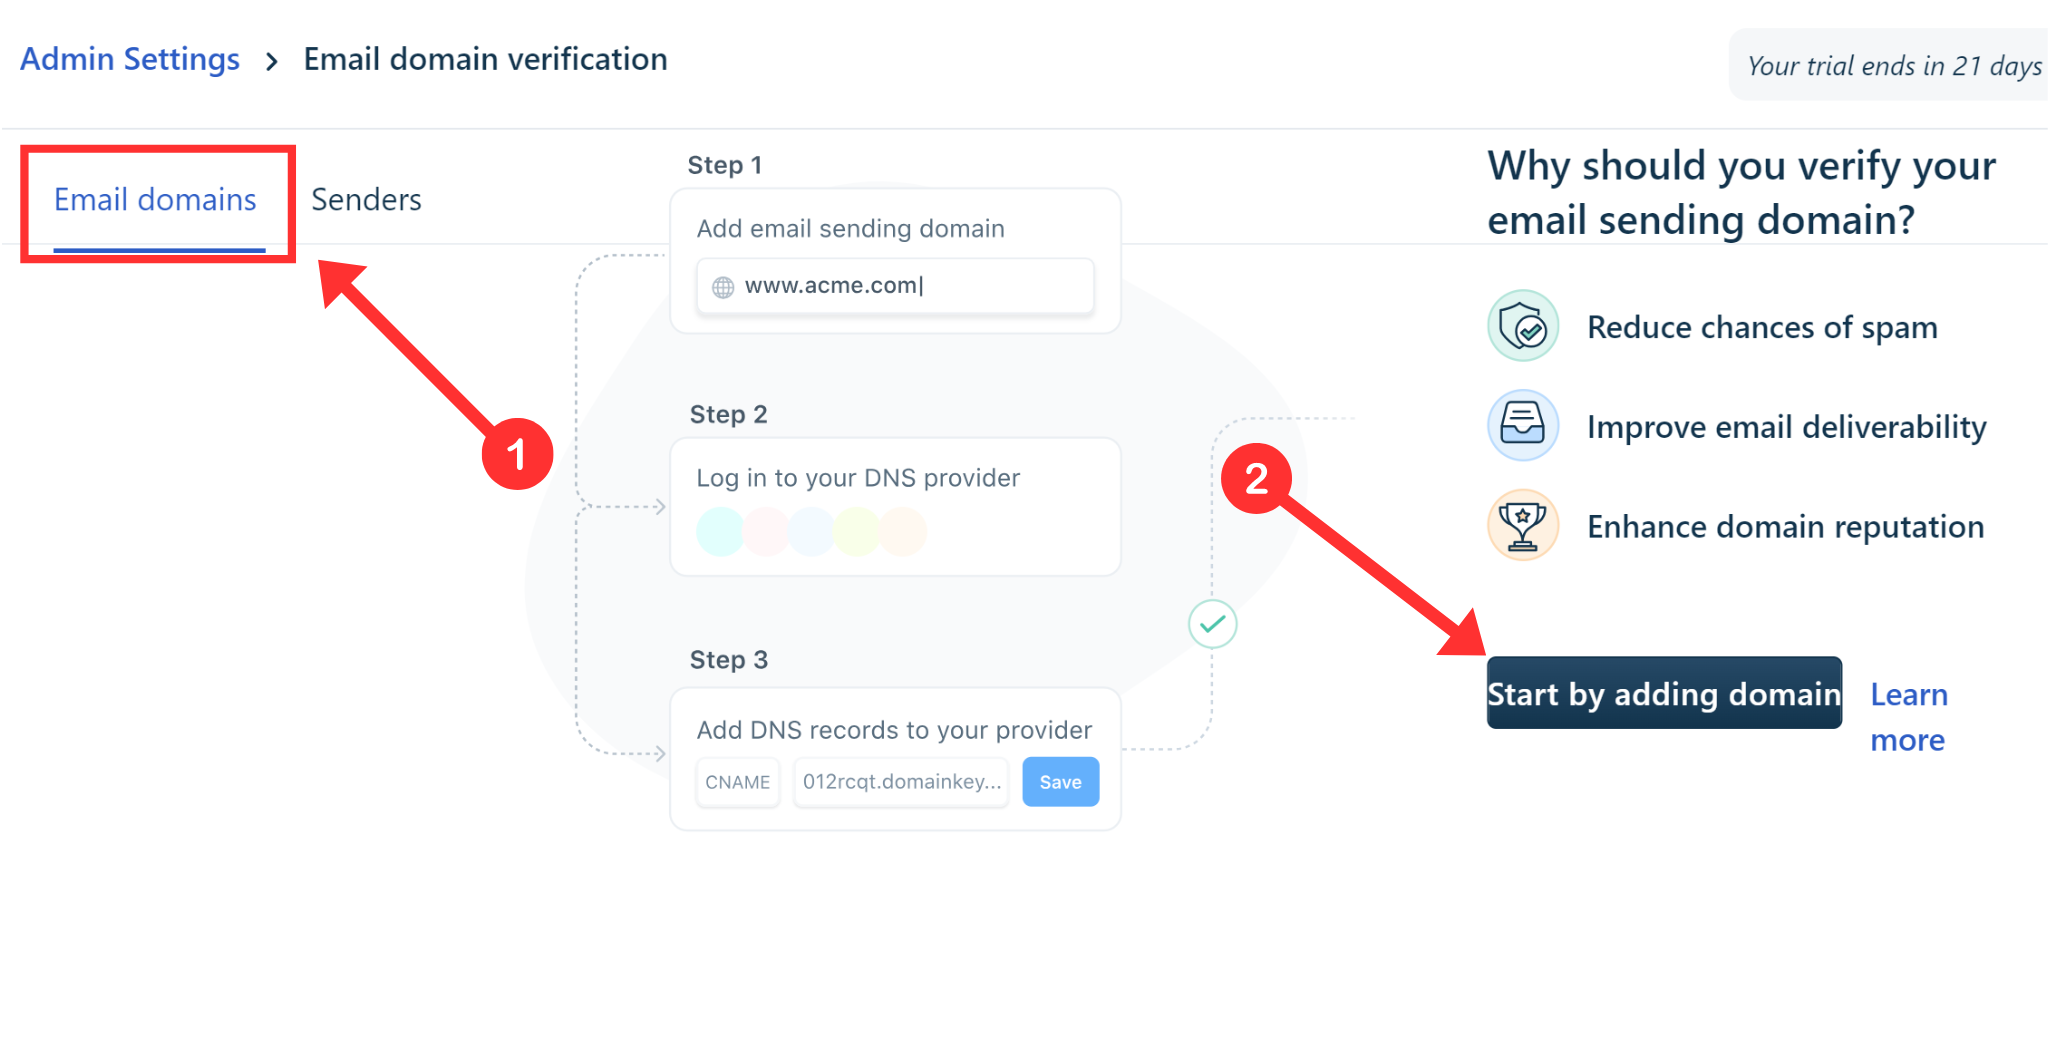
Now head to the Email Domains tab, and click Start by Adding Domain.
-
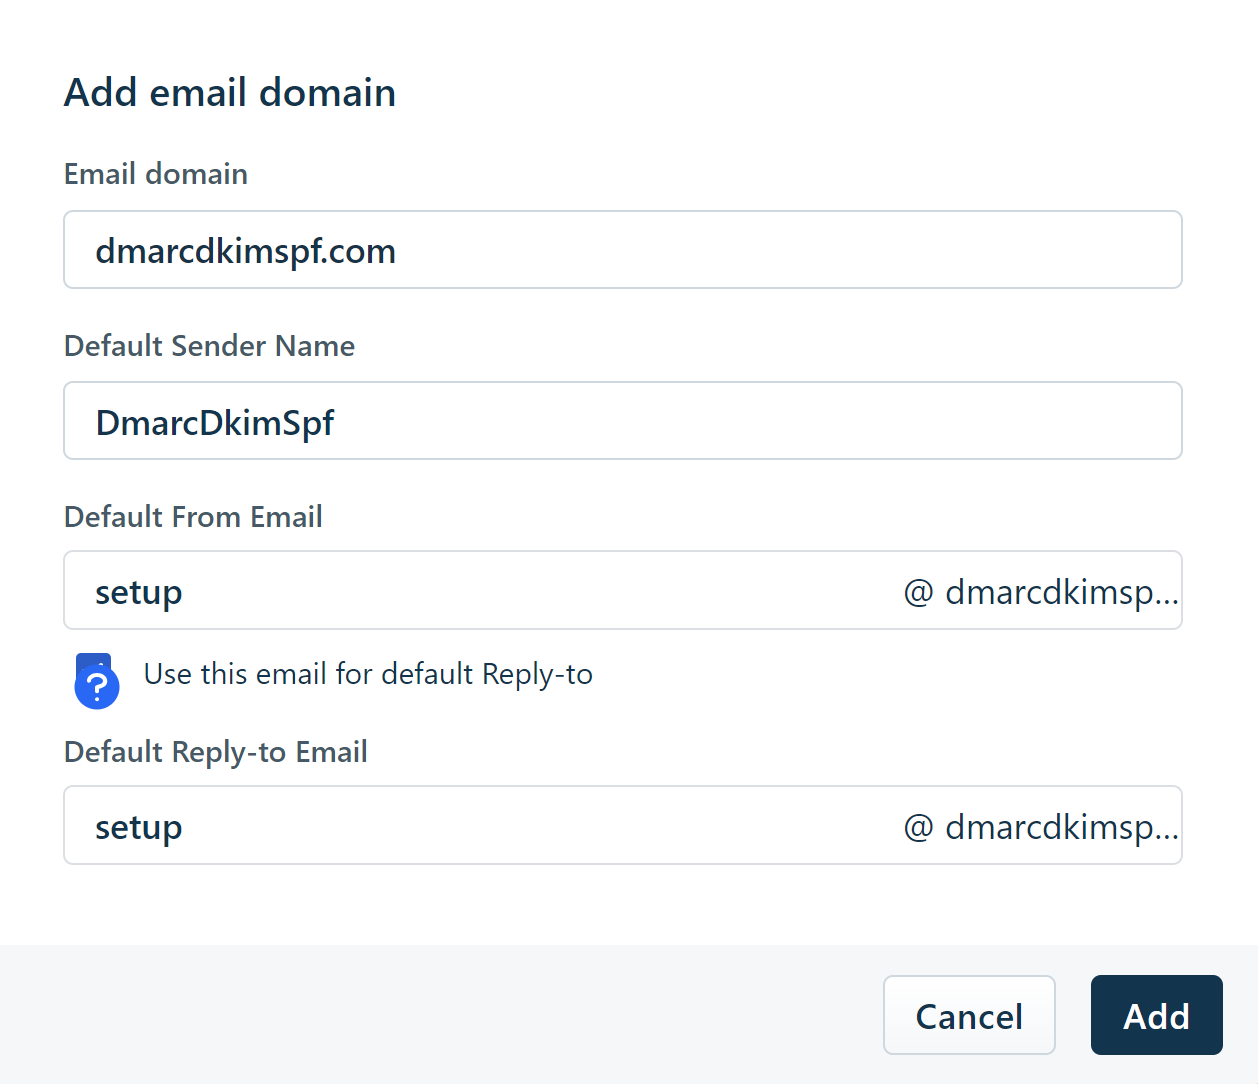
Add your domain and email, and click Add.
-
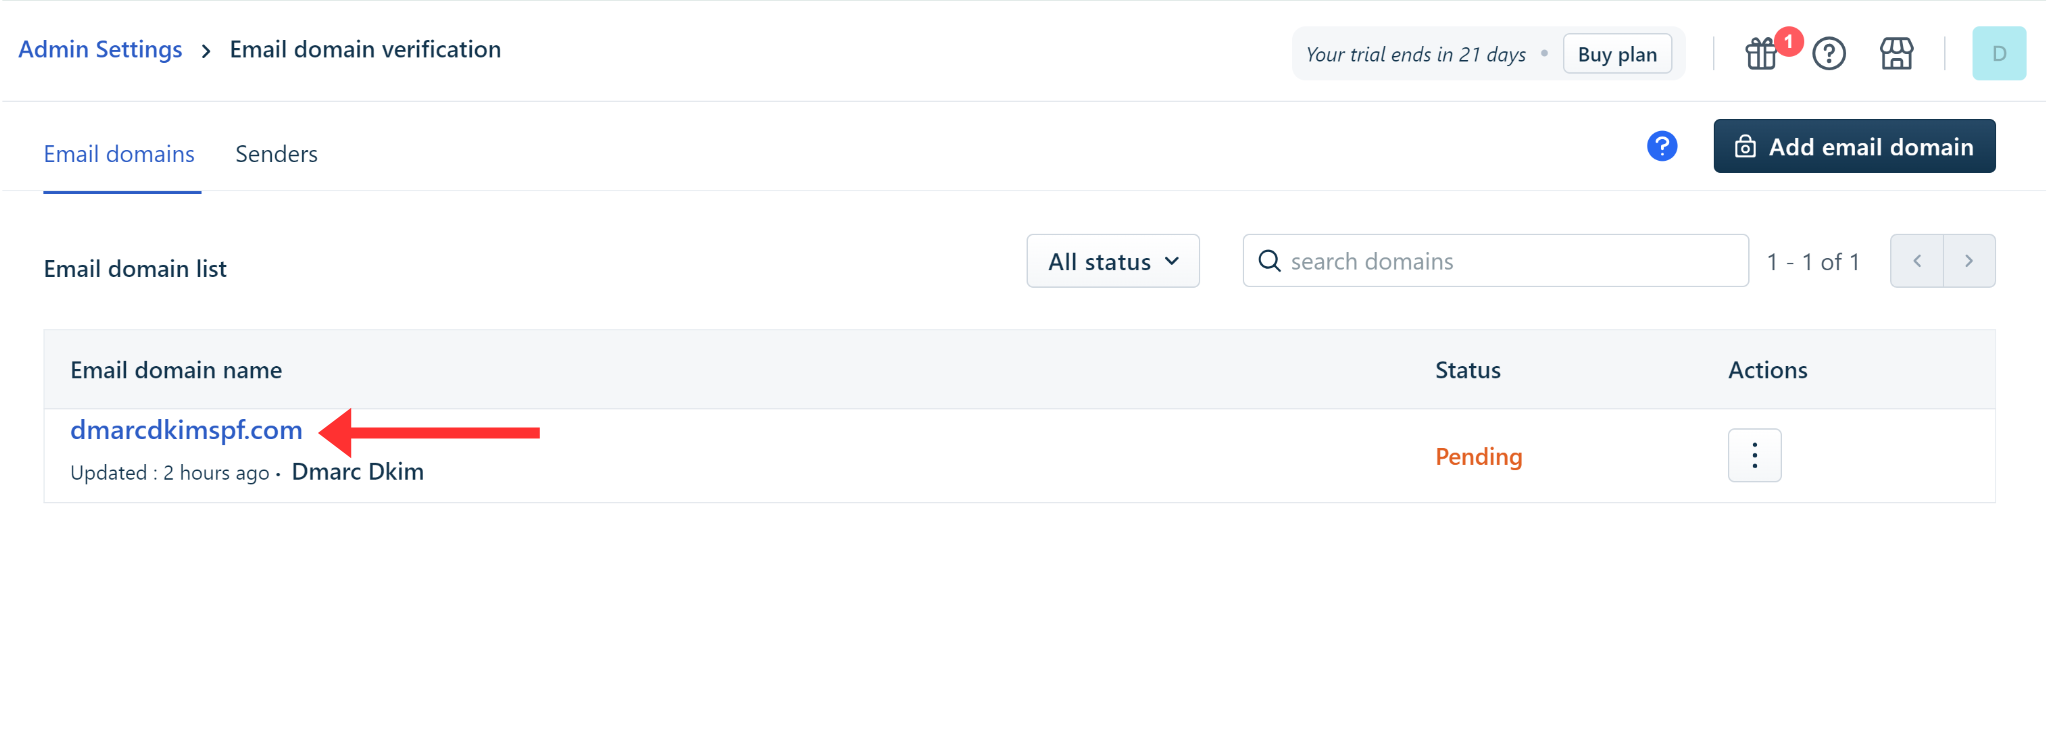
Click your domain name in the Email Domains tab.
-
On the next page, you'll see the SPF, DKIM, and Tracking records.
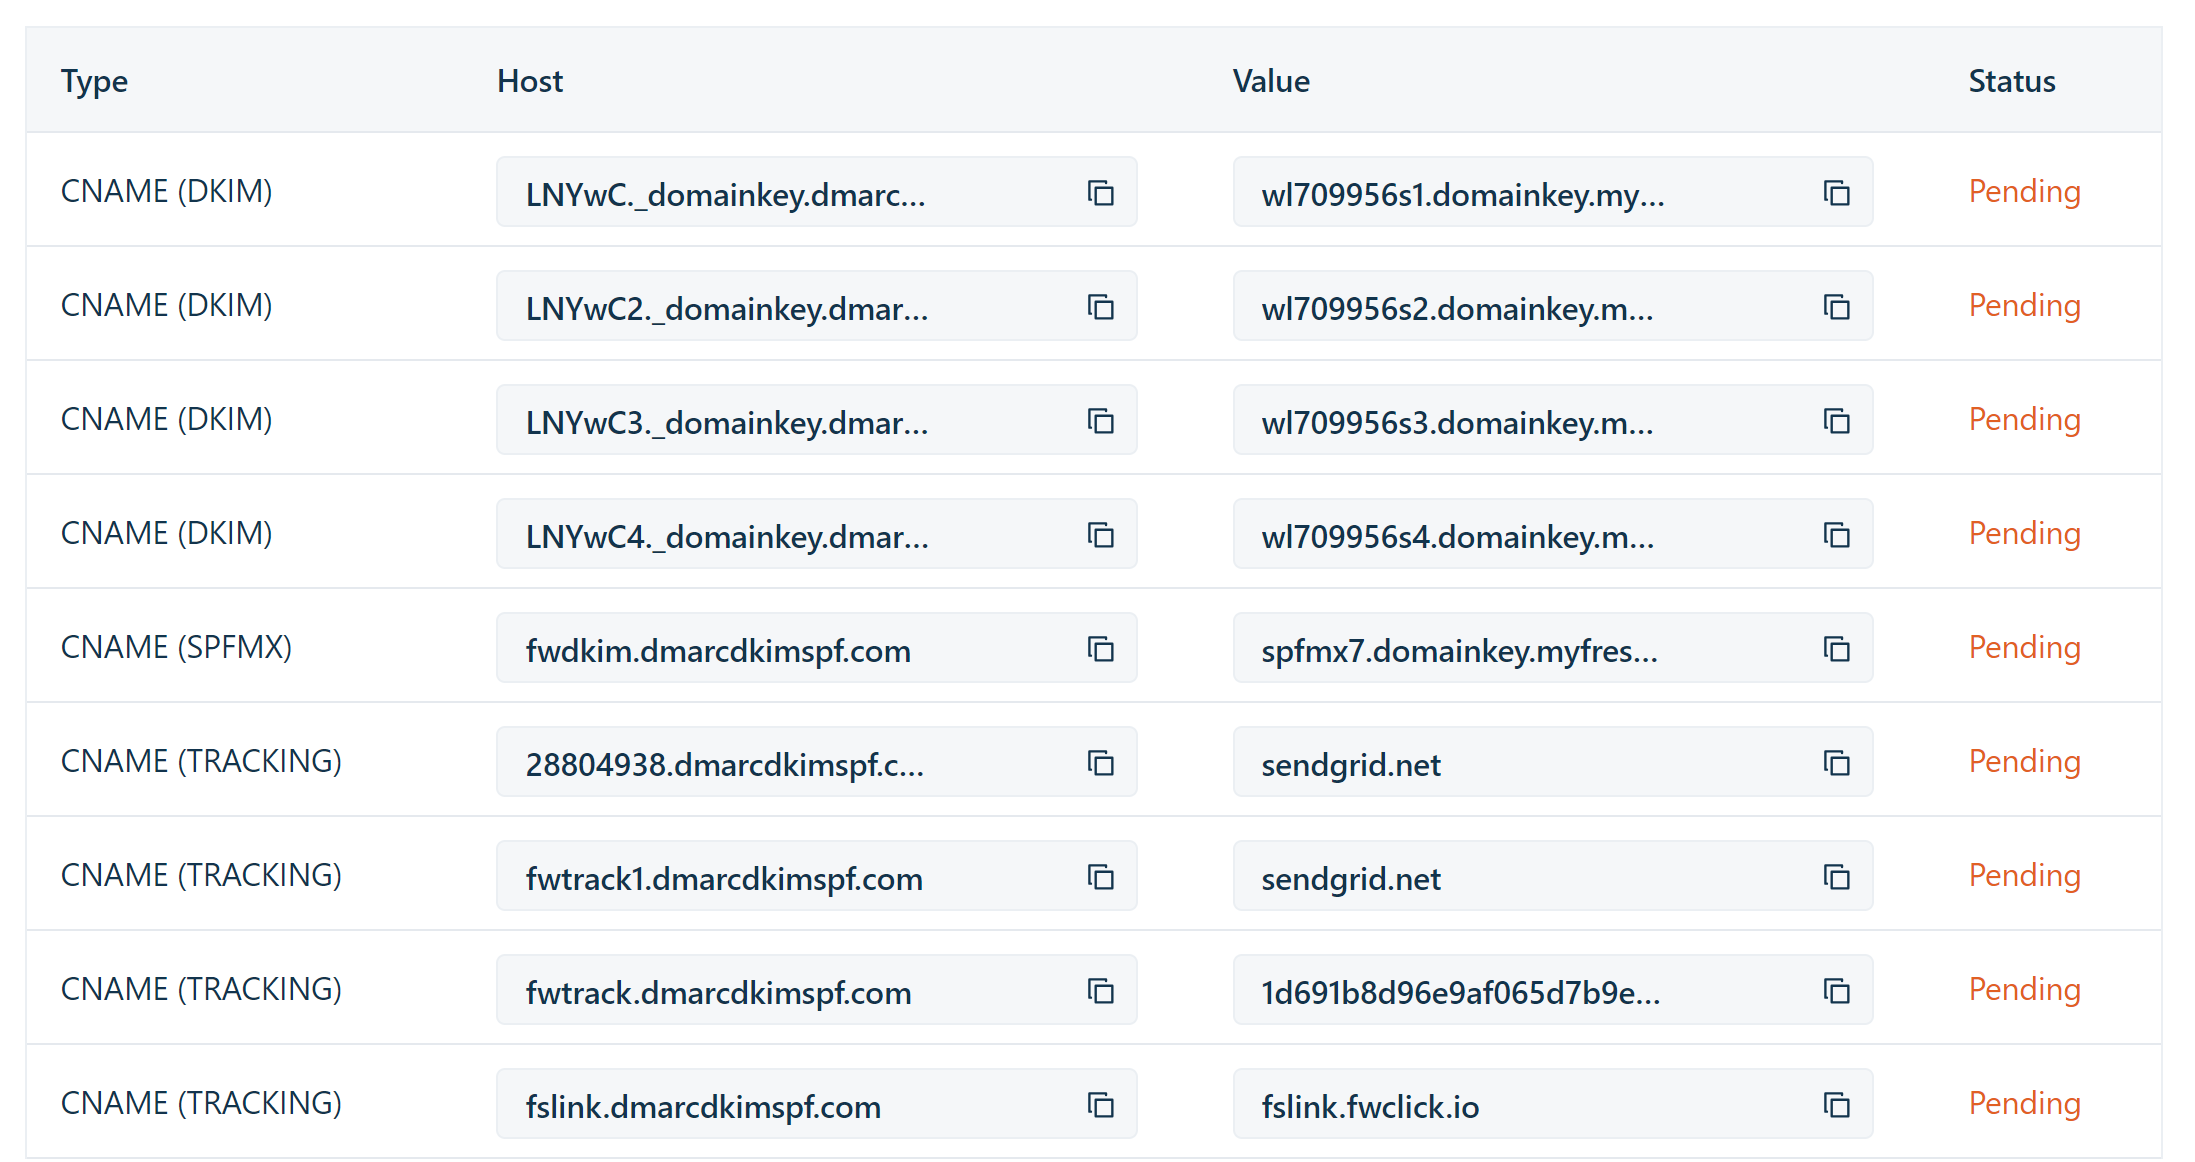
Add these records to your DNS dashboard.
Setup FreshWorks DKIM Record
Login to your DNS provider. (We are using Cloudflare for now).
-
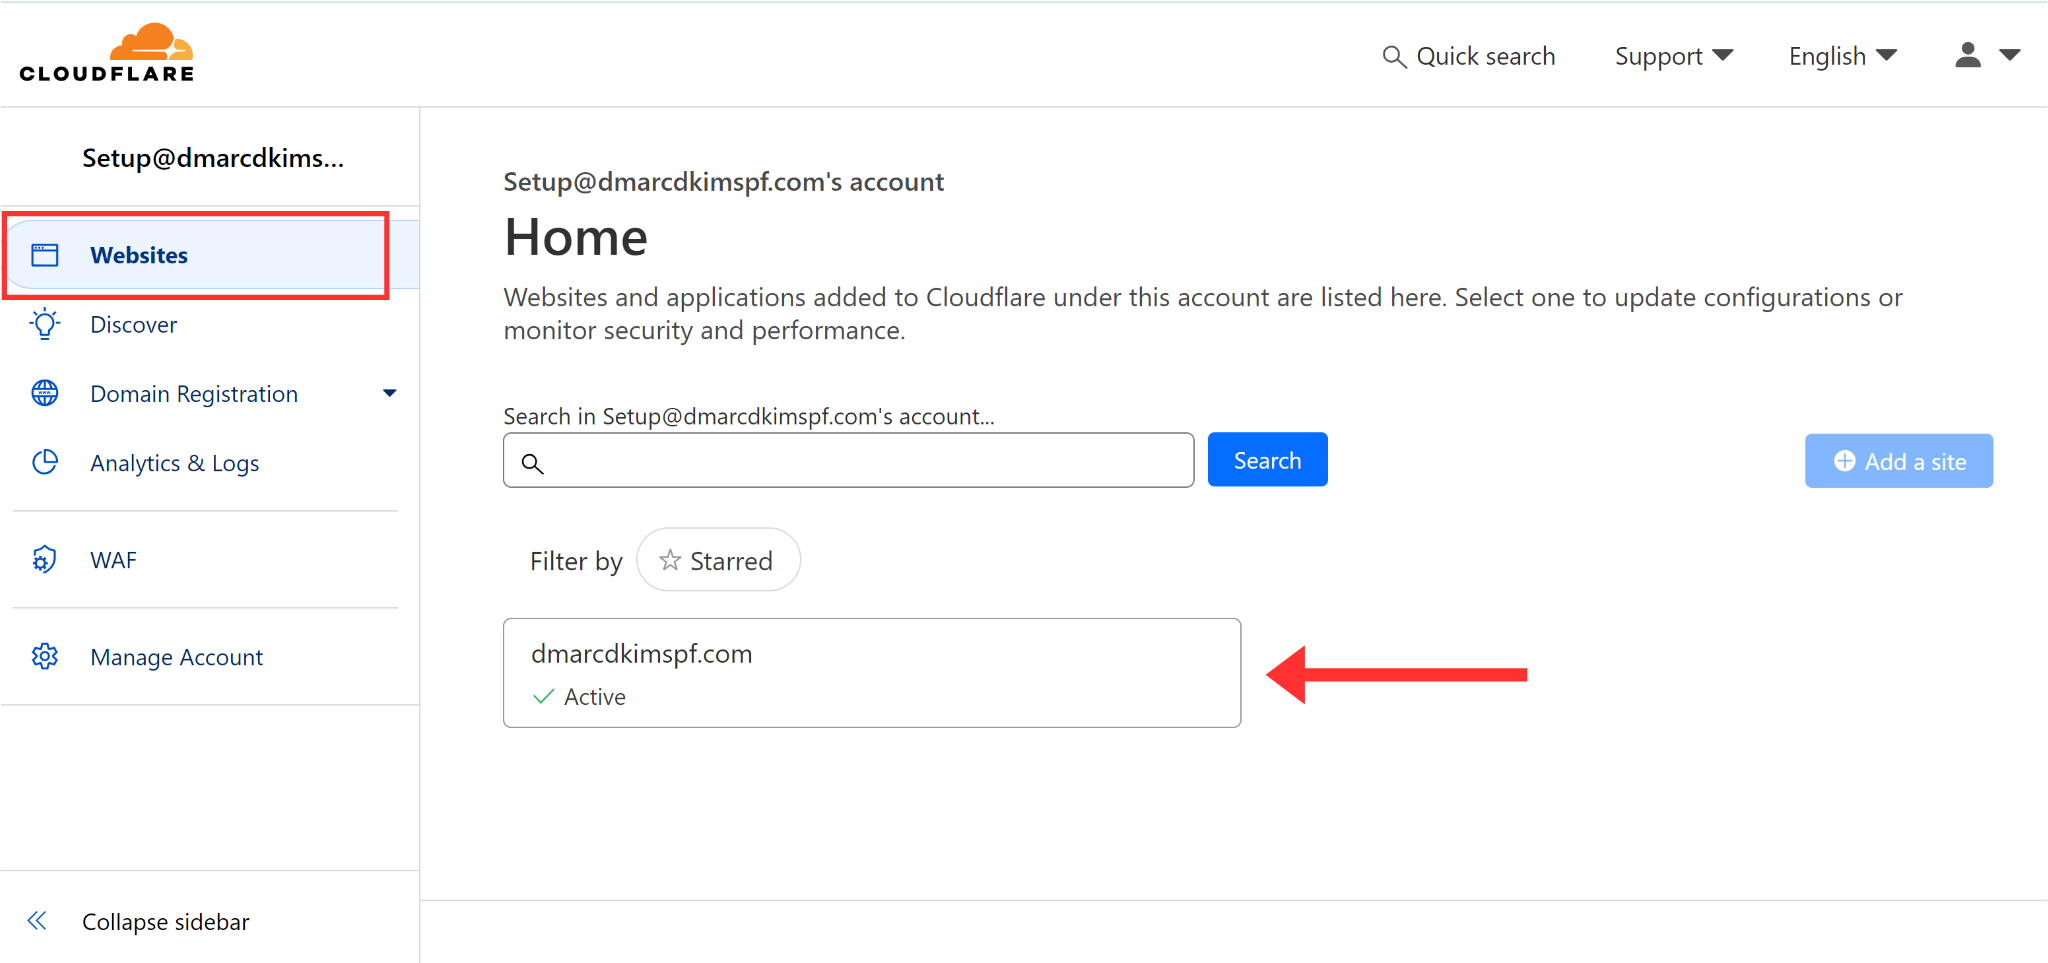
Go to your domain/website.
-
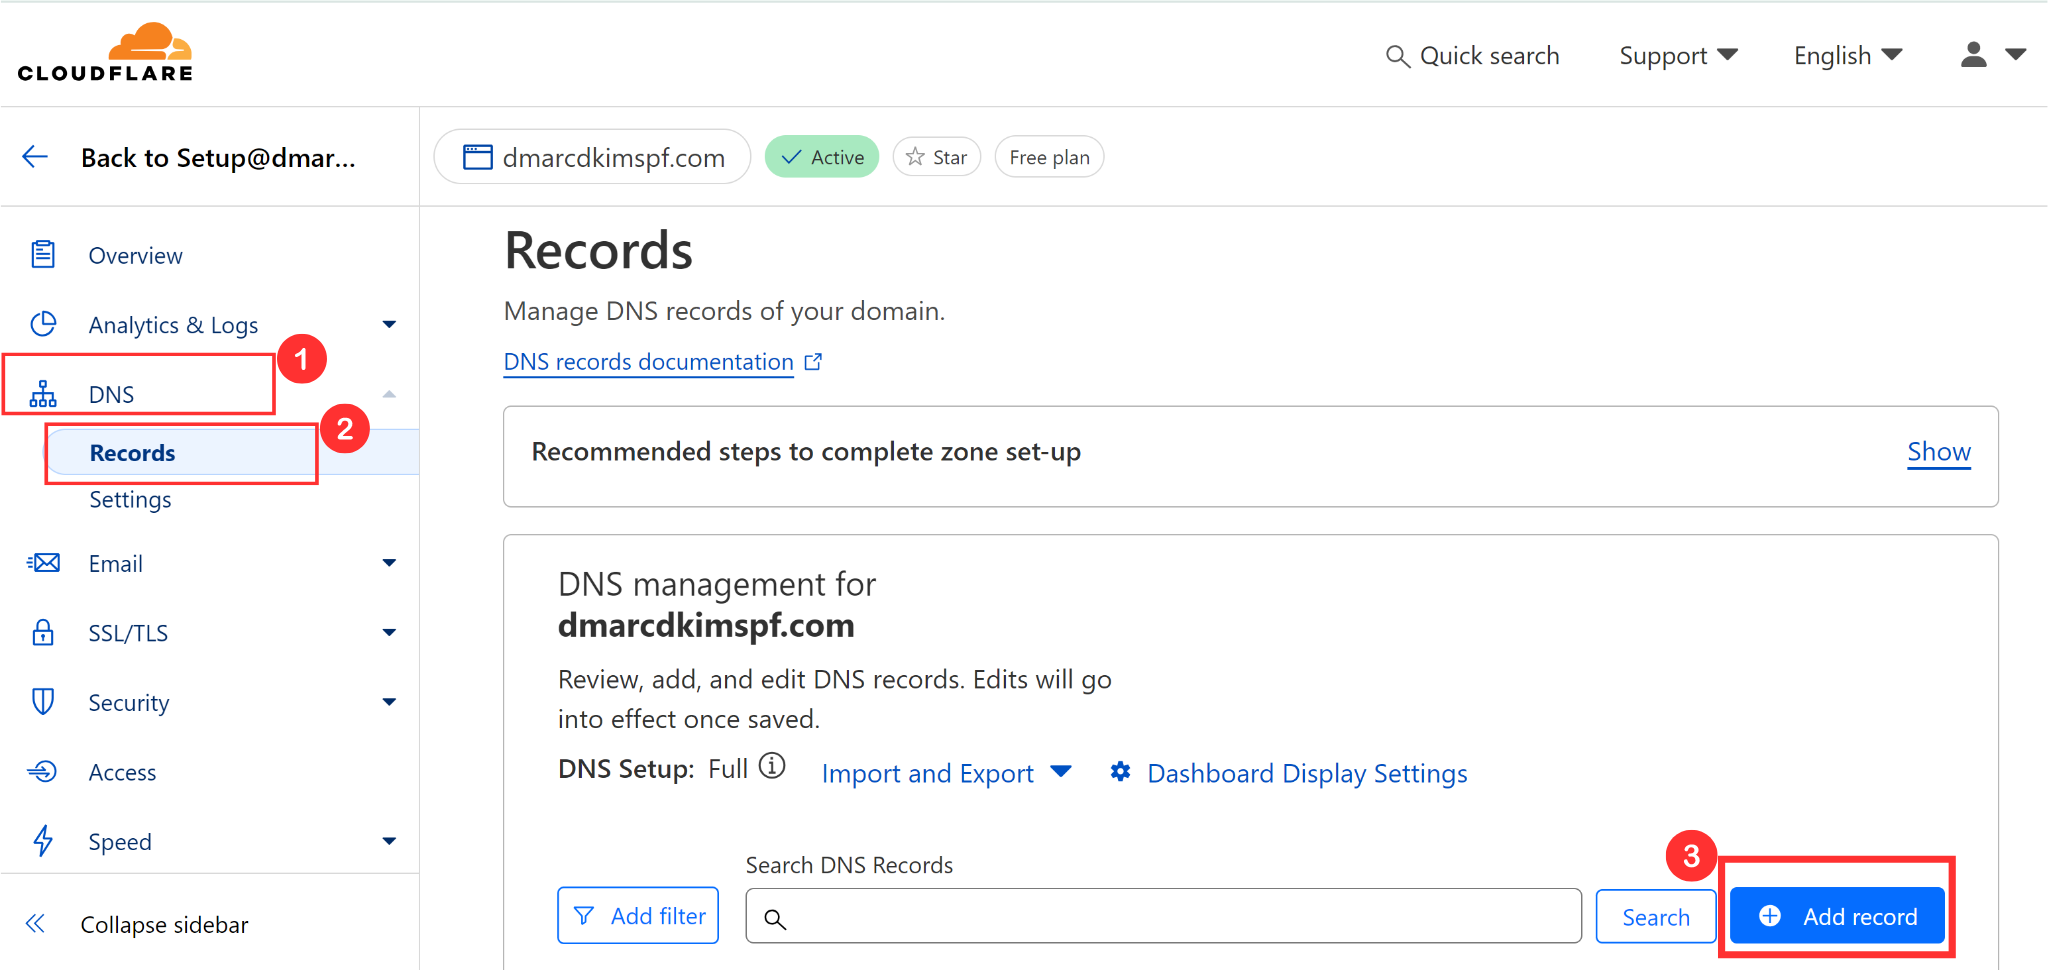
Head to DNS in the left menu bar and click Add Record.
Select type CNAME.
Copy the DKIM record name and paste it into the Name field.
Copy the record value and add it to the Target field.
-
Turn off the proxy status and click Save.
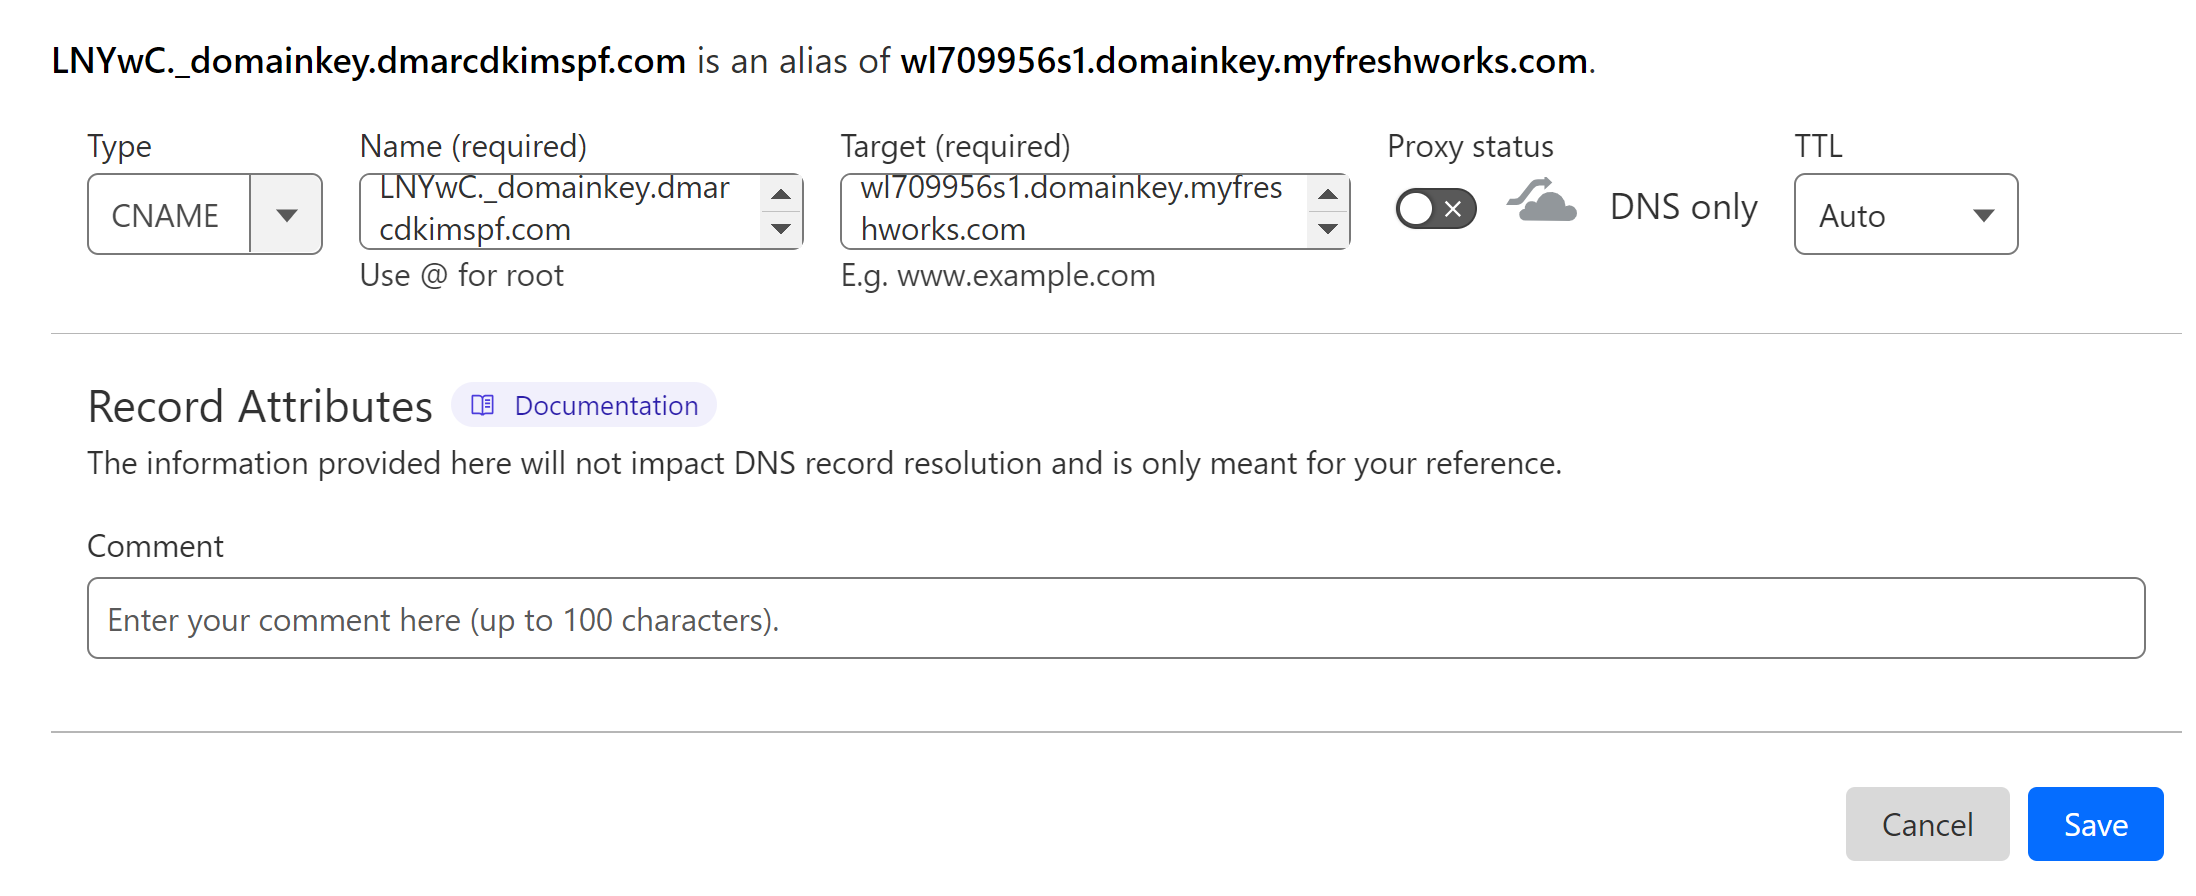
Repeat the same steps to add all DKIM records.
NOTE: Turn off the proxy for every CNAME record. When enabled, it diverts the traffic to your DNS server instead of your email server which causes authentication issues.
Setup FreshWorks SPF record:
If your DNS dashboard has an existing SPF, adding a second SPF will cause conflicts resulting in one of them to stop working.
Moreover, if you merge the two SPFs, the FreshWorks server will not verify the record. Therefore, delete the previous SPF record before adding the FreshWorks SPF value. After deleting, follow the steps below:
Click Add Record and select type CNAME.
Add the record name and value in the dedicated fields.
-
Turn off the proxy and click Save.
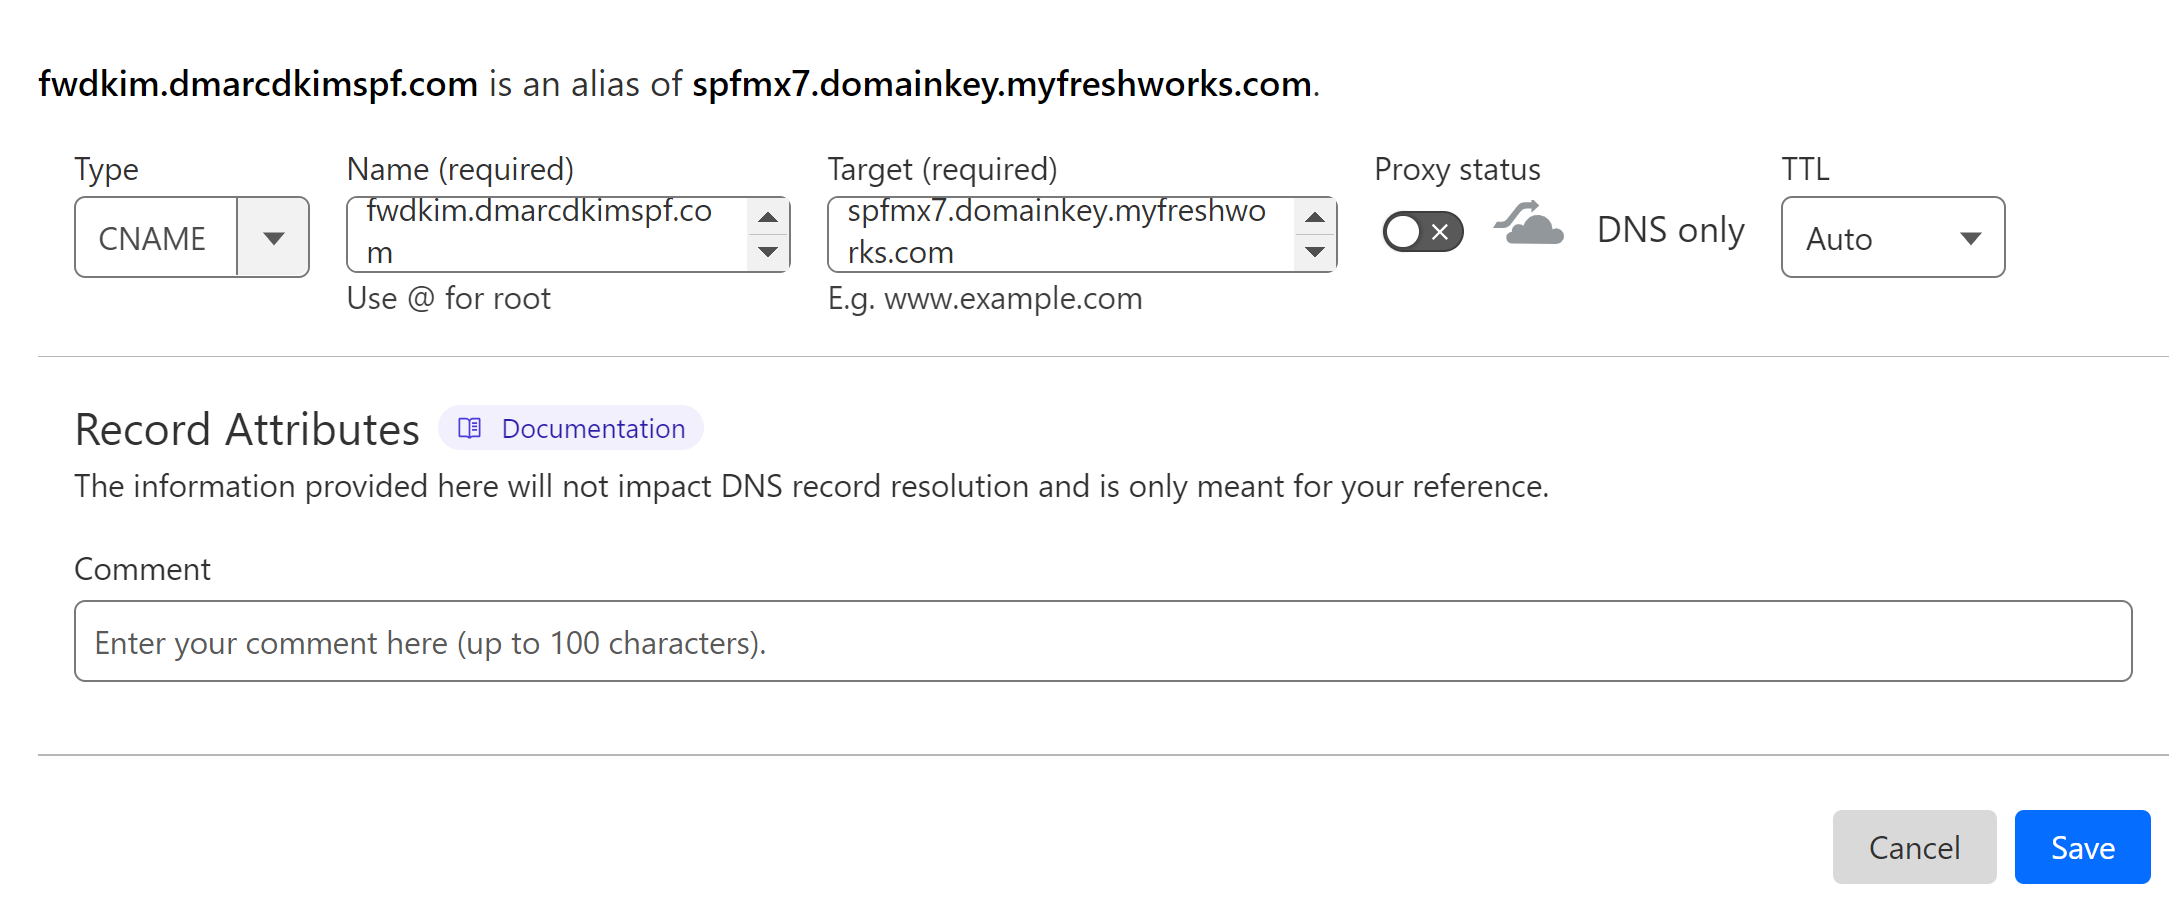
Setup FreshWorks Tracking Record:
Tracking records are useful to track email clicks, opens, and unsubscribes. Setup all three tracking records by following the steps below:
In your DNS dashboard, select type CNAME.
In the Name field, add the record name.
In the Target field, add the record value.
-
Turn off the proxy status and click Save.
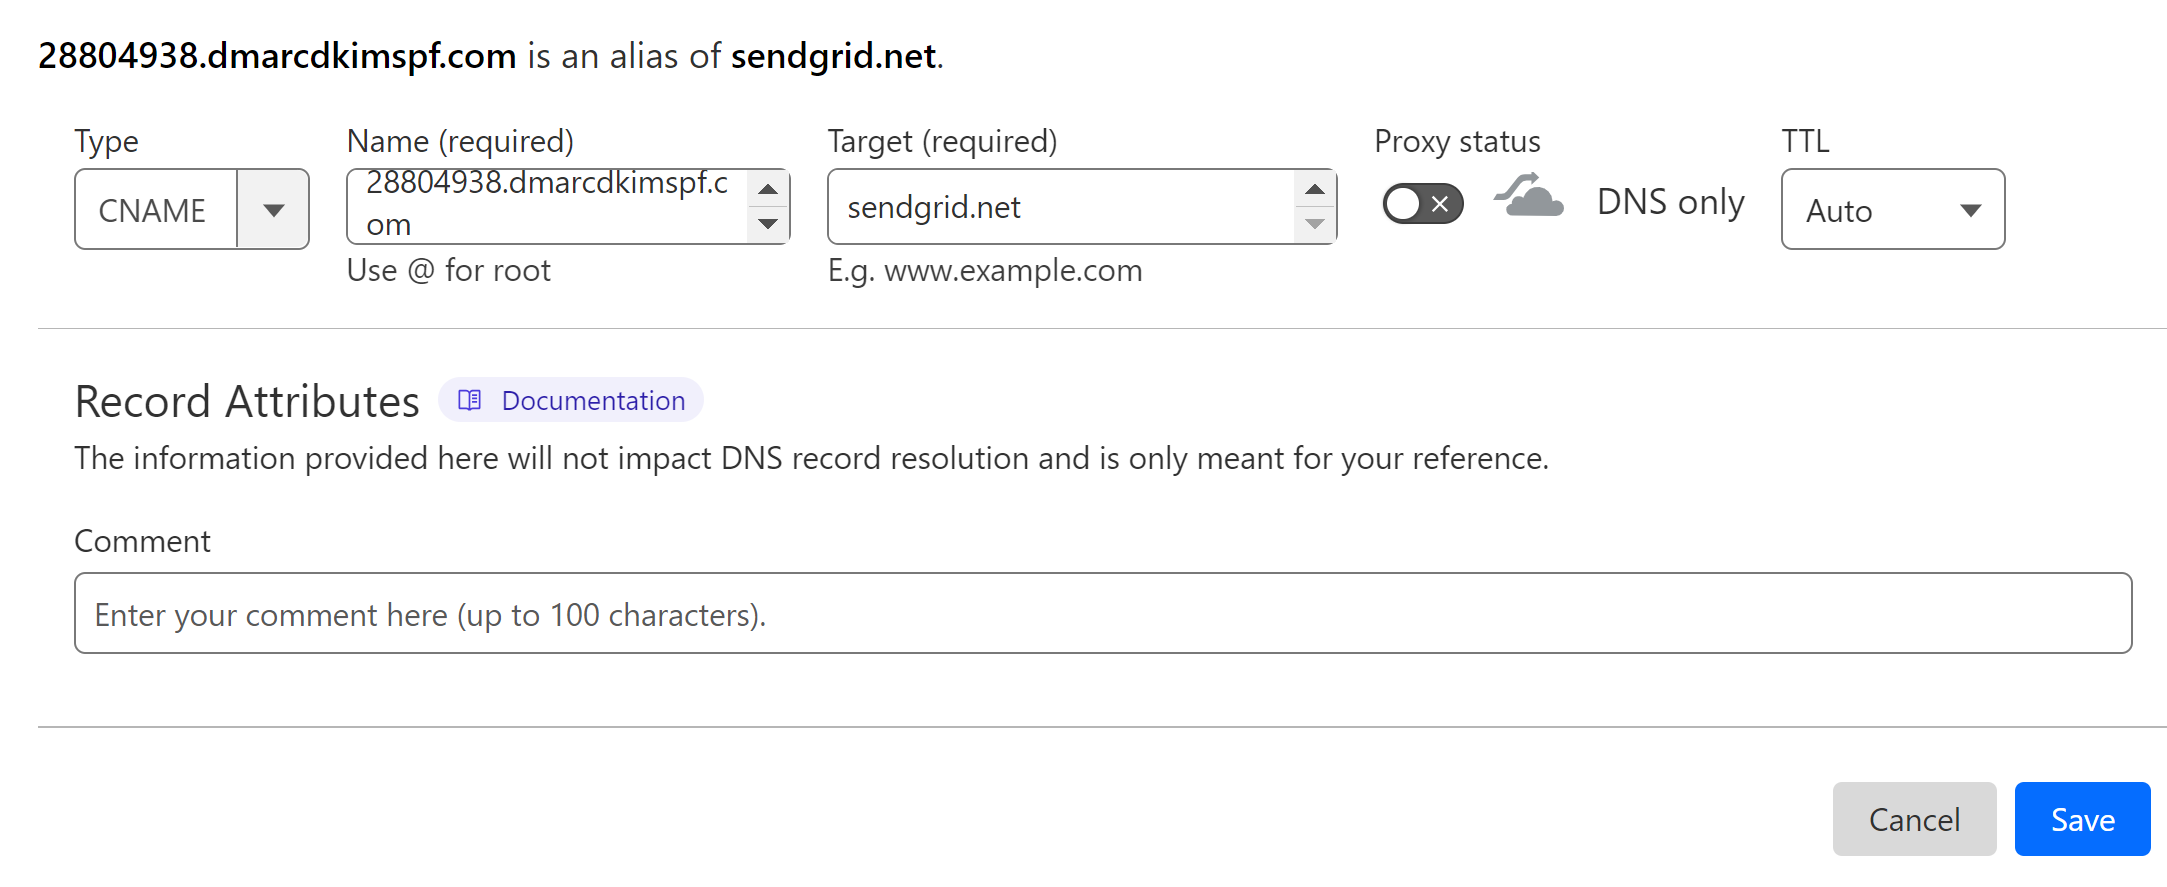
Add all tracking records to your DNS dashboard.
Verify FreshWorks DNS Records:
-
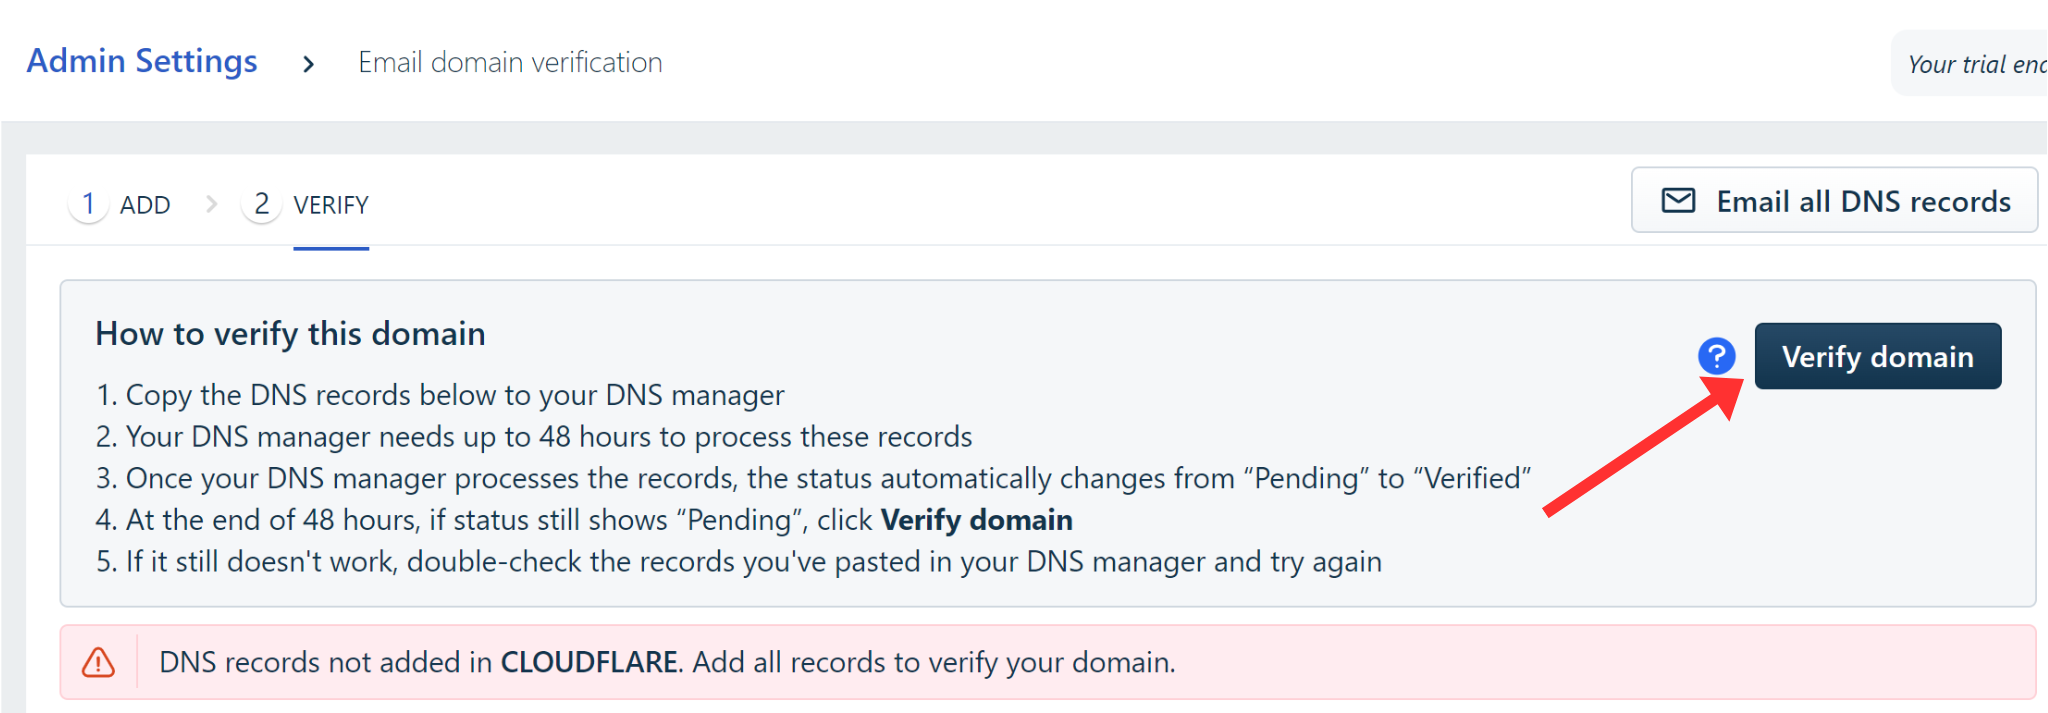
After adding all records, click the Verify Domain button at the top right corner.
-
If records are validated, the status will change from Pending to Verified.
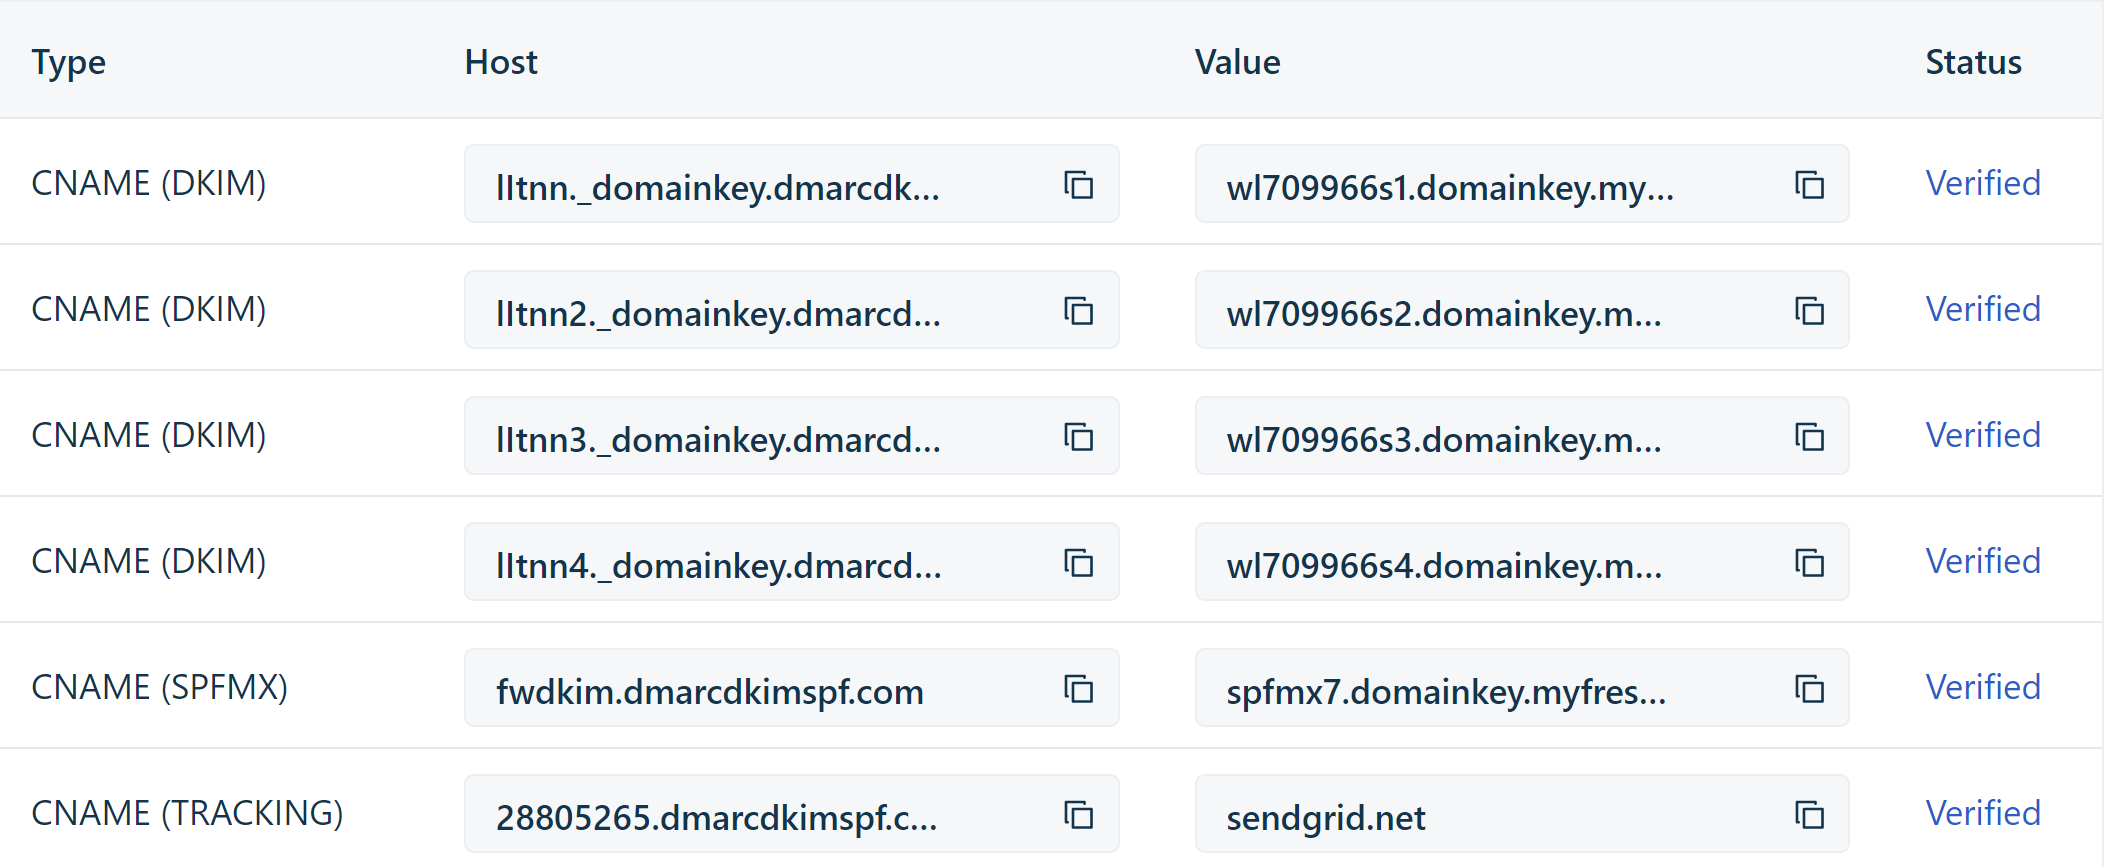
NOTE: Record verification may take up to 24 hours.
If the records are not verified after 24 hours, there might be a misconfiguration in your DSN setup. To troubleshoot domain authentication issues, hire a DmarcDkim.com expert.
Setup FreshWorks DMARC Record:
Setting up a DMARC record is crucial to protect your domain against spoofing. Otherwise, your emails are always at risk of spam. DmarcDkim.com helps you generate a strict DMARC policy for your domain.
Moreover, you can sign up at the portal to access the DMARC Reports and Analytics dashboard to have actionable insights into your email performance and be guided step by step to protect your email domain.
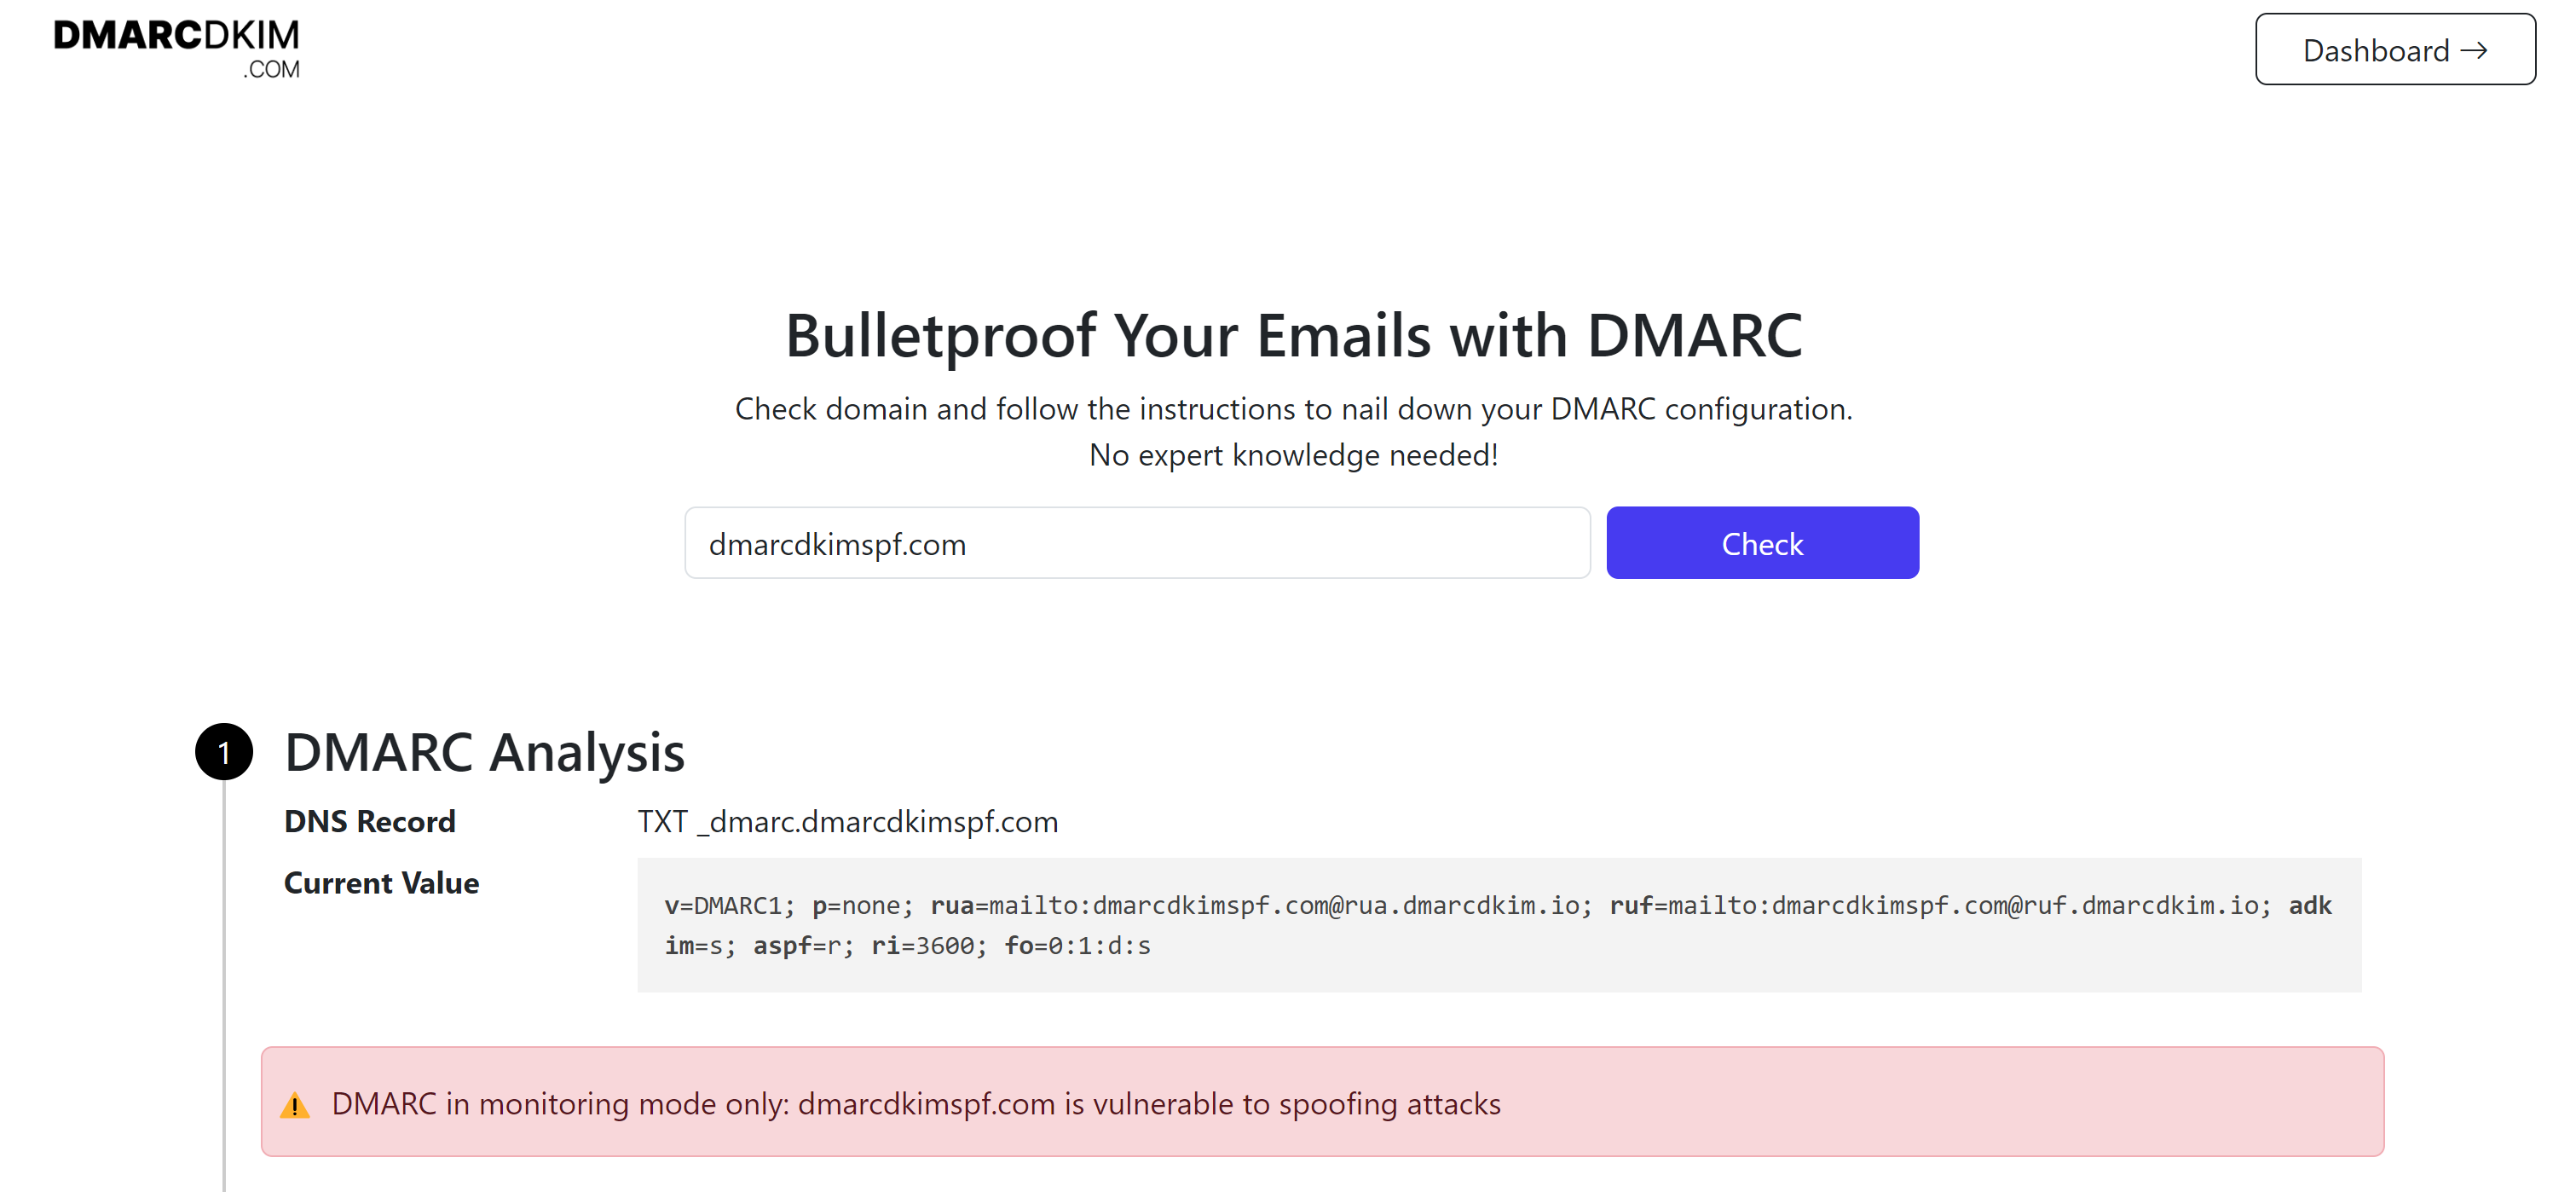
Go to DMARC Check Tool.
-
Add your domain name and click Check.
-
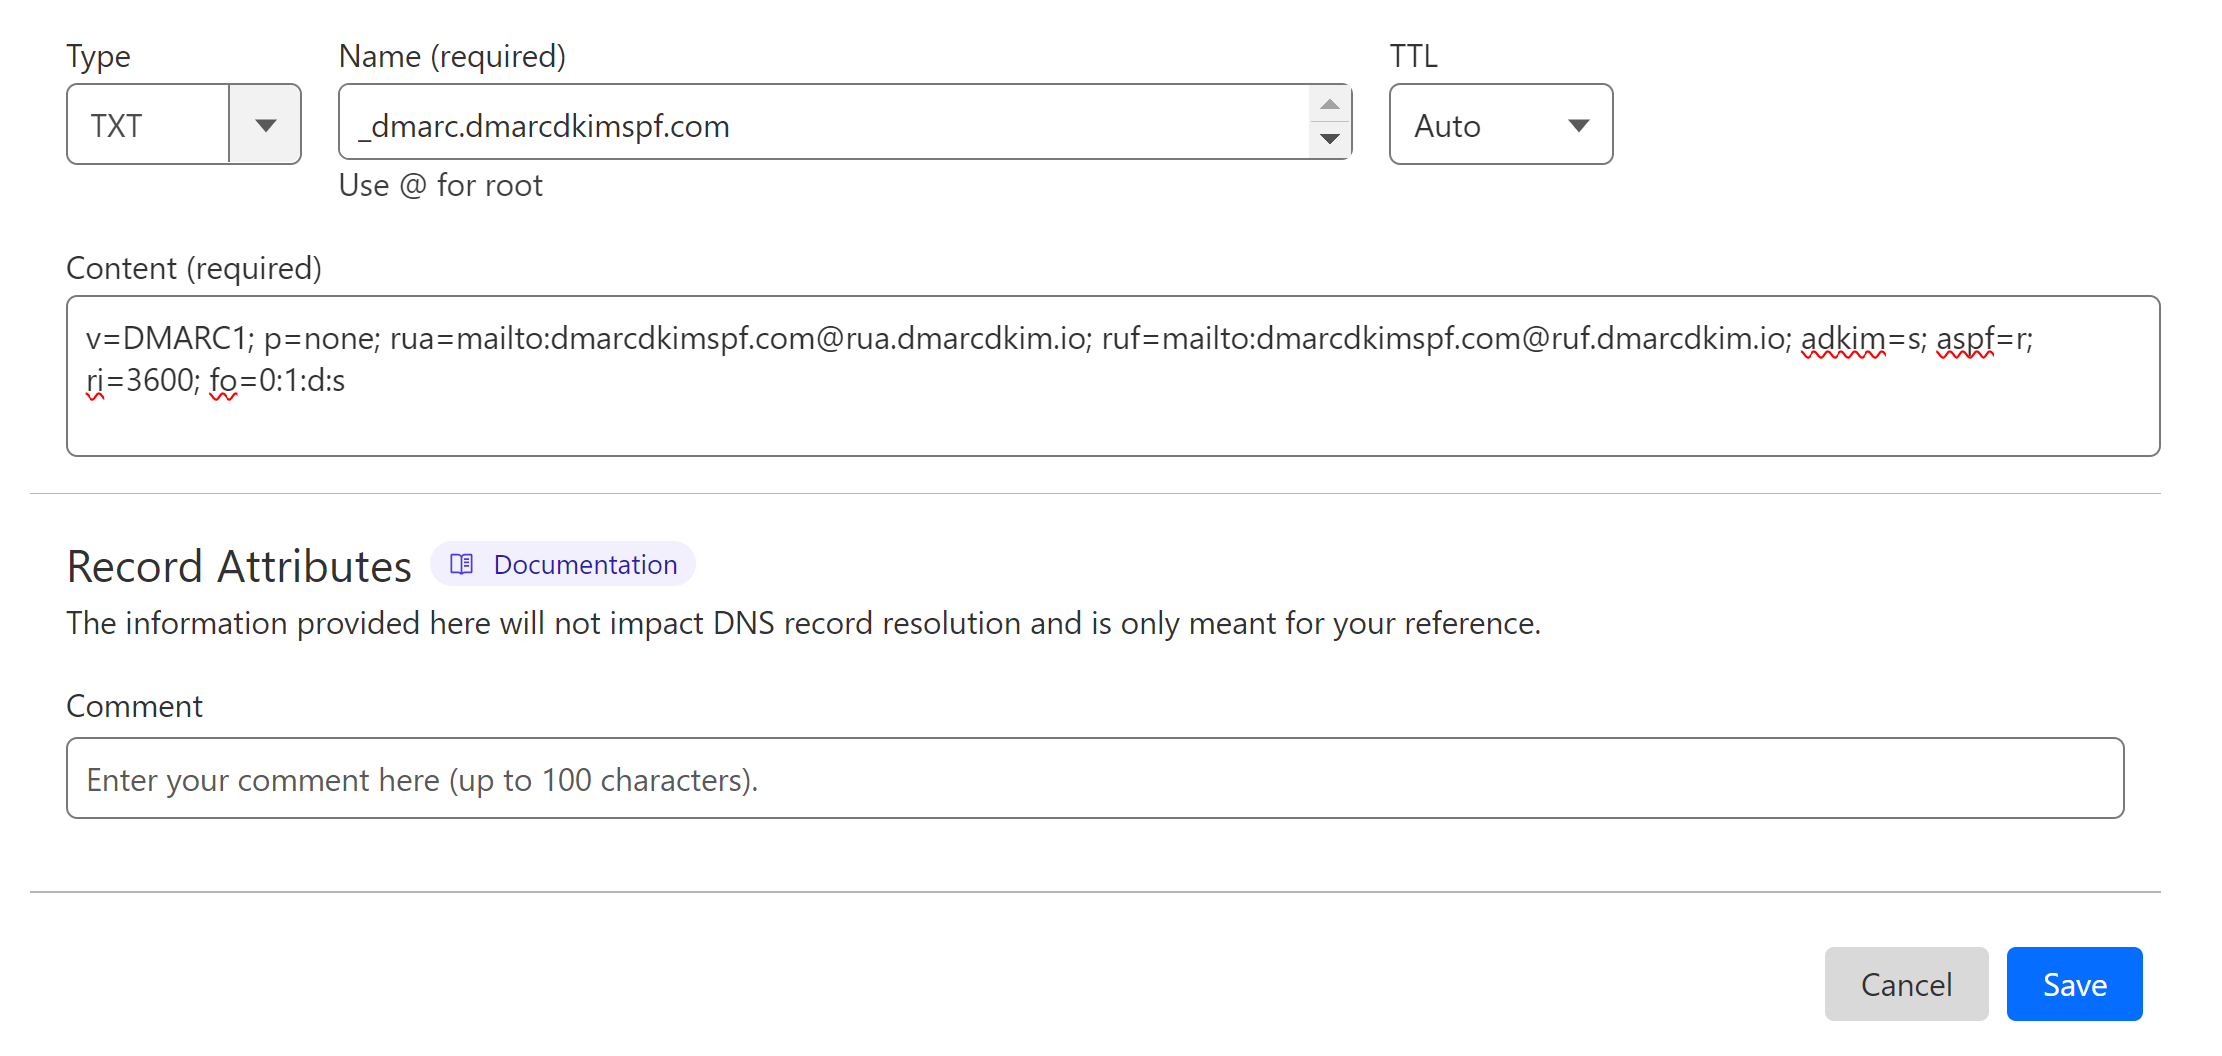
Copy the Record name and Suggested value and add them to your DNS dashboard.
Click Sign up now to access the reports dashboard.
Click Check DNS Records to verify your domain at DmarcDkim.com.
For support and assistance, contact a DmarcDkim.com expert.
Check domain and follow the instructions to nail down your DMARC configuration.
No expert knowledge needed!


