Setup FastMail SPF, DKIM, DMARC, MX Records for Domain Authentication
Check your domain for DMARC, DKIM, SPF and MX records. Get a free report.
How to Setup FastMail SPF, DKIM, DMARC, MX Records for Domain Authentication
SPF (Sender Policy Framework) helps prevent email spoofing by allowing domain owners to specify which mail servers are authorized to send email on behalf of their domain.
DKIM (DomainKeys Identified Mail) adds a digital signature to your email headers, enabling the recipient's server to verify that the email has not been altered during transit and that it indeed comes from your domain.
DMARC (Domain-based Message Authentication, Reporting, and Conformance) builds on SPF and DKIM. It allows domain owners to specify how receiving mail servers should deal with emails that fail SPF or DKIM checks.
You can configure these DNS records in the FastMail domain settings. Add them to your DNS provider for verification. By doing this, you can prevent emails from going to the spam folder.
Configure FastMail DNS Records:
-
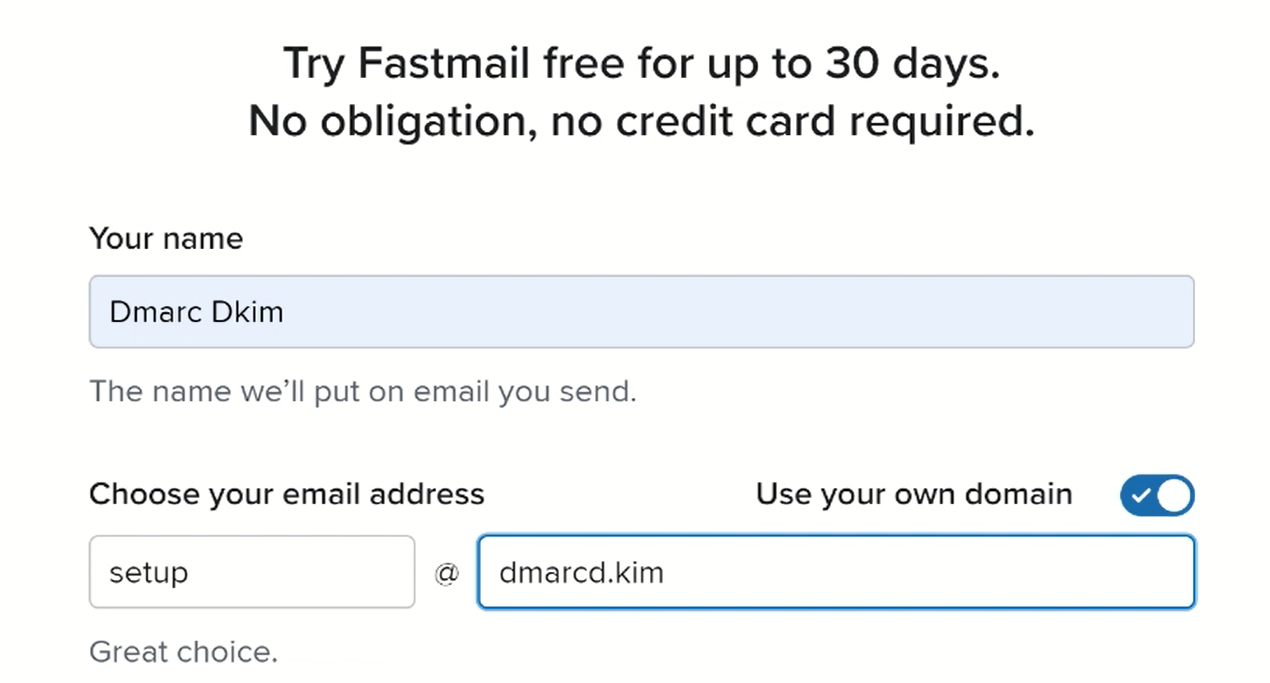
When signing up for the FastMail account, turn on the toggle for "Use your own domain" and write down your domain name.
-
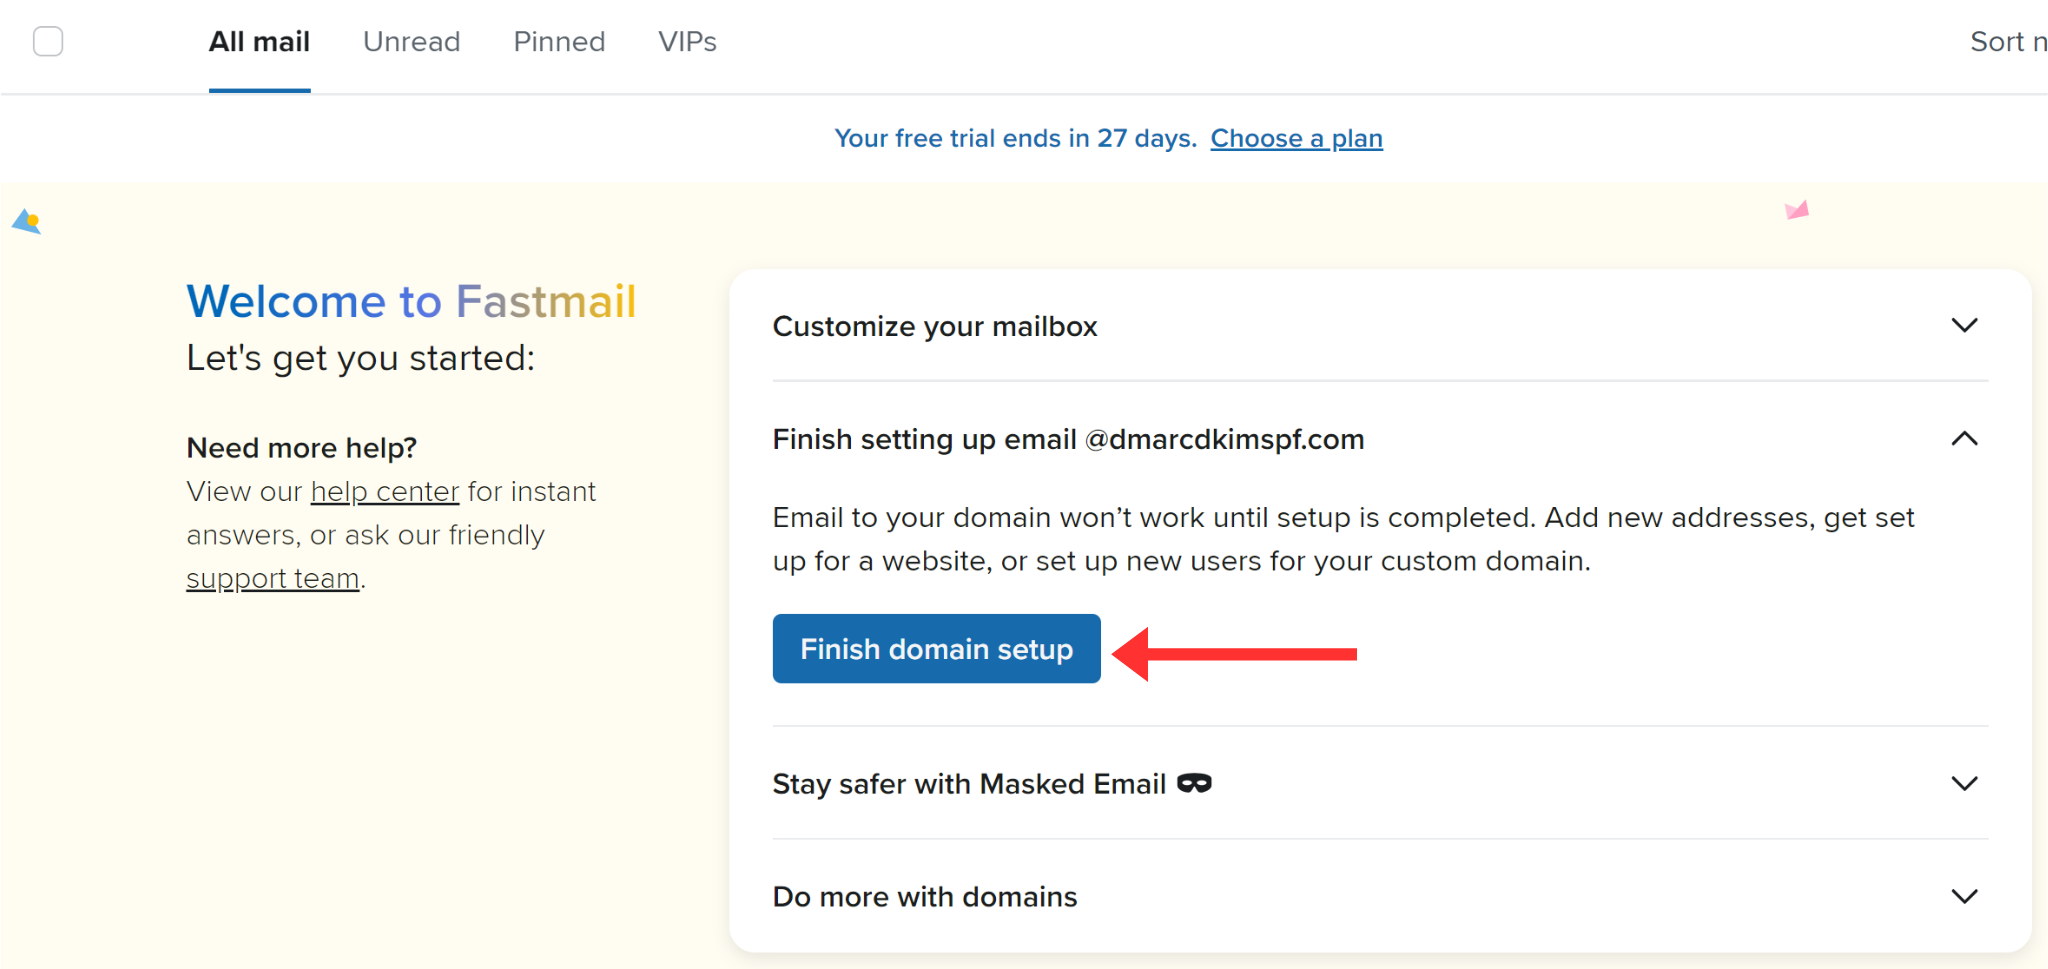
On the dashboard, click Finish Setting Up Email > Finish Domain Setup.
-
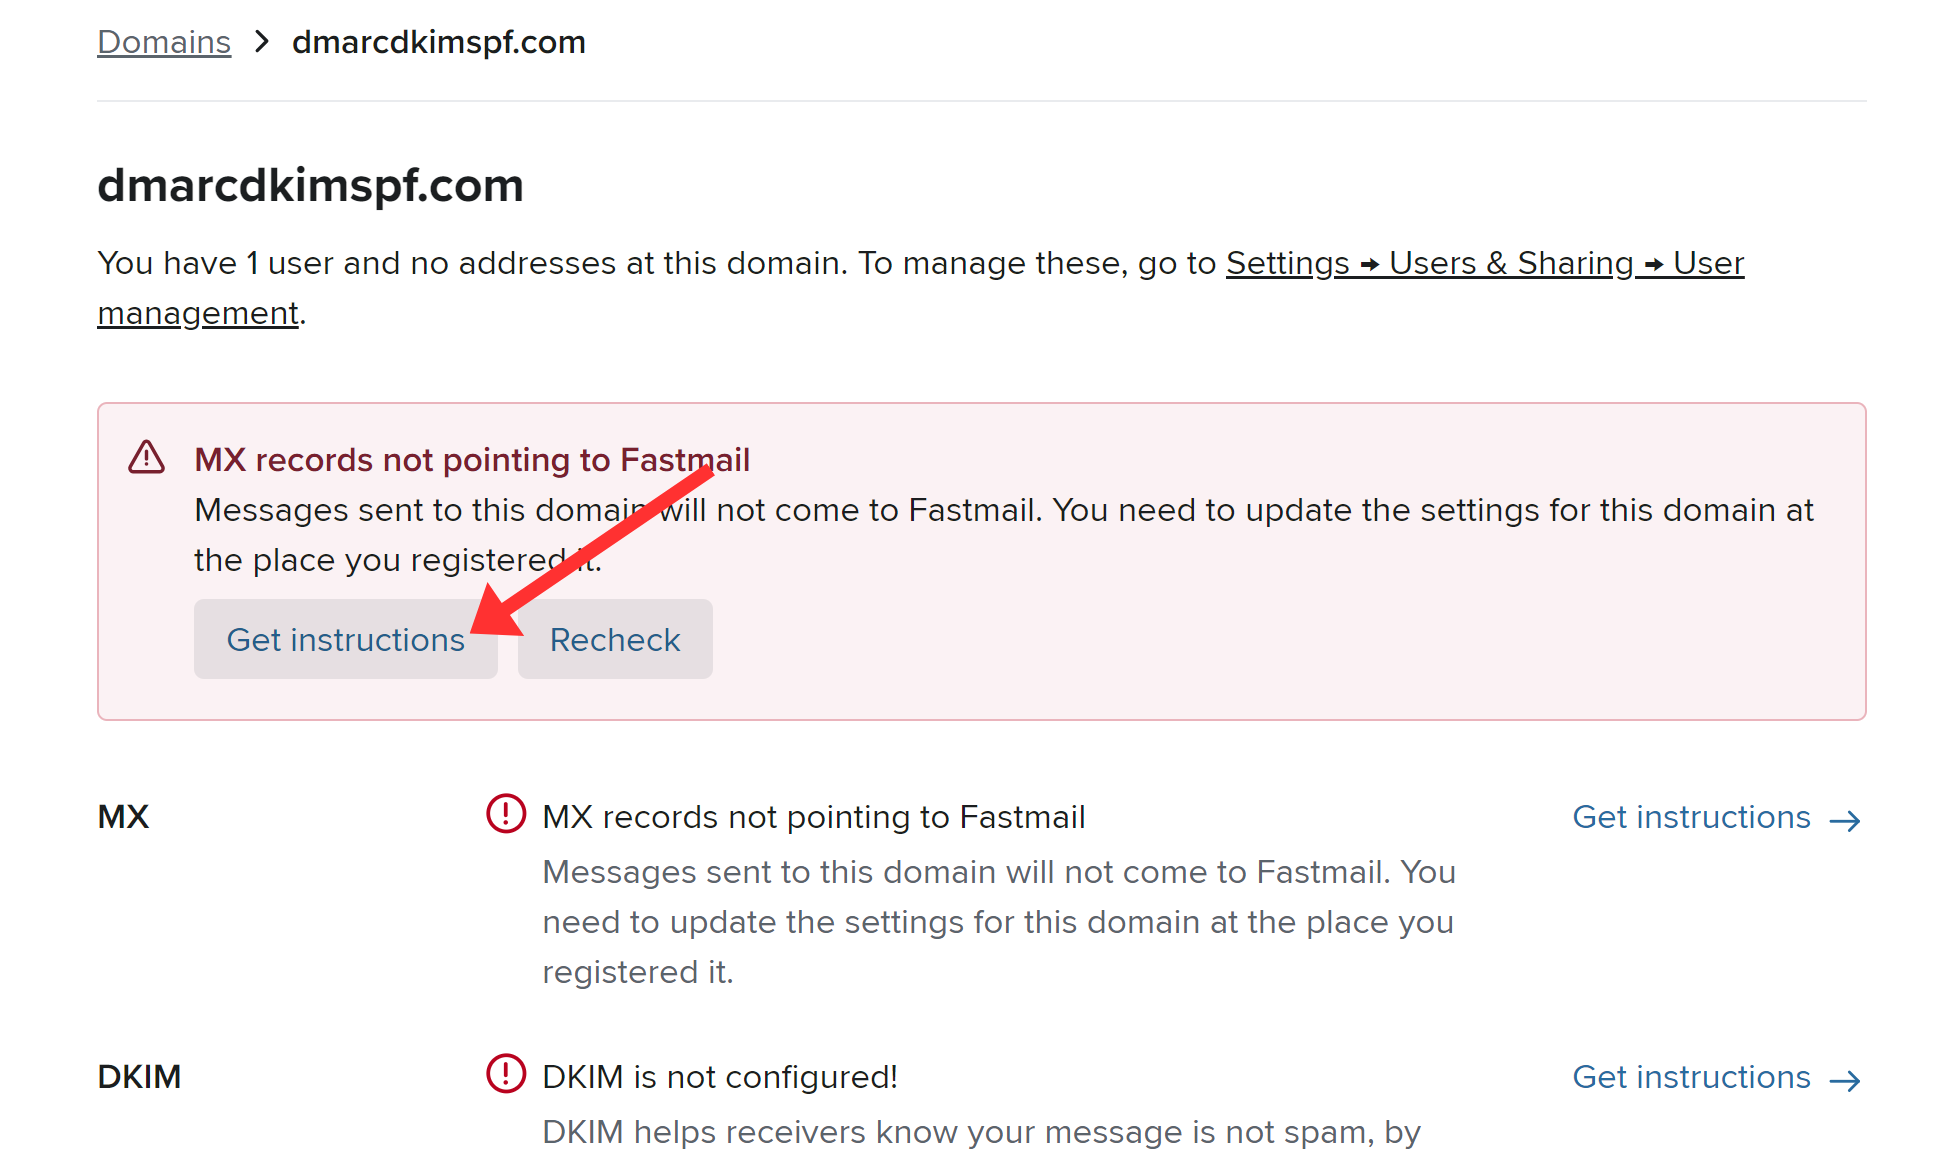
Next, click Get Instructions.
-
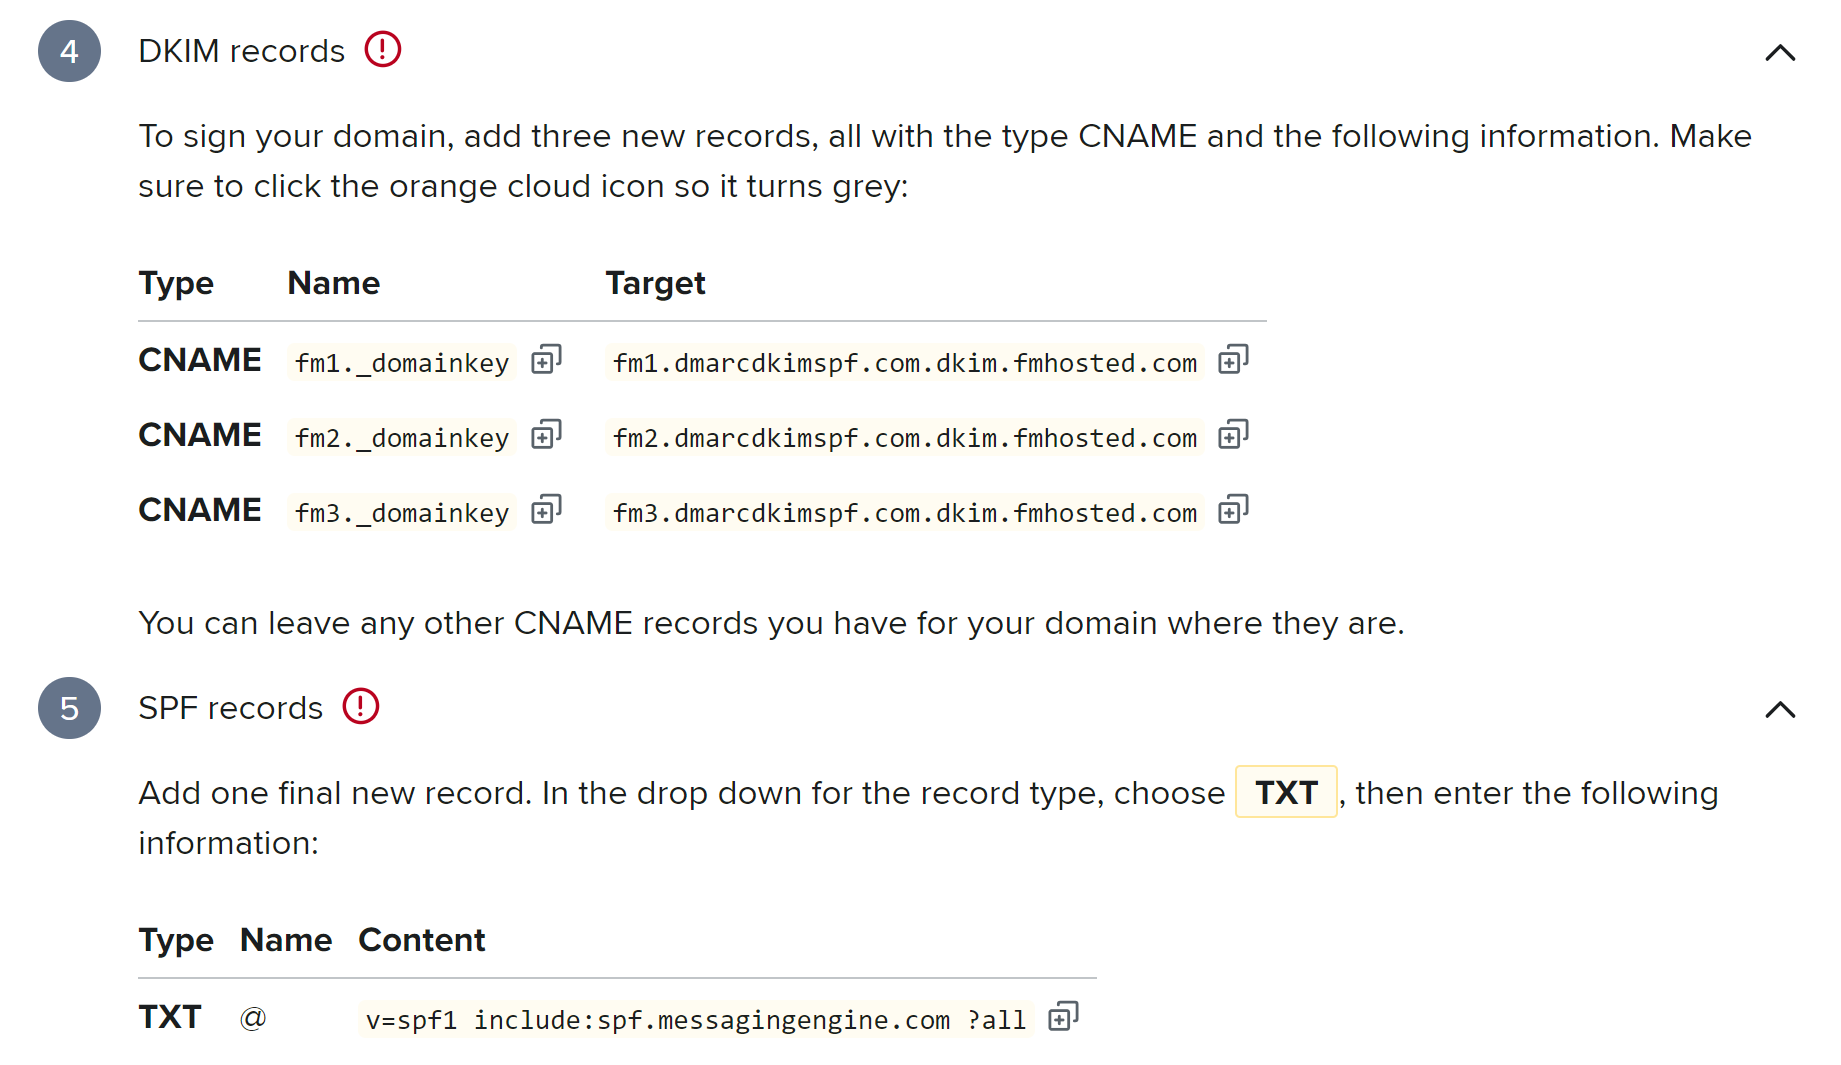
Here you will find the MX, DKIM, and SPF records. Setup these records in your DNS provider.
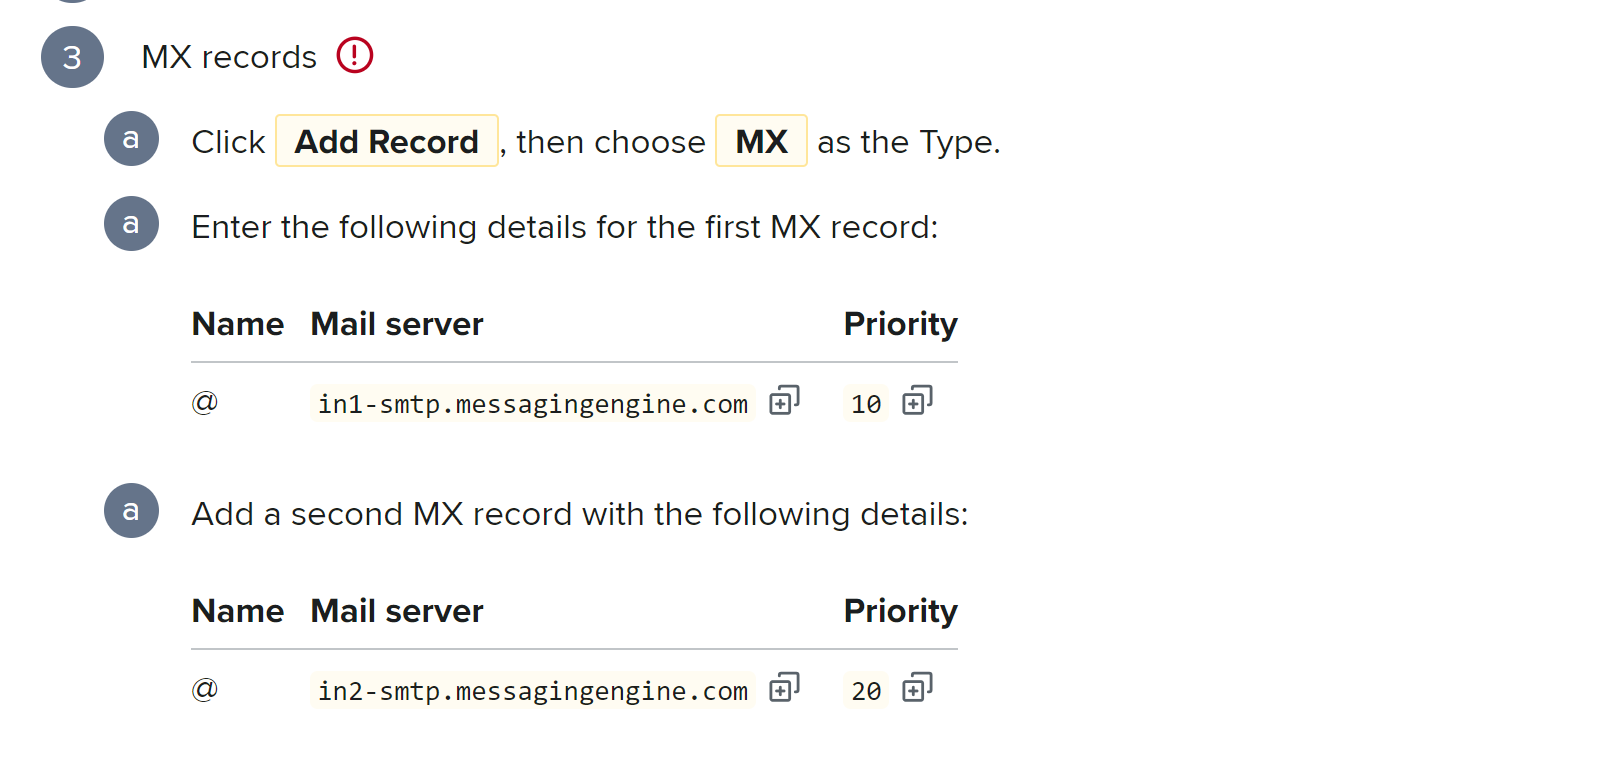
Setup FastMail MX Records:
Before adding the FastMail MX records, remove any other MX records if present in the DNS dashboard.
Login to your DNS provider. We are using Cloudflare for this guide post.
Select your domain.
Go to the DNS tab and click Add Record.
Select record type MX.
Write "@" in the Name field of your DNS dashboard.
Copy the MX value from the FastMail DNS page and paste it into the Mail Server field.
-
Select priority 10 for the first MX record and click Save.
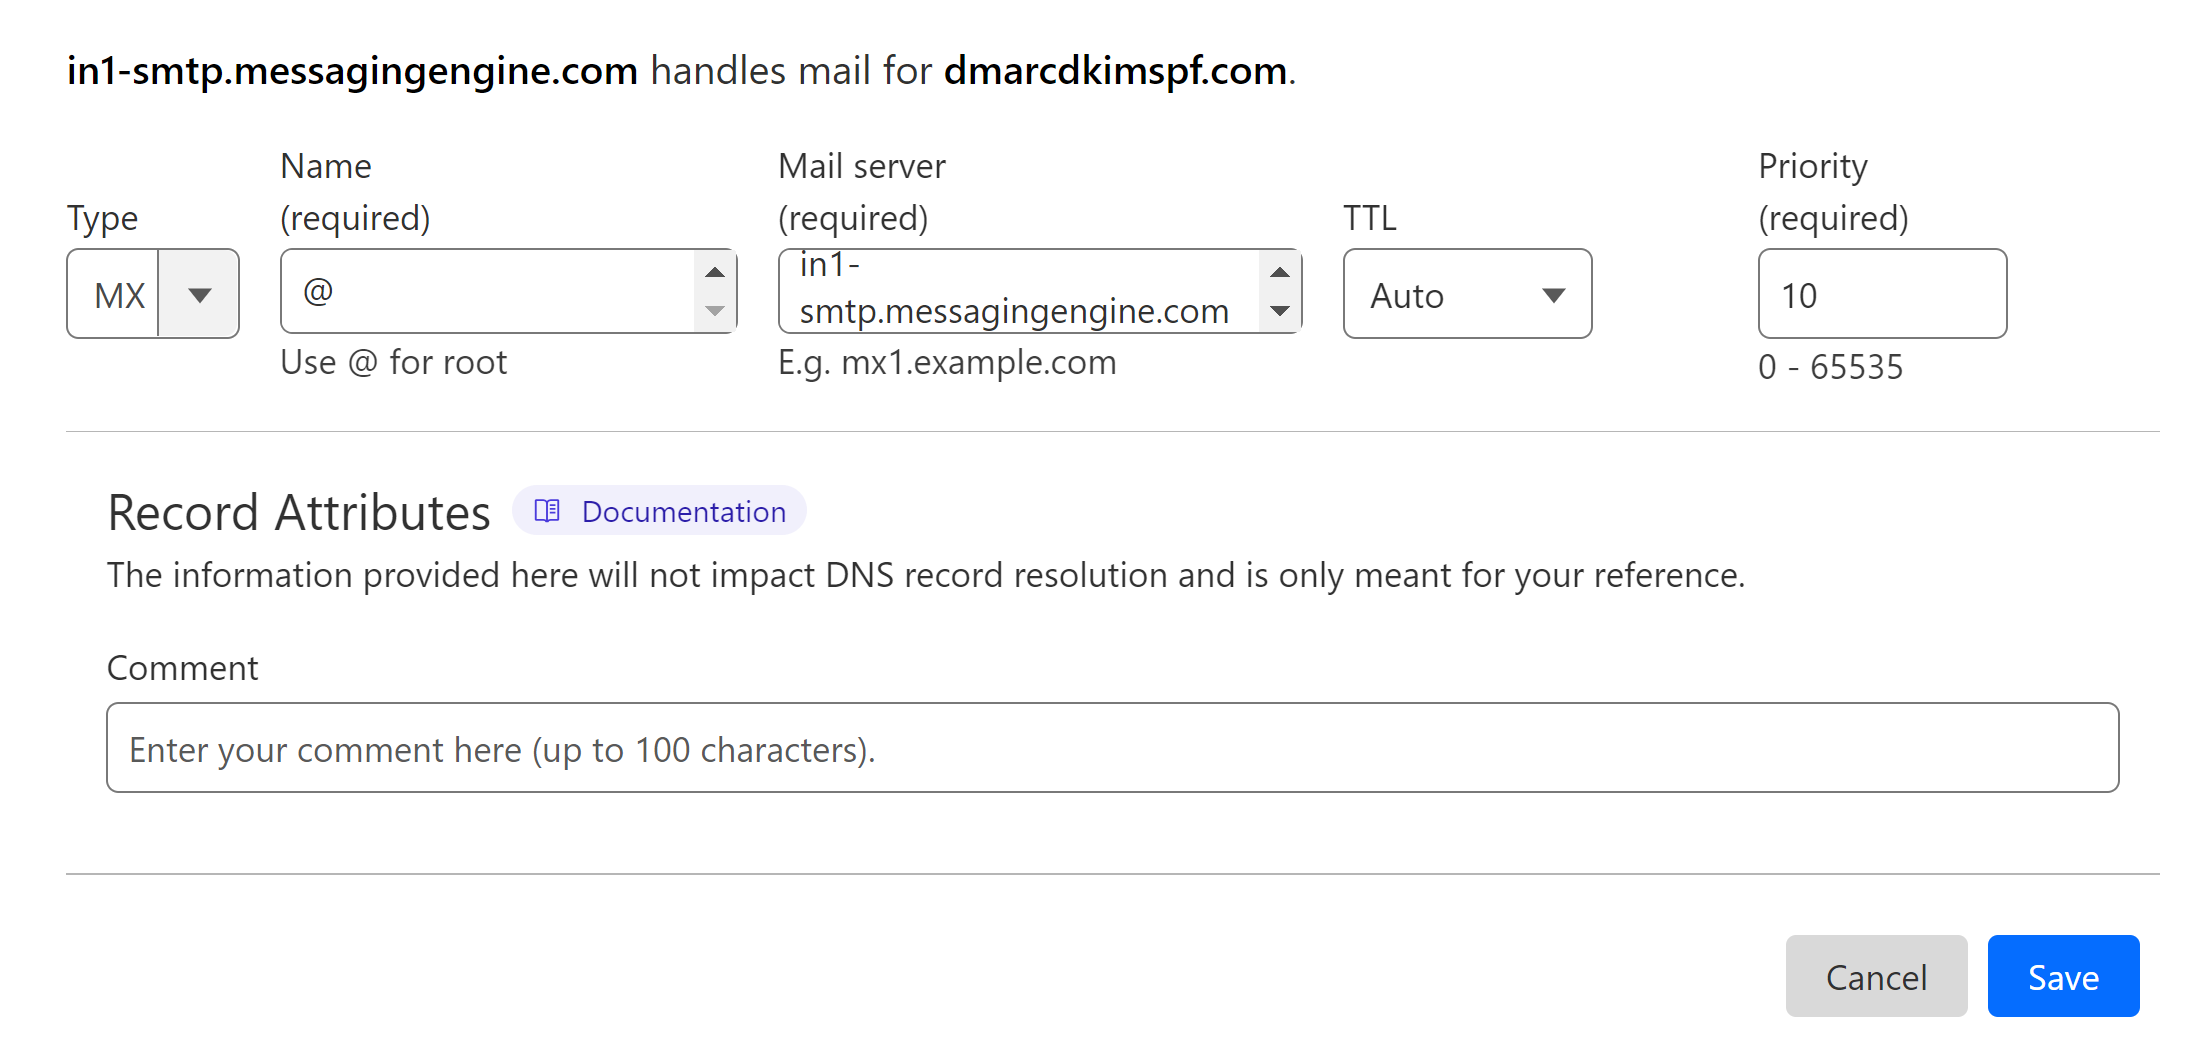
Add the second MX record with priority 20.
Setup FastMail DKIM Records:
FastMail provides three CNAME DKIM records. Add all three to your DNS dashboard.
In the DNS tab, select type CNAME.
Copy the DKIM record name and paste it into the Name field of your DNS provider.
Copy the DKIM value and add it to the Target field.
-
Turn off the Proxy and click Save.
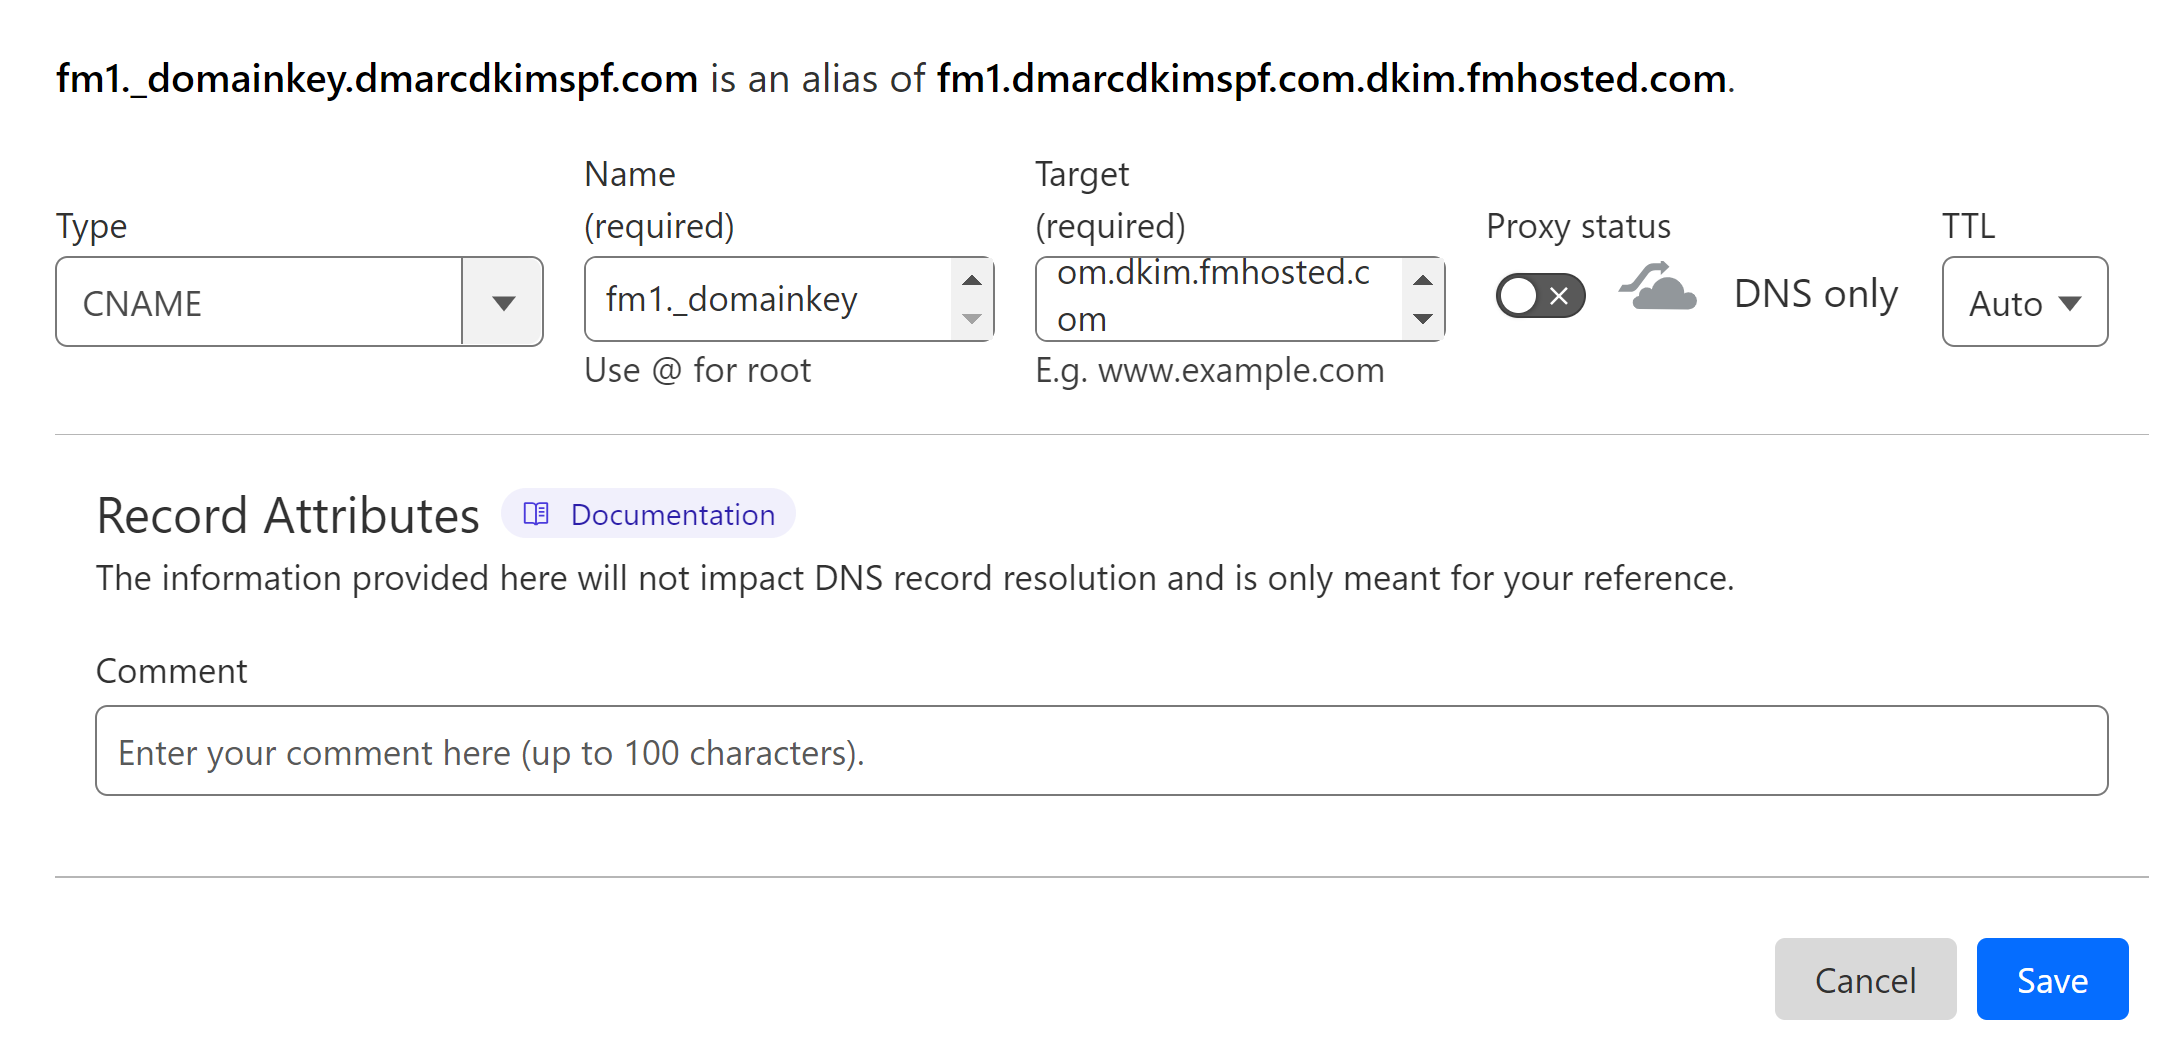
Add the other two DKIM records by following the same steps.
NOTE: Always turn off the proxy for CNAME records. If enabled, it diverts the traffic to the DNS server instead of email server which causes authentication issues.
Setup FastMail SPF Record:
Select type TXT.
Write "@" in the Name field.
In the Content field, add the SPF value: v=spf1 include:spf.messagingengine.com -all.
-
Finally, click Save.
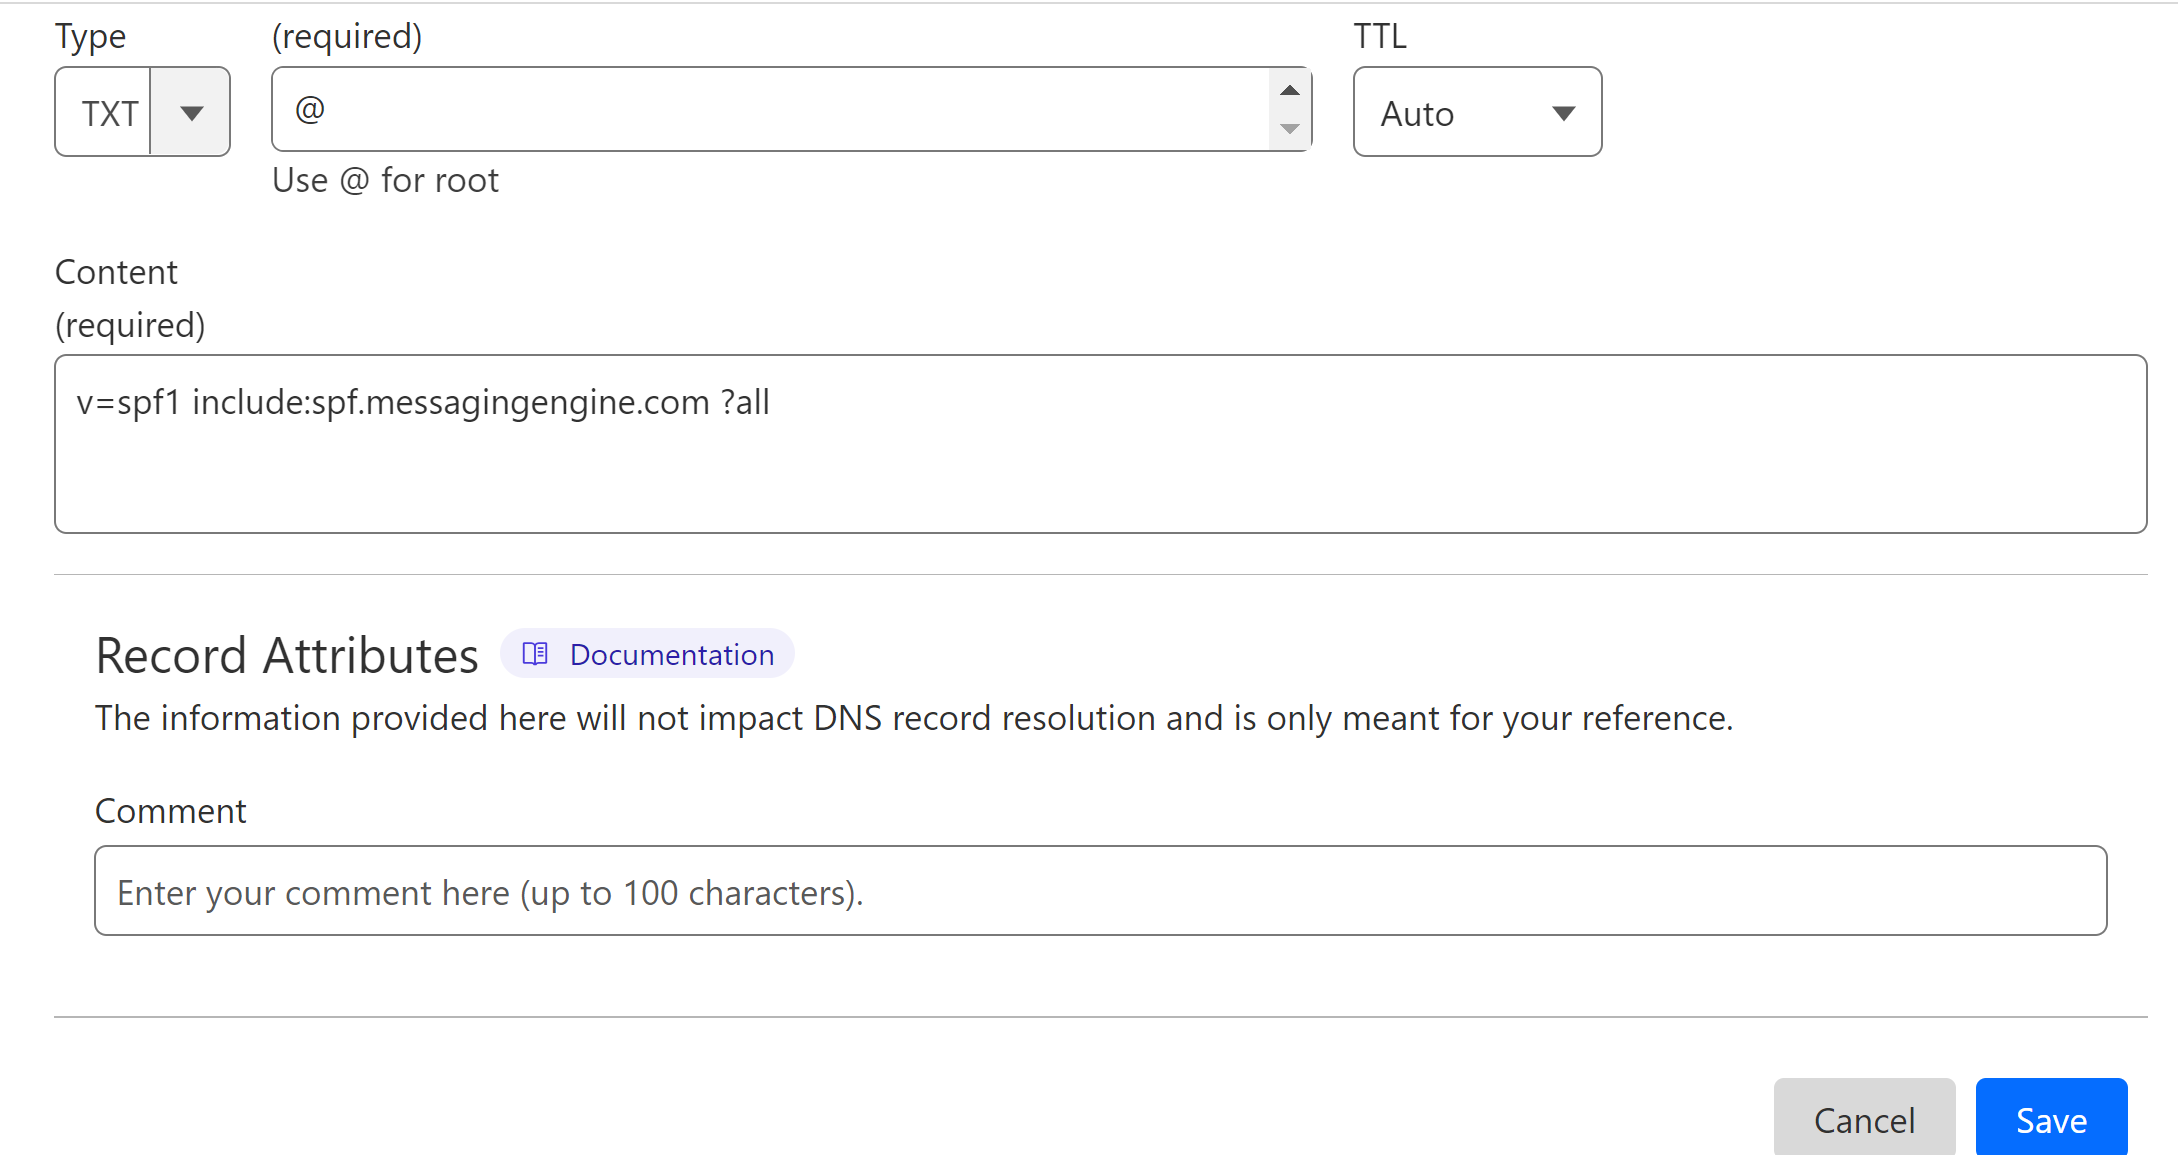
How to Merge Multiple SPF Records?
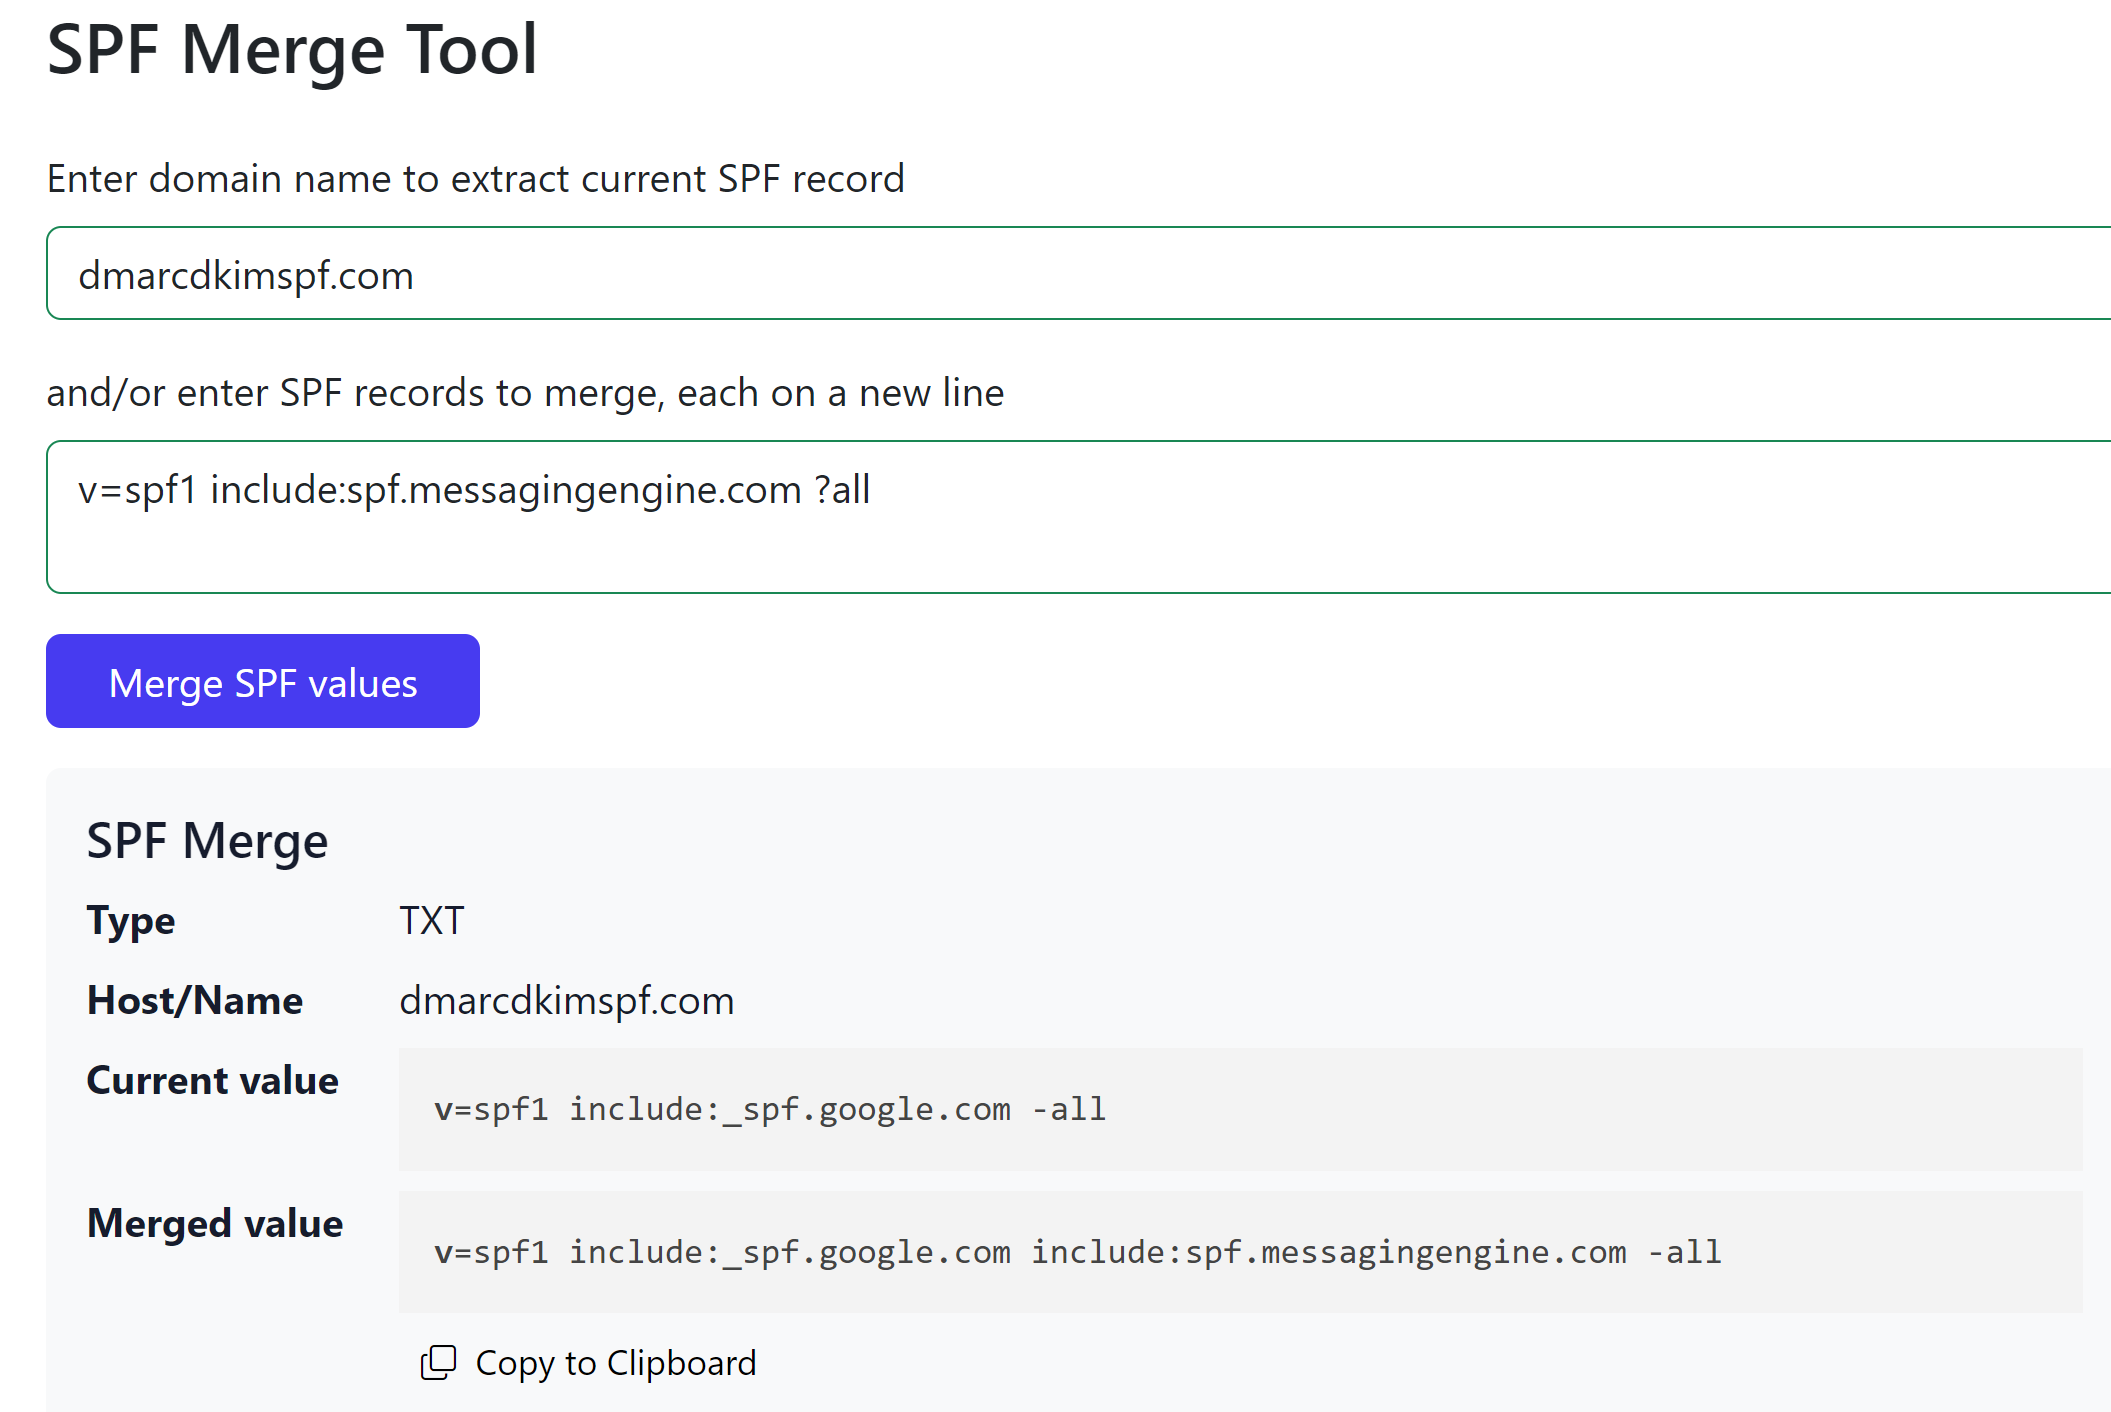
Due to the limitations of DNS providers, you can not add more than one SPF record for a domain. If your domain has an existing SPF record, merge it with FastMail SPF to avoid conflicts. You can use the DmarcDkim.com SPF merge tool for this purpose.
Open the SPF merge tool.
Add your domain name and FastMail SPF value.
Click the Merge SPF Values button.
The tool merges your existing SPF value with the new one to give a single, combined value.
-
Replace the existing SPF record in your DNS provider with the merged value.
Verify FastMail DNS Records:
-
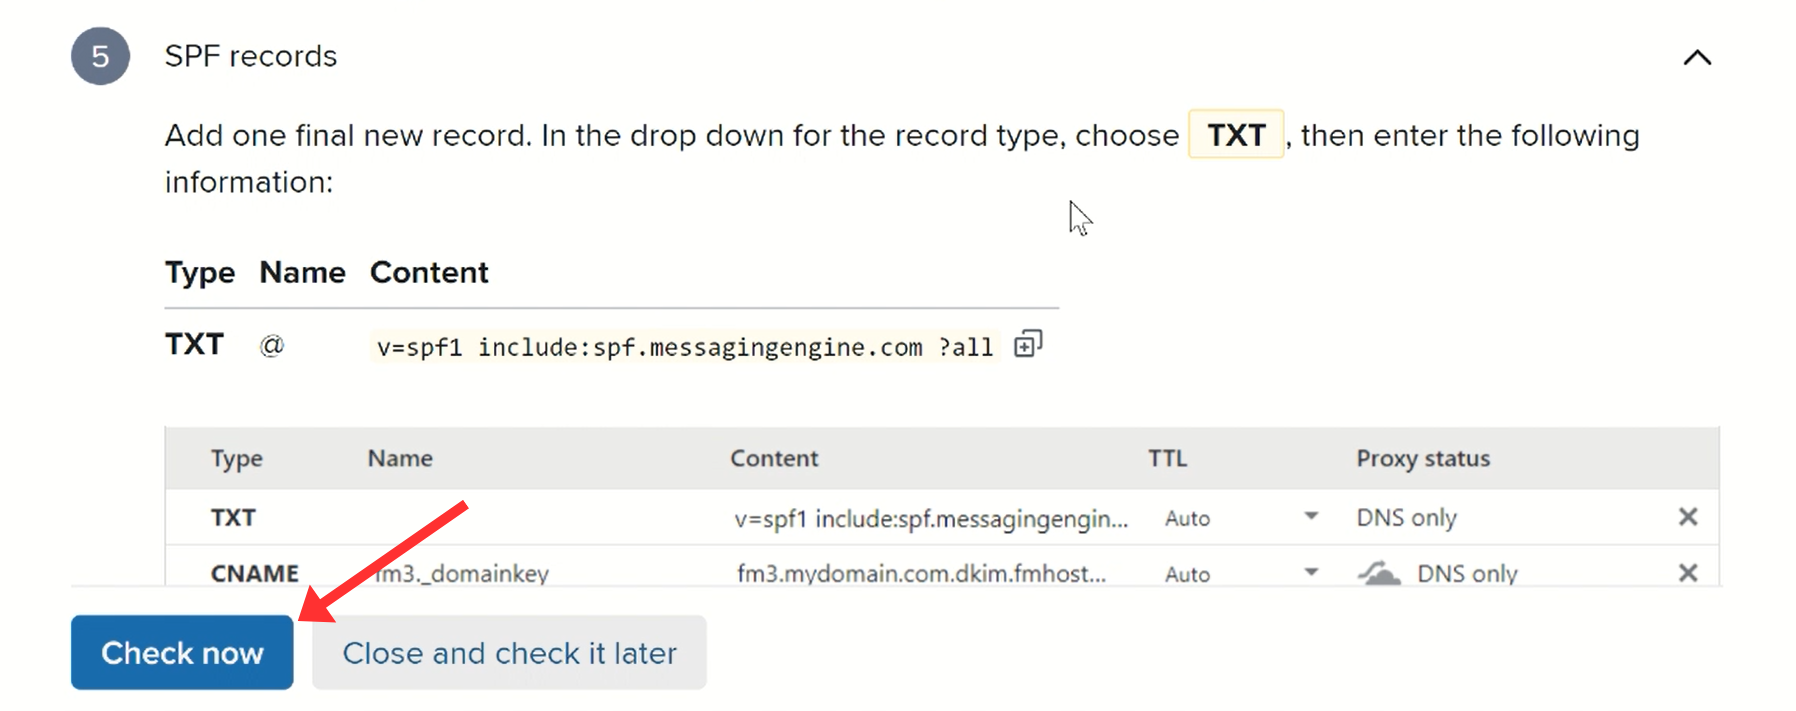
After adding all records, click Check Now.
-
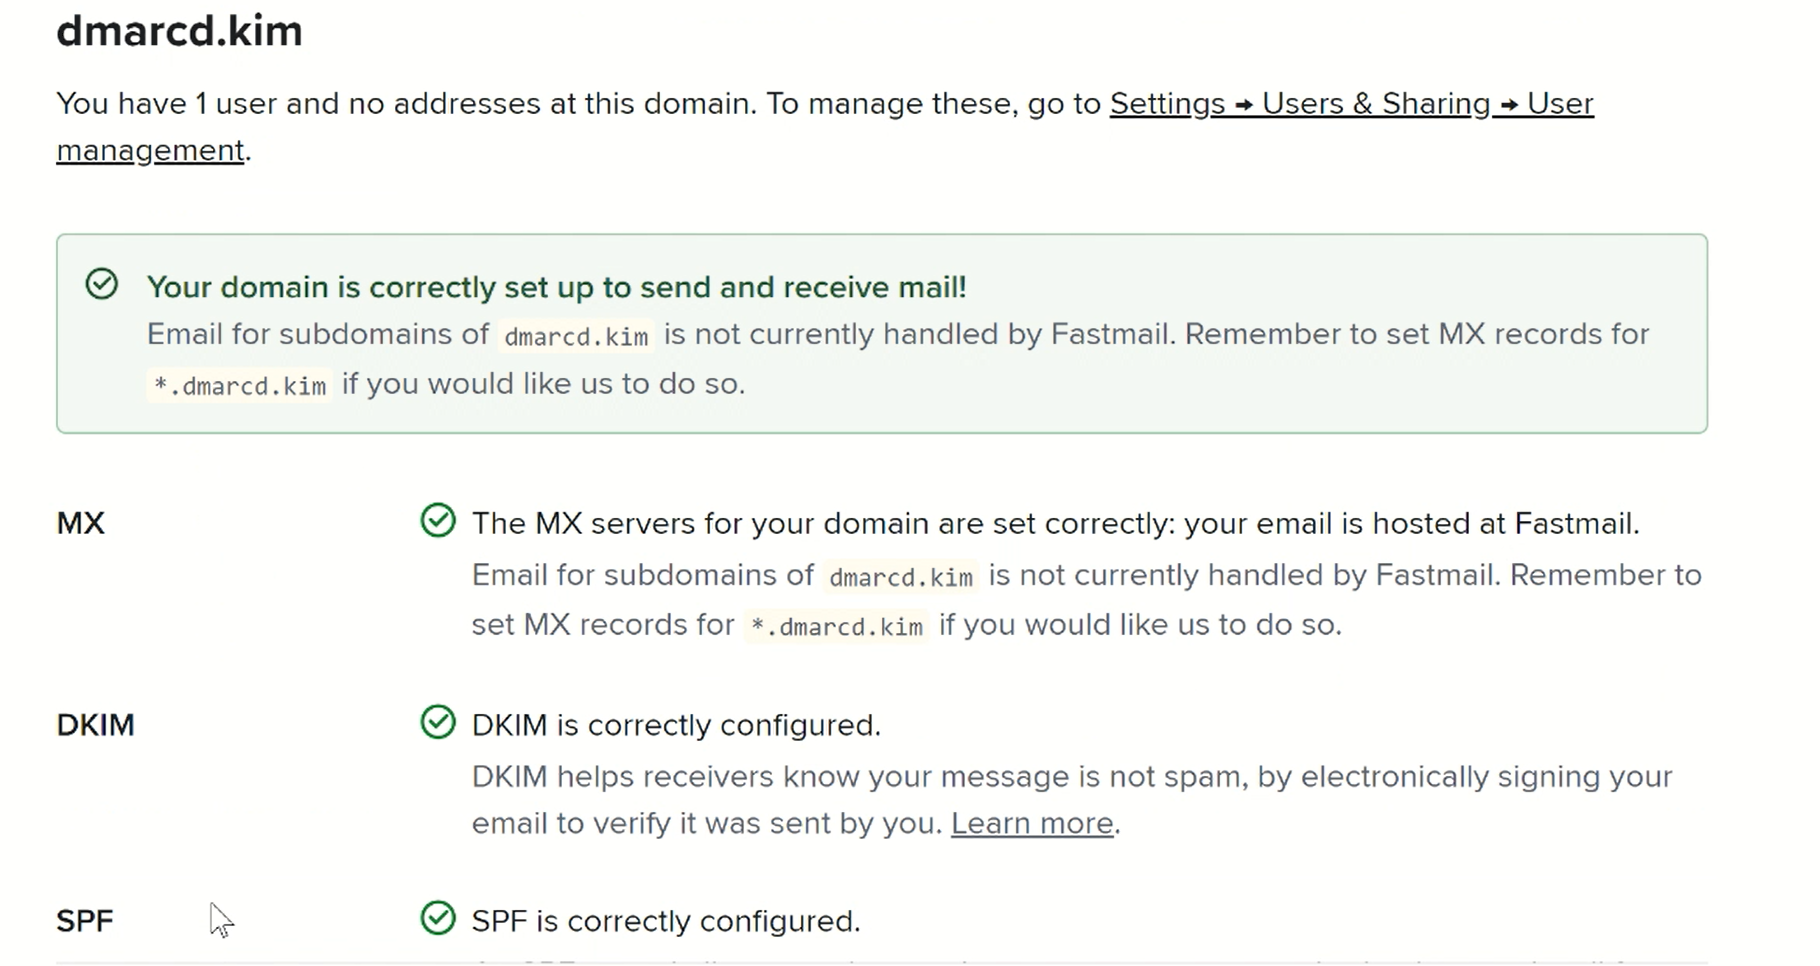
If the records are verified, you will see a confirmation text flashed in green along with green tickmarks next to each record.
NOTE: If the DNS records are not verified immediately, wait at least 24 hours for the servers to update DNS changes.
If verification fails after 24 hours, your DNS setup might be misconfigured. Hire a DmarcDkim.com expert to troubleshoot domain authentication issues.
Setup DMARC Record for FastMail:
Setting up a DMARC record is crucial to protect your domain against spoofing. Otherwise, your emails are always at risk of spam. DmarcDkim.com helps you generate a strict DMARC policy for your domain.
Moreover, you can sign up at the portal to access the DMARC Reports and Analytics for actionable insights into your email performance and step-by-step guidance to protect your domain.
Go to DMARC Check Tool.
-
Add your domain name and click Check.

-
Copy the Record name and Suggested value and add them to your DNS dashboard.

-
Click Sign up now to access the reports dashboard.

Click Check DNS Records to verify your domain at DmarcDkim.com.
For support and assistance, contact a DmarcDkim.com expert.
Check domain and follow the instructions to nail down your DMARC configuration.
No expert knowledge needed!


