Configure Sender Authentication in Flodesk - DMARC, DKIM, SPF Records
Check your domain for DMARC, DKIM, SPF and MX records. Get a free report.
How to Setup Flodesk DMARC, DKIM, SPF, Domain Authentication?
Setting up Sender Authentication is crucial to build trust with mailbox service providers like Gmail and Yahoo. Without authentication, emails sent from your domain will be marked as spam.
You can verify your email by adding DNS records to your DNS provider. DKIM, SPF, and DMARC are commonly used authentication records. You can get these DNS records from a trustworthy email delivery service like Flodesk. In this article, we will configure DNS records in Flodesk and add them to the DNS provider. We are using Cloudflare for this tutorial but you can add records to any DNS provider you use.
Configuring Flodesk DNS Settings
Sign up for your Flodesk account with the email you want to authenticate.
-
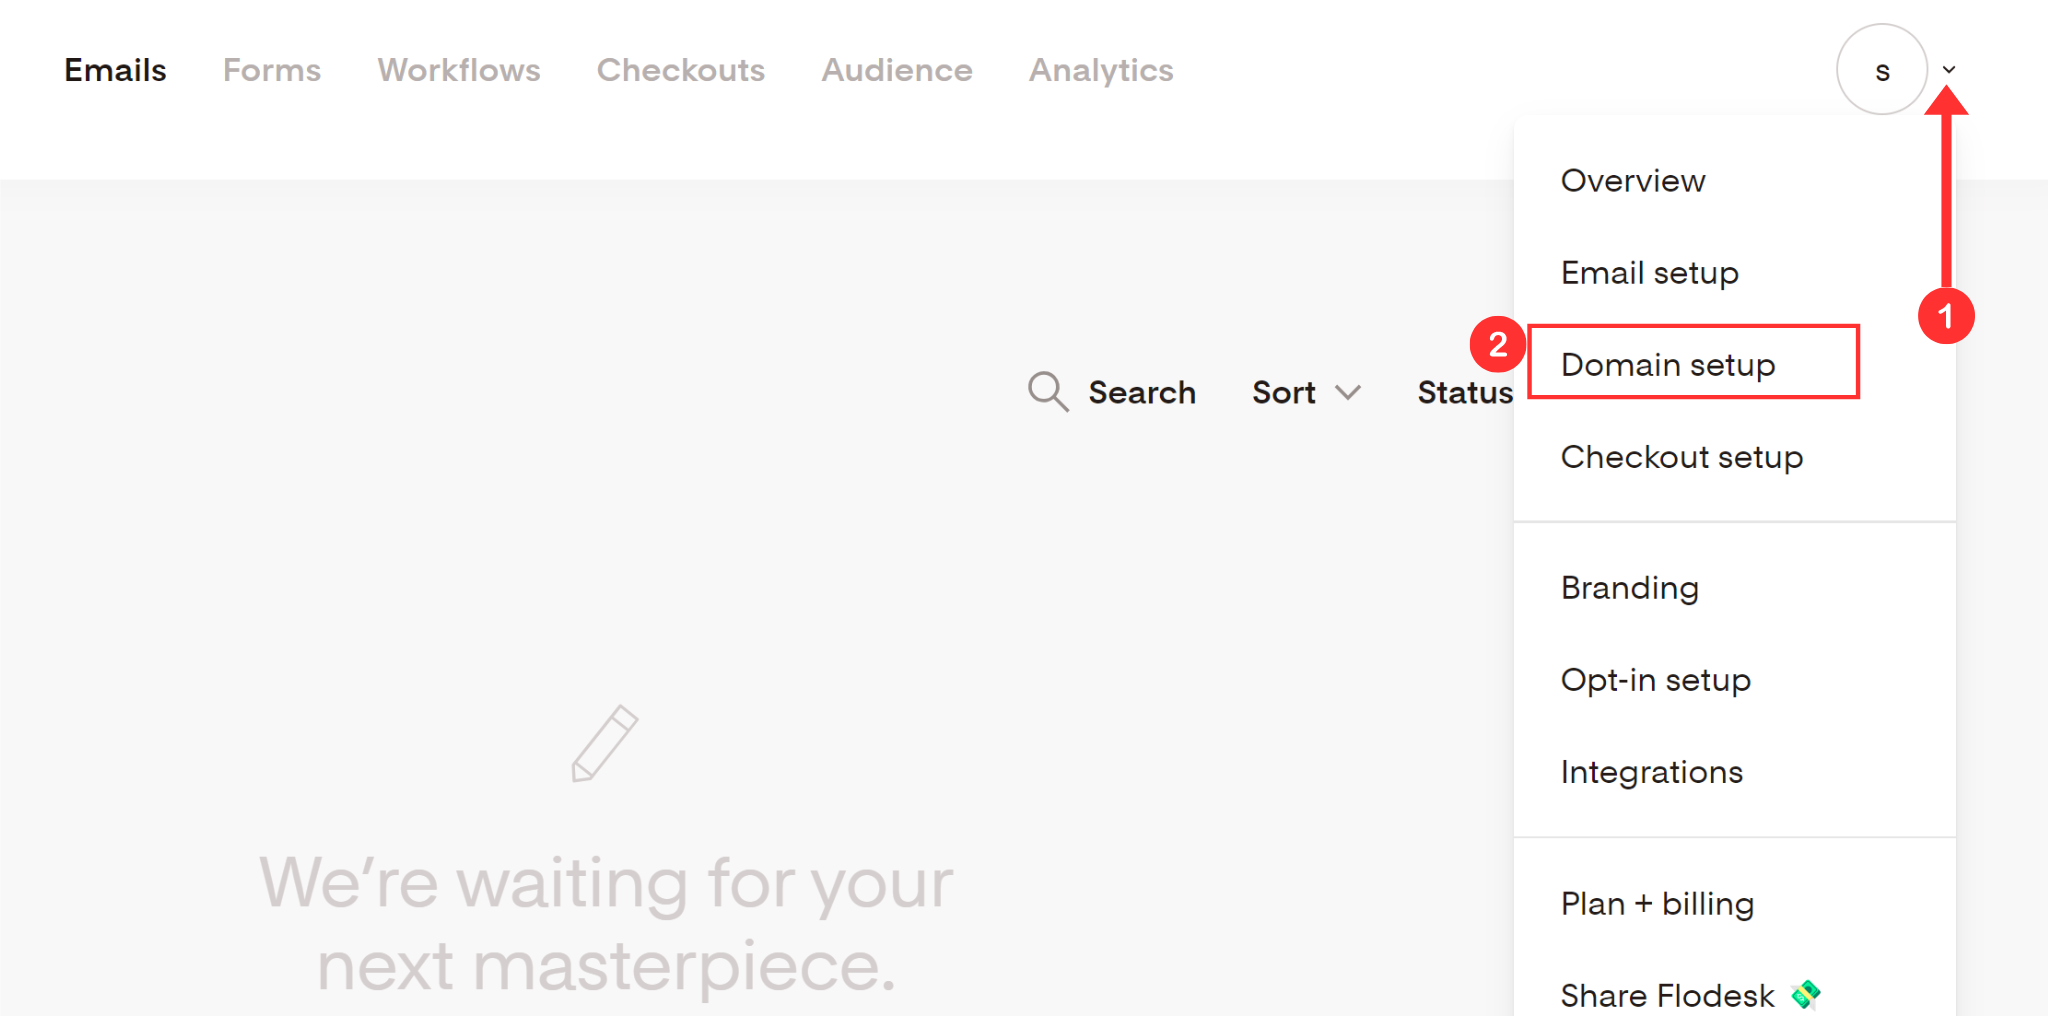
Click your profile icon in the top right corner and select Domain Setup.
-
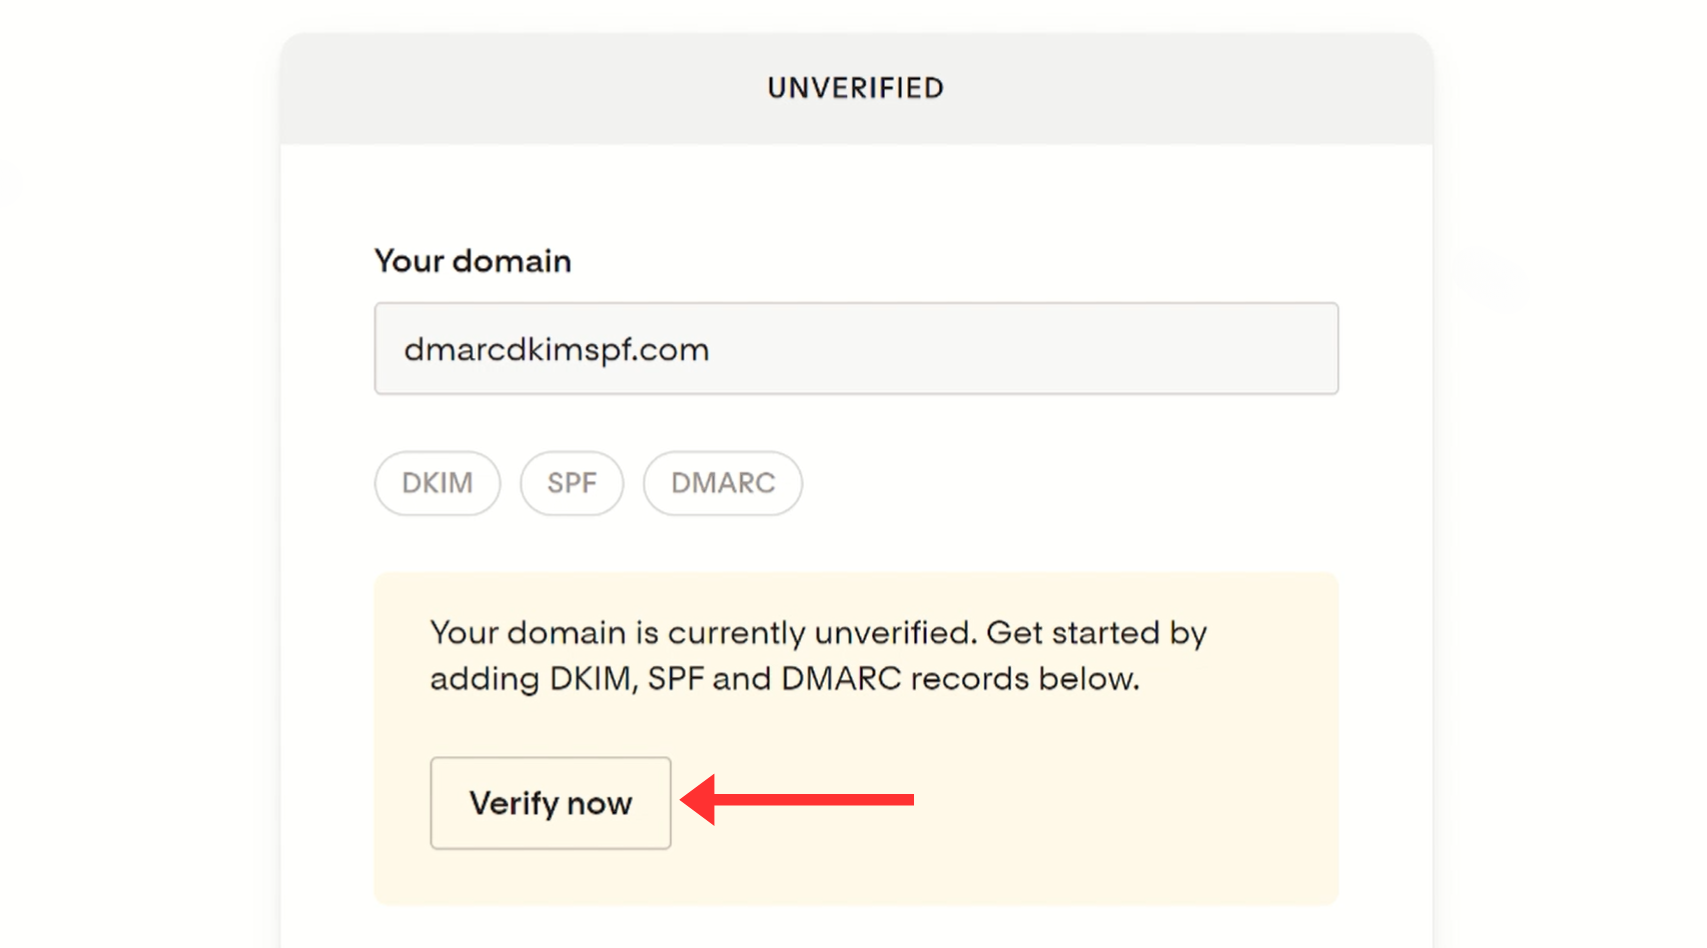
On the next screen, your sign-up email domain will be already added. Click Verify Now under the domain name.
-
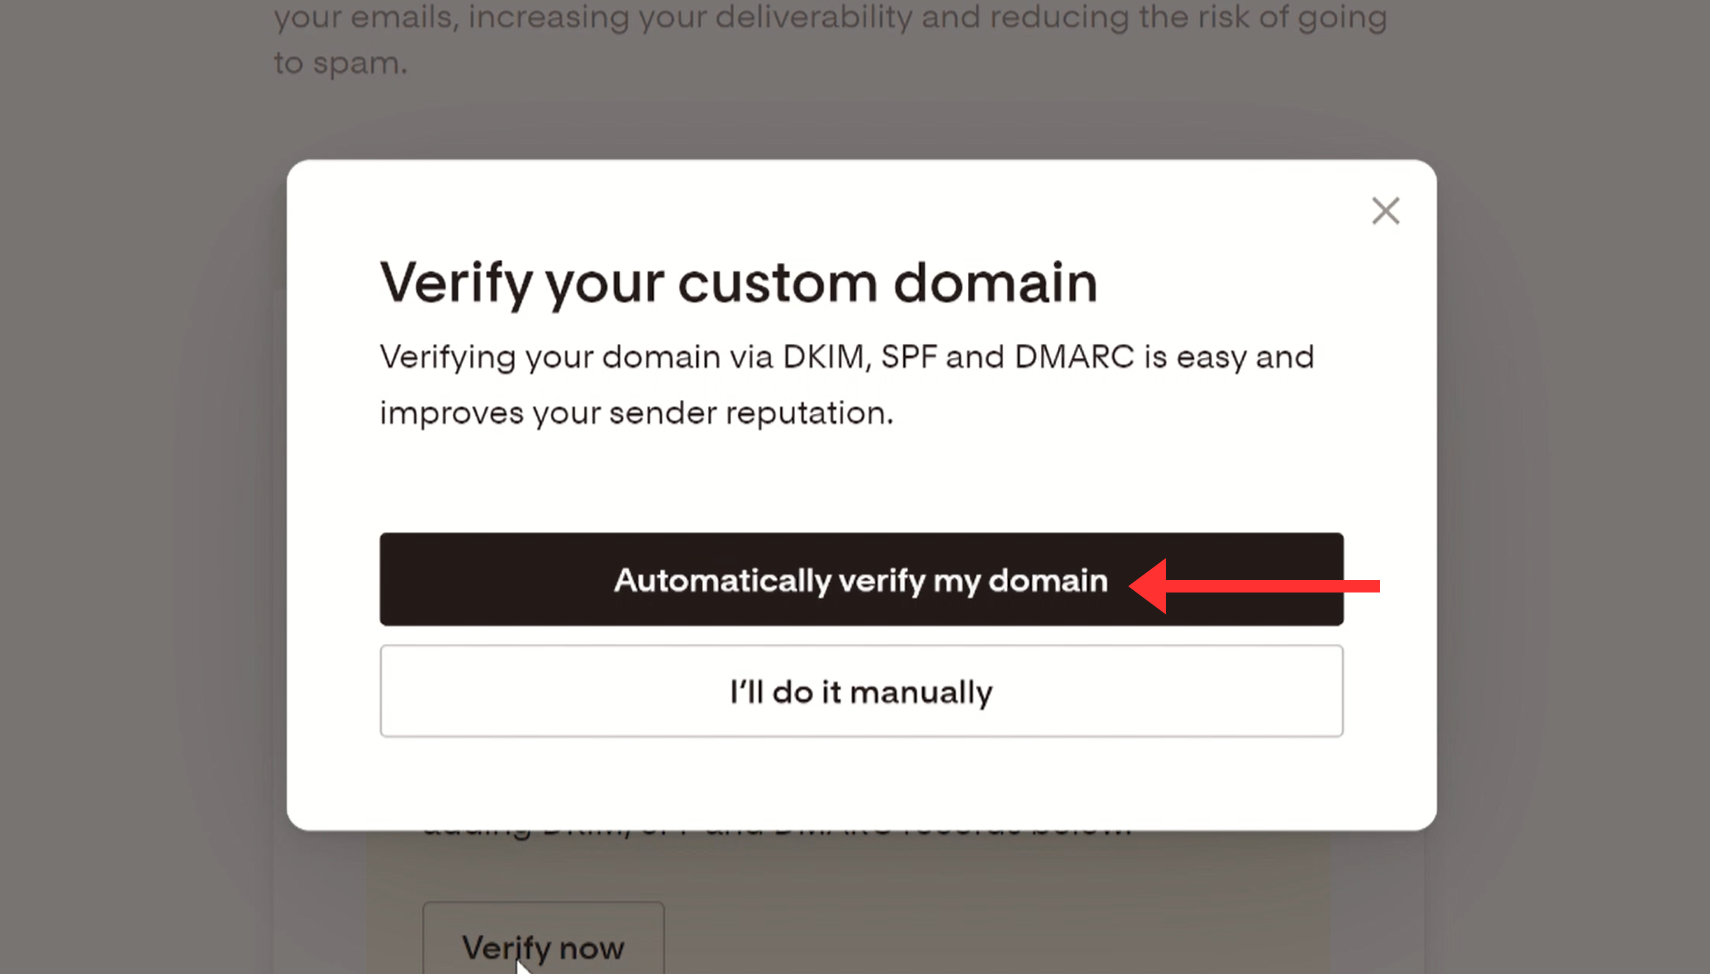
Here you have two options for sender domain authentication; automatic and manual.
Automatic Domain Authentication
-
Click on the "Automatically verify my domain" option.
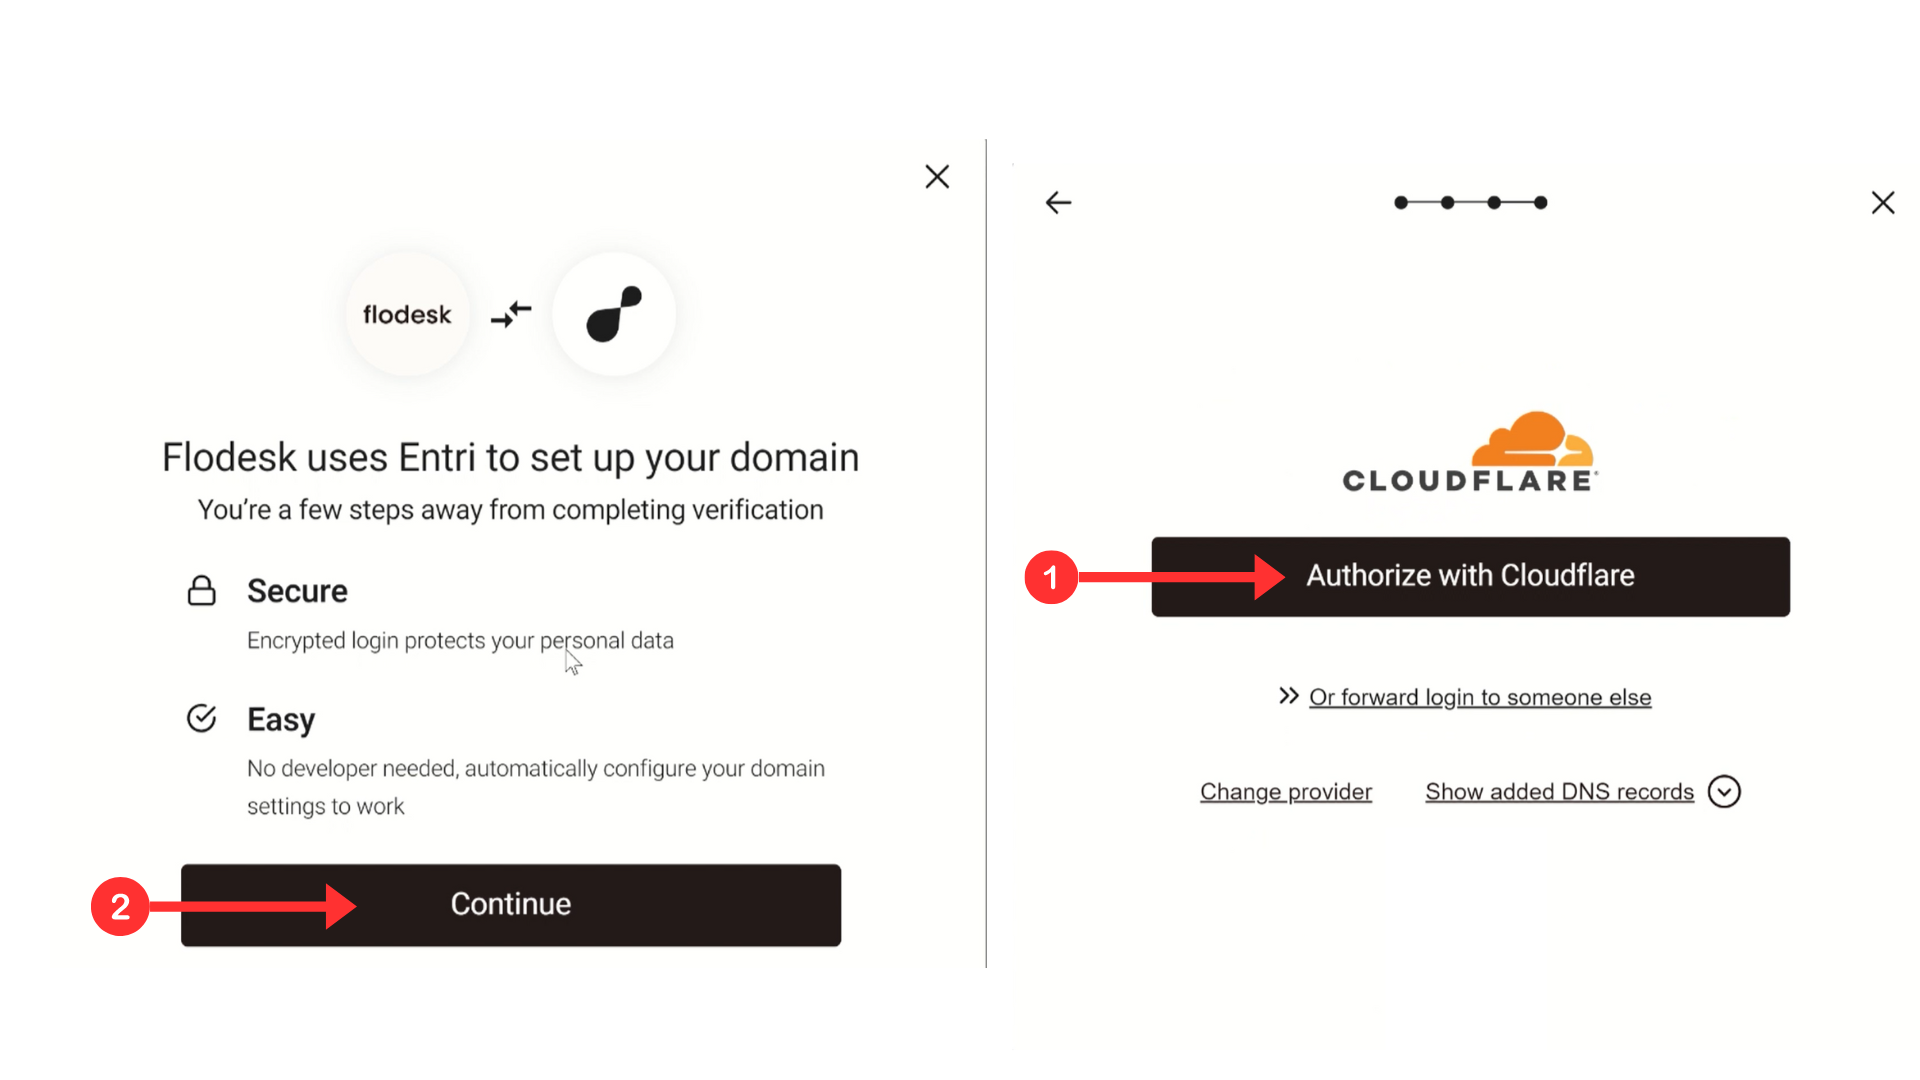
On the pop-up window, click Continue to proceed.
Then the server detects your domain provider and gets the DNS setup ready.
-
Once it detects your DNS provider, click "Authorize with (DNS provider)."
-
Flodesk opens your DNS dashboard with all DNS (CNAME and TXT) records already added. Click Authorize to confirm that you want to add DNS records.
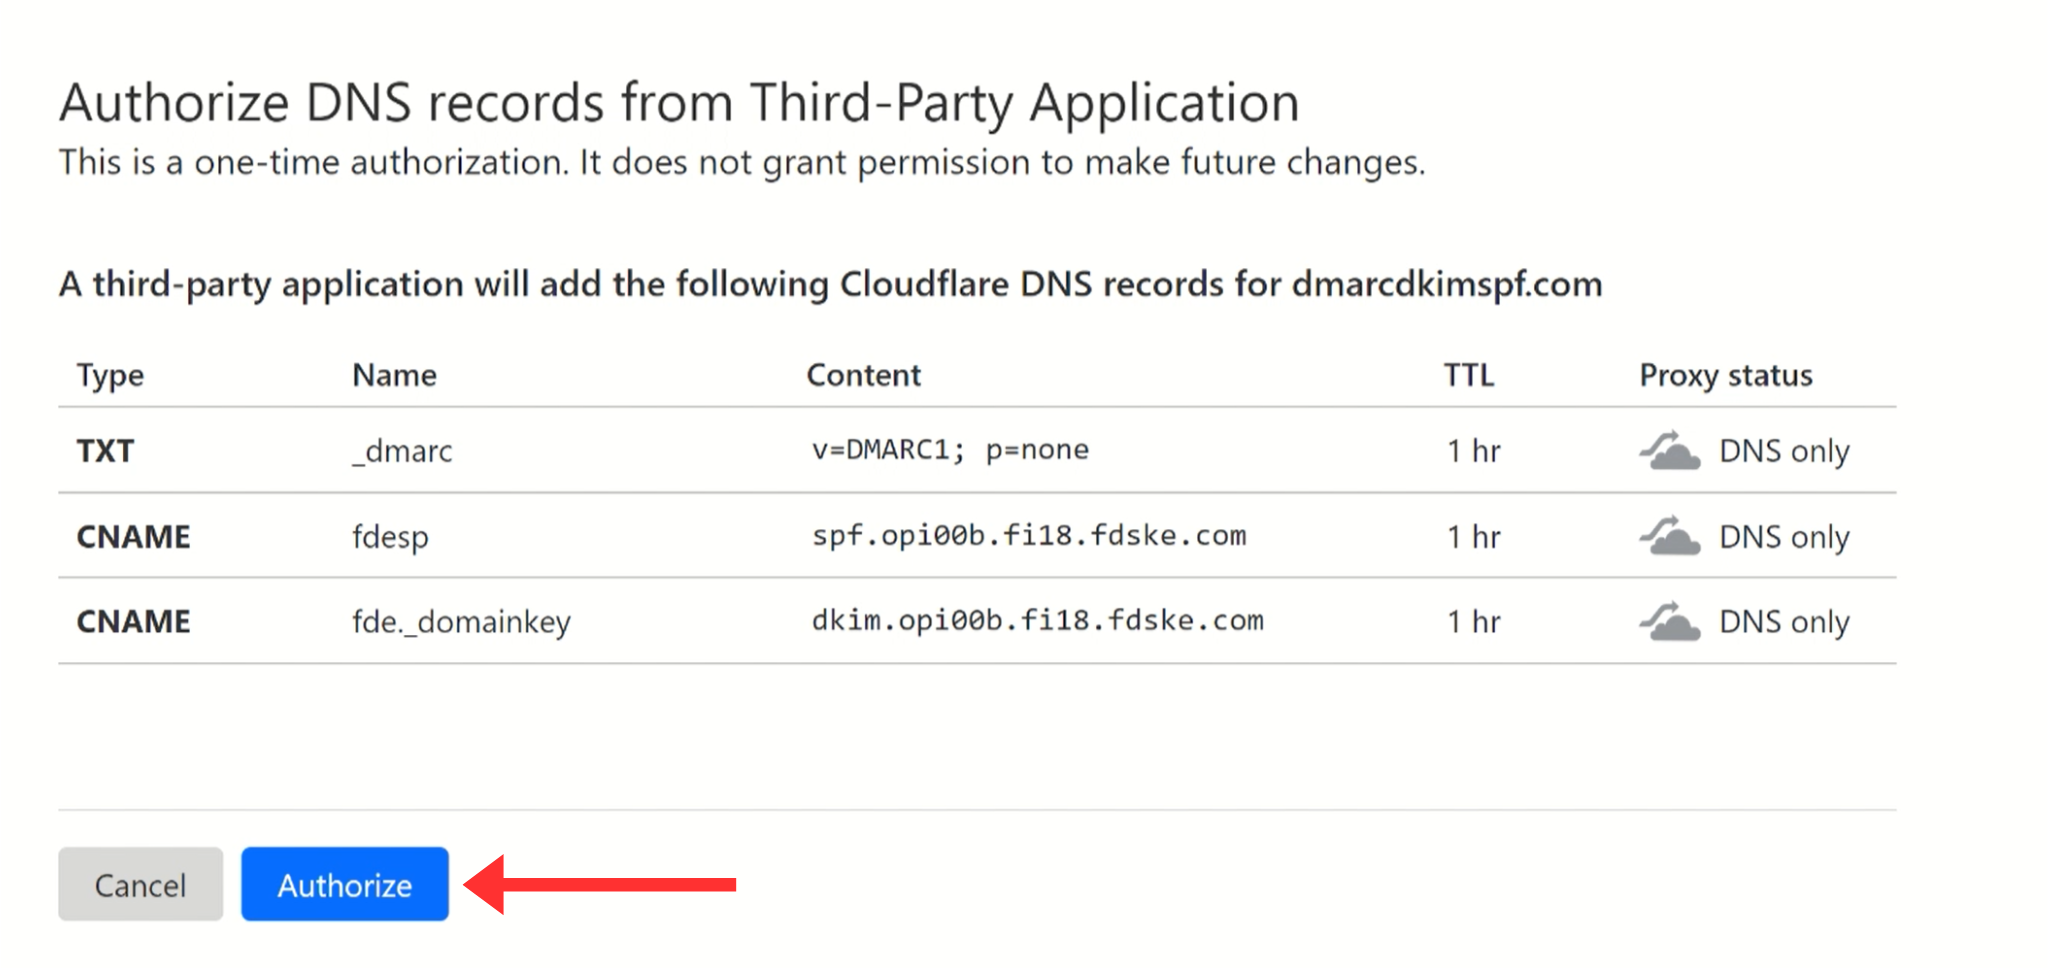
Finally, click Done under the confirmation message about successful DNS setup.
Manual Domain Authentication
-
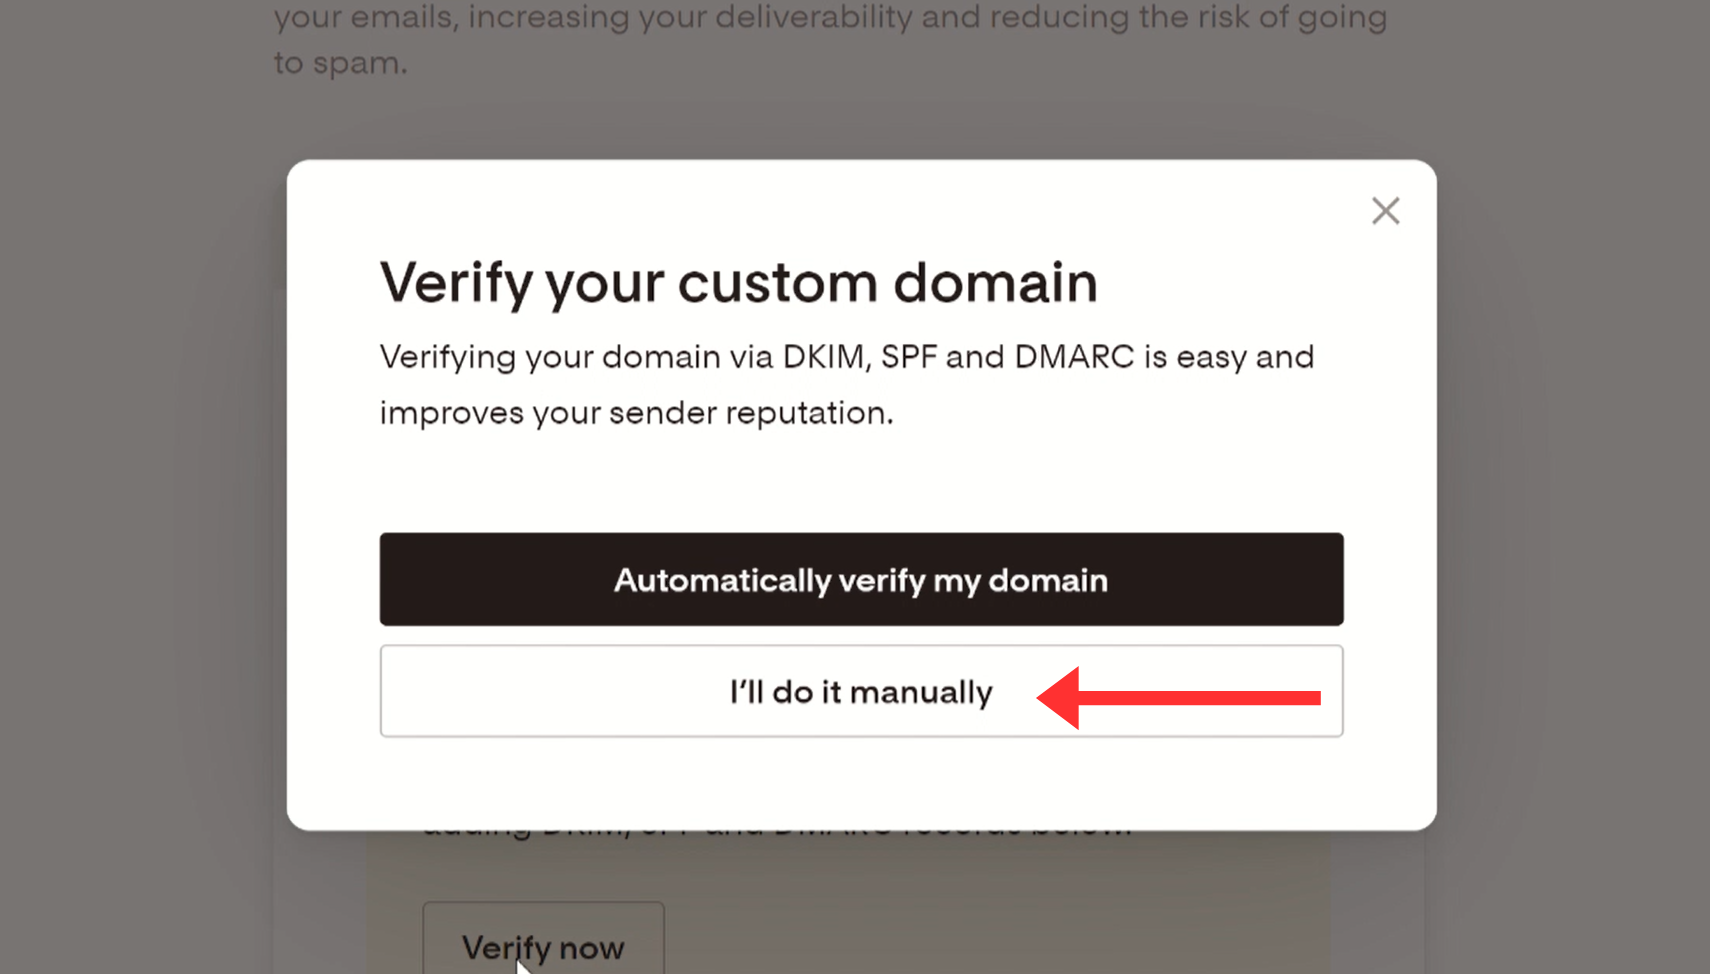
Click the option "I'll do it manually" to proceed with the manual DNS record setup.
-
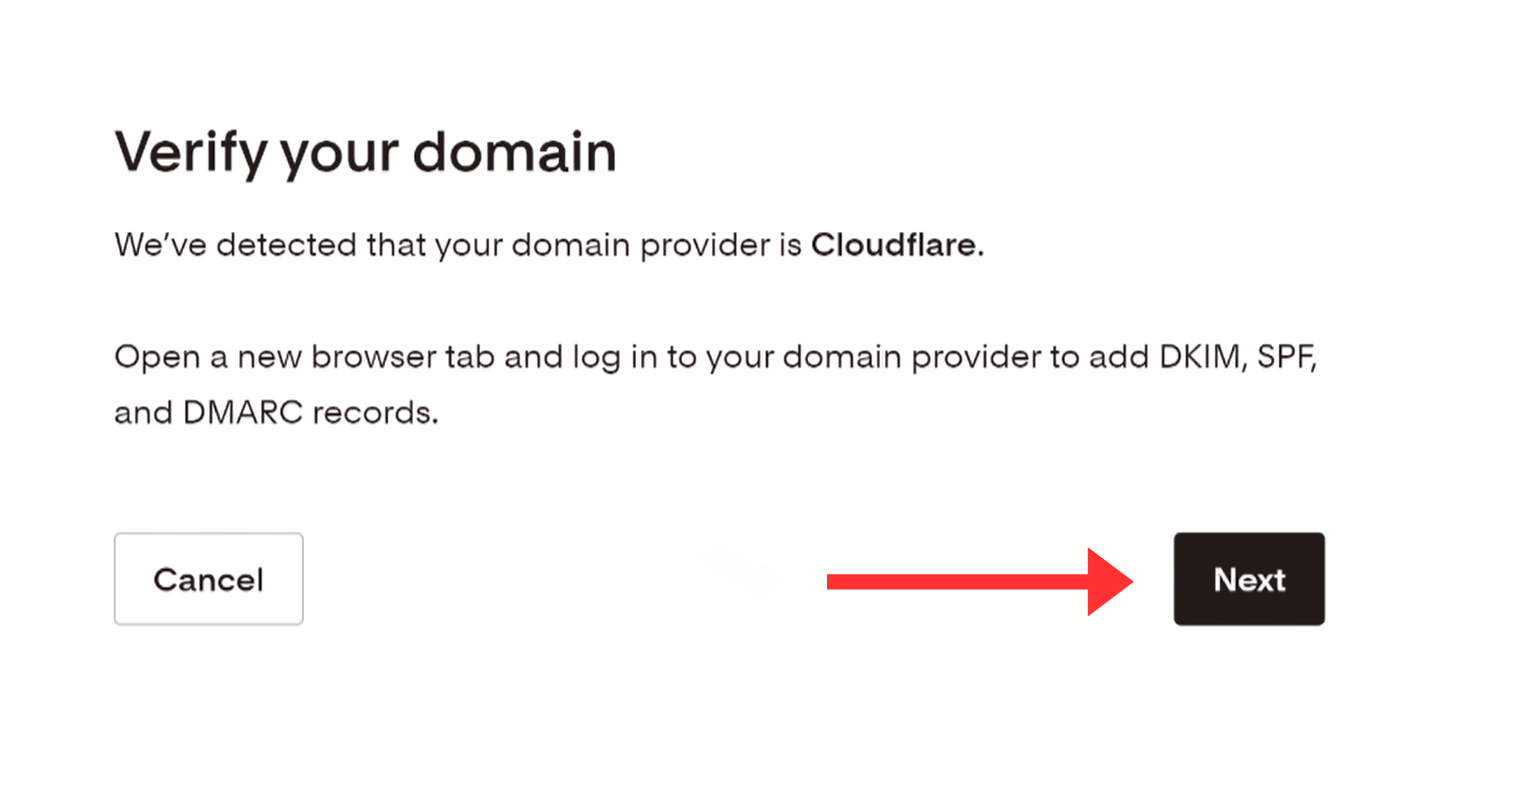
Click Next under the instructions about opening the DNS provider in a new browser tab.
-
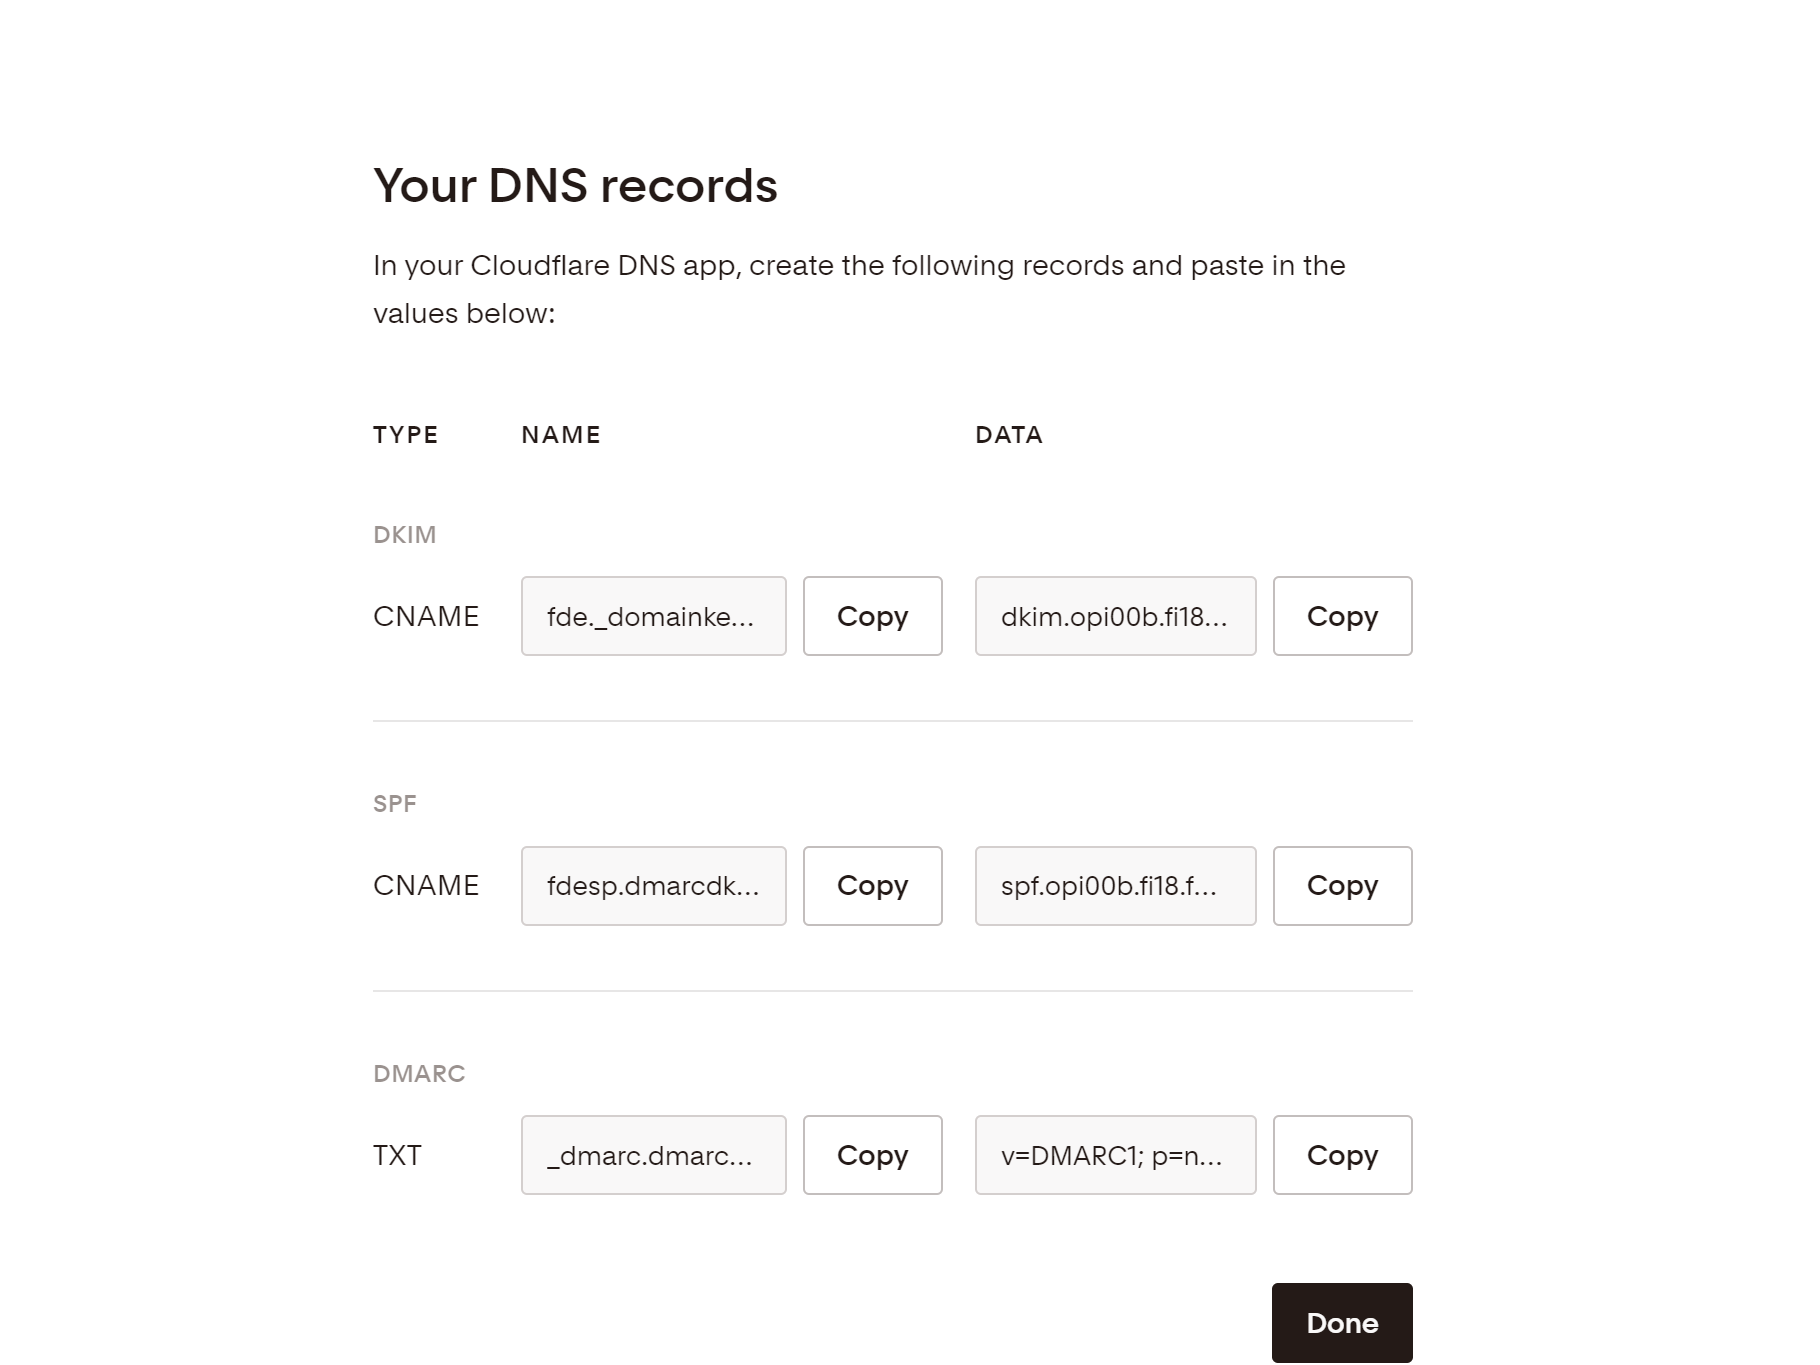
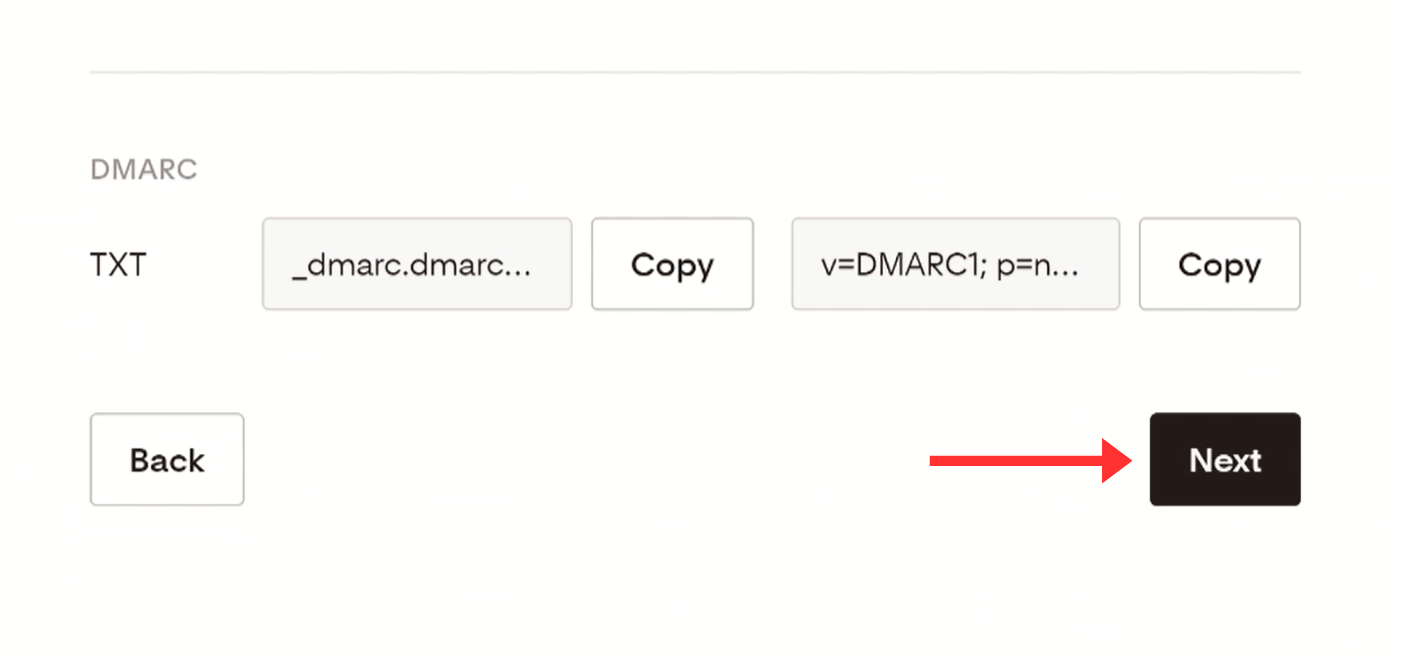
Next, you'll see Flodesk DKIM, SPF, and DMARC records on your screen. Copy each record and add it to the DNS dashboard one by one.
-
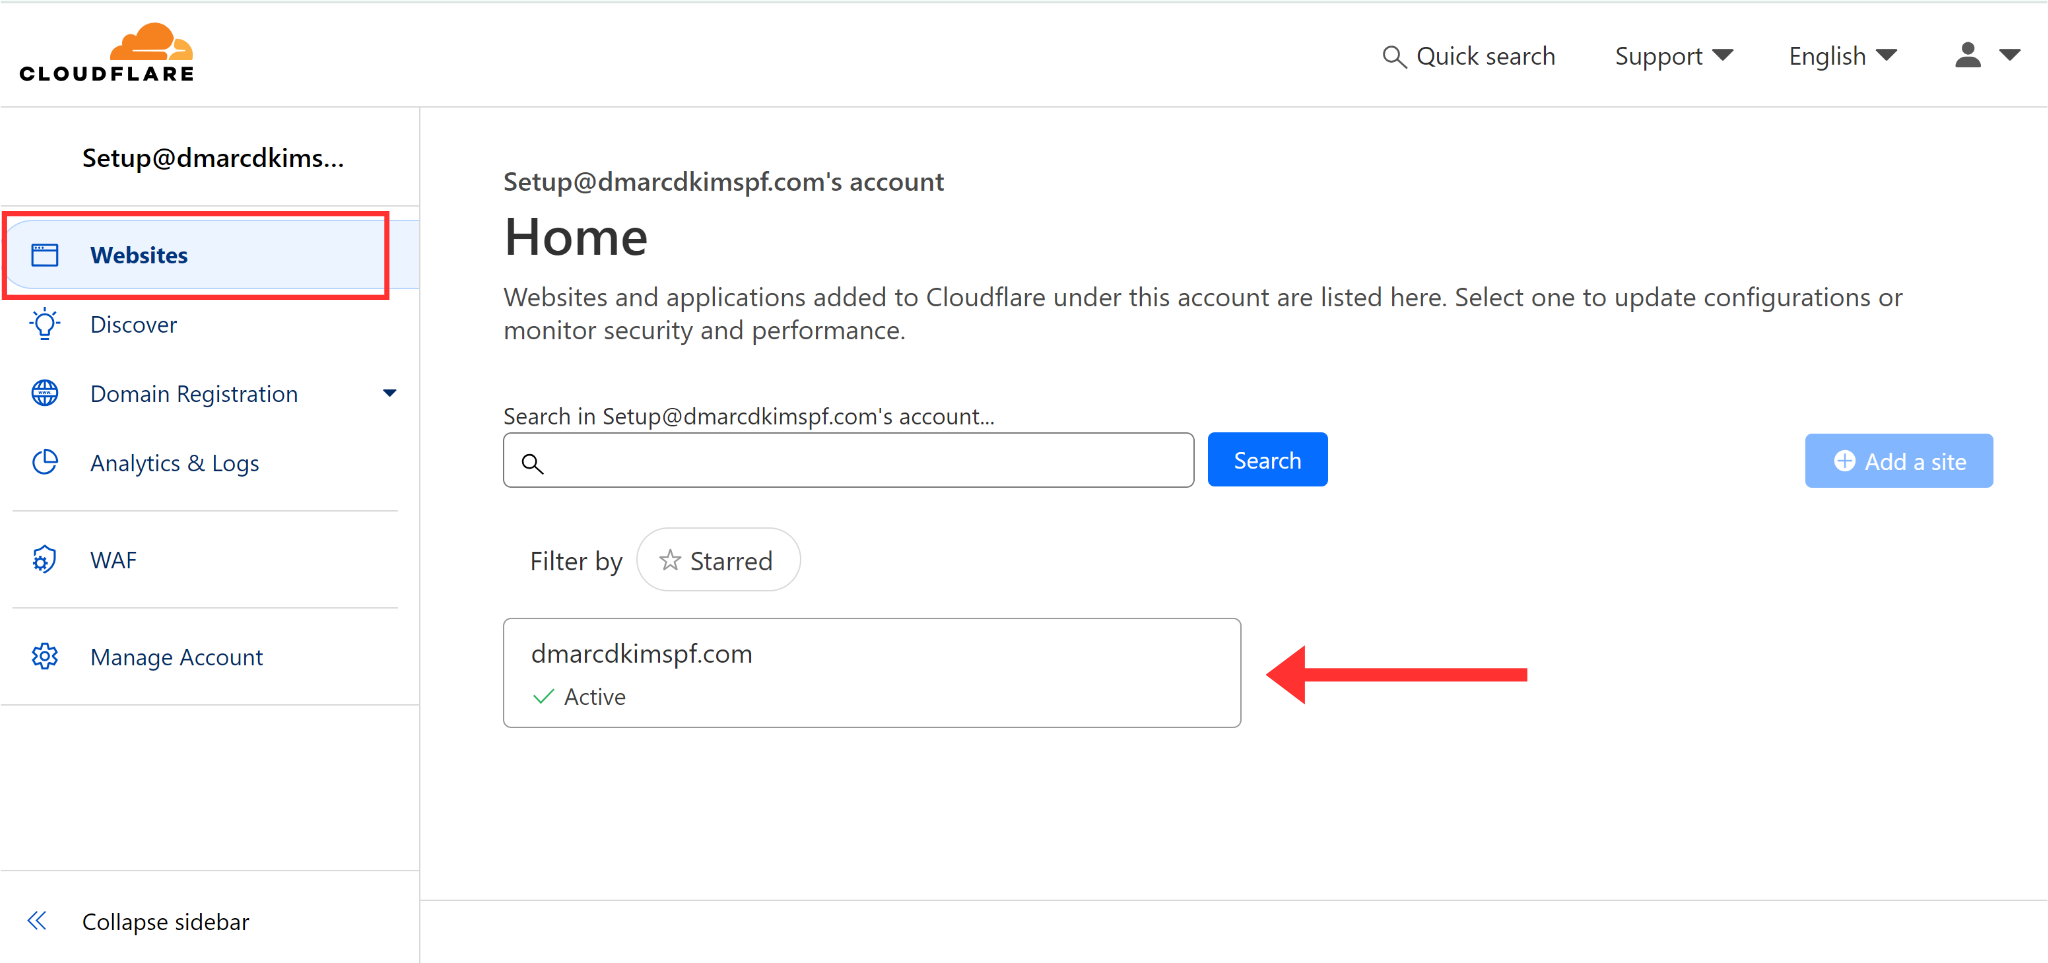
To add records, log in to your DNS provider (Cloudflare) and click your Website in the Home tab.
-
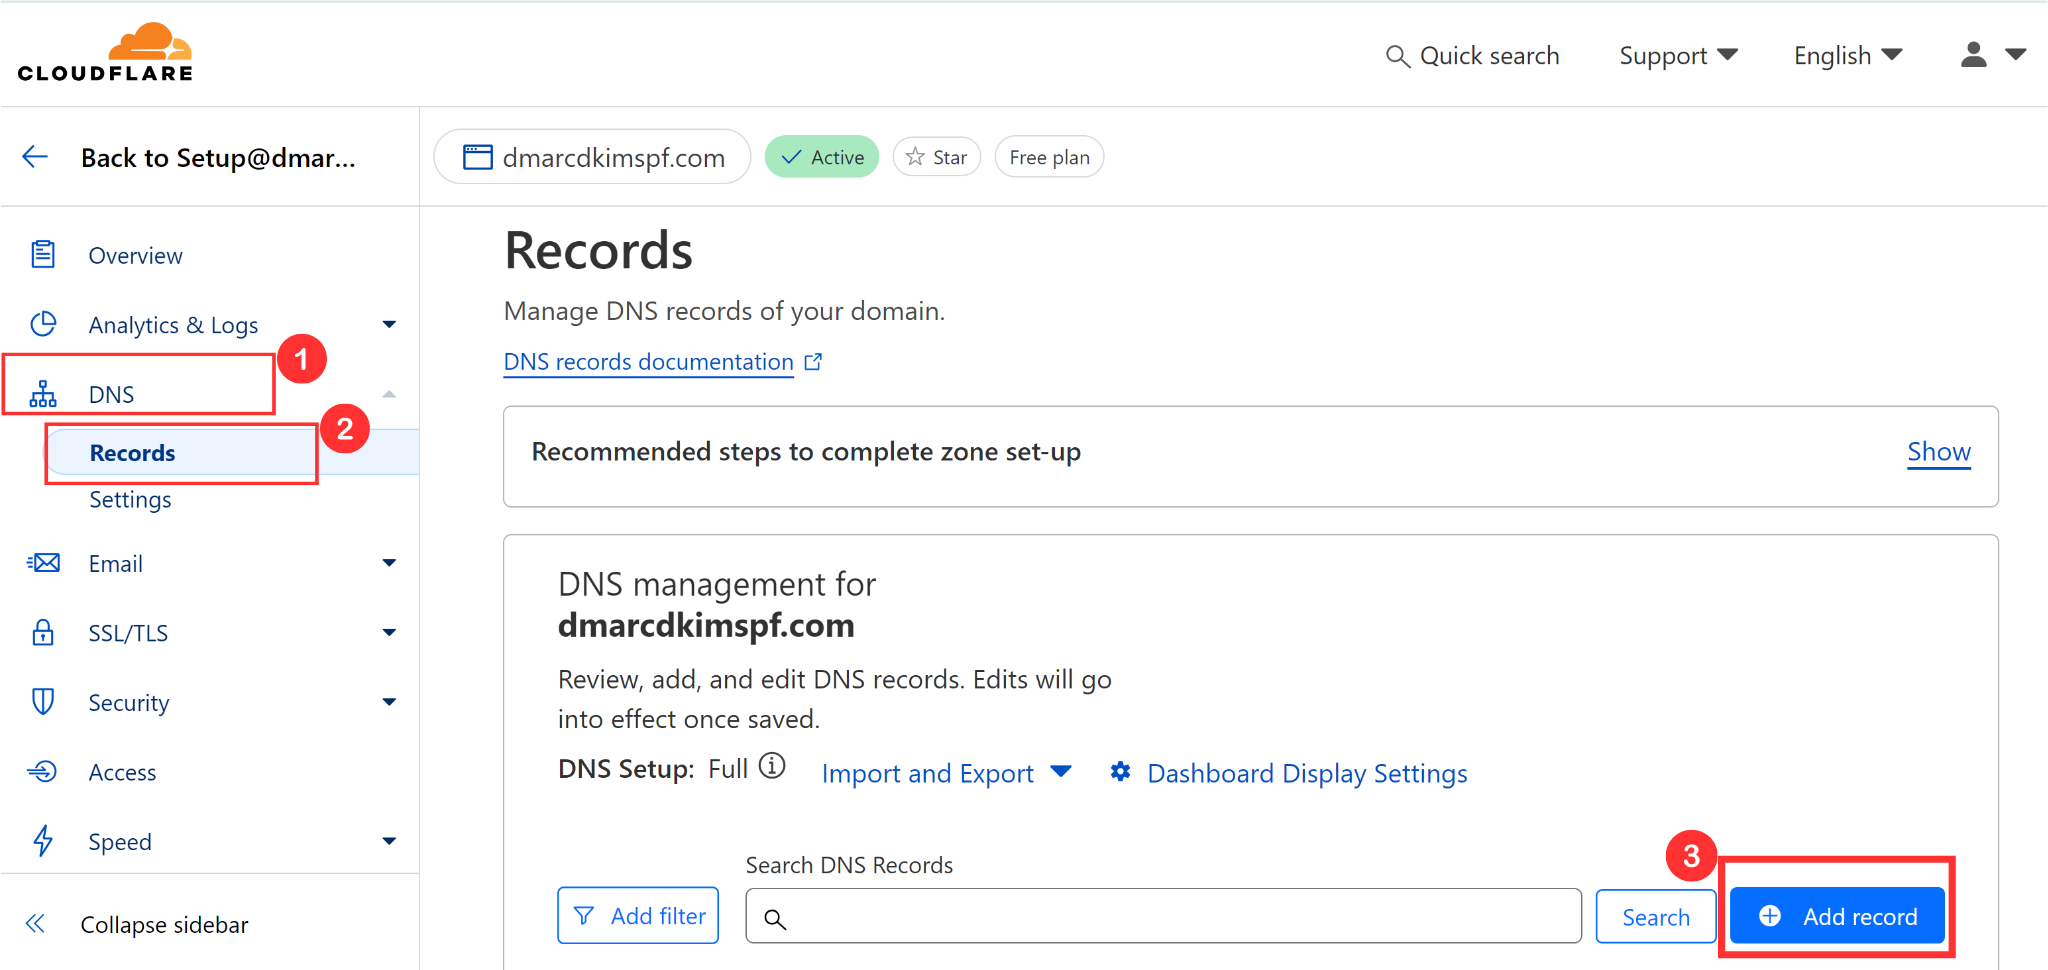
Click DNS and go to the Records tab. Here, click Add Records.
Copy each record from Flodesk and add it to the DNS dashboard one by one.
Adding Flodesk DKIM Record:
Copy the DKIM record name from Flodesk and add it to the Name field in the DNS dashboard.
Now copy the record value and paste it into the Target field.
Select the type CNAME, as mentioned in Flodesk.
-
Click Save to add the new record to your DNS dashboard.
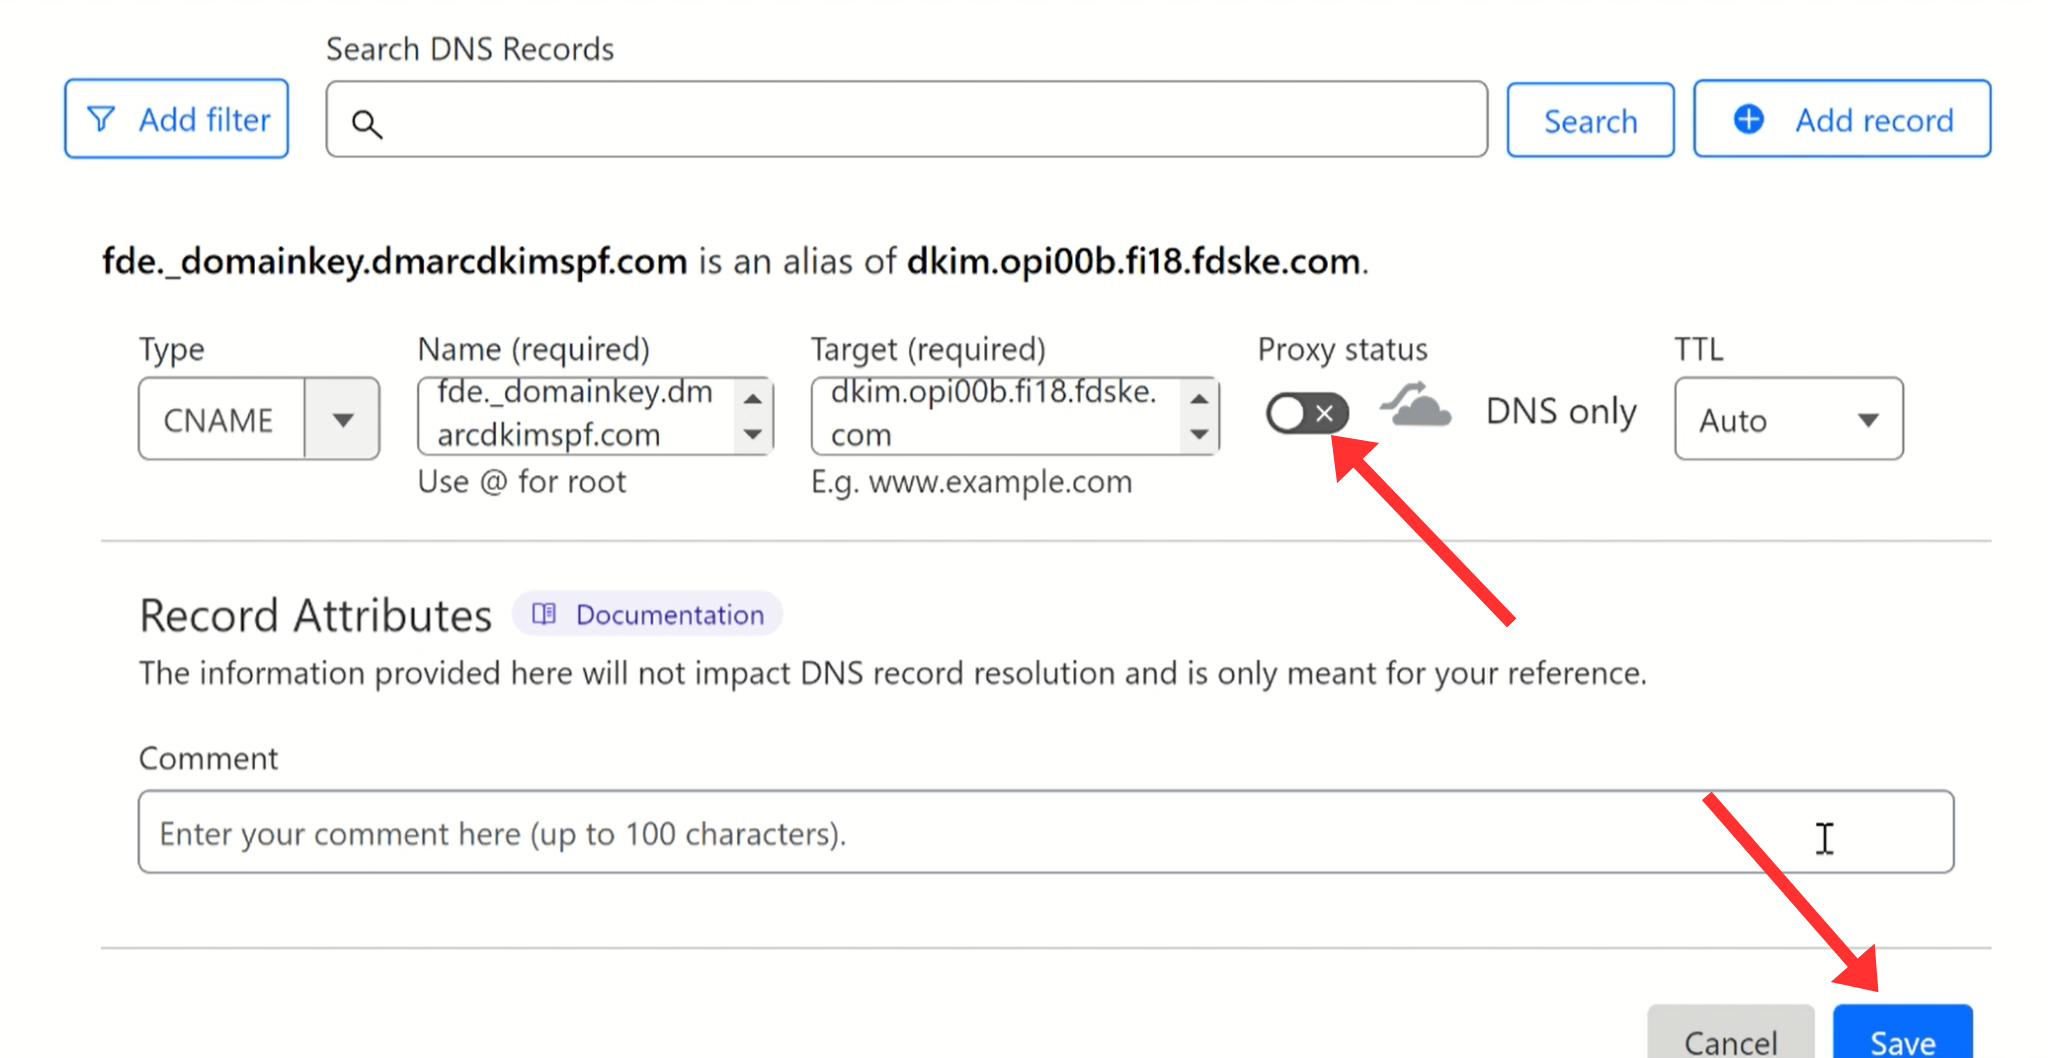
NOTE: Turn off the proxy for CNAME records. If enabled, the traffic will go to the Cloudflare server instead of the desired destination.
Adding Flodesk SPF Record:
If you have an existing SPF record in your DNS provider, adding Flodesk SPF will cause one of them to stop working. To avoid such conflicts, you can use the SPF merge tool which combines multiple SPF records into one.
Open the SPF Merge Tool and write your domain name here.
Add the Flodesk SPF record and click Submit.
-
The tool detects existing SPF records and merges them with Flodesk SPF to give a single, merged value.
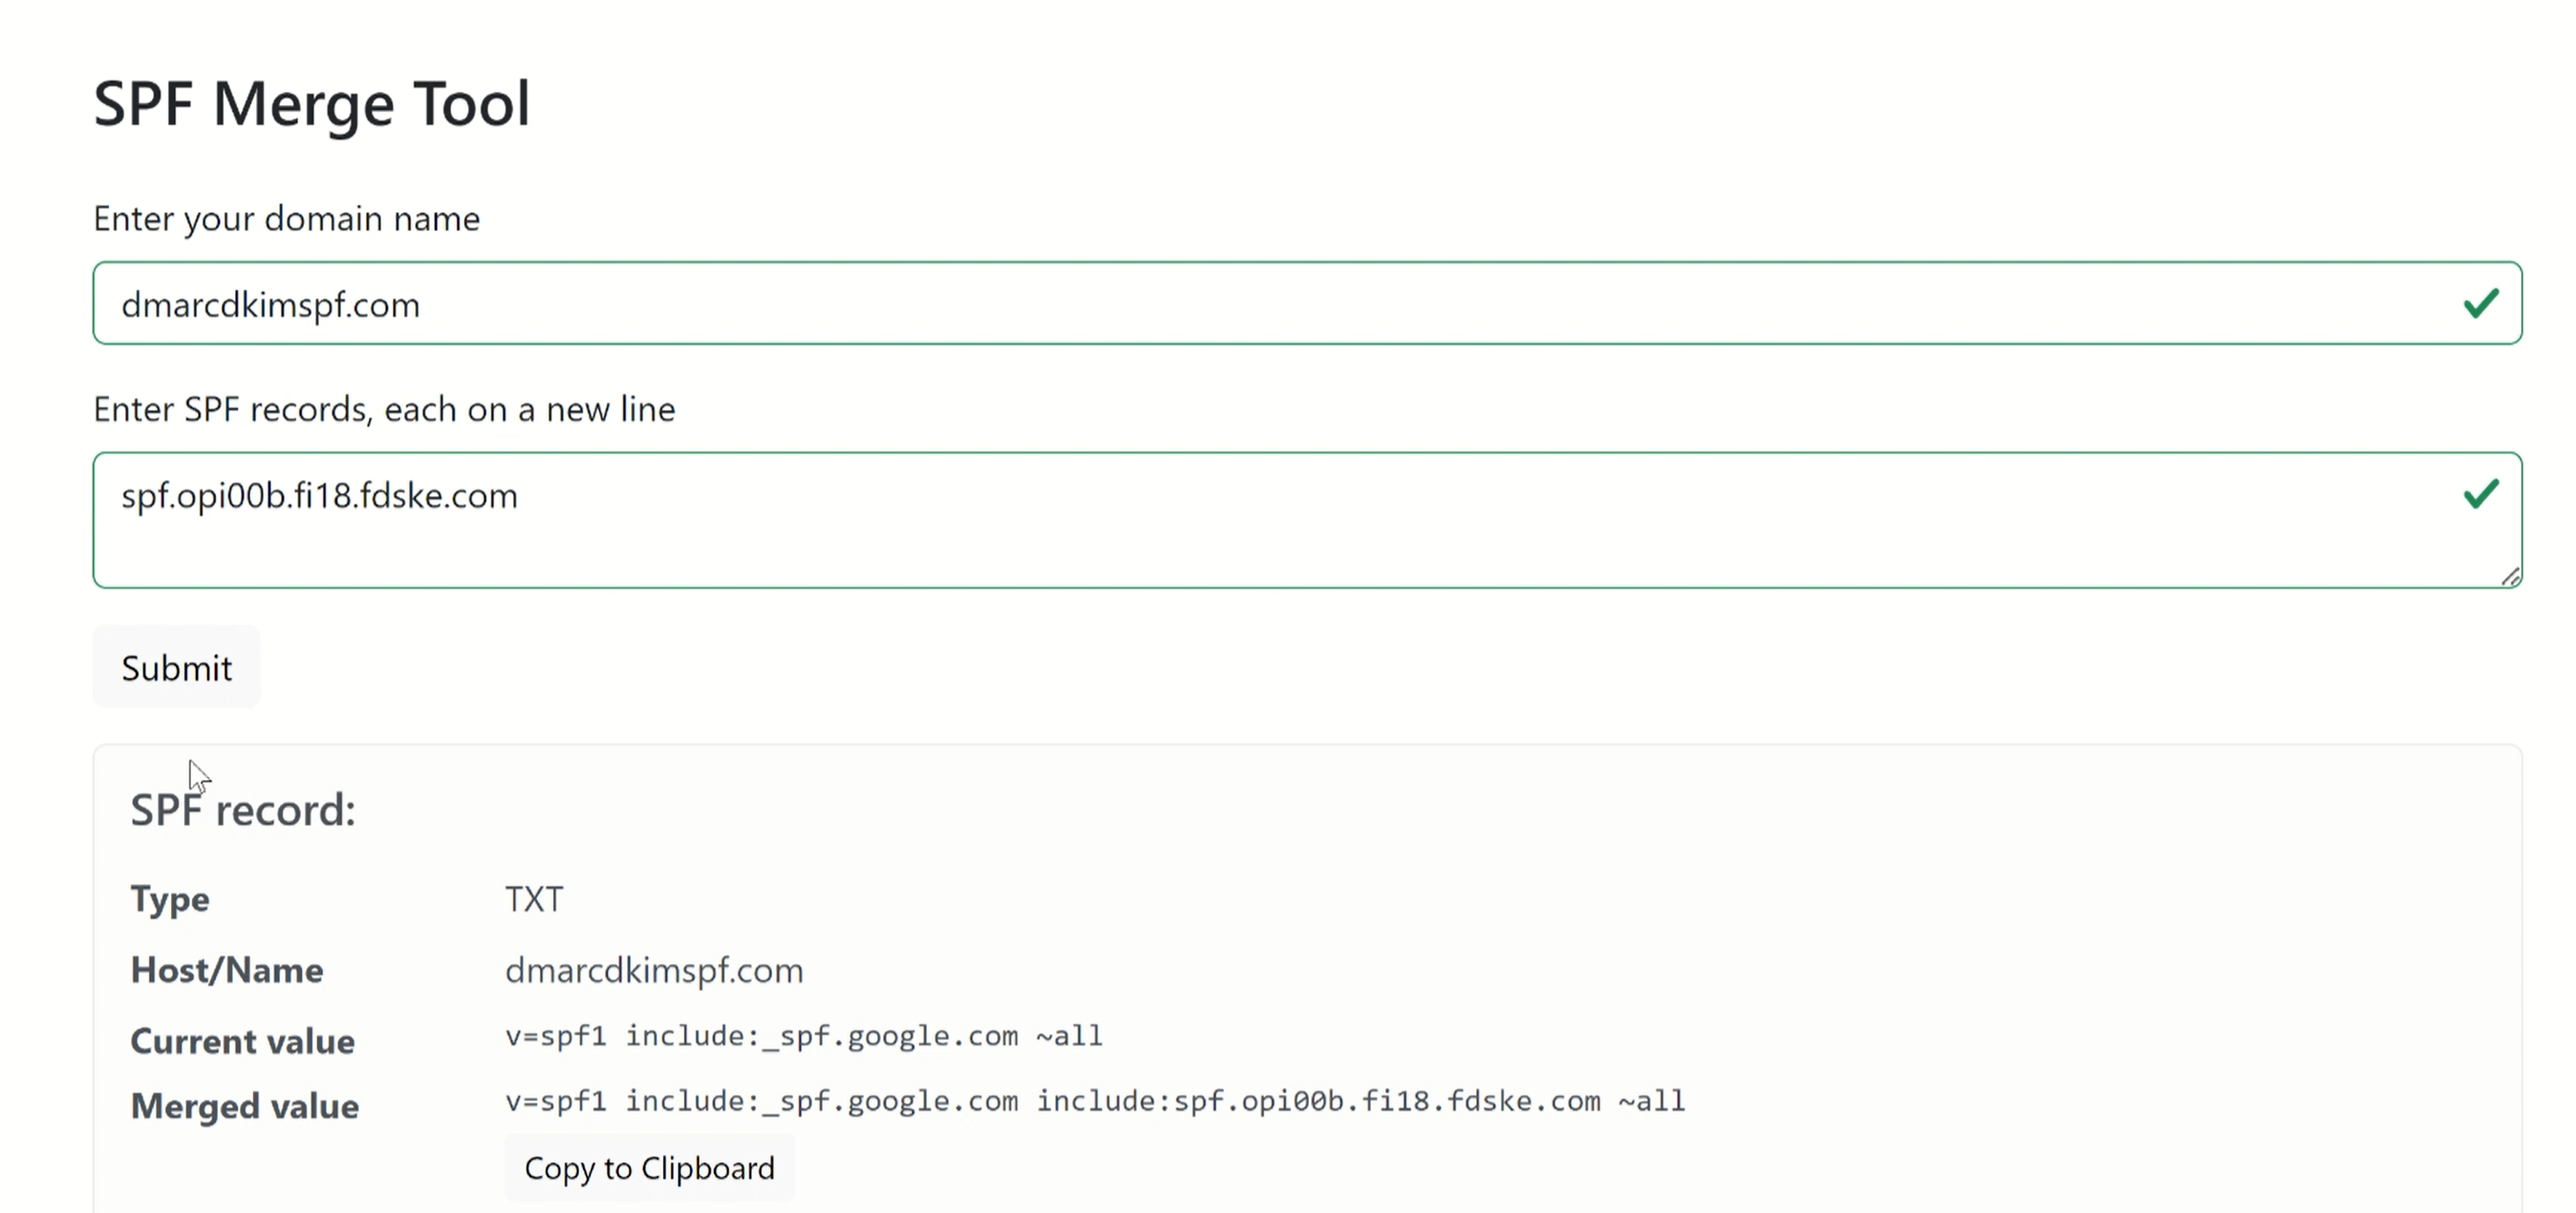
Copy the record name and merged value, and add them to the DNS provider.
Adding Flodesk DMARC Record:
Typically, email delivery service DMARC records lack the necessary tools for utilizing data from their reports. Consequently, making data-driven decisions about when to implement a strict policy is challenging.
A strict DMARC policy is crucial for guarding against spam and preventing unauthorized senders from using your domain to send emails. Therefore, many email marketers prefer using custom DMARC values to secure their domains and improve deliverability.
-
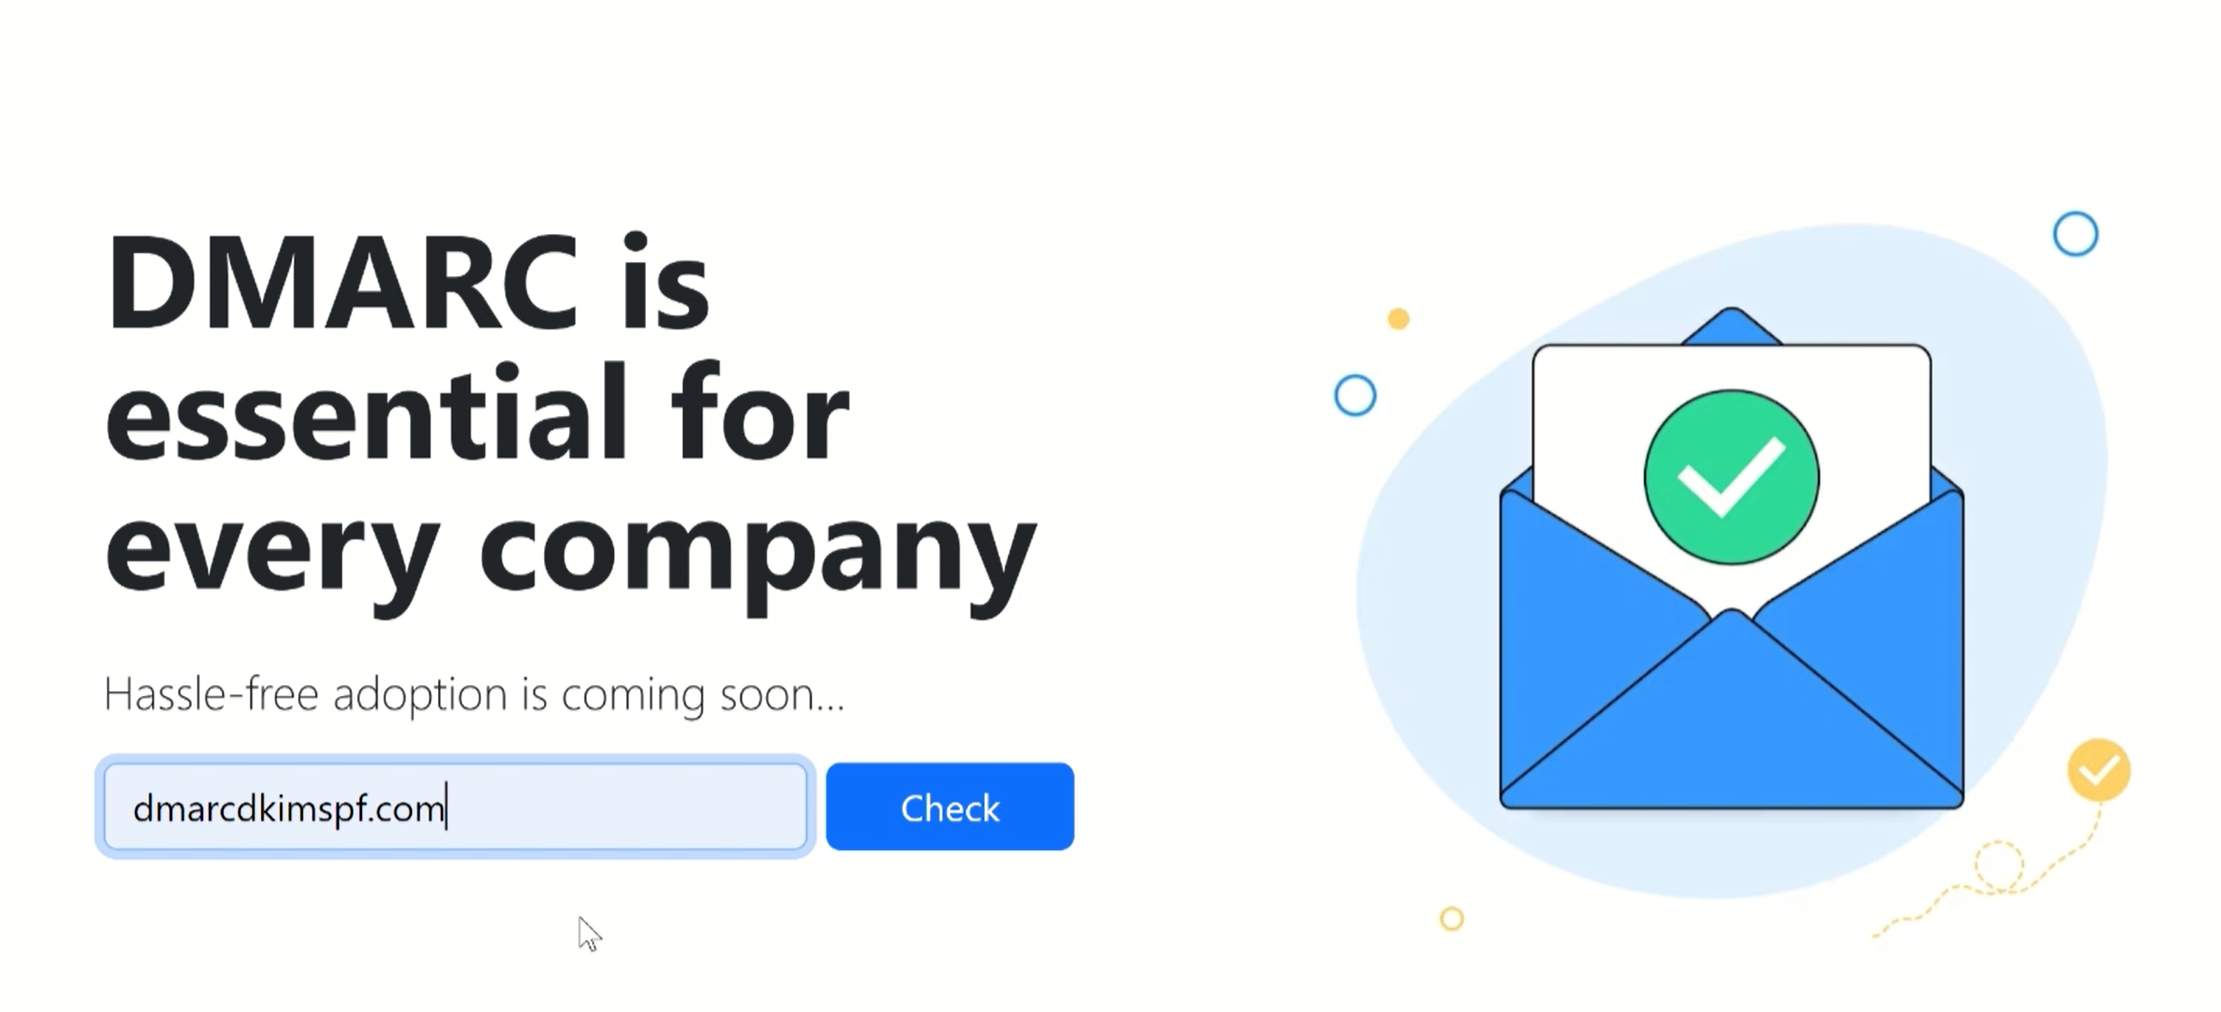
In the DMARC Check Tool, write your domain name and click Check.
-
The tool detects the current DMARC record and gives you a suggested value.
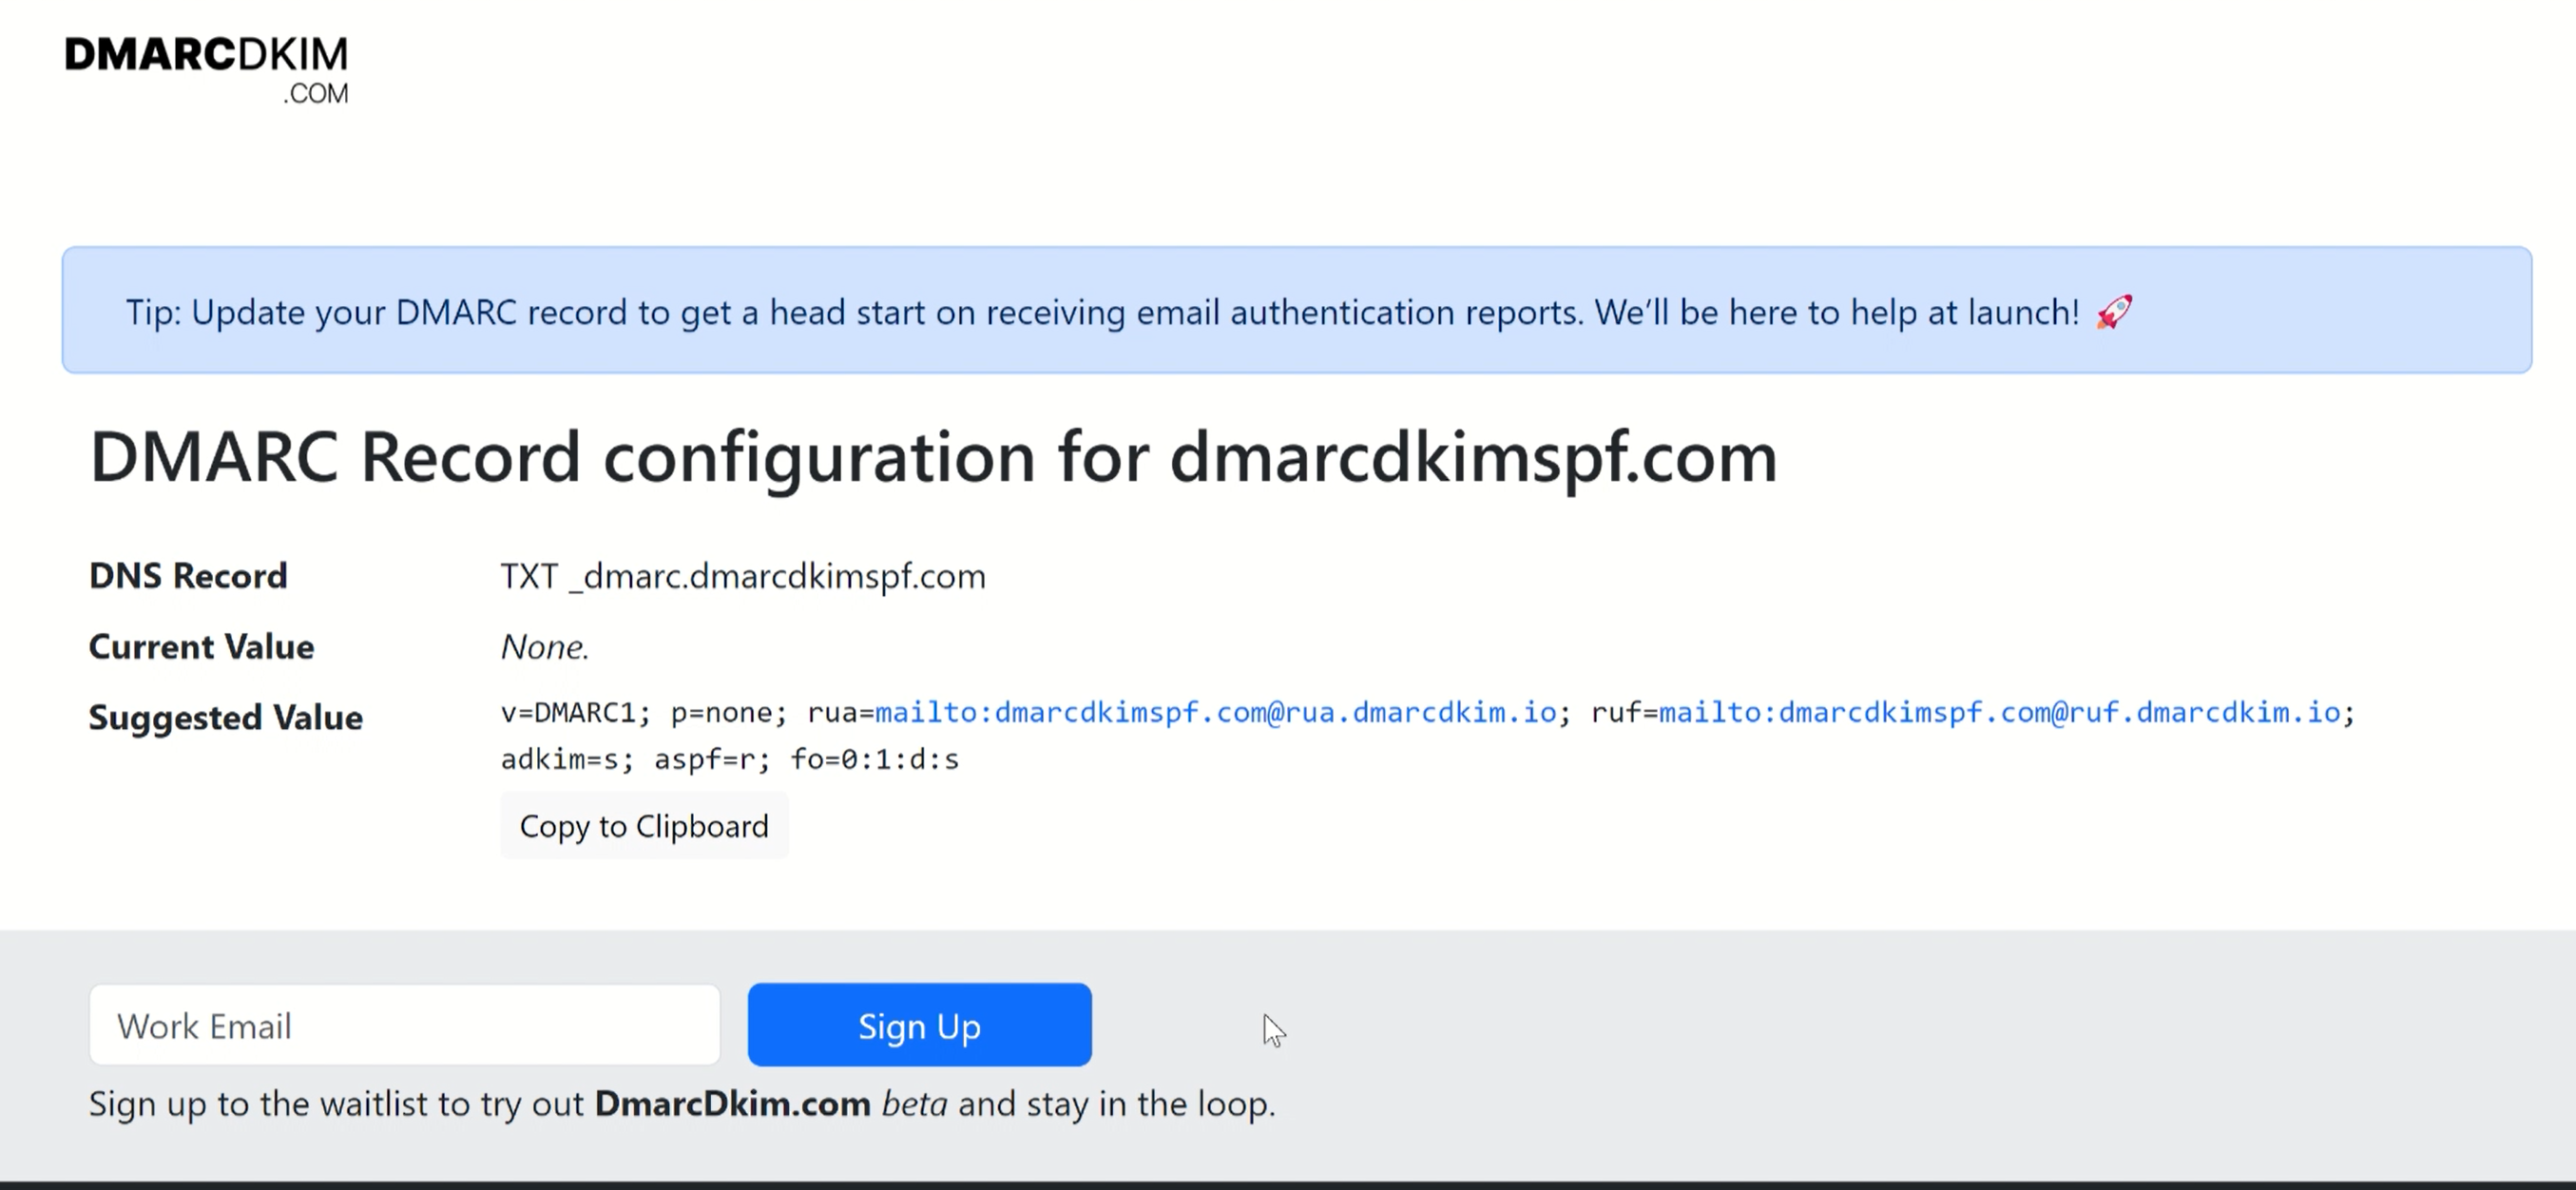
Copy the record name and suggested value, and add them to the DNS provider.
Verify Flodesk DNS Records:
-
Once you have added all records, click "Done" under the DNS records to verify them.
-
If records were added successfully, you should see green check marks with each record. This indicates that your sender domain has been authenticated.
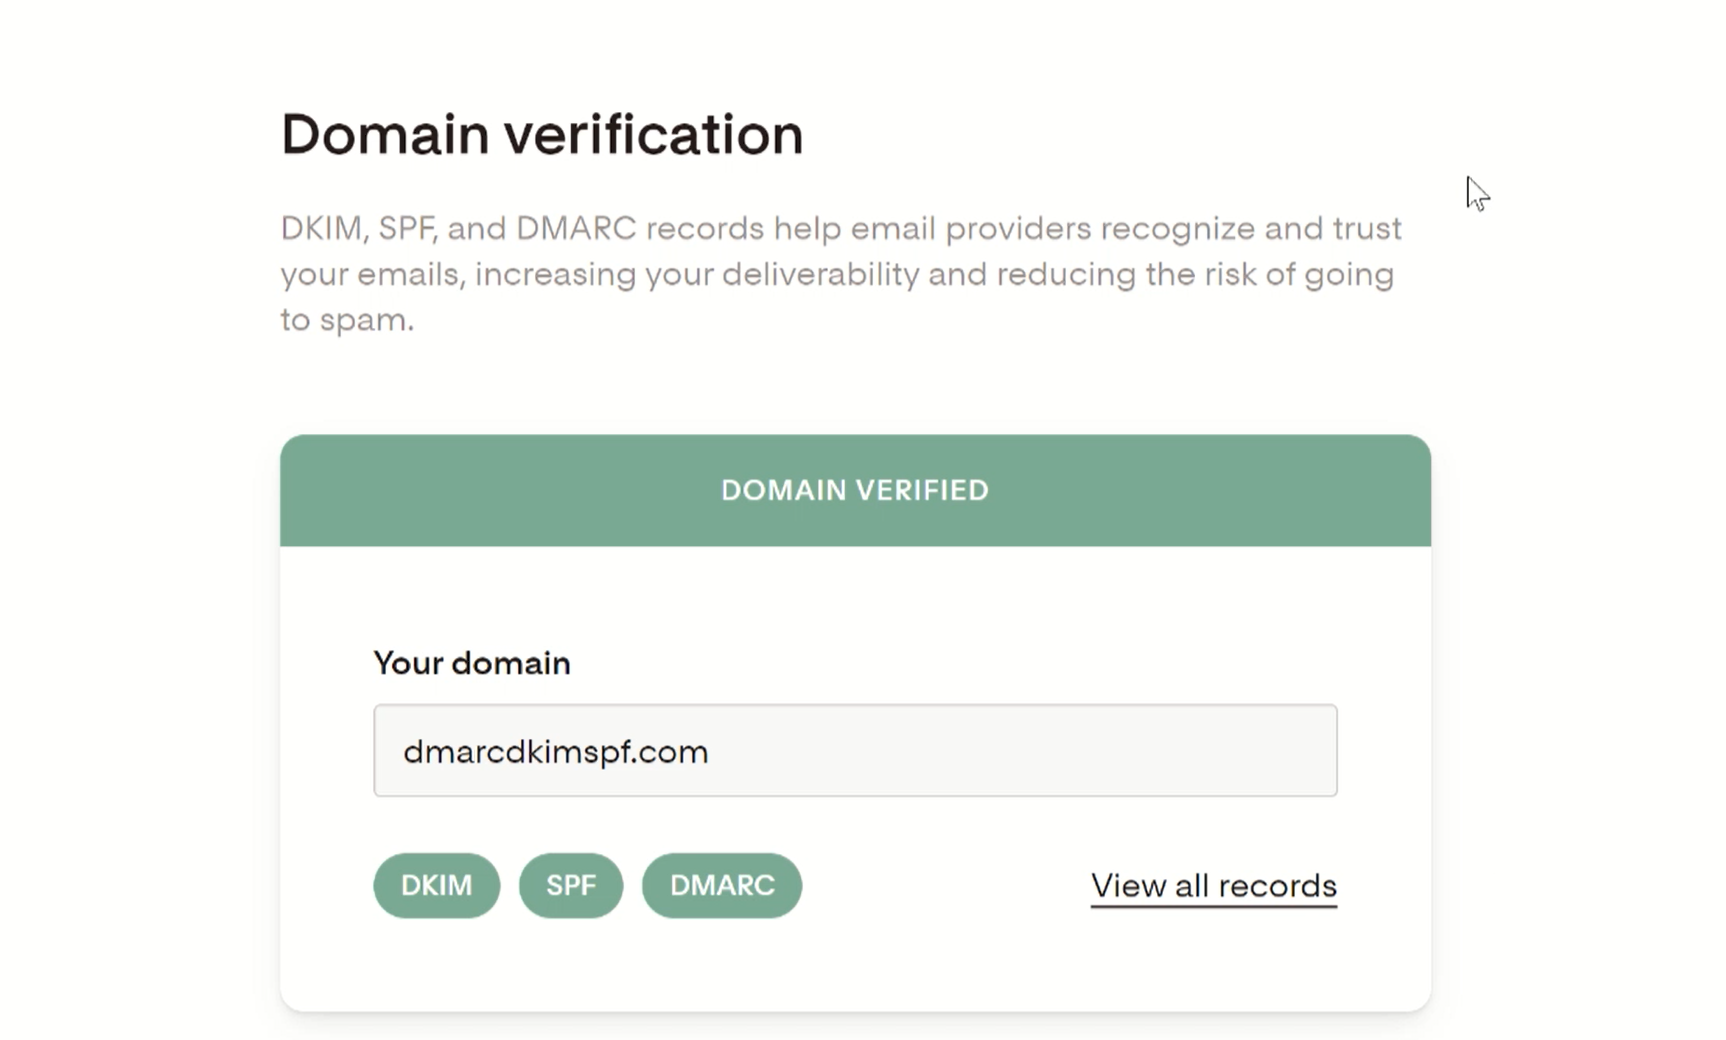
Sometimes, it may take up to 48 hours for servers to verify DNS records. But if you don't see an authentication success message after 48 hours, contact Flodesk customer support or hire DmarcDkim.com experts for further assistance.
Check domain and follow the instructions to nail down your DMARC configuration.
No expert knowledge needed!


