Emaillabs DNS Records Configuration - Step-by-Step Domain Authentication
Check your domain for DMARC, DKIM, SPF and MX records. Get a free report.
How to setup DNS records for EmailLabs domain authentication?
EmailLabs provides SPF, DKIM, and DMARC records to authenticate your sender domain. When your email is verified and your domain is authenticated, the email inbox providers are more likely to trust you as a legit source.
DKIM adds a unique signature to your emails, ensuring that the emails haven't been forged along the way. SPF specifies which servers are allowed to send emails on your behalf. Together, they lay the foundation for DMARC - a set of rules and policies determining what happens to the emails that fail authentication checks.
This guide post will walk you through the step-by-step configuration of the DNS records in EmailLabs.
Configure DNS Records:
-
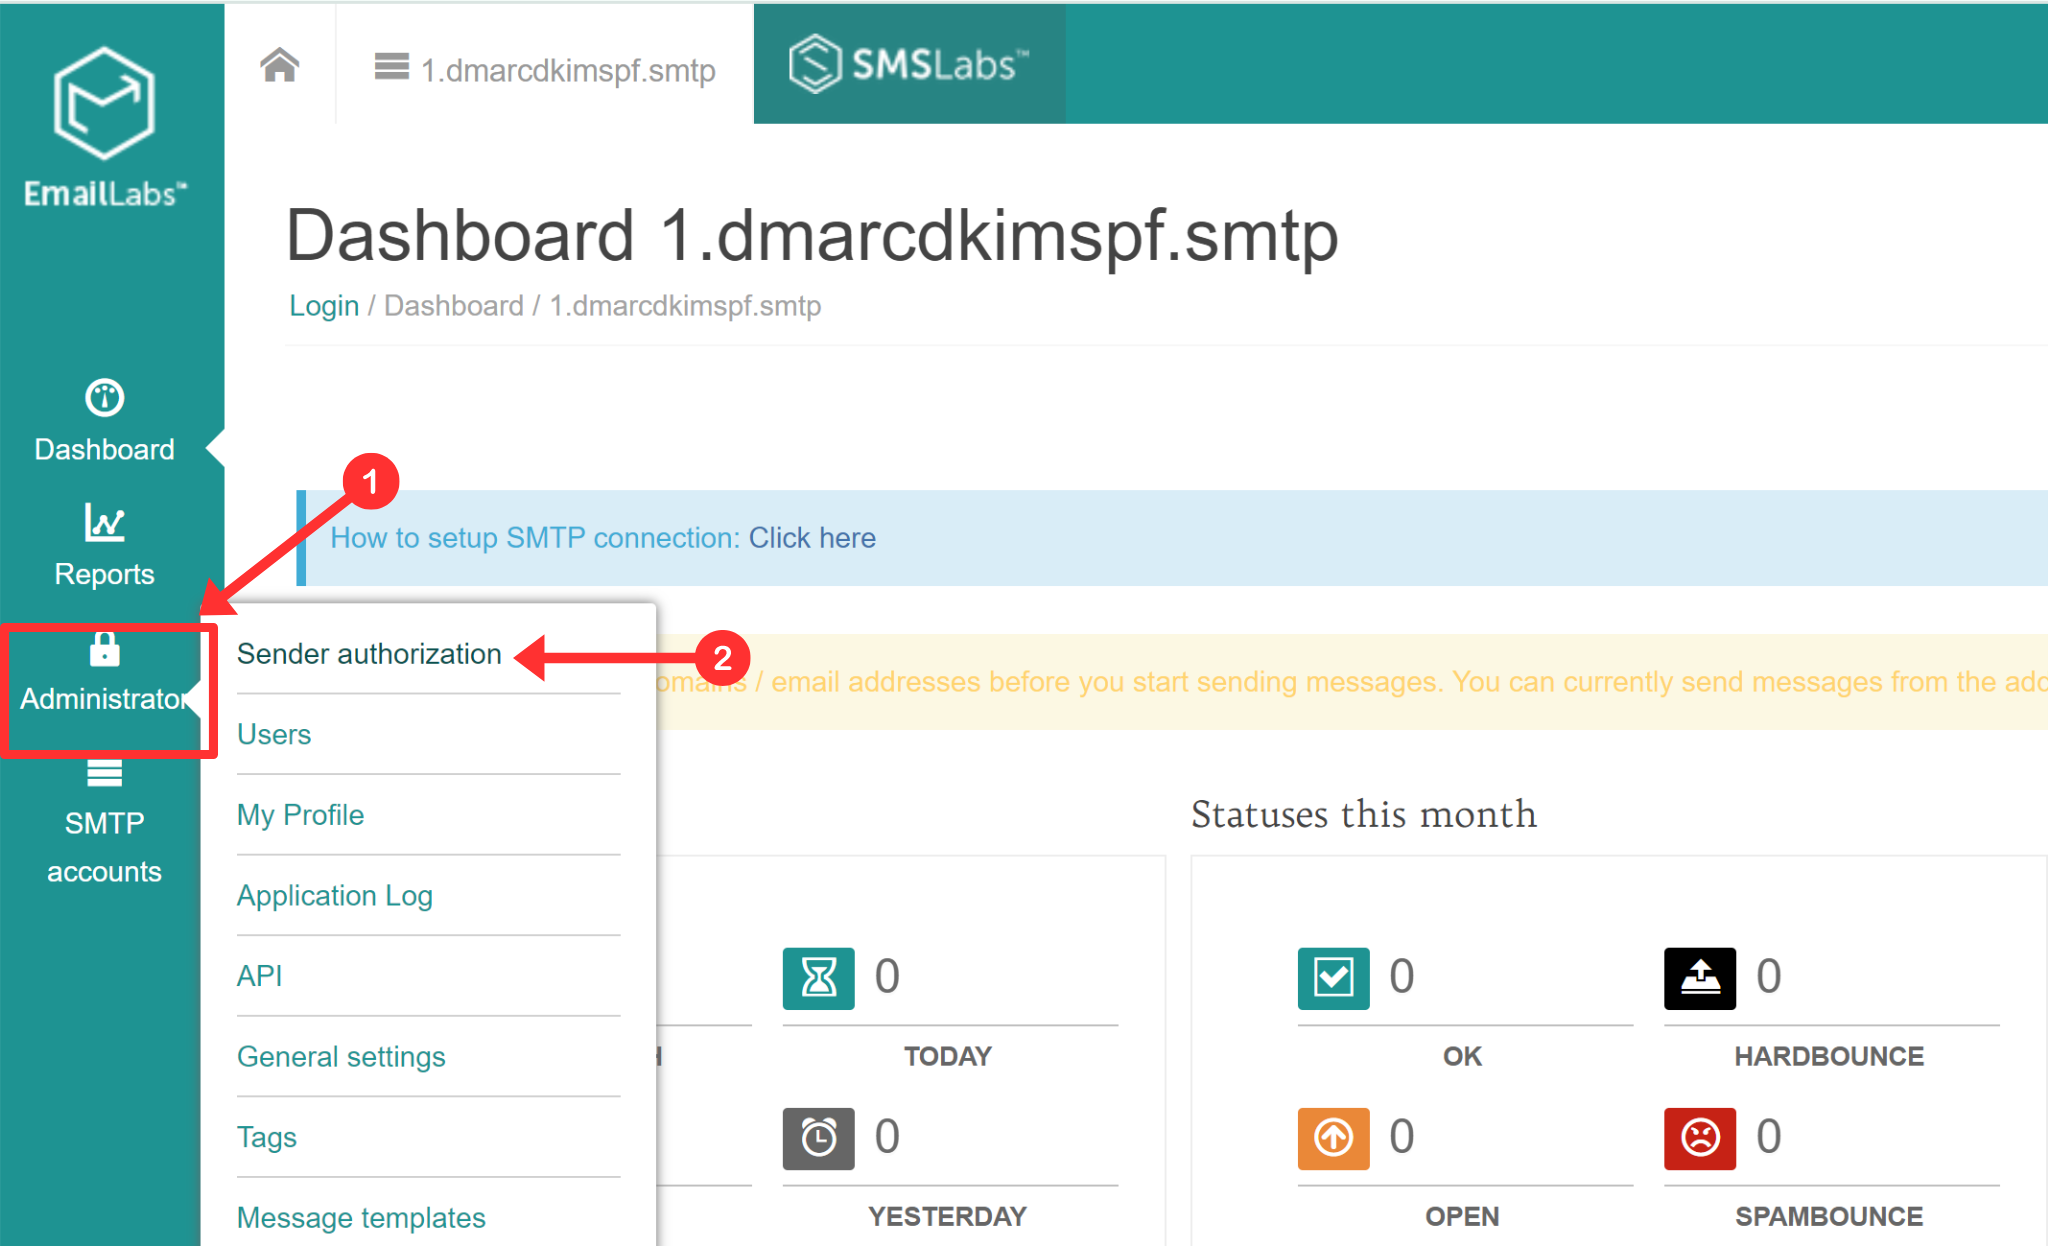
On the dashboard, click Administrator and go to Sender Authorization.
-
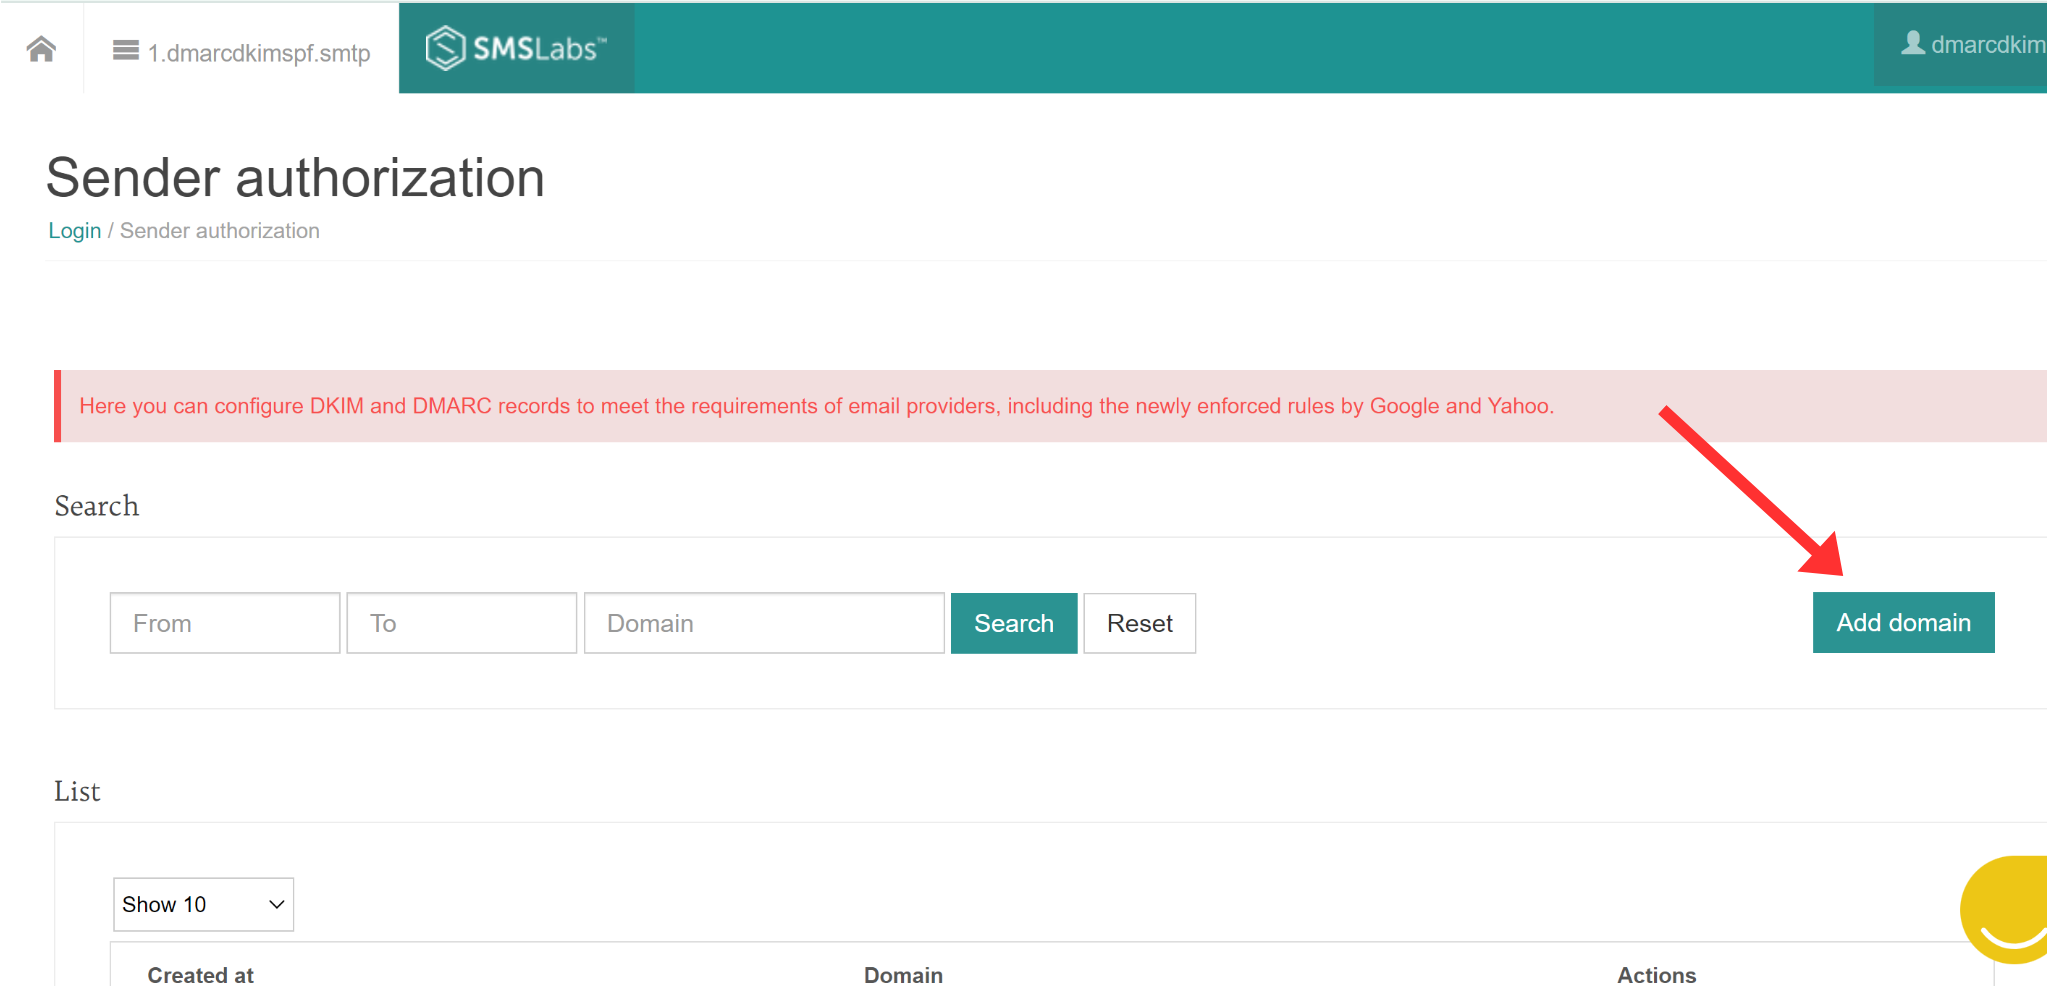
Click Add Domain.
-
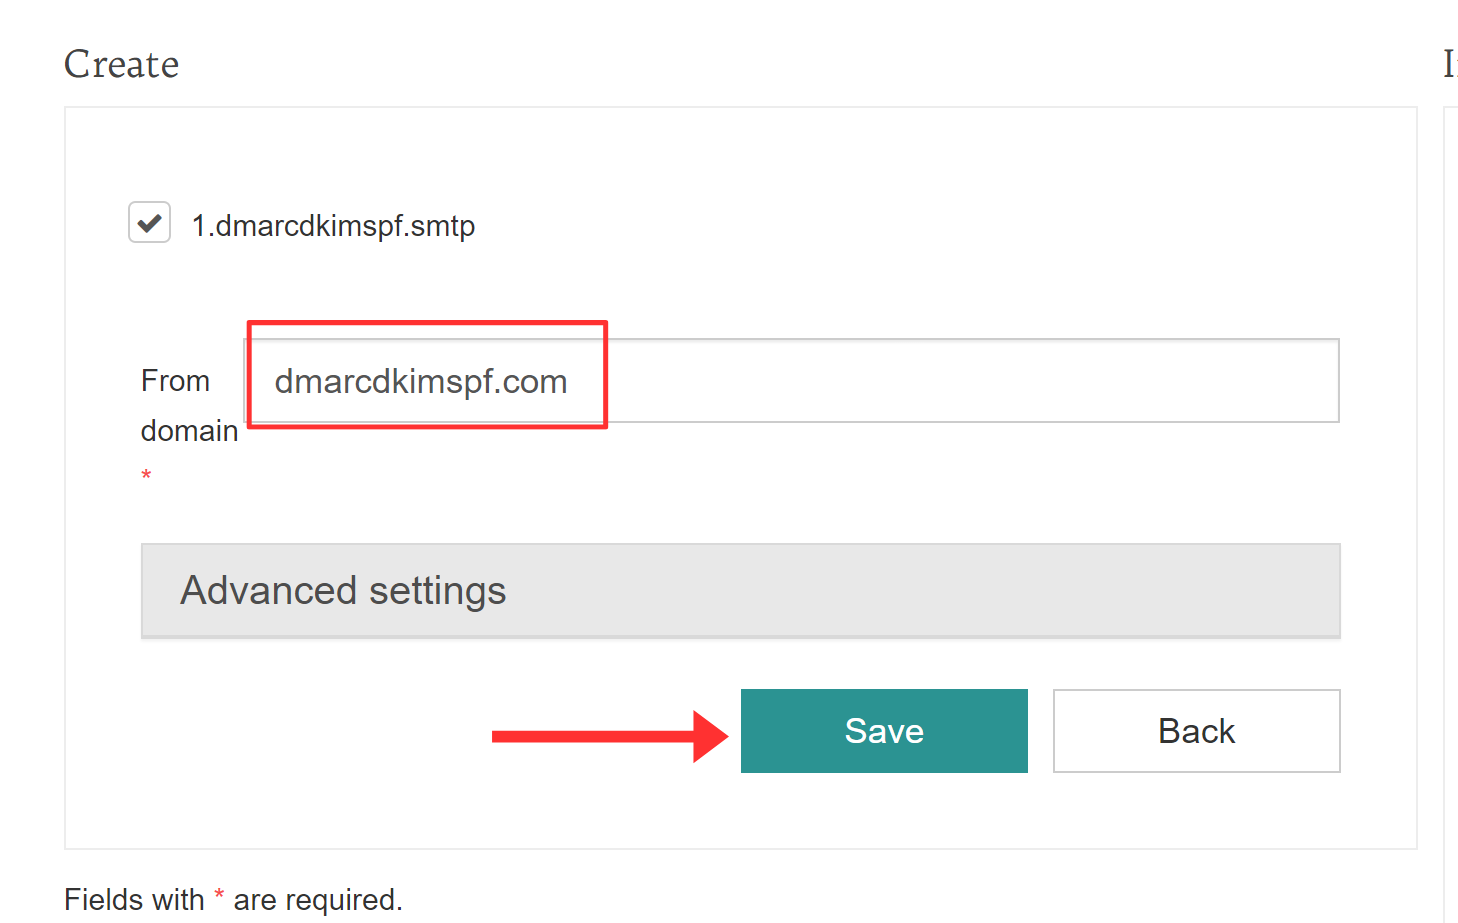
Write down your domain name and click Save.
-
On the next page, you'll see the CNAME records, add these records to the DNS provider.

Add Records to DNS Provider
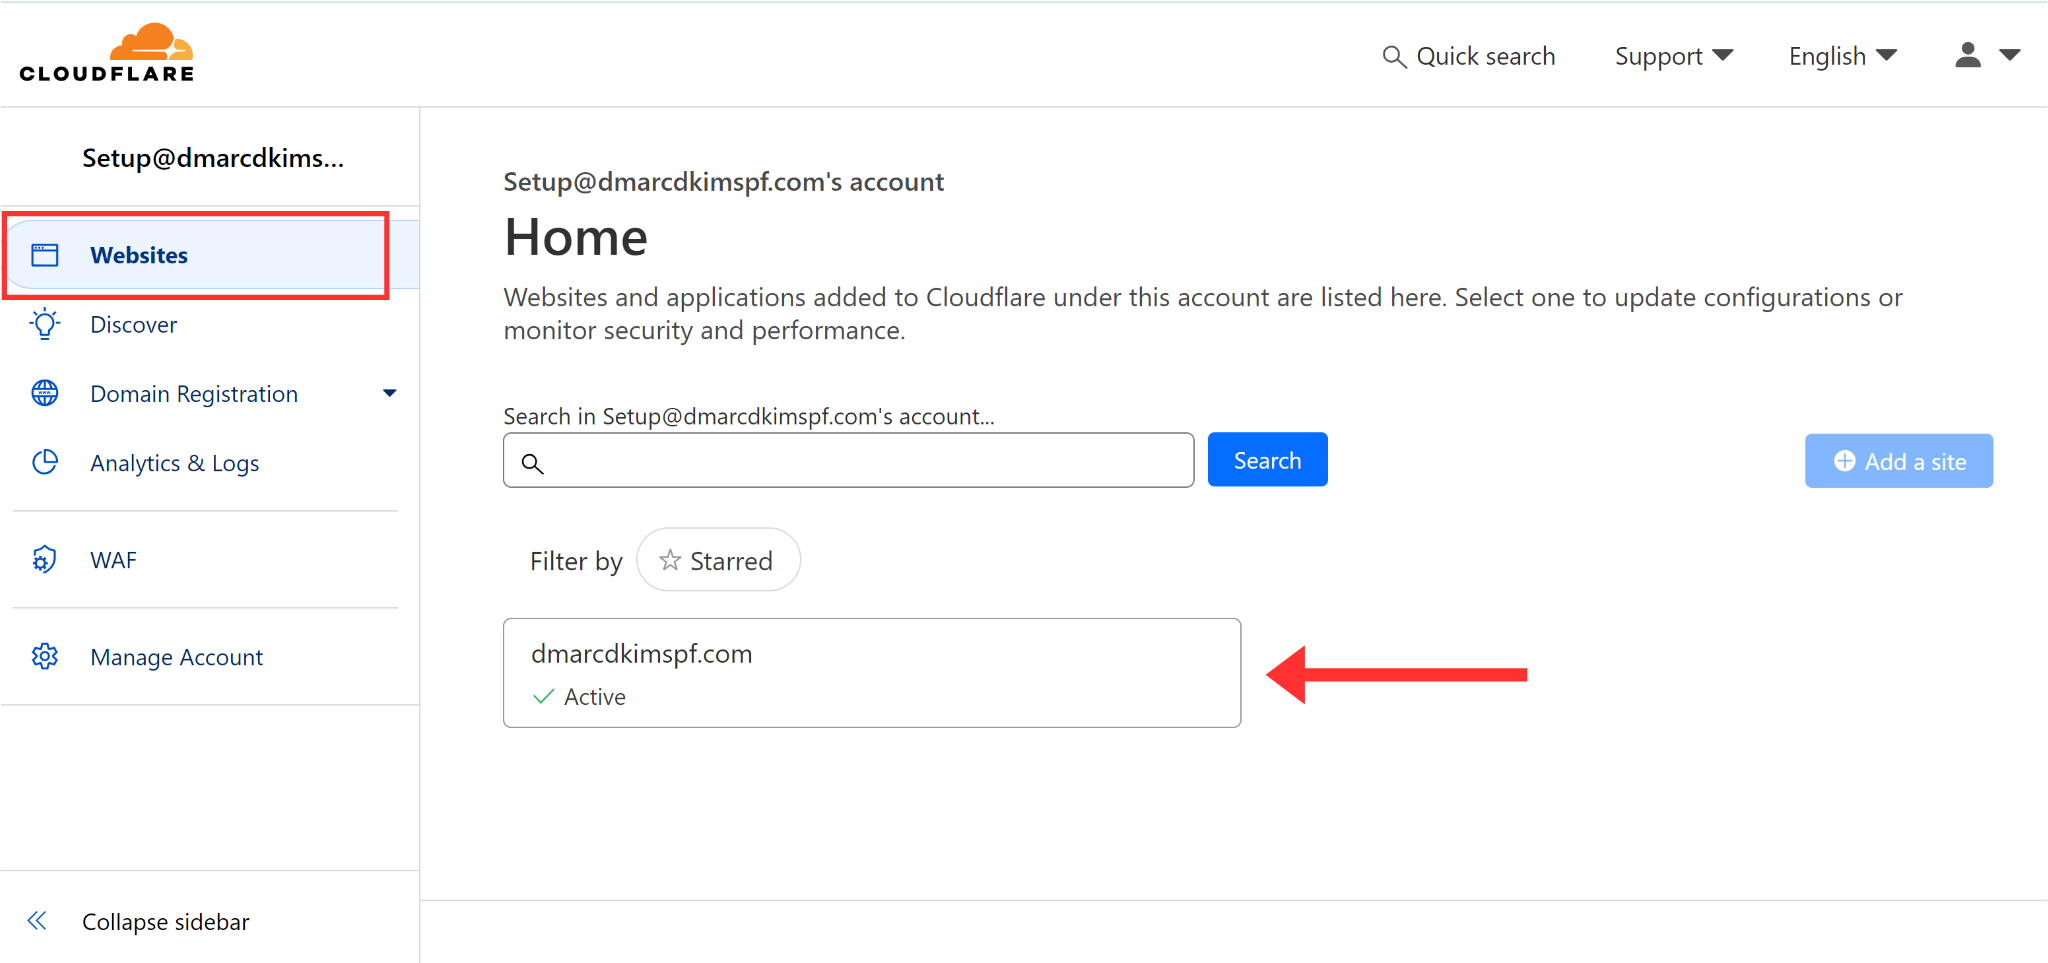
Login to your DNS provider. We are using Cloudflare for this guide.
-
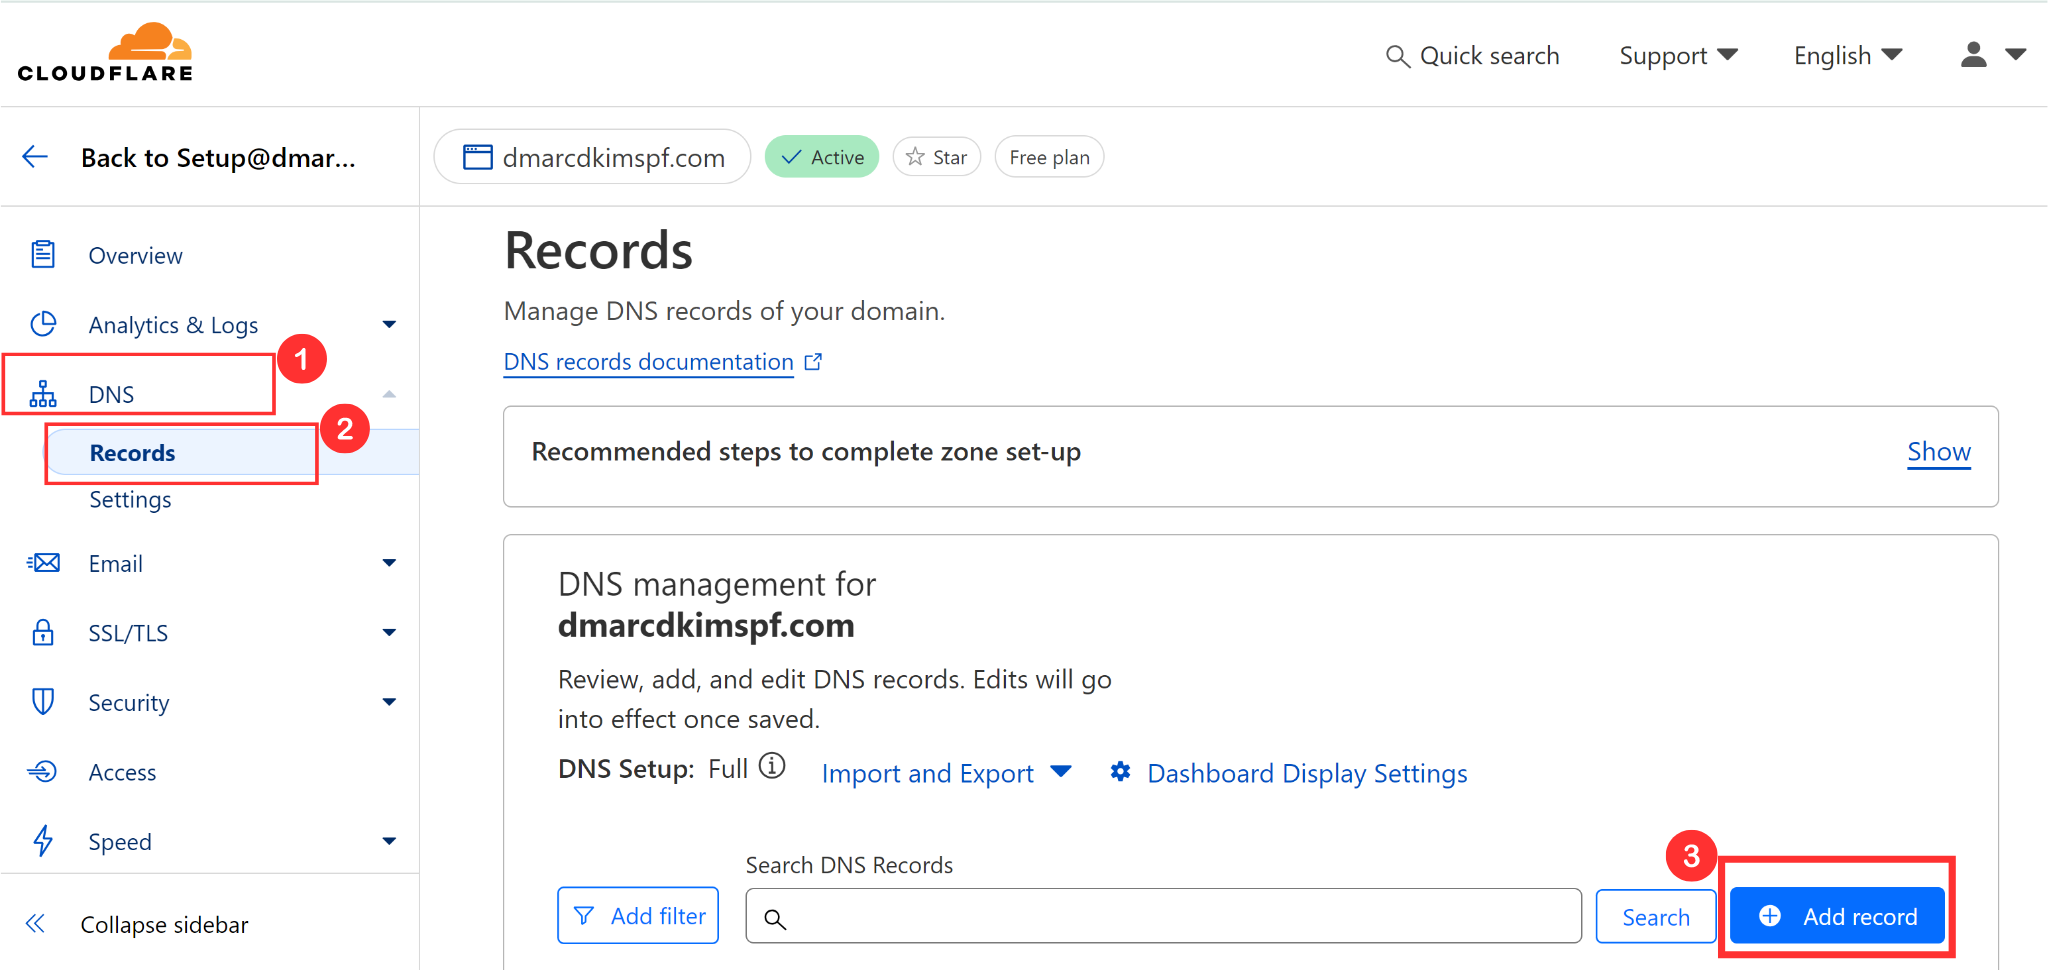
Go to the Websites tab and click on your domain.
Click DNS and go to Records.
-
Hit the Add Record button to add new records.
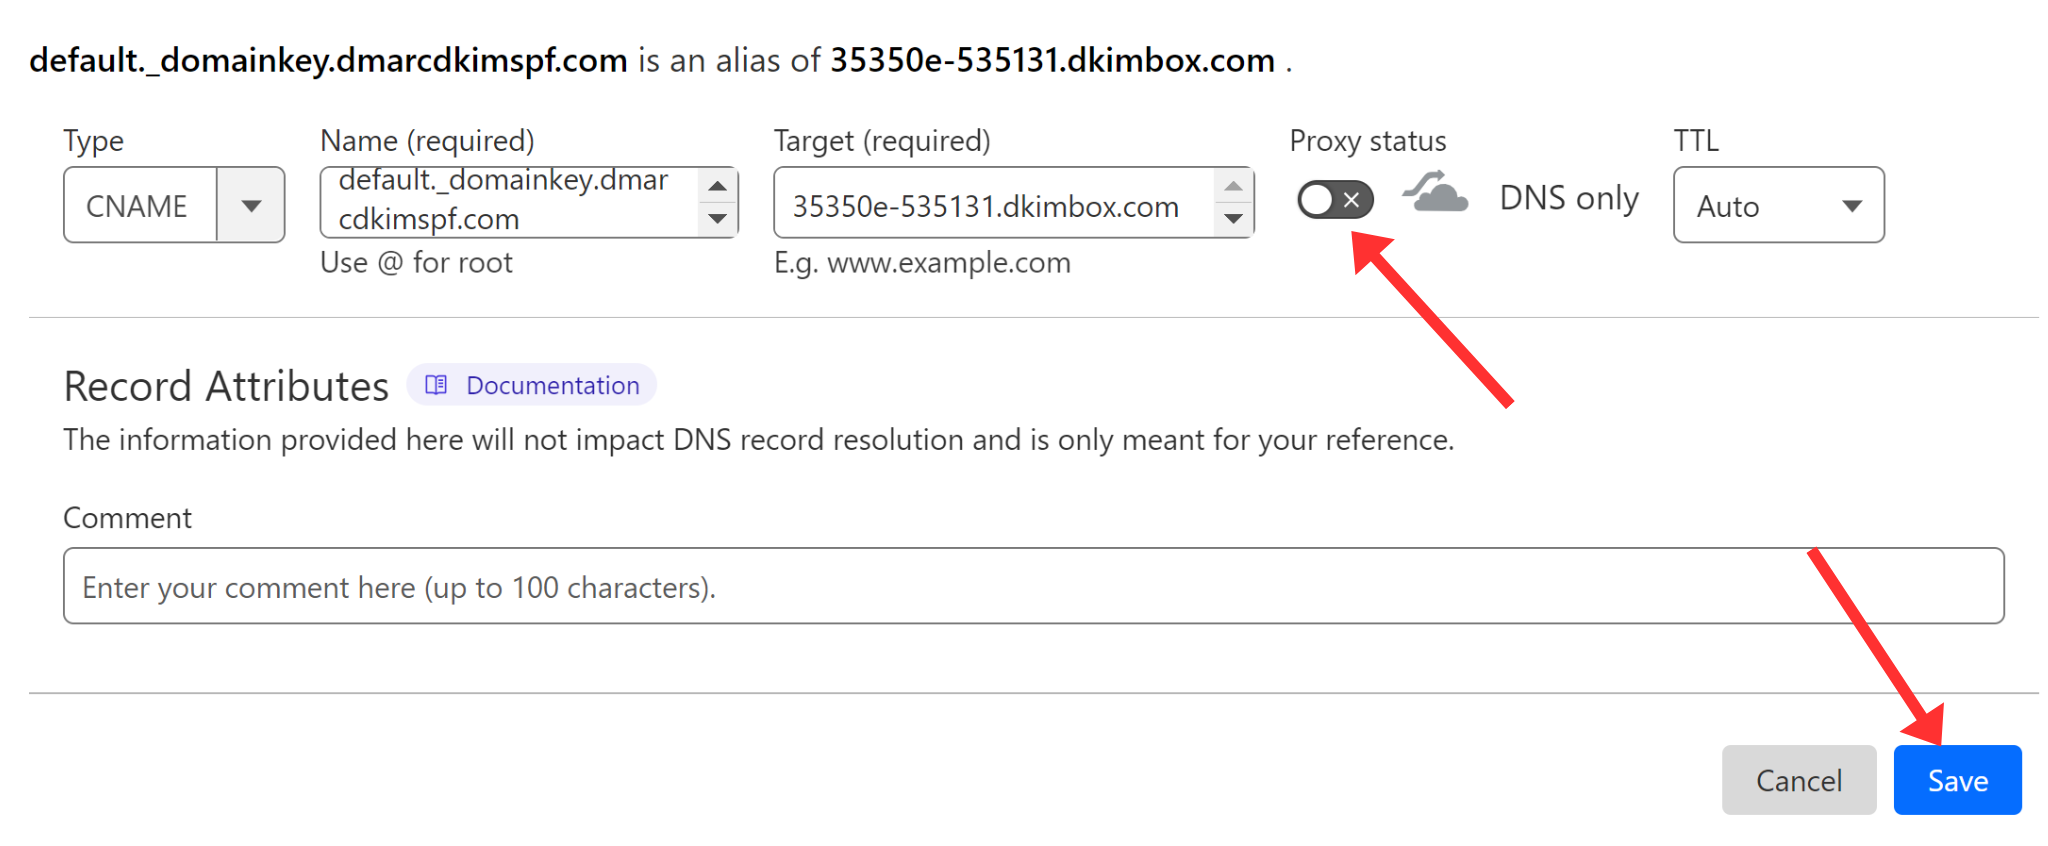
Select type CNAME.
Add the Record Name in the Name field.
Add the Record Value in the Target field.
Turn off the proxy and click Save.
-
Follow the same process to add each record.
Verify DNS Records:
-
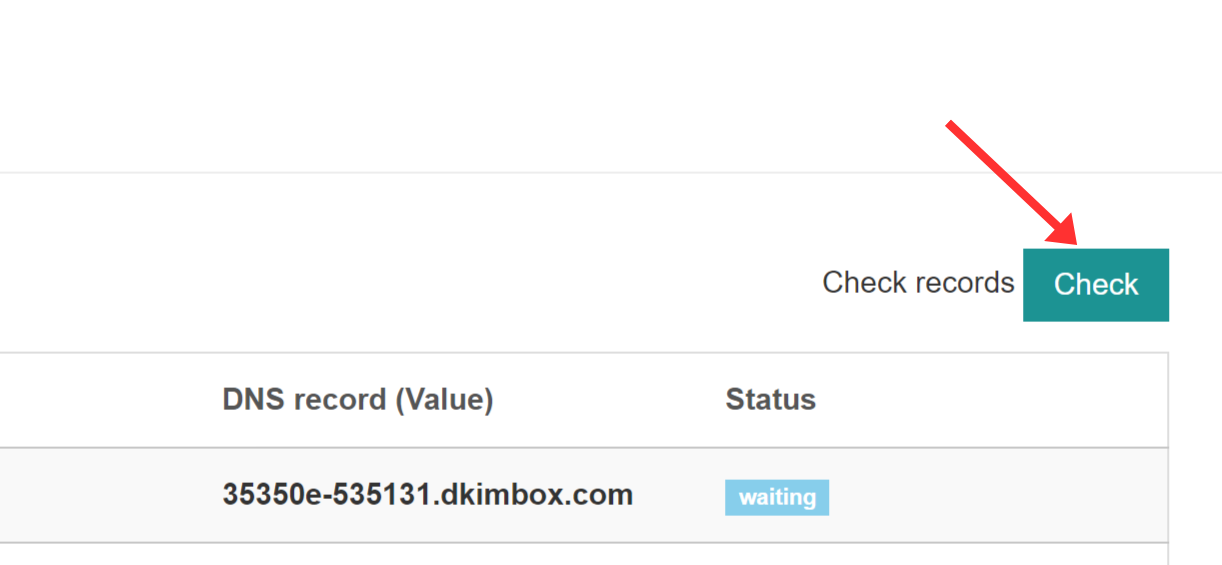
After adding all records to the DNS provider, return to the Emaillab DNS page and click the Check button.
-
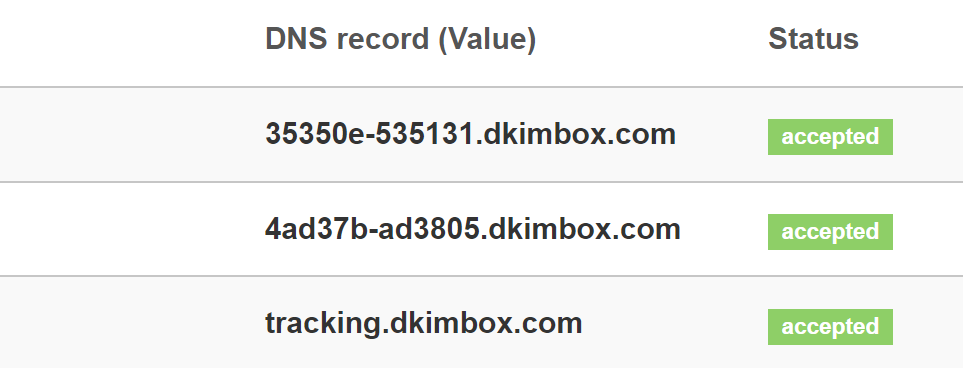
The status for each record will turn green, indicating a successful record verification.
Generate DMARC Record:
The DMARC record provided by the EmailLabs doesn't allow you to have insights into your email performance. Without the insights, you can not take action to implement a strict poly and your emails remain at risk of spoofing.
You can use a third-party tool to generate a DMARC record that provides actionable insights for implementing a strict policy.
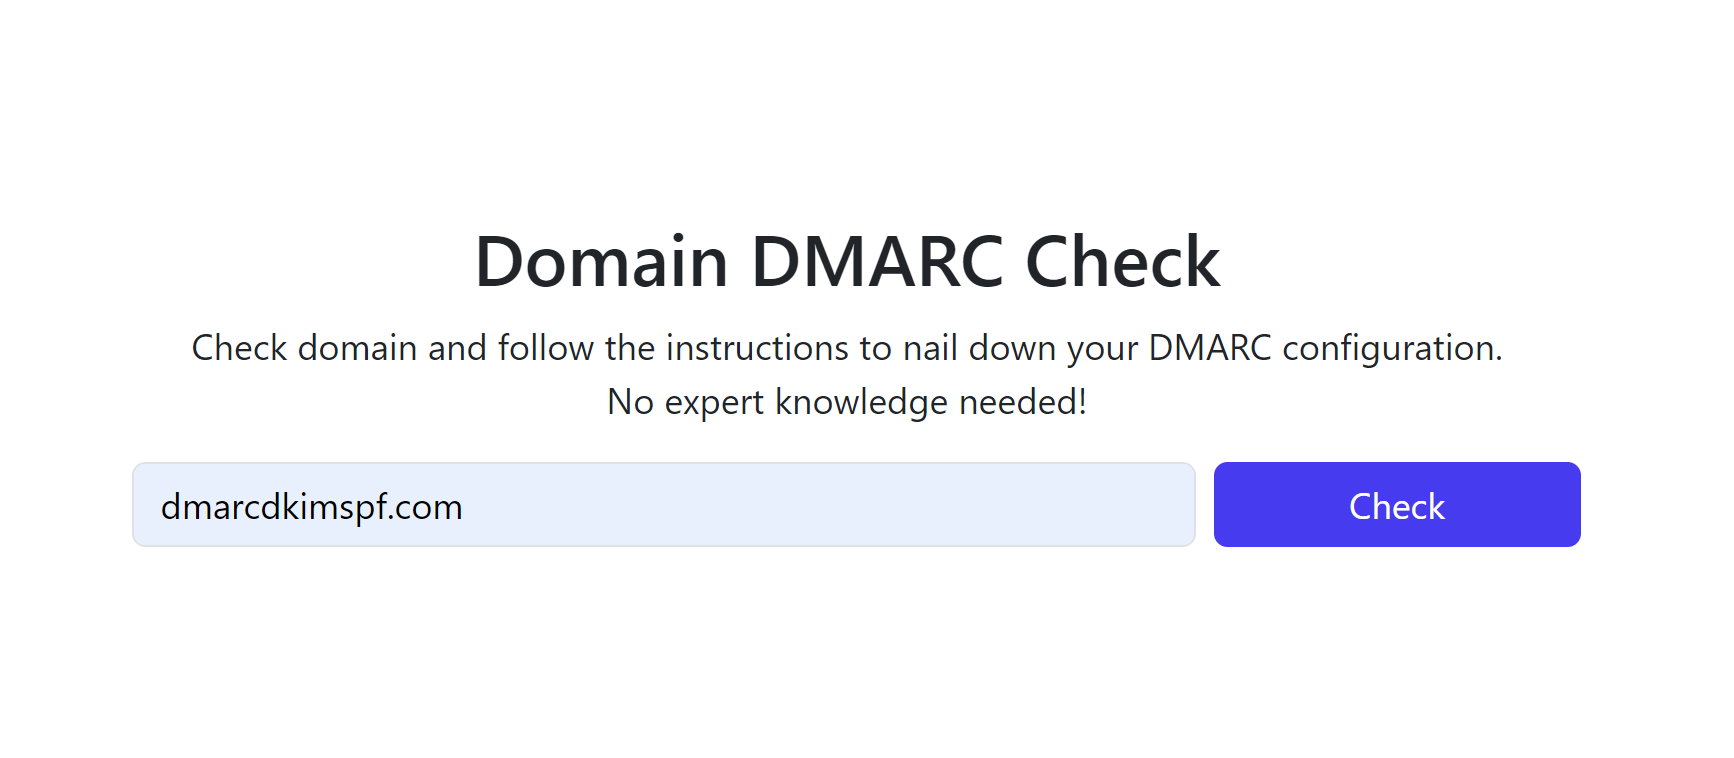
Go to the DMARC Tool.
-
Write your domain name and click Check.
-
Copy the record name and Suggested value, and add them to the DNS dashboard.
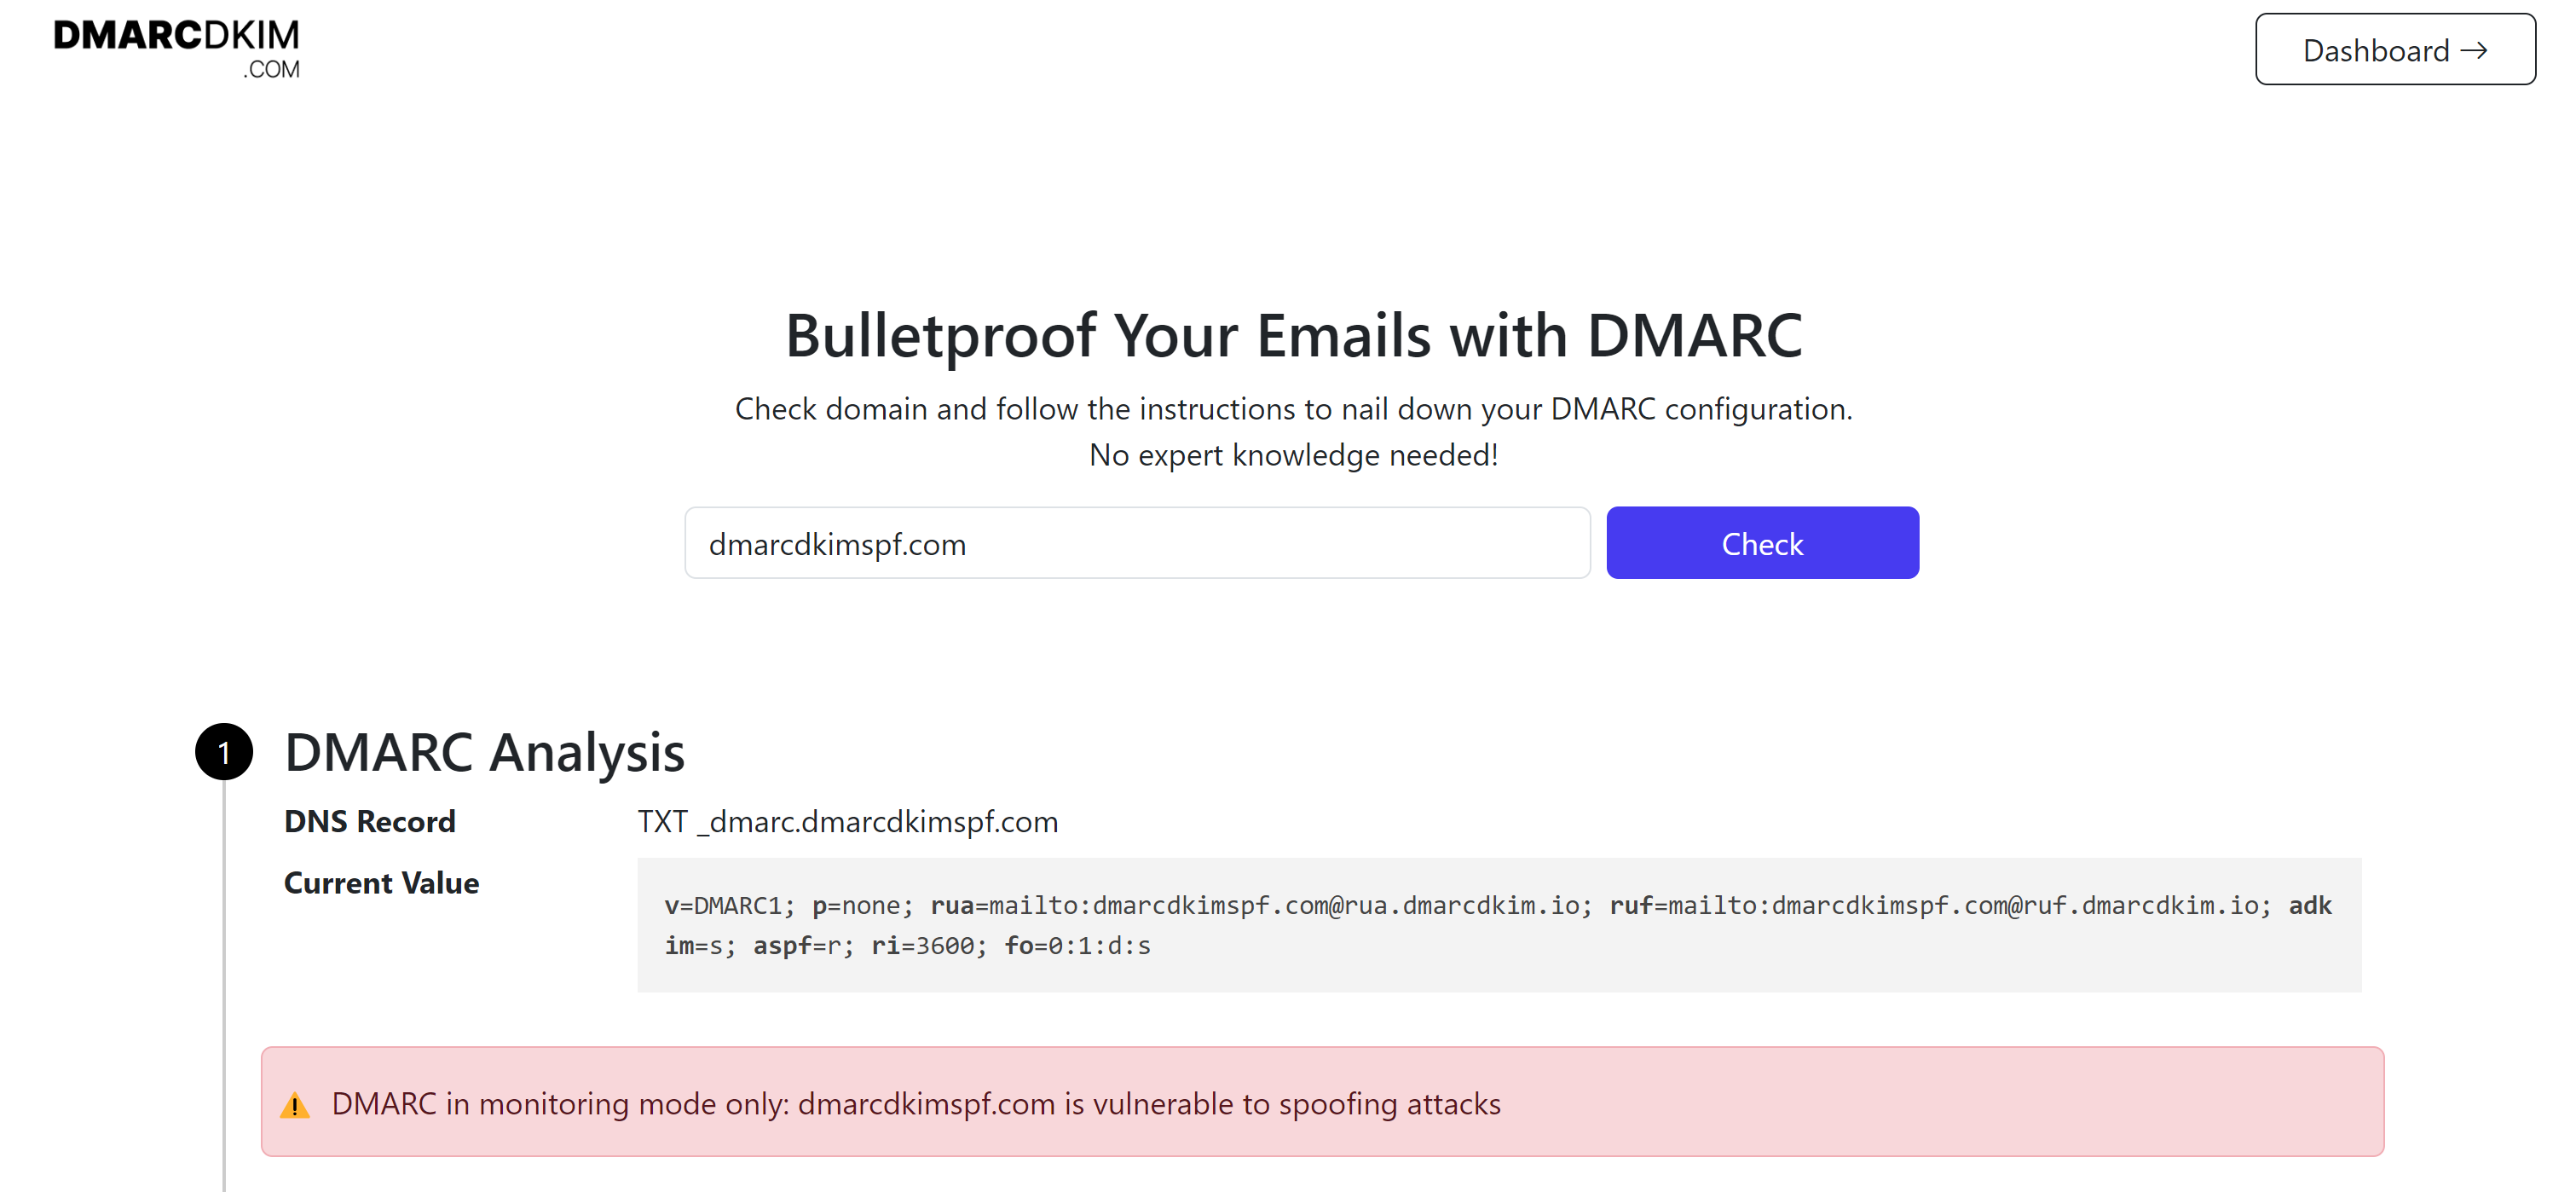
Sign up to get access to the Reports Dashboard where you get actionable insights.
For assistance and support, hire a DmarcDkim.com expert to help you out.
Check domain and follow the instructions to nail down your DMARC configuration.
No expert knowledge needed!


