Configure DKIM, SPF, and DMARC in Benchmark Email - Domain Authentication
Check your domain for DMARC, DKIM, SPF and MX records. Get a free report.
- The impact of Business Email Compromise
- A quiet Google update just made SPF more forgiving
- Cyber Insurance and DMARC Enforcement
- Email impersonation scams explained
- TLS-RPT Record
- SMTP Smuggling
- 🇩🇪 Welche Hosting Anbieter unterstützen DMARC
- Reverse Engineering Phishing
- DMARC Enforcement in 2026
- DMARC for non sending domains
How to Setup Benchmark Email DMARC, DKIM and SPF Records?
Benchmark not only helps you deliver your emails but also makes sure your emails land in your customers' inboxes. That's why it provides DNS records to verify your sending domain. You can locate the SPF, DKIM, and DMARC records in the Domain Authentication page of the Benchmark Email app. Then authenticate your domain by adding these records to the DNS provider.
Follow the steps below to learn how you can configure the CNAME and TXT records in Benchmark and setup DNS records in your DNS console.
Configure Benchmark Email DNS Records:
-
On the home page, click your profile icon and go to Account Settings.
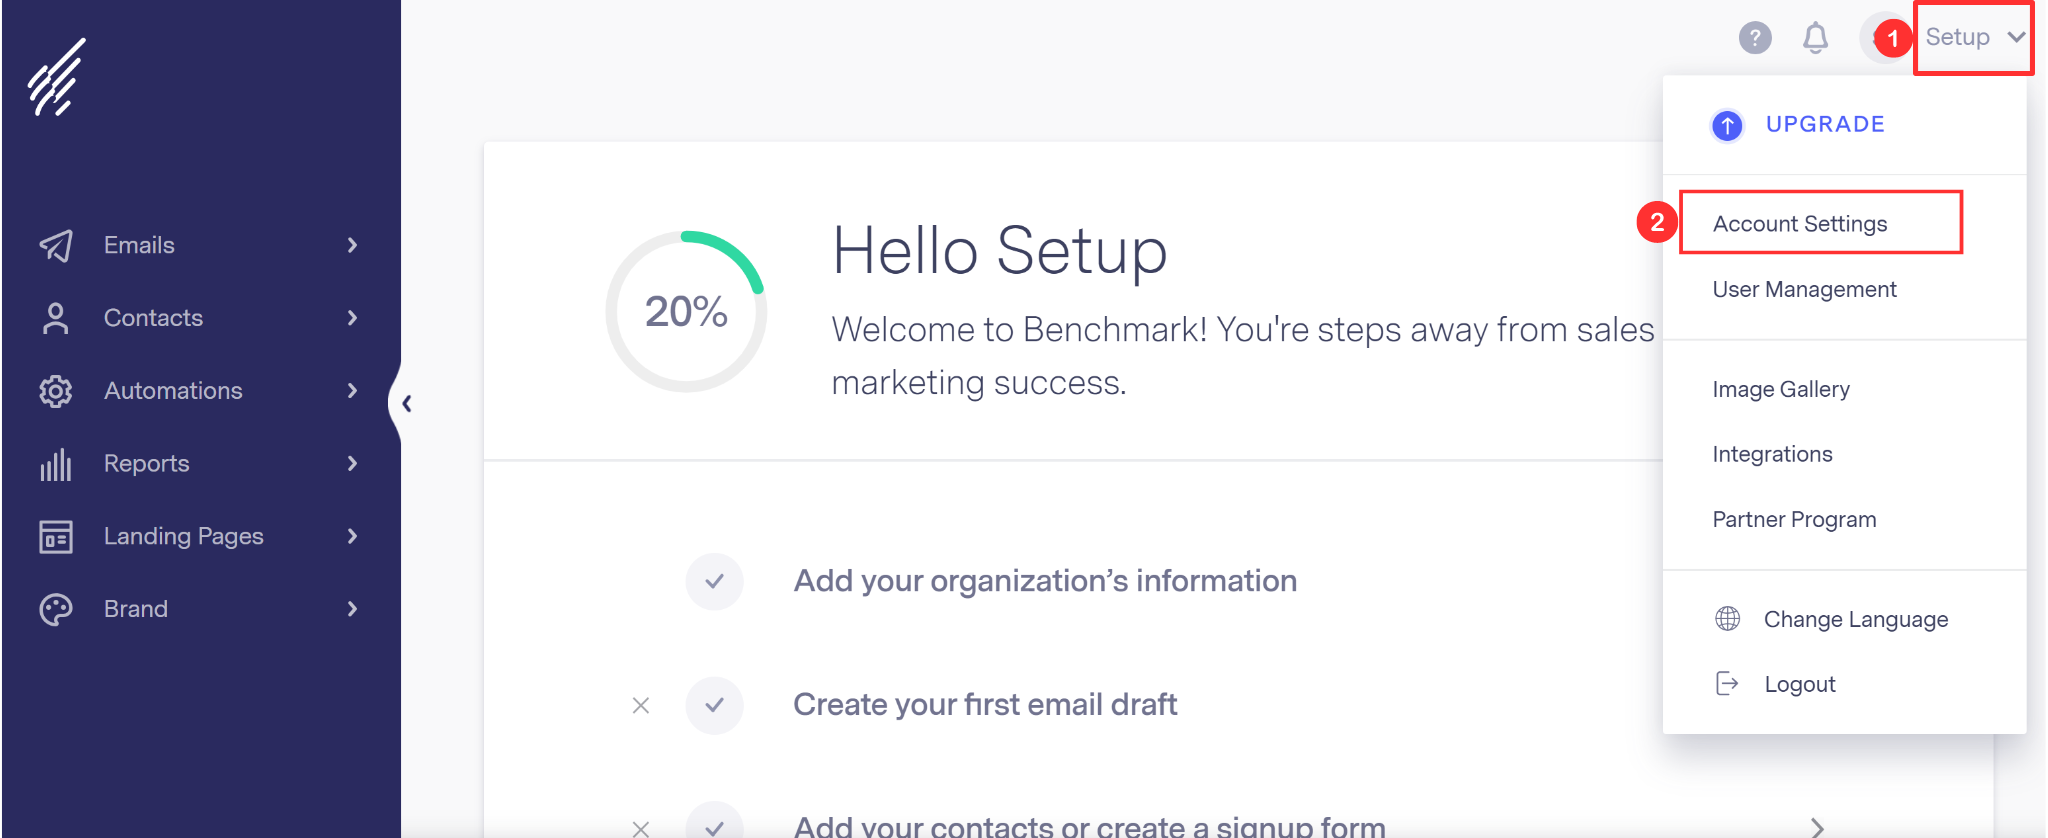
Select Domain Authentication in the left navigation section.
-
Here, your default sender domain will be added. Click View under DNS Records.
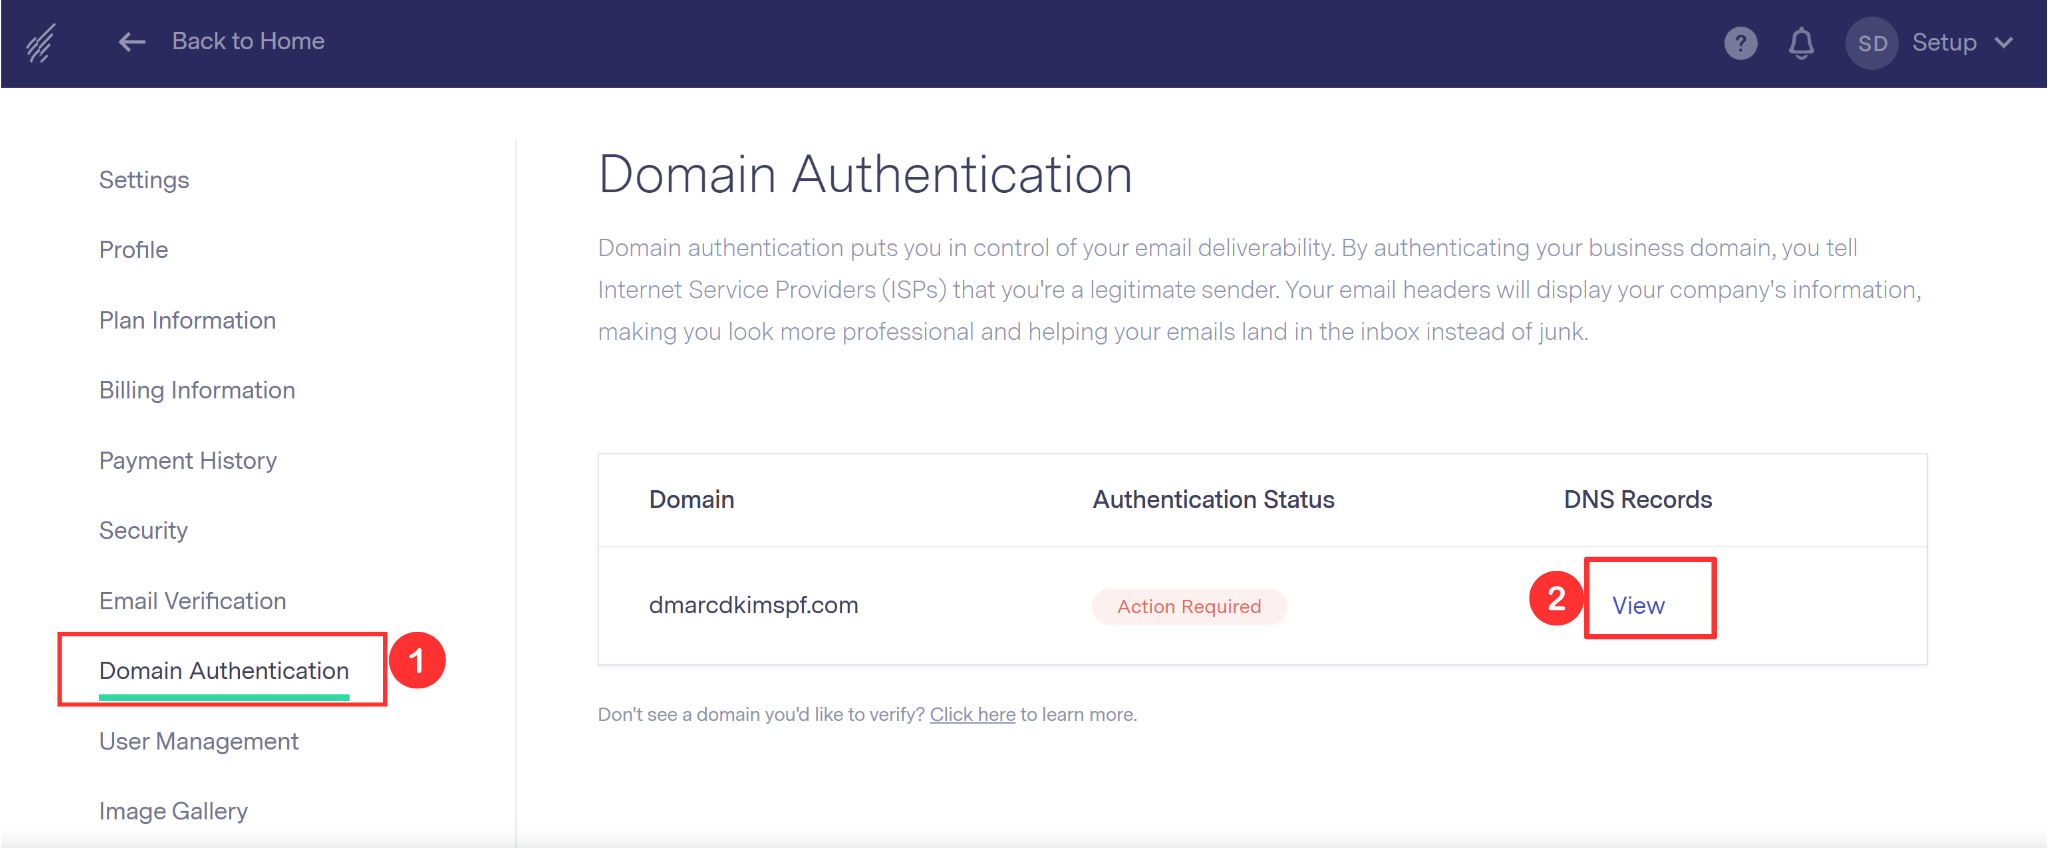
This will redirect you to the DNS records page with DKIM, SPF, and DMARC records.
Add these records to your DNS provider
Add Benchmark Email DKIM (CNAME) record:
-
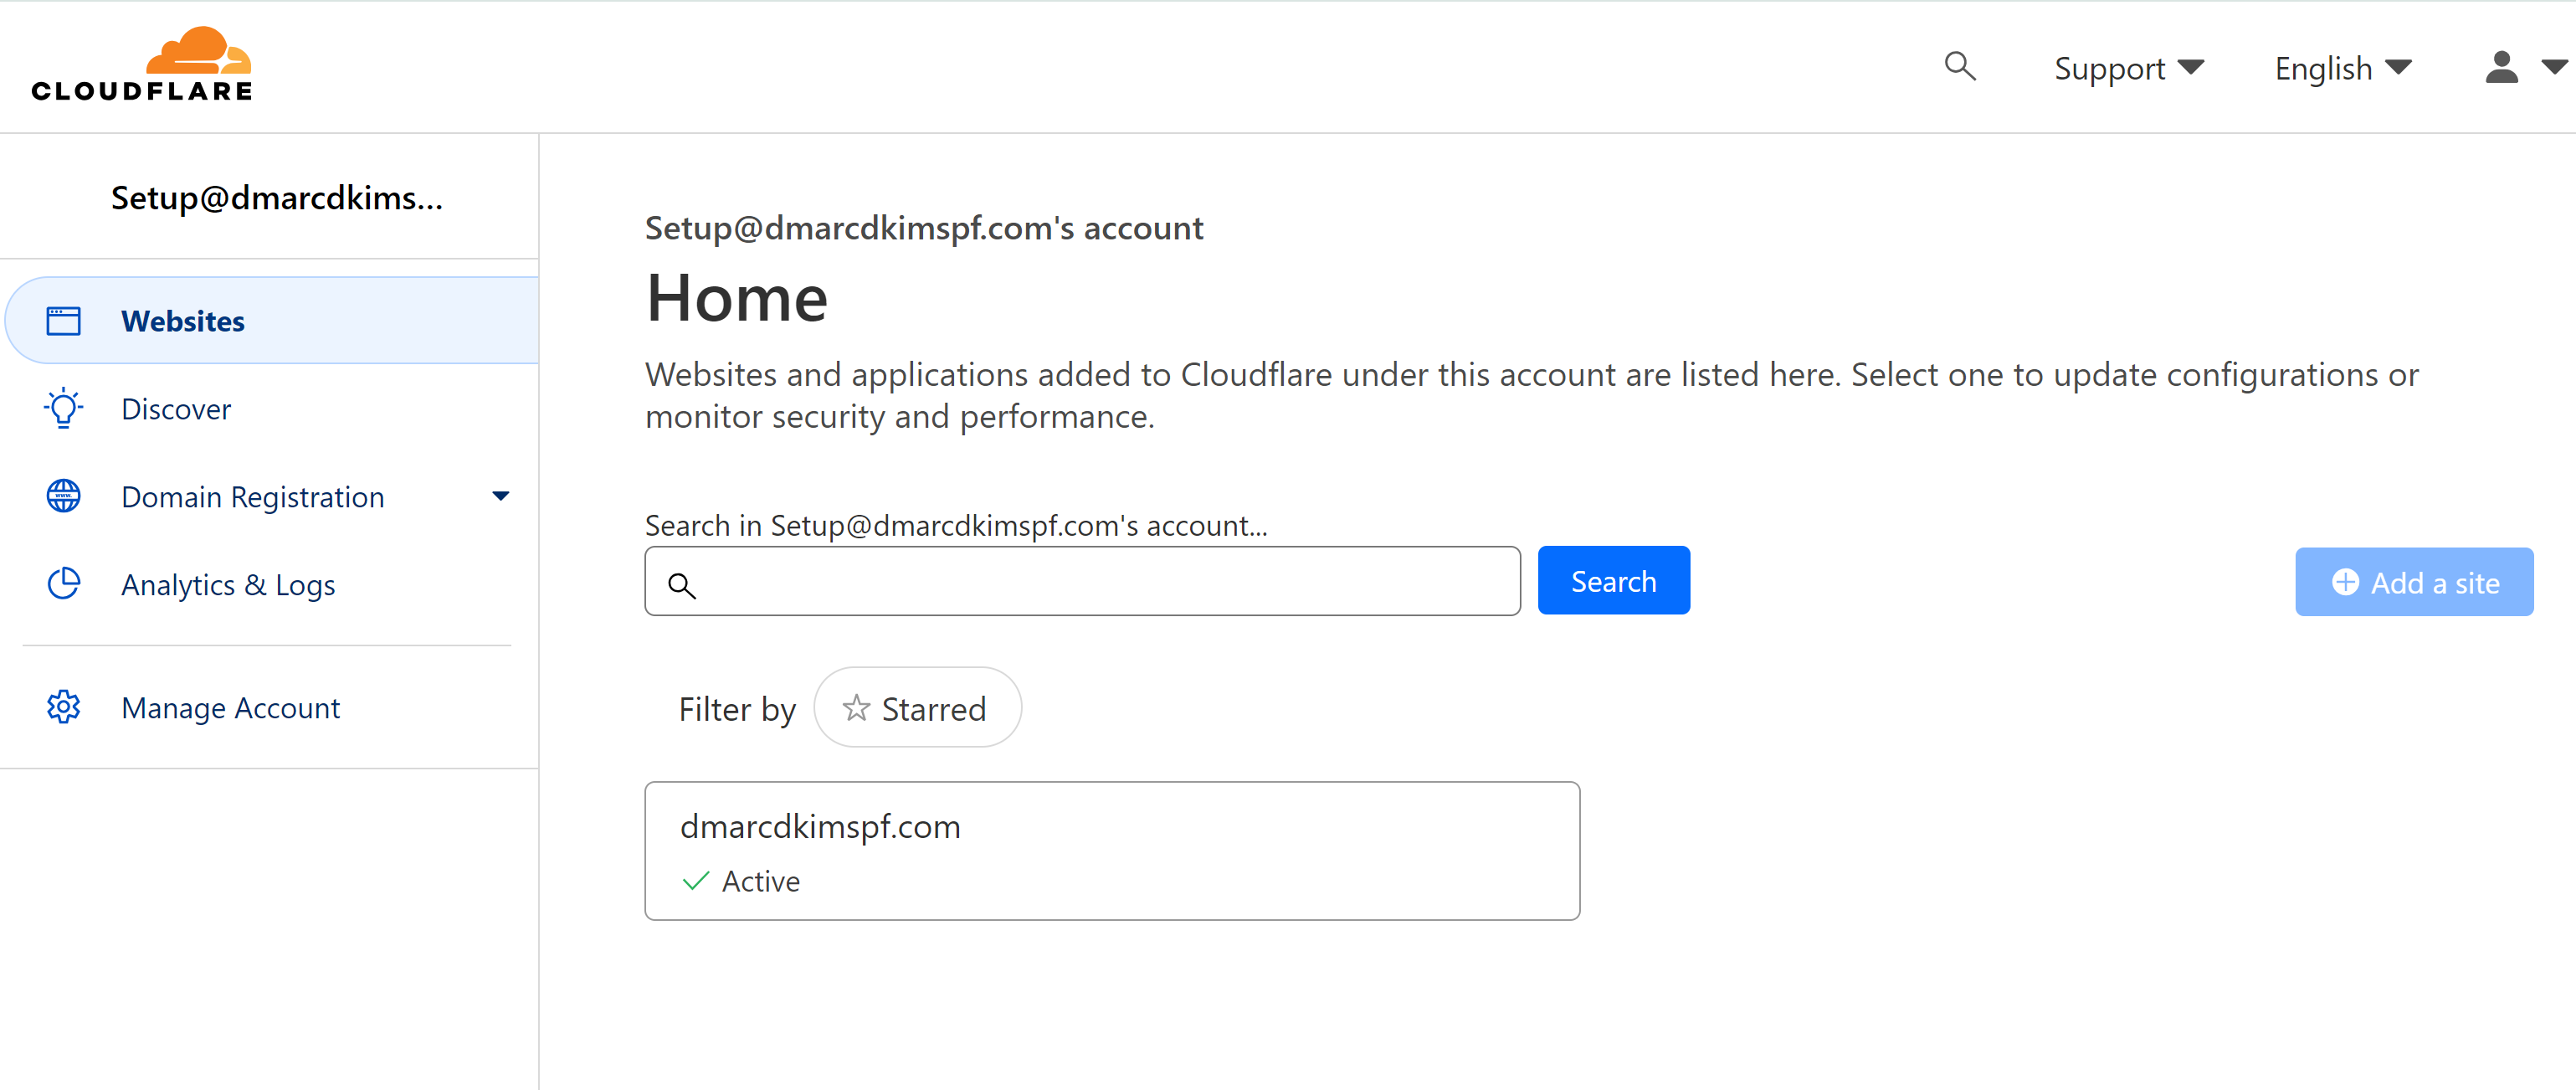
Log in to your DNS provider (Cloudflare in this instant) and click your Website.
-
Click DNS, select Records, and hit the Add Record button to add new records.
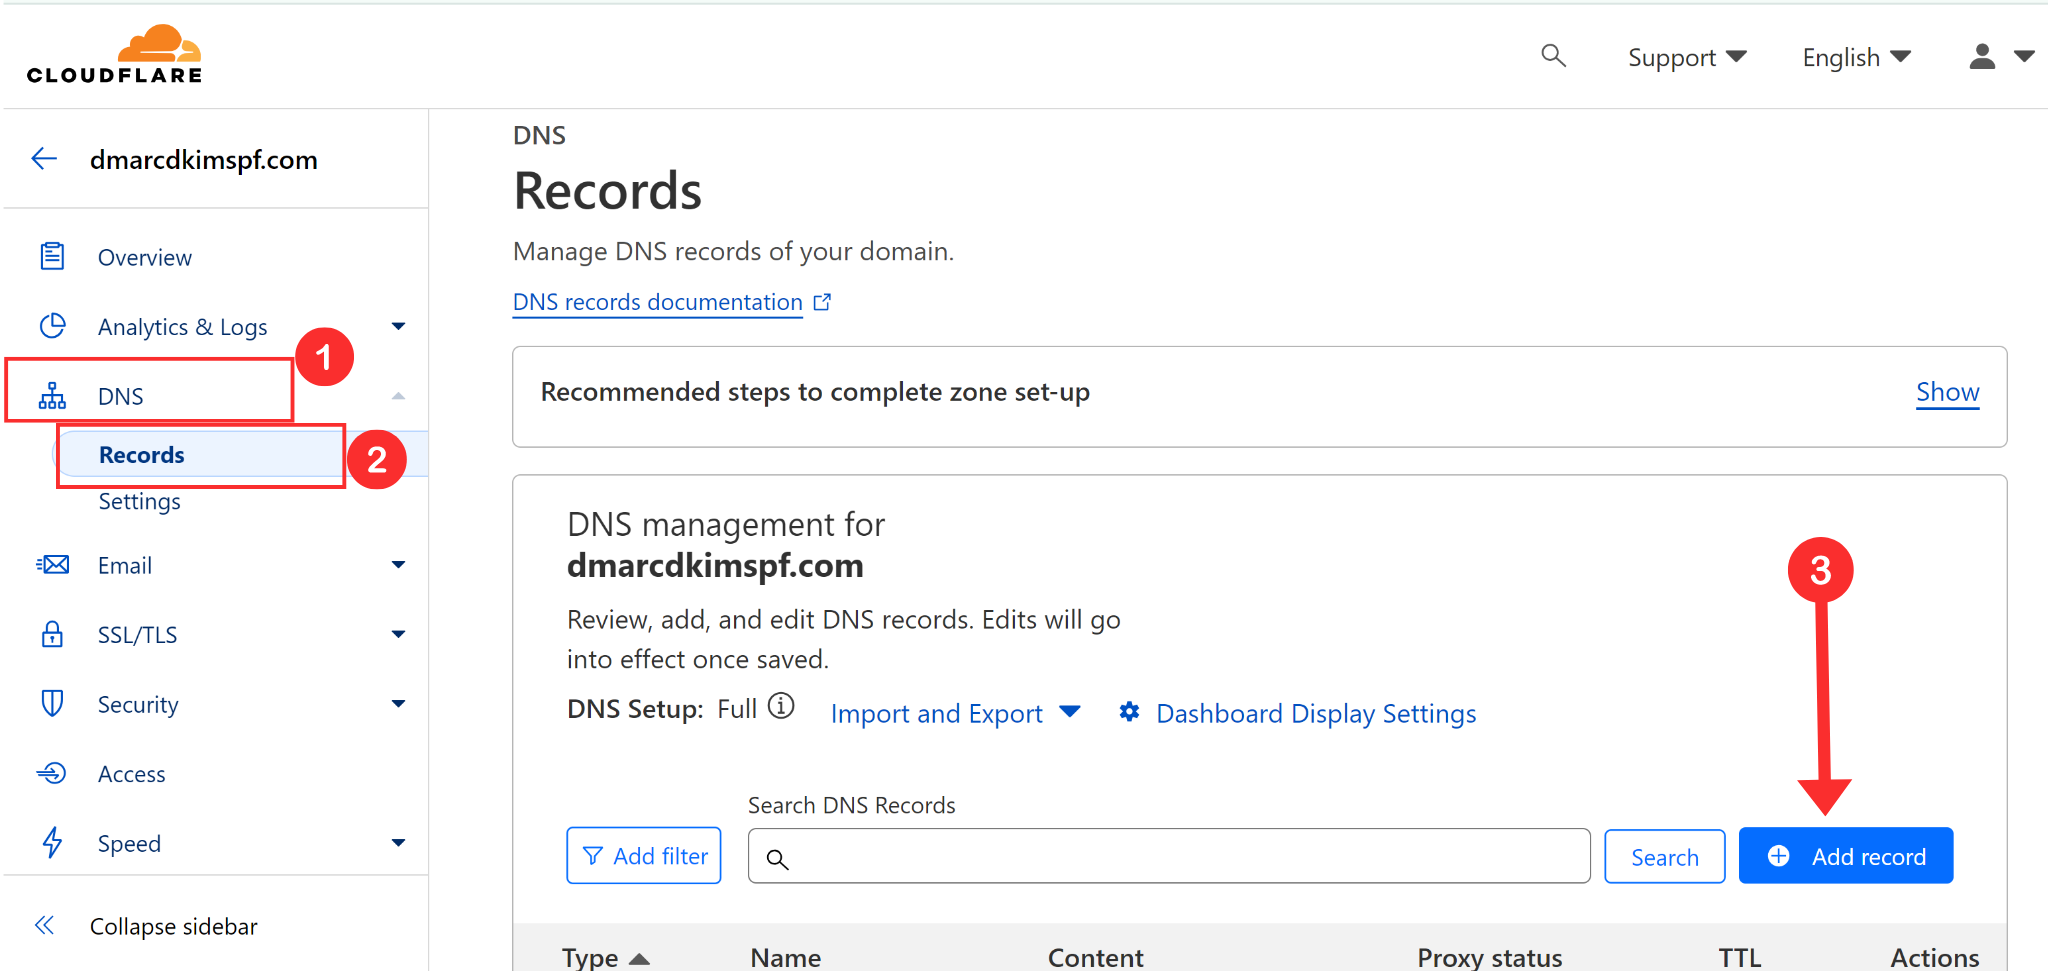
Copy the record name and add it to the Name section in the DNS provider.
Copy the record value and paste it into the Target field.
Turn off the proxy to prevent traffic from diverting to Cloudflare instead of the email server, causing verification issues.
-
Select type CNAME and click Save.
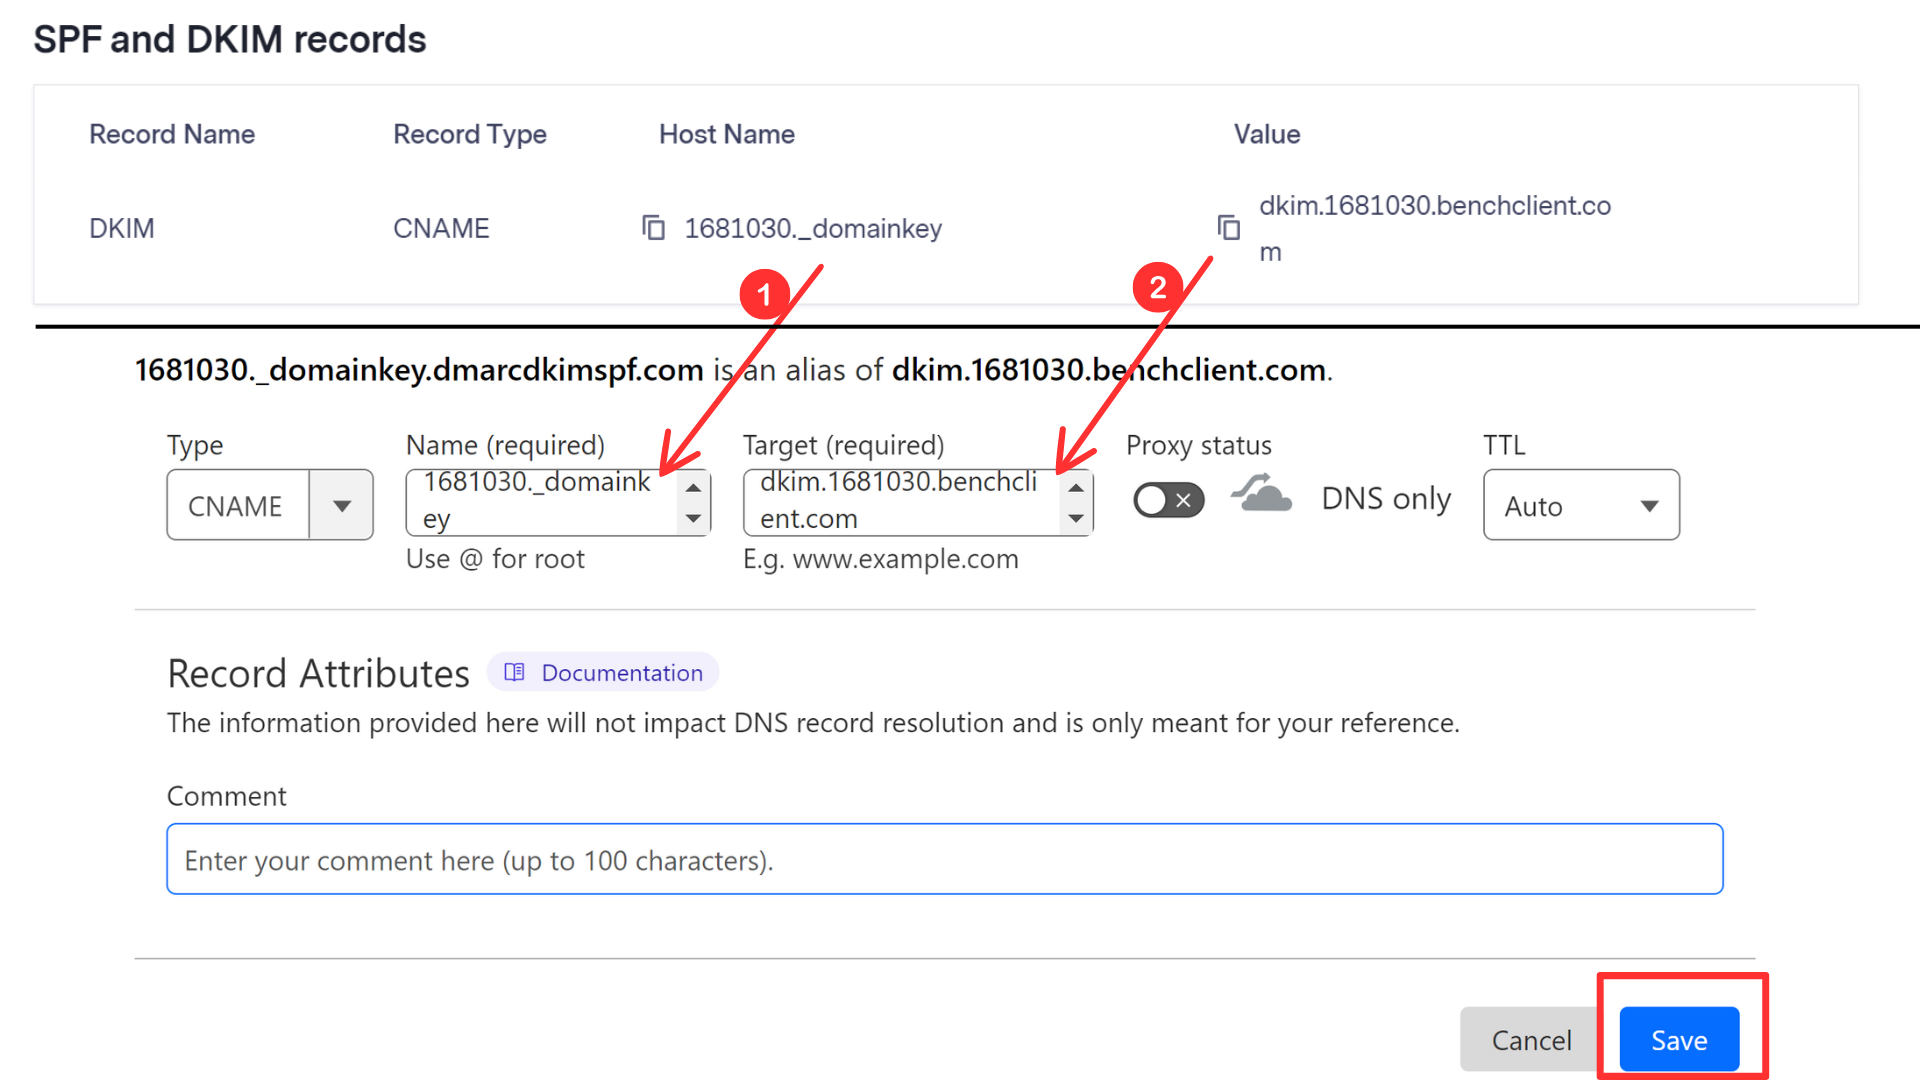
Add Benchmark Email SPF (CNAME) Record:
Copy the SPF record name and value
-
Select type TXT, turn off the proxy, and Save the record.
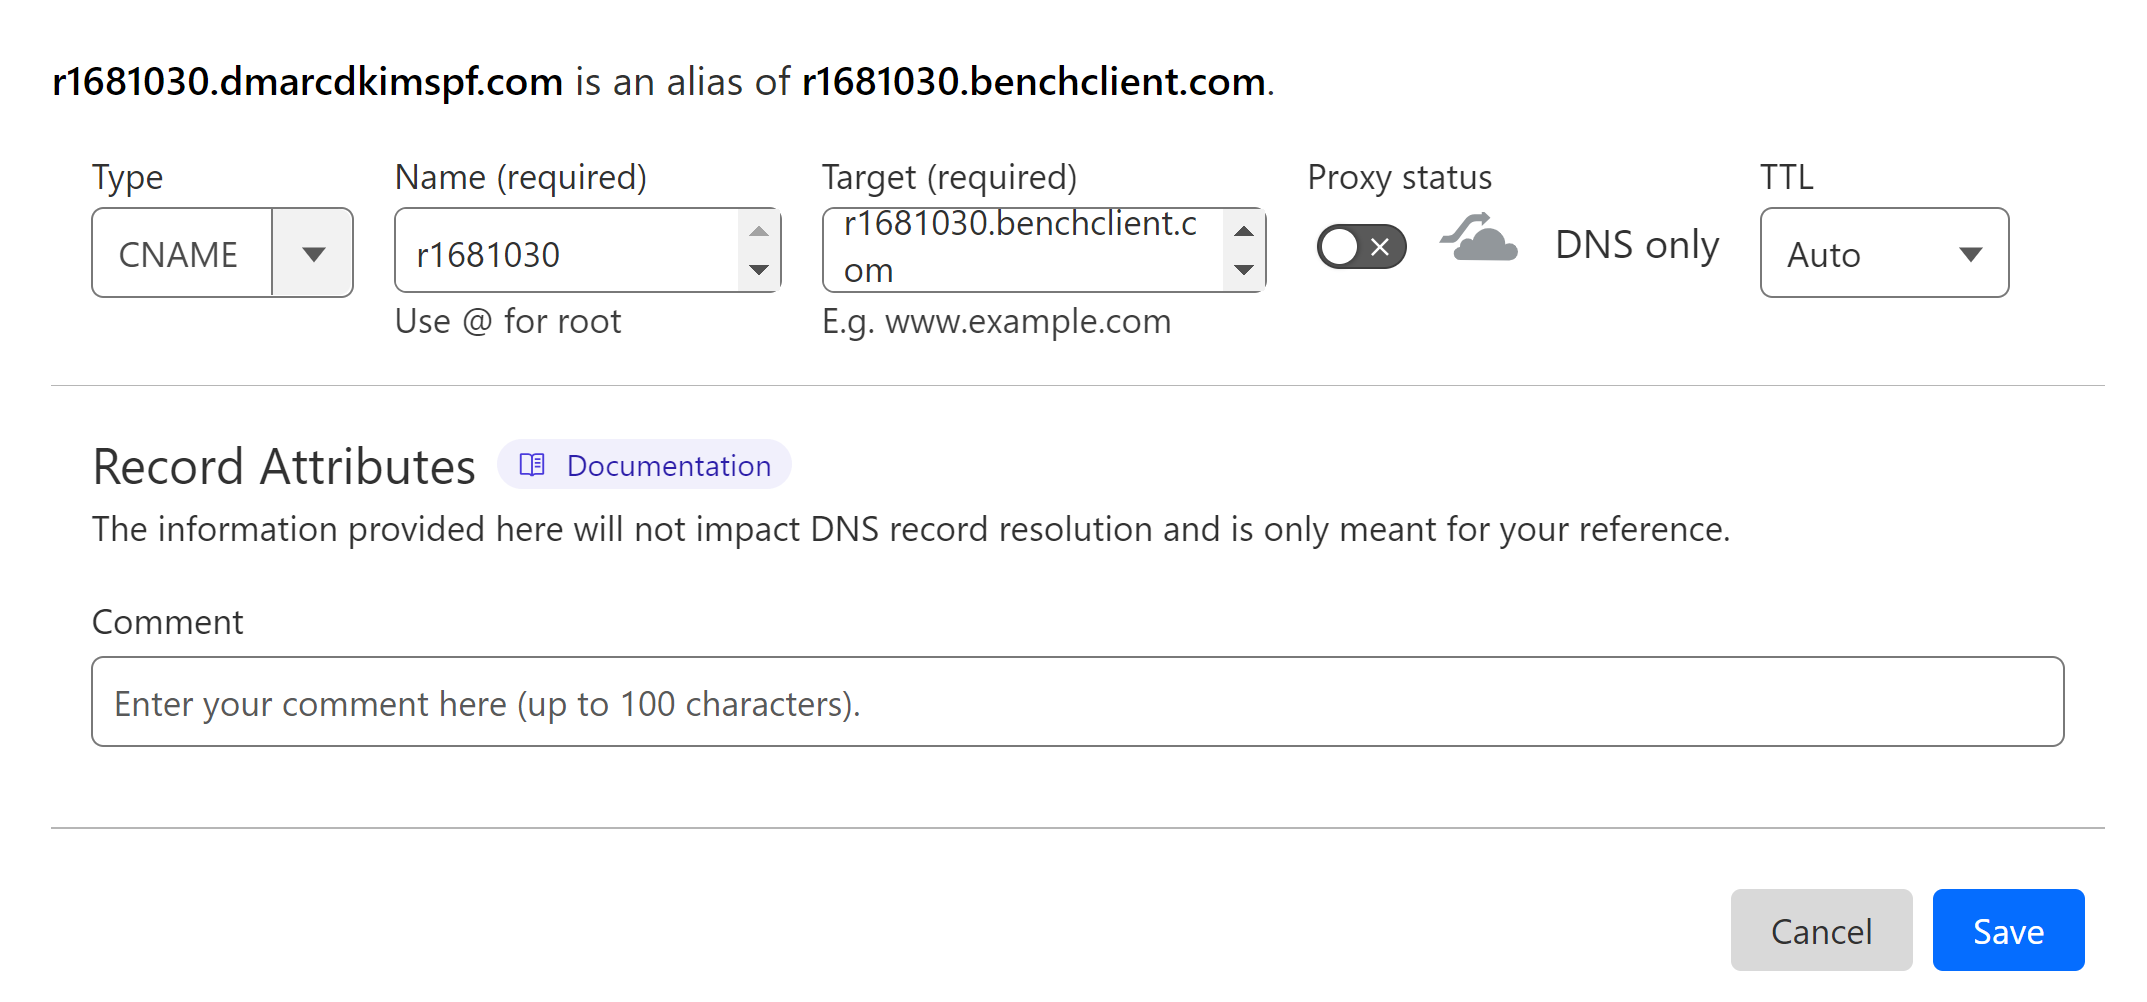
NOTE: You can not add more than one SPF record to a DNS provider. It will result in one of the SPFs to stop working.
Add Benchmark Email DMARC (TXT) Record:
Usually, the DMARC value provided by email delivery services is not configured to provide the required security to your emails. It doesn't have the destinations for DMARC reports and without the reports, you cannot decide further actions for a strict policy.
Moreover, the p=none value is solely for the monitoring purpose and doesn't fulfill the purpose of DMARC.
That's where DmarcDkim.com comes to help. You can use our DMARC tool to generate an effective DMARC value with actionable insights from the reports. Consider signing up to have access to the reports dashboard.
Open the DMARC Check Tool, write the domain name, and click Check.
-
Next, you'll get a suggested value. Add it to your DNS console.
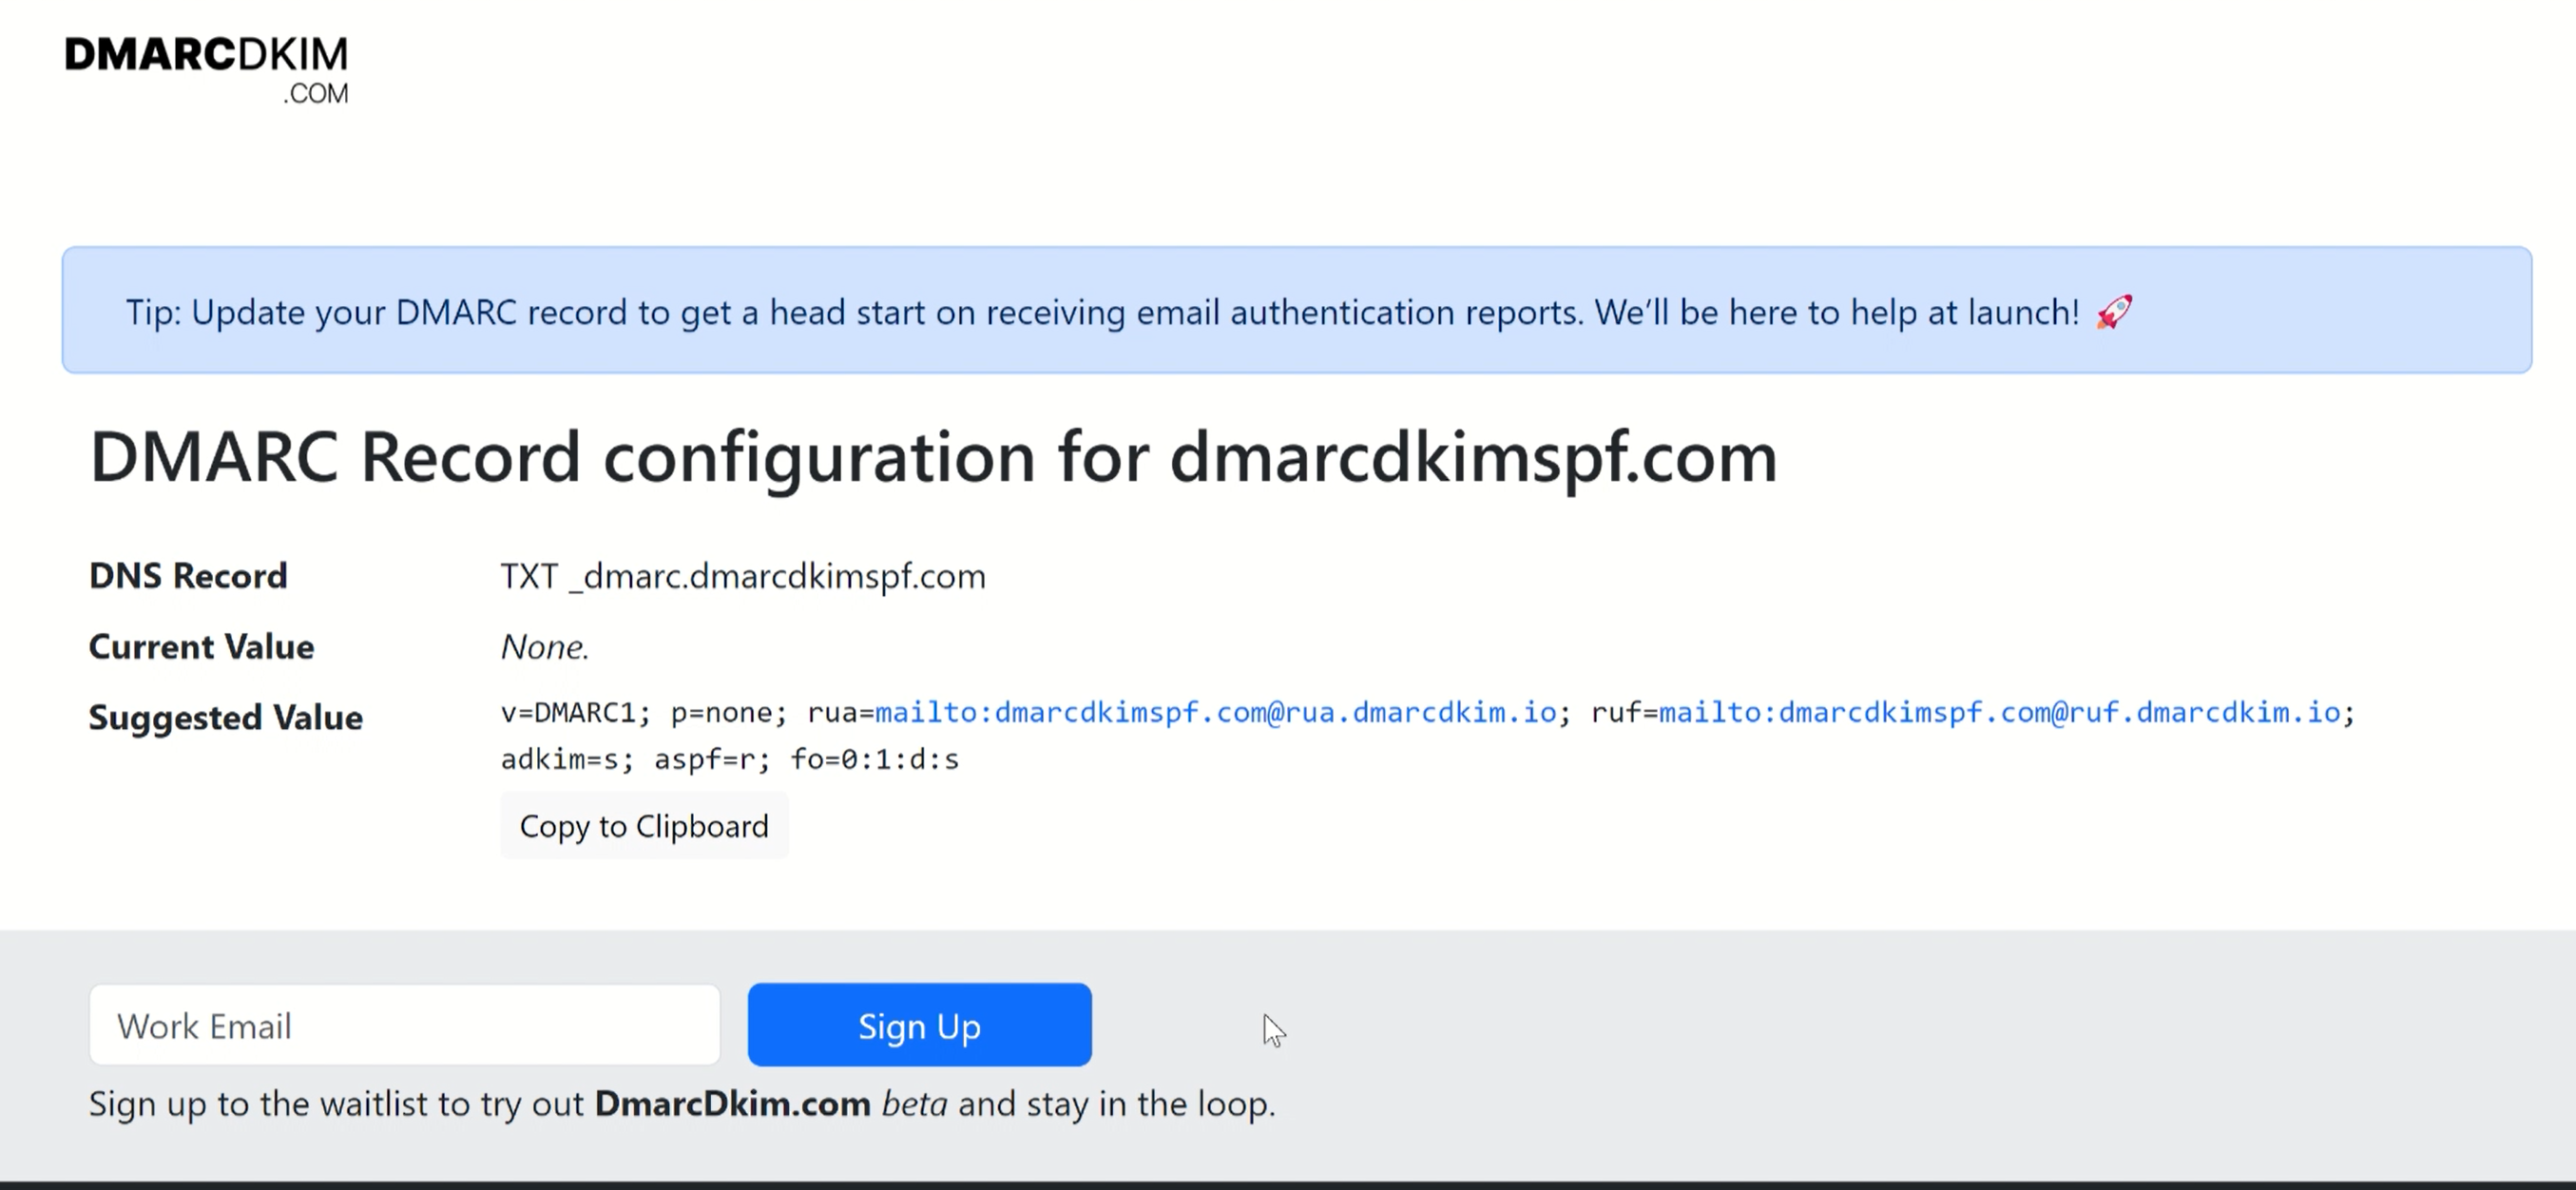
IMPORTANT: Replace the "adkim=s" with "adkim=r" in the suggested value because Benchmark has specified a relaxed mode for DKIM and SPF. ('r' means relax mode and 's' means strict mode.) If you keep a strict mode for DKIM, the record will not get verified by Benchmark Mail.
Add the DNS Record (record name) and the Suggested value (with adkim=r) to your DNS provider and save the record.
Verify DNS Records:
-
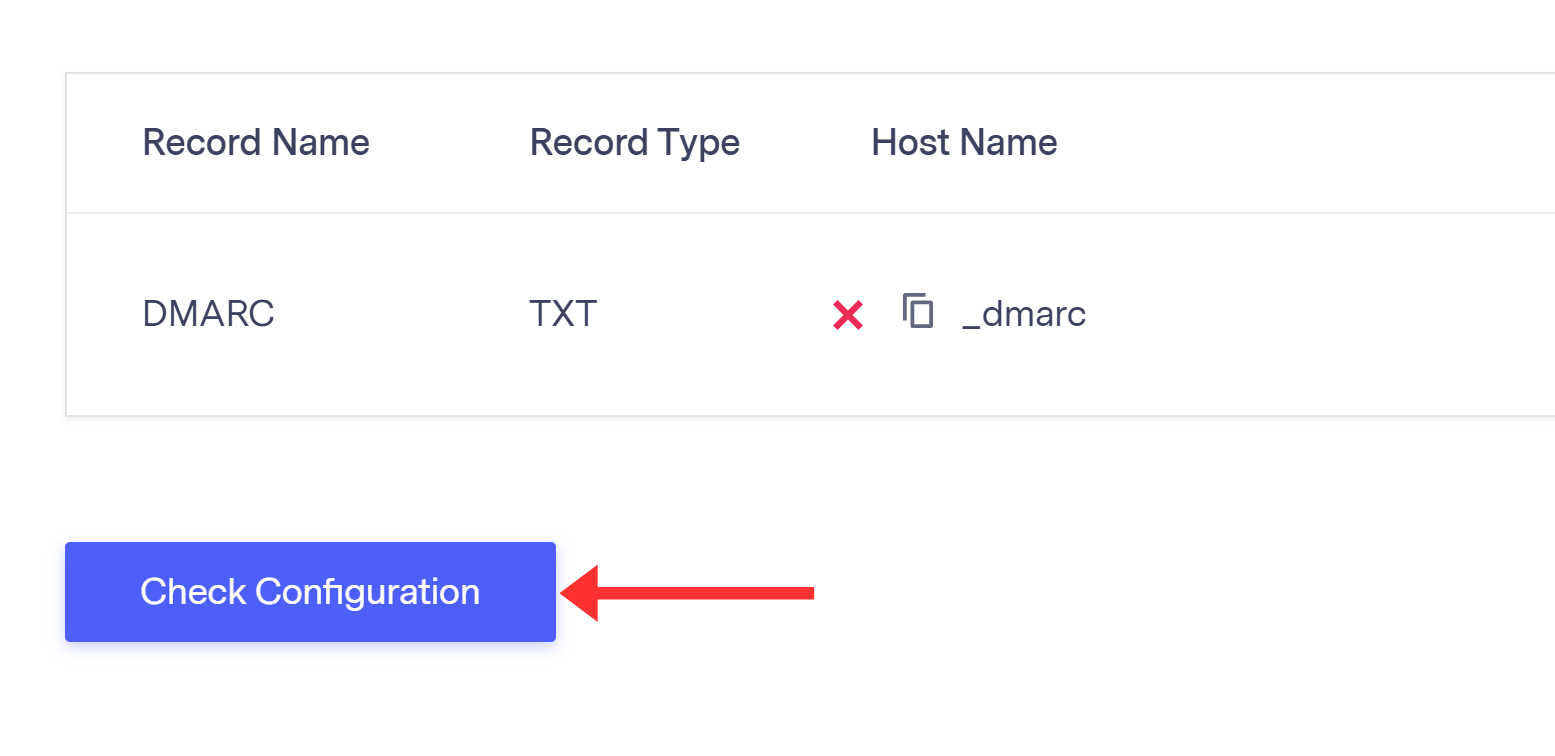
After adding all records, go back to the DNS record page on Benchmark and click Check Configuration at the bottom.
-
If the DNS setup was successful, you should see green tick marks with each record.
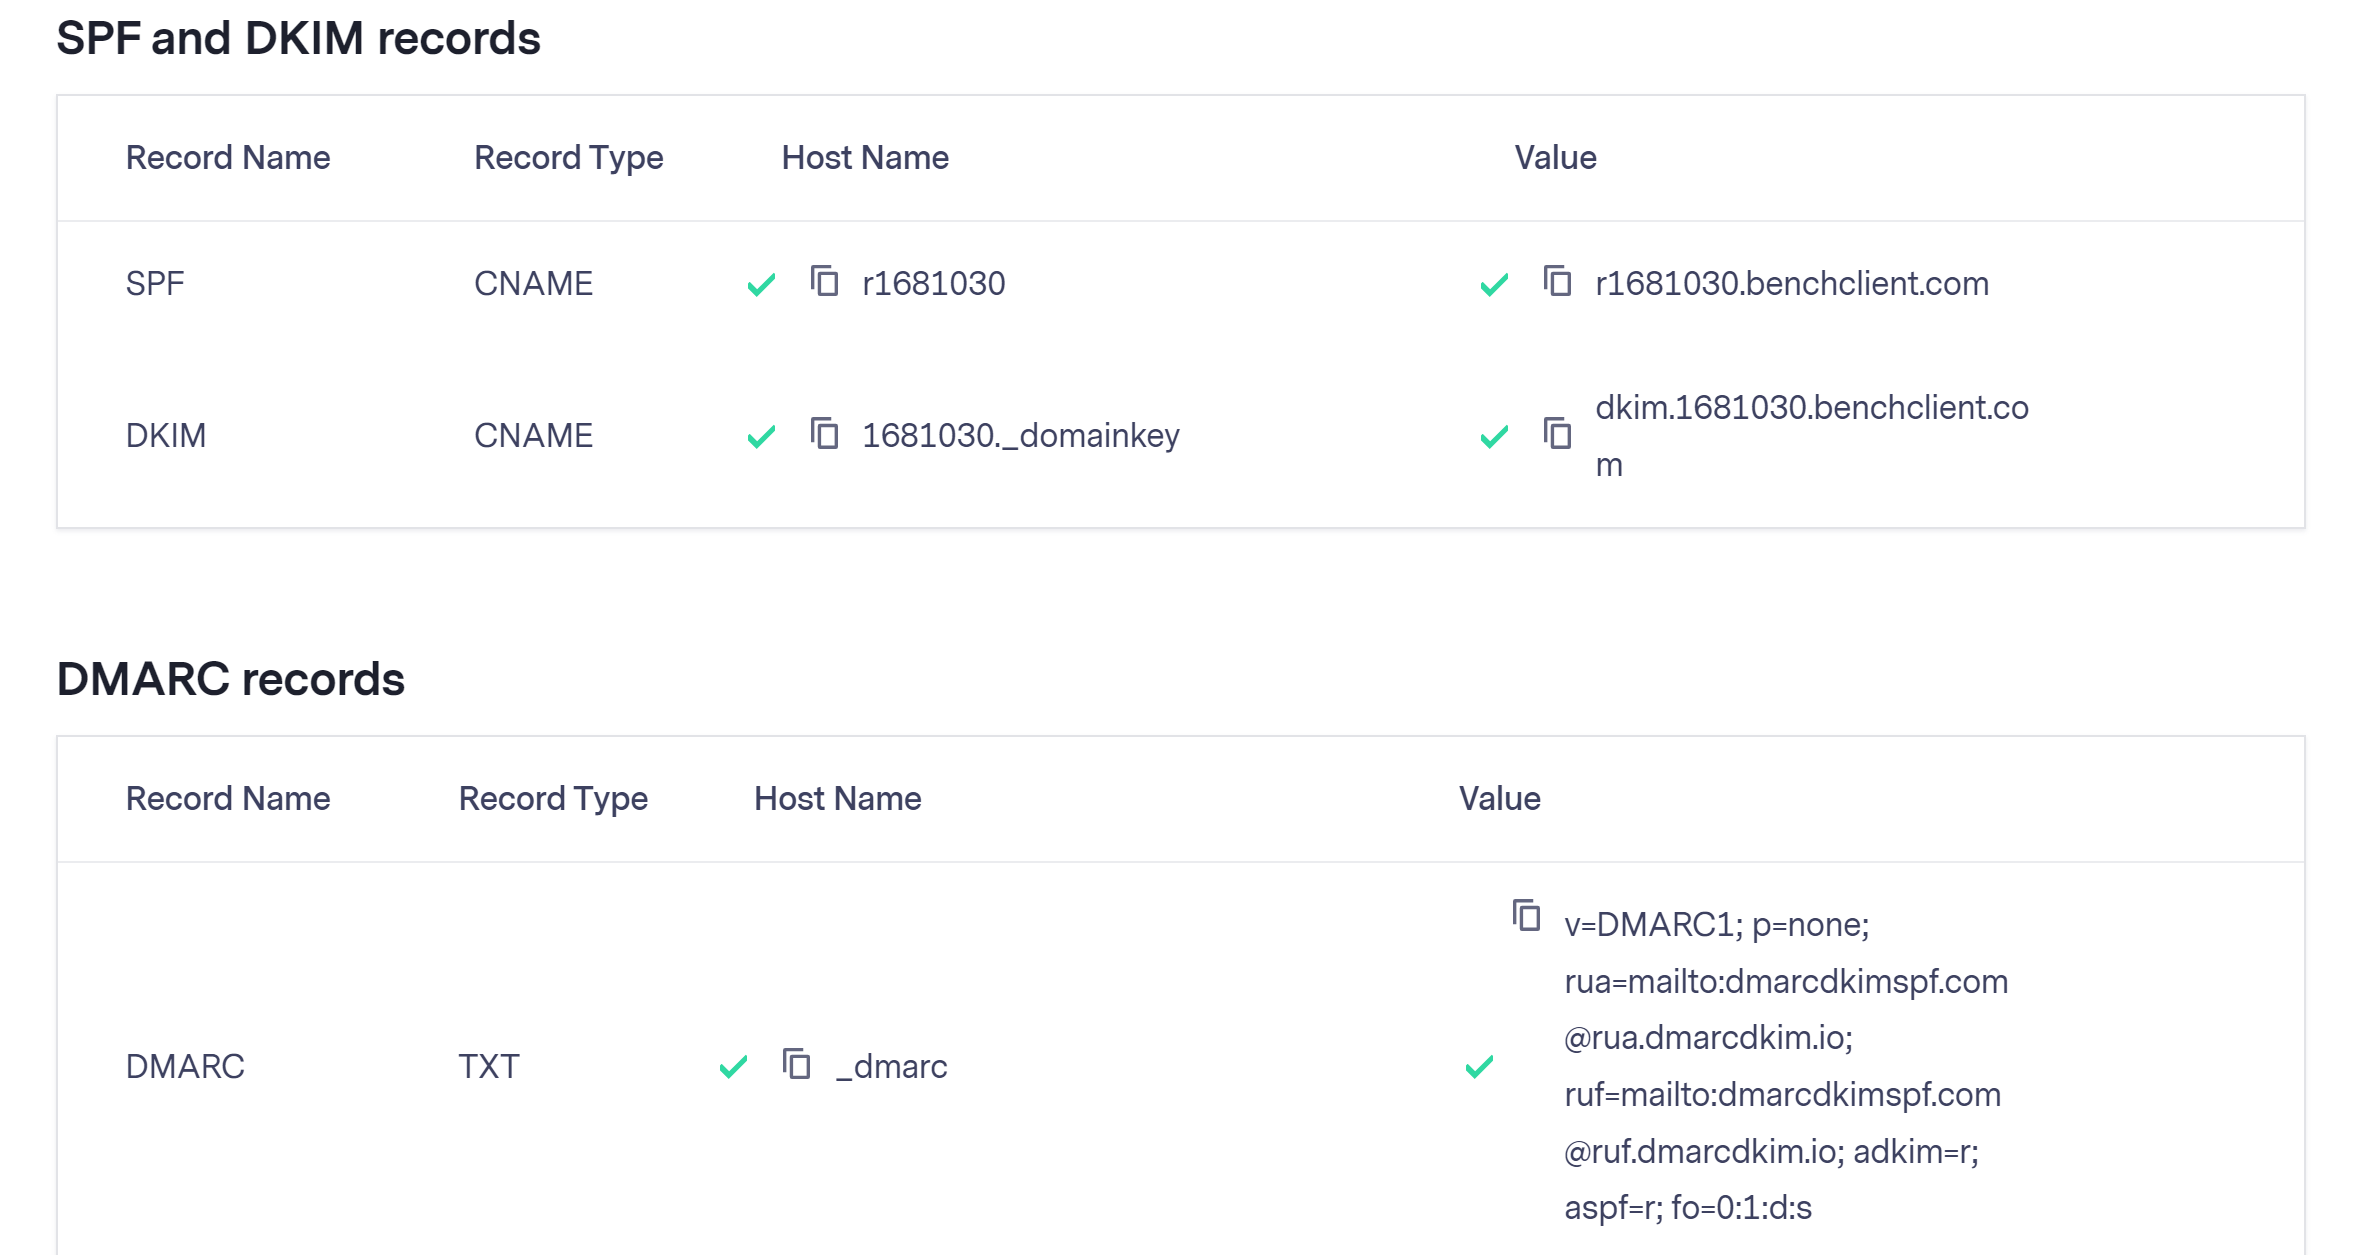
If you don't see the green tick marks, it means the DNS records were not added correctly and there is a misconfiguration in the DNS setup. To troubleshoot Domain authentication issues, hire a DmarcDkim.com expert to solve this issue.
Check domain and follow the instructions to nail down your DMARC configuration.
No expert knowledge needed!


