Sparkpost DMARC, DKIM, SPF DNS Verification - Sending Domain & Bounce Domain Records
Check your domain for DMARC, DKIM, SPF and MX records. Get a free report.
How to Setup Sparkpost DMARC, DKIM, SPF and Bounce Domain Records?
Sparkpost gives you the DKIM Sending record, CNAME tracking domain, and bounce domain record to authenticate your email domain. You can configure this domain name setup in the Domains tab of your Sparkpost account.
This guide post will walk you through the step-by-step process of setting up TXT and CNAME DNS records to your DNS provider. For this guide, we will be using Cloudflare as our DNS provider but you can add these records to any DNS provider you use.
Verifying Sending Domain in Sparkpost:
-
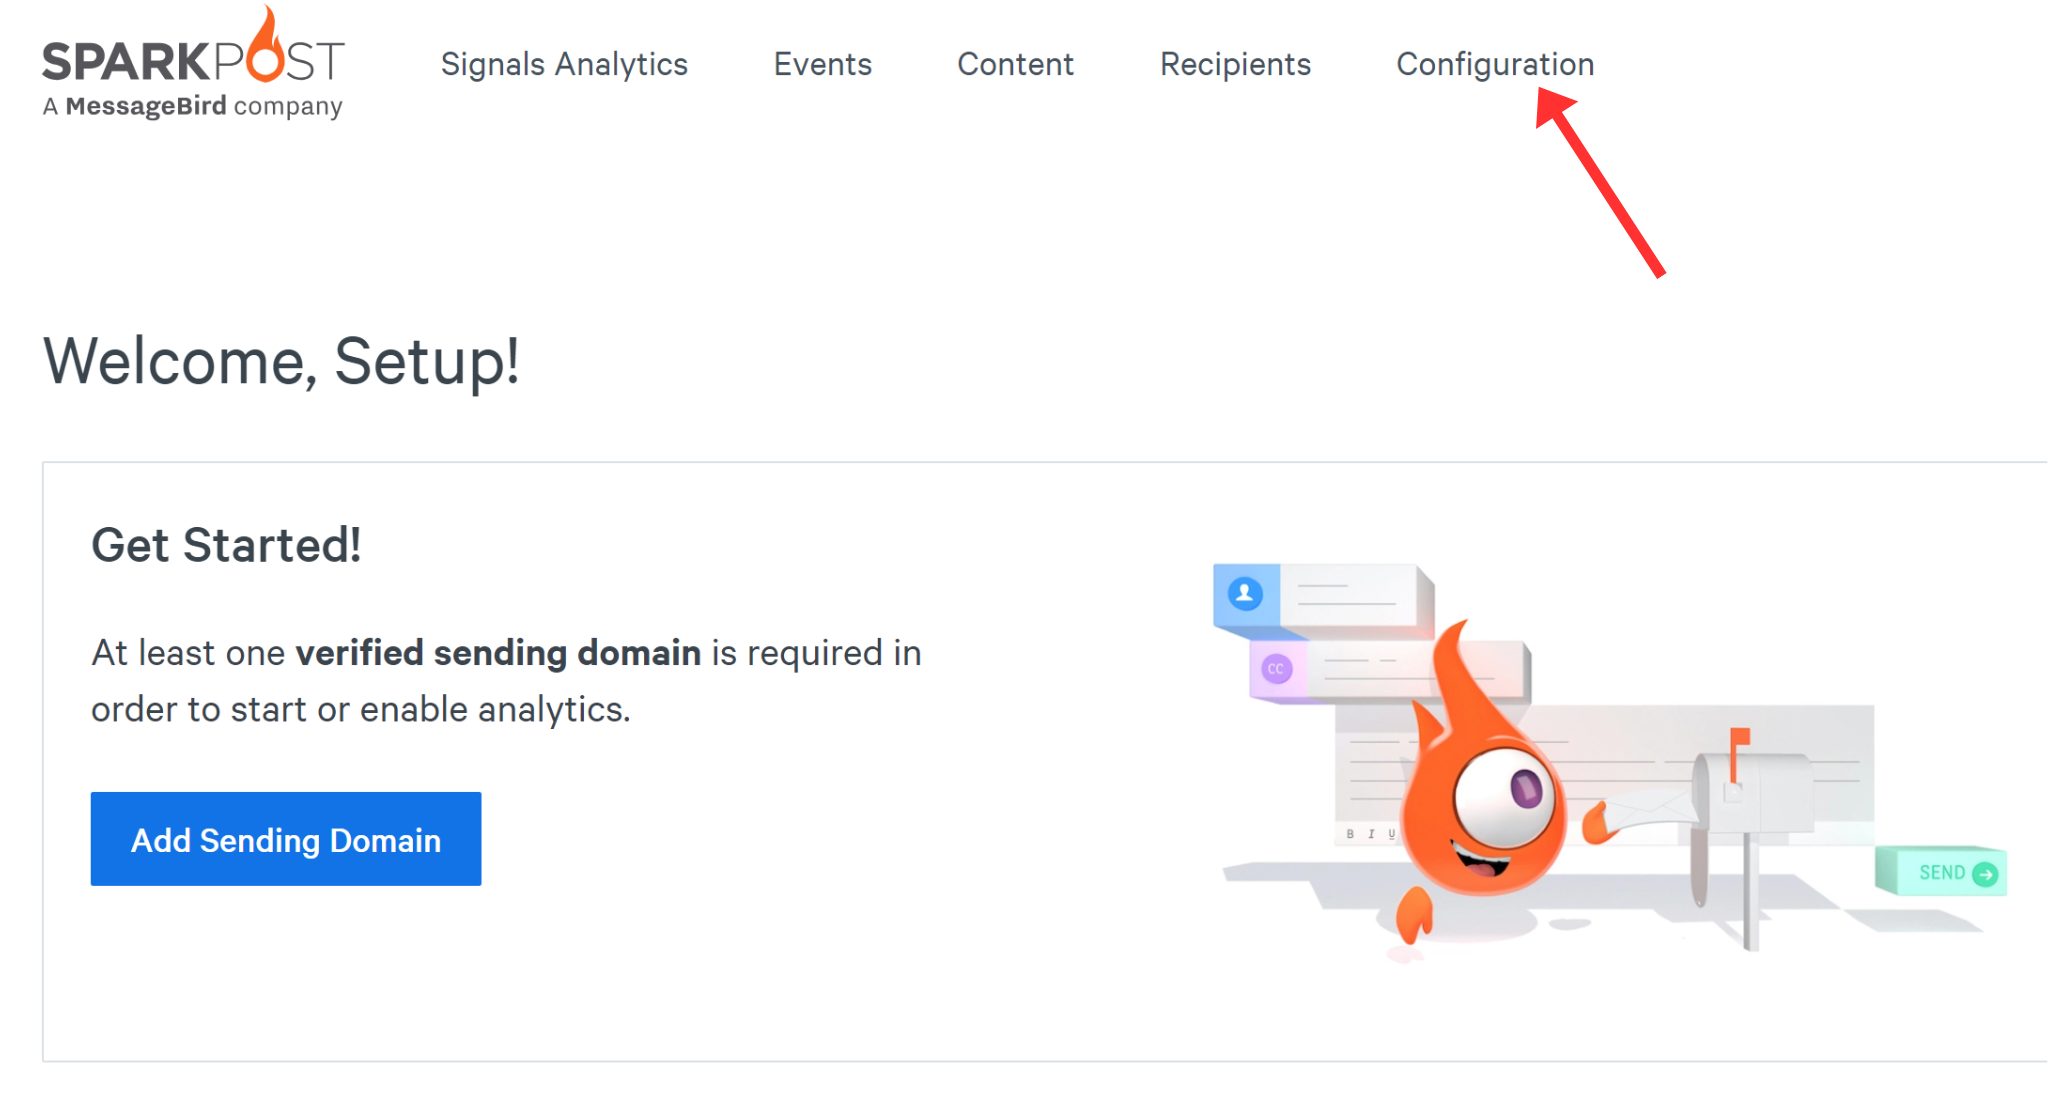
On the Sparkpost dashboard, click "Configuration" in the top menu bar.
-
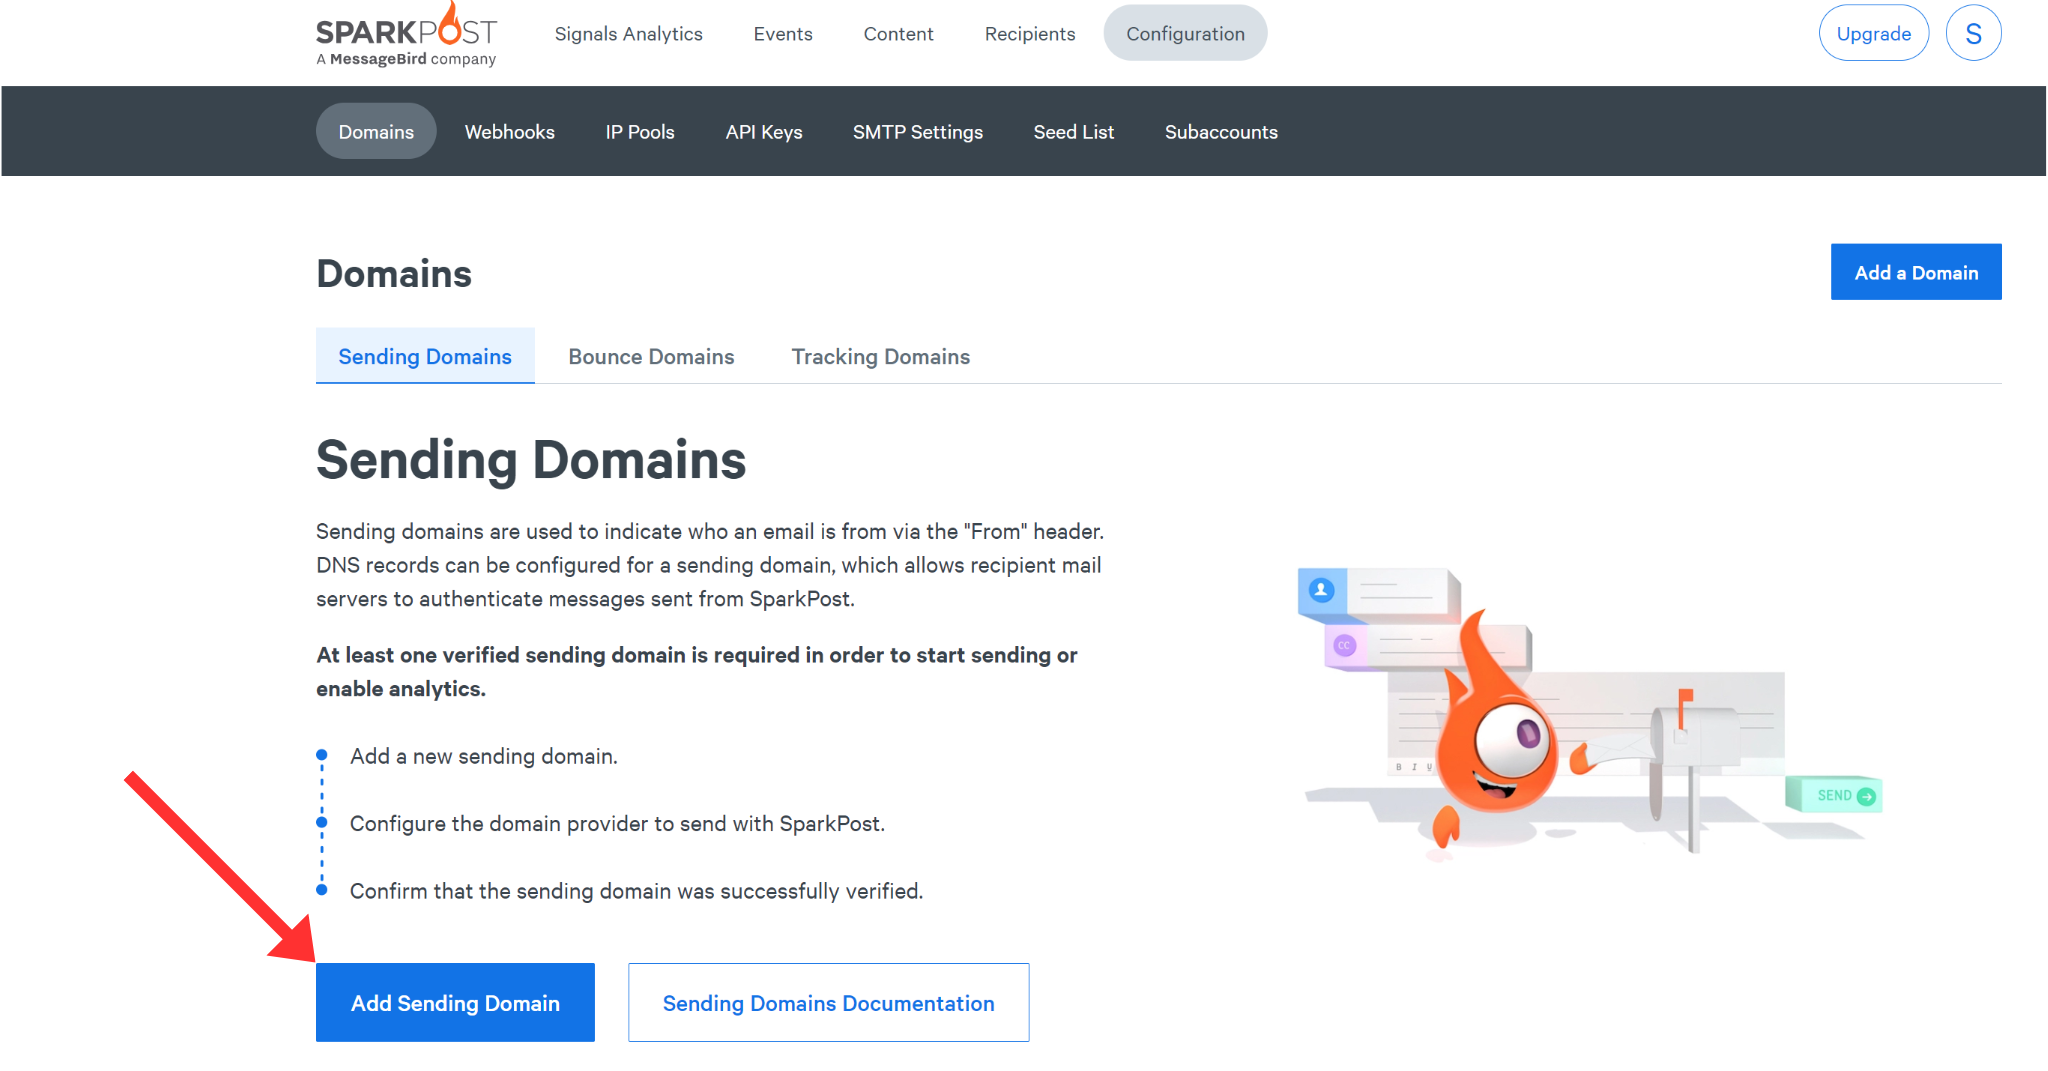
Click the "Add Sending Domain" button in the Domains tab.
-
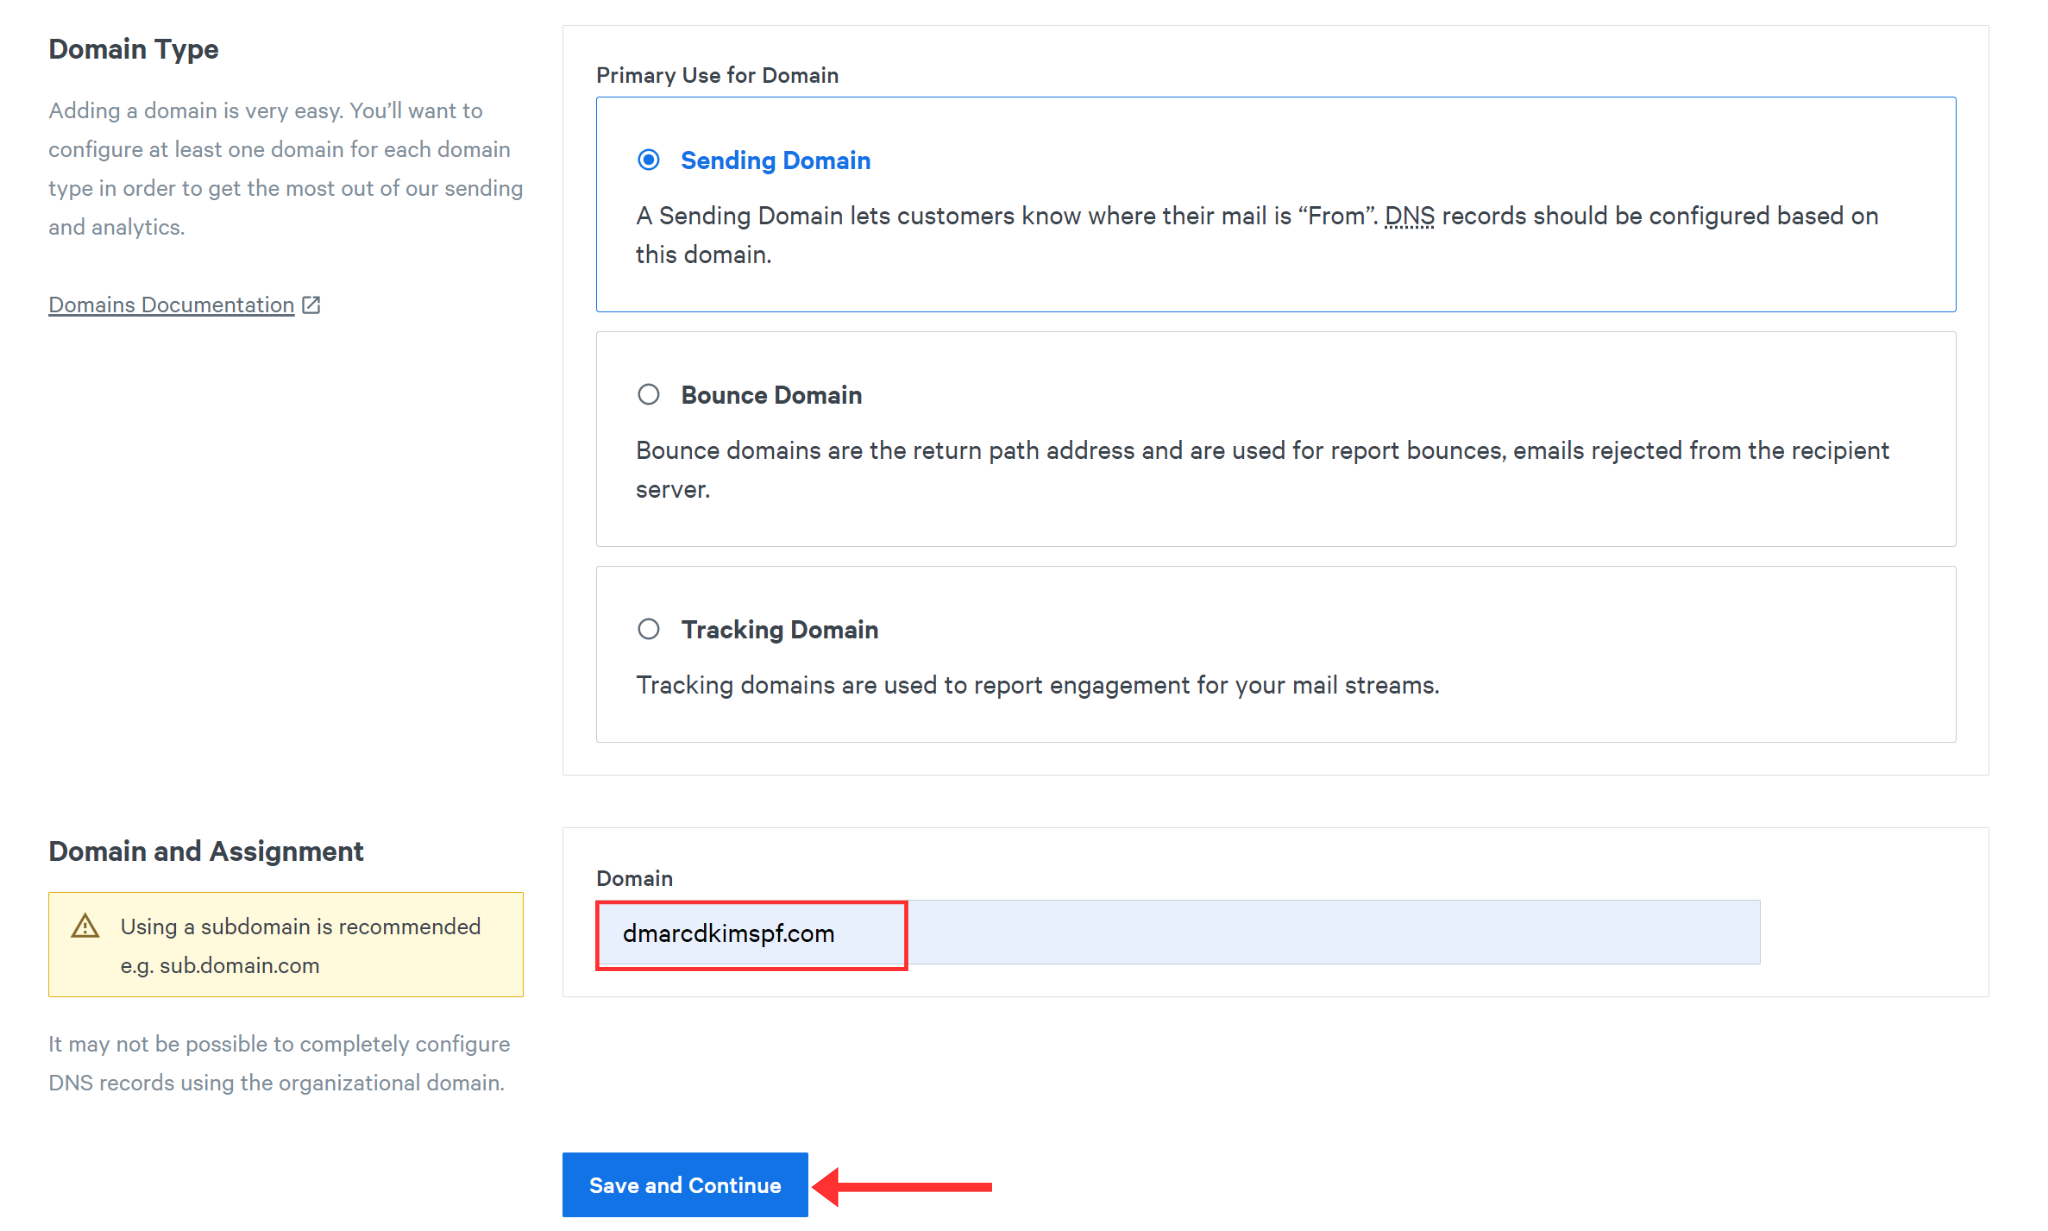
On the next page, scroll down, write your sending domain name, and click "Save and Continue."
-
On the pop-up window, select NO under "Verify domain for bounce for strict alignment" and click Save and Continue.
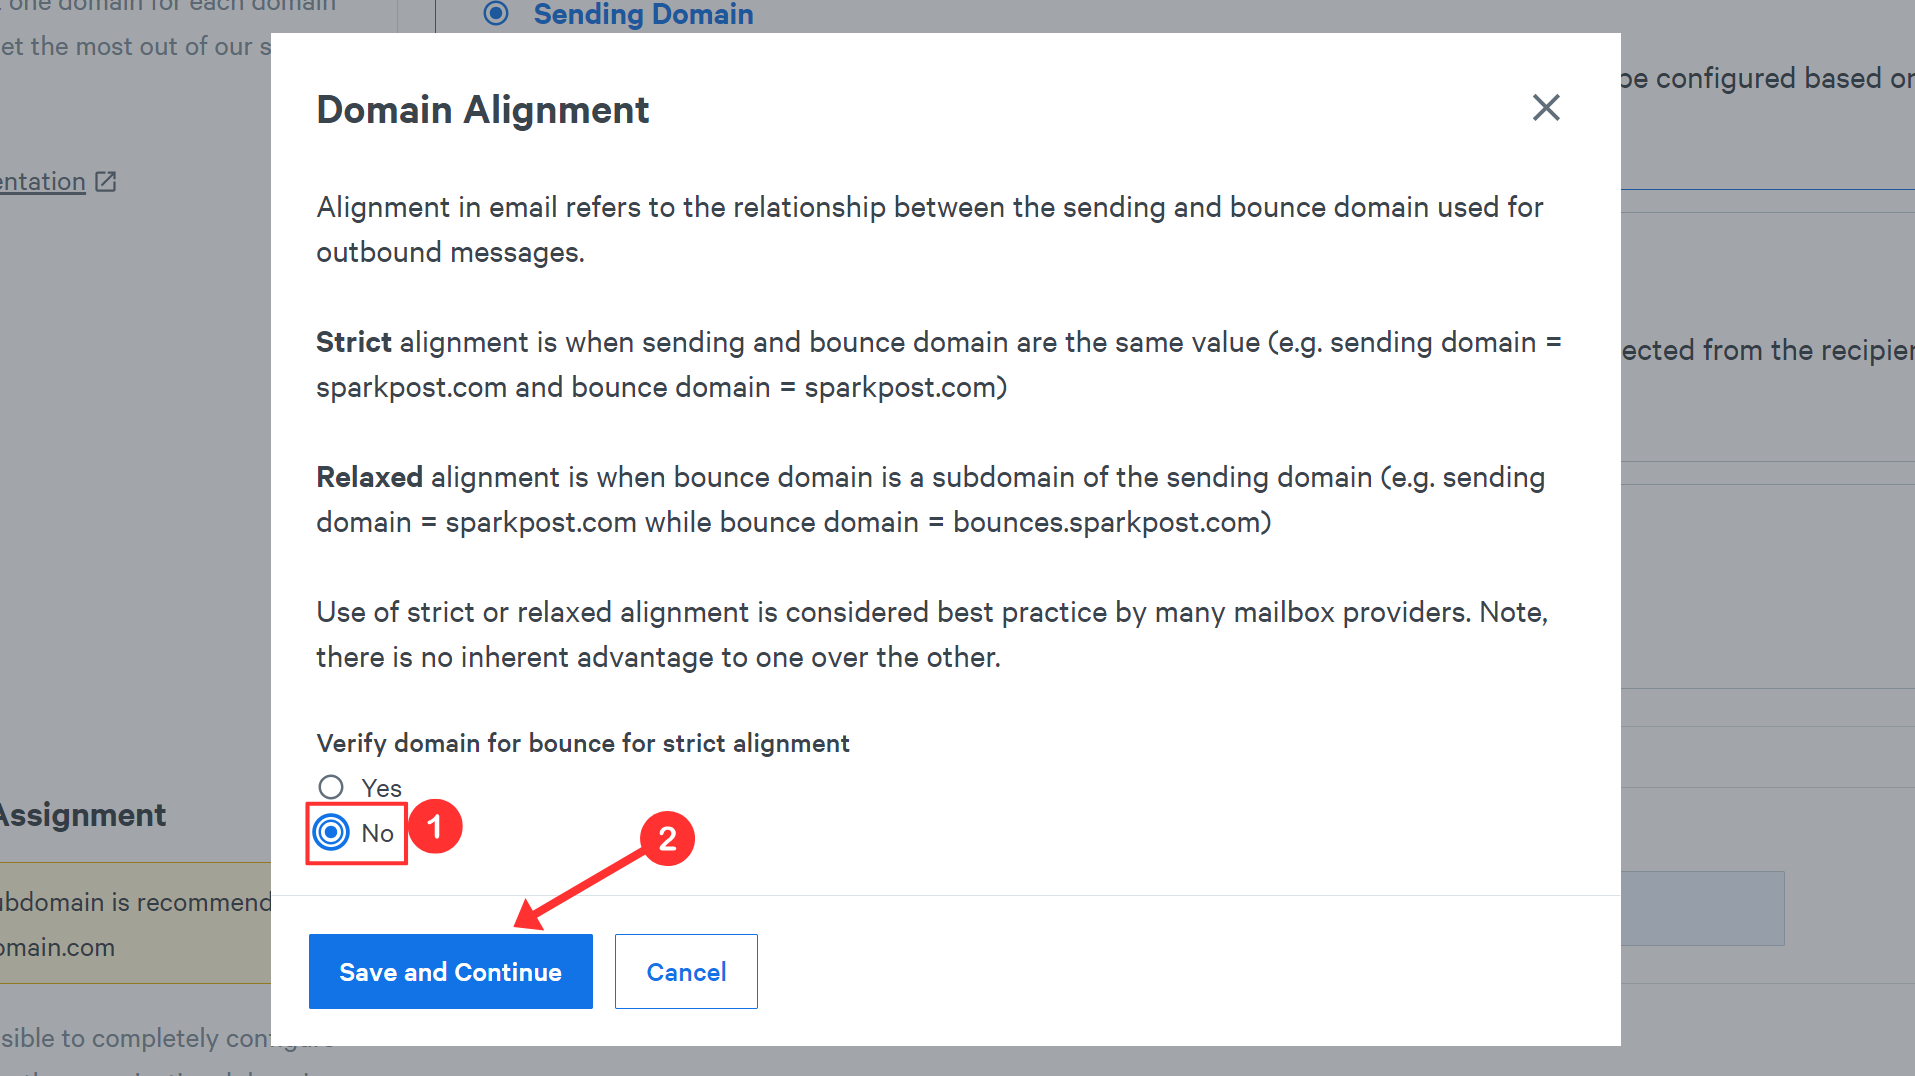
Strict alignment means the sending domain and bounce domain are the same. If you select this option, you will not be able to receive emails on your root domain, as the emails will be going to SparkPost. Relaxed alignment means sending and bounce domains are different. If you choose this option, the emails will go to your domain instead of Sparkost.
It will redirect you to the page with the DKIM record.
-
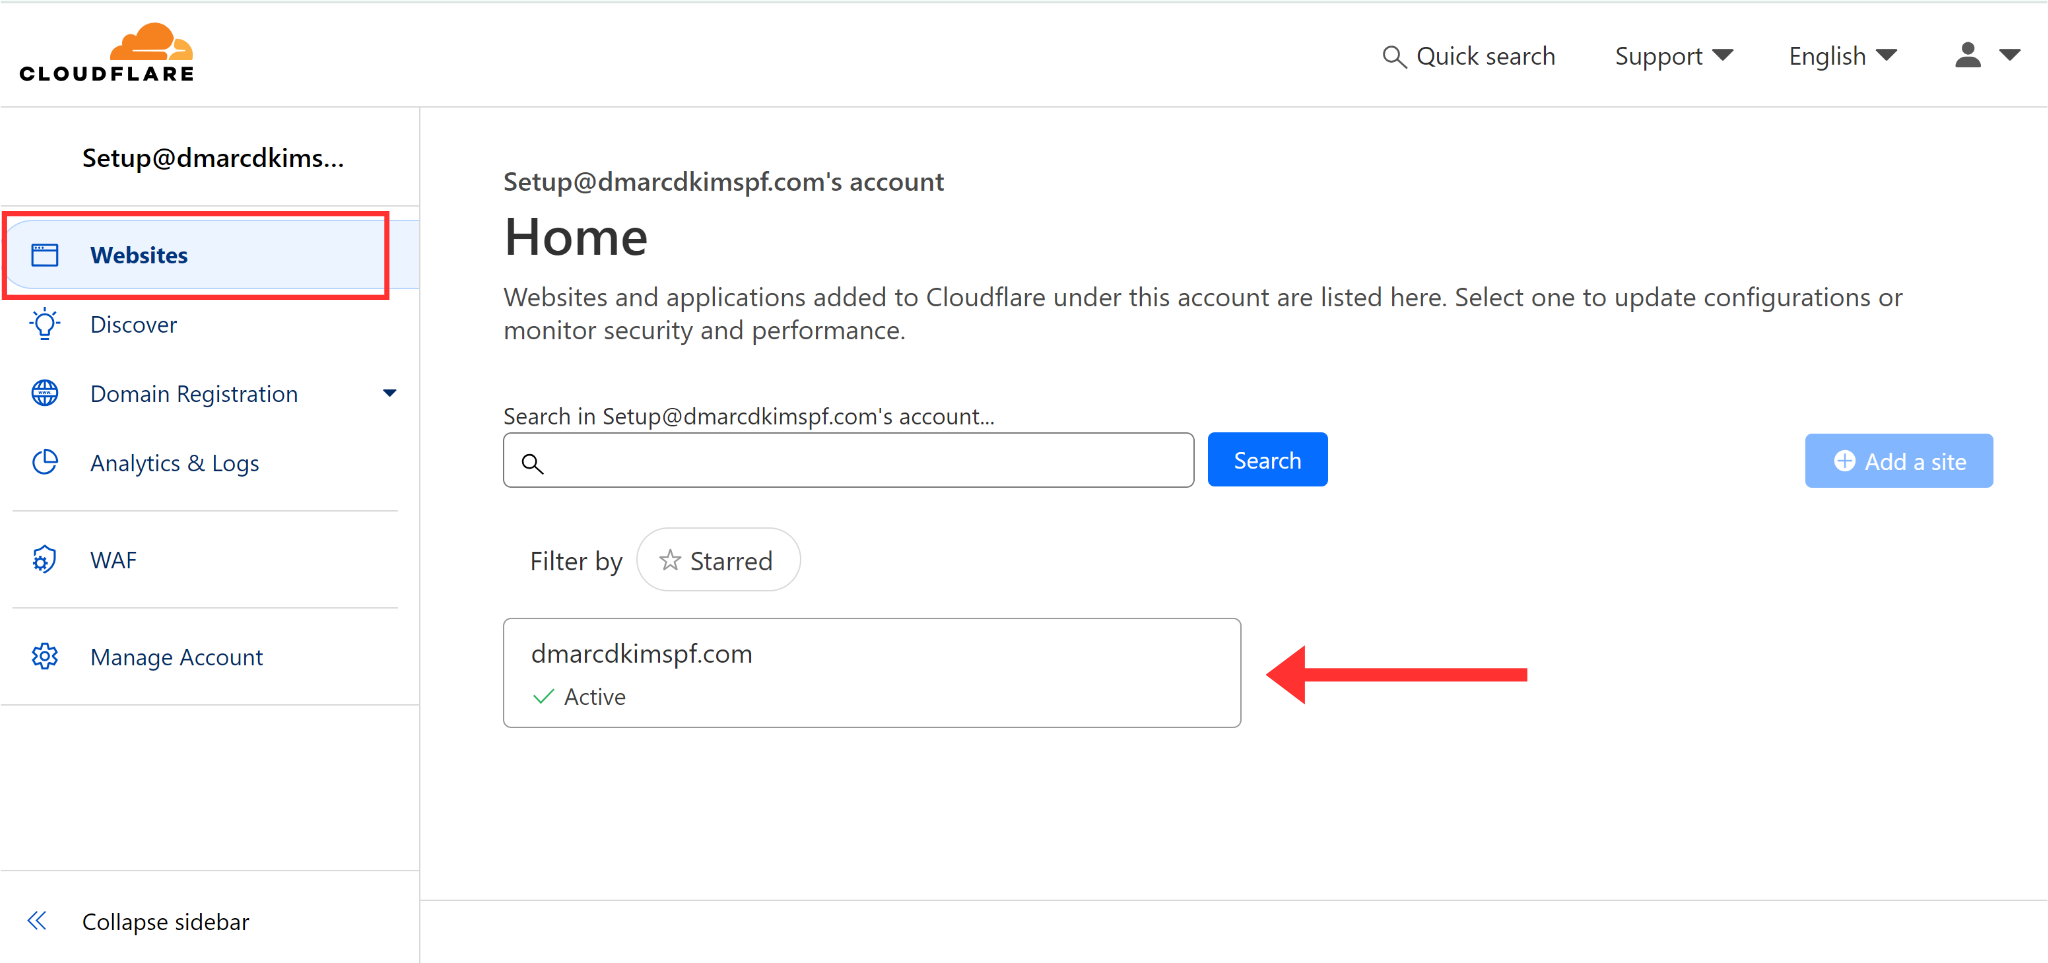
Login to your DNS provider (Cloudflare for this instance) and click on your Website.
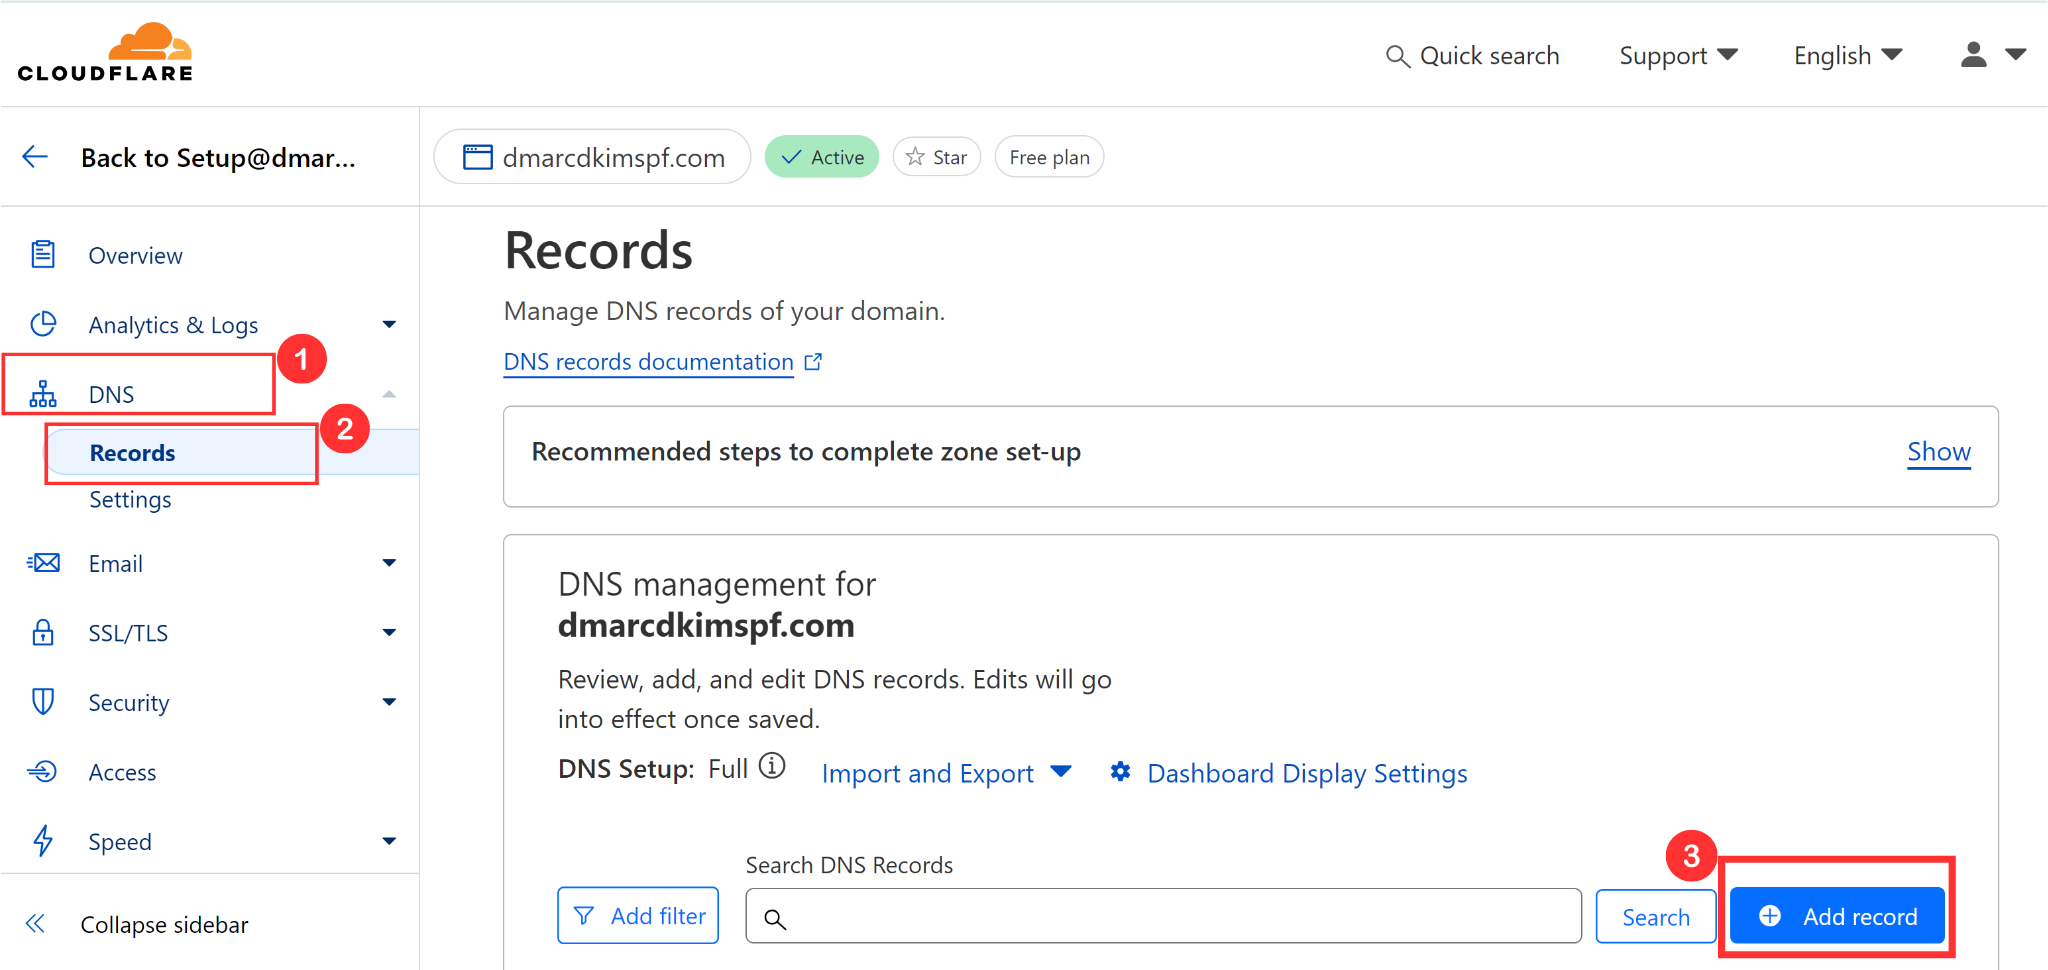
Click DNS in the left navigation menu and go to Records.
-
Click Add Record to setup a new DNS record to the dashboard.
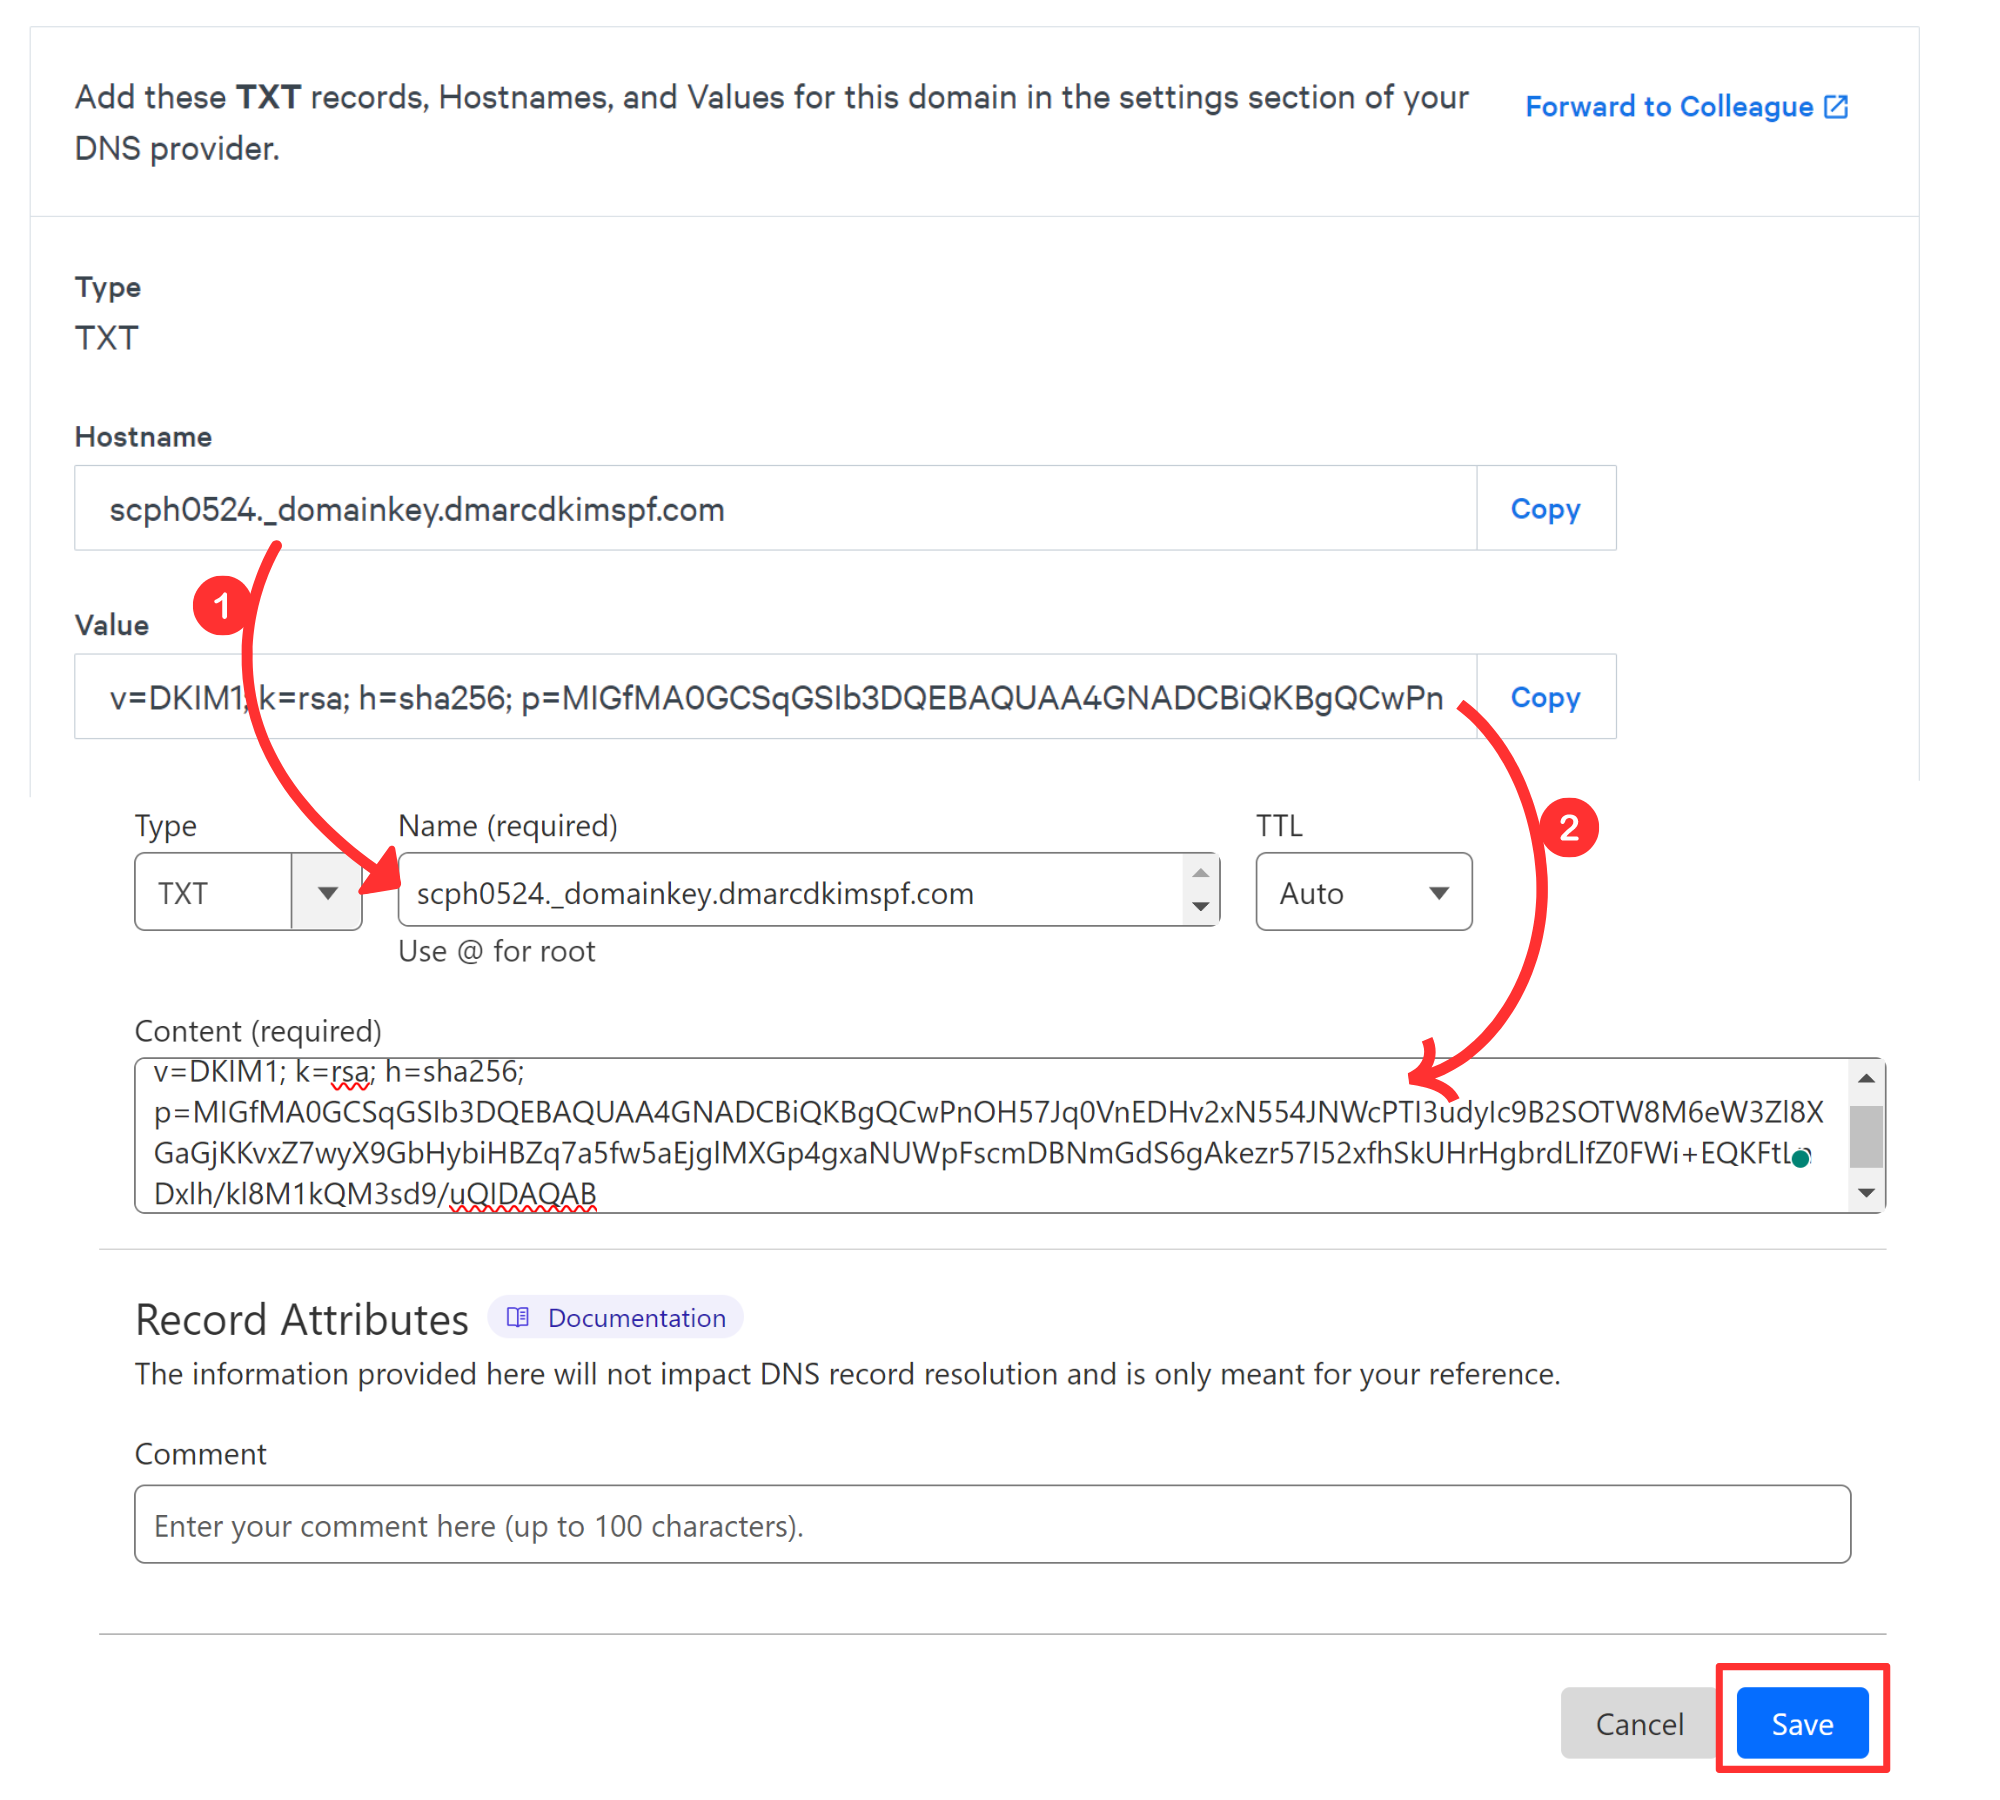
Copy the DKIM record name and value, and add it to the DNS dashboard.
-
Select type TXT and click Save.
-
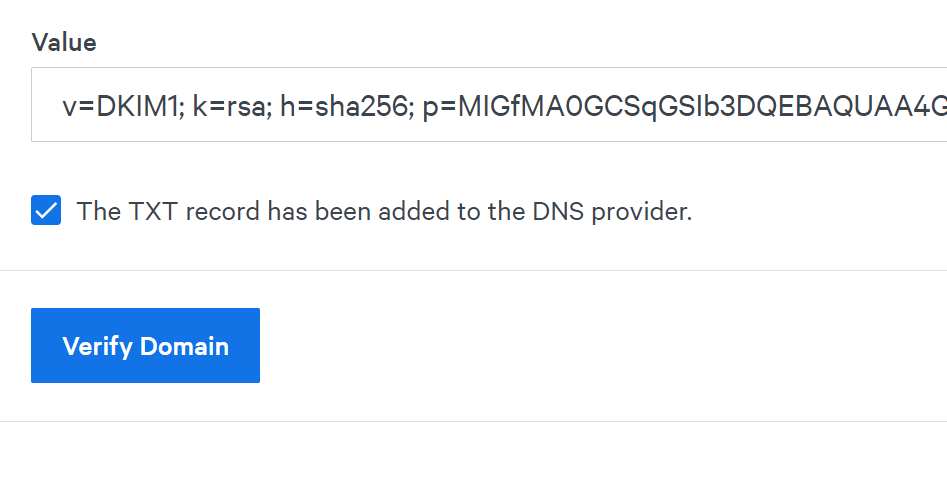
Go back to the Sparkpost page, check the box for "record has been added" and click Verify Domain.
Verifying Sparkpost Bounce Domain:
In the Domains tab, select the Bounce Domain section.
-
At the bottom of the page, click Add Bounce Domain.
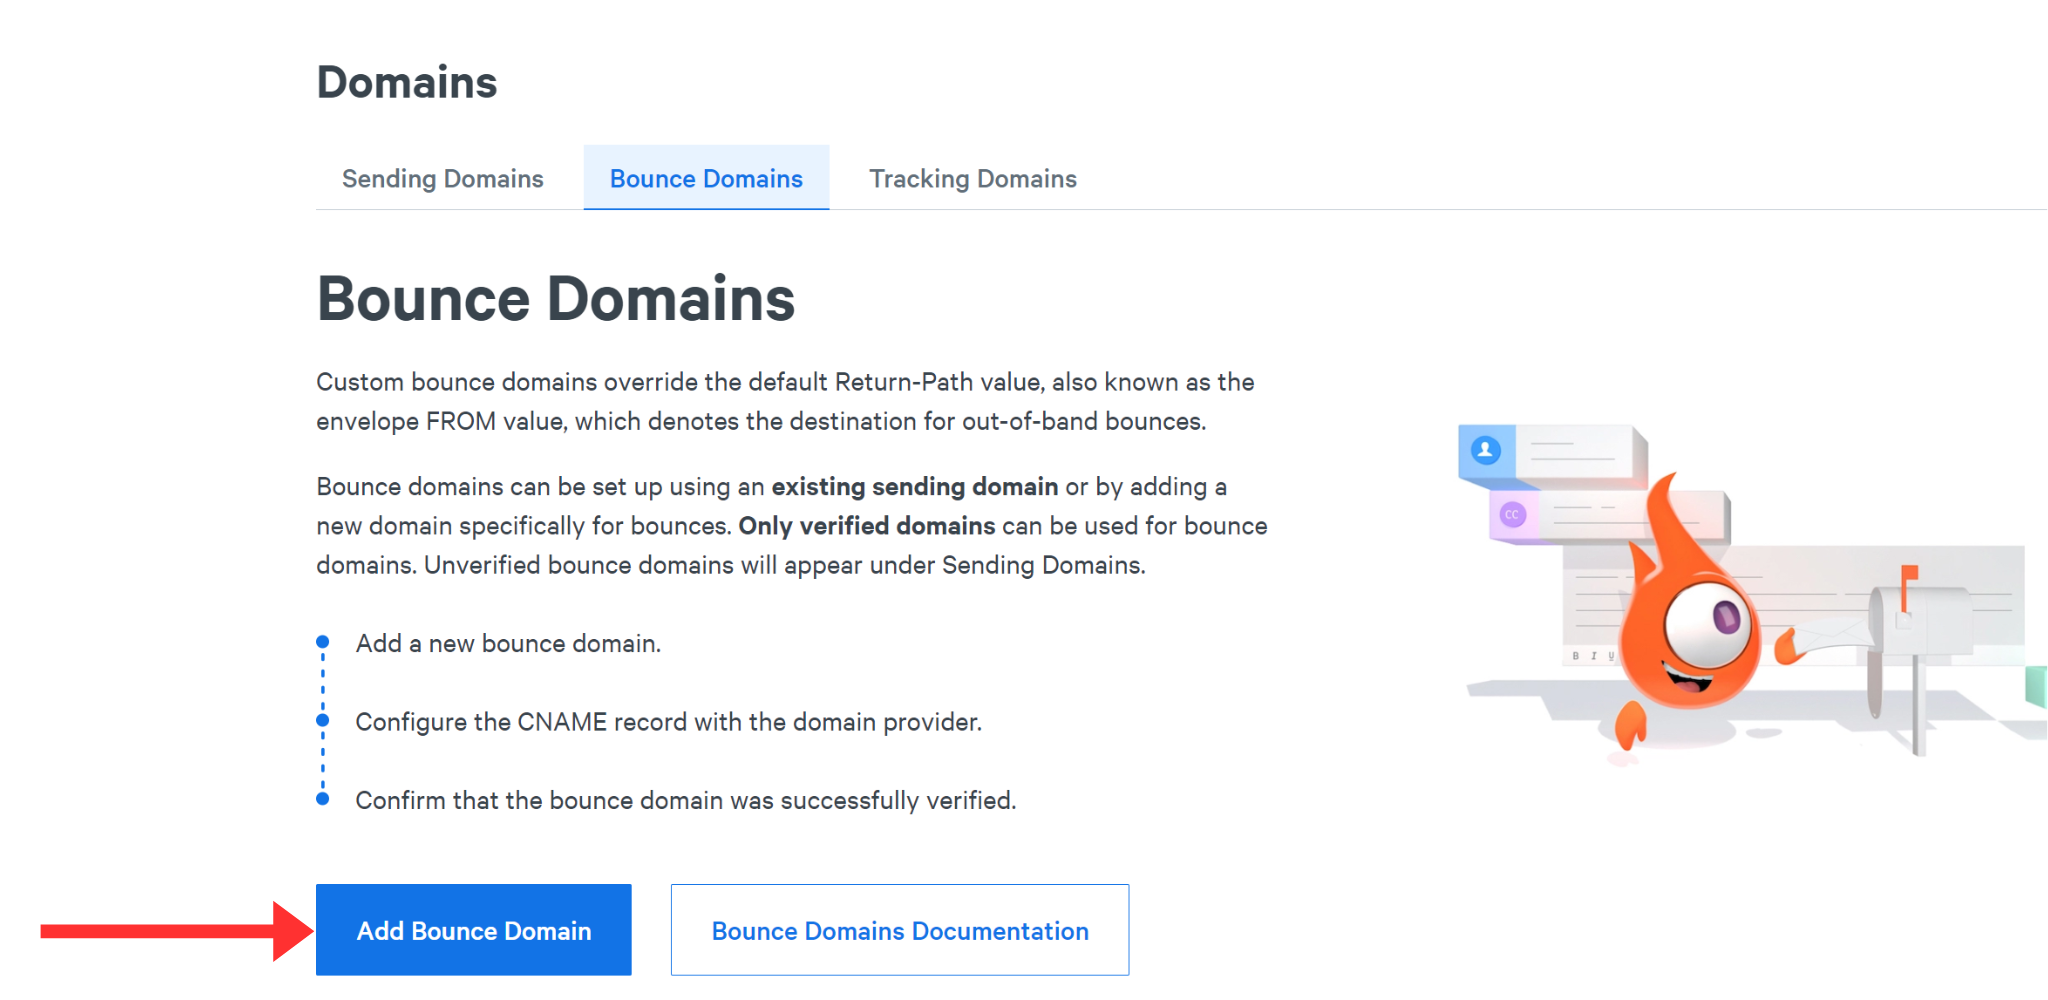
-
On the next page, scroll down to write a subdomain instead of your root domain, and click Save and Continue.
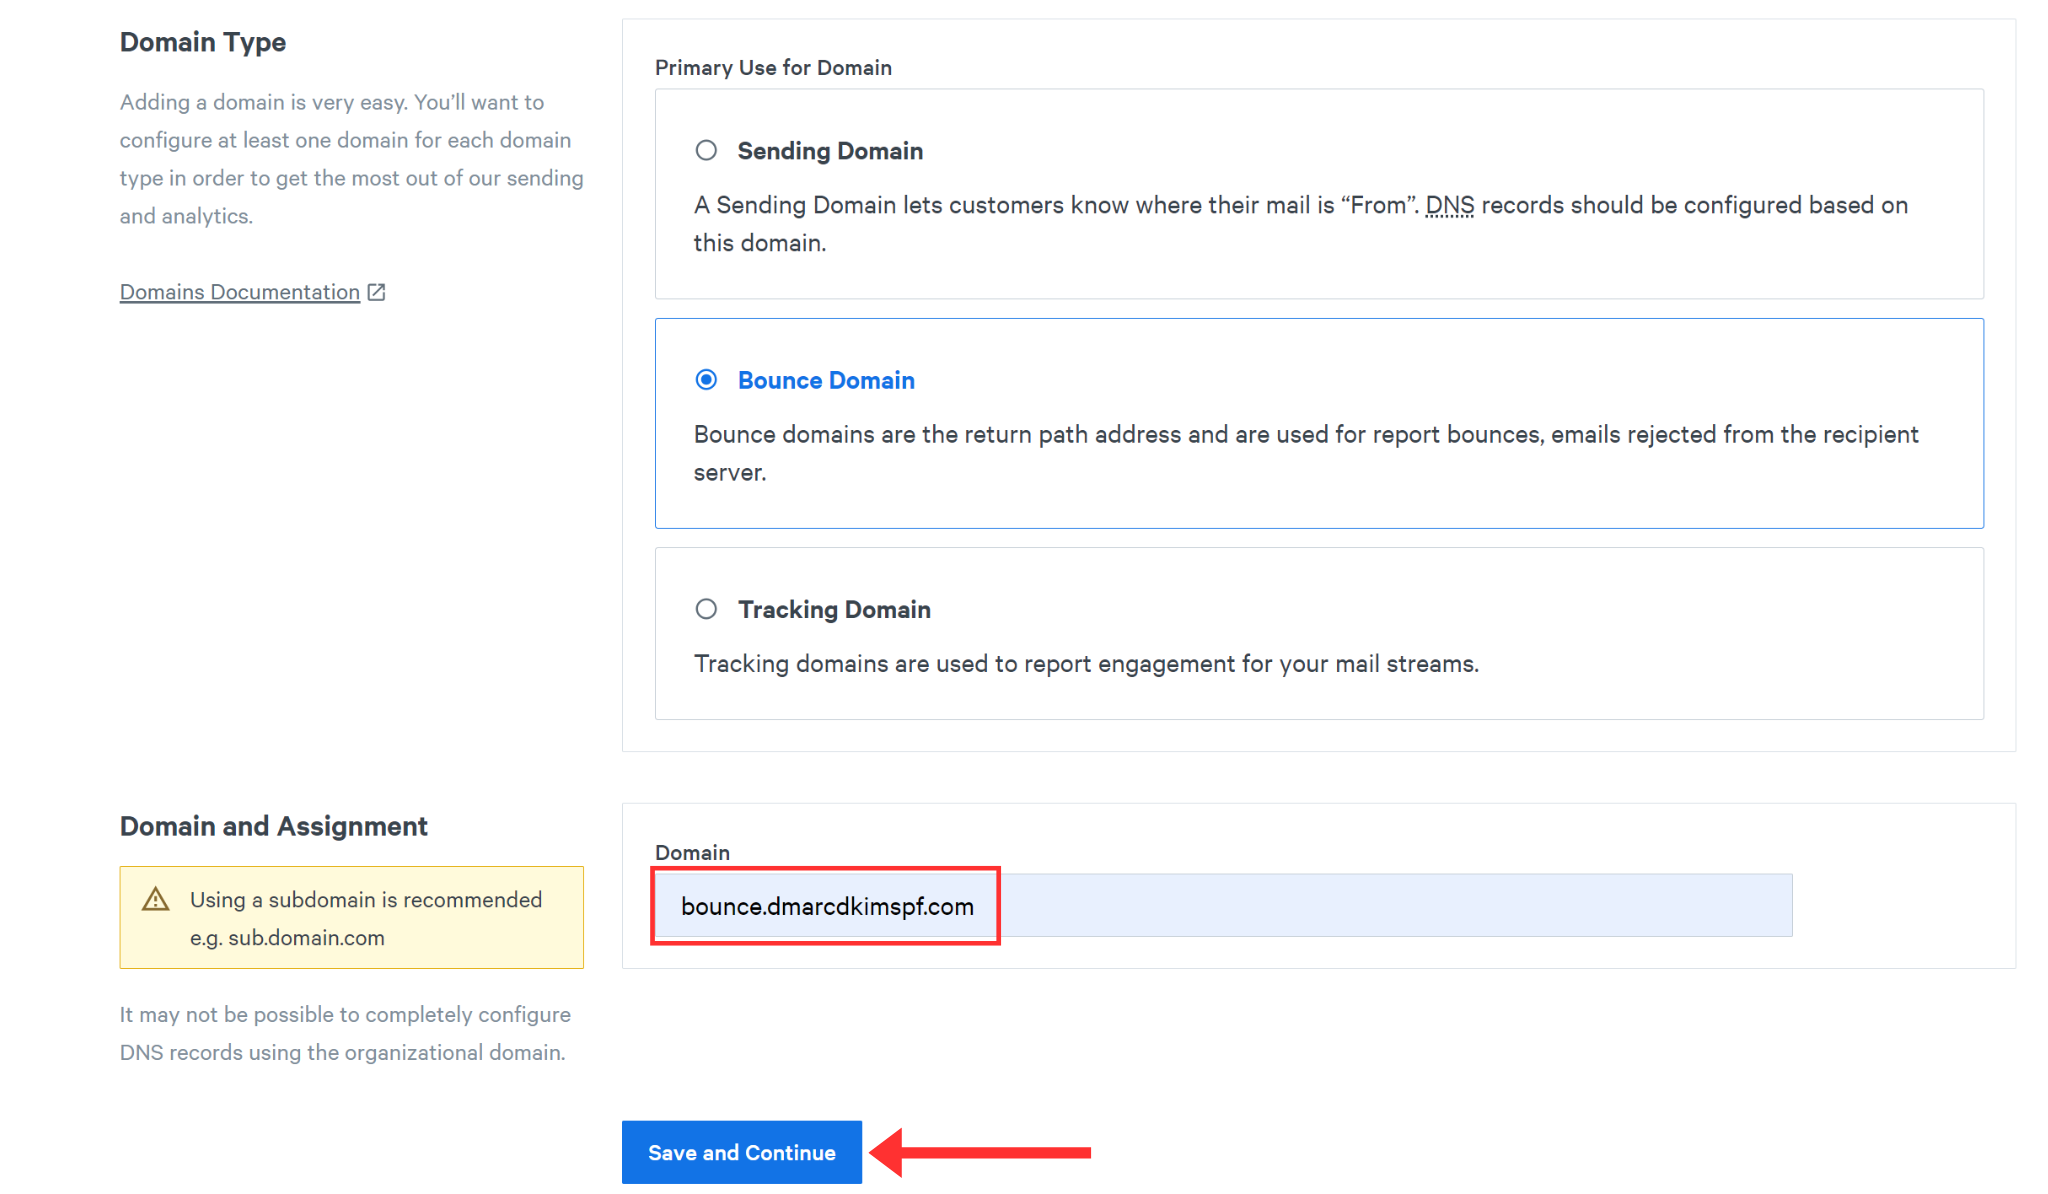
NOTE: Using a root domain as a bounce domain means you will not be able to receive any mail there, as all messages will be sent to SparkPost. Therefore, we use a subdomain by adding "bounce." before the root domain.
-
Next, you'll see a CNAME record. Add the record name and value to your DNS provider.
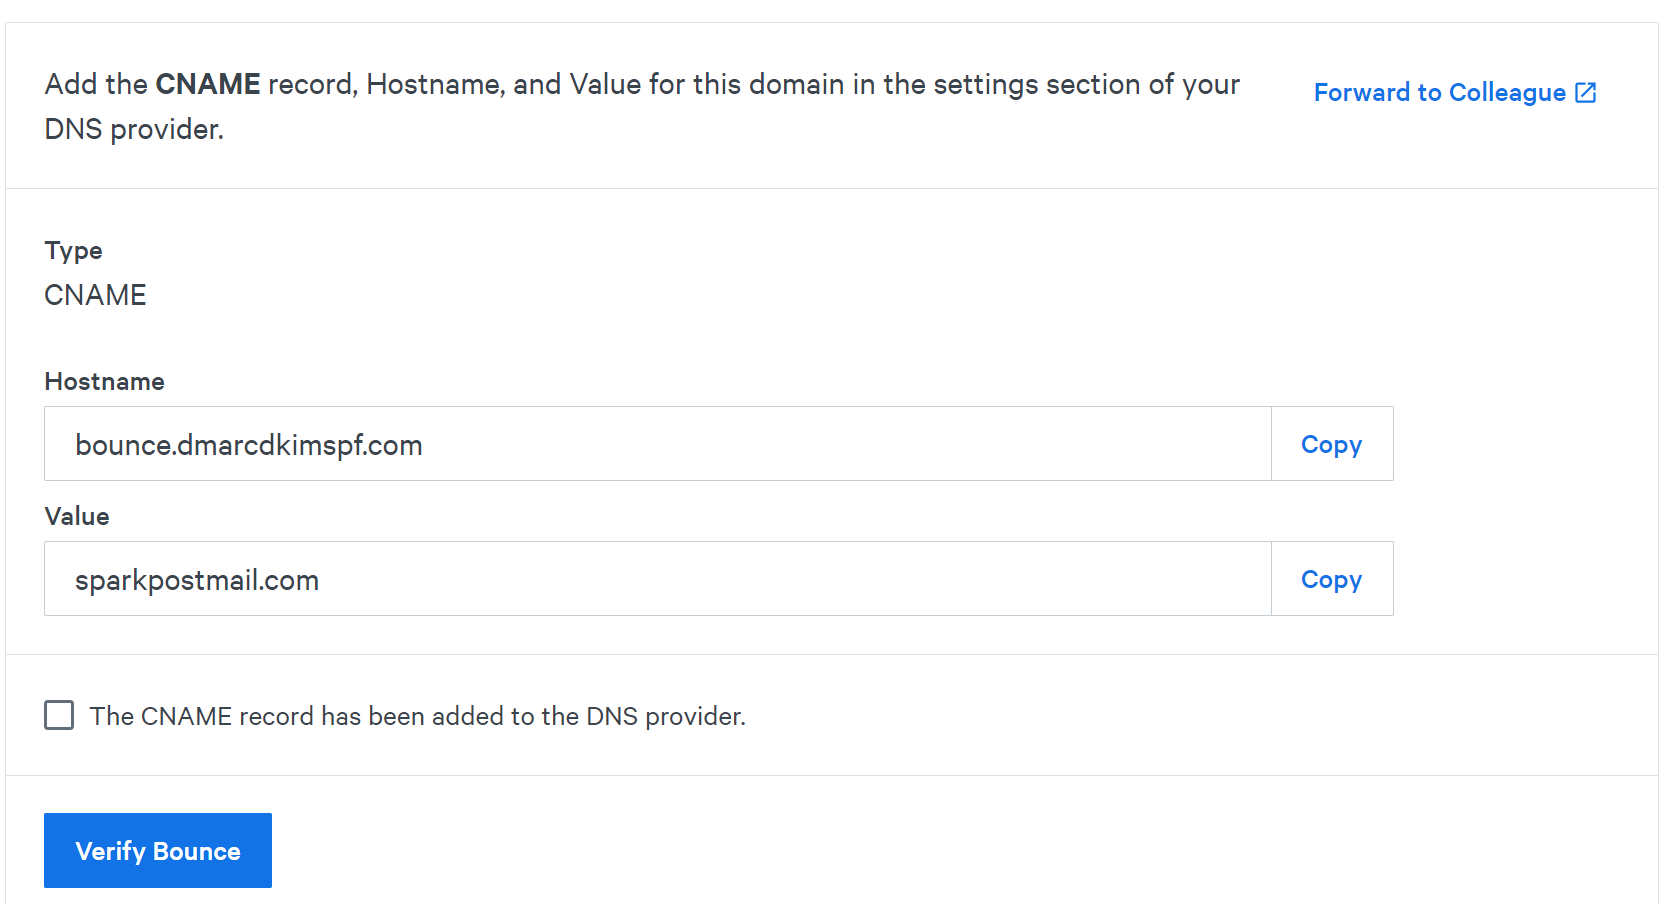
Select type CNAME and turn off the proxy to prevent the traffic from diverting to the Cloudflare server instead of the email server.
-
Click Save to add the record.
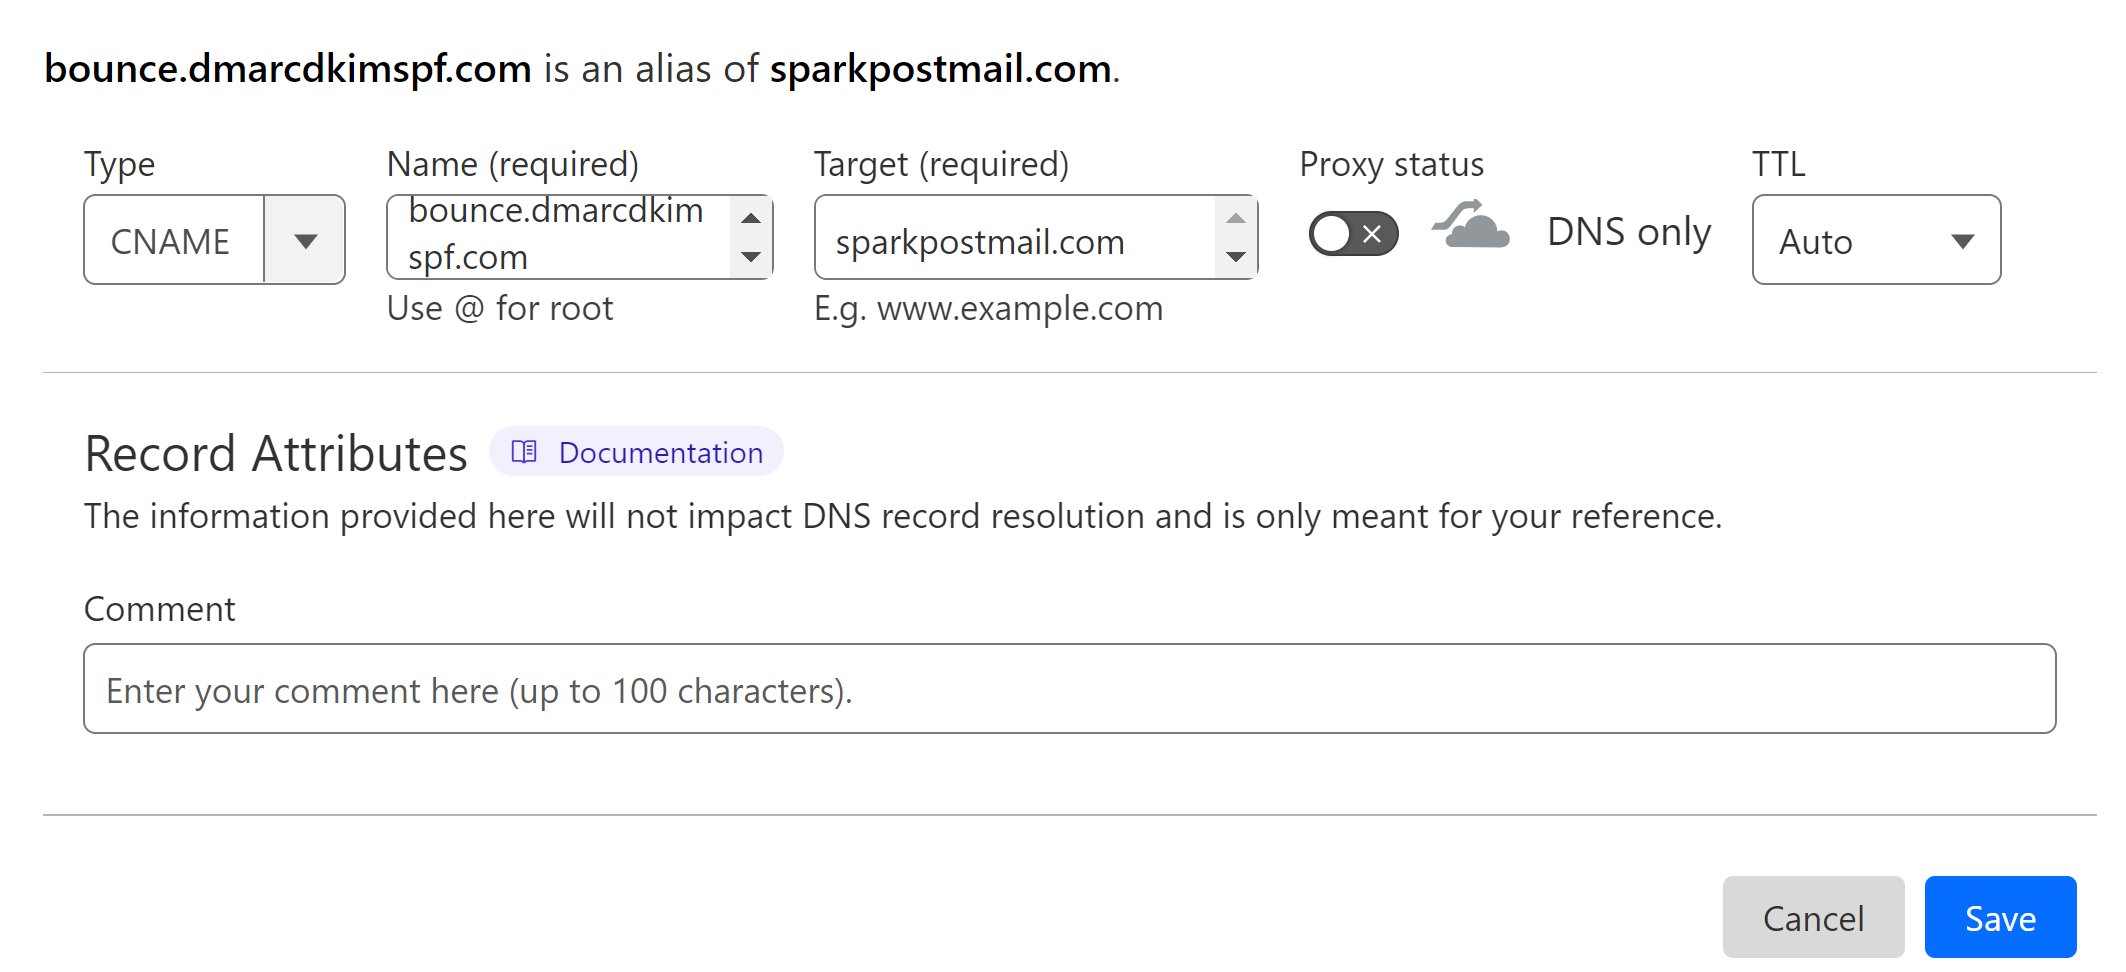
Return to the DNS page on Sparkpost and click Verify Domain.
Verifying Sparkpost Tracking Domain:
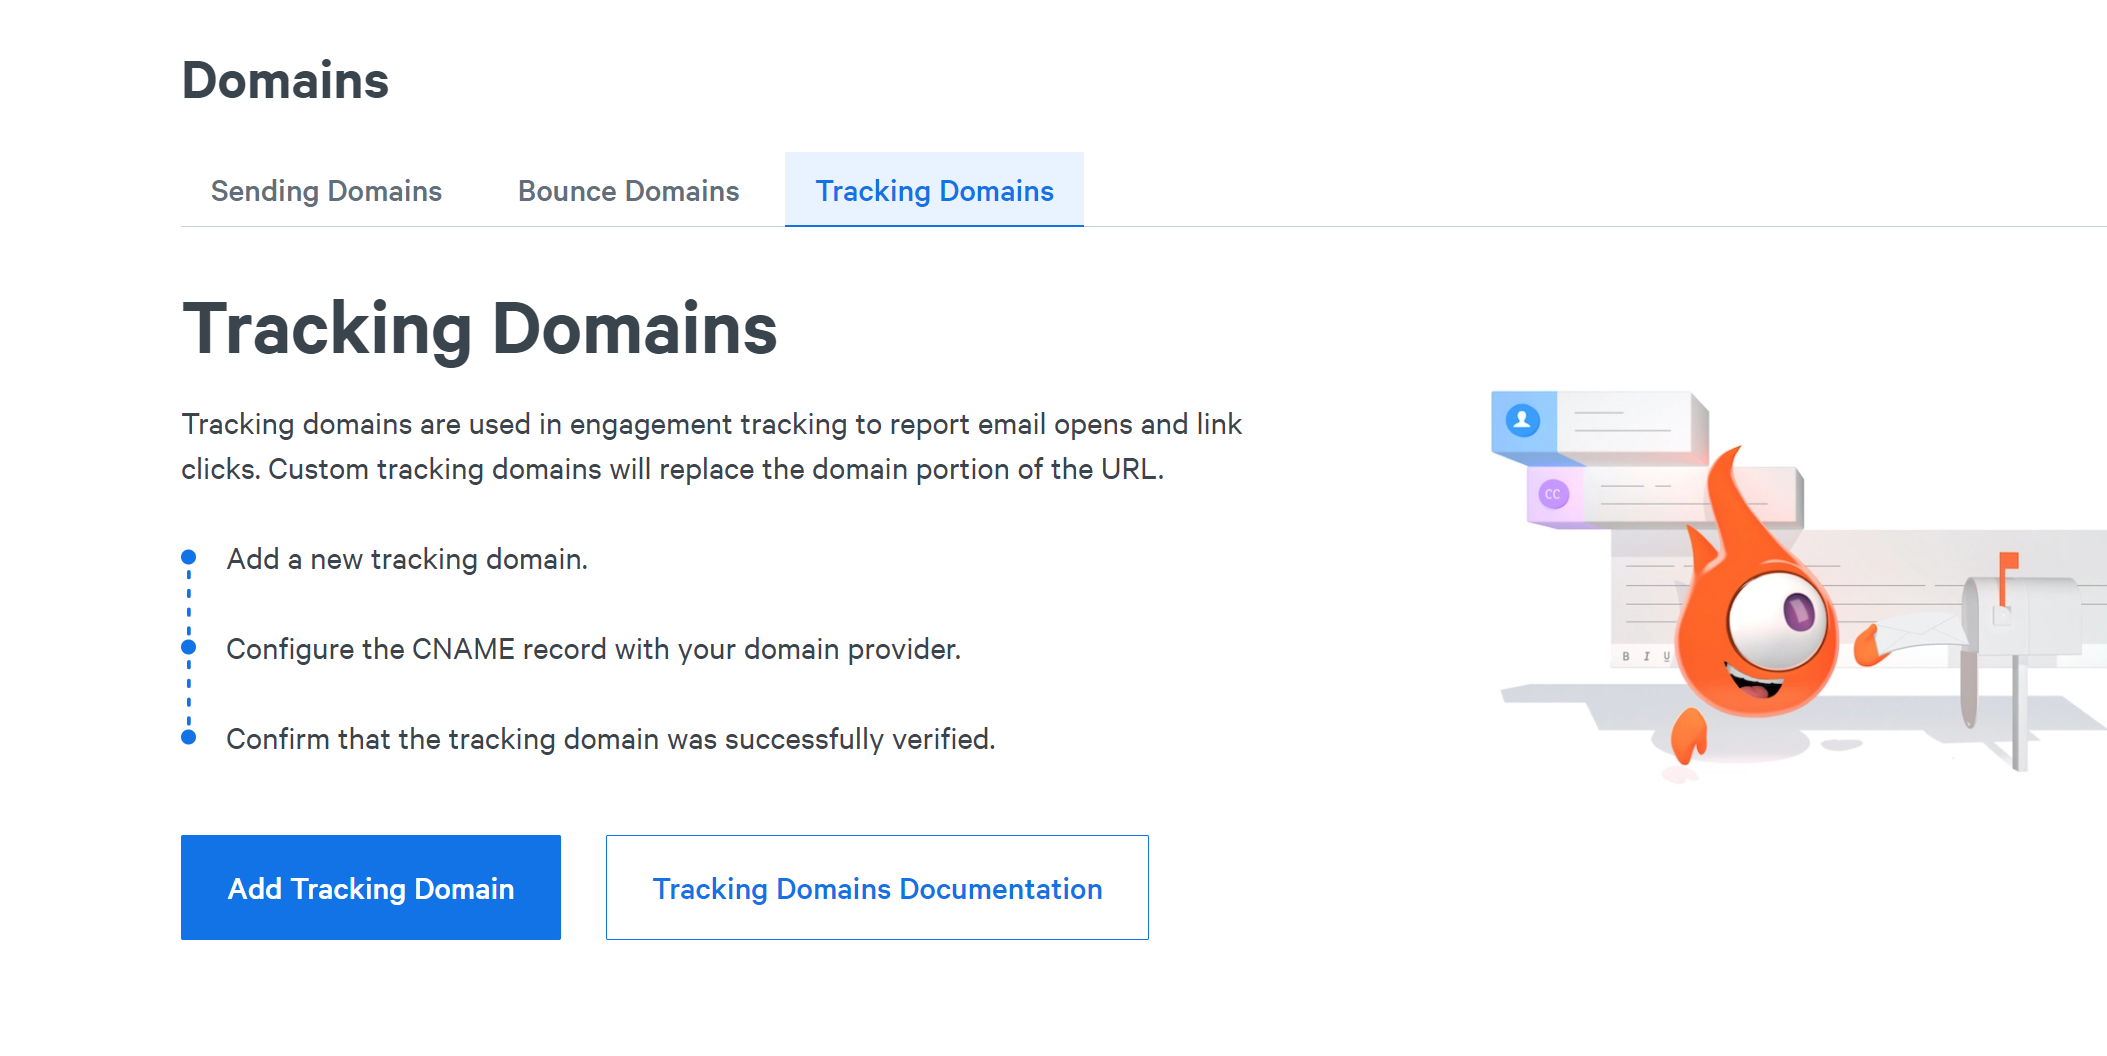
Go back to the Domains tab and go to the Tracking Domains section.
-
Click Add a Tracking Domain, at the bottom of the page.
-
On the next page, scroll down to write the subdomain name and click Save and Continue.
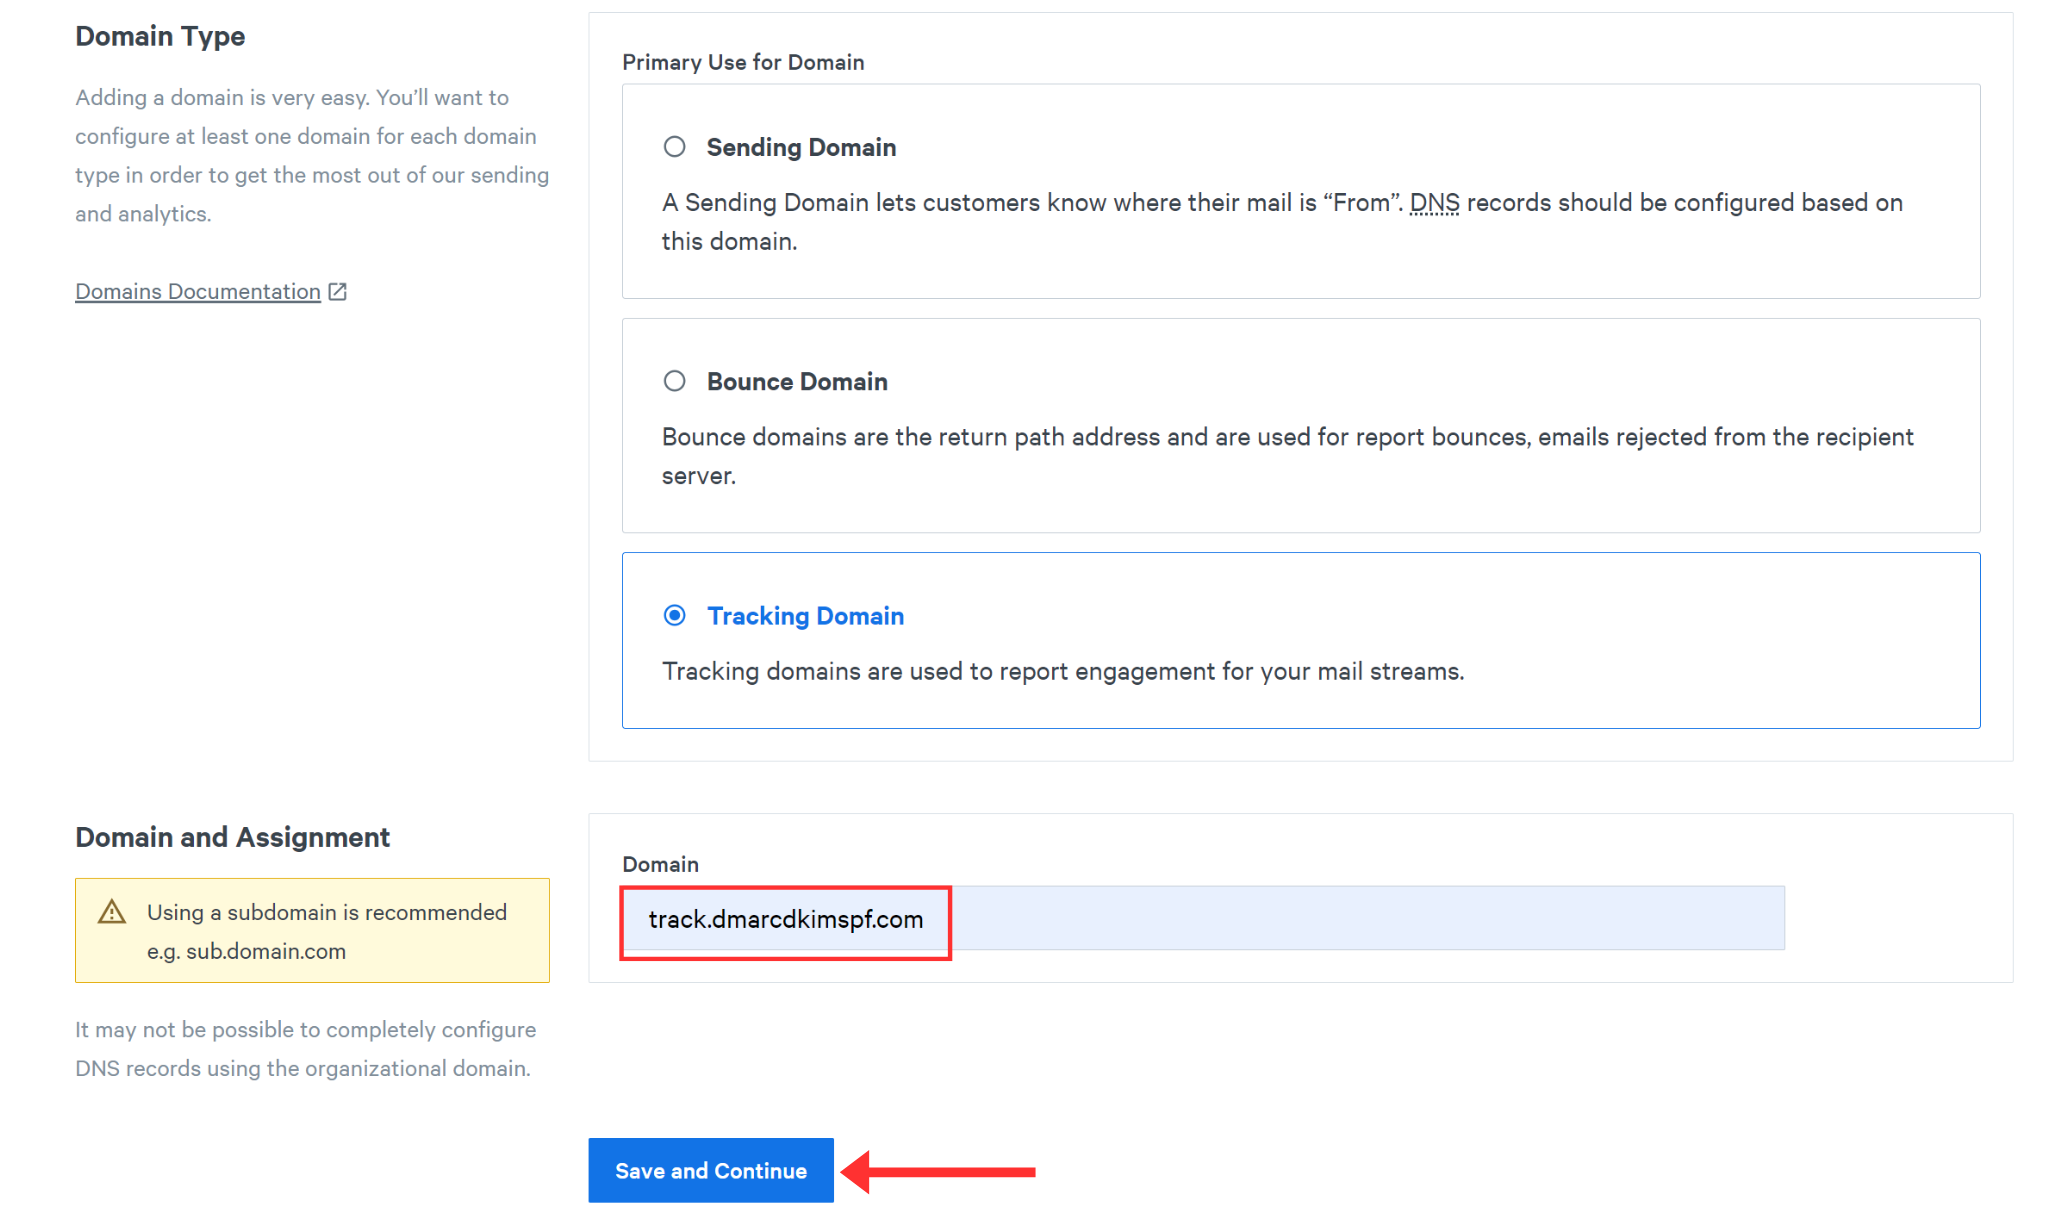
NOTE: When adding a CNAME record to the DNS dashboard, ensure there is no other CNAME record with that domain name. The DNS provider will not add two CNAME records with a similar domain name. Therefore, we use a subdomain for adding tracking records i.e., track.rootdomain.com.
-
It will redirect you to the page with the CNAME tracking record.
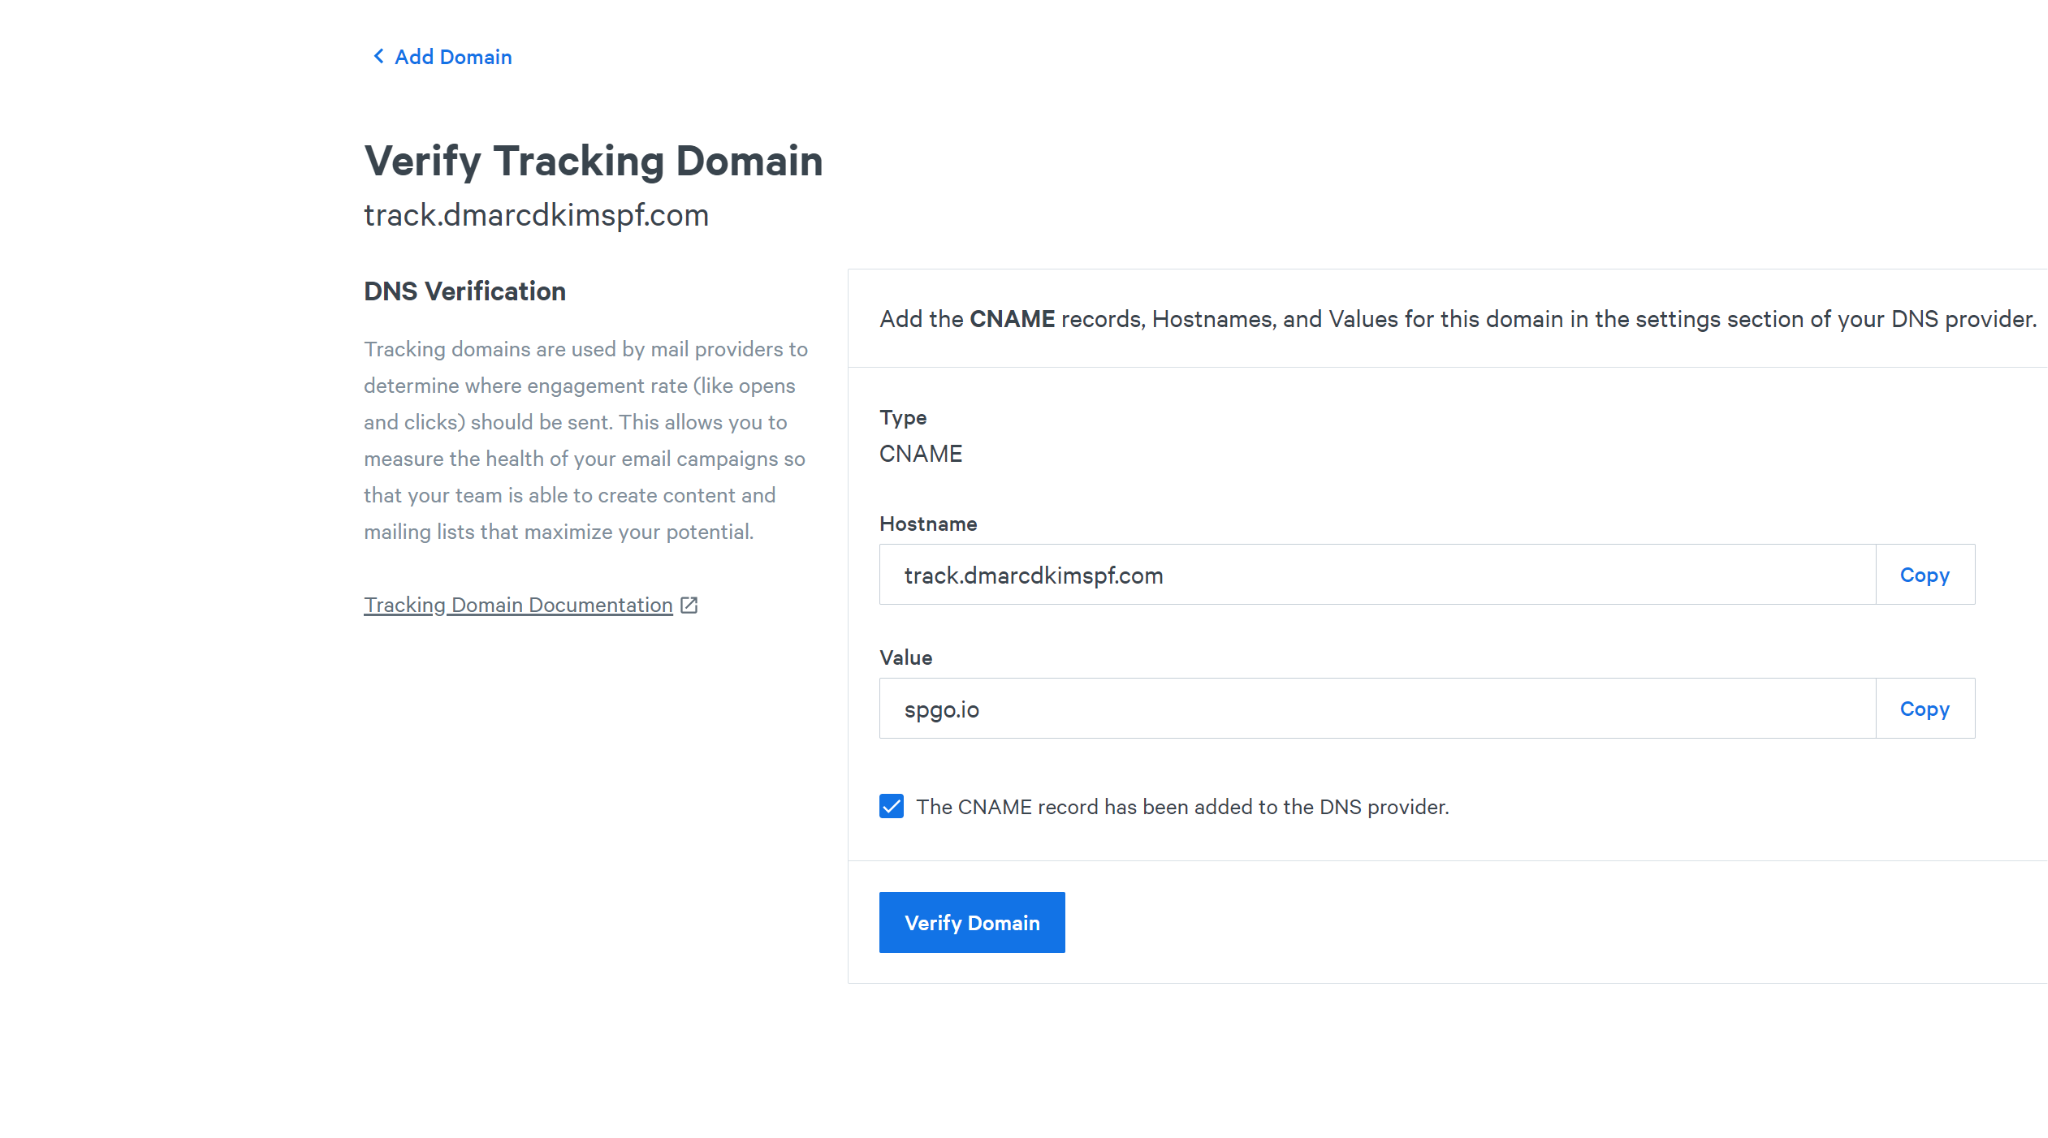
Add this record to your DNS provider.
Come back to the Sparkpost DNS page and click Verify Domain.
If all records were added successfully, you should see the grey highlighted text next to each domain.
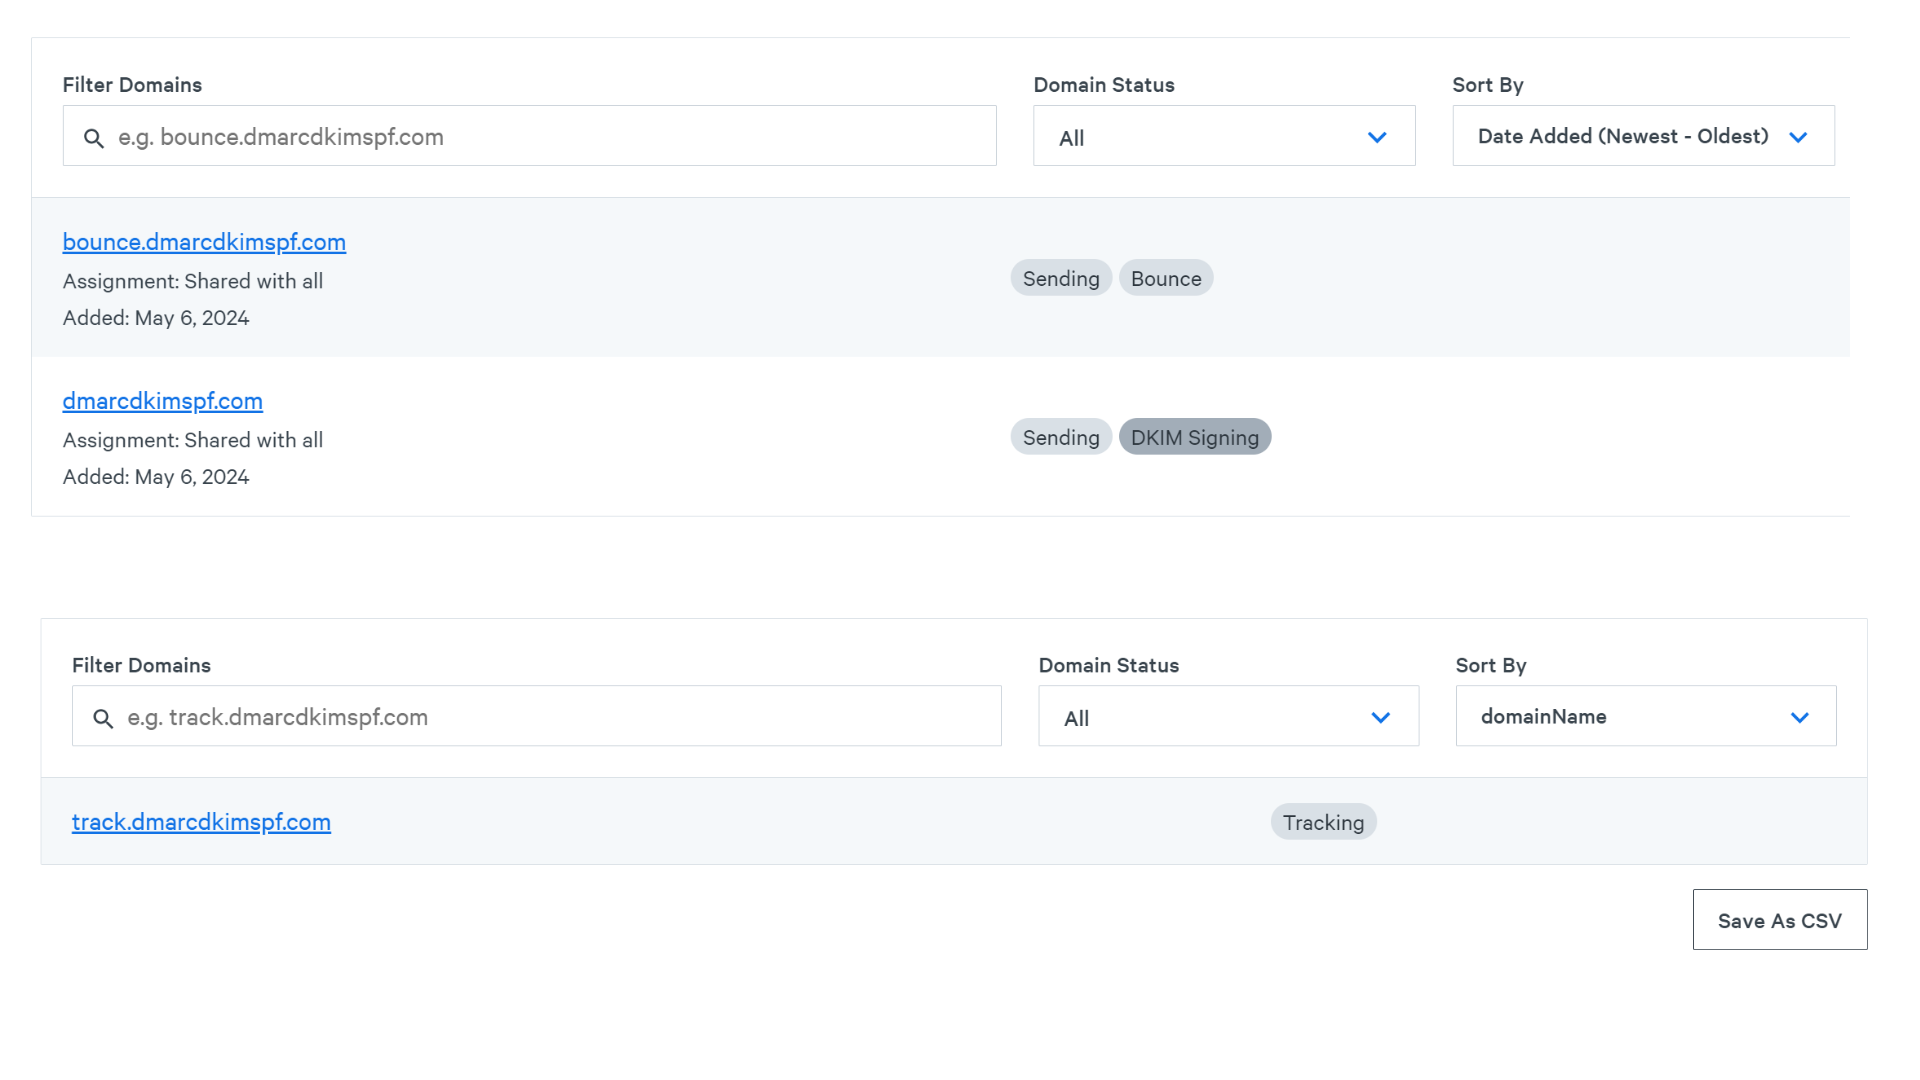
If you don't see the verification confirmation, wait for 24-48 hours for the server to propagate changes.
If the records are not authenticated after 48 hours, it points to a potential misconfiguration in your DNS records. You can hire a DmarcDkim.com expert to figure out where the issue lies.
Generate Sparkpost DMARC Value:
Sparkpost doesn't provide a DMARC record but it's important to add when you want to prove that your emails are coming from a legit source. With DMARC, you can specify what happens to the emails that fail to pass the authentication check.
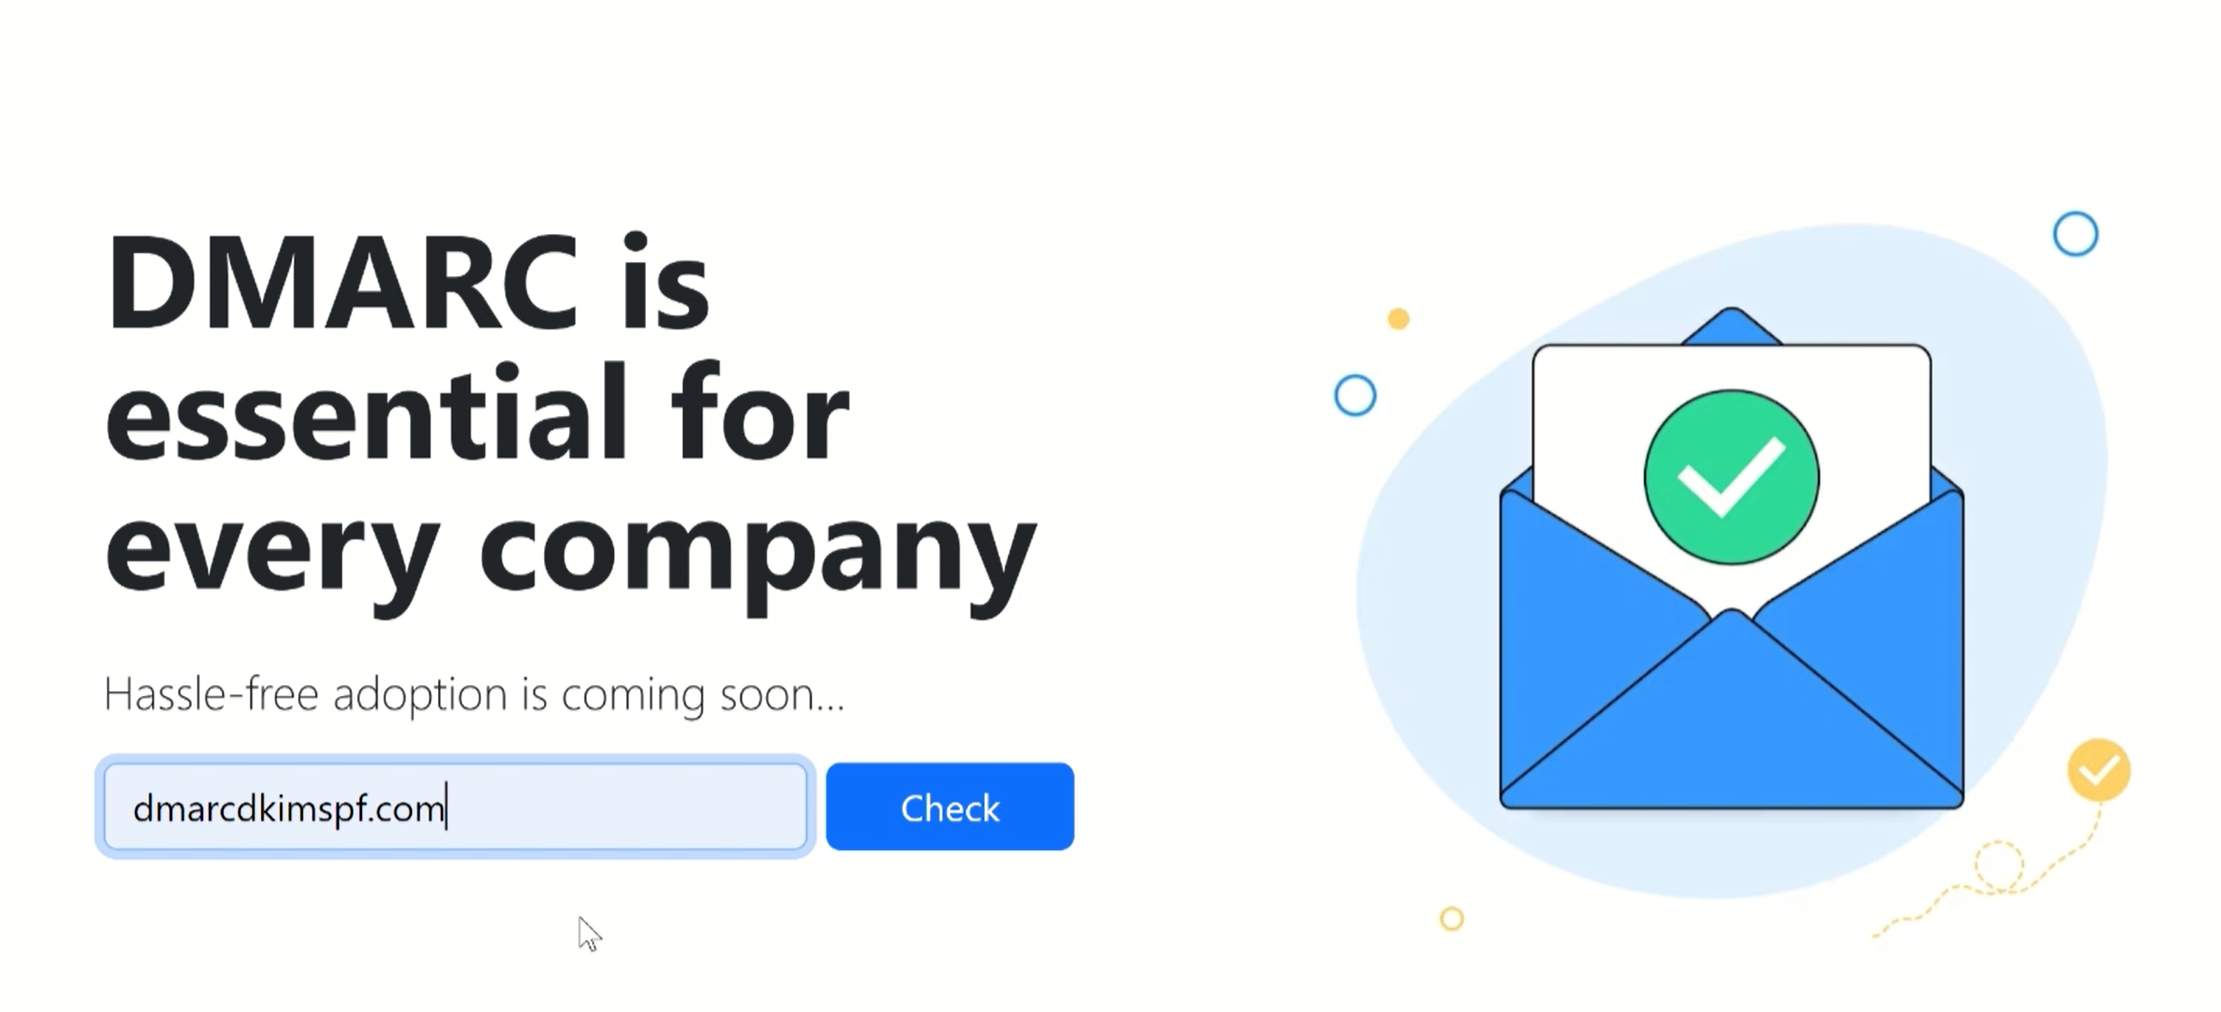
DmarcDkim.com helps you generate a hassle-free DMARC value within a few clicks. Just add your domain name and the tool detects any existing DMARC value and gives you a suggested value.
-
Open the DMARC Check Tool, write your domain name, and click Check.
-
Copy the record name and suggested value and add them to your DNS Provider.
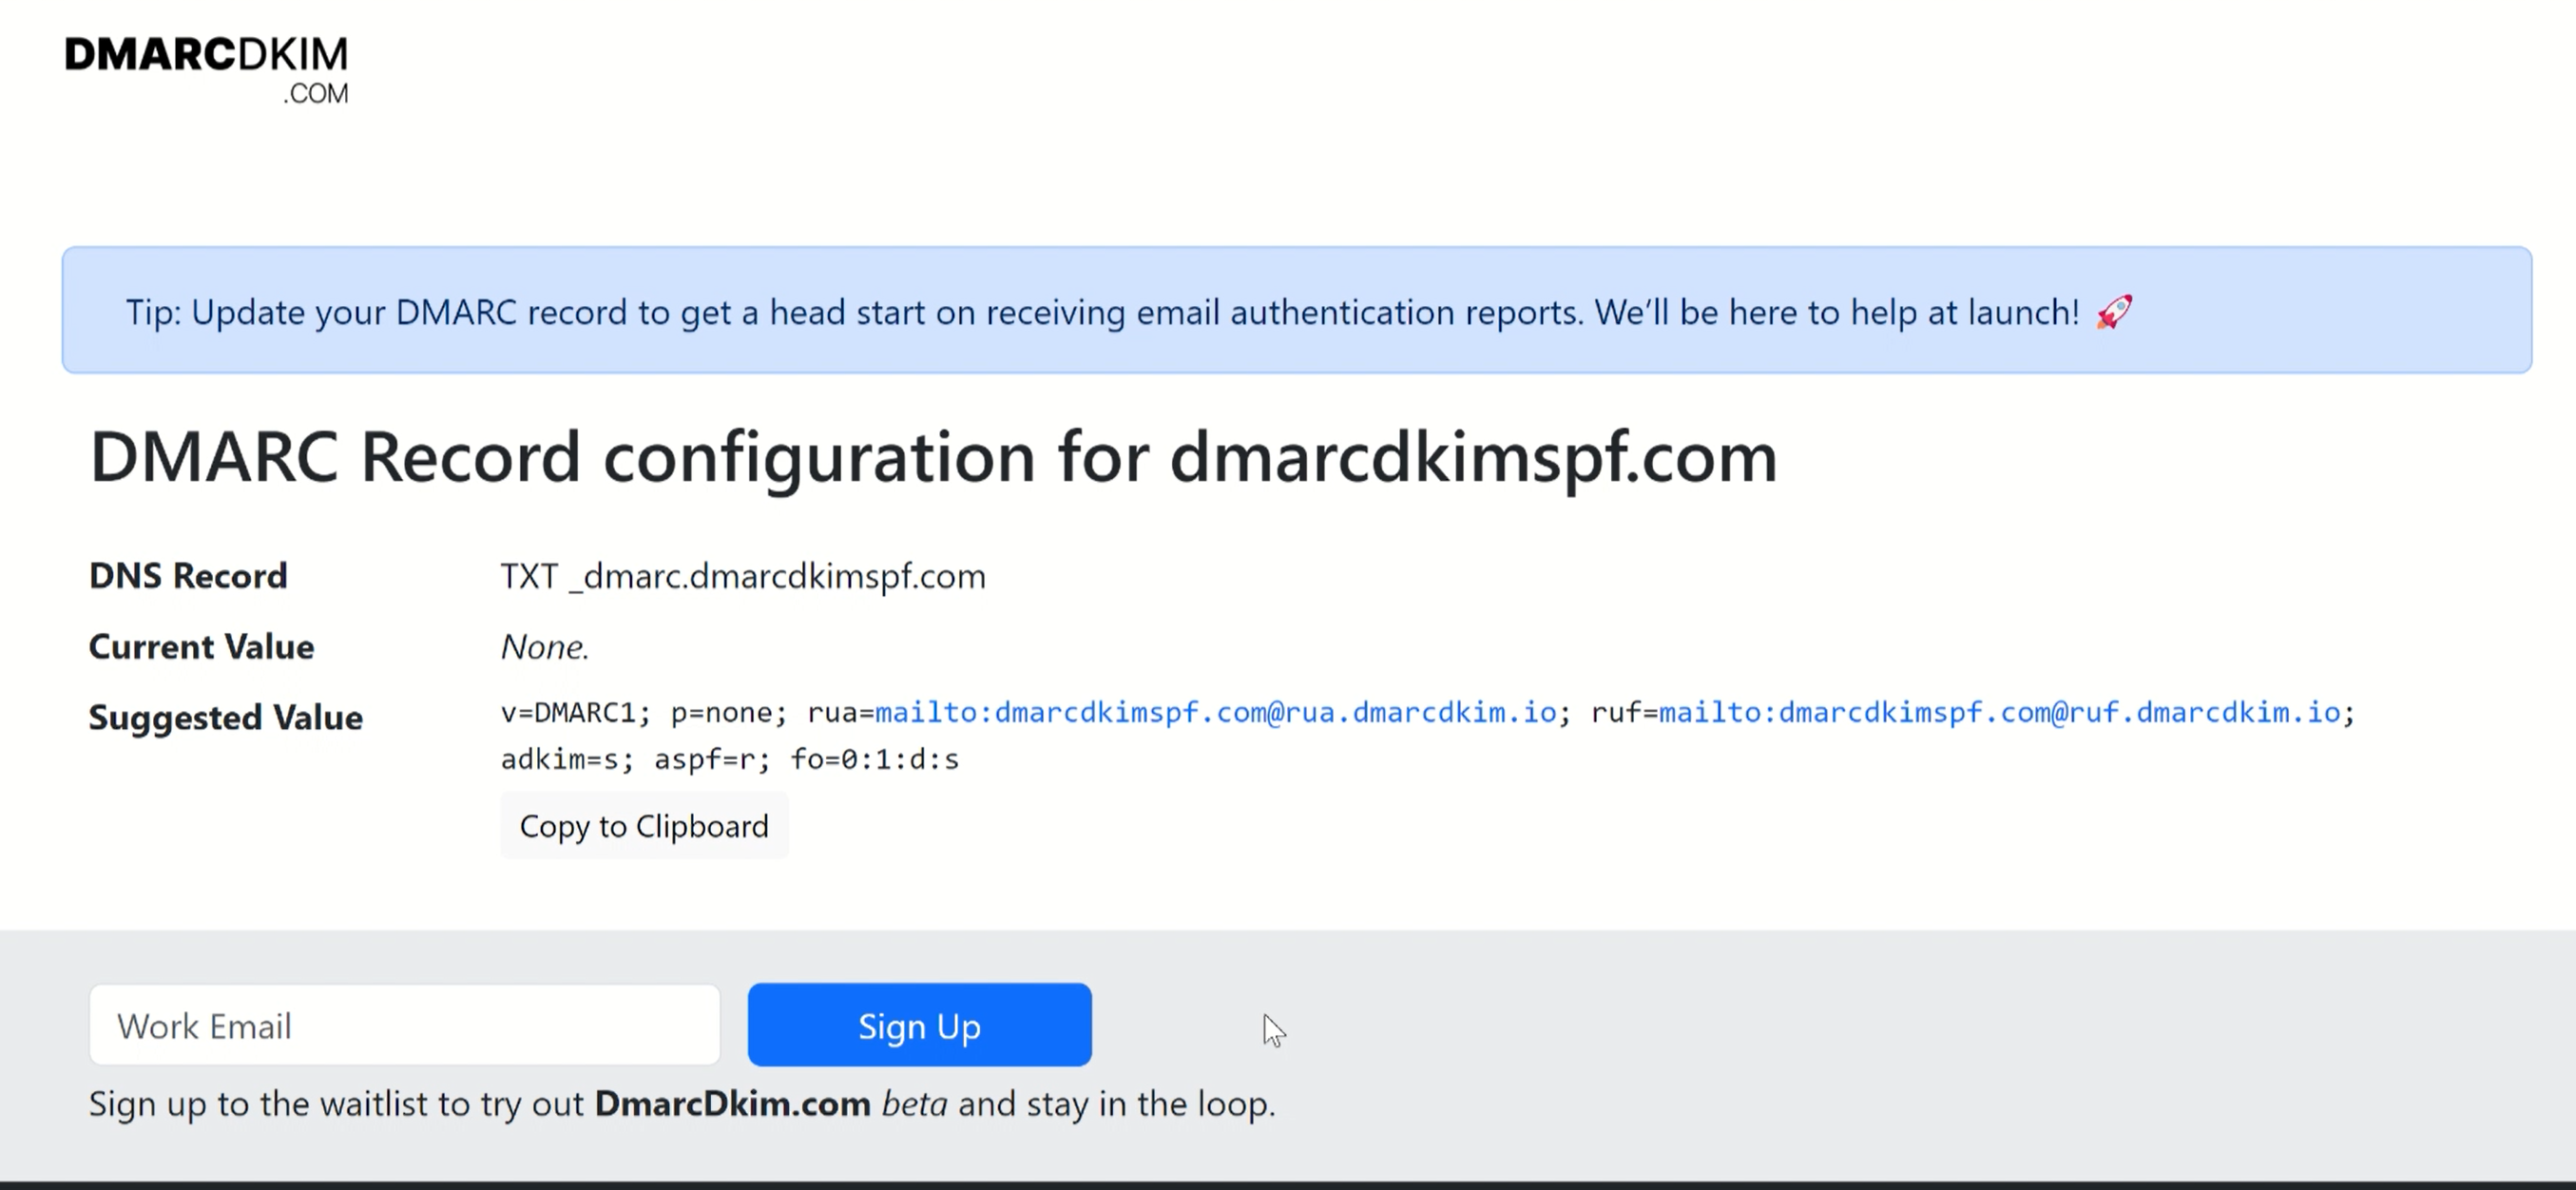
Check domain and follow the instructions to nail down your DMARC configuration.
No expert knowledge needed!


