Setup Aweber SPF, DKIM, DMARC Records - Domain Authentication
Check your domain for DMARC, DKIM, SPF and MX records. Get a free report.
- The impact of Business Email Compromise
- A quiet Google update just made SPF more forgiving
- Cyber Insurance and DMARC Enforcement
- Email impersonation scams explained
- TLS-RPT Record
- SMTP Smuggling
- 🇩🇪 Welche Hosting Anbieter unterstützen DMARC
- Manual DMARC Monitoring vs Automated Monitoring
- Reverse Engineering Phishing
- DMARC Enforcement in 2026
- DMARC for non sending domains
How to Setup Aweber SPF, DKIM, DMARC Records - Domain Authentication
With the increasing use of email technology, spoofing and spamming have become major concerns. To protect users from scams, email inbox providers introduced some security standards that email senders must comply with.
SPF, DKIM, and DMARC are the commonly used security standards. They ensure that you are a legitimate sender and that your emails are safe to open—only then will they be delivered to your recipients' inboxes.
If your domain lacks any of these authentication measures, your emails will be rejected by the servers. That is why, email delivery websites like Aweber provide you with the necessary DNS records for your email domain authentication.
In this article, we will guide you on how to configure Aweber DNS records and authenticate your domain for better and safer email communication.
Configure Aweber DNS Records:
-
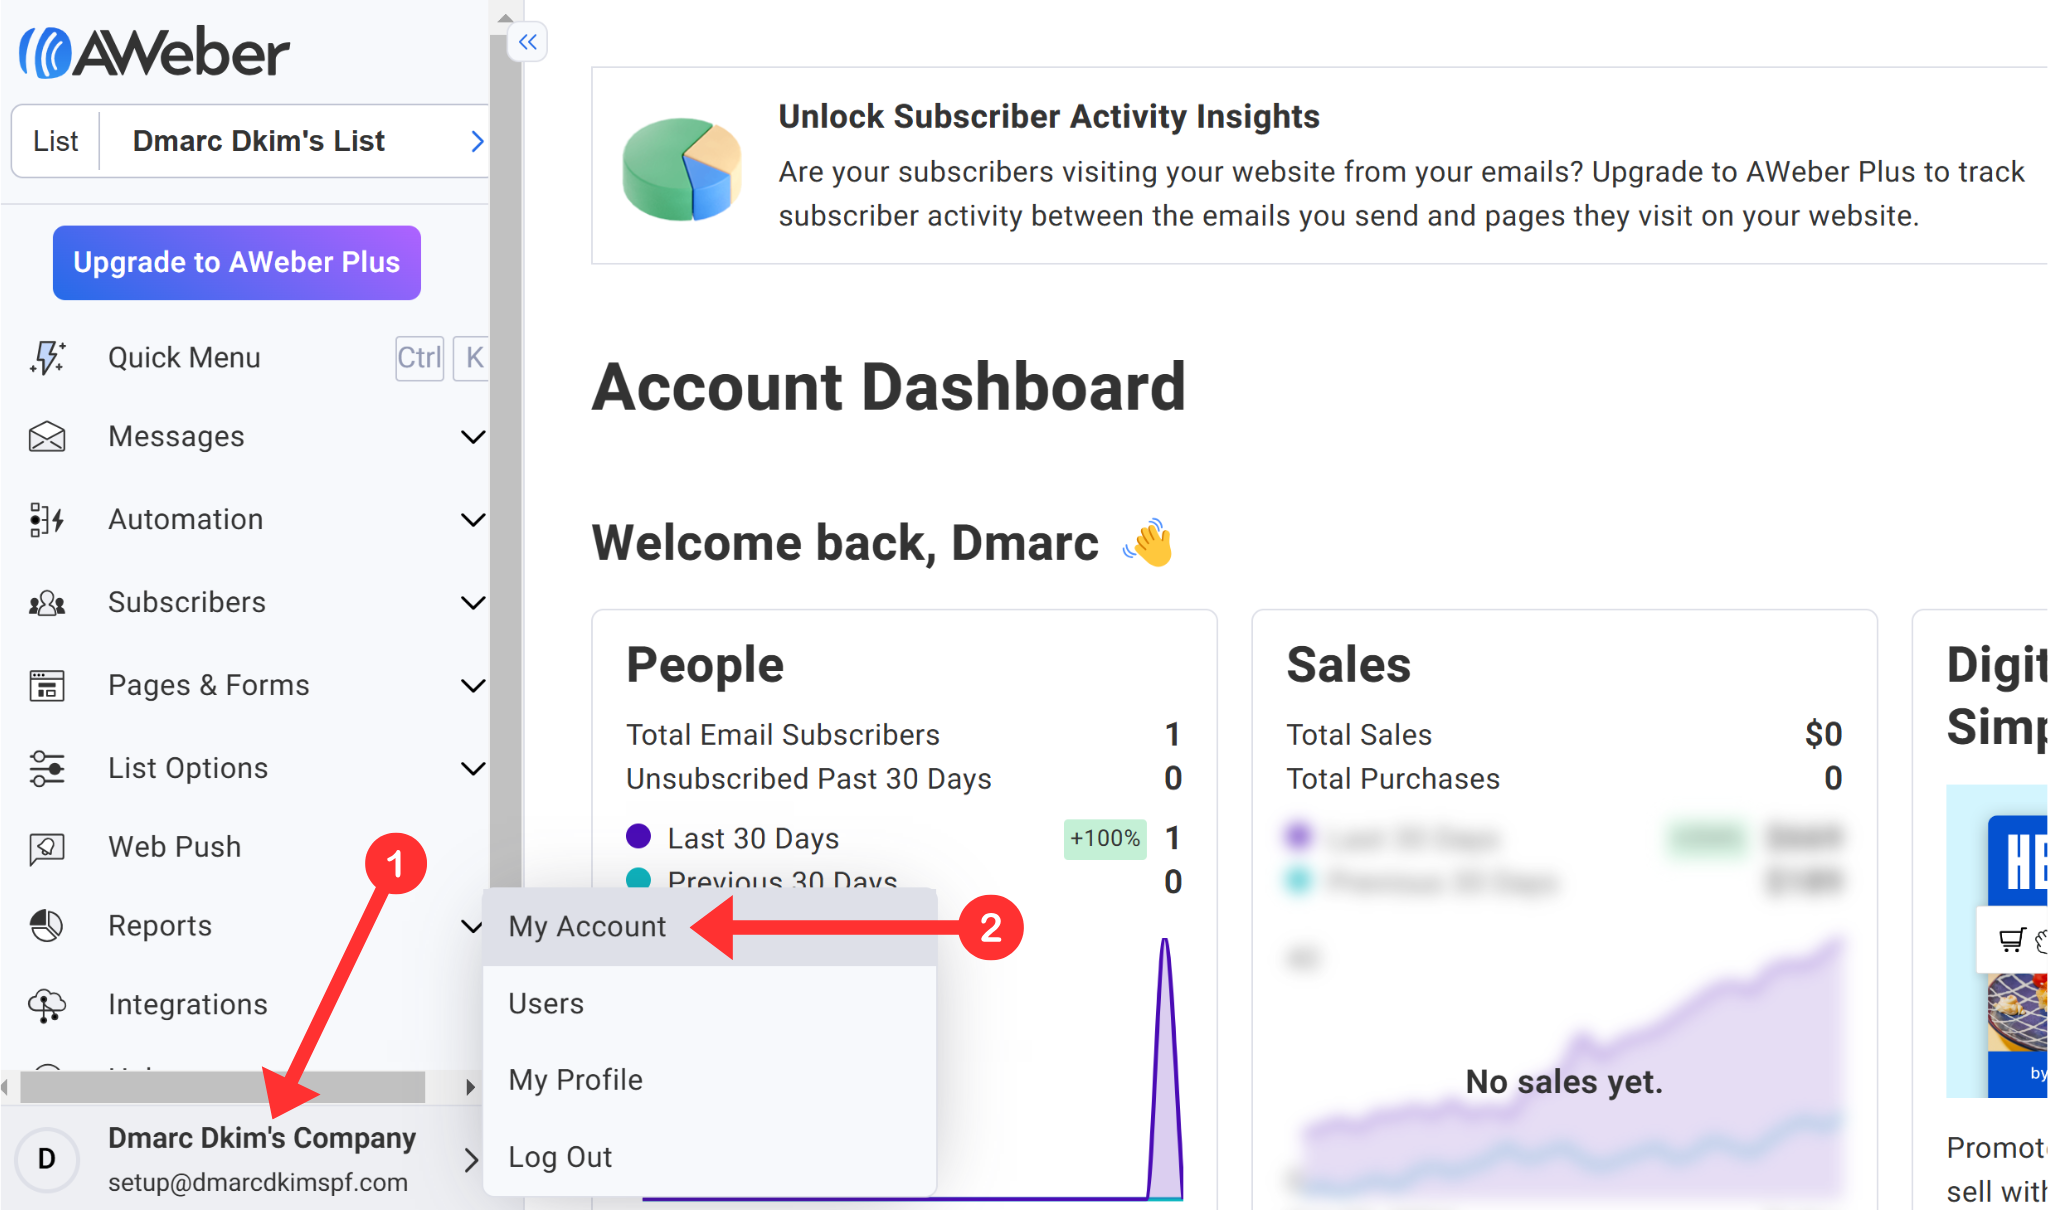
On the Aweber dashboard, click on your Profile Name and go to My Accounts.
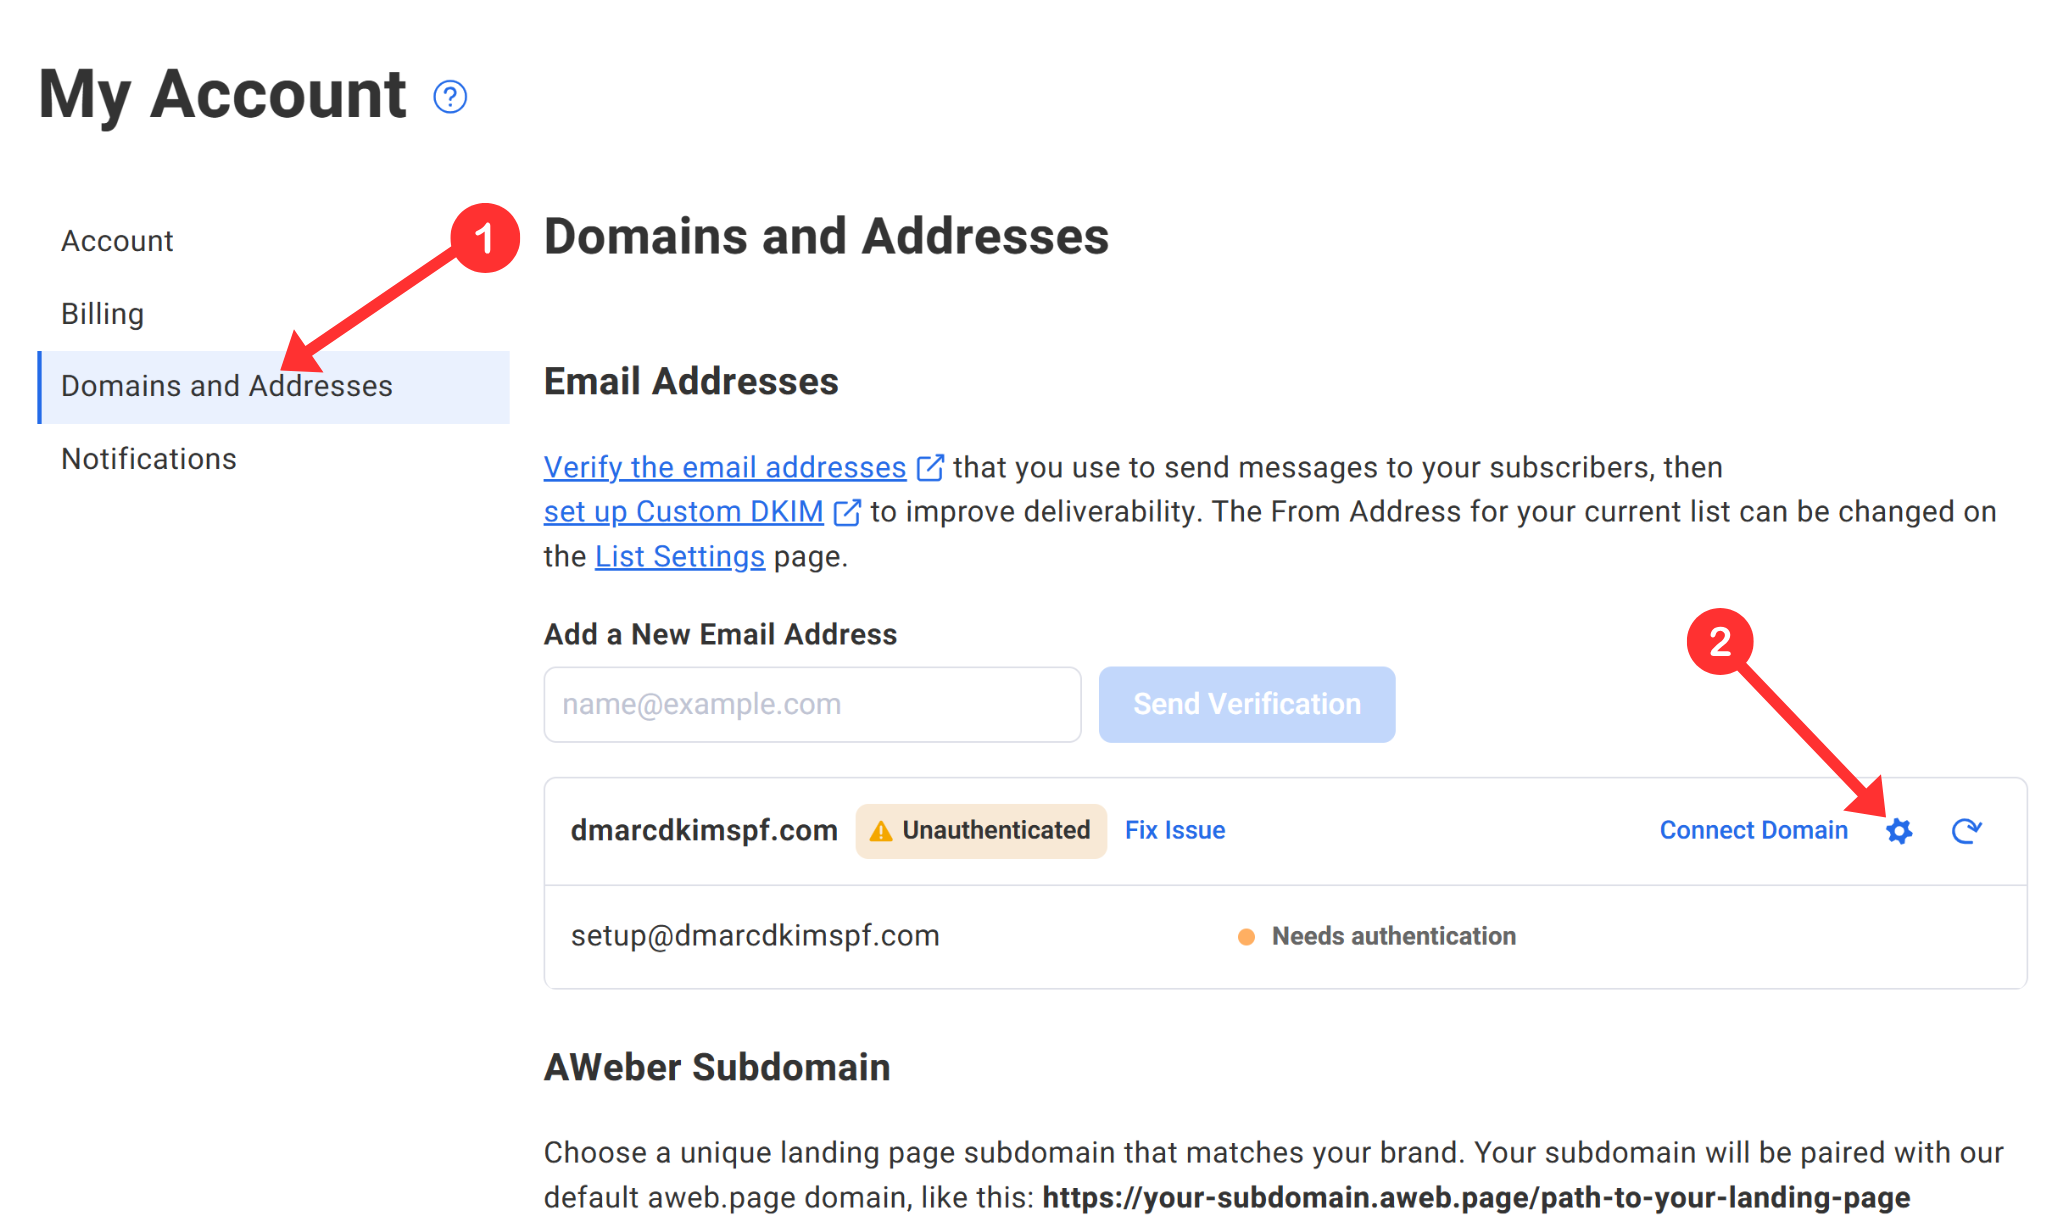
Go to the Domain and Addresses tab.
-
Click the gear icon next to your domain.
-
The pop-up window will display three DKIM records and a DMARC record.
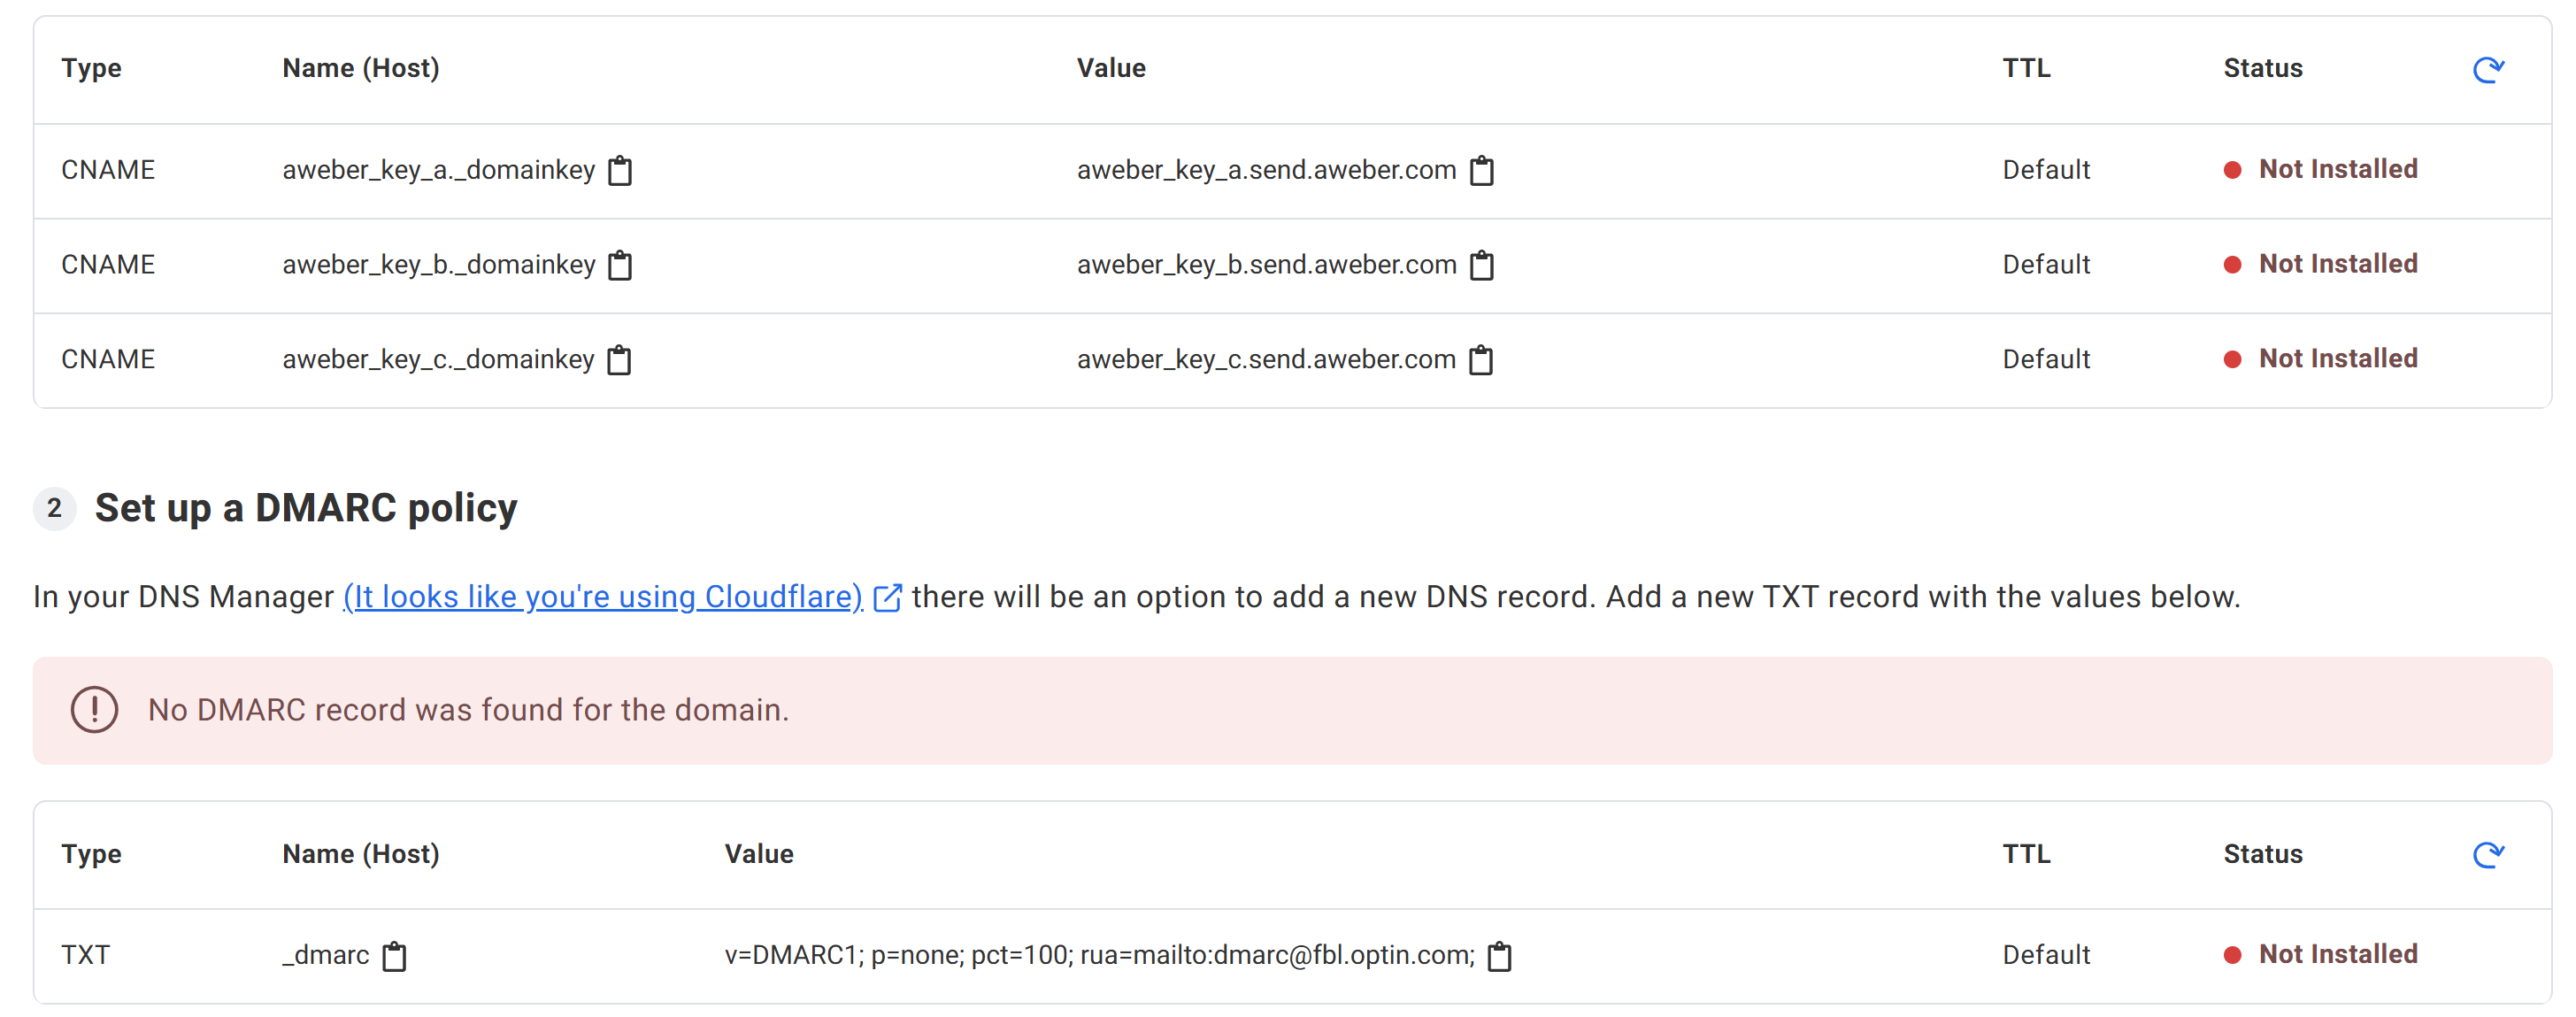
Add the DKIM records to your DNS provider and see the last section of this article for DMARC setup instructions.
Setup Aweber DKIM Records:
Login to your DNS provider and go to your domain.
Open the DNS tab and click Add Record.
Select type CNAME.
Copy the Hostname from Aweber and paste it into the Name field in the DNS provider.
Copy the record Value and add it to the Target field.
-
Turn off the proxy and click Save.
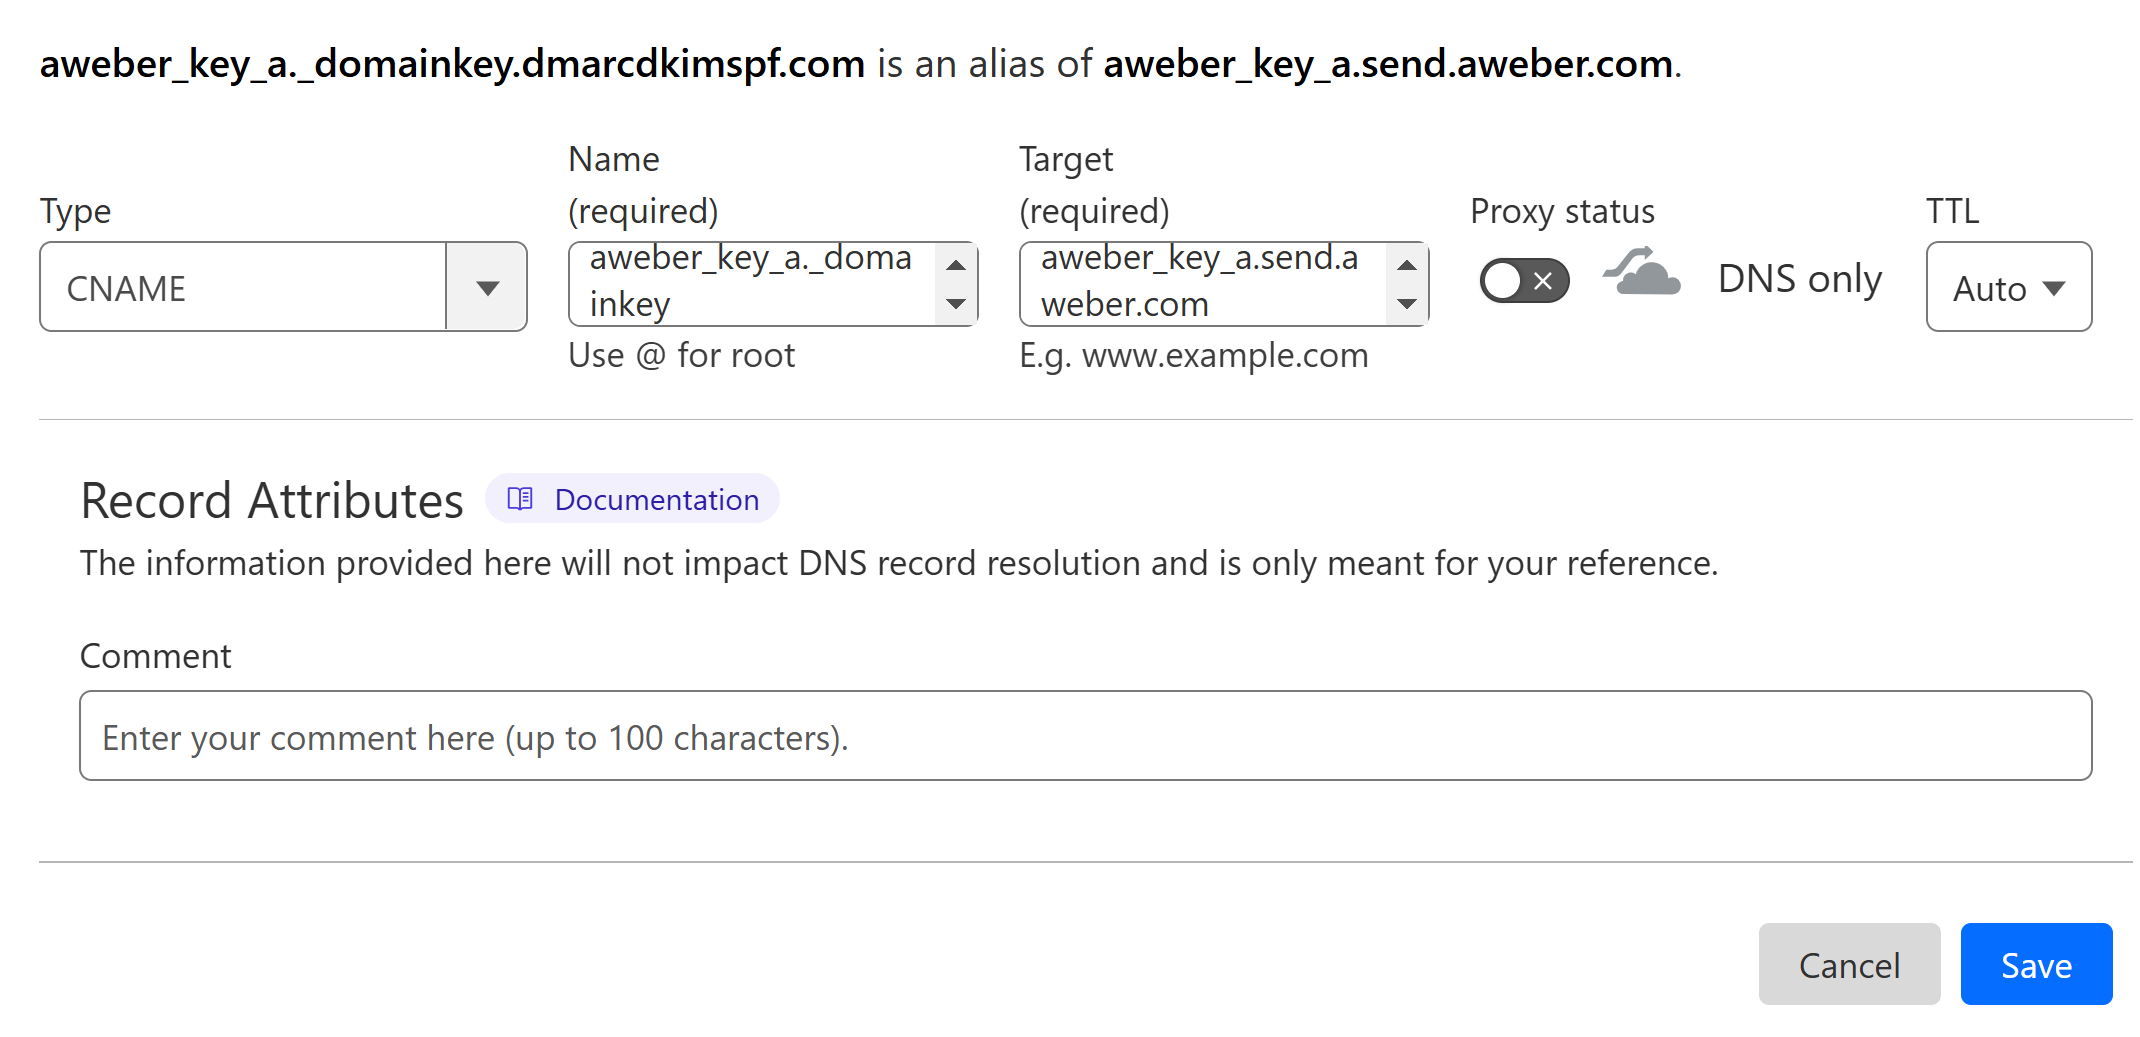
Follow the same steps to add all DKIM records.
NOTE: Always turn off the proxy toggle for CNAME records. When the proxy is enabled, it diverts the traffic to the DNS server instead of the email server.
Setup Aweber SPF Record:
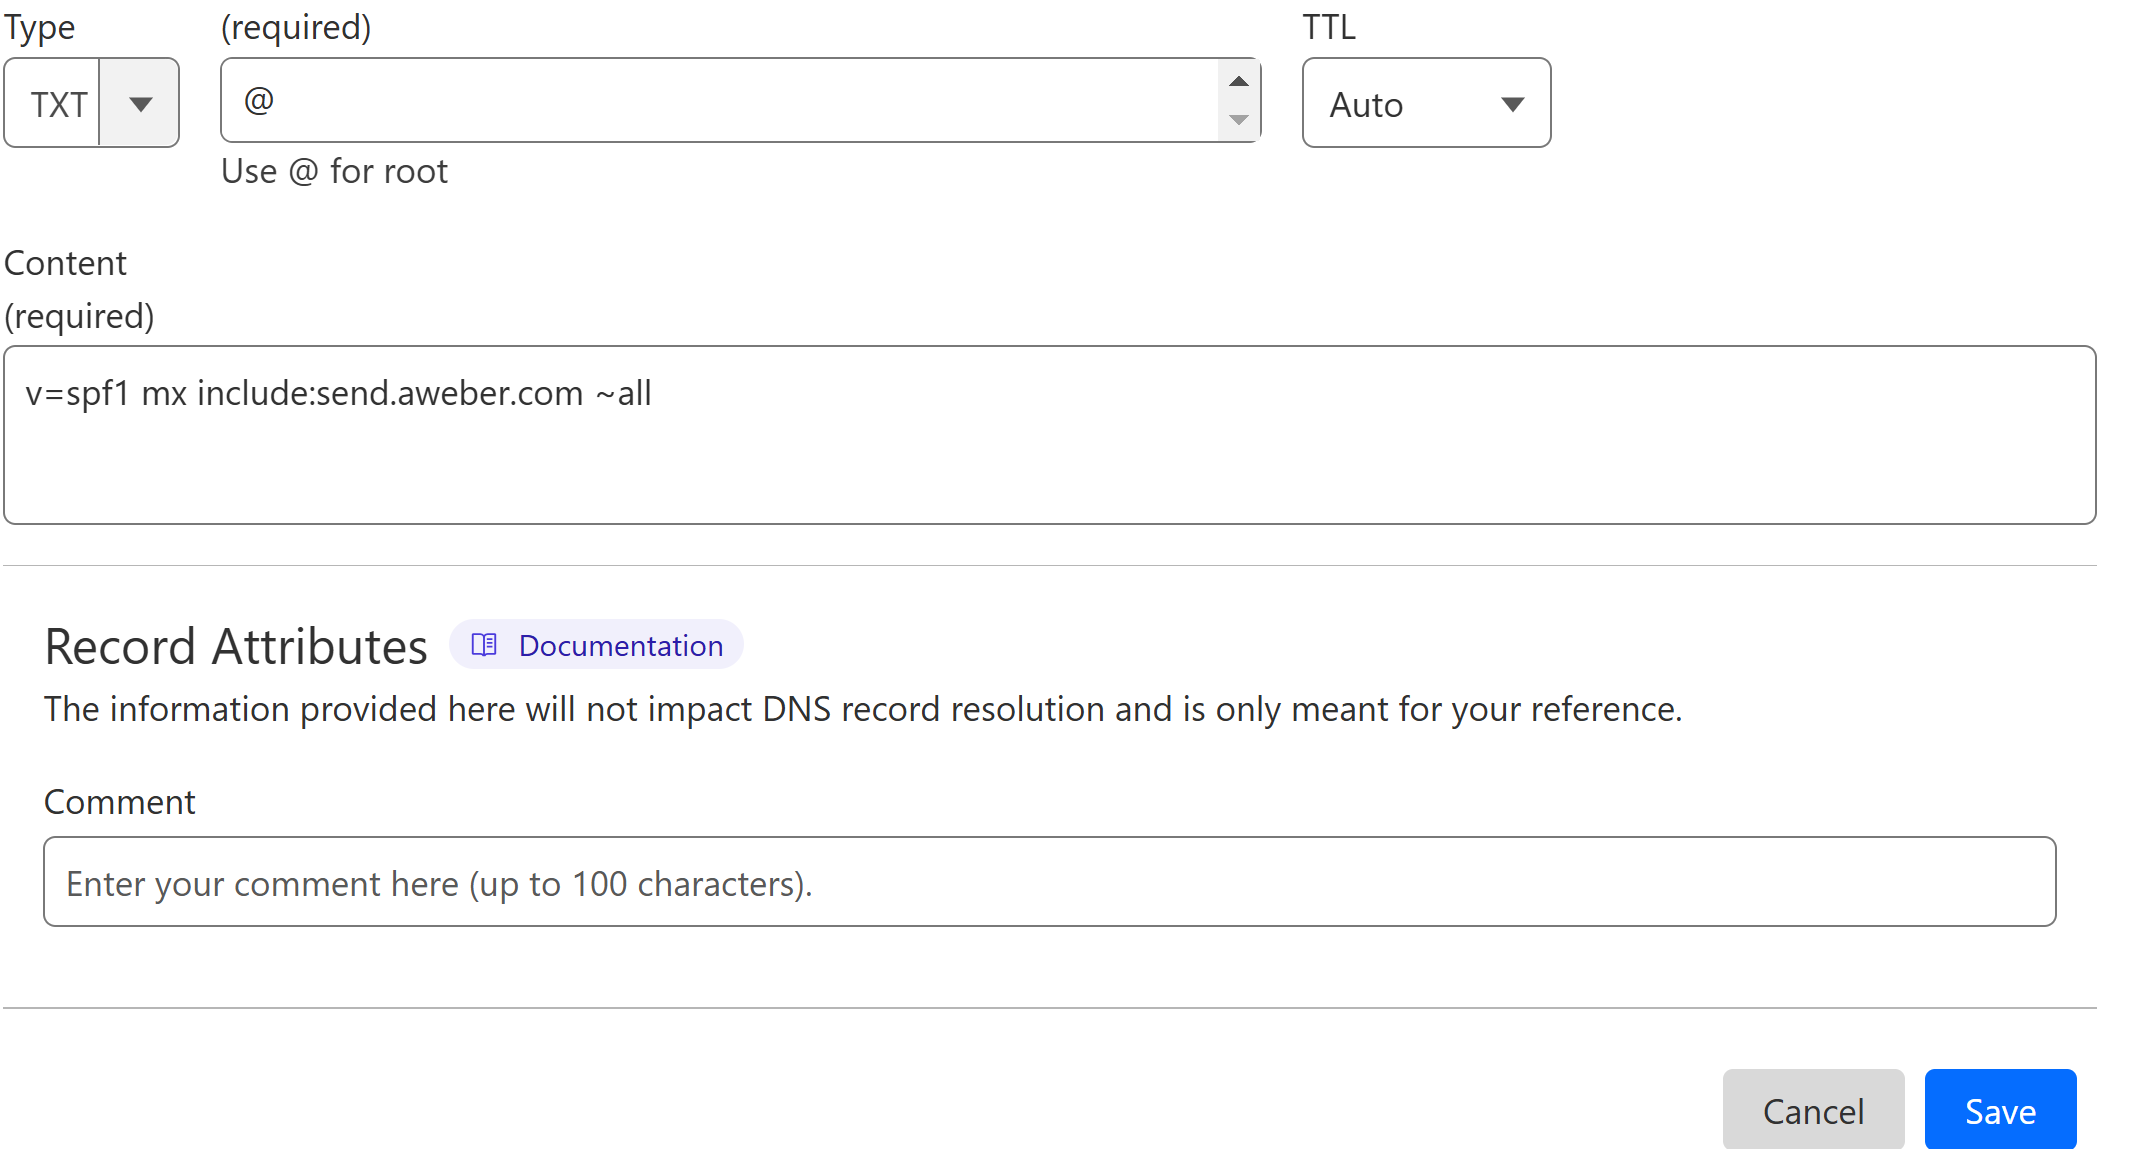
You don't need an SPF record to help emails get delivered or to stop fake emails when using AWeber. This is because the SPF record needs to match the domain in the return path, which is usually owned by the email service provider. If you still decide to add an SPF record for AWeber, it probably won’t be used by email services, but it won’t cause any problems either. Add the following TXT SPF record in your DNS dashboard to setup Aweber SPF.
In the DNS dashboard, select type TXT.
In the Name field, write "@" for rooting.
In the Content field, add the SPF value: v=spf1 mx include:send.aweber.com ~all.
-
Click the Save button.
What to do if there are multiple SPF records?
Due to the limitations of DNS providers, we cannot add more than one SPF record for a single domain. If there is an existing SPF record, you need to merge it with Aweber SPF to avoid conflicts. For merging, follow the steps below.
Open the SPF merge tool.
Add your domain name and Aweber SPF value.
Click Merge SPF Values.
-
The tool detects the existing value and merges it with Aweber SPF.
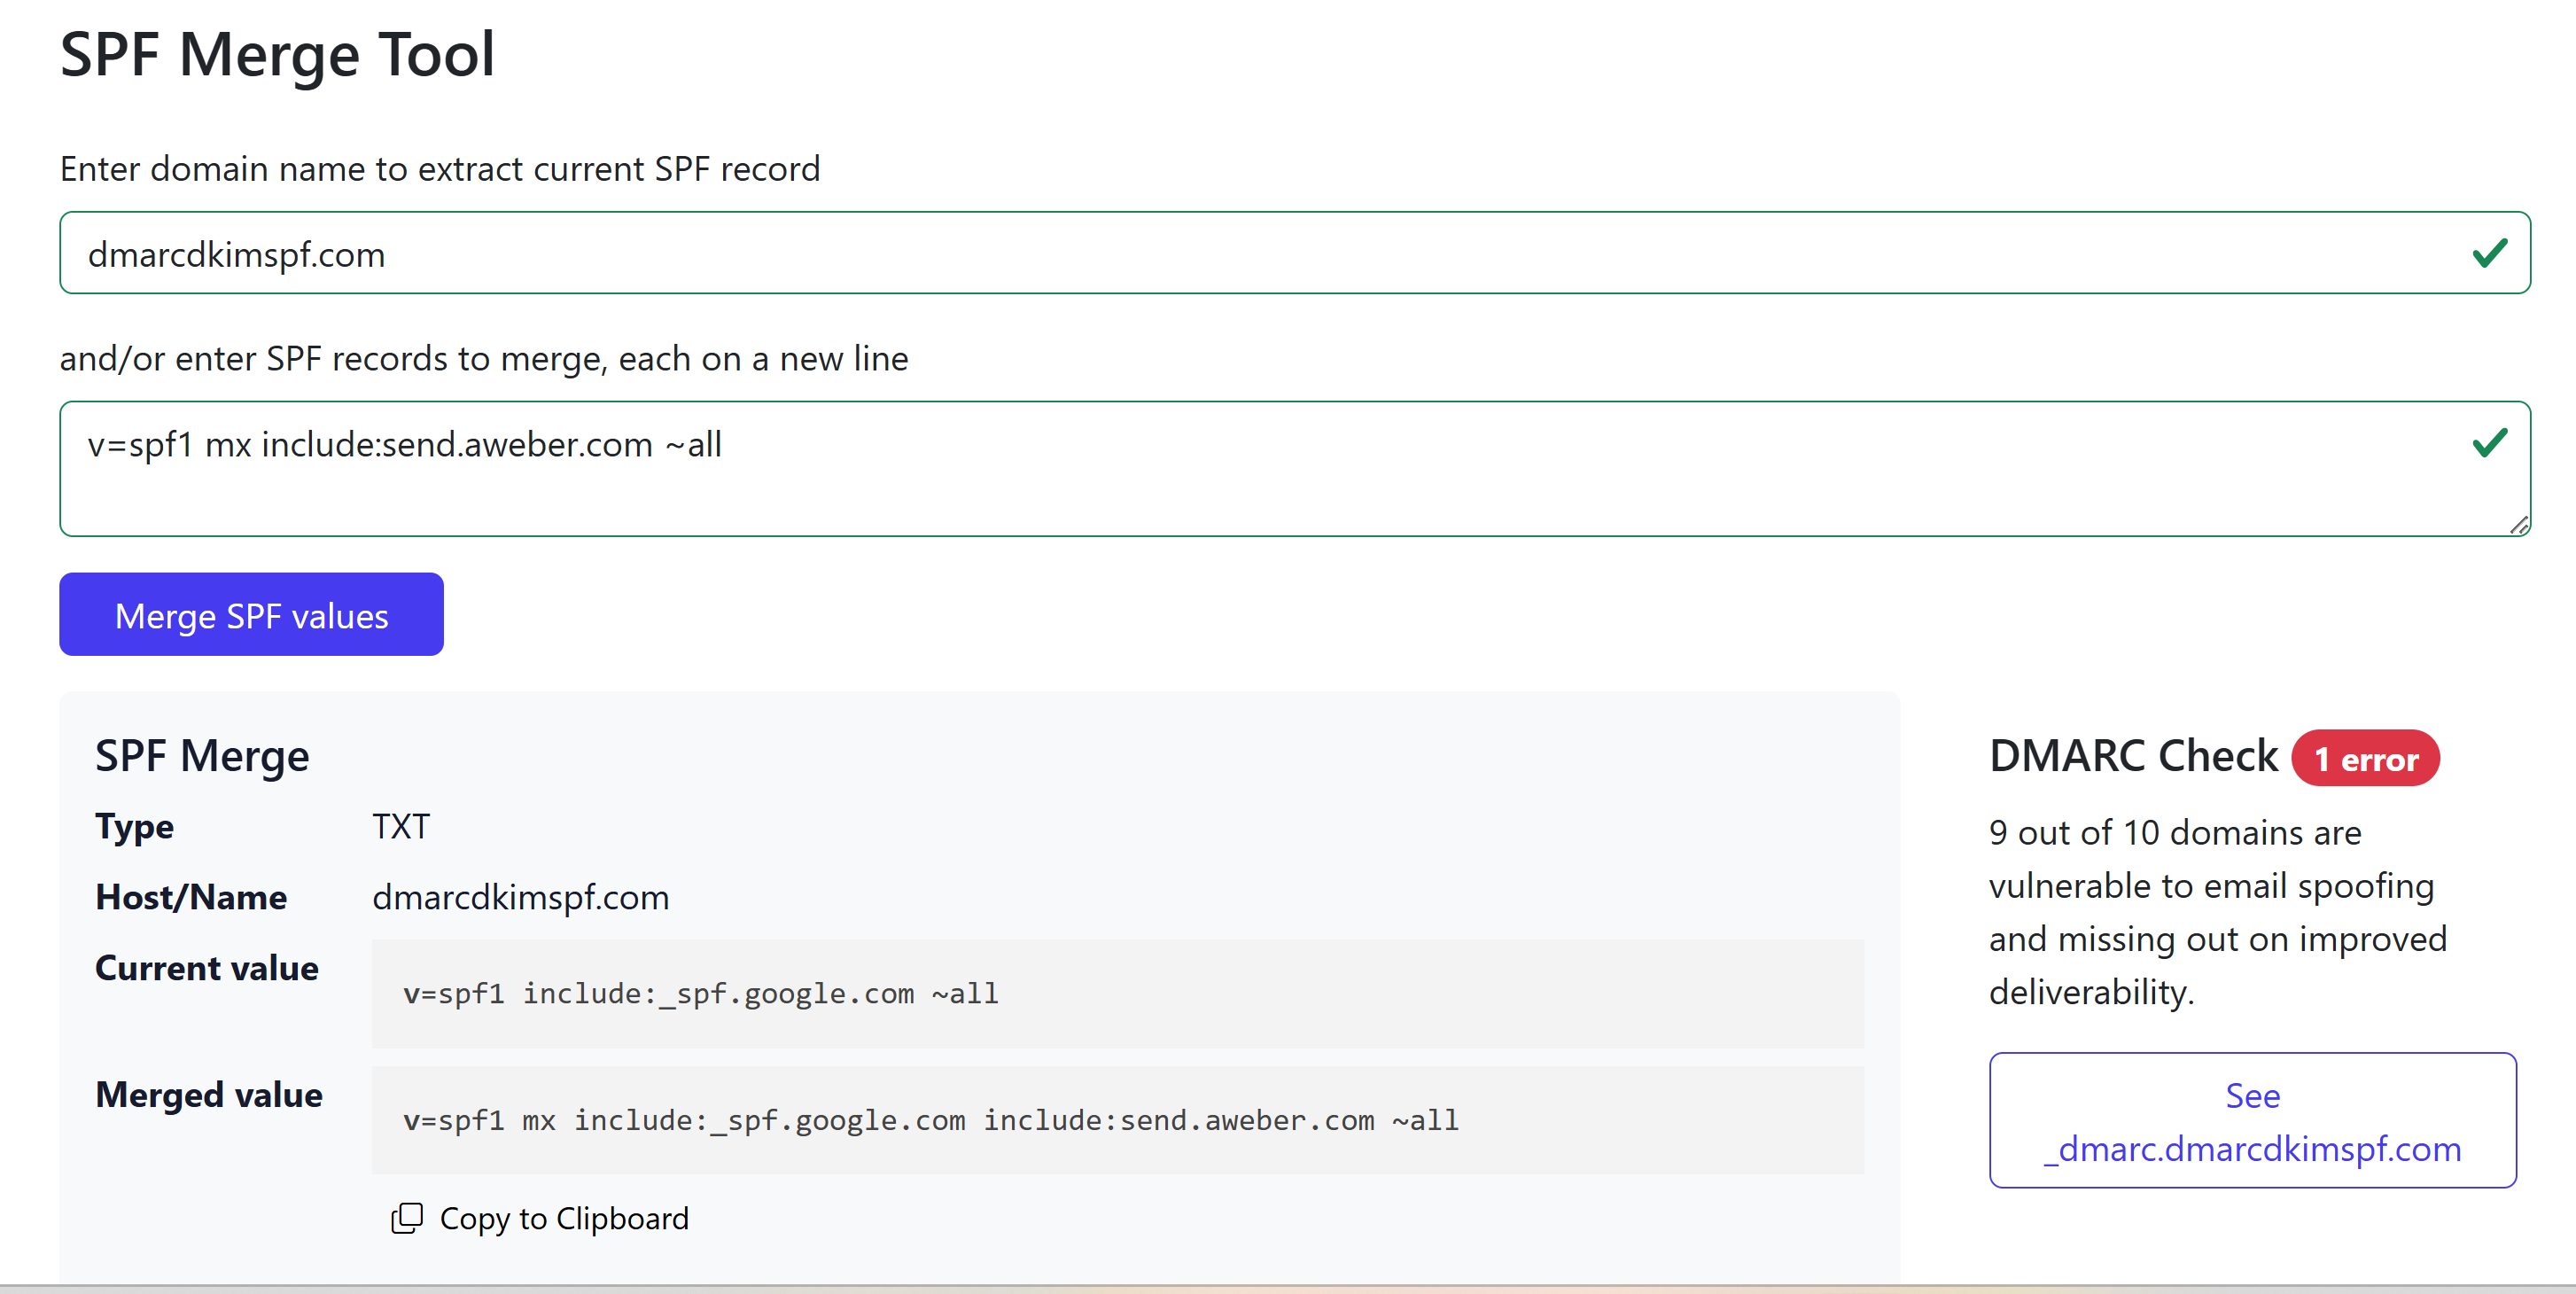
Copy the merged value and edit the existing SPF record.
Setup Aweber DMARC Record:
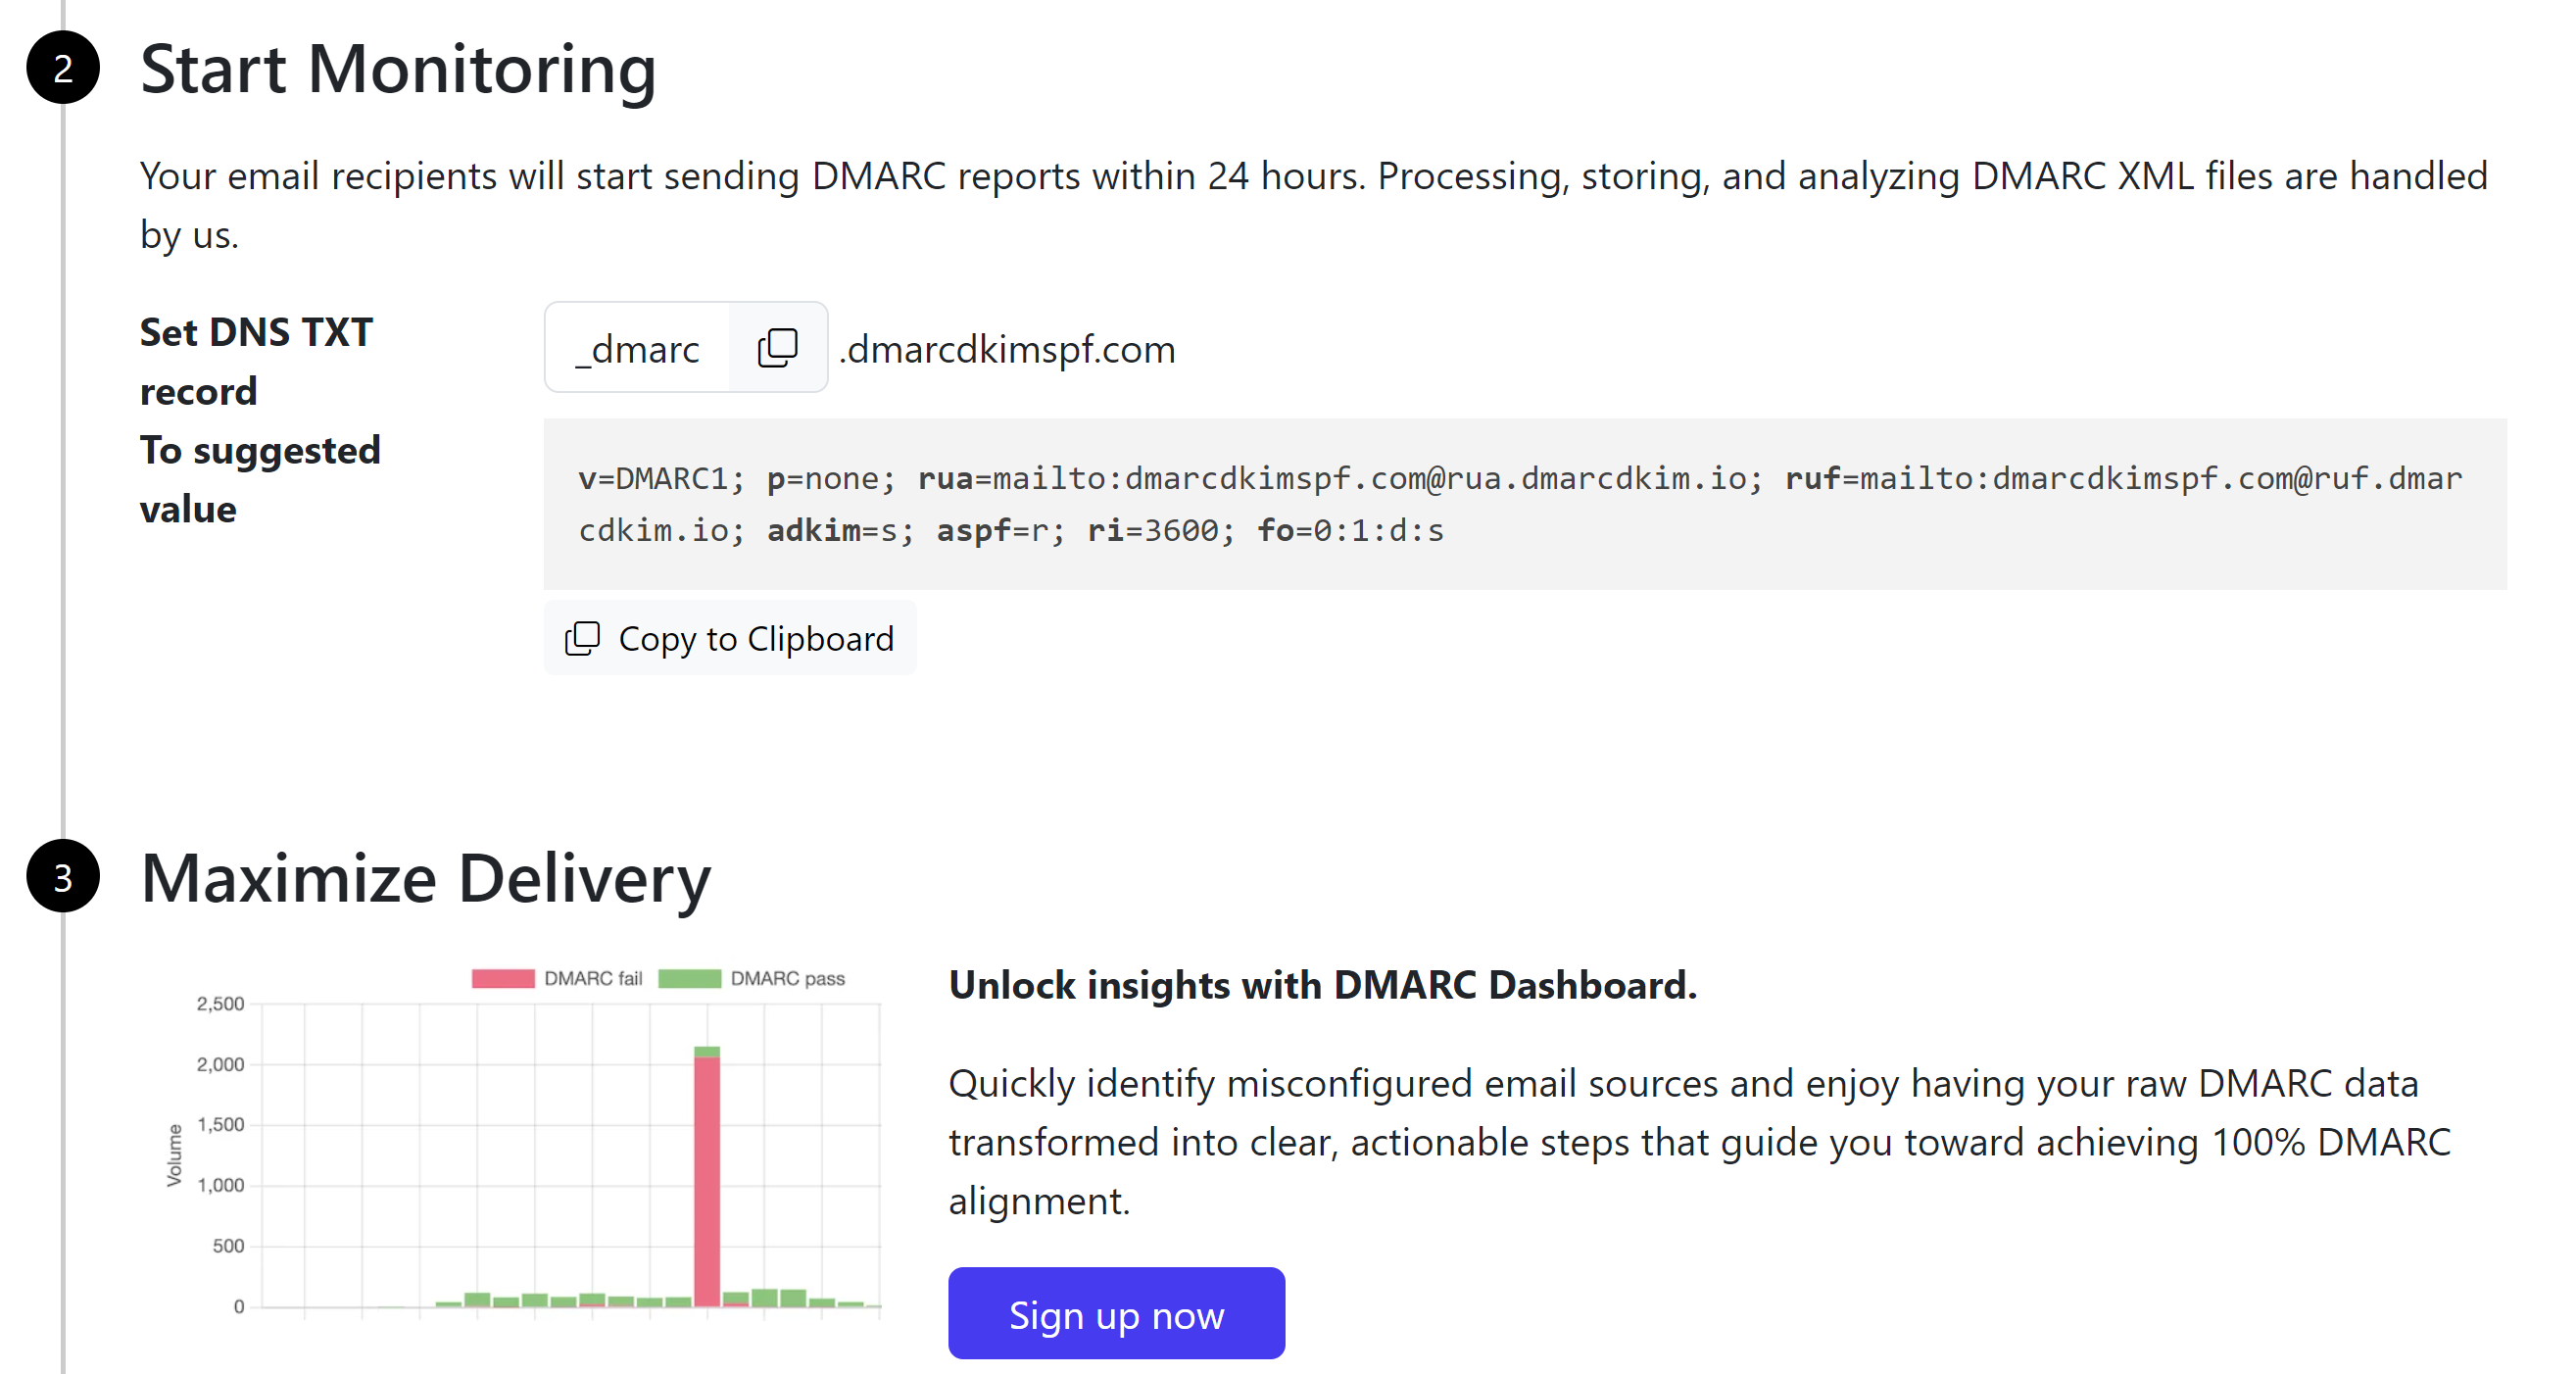
The DMARC value provided by Aweber only provides email monitoring. It does not block the unauthorized senders. Also, there is no destination for the DMARC reports where you can see the email performance insights.
To address all these issues, DmarcDkim.com has built a tool that guides you through implementing a strict DMARC policy and gives you access to the DMARC reports and analytics.
Go to the DMARC check tool.
-
Add your domain name and click Check.

Copy the TXT DMARC record and add it to your DNS dashboard.
-
Sign up to access the DMARC reports and analytics dashboard.
Aweber DNS Records Verification:
-
After adding all the records, click the Refresh Status button at the bottom of the page.

-
If the records are verified, you will see the confirmation text "Installed" with each record.

DNS authentication may take up to 24 hours. However, if the records are not authenticated after 24 hours, it points to a misconfiguration in your DNS setup. To troubleshoot the domain authentication errors, contact a DmacrDkim.com expert.
Check domain and follow the instructions to nail down your DMARC configuration.
No expert knowledge needed!


