Freshdesk Domain Authentication - SPF, DKIM, DMARC Configuration
Check your domain for DMARC, DKIM, SPF and MX records. Get a free report.
- The impact of Business Email Compromise
- A quiet Google update just made SPF more forgiving
- Cyber Insurance and DMARC Enforcement
- Email impersonation scams explained
- TLS-RPT Record
- SMTP Smuggling
- 🇩🇪 Welche Hosting Anbieter unterstützen DMARC
- Reverse Engineering Phishing
- DMARC Enforcement in 2026
- DMARC for non sending domains
How to set up Freshdesk DMARC, DKIM and SPF records?
Domain authentication protects your email domain from spamming and spoofing. Moreover, email inbox providers require proof that the emails are coming from an authentic source and are safe to open.
Freshdesk provides DKIM and SPF records which help you build trust with the inbox provider and prevent your emails from landing in customers' spam folders.
You can find these DNS records in the Emails tab of your Freshdesk account and add these records to your DNS provider for verification. Follow the steps below to learn the exact process.
Configuring Freshdesk DKIM Records:
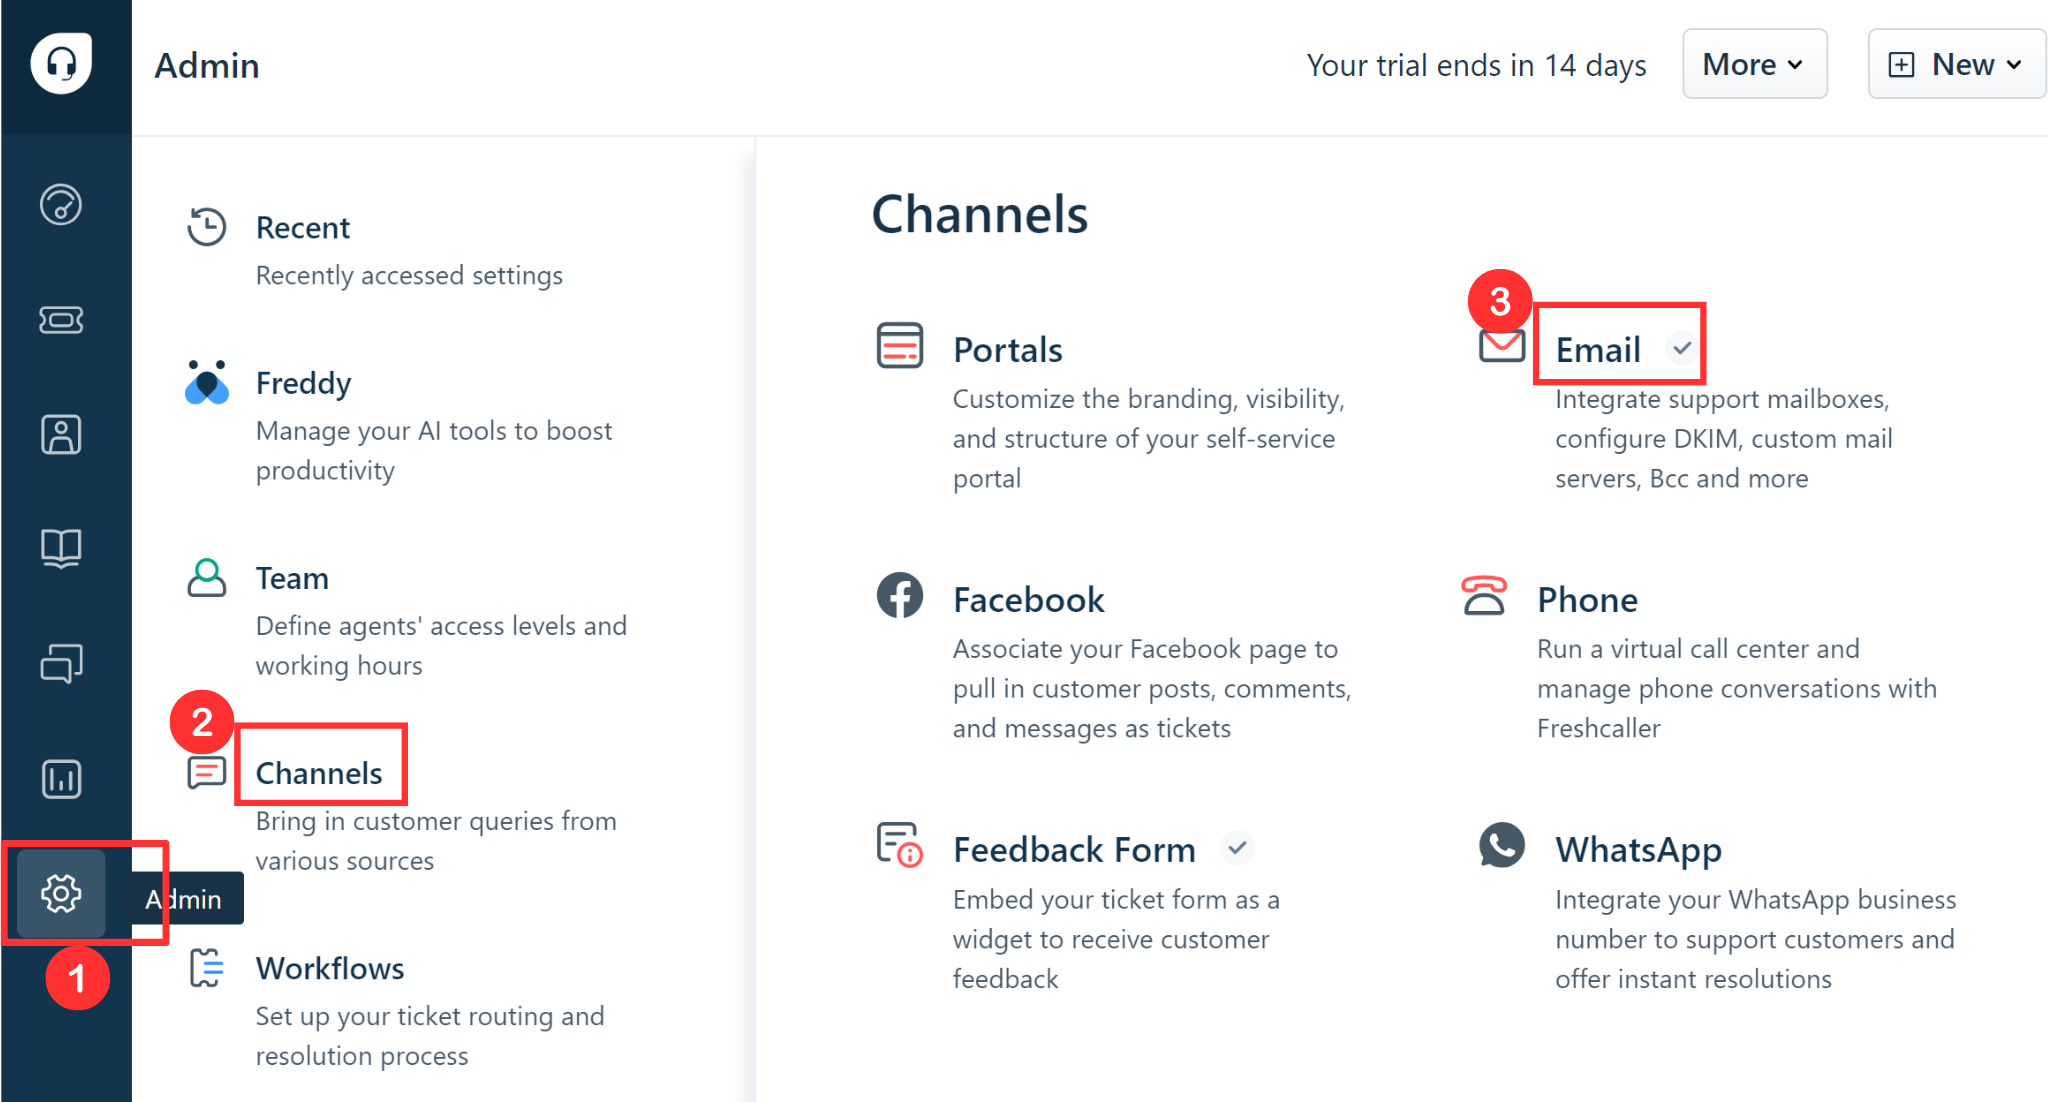
On the dashboard, click the gear icon in the left navigation menu.
-
Click Channels and go to Emails.
-
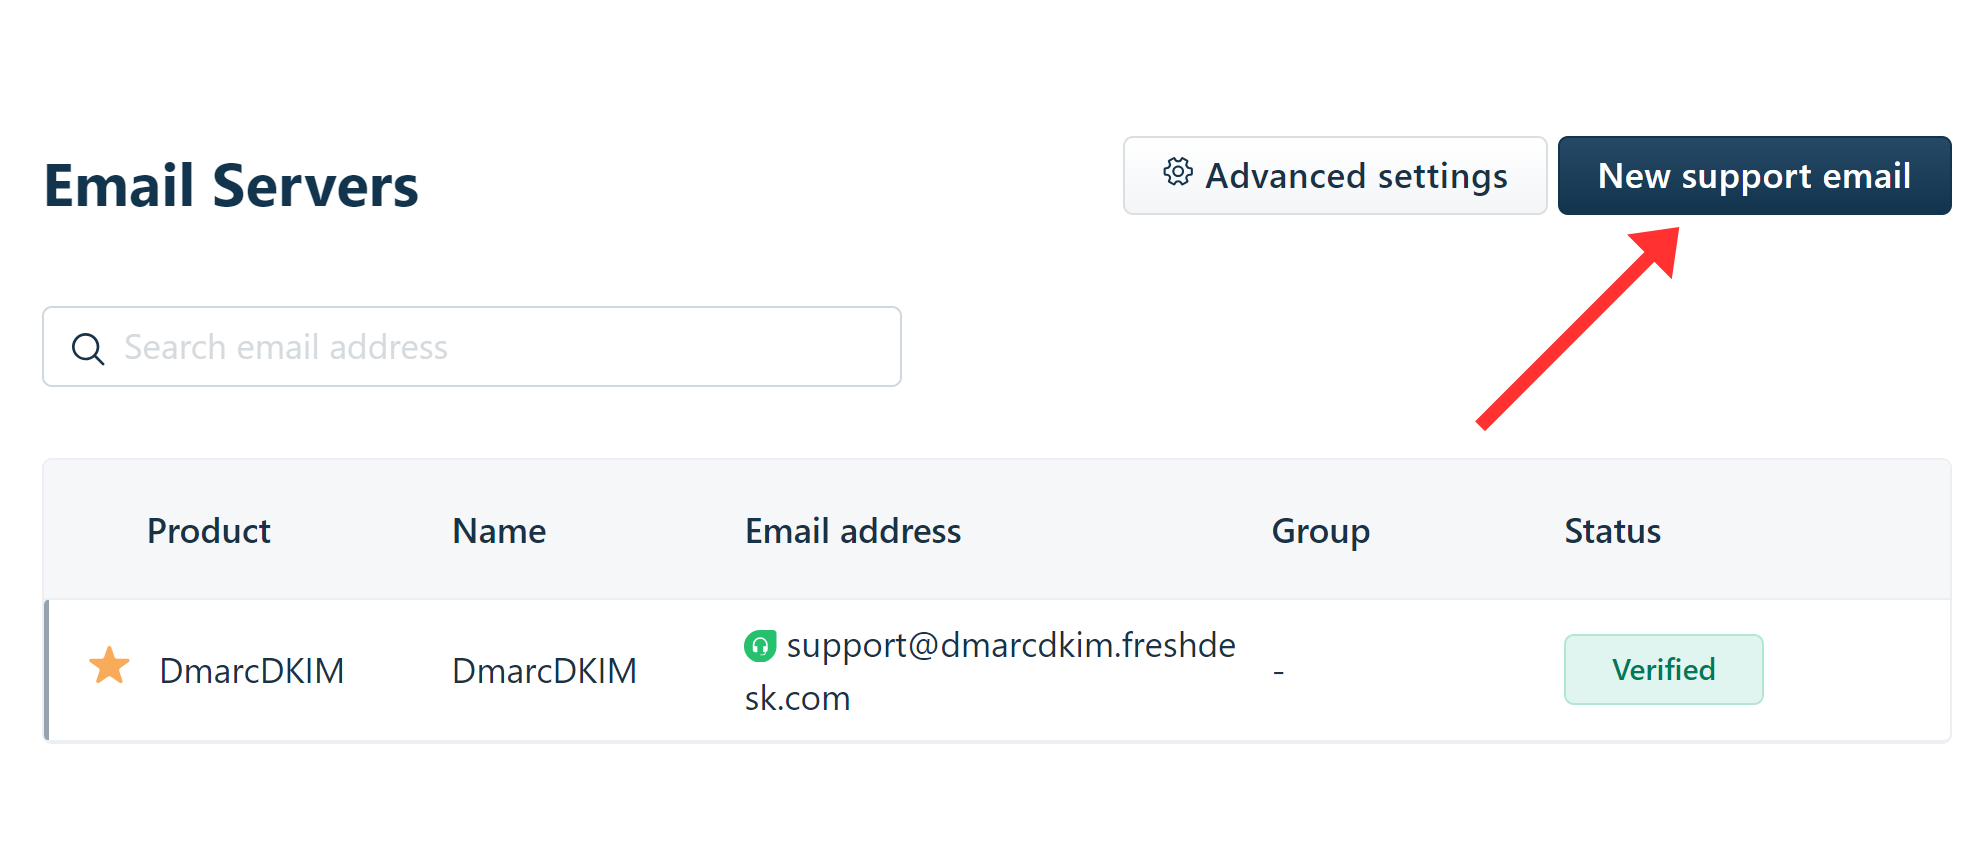
Your signup email domain will be added by default. If you want to add another email, click New support email and add details.
-
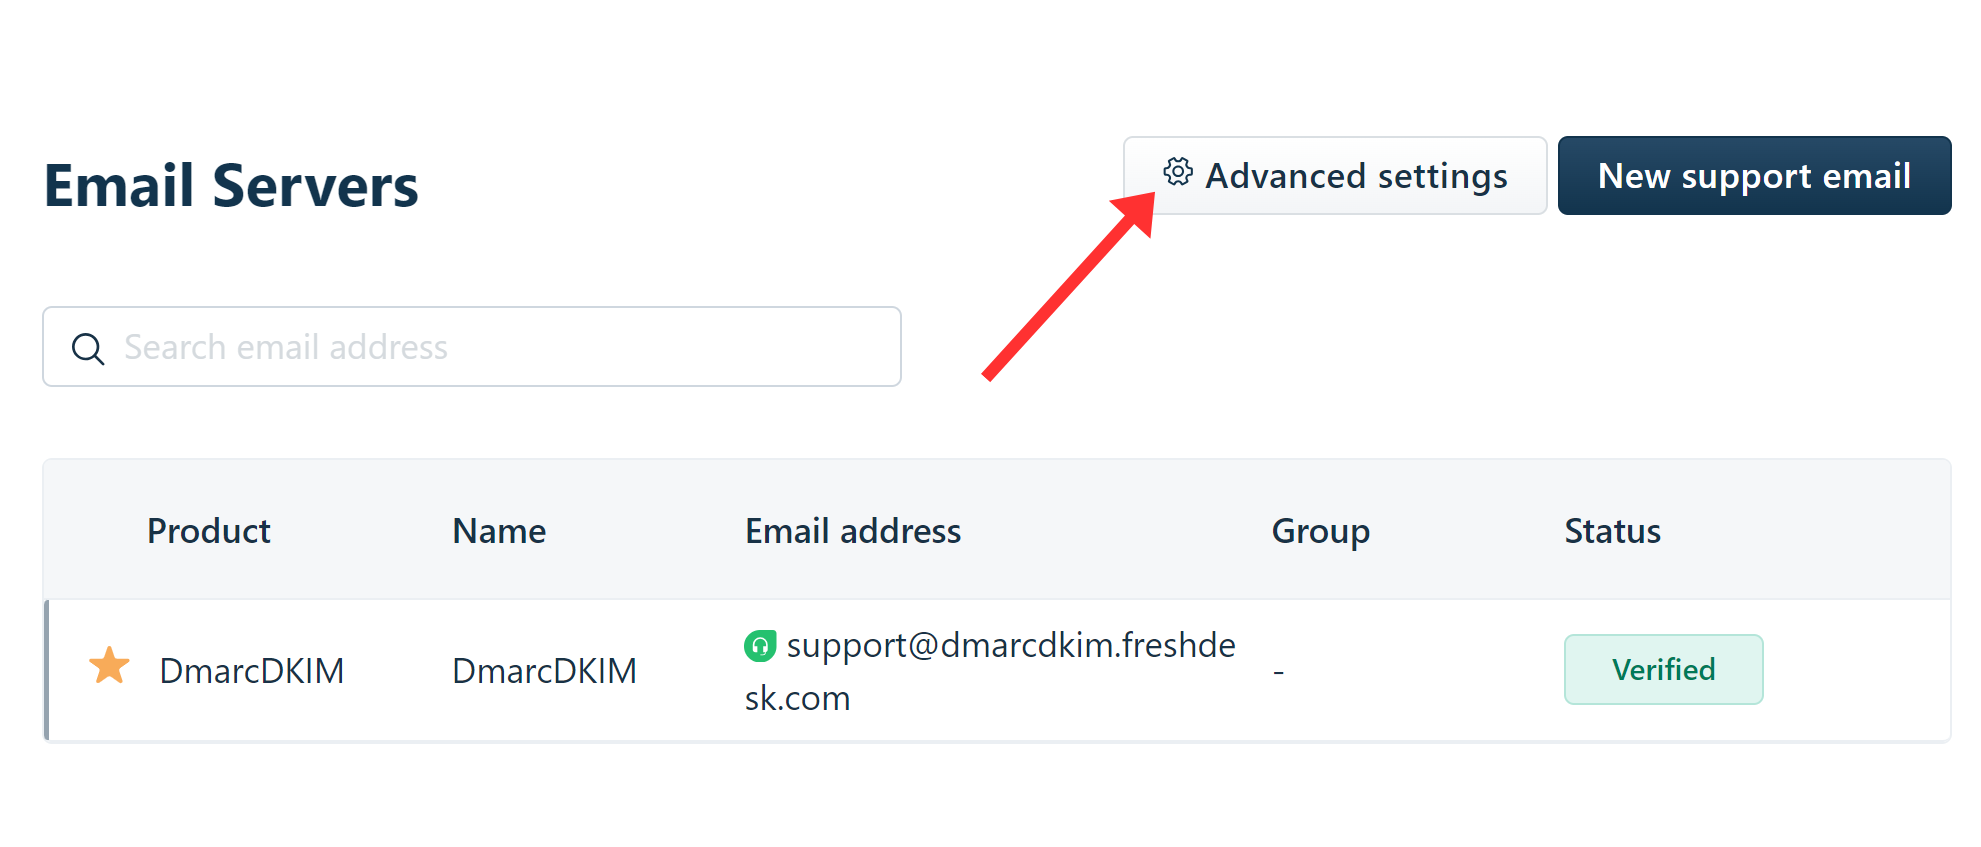
To authenticate the domain, click Advanced Settings.
-
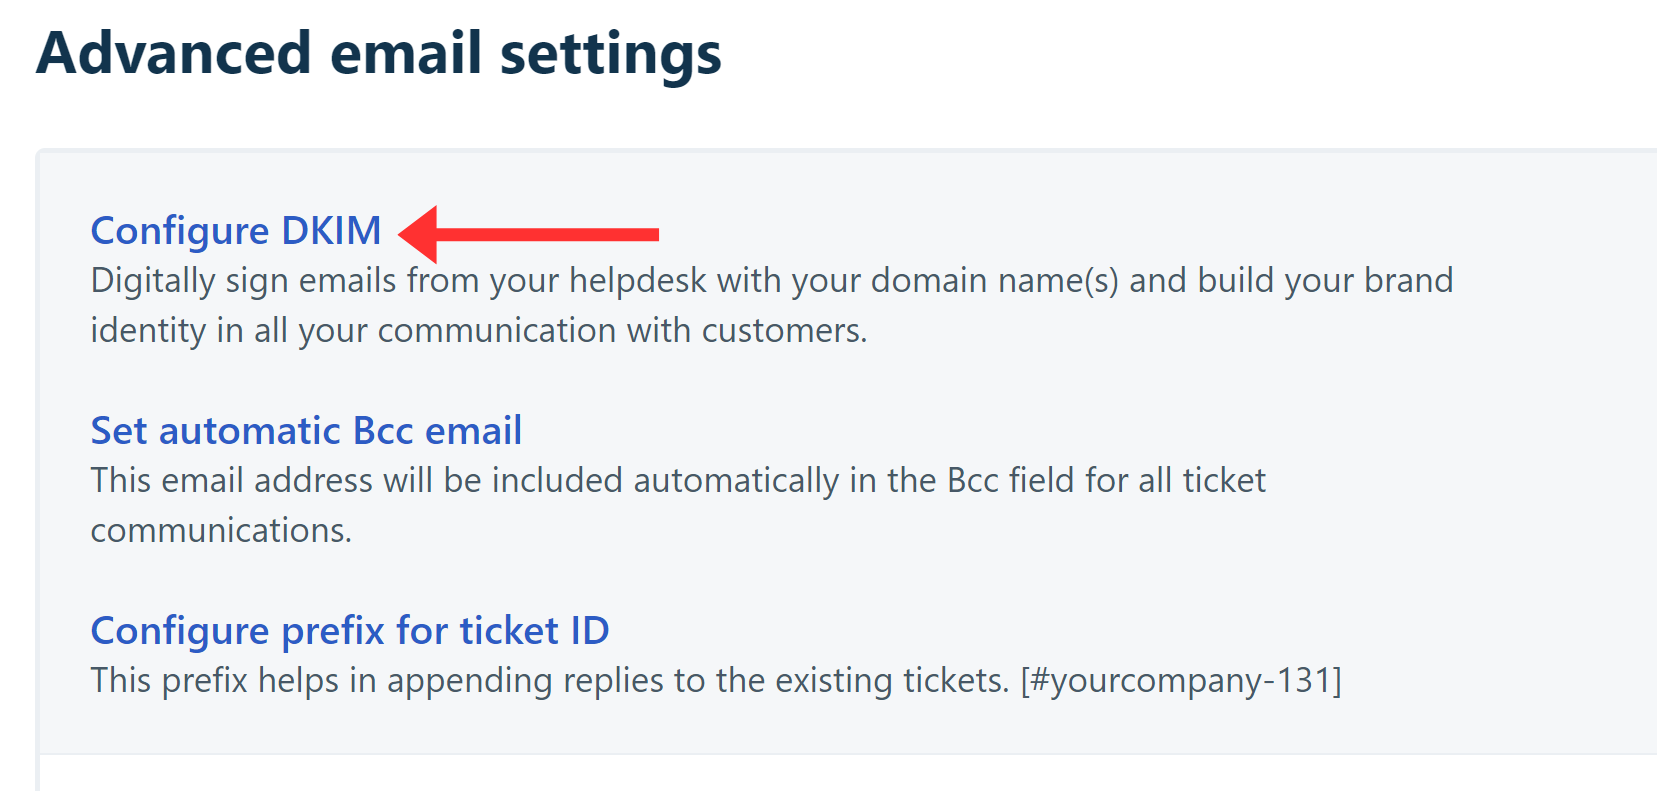
Go to the Configure DKIM option.
-
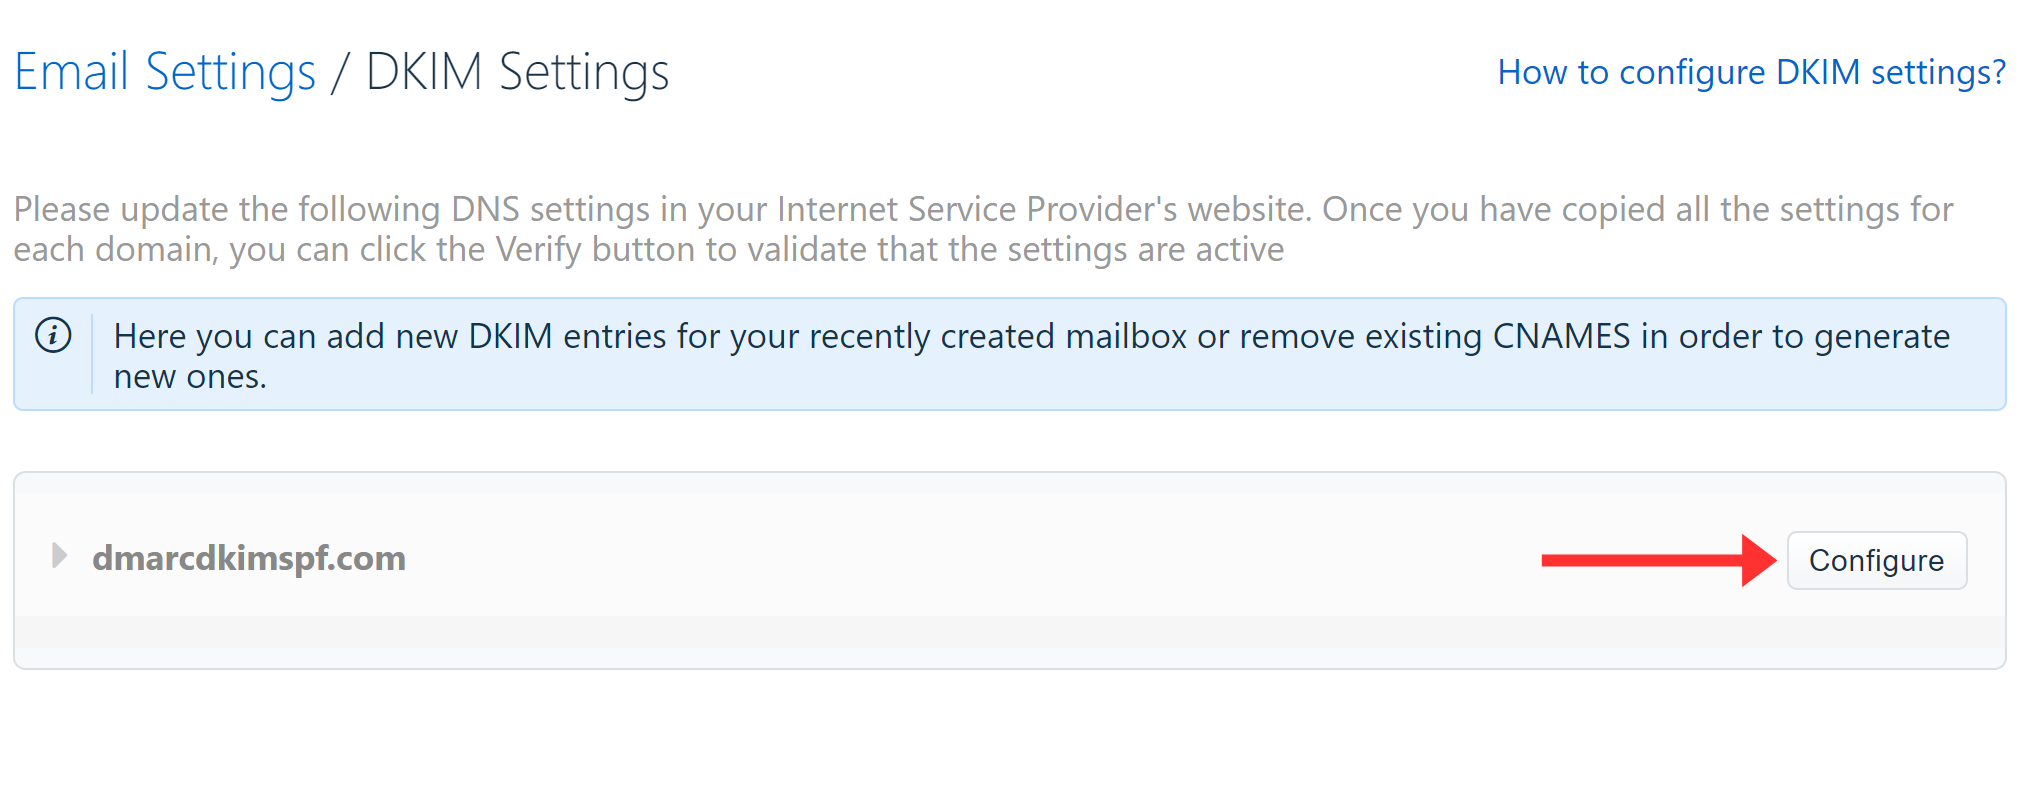
Click the Configure button next to your domain name.
-
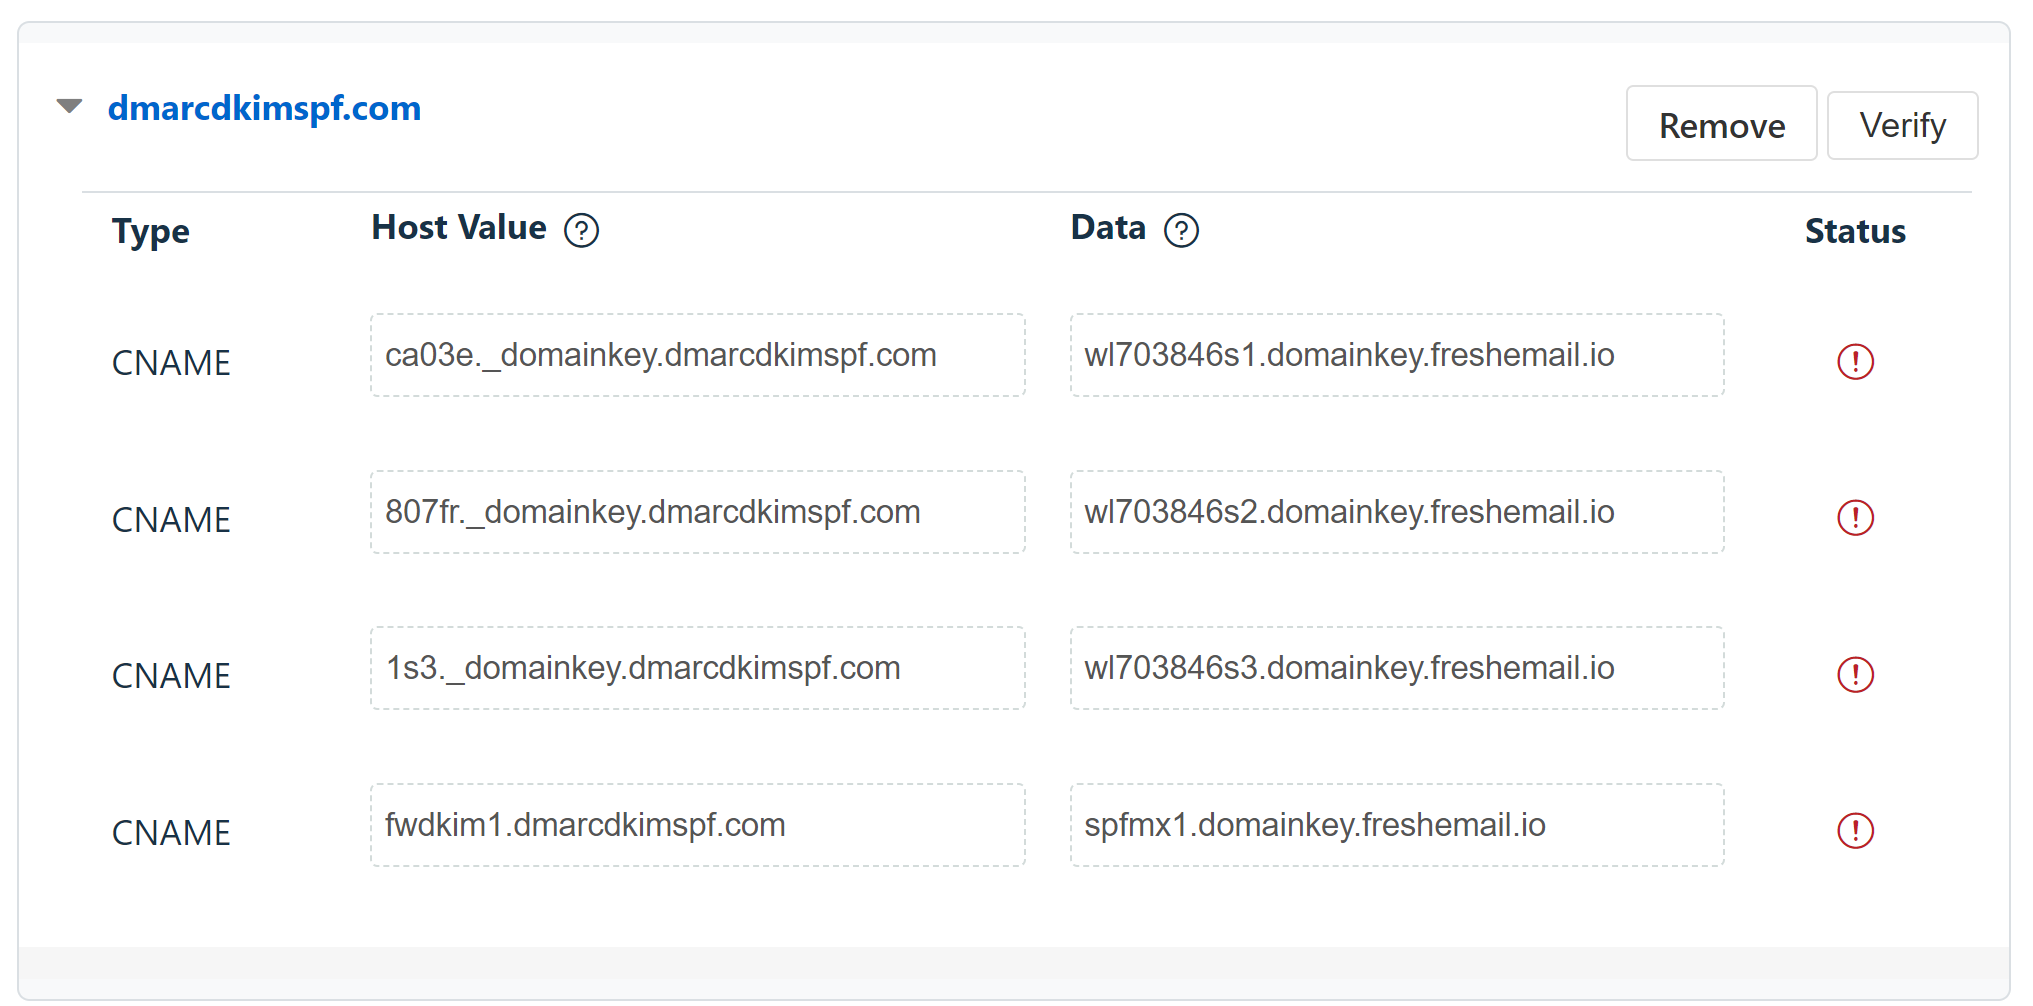
Here, you'll see four CNAME DKIM records. Add each record to your DNS provider.
Adding Freshdesk DKIM to DNS Provider:
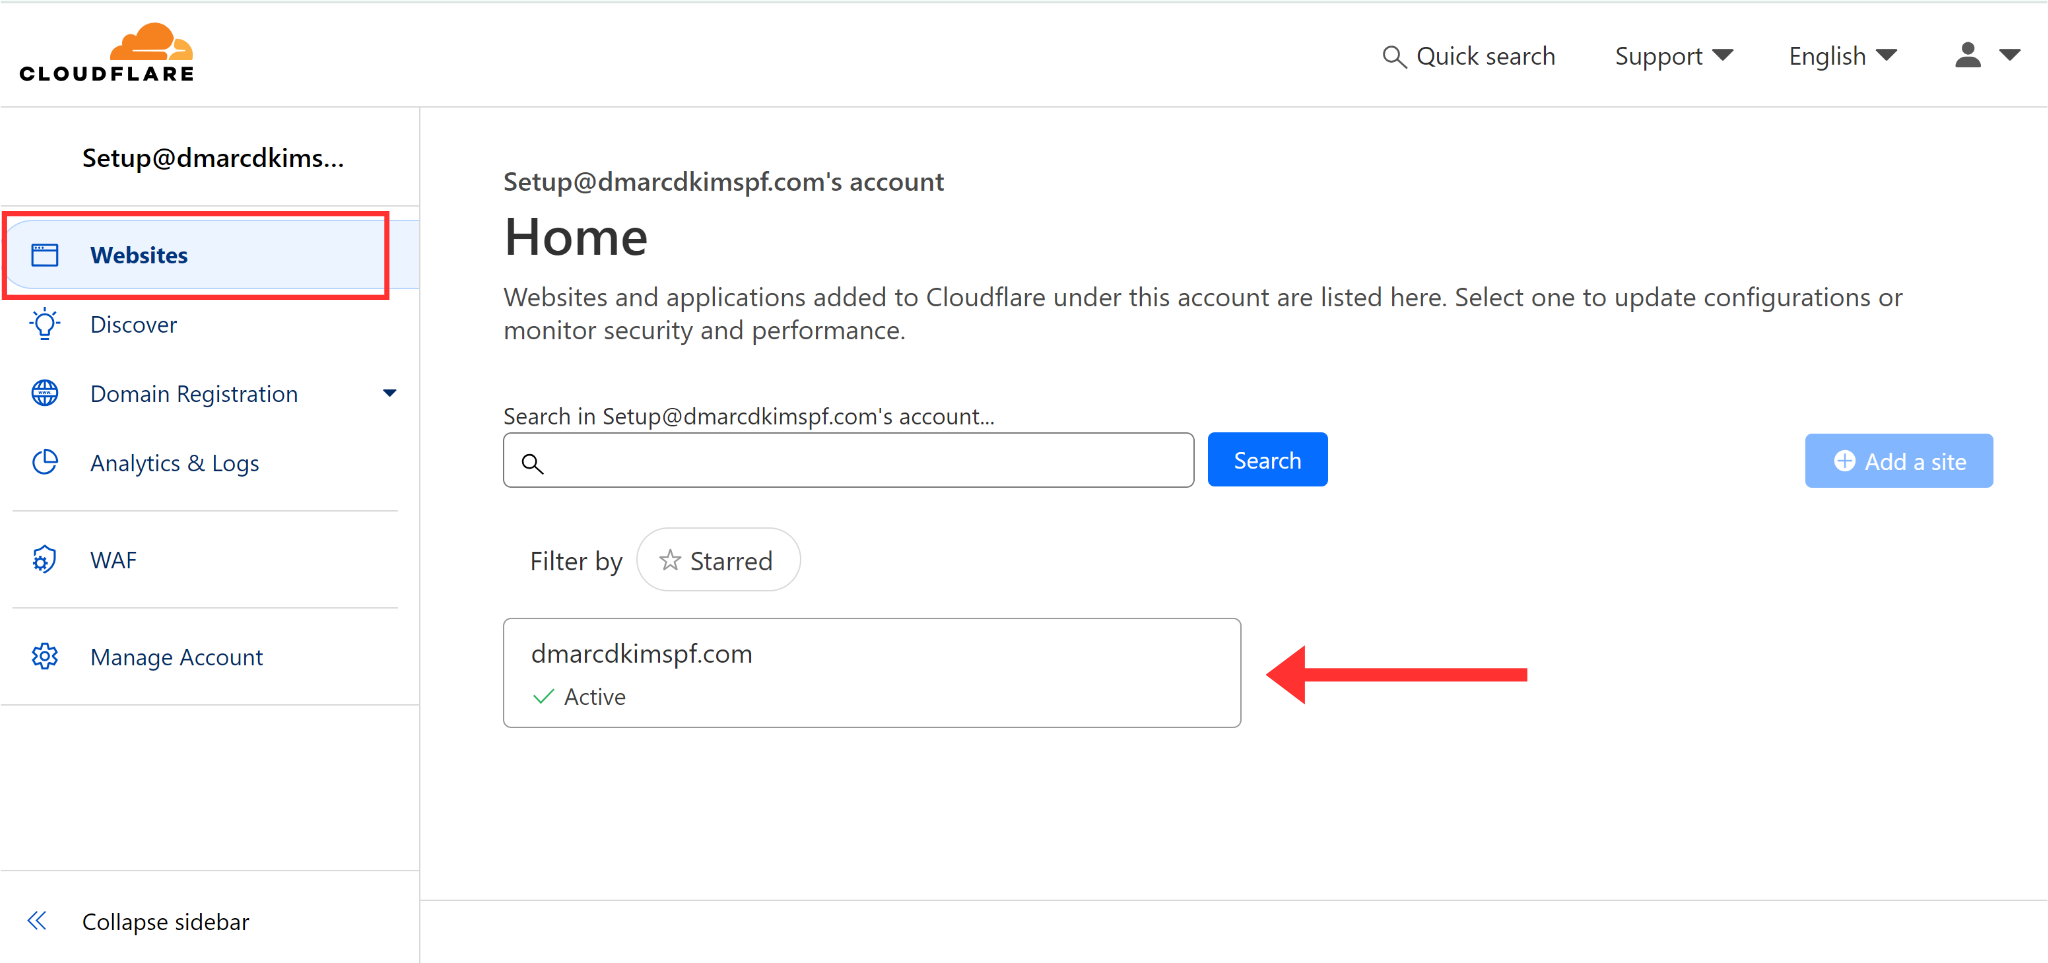
Login to your DNS provider. We are using Cloudflare for this guide.
-
Go to the Websites tab and select the domain.
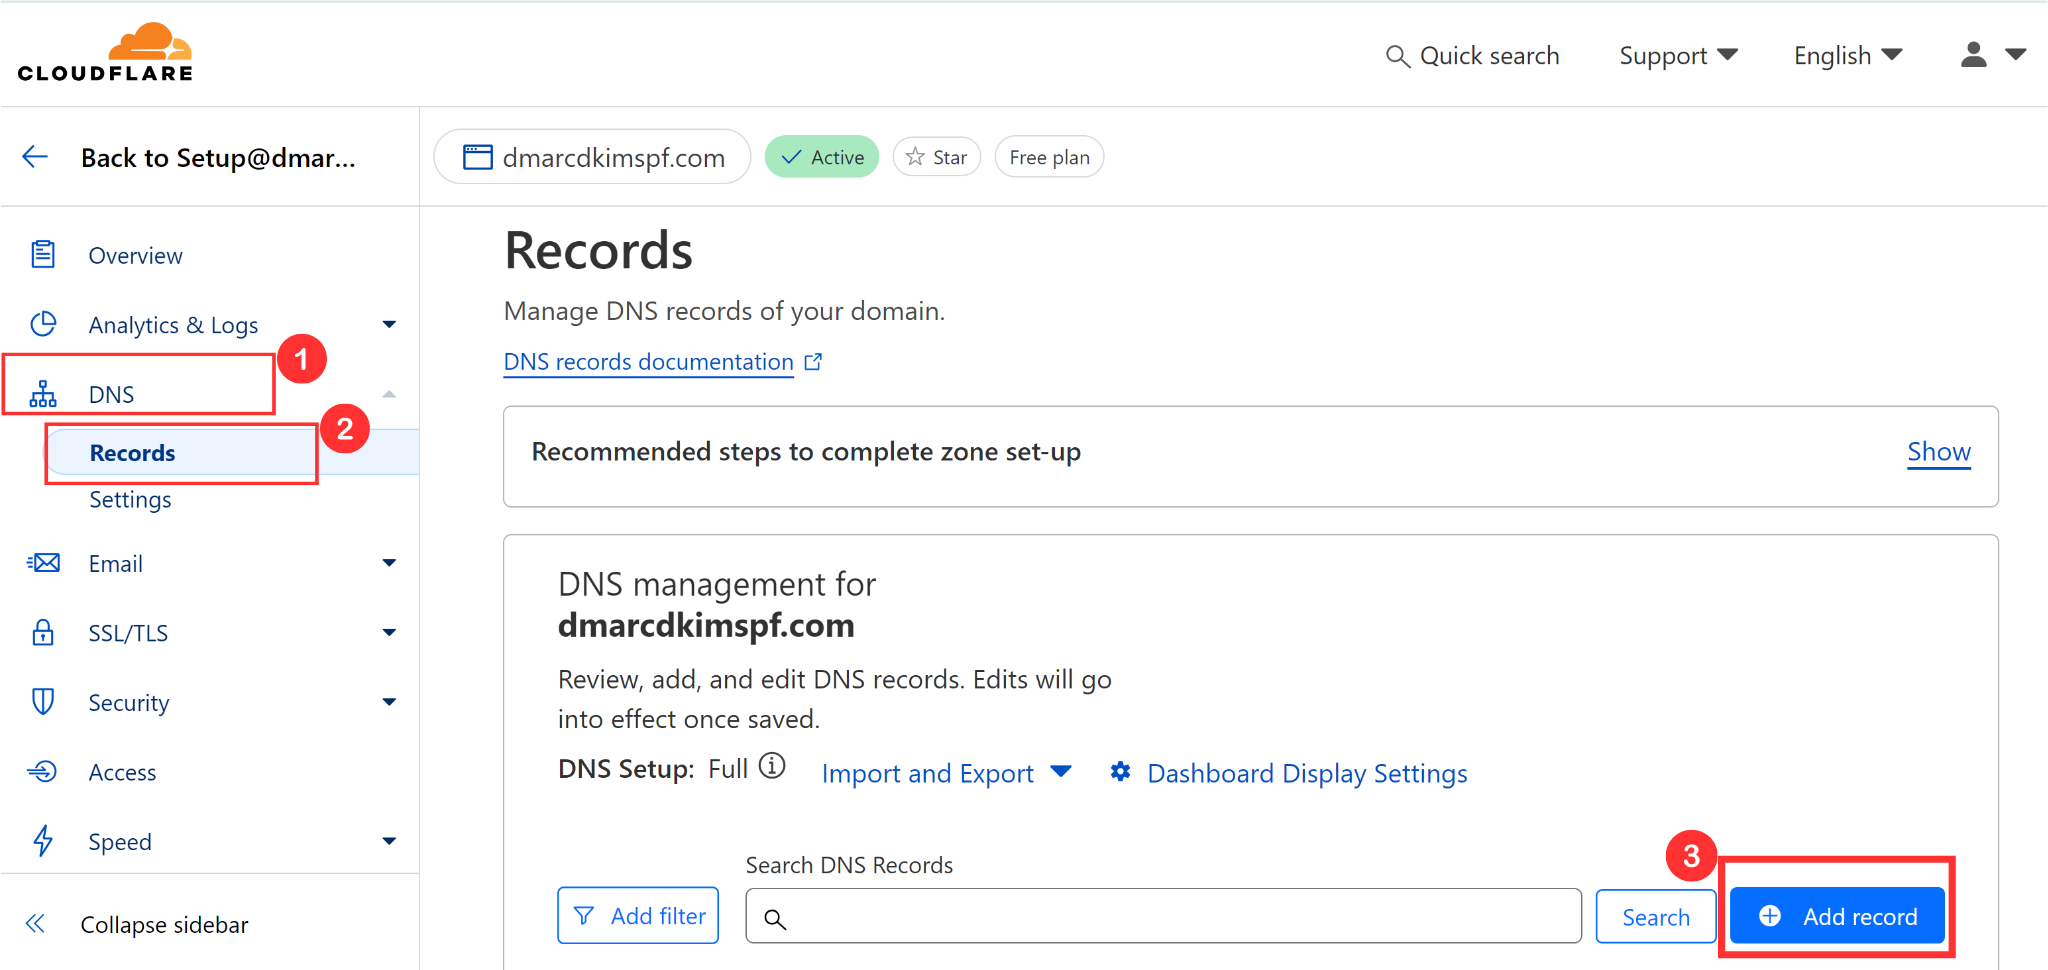
Click DNS and go to Records.
-
Click Add Record to enter Freshdesk DKIM records.
Copy the record name and add it to the Name field.
Copy the record value and add it to the Target field.
-
Turn off the proxy and click Save.
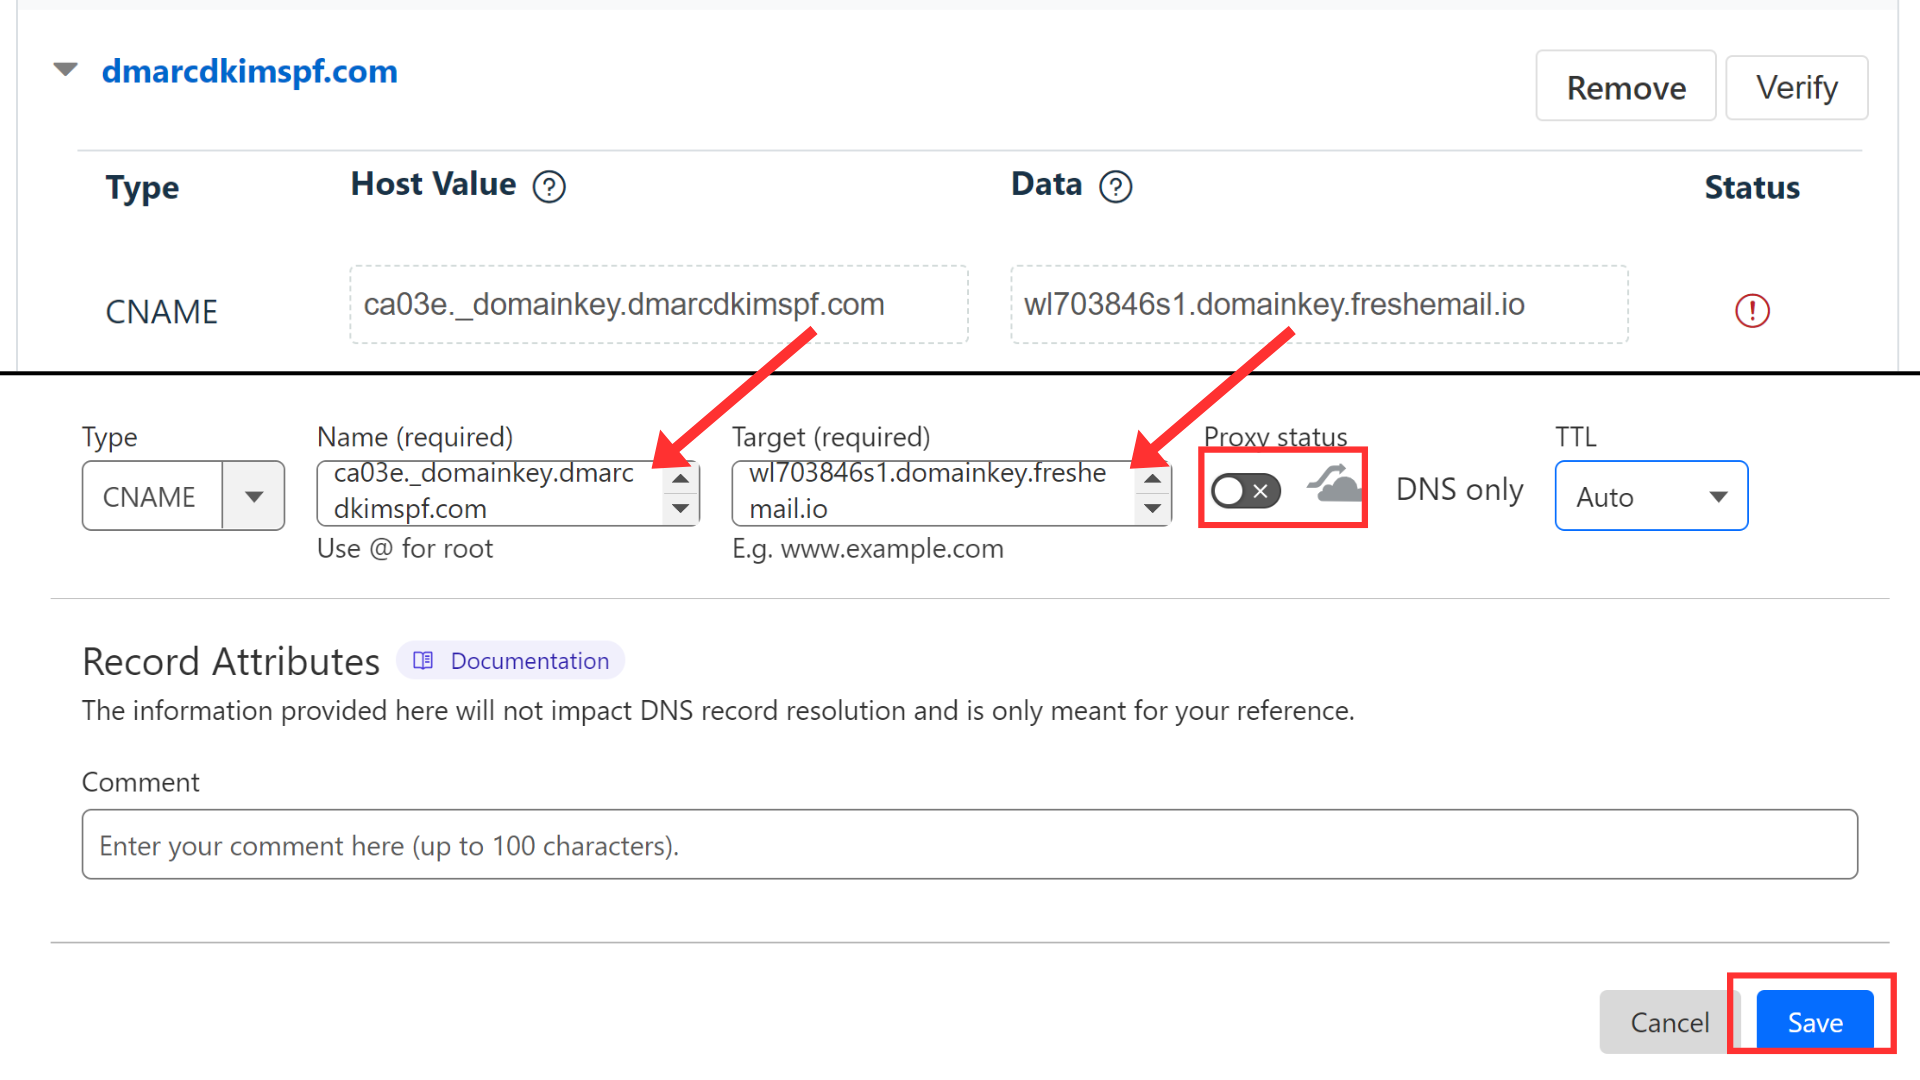
NOTE: Always turn off the proxy for CNAME records. If the proxy is enabled, it diverts the traffic to your DNS provider instead of your email server.
Verify Freshdesk DKIM Records:
Once all CNAME records are setup, click the Verify button.
-
If records were added correctly, you should see green checkmarks with each record.
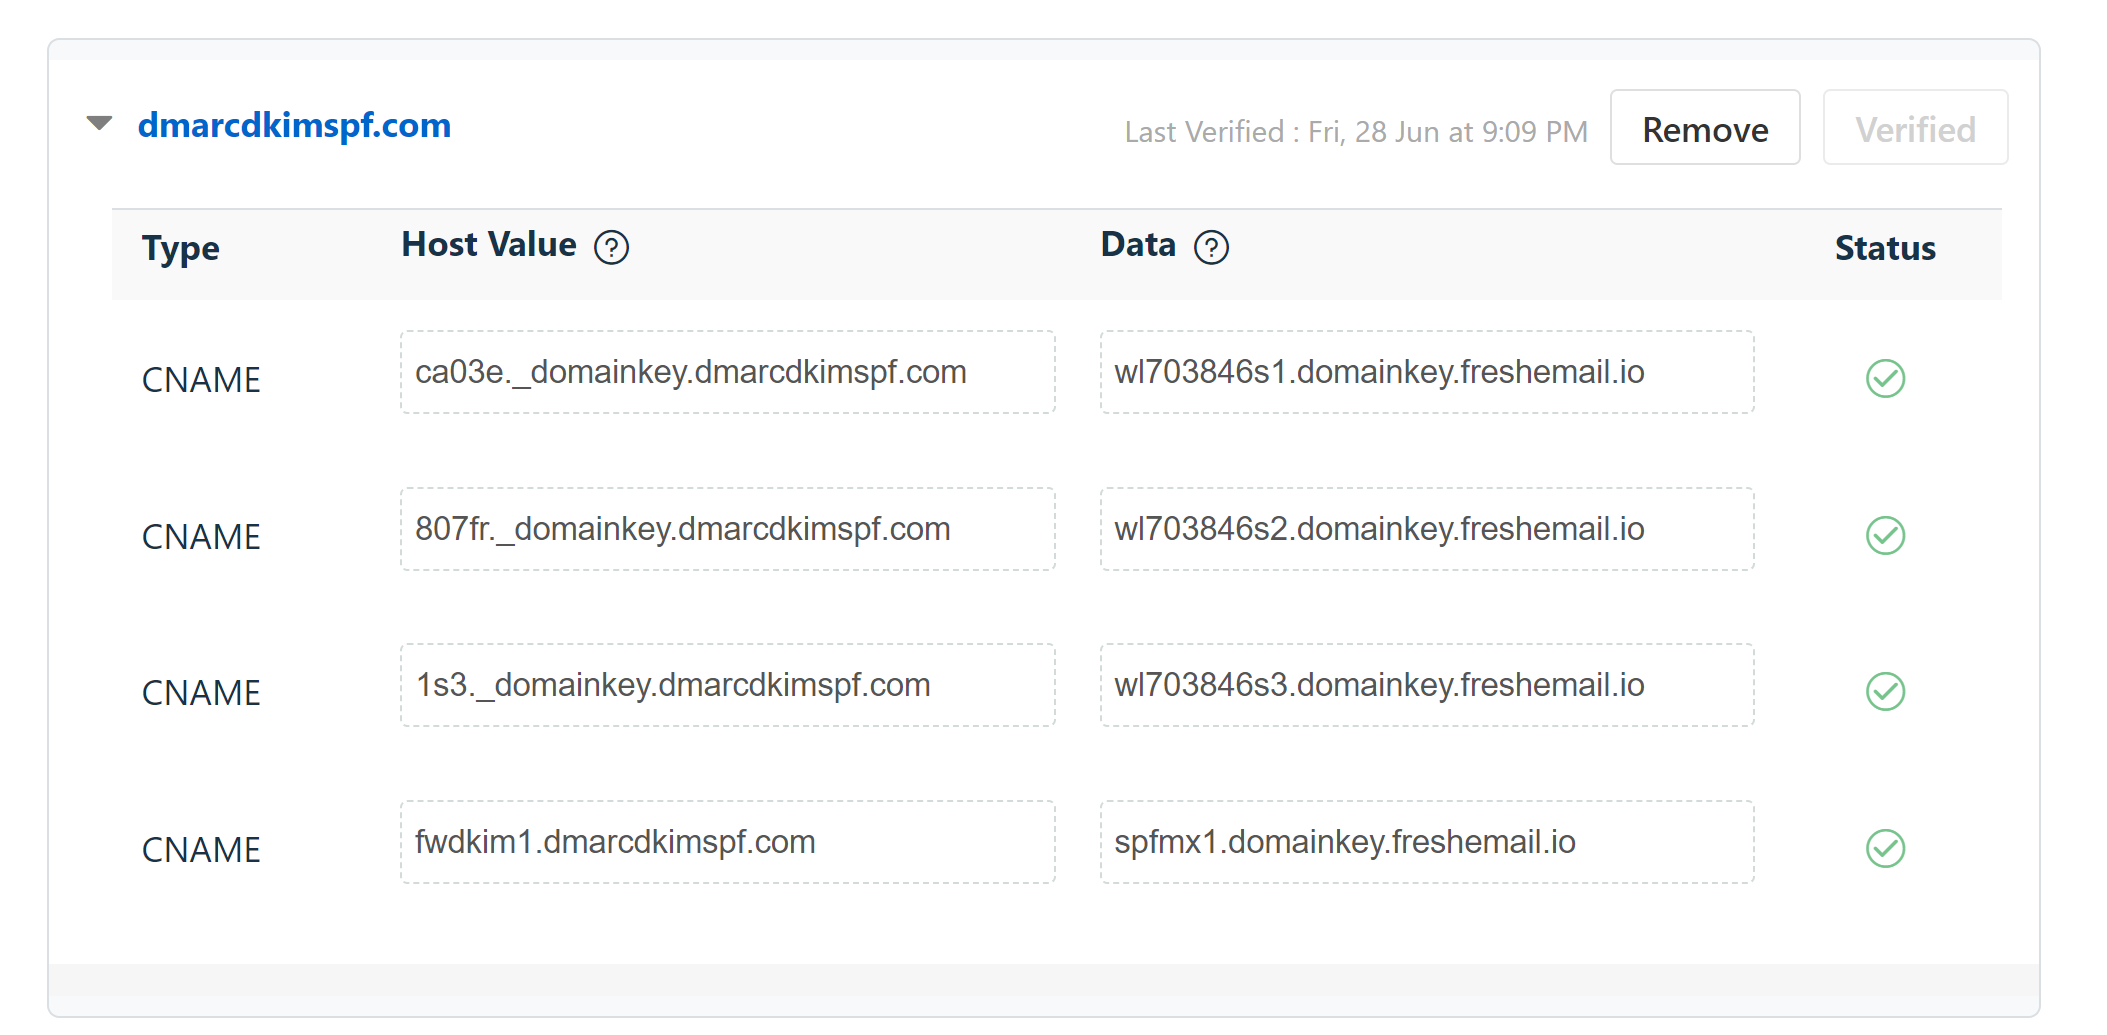
NOTE: Wait up to 24 hours for DNS records to update. If records are not verified after 24 hours, there can be a misconfiguration in the DNS setup. You can hire a DmarcDkim.com expert to troubleshoot authentication issues.
Adding Freshdesk SPF Record:
You can find the SPF record at the Freshdesk Help Center.
In the record name section, write your domain name or simply write "@."
In the Target section, write SPF value: v=spf1 include:email.freshdesk.com ~all.
-
Select type TXT and click Save.
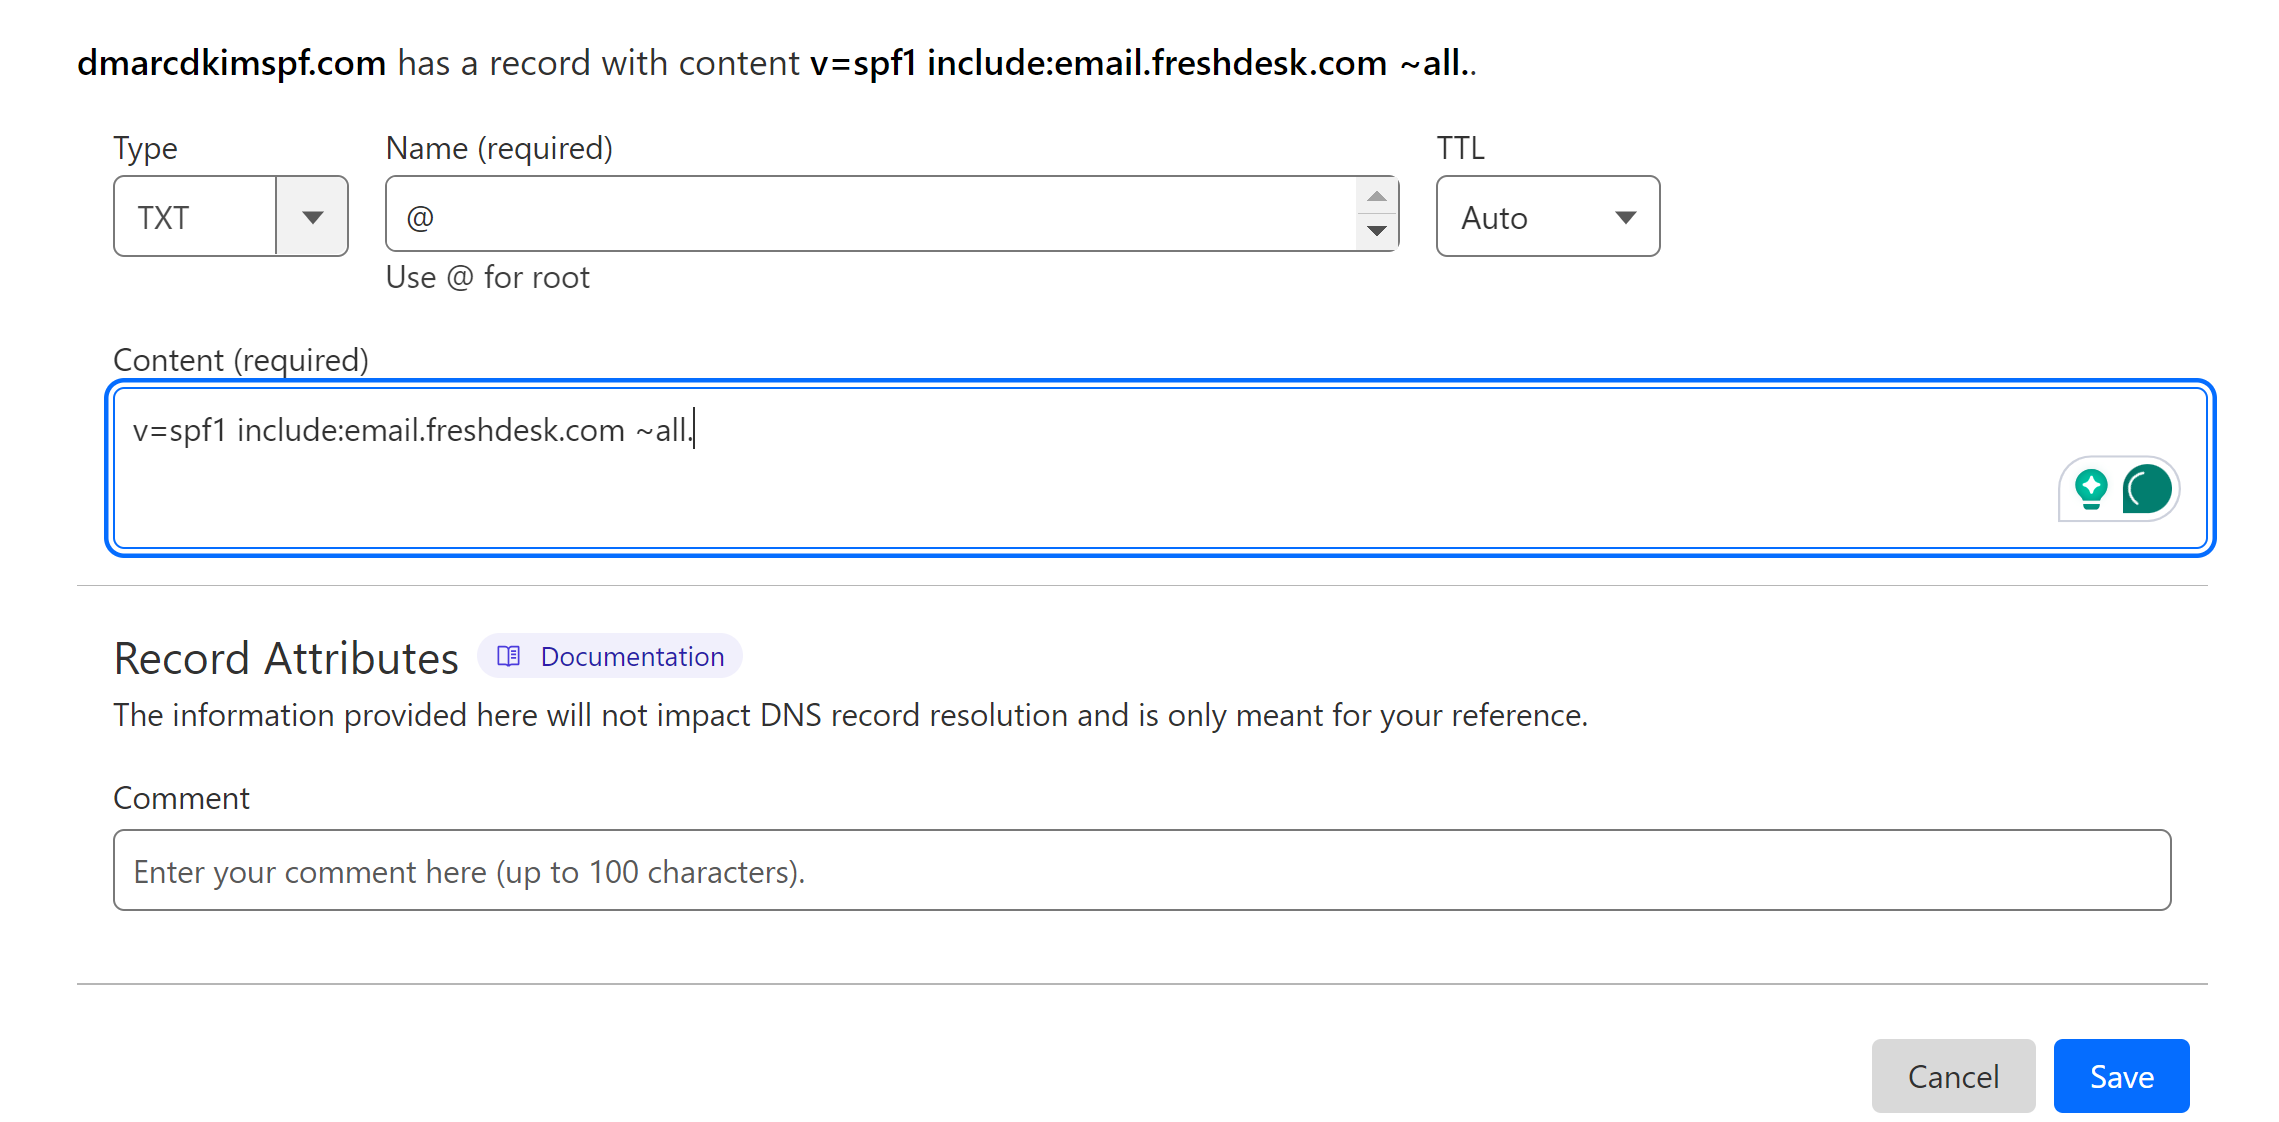
If your DNS provider has an existing SPF record, merge it with the Freshdesk SPF to get a single, combined value. Due to DNS provider limitations, only one SPF record can be added at a time.
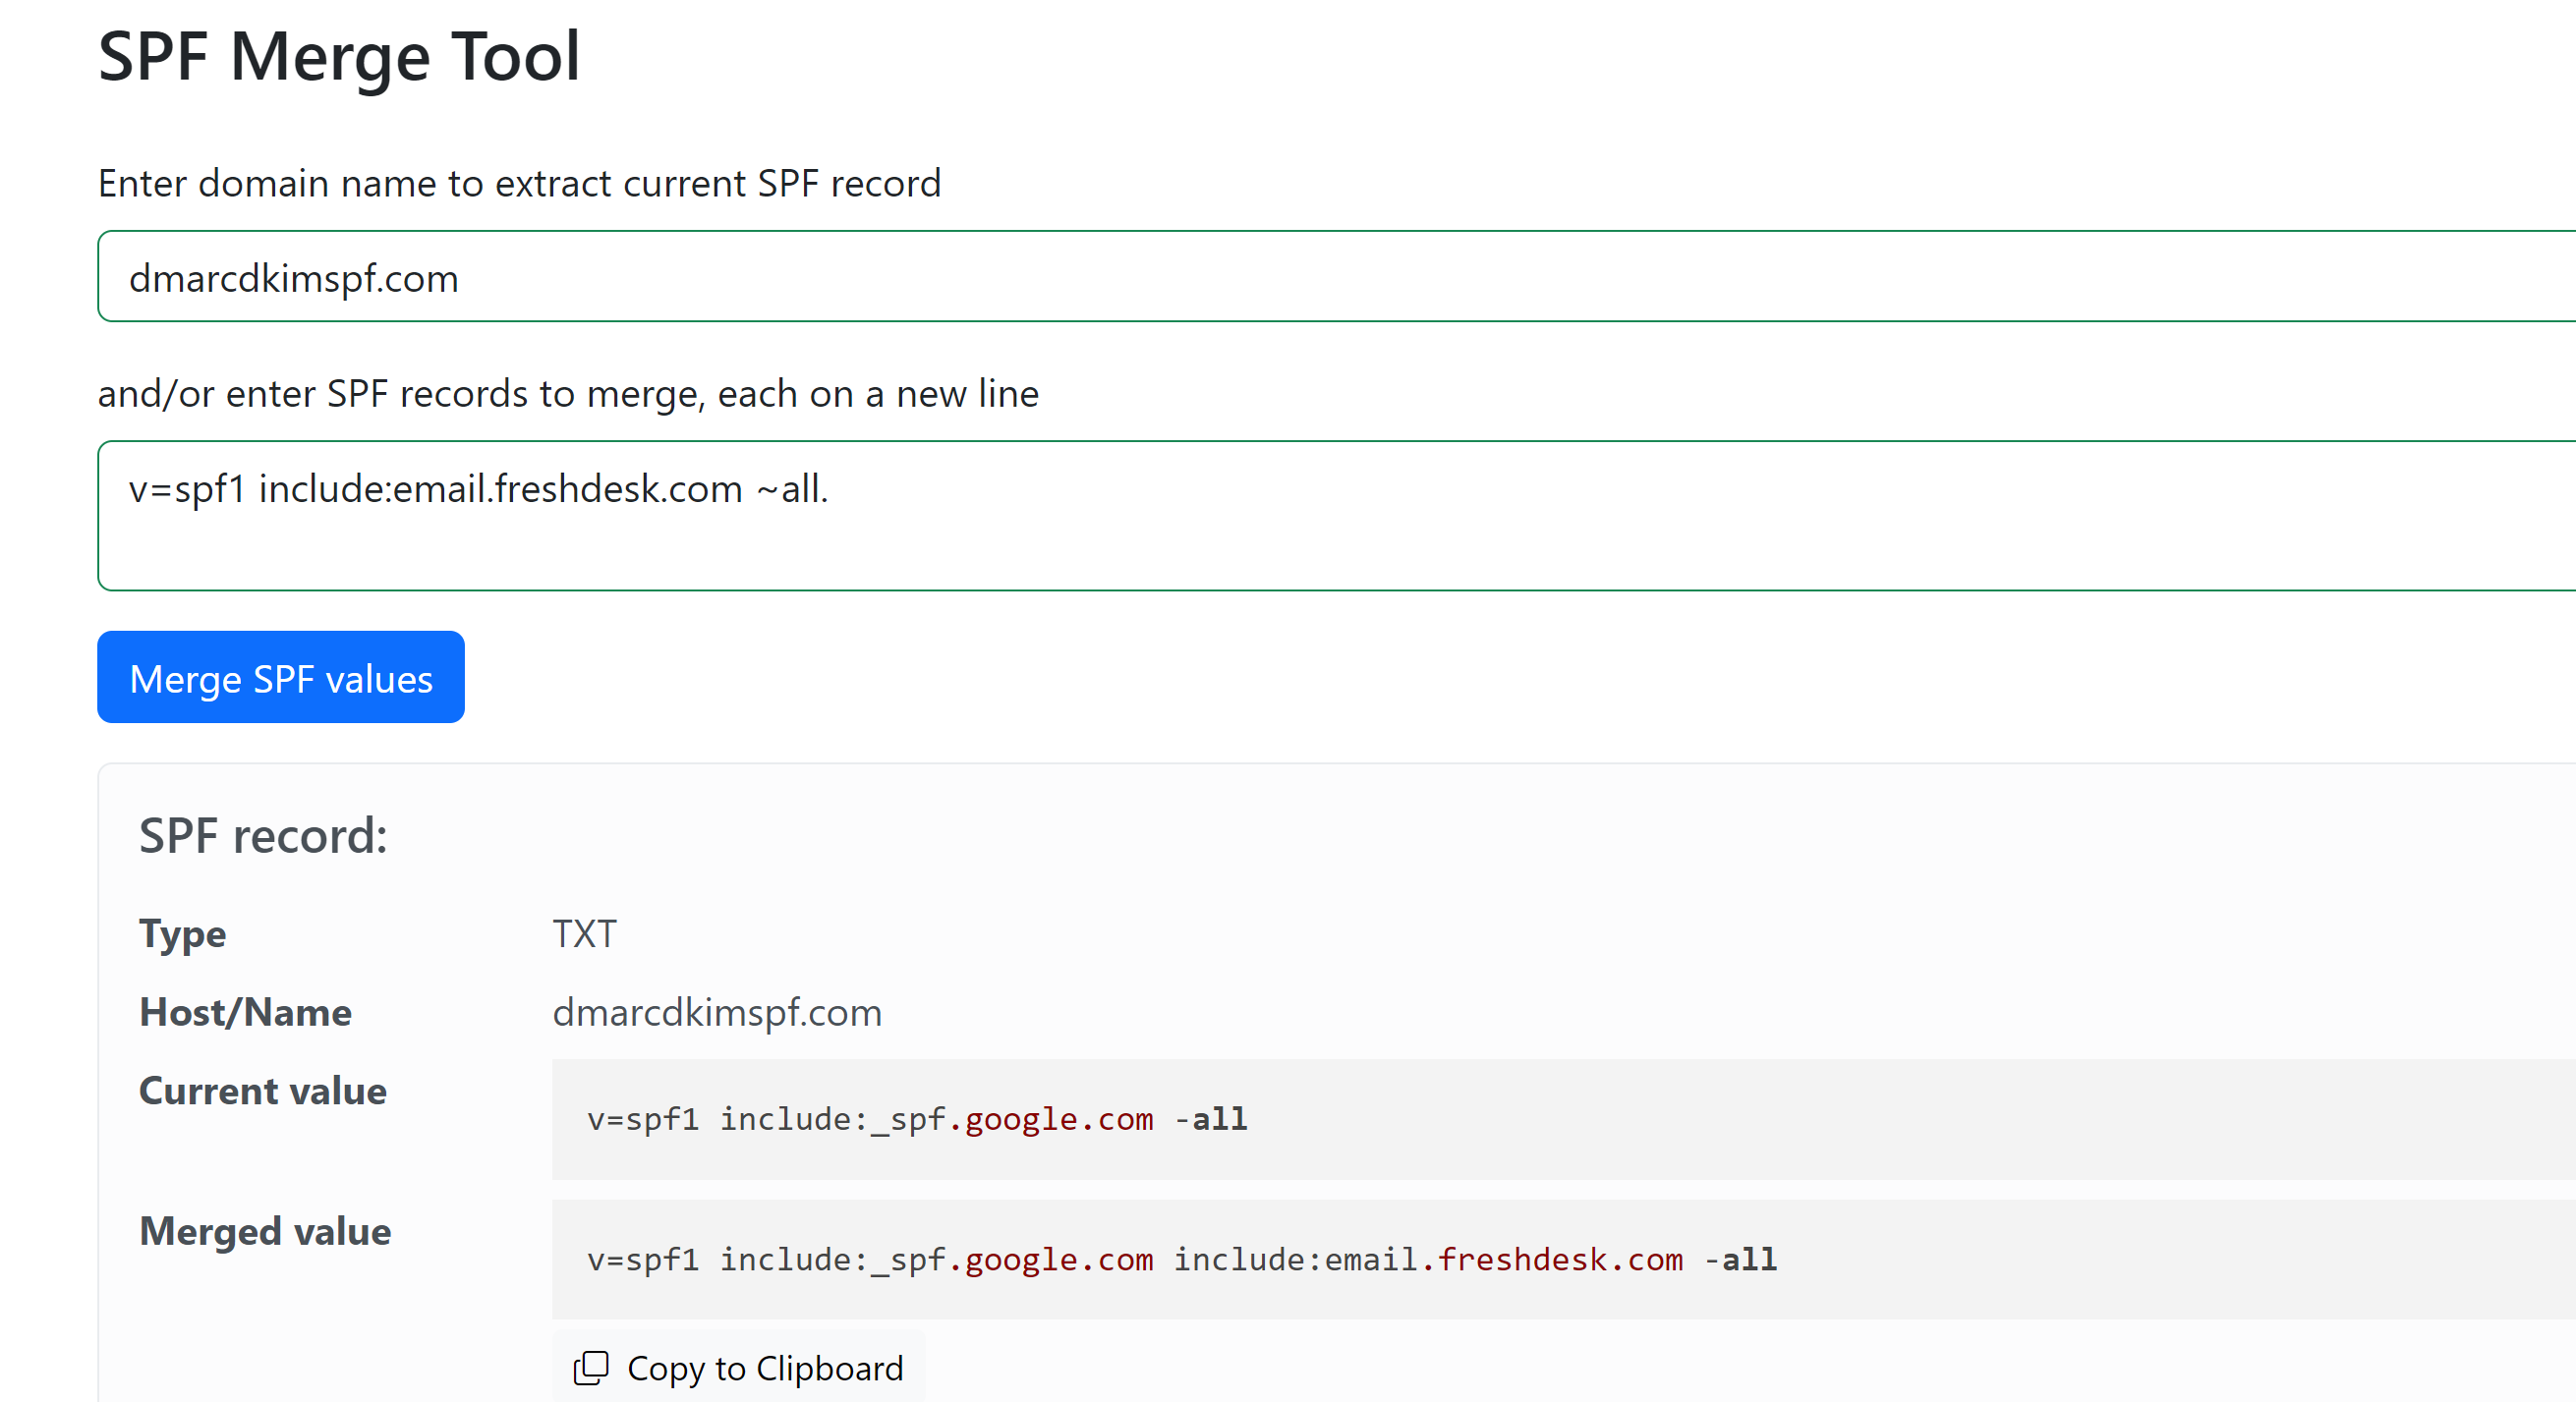
Go to the SPF Merge Tool.
Add your domain name and Freshdesk SPF value.
Click the Merges SPF Values button.
The tool detects your existing SPF value and merges it with Freshdesk SPF.
-
Copy the merged value and paste it in place of the existing SPF value.
Adding Freshdesk DMARC Record:
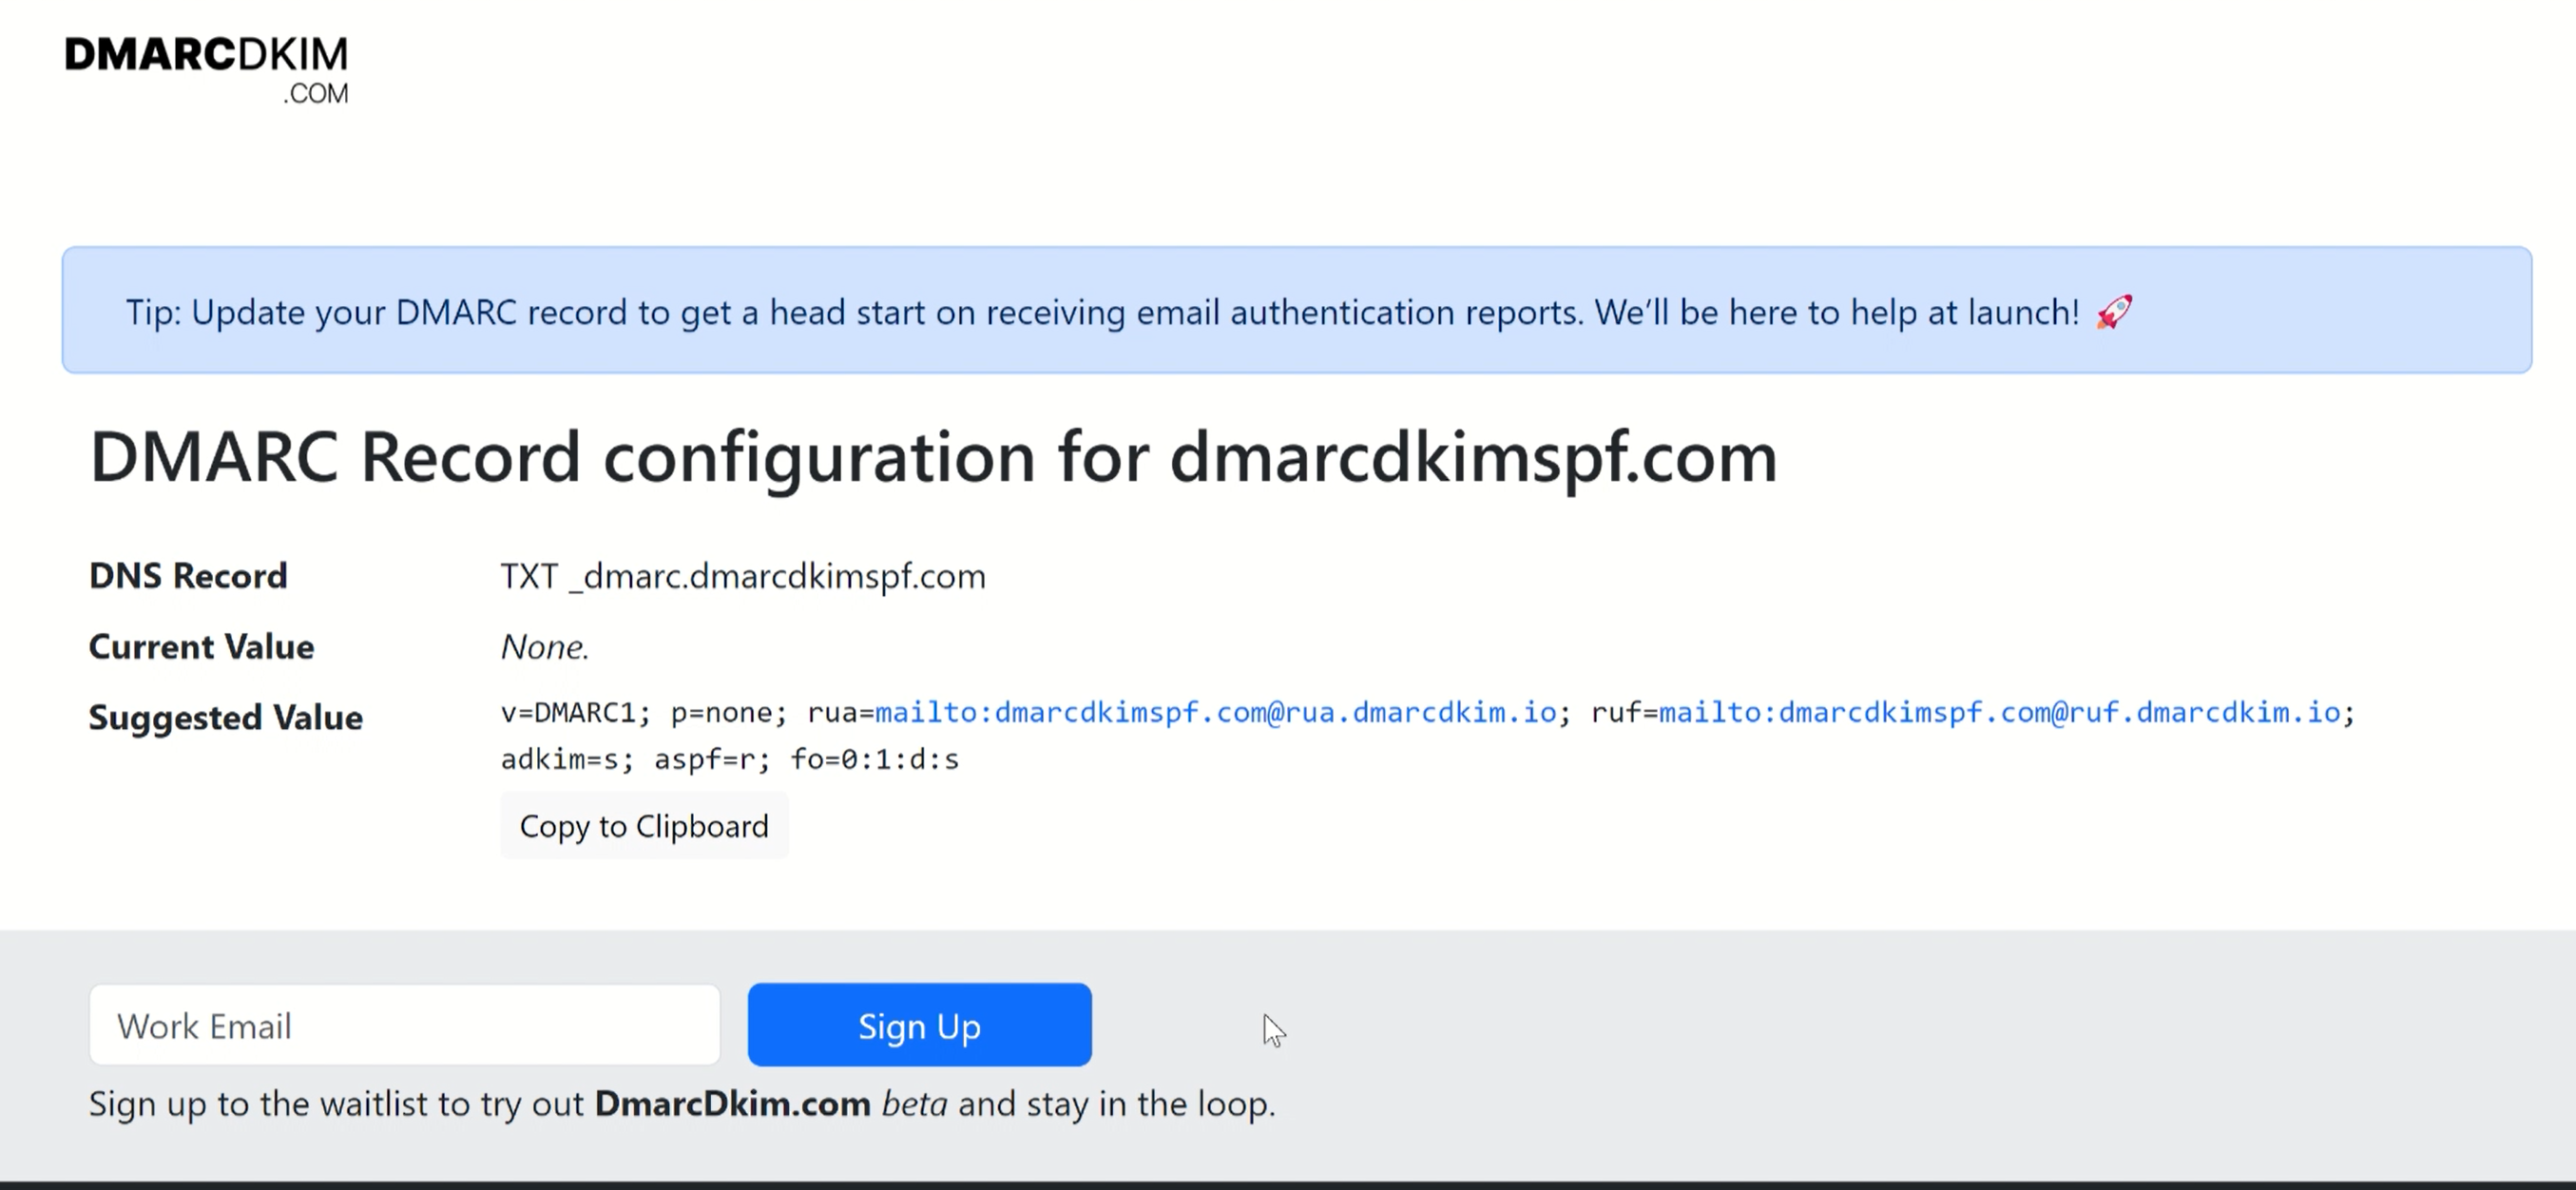
Freshdesk does not provide a DMARC value. You can use the DmarcDkim.com tool to generate a DMARC value.
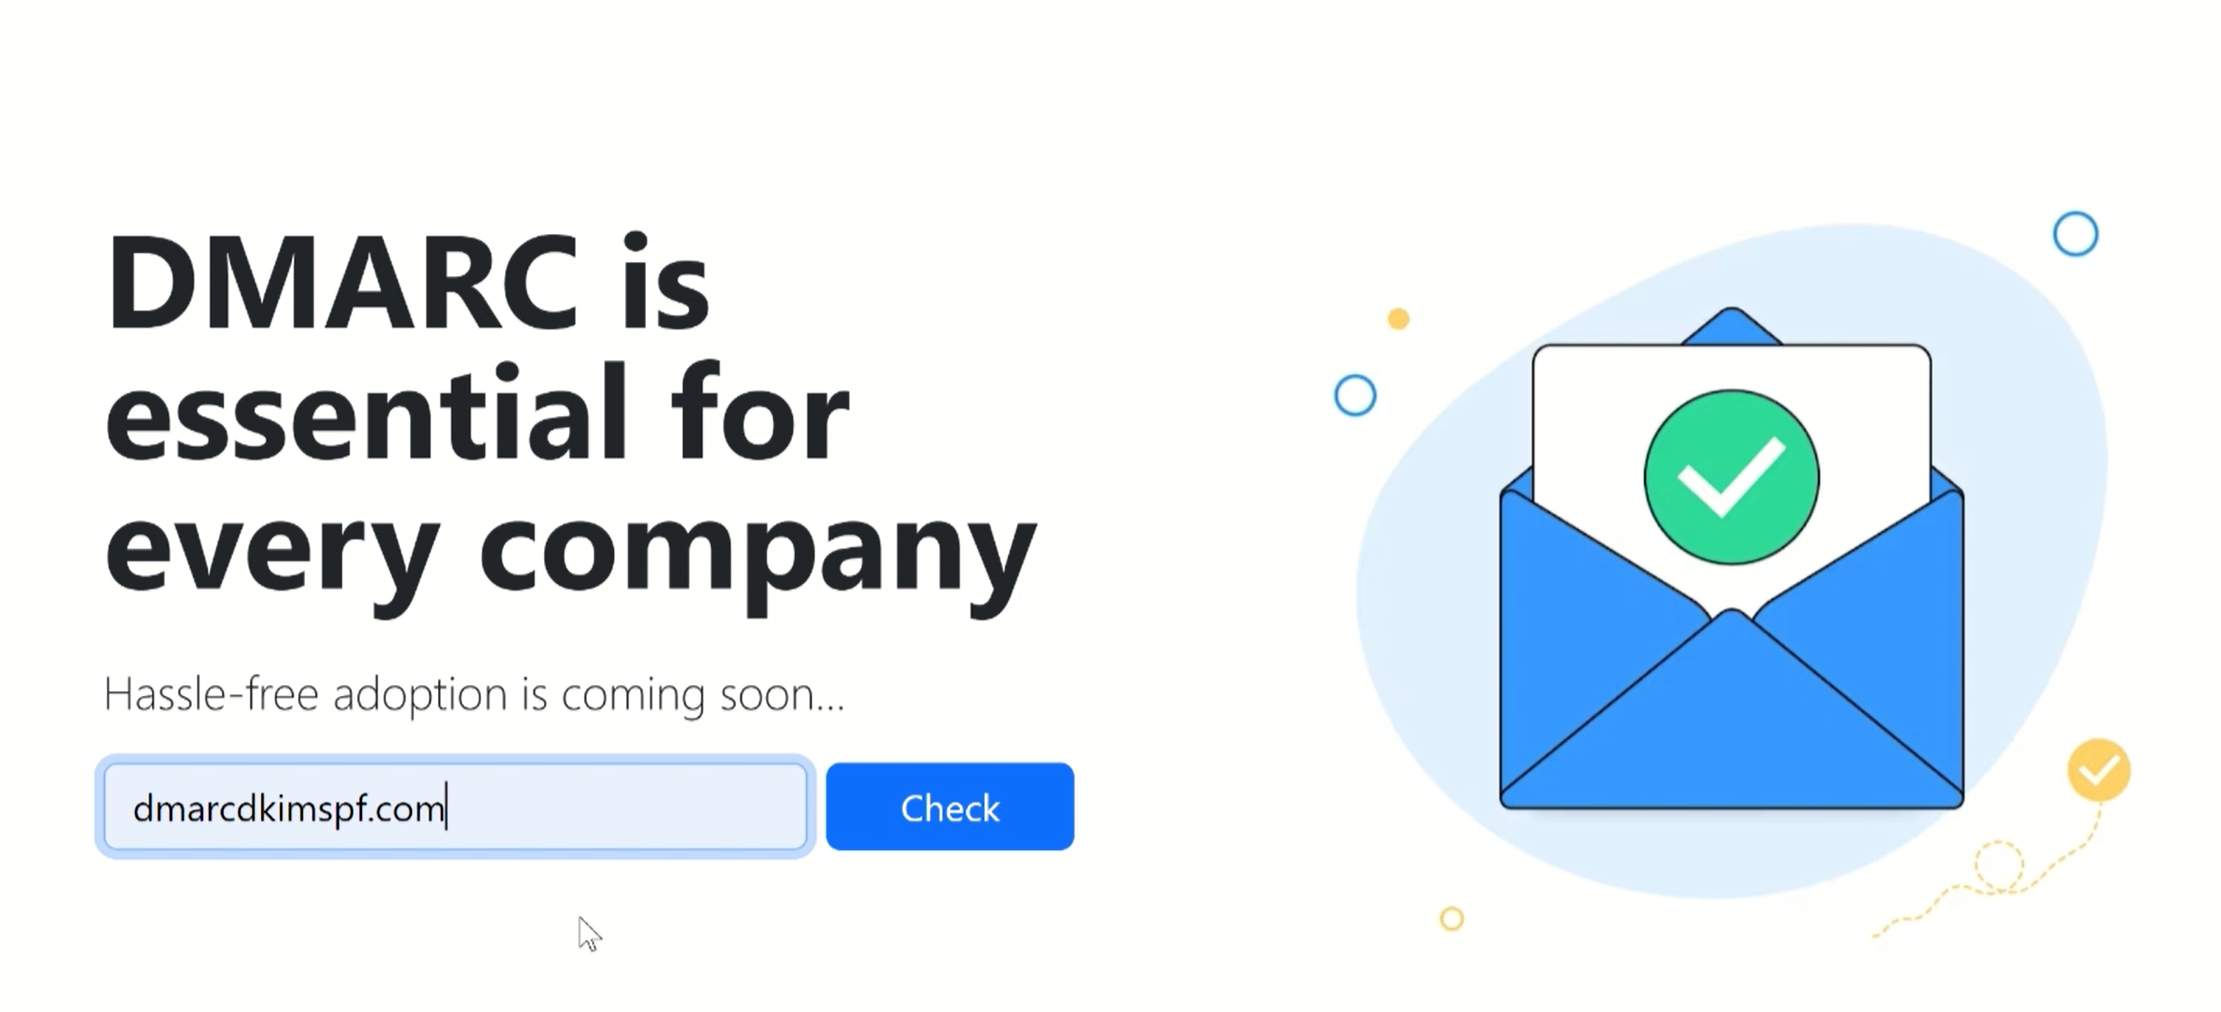
Go to the DMARC Lookup Tool.
-
Write your domain name and click Check.
-
The tool gives you a suggested value. Add this value to your DNS provider.
If you face any problem in adding or authenticating your domain, hire a DmarcDkim.com expert to help you out.
Check domain and follow the instructions to nail down your DMARC configuration.
No expert knowledge needed!


