Step-by-Step Vtiger Domain Authentication - SPF, DKIM, DMARC, Bounce Records
Check your domain for DMARC, DKIM, SPF and MX records. Get a free report.
How to Set Up DMARC, DKIM and SPF DNS Records for Vtiger Domain Authentication?
Domain authentication is the stepping stone to a successful email campaign. These days, spamming is easier than ever. That's why email inbox providers require proof that you are who you say. SPF, DKIM, and DMARC are the common ways to test email authenticity and owner verification.
Vtiger provides you with DNS records that add a signature to your emails, protecting them against forgery and spam. You can find these records in Vtiger Email Settings and add them to your DNS provider.
Follow the steps below to add and verify the Vtiger CNAME and TXT records.
Configure Vtiger DNS Records:
-
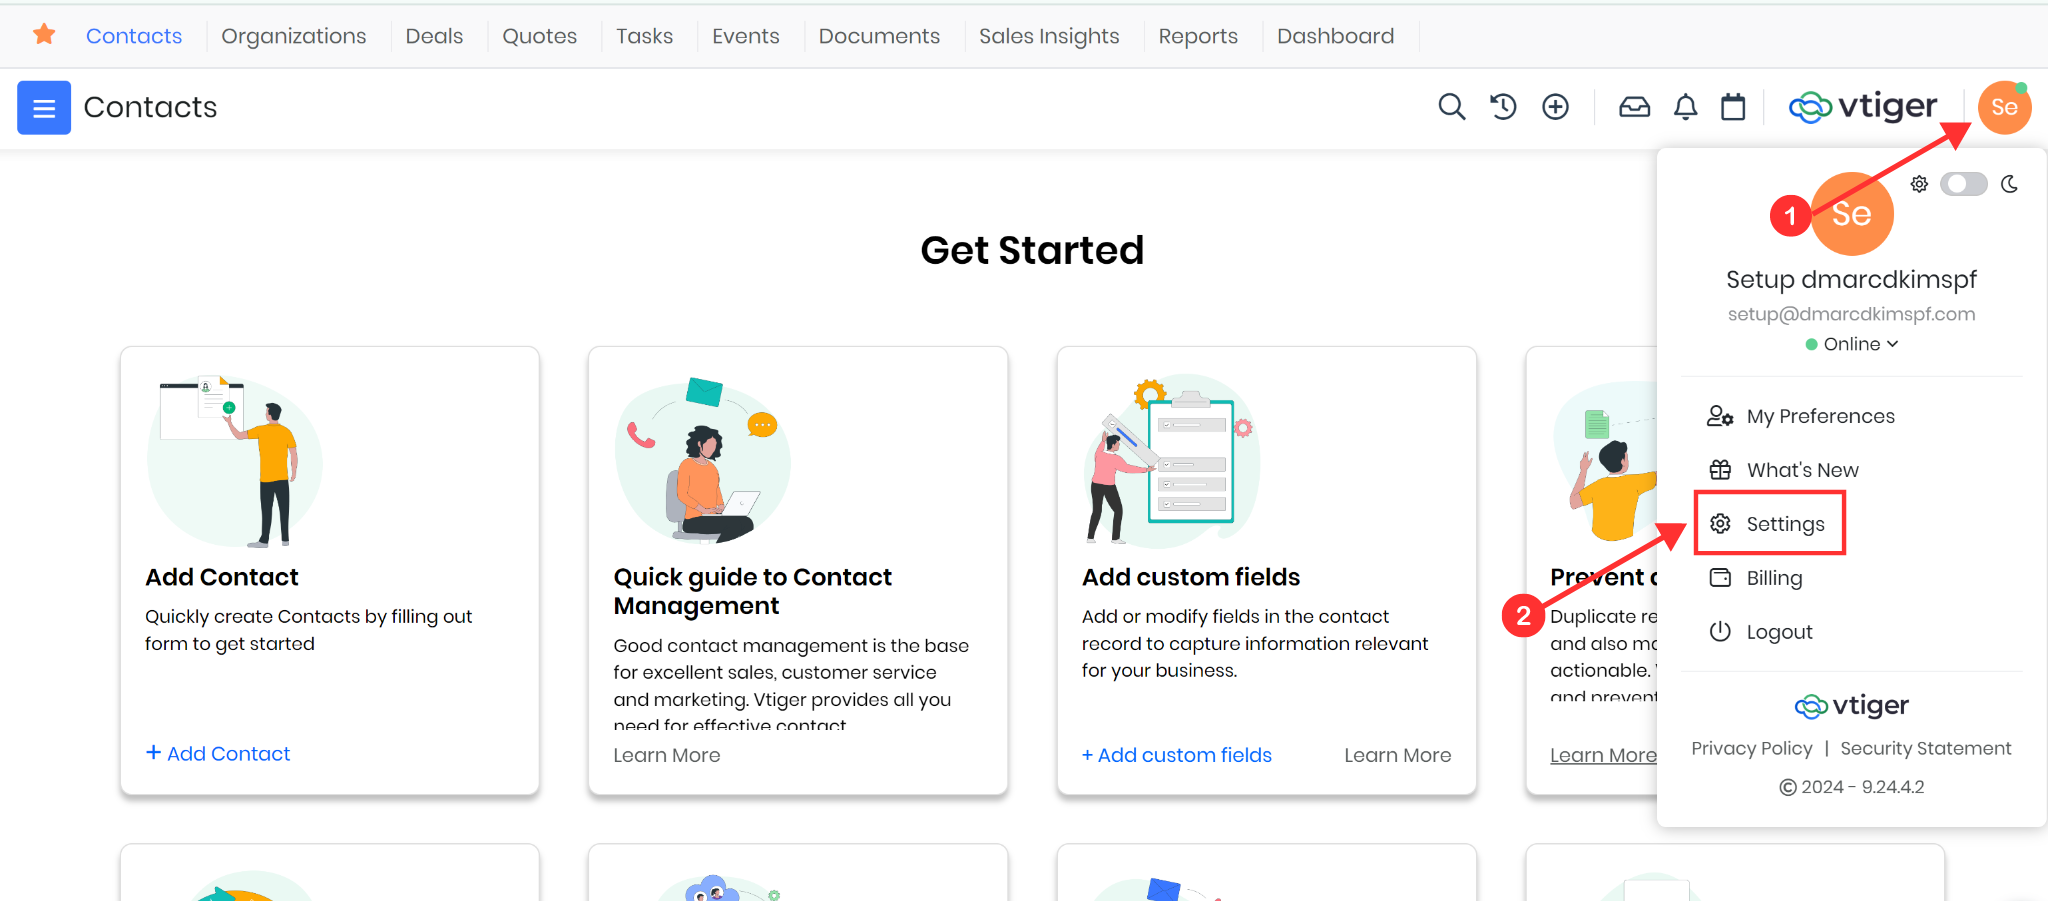
On the Vtiger dashboard, click your account name and go to Settings.
-
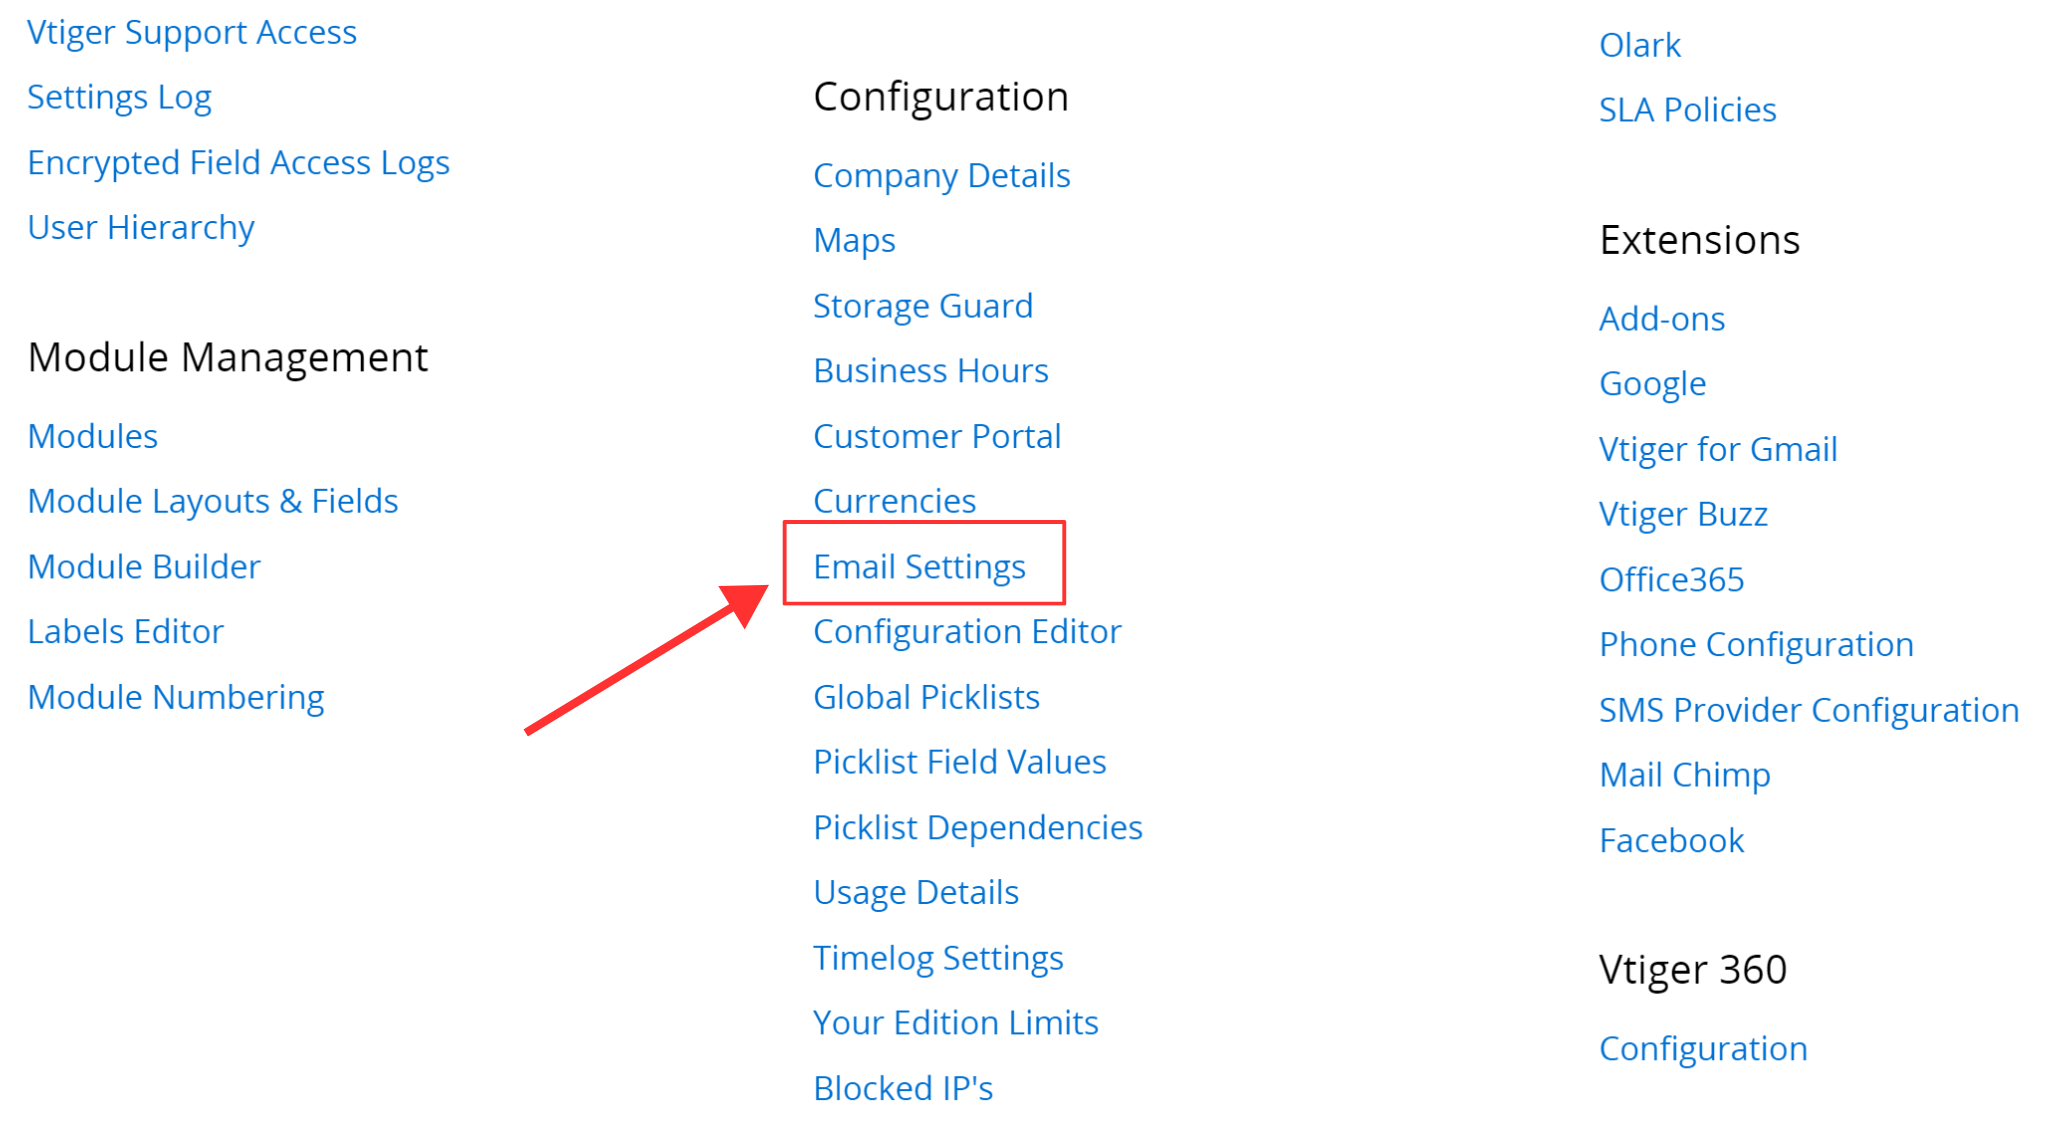
Click Email Settings in the Configuration section.
-
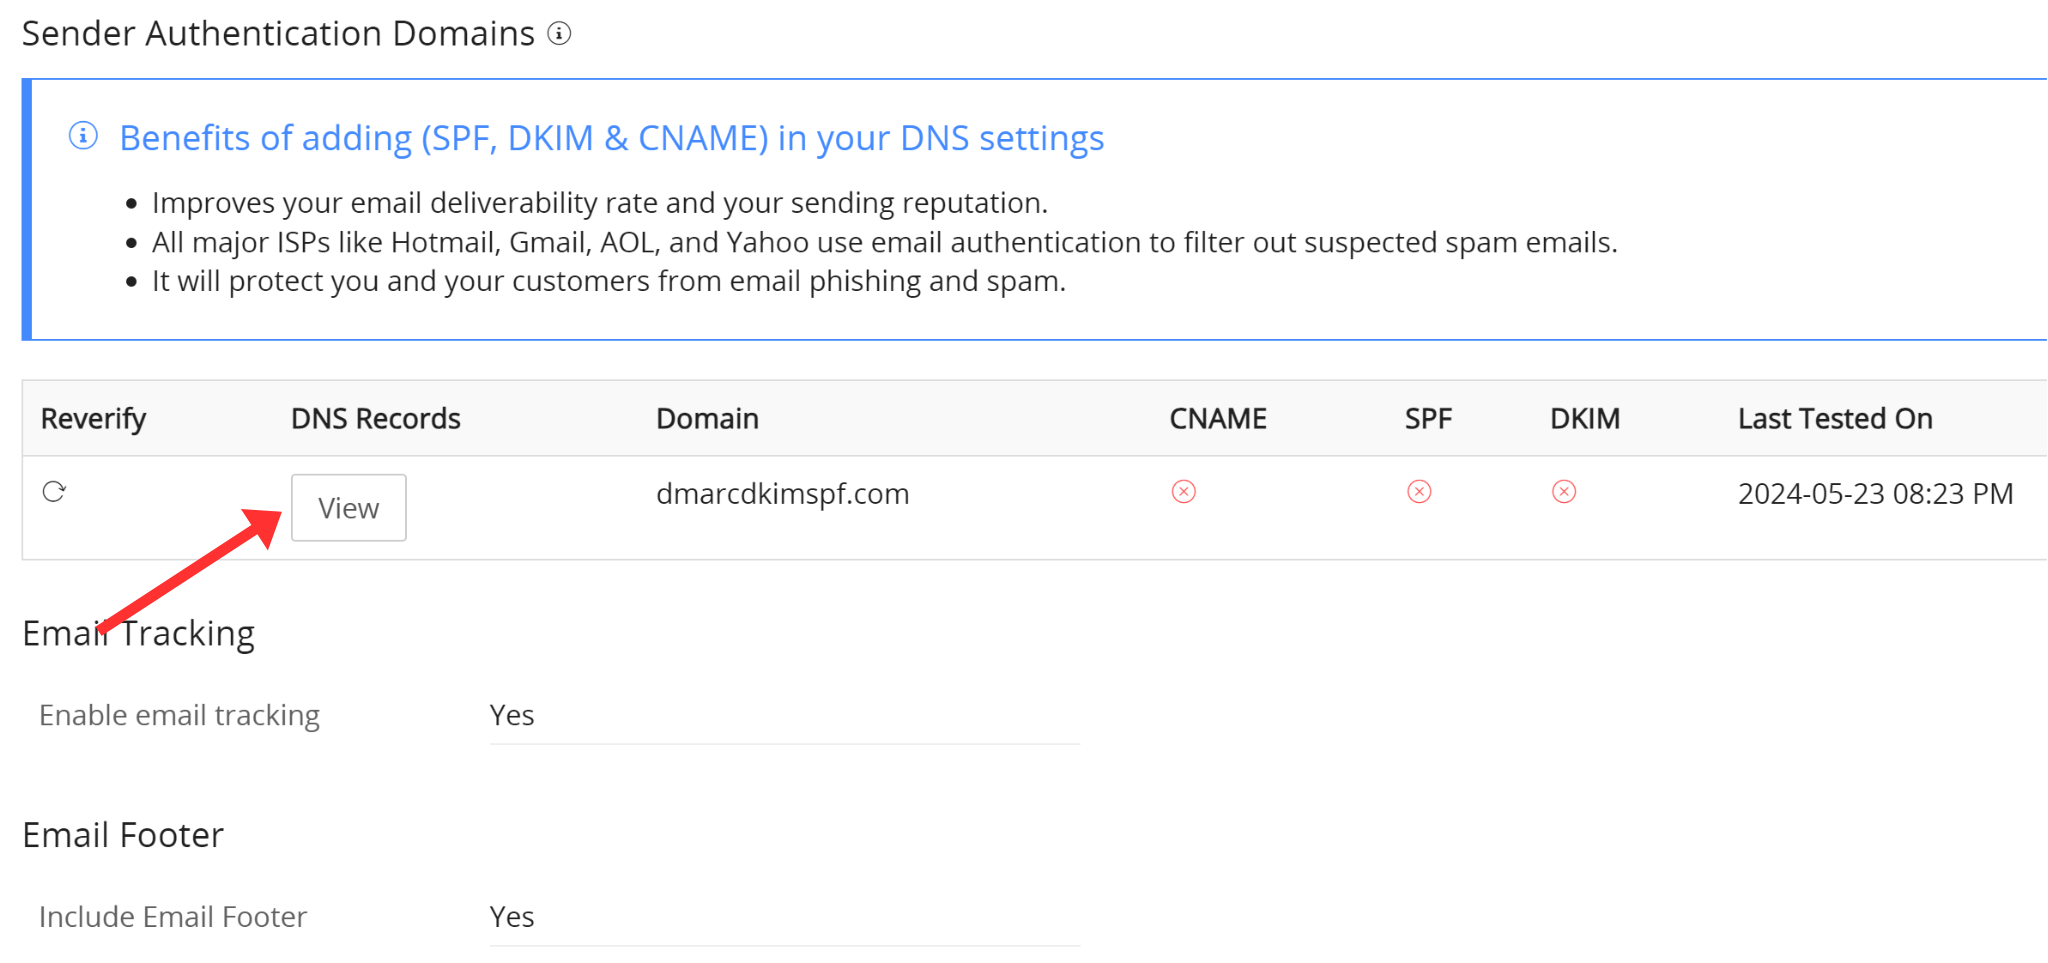
On the next page, the sign-up email domain will be added by default. Click View under DNS Records.
-
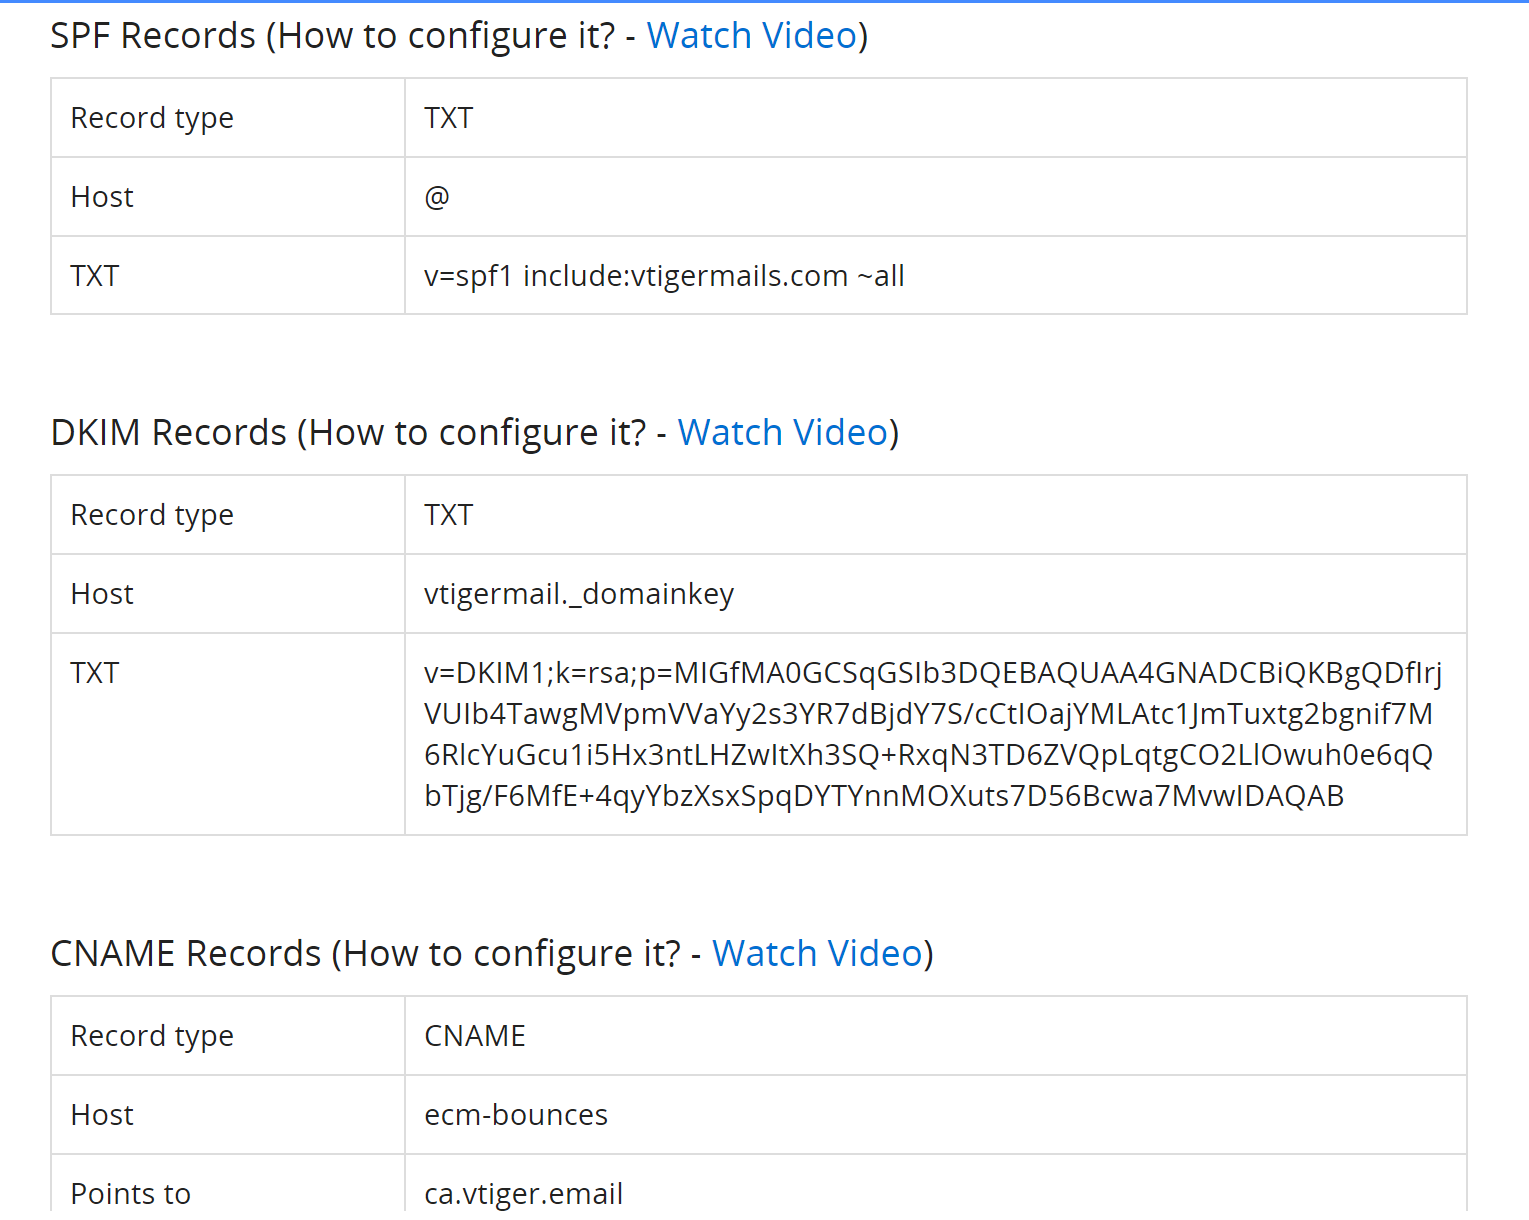
It will redirect you to the pop-up window with Vtiger SPF, DKIM, and Bounce records. Add these records to the DNS provider.
Open DNS Dashboard:
Login to your DNS provider. We use Cloudflare for this guide post.
-
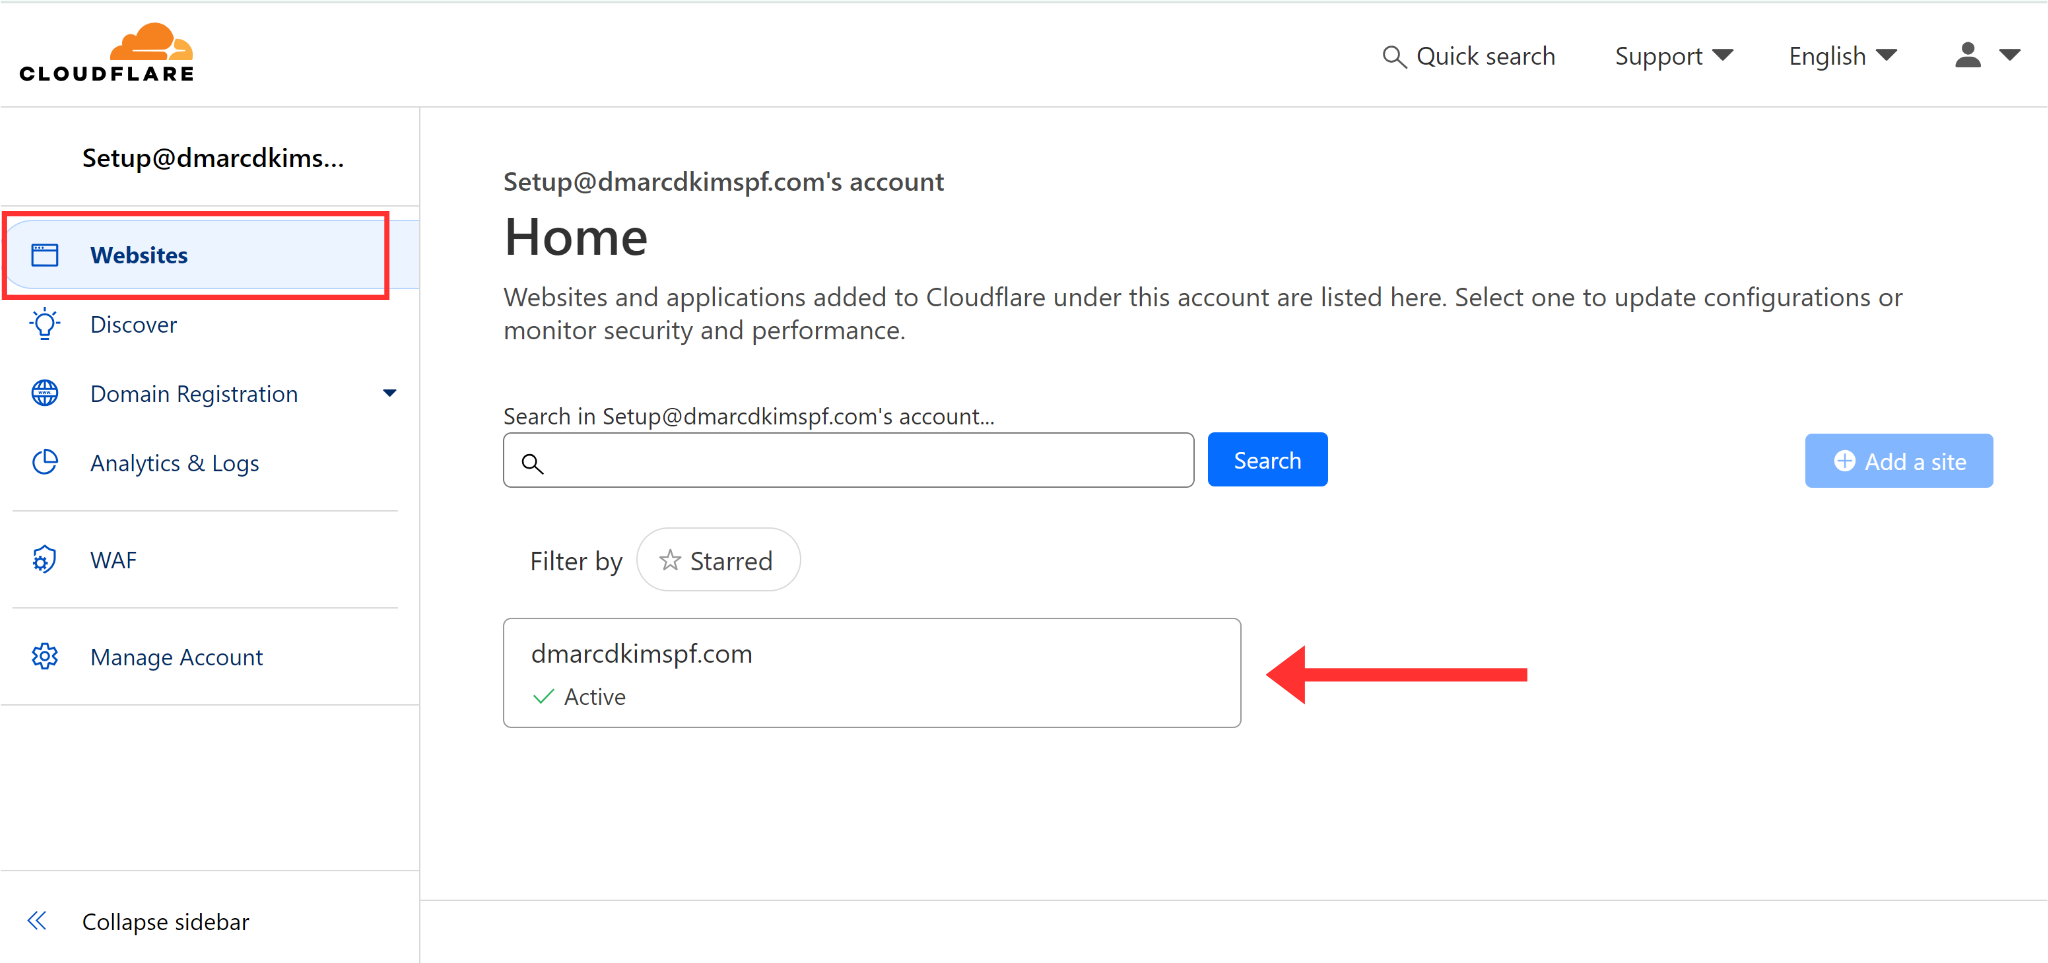
Click your Website in the home tab.
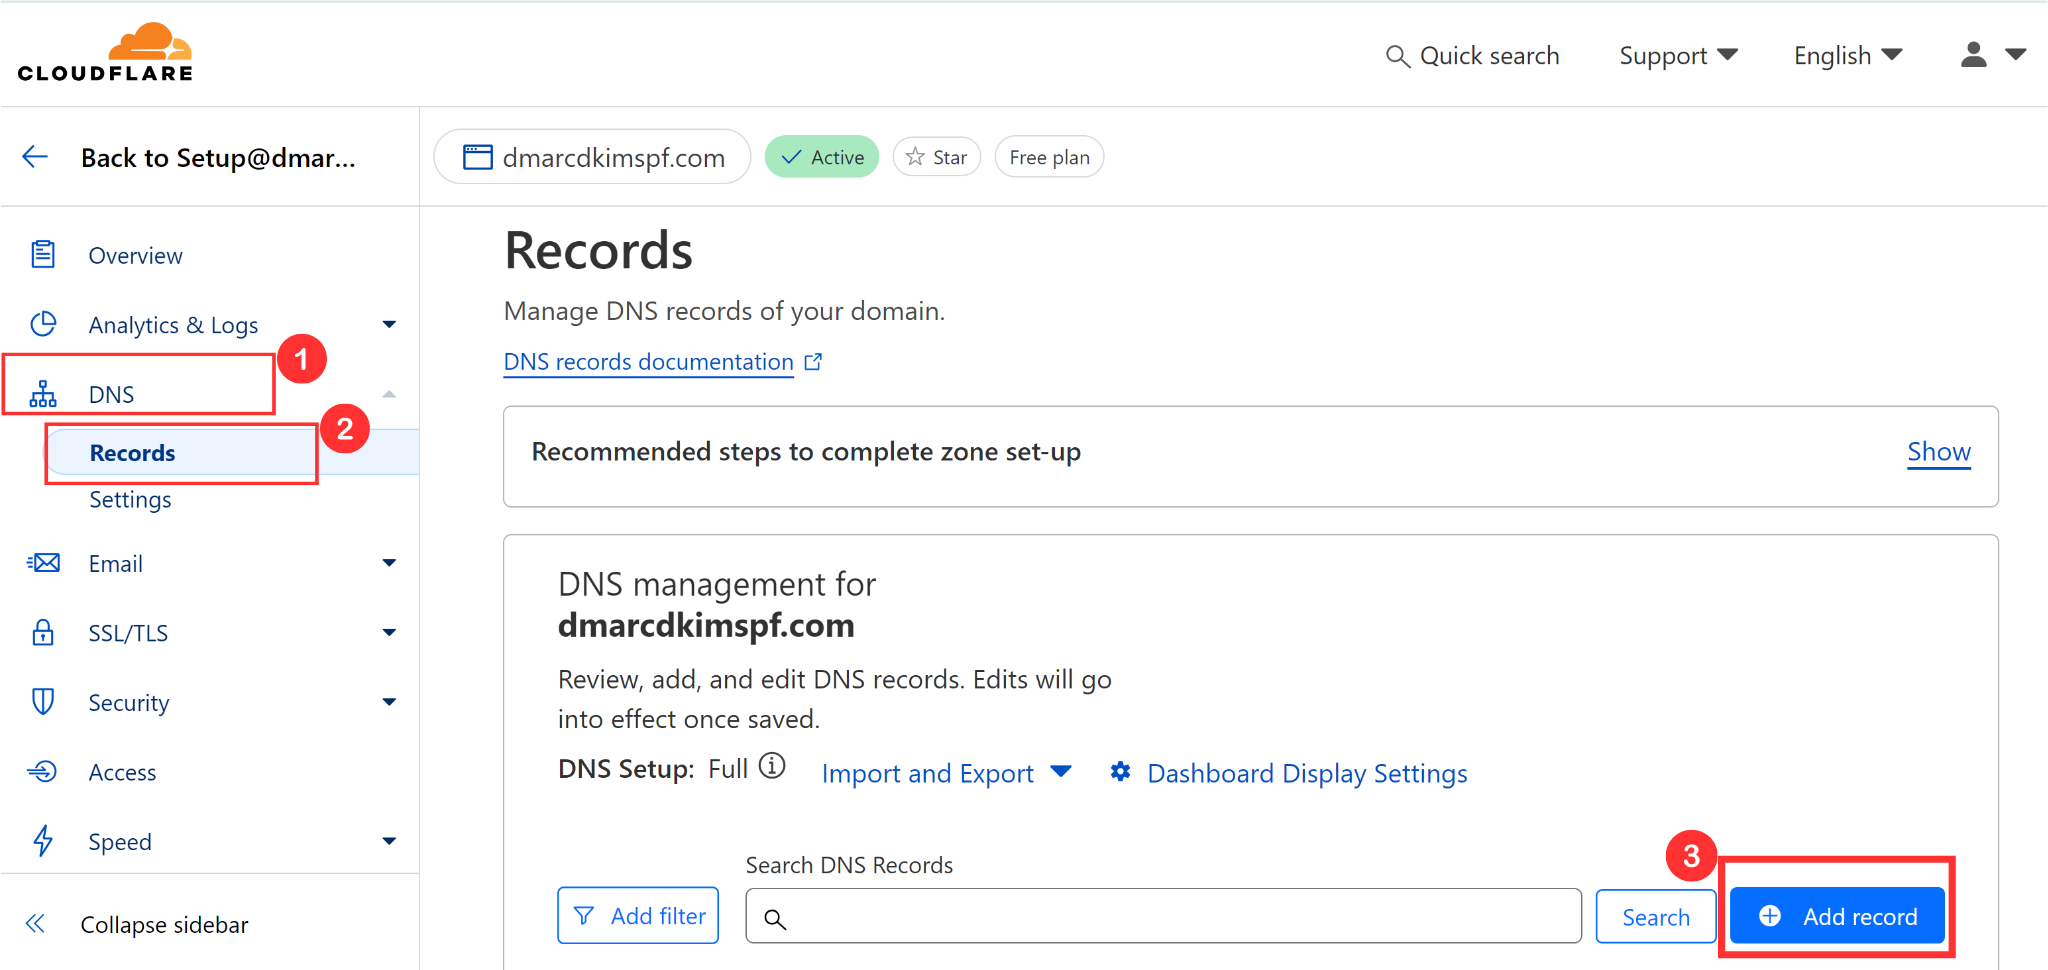
In the left side panel, click DNS and go to Records.
-
Here, click Add Record to add new records to the DNS dashboard.
Add Vtiger DKIM and Bounce Records:
-
Copy the record name and value and paste them into the dedicated fields on your DNS dashboard.

Select the type TXT for DKIM and CNAME for the Bounce record.
Turn off the proxy for the CNAME record and click Save.
NOTE: When the proxy is enabled, it diverts the traffic to the DNS provider server instead of the email server. Therefore, always turn it off for CNAME records.
Add Vtiger SPF Record:
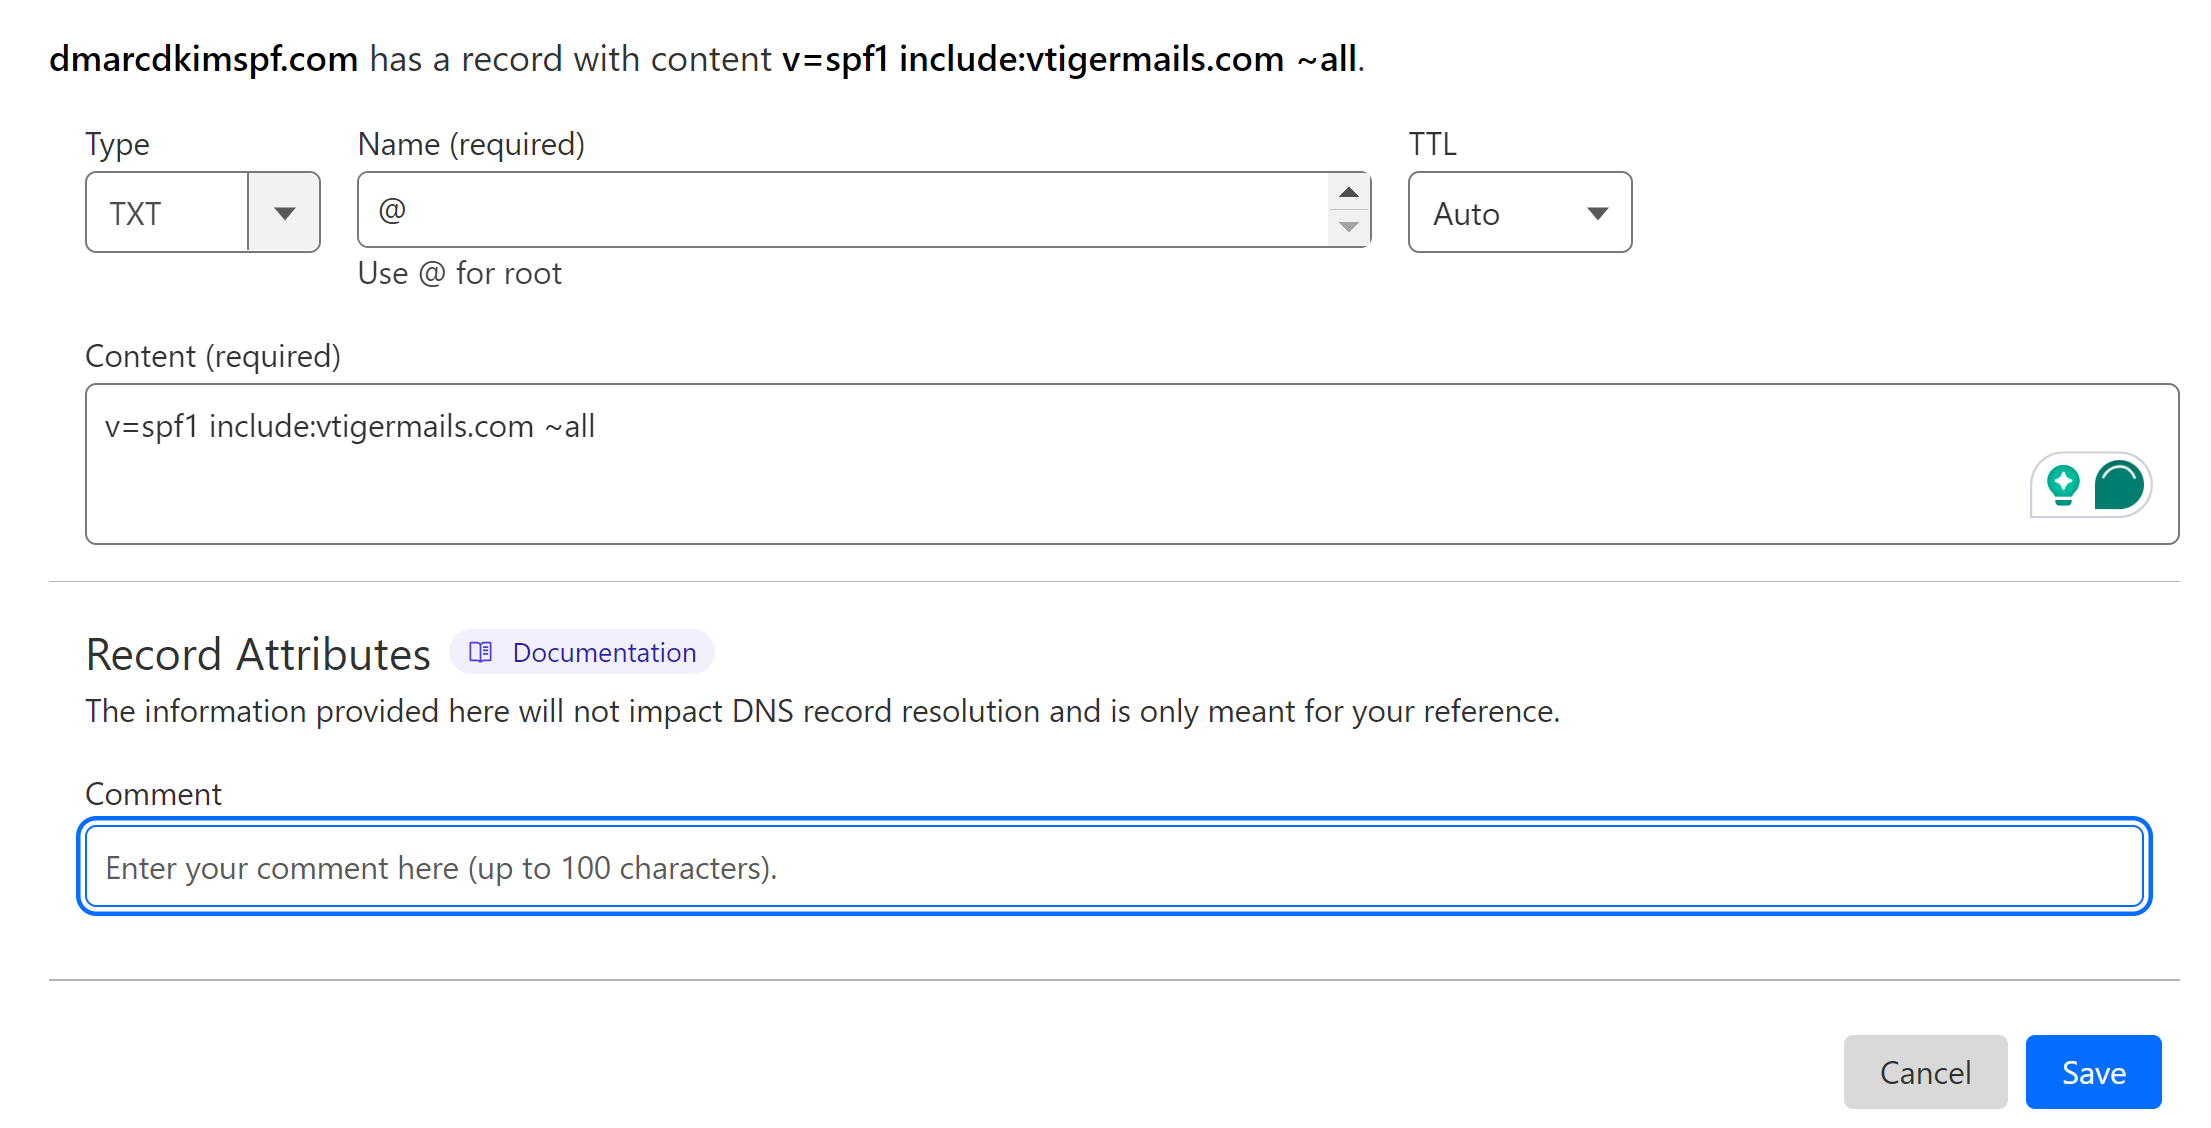
Copy the SPF record name and add it to the Name section in the DNS dashboard.
Copy the record value and add it to the Content section.
-
Select type TXT and hit the Save button.
NOTE: You can add only one SPF record to your DNS dashboard. Therefore, check the list of existing records before adding the Vtiger SPF. If you have an existing SPF record, merge it with Vtiger SPF to avoid conflicts.
Got to the SPF Merge Tool.
Add your domain and Vtiger SPF value.
-
Click Merge SPF values.
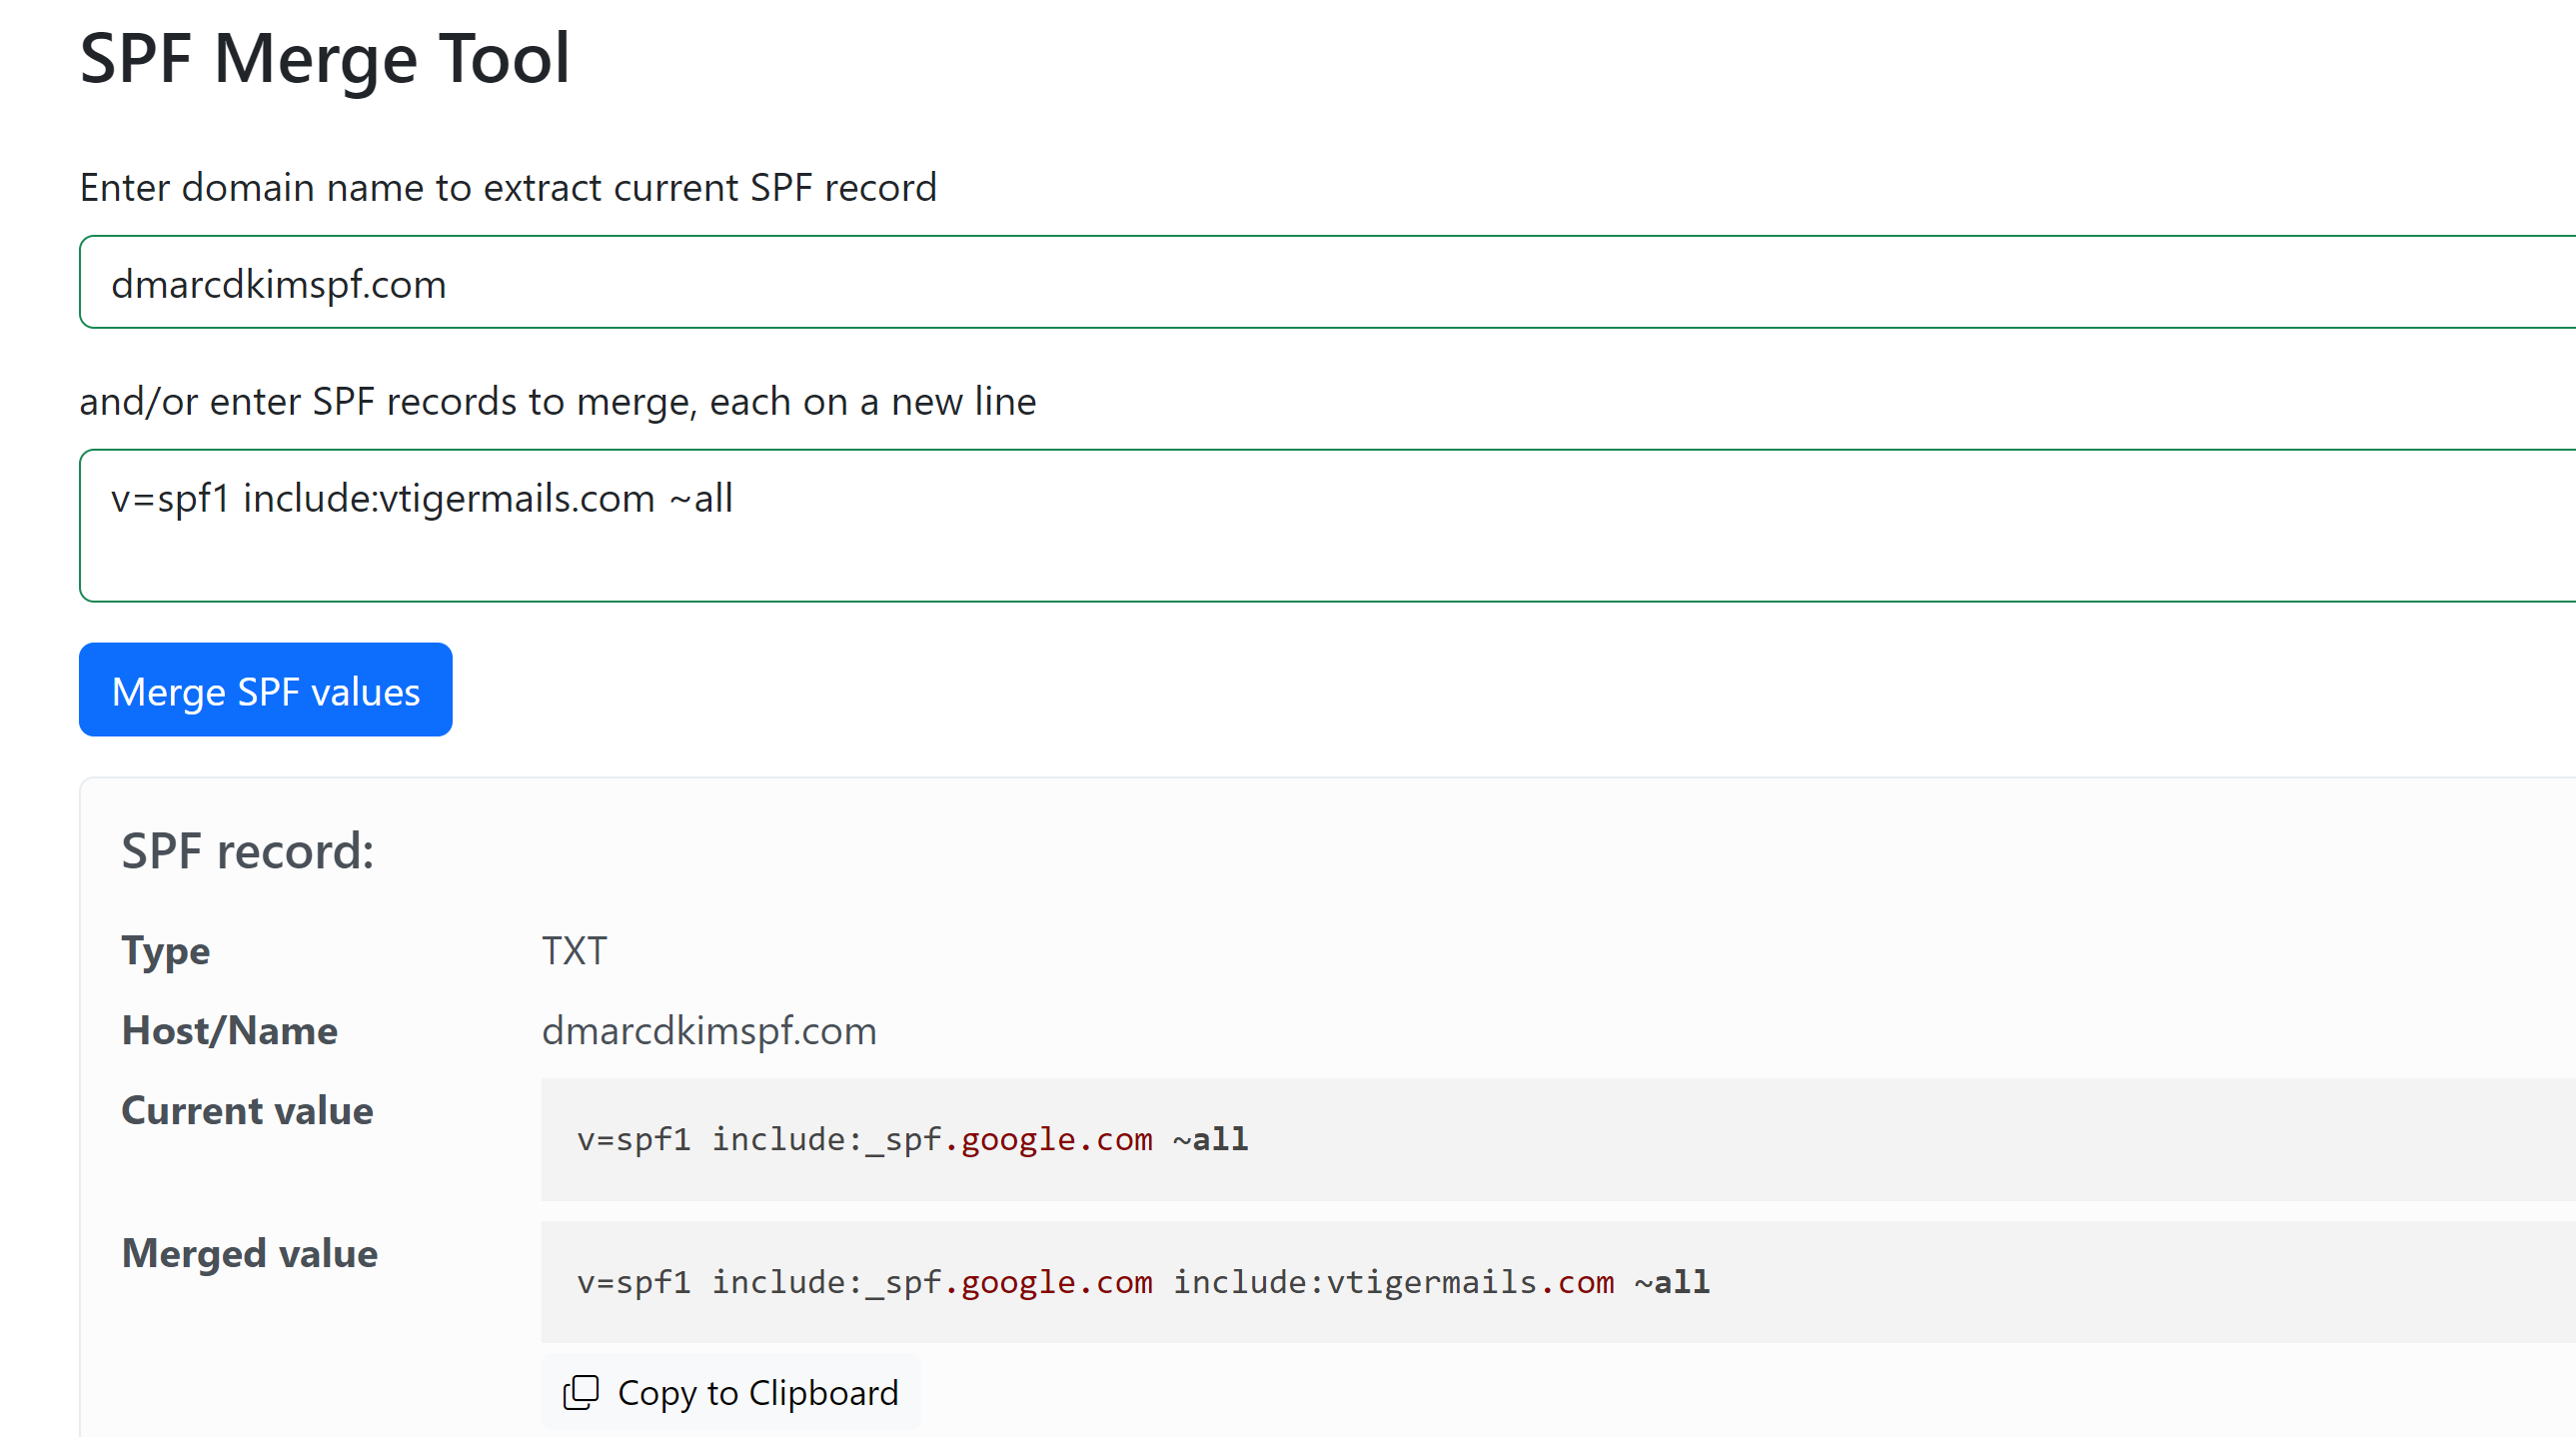
Copy the merged value and add it to the DNS provider.
Add Vtiger DMARC Record:
Adding the DMARC record makes your domain more likely to be recognized as a trustable source. Moreover, it helps you get more control over email performance. You can specify policies to determine what happens to the emails that fail the authentication check.
You can generate a custom DMARC value, tailored to your domain with the help of DMARC Tool.
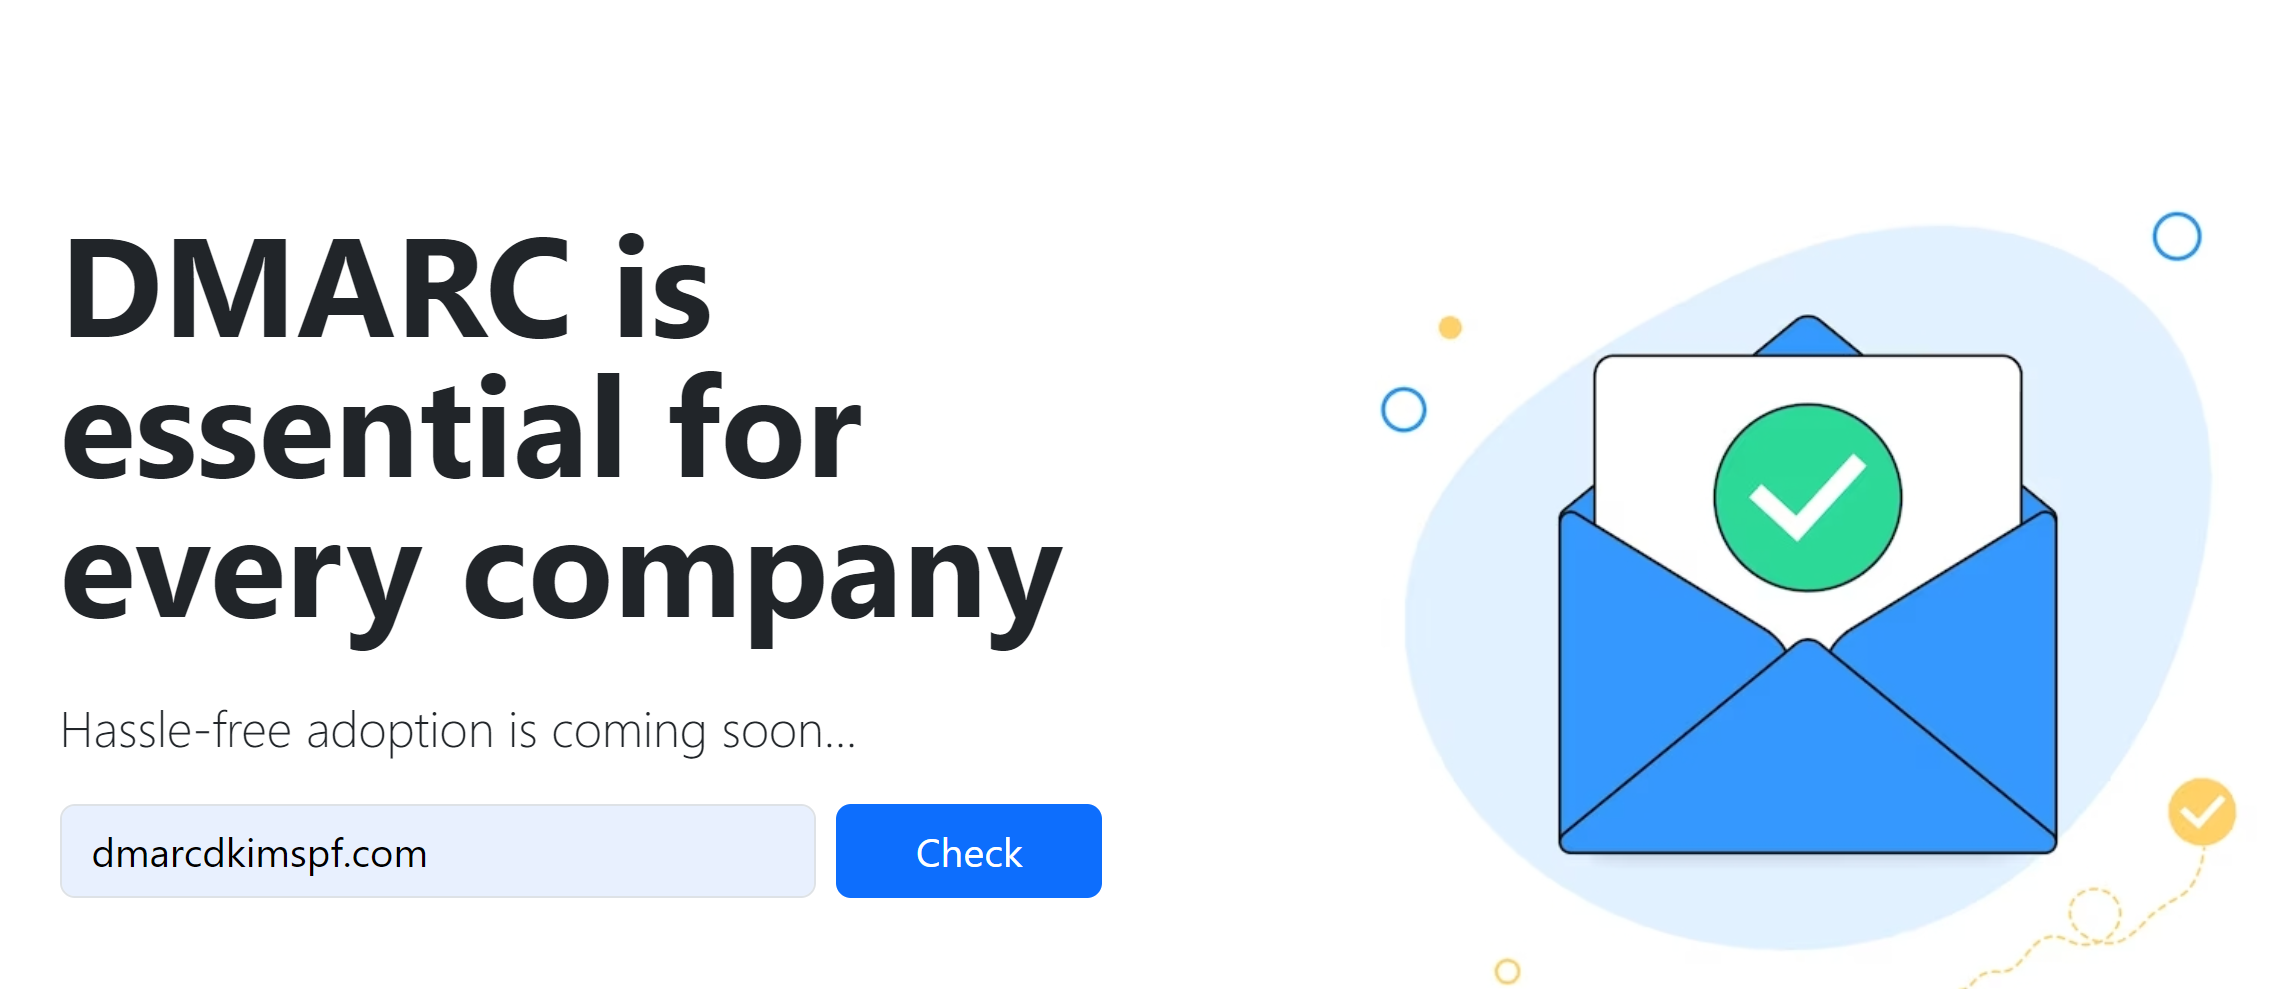
Go to DmarcDkim.com to access the DMARC Check Tool.
-
Write down your domain name and click Check.
-
Copy the Suggested value and to the DNS provider.
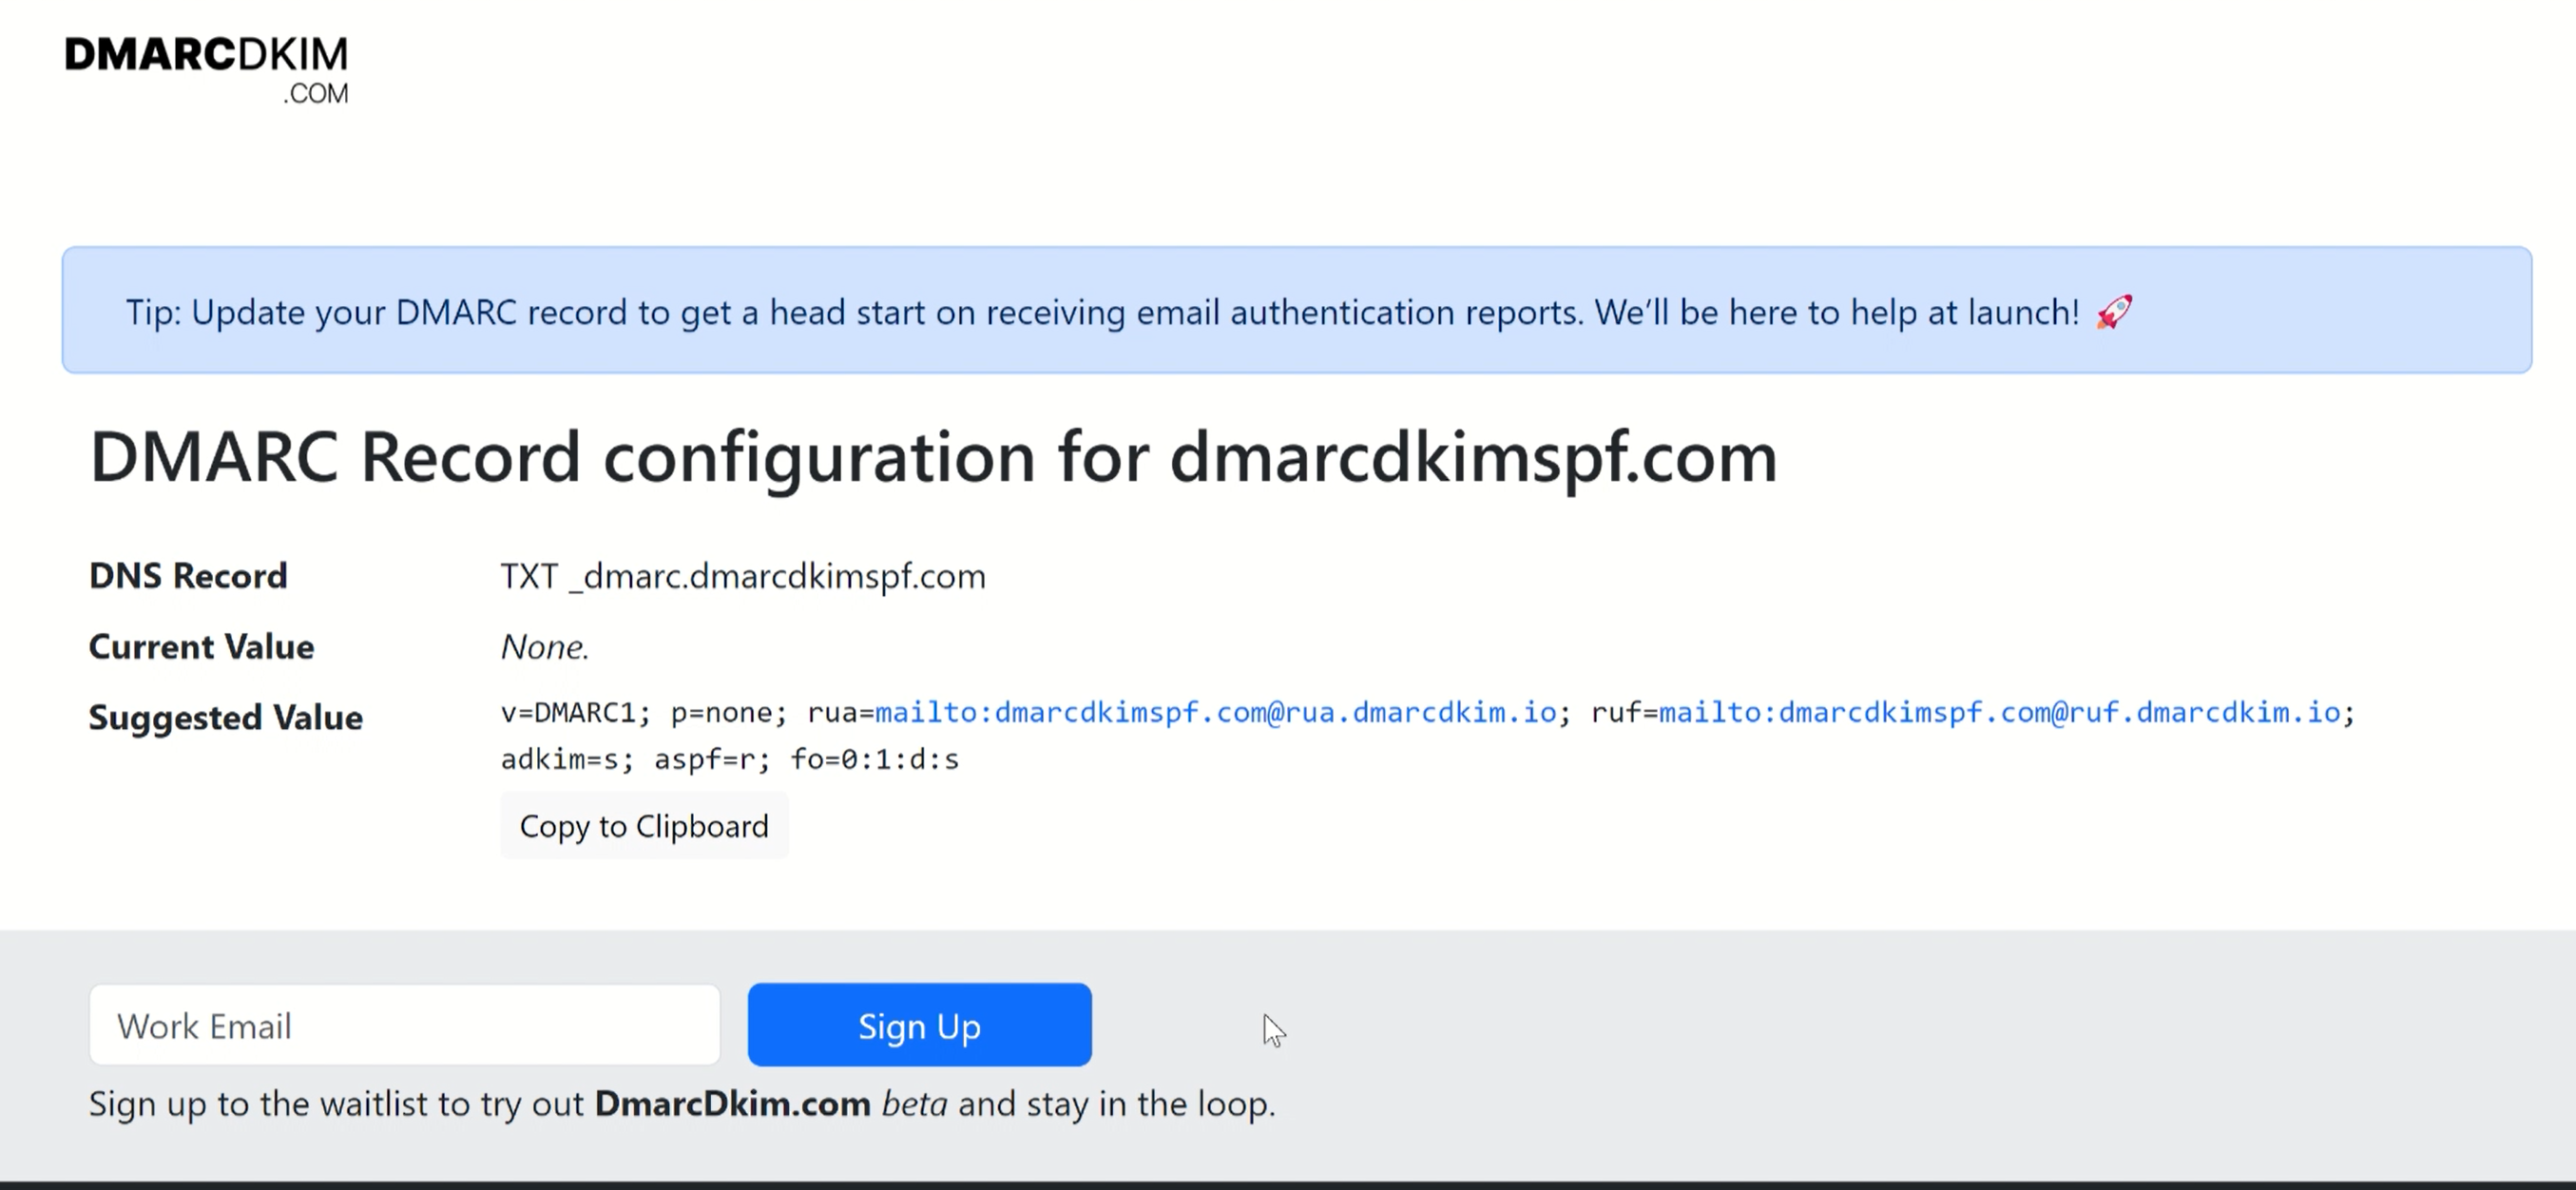
Select type TXT and click Save.
When all records are added, refresh the Vtiger DNS page. If the records were added successfully, you'll see green tickmarks with each record, indicating a successful domain authentication.
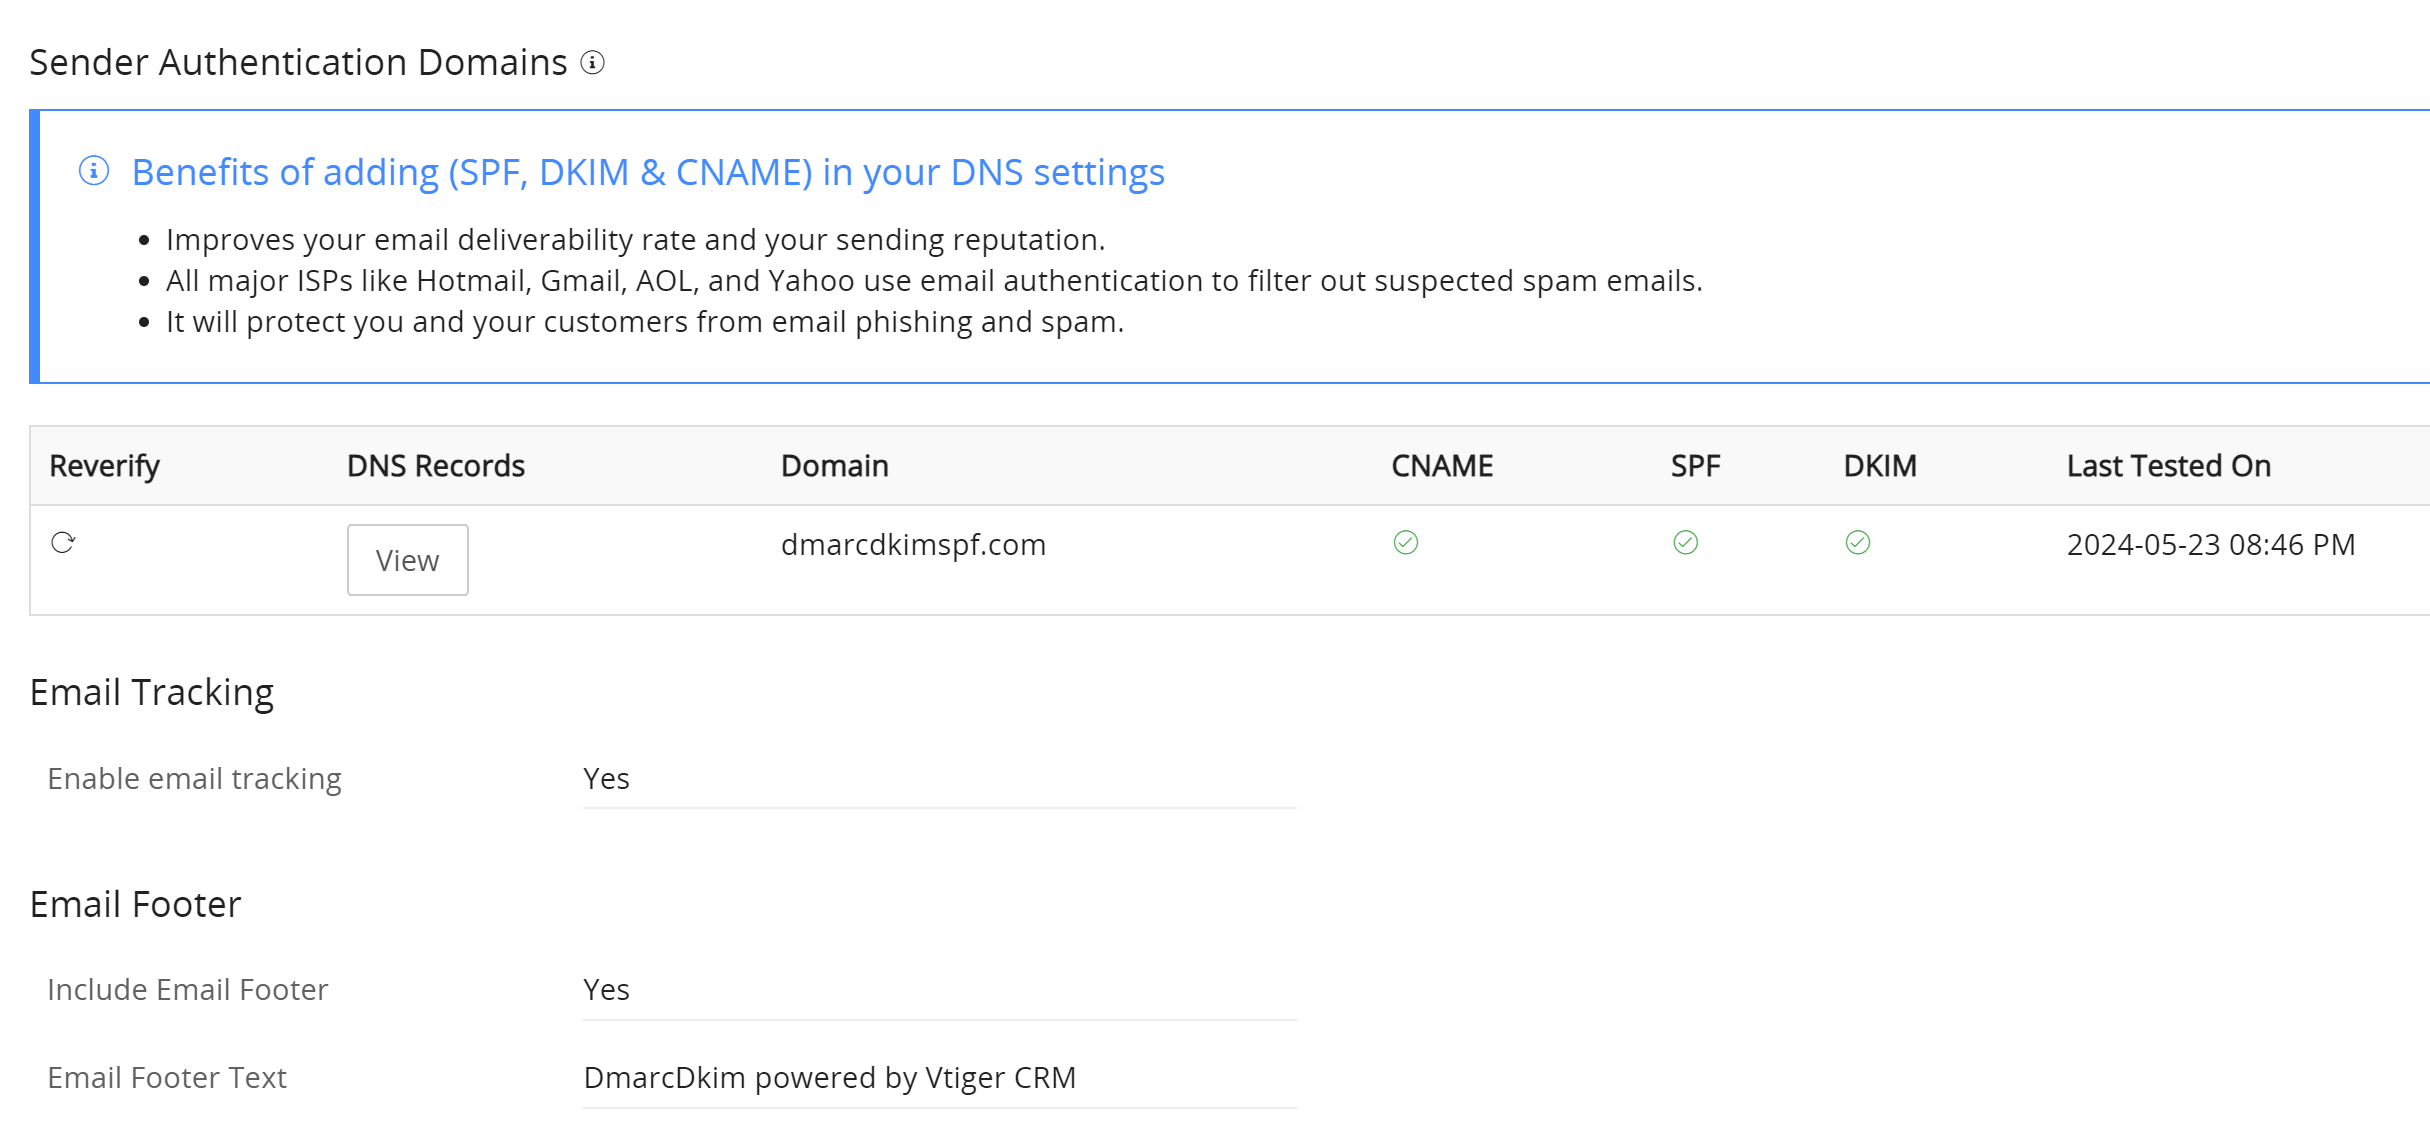
If you do not see the green tick marks with any, or all the records, wait a while. It is recommended to wait up to 24 hours for the DNS changes to propagate.
If the domain is not authenticated after 24 hours, there might be a misconfiguration in your DNS setup. To troubleshoot the domain authentication issues, contact the Vtiger support team or hire a DmarcDkim.com expert.
Check domain and follow the instructions to nail down your DMARC configuration.
No expert knowledge needed!


