Configure Drip DMARC & DNS Records for Domain Authentication
Check your domain for DMARC, DKIM, SPF and MX records. Get a free report.
How to Set up DNS Records for Drip DMARC & Domain Authentication?
Domain Authentication prevents others from sending fake emails using your domain. By setting up the DNS records, your emails are more likely to reach inboxes instead of spam folders. It also gives you insights into how your emails are being received and if there are any problems.
This guide will walk you through configuring DNS records for DKIM (DomainKeys Identified Mail) and DMARC (Domain-based Message Authentication, Reporting, and Conformance) to authenticate your email domain when using Drip.
Configure Drip CNAME Records:
-
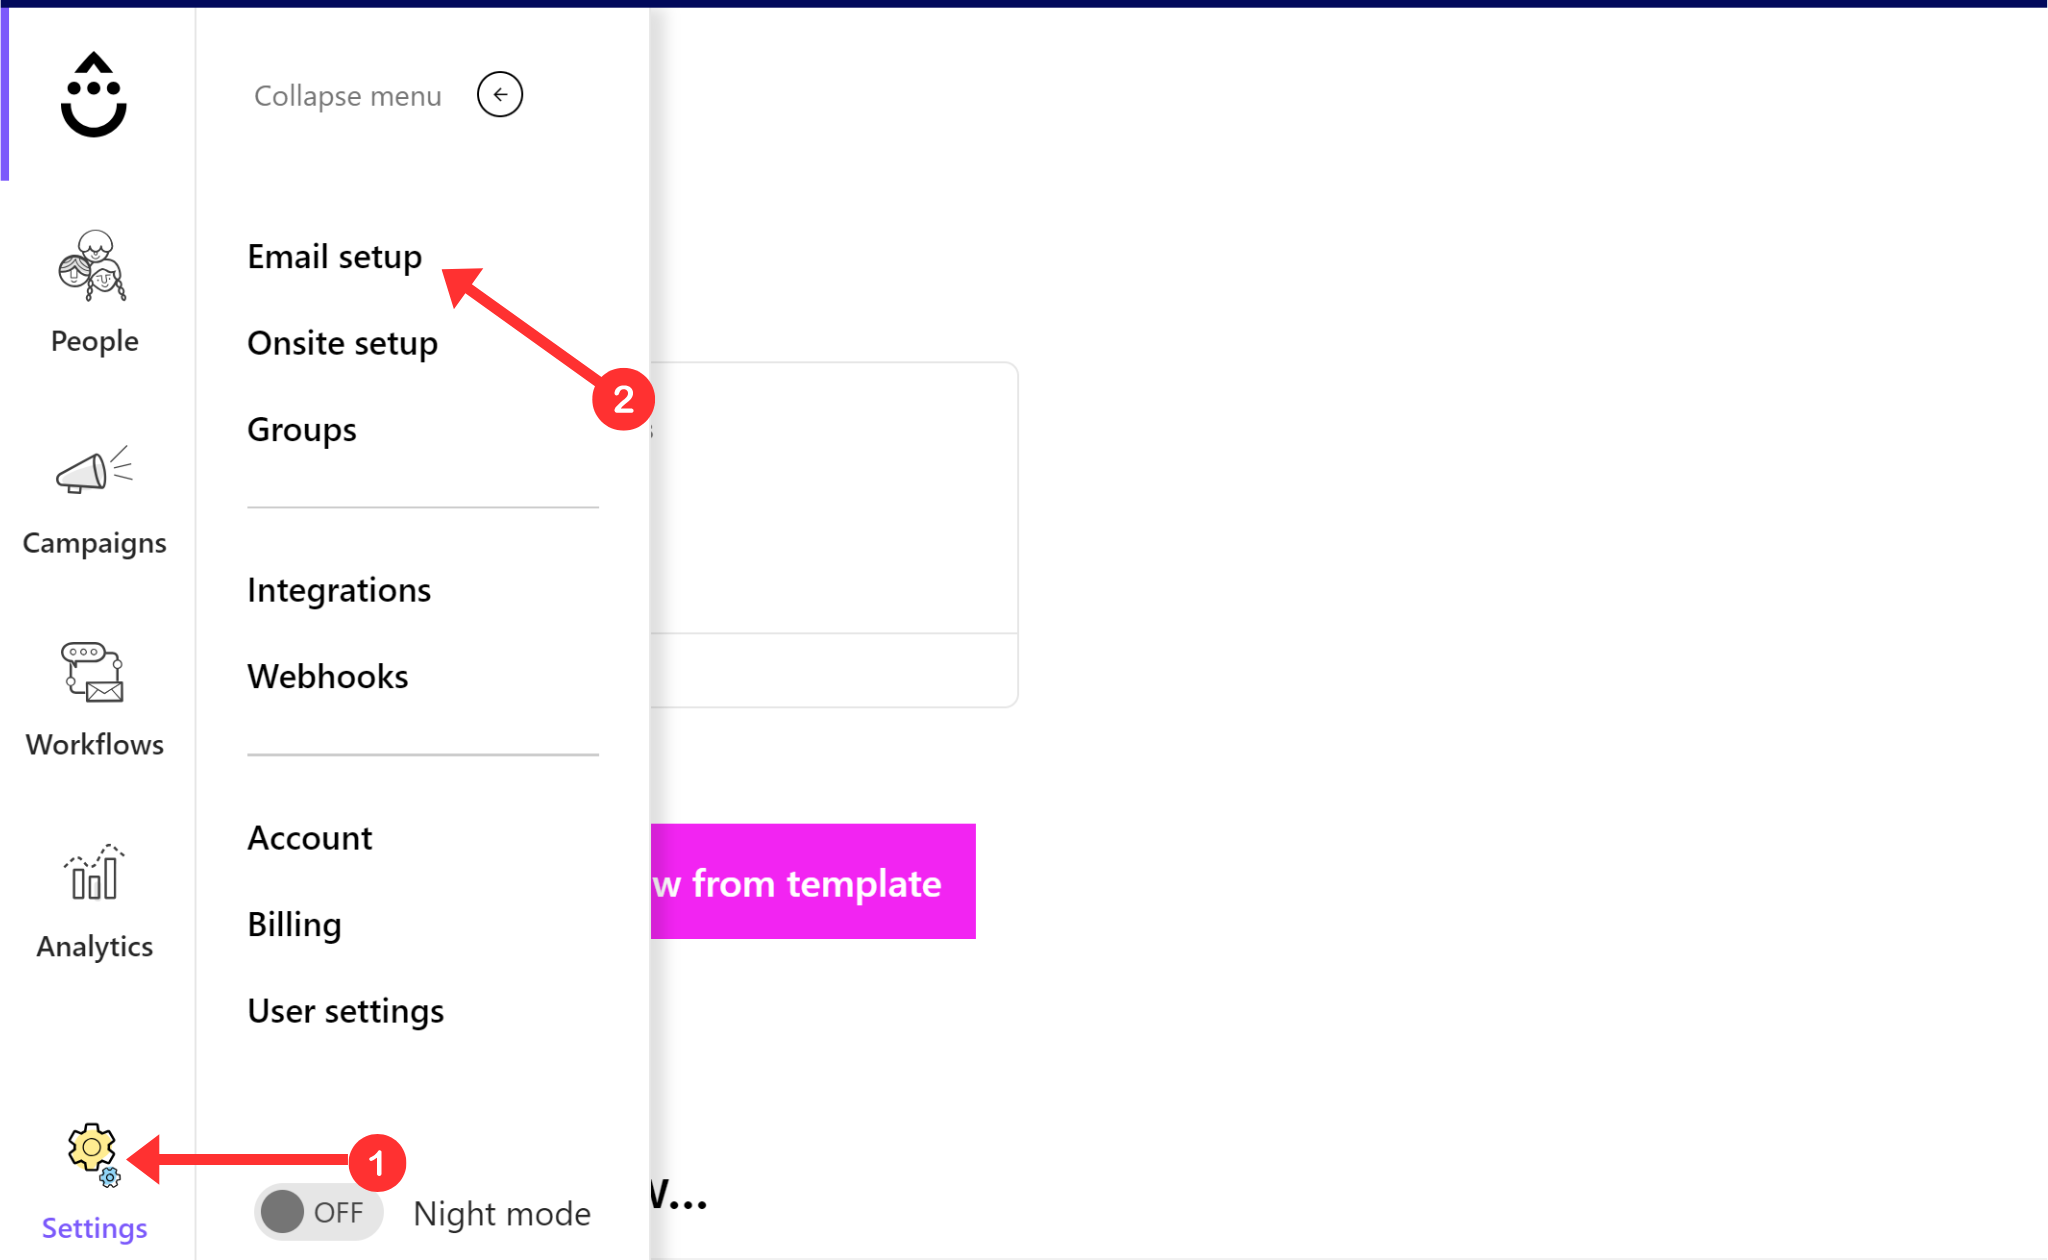
Go to the Settings and click Email Setup.
-
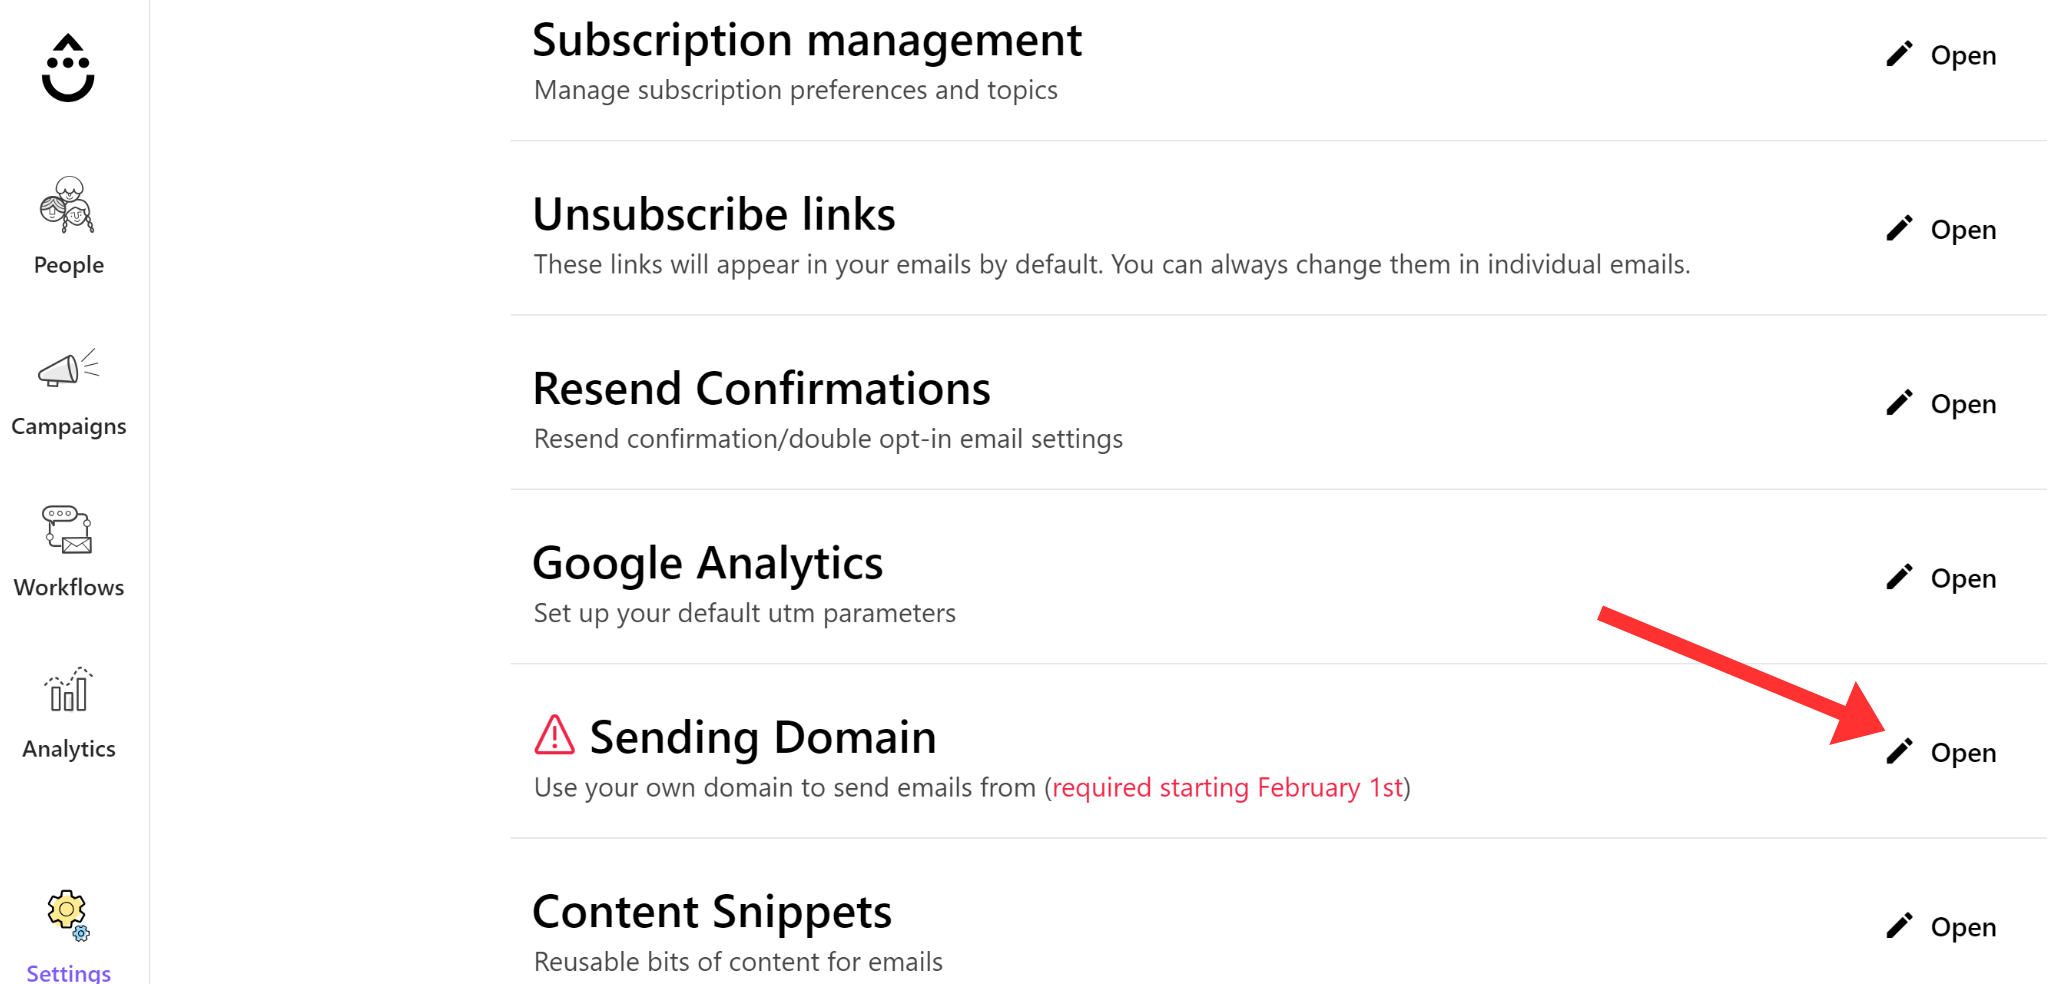
Click Open next to the Sending Domain option.
-
Click "Add New Sending Domain."
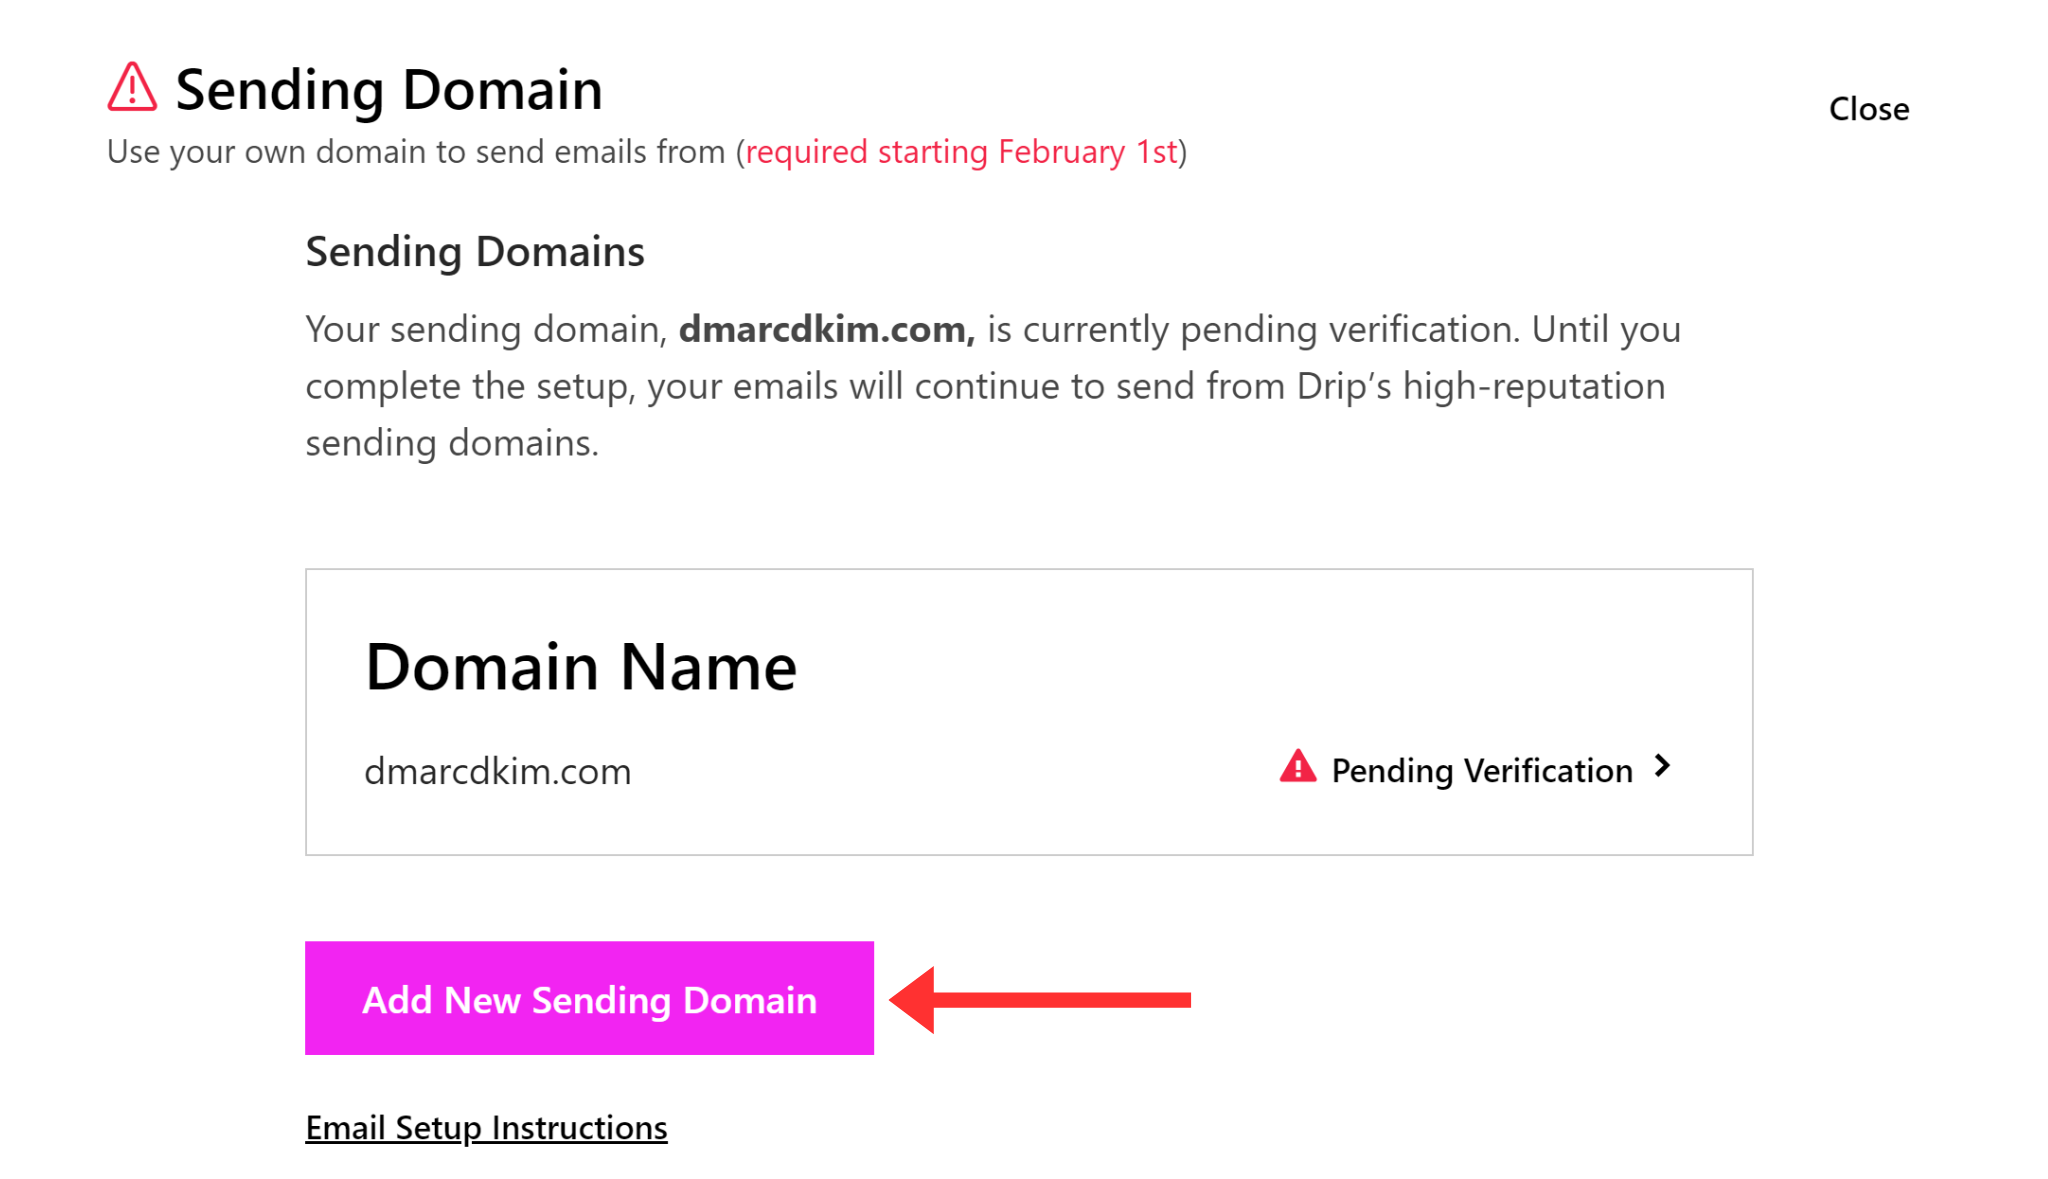
Write down your domain name.
-
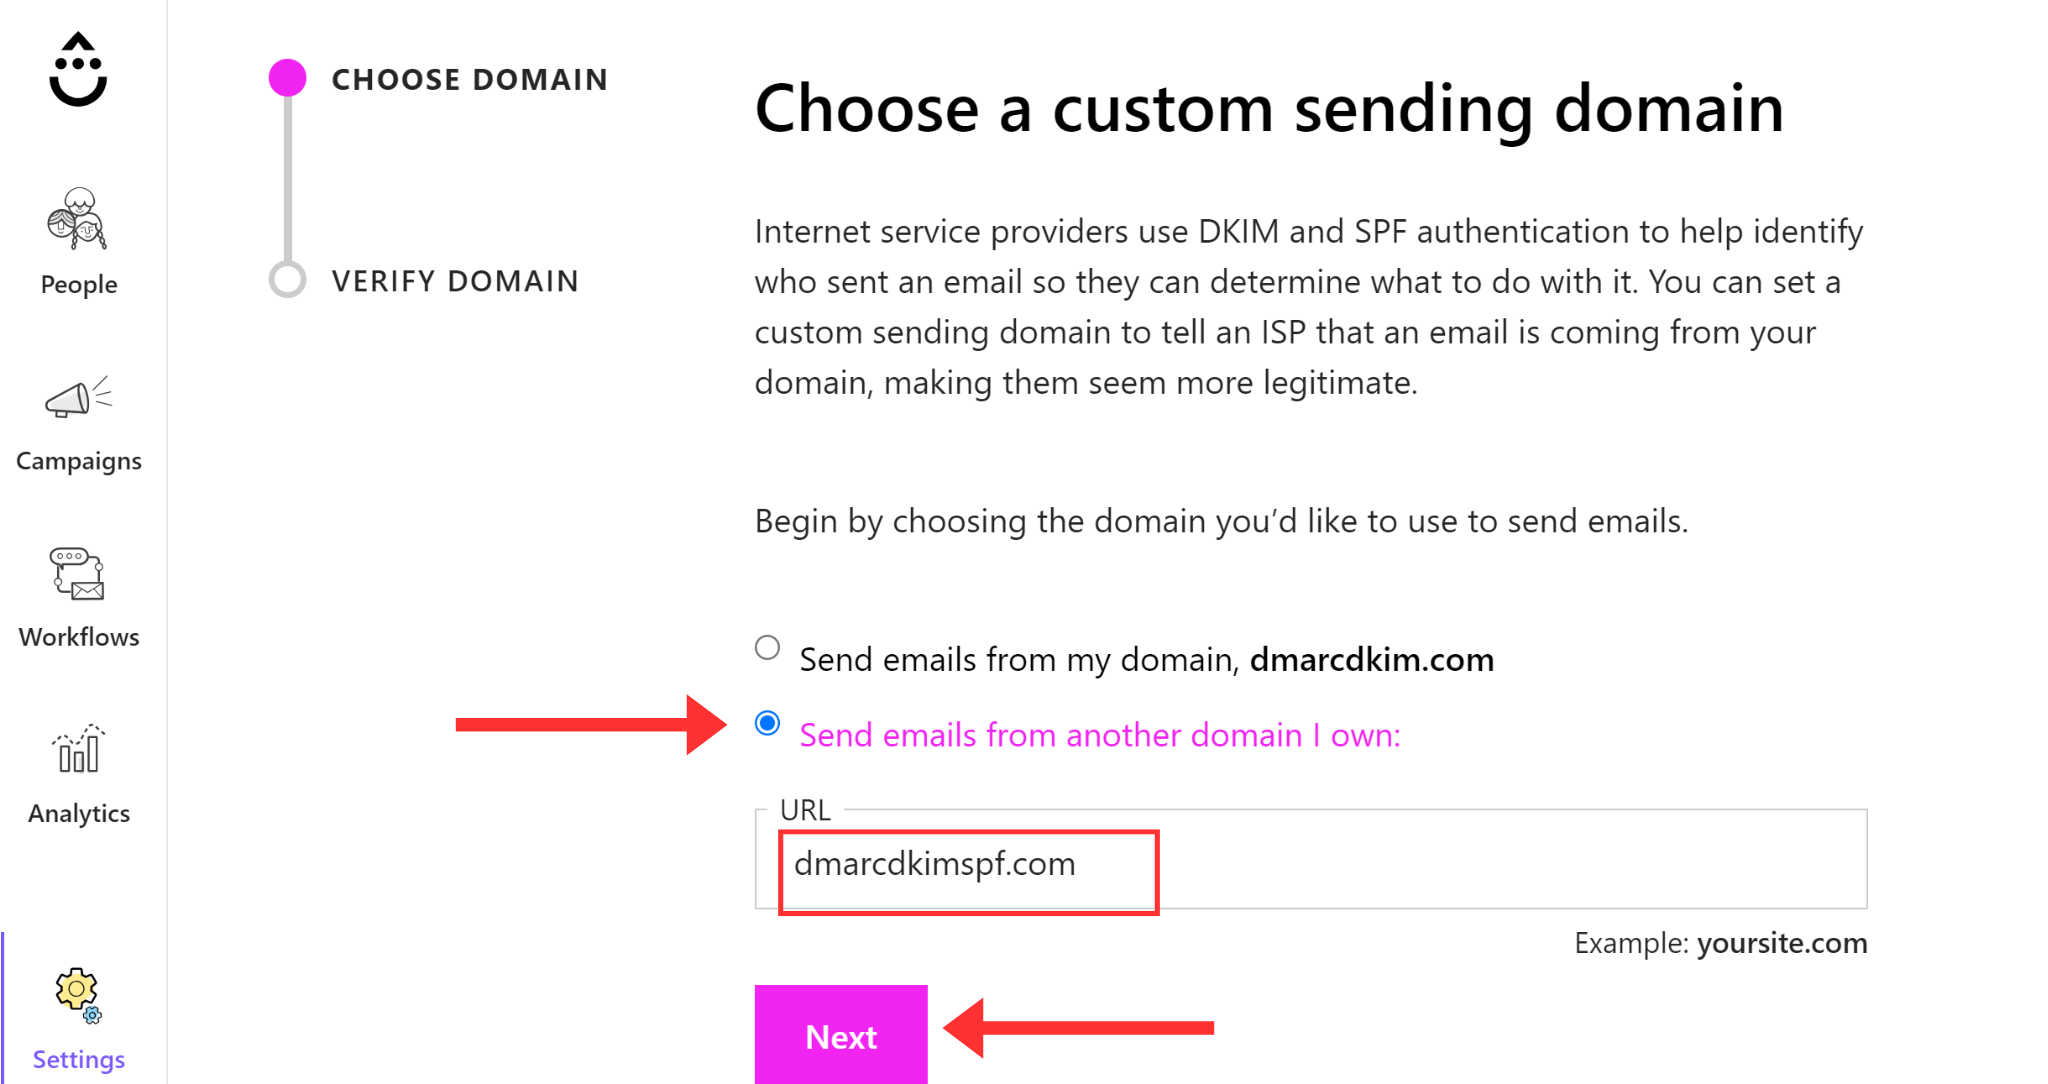
Select "Send emails from another domain I own" and click Next.
-
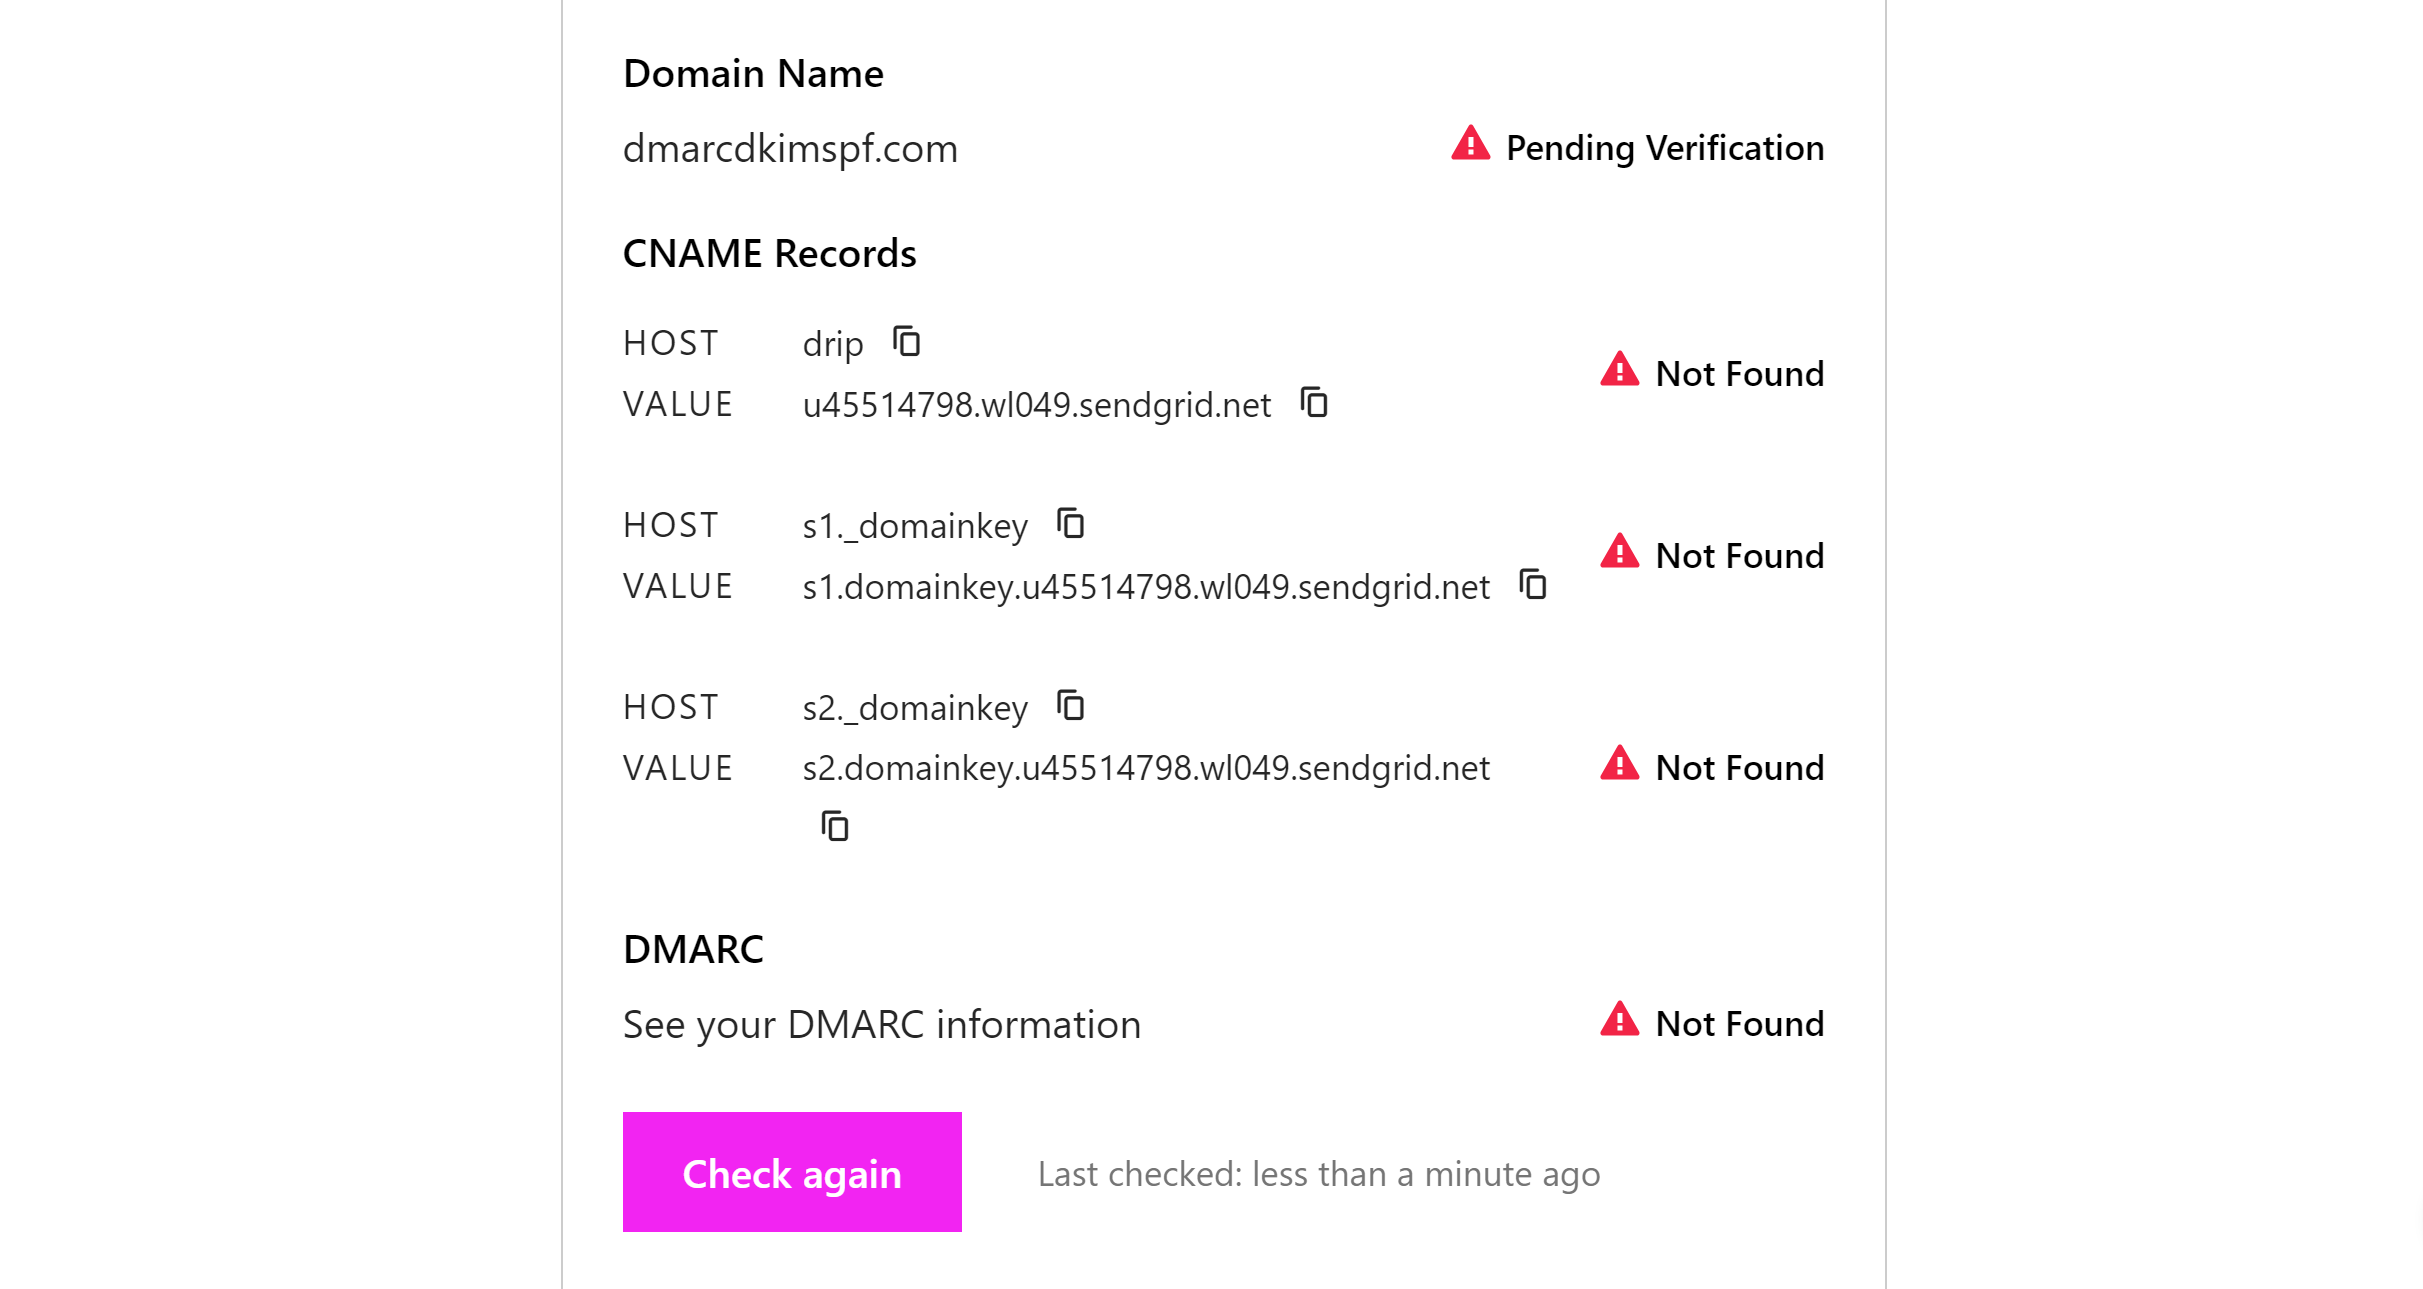
On the next page, you'll find three CNAME records - add these records to your DNS provider.
Add Drip CNAME Records to DNS Provider:
-
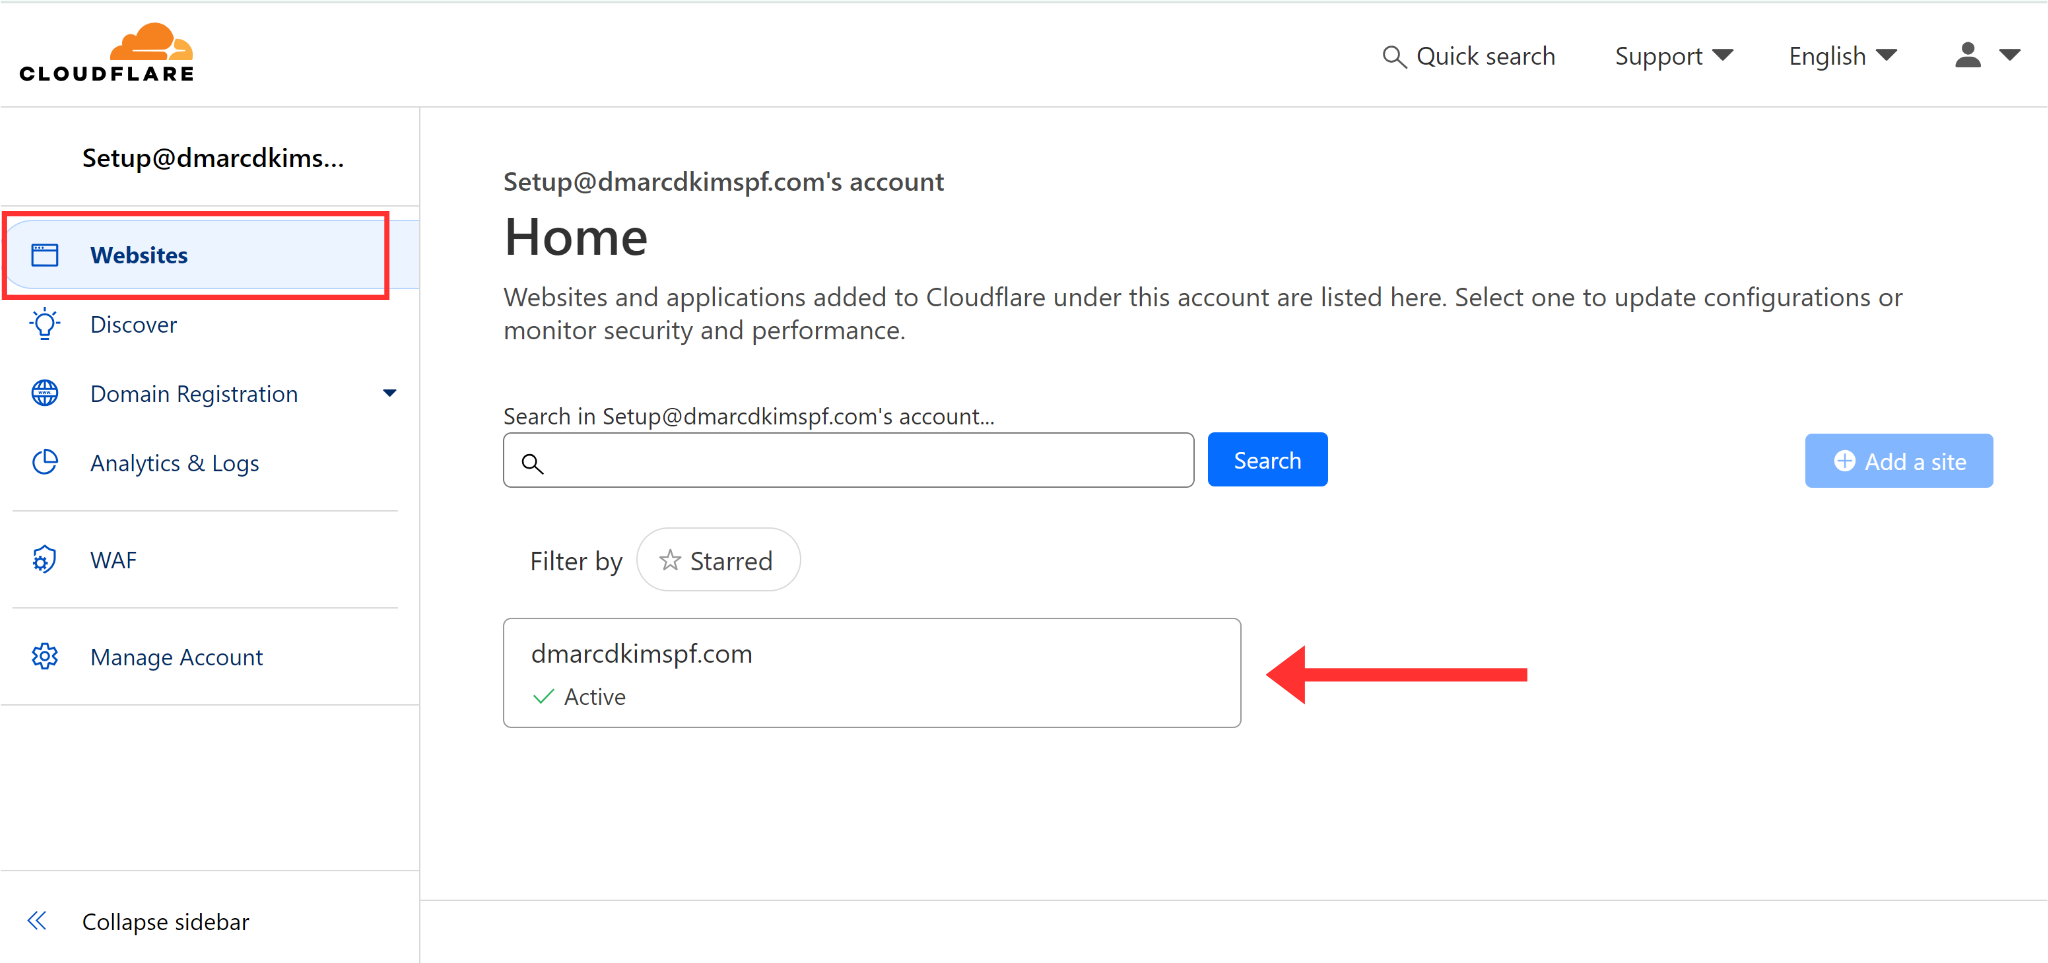
Login to your DNS provider (Cloudflare for this instance) and click your domain in the Website tab.
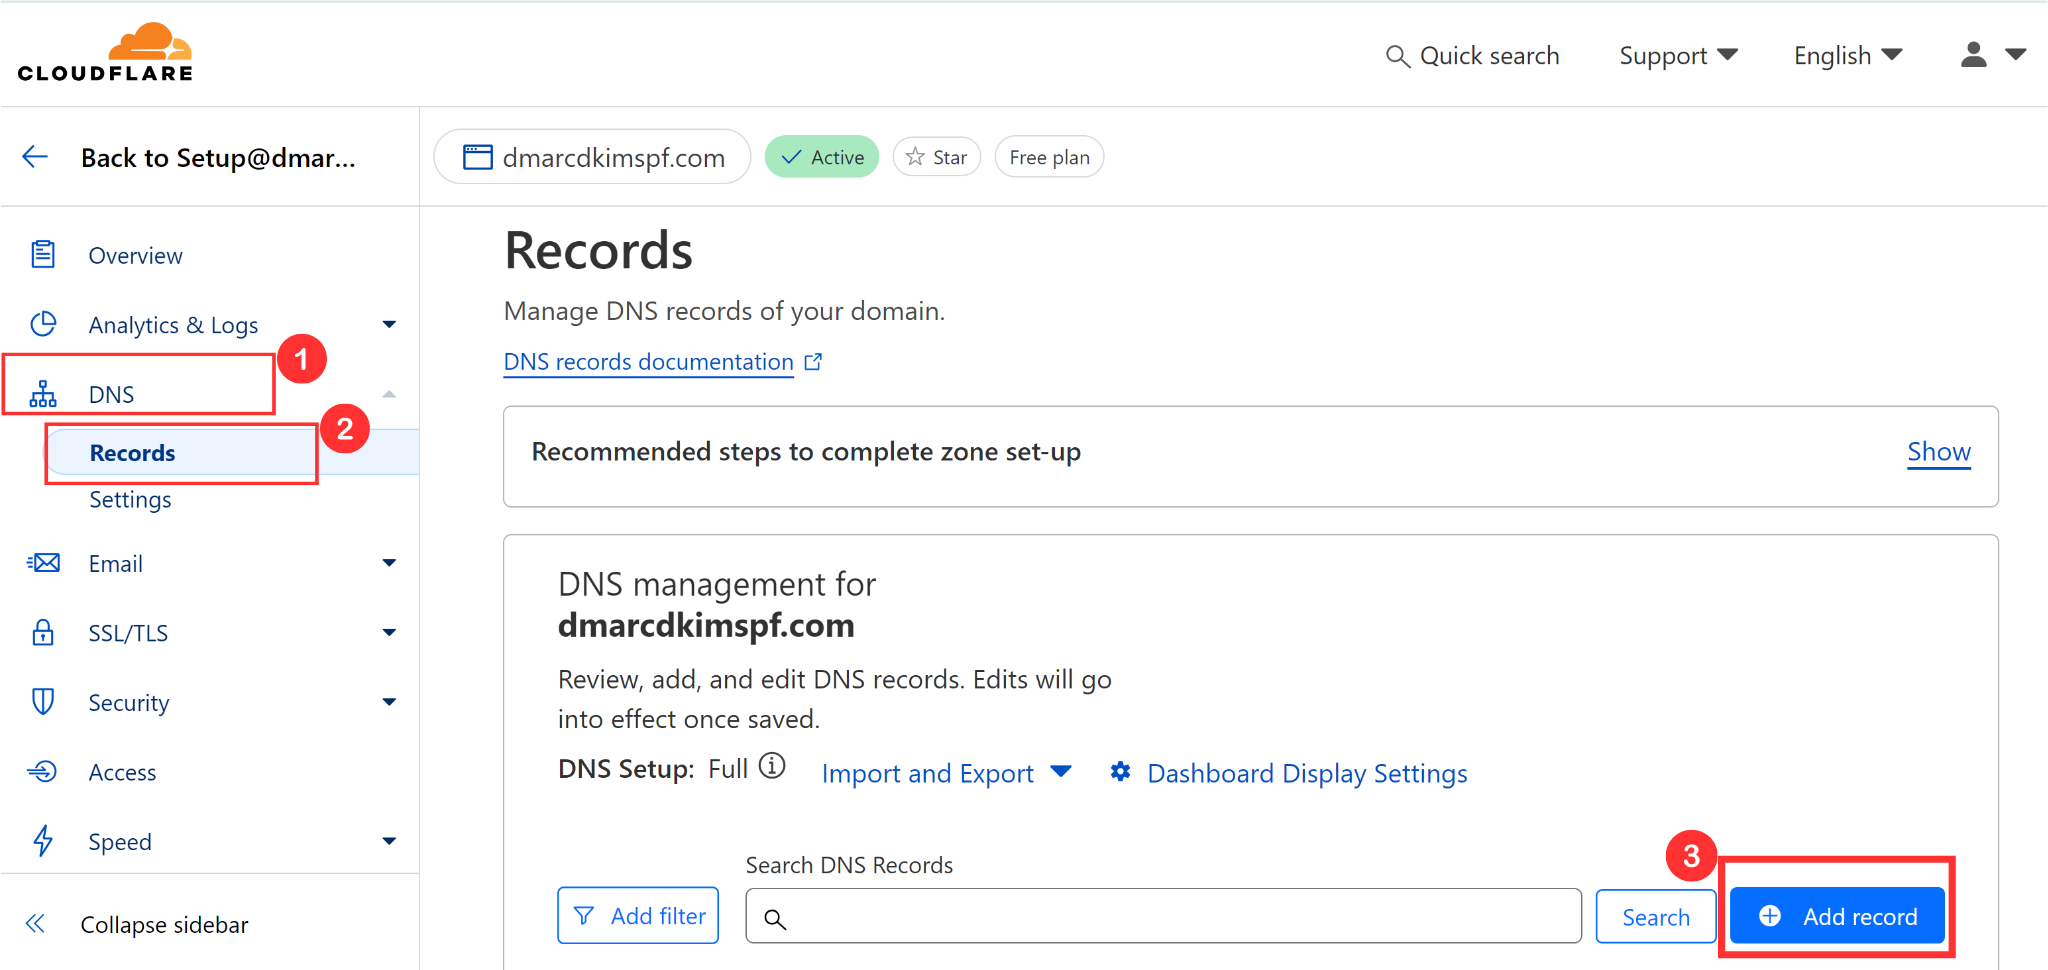
Click DNS and go to the Records tab in the left navigation menu.
-
Click the Add Record button to add the new records.
Select type CNAME.
Add the record name or Host in the Name field.
Add the record Value in the Target field.
-
Turn off the proxy and click Save.
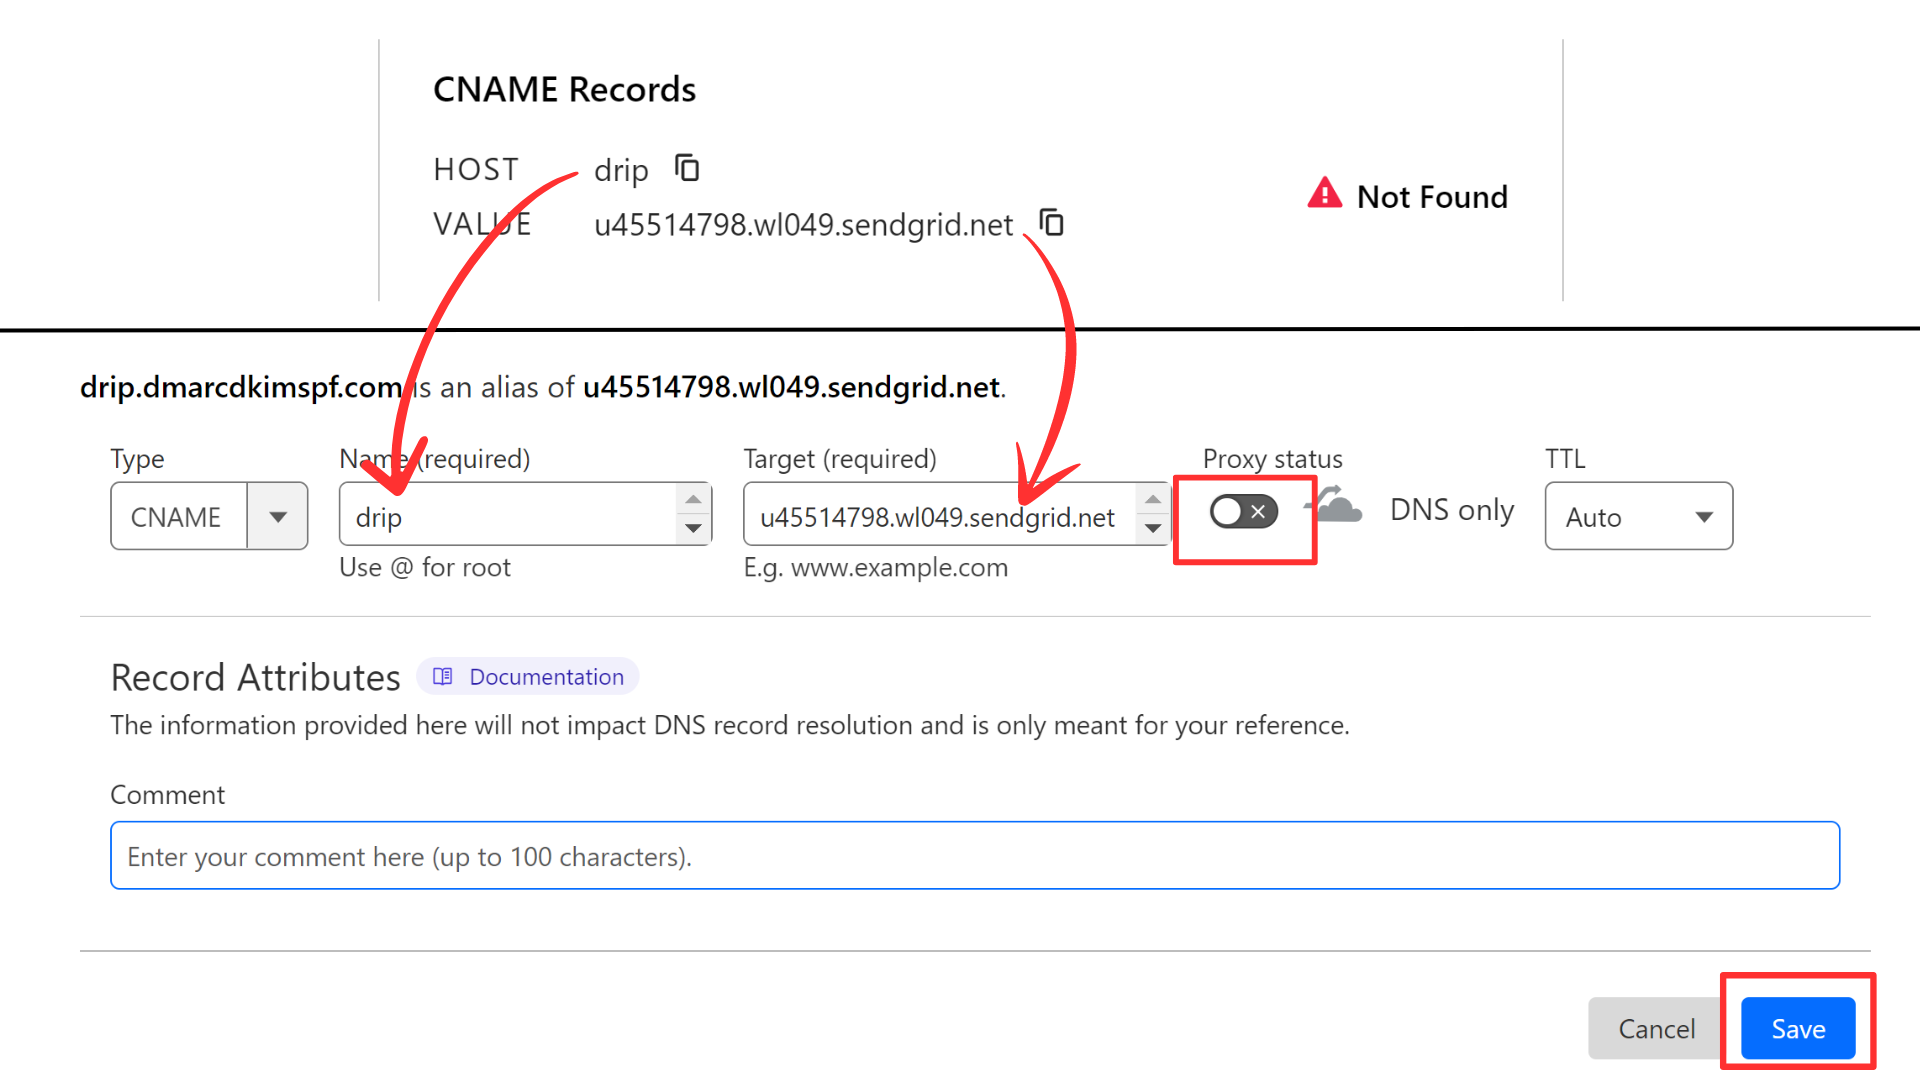
NOTE: Always turn off the proxy for the CNAME records. When enabled, it diverts the traffic to the DNS server which can cause authentication issues.
Verify Drip DNS Records:
-
Click the "Check Again" button.

-
The DNS status will change to green checkmarks, indicating the successful CNAME records verification.
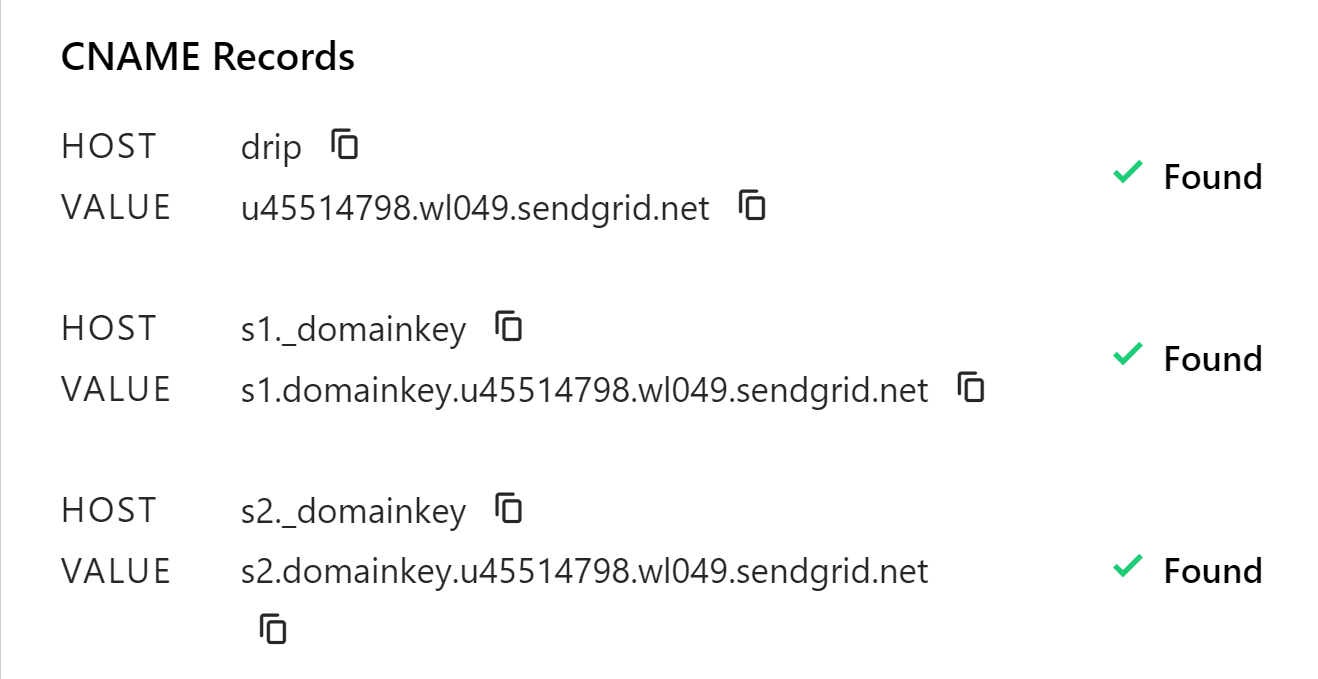
NOTE: If you do not see the green checkmarks immediately after adding the CNAME records, wait up to 24 hours for the DNS changes to update.
If the records do not verify after 24 hours, there could be a misconfiguration in your DNS setup. To troubleshoot the authentication issues, hire a DmarcDkim.com expert.
Generate Drip DMARC Value:
Drip redirects you to a third party DMARC generator tool. If you click on "See your DMARC information", you will be asked to select the region and sign up to create your account, which consumes time and extra effort.
To save you time and avoid complexity, DmarcDkim.com offers a beginner-friendly and quick DMARC tool.
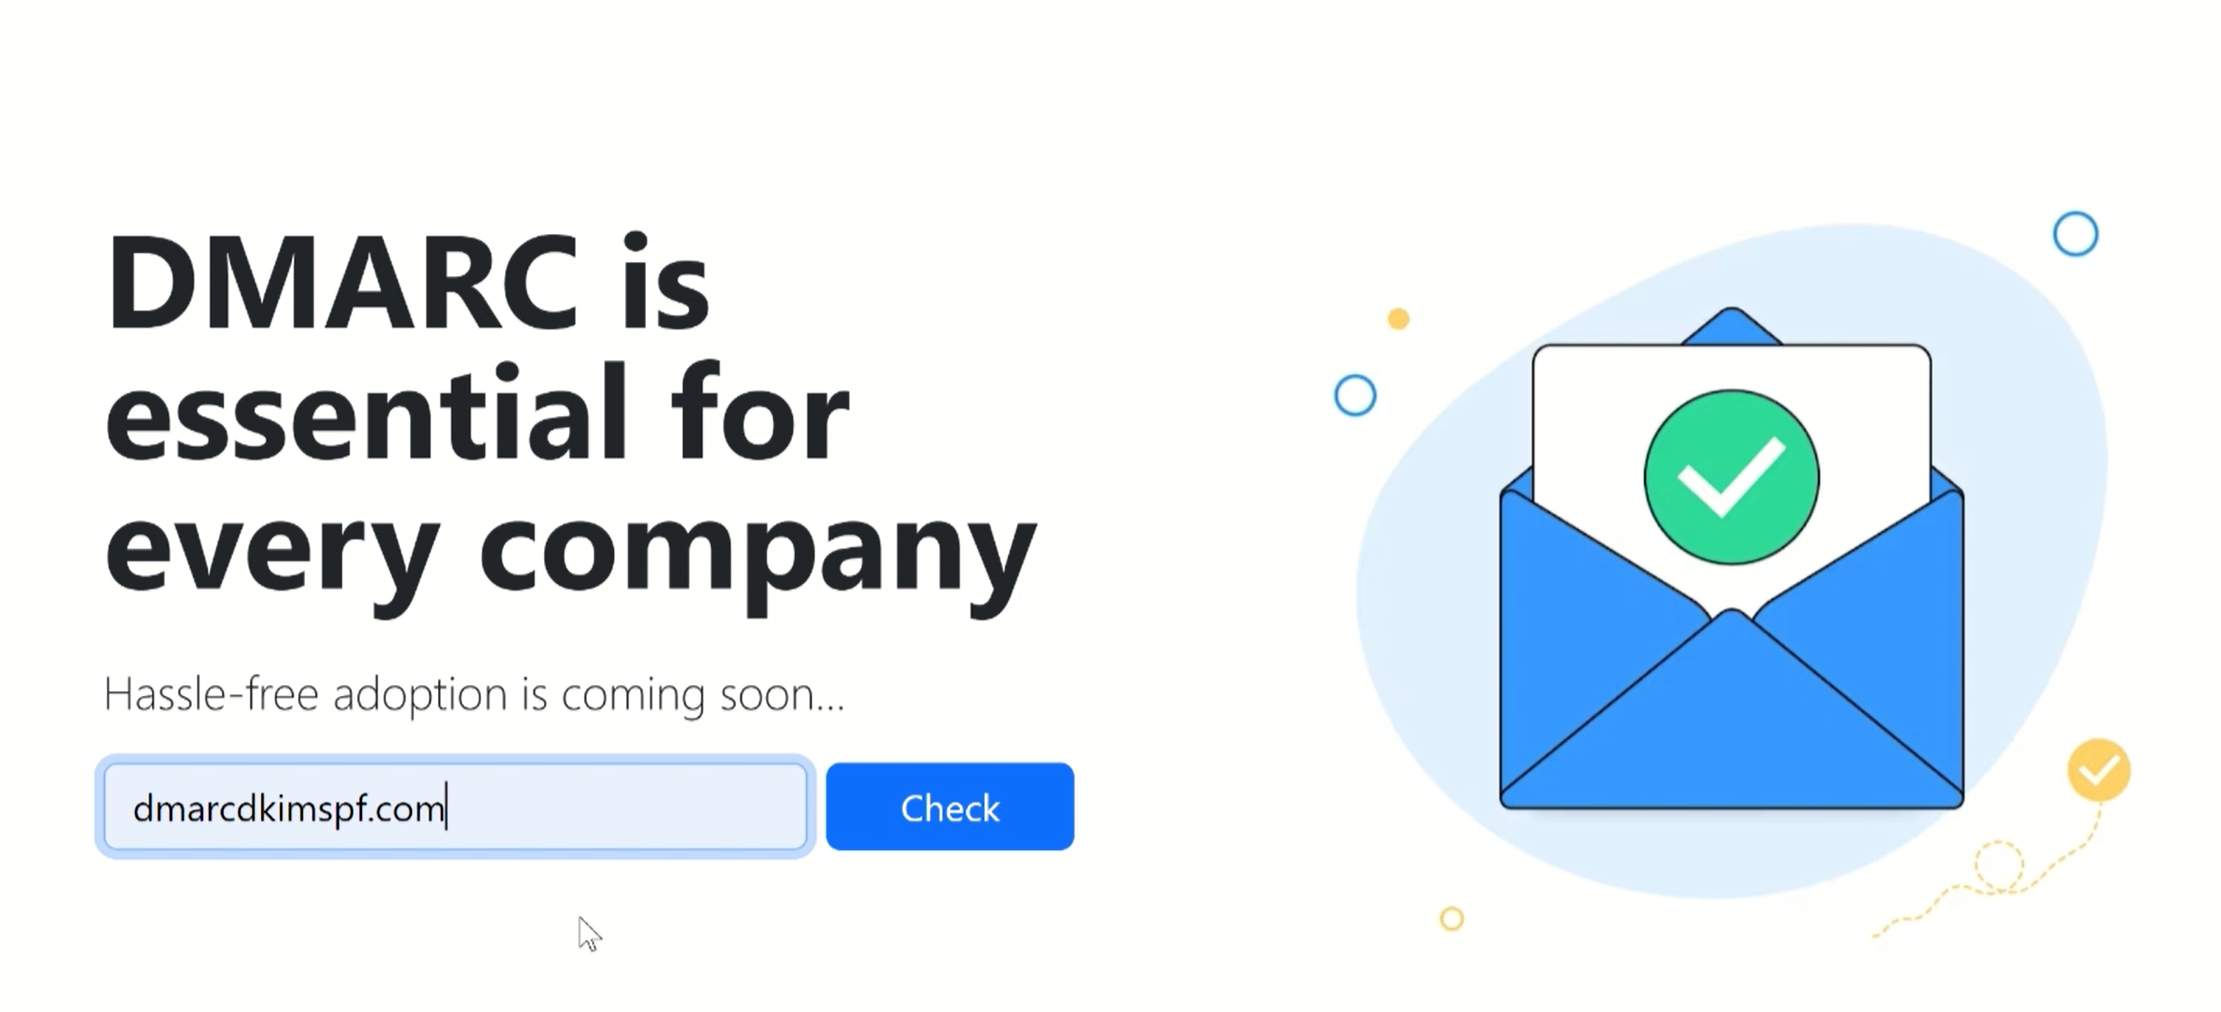
Go to the DMARC Lookup Tool.
-
Write down your domain name and click Check.
-
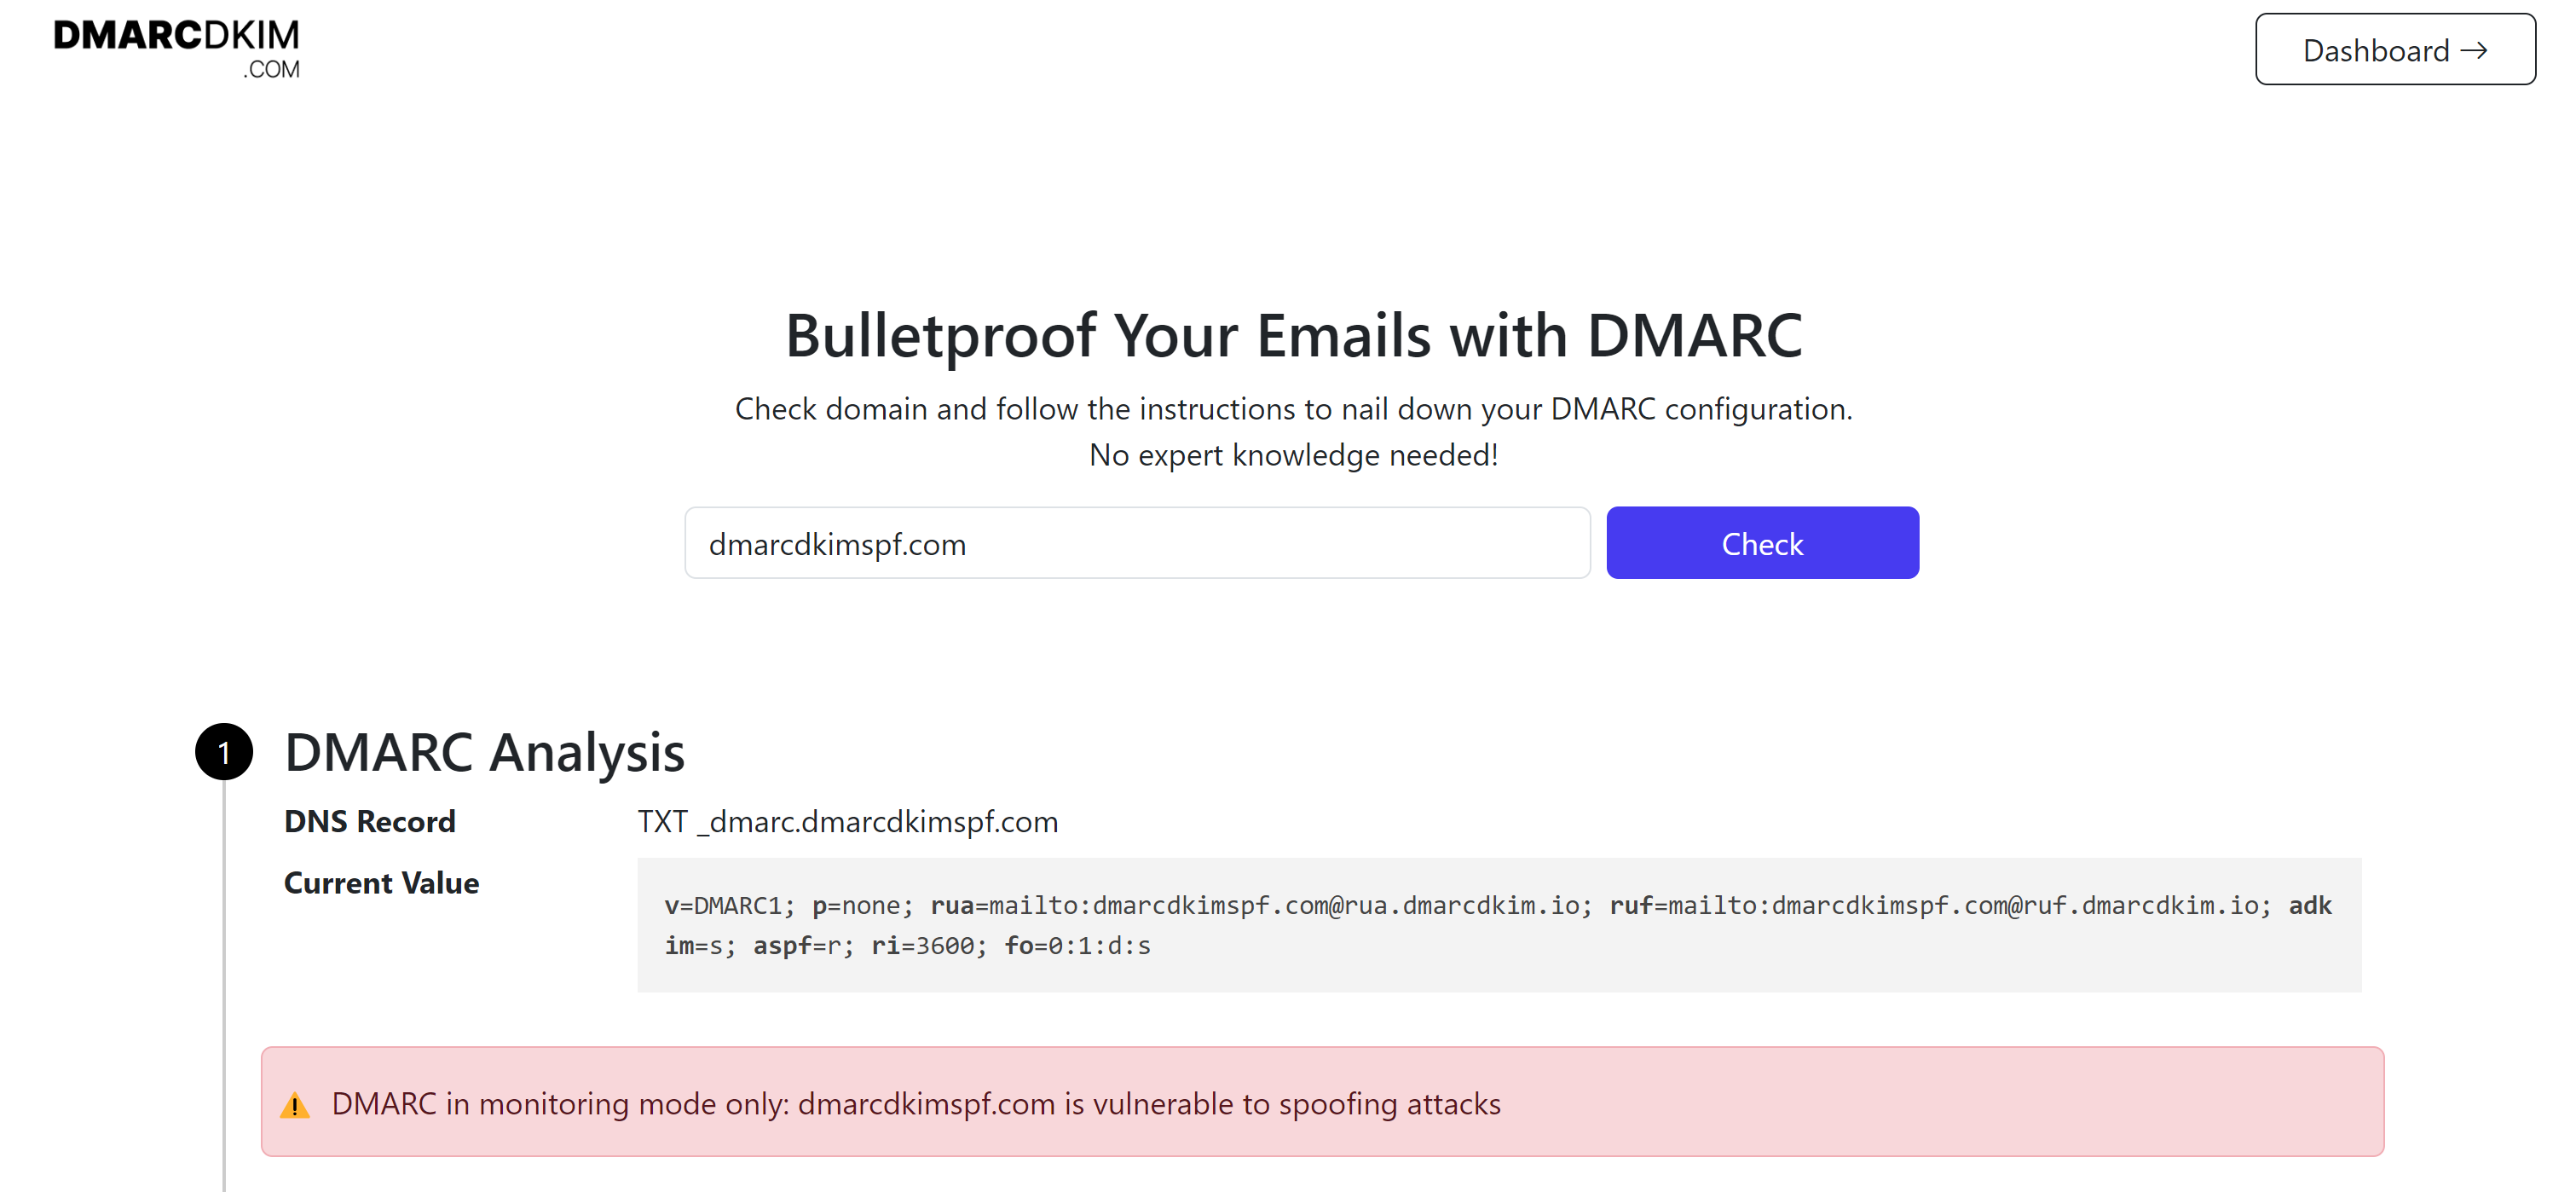
The tool analyzes your domain and suggests a DMARC value accordingly.
-
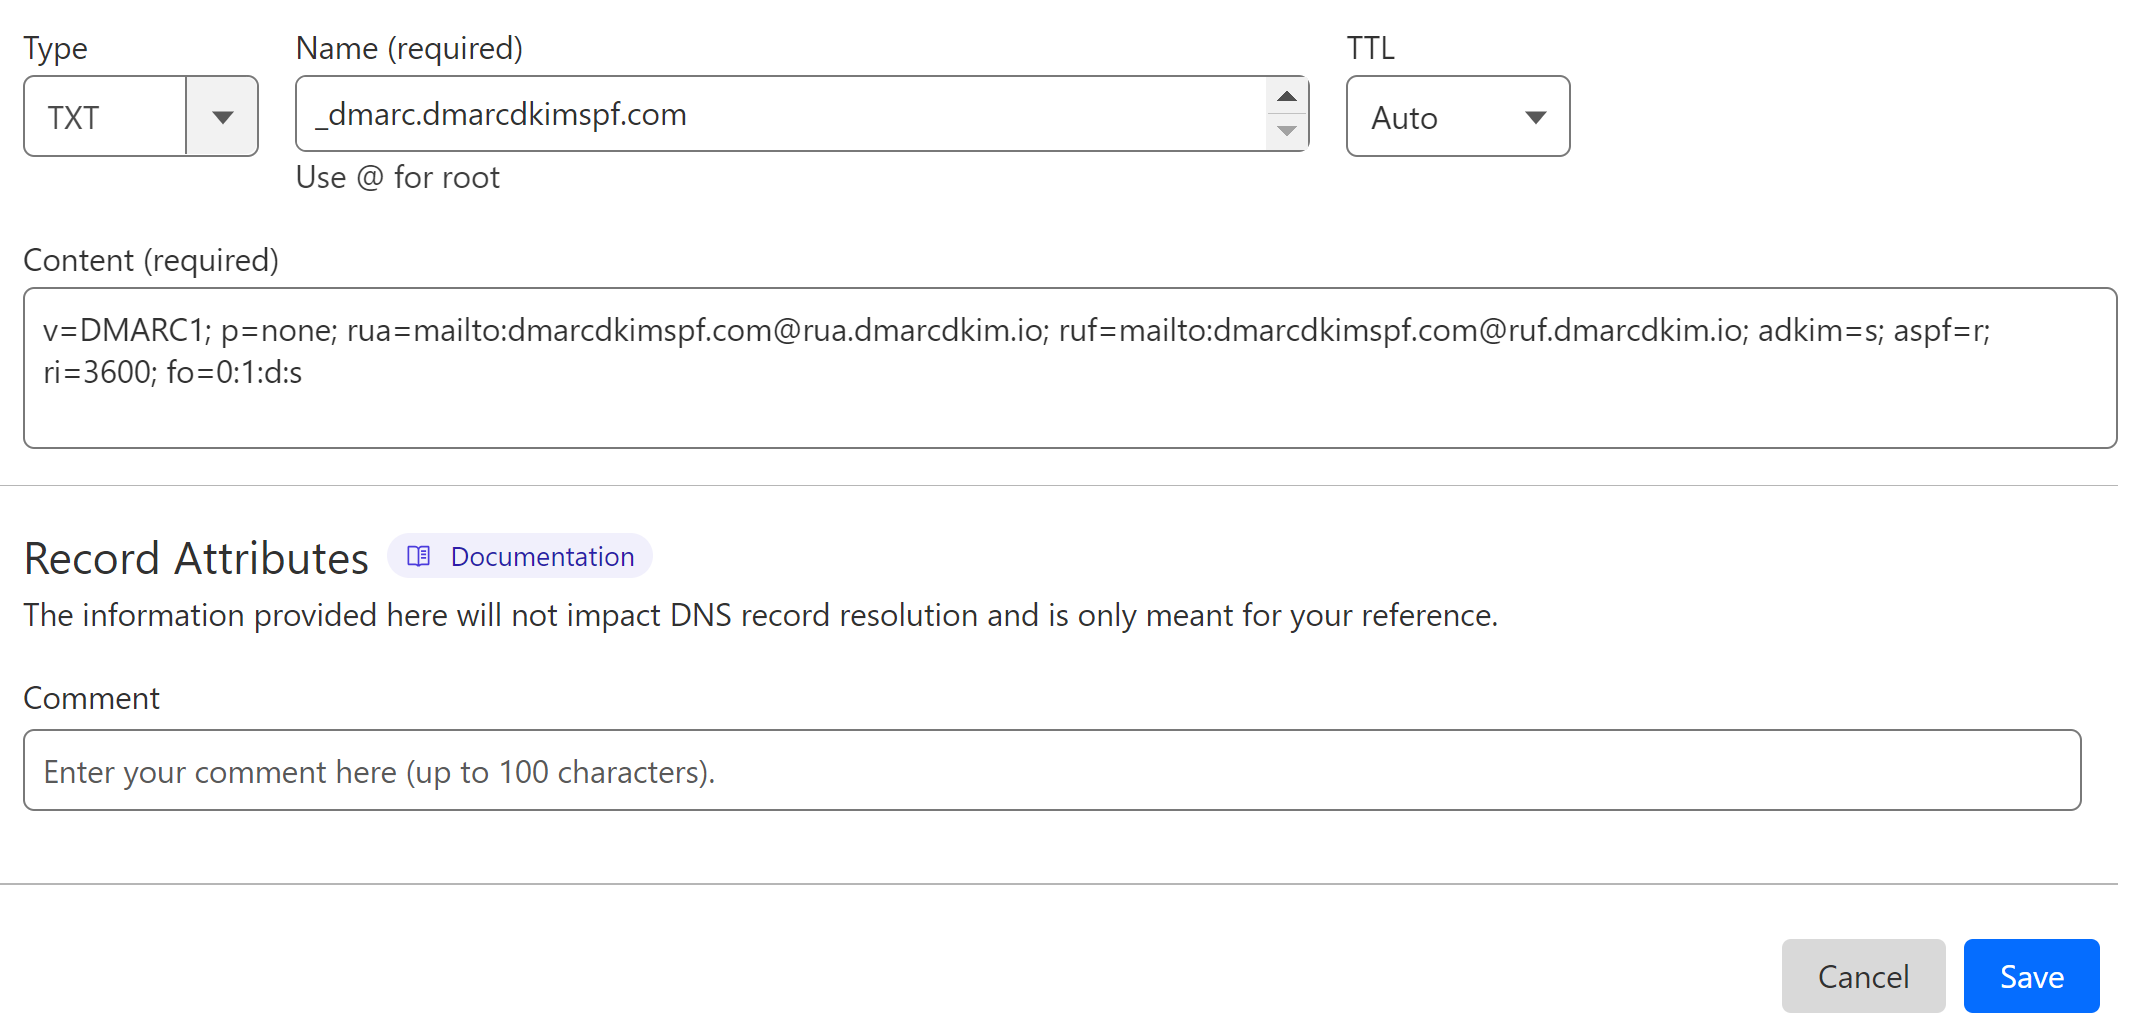
Copy this value and add it to your DNS dashboard.
Moving forward with DMARC reports:
Once you have added the DMARC record to your DNS dashboard, the tool analyzes your domain.
It generates DMARC reports that can be easily interpreted and you can take action to implement a strict policy. Sign up the account to get access to the reports dashboard.
If you are unable to configure or verify the DNS records, contact DmarcDkim.com support.
Check domain and follow the instructions to nail down your DMARC configuration.
No expert knowledge needed!


