Rocketseed SPF, DKIM, and DMARC Set Up - 2024 Guide
Is your domain really protected?
Enter your domain to run a live DMARC check and see how easy it for others to spoof your domain.
No sign-up required. Safe to try on any domain.
Articles
- DMARC for non sending domains
- ARC Is Being Retired
- Manual DMARC Monitoring vs Automated Monitoring
- Reverse Engineering Phishing
- ARC - Authenticated Received Chain
- Email impersonation scams explained
- Click/Link Tracking
- DMARC Enforcement in 2026
- Cyber Insurance and DMARC Enforcement
- How to Implement DMARC for Email Security in UK
- TLS-RPT Record
- SMTP Smuggling
- DMARC record
- DNS and NS
- 🇩🇪 Welche Hosting Anbieter unterstützen DMARC
- MX records
- Domain Authentication
- The impact of Business Email Compromise
- CEO Scam
- DNS records
- Email Verification
- DMARC2 vs DMARC1
- DNS Leak
- DNS Check
- Return-path record
- CNAME record
- Welche E-Mail-Sicherheitsdienste DMARC integrieren
- What Is MTA-STS and Why It Matters Now
- A quiet Google update just made SPF more forgiving
- DMARC Dashboard now available on Azure Marketplace
- DMARCbis Adoption Has Started
- DARA Records
- DKIM2 vs DKIM
- DMARC-Überwachung: Anbieter im Vergleich
- DMARC-Dienstleister in Deutschland
- Understanding DMARC Reports
- DMARC Built for Europe. Hosted in Germany.
- SOA records
- CNAME vs. A Records
- Beste DMARC-Lösungen für kleine Unternehmen
- Die erste deutsche dedizierte DMARC-Plattform
- Cracking a 1024-bit DKIM Key
- Top 7 SPF Check Tools Compared 2026
- DNS Lookup
- Reverse DNS Lookup
- Der deutsche Bundestag hat ein Spoofing-Problem
How to configure SPF, DKIM, DMARC Records for Rocketseed?
SPF (Sender Policy Framework) specifies which servers are allowed to send emails on your behalf. This email validation system blocks emails sent from unauthorized sources.
DKIM (Domain Identified Keys) adds a unique signature to your emails to make sure they have not been forged.
DMARC (Domain-based Message Authentication, Reporting, and Conformance) is applied after the SPF and DKIM records are added. DMARC helps with domain authentication and gives you reports about email performance.
Setting Up Rocketseed SPF Record:
We are using Cloudflare for this guide post but you can add these records to any DNS provider you use.
-
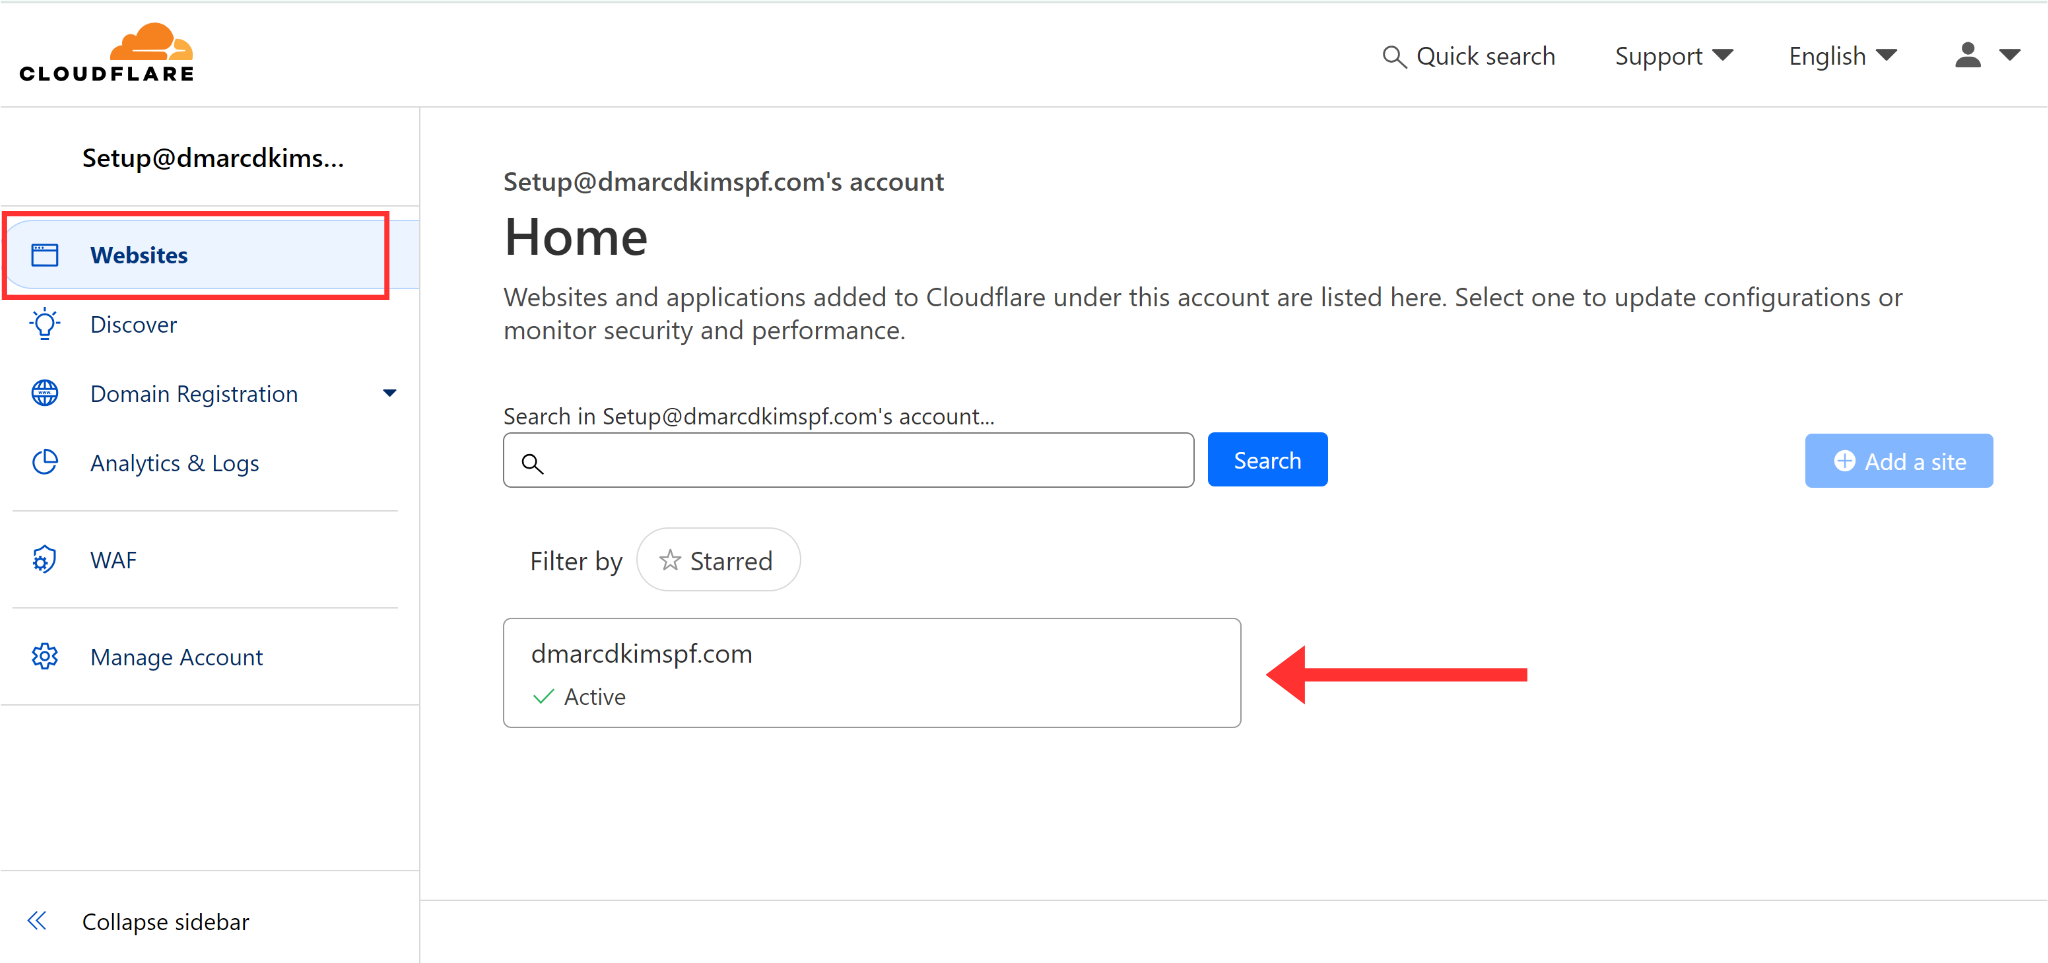
Login to your DNS provider and click your website in the home tab.
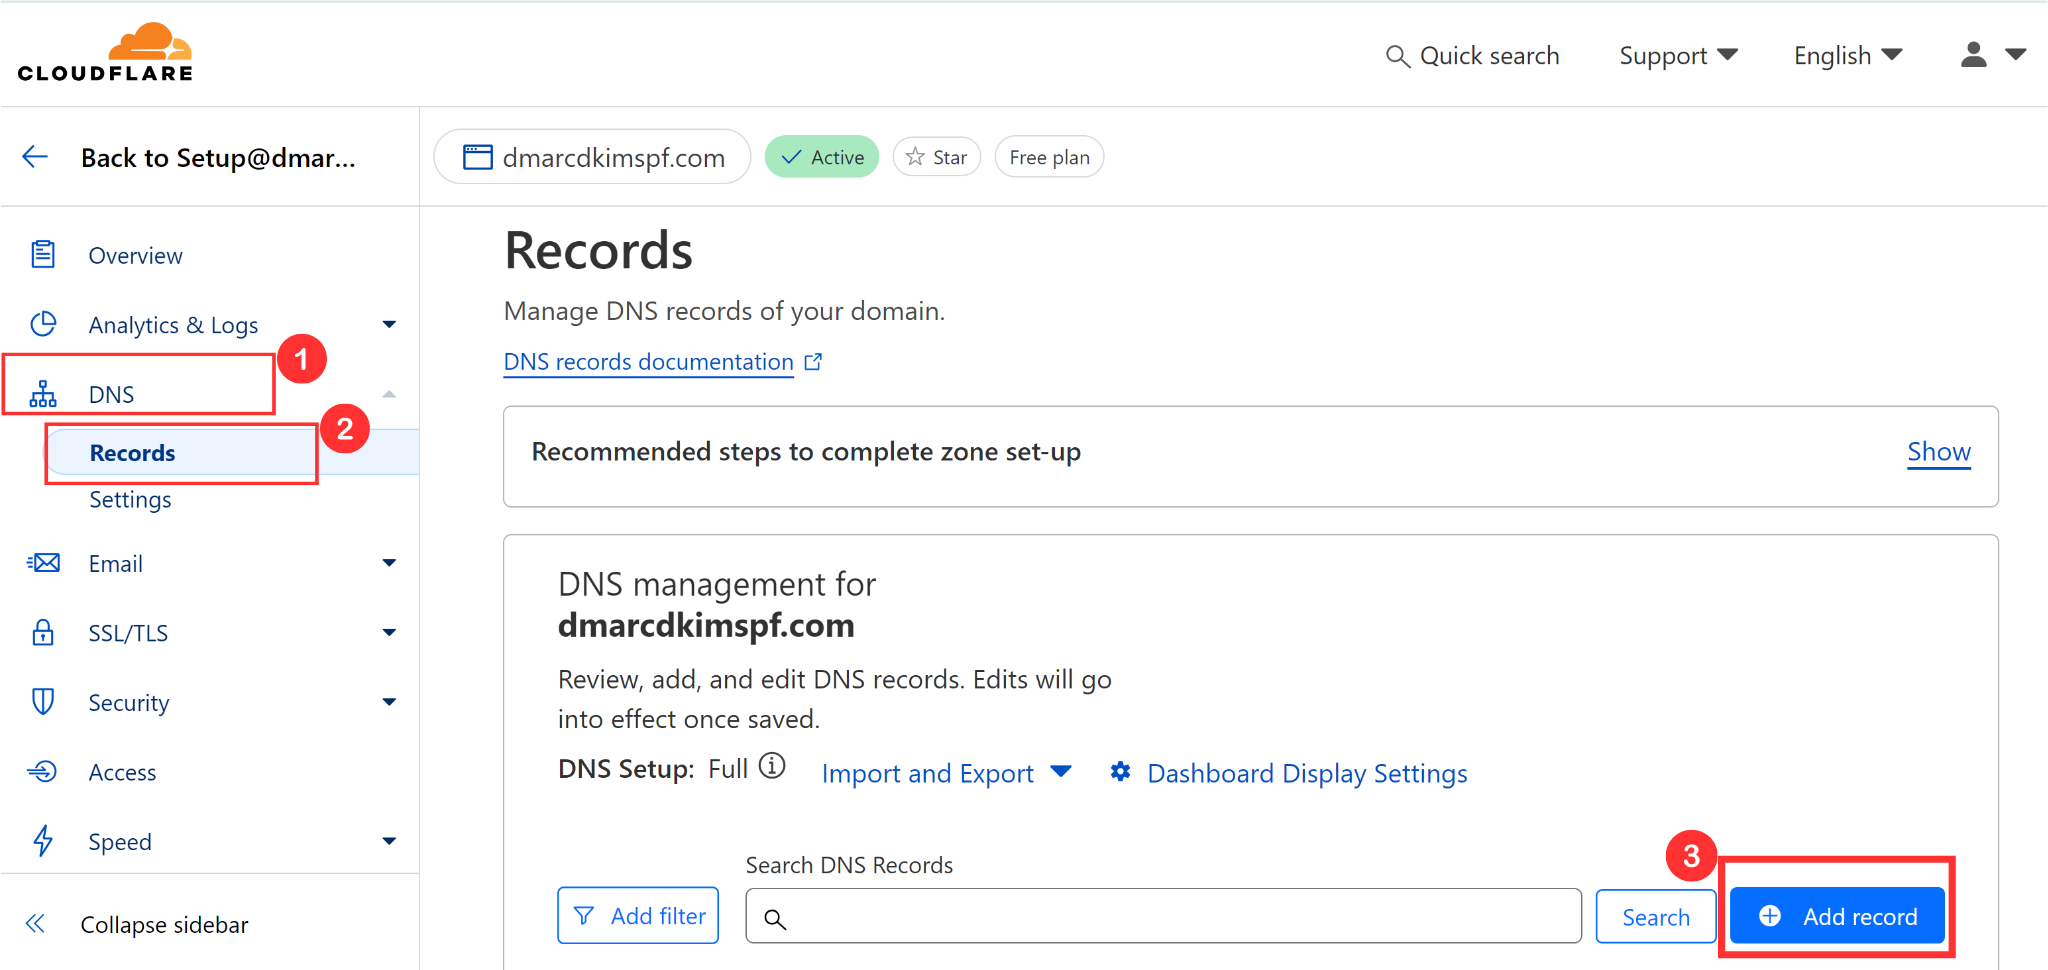
Click DNS in the left navigation menu and go to Records.
-
Hit the Add Record button to add new SPF records.
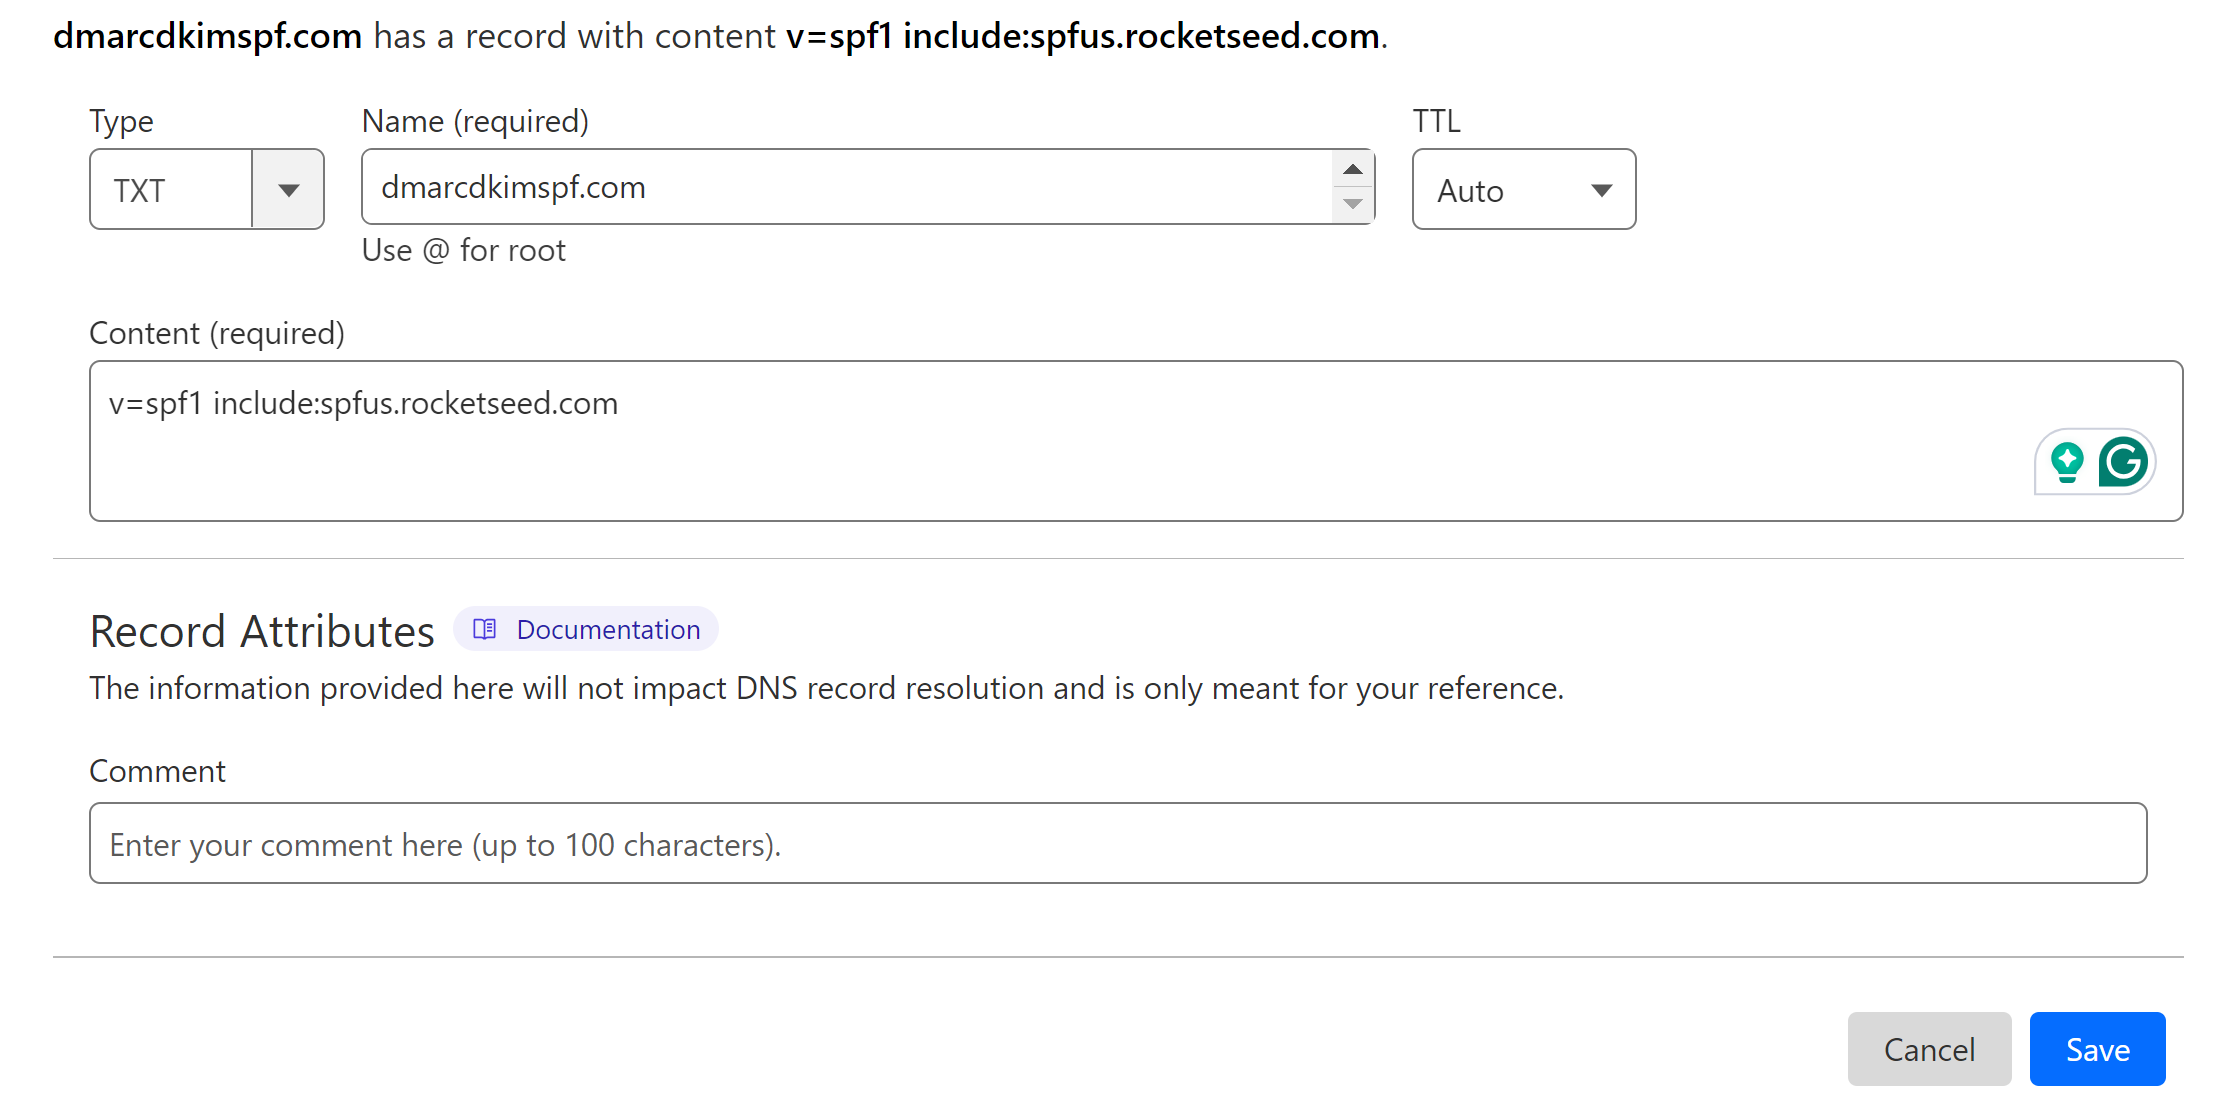
Select the record type, TXT.
In the Host or Name section, write your domain name.
In the Content or Value section, write the given SPF value: v=spf1 include:spfuk.rocketseed.com (if you are located in Europe) v=spf1 include:spfus.rocketseed.com (if you are located in the Americas) v=spf1 include:spfza.rocketseed.com (if you are located in Africa)
-
Finally, click the Save button to add the Rocketseed SPF record to your DNS dashboard.


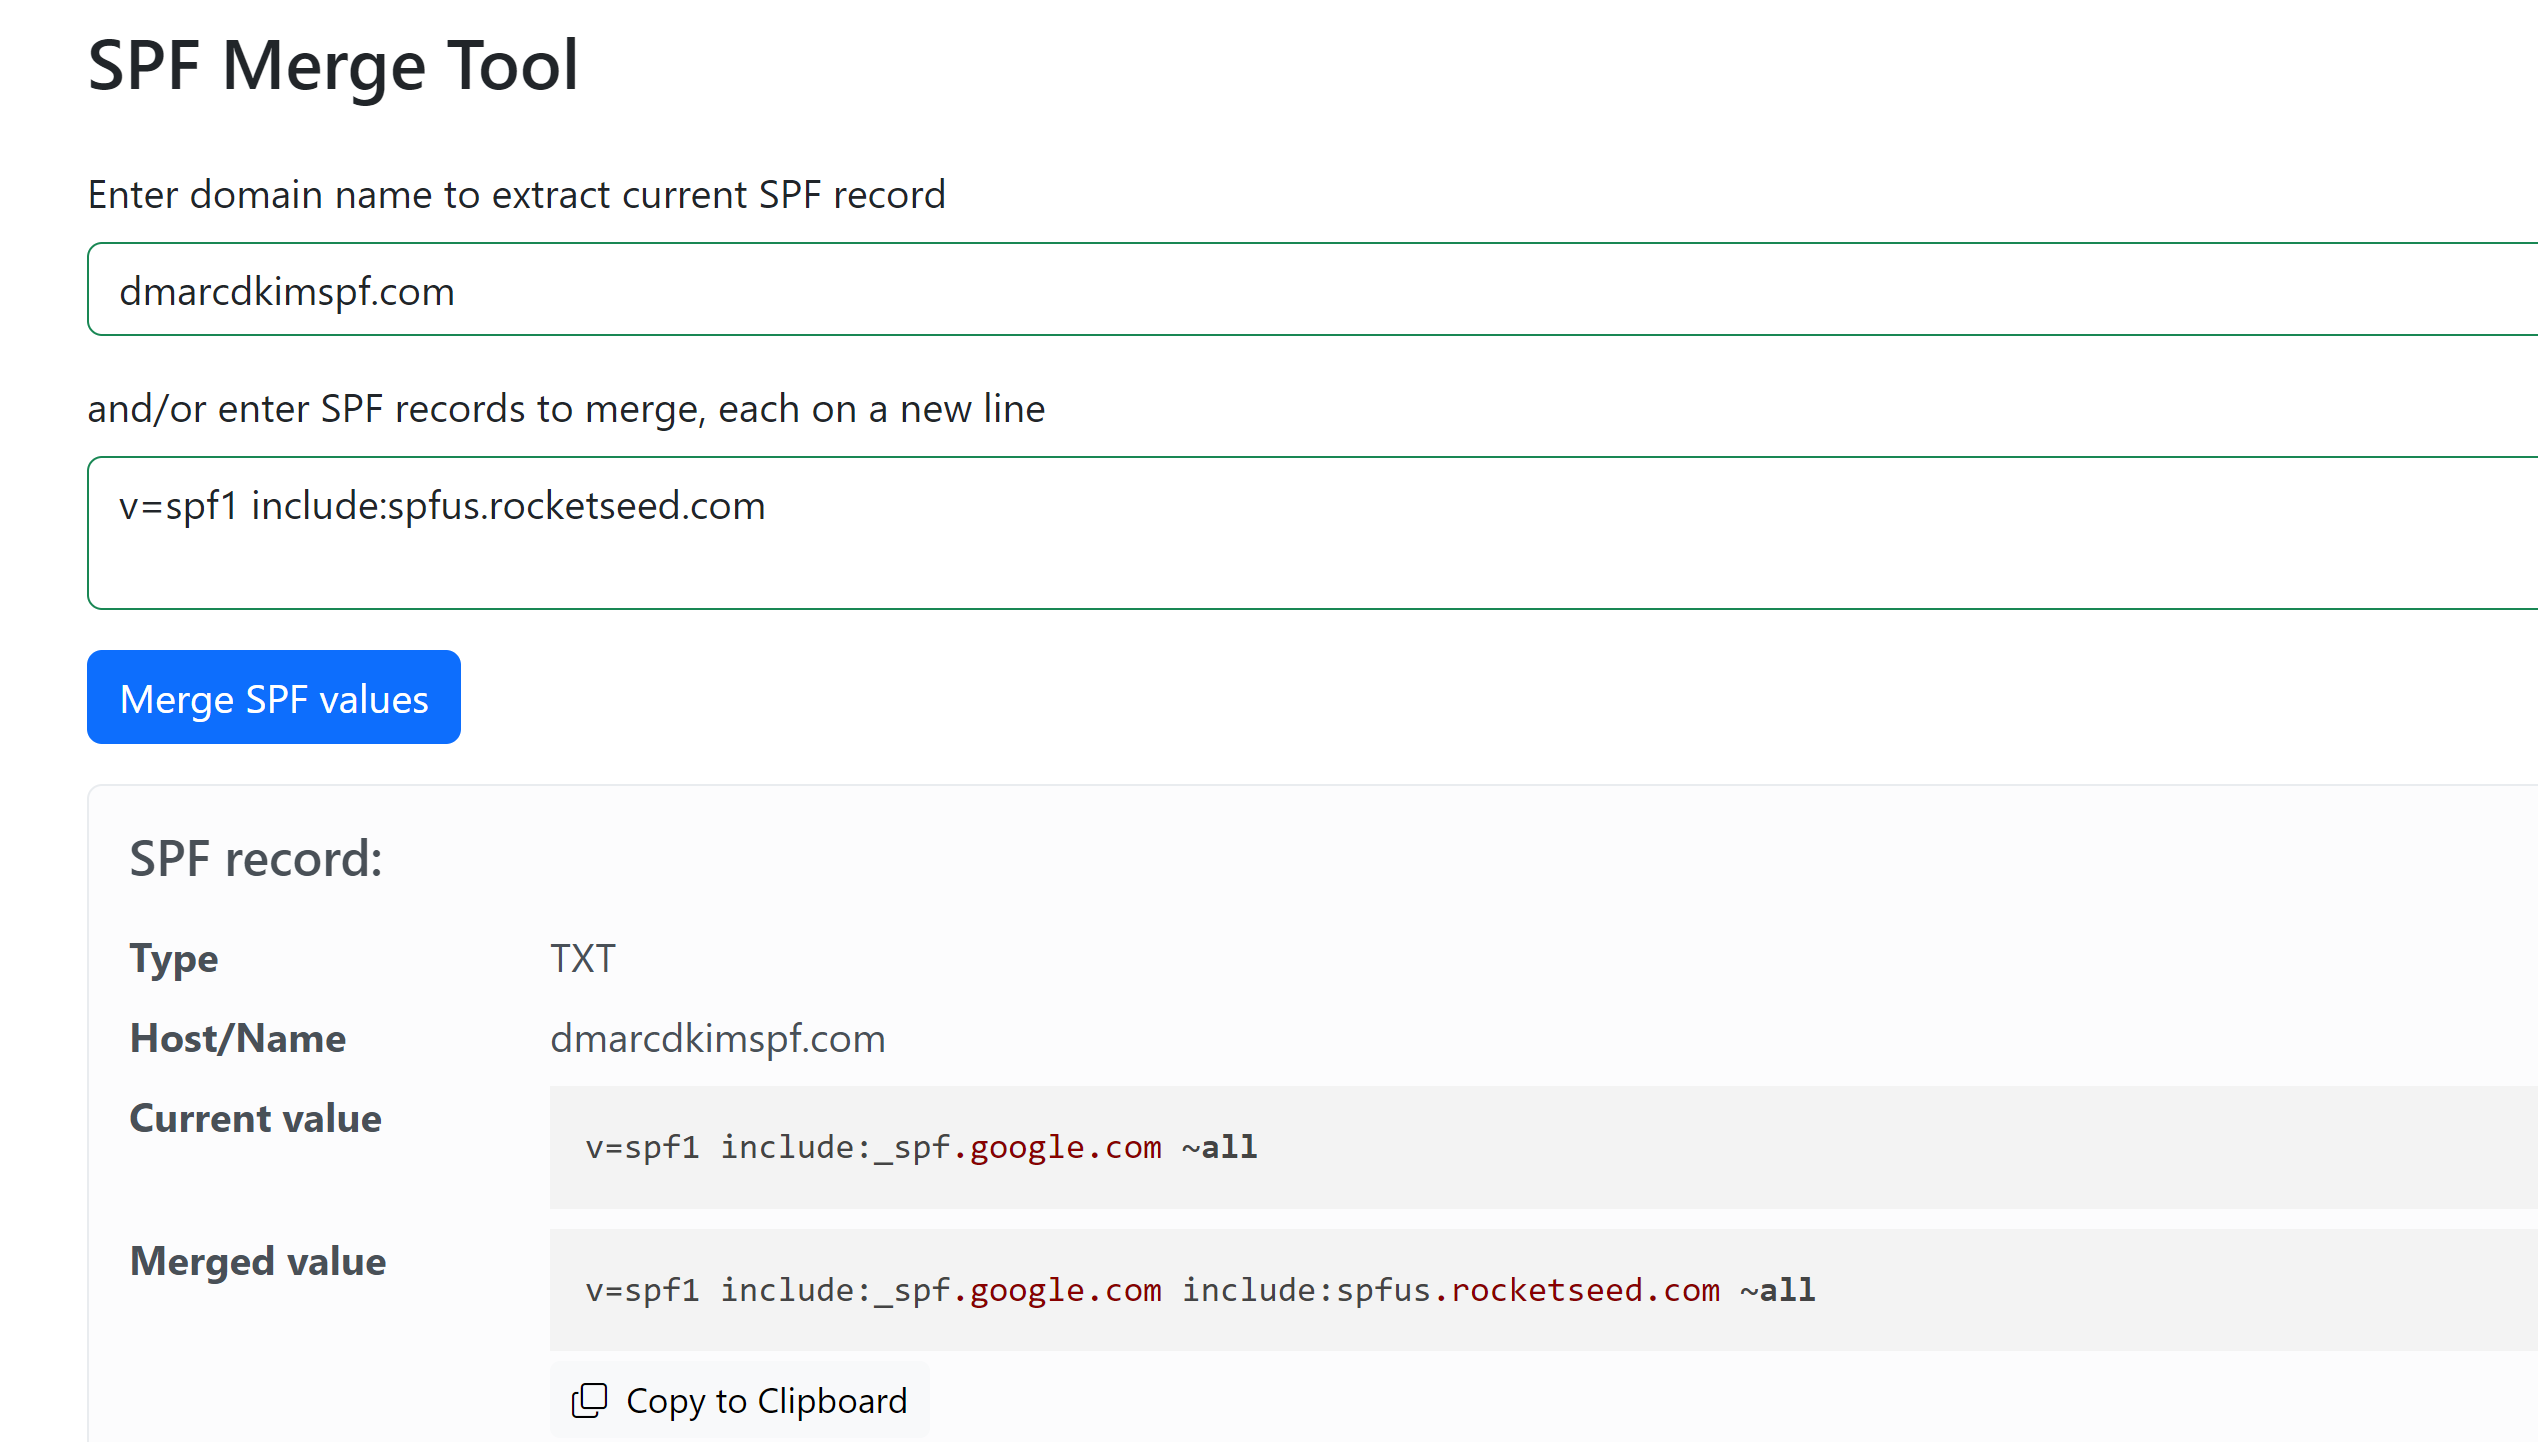
NOTE: Adding more than one SPF record creates conflicts, causing one to stop working. If your DNS dashboard has an existing SPF record, merge it with the Rocketseed SPF with the help of an SPF Merge Tool.
In the SPF Merge Tool, write your domain name.
Add the Rocketseed SPF value and click Merge SPF Value.
-
Copy the record name and merged value, and add it to the DNS dashboard.

Setting Up Rocketseed DKIM Record:
To generate a DKIM value for your custom domain, contact the Rocketseed team.
Write a request to the support team that you want them to implement a DKIM signing for your domain.
Rocketseed will provide a TXT value to add to your DNS dashboard.
Once added, the Rocketseed server verifies the DKIM record and gives you further instructions accordingly.
Setting Up Rocketseed DMARC:
You can generate a DMARC value use the DmarcDkim.com Tool, which gives a value tailored to your domain. Initially, it provides email monitoring but you can implement a strict policy over time. Consider Signing up to get actionable insights about the DMARC reports.
-
Open the DMARC Check Tool, write your domain name, and click Check.
-
Copy the DNS Record name and suggested value and add it to the DNS provider.
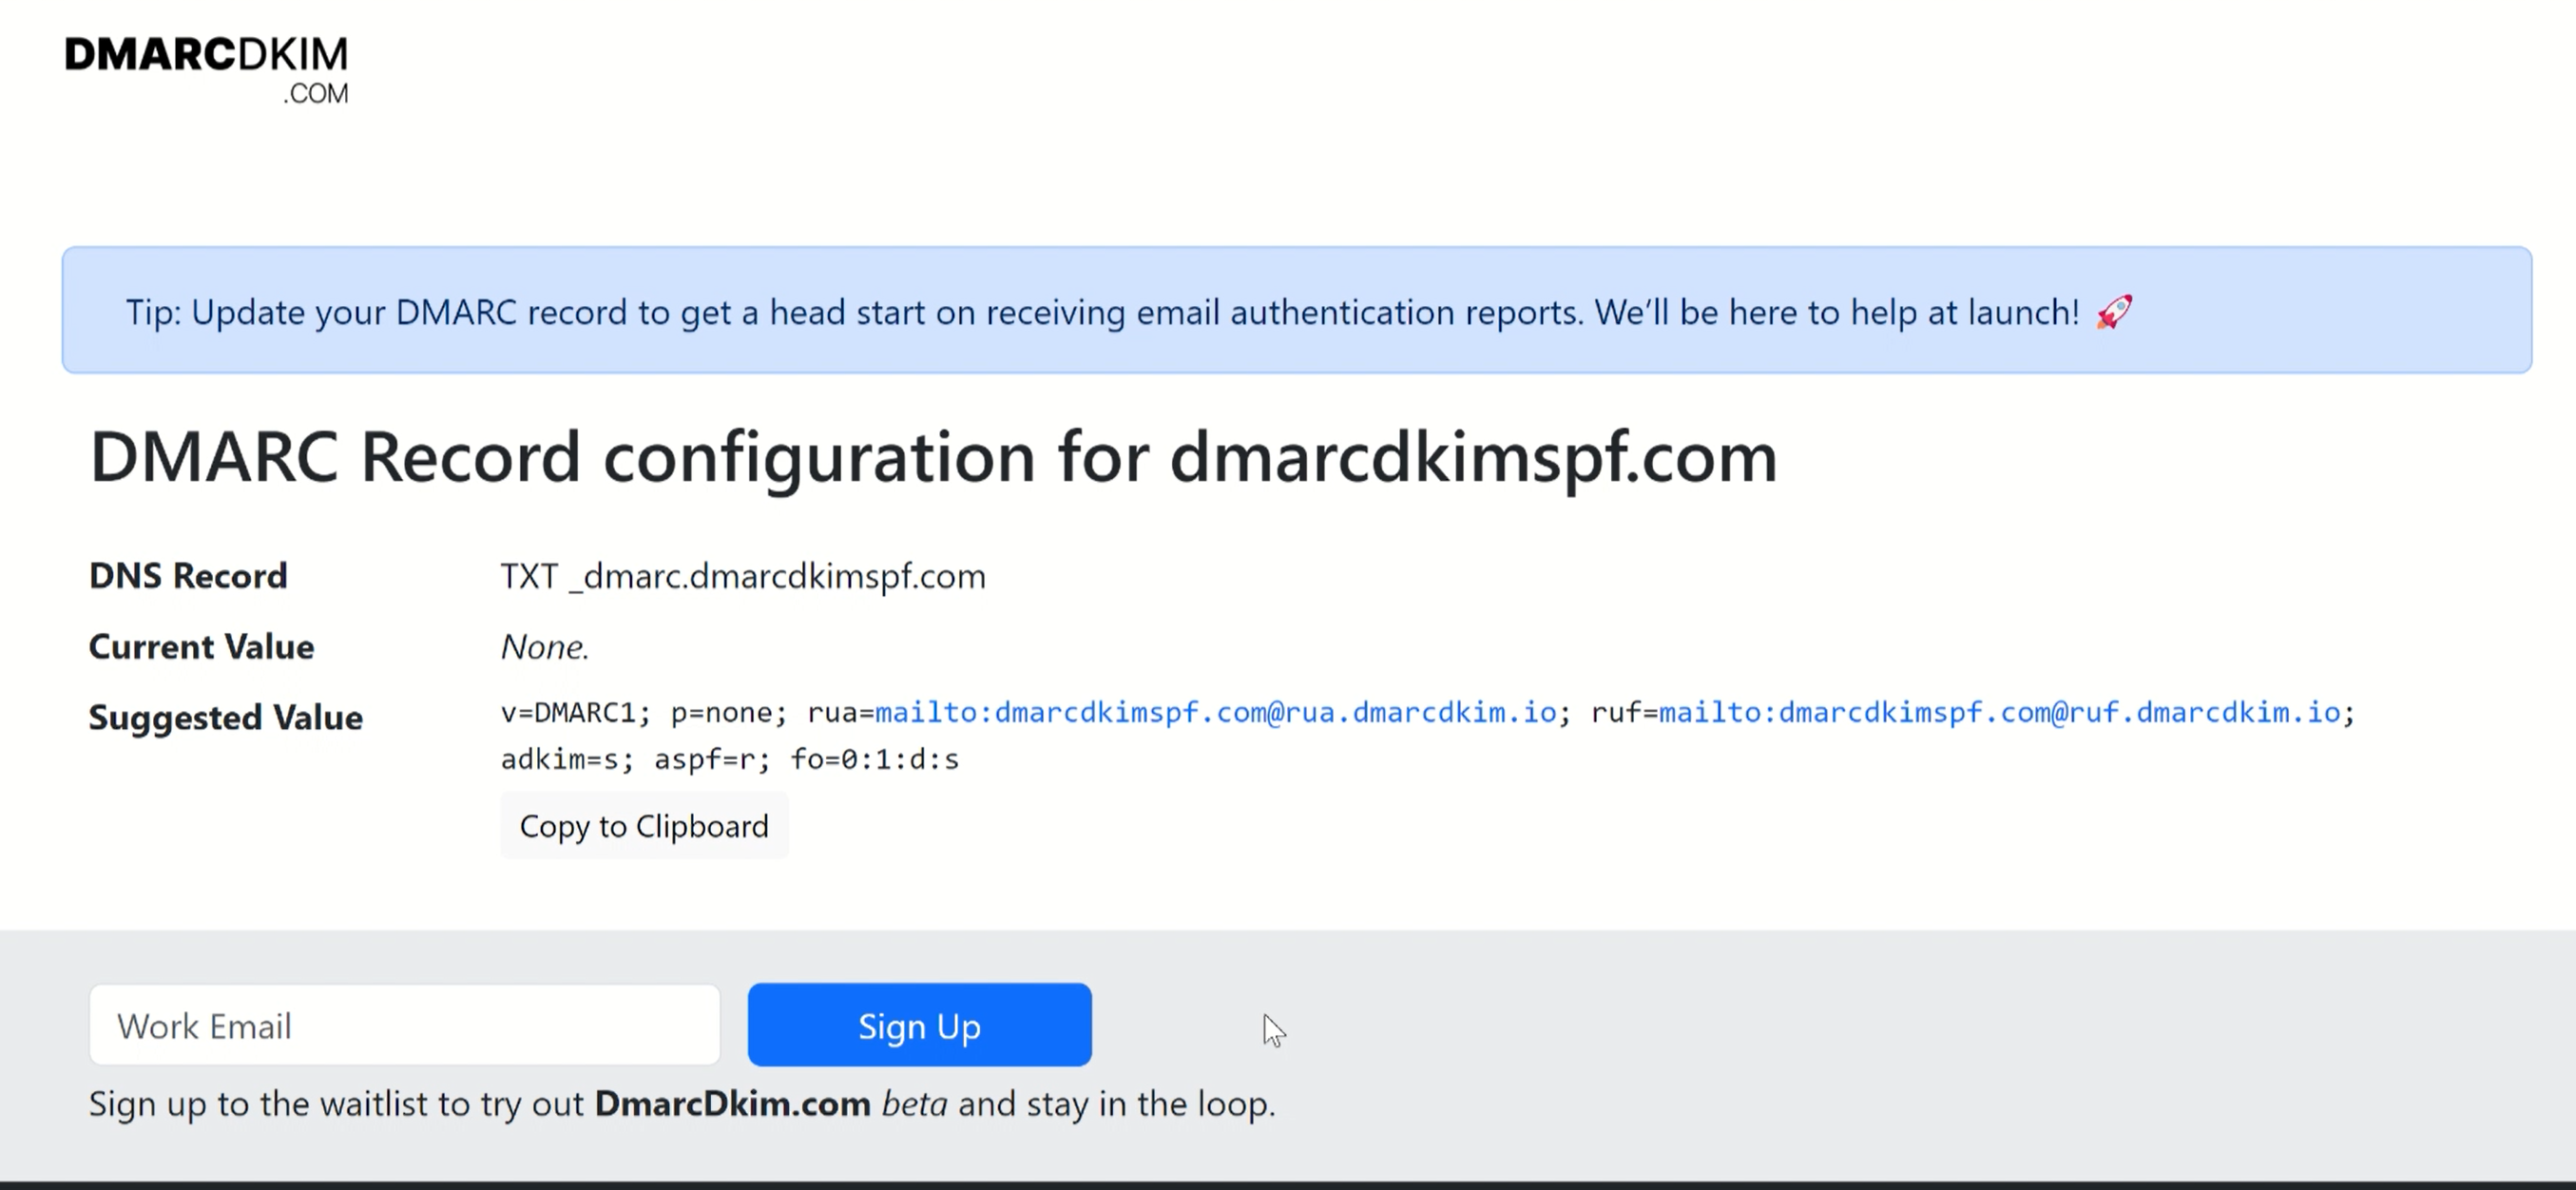
Select type TXT and click Save.


Setting Up Rocketseed Tracker Domain:
Request your DNS provider to create a specific CNAME record in the DNS settings for your domain. In the request, you can write;
"Please activate the following CNAME record for me: I need the alias name of branding.mycompany.com to point to the host name: tbc.Rocketseed.com."
It specifies that the alias name (or the record name) is "branding.mycompany.com", and it should point to the host name (or the record value) "tbc.Rocketseed.com."
After the CNAME record is created, you need to update the tracker domain setting on Rocketseed's relay server to ensure everything is properly configured.
Rocketseed offers you the option to let them handle the update of the tracker domain setting or to do it yourself.
If you choose to do it yourself, enter the value of the CNAME record to your Rocketseed account.
Log in to your Rocketseed account and navigate to Account Settings.
Click on your company name or account settings within the Rocketseed platform.
Look for the section related to SMTP (Simple Mail Transfer Protocol) credentials.
Here, you'll find a field where you can enter the value of the CNAME record that was created by your hosting company. This value typically corresponds to the target domain specified in the CNAME record (in this case, "tbc.Rocketseed.com").
After entering the CNAME record value, save your changes.
This ensures that Rocketseed's system recognizes and properly handles emails sent from your alias domain.
After adding all records, wait up to 48 hours for the servers to propagate DNS changes.
If you face any difficulty adding the DNS records to your DNS provider, contact the Rocketseed support team or hire a DmarcDkim.com expert to help you out.
Check domain and follow the instructions to nail down your DMARC configuration.
No expert knowledge needed!