Setup Octopus Email SPF, DKIM, DMARC for Domain Authentication
Check your domain for DMARC, DKIM, SPF and MX records. Get a free report.
How to Configure SPF, DKIM, DMARC Records for Email Octopus?
This article will guide you on how to setup the domain authentication records for Email Octopus. By authenticating your sender email domain, you can prevent emails from landing in the spam folder.
SPF, DKIM, and DMARC are the commonly used authentication records.
SPF (Sender Policy Framework) helps prevent email spoofing by allowing domain owners to specify which mail servers are authorized to send email on behalf of their domain.
DKIM (DomainKeys Identified Mail) adds a digital signature to your email headers, enabling the recipient's server to verify that the email has not been altered during transit and that it indeed comes from your domain.
DMARC (Domain-based Message Authentication, Reporting, and Conformance) builds on SPF and DKIM. It allows domain owners to specify how receiving mail servers should deal with emails that fail SPF or DKIM checks.
You don't need to set up an SPF record when sending emails from Email Octopus. When you verify your domain, it generates a subdomain in the format eom.yourdomain.com. This subdomain serves as the "mail from" address for your sends via EmailOctopus.
Email Octopus handles the SPF setup for this domain to ensure it aligns with the "mail from" domain, so no further action is required on your part.
Configure Email Octopus DNS Records:
-
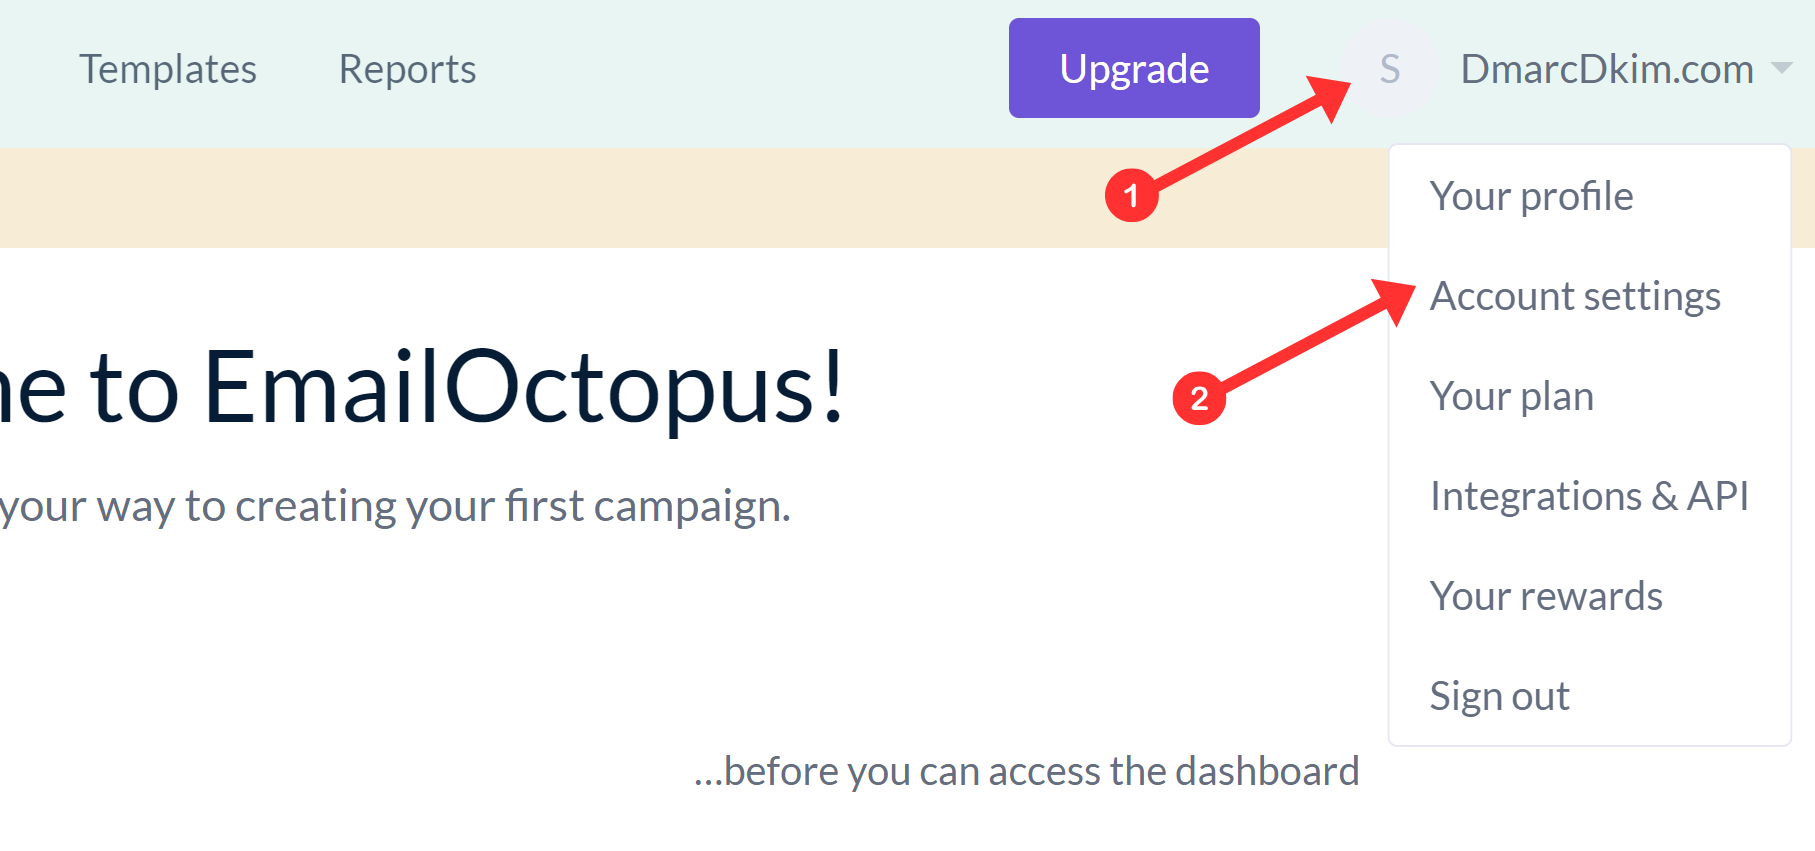
On the dashboard, click on your profile name and go to Account Settings.
-
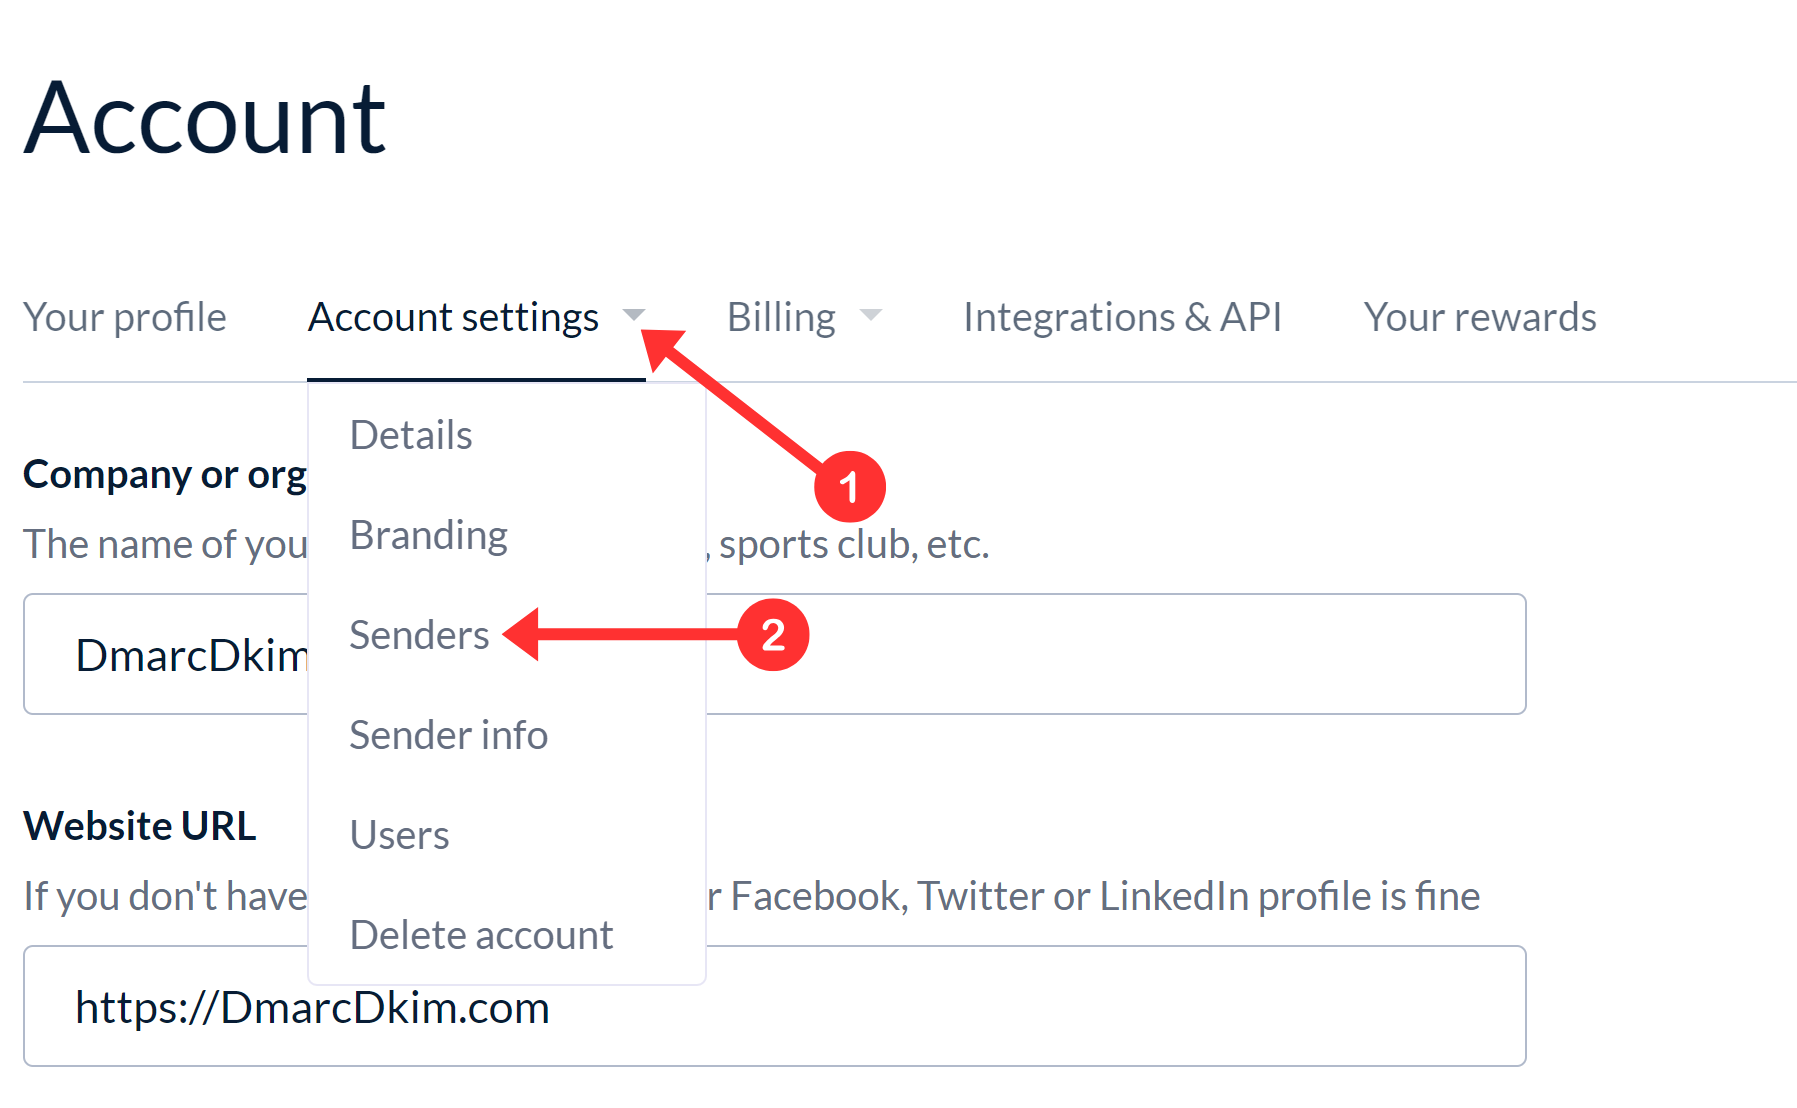
Click the drop-down arrow with Account Settings and select Senders.
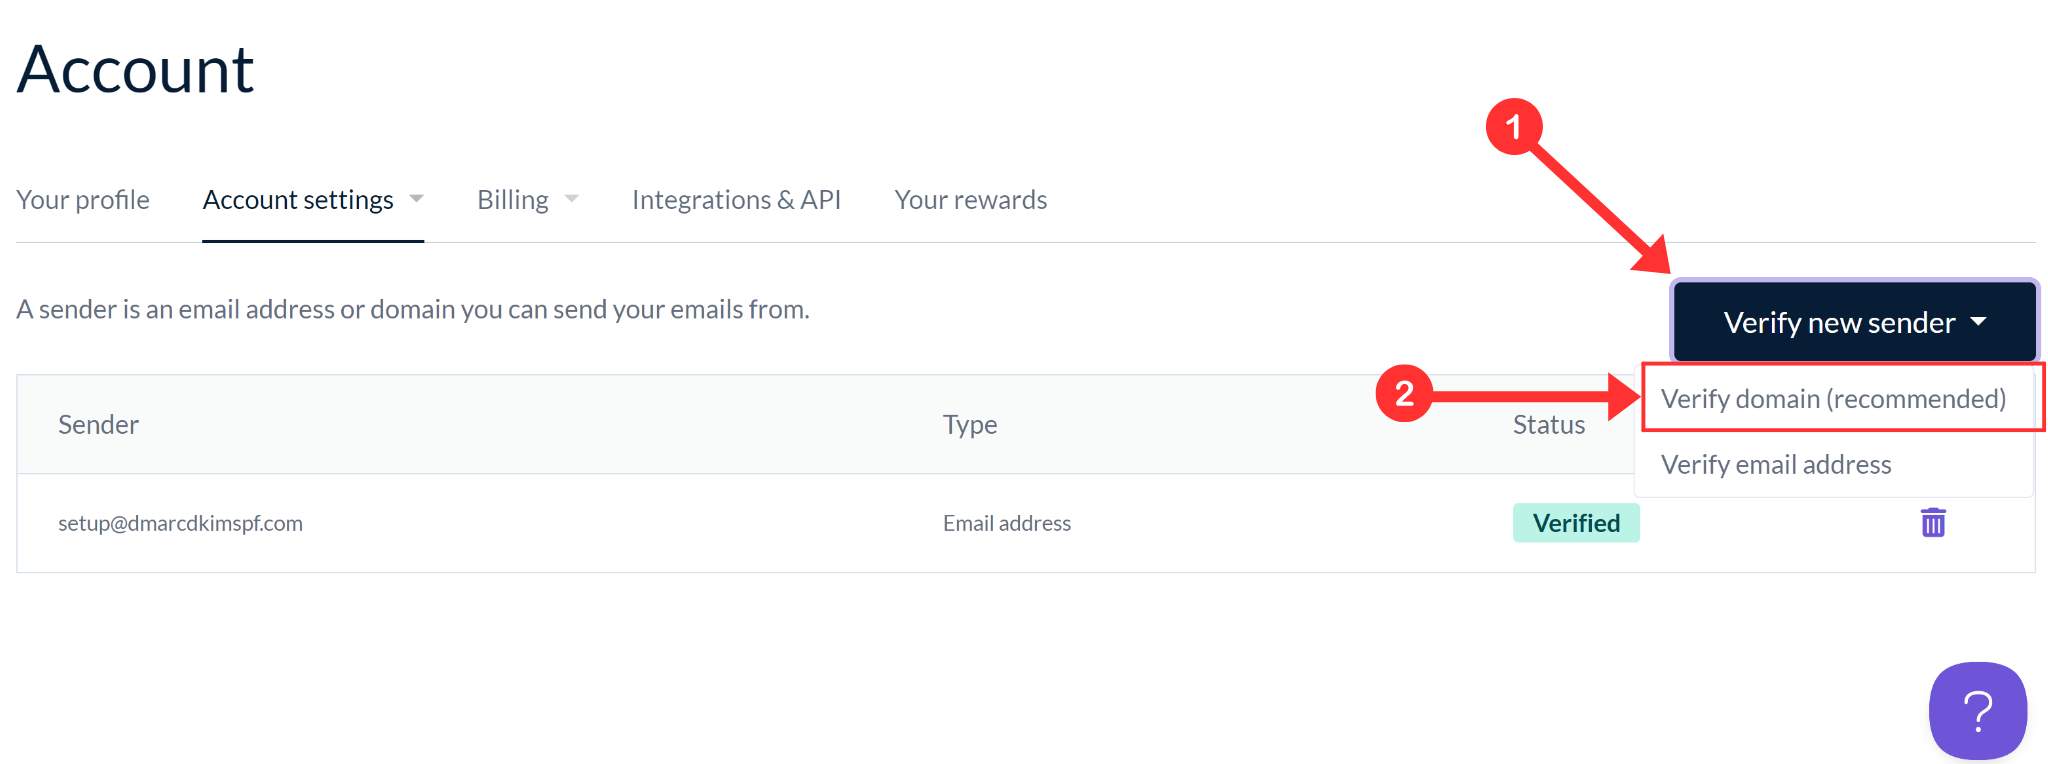
Here, your sign-up email will be verified by default. You just need to authenticate the domain.
-
Click Verify New Sender and select Verify Domain.
-
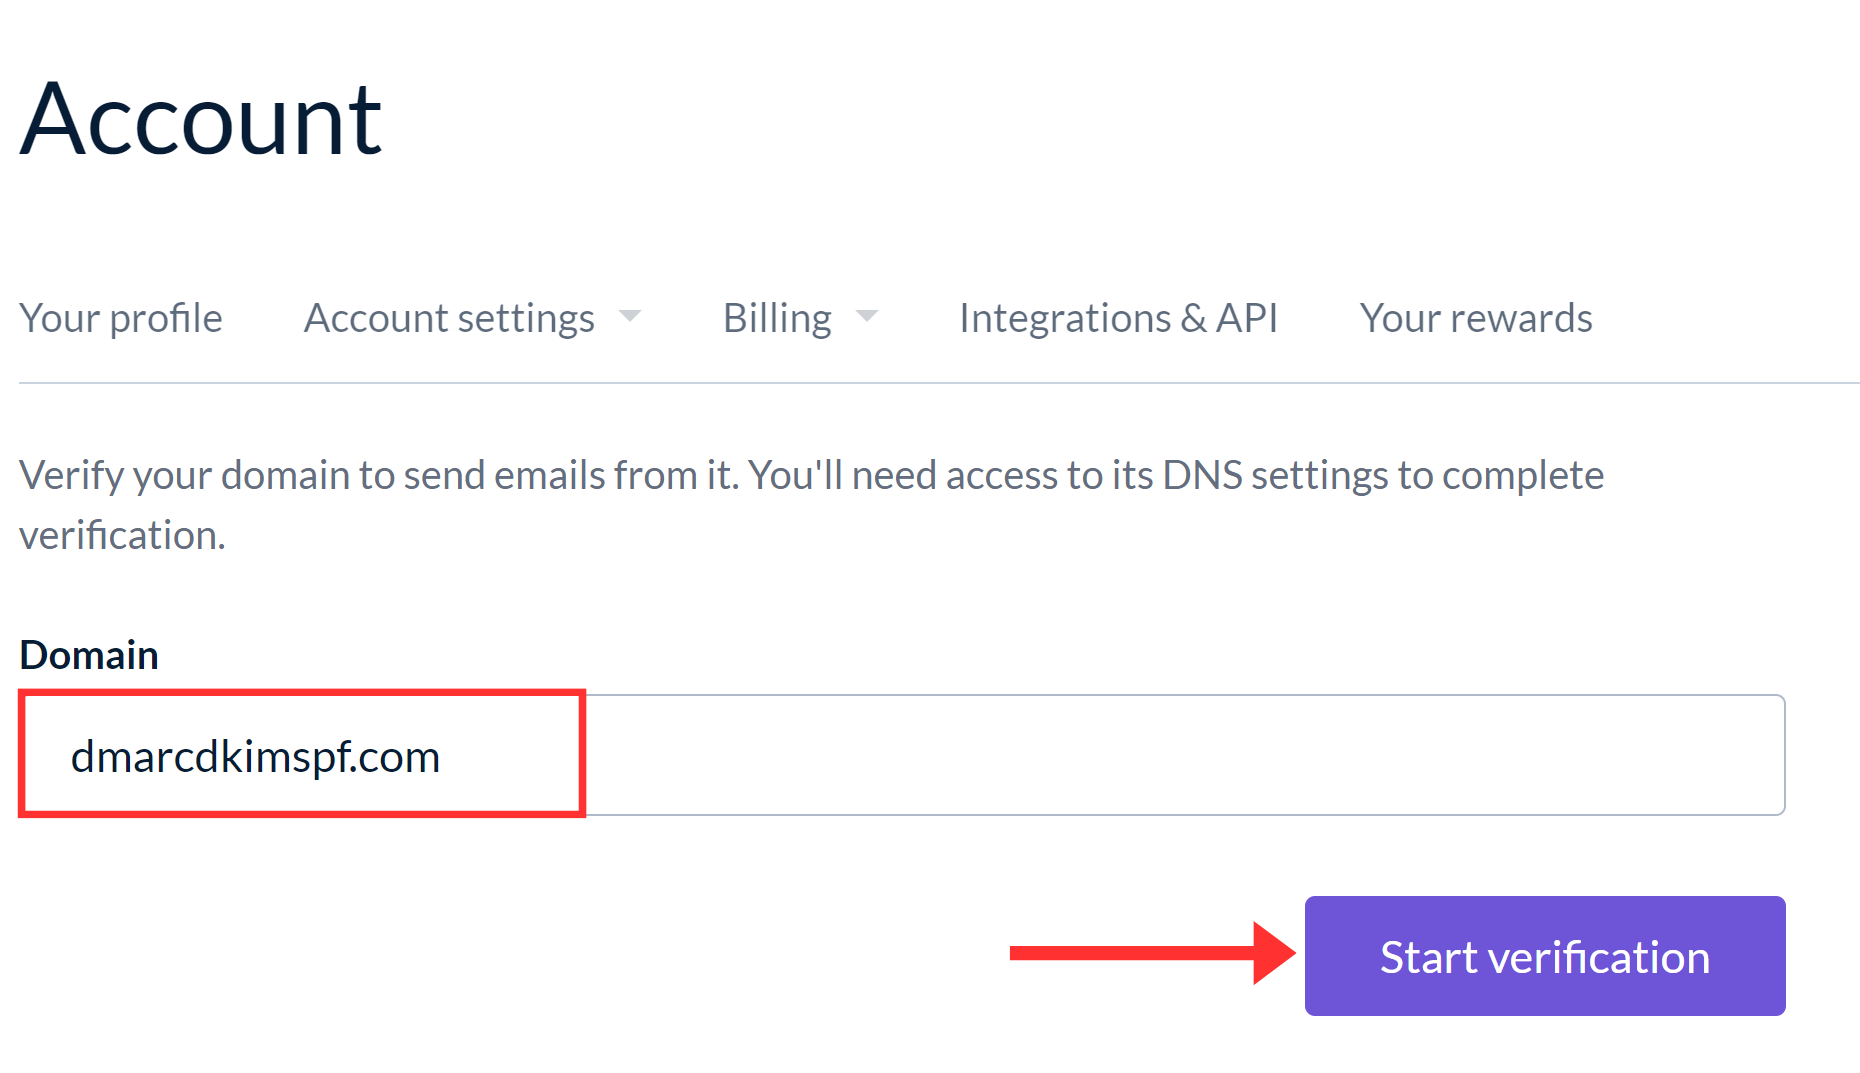
Add your domain name and click Start Verification.
-
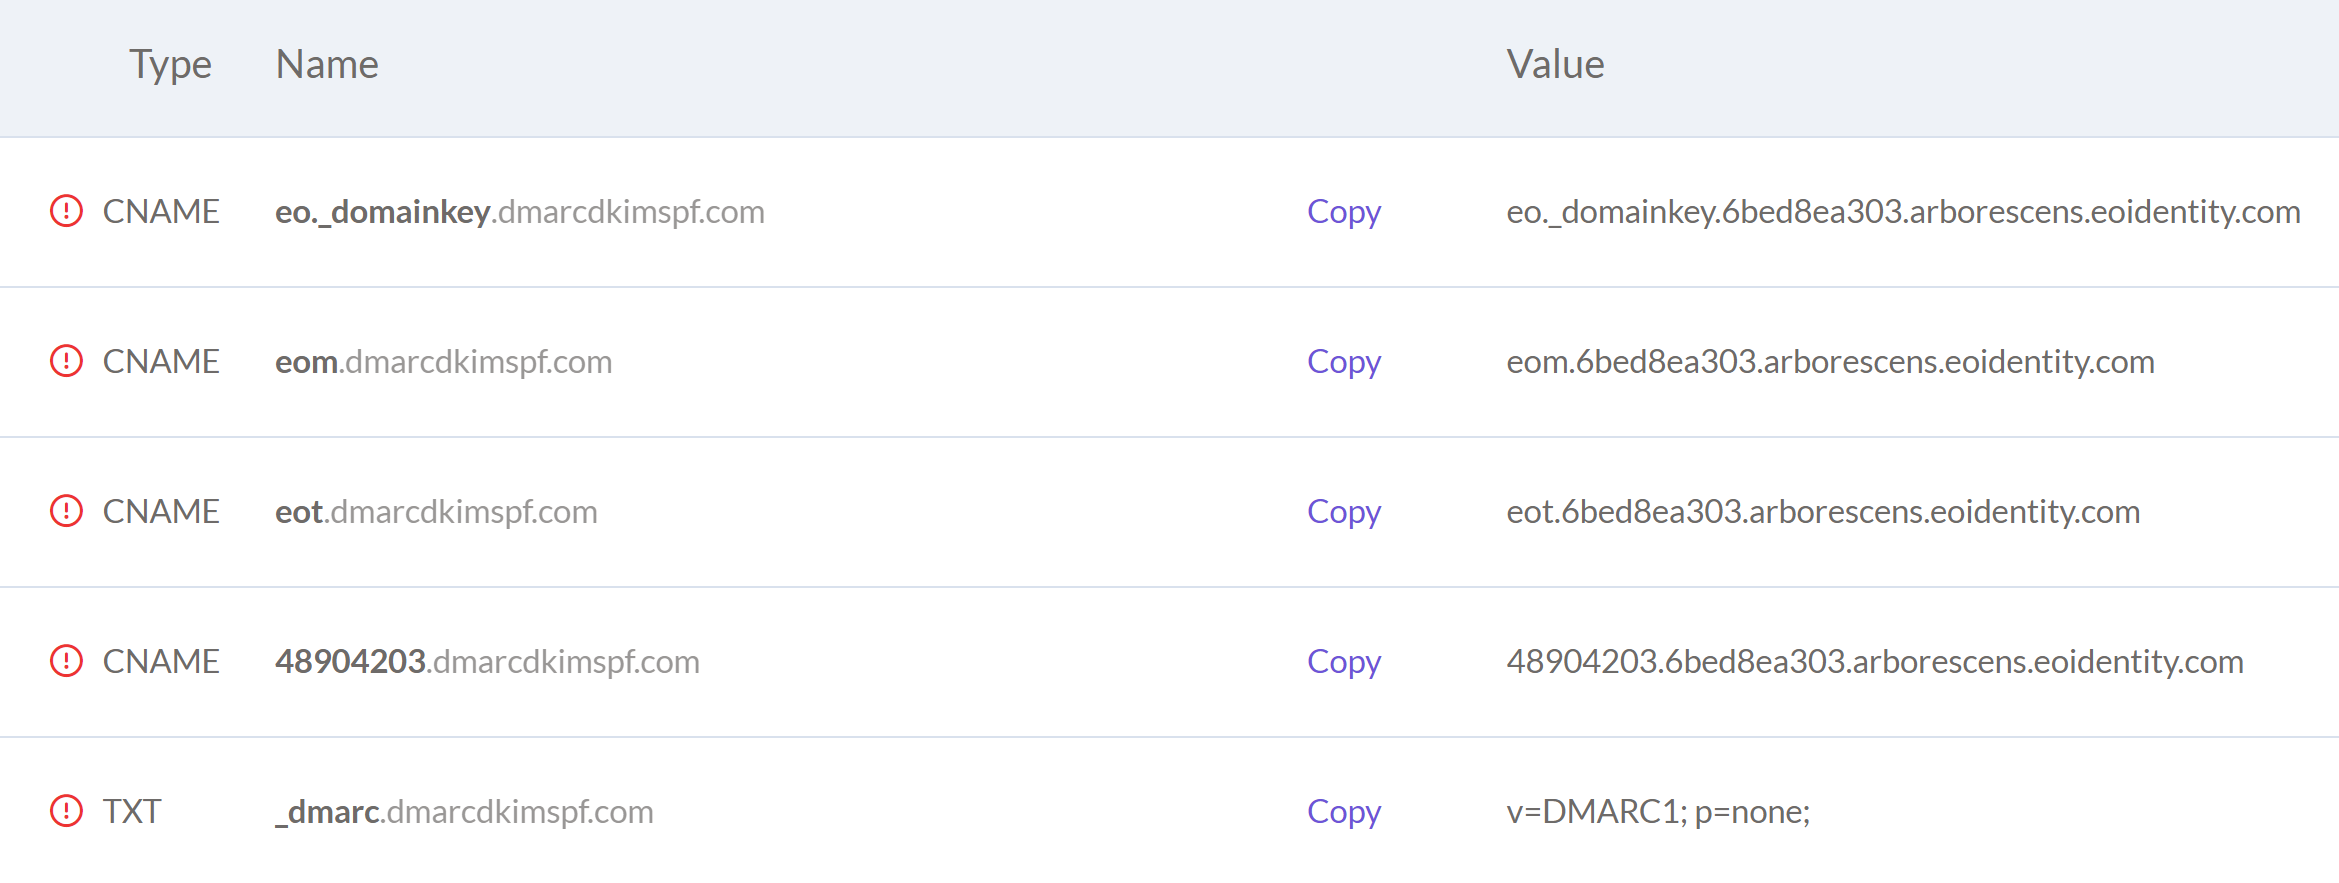
Next, the CNAME and TXT records will be displayed on your screen. Add all these records to your DNS provider.
Setup Emil Octopus DKIM Record:
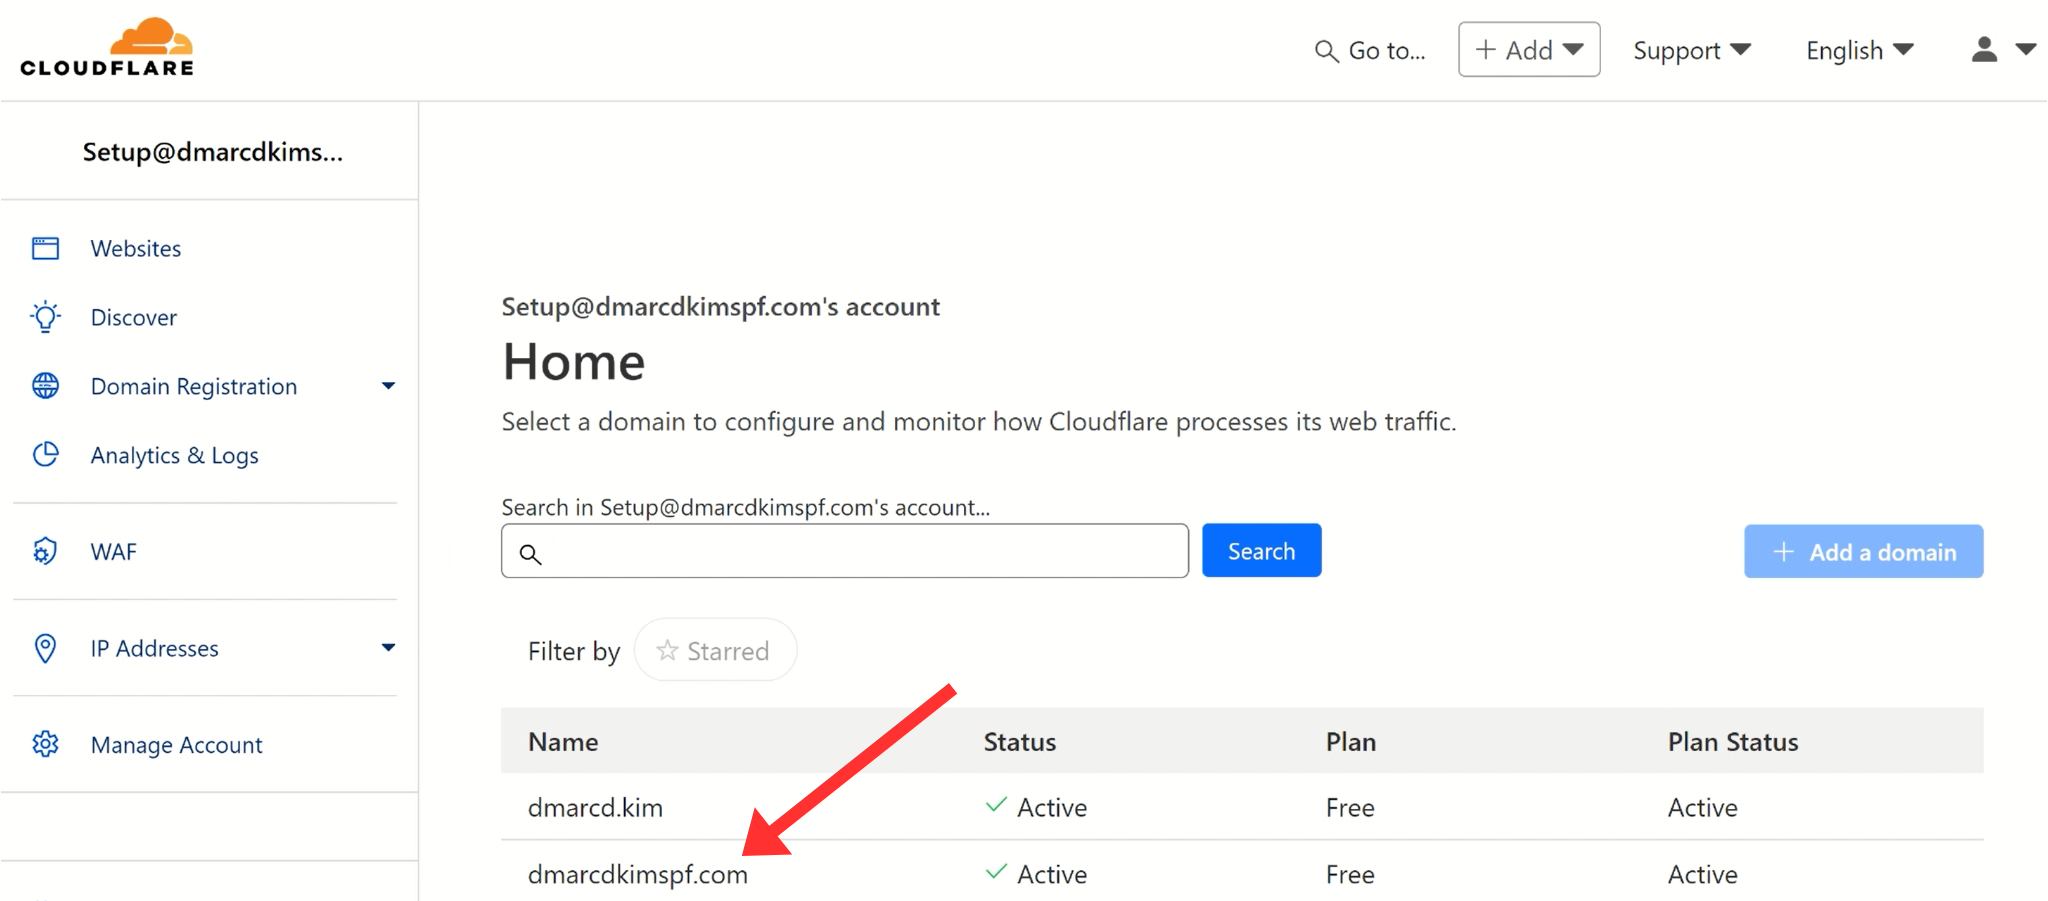
Login to your DNS provider. We are using Cloudflare for this tutorial.
-
Select your domain that needs authentication.
Head to the DNS management option.
-
Look for a button to Add Records.

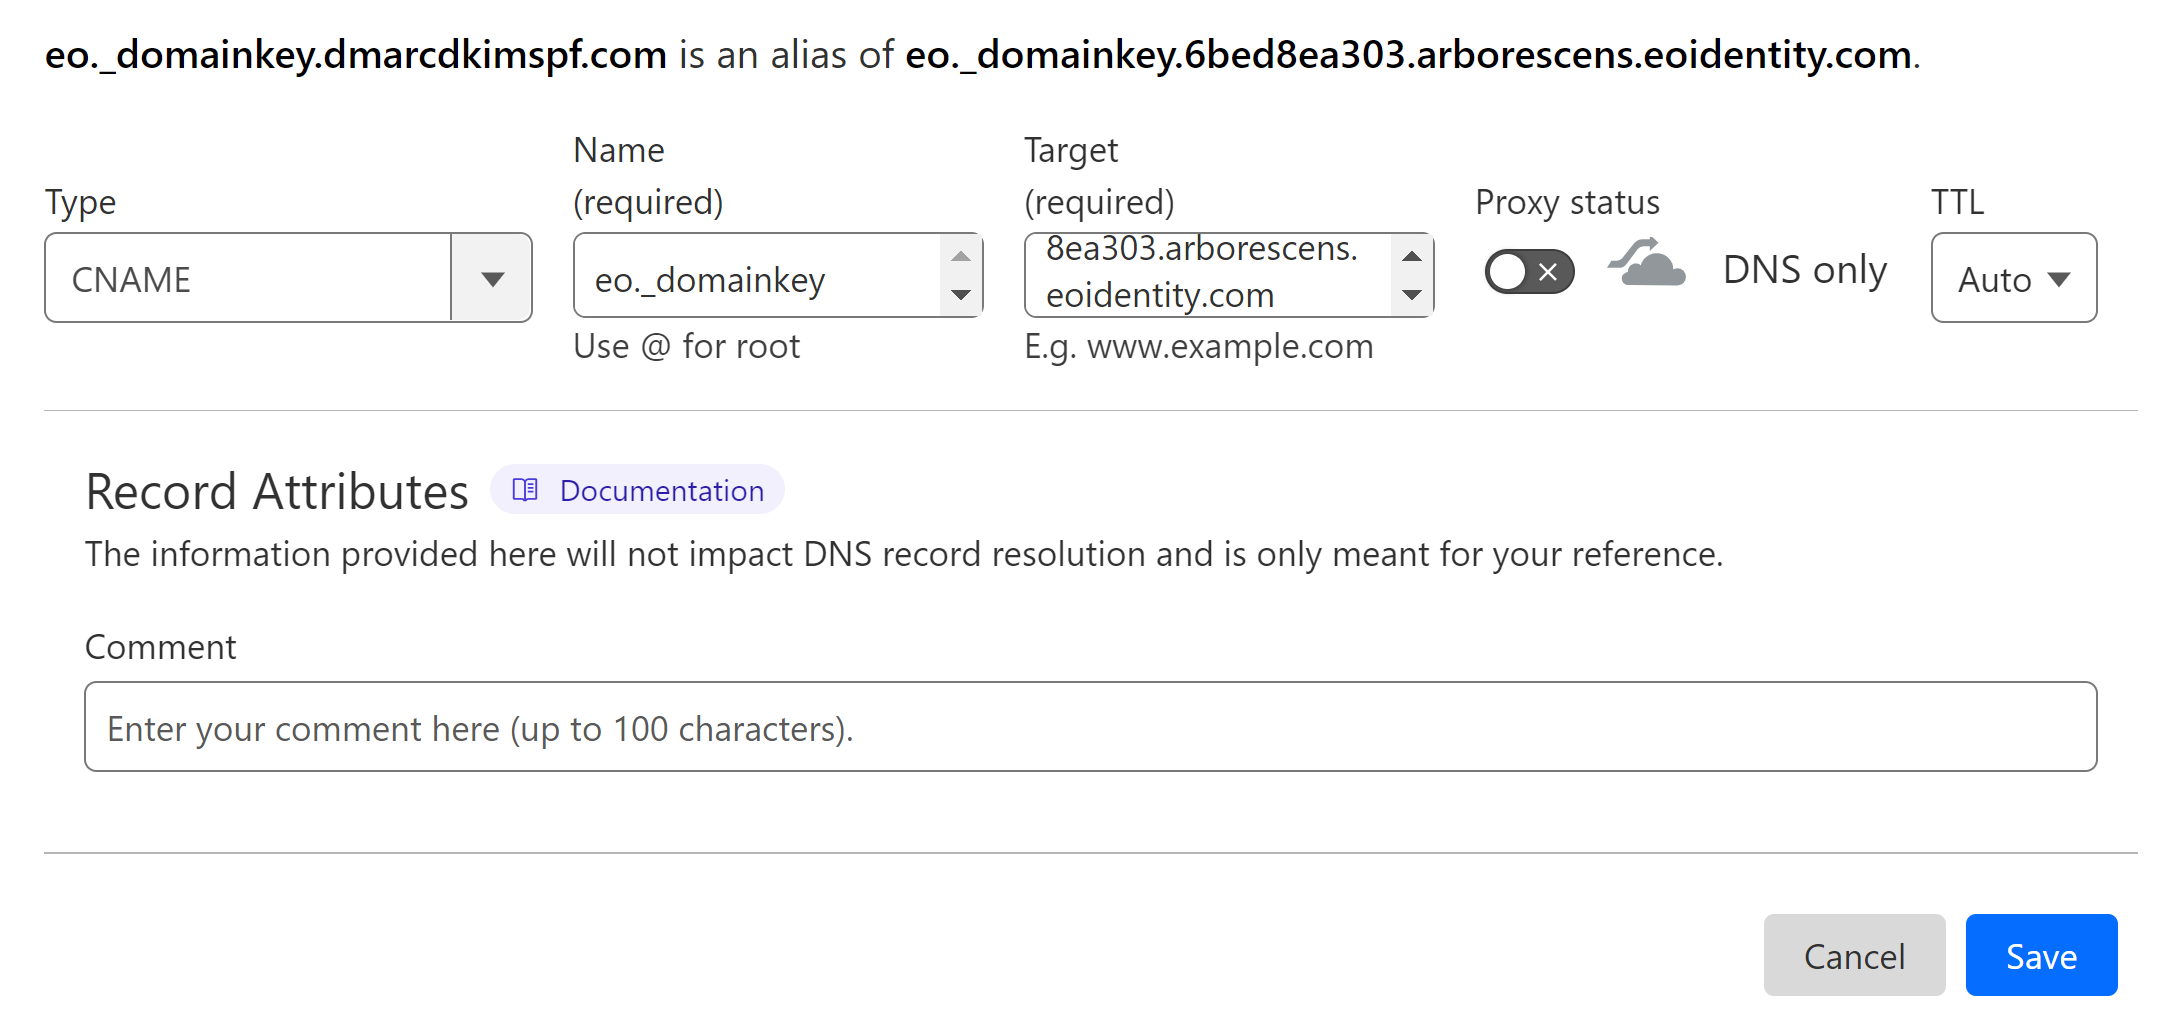
Select record type CNAME.
In the Name field, add the hostname mentioned on the Email Octopus DNS page.
Copy the the DKIM value, and paste it into the Target field.
-
Turn off the proxy toggle and click Save.
Add the Email Octopus Verification Records:
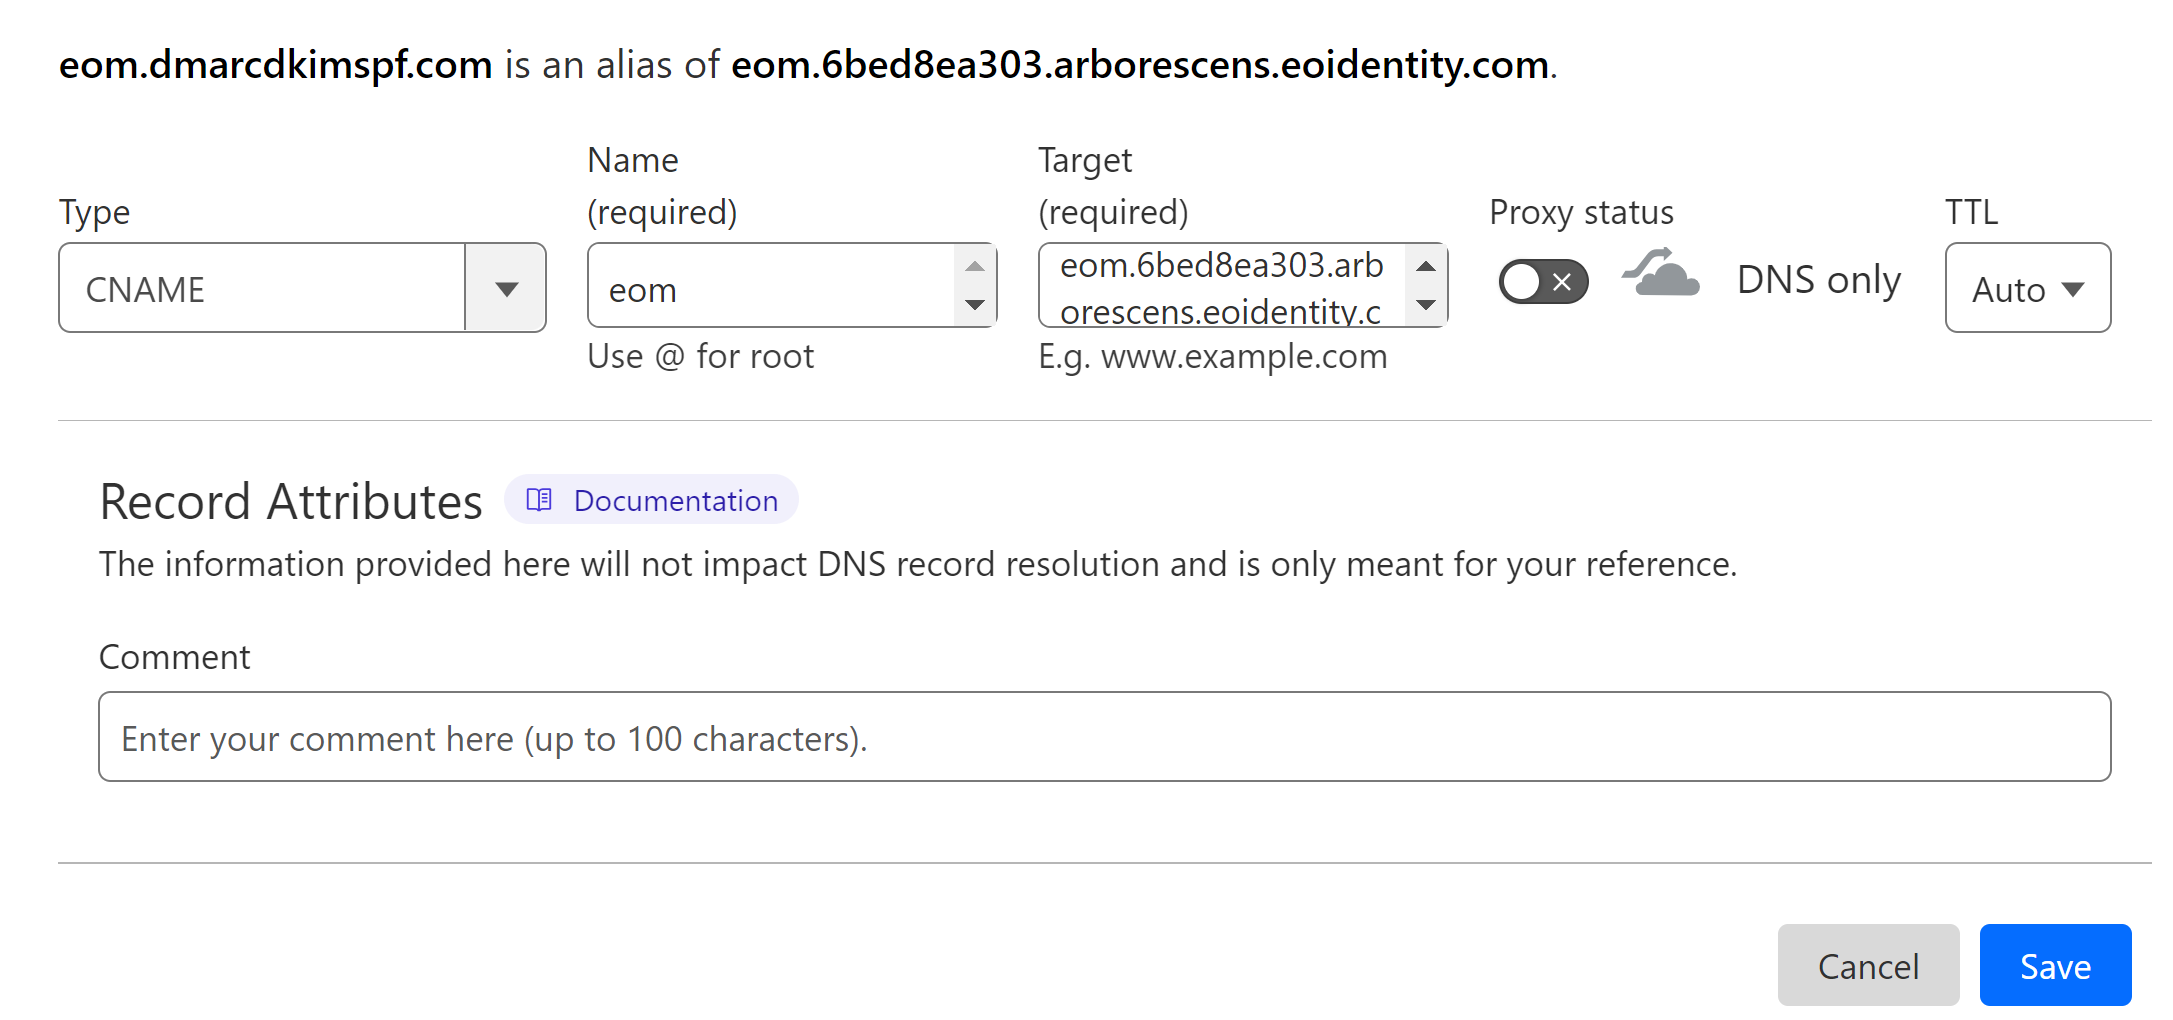
After DKIM, there are three other CNAME records, add all of them to the DNS provider.
Select record type CNAME.
Add the record name and value in the dedicated field of the DNS provider.
-
Turn off the proxy toggle for each CNAME record and click Save.
Setup Email Octopus SPF Record:
SPF record is not required when you send emails using Email Octopus.
It is because when you verify your email, Email Octopus generates a subdomain in the format eom.yourdomain.com. This subdomain serves as the "mail from" address for your sends via EmailOctopus.
Email Octopus handles the SPF setup for this domain to ensure it aligns with the "mail from" domain, so no further action is required on your part.
Setup Email Octopus DMARC Record:
Email Octopus provides a DMARC value with a monitoring (p=none) policy. It only monitors emails and doesn't block spammy emails. Moreover, it doesn't give you DMARC reports. Thus, you can't know which unauthorized senders are abusing your domain.
DmarcDkim.com addresses all these issues by providing you with an efficient DMARC Check tool. This tool monitors unauthorized senders, gives you DMARC reports, and then gives you step-by-step instructions to setup a strict policy to block spammy emails.
Go to the DMARC Check tool.
-
Add your domain name and click Check DMARC.

-
The tool gives you an initial monitoring value - add it to your DNS provider.

After monitoring all incoming emails, it guides you to setup a strict policy to block unauthorized emails.
-
Sign up for the tool to get actionable insights and DMARC reports.

Verify Email Octopus DNS Records:
-
Once all DNS records are added, click Complete Verification.

-
Green tickmarks will appear next to each record if it is verified.
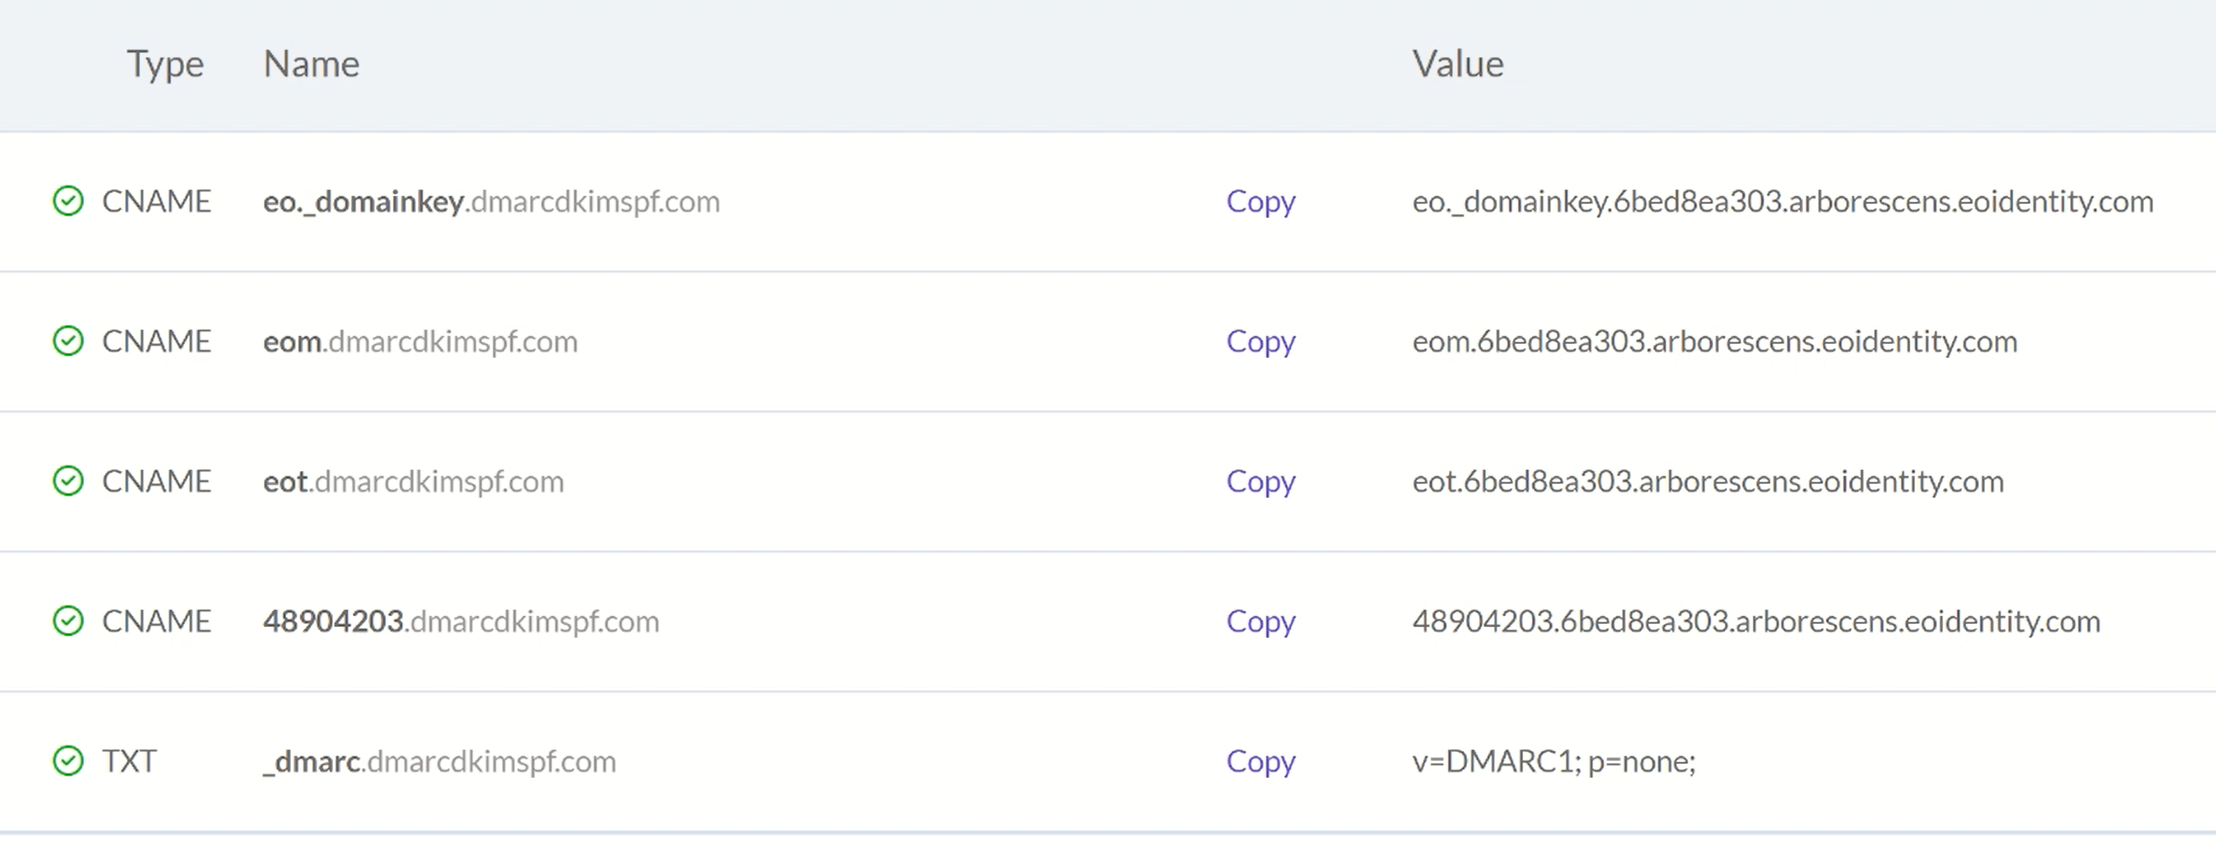
If the records are not verified immediately, wait for 24 hours.
NOTE: If DNS verification fails after 24 hours, it points to a potential misconfiguration in the DNS setup. Look for any typos in the DNS values and make sure there are no conflicting records.
If you are unable to find the underlying issues, hire a DmarcDkim.com expert to handle your domain authentication hassles.
Check domain and follow the instructions to nail down your DMARC configuration.
No expert knowledge needed!


