
Vendasta SPF, DKIM, DMARC Configuration - Step-by-Step Guide
Check your domain for DMARC, DKIM, SPF and MX records. Get a free report.
How to Configure SPF, DKIM, and DMARC Records for Vendasta Domain Authentication?
DKIM (DomainKeys Identified Mail), SPF (Sender Policy Framework), and DMARC (Domain-based Message Authentication, Reporting, and Conformance) are the necessary DNS records required to authenticate your domain.
Emails sent from unauthorized domains are more likely to end up in the spam folder. Therefore, it is crucial to comply with the security standards of email inbox providers like Google, Outlook, and Yahoo.
Vendasta provides you with the DNS records for verifying the sender email address. You can configure these records and set them up in your DNS provider by following the steps given below.
Configuring Vendasta DNS Records:
Login to your Vendasta Partner Center.
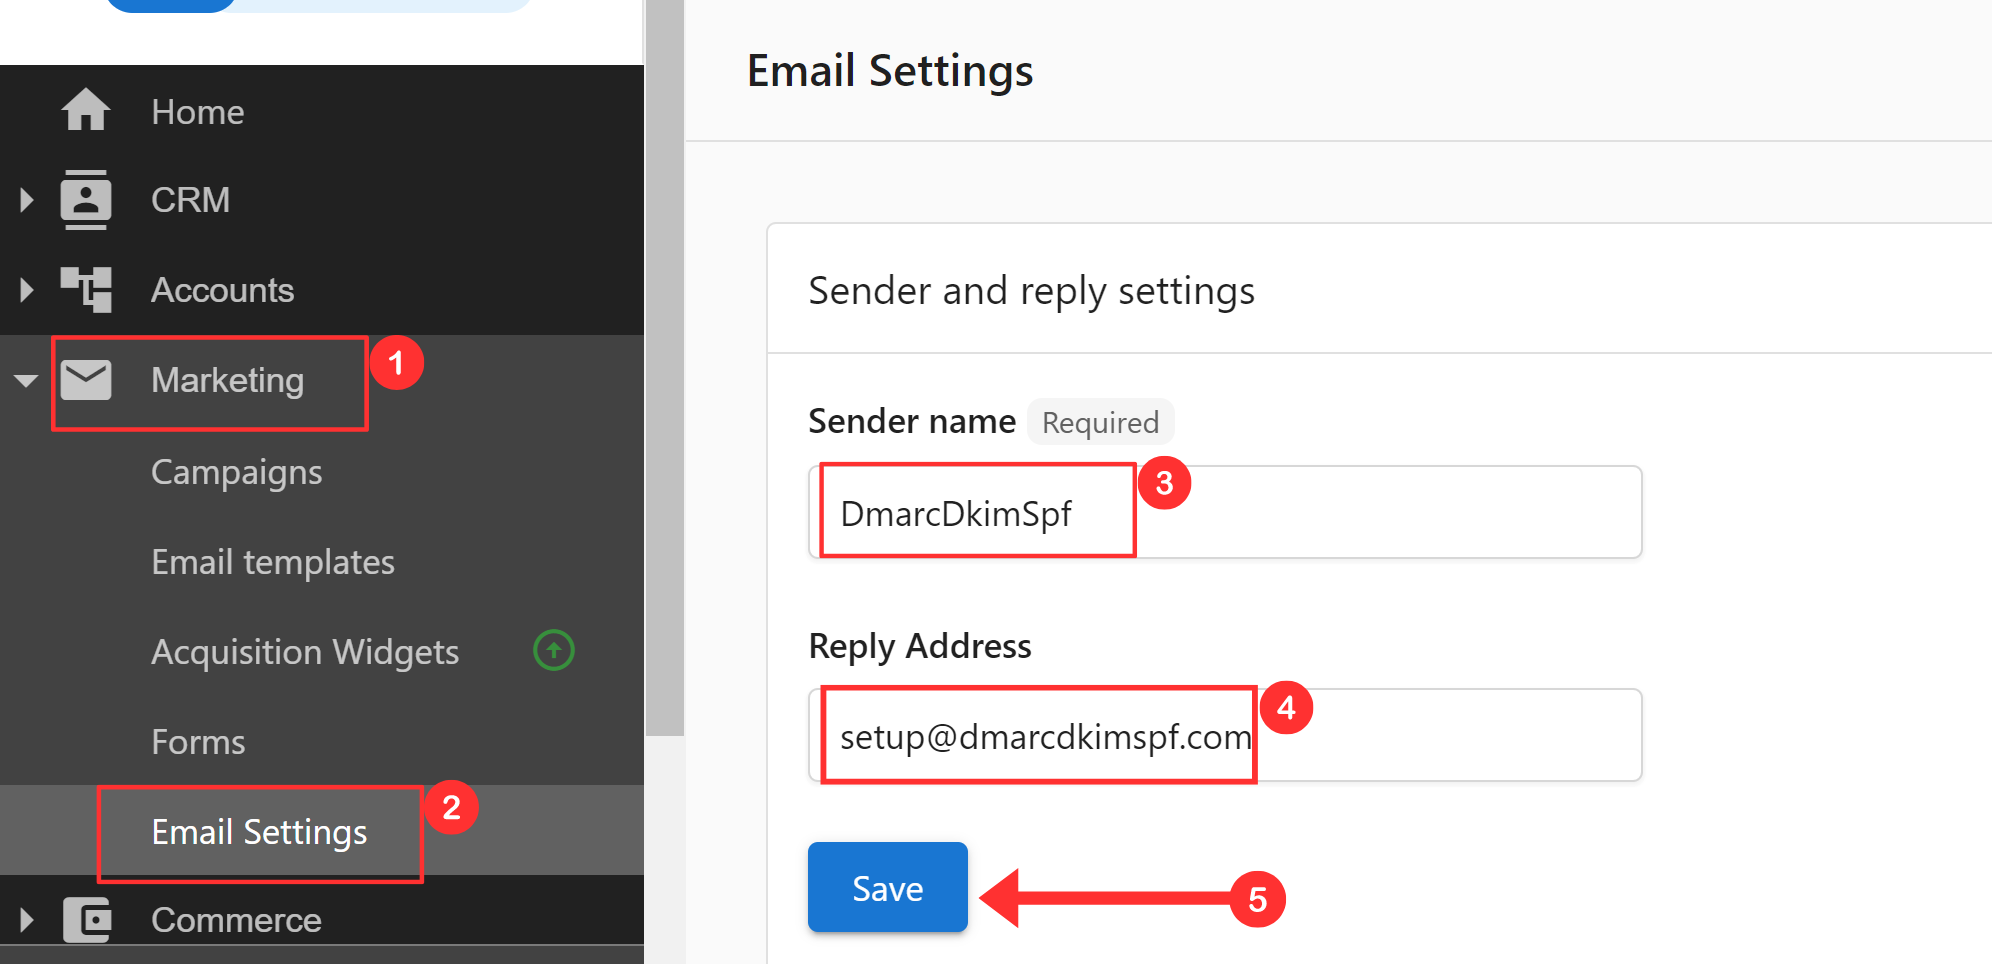
Click Marketing and go to Email Settings in the drop-down menu.
-
Write down your Sender Name, Email Address and click Save.
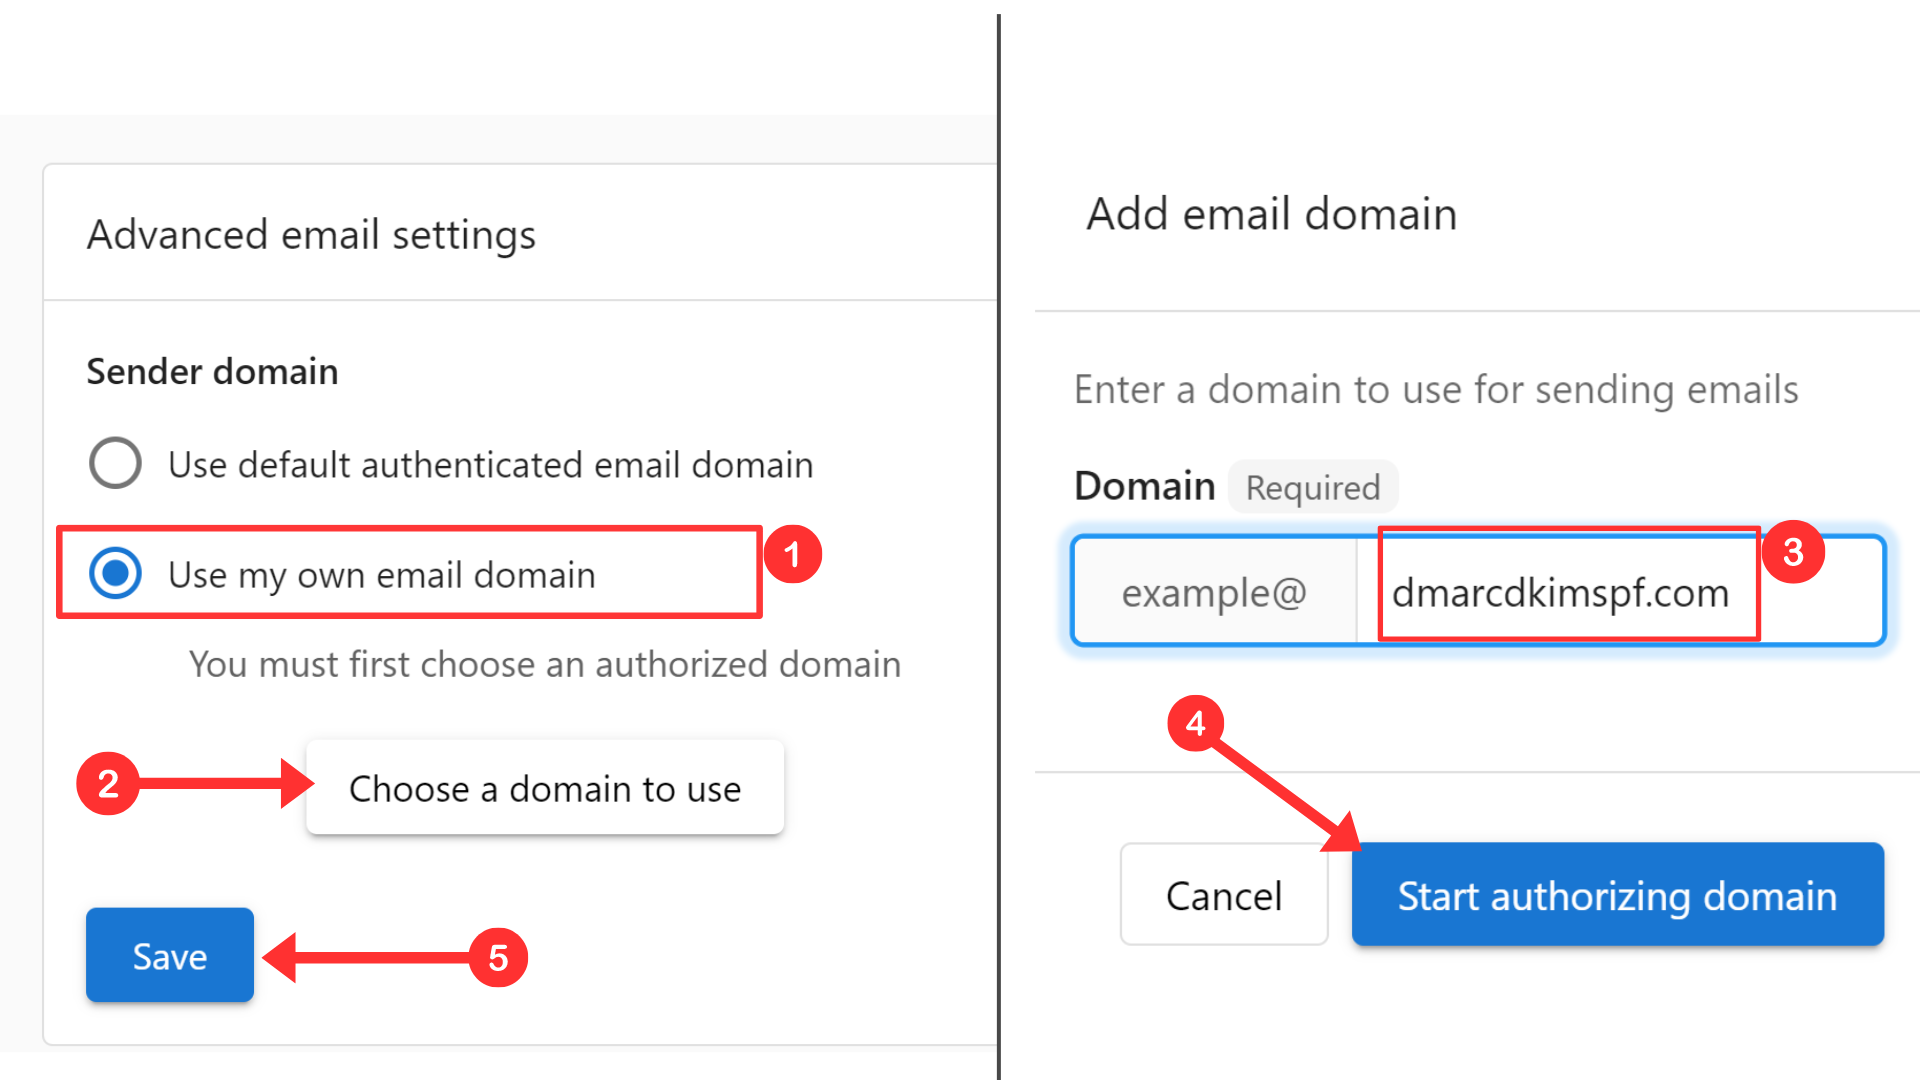
Scroll down and your signup email domain will be added there by default.
If you want to add another domain, select "Use my own email domain" and click "Choose a domain to use."
-
Write down your domain name and click "Start authorizing domain."
-
At the bottom of the page, click the arrow next to your domain.

-
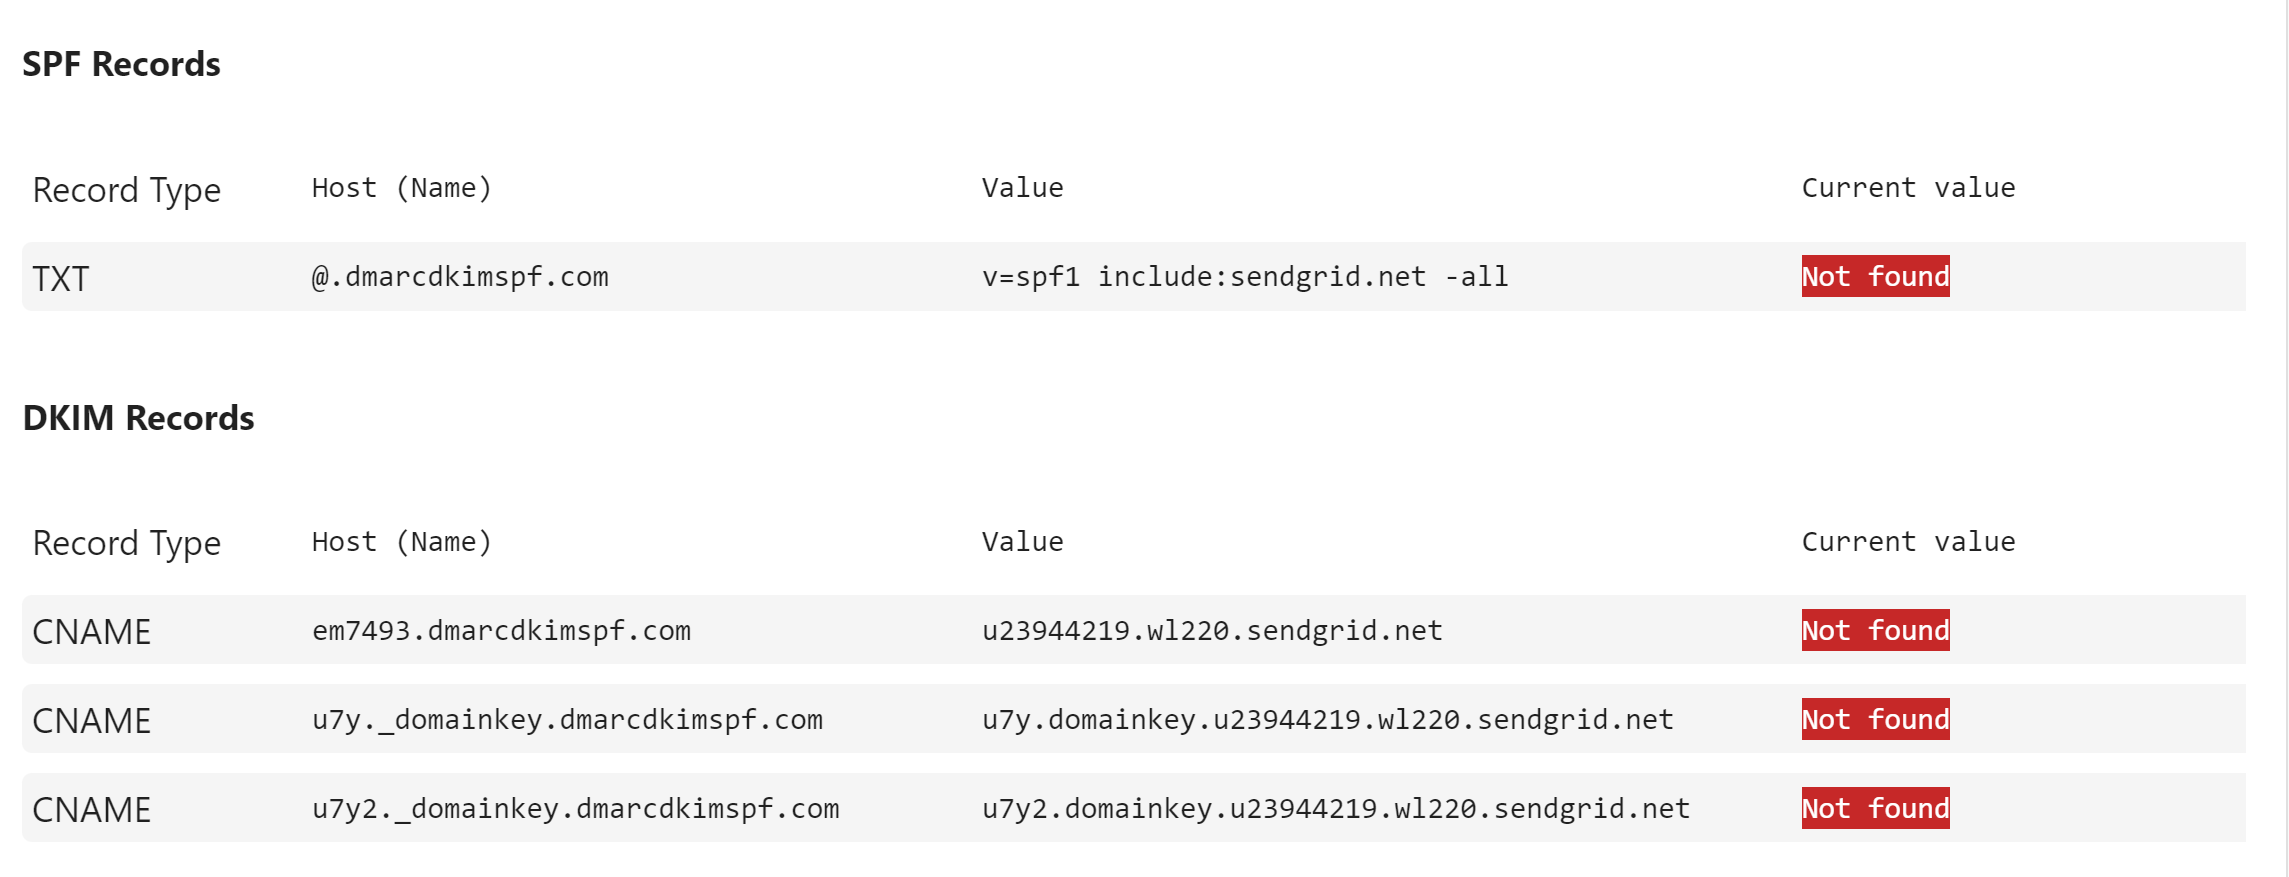
It will take you to the TXT and CNAME DNS records page.
Add Vendasta SPF Record to DNS Provider:
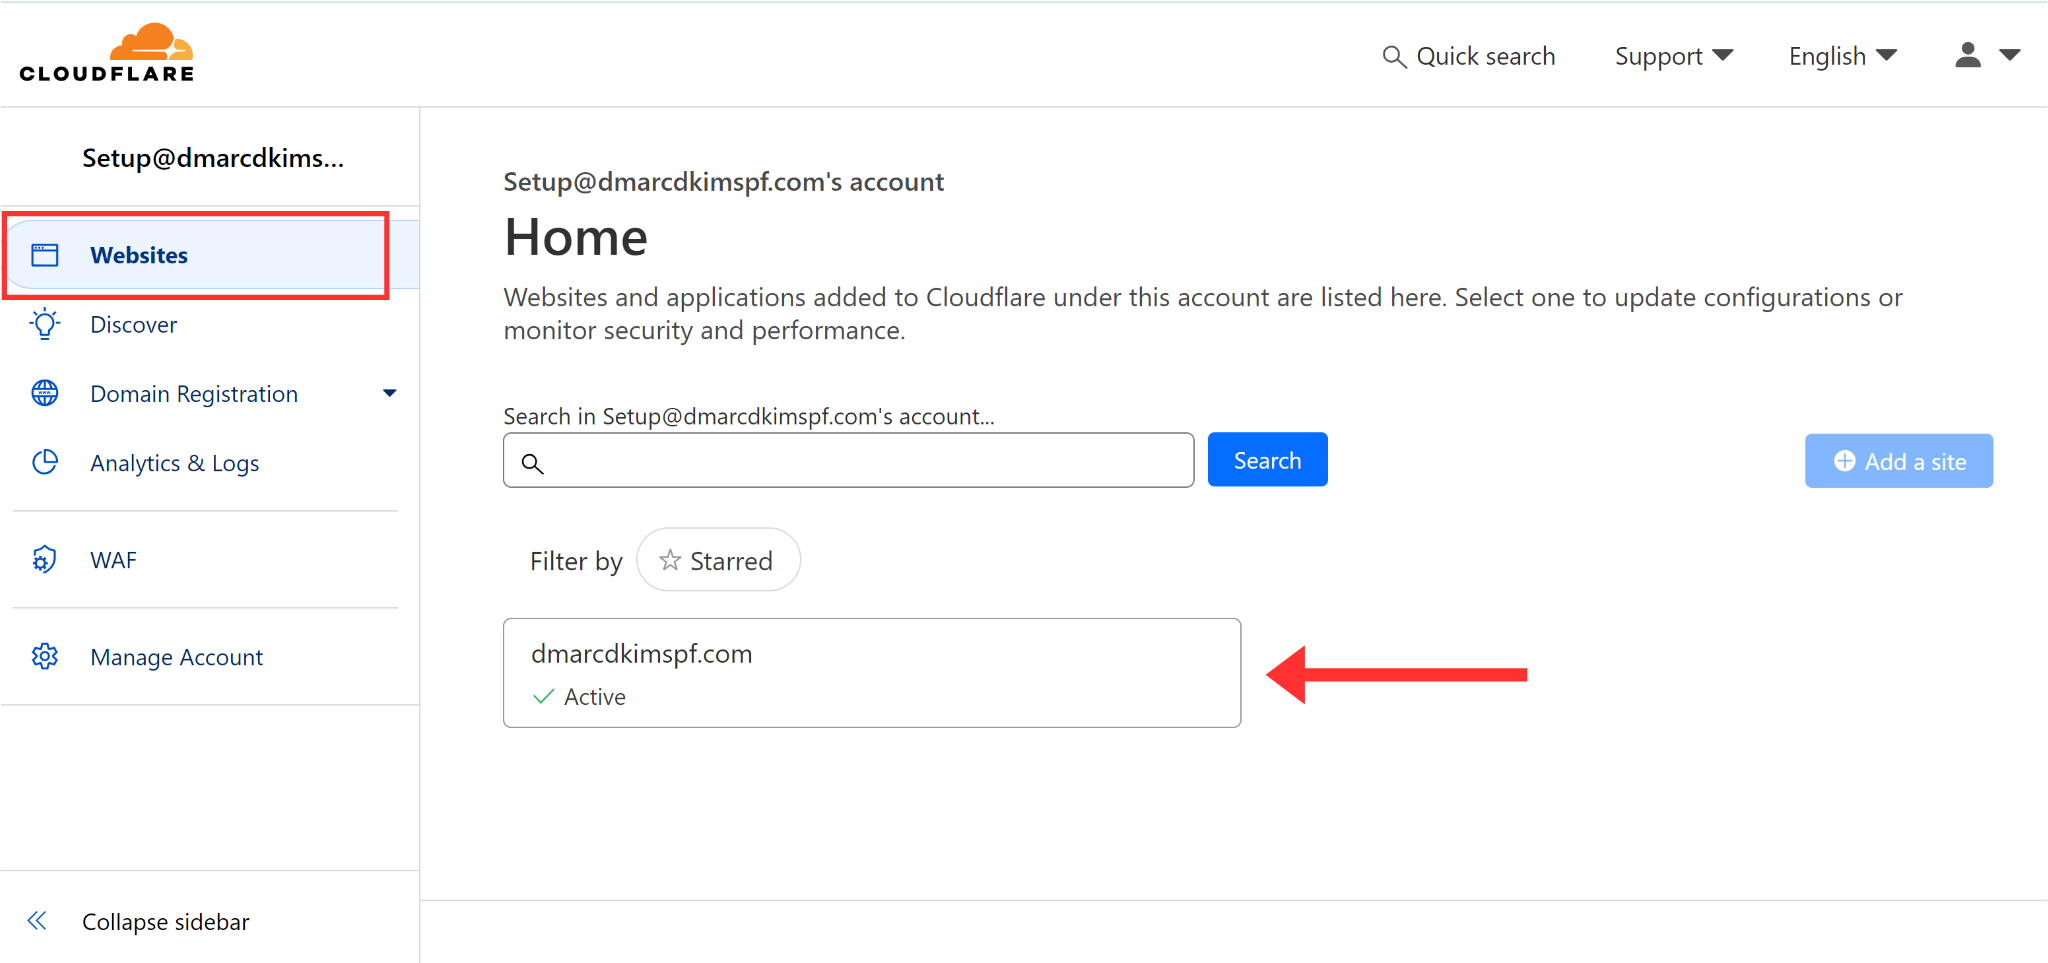
Log in to your DNS provider. We are using Cloudflare for this guide.
-
In the Websites tab, click on your domain.
-
Click DNS, go to Records, and hit the Add Record button.
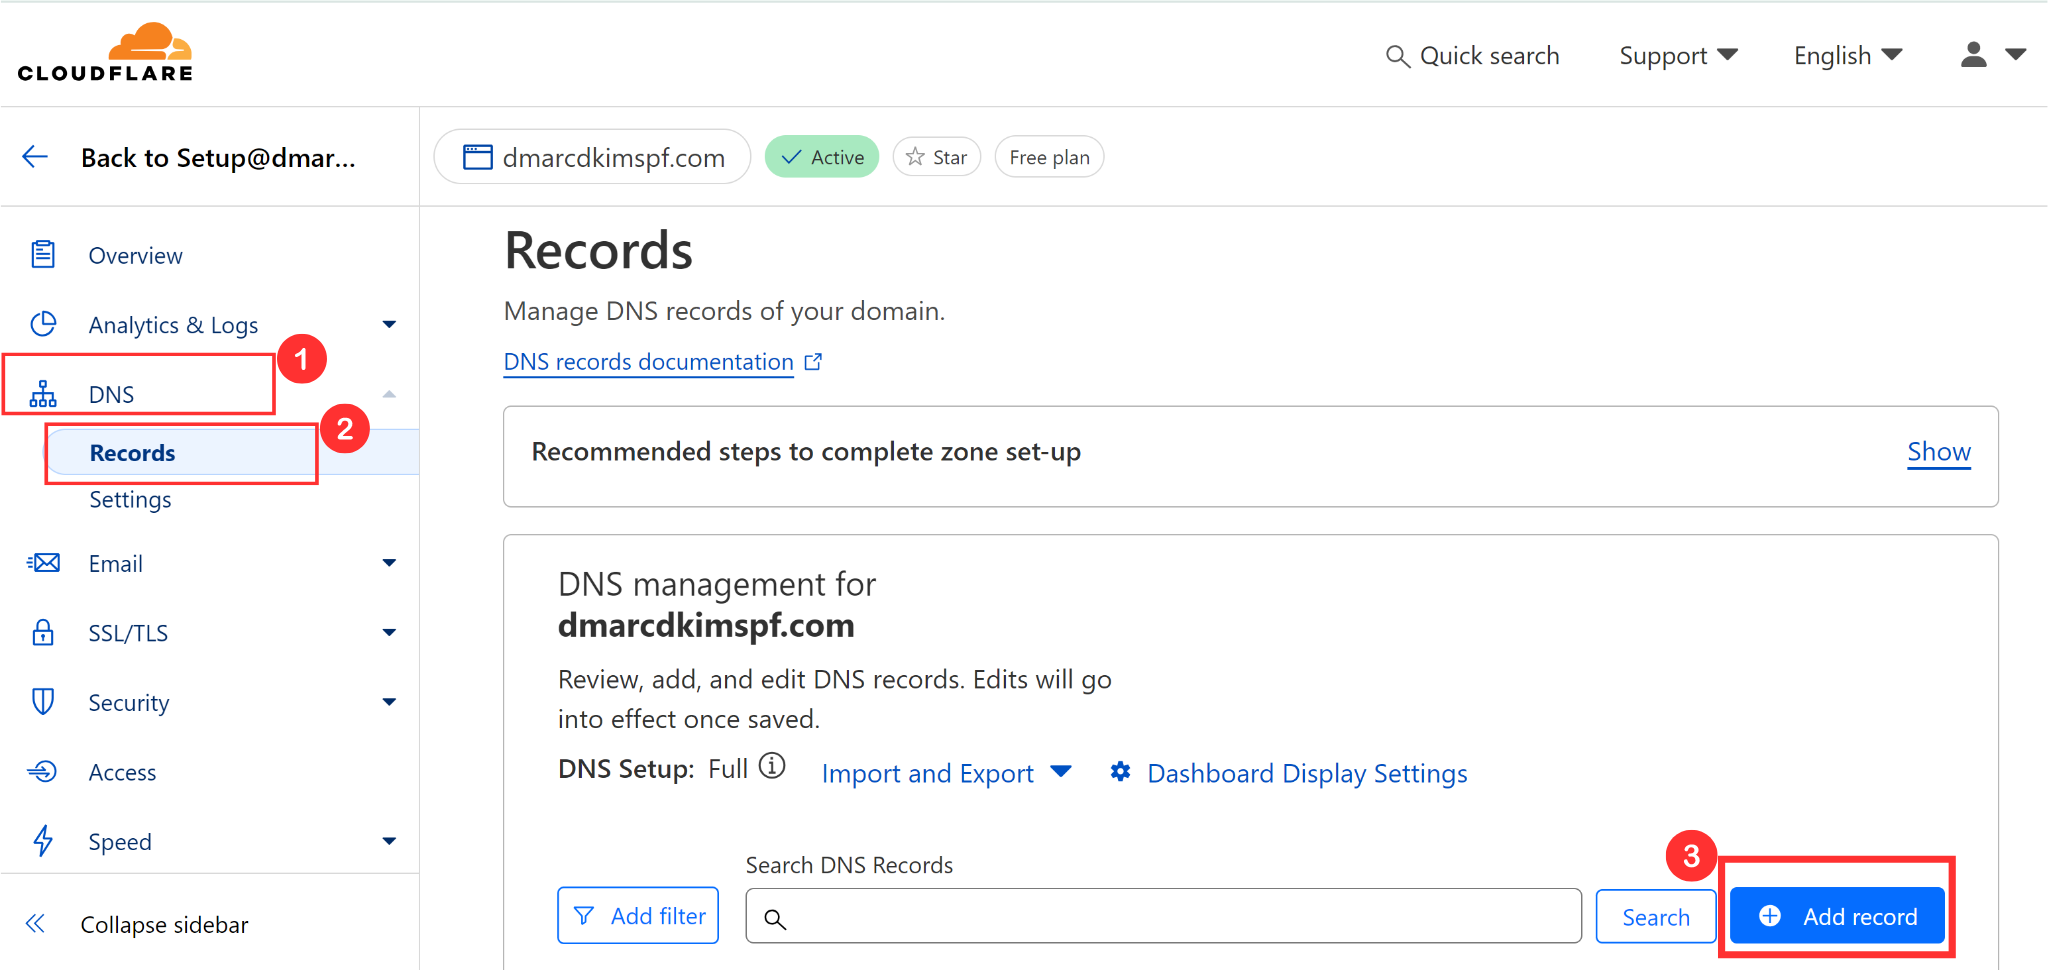
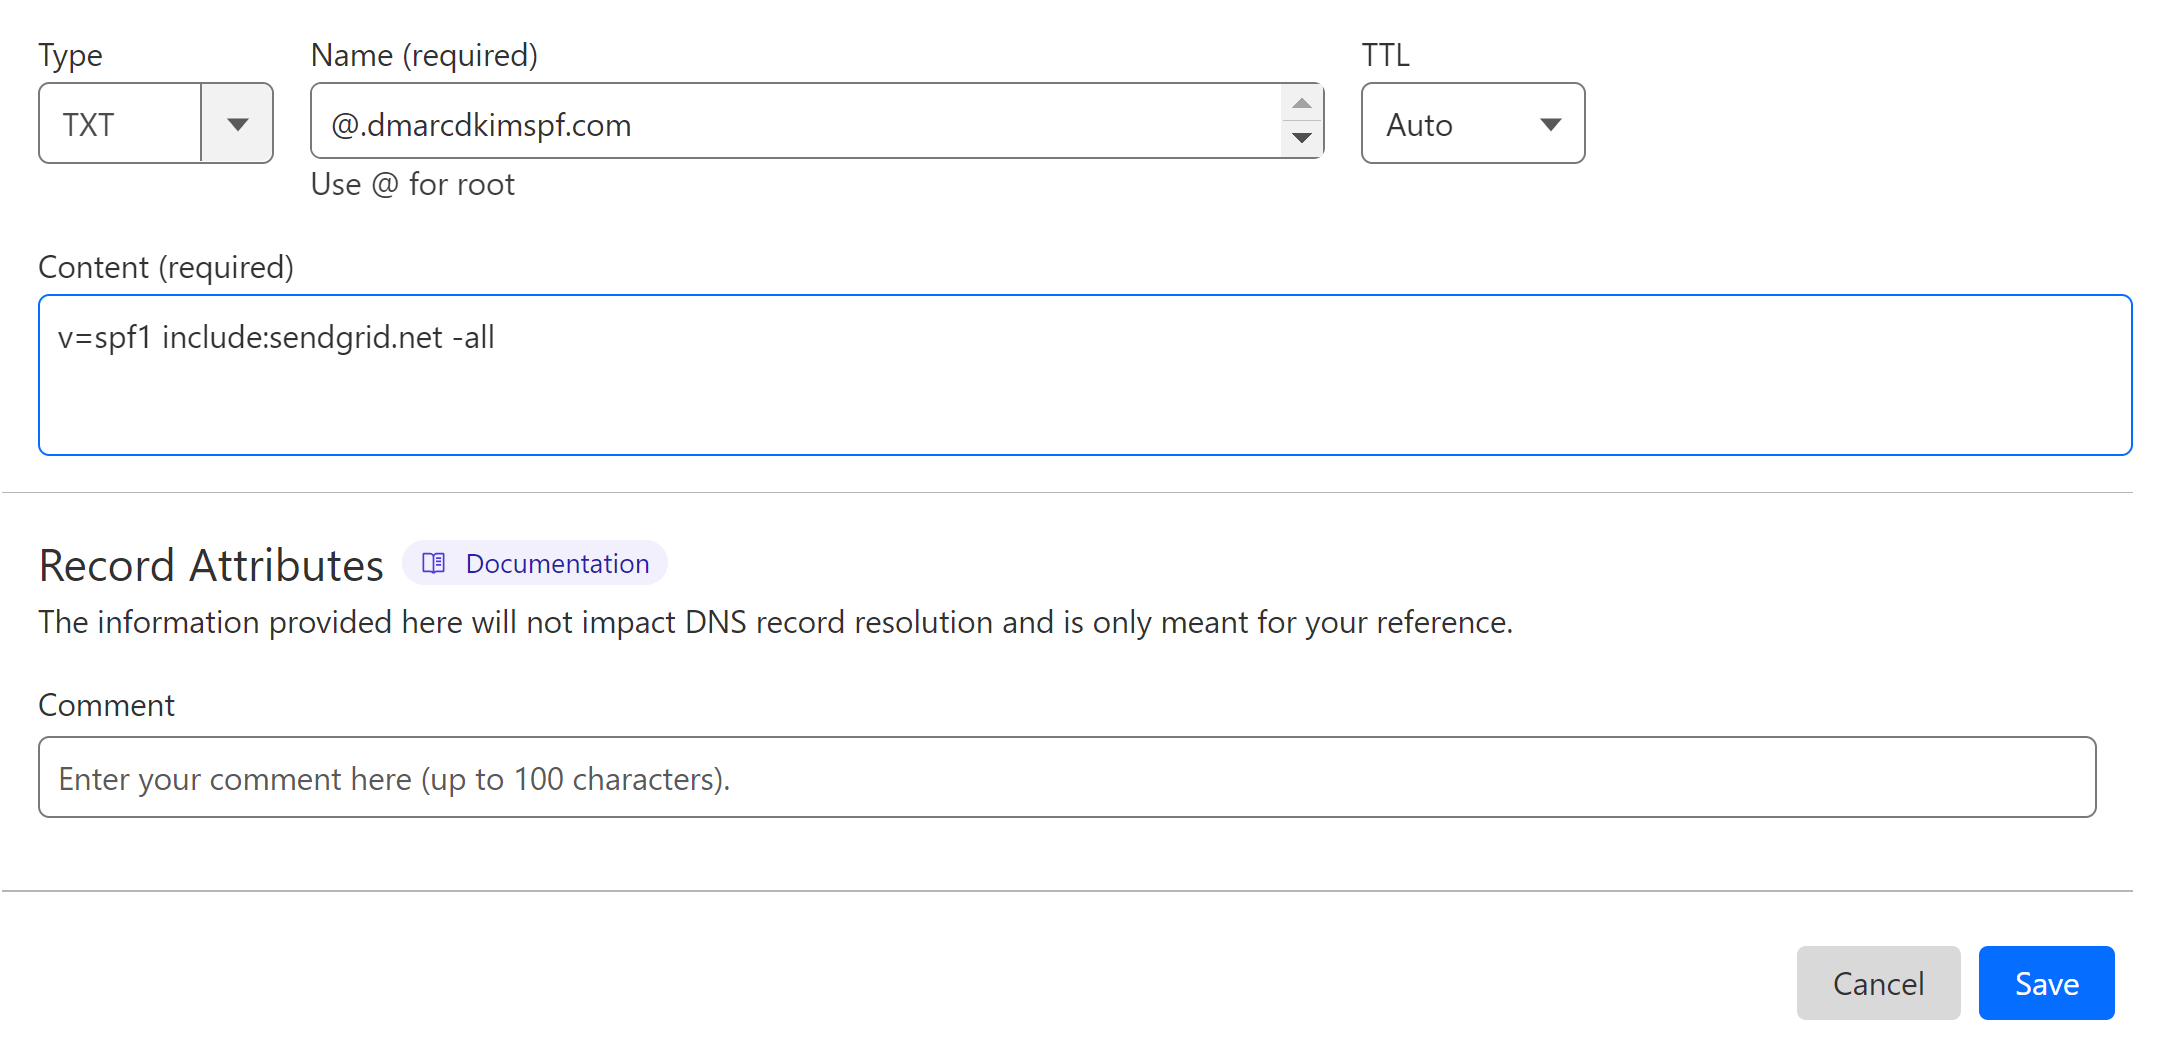
Select type TXT.
Copy the host name from Vendasta and paste it into the Name field in the DNS dashboard.
Copy the record value and add it in the Content field.
-
Finally, click Save.
Merge Vendasta SPF Records:
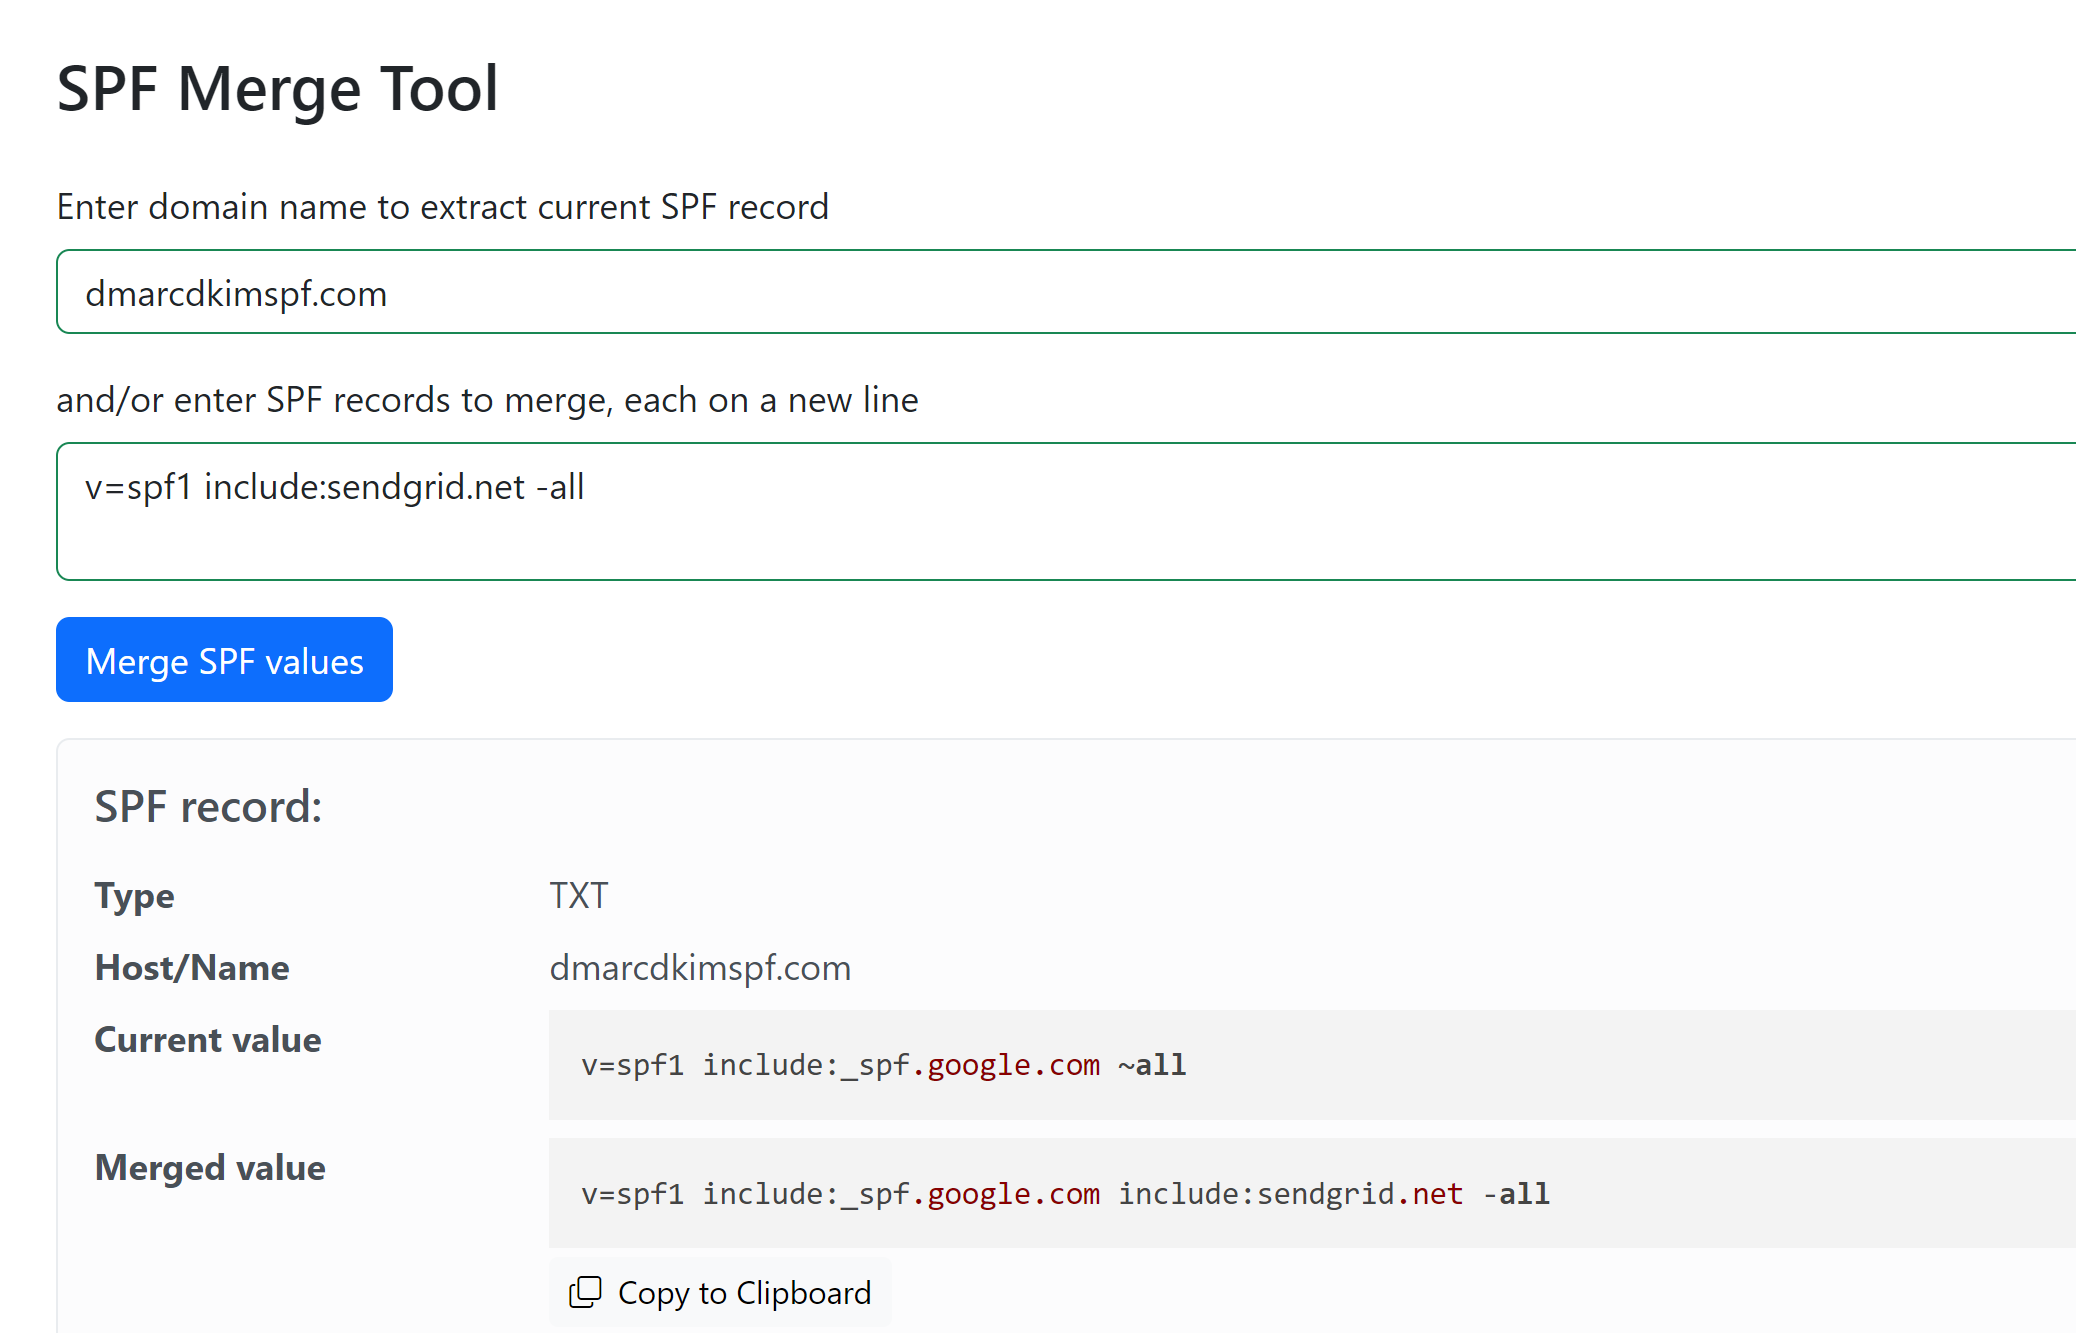
Due to the limitations of the DNS providers, you can only add one SPF record to a domain. Adding more than one can cause conflicts. To prevent such issues, merge the Vendasta SPF record with the existing record.
Go to the SPF Merge tool.
Write your domain name and Vendasta SPF value.
Click "Merge SPF Values."
-
The tool gives you a merged value - add it to your DNS provider.
Add Vendasta DKIM Record:
In the DNS dashboard, select type CNAME.
Copy the host and value and add them to the dedicated field in the DNS provider.
-
Turn off the proxy status and click Save.
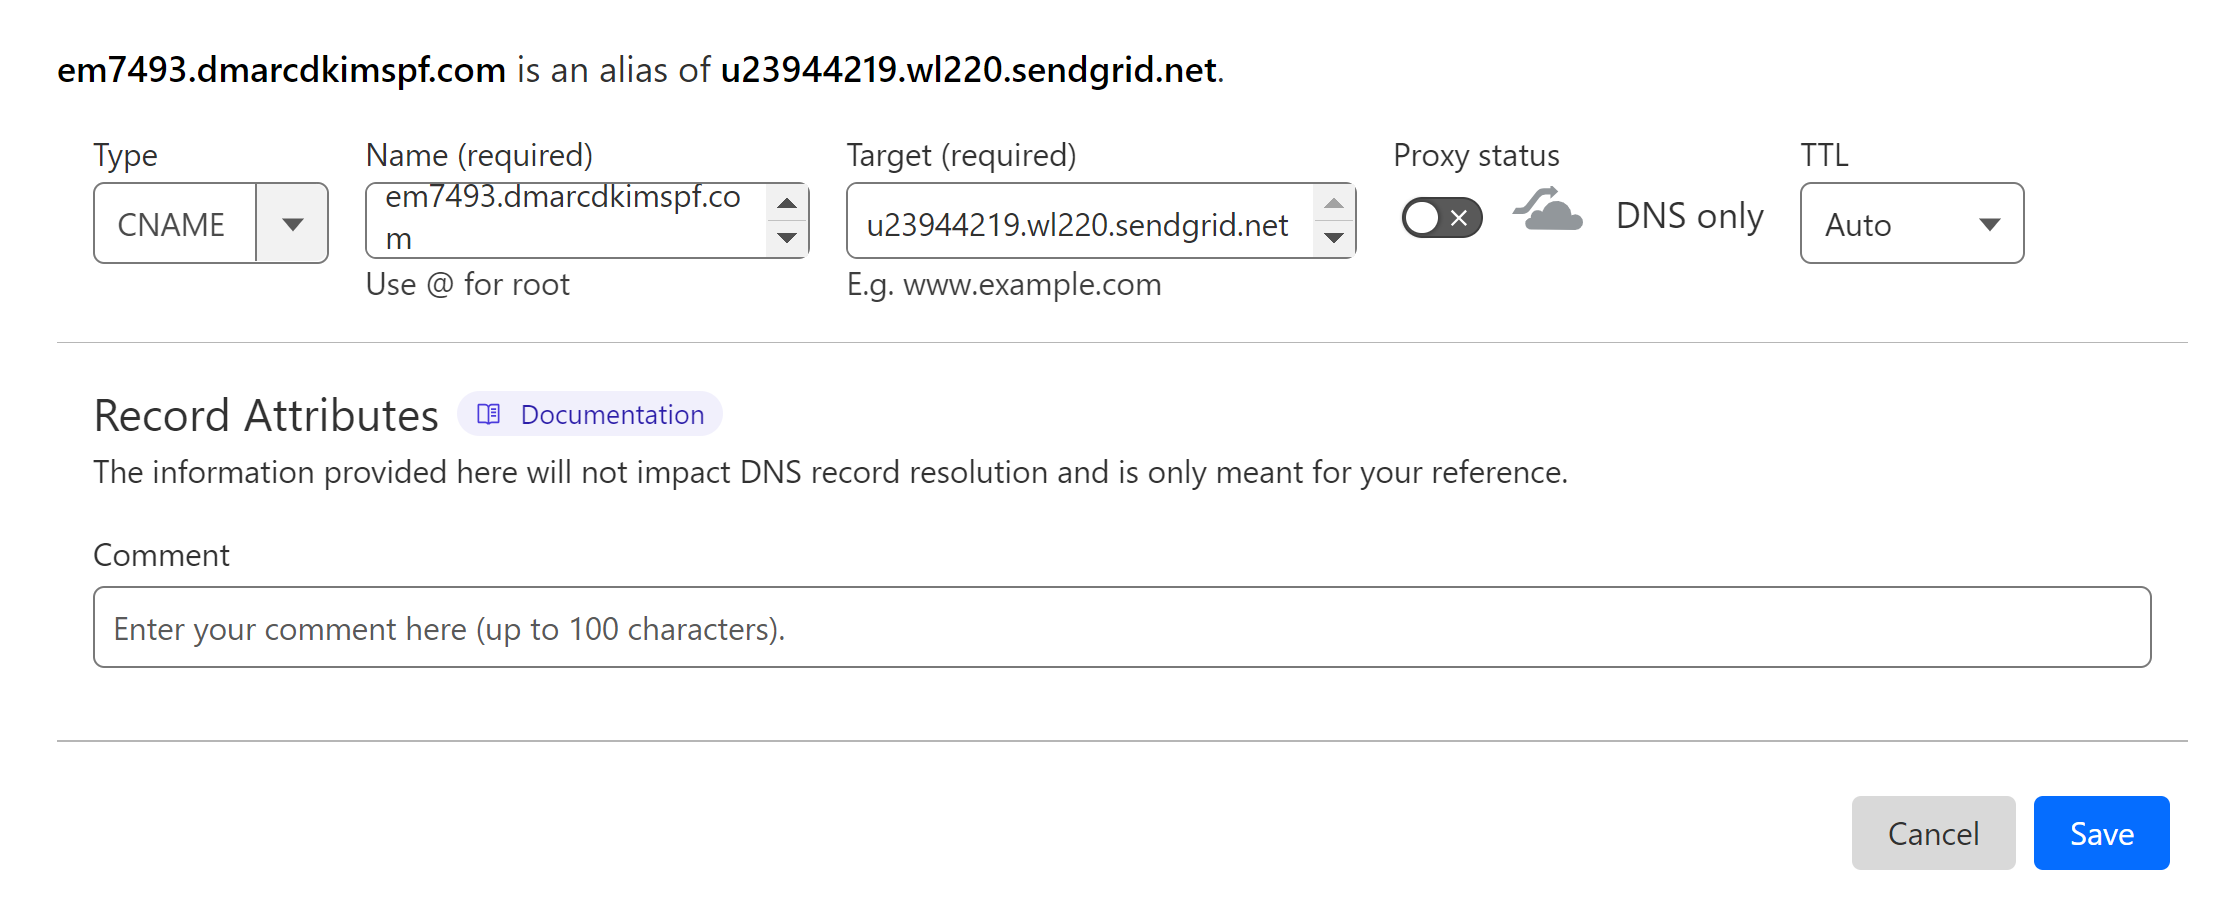
NOTE: Turn off the proxy for every CNAME record. When enabled, it diverts the traffic to your DNS server instead of the email server, which causes verification issues.
Add Vendasta DMARC Record:
To generate a custom and effective DMARC value, you can use the DmarcDkim.com tool. It helps you implement a strict policy (p=reject) and gives you actionable insights into your email performance.
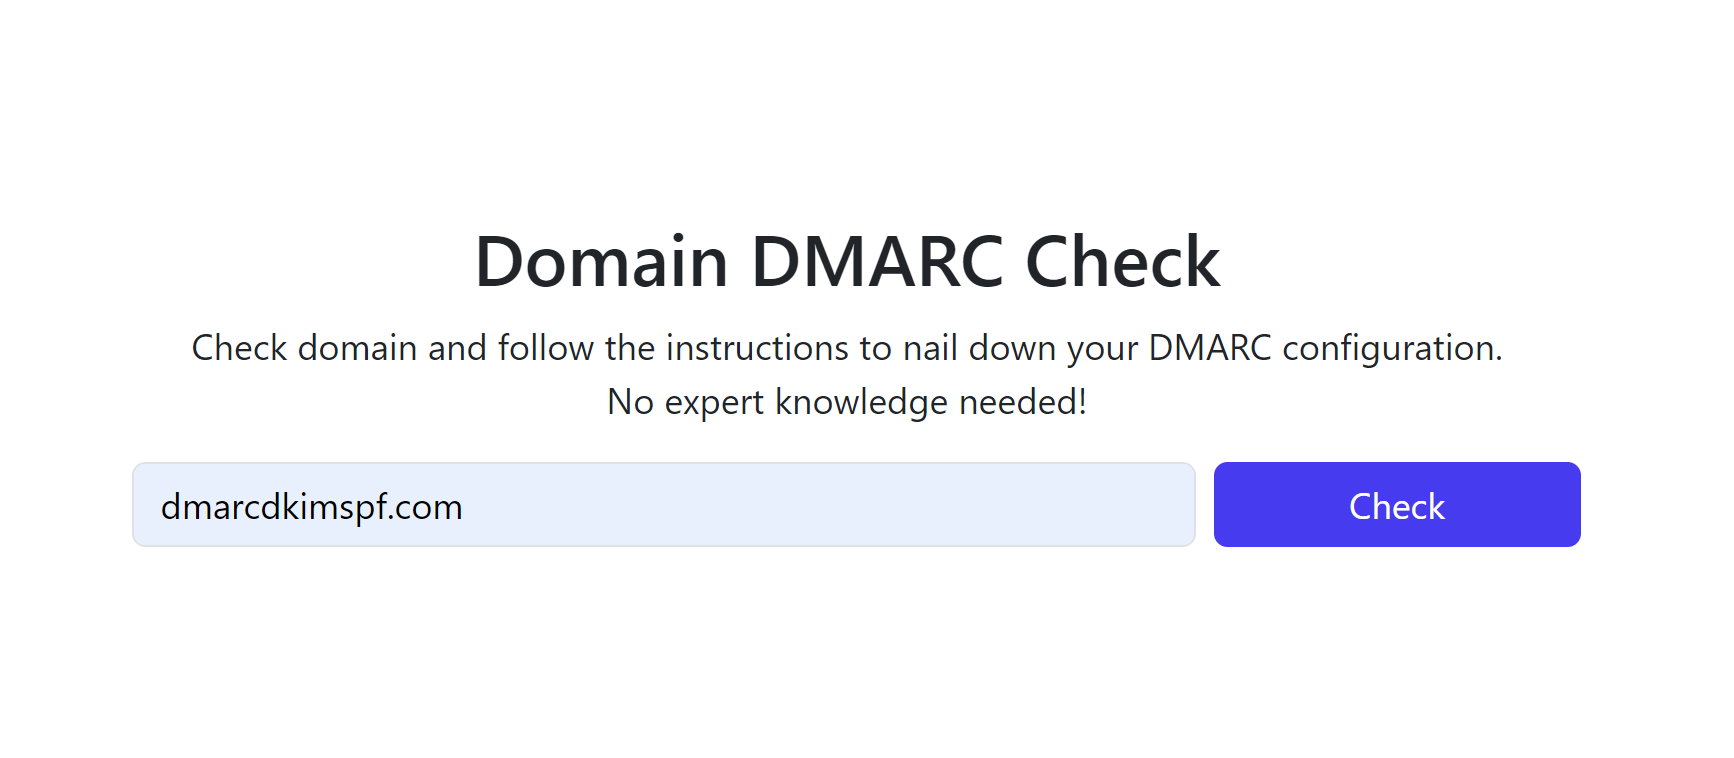
Go to DMARC Lookup Tool.
-
Write your domain name and click Check.
-
The tool gives you a Suggested value, add it to your DNS provider.
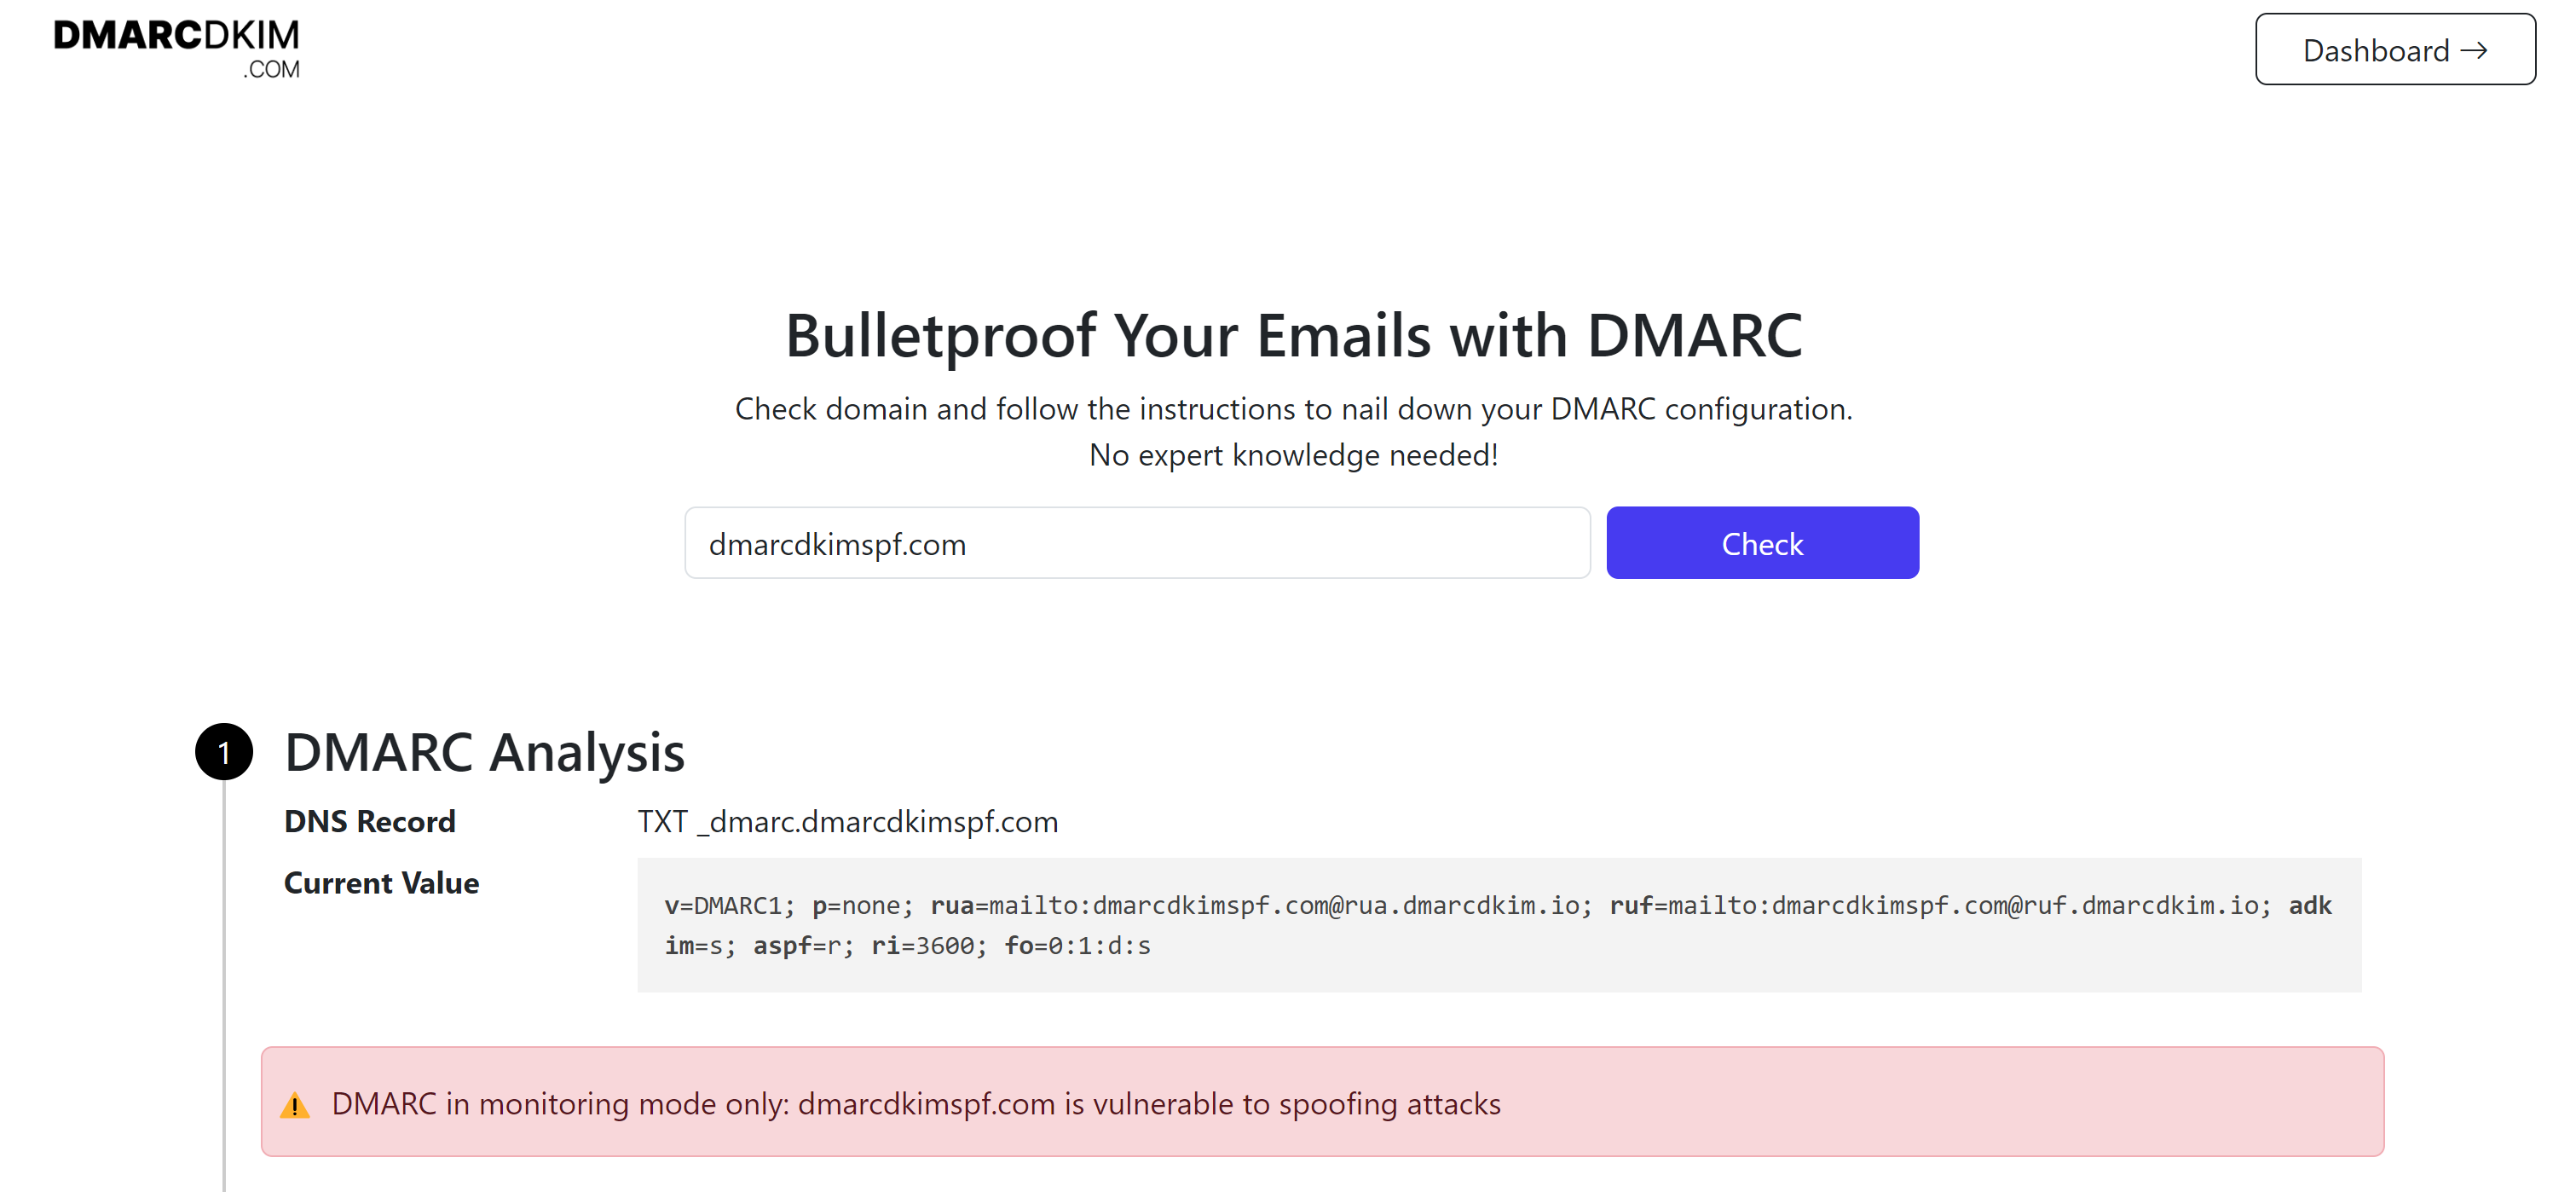
Scroll down and click Sign up now to access the DMARC Reports Dashboard.
Verify DNS Records:
-
Return to the Vendasta DNS records page and click "Check Domain Records."
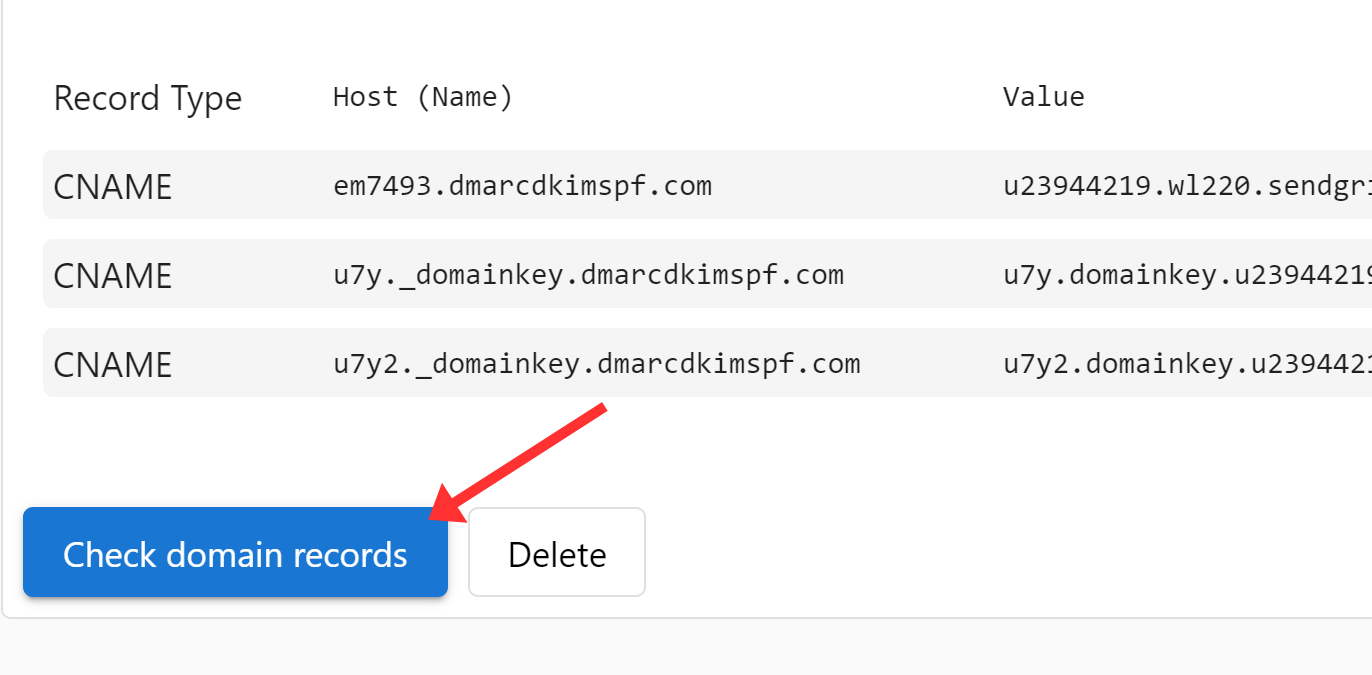
If the records were added successfully, you should see the DNS values written instead of red badges.
If the records are not verified immediately, wait 24-48 hours and check again.
If there is no authentication success after 48 hours, there might be a misconfiguration in your DNS setup.
To troubleshoot the domain authentication issues, hire a DmarcDkim.com expert.
Check domain and follow the instructions to nail down your DMARC configuration.
No expert knowledge needed!


