Configure CleverReach DMARC, DKIM, SPF Records - Sender Domain Authentication
Check your domain for DMARC, DKIM, SPF and MX records. Get a free report.
How to configure SPF, DKIM, and DMARC Records for CleverReach?
Domain authentication is crucial for successful email delivery. You can authenticate your sending email domain with the help of CleverReach DNS records. You can find the DKIM and SPF values in the account settings.
Add the records to your DNS provider for verification. When records get verified, your emails will not be marked as spam. Follow this step-by-step guide to configure the SPF and DKIM values and authenticate your domain.
Configuring CleverReach DKIM:
-
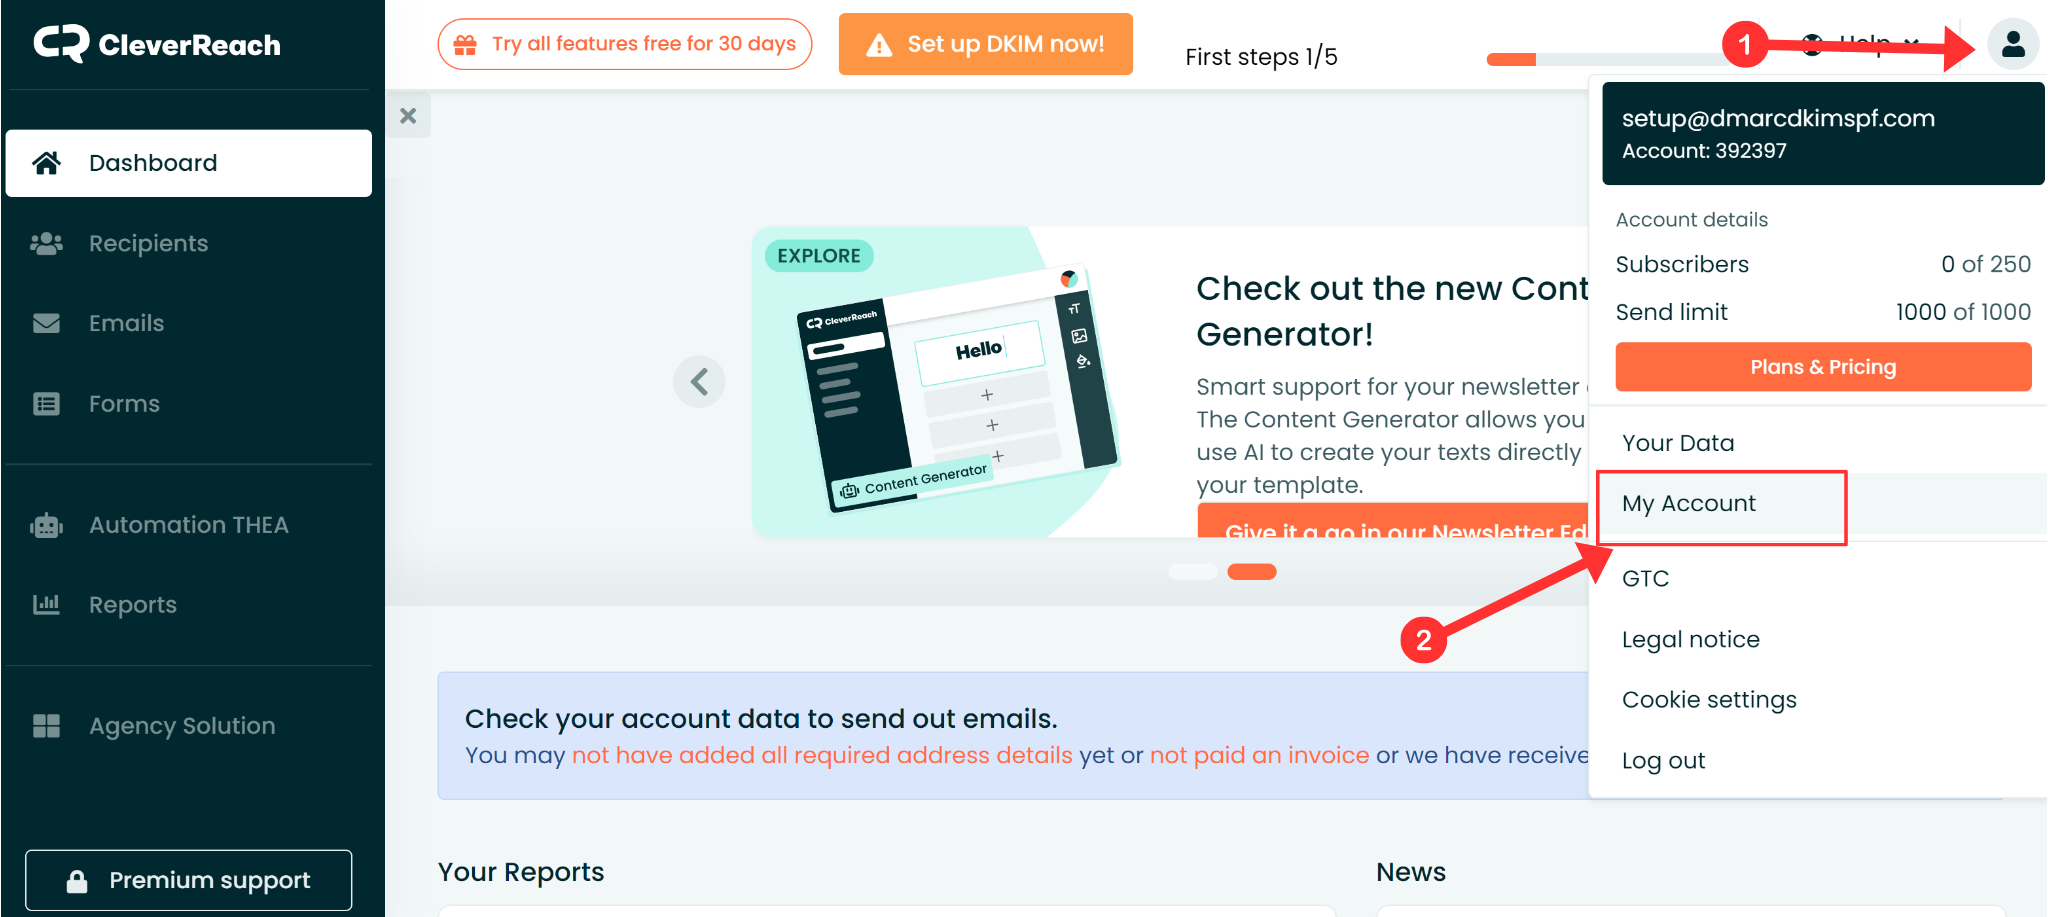
On the dashboard, click your profile icon and go to Account Settings.
-
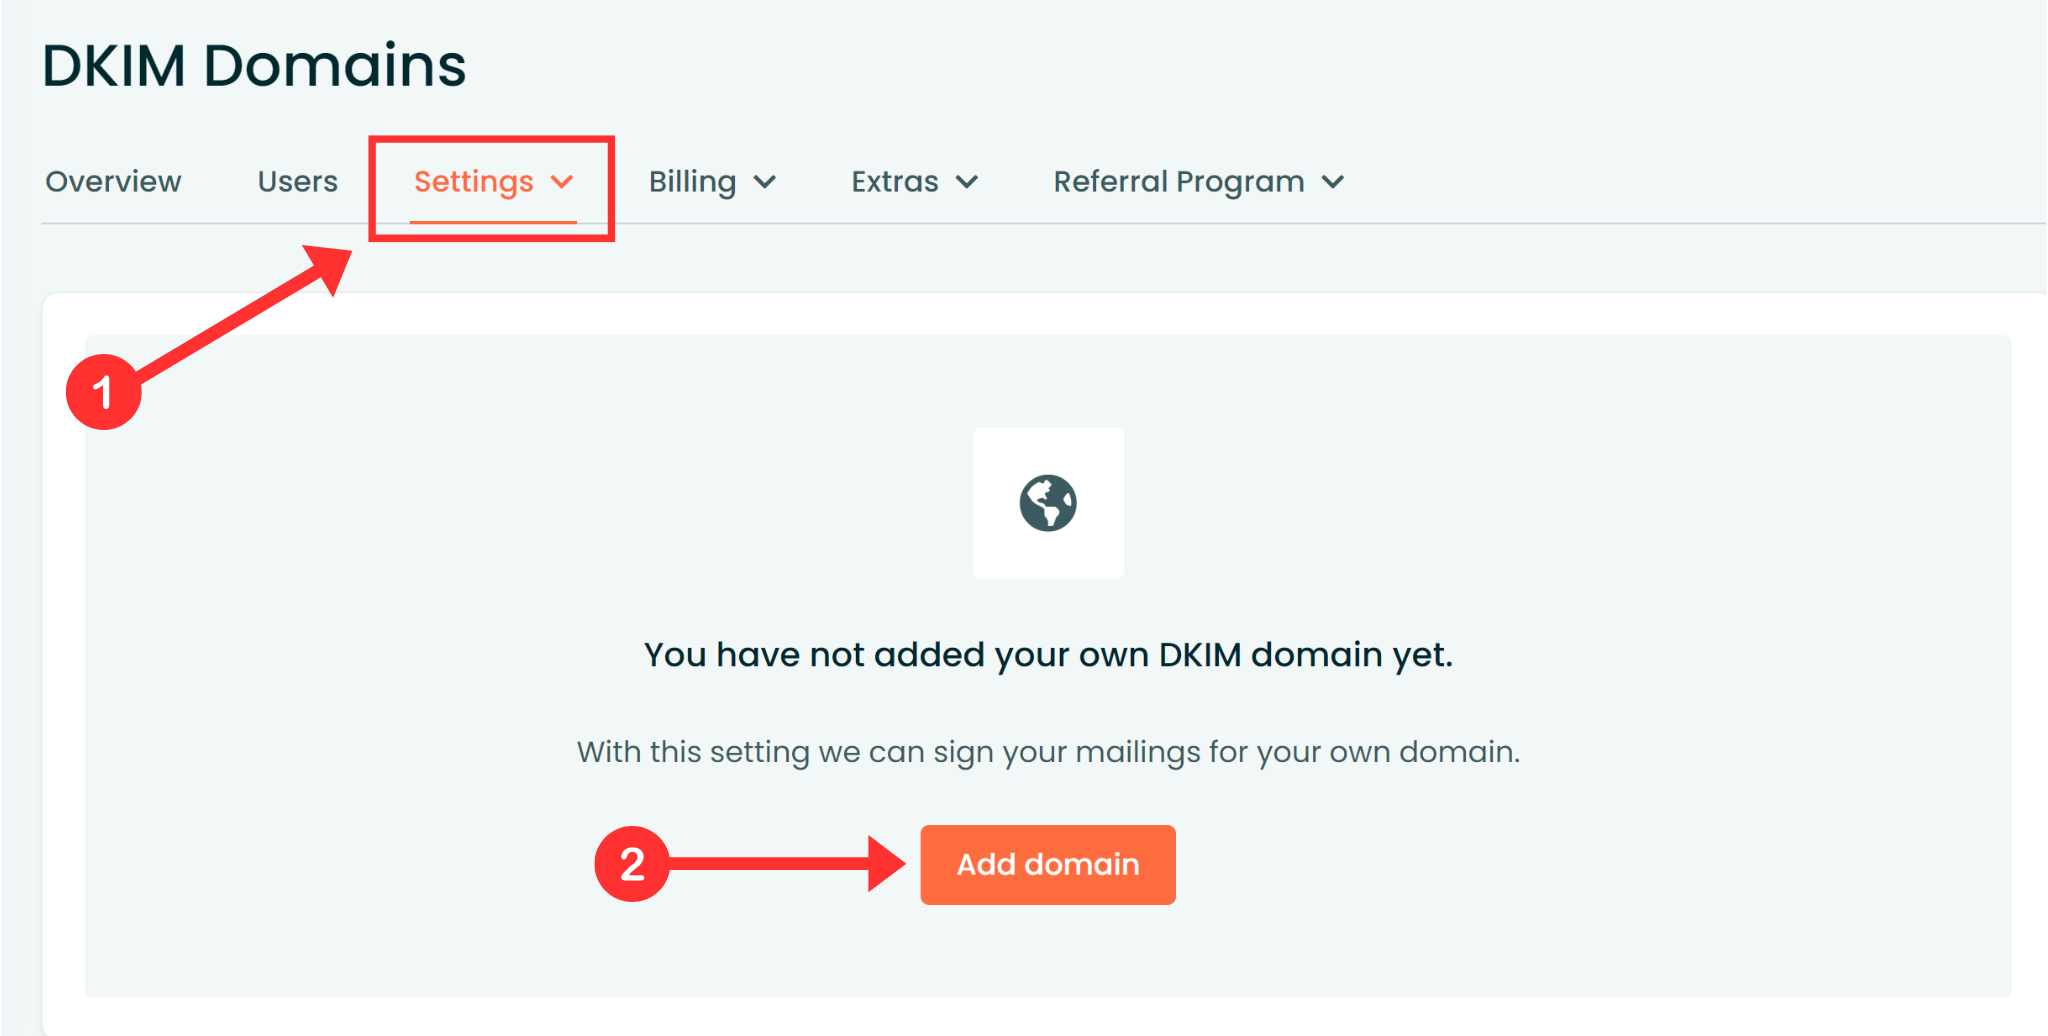
In the Settings tab, click Add Domain.
-
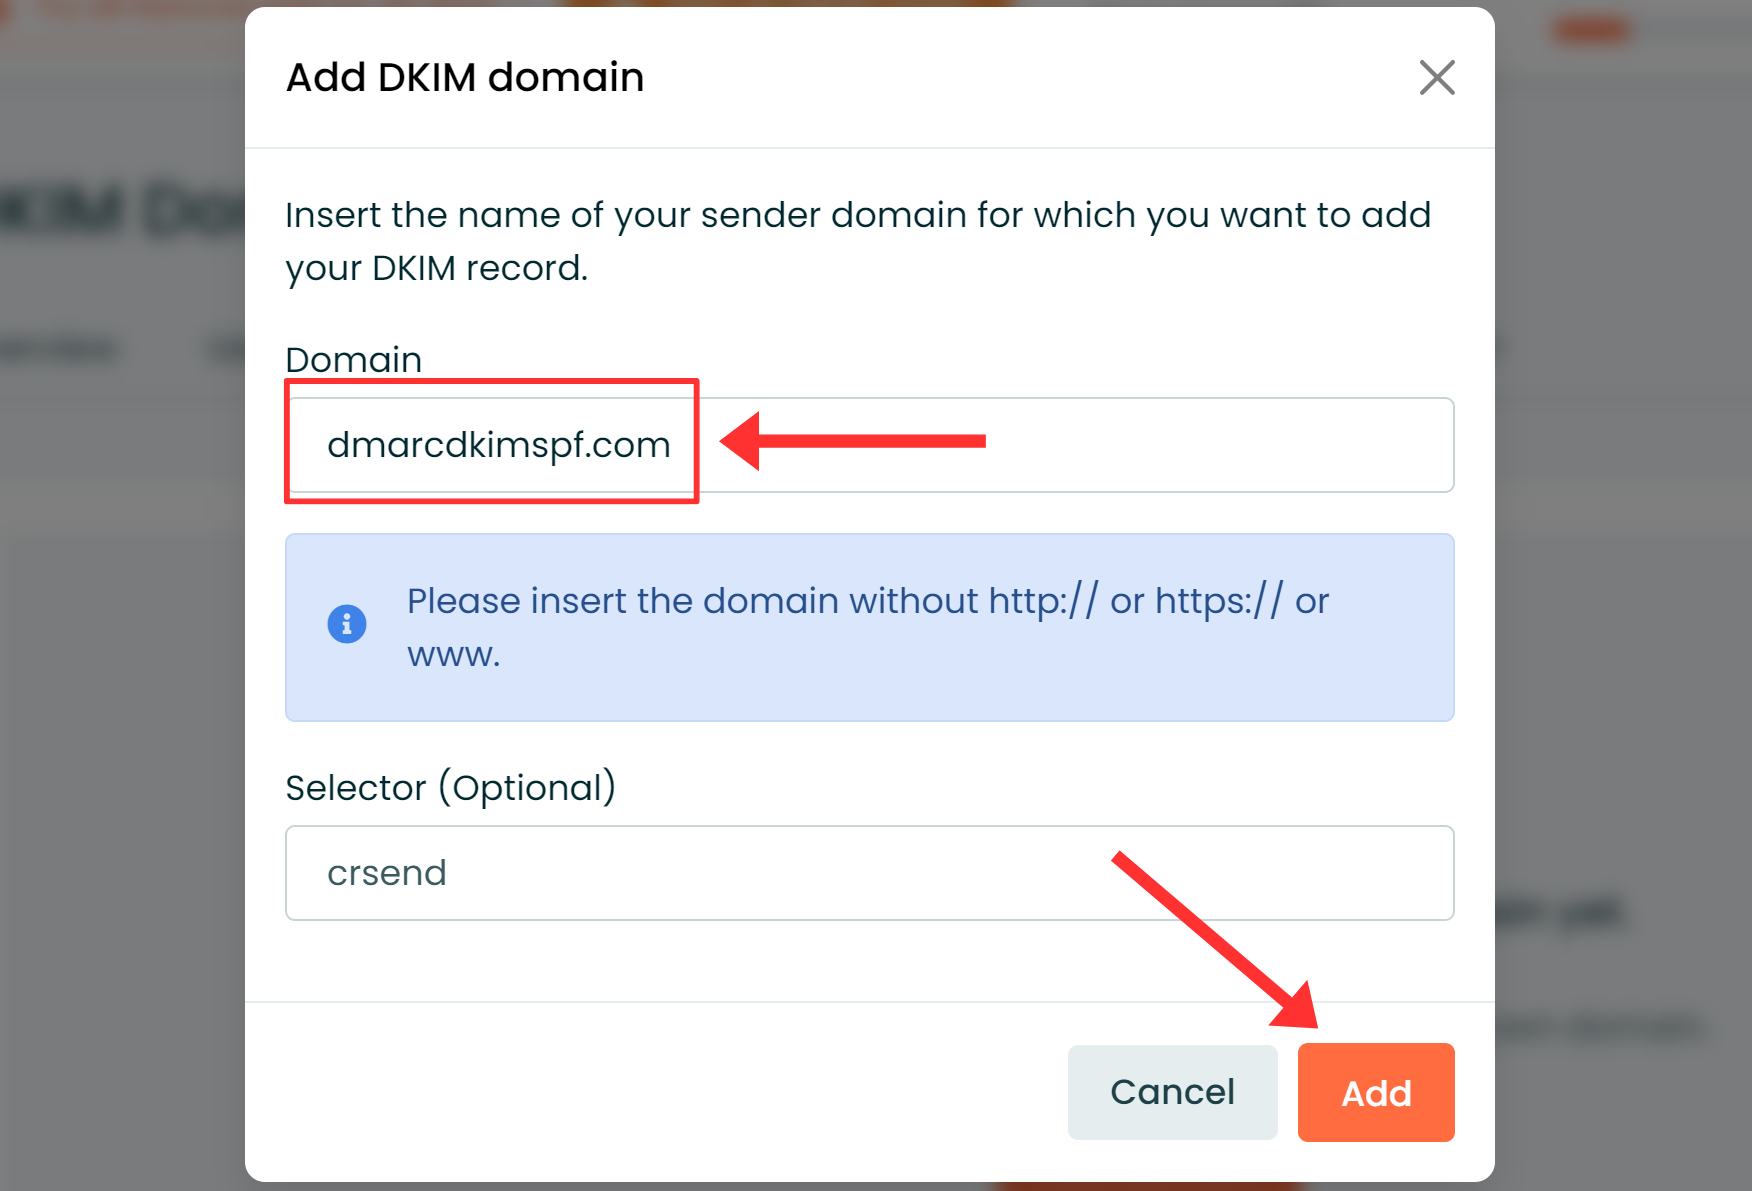
Write your domain name and click Add.
-
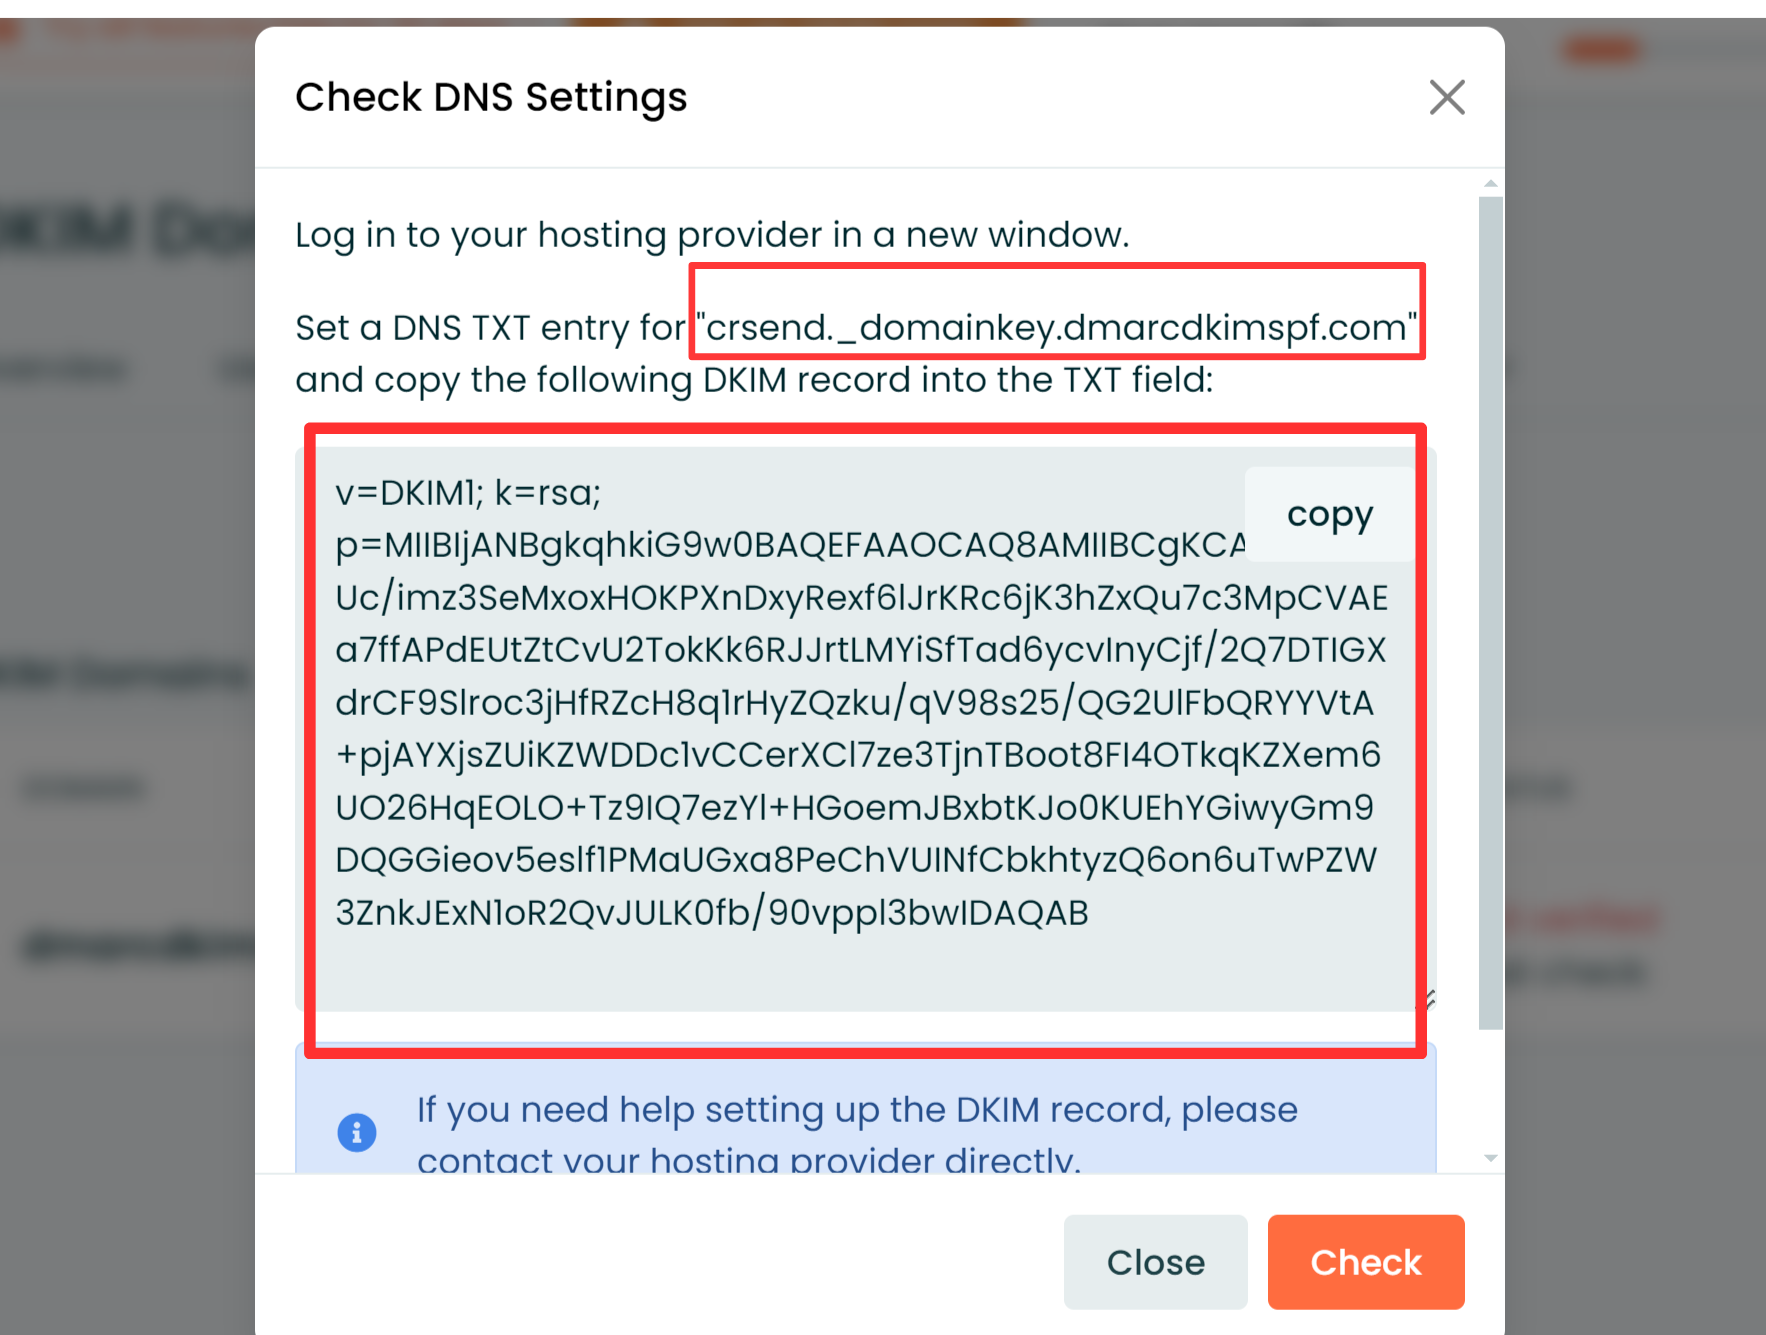
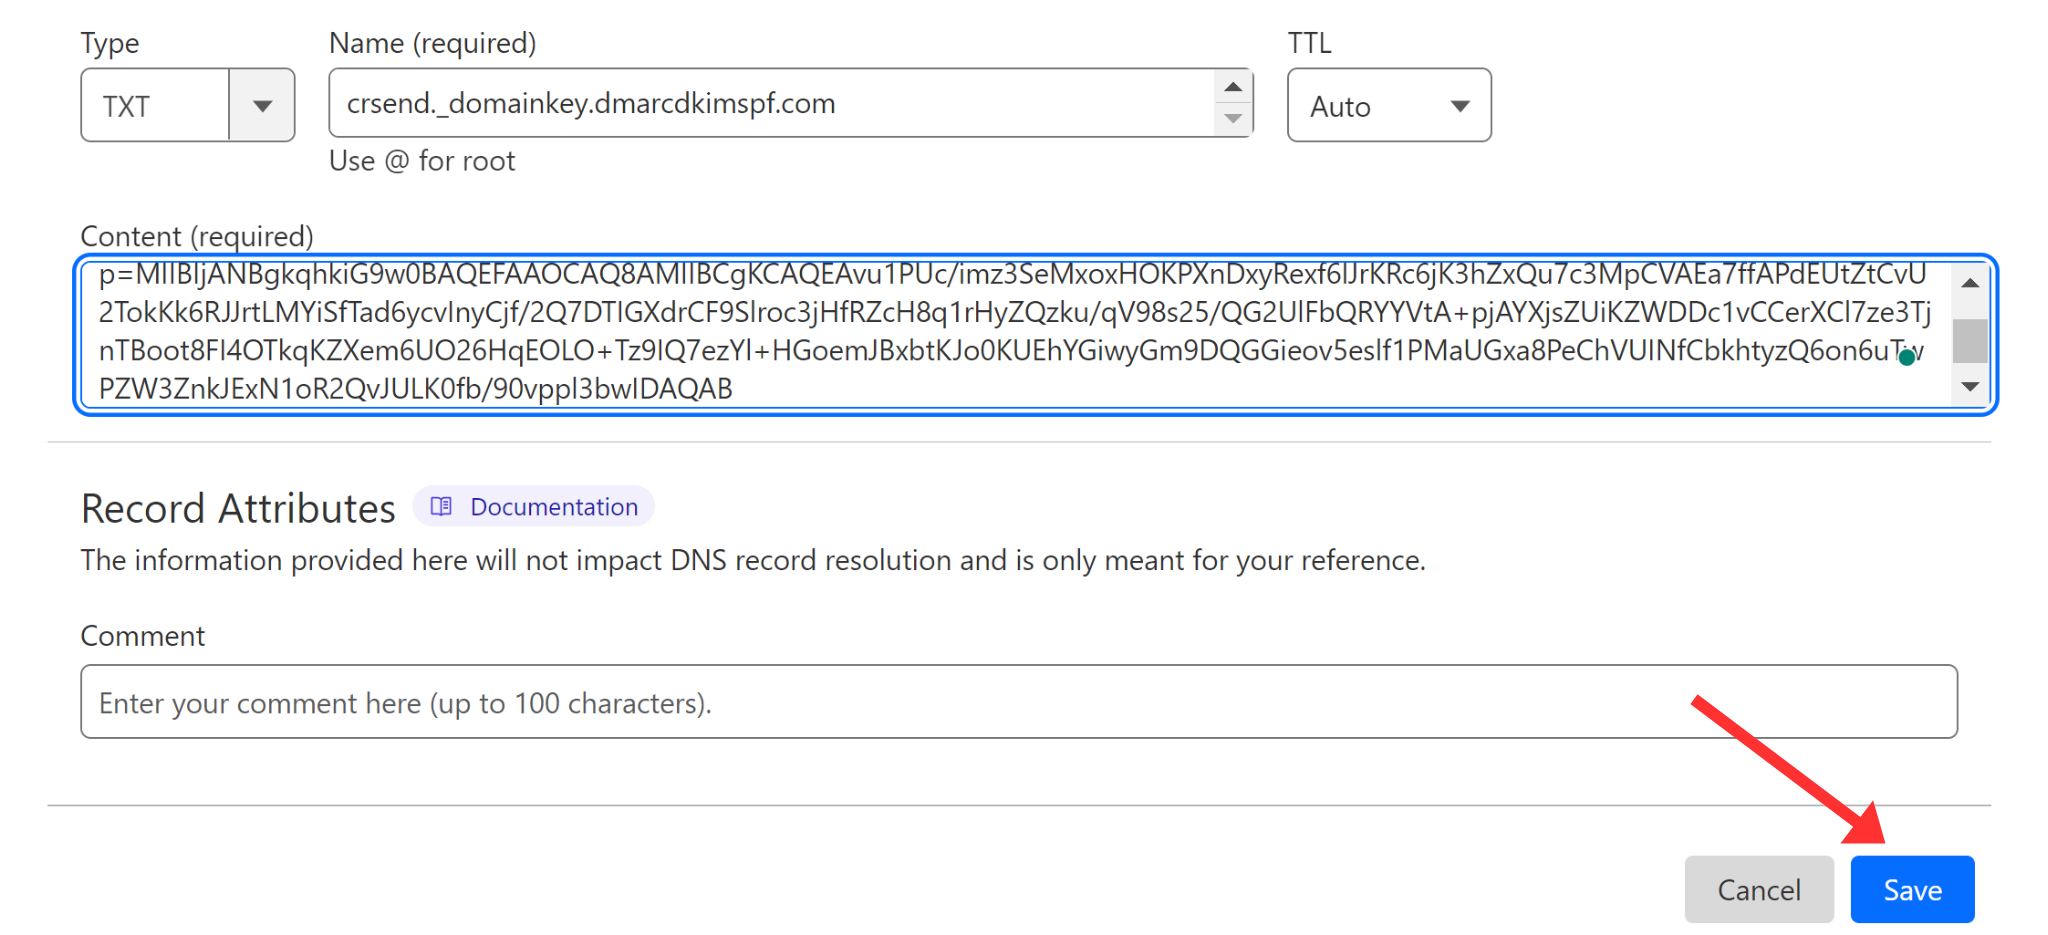
Copy the DKIM record name and DKIM value.
-
Paste them into the DNS provider's dedicated field.
-
Select type TXT and click Save.
Configuring CleverReach SPF:
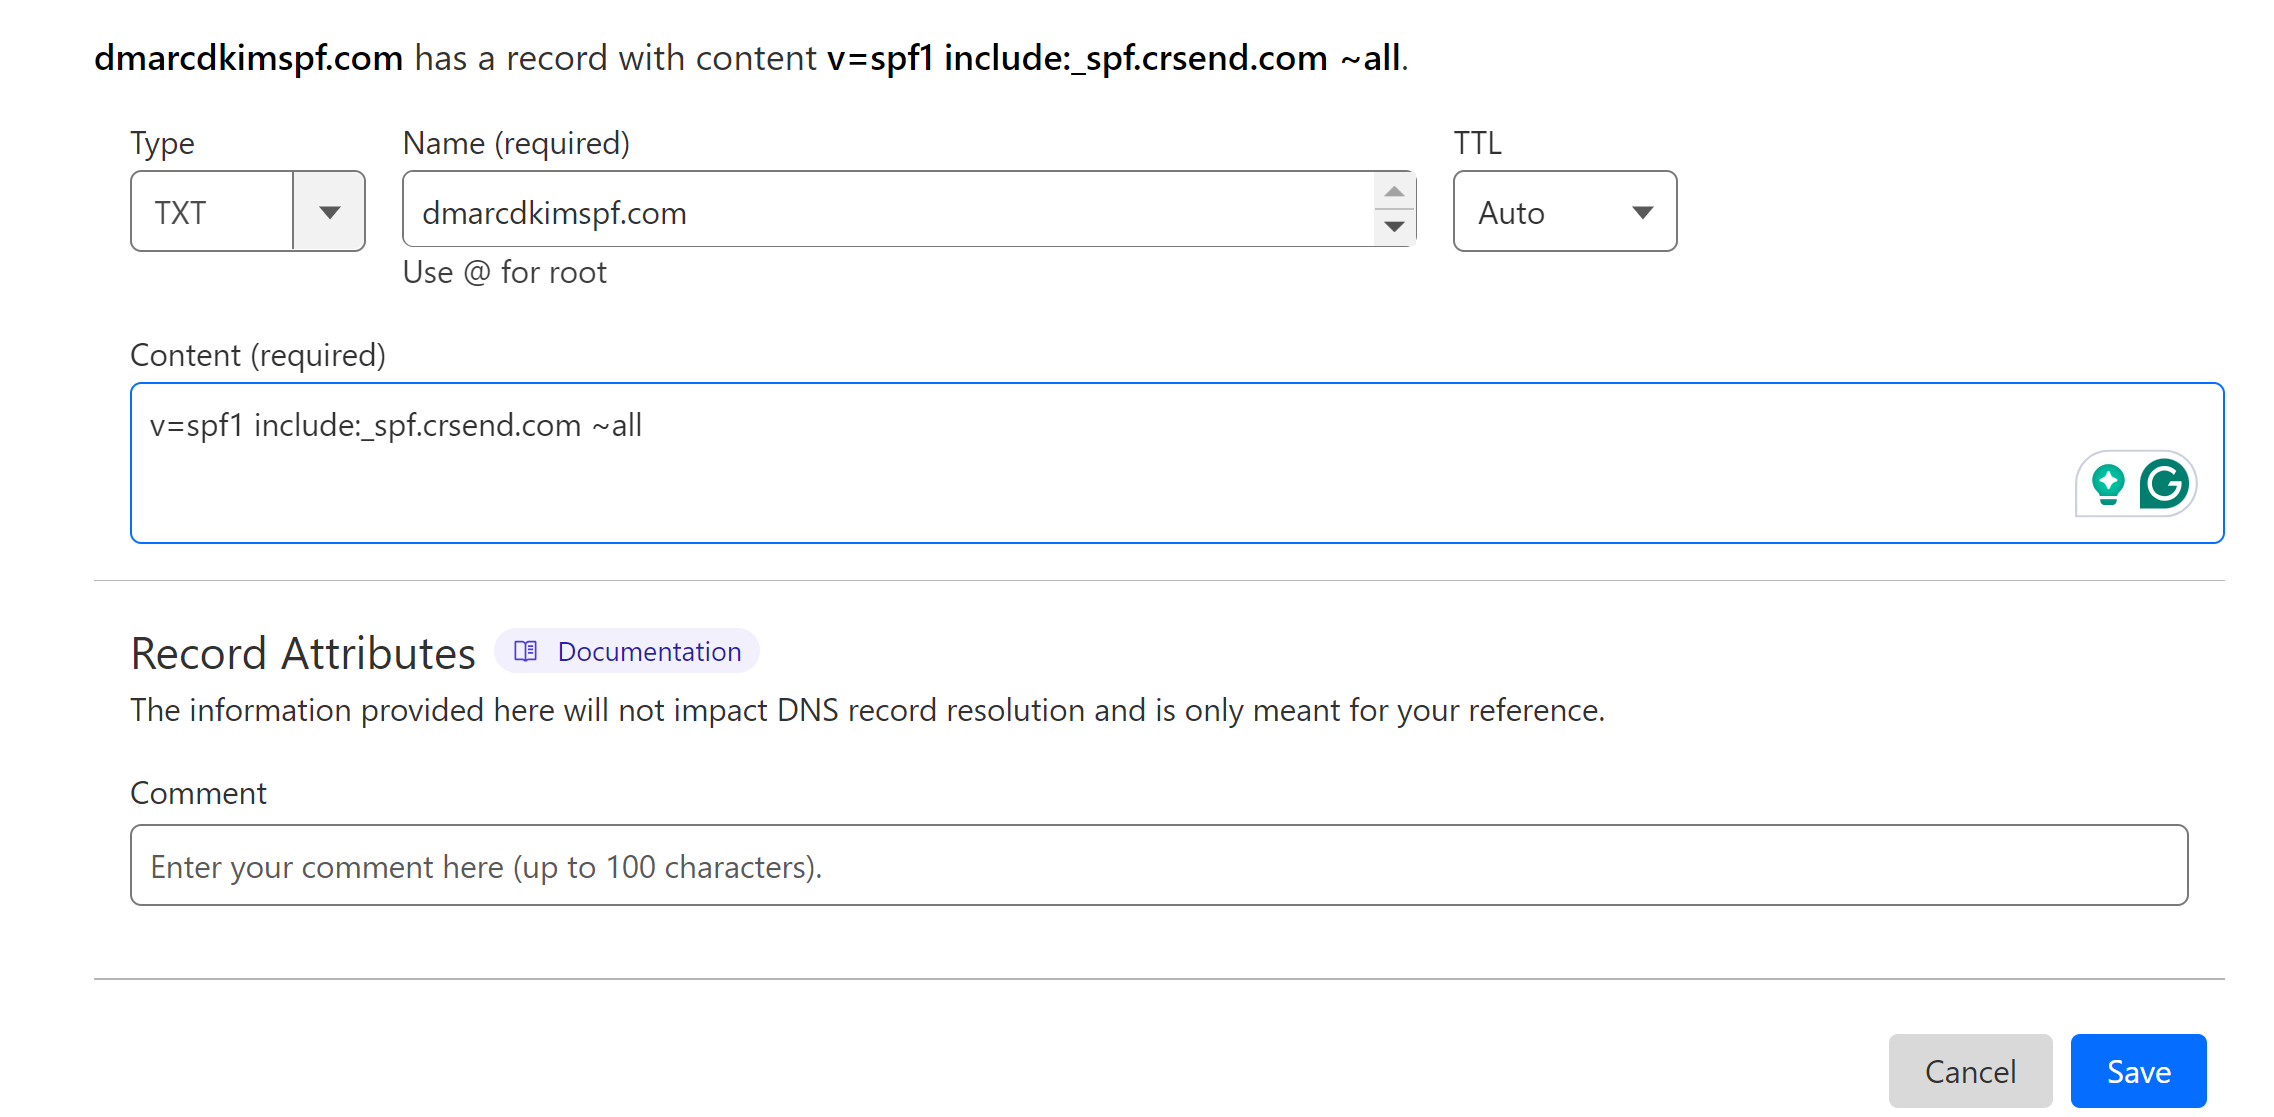
On your DNS dashboard, click Add Record.
Write your domain name in the Name field.
Add the SPF value: v=spf1 include:_spf.crsend.com ~all into the Content field.
-
Select type TXT and click Save.
If your DNS dashboard has an existing SPF record, merge it with the Clever Reach SPF to get a single, combined value.
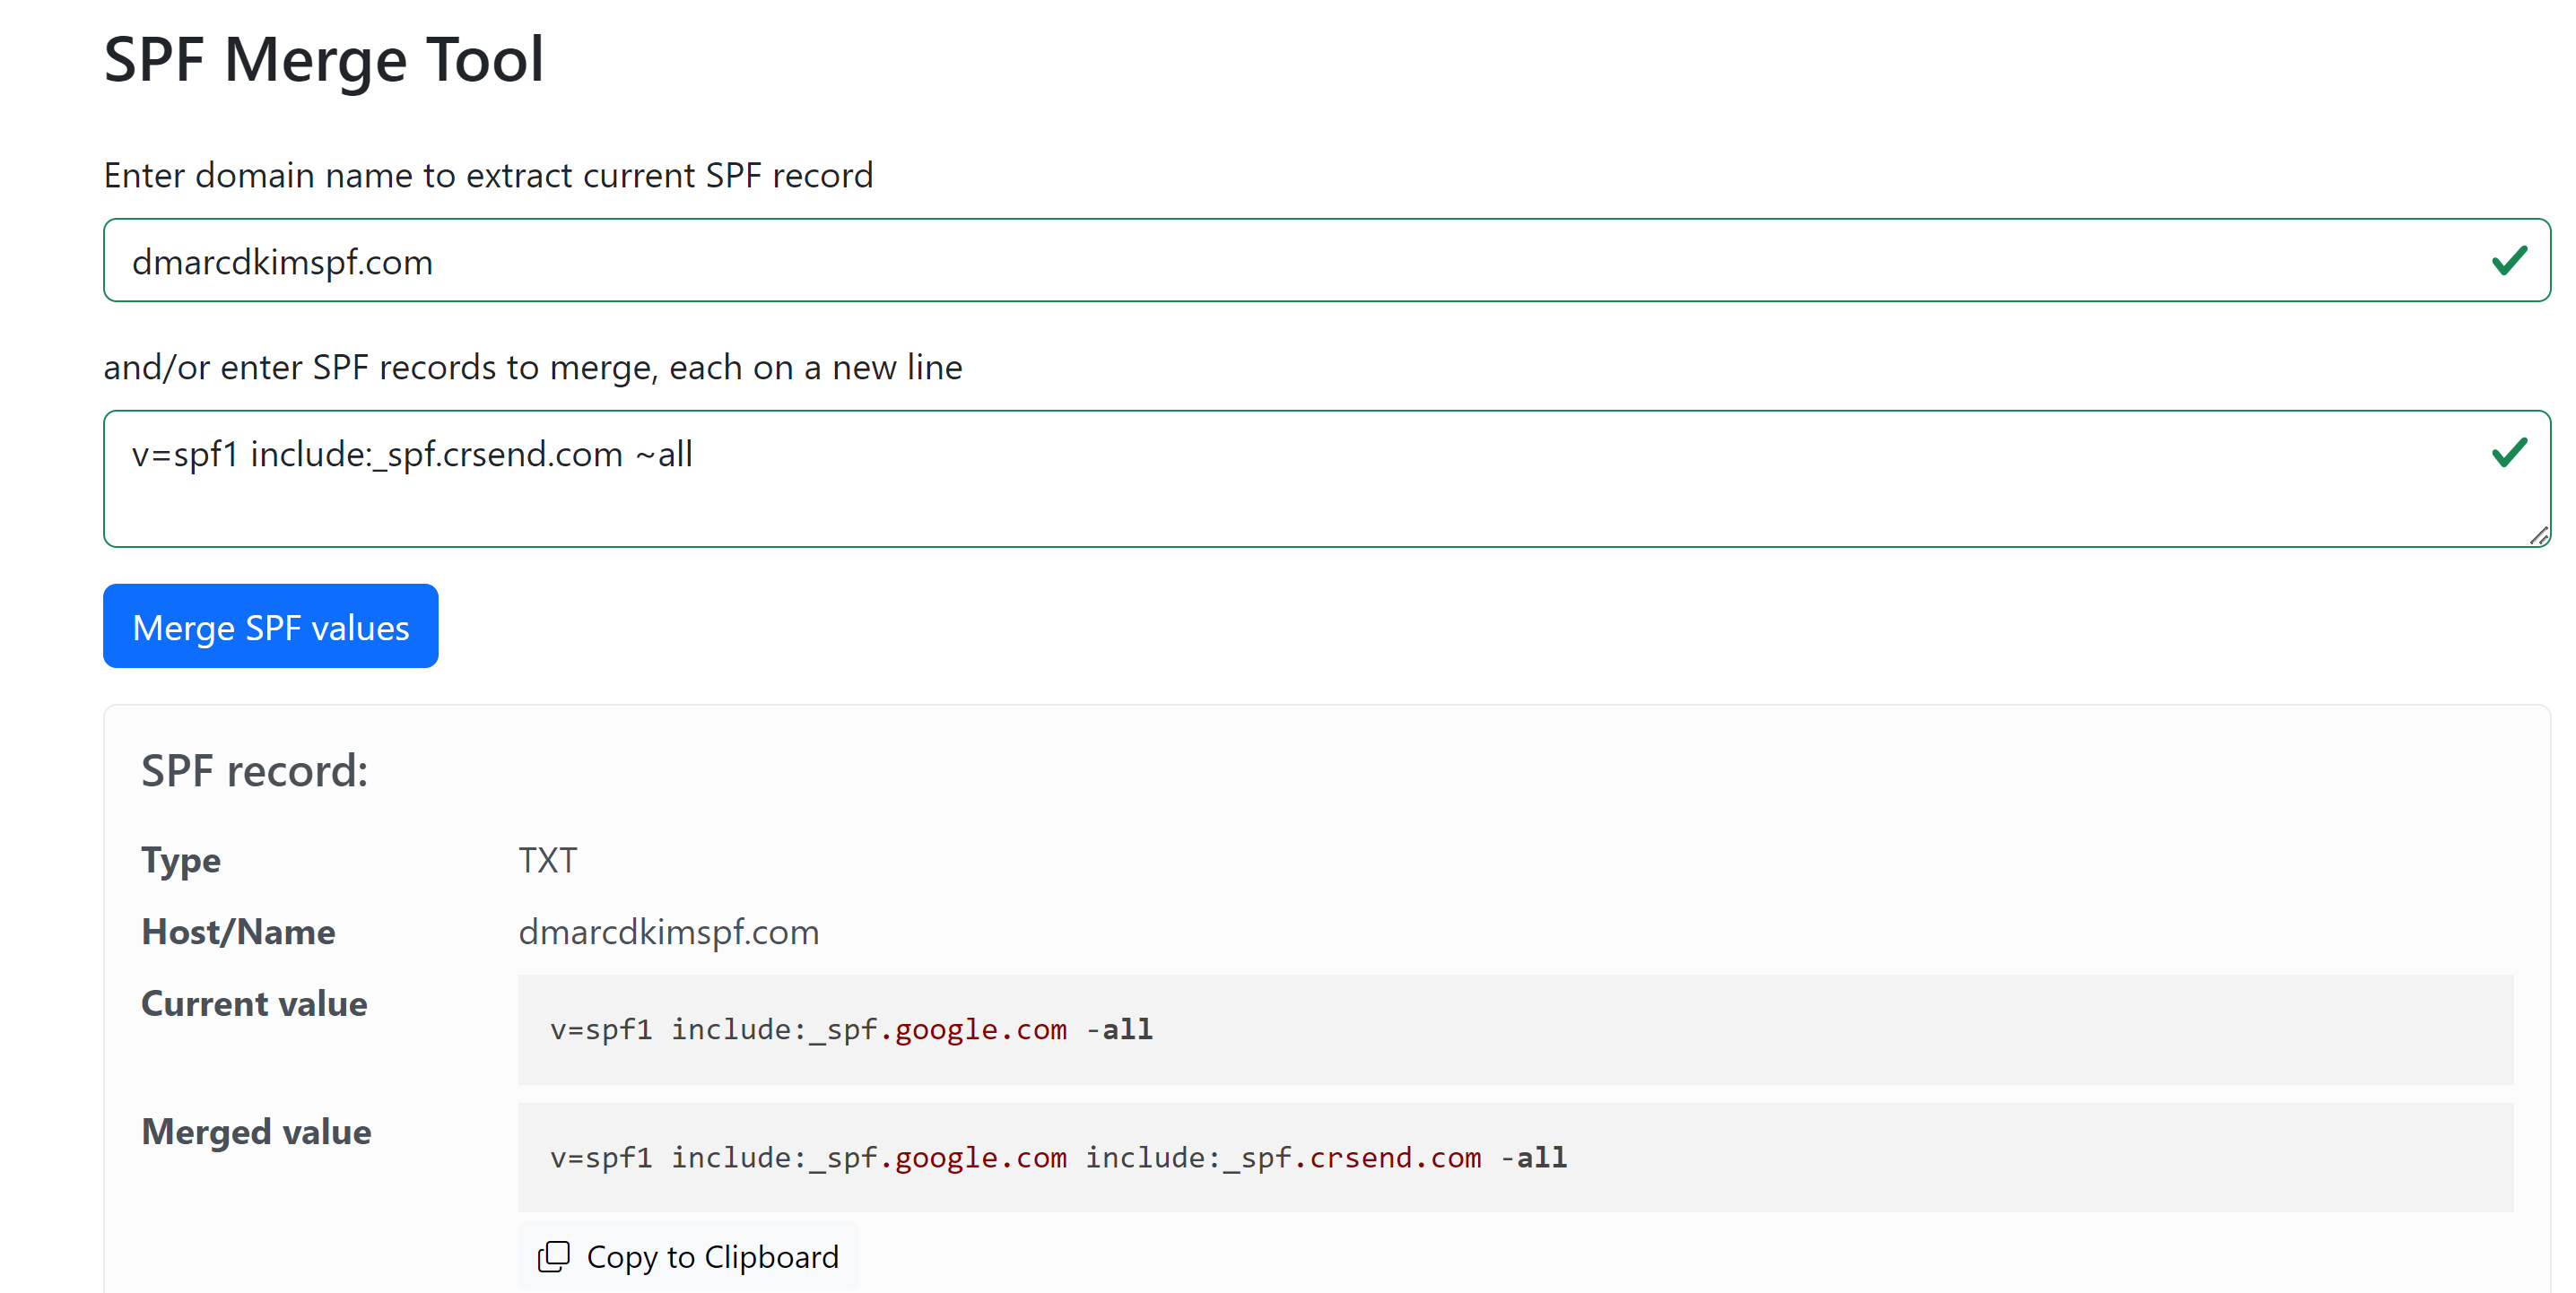
Go to the SPF Merge Tool.
Write your domain name and add the Clever Reach SPF value.
Click the "Merge SPF Value" button.
-
Add the record name and merged value to your DNS dashboard.
Configuring CleverReach DMARC:
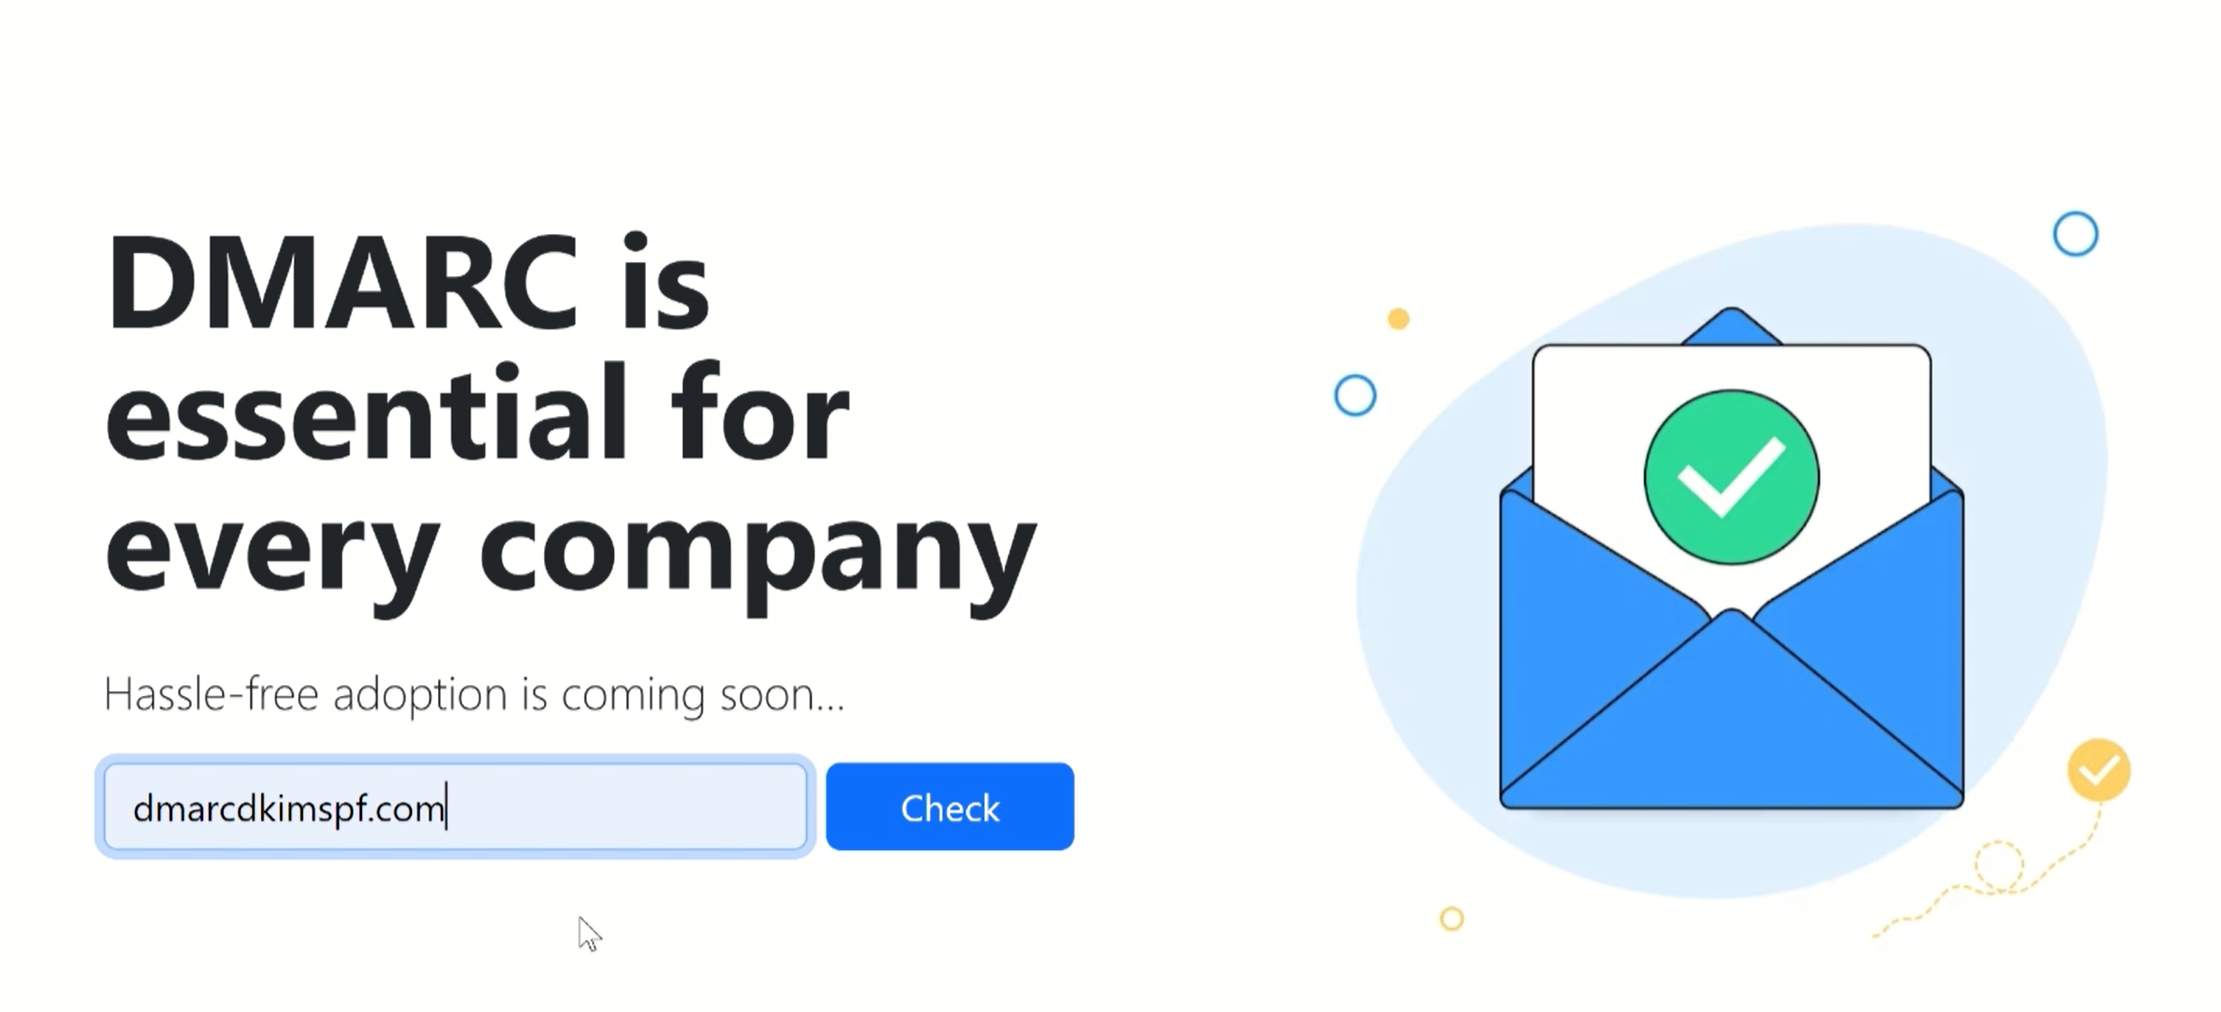
Go to the DmarcDkim.com Check Domain Tool.
-
Write your domain name and click Check.
-
The tool gives a suggested DMARC value - add it to the DNS dashboard.
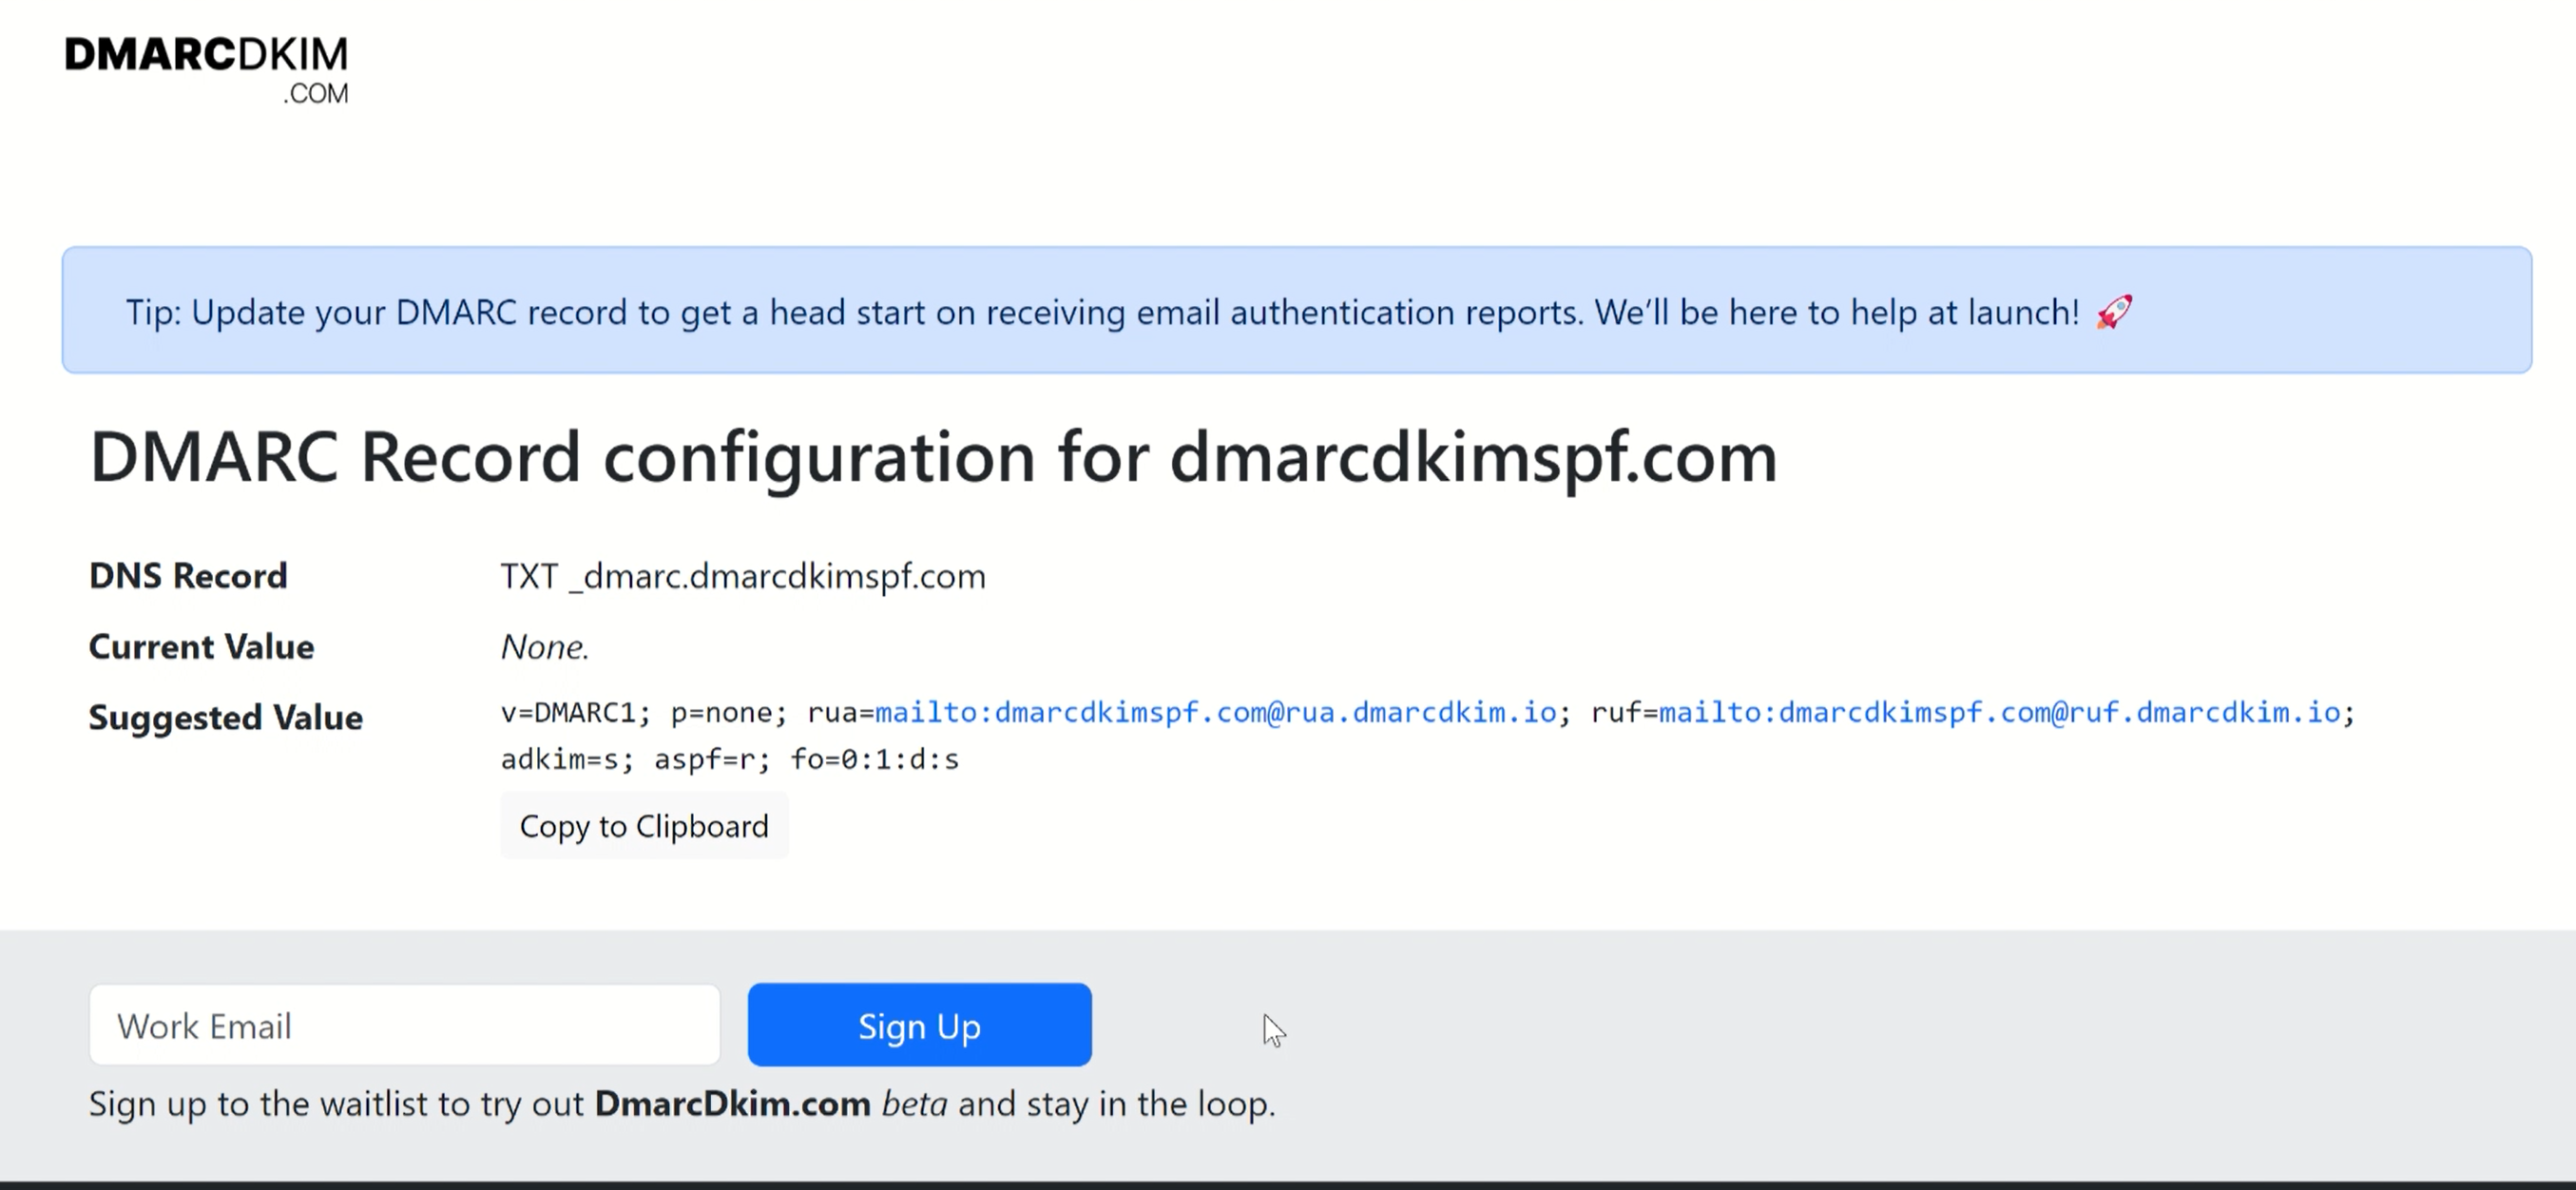
Select type TXT and click Save.
Wait up to 48 hours for the DNS changes to propagate. If the records are not verified after the given time, it indicates a potential misconfiguration in your DNS records.
You can hire a DmarcDkim.com expert to determine where the issue lies.
Check domain and follow the instructions to nail down your DMARC configuration.
No expert knowledge needed!


