Configure Domain Authentication with Moosend - DKIM, SPF, DMARC records
Check your domain for DMARC, DKIM, SPF and MX records. Get a free report.
- The impact of Business Email Compromise
- A quiet Google update just made SPF more forgiving
- Cyber Insurance and DMARC Enforcement
- Email impersonation scams explained
- TLS-RPT Record
- SMTP Smuggling
- 🇩🇪 Welche Hosting Anbieter unterstützen DMARC
- Manual DMARC Monitoring vs Automated Monitoring
- Reverse Engineering Phishing
- DMARC Enforcement in 2026
- DMARC for non sending domains
How to configure Moosend DKIM, SPF, and DMARC records?
When you send an email, mailbox providers (Yahoo, Gmail, Outlook, etc.) need verification whether emails are coming from an authorized sender or a spammer. No matter which email delivery service you use, you need to set up sender authentication for your email domain so your emails don't get flagged as spam.
There are three commonly used DNS records to authenticate your webmail; DKIM (DomainKeys Identified Mail), SPF (Sender Policy Framework), and DMARC (Domain-based Message Authentication, Reporting, and Conformance).
These records can be generated through a reputable email marketing platform such as Moosend. Adding the CNAME and TXT records to your DNS provider can get you lost. That's where we come to help.
In this article, we'll walk you through the sender domain authentication process so you can enjoy safe and efficient email communication.
Configuring Moosend DNS Records:
Begin by setting up your account on Moosend using the email address you intend to authenticate for your email marketing efforts. This step ensures seamless communication and validation within the platform.
-
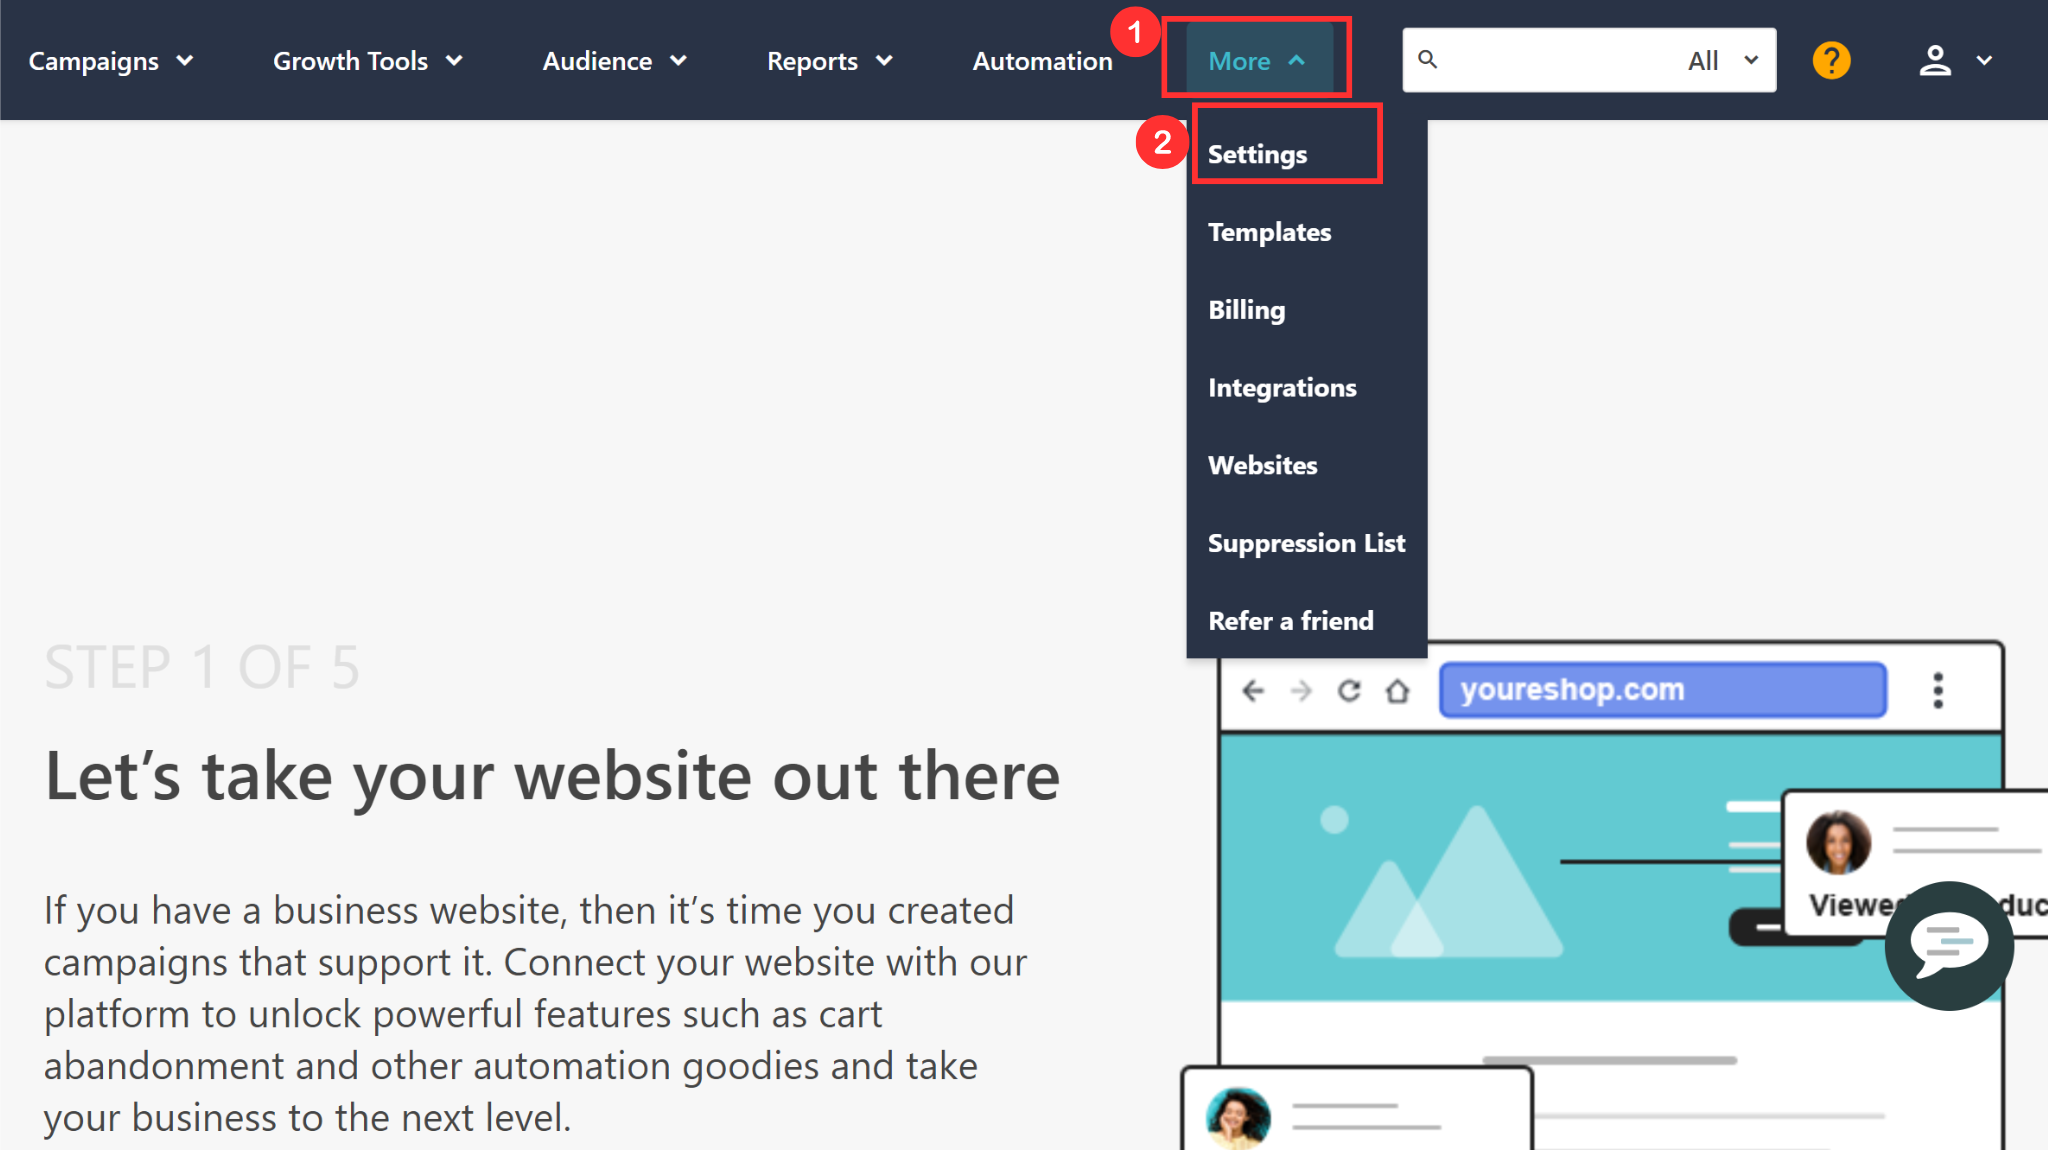
In the top menu bar, click More and go to Settings.
-
Click the Senders option in the left side panel and you'll see your email already added here. Moosend adds your default email here which you used for signing up the account.
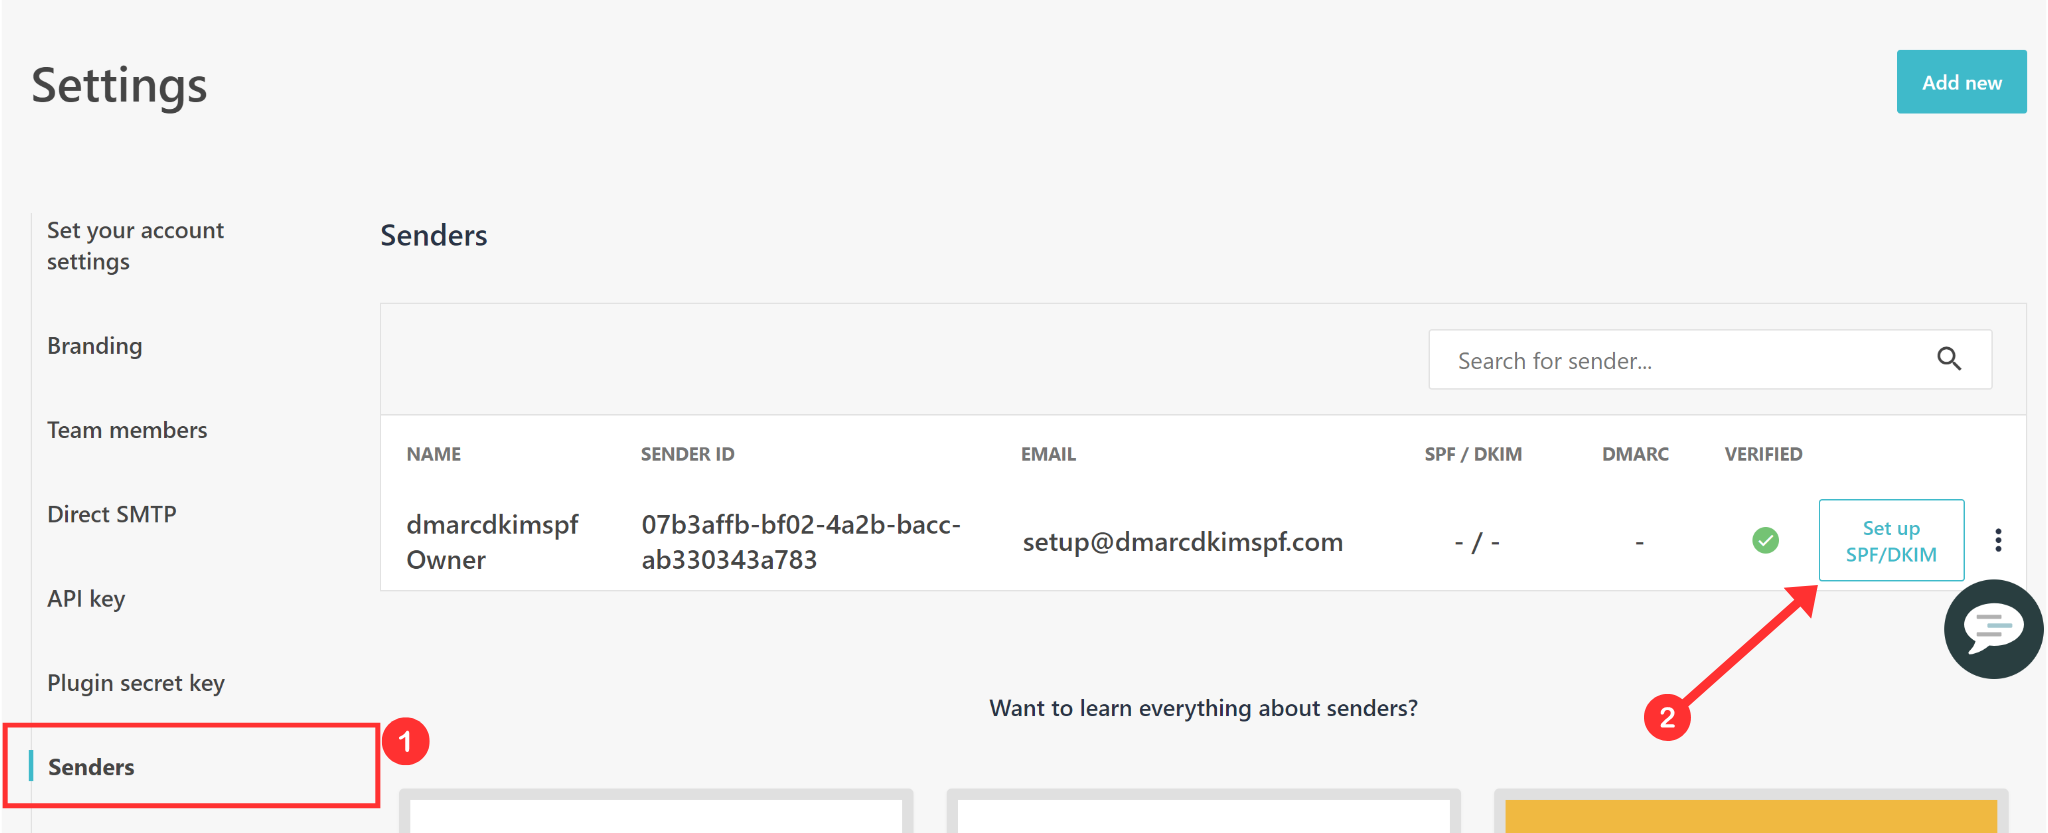
If you want to add any other email for domain verification, click "Add new" and save a new email.
-
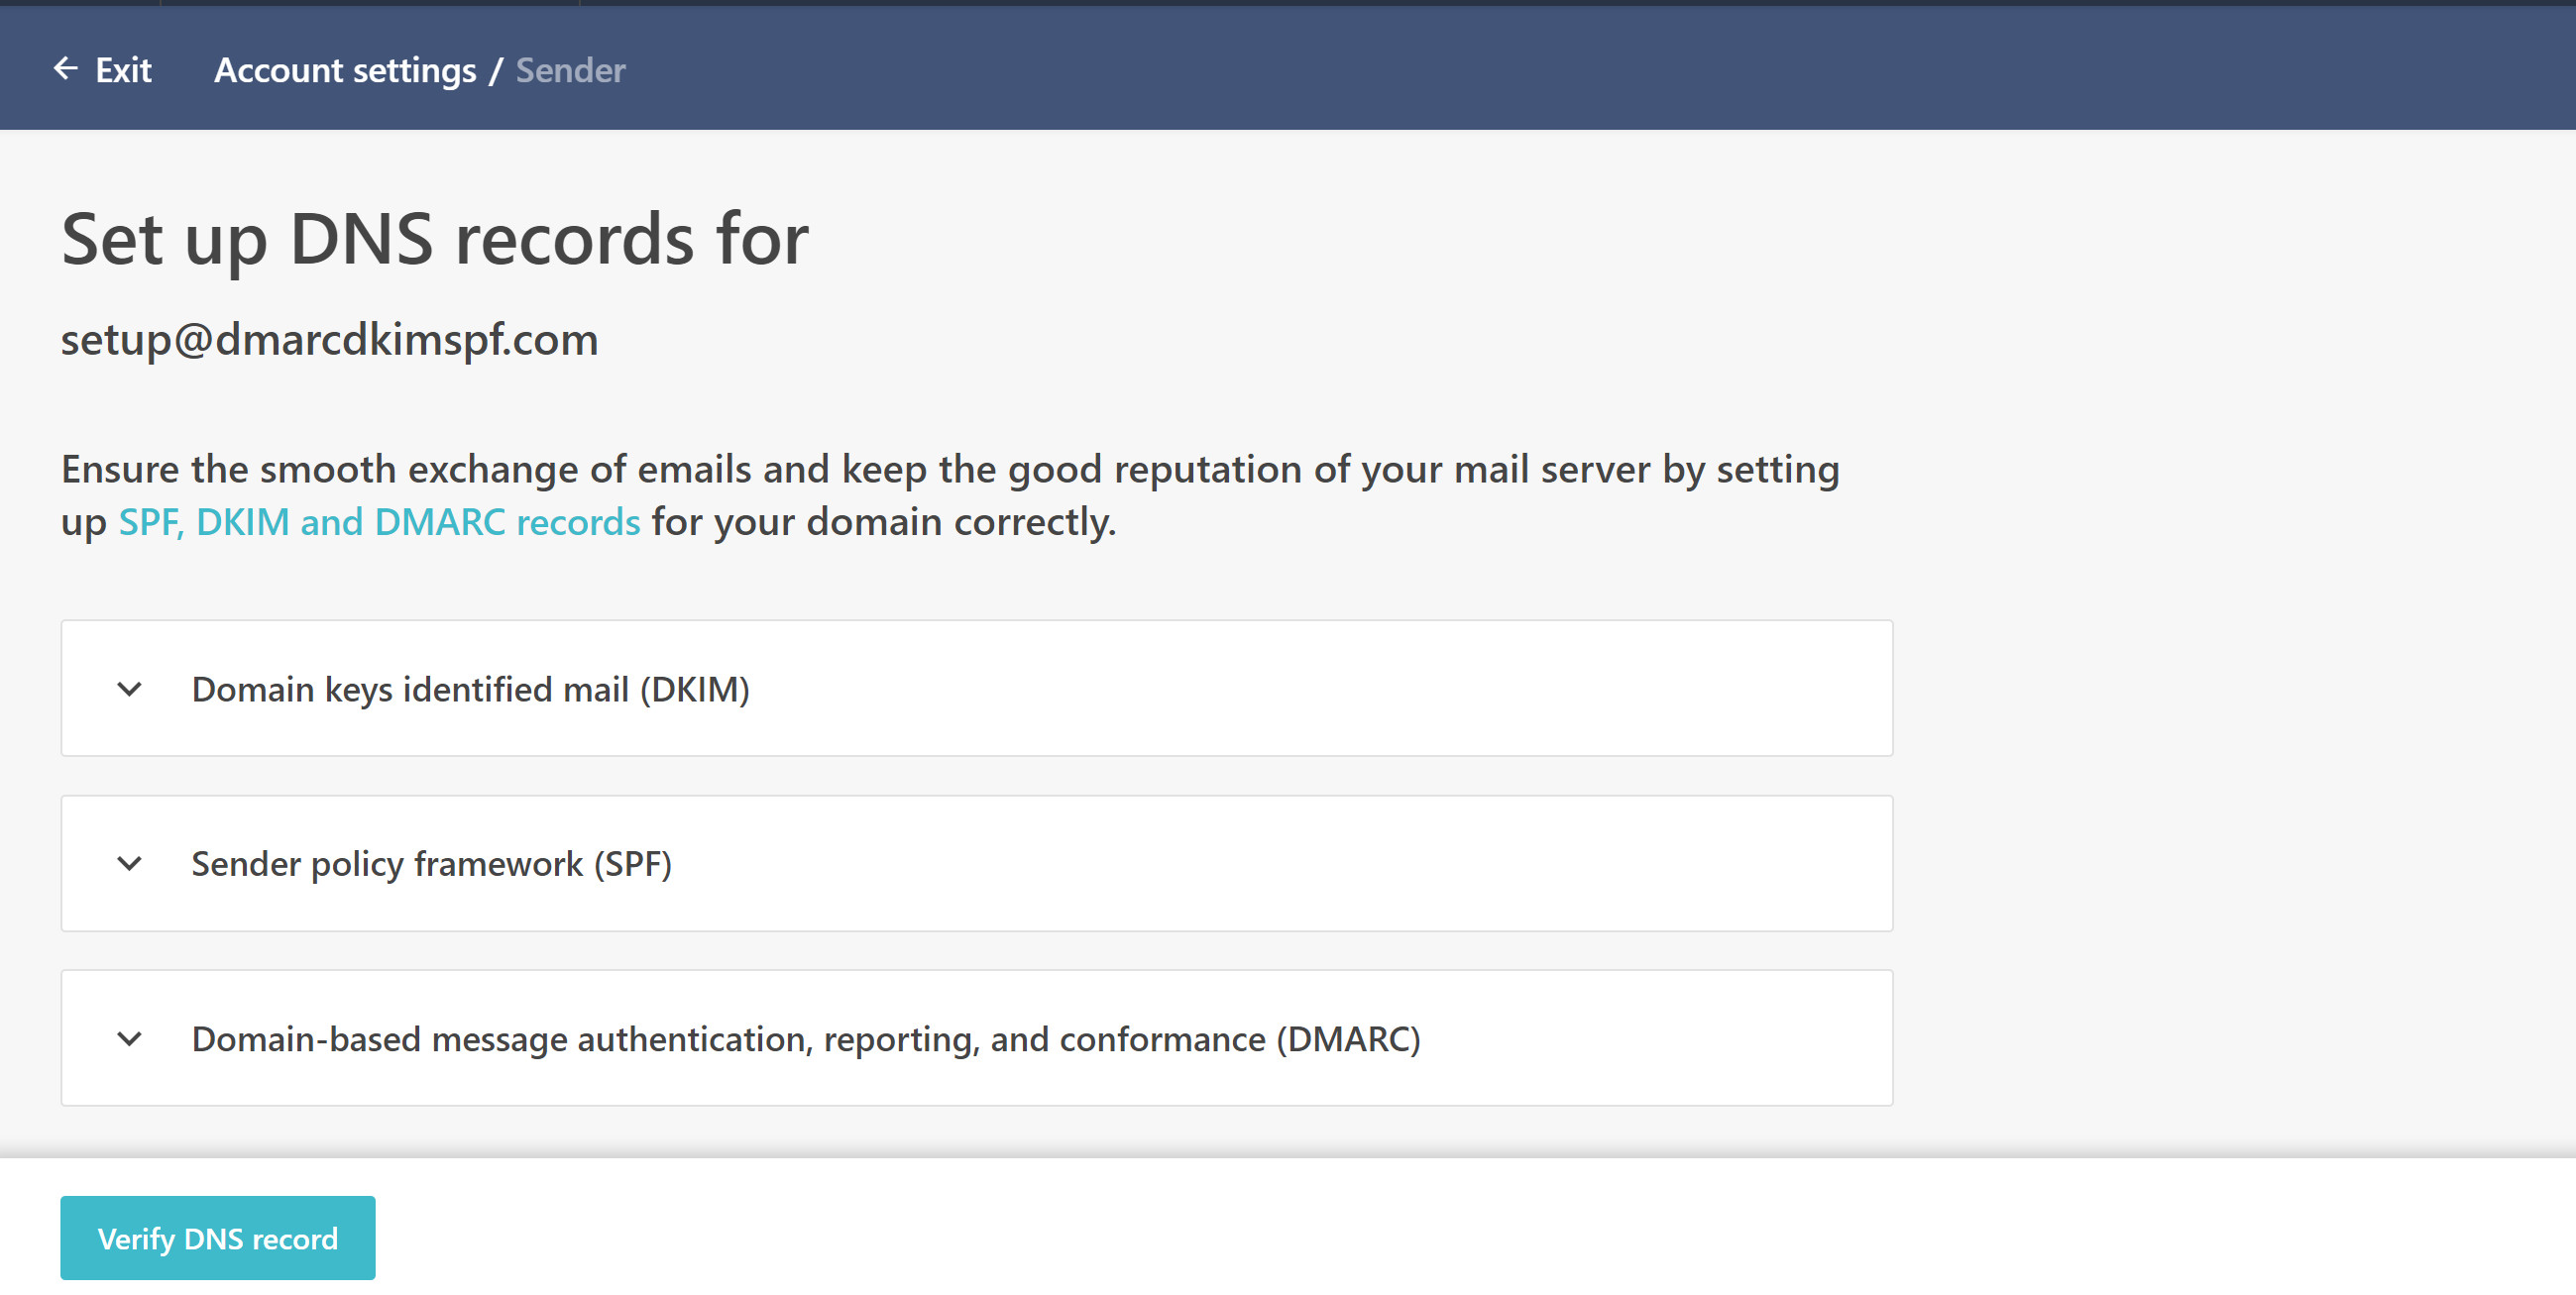
Click Setup SPF, DKIM next to your email and you'll see the DNS (CNAME and TXT) records on the next screen.
Adding Moosend DKIM Record:
For this guide post, we are using Cloudflare but you can add DNS records to any DNS provider you use.
-
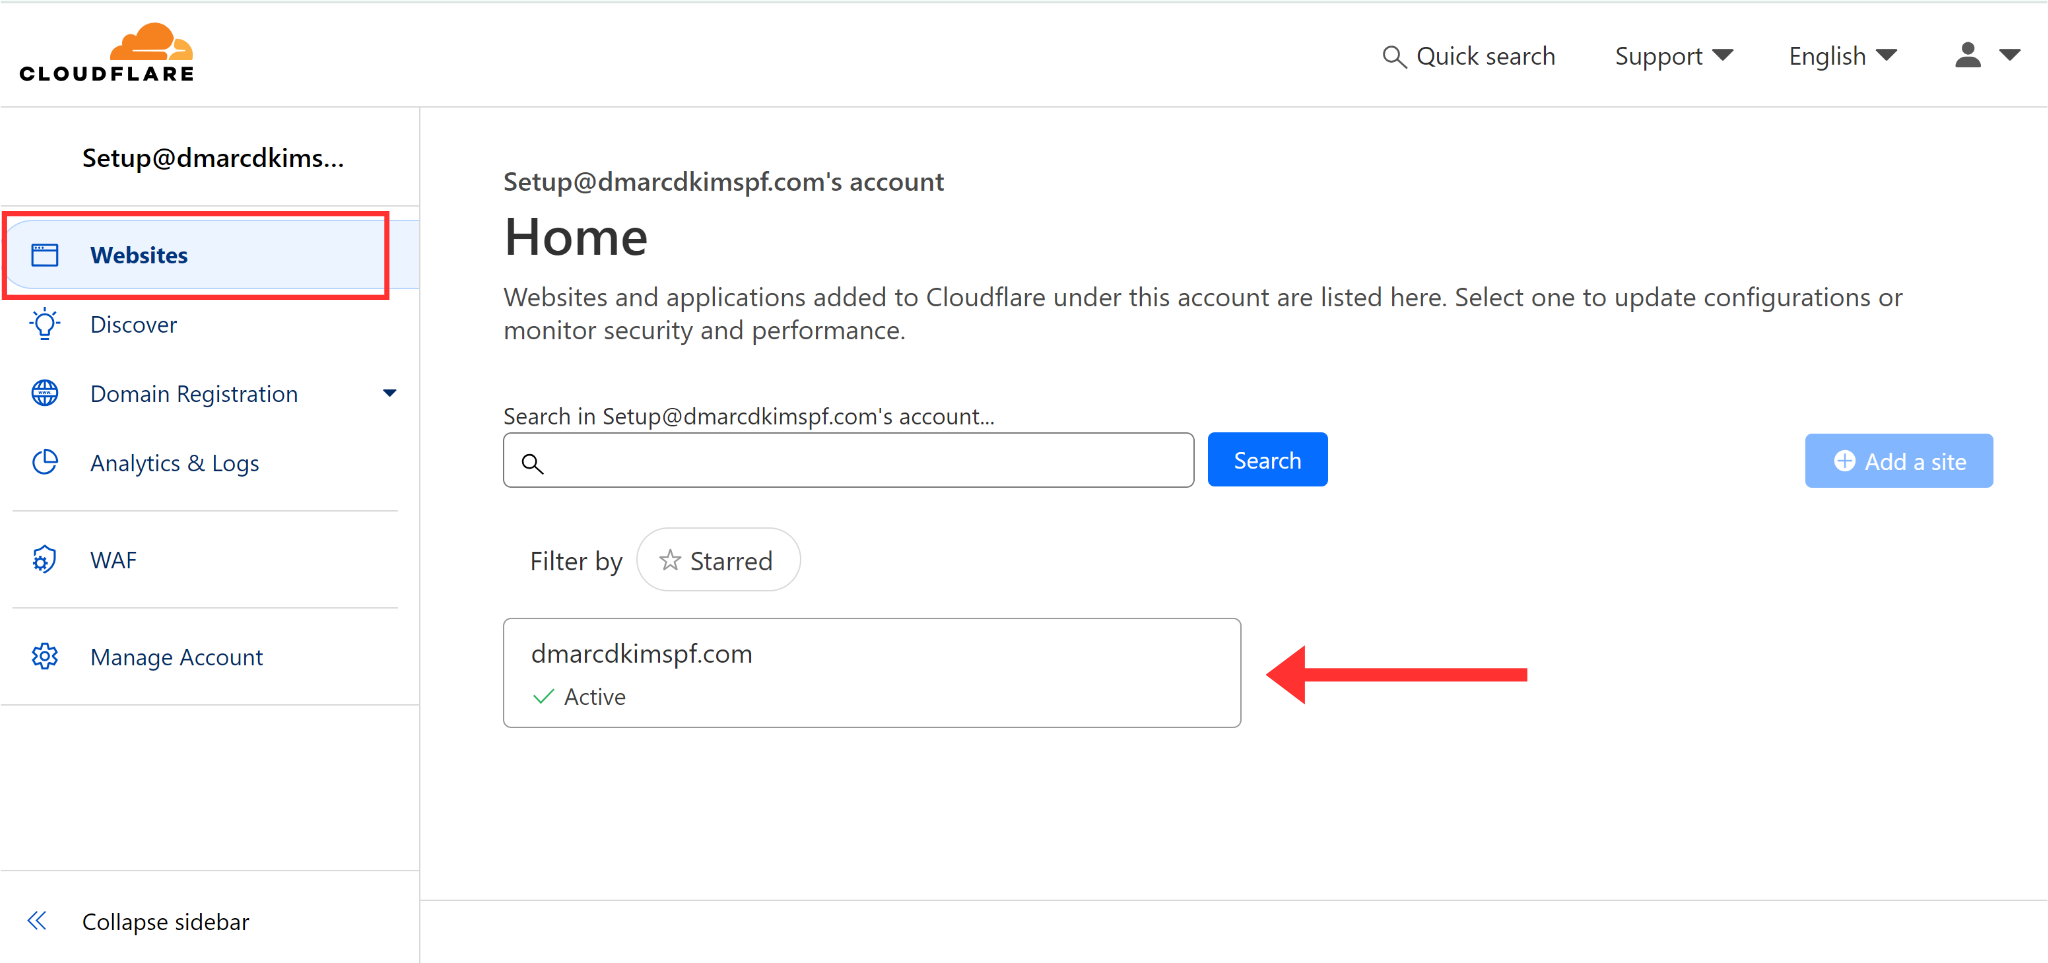
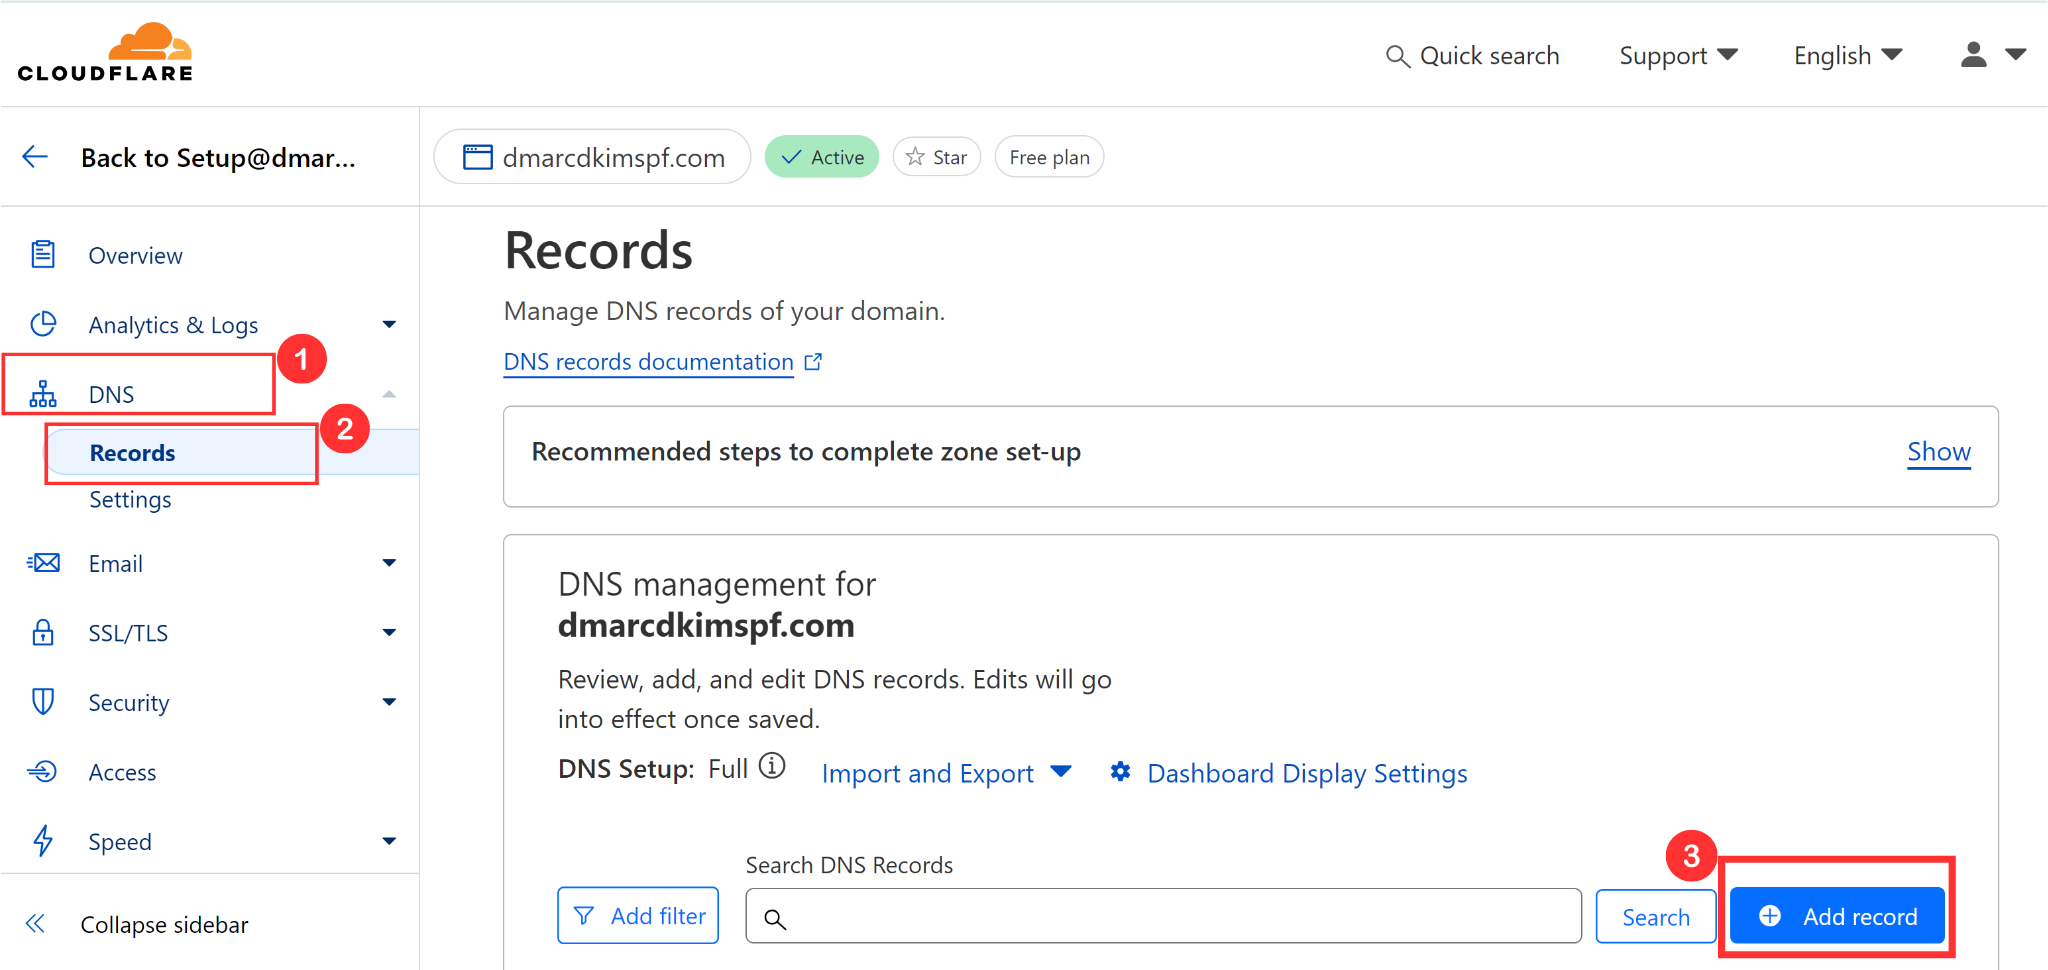
To open Cloudflare DNS settings, click your Website in the Home tab.
-
Next, click DNS, select Records, and hit the Add Record button.
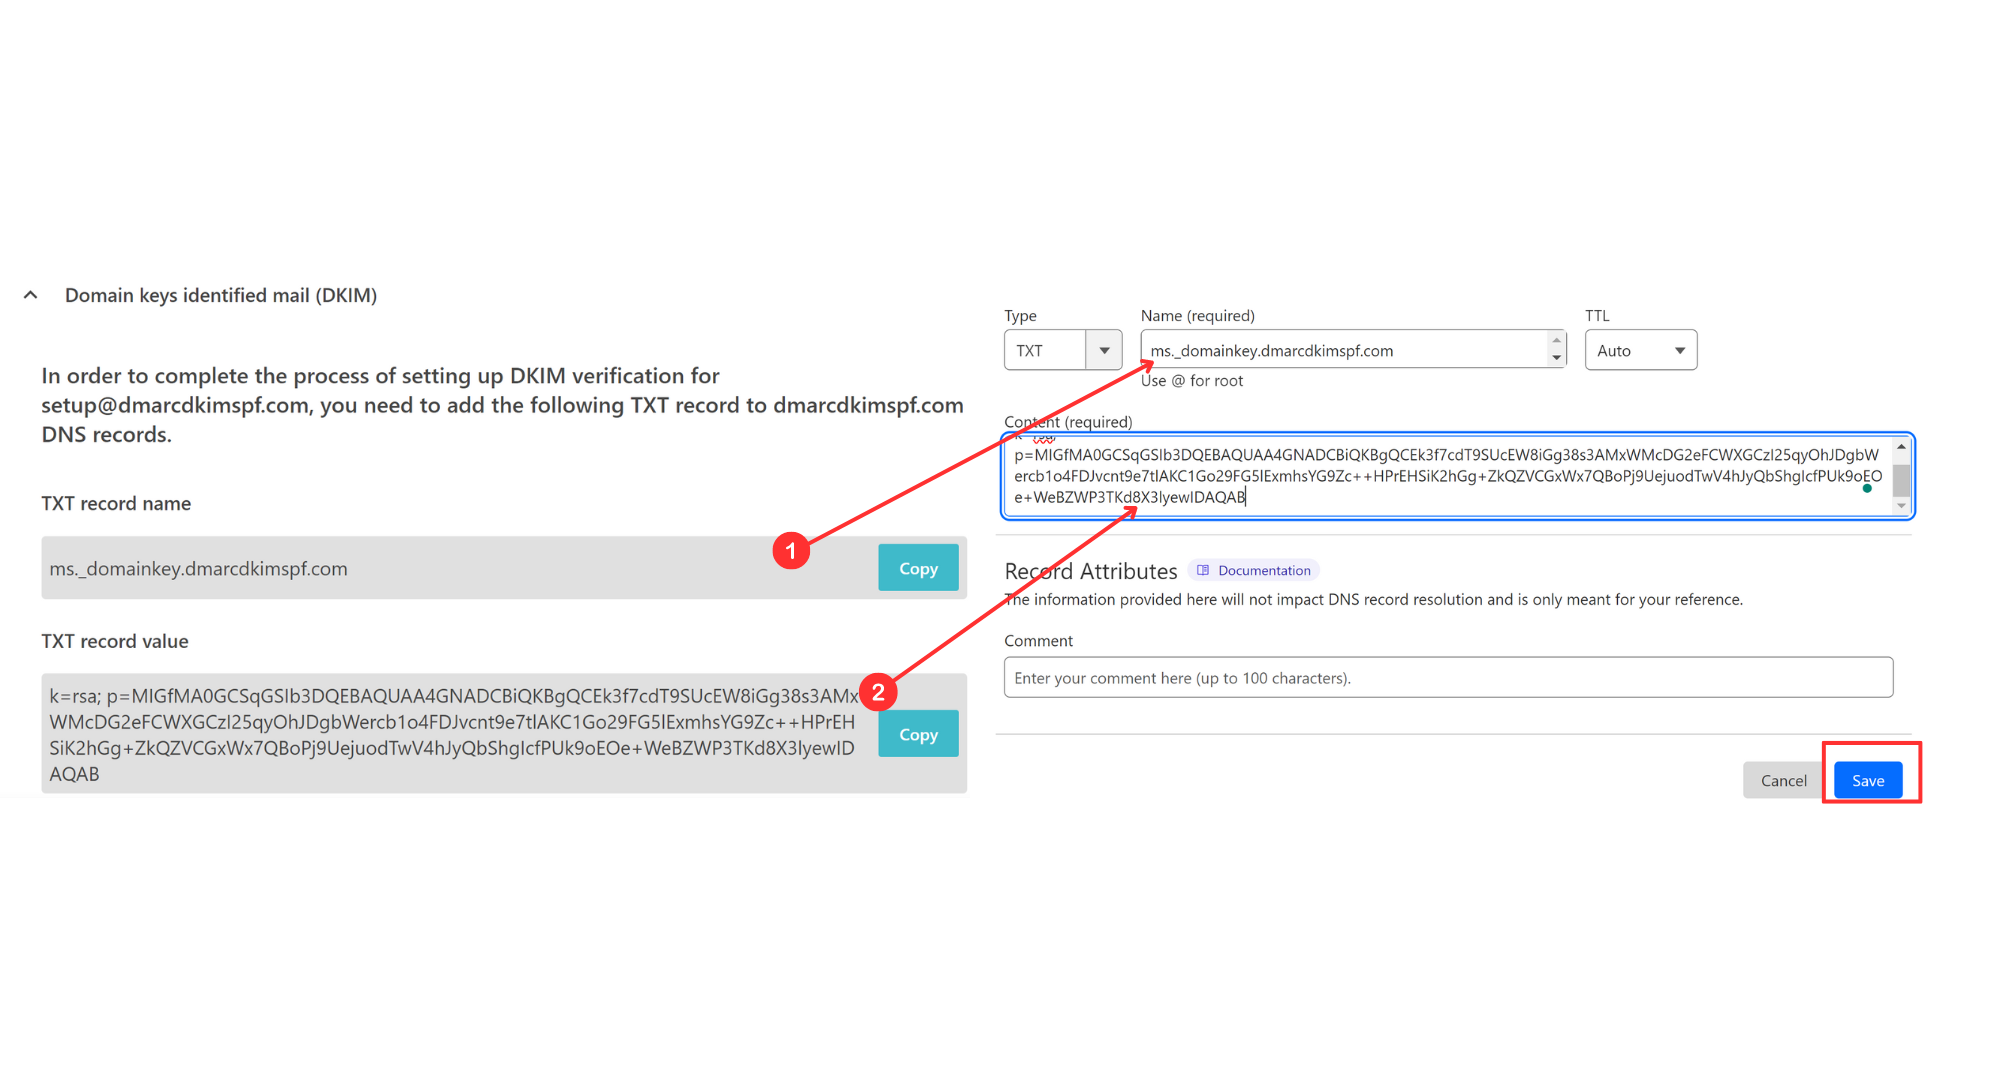
Copy the TXT DKIM record name and paste it into the Name field in the DNS provider.
Then copy the TXT record value and paste it into the Content filed in the DNS provider
-
Finally, hit the Save button in the bottom right corner.
Adding Moosend SPF Record:
Before adding an SPF record, make sure there is no SPF already added to the DNS dashboard. If you add more than one SPF record, one will stop working.
To avoid such conflicts, use the SPF Merge Tool, which intelligently unites multiple SPF records into one.
In the SPF Merge tool, write your domain name, and enter the Moosend SPF value.
-
Click Submit and the tool will automatically detect other SPF records added to the DNS provider, and merge them into one.
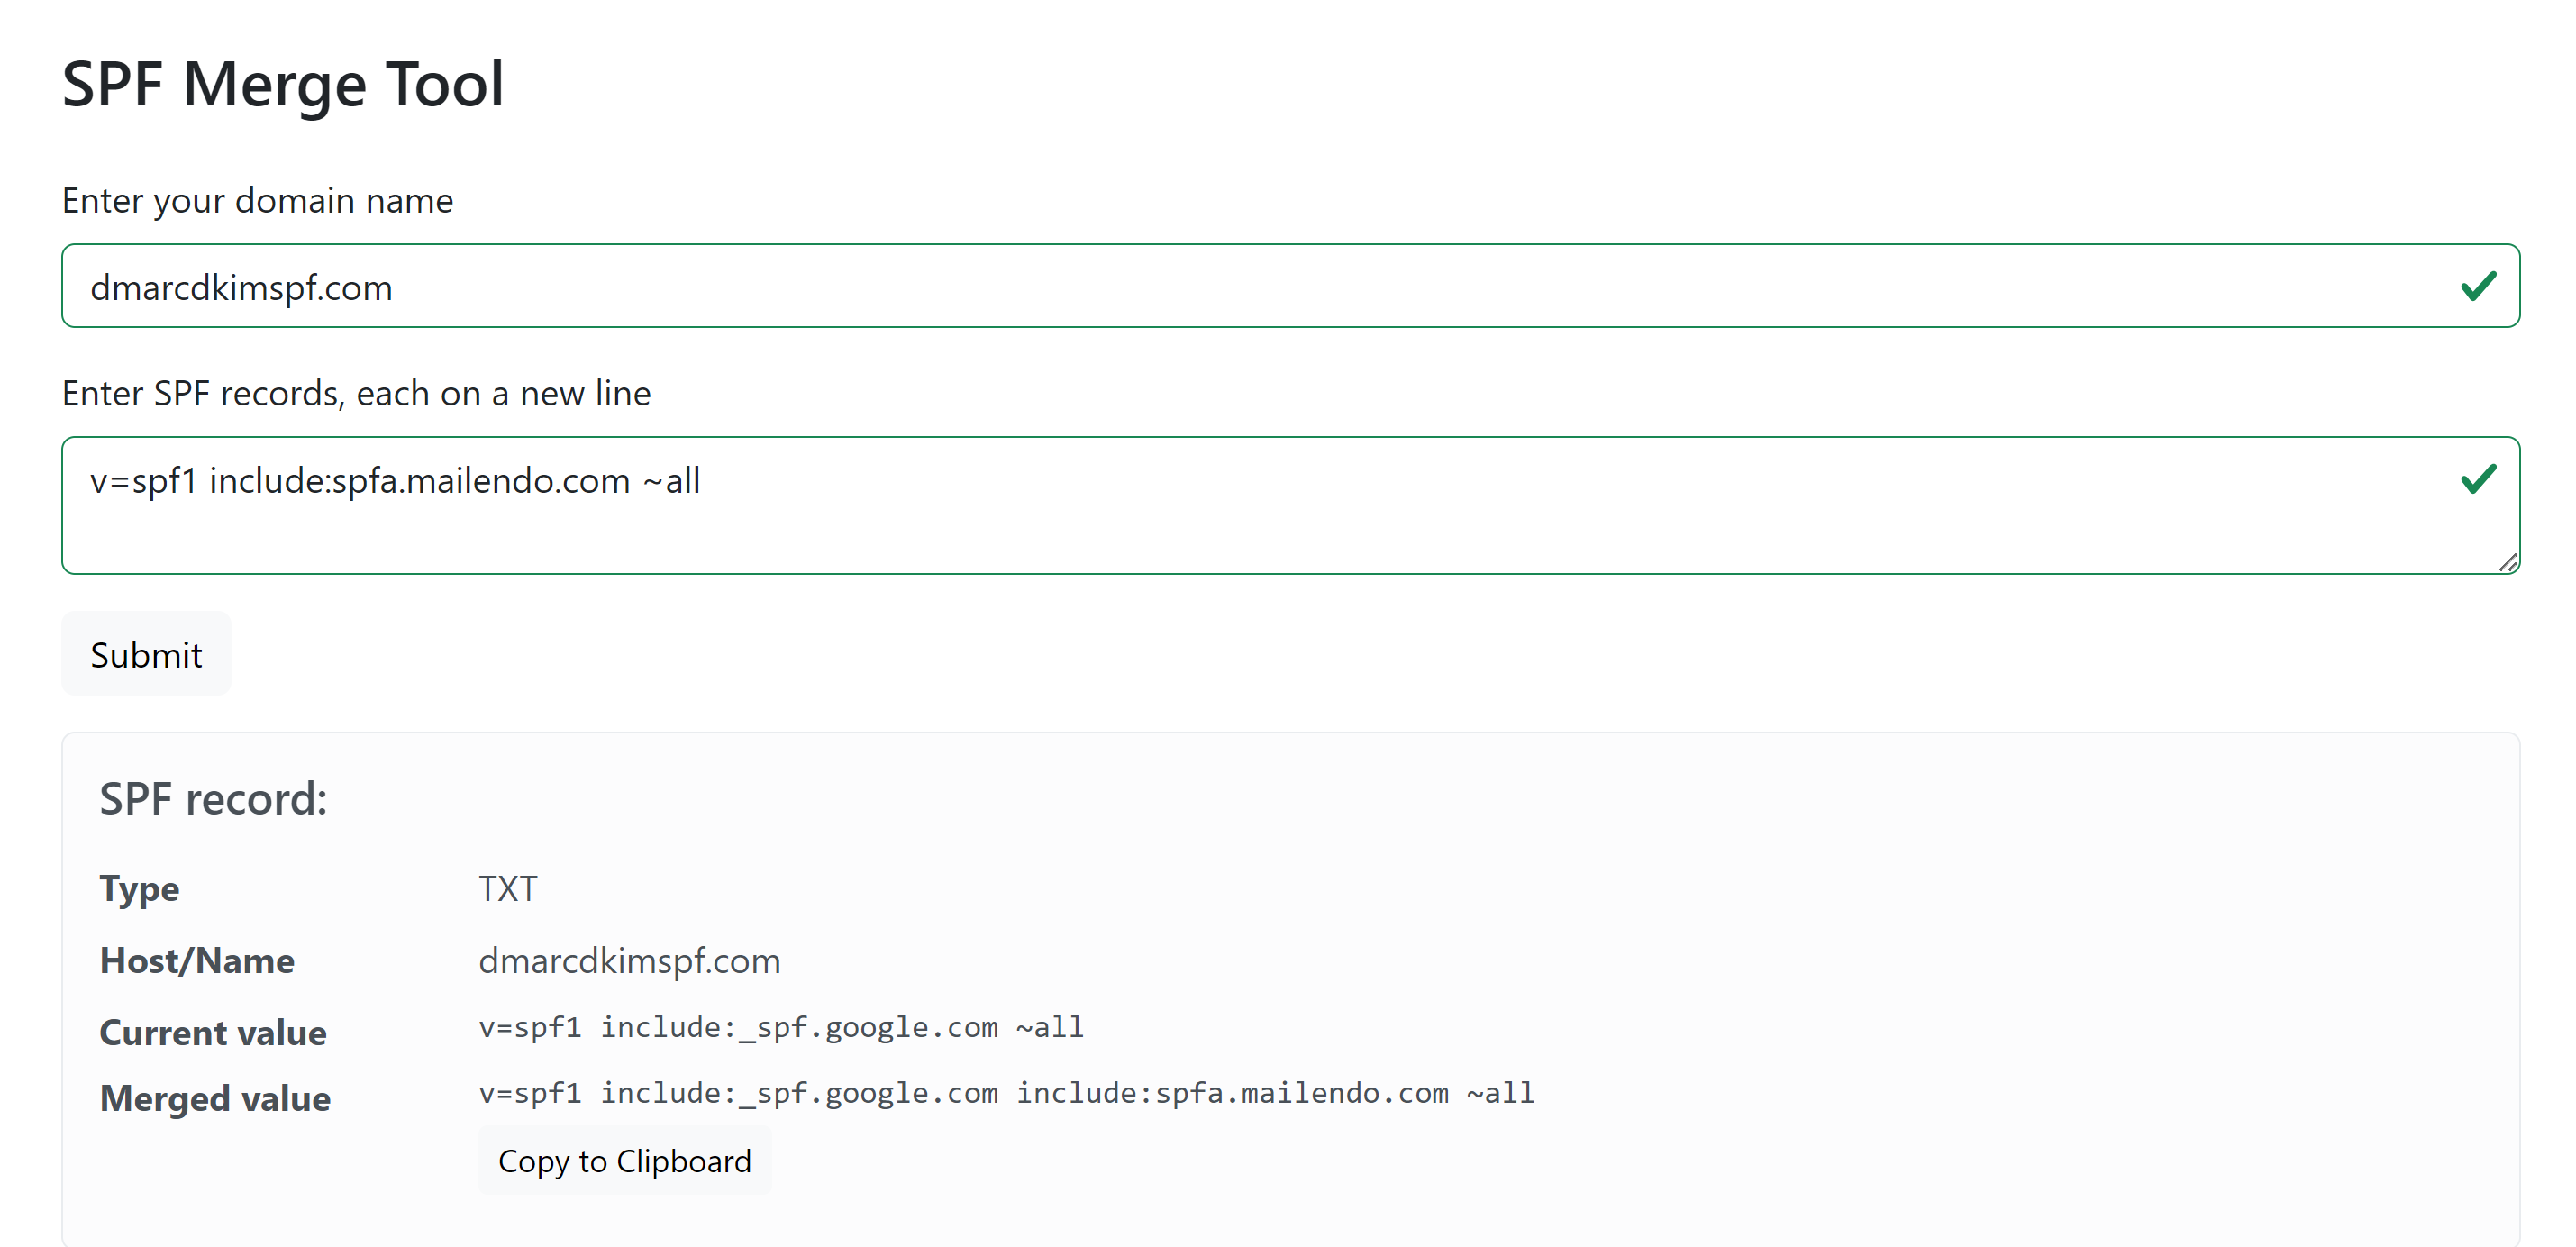
Add the merged TXT SPF value in your DNS dashboard and delete previous, individual SPF records.
Adding Moosend DMARC Record:
Usually, DMARC records provided by the email delivery services do not provide tools to leverage data from the DMARC reports, hence, you couldn't make a data-informed decision on when to enable a strict policy.
Without a strict DMARC policy, the risk of your emails being flagged as spam is higher. Only strict DMARC policy protects from email spoofing so no bad actor can send emails on your behalf.
Therefore, successful email marketers use custom DMARC values to secure their domains and improve deliverability
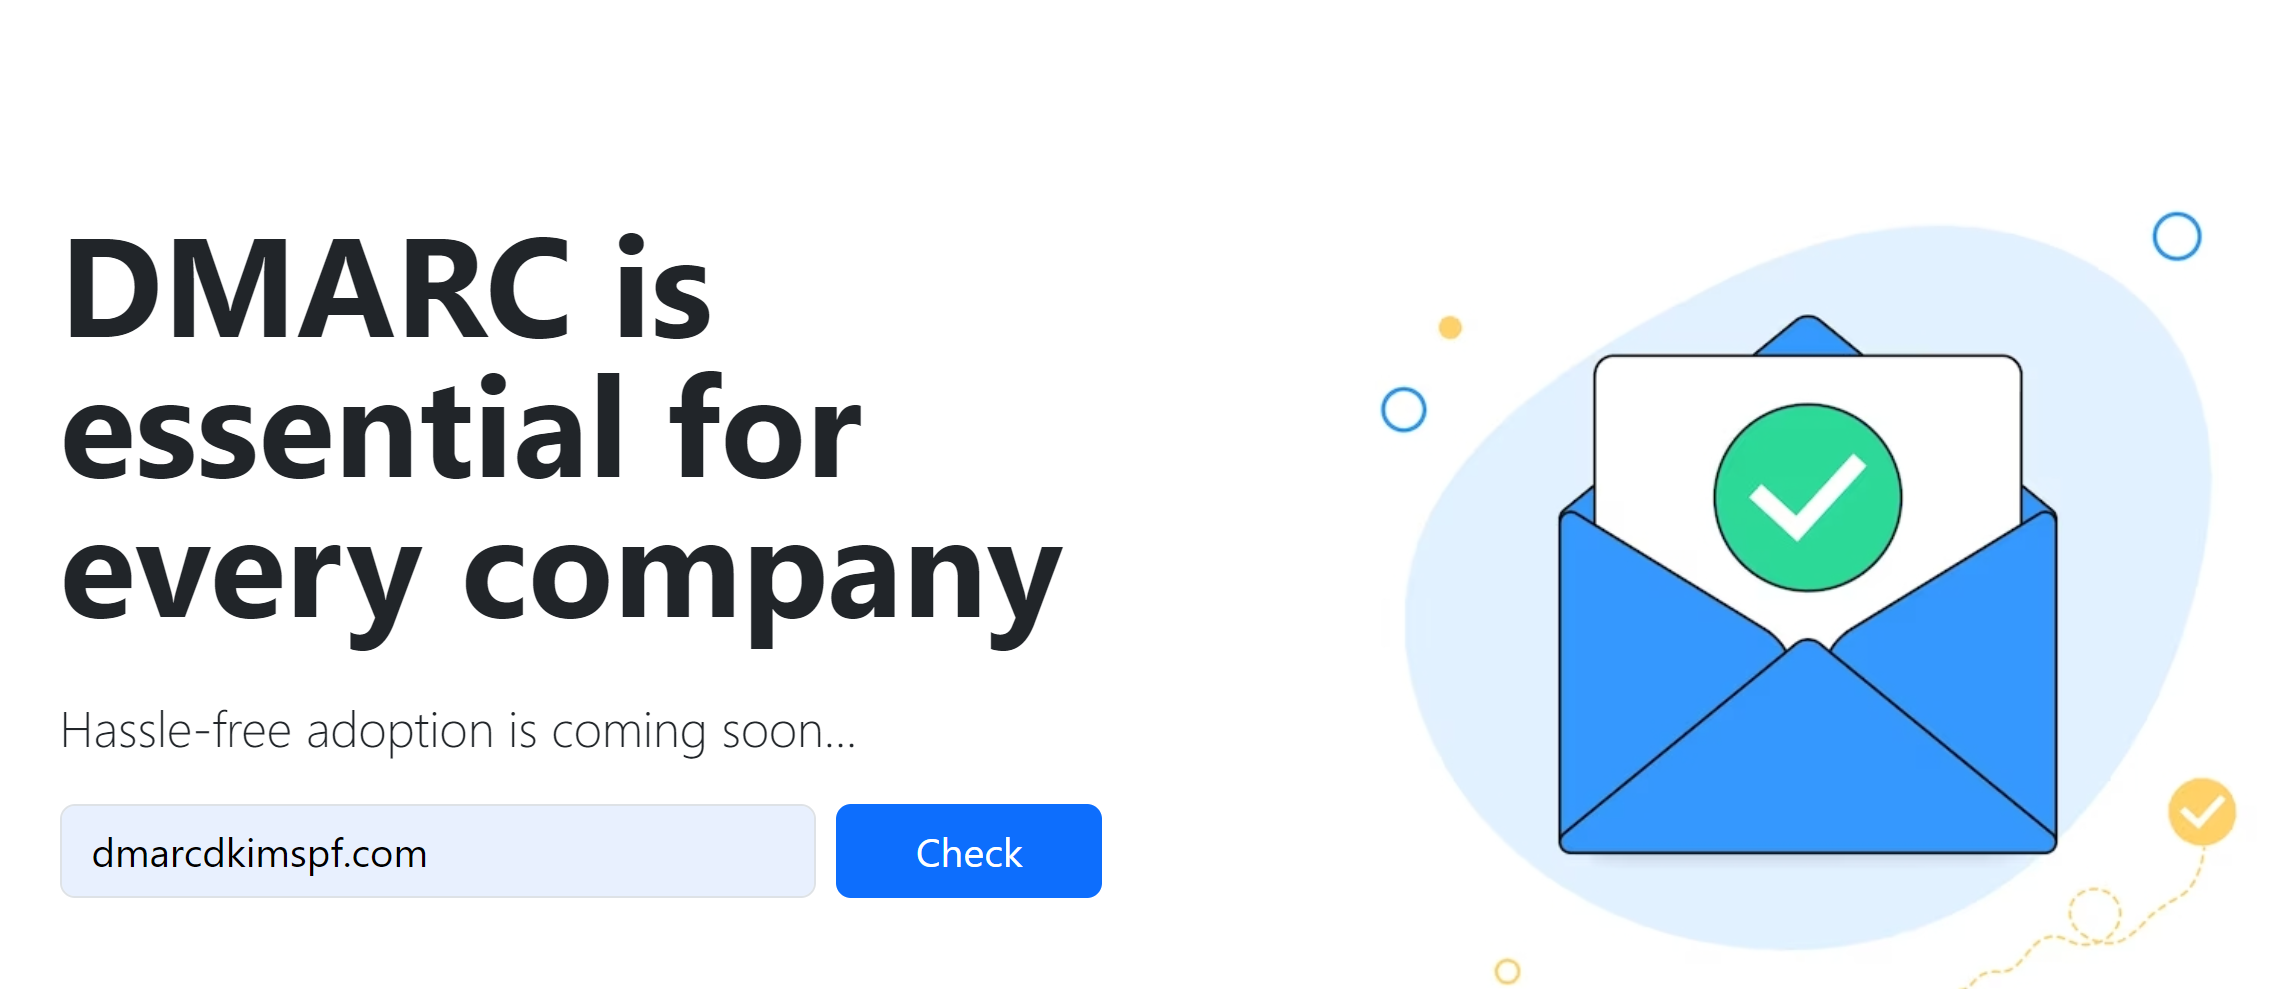
To generate an effective, strict DMARC policy over time, go to the DMARC Check Tool.
-
Enter your domain and click Check.
-
The tool gives a suggested value that analyses email-sending infrastructure and has information about what to do with non-compliant emails.
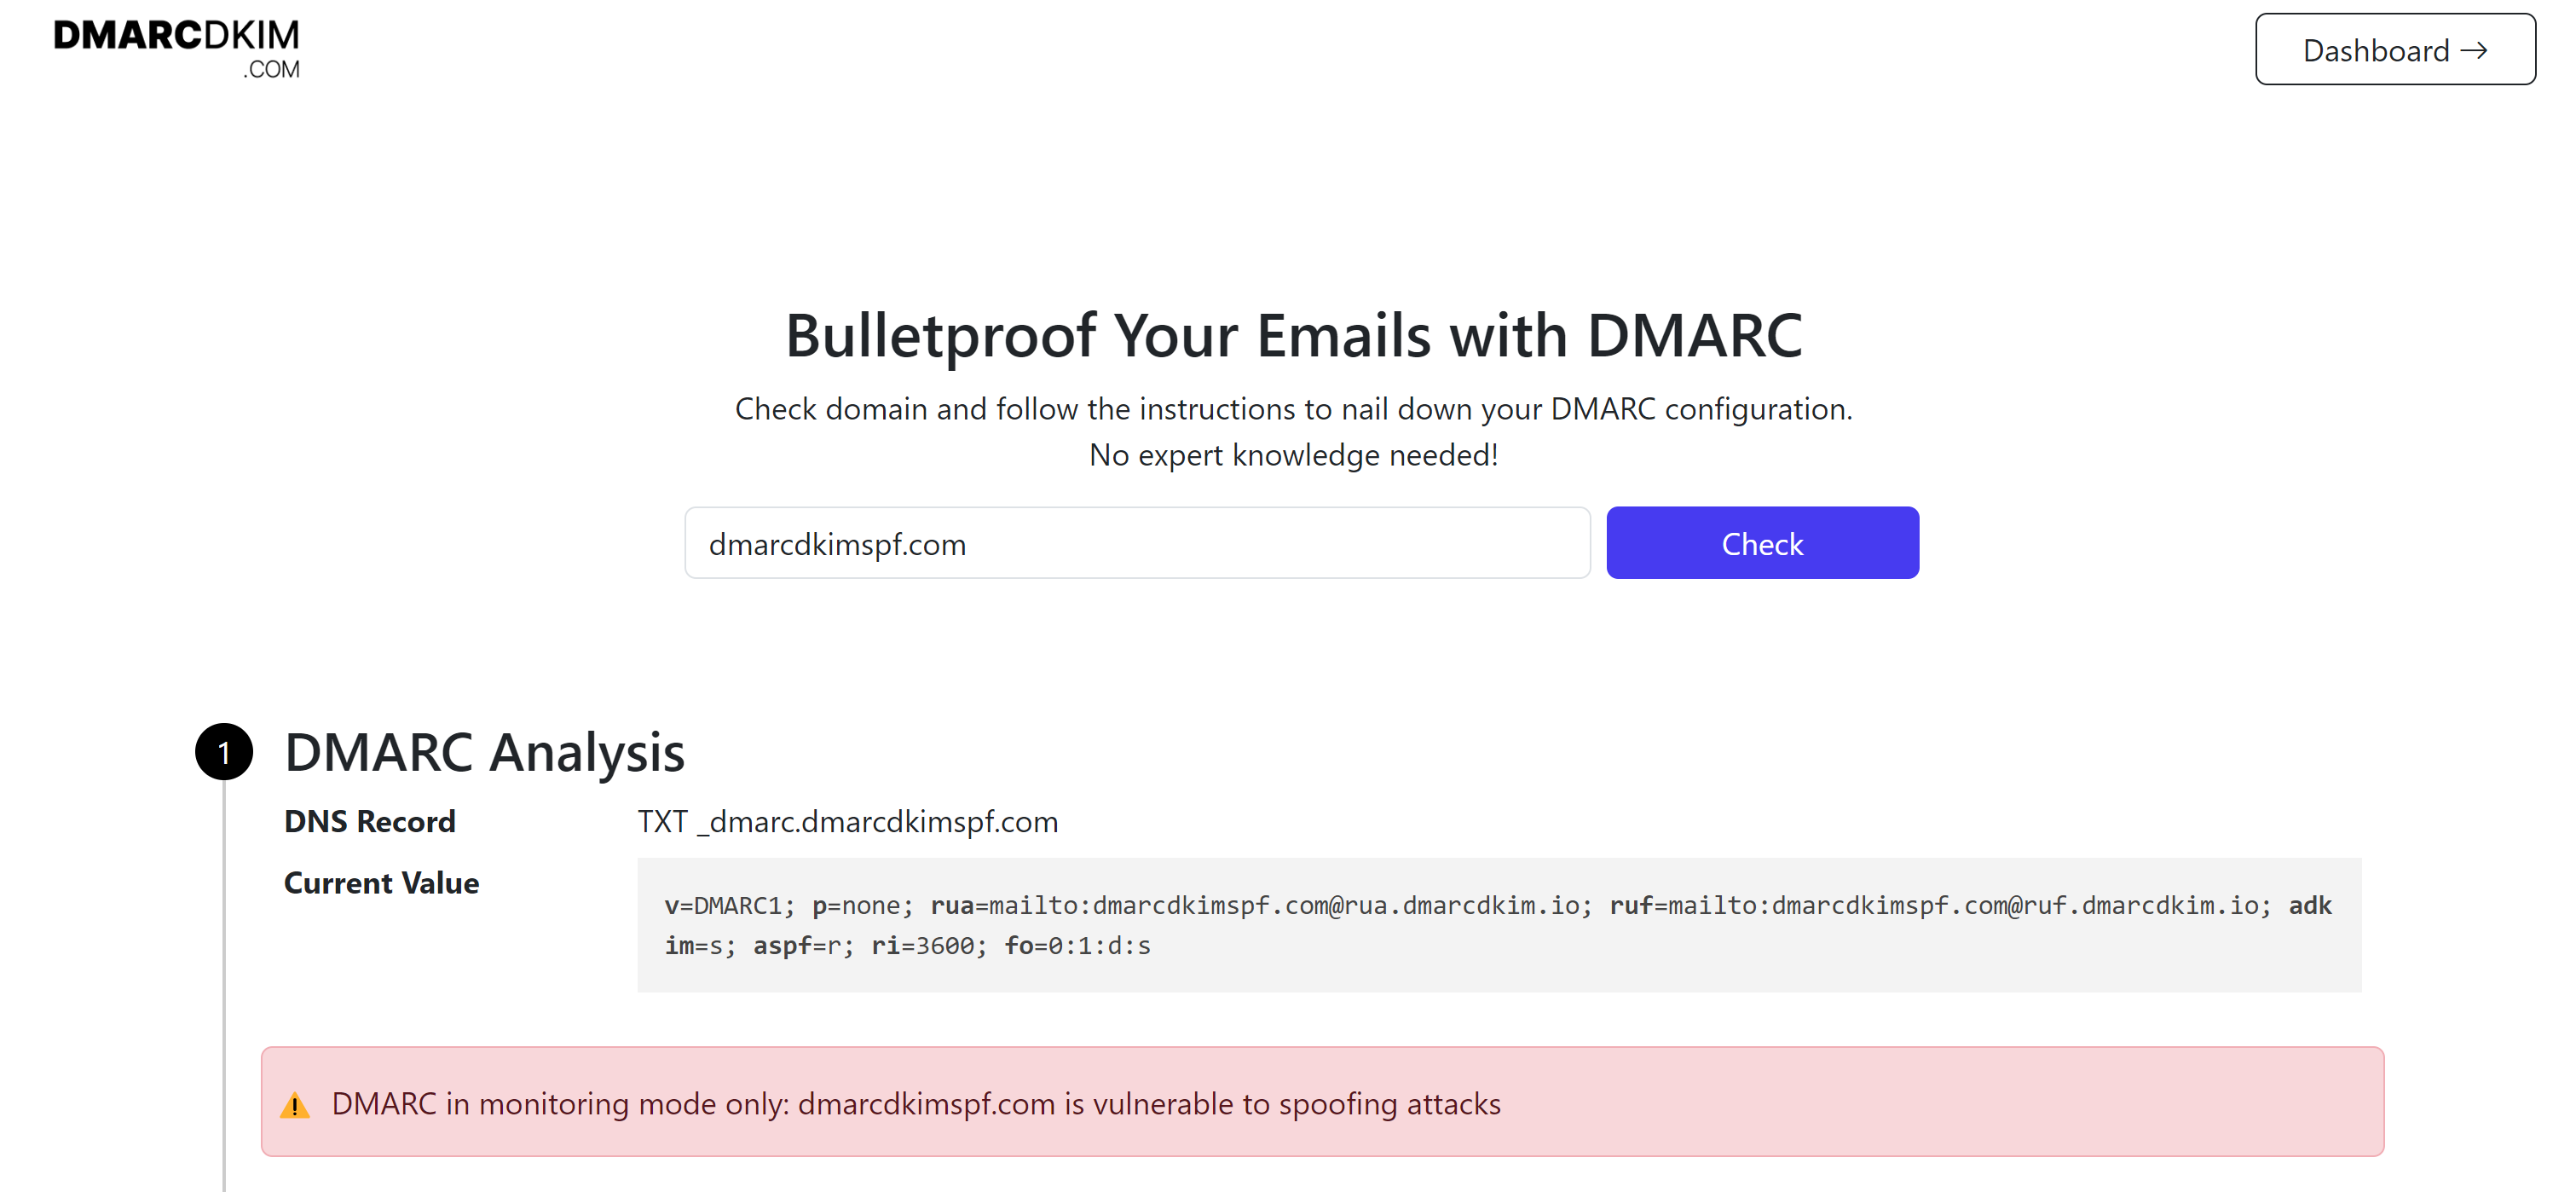
Copy the record name and suggested value and add them to the DNS provider.
Verifying Moosend DNS records:
Once all records are added, return to the DNS records page on Moosend and click the Verify DNS Records button at the bottom right corner of the screen.
If records are added successfully, you should see green checkmarks under SPF, DKIM, and DMARC.
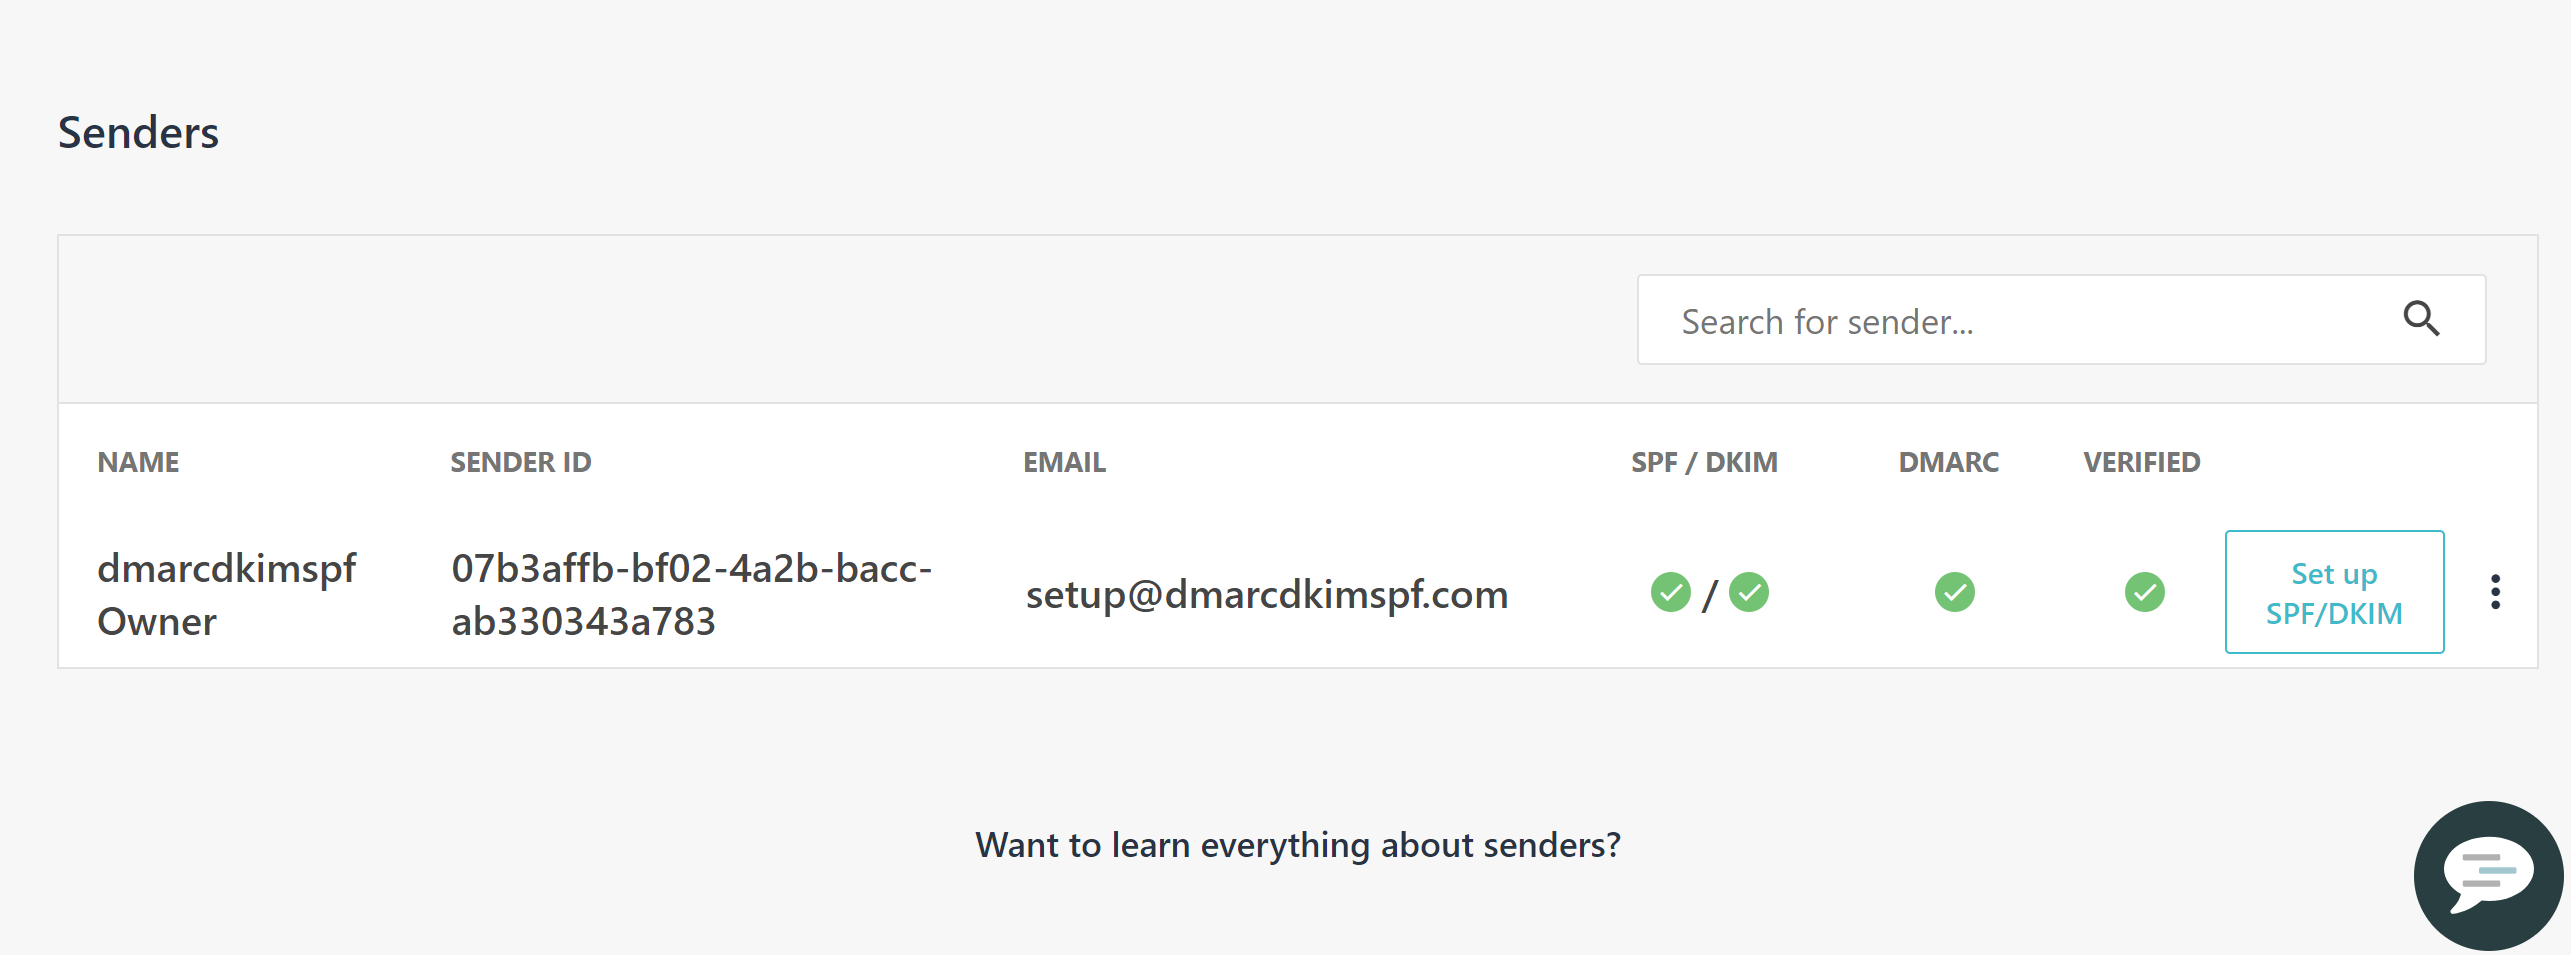
If you don't see the authentication message or green checkmarks, wait for 24 hours, the recommended wait time for the DNS records updating process.
In case the DNS records are not authenticated after 24 hours, contact the Moosend support team or hire DmarcDkim.com experts for further assistance.
Check domain and follow the instructions to nail down your DMARC configuration.
No expert knowledge needed!


