
SpamHero SPF, DKIM, DMARC and MX Records Setup for Domain Authentication
Check your domain for DMARC, DKIM, SPF and MX records. Get a free report.
How to Configure and Setup DNS records for SpamHero?
The email inbox providers require proof that you are who you say and your emails are safe to open. That's where domain authentication comes in. By authenticating your sender email domain, the ESPs recognize you as a legitimate source. SPF, DKIM, and DMARC are commonly used sender validation standards. You can obtain these DNS records from an authorized platform like SpamHero. In this article, we will configure the SPF, DKIM, DMARC, and MX, records and add them to the DNS provider to protect your emails against spamming and spoofing. So stay tuned!
Configure SPF and DKIM Record:
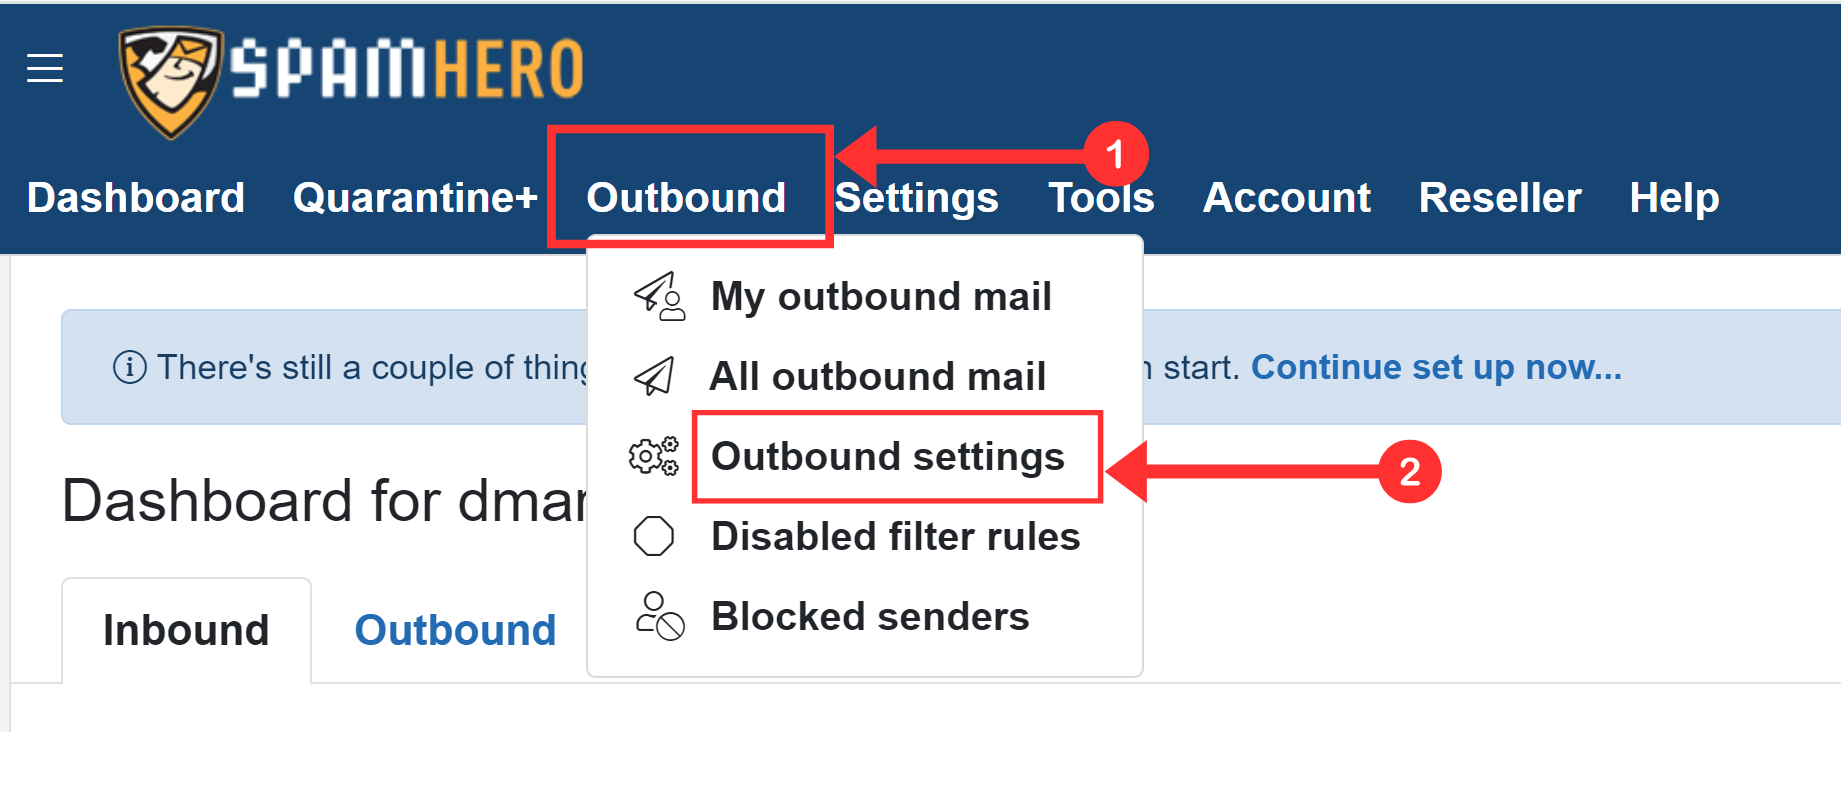
On the SpamHero dashboard, click Outbound in the top menu bar.
-
Go to the Outbound Settings tab.
-
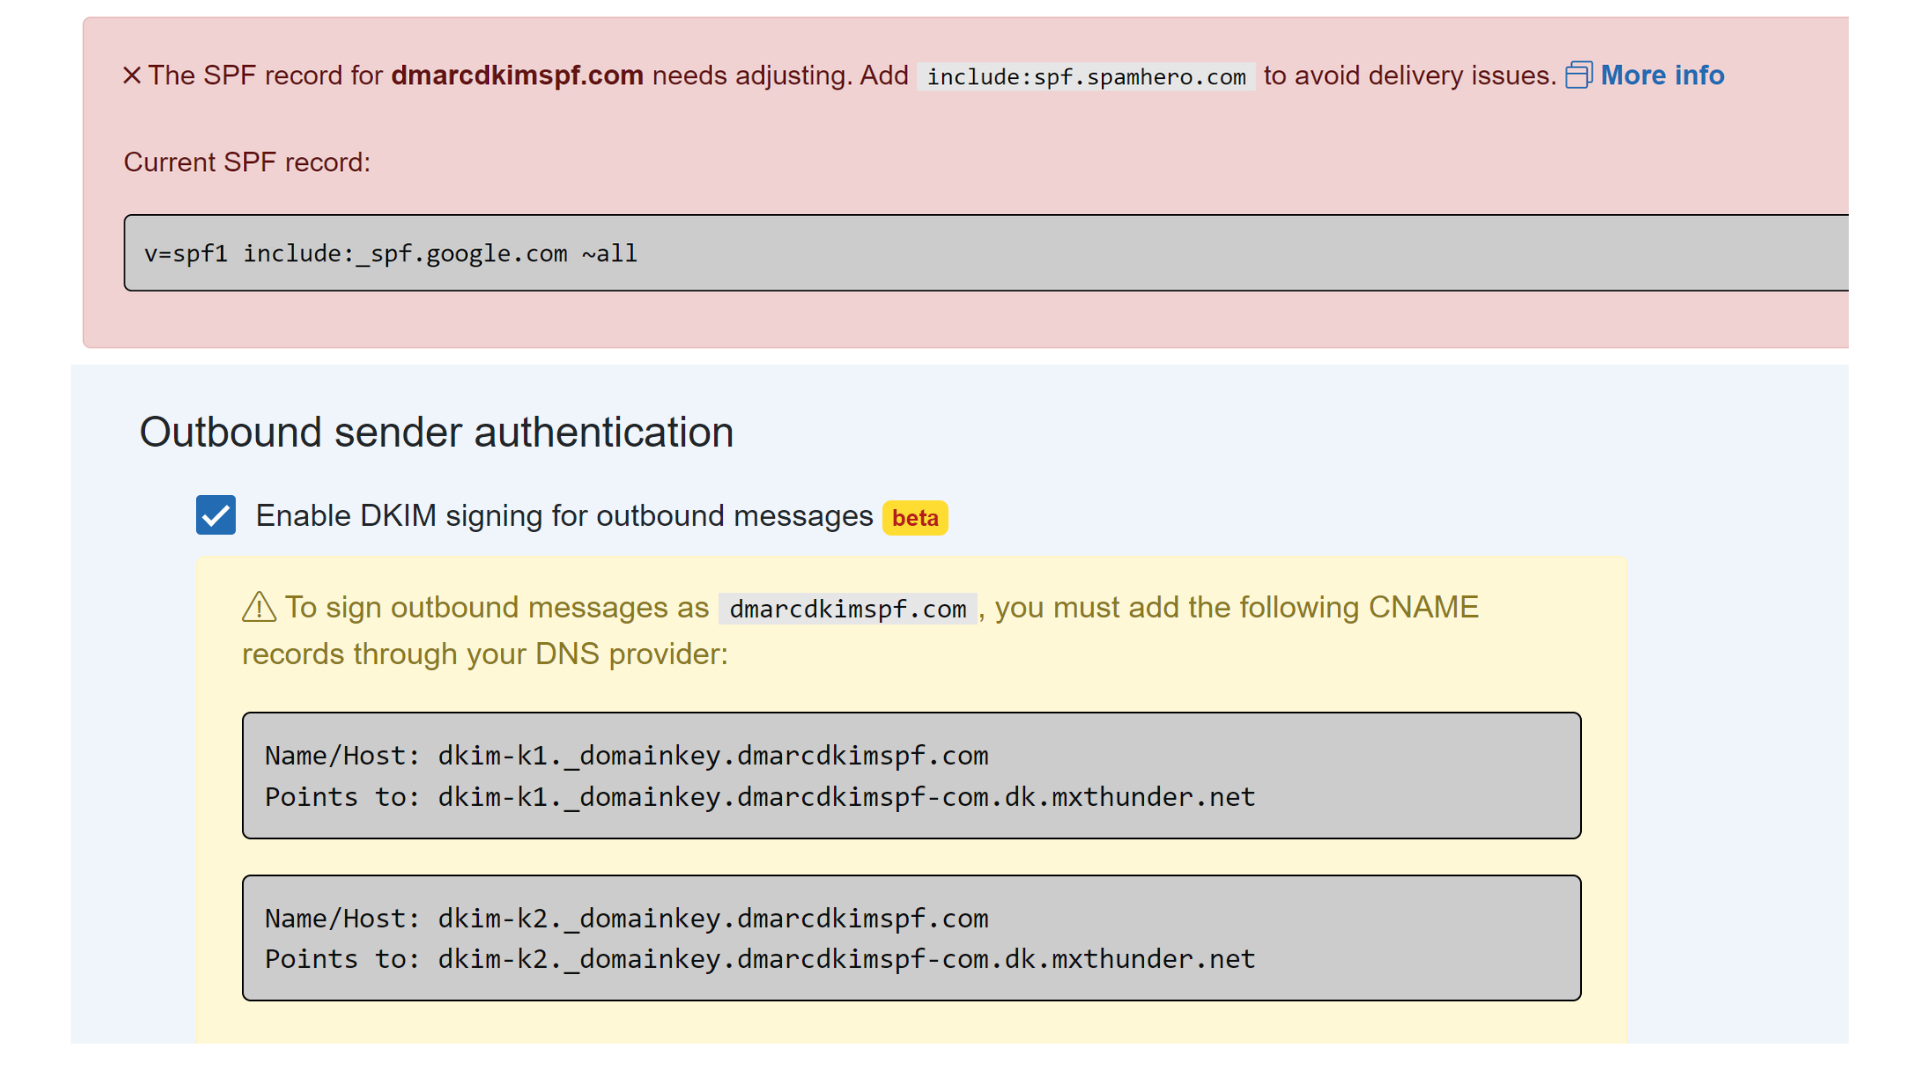
Here you'll find the SPF and DKIM records, add these to your DNS provider.
Add SPF to DNS provider:
-
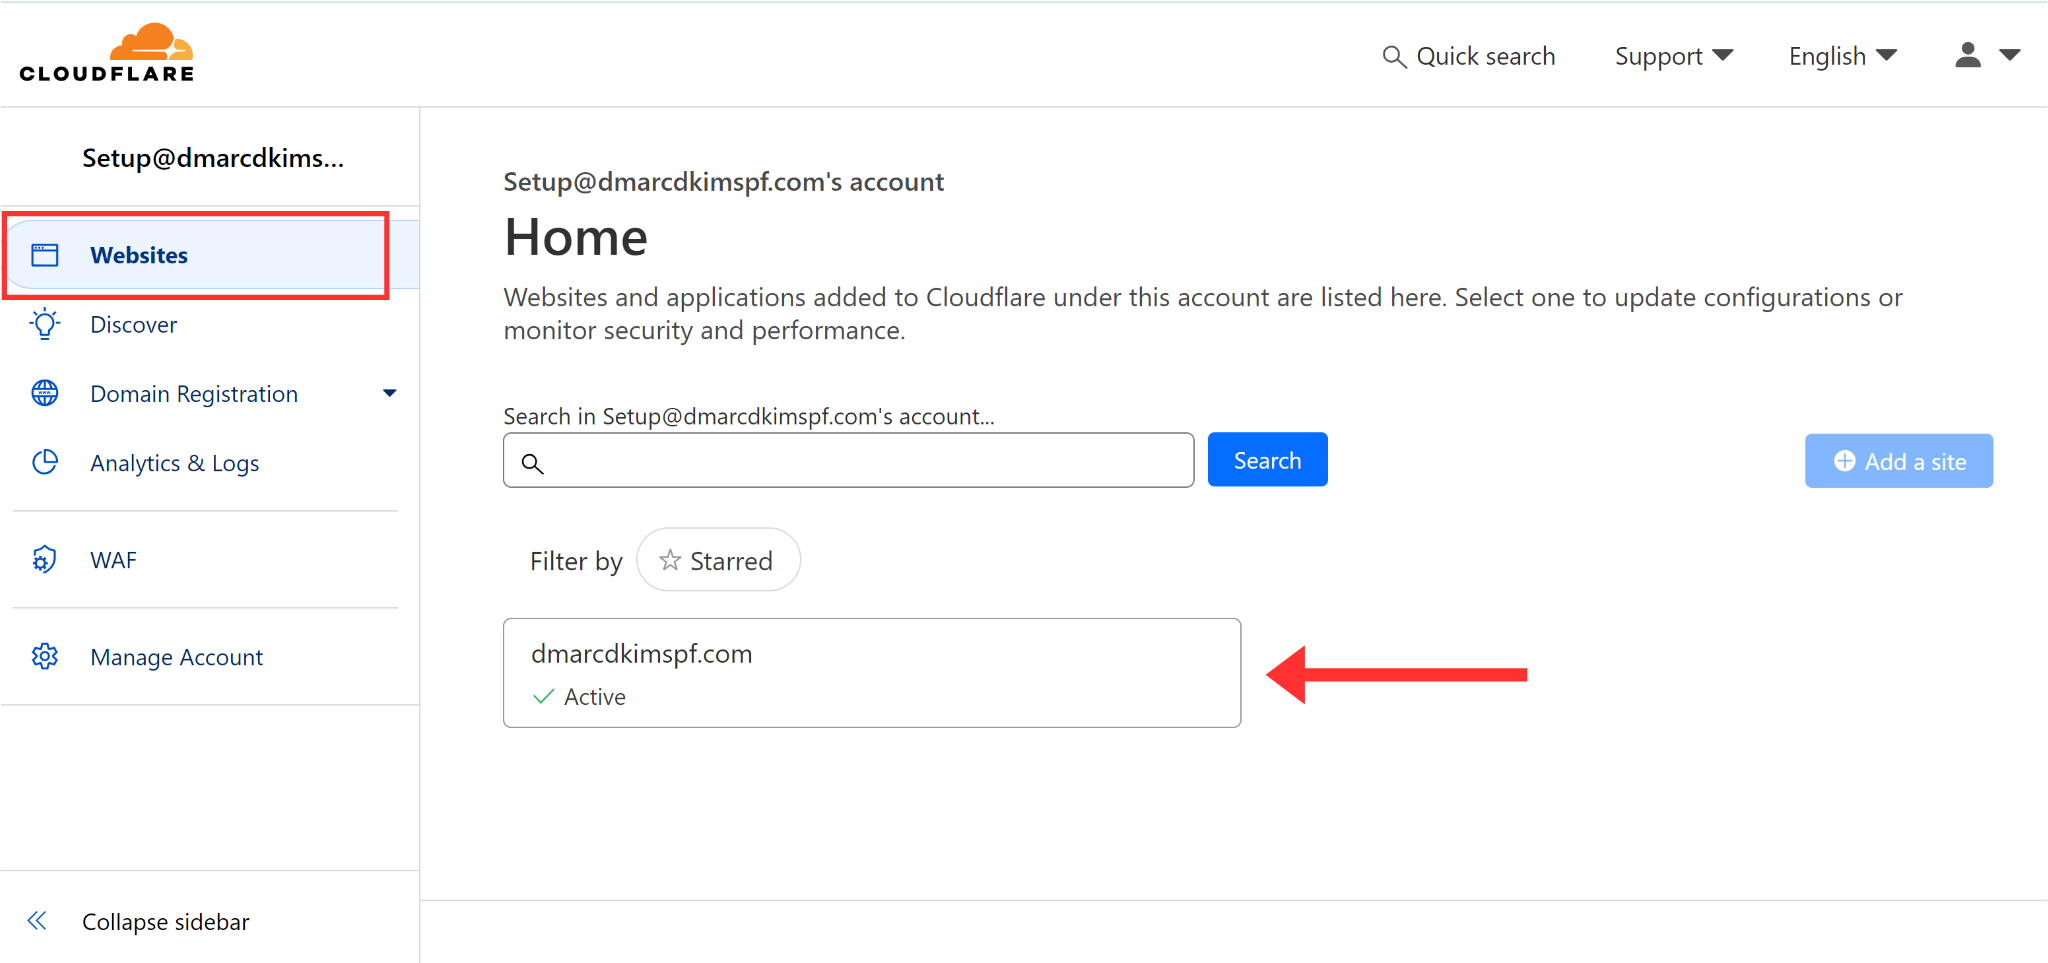
Login to your DNS provider and go to your website.
-
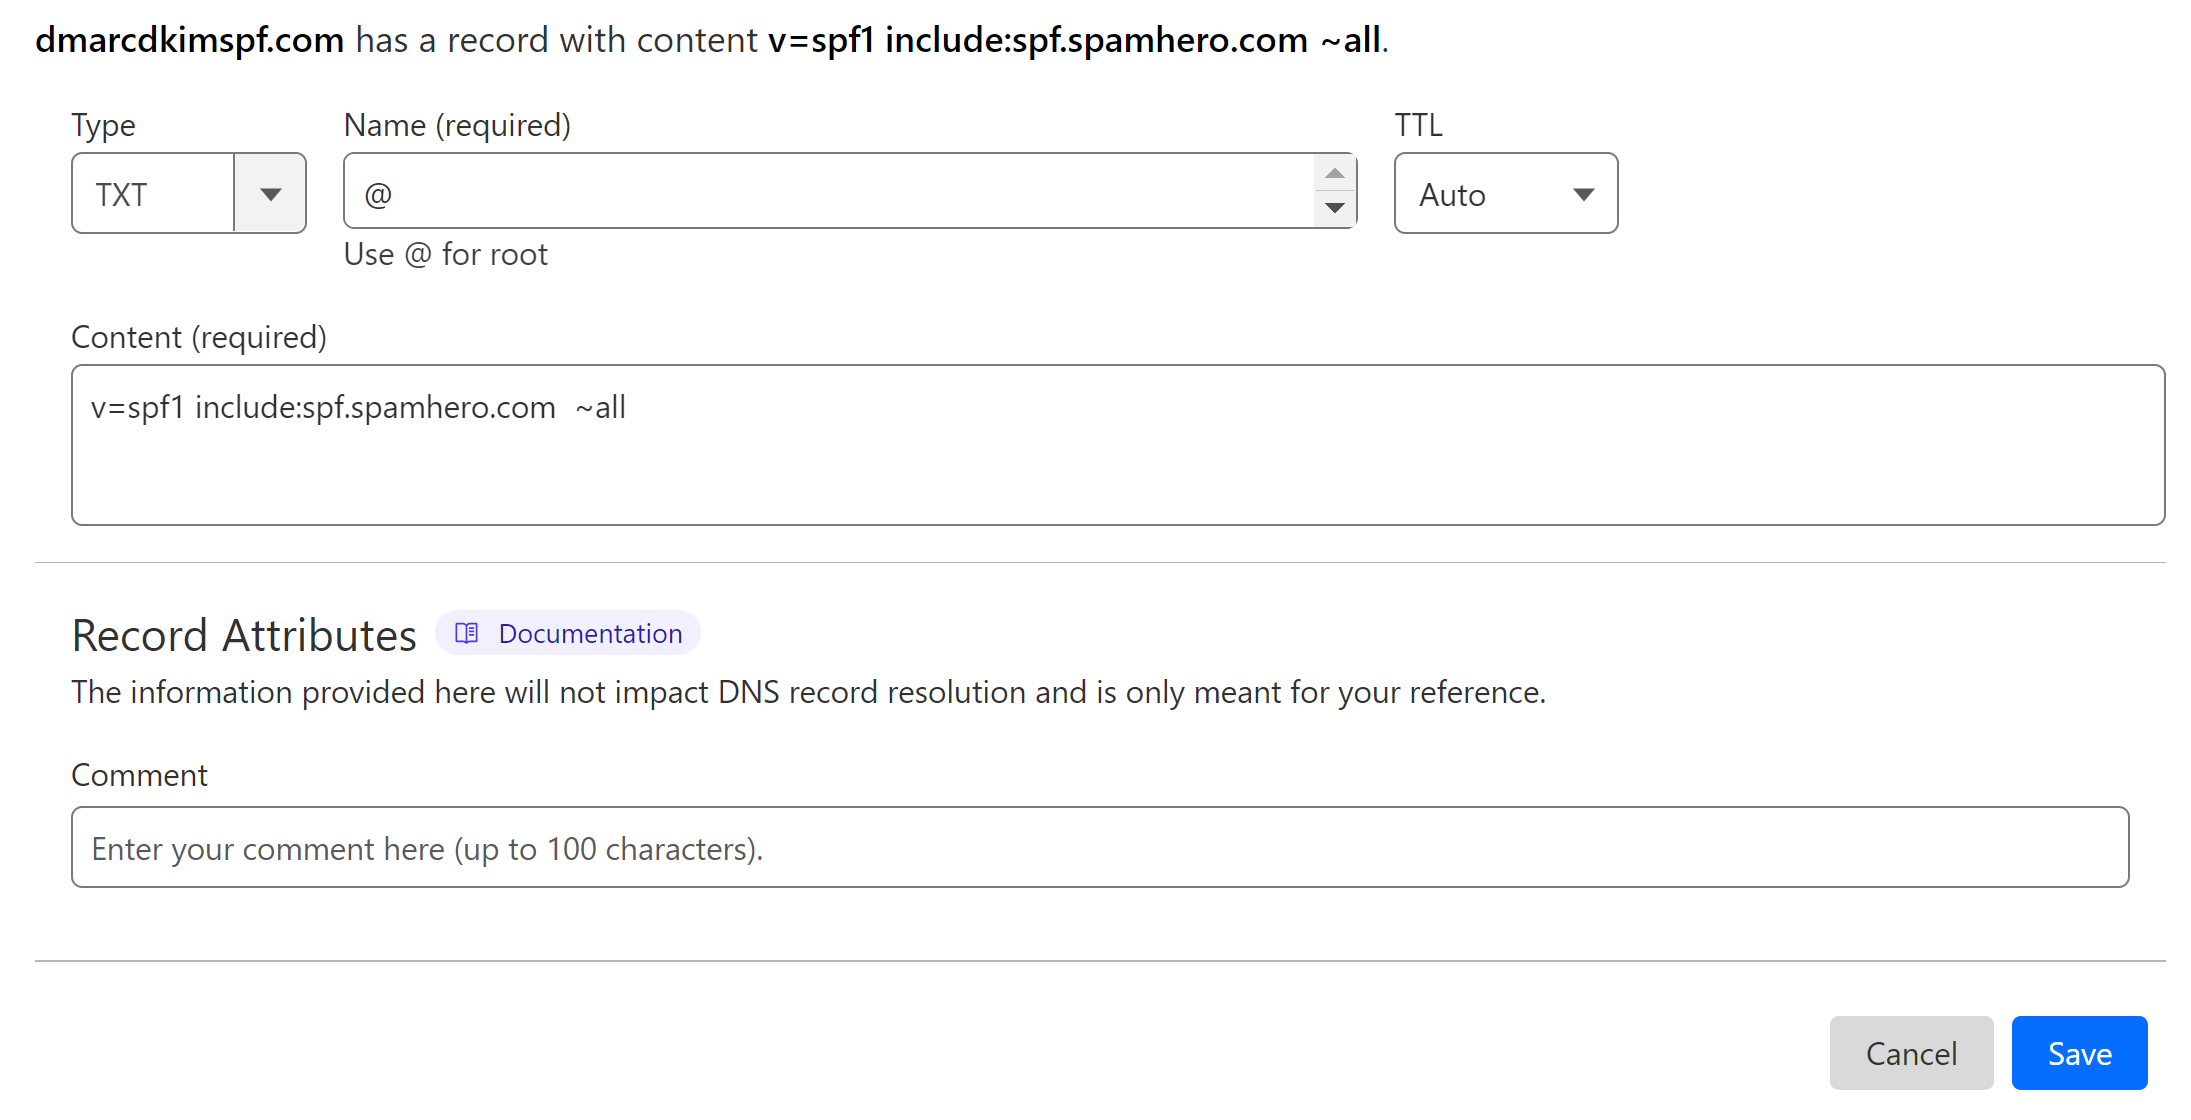
Go to the DNS tab and click Add Record.
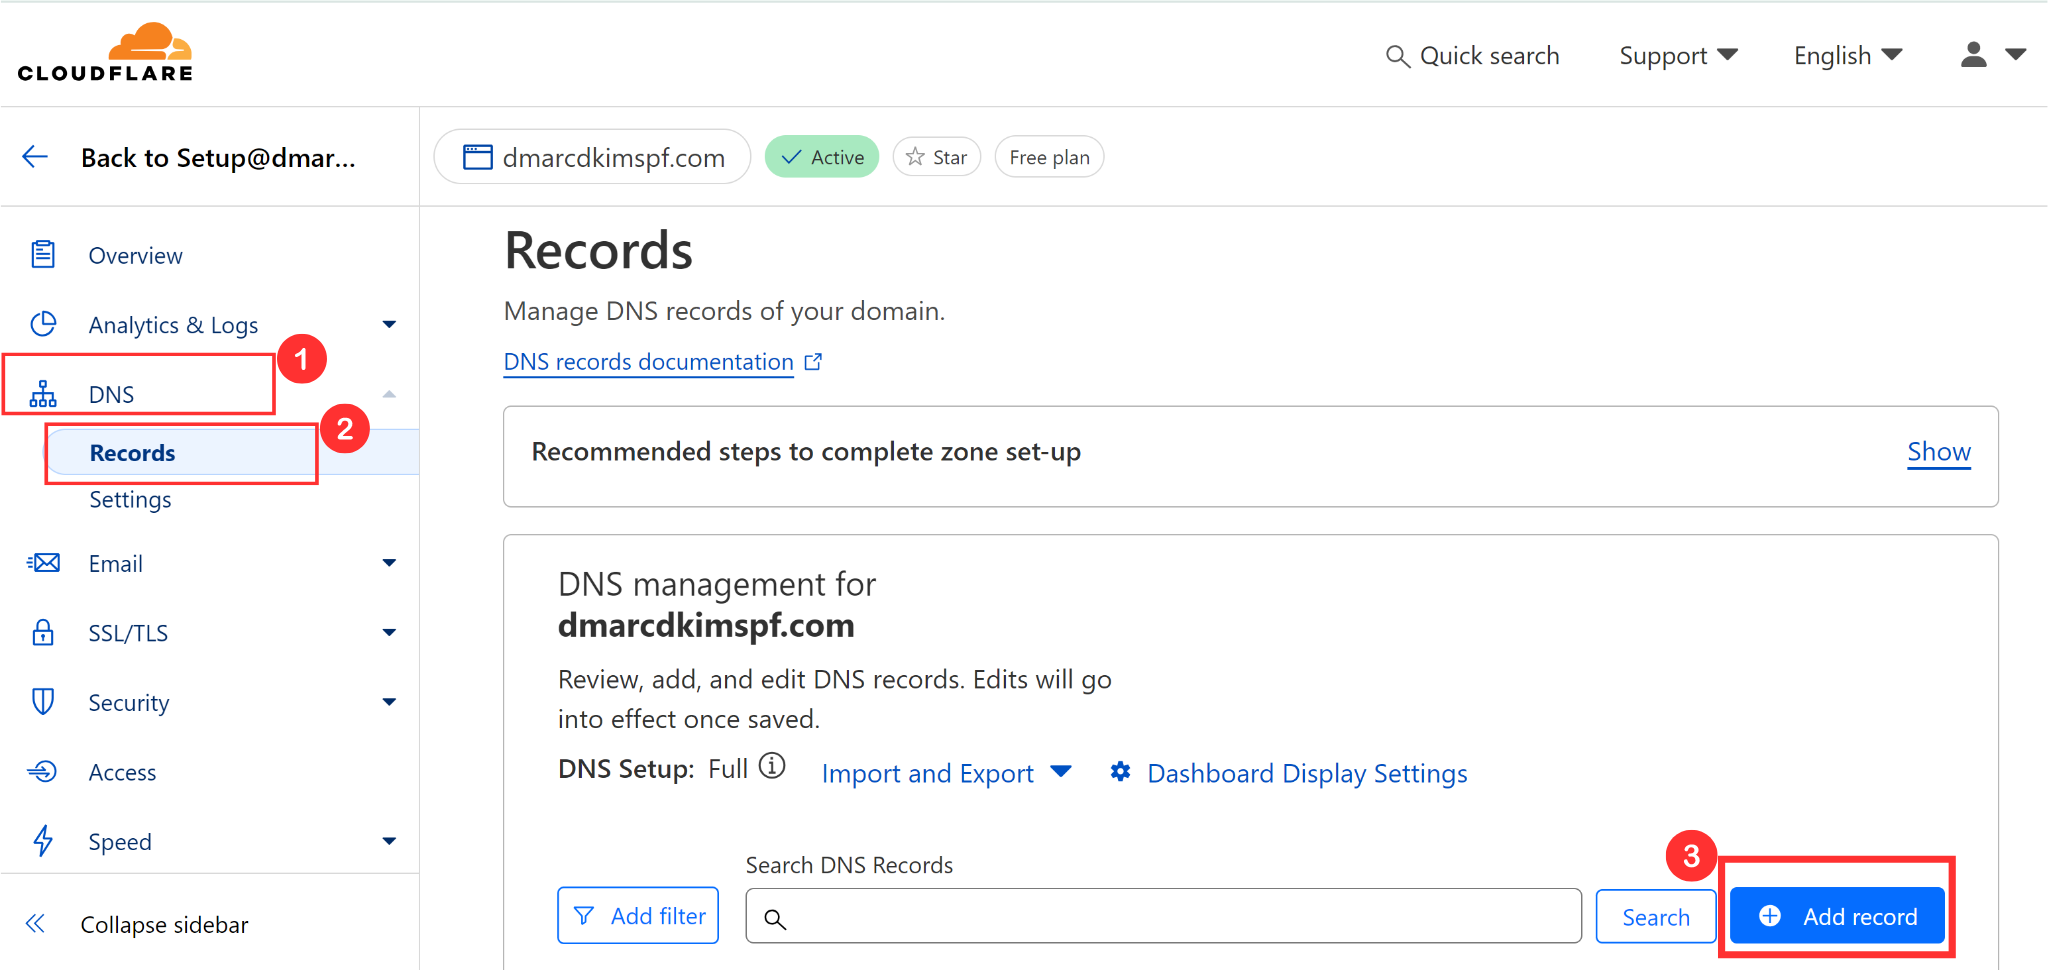
Select record type TXT.
In the Name field, write down your domain name or write "@."
In the Content field, add the SPF value: v=spf1 include:spf.spamhero.com ~all.
-
Finally, click Save.
Merge Multiple SPF Records:
Due to the limitations of the DNS providers, you can not add more than one SPF record to your domain. If there is an existing SPF record, merge it with the SpamHero SPF to avoid conflicts.
Go to DmarcDkim.com SPF Merge tool.
Add your domain name and SpamHero SPF value.
Click Merge SPF Values.
-
The tool merges your existing SPF with the new SPF and gives a merged value.
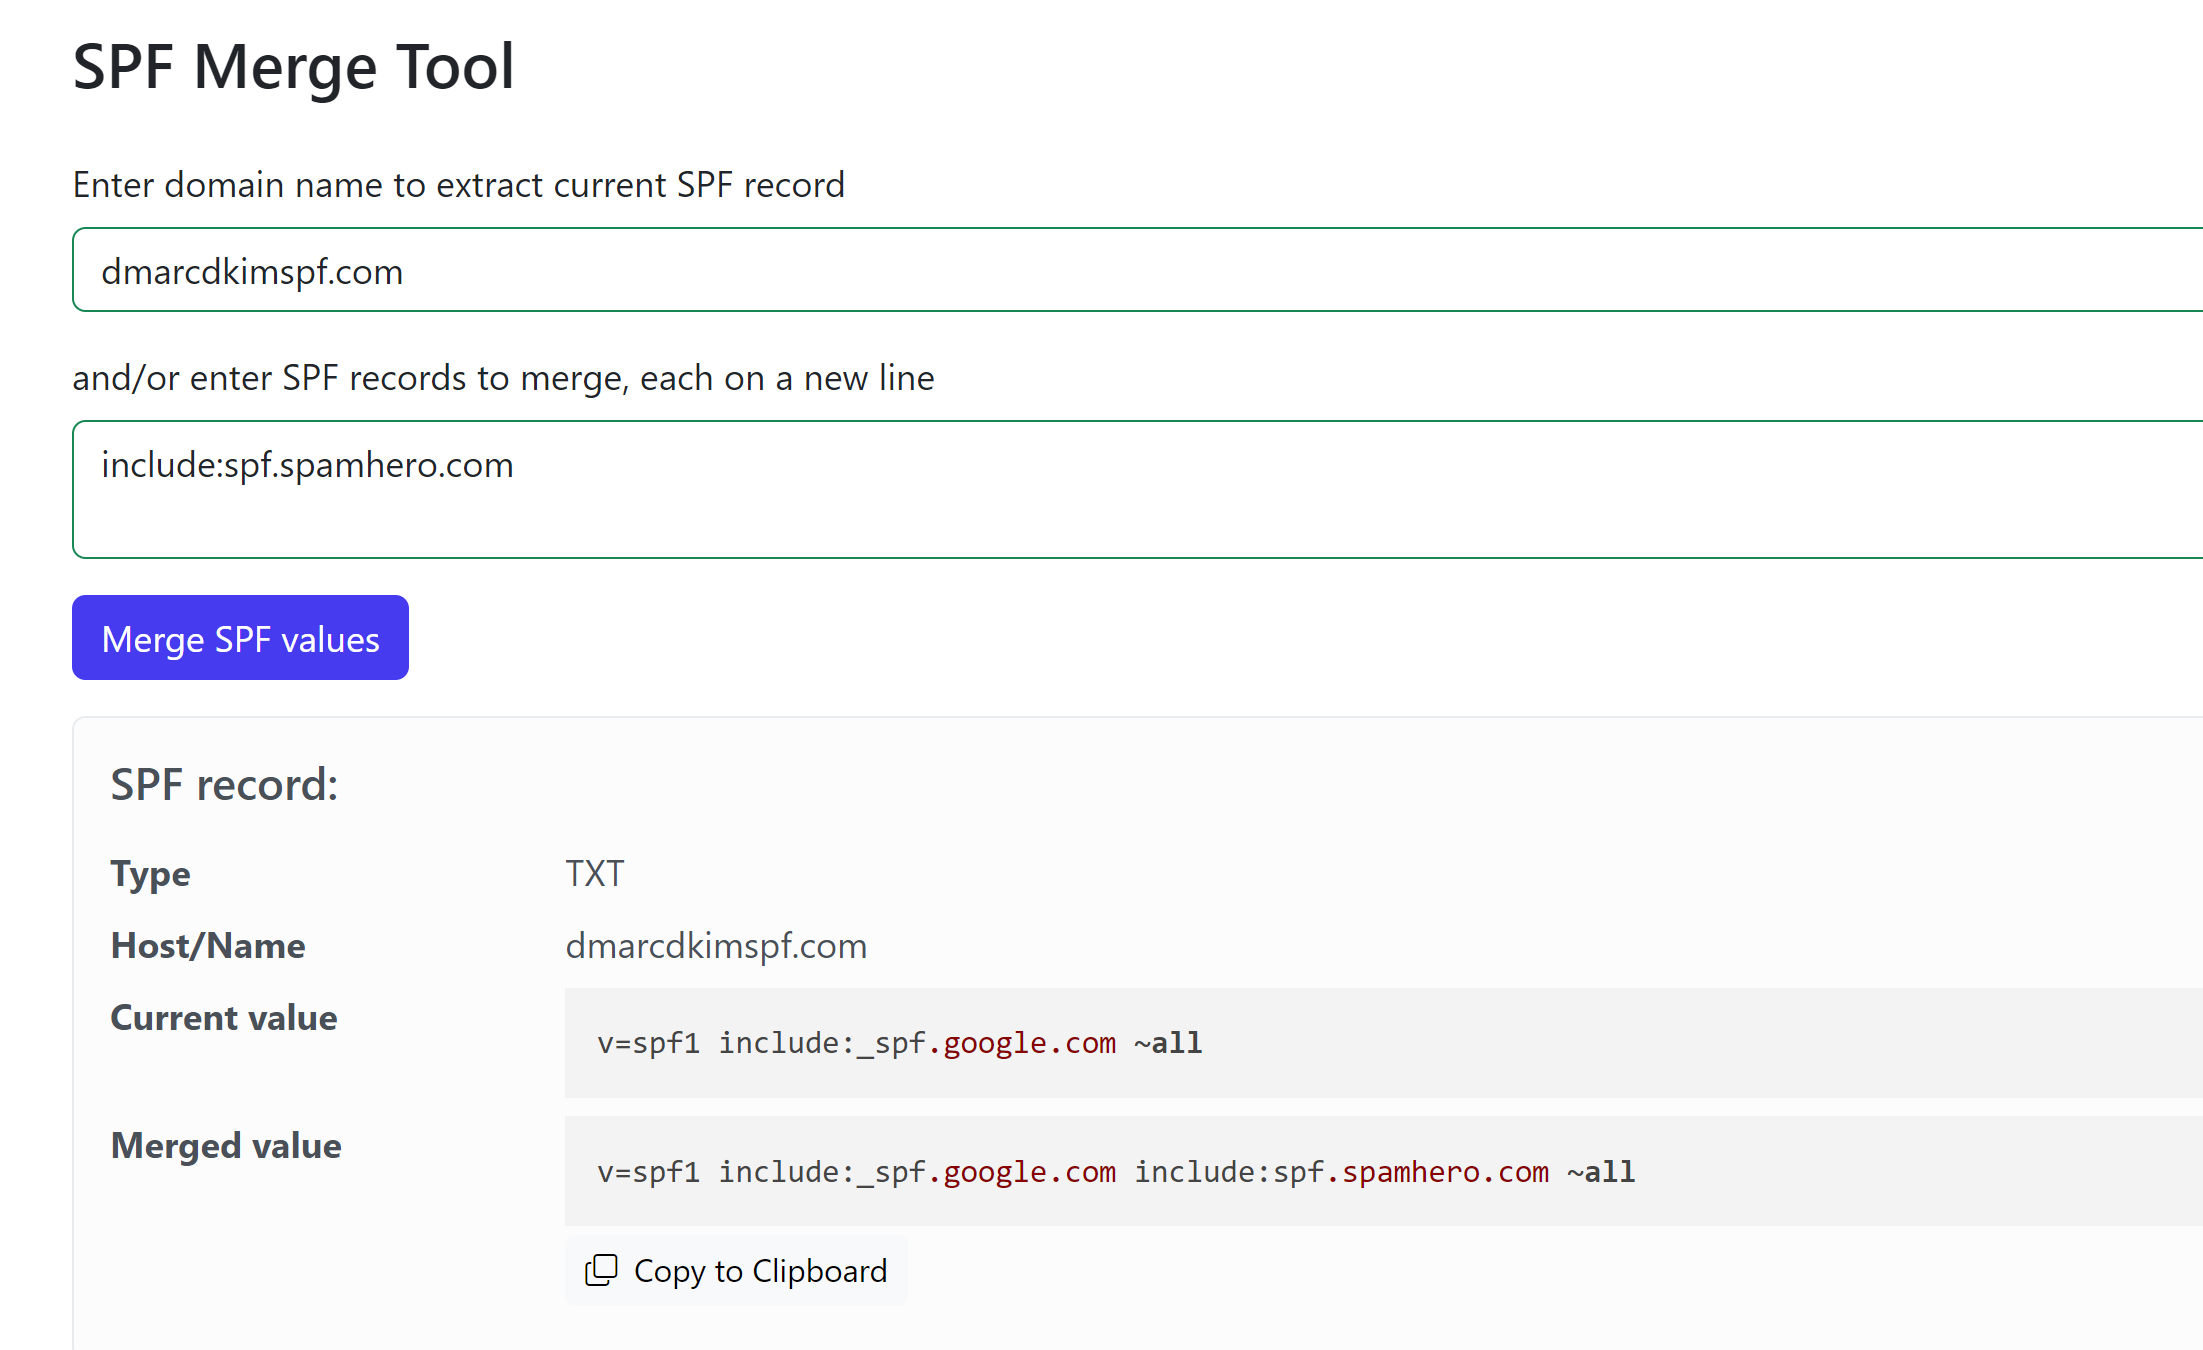
In your DNS dashboard, replace the existing value with the merged value and click Save.
Add DKIM to DNS provider:
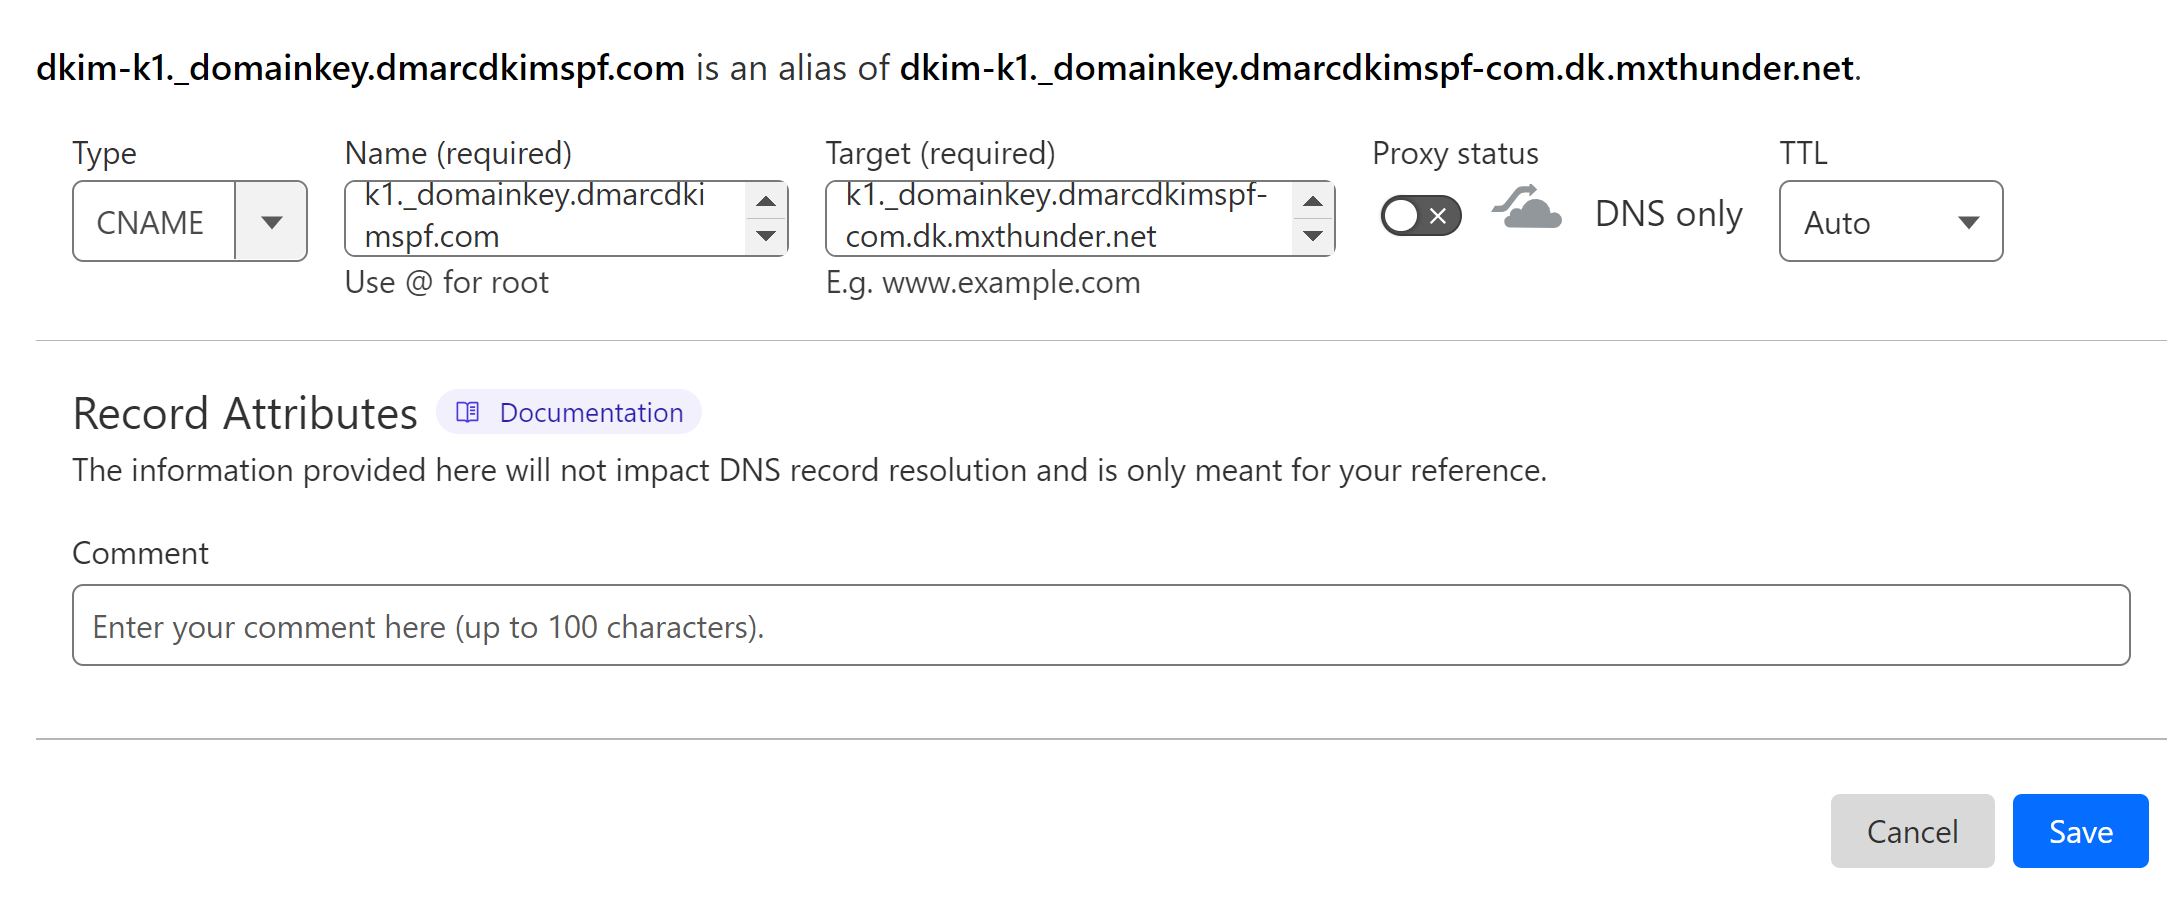
In your DNS dashboard, select type CNAME.
Copy the Host name and paste it into the Name field.
Copy the Record value and paste it into the Target field.
-
Turn off the proxy status and click Save.
Verify SPF and DKIM Records:
-
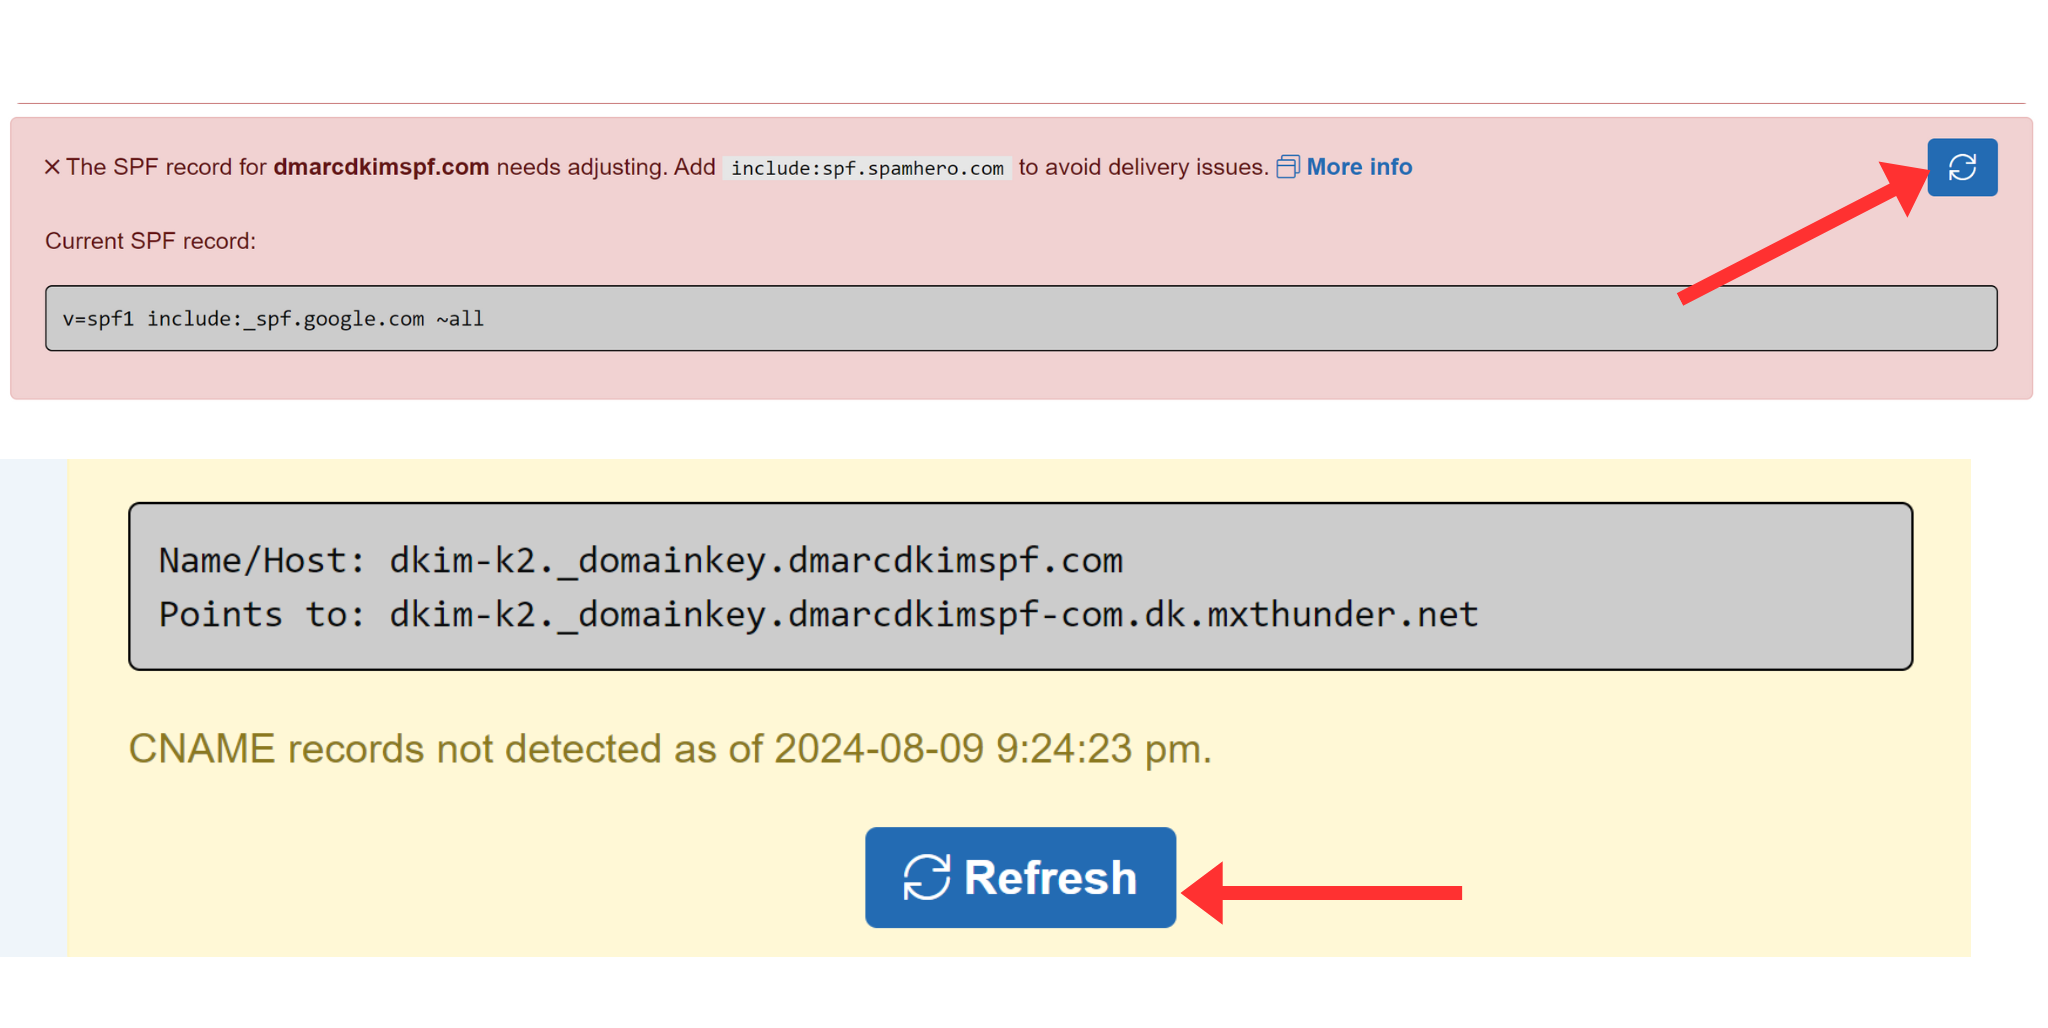
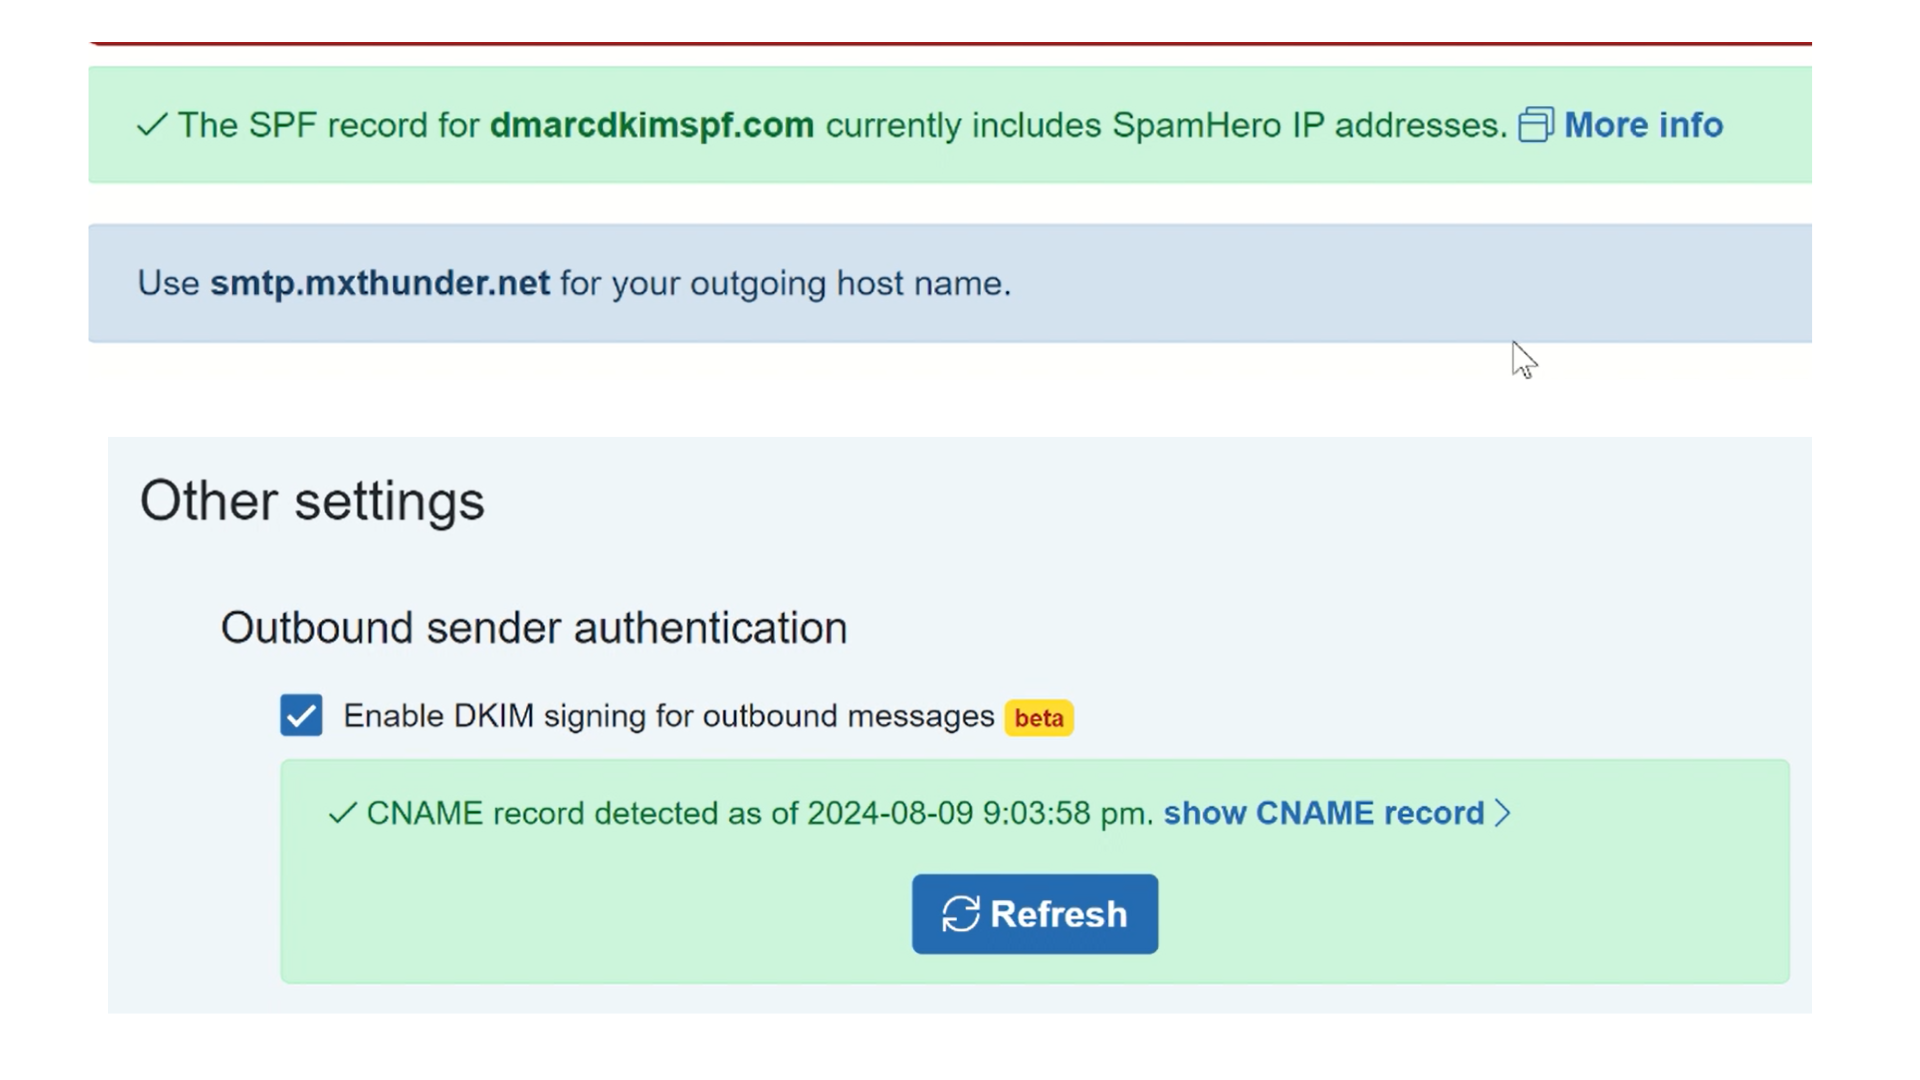
After adding all records, click the refresh icon with SPF and DKIM to validate them.
-
If records are validated successfully, you should see the the green highlited text with each record.
Setup MX Records:
If your domain has existing MX records, there is no need to add SpamHero MX records. Adding MX records from multiple sources can confuse the servers and cause conflicts.
However, if you see a warning on your SpamHero dashboard regarding MX records, add the SpamHero MX records to your DNS provider and delete the previous ones.
-
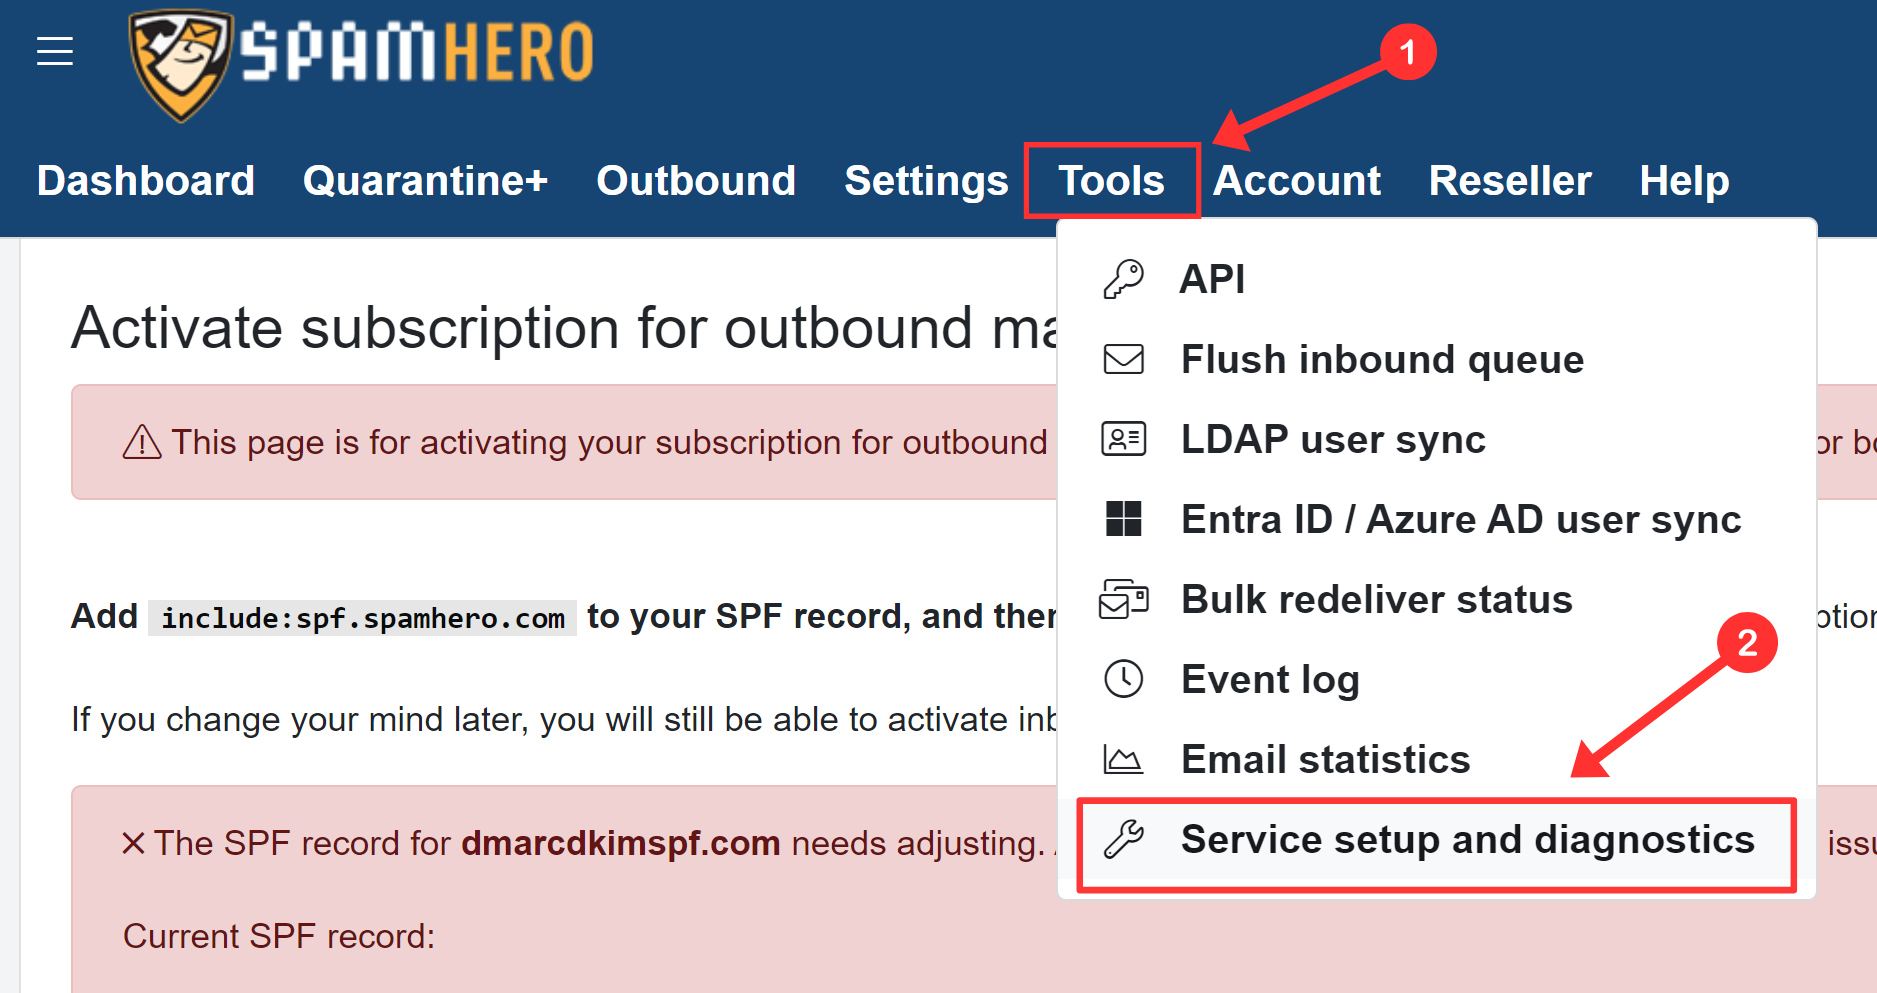
Click Tools in the top menu bar and go to "Service Setup and Diagnostics."
-
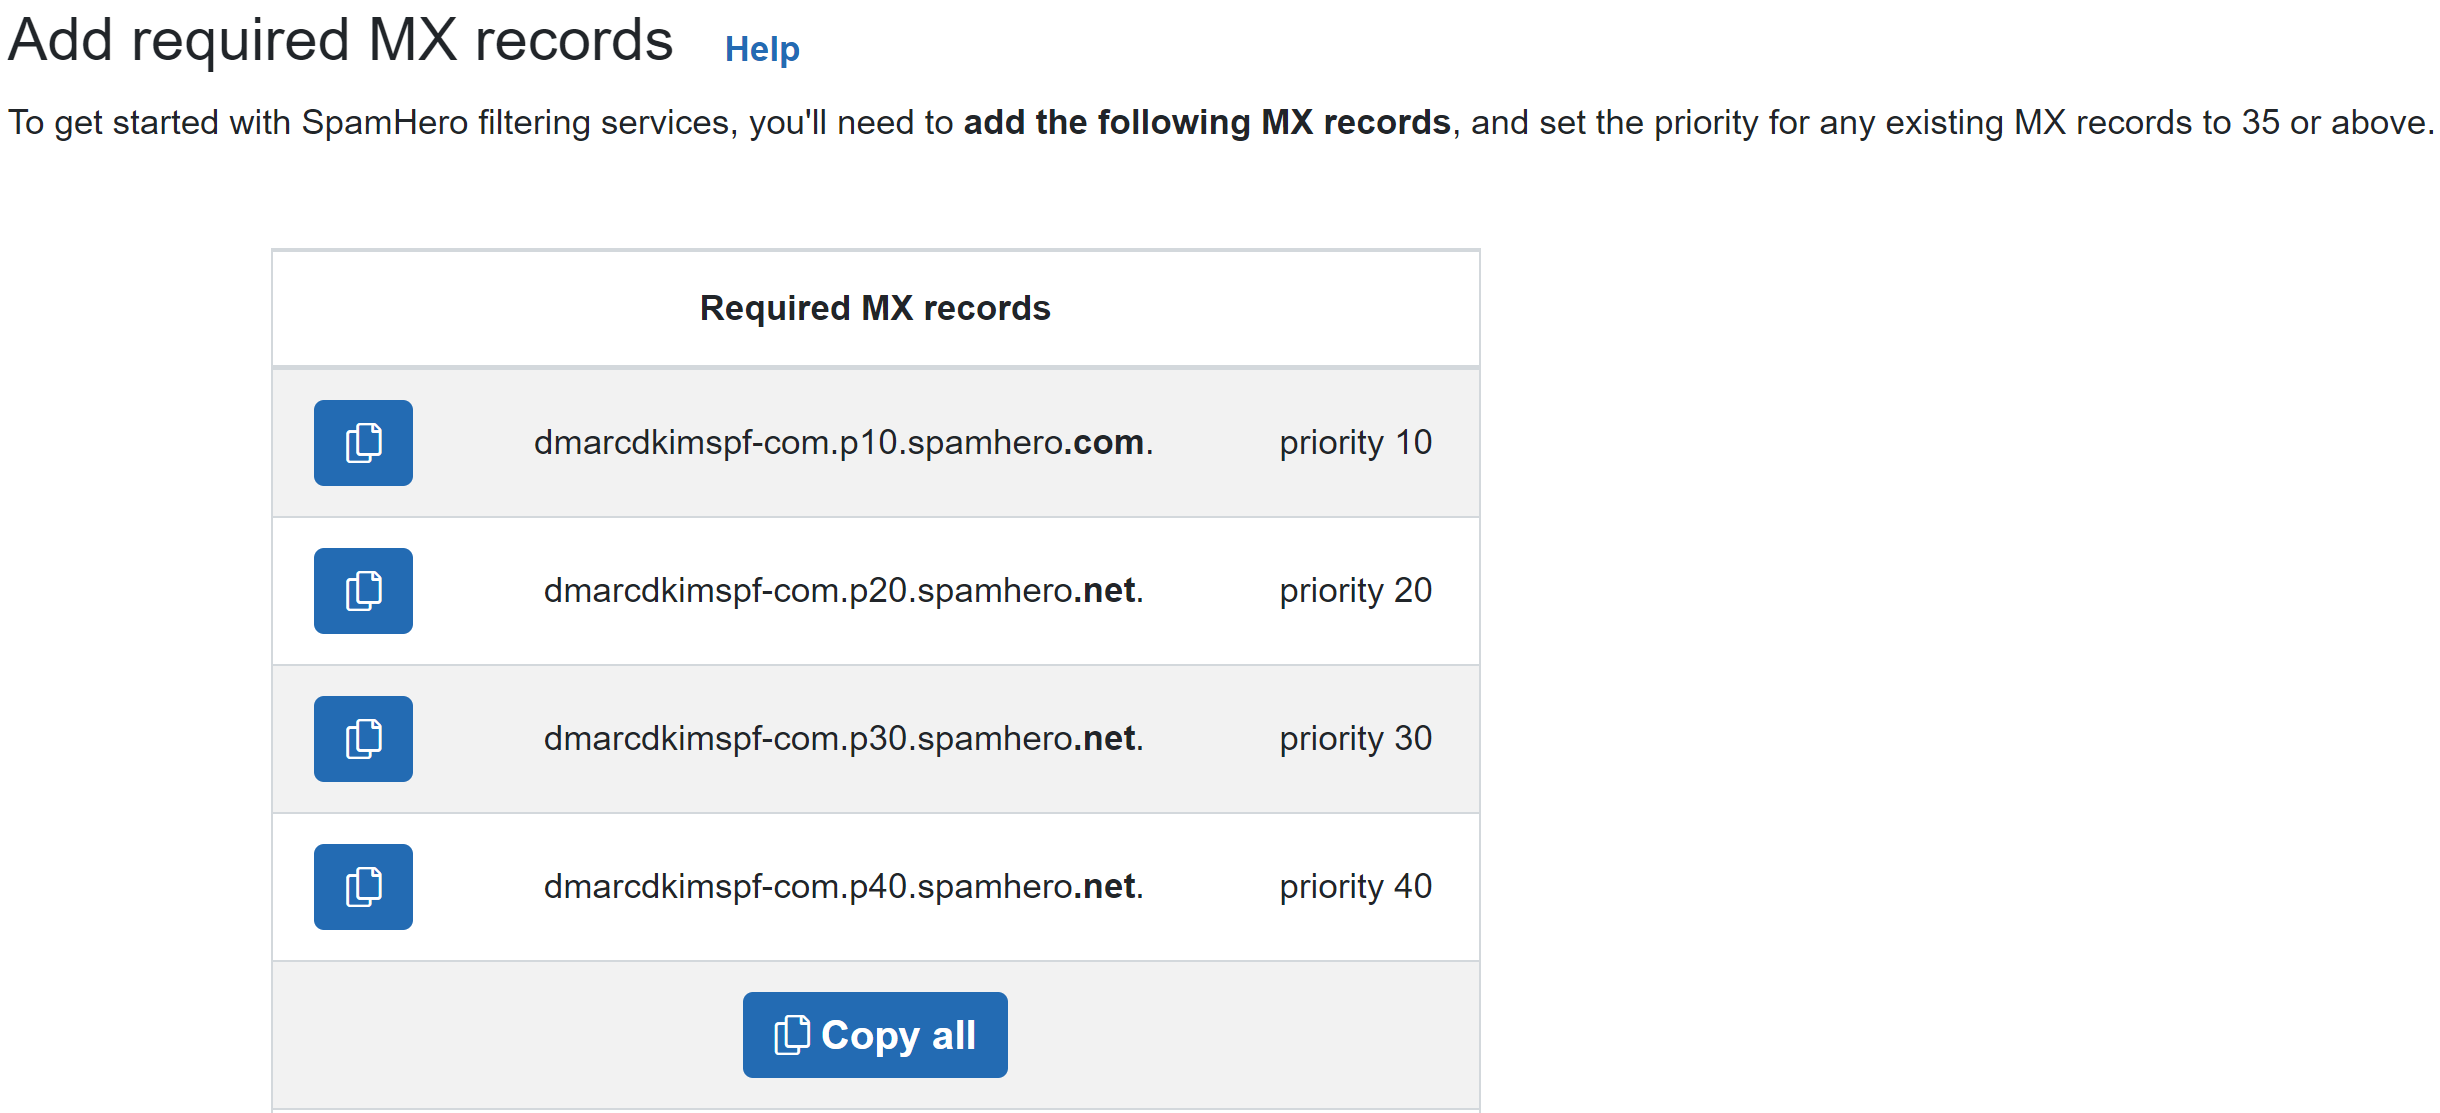
Here you'll find the MX records, add them to your DNS provider.
In the DNS dashboard, select type MX.
In the Name field, write "@."
Copy the record value and paste it into the Mail Server field.
-
Select priority same as mentioned with each MX record.
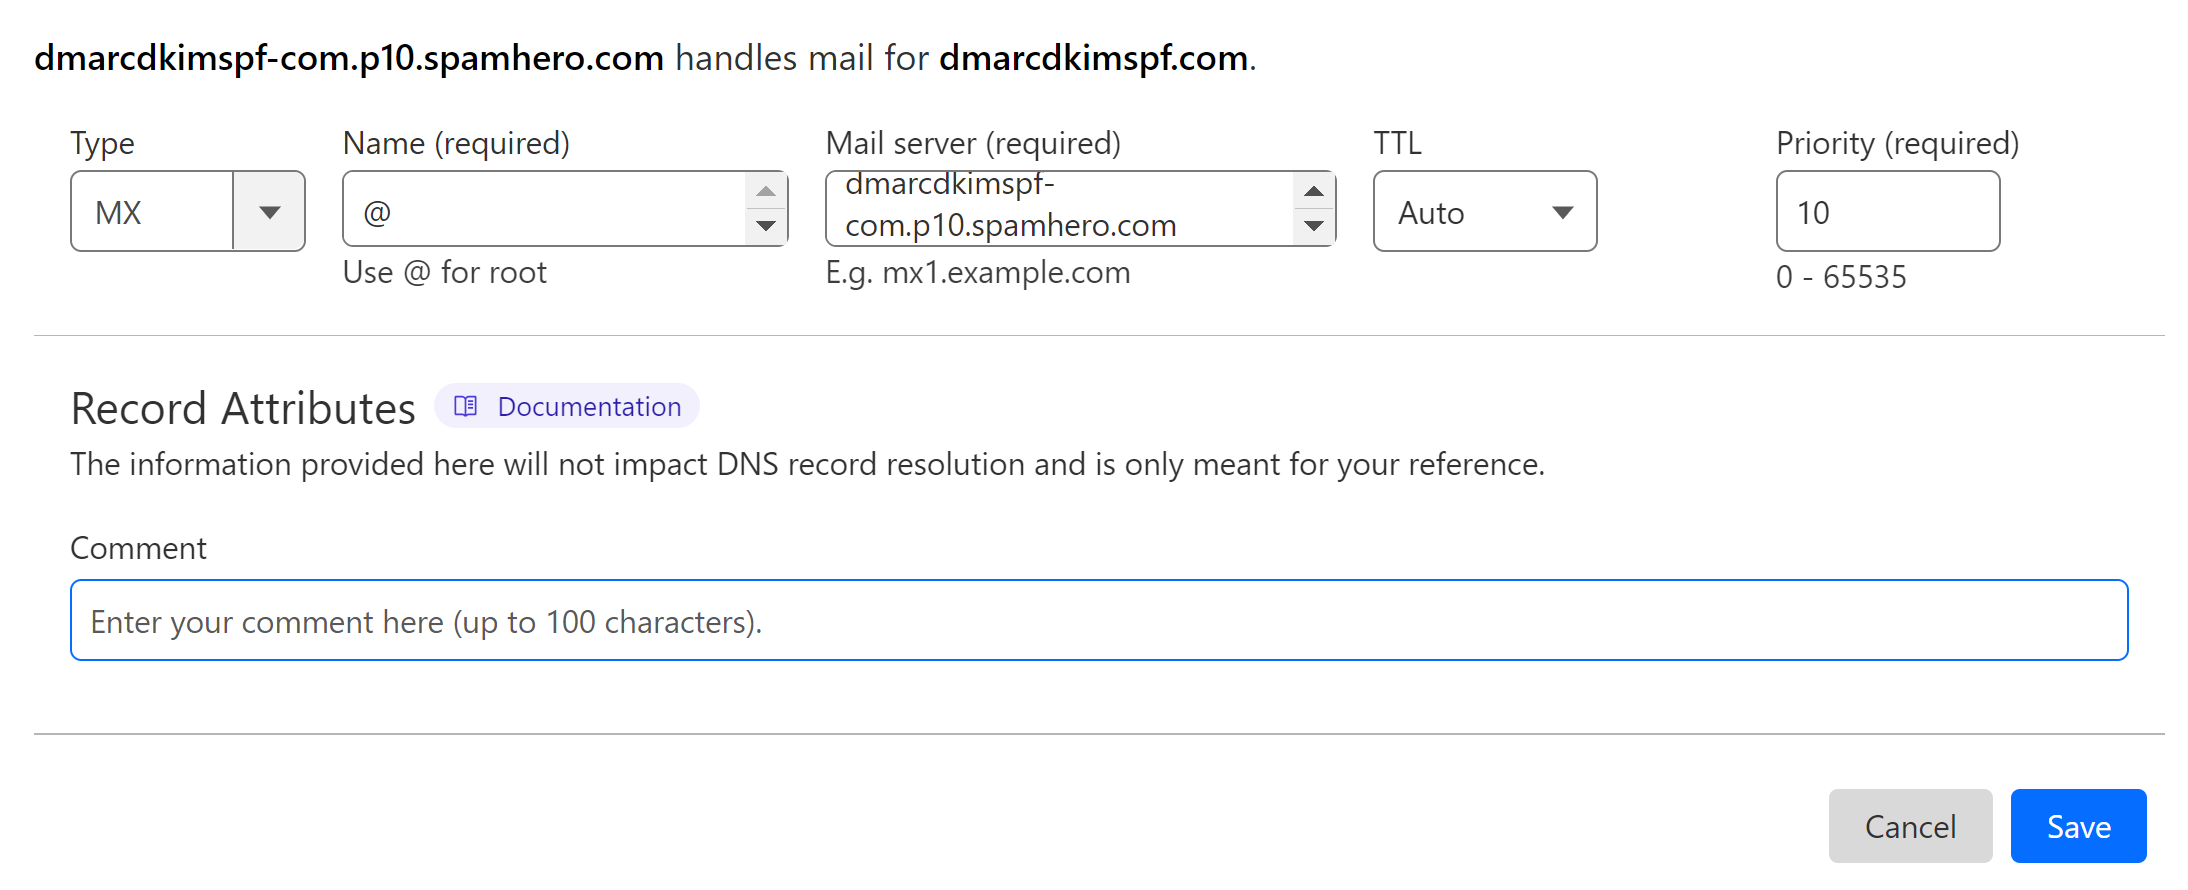
Repeat the same process for adding all MX records.
-
Once all records are added, click "I've added the required MX records."
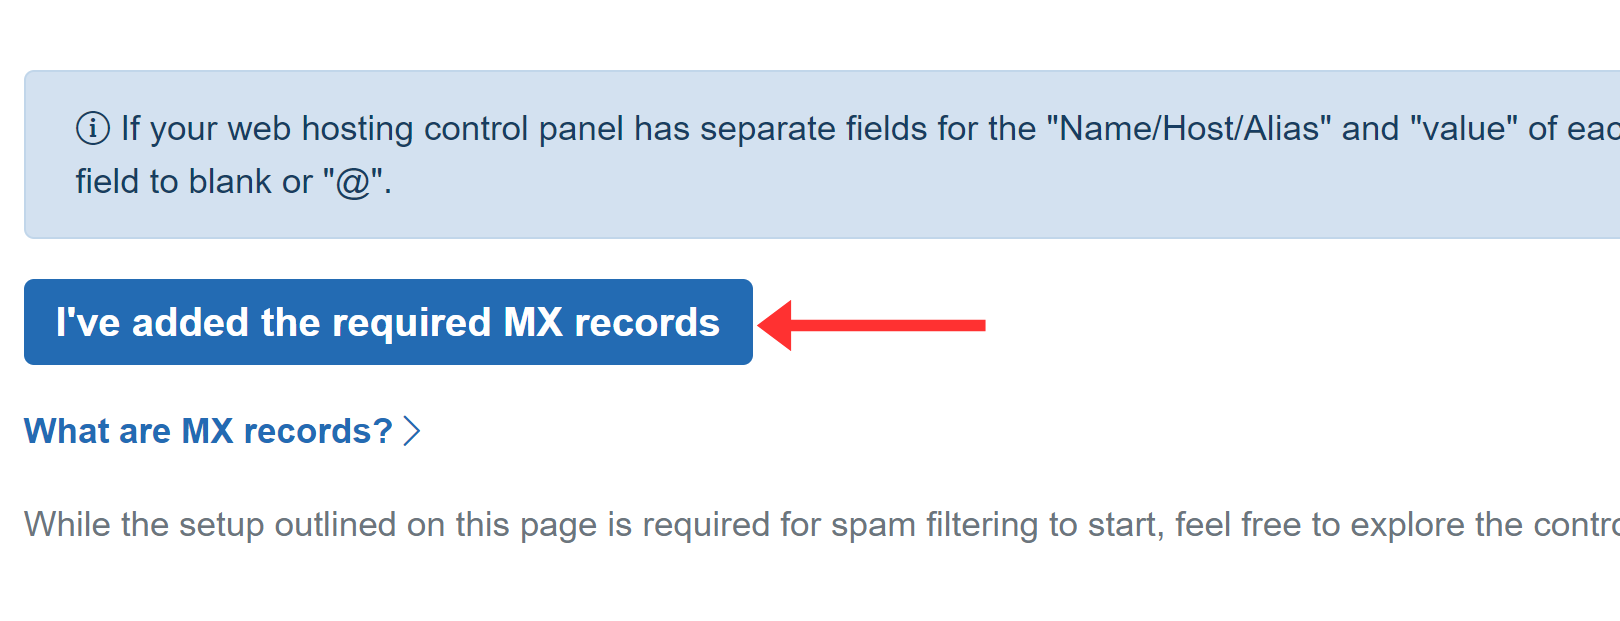
NOTE: DNS records may take up to 24 hours to get verified.
If records do not validate after 24 hours, there might be a misconfiguration in your DNS setup. To troubleshoot the domain authentication issues, hire a DmarcDkim.com expert.
Setup DMARC Record:
DmarcDkim.com DMARC Check Tool allows you to implement a strict policy for emails coming from unauthorized sources. It also gives you actionable insights into your DMARC reports so you can change and improve policy accordingly.
Go to DMARC Check Tool.
-
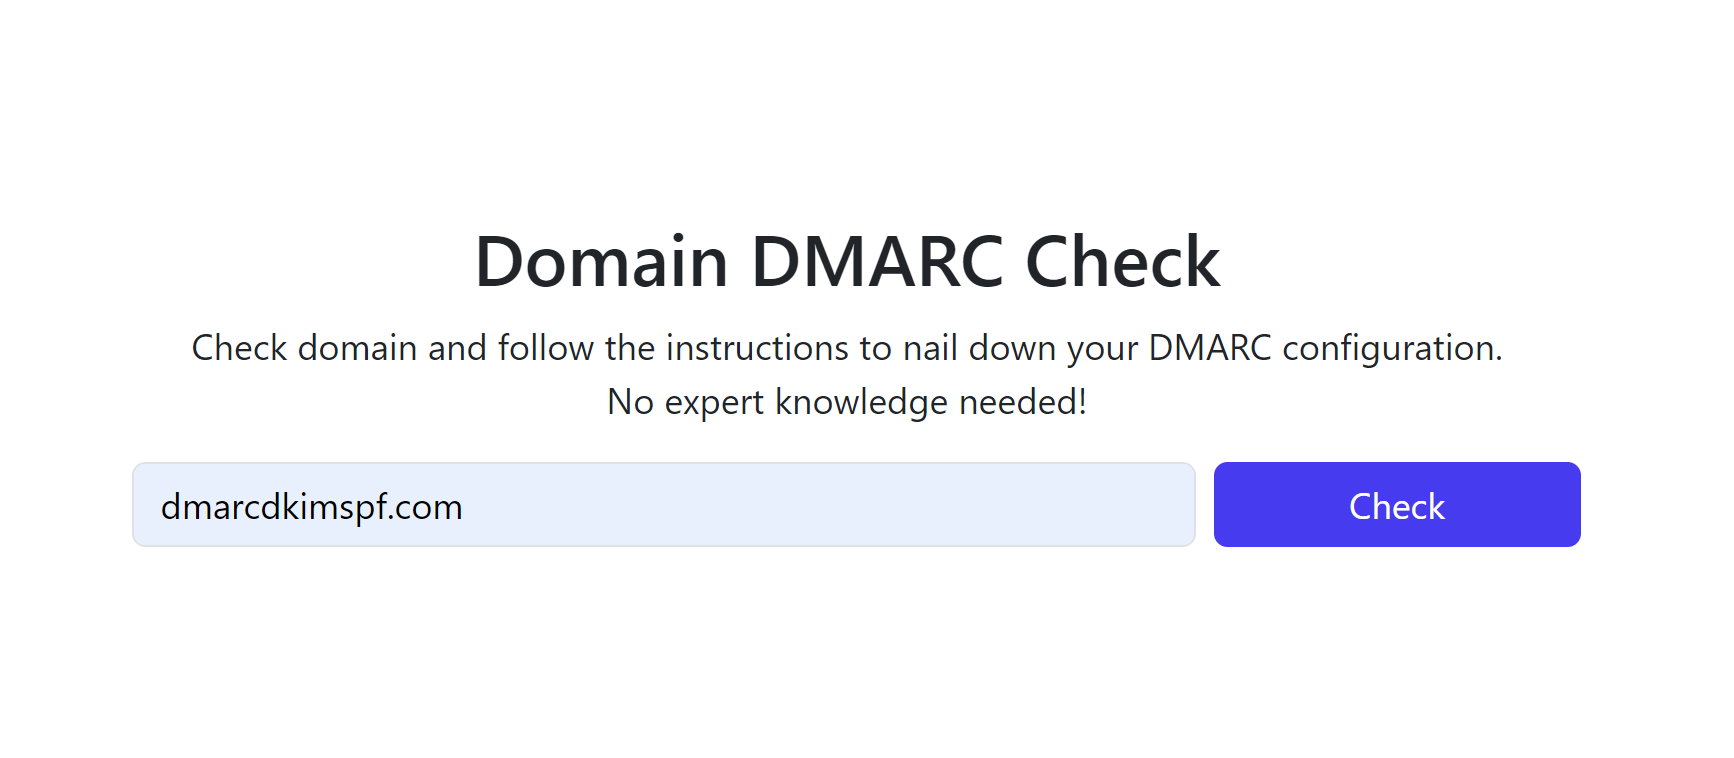
Add your domain name and click Check.
-
Copy the suggested value and it to your DNS provider.
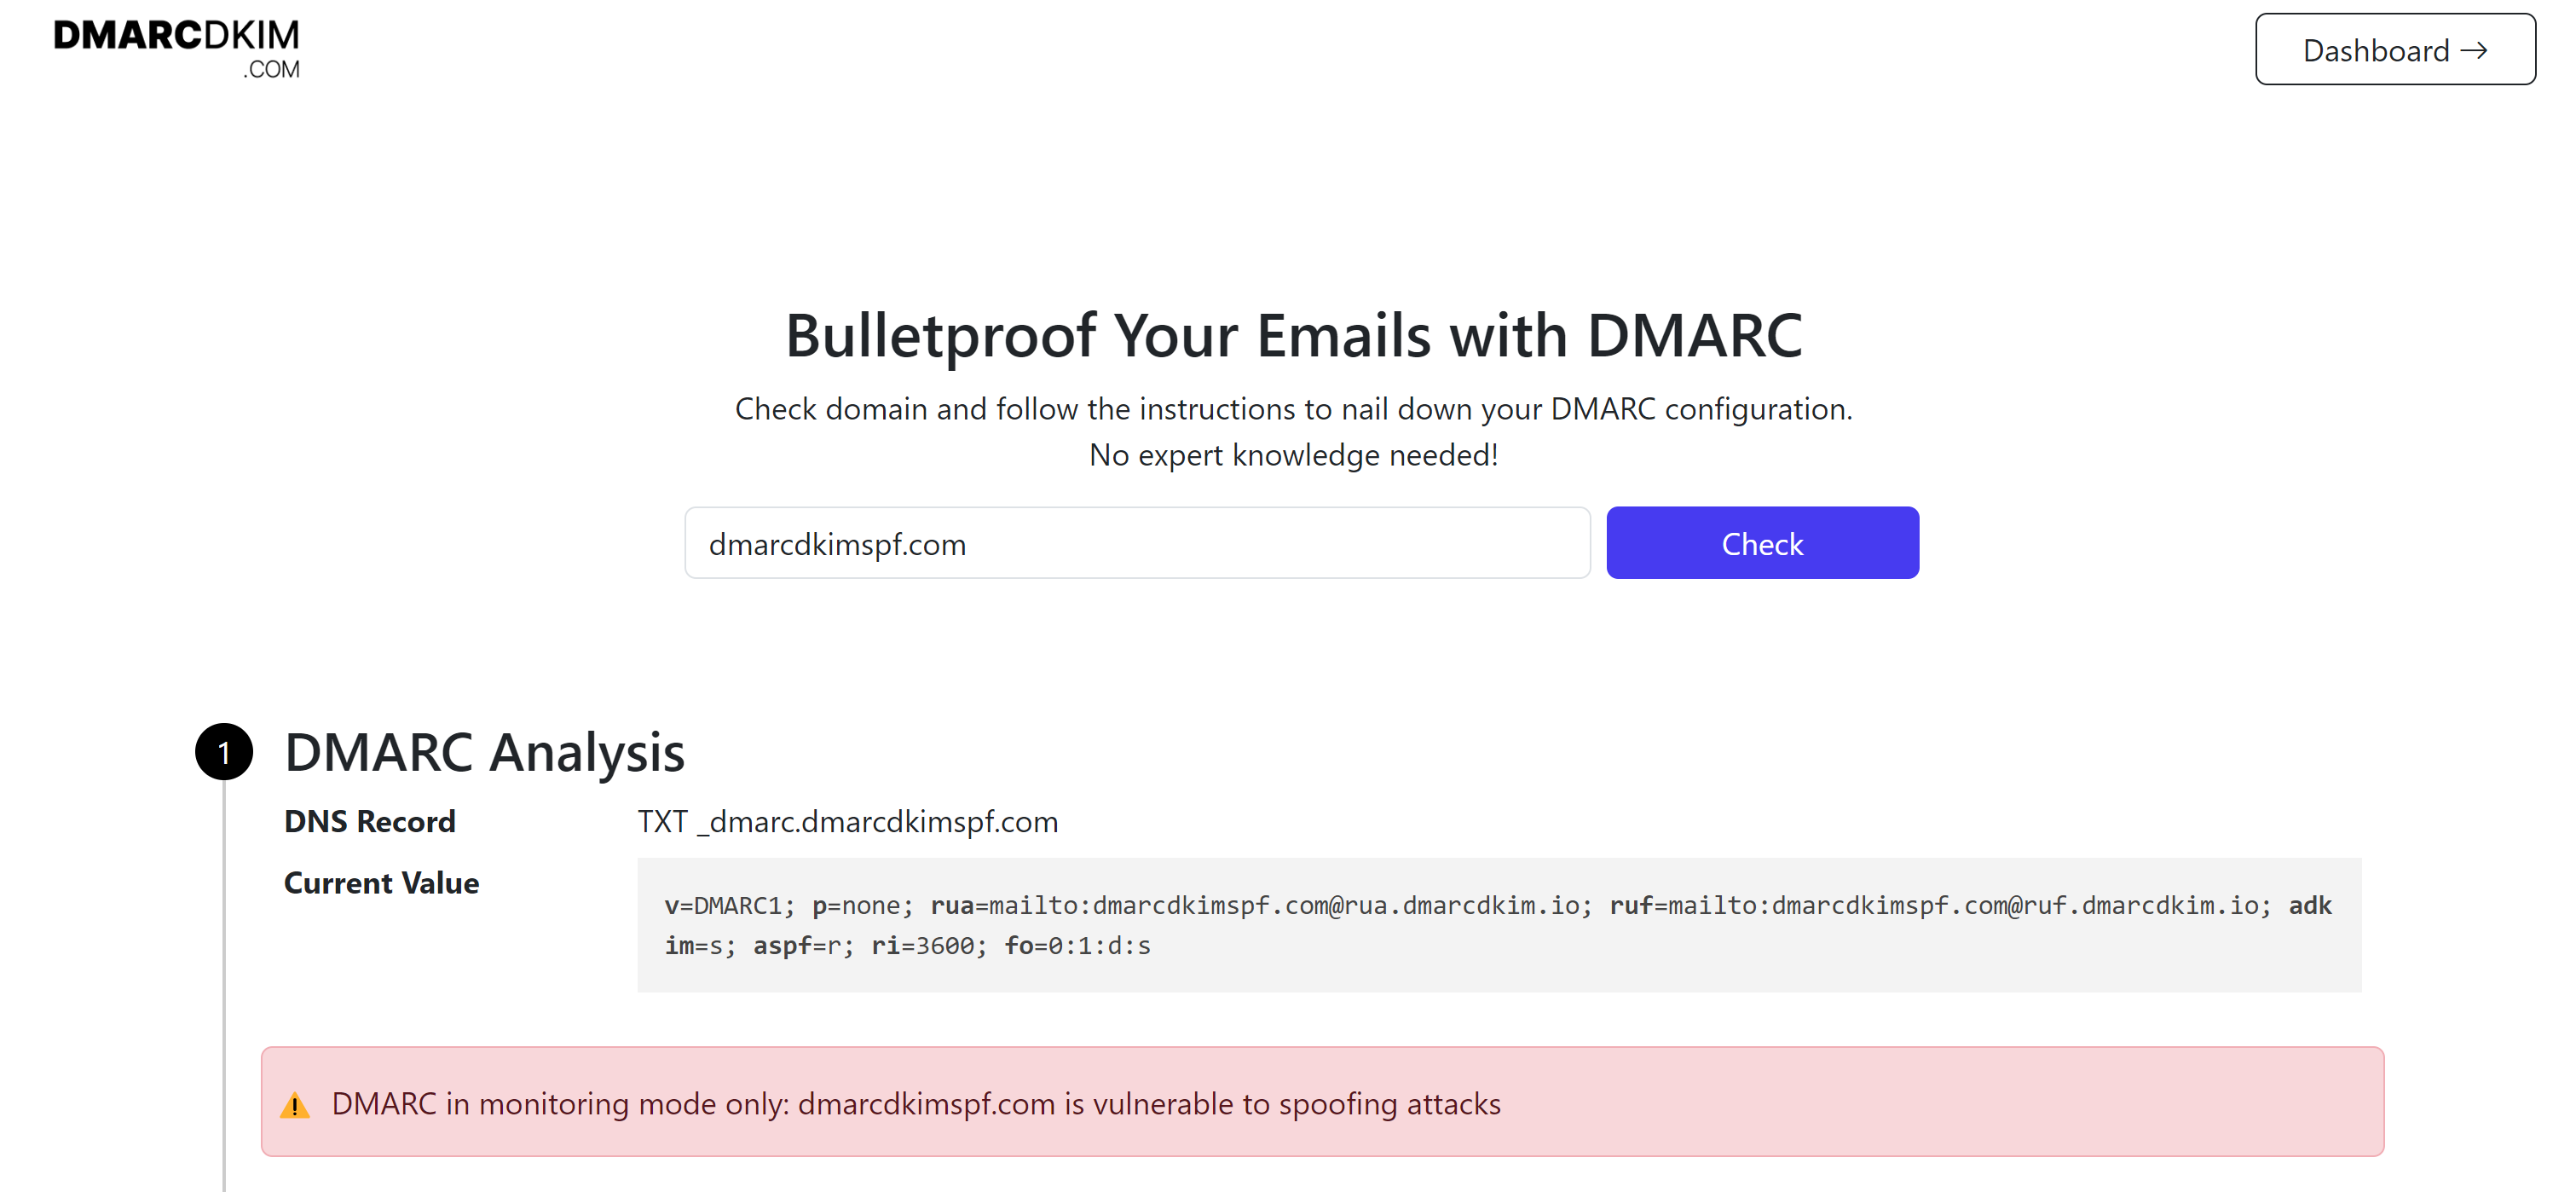
Click Sign up now to get access to the DMARC reports dashboard.
The tool starts generating reports after 24 hours of adding the DMARC record to the DNS provider.
Check domain and follow the instructions to nail down your DMARC configuration.
No expert knowledge needed!


