Configuring SPF and DKIM Records for Mailgun DMARC - Domain Authentication
Check your domain for DMARC, DKIM, SPF and MX records. Get a free report.
How to Authenticate Sender Domain for Mailgun DMARC?
To launch a successful email campaign, your sender domain has to be authenticated. The mailbox providers like Google, Yahoo, and Outlook require verification that the emails are coming from a legitimate source and haven't been forged along the way.
DNS records - DKIM, SPF, and DMARC - are the common ways to verify your emails. These records can be generated from a trustworthy email delivery platform like Mailgun.
If you see the error "This website is pending domain owner verification," this article is for you. This guide post is dedicated to guiding you through the DNS verification process and authenticating your domain.
Configure Mailgun DNS Records:
Sign in to your Mailgun account with the email you want to authenticate.
-
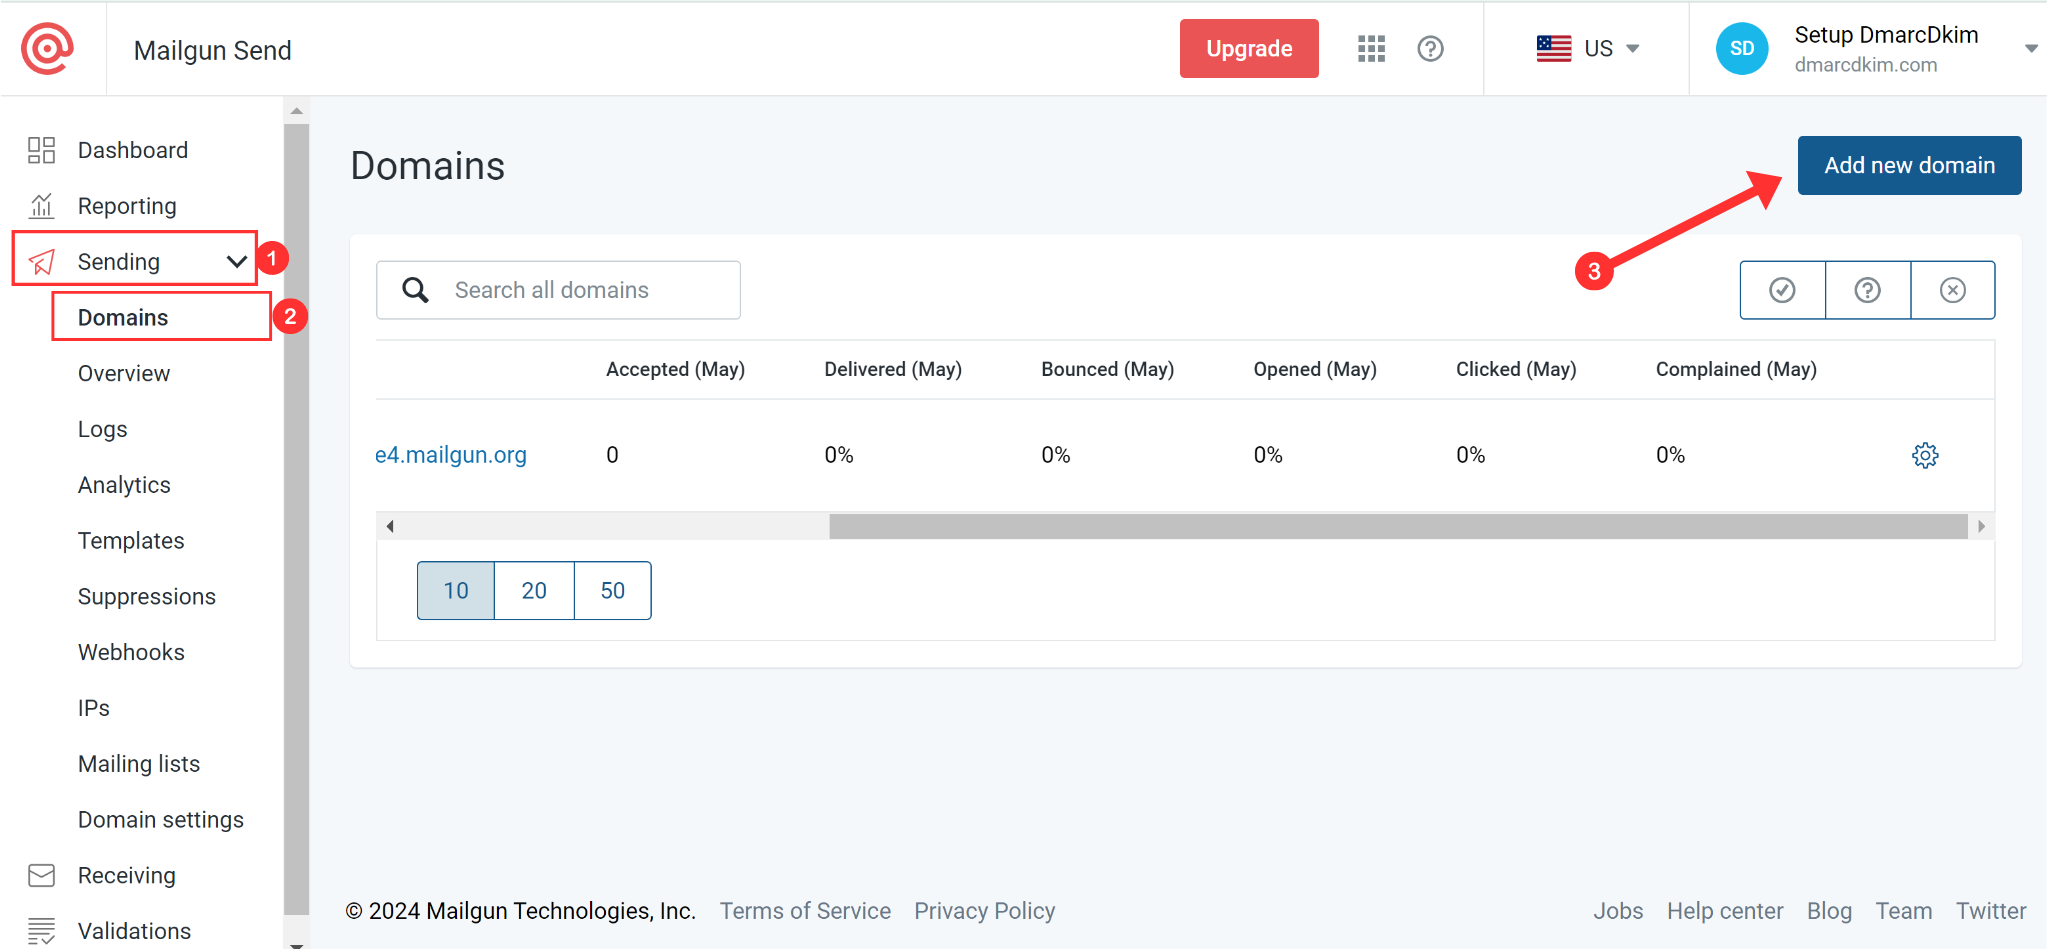
On the dashboard, click Settings, go to the Domain tab., and hit the Add Domain button.
-
Write down your domain name, select the region, and click Add Domain.
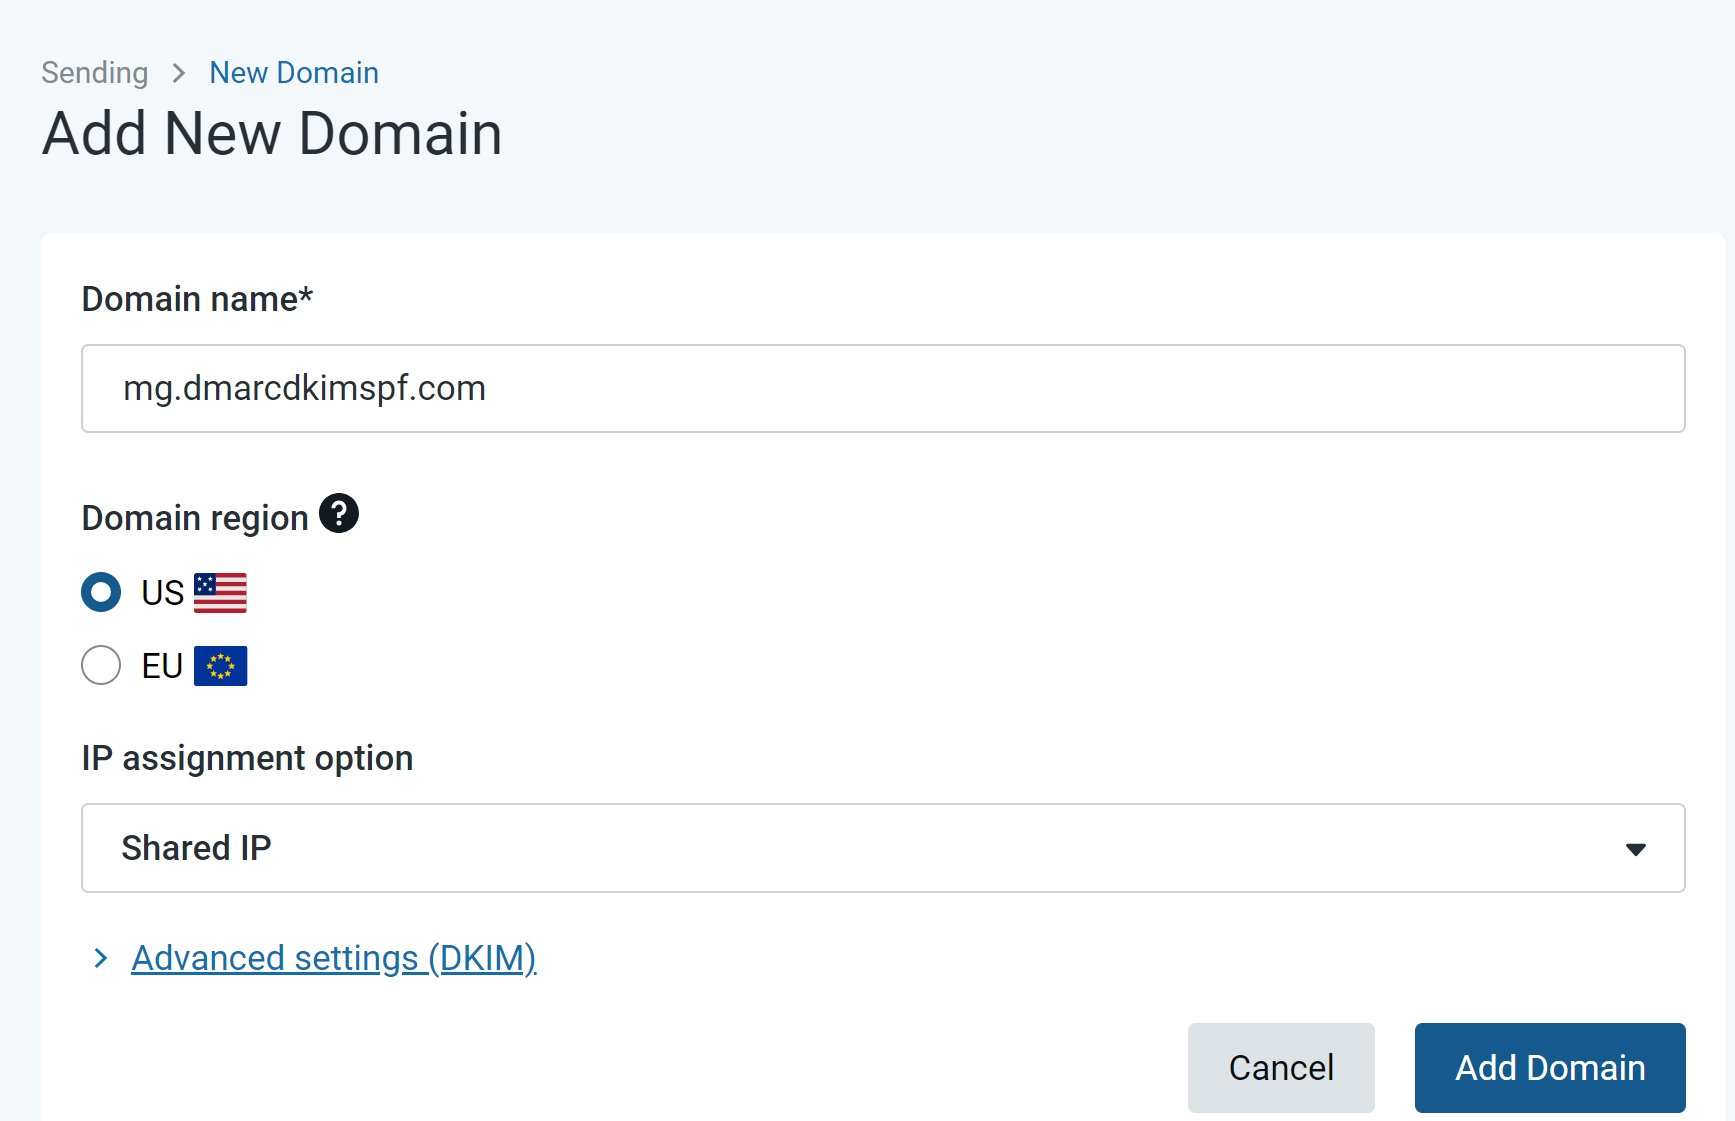
Now click the domain name you added.
On the next page, you'll see Sending (TXT), Receiving (MX), and Tracking (CNAME) DNS records.
Add Mailgun Sending (TXT) Records:
Login to your DNS provider in a different browser tab (we are using Cloudflare for this guide but you can add records to any DNS provider you use).
-
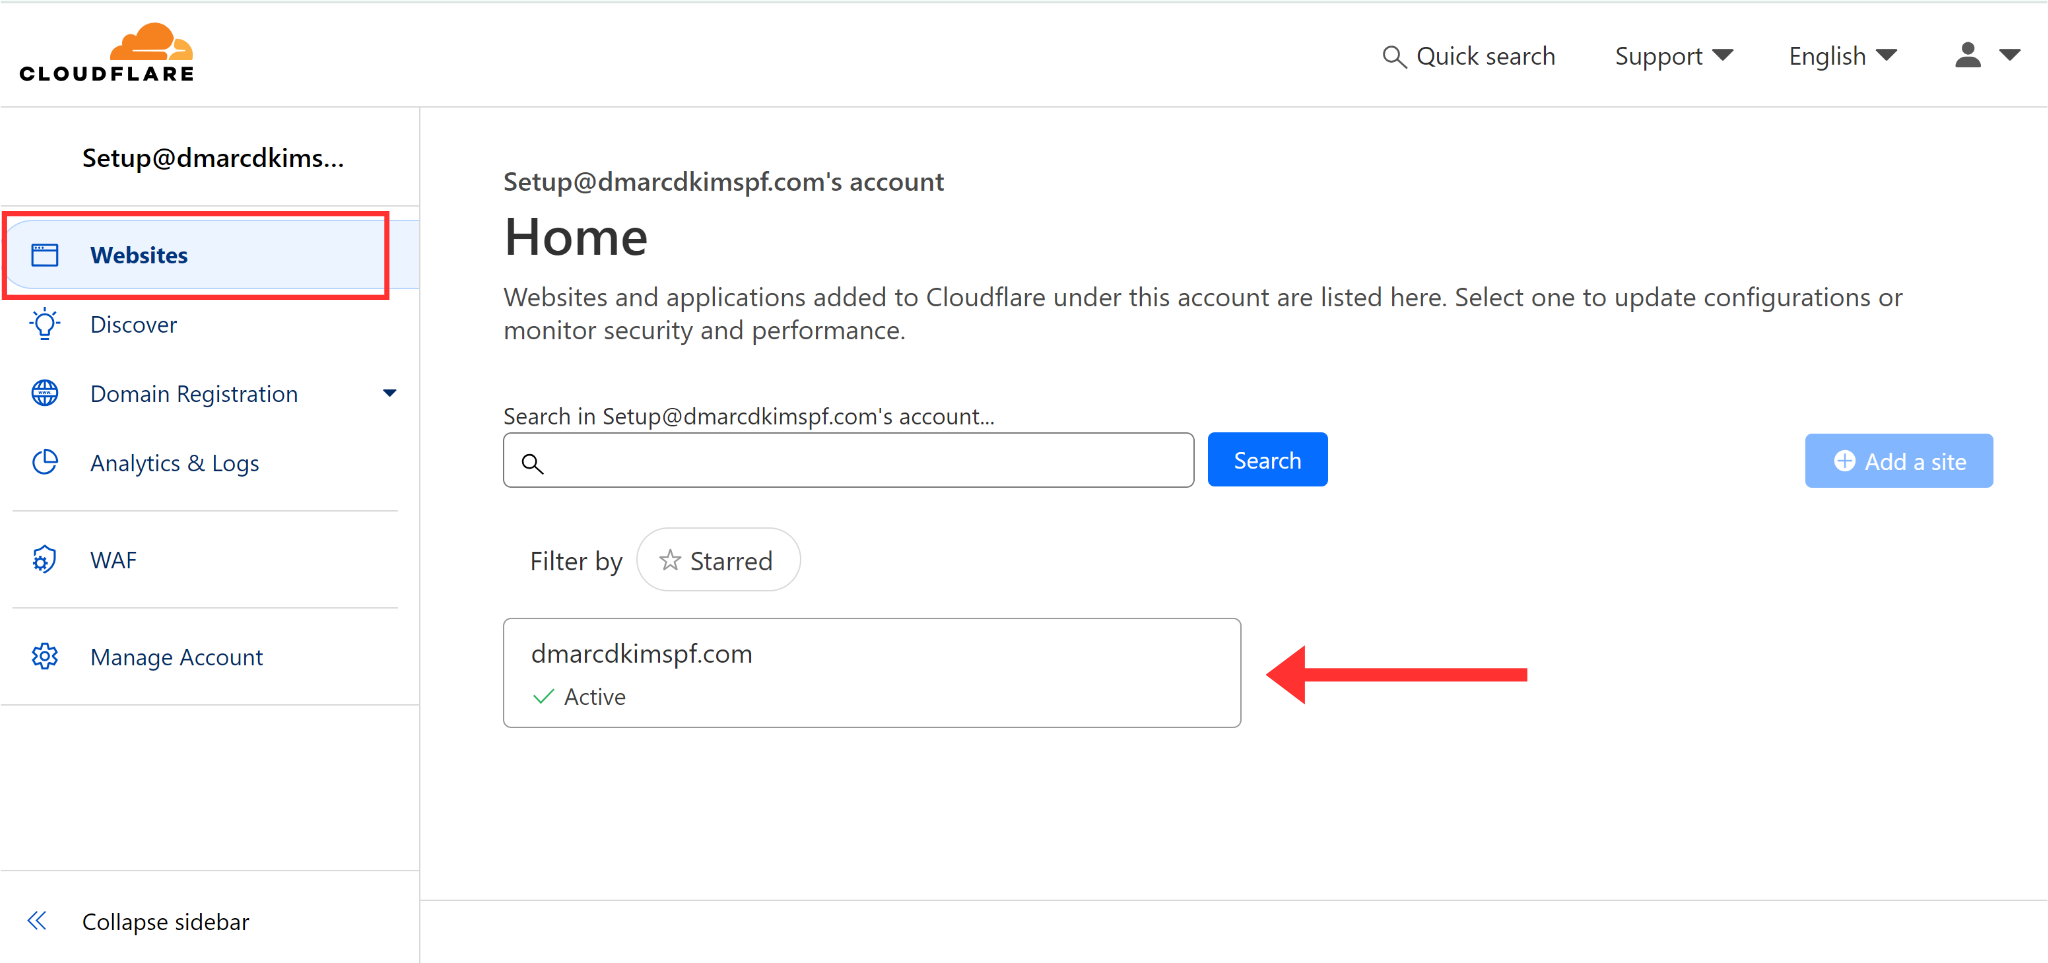
In the Home tab, click your Website.
-
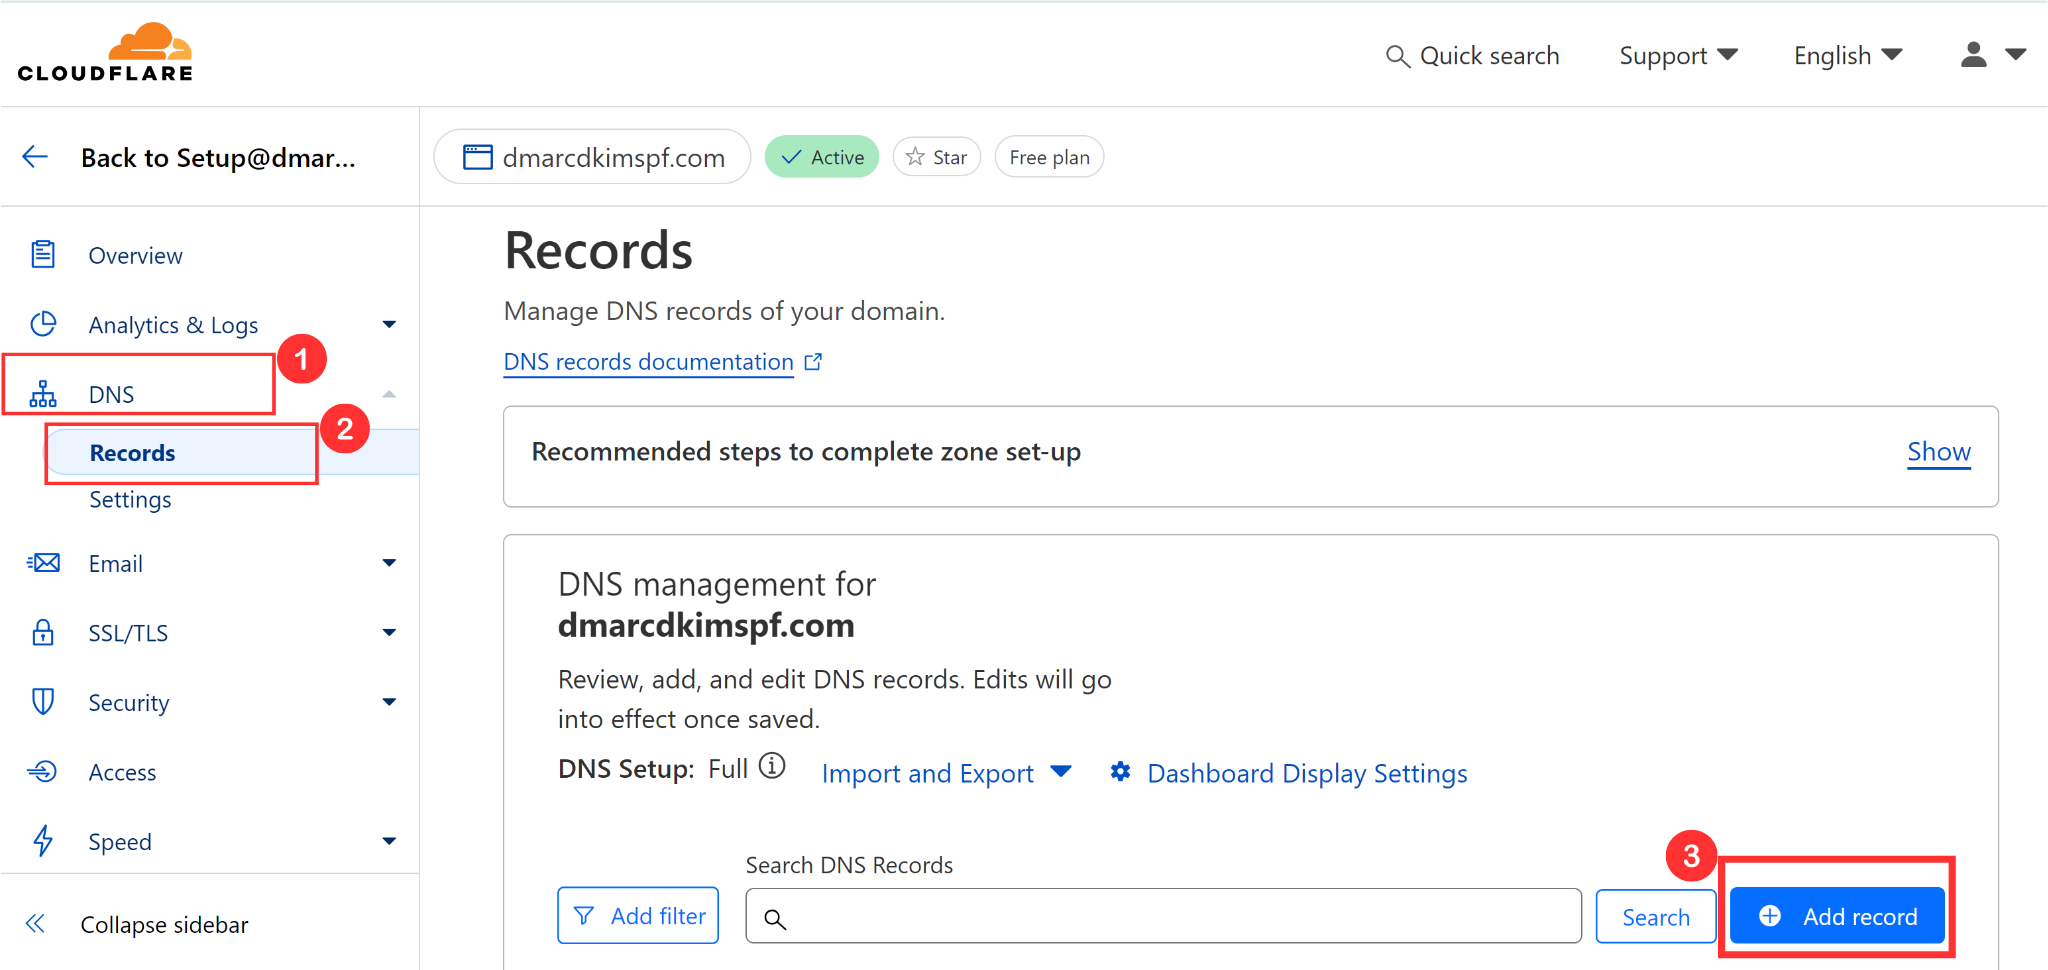
Click DNS, select Records, and hit the Add Record button to add new records.
-
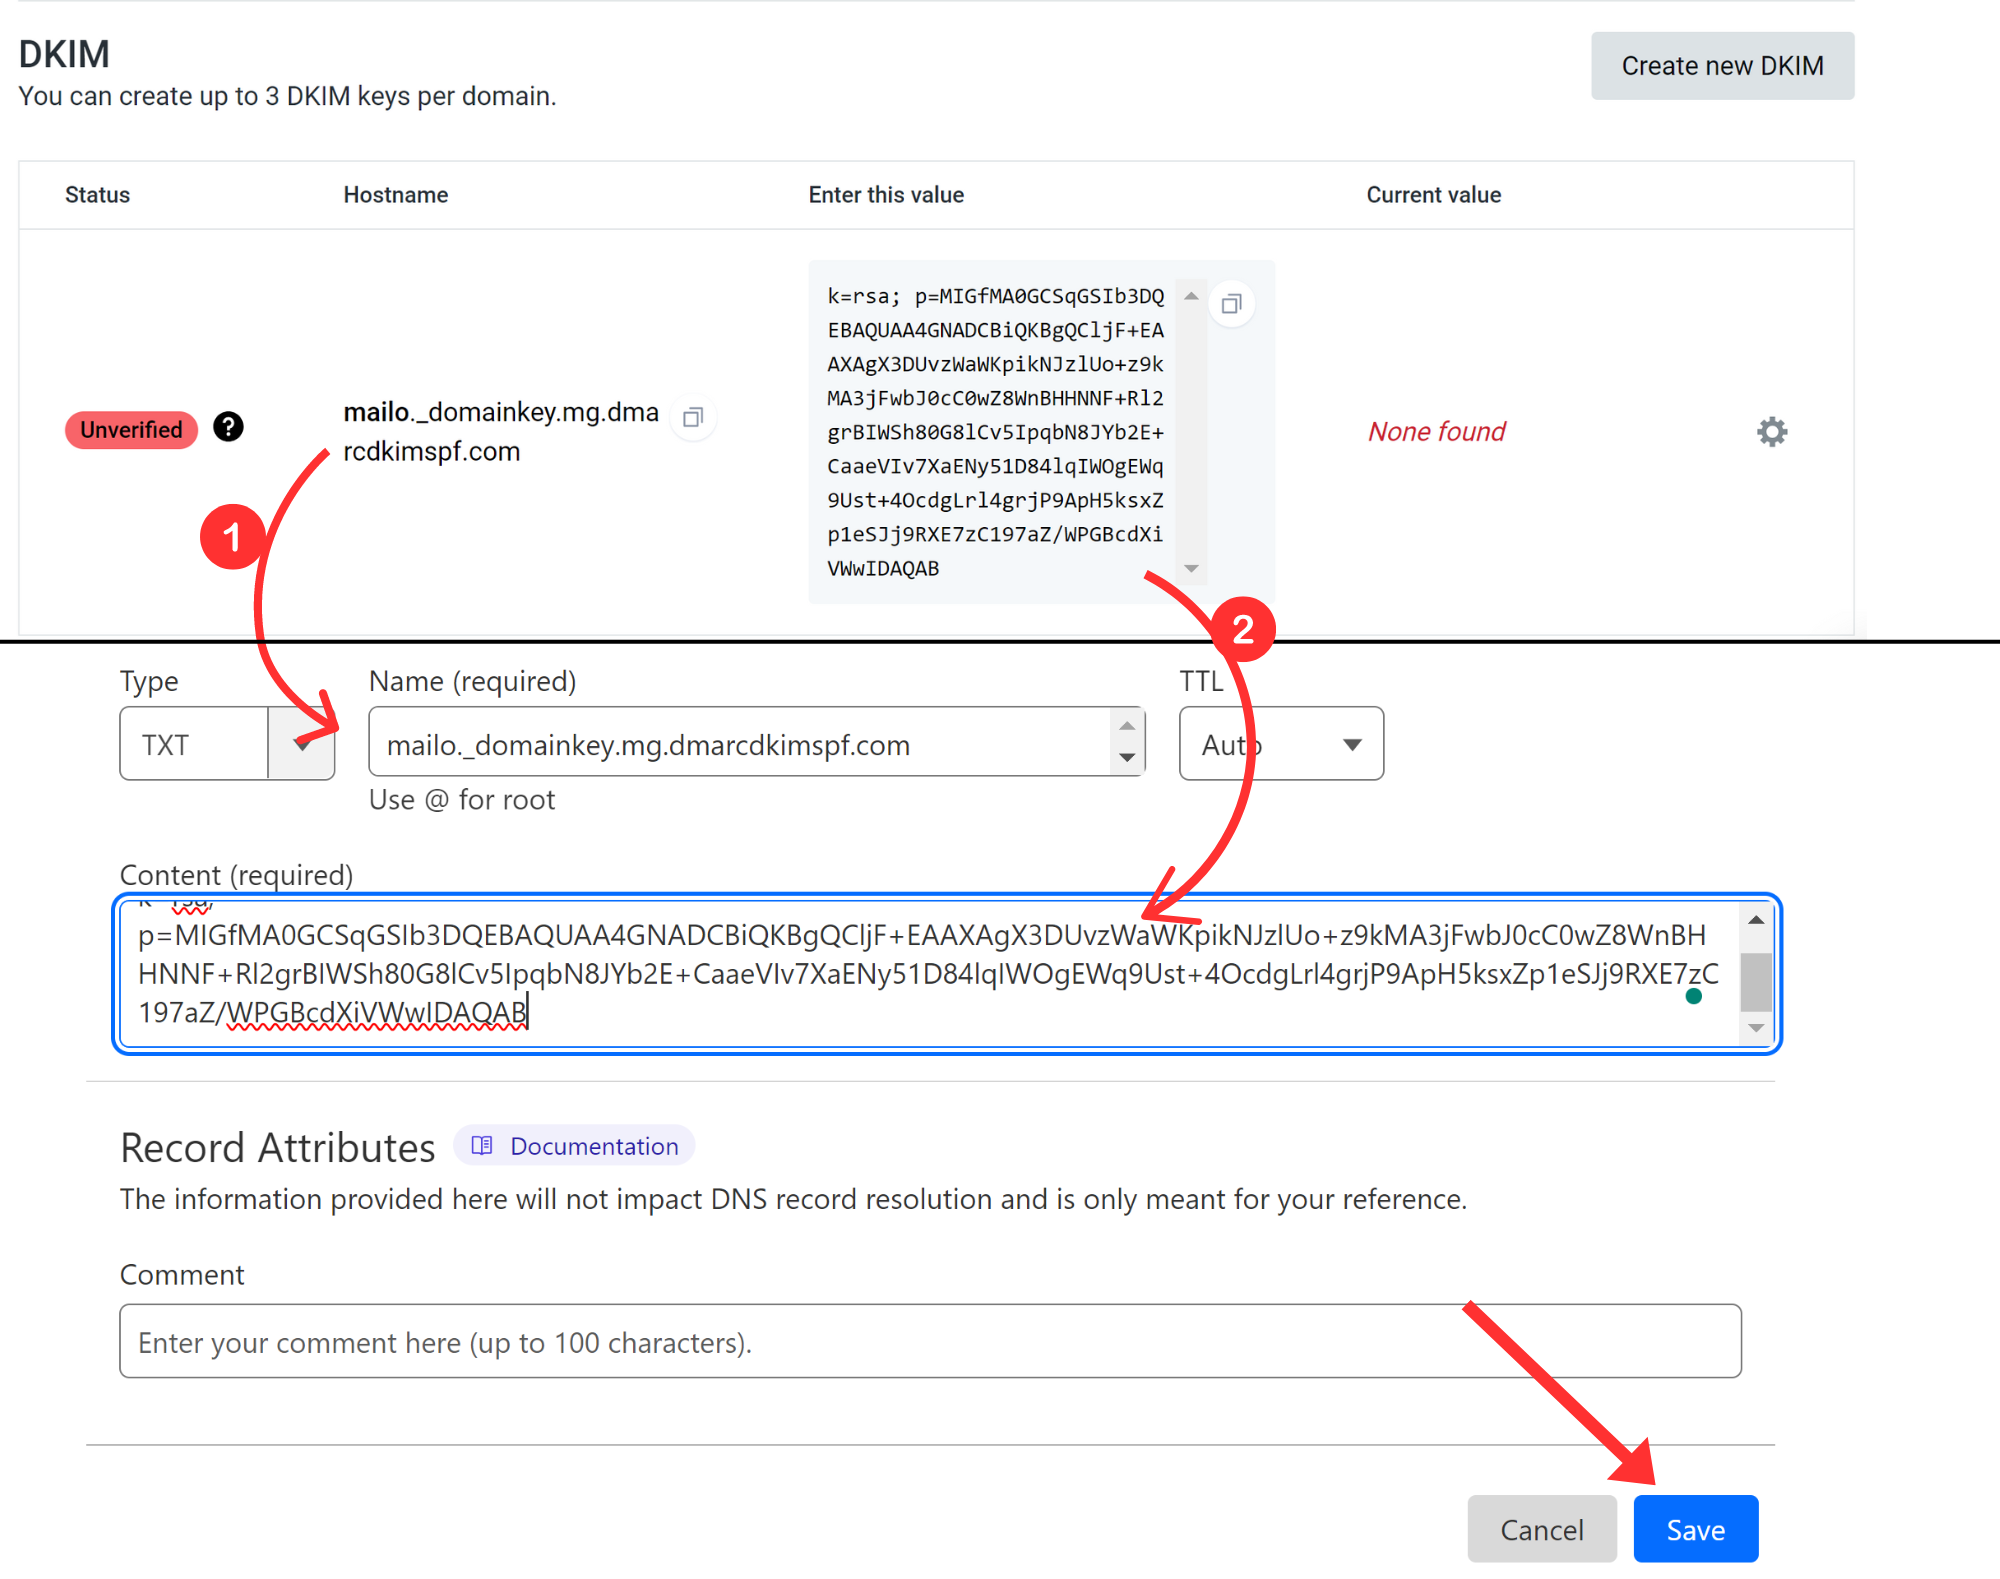
Copy the Sending DKIM and SPF record name and value, and add them to the dedicated field in the DNS provider.
What to do if SPF already exists in the DNS Provider?
If there is an existing SPF record in your DNS provider, you can use the SPF Merge Tool to combine multiple SPF records into one.
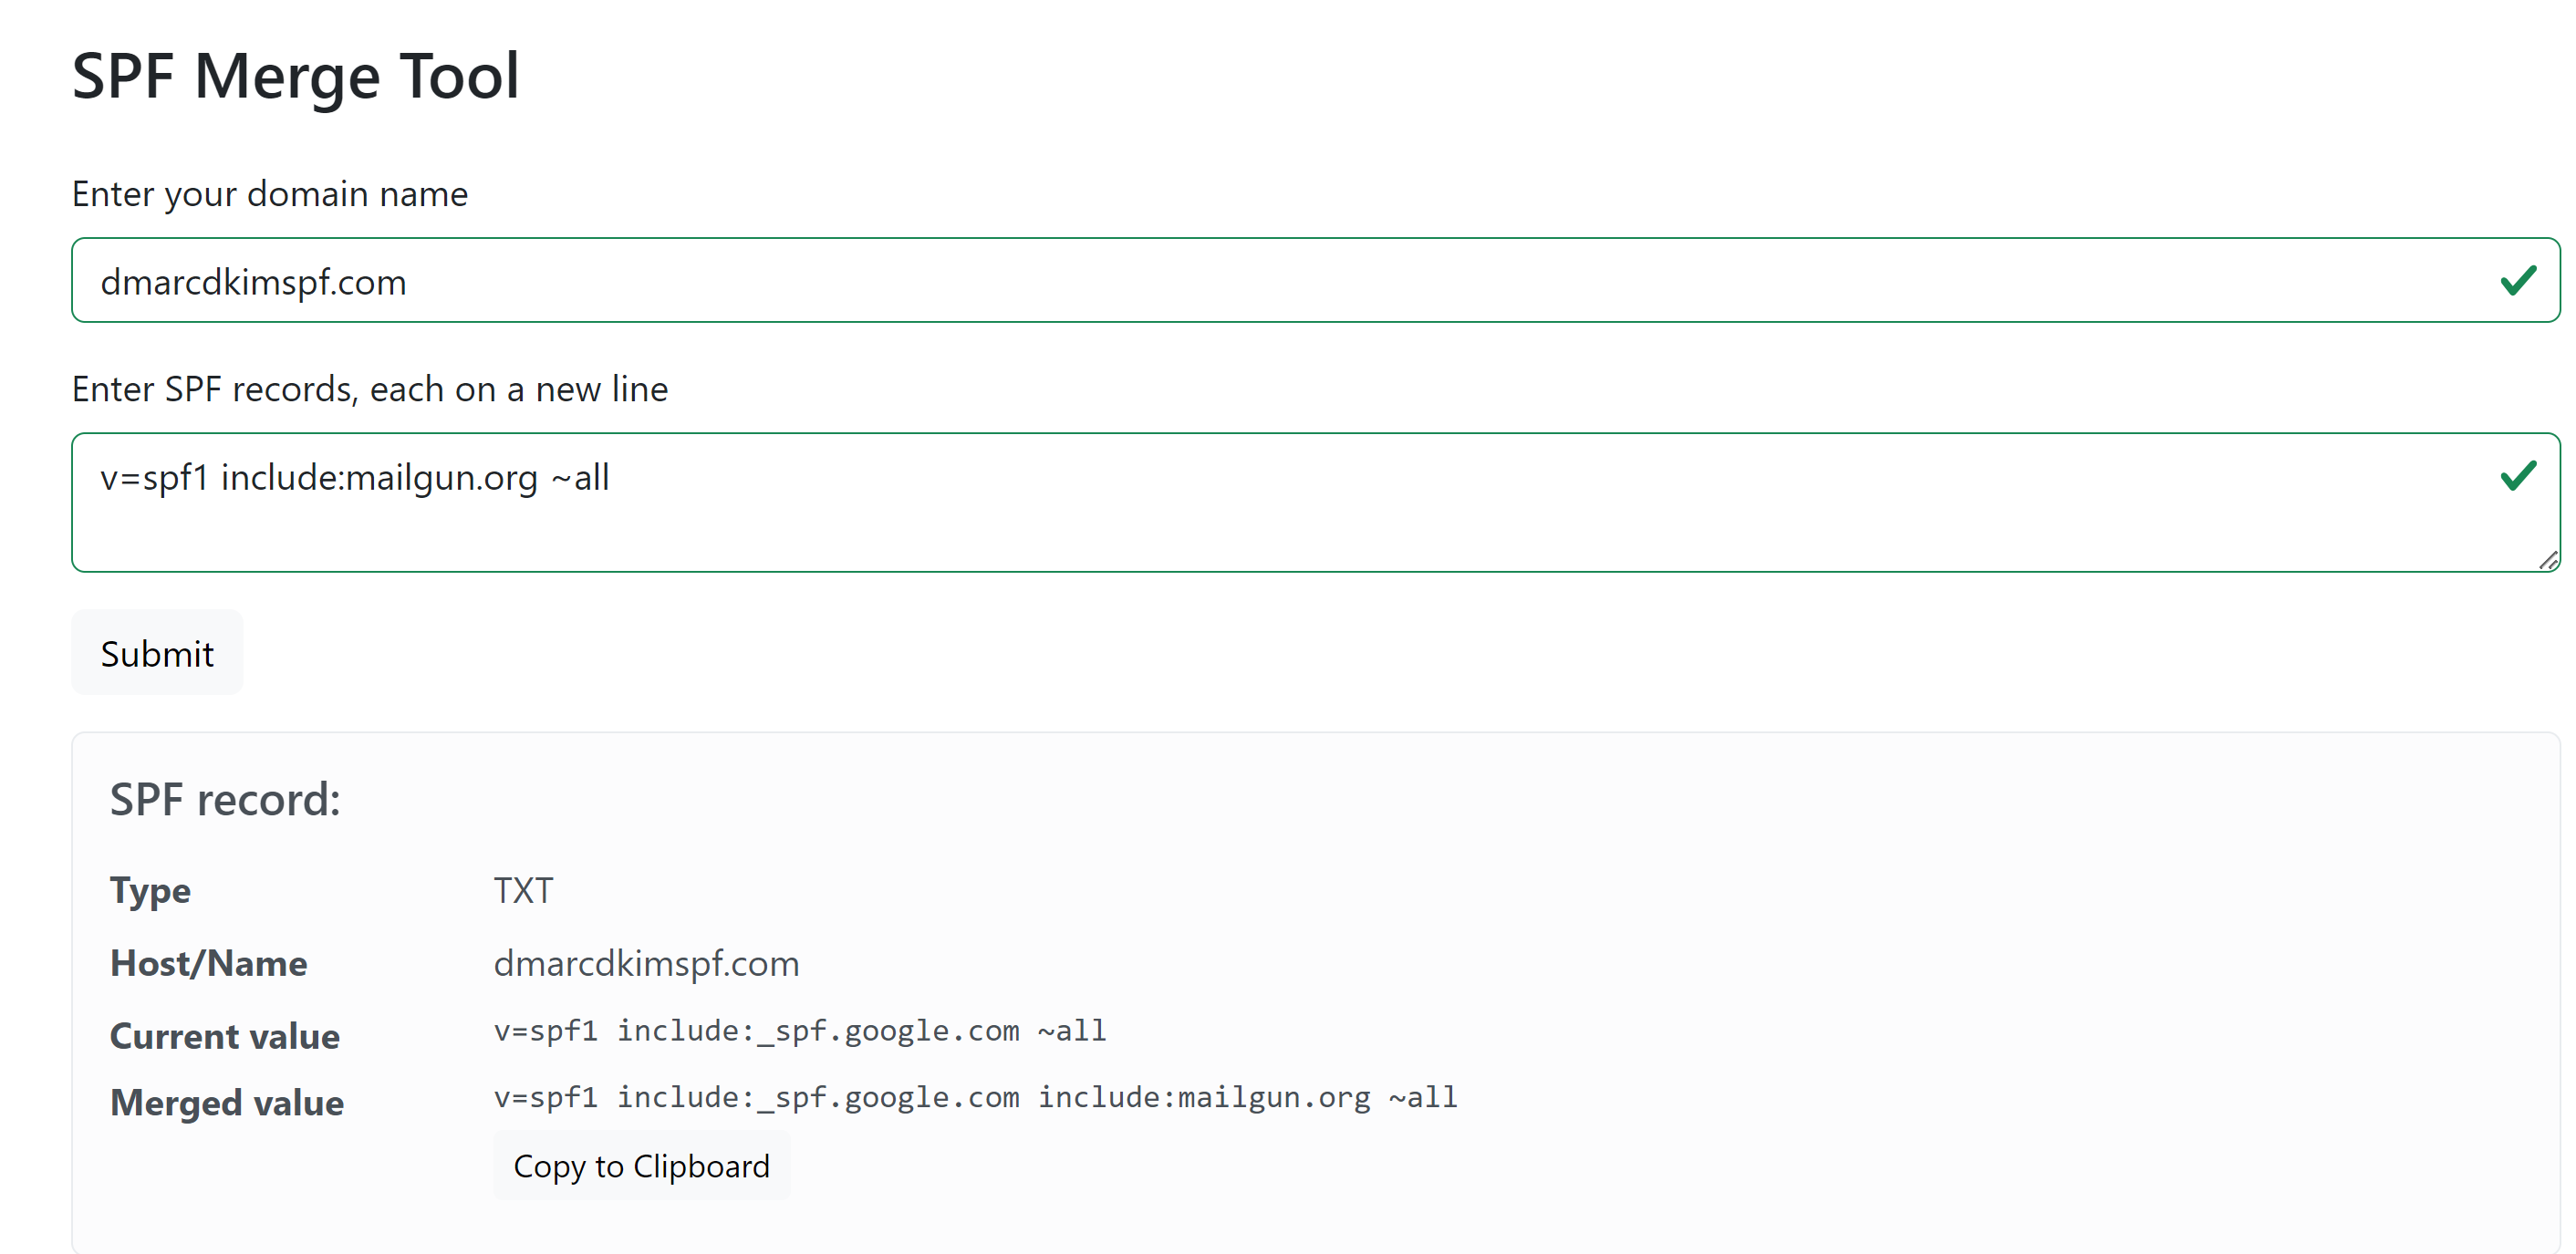
Open the SPF Merge Tool and write down the domain name
Add the Mailgun SPF record and click Submit.
-
The tool generates a merged value, combining both - existing SPF and Mailgun SPF into one.
-
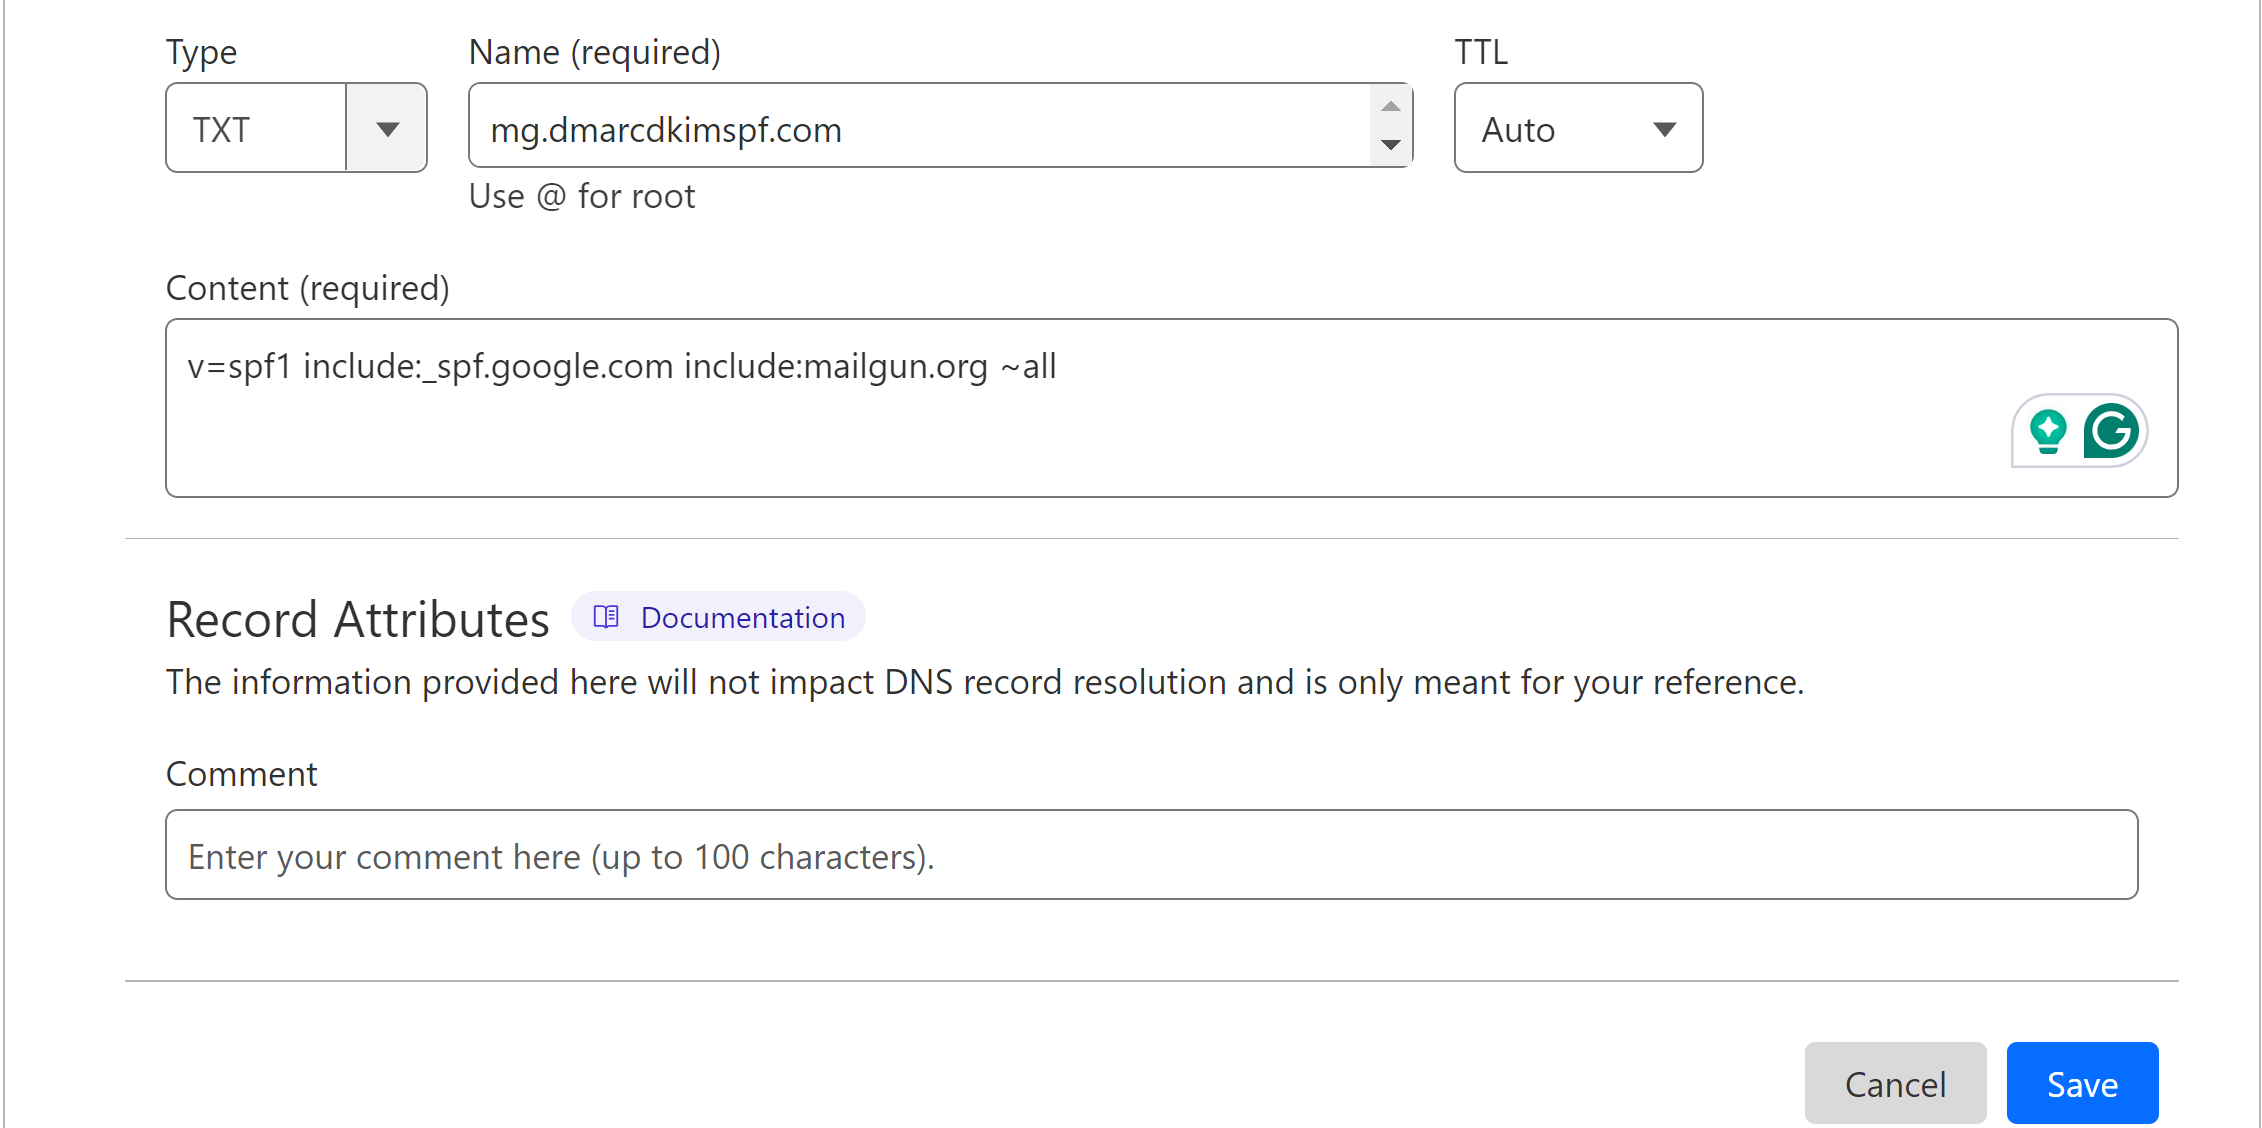
Add this merged value and record name to the DNS provider.
Add Mailgun Receiving (MX) Record:
If your domain has MX records from any other email service, don't add Mailgun MX records. Because you can have only one receiving server for a domain. Having multiple receiving servers can cause conflicts. Learn more about adding MX records.
If you haven't added any MX records to your DNS, then add the Mailgun MX records following the steps below:
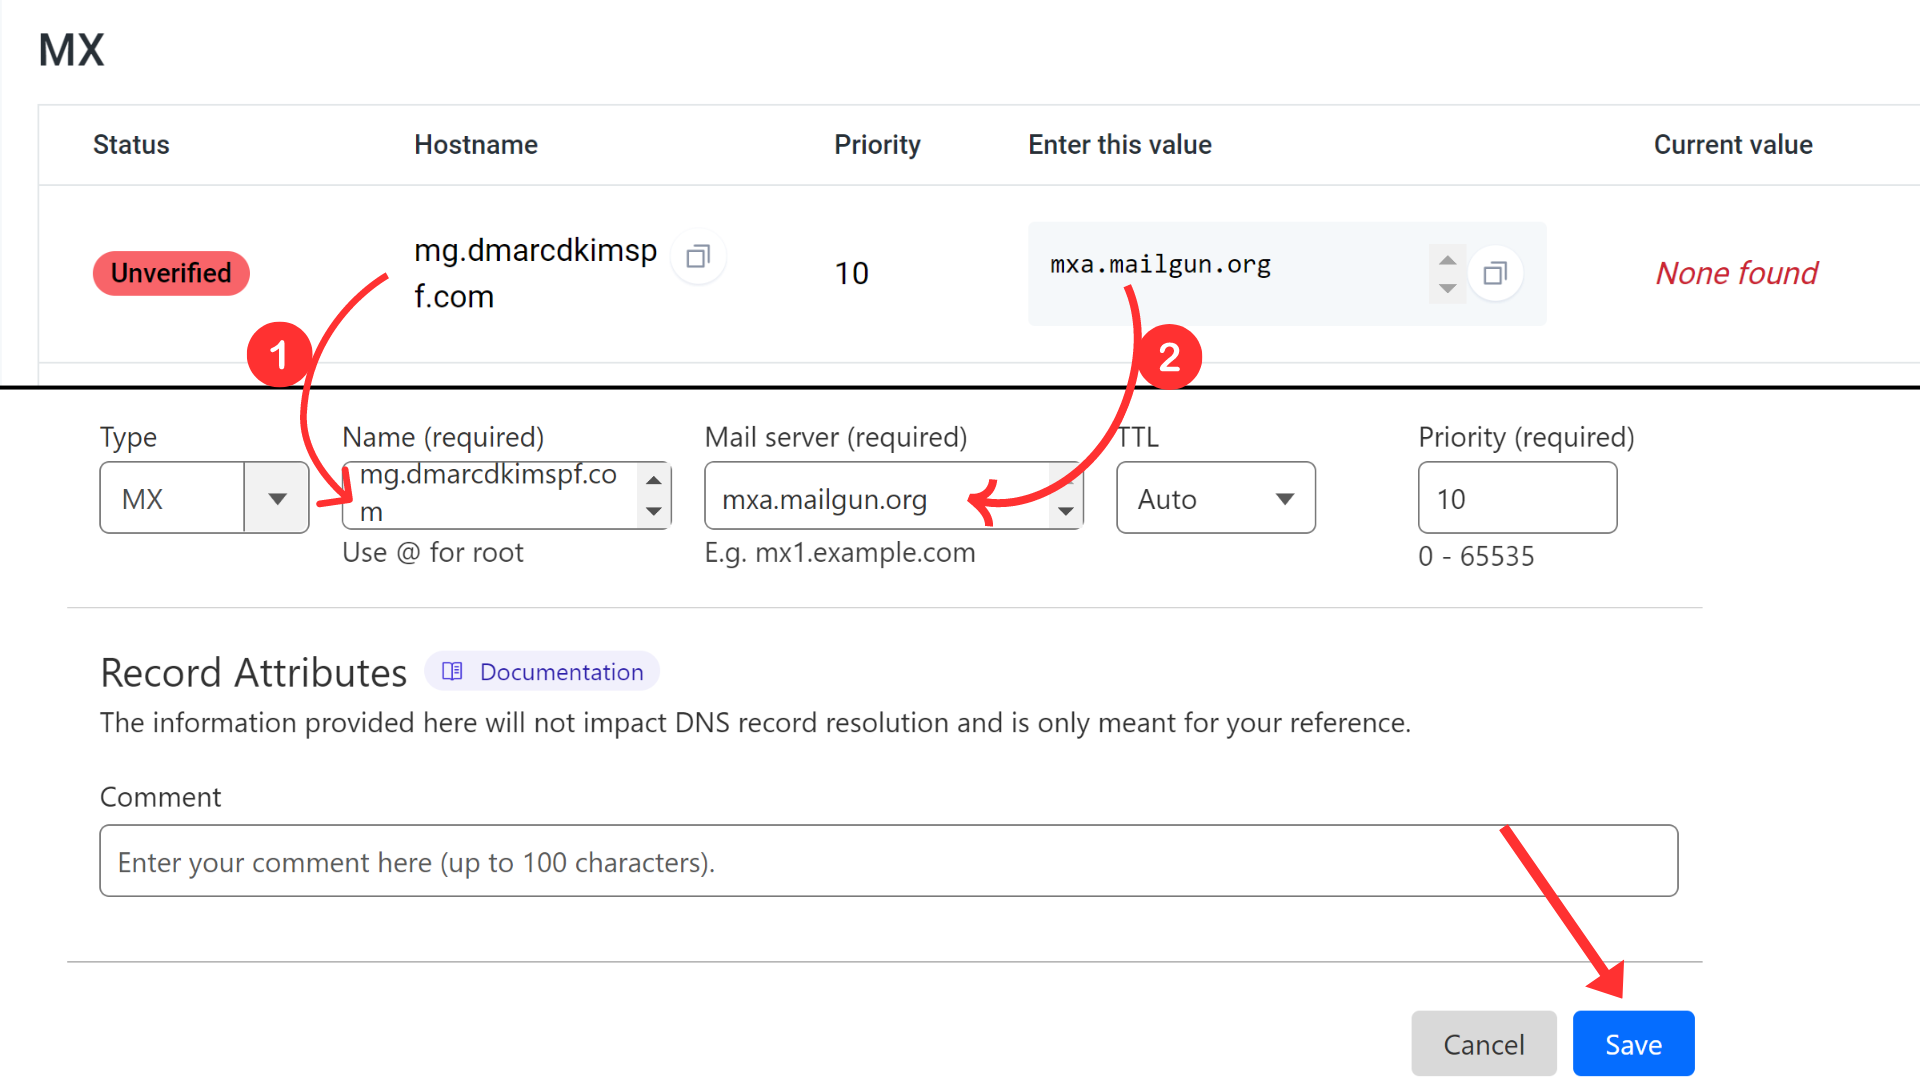
Copy the MX record name and paste it into the Name field in the DNS dashboard.
Then copy the MX record value and add it to the Target field in the DNS provider.
Select the record type "MX" from the drop-down menu.
Set priority value "10."
-
Click Save to add the receiving record.
Follow the same steps for the second MX record.
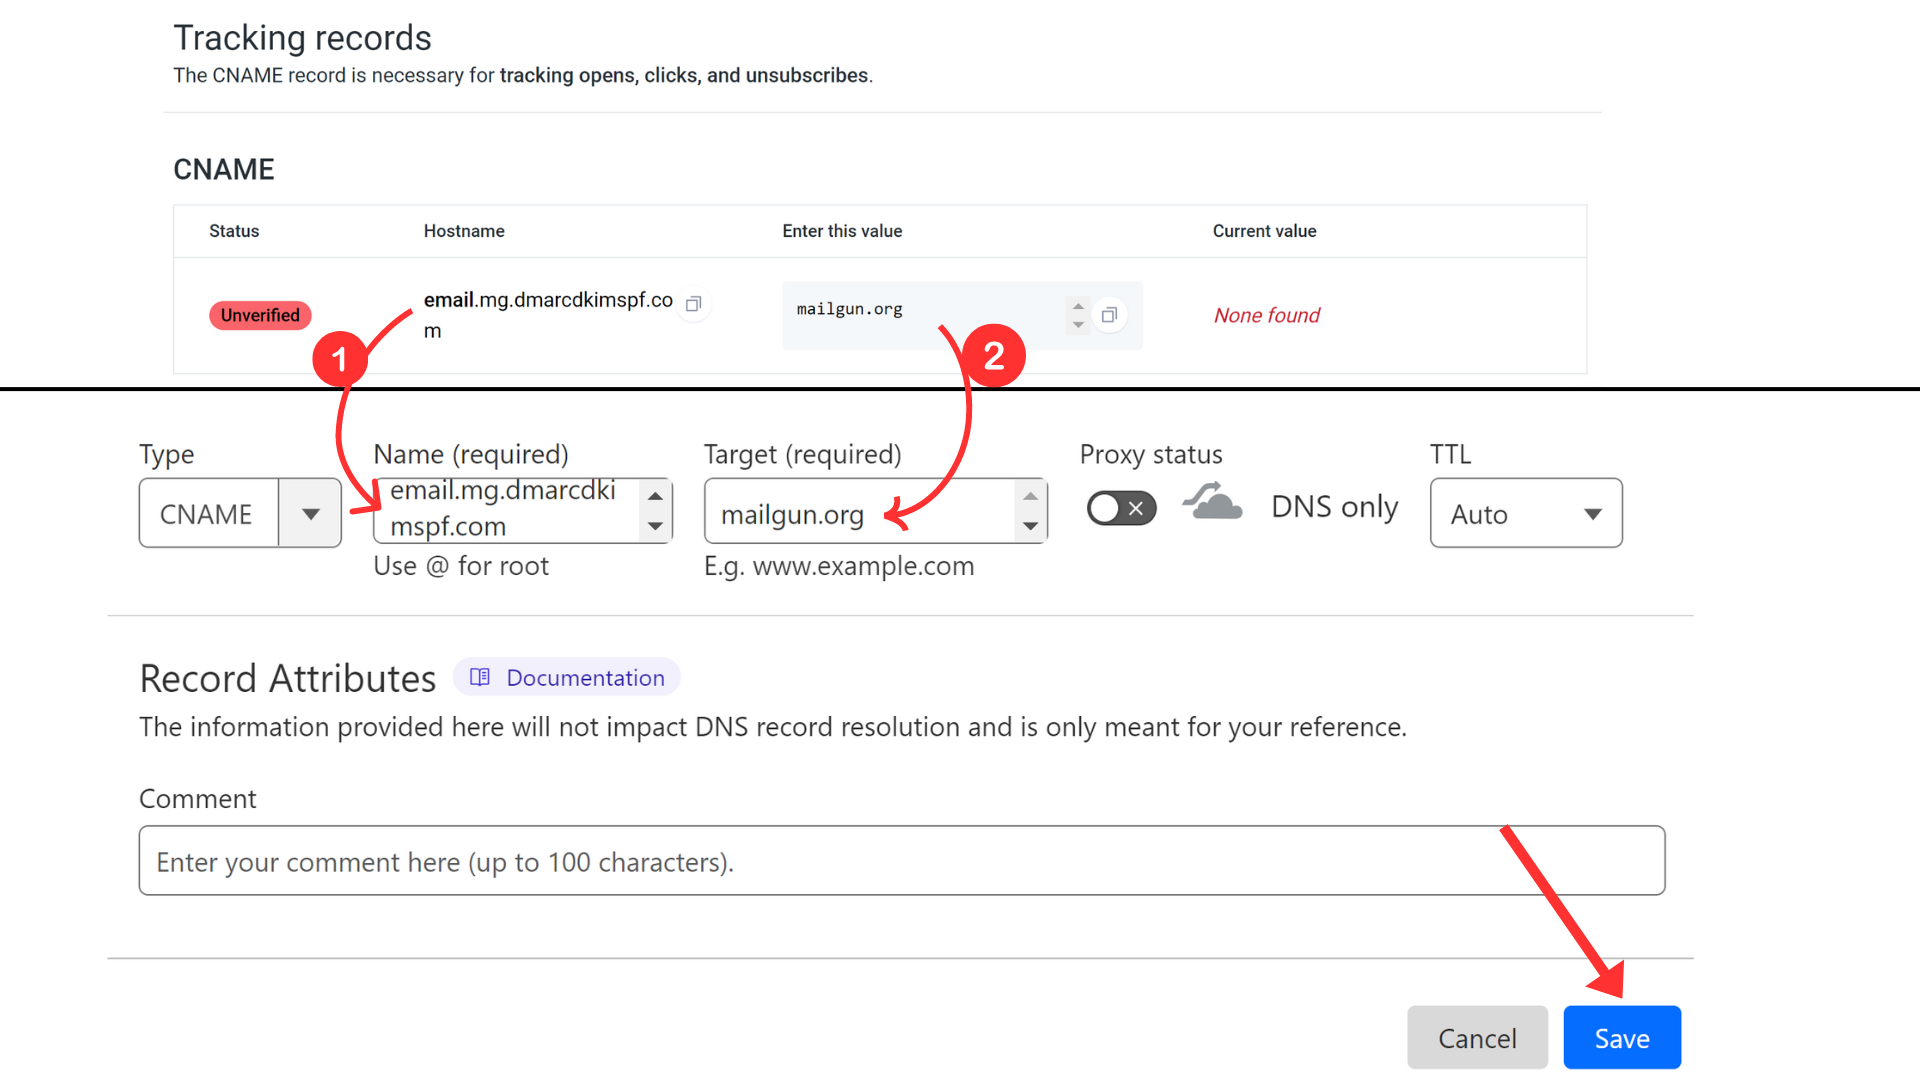
Add Mailgun Tracking (CNAME) Records:
Copy the record name and add it to the Name field.
Copy the record value and add it to the Target field.
Select record type "CNAME."
-
Click Save to add the record.
Add Mailgun DMARC (TXT) Record:
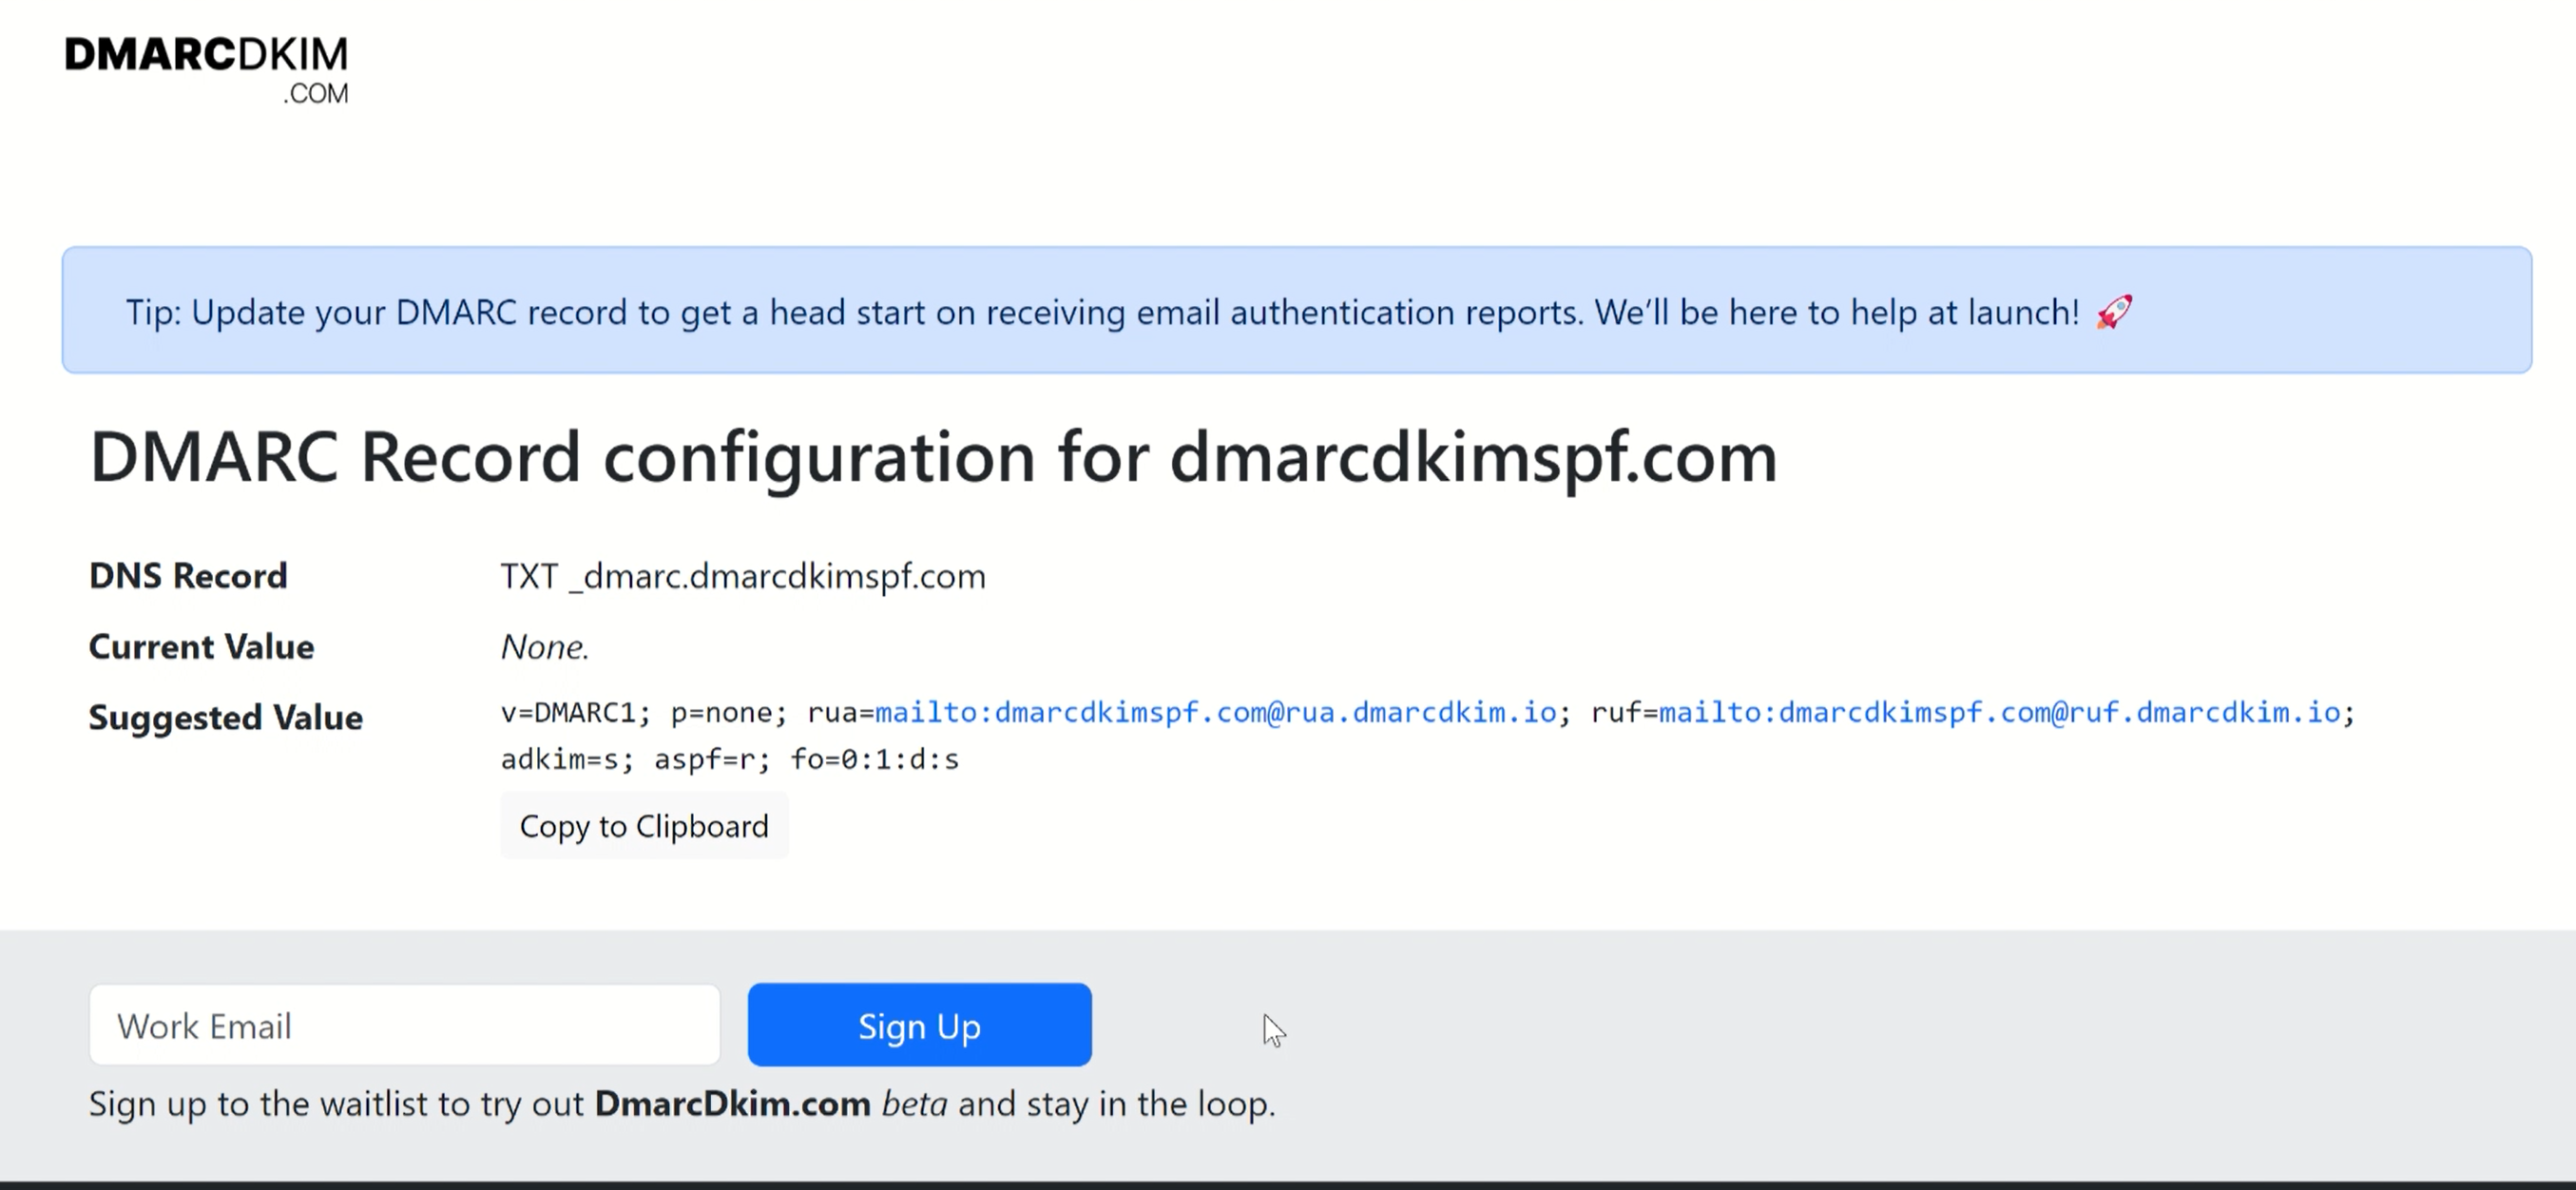
Mailgun doesn't provide the DMARC value but adding DMARC is crucial for email communication security. Therefore, we recommend using a DMARC Check Tool to generate an effective custom DMARC value.
This value provides initial monitoring and allows you to implement a strict DMARC policy over time. Moreover, it has proper instructions to leverage data from the DMARC report.
-
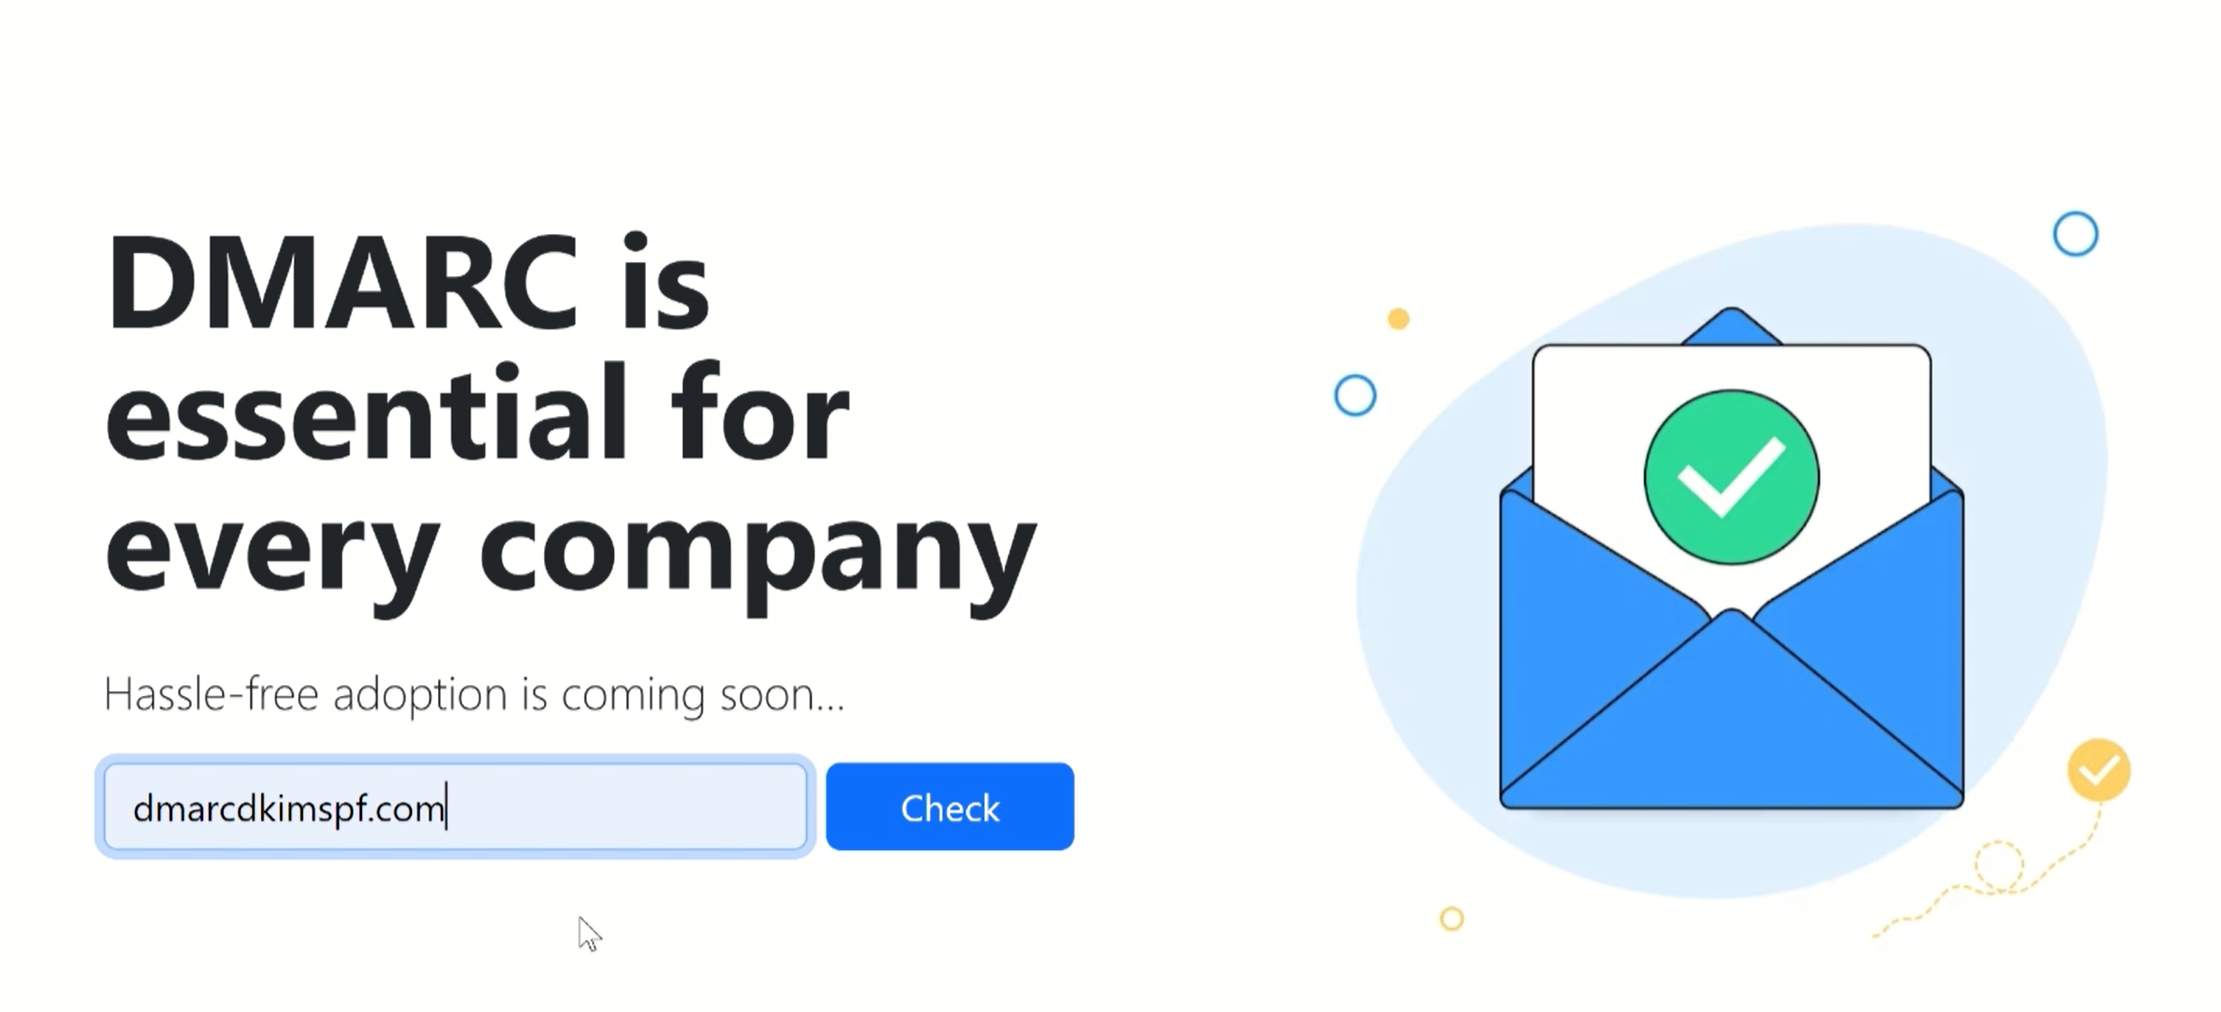
Open the DMARC Check Tool, write your domain name, and click Check.
-
The tool gives you a suggested value. Add this record name and value to your DNS provider.
Verify Mailgun DNS Records:
-
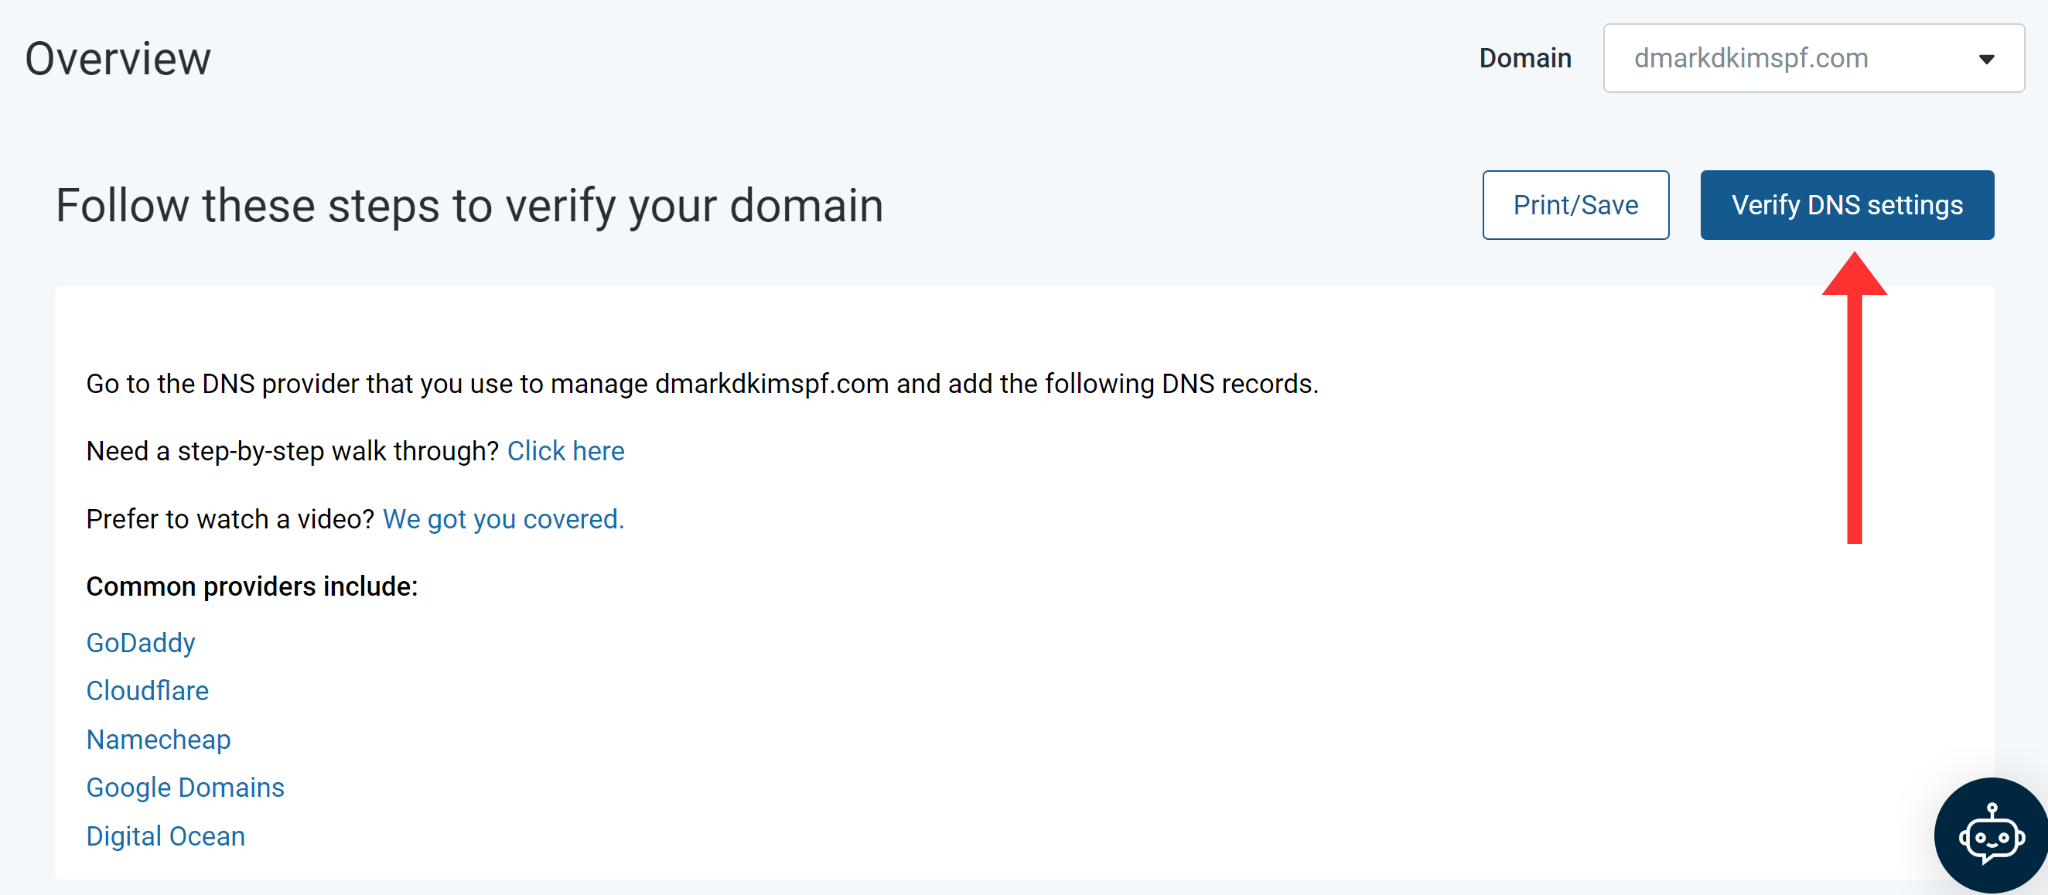
Once all records are added, return to the Mailgun DNS records page and click "Verify DNS Settings."
-
If records were added successfully, you should see green checkmarks next to your domain which means the sender domain is authenticated.
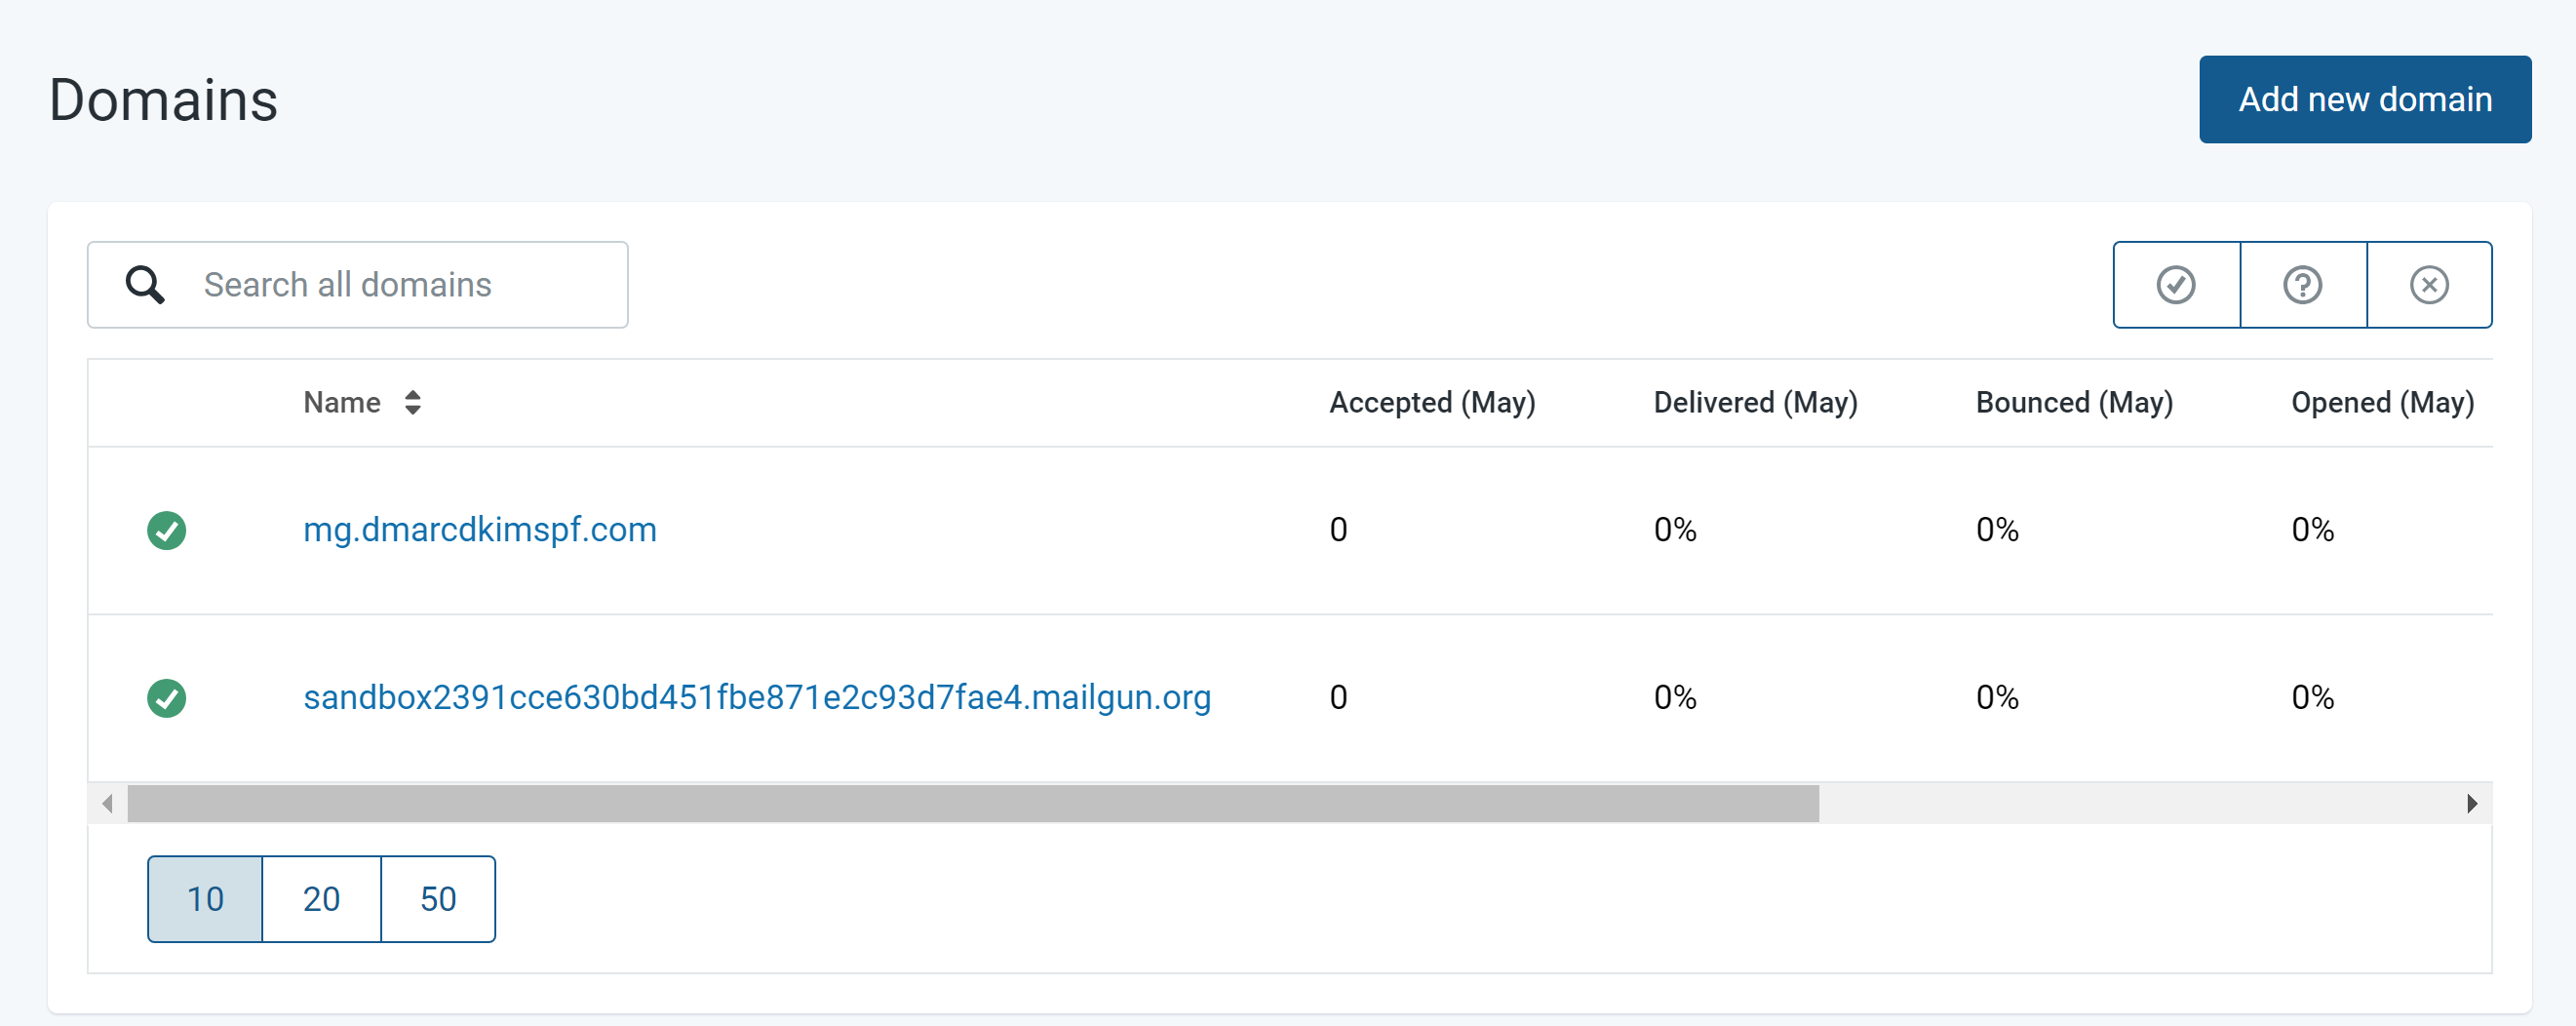
If your domain didn't get DNS records verified right after adding them, wait up to 48 hours and check again. If there is no success, then it means there is some misconfiguration in your DNS records. To diagnose and fix the issue, hire a DmarcDkim.com expert or contact Mailgun support service.
Check domain and follow the instructions to nail down your DMARC configuration.
No expert knowledge needed!


