Beehiiv Domain Authentication - Configure SPF, DKIM, DMARC Records
Check your domain for DMARC, DKIM, SPF and MX records. Get a free report.
How to Authenticate Beehiiv Email Domain? Step by Step Guide
Authenticating and securing email communication is crucial for businesses to prevent spoofing and improve deliverability. There are three commonly used protocols to authenticate emails - SPF (Sender Policy Framework), DKIM (DomainKey Identified Mail), and DMARC (Domain-based Message Authentication, Reporting & Conformance ).
You can get these DNS records from the email service provider and add them to the domain hosting server to authenticate your webmail.
Beehiiv provides authentication records for your email domains. In this article, you'll learn how to setup these records in the DNS provider for verification.
Configure Beehiiv DKIM and SPF records:
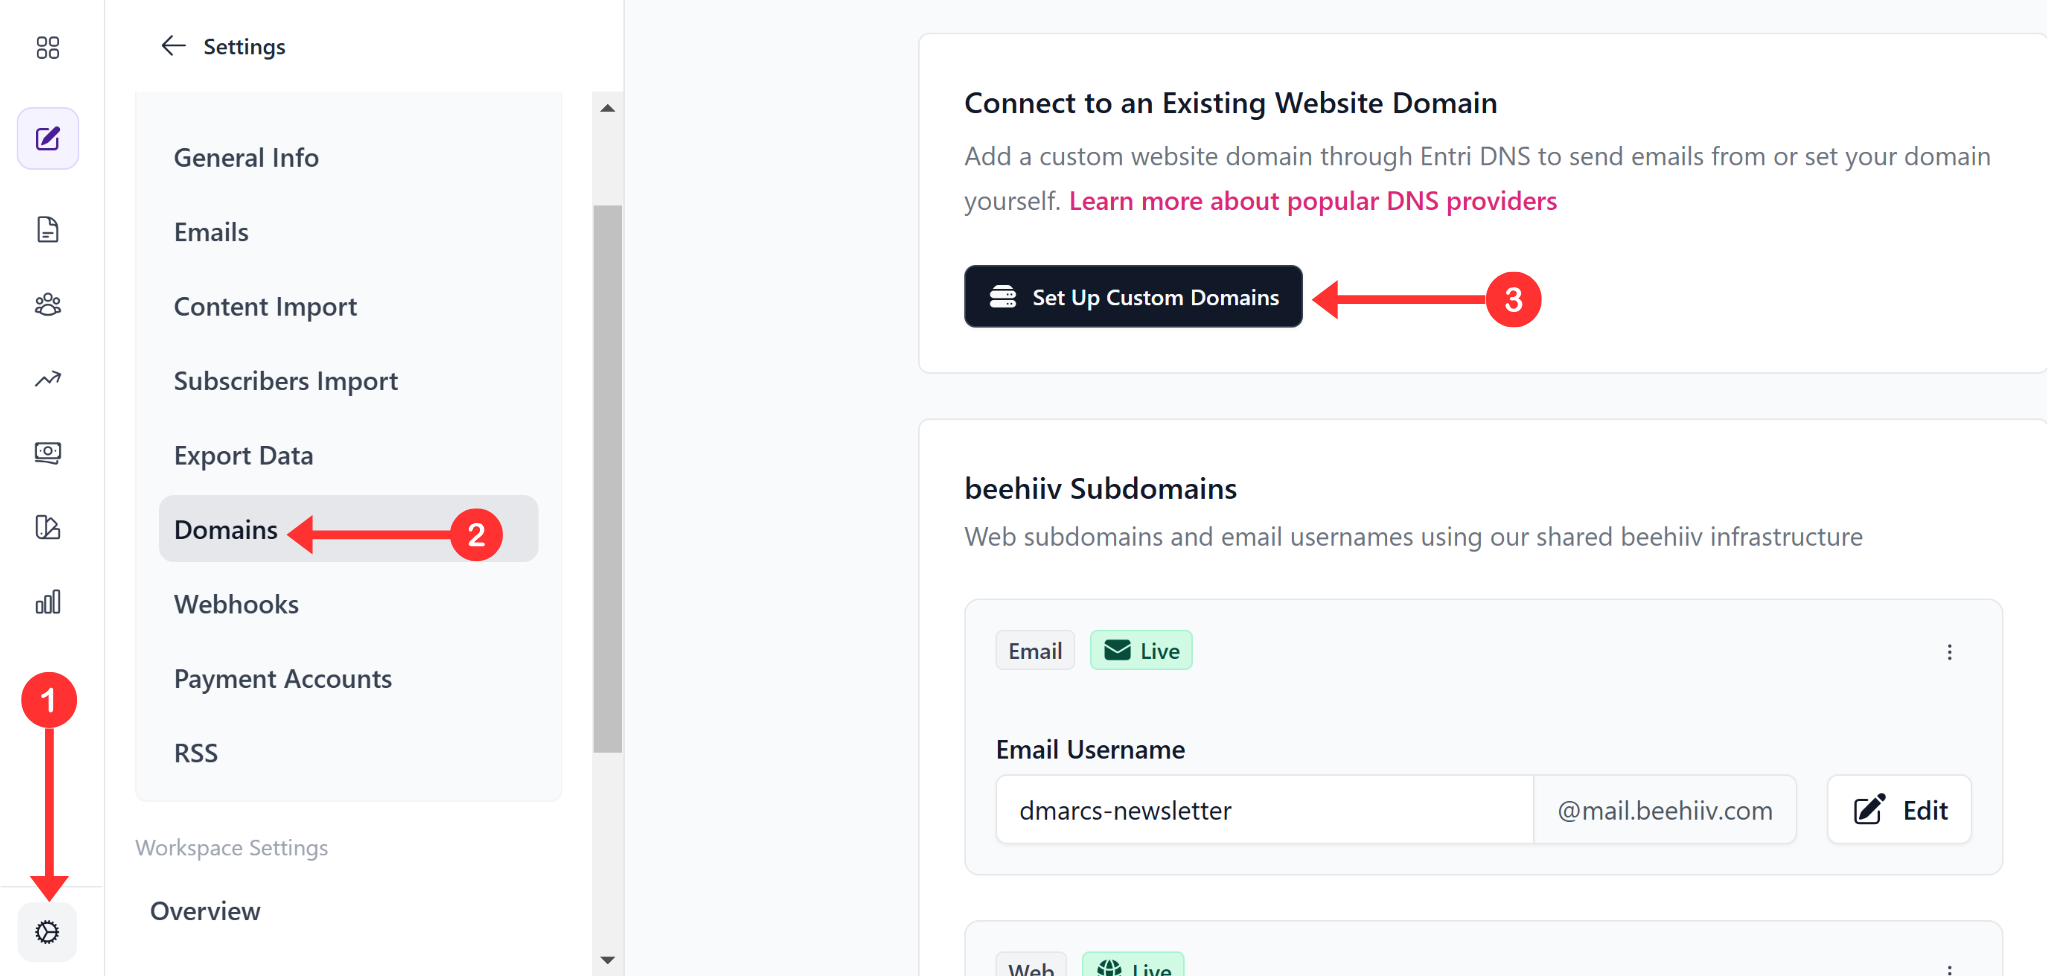
On the dashboard, click Settings in the left navigation menu.
-
Go to the Domains tab and click Set up Custom Domain.
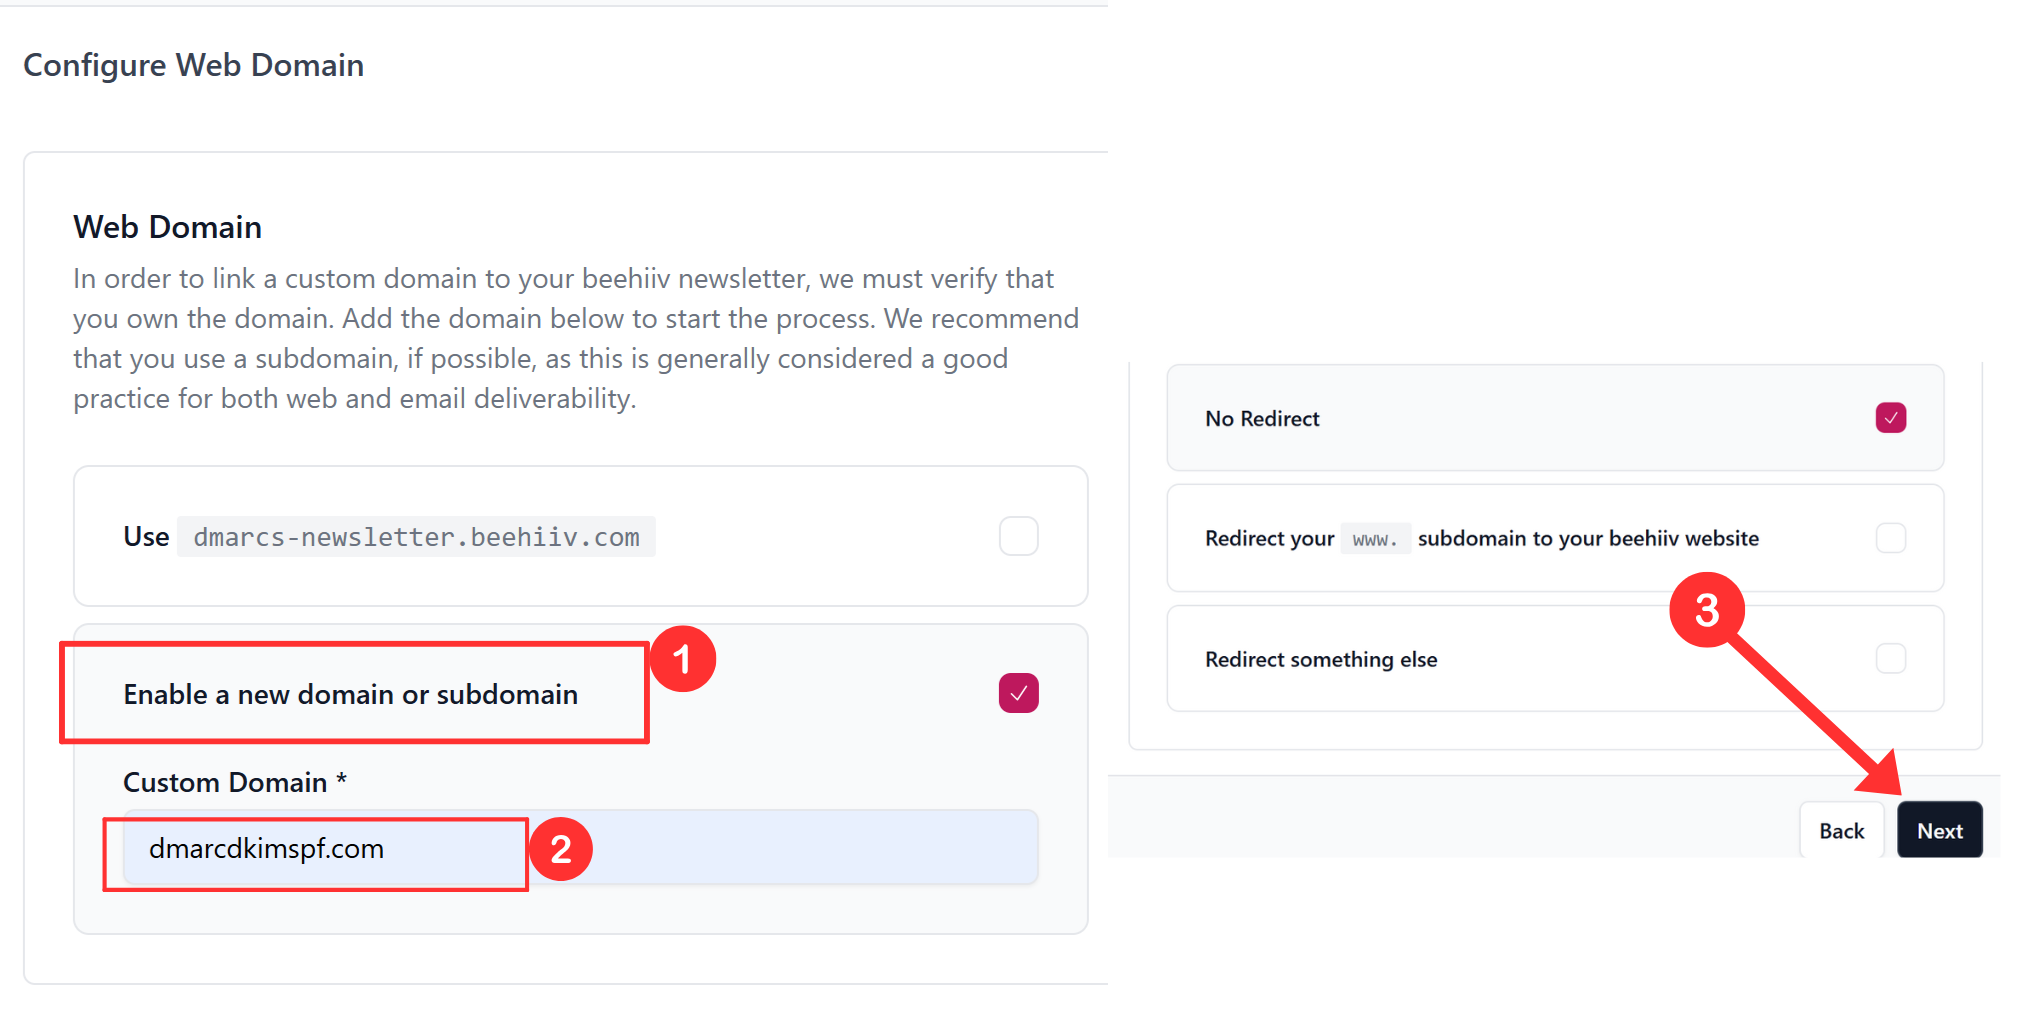
Click "Enable a new domain or subdomain" and write your domain name.
-
Select No Redirect and click Next.
-
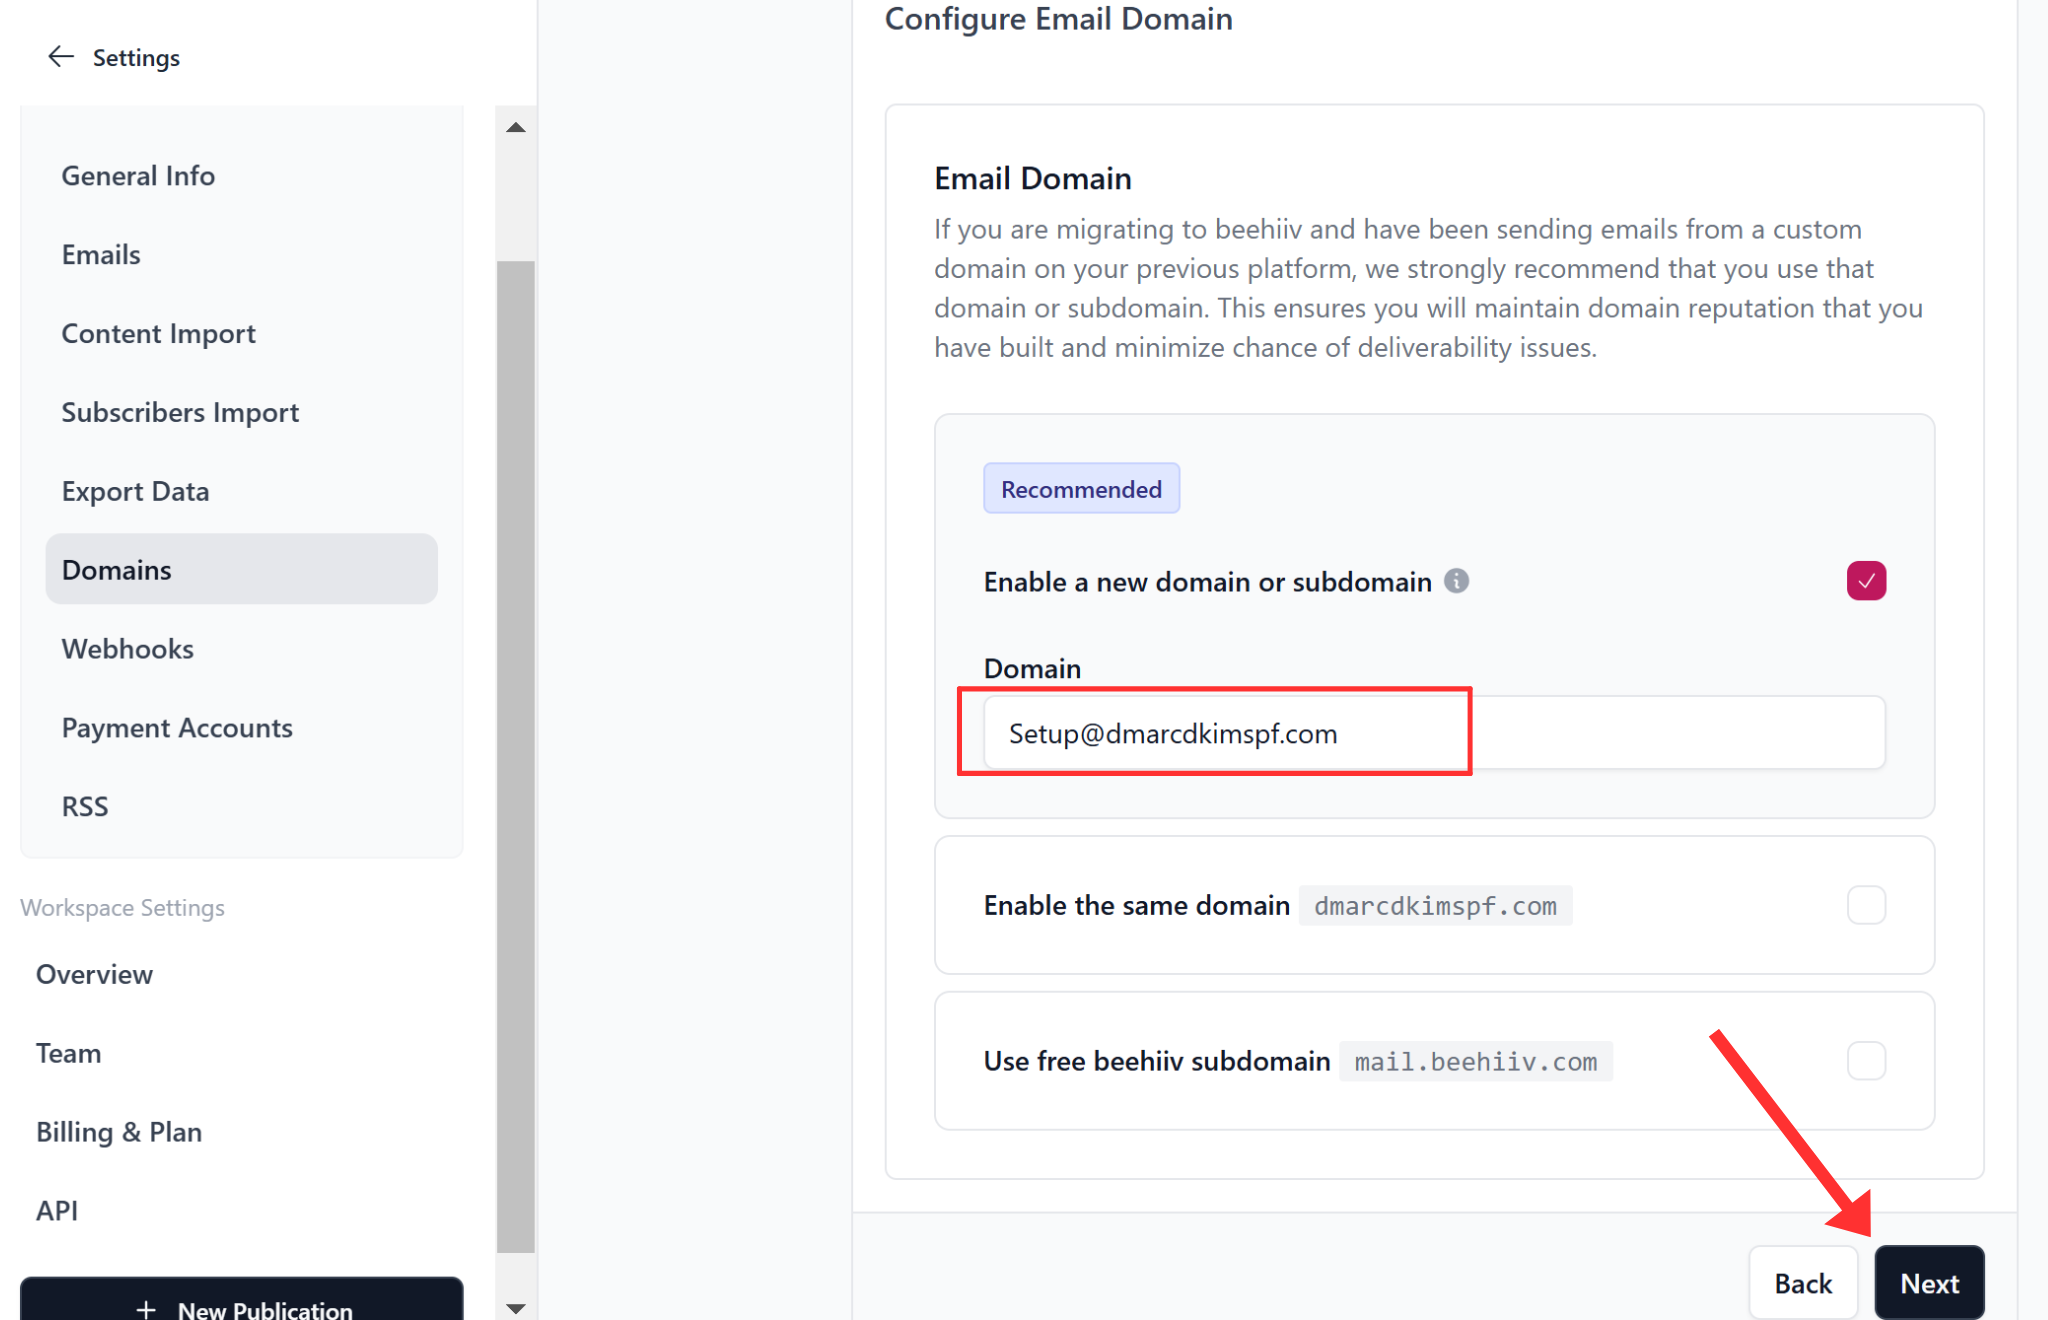
Now write down your business email and click Next.
-
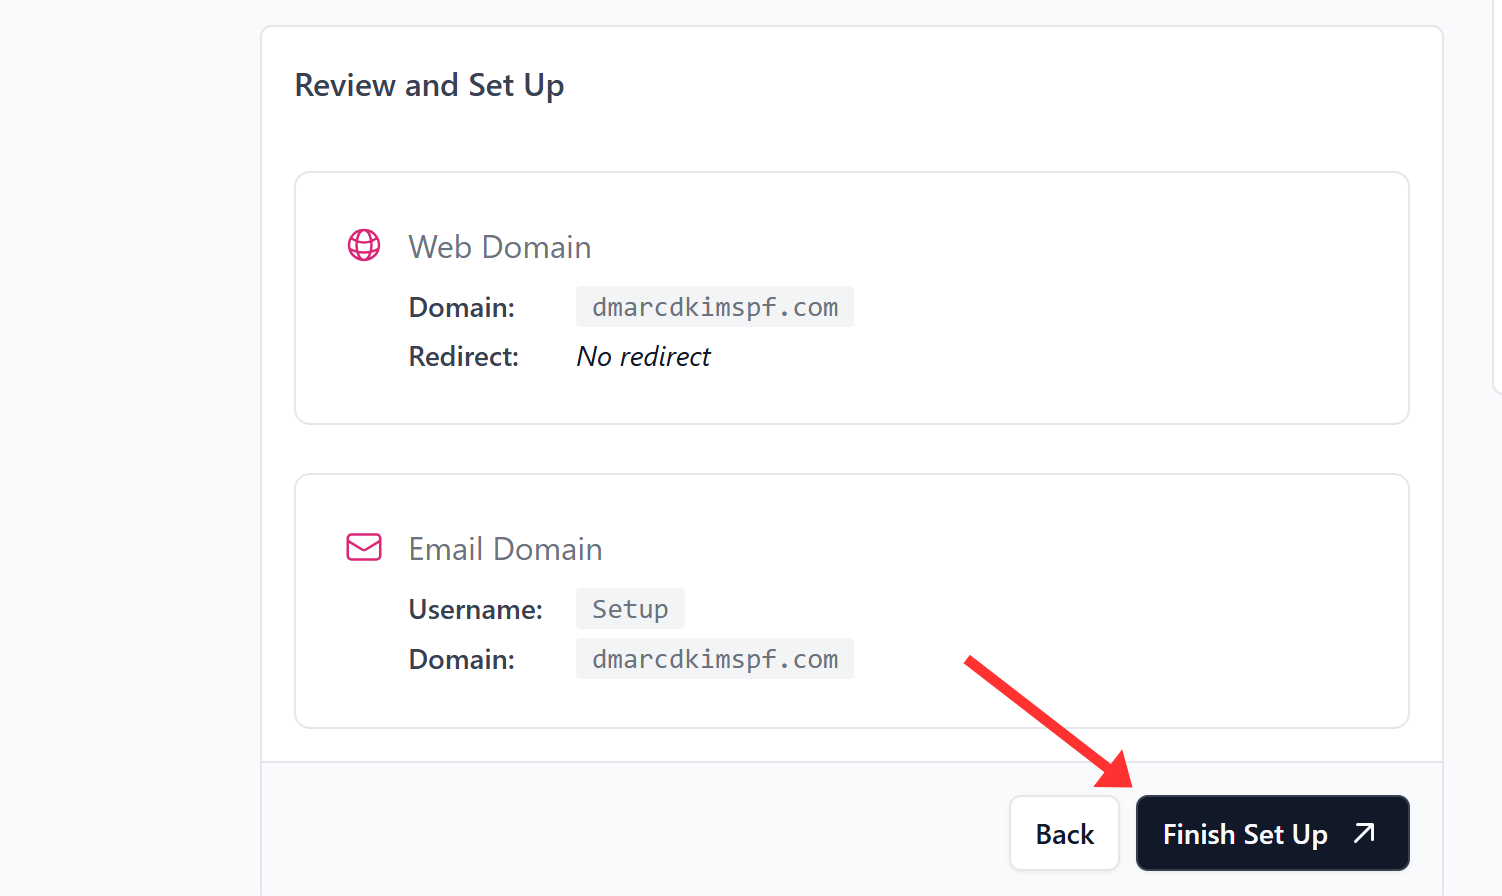
Click Finish Setup.
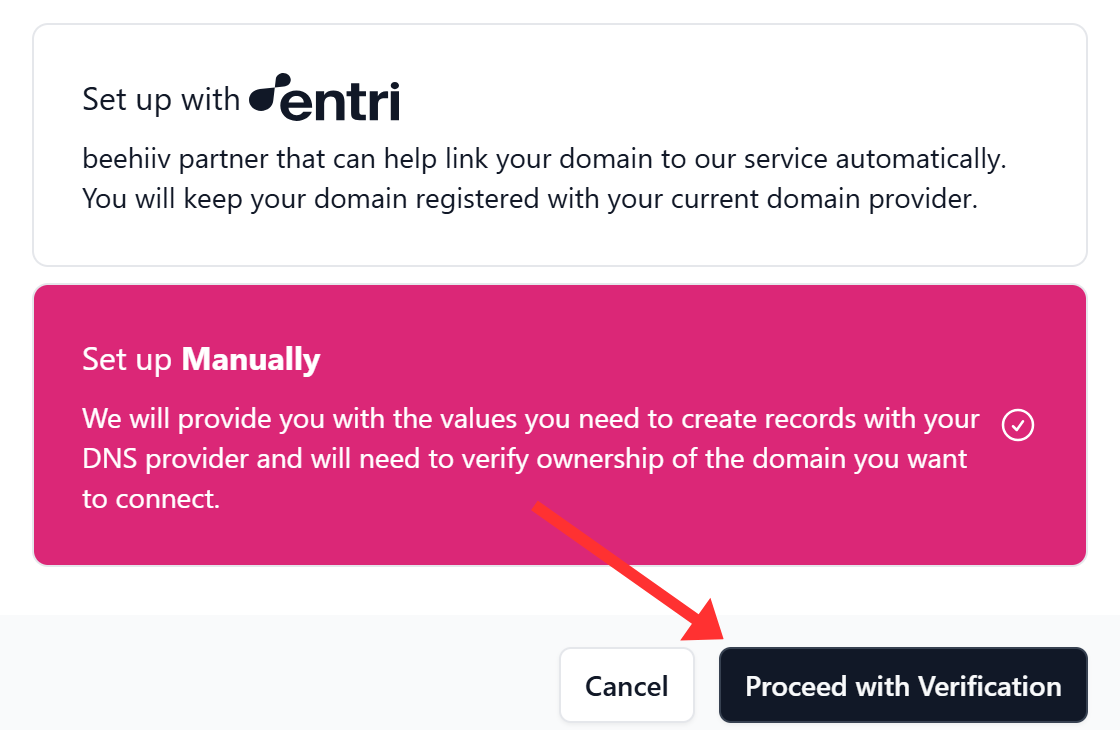
Next, you get two options; "Setup with Entri" and "Setup manually." Choosing the first option adds all the DNS records automatically to your DNS provider. If you opt for the second one, you will need to copy and paste the records to the DNS provider.
-
Select the verification method and click Proceed with Verification.
-
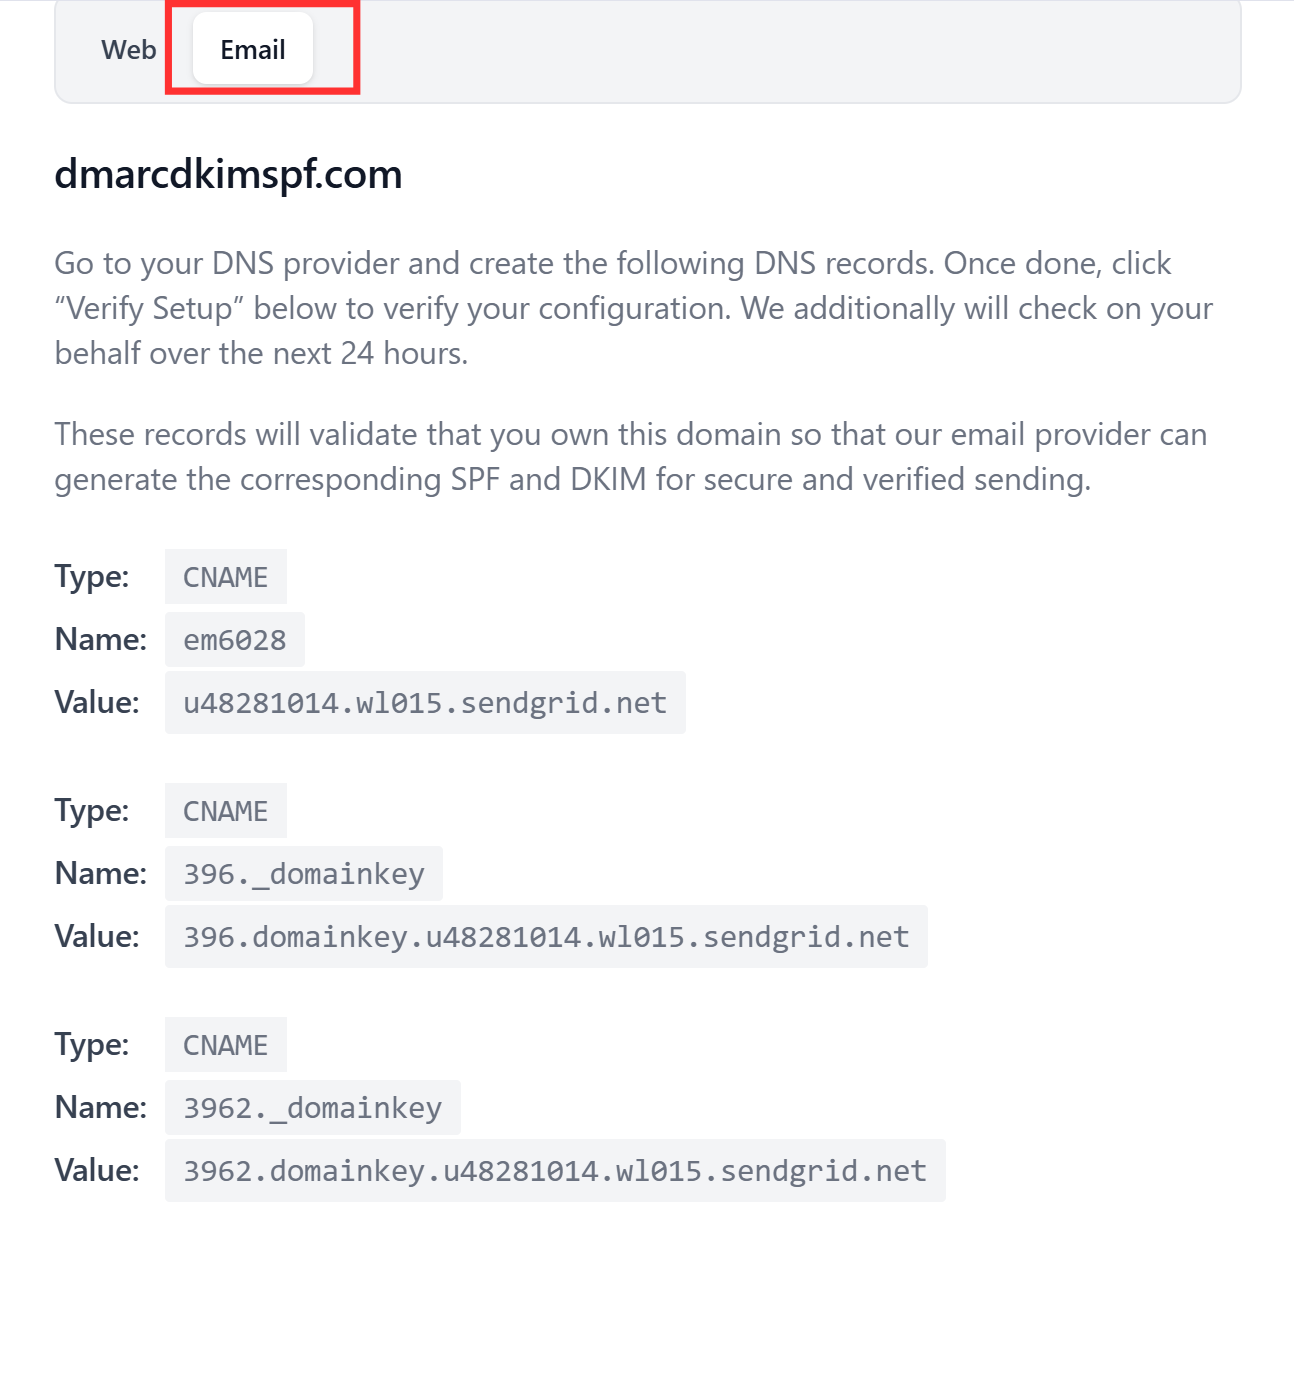
If you go for manual verification, you will see the following CNAME records in the Email tab.
Setup the Beehiiv CNAME Records:
-
Login to your DNS provider and open your domain.

-
Go to the DNS tab and click Add Record.

Select type CNAME.
Copy the record name and paste it into the Name field of the DNS dashboard.
Copy the record value and paste it into the Target field.
-
Turn off the proxy toggle and click Save.
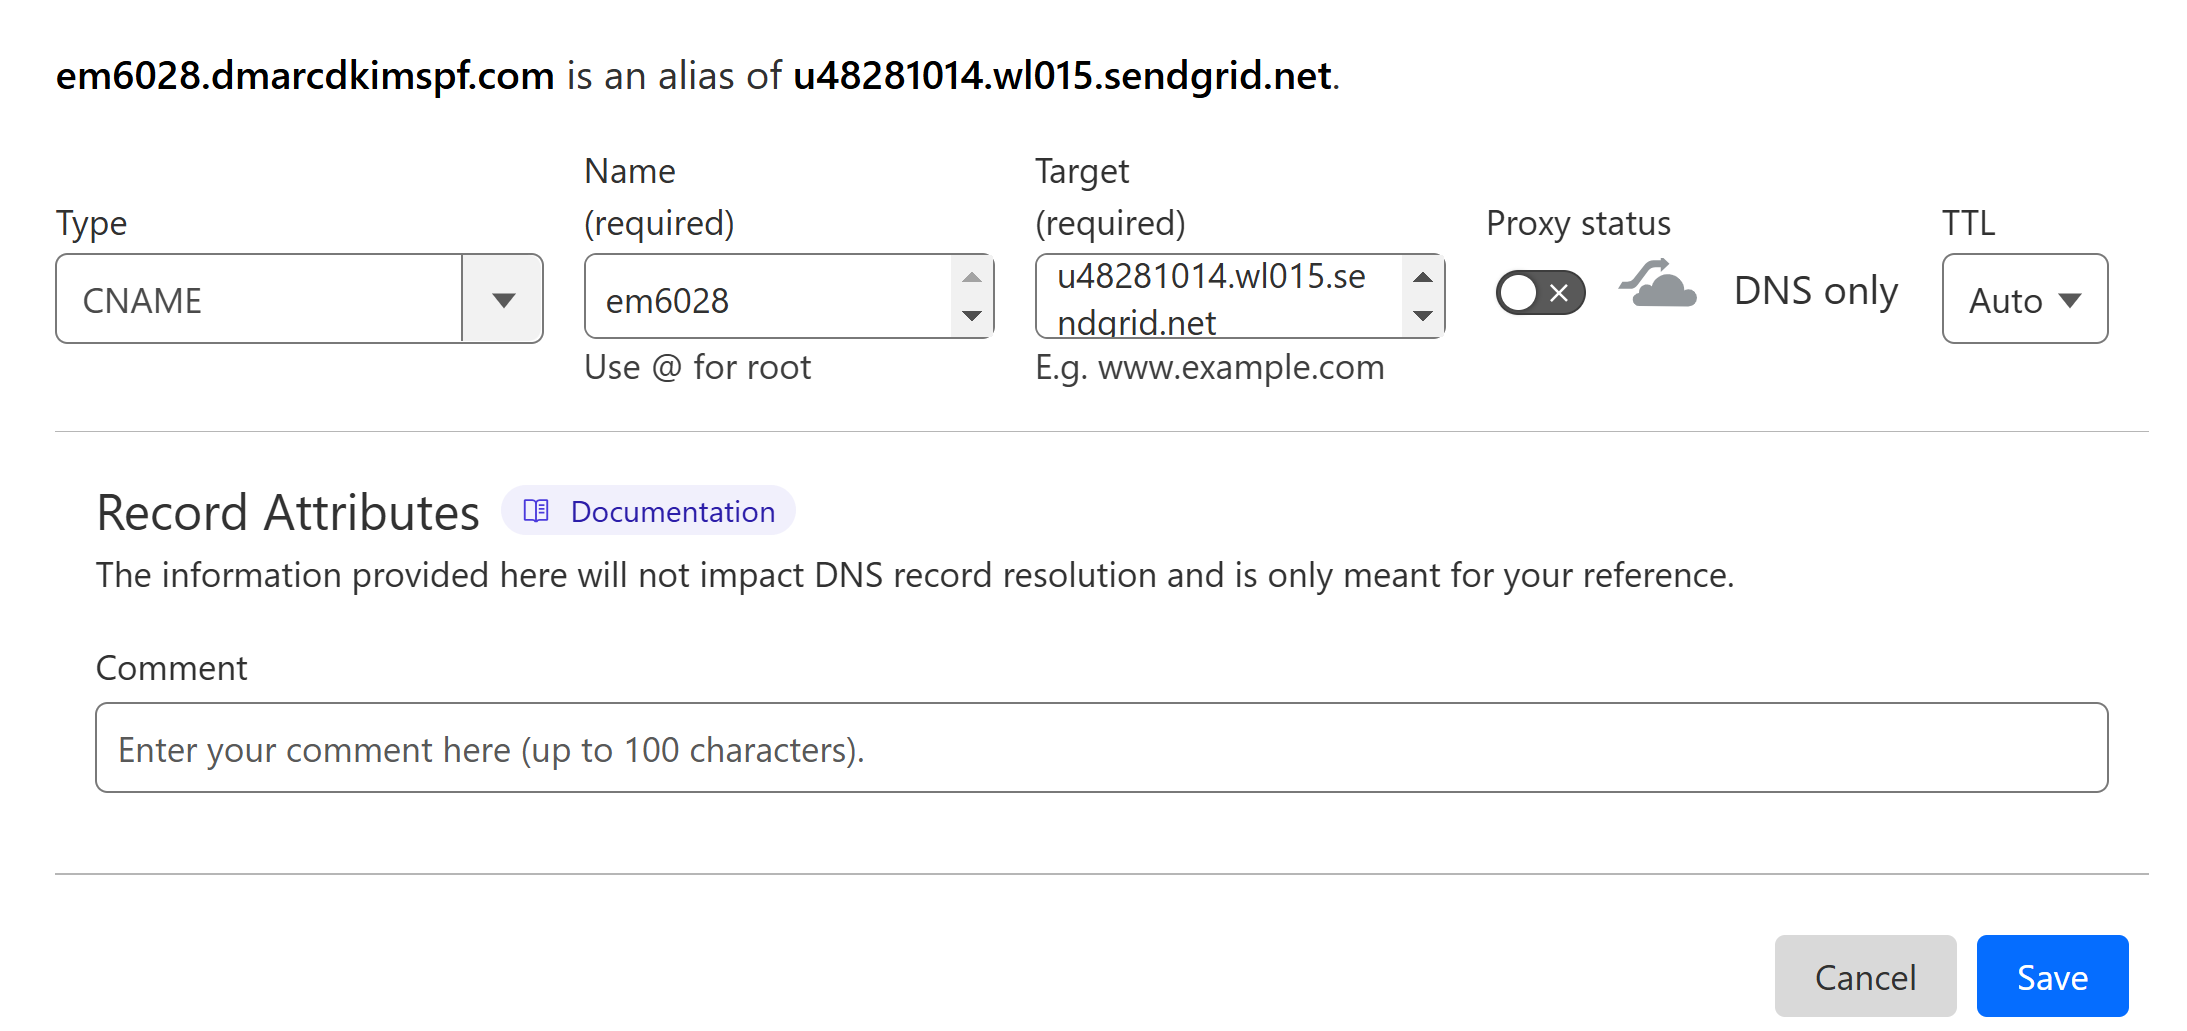
Follow the same process to add all CNAME records.
Verify Beehiiv DNS Records:
-
After adding all records, click Verify Setup.

If the records are verified, a tickmark with "Email" will appear at the top.
If records are not verified immediately, wait for 48 hours.
NOTE: If domain authentication fails after 48 hours, it points to a potential misconfiguration in the DNS setup. For troubleshooting errors, contact a DmarcDkim.com expert.
Setup Beehiiv DMARC Record:
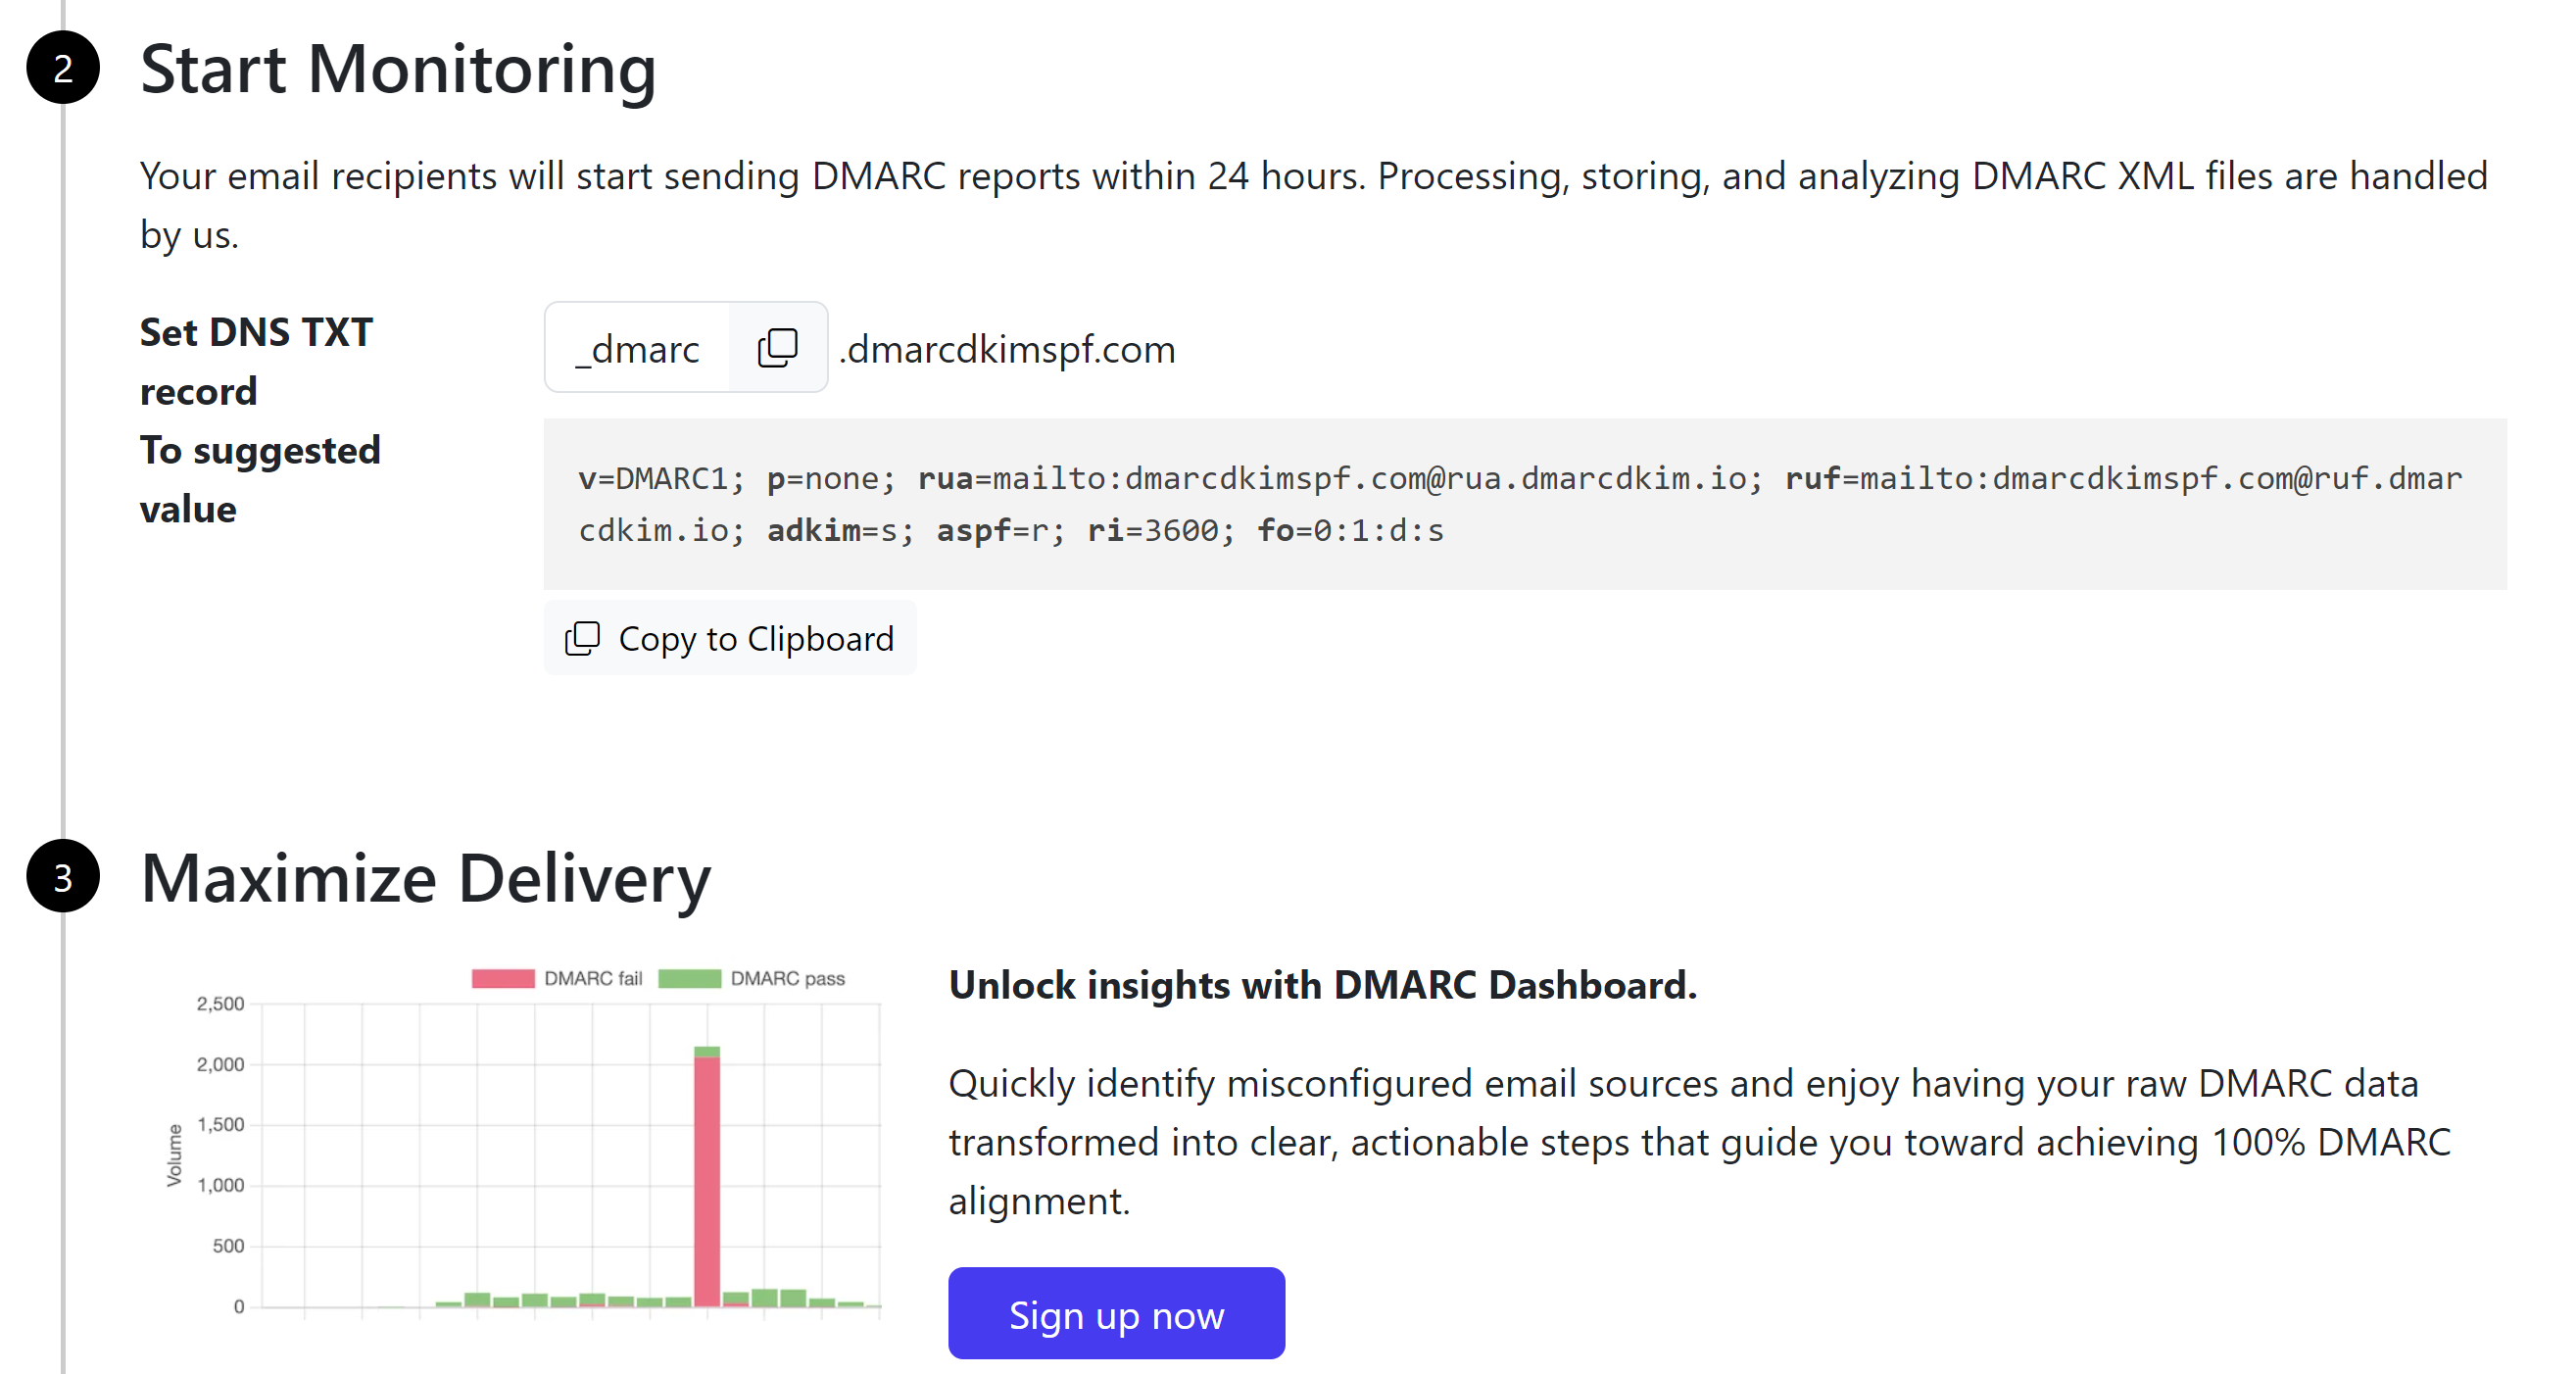
To generate an effective DMARC policy, you can use the DmarcDkim.com tool. It guides you through every step of setting up a strict policy and gives you actionable insights into DMARC reports.
Open the DMARC check tool.
-
Add your domain name and click Check.

The tool gives you a suggested value. Add it to your DNS provider.
-
Click Sign up now to get access to the DMARC reports dashboard.
For support and assistance, contact the DmarcDkim.com team.
Check domain and follow the instructions to nail down your DMARC configuration.
No expert knowledge needed!


