Setup Hostinger DMARC, DKIM and SPF DNS Records for Email Domain Authentication
Check your domain for DMARC, DKIM, SPF and MX records. Get a free report.
How to Setup SPF, DKIM and MX Records for Hostinger DMARC?
With the increasing use of email technology, spoofing and spamming have also become a major concern. To protect the users from scams, email inbox providers introduced some security standards that must be complied with by the email senders.
SPF, DKIM, and DMARC are the commonly used security standards. They make sure you are a legitimate sender and your emails are safe to open - only then they will be delivered to your recipients' inboxes.
If your domain lacks any of these authentication measures, your emails will be rejected by the servers. That is why, email-sending websites like Hostinger provide you with the necessary DNS records for your email domain authentication.
In this article, we will guide you on how to configure Hostinger DNS records and authenticate your domain for better and safer email communication.
Configure Hostinger DNS Records:
-
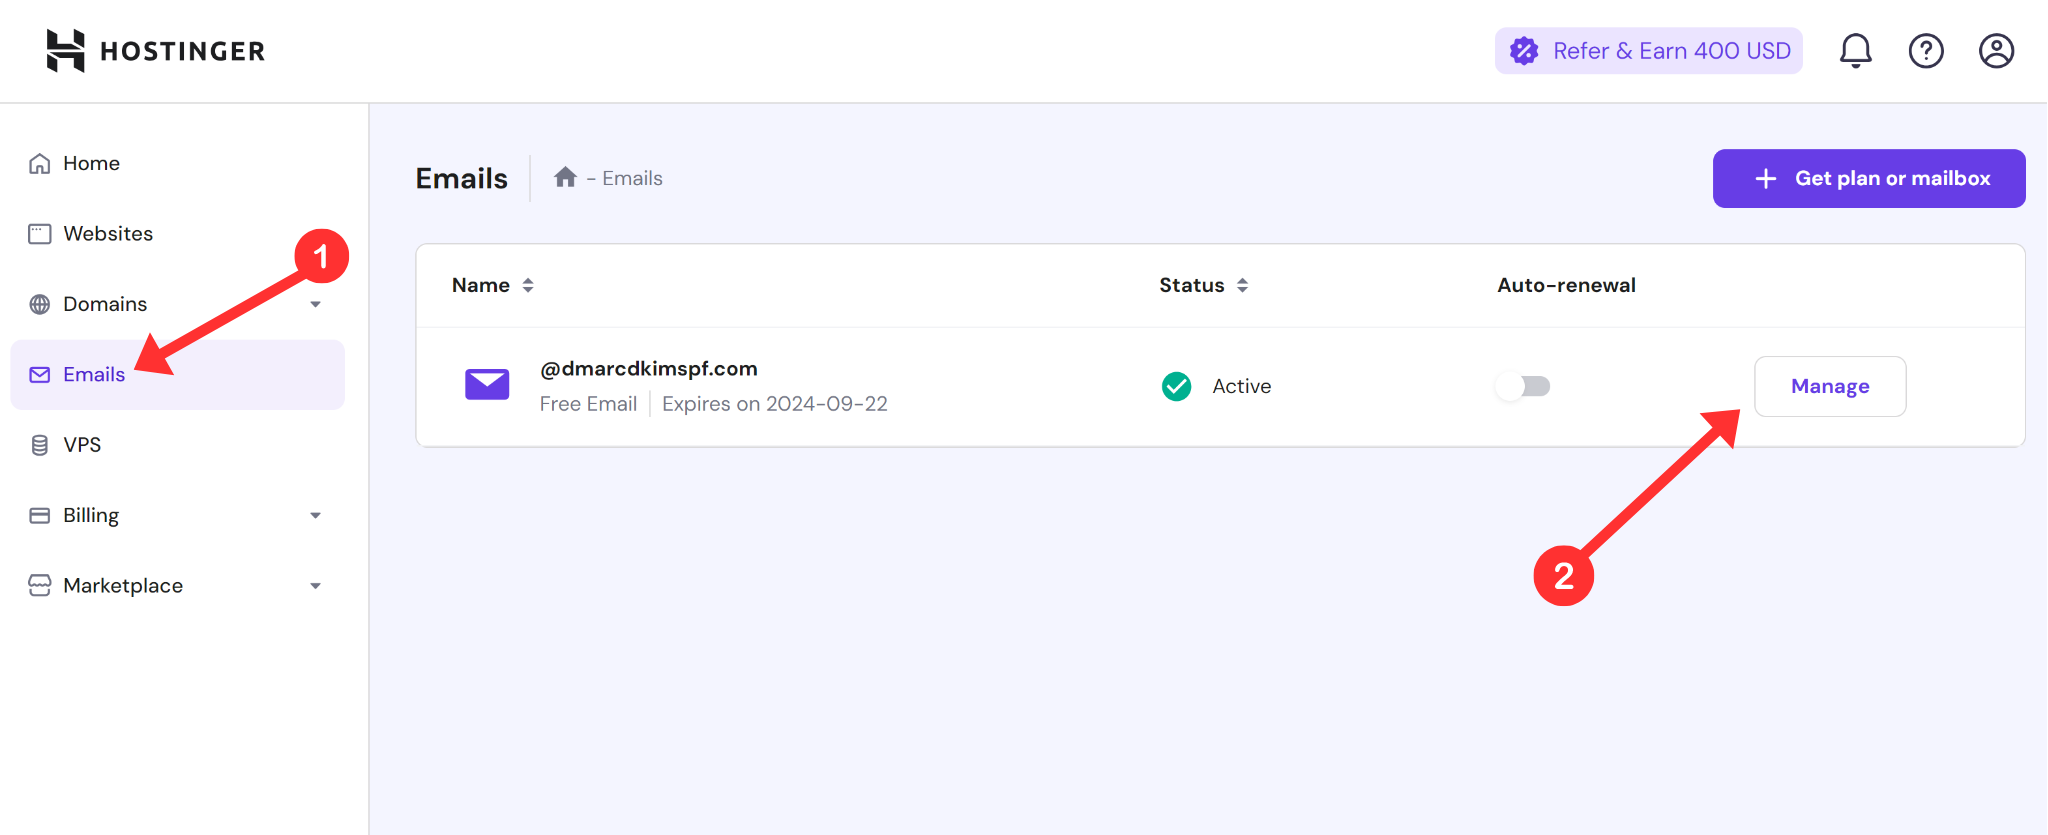
Go to the Emails tab and click the Manage button next to your email domain.
-
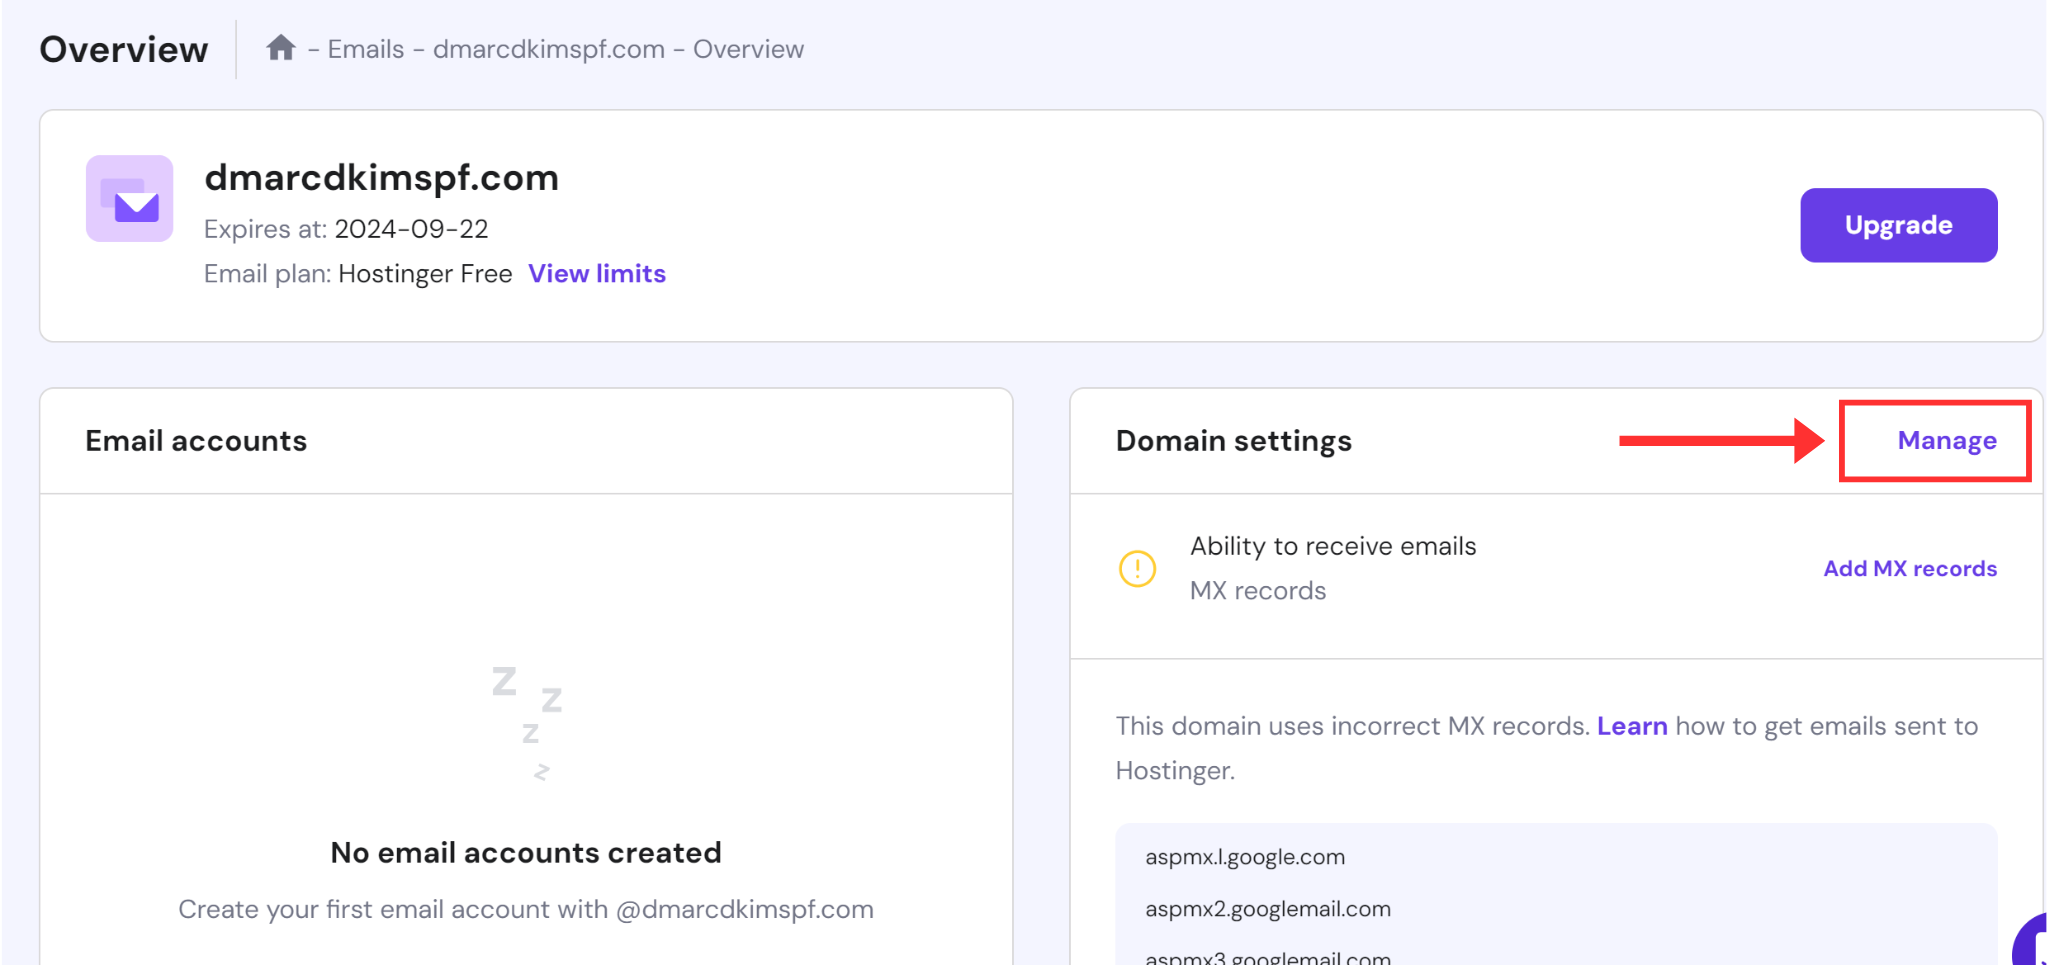
Now click Manage in the Domain Settings section.
-
It will take you to the Connect Domain page where you can find MX, SPF, DKIM, and DMARC Records.
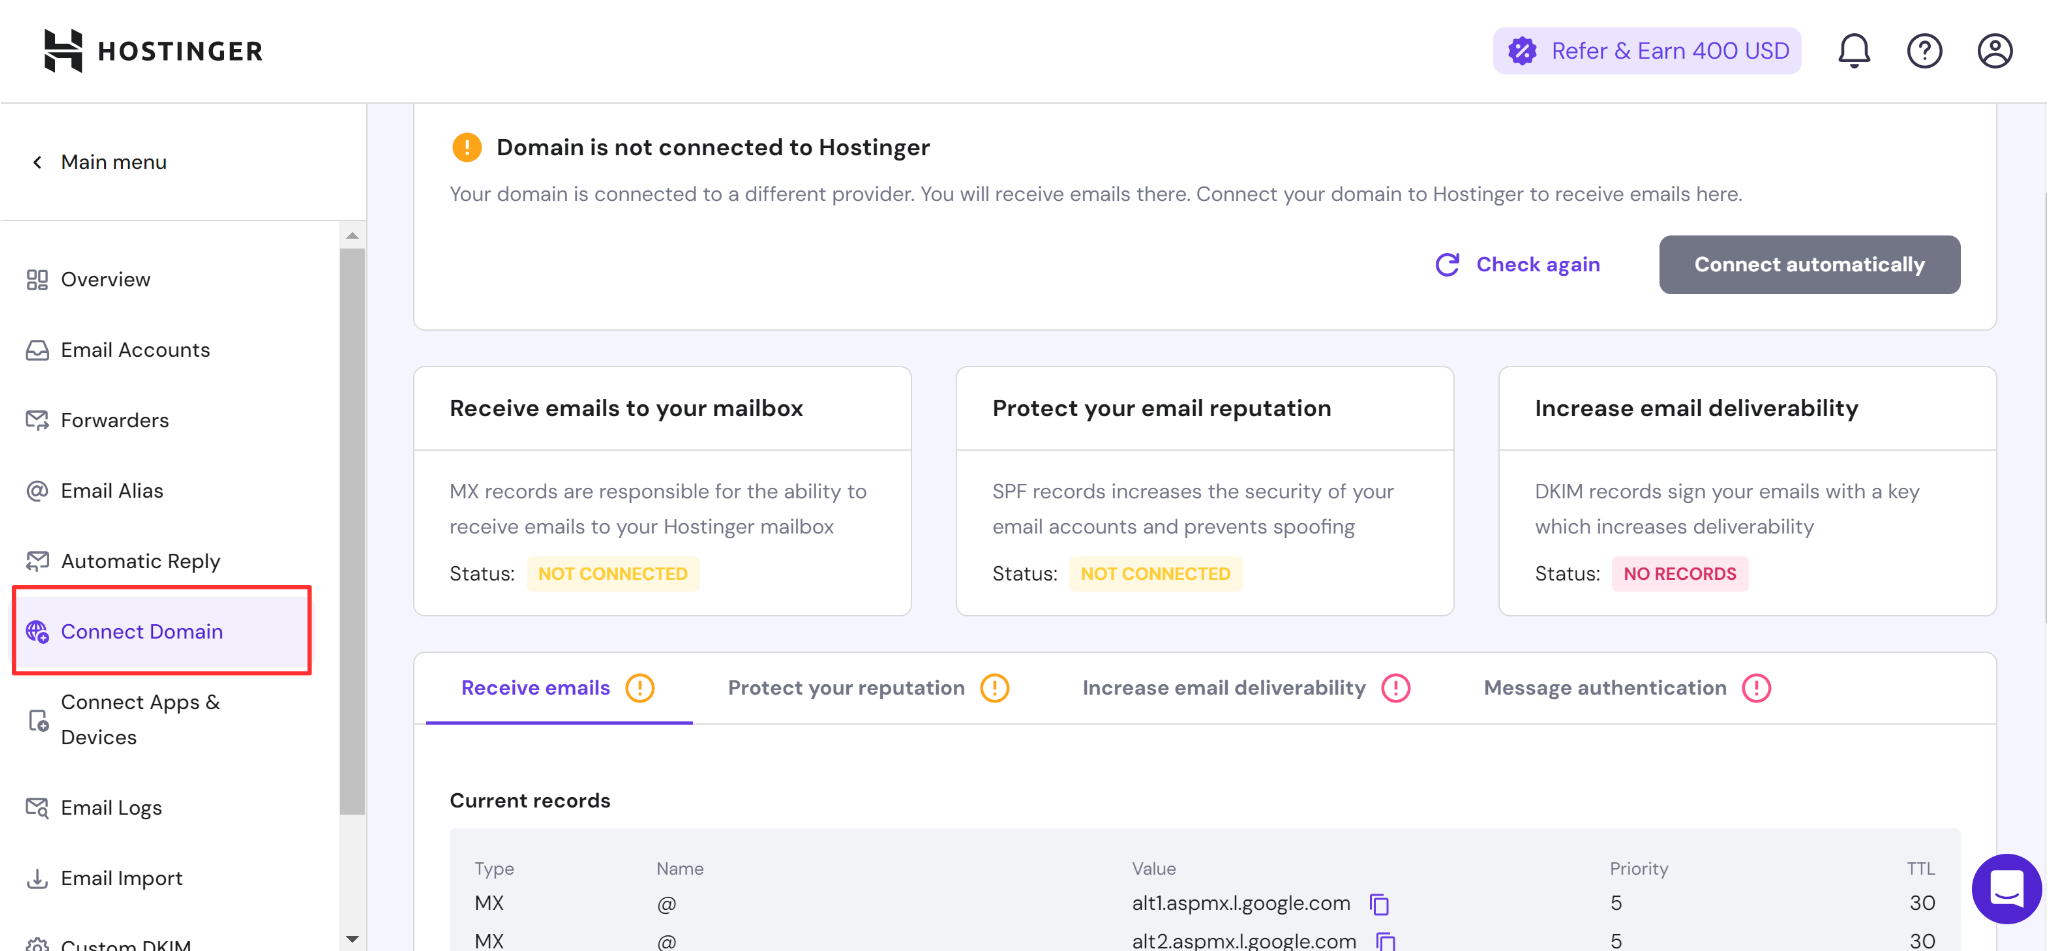
Add these records to your DNS provider.
1. Setup Hostinger MX Records:
If your domain has existing MX records, delete them before adding Hostinger's MX records. MX records specify the servers responsible for receiving emails. If a domain has MX records from multiple sources, it can cause confusion about which server should receive the emails.
-
To add the MX records, log in to your domain provider and click your domain.
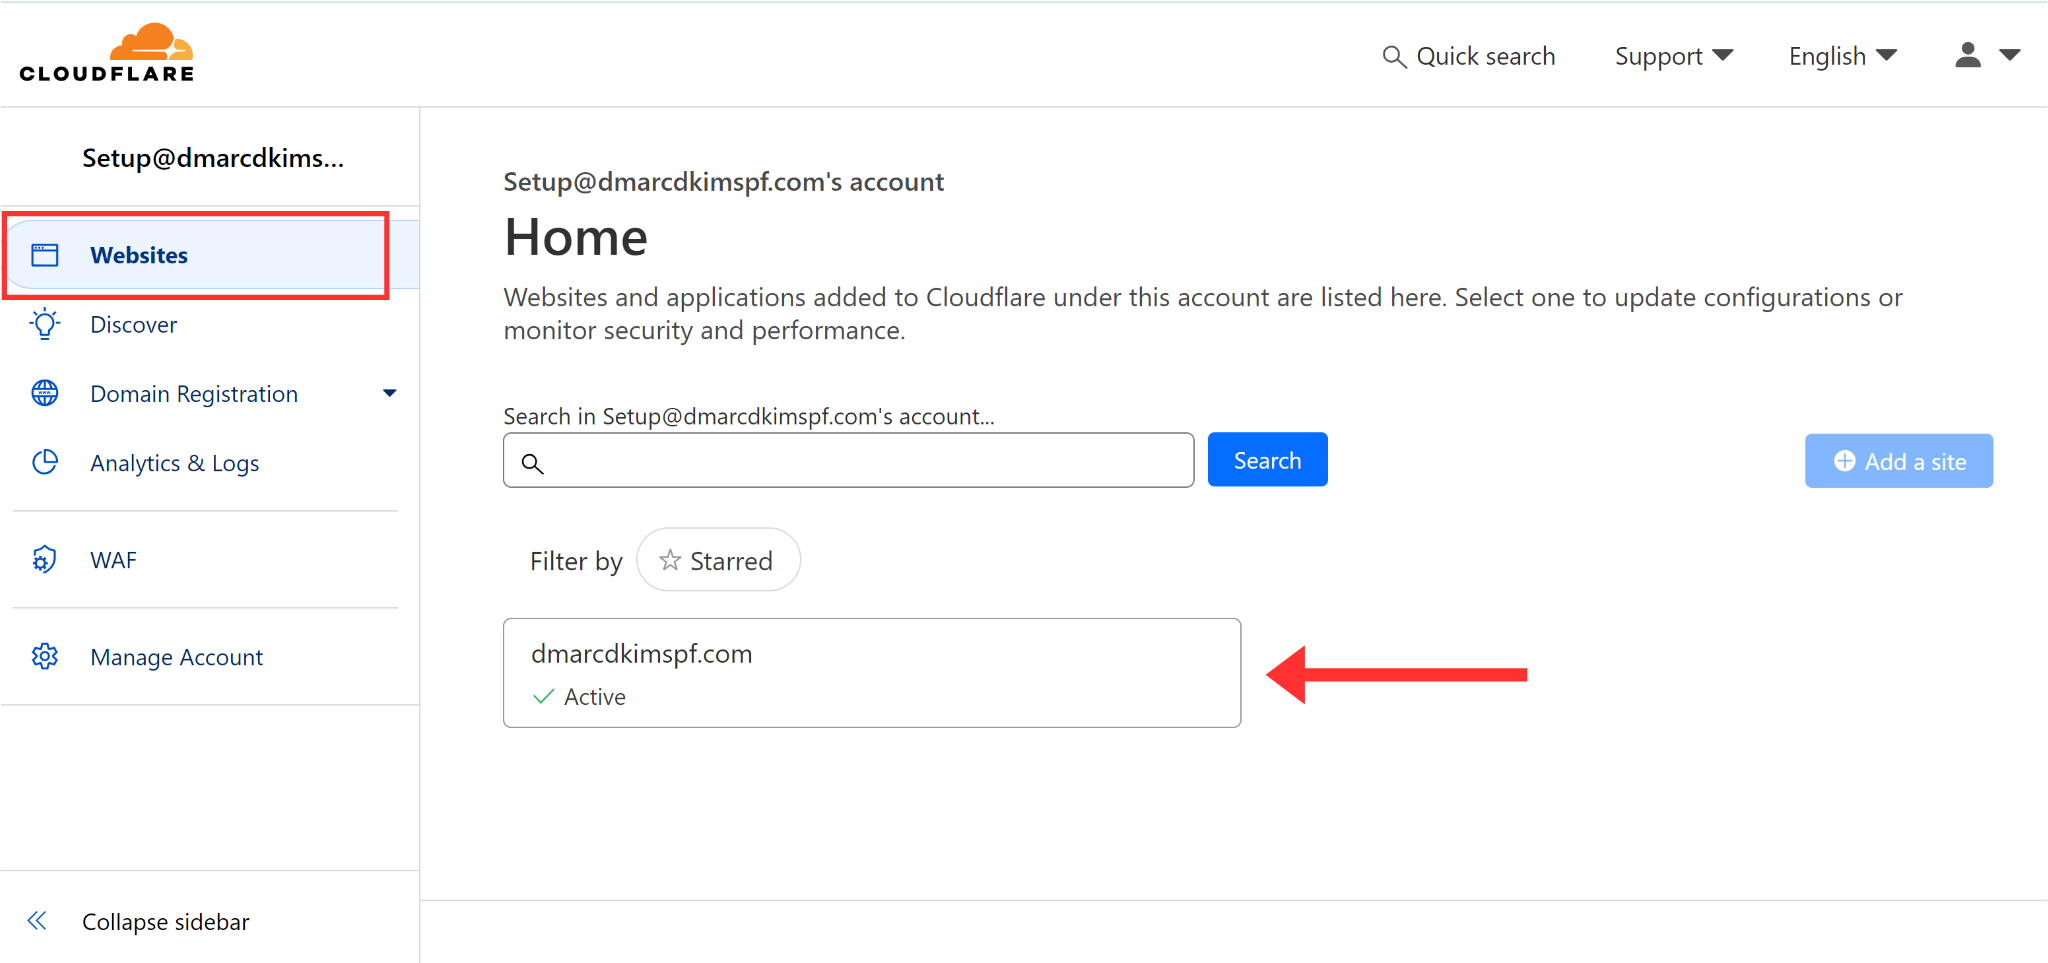
-
Go to the DNS tab, and click Add Record.
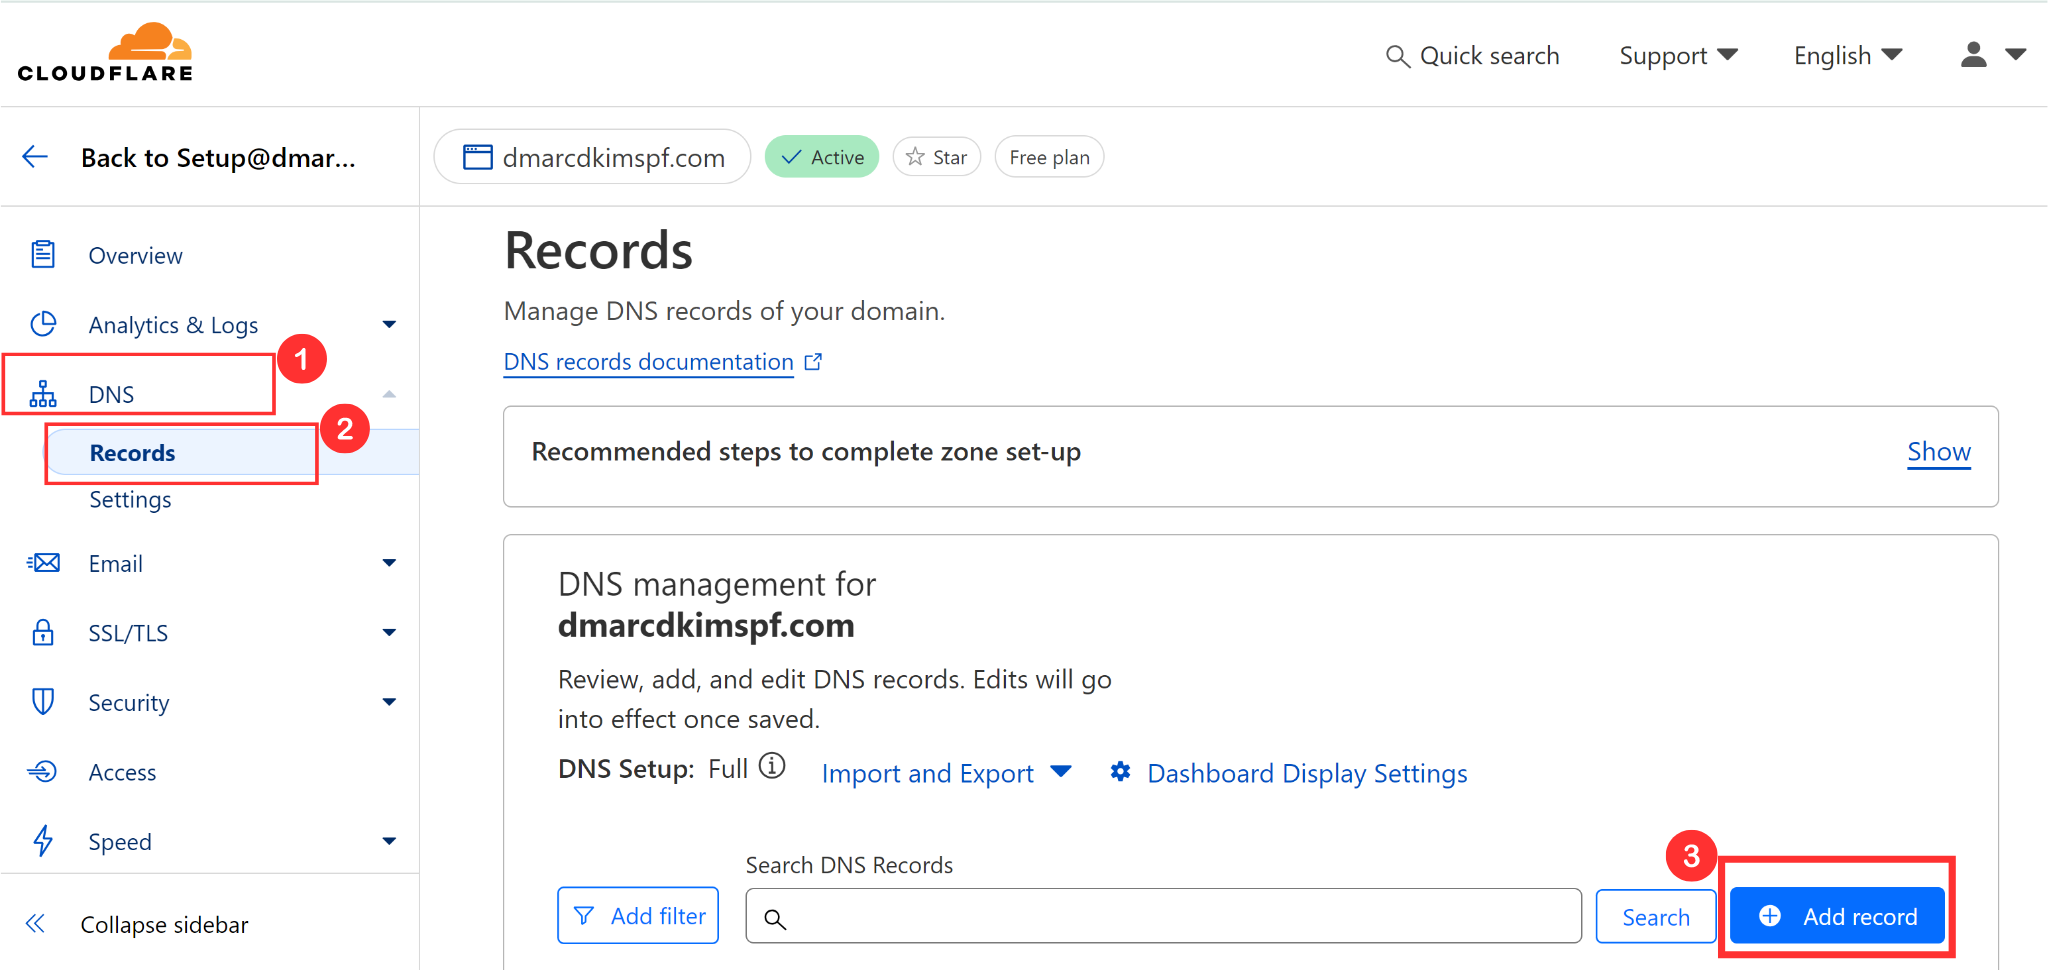
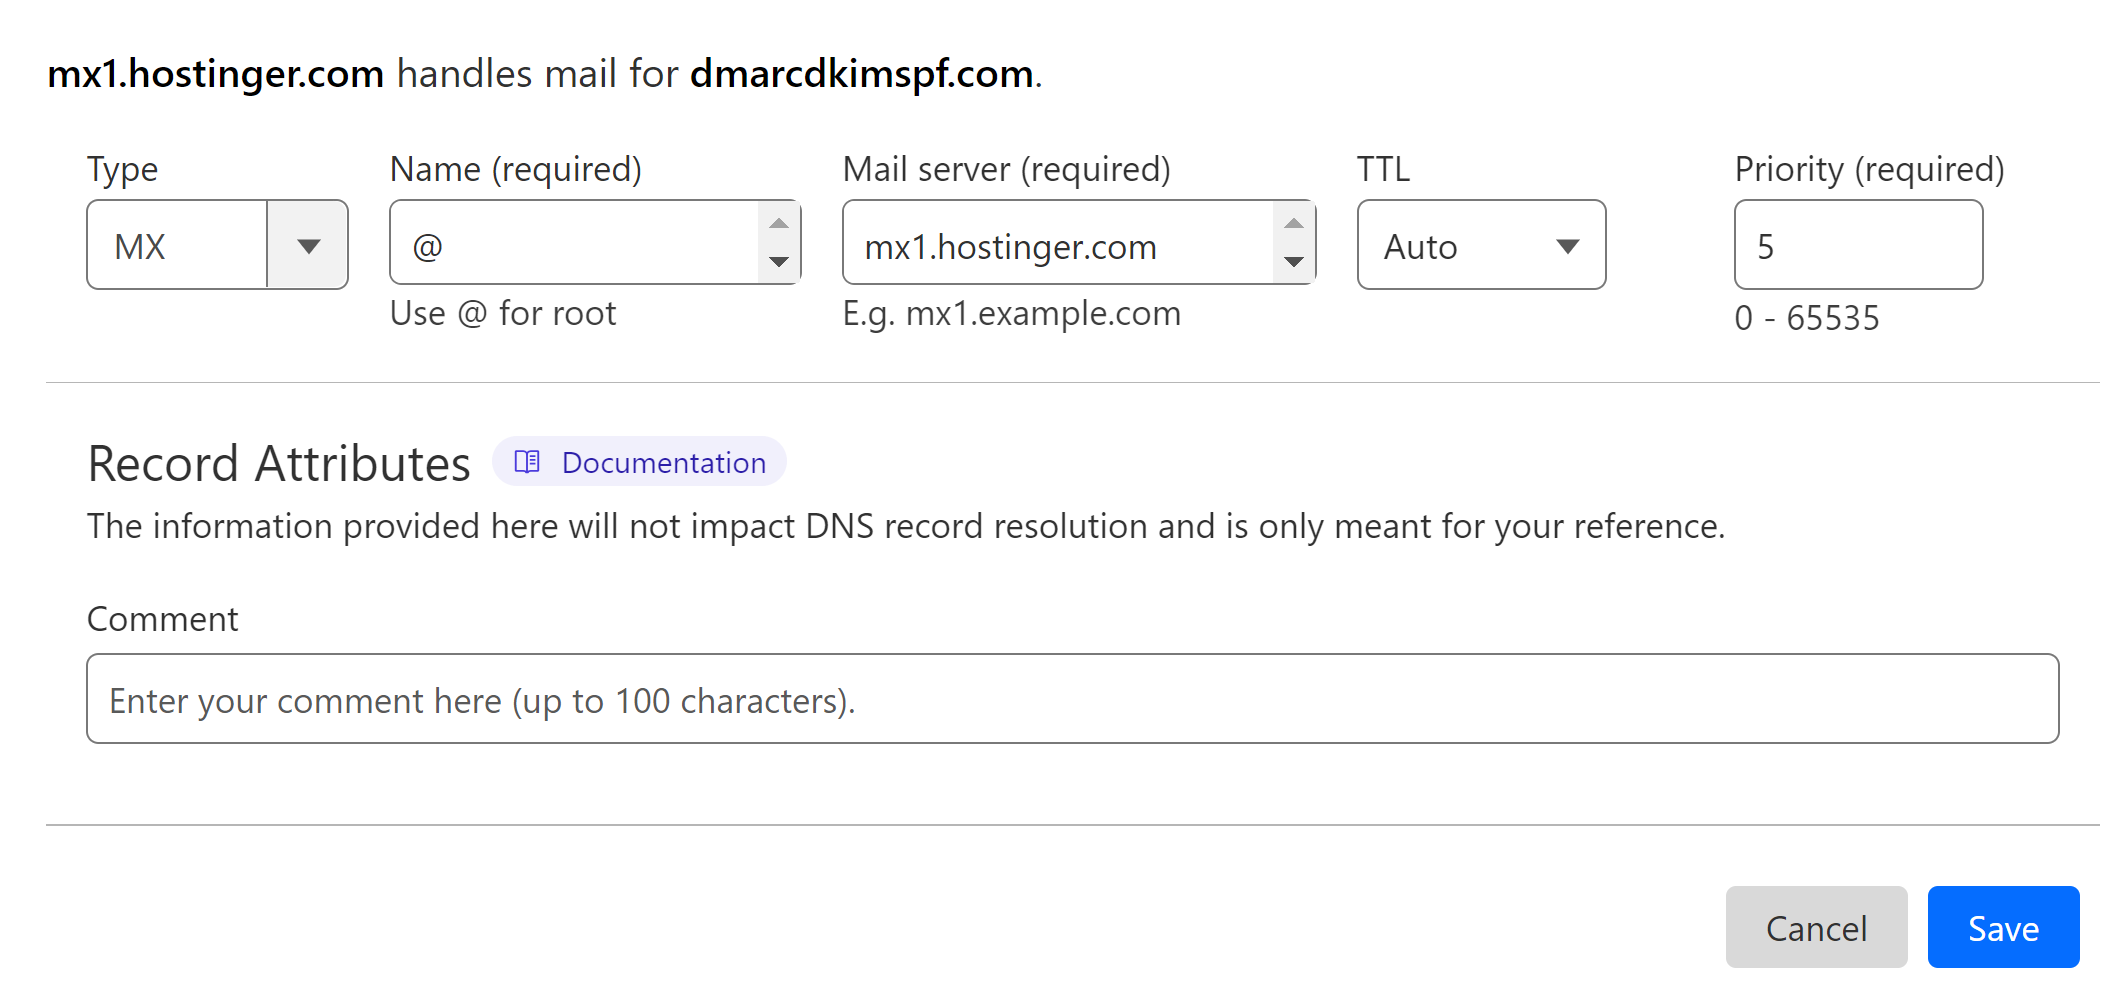
Select type MX.
In the Record Name field, write "@."
In the Mail Server field, add the MX value.
Select the priority 5 and 10 as mentioned with each MX value.
-
Finally, click Save to add the record.
2. Setup Hostinger SPF Record:
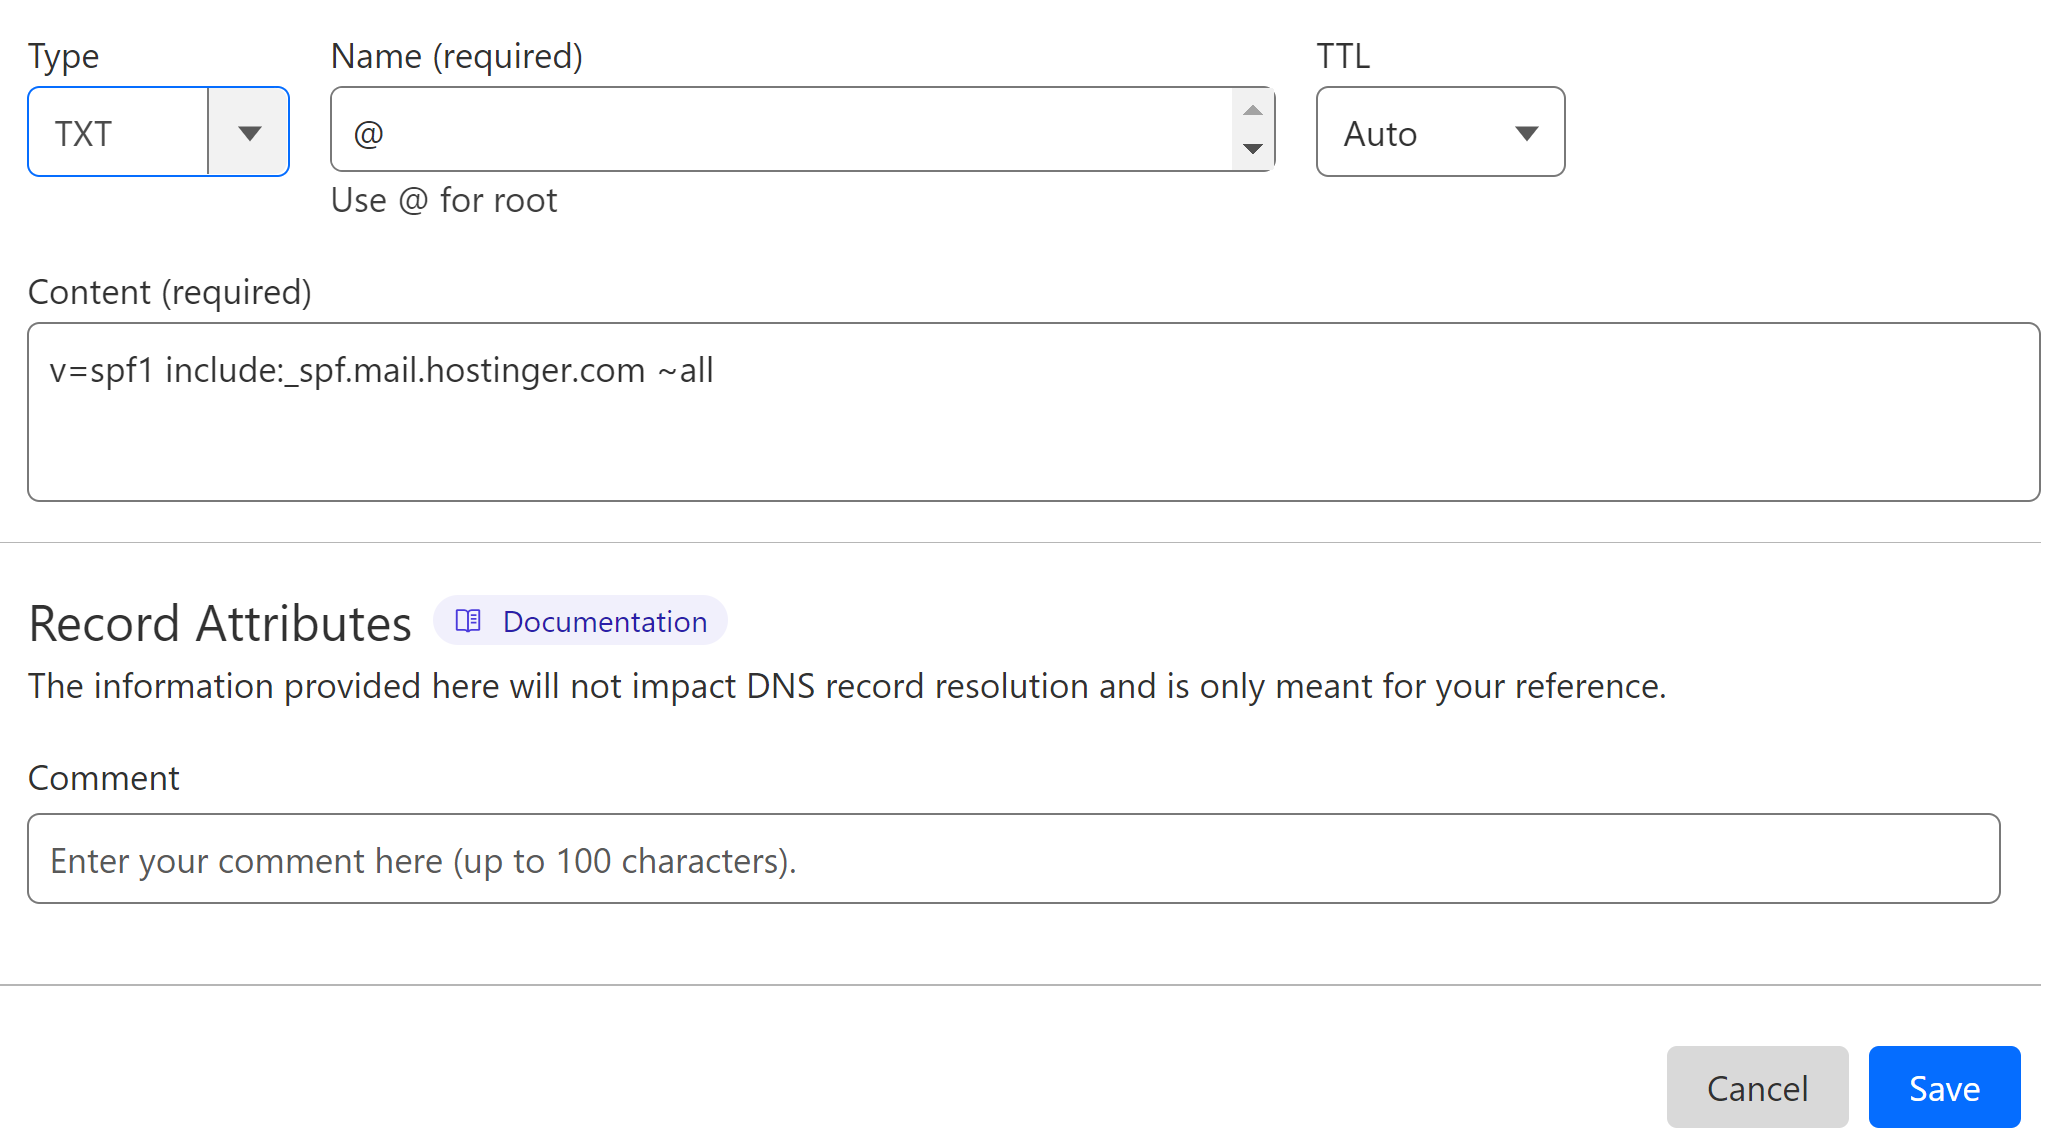
In the DNS dashboard, select type TXT.
Add the record name and value in the dedicated field.
-
Click Save.
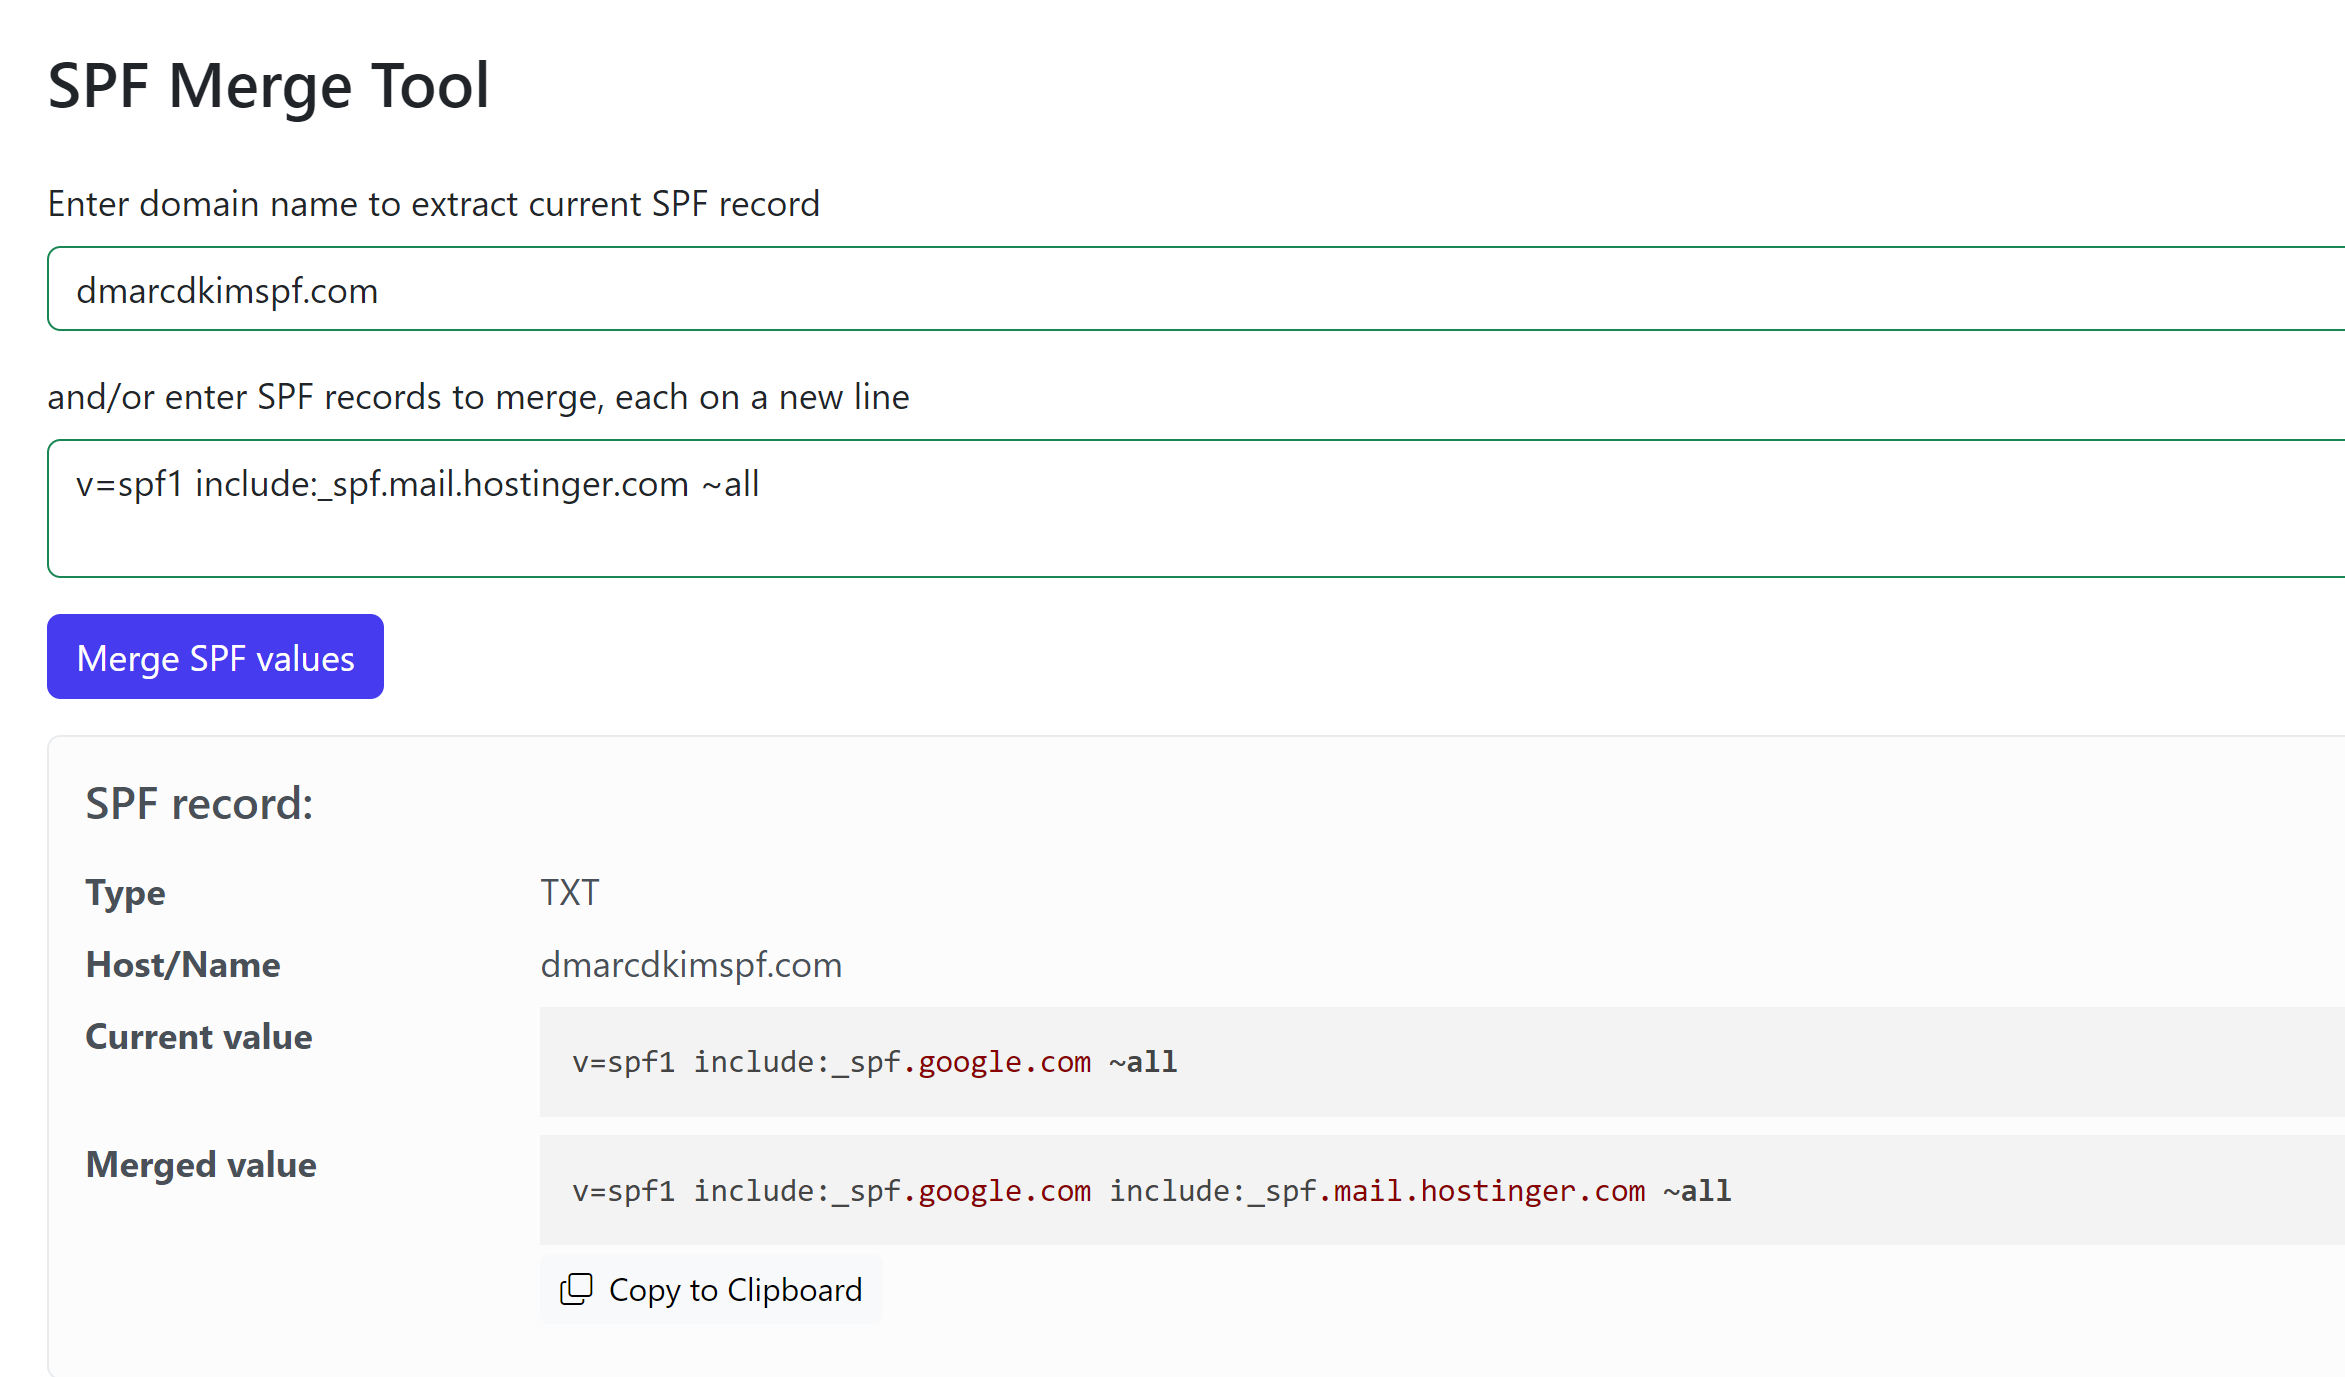
Merge Multiple Hostinger SPF Records:
Adding more than one SPF record to a domain can cause conflicts. If there is an existing SPF record, merge it with the Hostinger SPF to avoid conflicts.
Go to the SPF Merge tool.
Add your domain name and click Merge.
-
Copy the merged value and edit your existing SPF record.
3. Setup Hostinger DKIM Records:
To DKIM sign your email messages, you can choose either generic DKIM values or the Custom DKIM.
Generic DKIM Setup:
Select type CNAME.
Copy the record name and paste it into the Name field.
Copy the record value and paste it into the Target field.
-
Turn off the proxy and click Save.
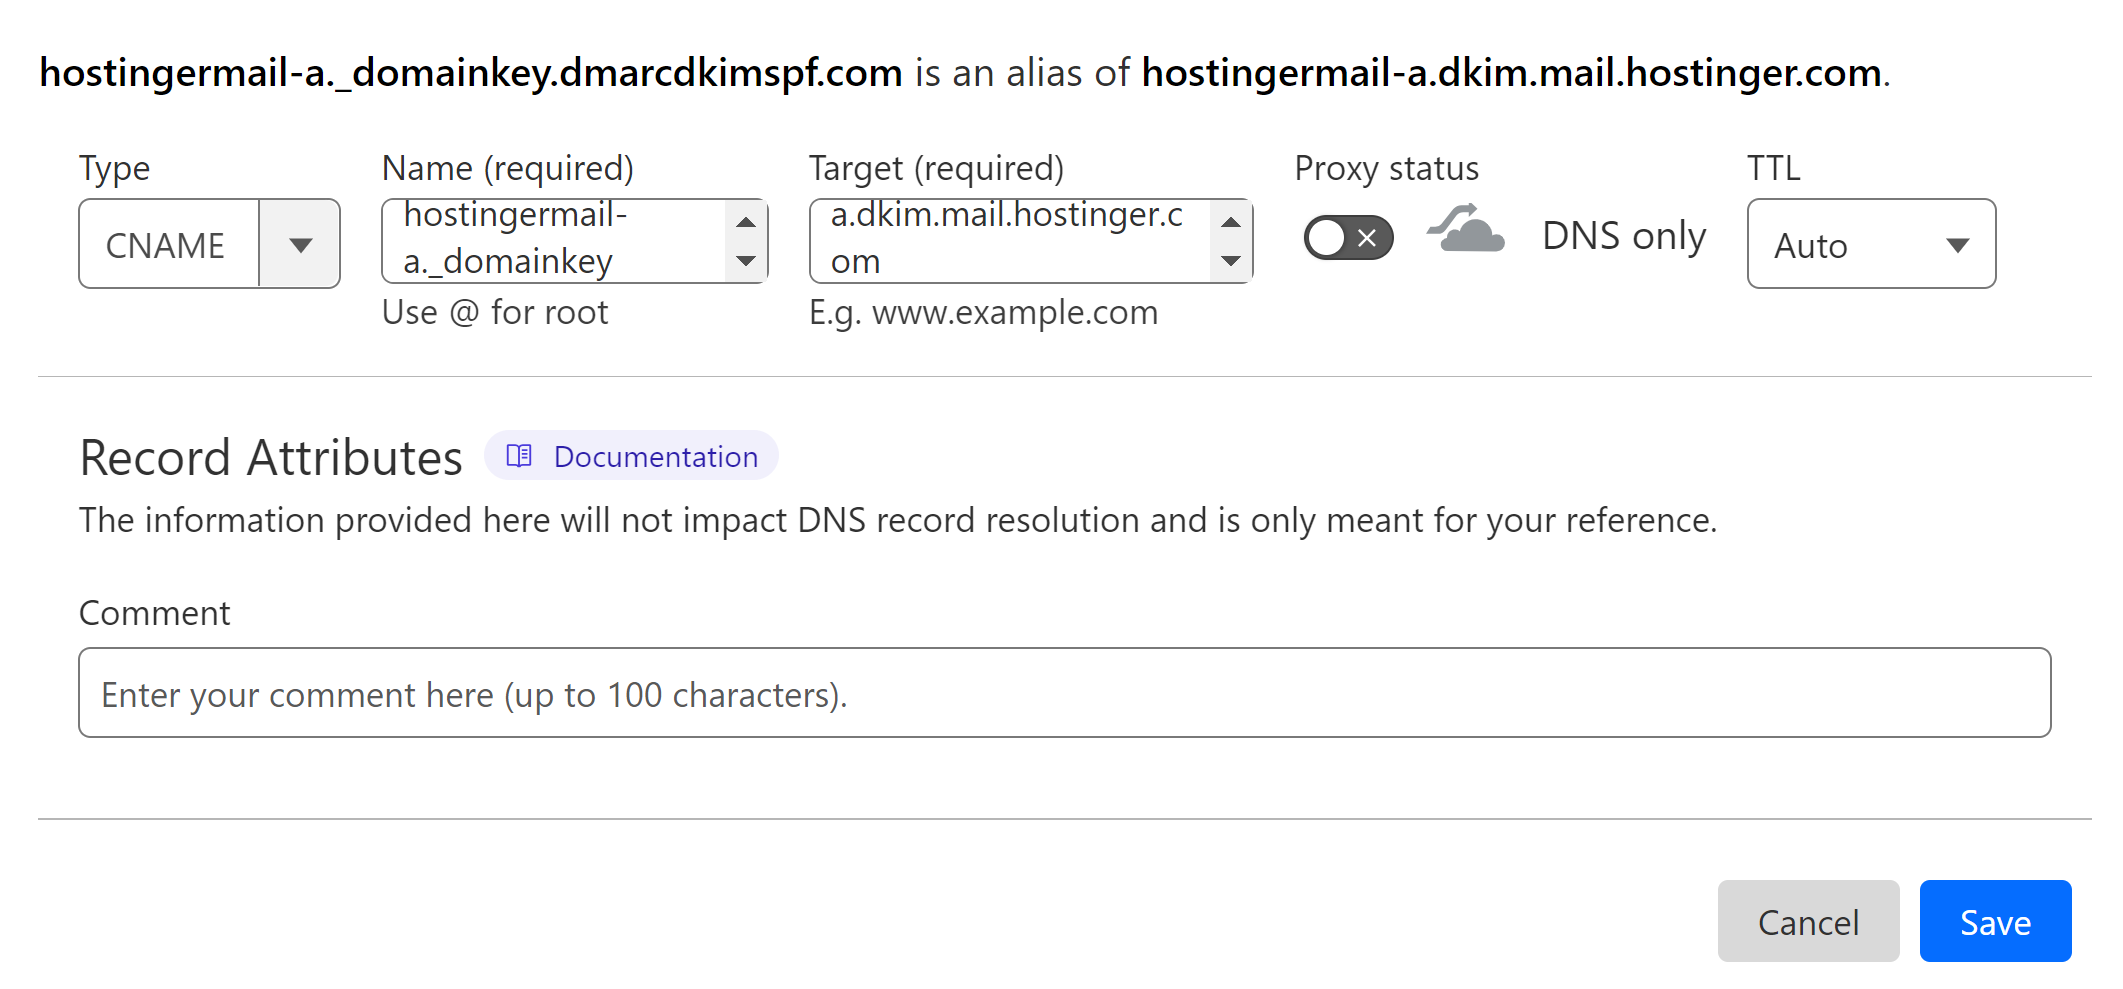
Repeat the same steps to add all DKIM records.
Custom Hostinger DKIM Setup:
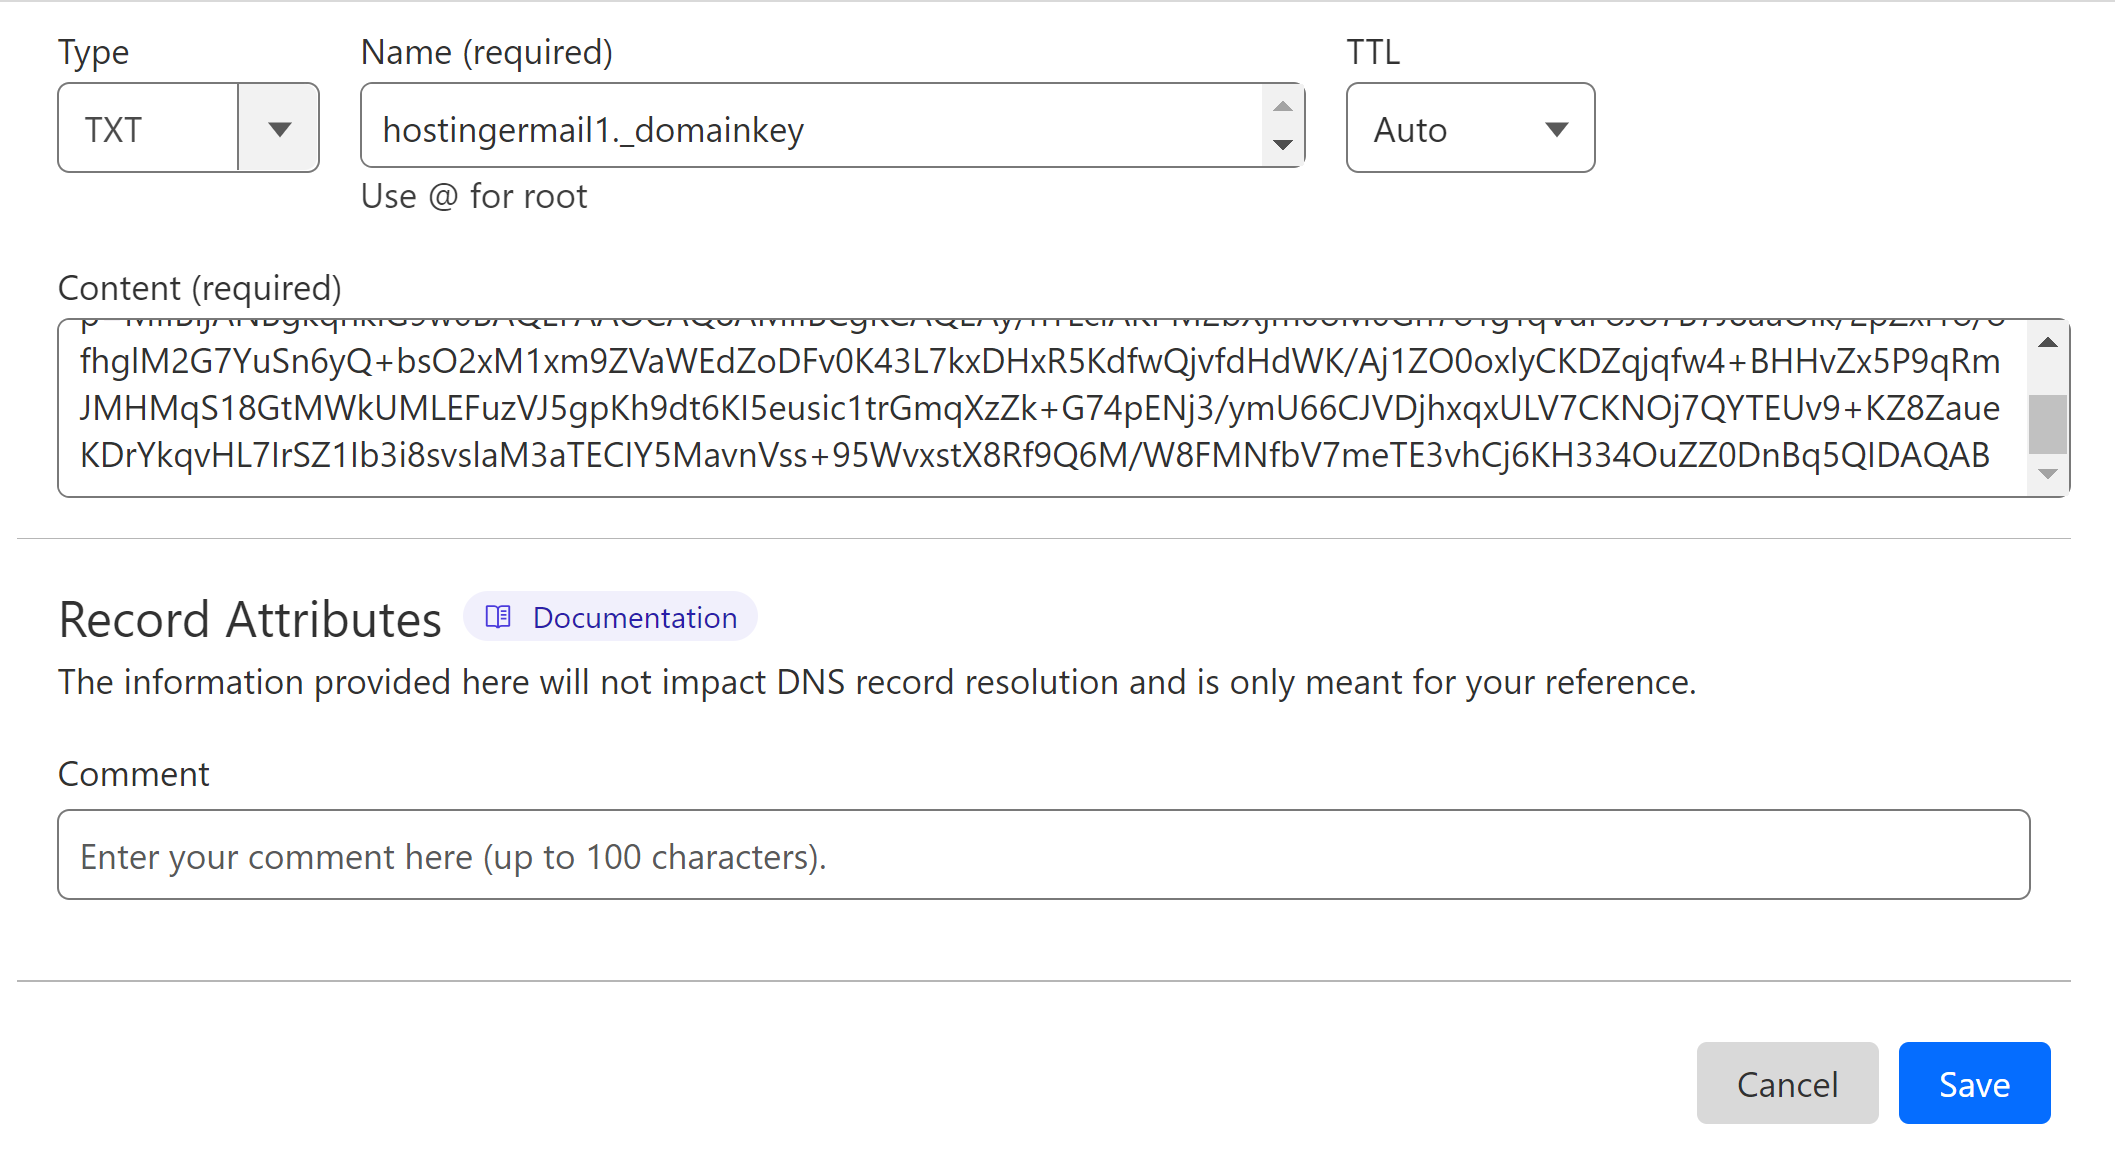
To configure the Custom DKIM value, go to the Emails tab, click Manage, and then go to the Custom DKIM tab.
Select record type TXT.
In the Name field, write the record name.
In the Target field, write the record value.
-
Click Save.
5. Setup Hostinger DMARC Record:
The DMARC value provided by Hostinger only monitors the emails. It does not reject or quarantine the unauthorized emails. Thus, your email communication is not fully secured.
Moreover, there is no dashboard where you can have insight into your email activity. Without the insights, you can not stay ahead of the scammers. DmarcDkim.com addresses all these issues with an efficient DMARC tool which allows you to implement a strict policy and provides actionable DMARC reports.
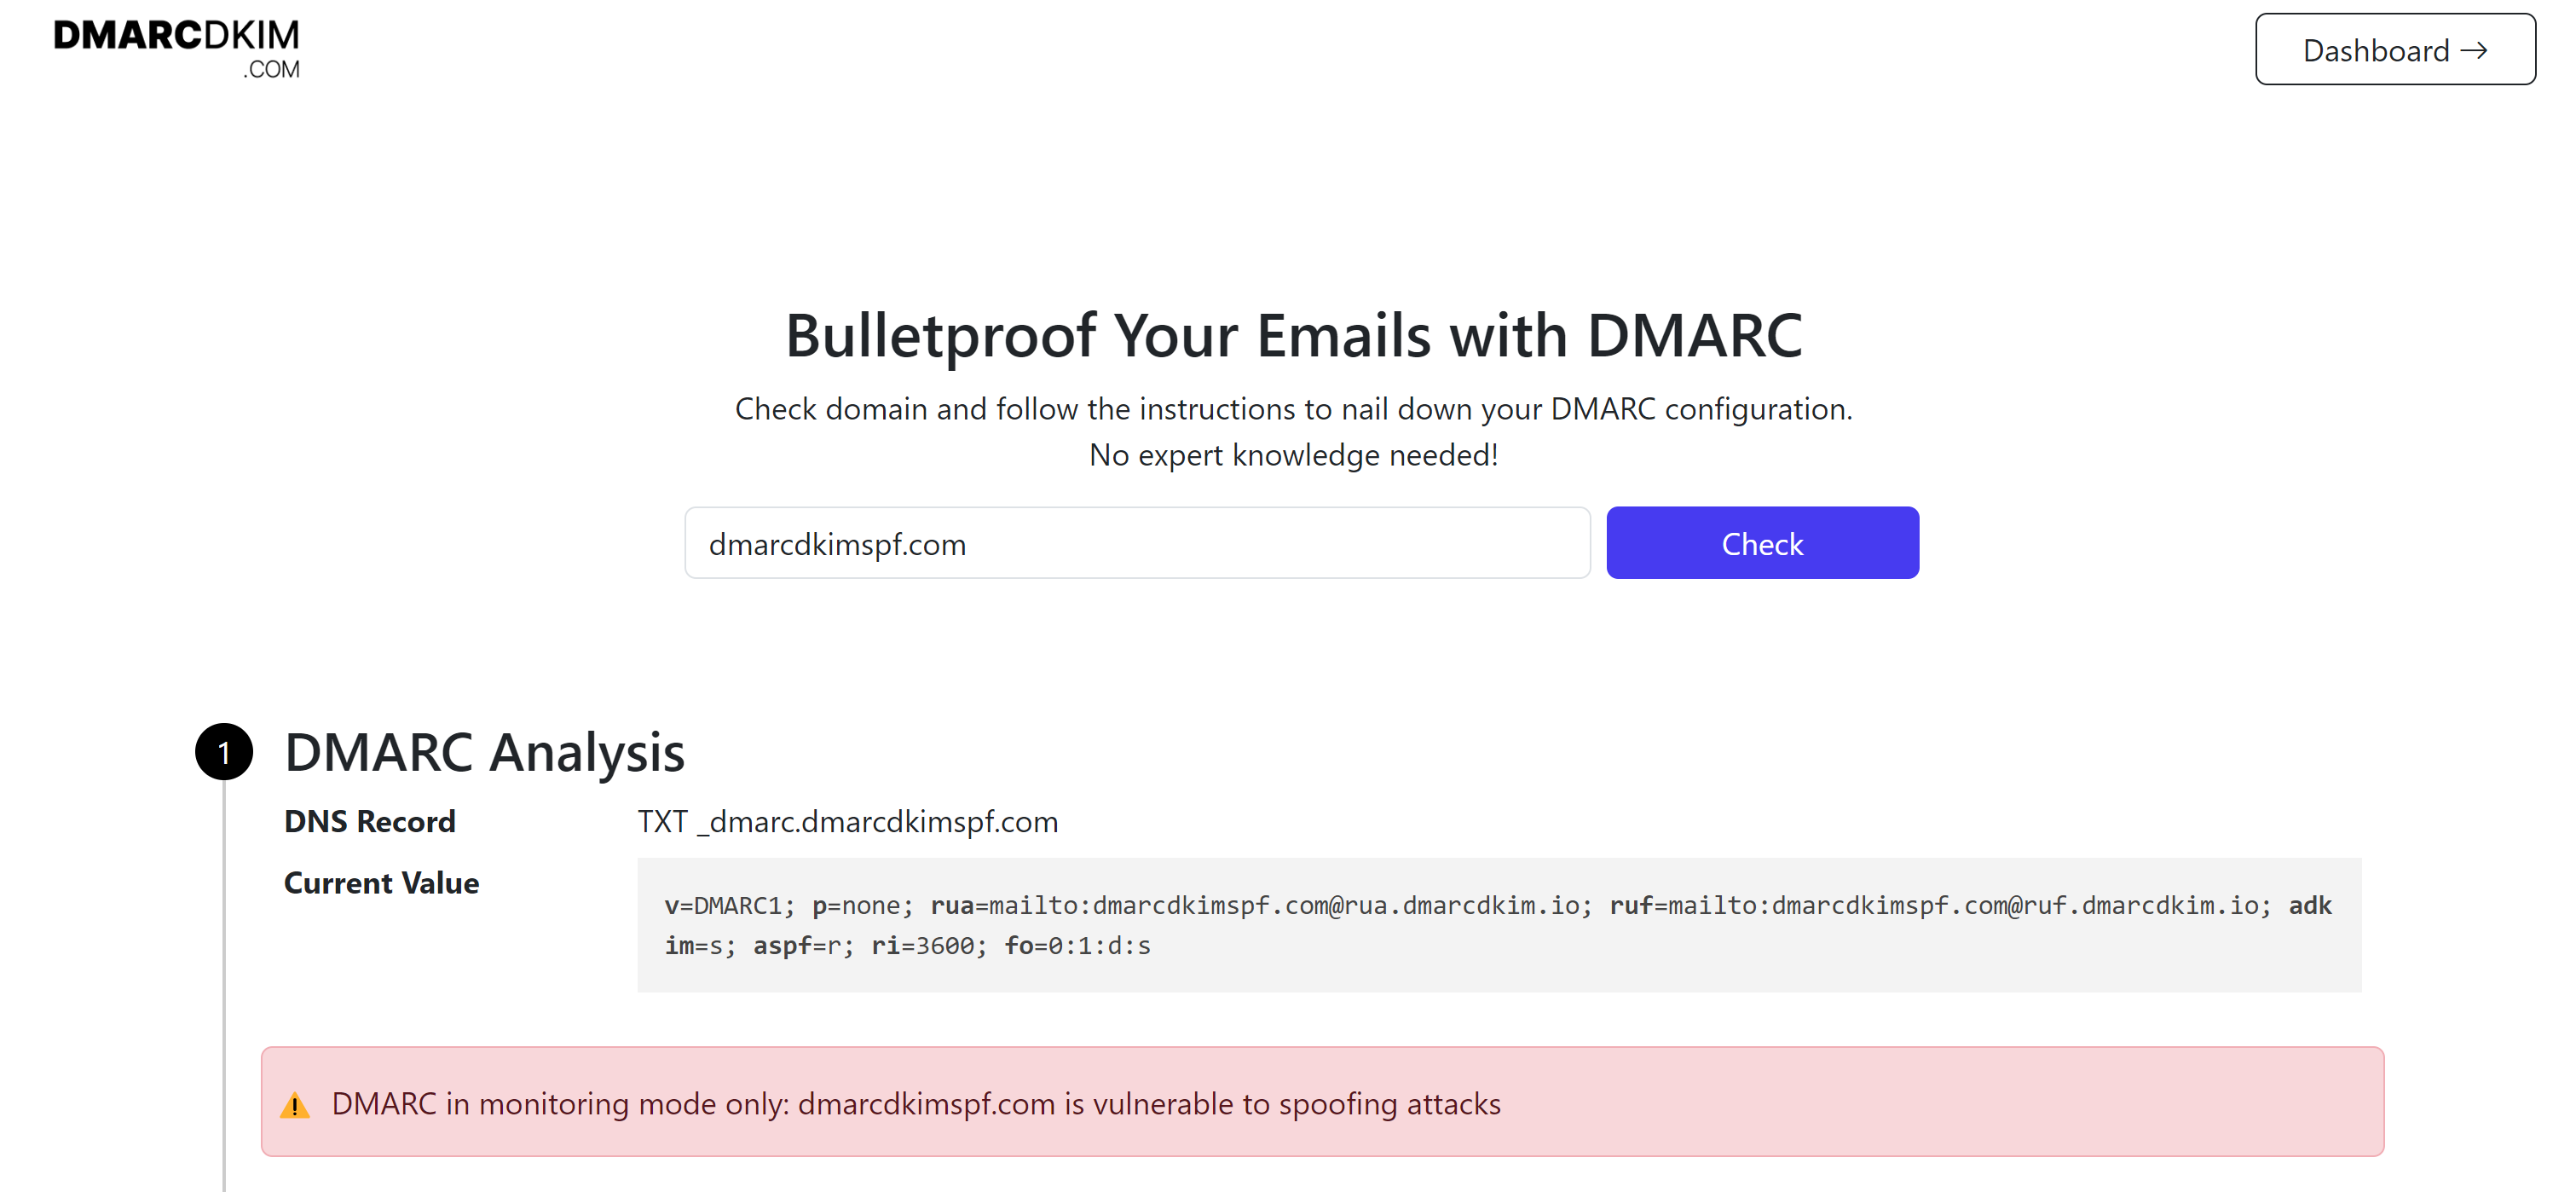
Go to the DMARC check tool.
-
Add your domain name and click Check.
-
Add the Suggested value to your DNS dashboard.
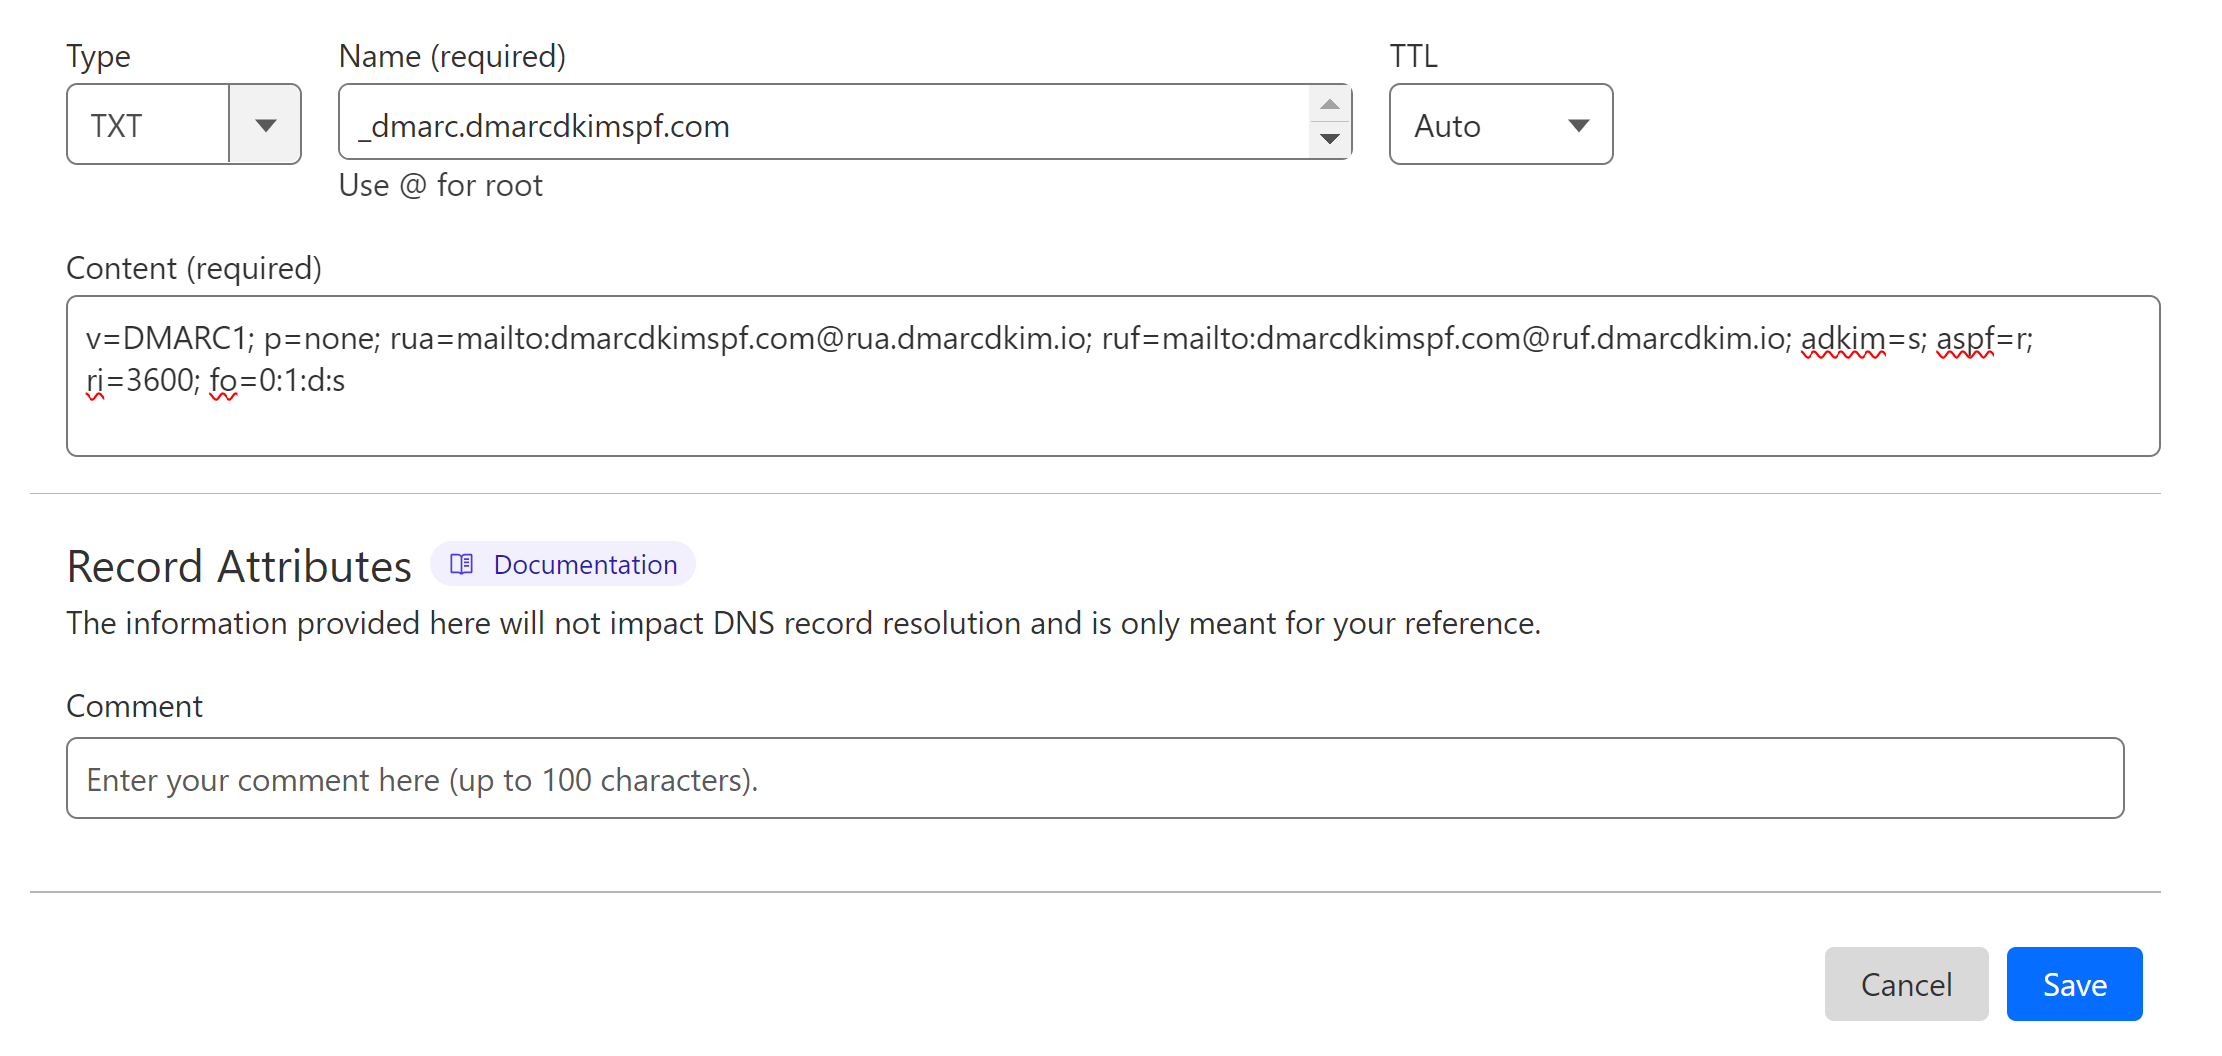
Sign up for the tool to access the DMARC reports dashboard.
Verify the Hostinger DNS Records:
-
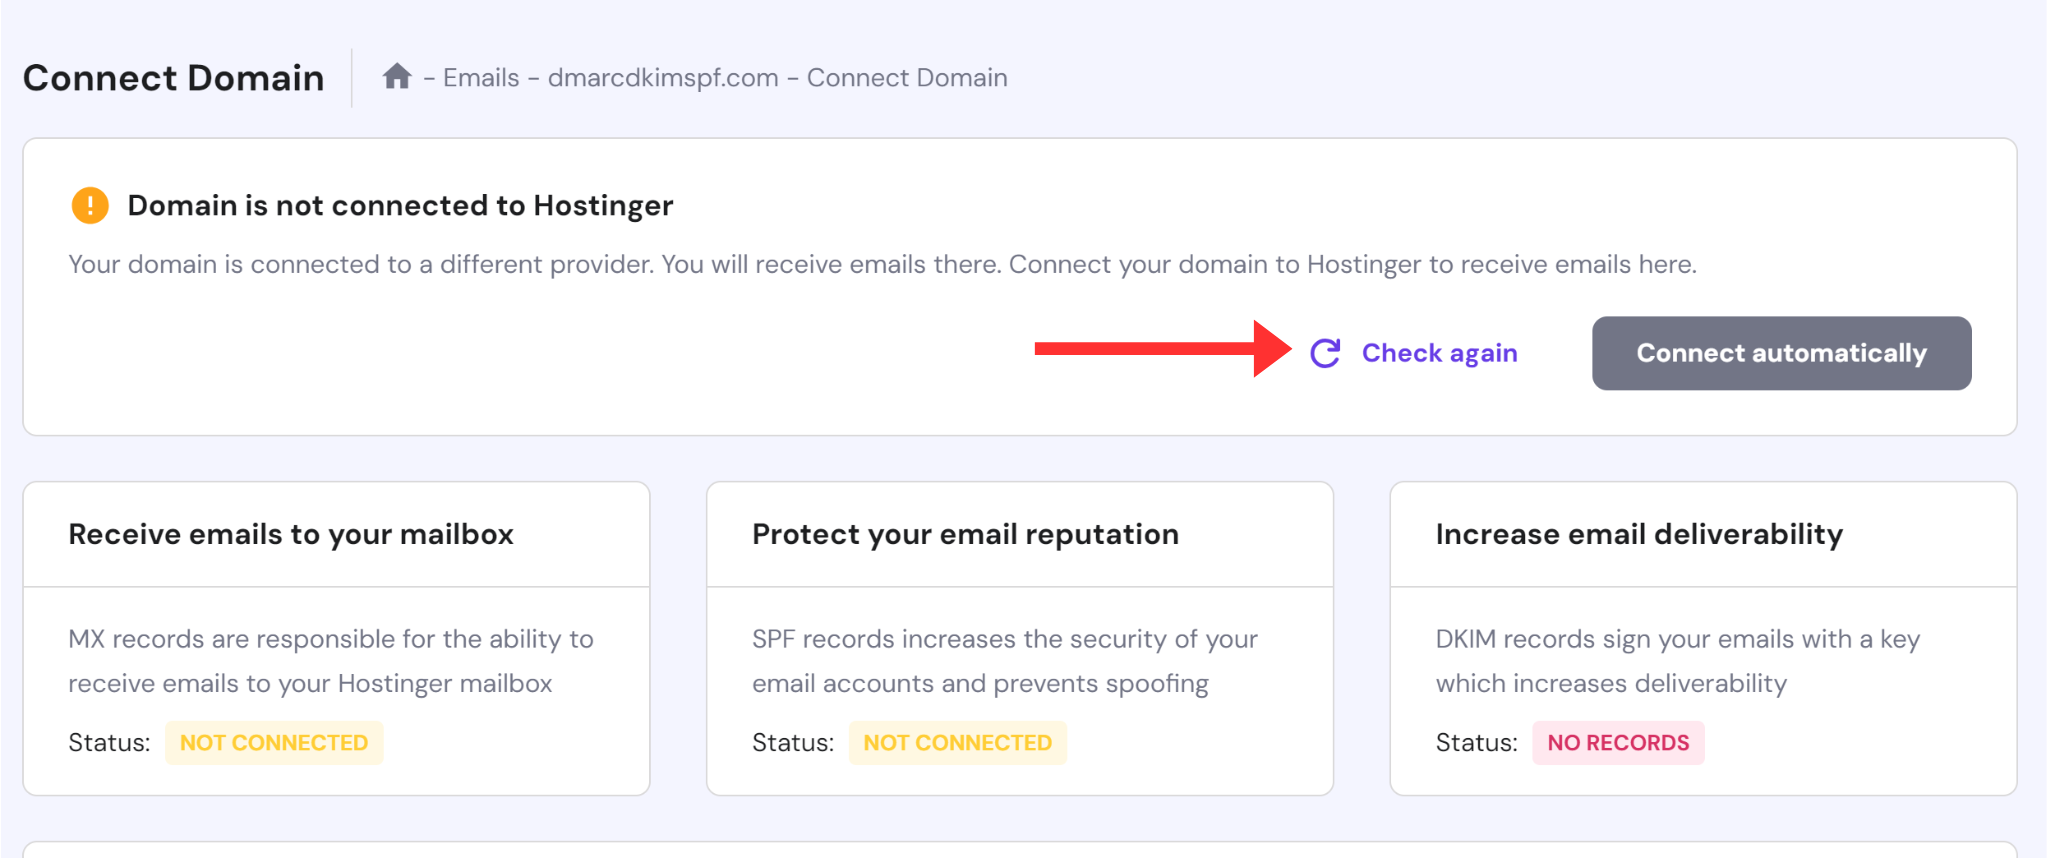
When all records are added, click the Refresh icon to update DNS changes.
-
If the records are verified, the domain connects to Hostinger.
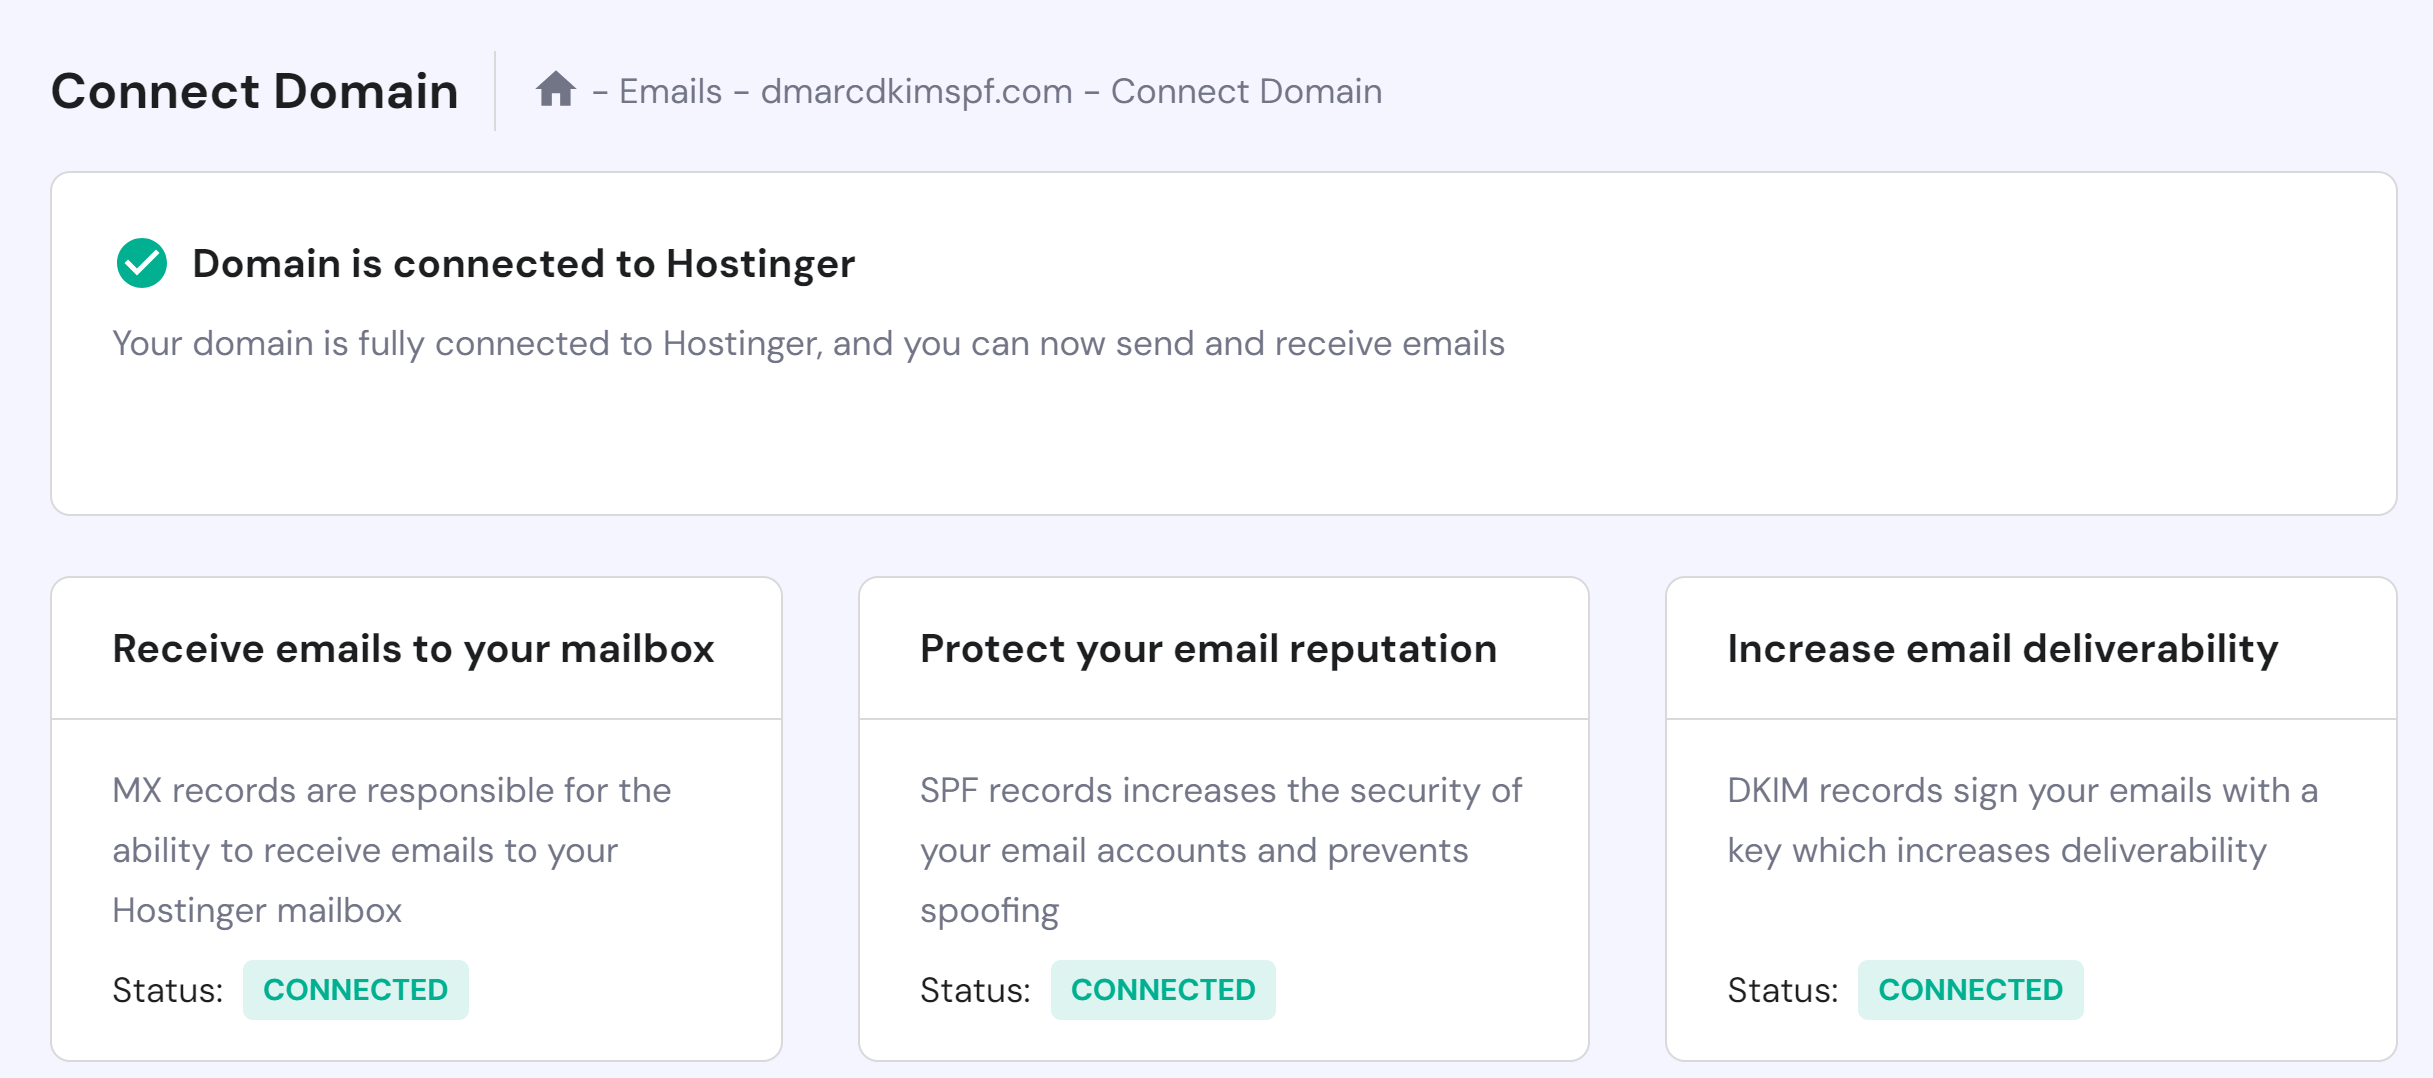
NOTE: DNS verification may take up to 24 hours.
If records do not validate after 24 hours, there might be a misconfiguration in your DNS setup. You can hire a DmarcDkim.com expert to troubleshoot the DNS setup errors.
Check domain and follow the instructions to nail down your DMARC configuration.
No expert knowledge needed!


