
How to Setup Google Workspace SPF, DKIM, DMARC, MX Records - Email Authentication Tutorial
Check your domain for DMARC, DKIM, SPF and MX records. Get a free report.
Google Workspace MX, DMARC, DKIM, SPF Configuration for Domain Authentication
If you are tired of emails going to customers' spam folders, this article is for you. The inbox providers like Google and Yahoo only approve emails that pass their authentication check. Therefore, it is important to comply with the security standards to be trusted by inbox providers. SPF, DKIM, and DMARC are commonly used authentication standards to verify your domain. You can find these records in the Google Workspace Gmail settings. Follow the steps below to configure and add the Google Workspace verification records to the DNS provider.
Google Workspace Domain Verification:
You need to confirm or verify your domain ownership to get access to Google Workspace's advanced features. These features also include the DKIM signing for your outgoing emails. Once you have created your Google Workspace account with your domain and email, follow the steps below to verify the domain:
-
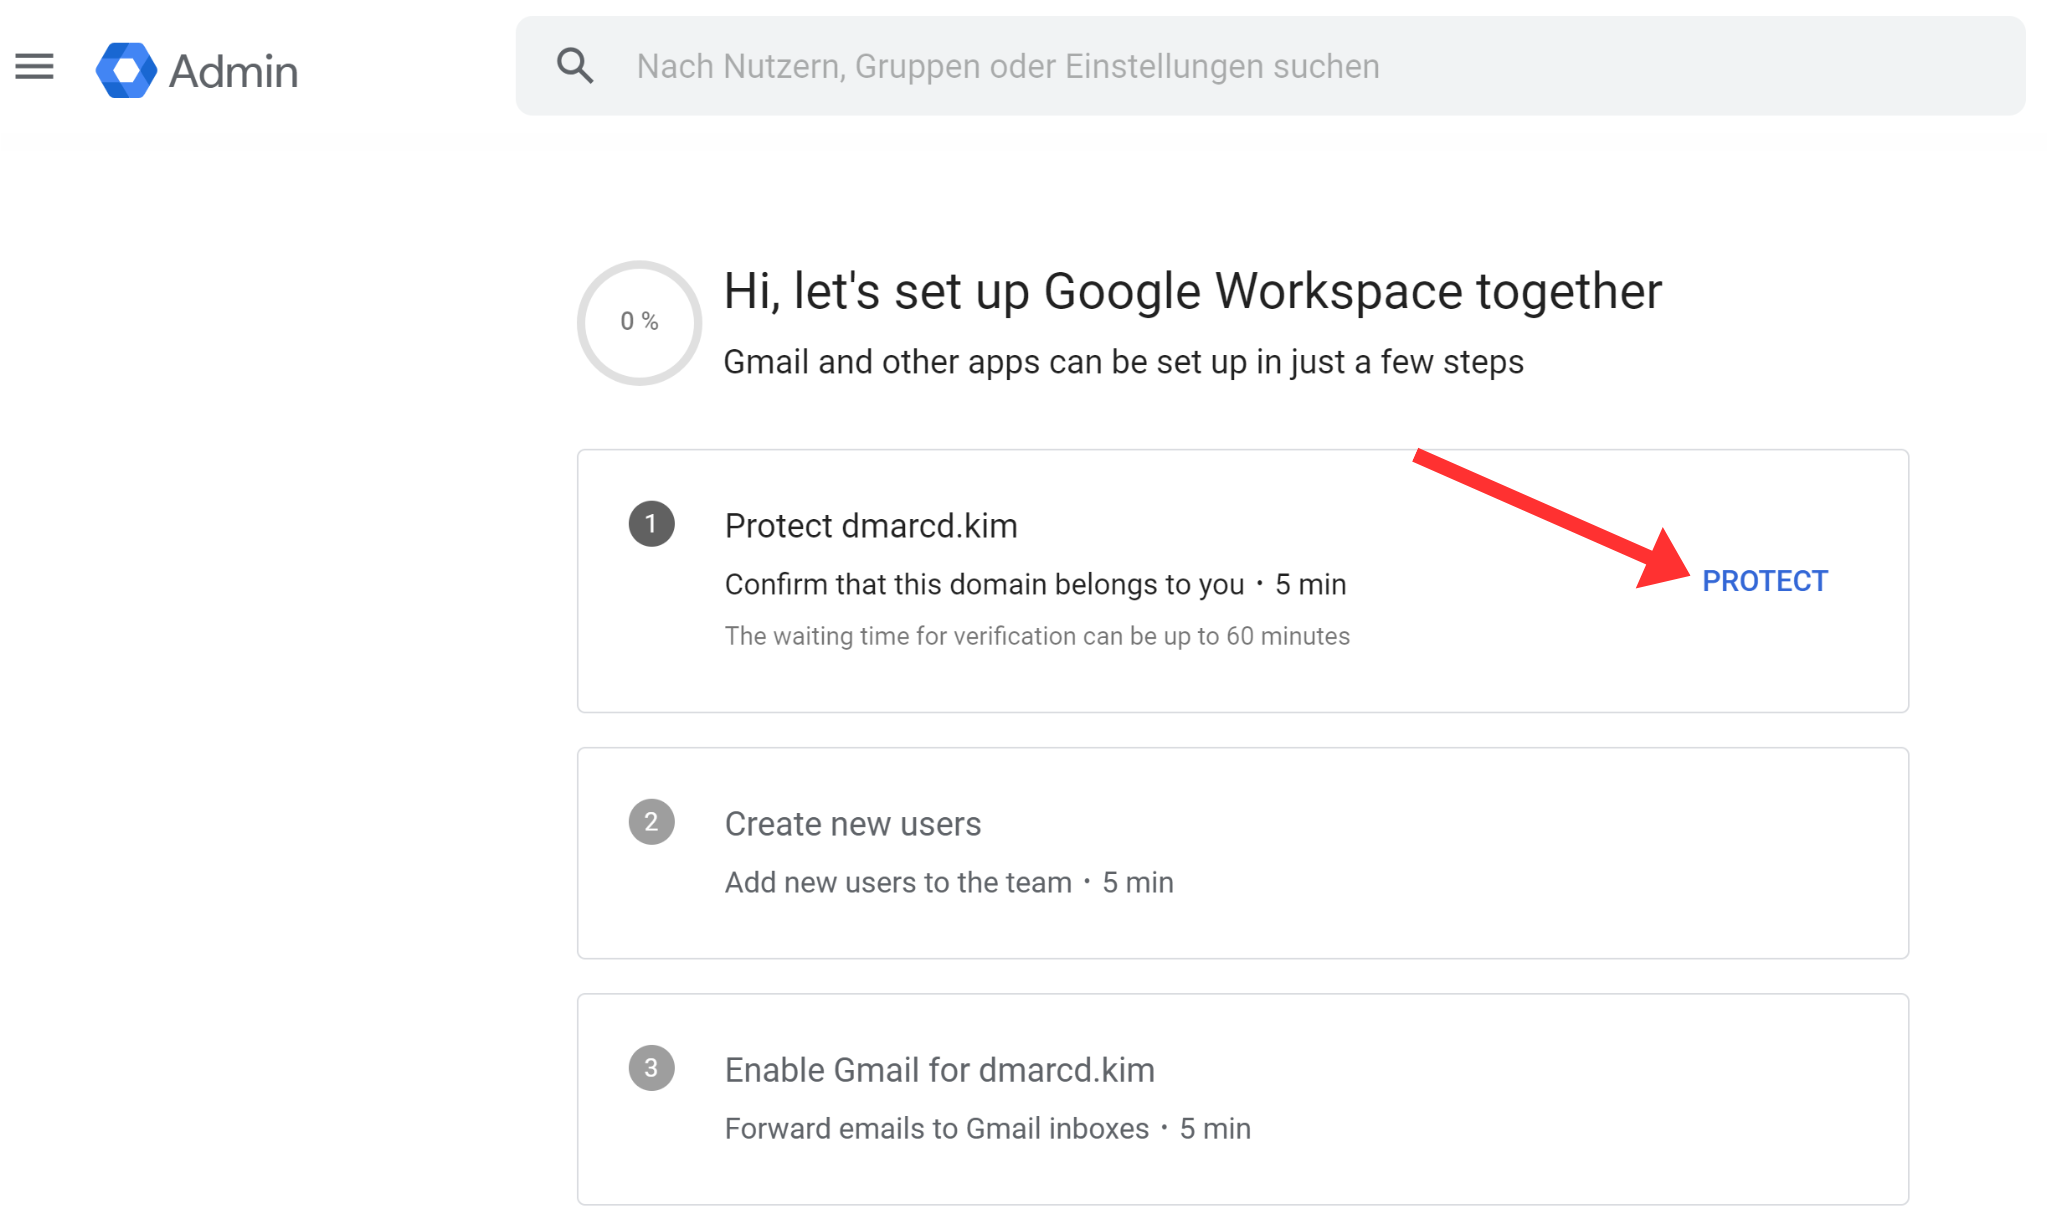
At the Google Workspace Admin console, click "Protect" in the first section of the three-step setup.
-
Alternatively, you can click Admin at the top left corner and click the "Configure Domain" option.
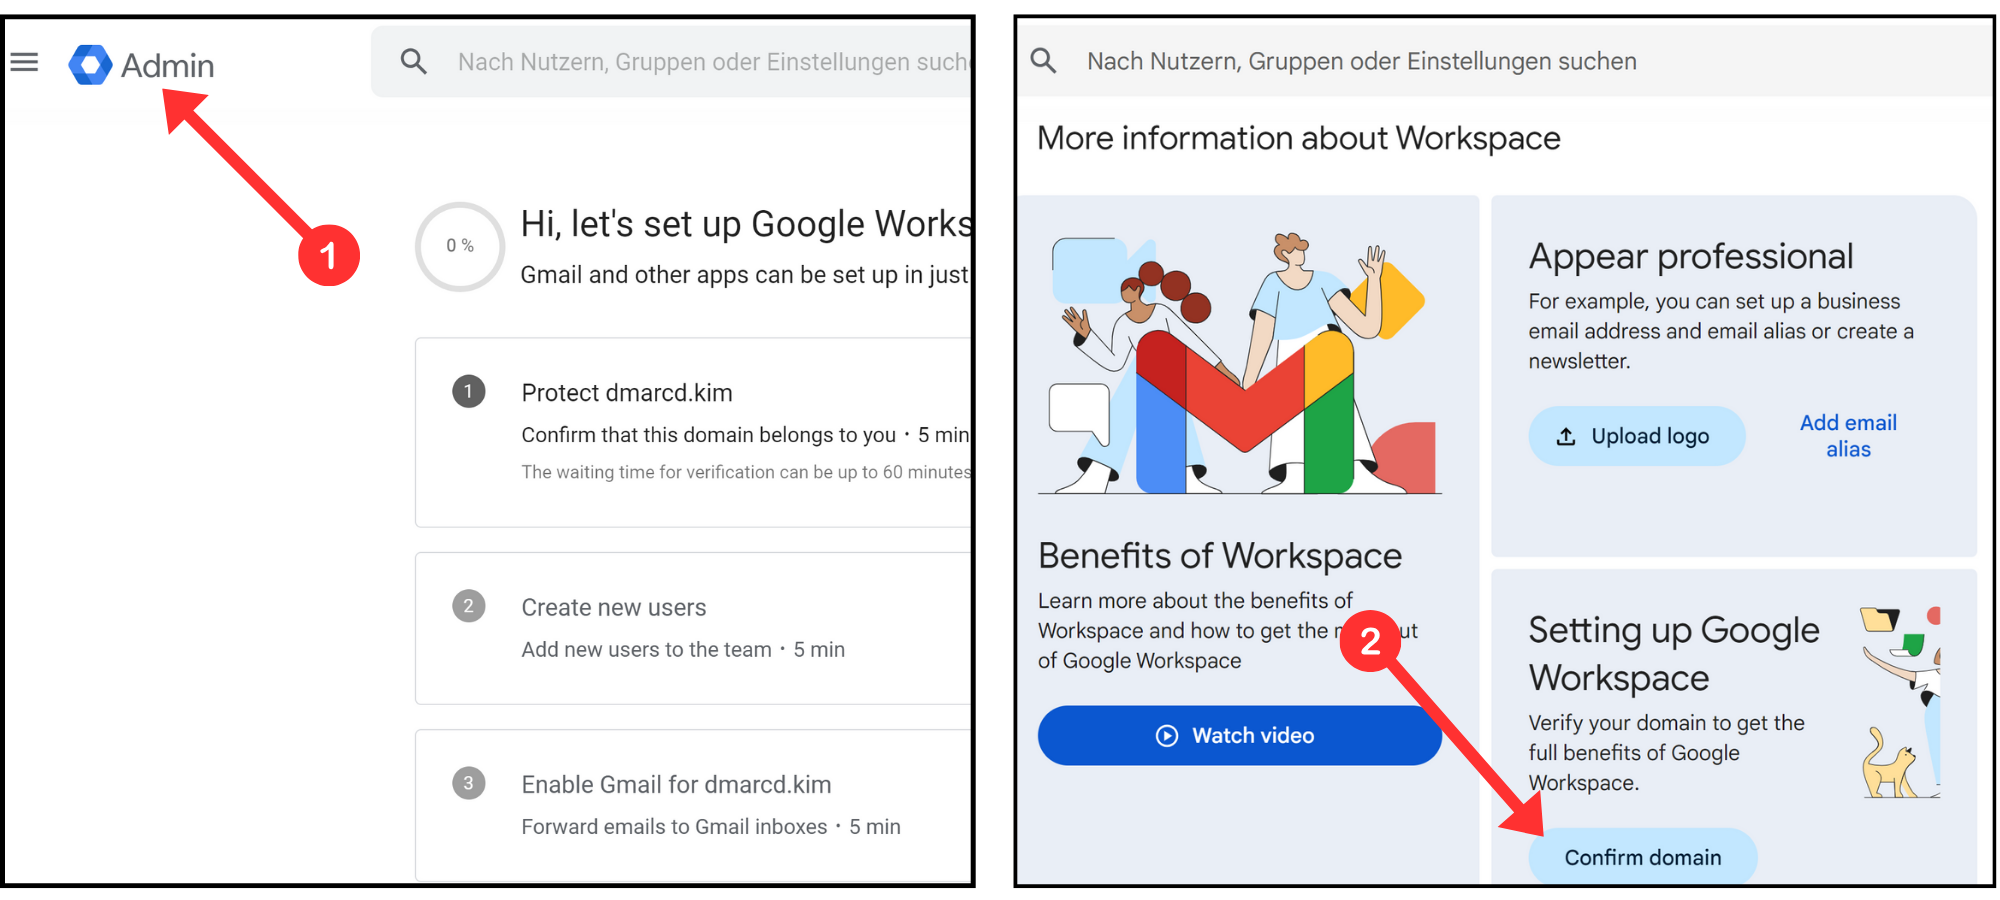
Read the instructions for logging in to your DNS provider and click "Continue with Step 2."
-
On the next page, copy the domain confirmation record name and value and add it to your DNS provider.

-
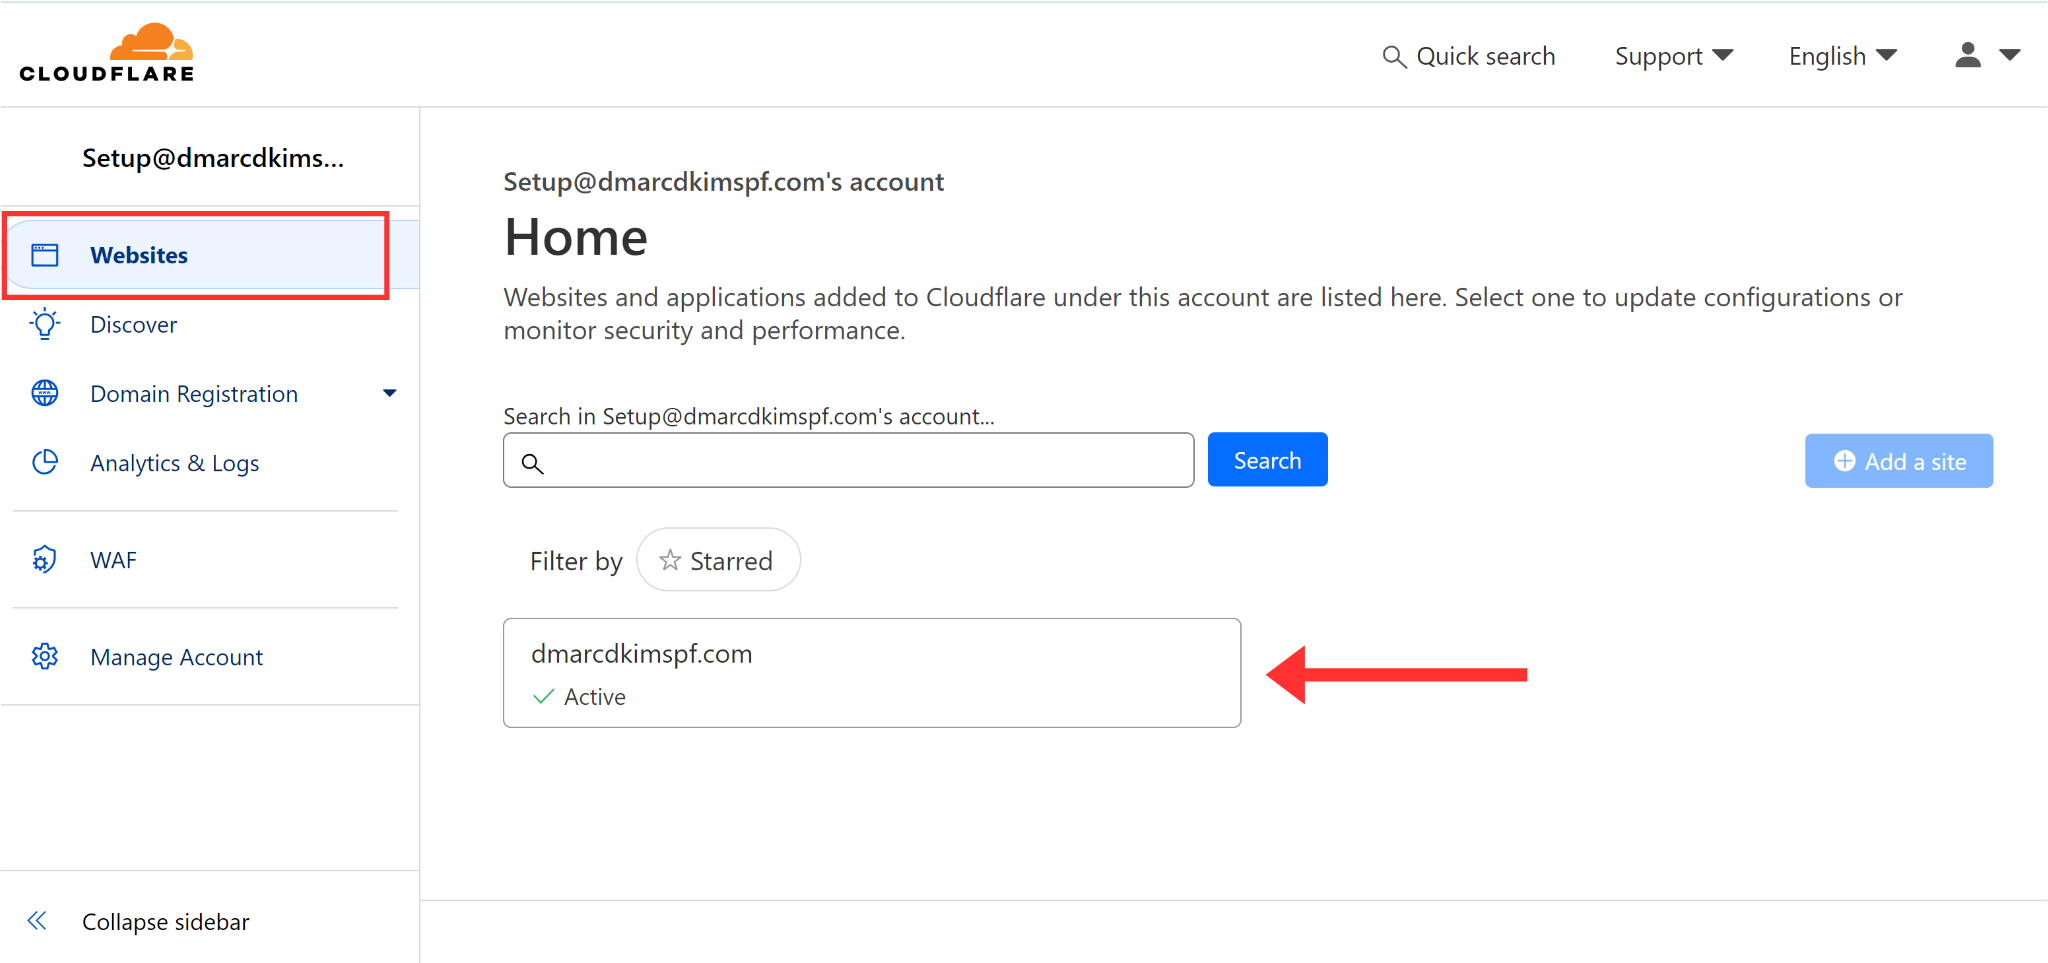
Login to your DNS provider and head to your domain. (We are using Cloudflare for this guide)
-
Go to the DNS tab and click Add Record.
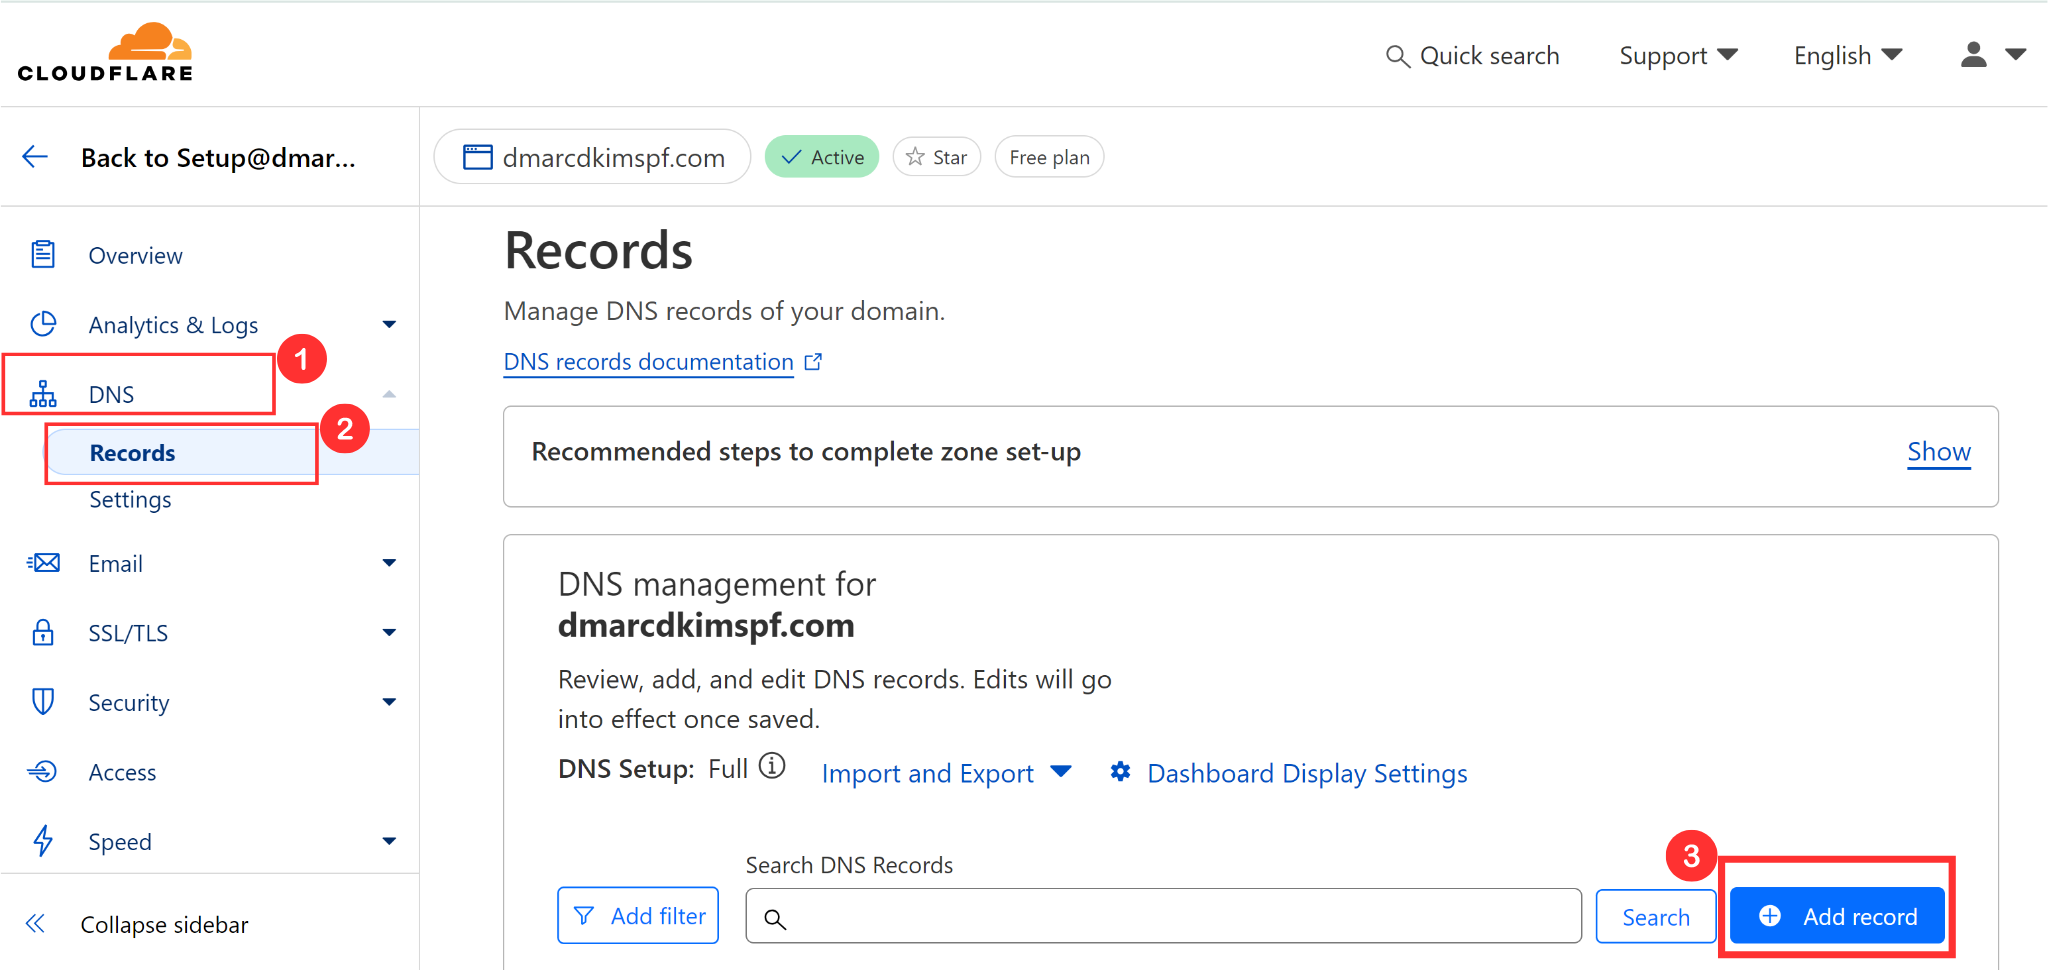
Select type TXT.
In the record Name field, write the host name:
@-
Now copy the record value from Workspace and paste it into the Content field.

Hit the Save button to add the record to your DNS dashboard.
-
Once added, go back to Google Workspace and click the "Protect Domain."

Setup Google Workspace MX Records:
-
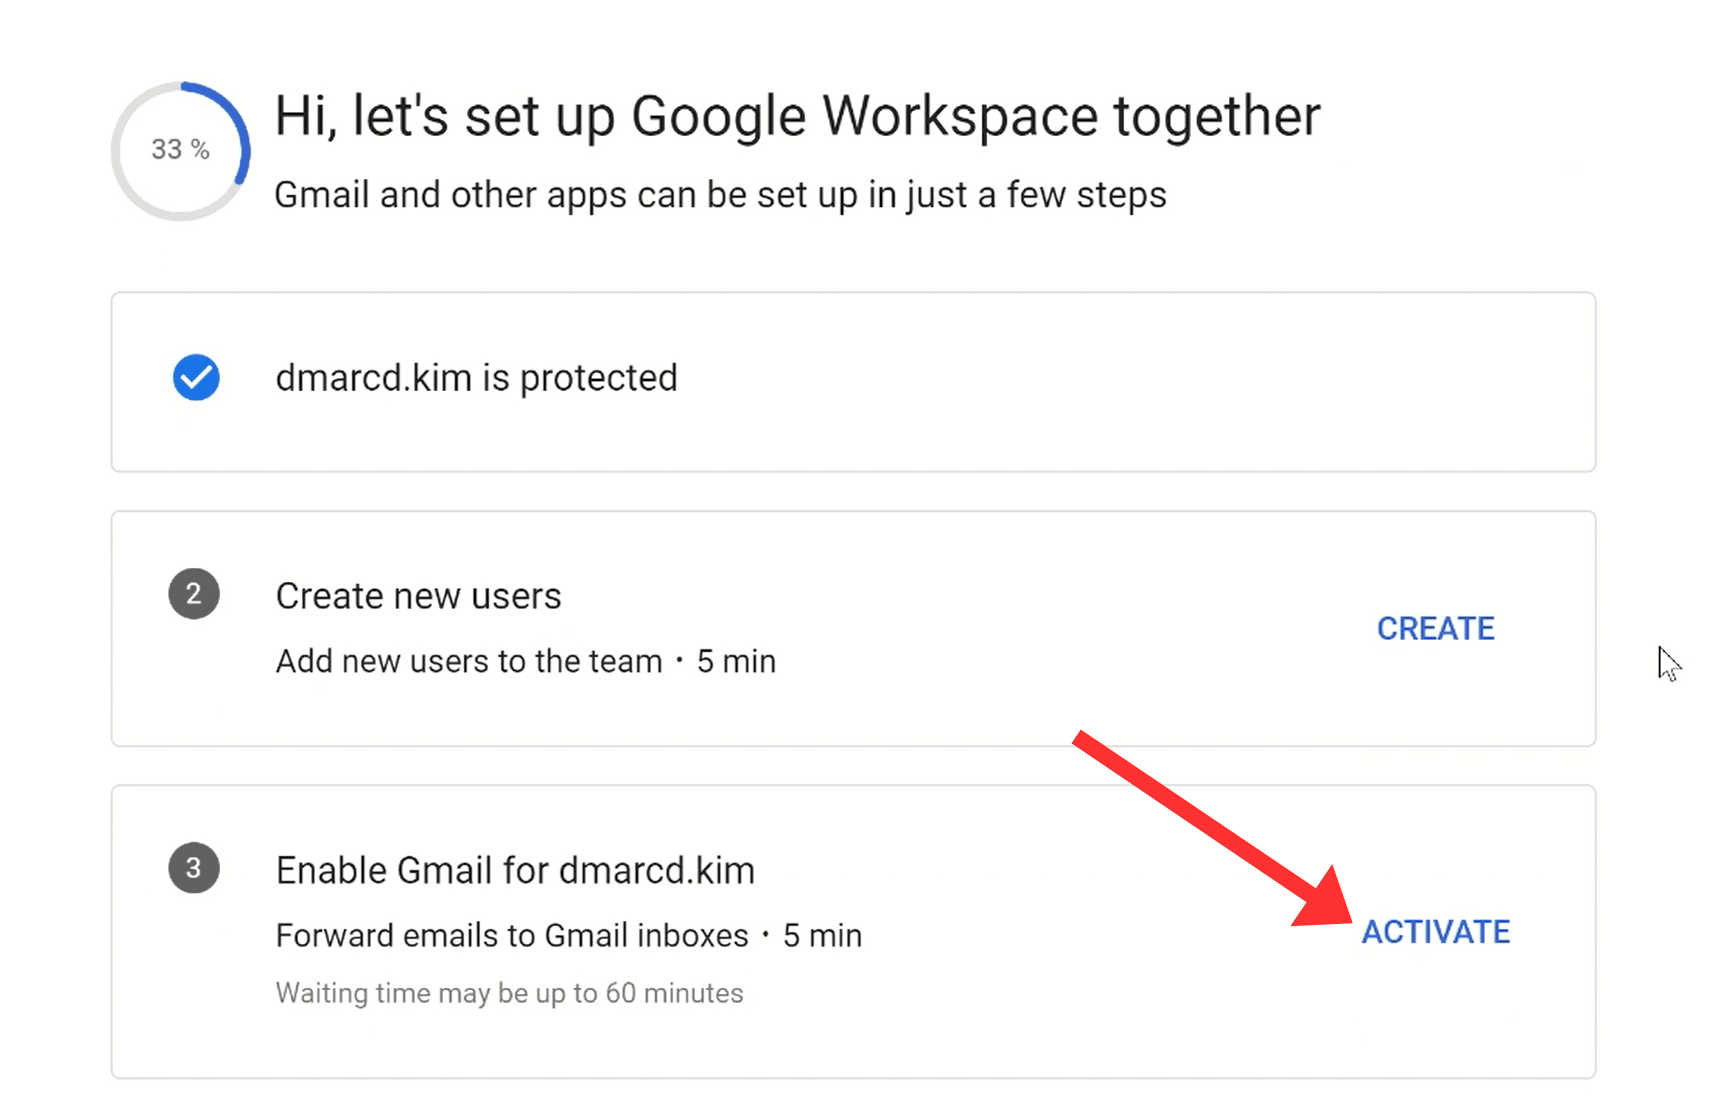
Click Activate in the "Enable Gmail for your domain" section.
-
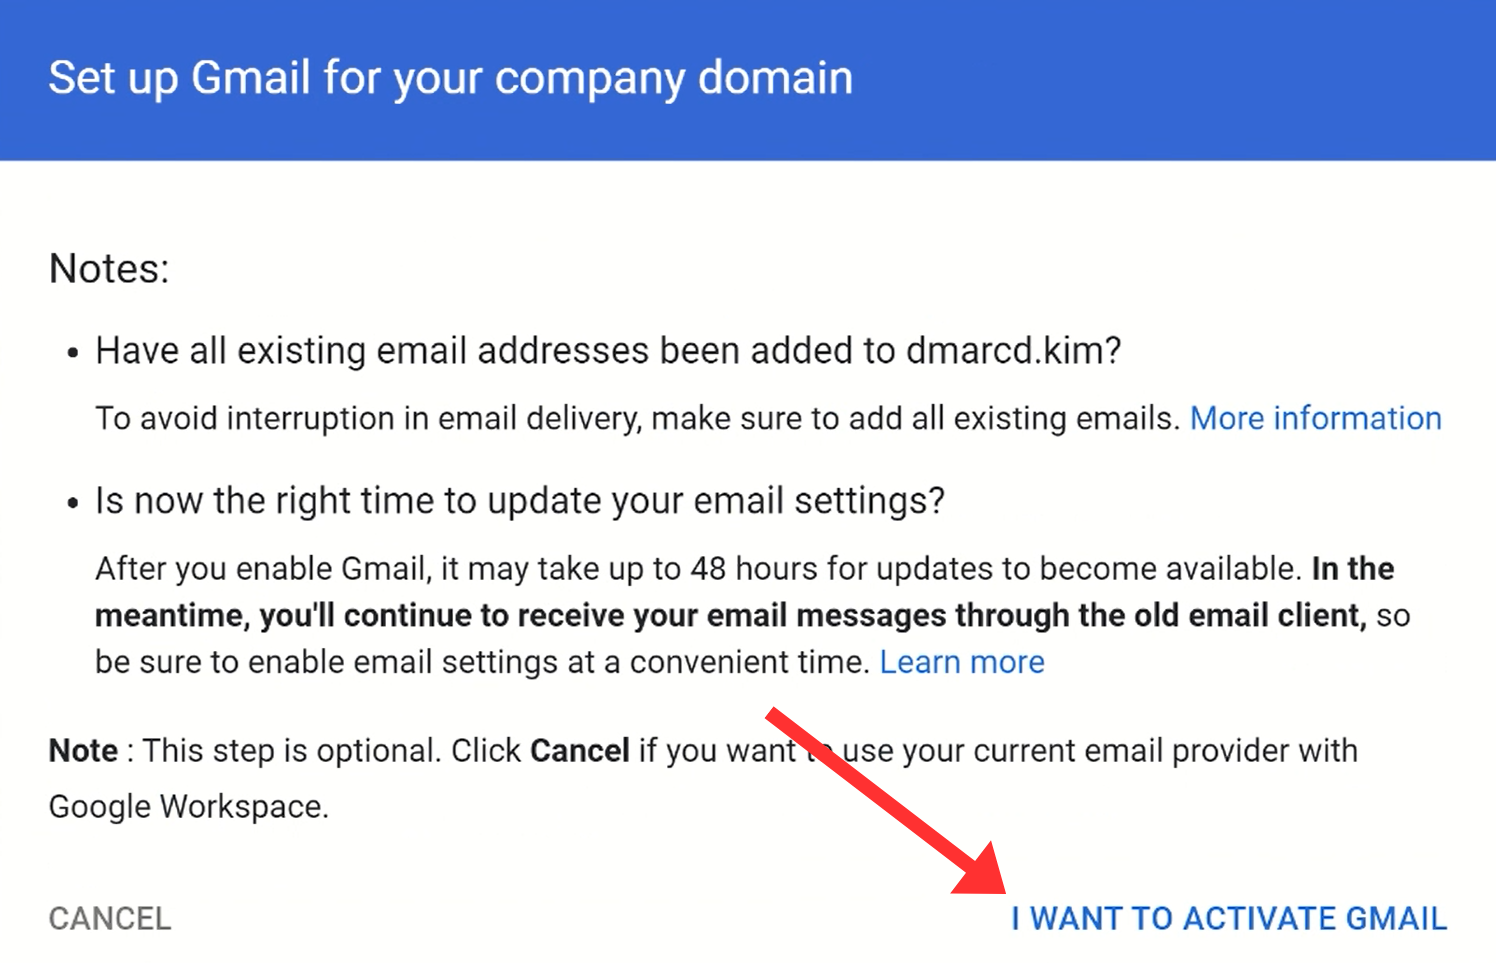
Select "I Want to Activate Gmail."
-
Click Change Confirmation Method.

If you select Automatic Activation, the Google MX records will be added to your DNS provider automatically.
-
If you select Manual Activation, you will see a list of MX records.

To add Google Workspace MX records, delete previous records if there are any.
In the DNS dashboard, select record type MX.
Write "@" in the Name field.
Copy the MX value and paste it into the Mail Server field.
-
Select priority as mentioned with the MX record and click Save.

Repeat the same process to add all Google MX records.
Configure Google Workspace DKIM record:
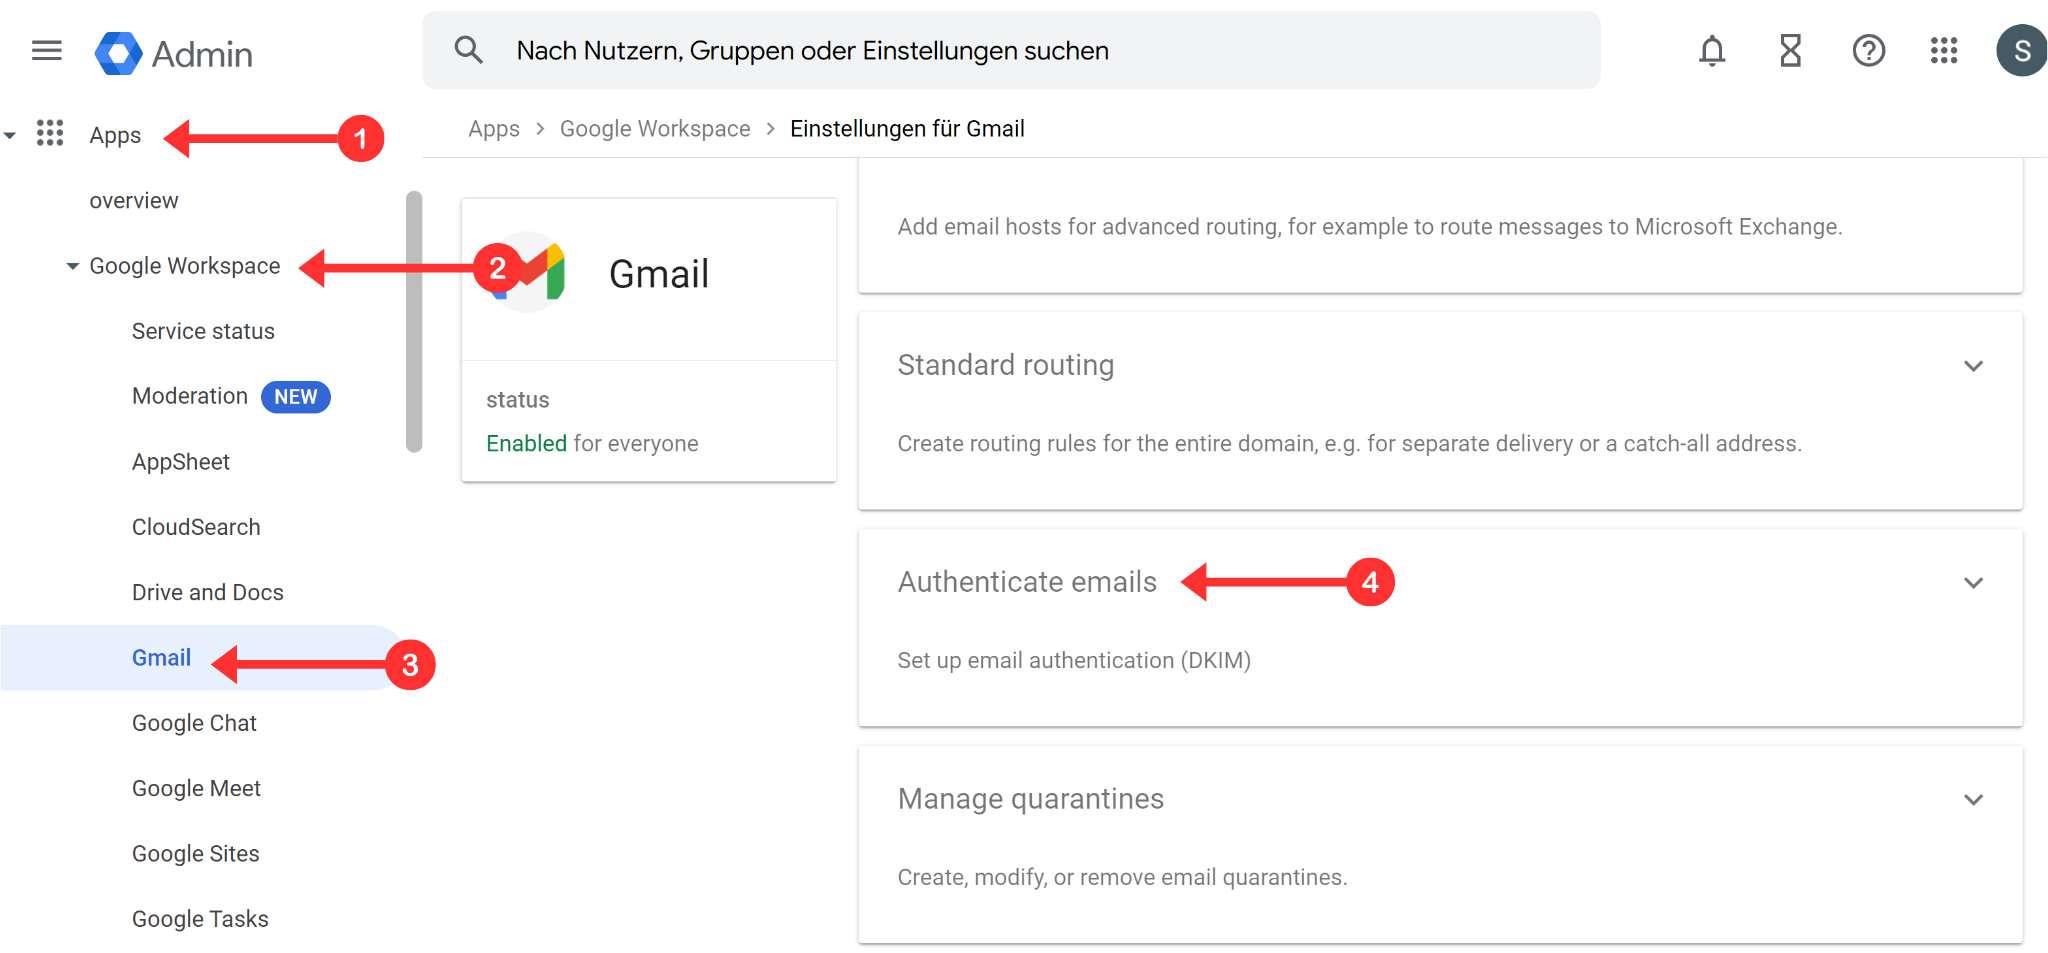
In Google Workspace Admin console, go to Apps in the left navigation menu.
Click Google Workspace and head to the Gmail tab.
-
Go to the Authenticate Email section.
-
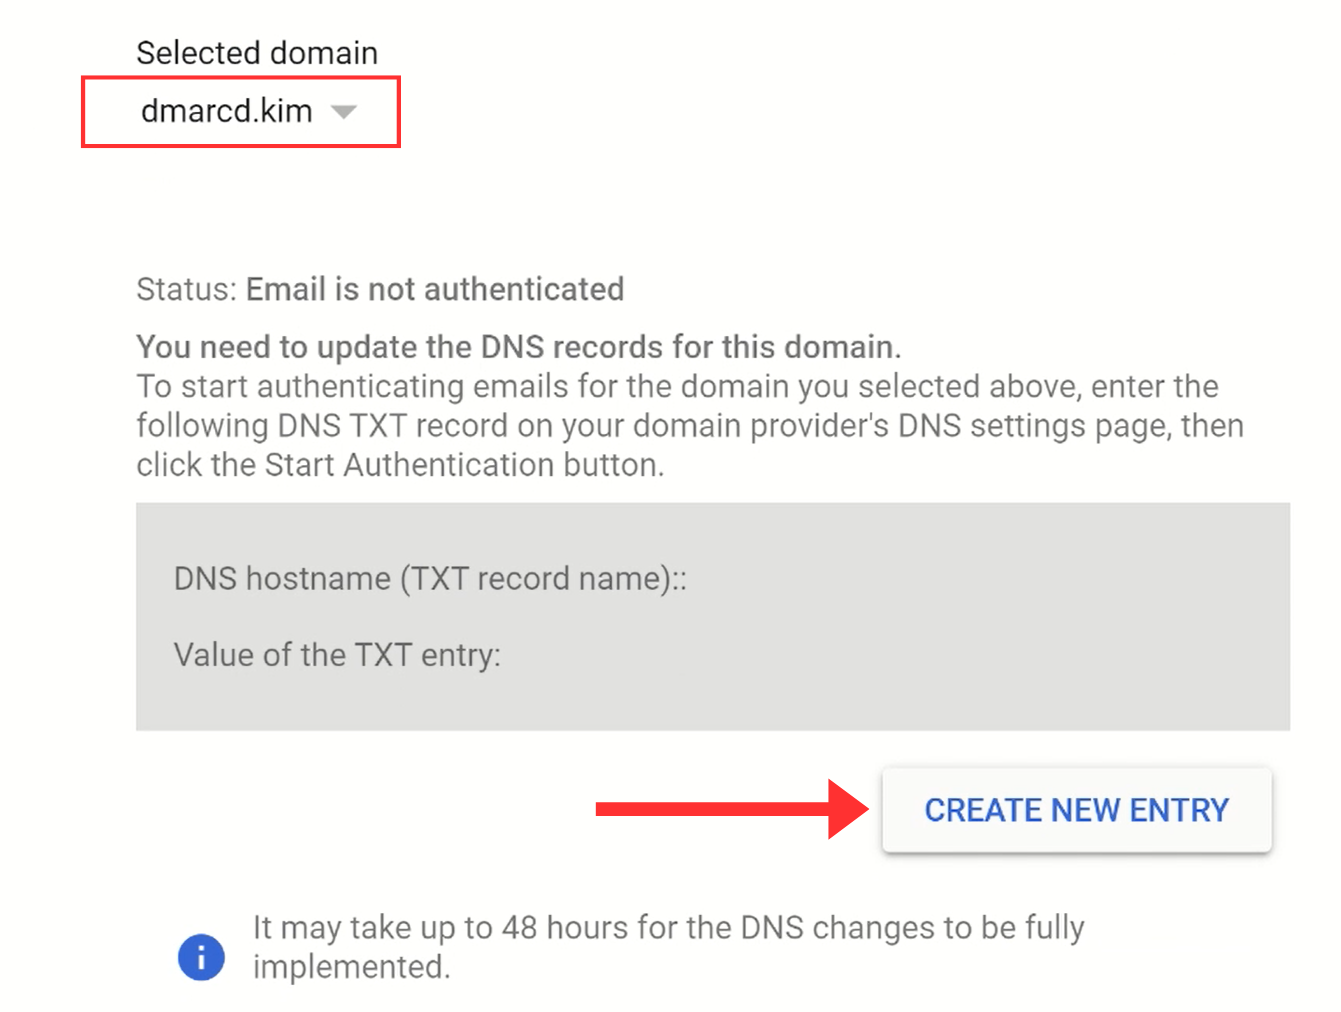
Select the domain and click Create New Entry.
-
Set the DKIM key length to
2048for the best security, and then click Generate.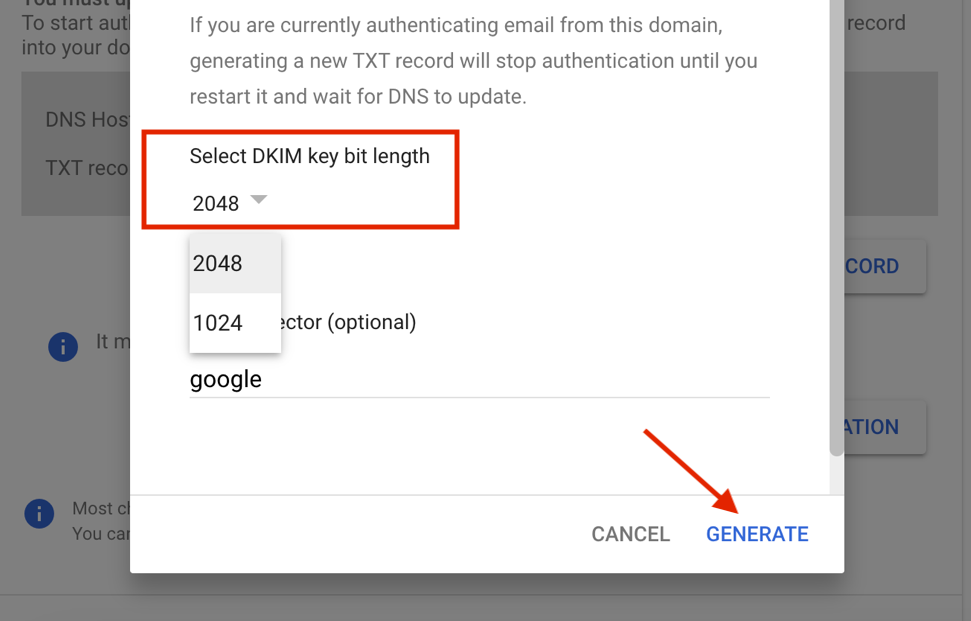
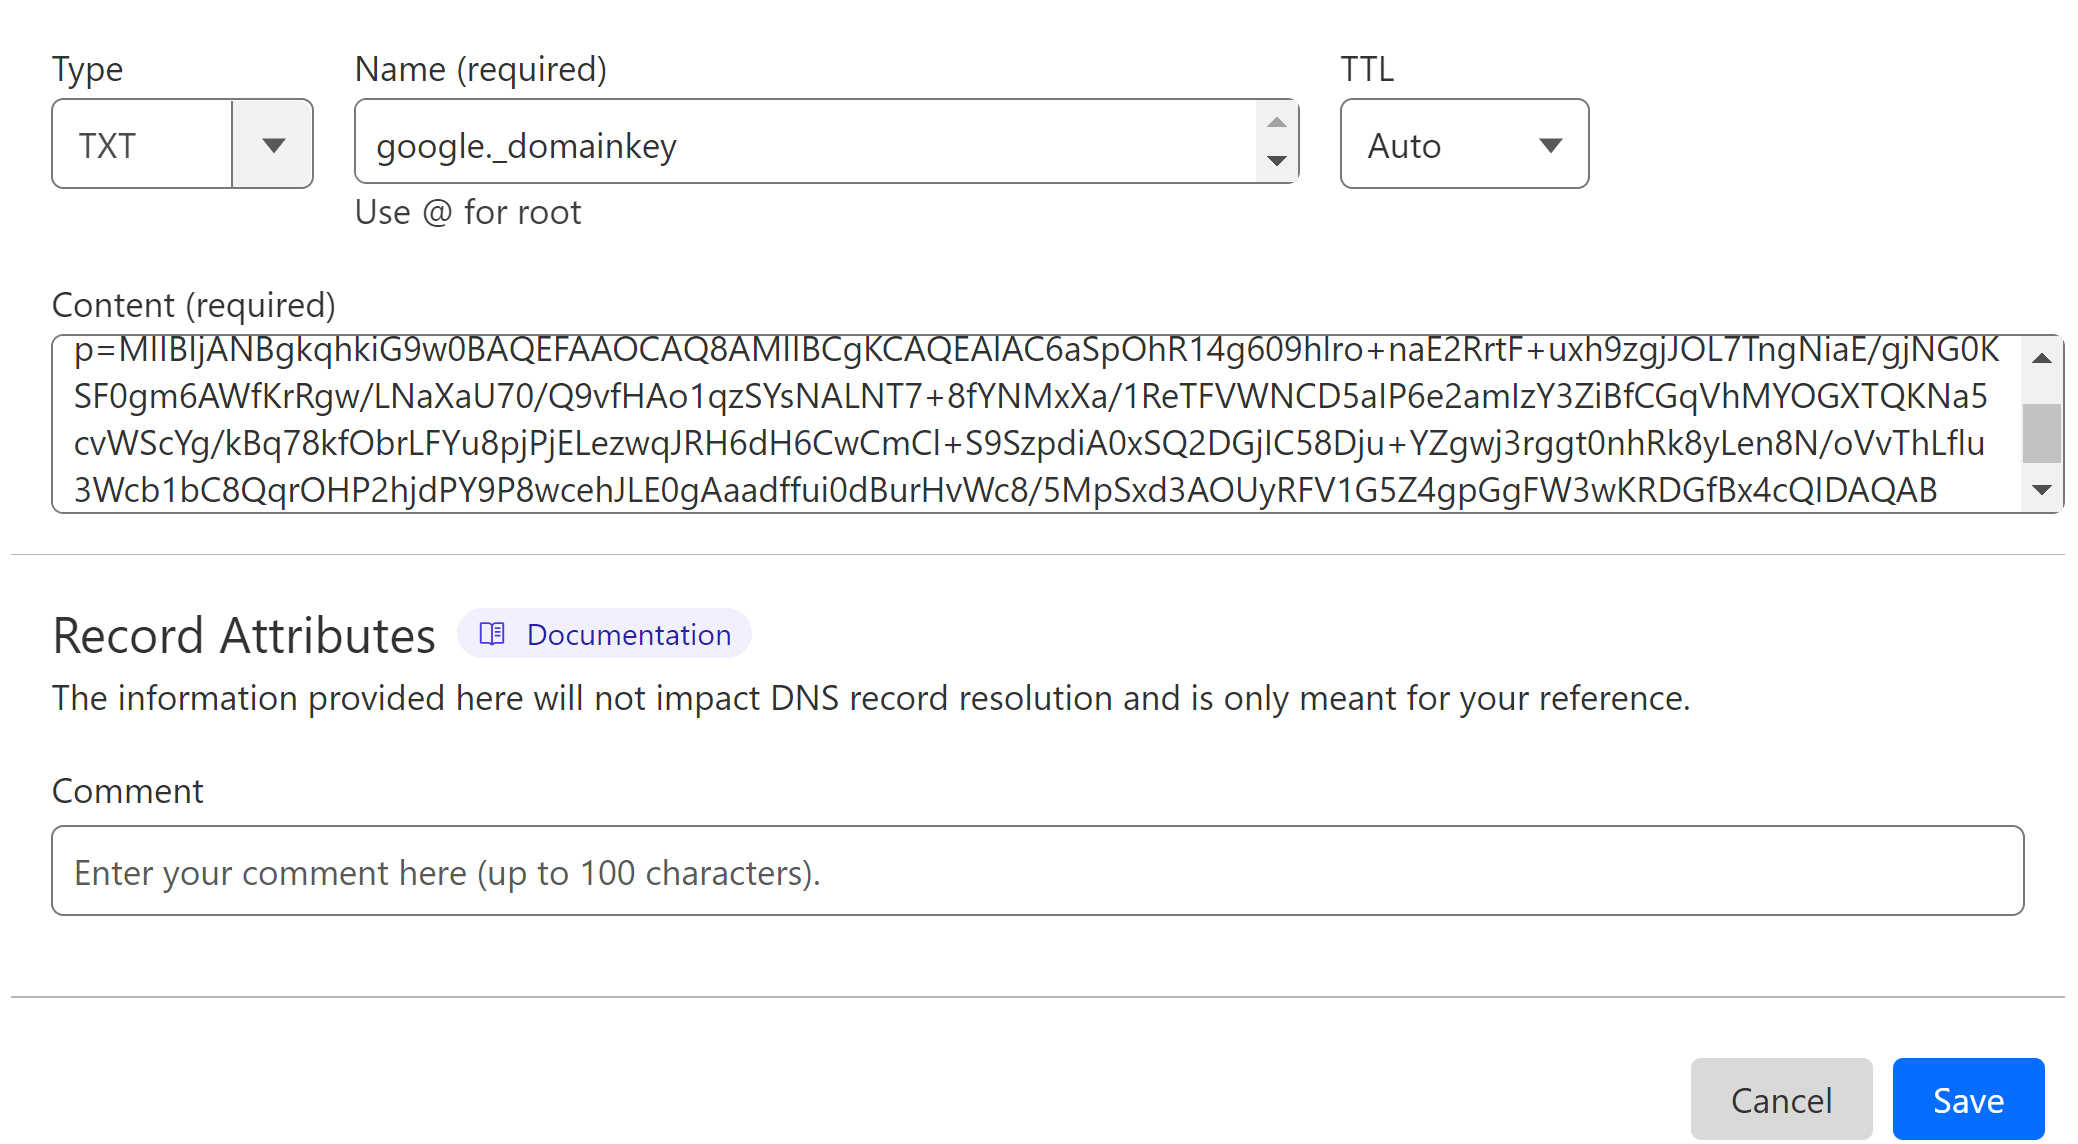
Copy the Google Workspace DKIM record and add it to the DNS provider.
Select type TXT.
Add the record name in the Name field of your DNS dashboard.
Add the DKIM value in the Content field.
-
Click Save.
Setup Google Workspace SPF value:
In your DNS management panel, select type TXT.
In the record Name field, write
@In the Content field, copy and paste the following SPF value:
v=spf1 include:_spf.google.com ~all.-
Click Save and wait for DNS verification.

What to do when you have multiple SPF records?
If your domain already contains an SPF record/records from any other source, you can merge the existing value with the Google Workspace SPF value. You can use the DmarcDkim.com SPF merge tool to merge multiple SPF records.
Go to the SPF Merge Tool.
Add your domain name and Google Workspace SPF value.
Click the "Merge SPF Values" button.
The tool combines both records and gives you a merged value.
Edit your current SPF record by replacing the previous value with the merged value.
Setup Google Workspace DMARC record:
Utilize the DmarcDkim.com domain check tool to implement a strict DMARC policy and get actionable reports to protect your email receivers from scams.
Go to the DMARC Check tool.
-
Add your domain name and click Check.

-
The tool analyzes your domain and gives you a suggested value.

-
Add the record name and suggested value to your DNS provider.

-
Click the Sign-up button and add your business email to create your account at DmarcDkim.com.

On the dashboard, write your domain name and click Add Domain.
Next, add the domain verification record and confirm your domain ownership.
Now click Check DNS Records to update DNS changes.
After verification, your domain will start receiving DMARC reports within 24 hours.
For support and assistance, hire a DmarcDkim.com expert.
Check domain and follow the instructions to nail down your DMARC configuration.
No expert knowledge needed!


