Guide to Domain Authentication for Flexmail - SPF, DKIM, DMARC Verification
Check your domain for DMARC, DKIM, SPF and MX records. Get a free report.
- The impact of Business Email Compromise
- A quiet Google update just made SPF more forgiving
- Cyber Insurance and DMARC Enforcement
- Email impersonation scams explained
- TLS-RPT Record
- SMTP Smuggling
- 🇩🇪 Welche Hosting Anbieter unterstützen DMARC
- Manual DMARC Monitoring vs Automated Monitoring
- Reverse Engineering Phishing
- DMARC Enforcement in 2026
- DMARC for non sending domains
Flexmail Domain Authentication - SPF, DKIM, DMARC
Proper domain authentication is crucial for ensuring the security and deliverability of your emails. SPF, DKIM, and DMRC are three common ways to verify sender emails.
Flexmail generates the DNS records that you can add to your DNS setup for verification. This allows the email inbox services to recognize you as a legitimate source.
This guide post walks you through the step-by-step process of authenticating your email domain with Flexmail. So keep reading!
Generatig DNS Records in Flexmail:
-
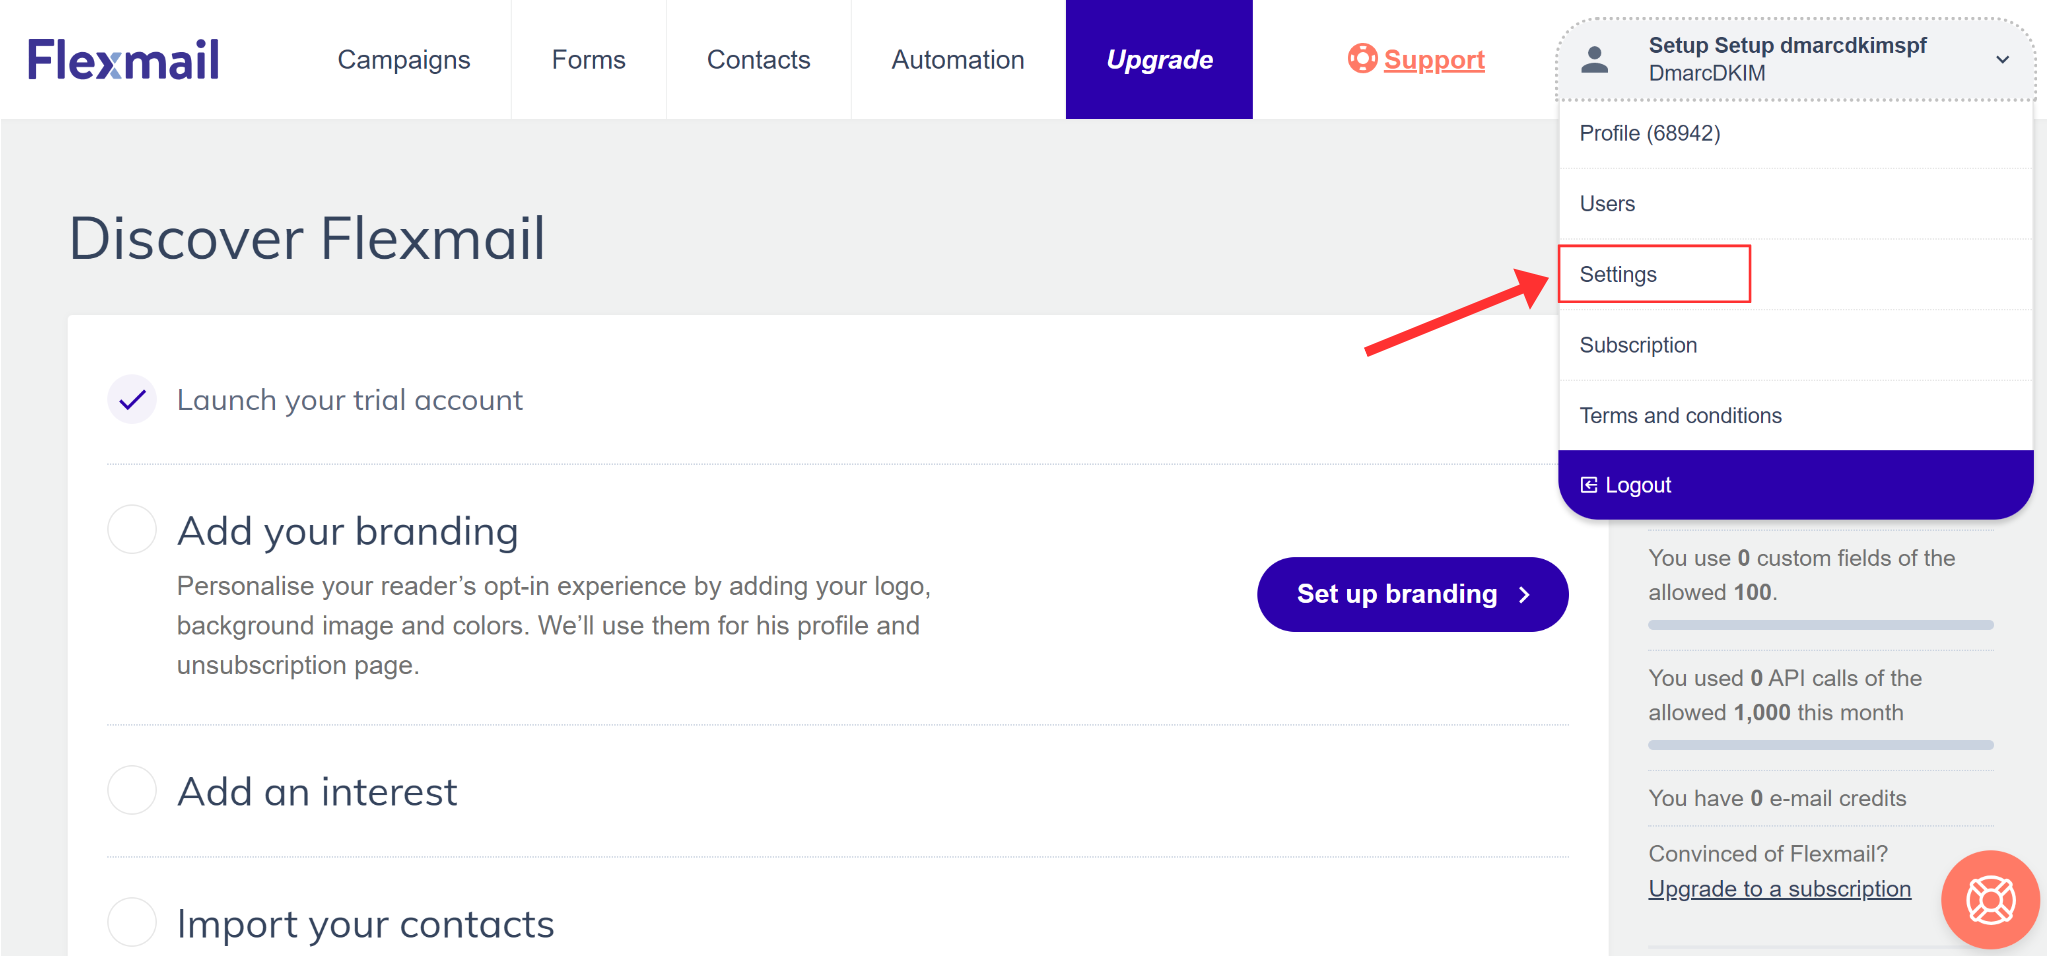
Click the username in the top right corner and go to Settings.
-
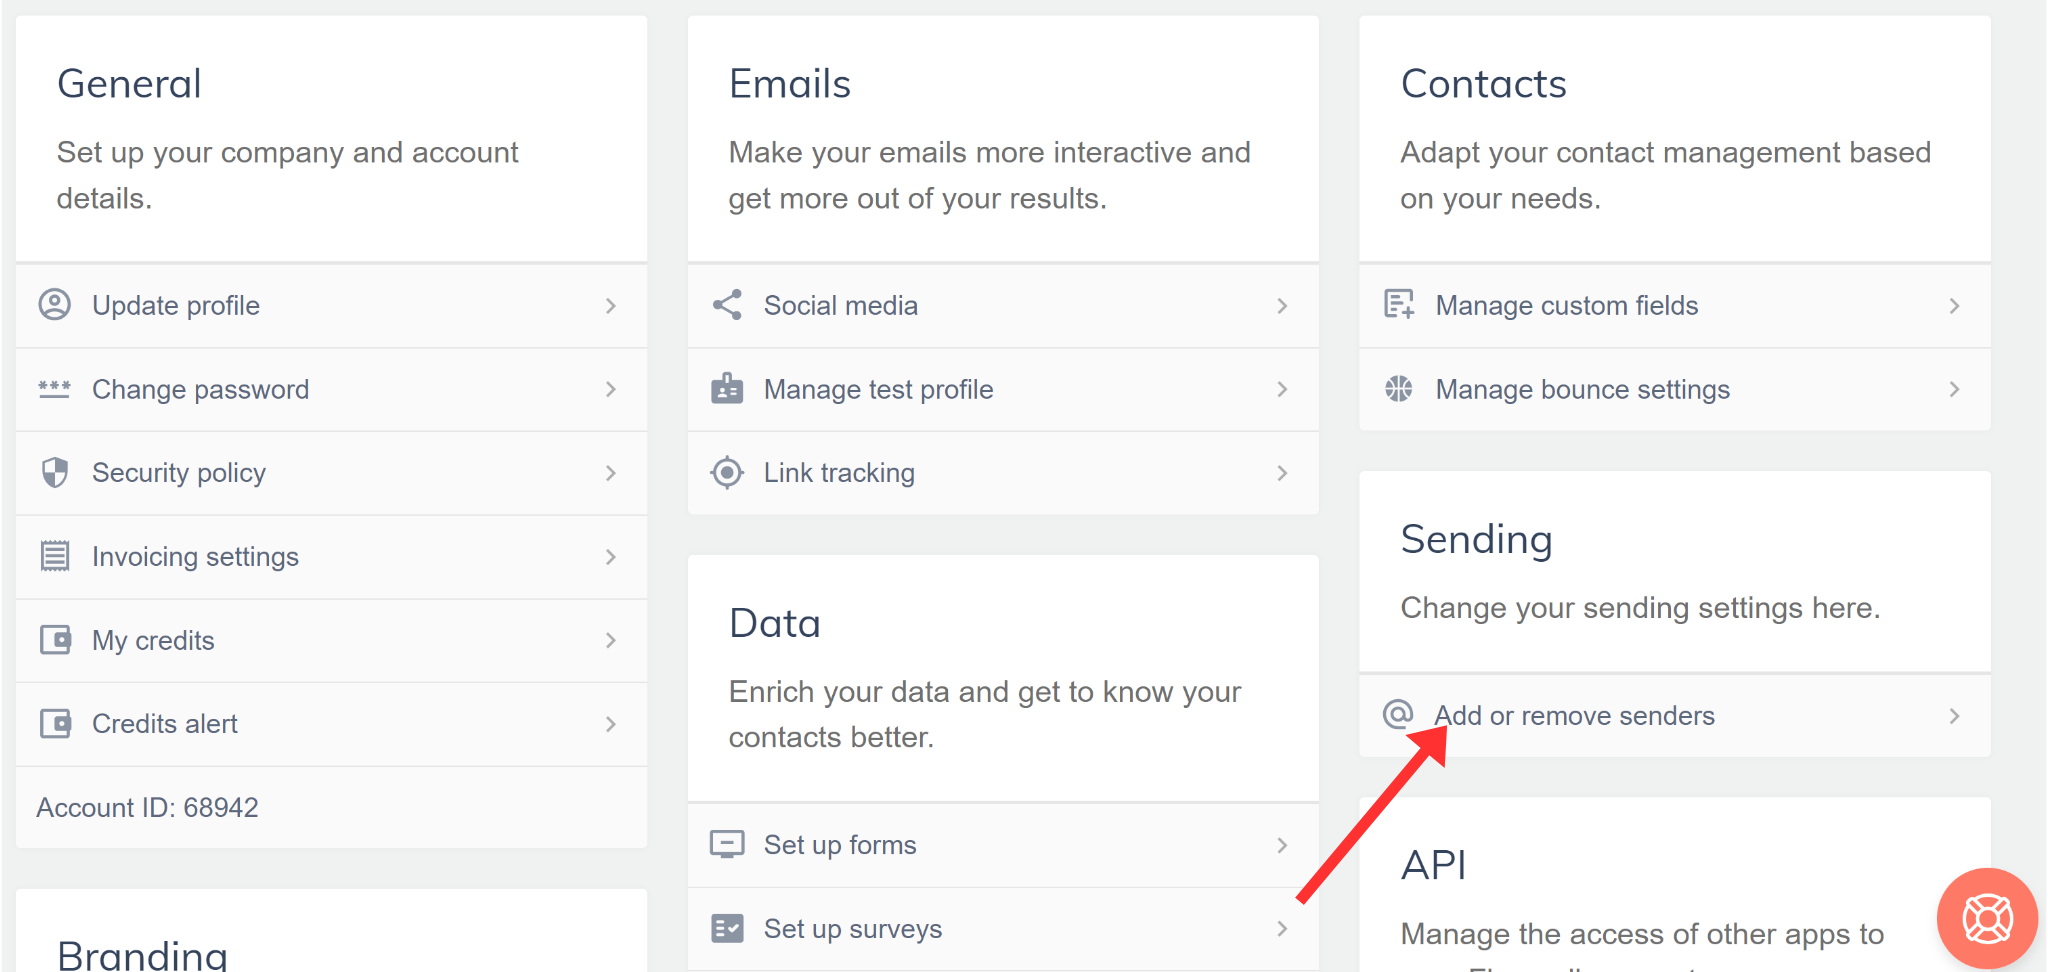
In Settings, click the "Add or remove sender" in the Sending section.
-
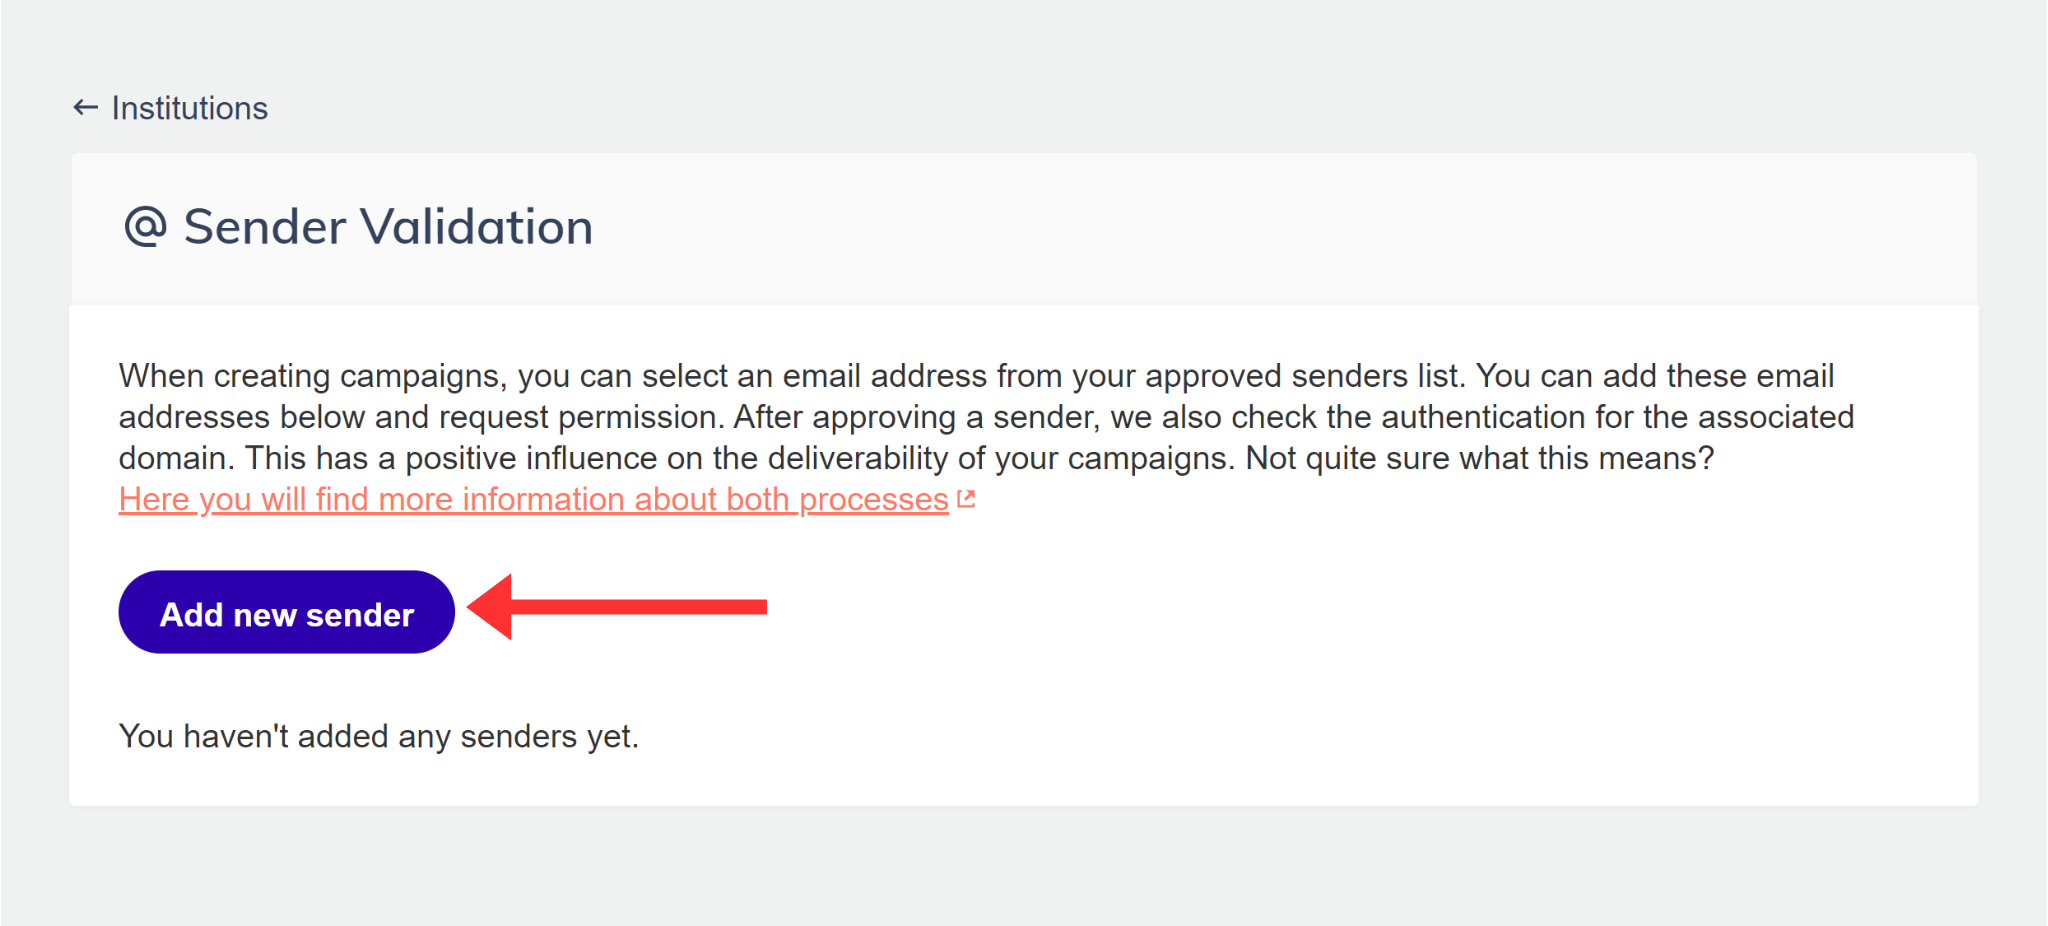
Click the Add New Senders option in the Sender Validation section.
-
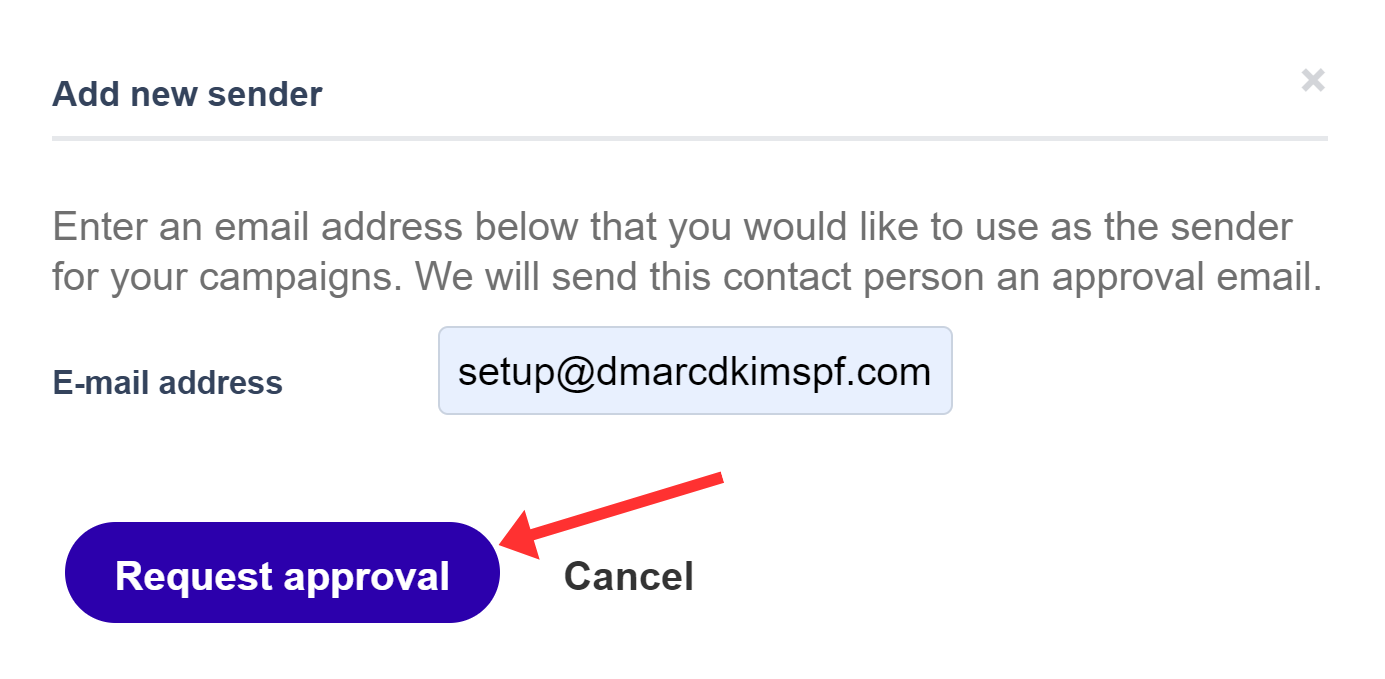
Write down your sender email and click Request Approval.
Go to your email inbox and click the verification link to verify your sender address. This link will take you back to the Flexmail dashboard.
-
In the Sending tab, click Set Up Authenticate.
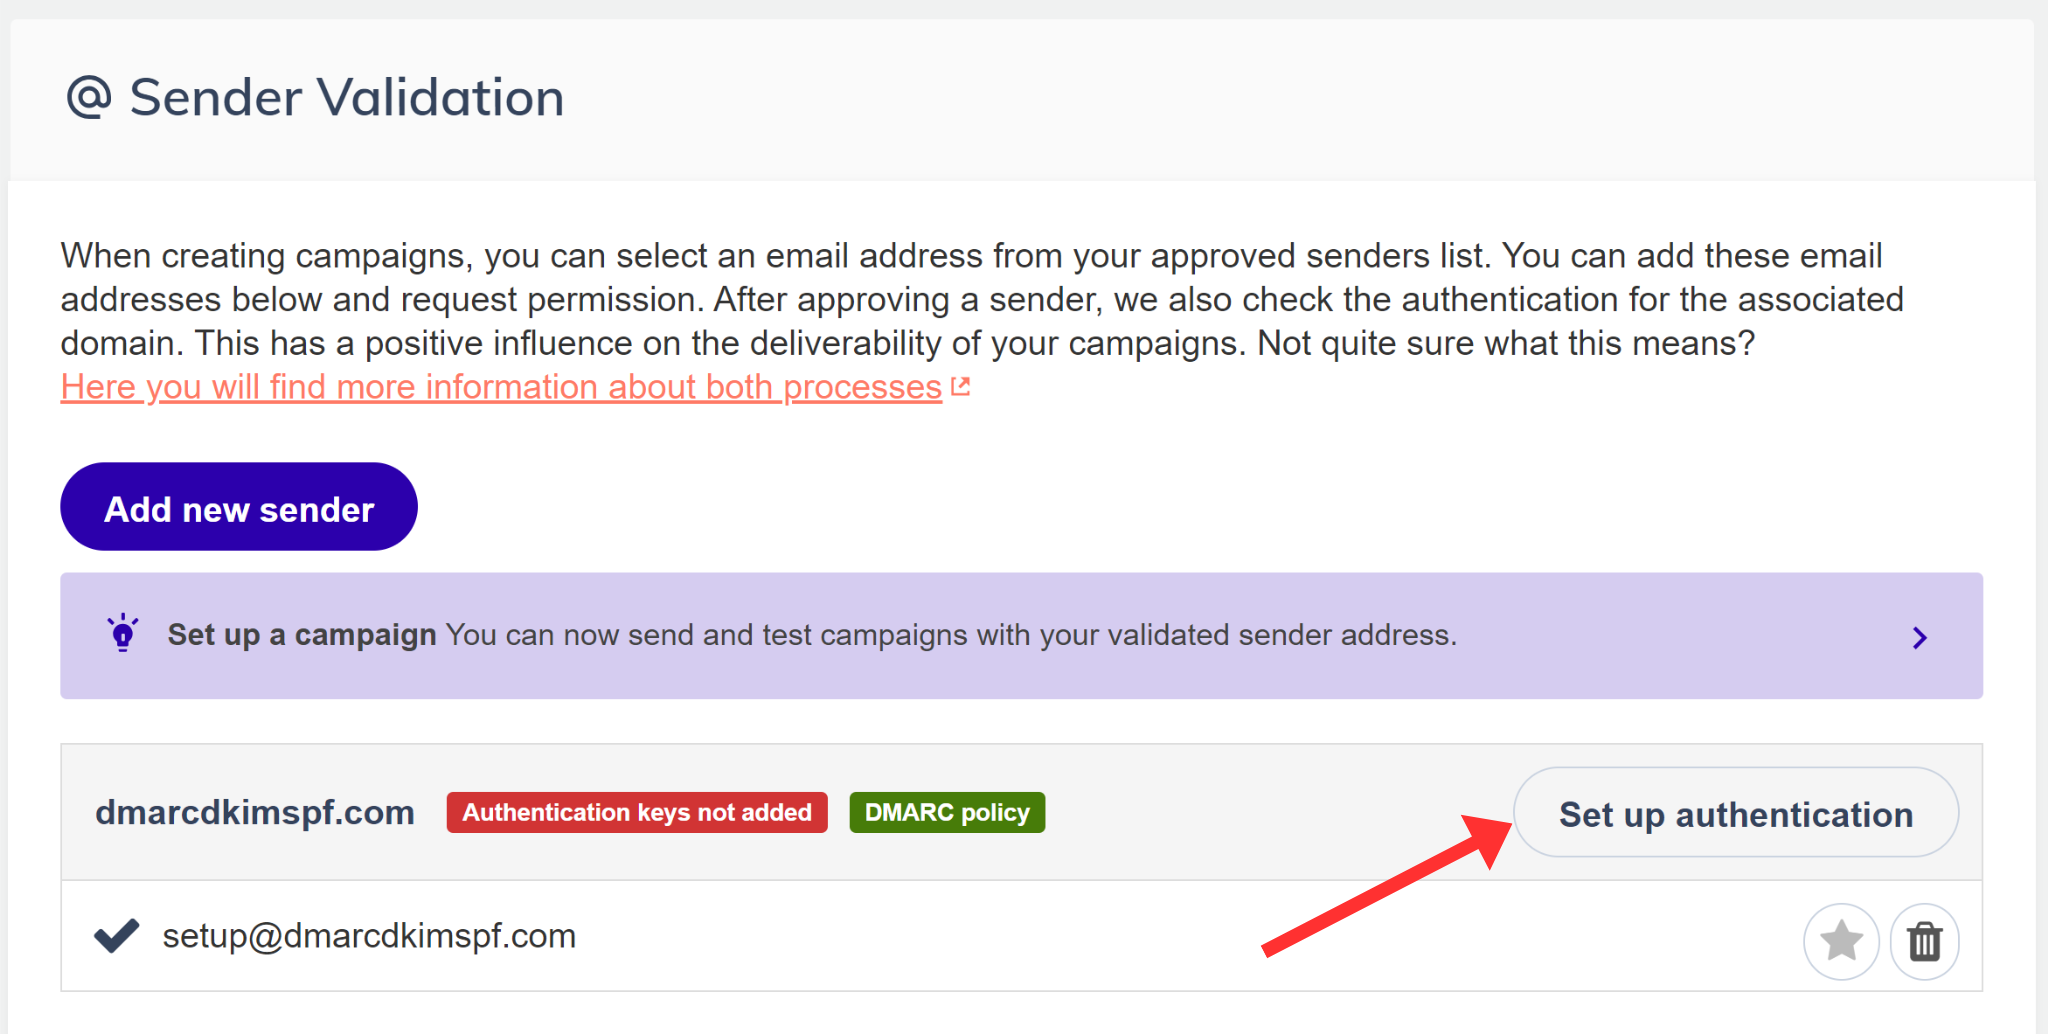
-
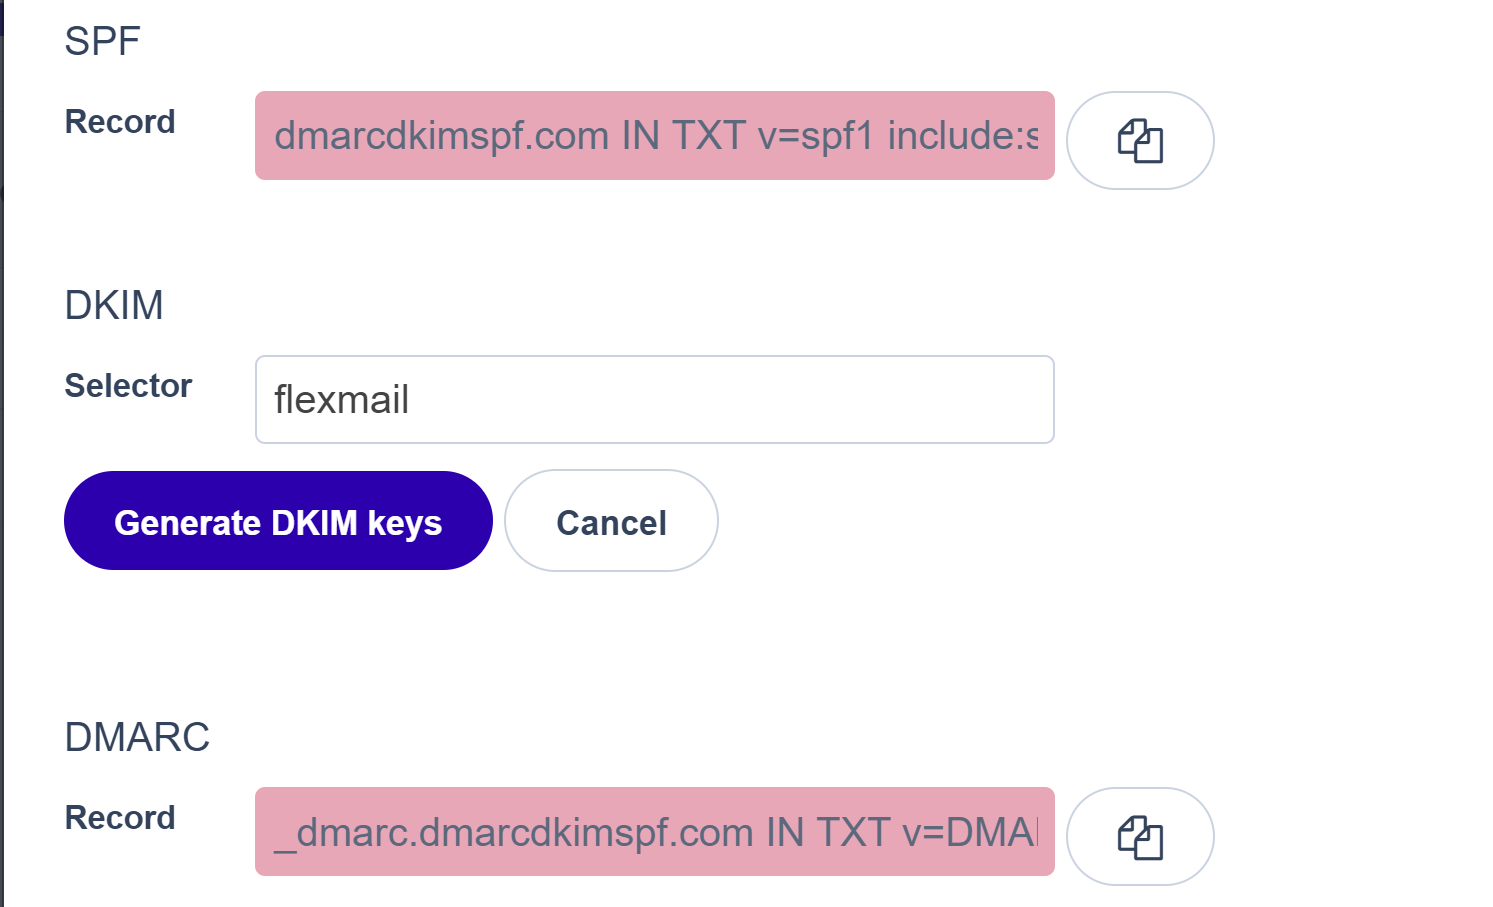
It will redirect you to the Flexmail DNS records page with SPF, DKIM, and DMARC records.
Adding Flexmail Records to DNS Provider:
-
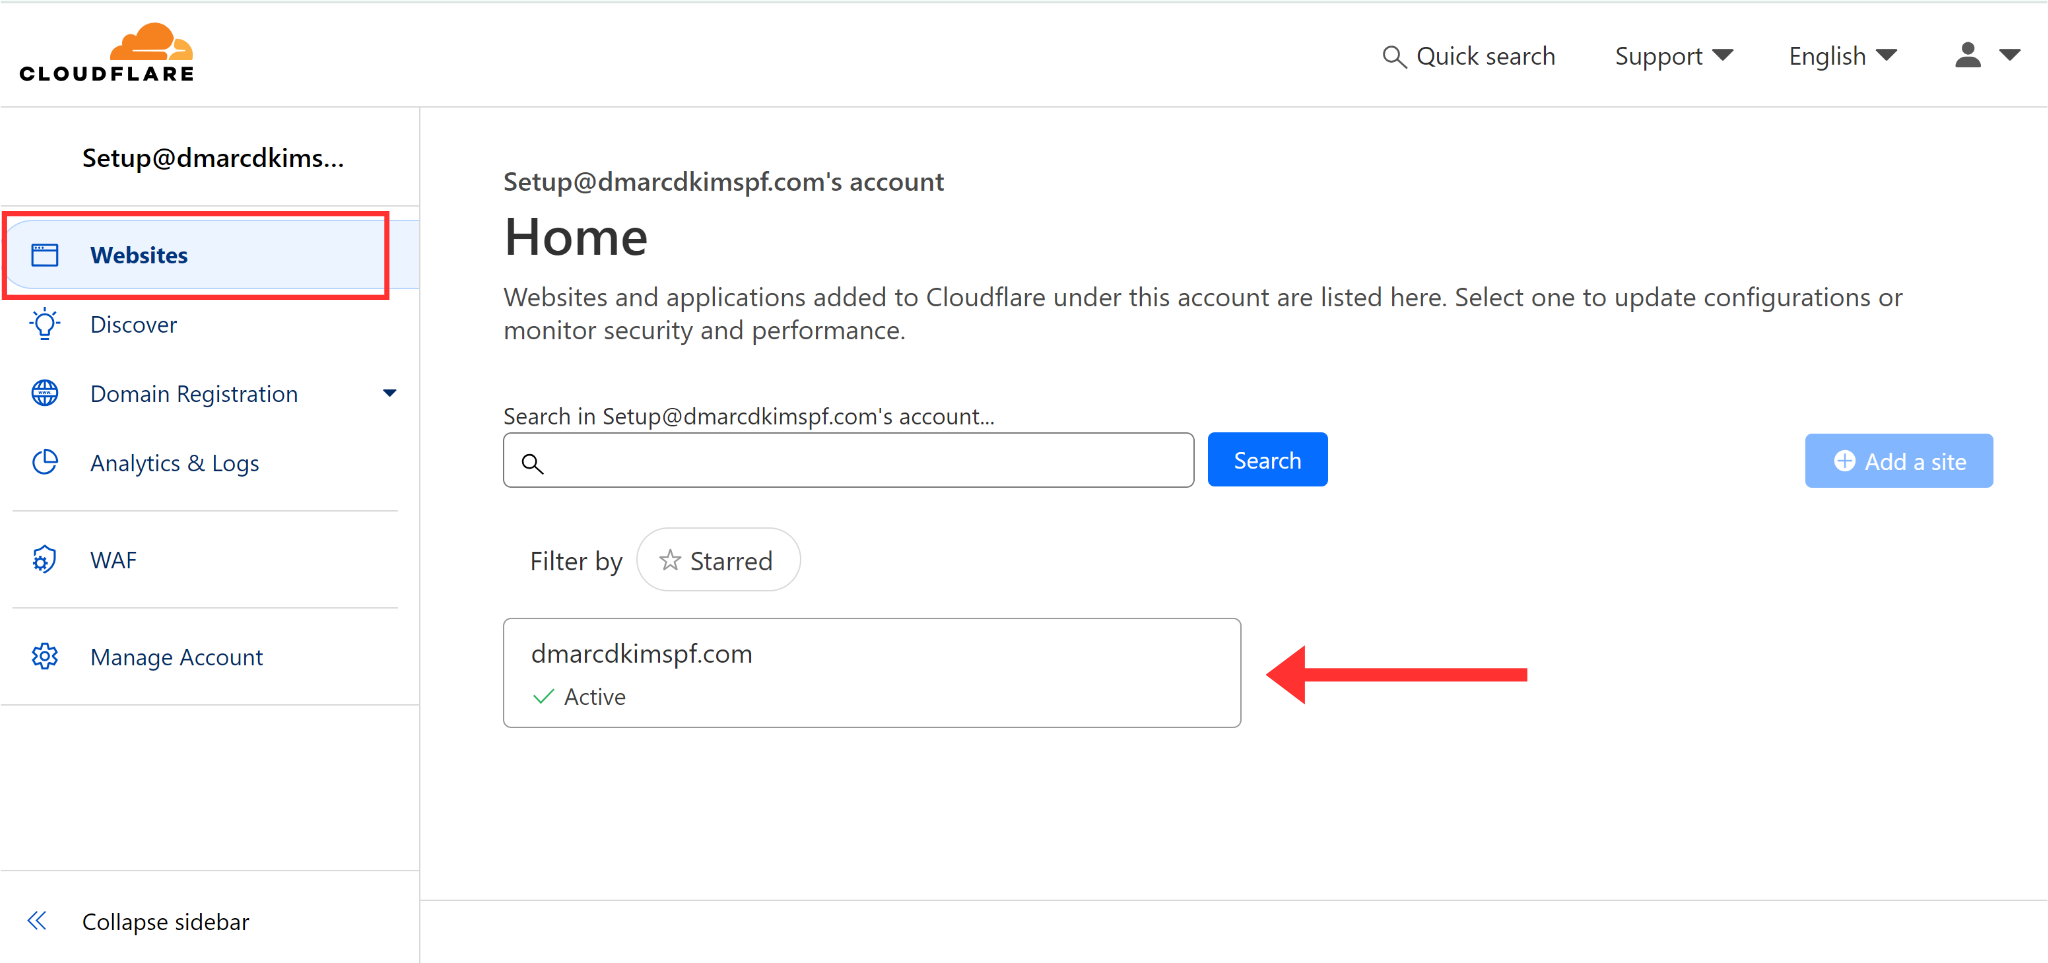
Go to your DNS setup (we use Cloudflare for this guide post), and click your website.
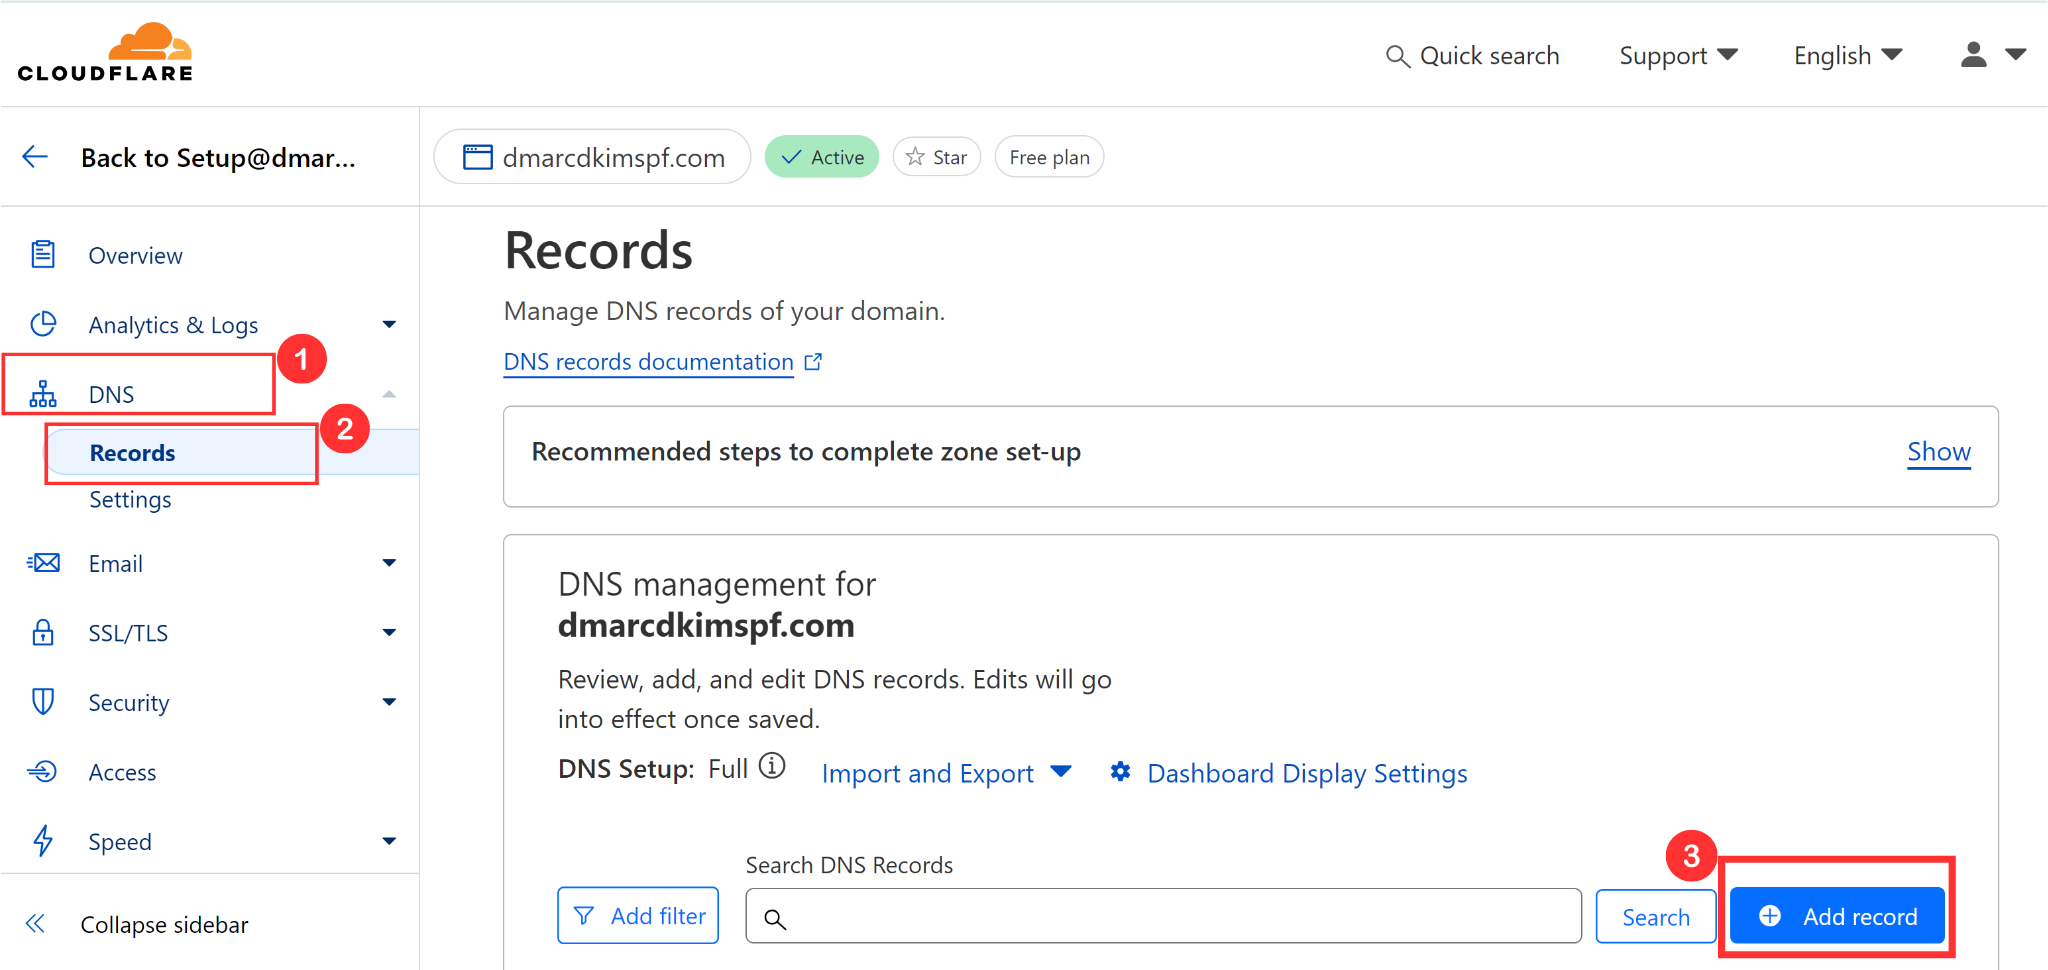
Navigate to the DNS tab in the left side panel and click Records.
-
Click the blue Add Record button in the Records tab.
Now, add the SPF, DKIM, and DMARC records from Flexmail into your DNS dashboard.
Adding Flexmail SPF Record:
You can only add one SPF record to your DNS provider. Adding more than one SPF causes conflicts, resulting in one of them to stop working. Therefore, Flexmail detects the existing record in your DNS dashboard and merges it with its SPF to give a merged value. Add this merged value to avoid conflicts.
-
Copy the Flexmial SPF record name and add it to the Name section.

-
Copy the value - the text next to "IN TXT" - and add it to the Content section.

-
Select type TXT and click the Save button.
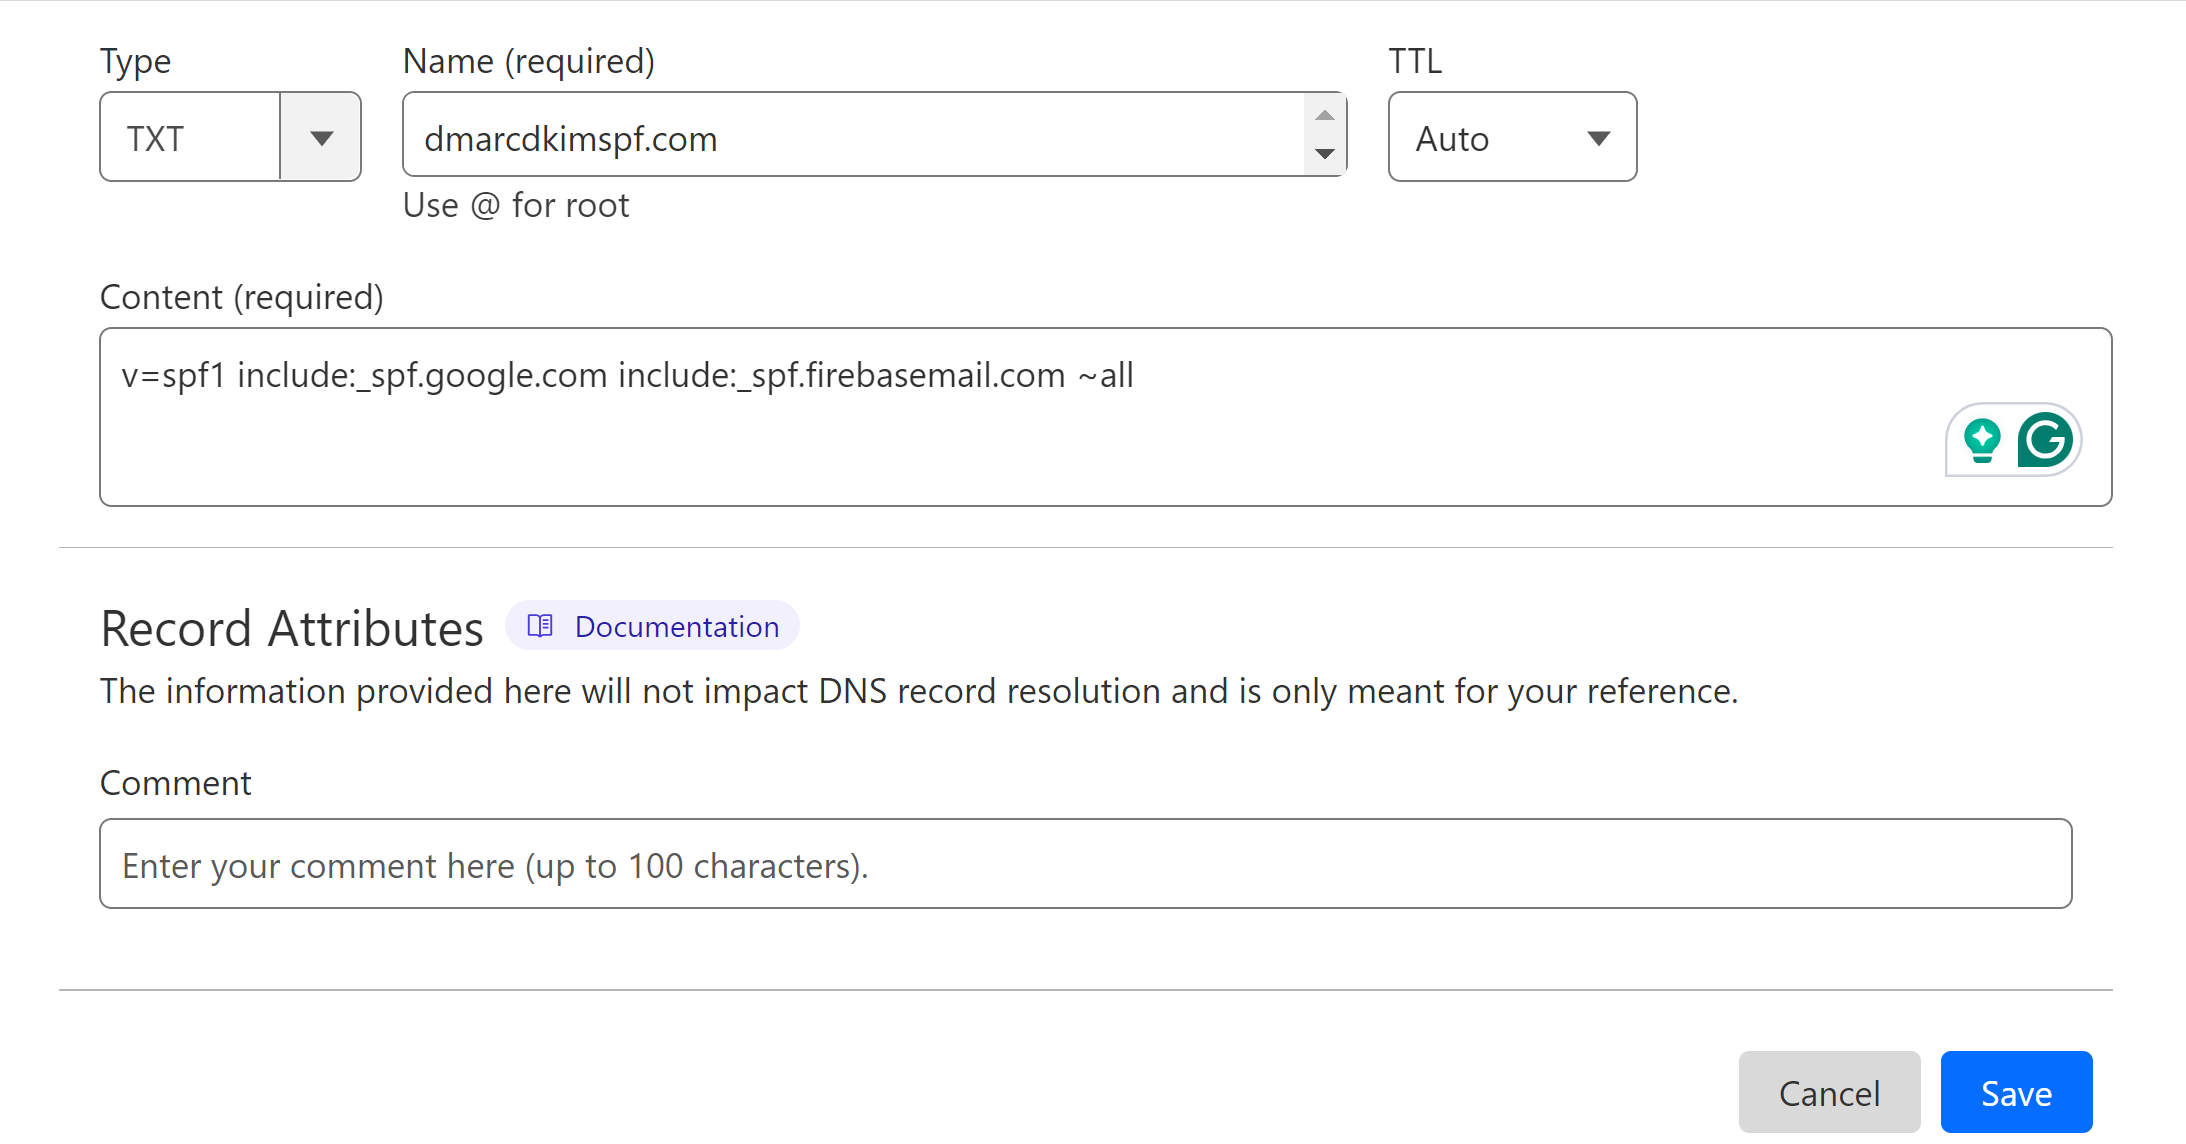
Adding Flexmail DKIM Record:
-
Click the Generate DKIM Keys button.

Flexmail generates a DKIM record. Copy the record name and value, and it to the DNS dashboard.
-
Select type TXT and click the Save button at the bottom right corner.
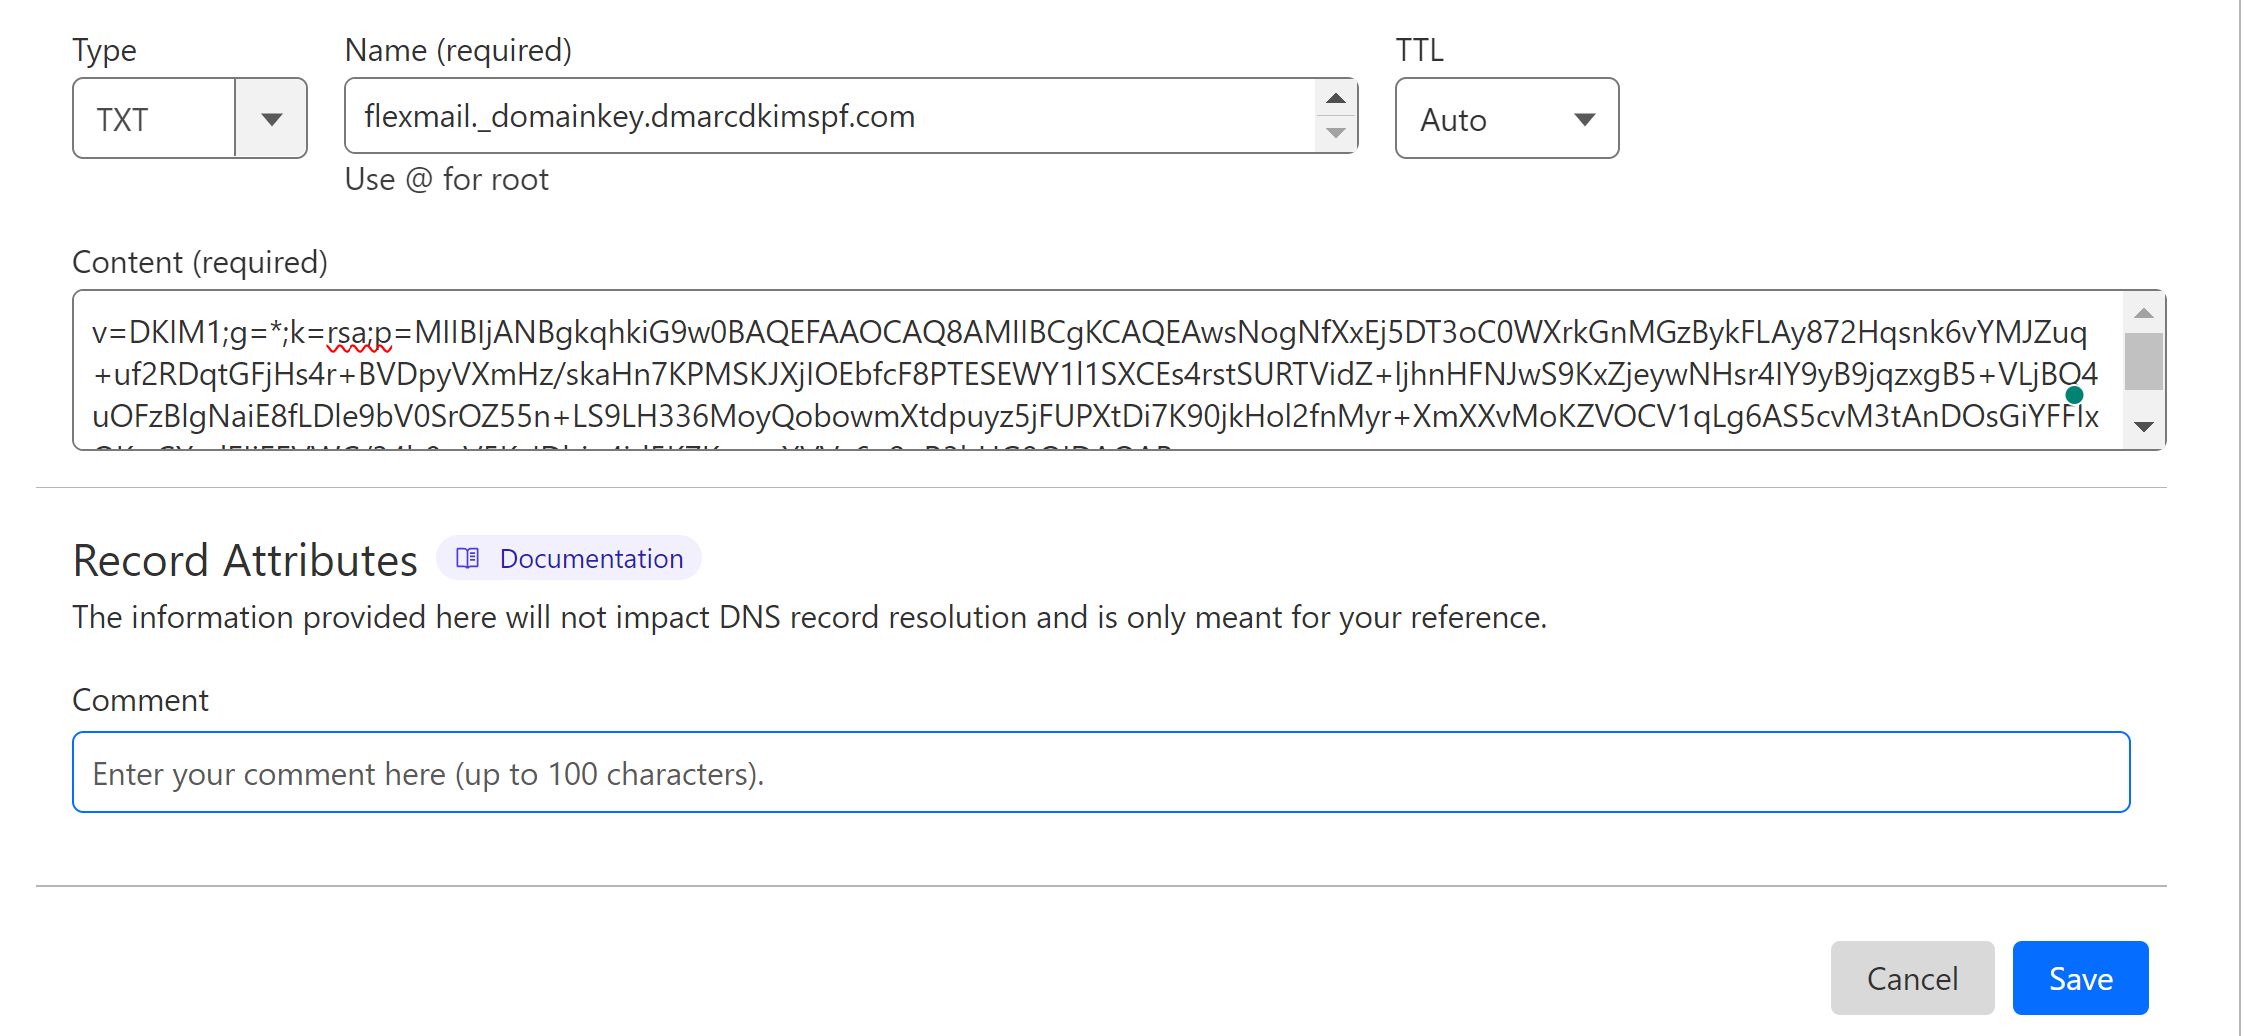
Adding Flexmail DMARC Record:
The DMARC record generated by Flexmail is only for monitoring purposes and does not help you implement a strict policy if needed. Moreover, this value doesn't specify destinations for the emails that fail to pass the authentication check. Without a destination, you can't have insights into the email performance.
That's why DmarcDkim.com provides a tool that helps you generate a custom DMARC value. Initially, it provides monitoring but later you can add a strict policy. This way, you can have full control over the DMARC policy.
To generate a DMARC record, go to the DMARC Check Tool.
-
Write your domain name and click Check.
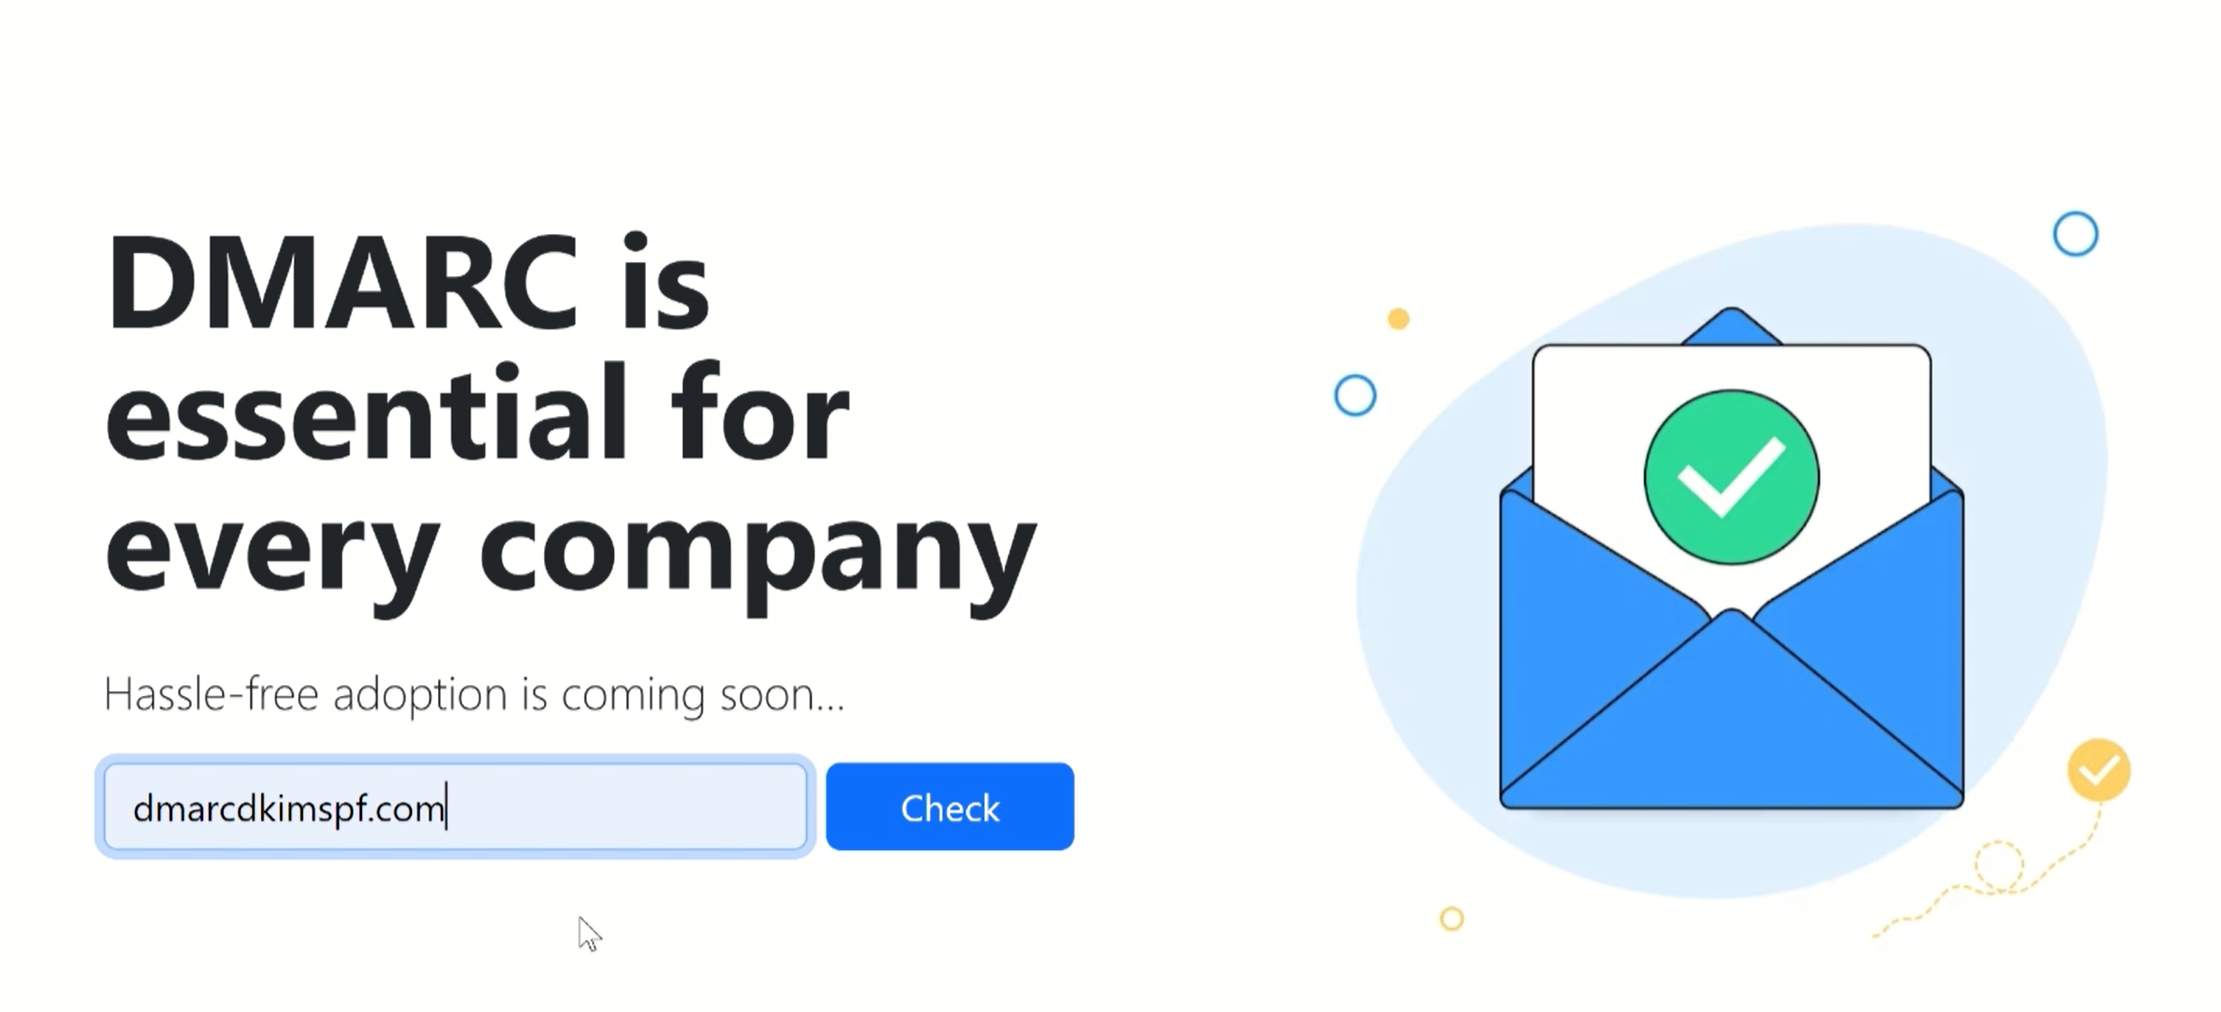
-
Copy the record name and suggested value, and add it to your DNS provider.
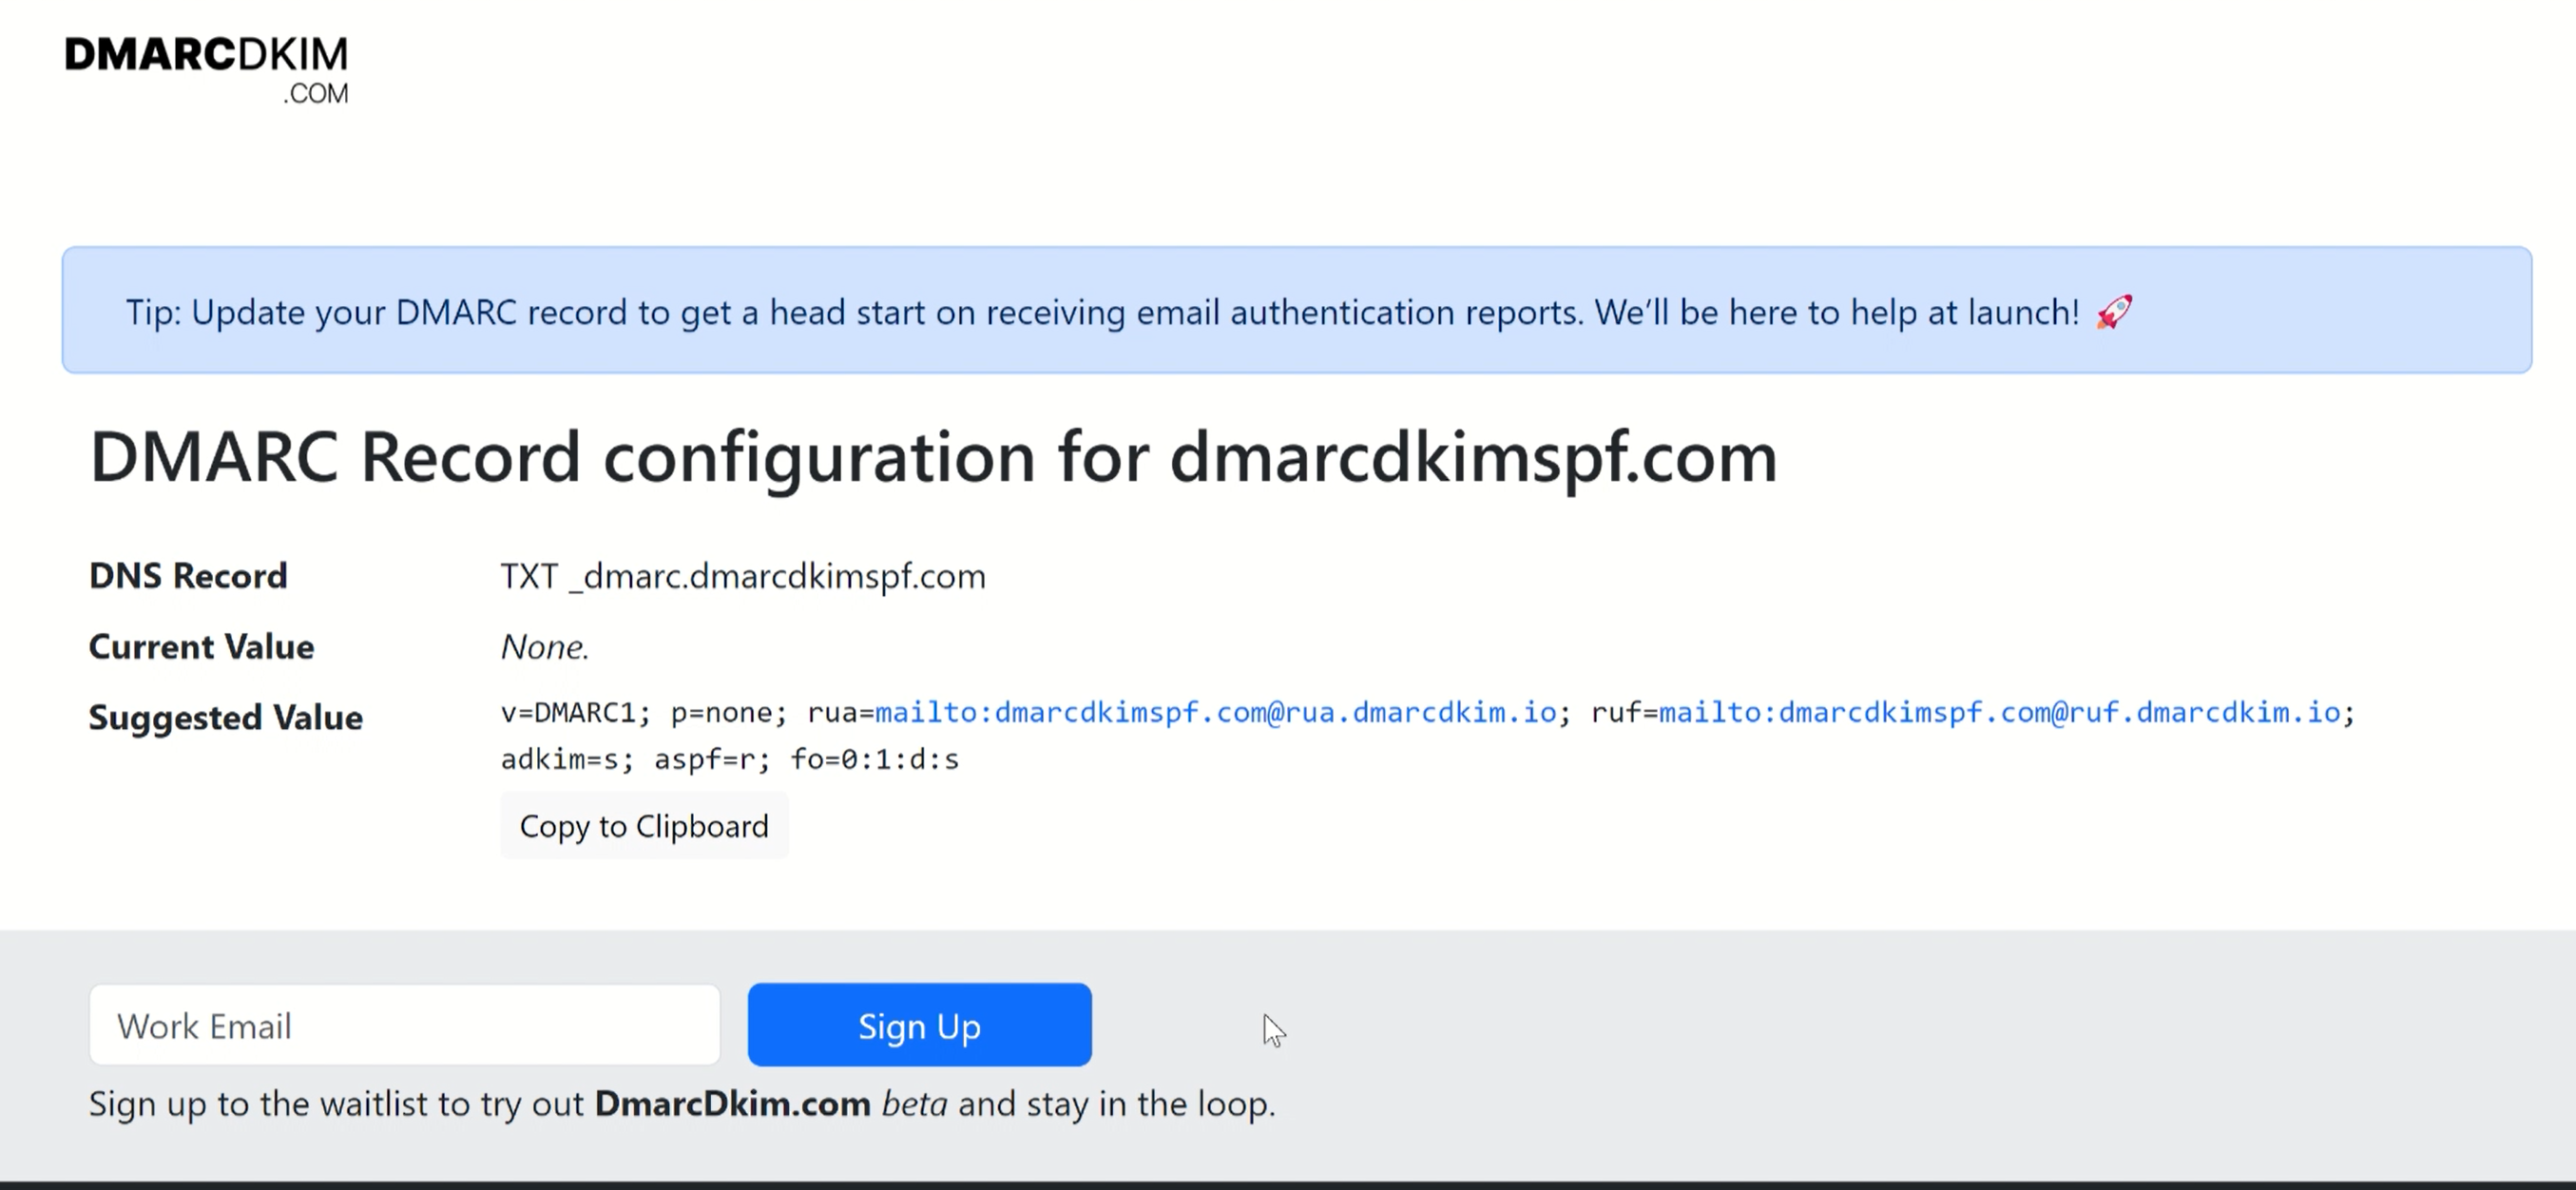
Select type TXT and click Save.
After adding all the records, refresh the Flexmail DNS page to check if they have been successfully updated. If the verification was successful, the records should be highlighted in green.
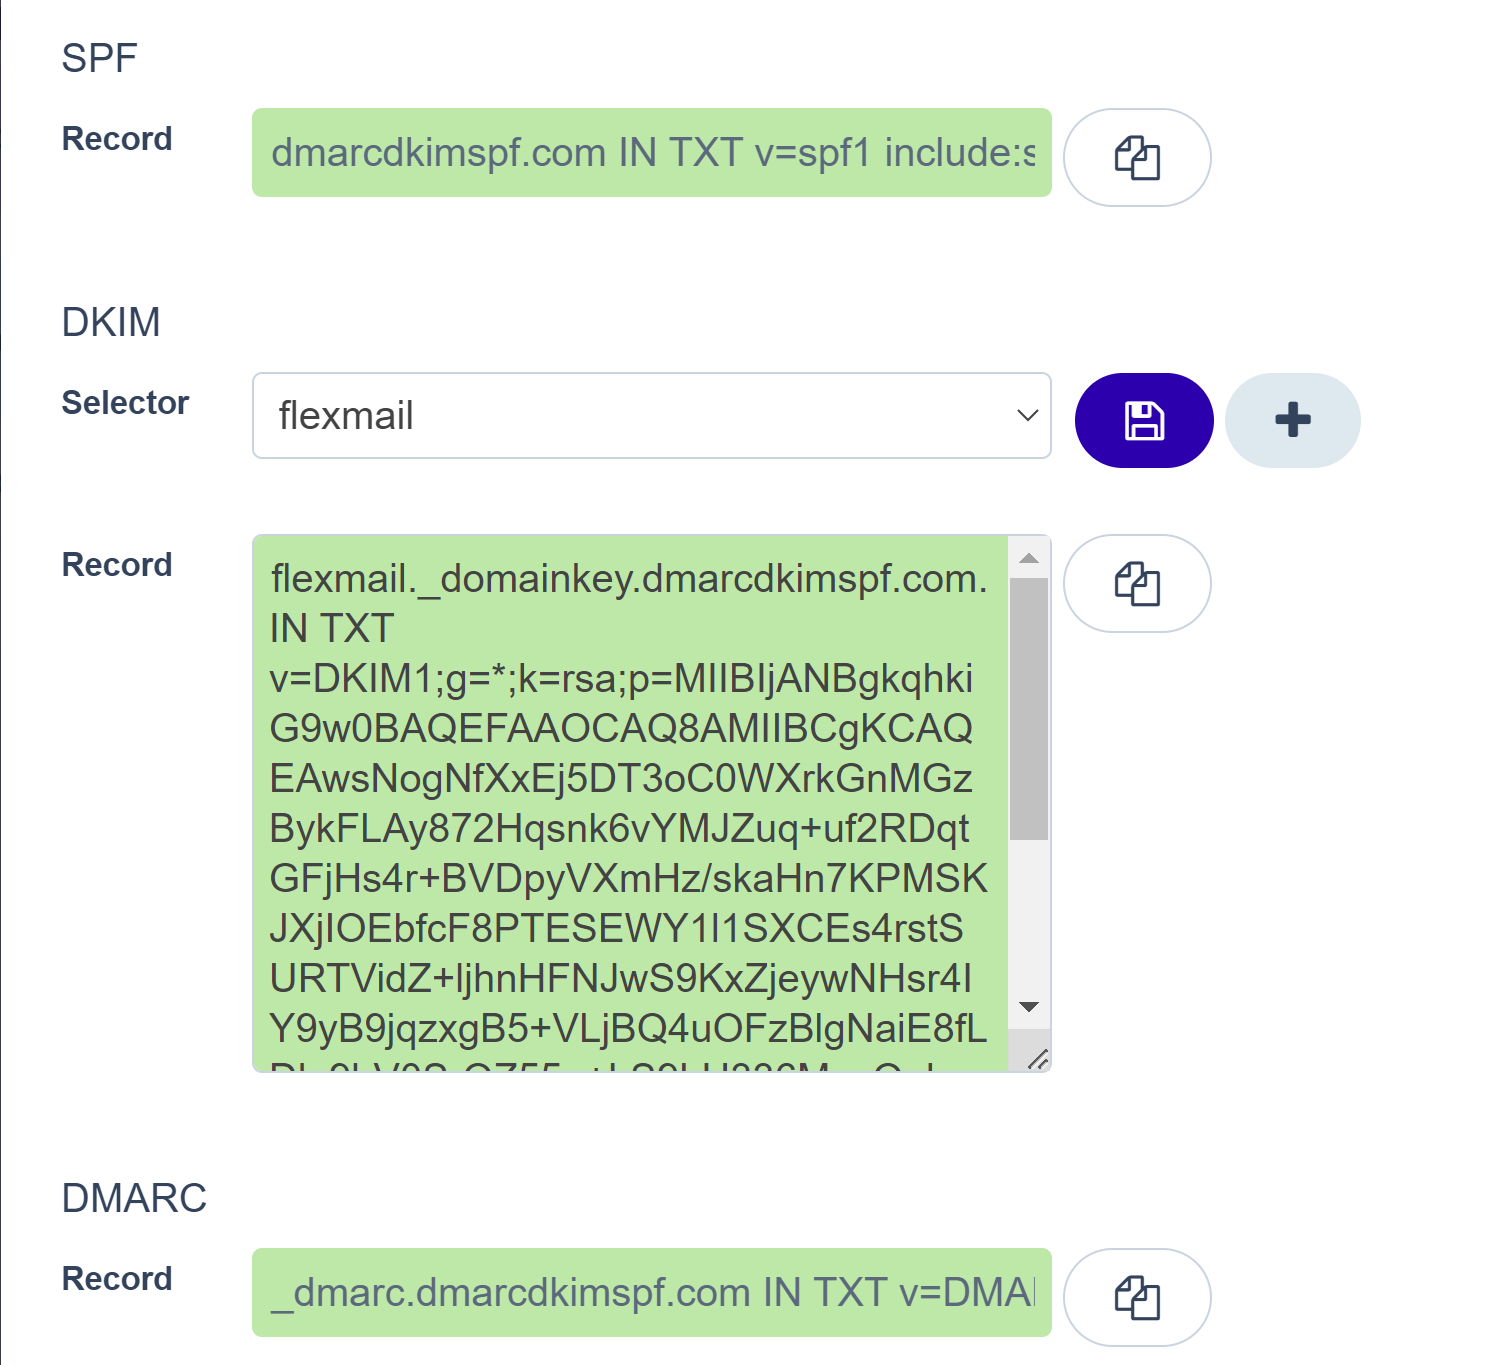
However, if you still see the SPF, DKIM, or DMARC record highlighted with red, wait up to 24 hours. Because sometimes it takes longer for the servers to propagate DNS changes.
Check for domain authentication after 24 hours and if there is no success, contact the Flexmail support team or hire a DmarcDkim.com expert to resolve the DNS setup issues.
Check domain and follow the instructions to nail down your DMARC configuration.
No expert knowledge needed!


