How to configure DMARC, DKIM and SPF DNS records in GetResponse?
Check your domain for DMARC, DKIM, SPF and MX records. Get a free report.
GetResponse DMARC, DKIM, SPF - Custom Domain Authentication (2024 Guide)
DKIM and SPF records are of paramount importance when it comes to efficient email communication. These DNS records verify the sender's identity and email authenticity. DMARC adds further security to your webmail by setting additional rules for email communication.
If you are using GetResponse for your email campaigns, configuring DNS records may sound a technical task. That's why we're here to help you out. Domain authentication is a simple process which can be accomplished by following the steps below:
-
On GetResponse dashboard, click on Tools in the top left corner of your screen and open Emails and Domains.
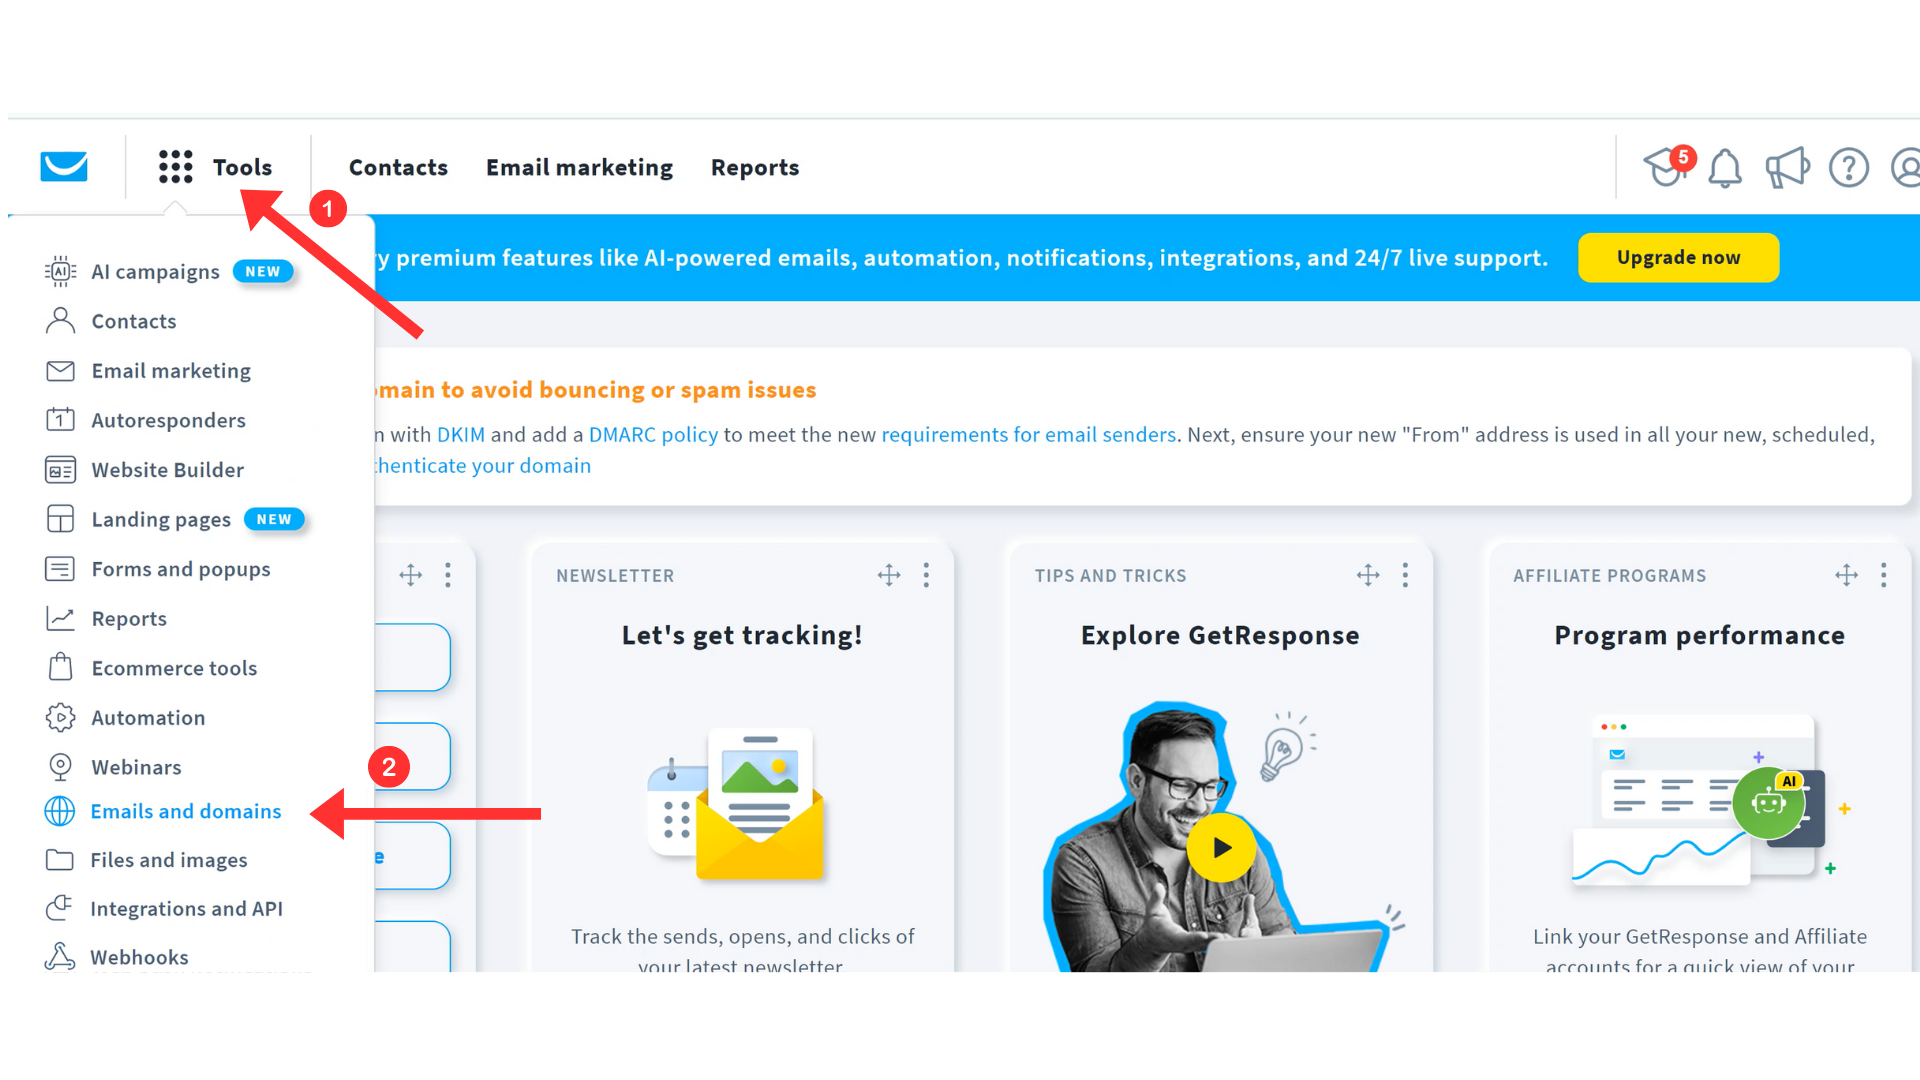
If you signed up with email having your domain, you'll this domain automatically added here. If you wish to add any other webmail, click on Add domain and add a new domain.
-
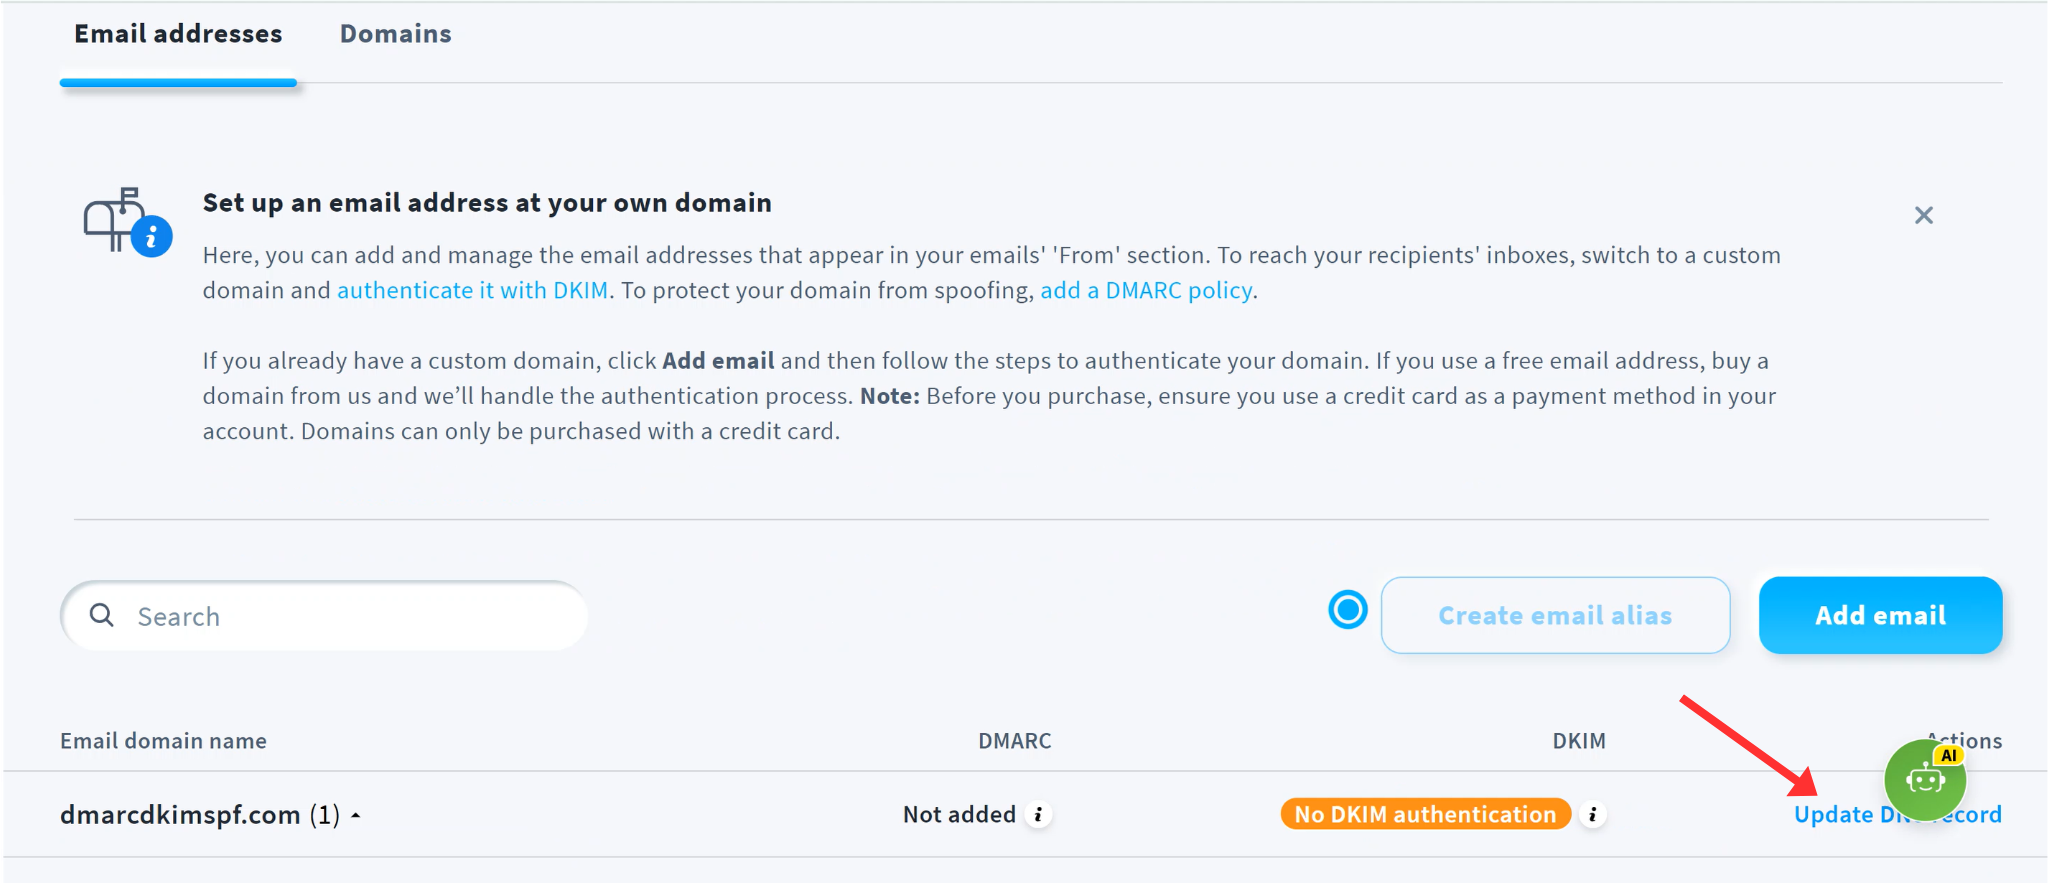
Click Update DNS records next to your domain name.
-
Now you'll see GetResponse DKIM and DMARC records on your screen. Copy these records and add in your DNS provider.

You can add these records in any DNS provider but we are using Cloudflare for this guide post.
-
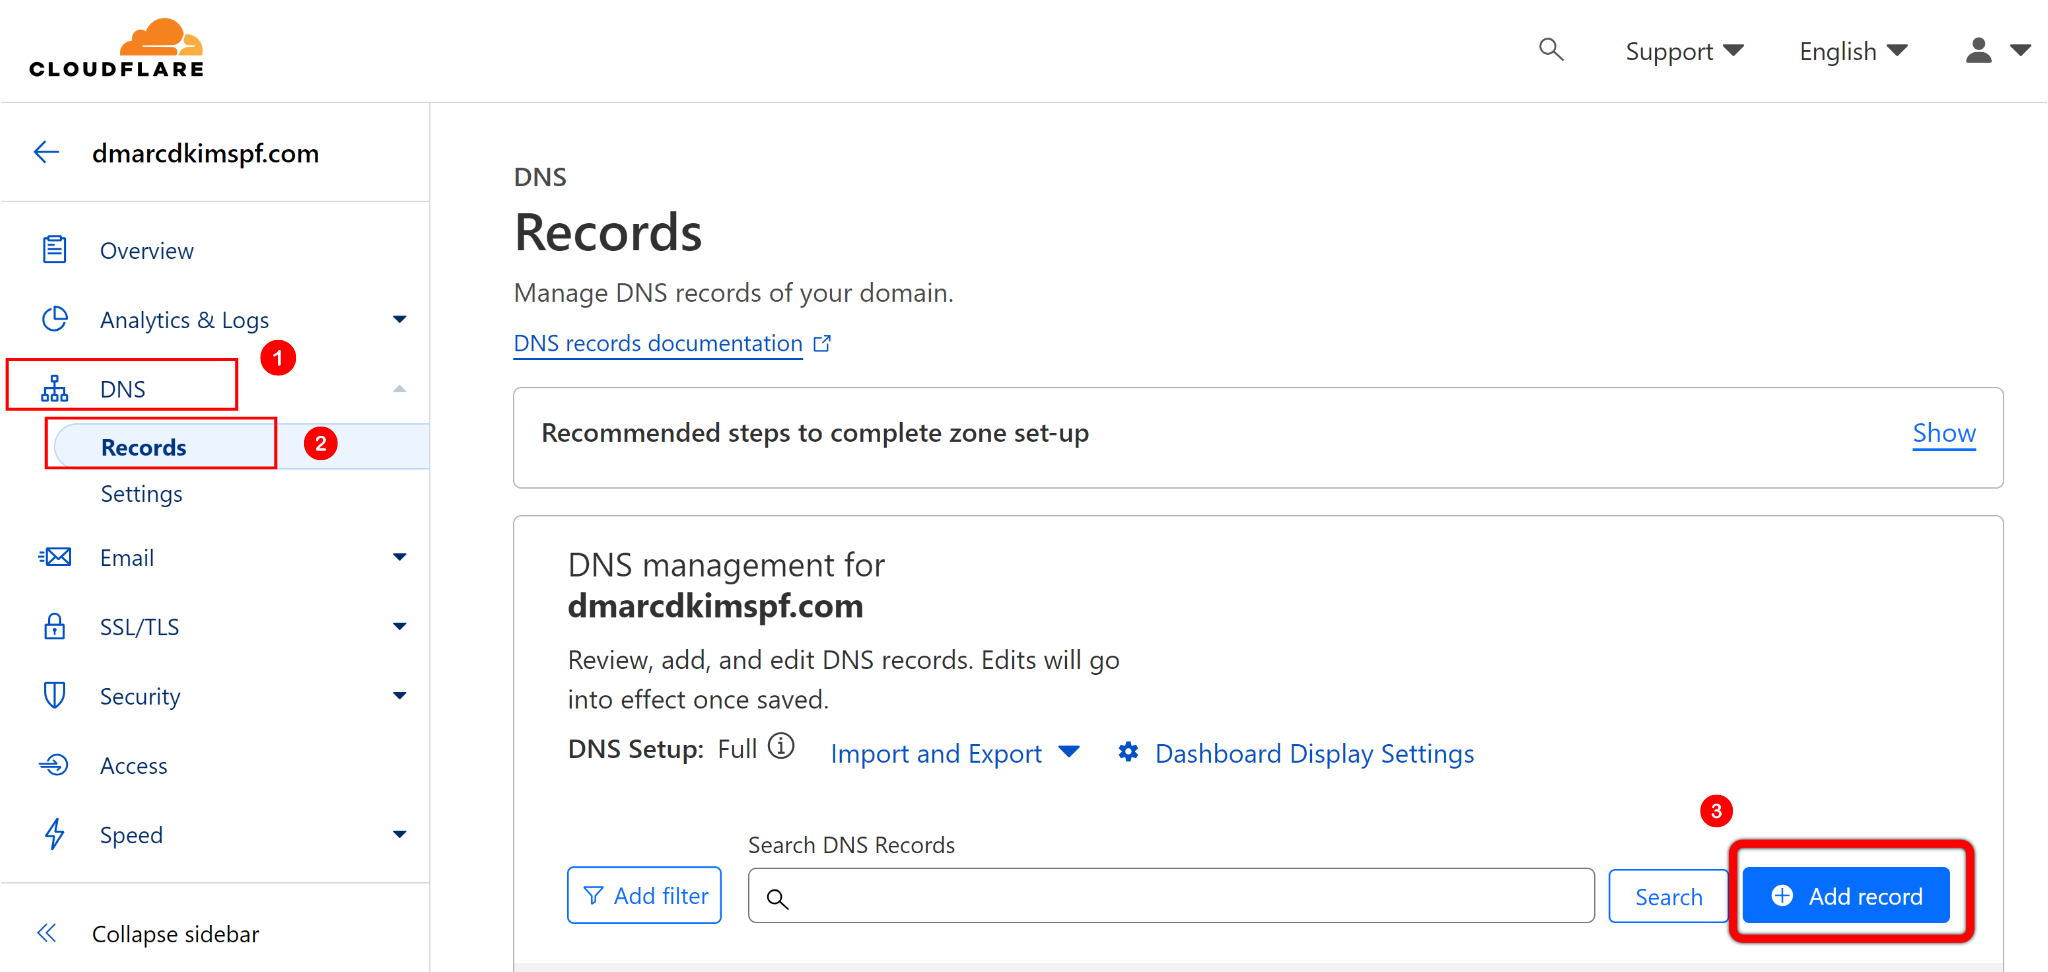
On Cloudflare Home tab, click on your website and go to DNS > Records > Add record.
-
Here, add both records one by one and click Save.
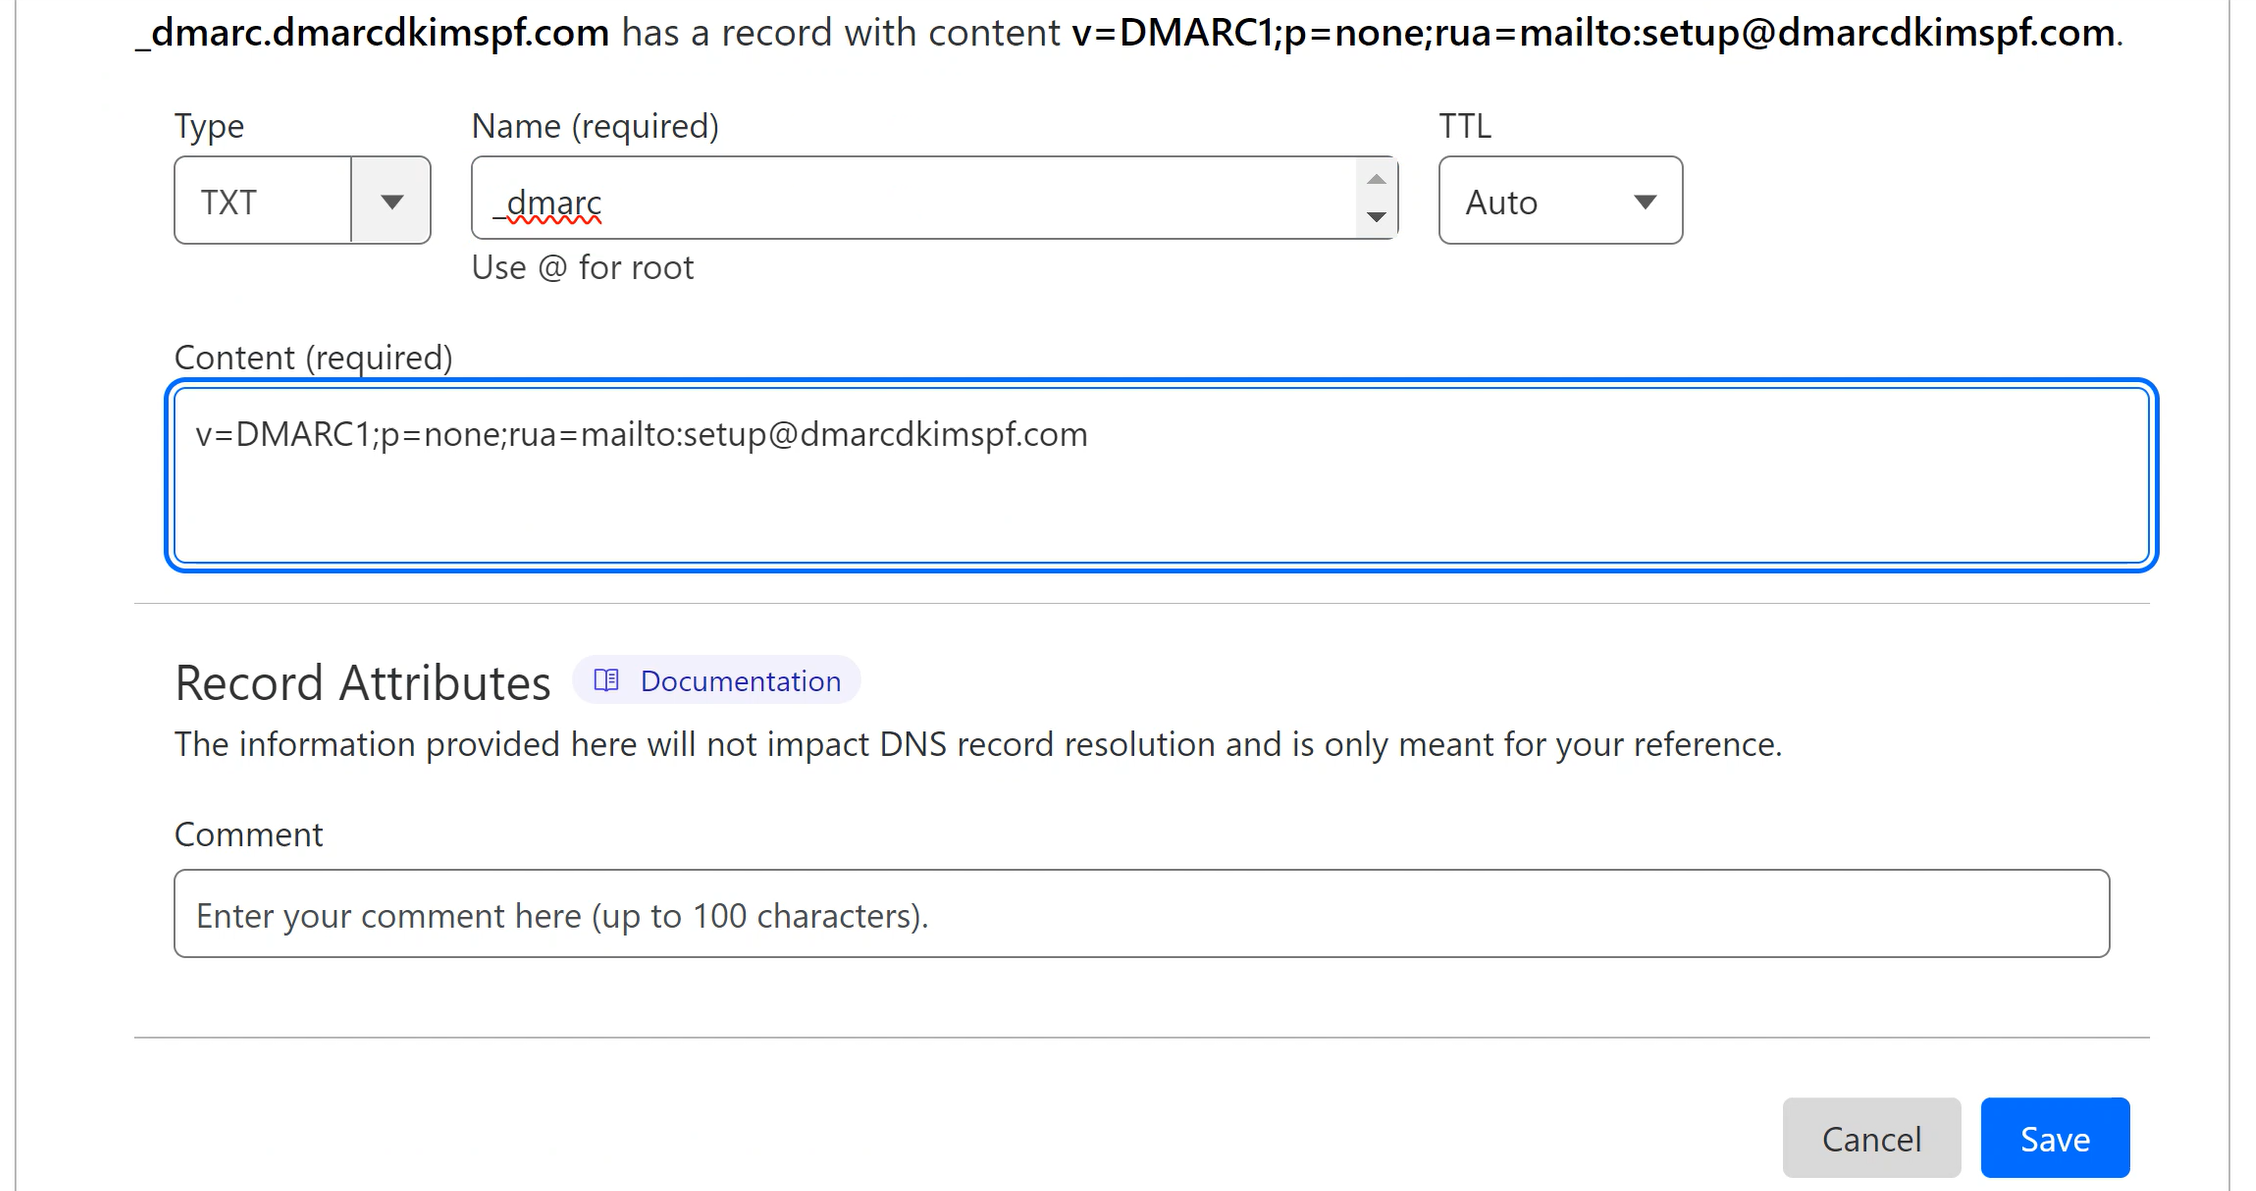
p=noneDMARC record is just a placeholder. Use DMARC Lookup Tool which analyzes data behind DMARC reports and allow you to act on it to deploy strict policy. Only a strict DMARC policy provides better deliverability and protection from email spoofing.-
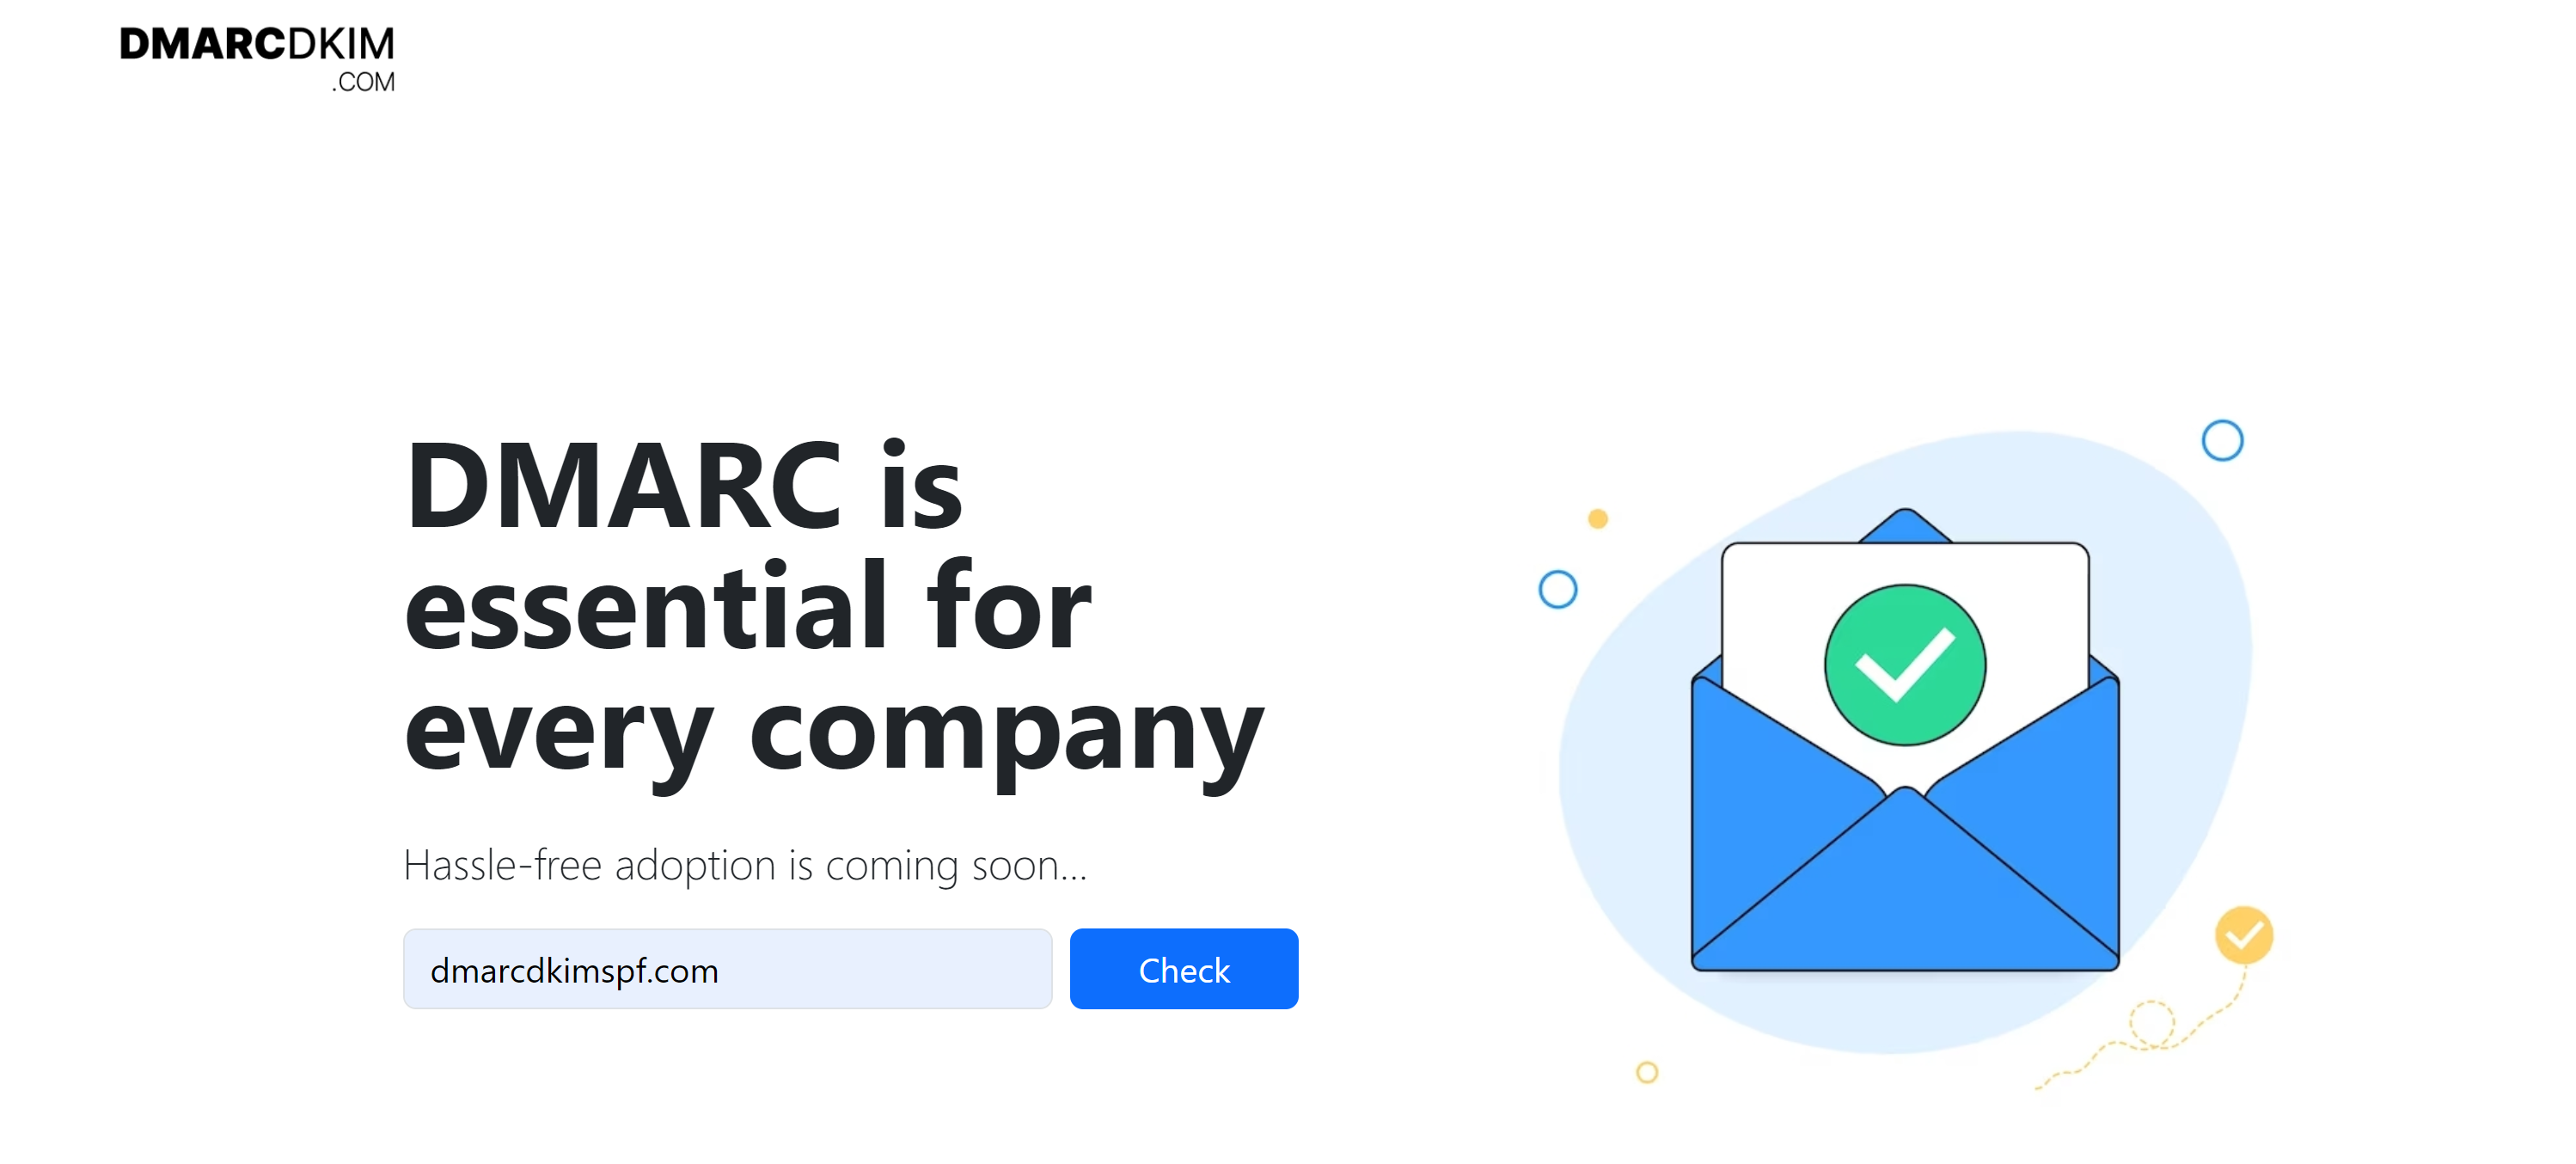
Open the DMARC tool, write your domain name here, and click Check.
-
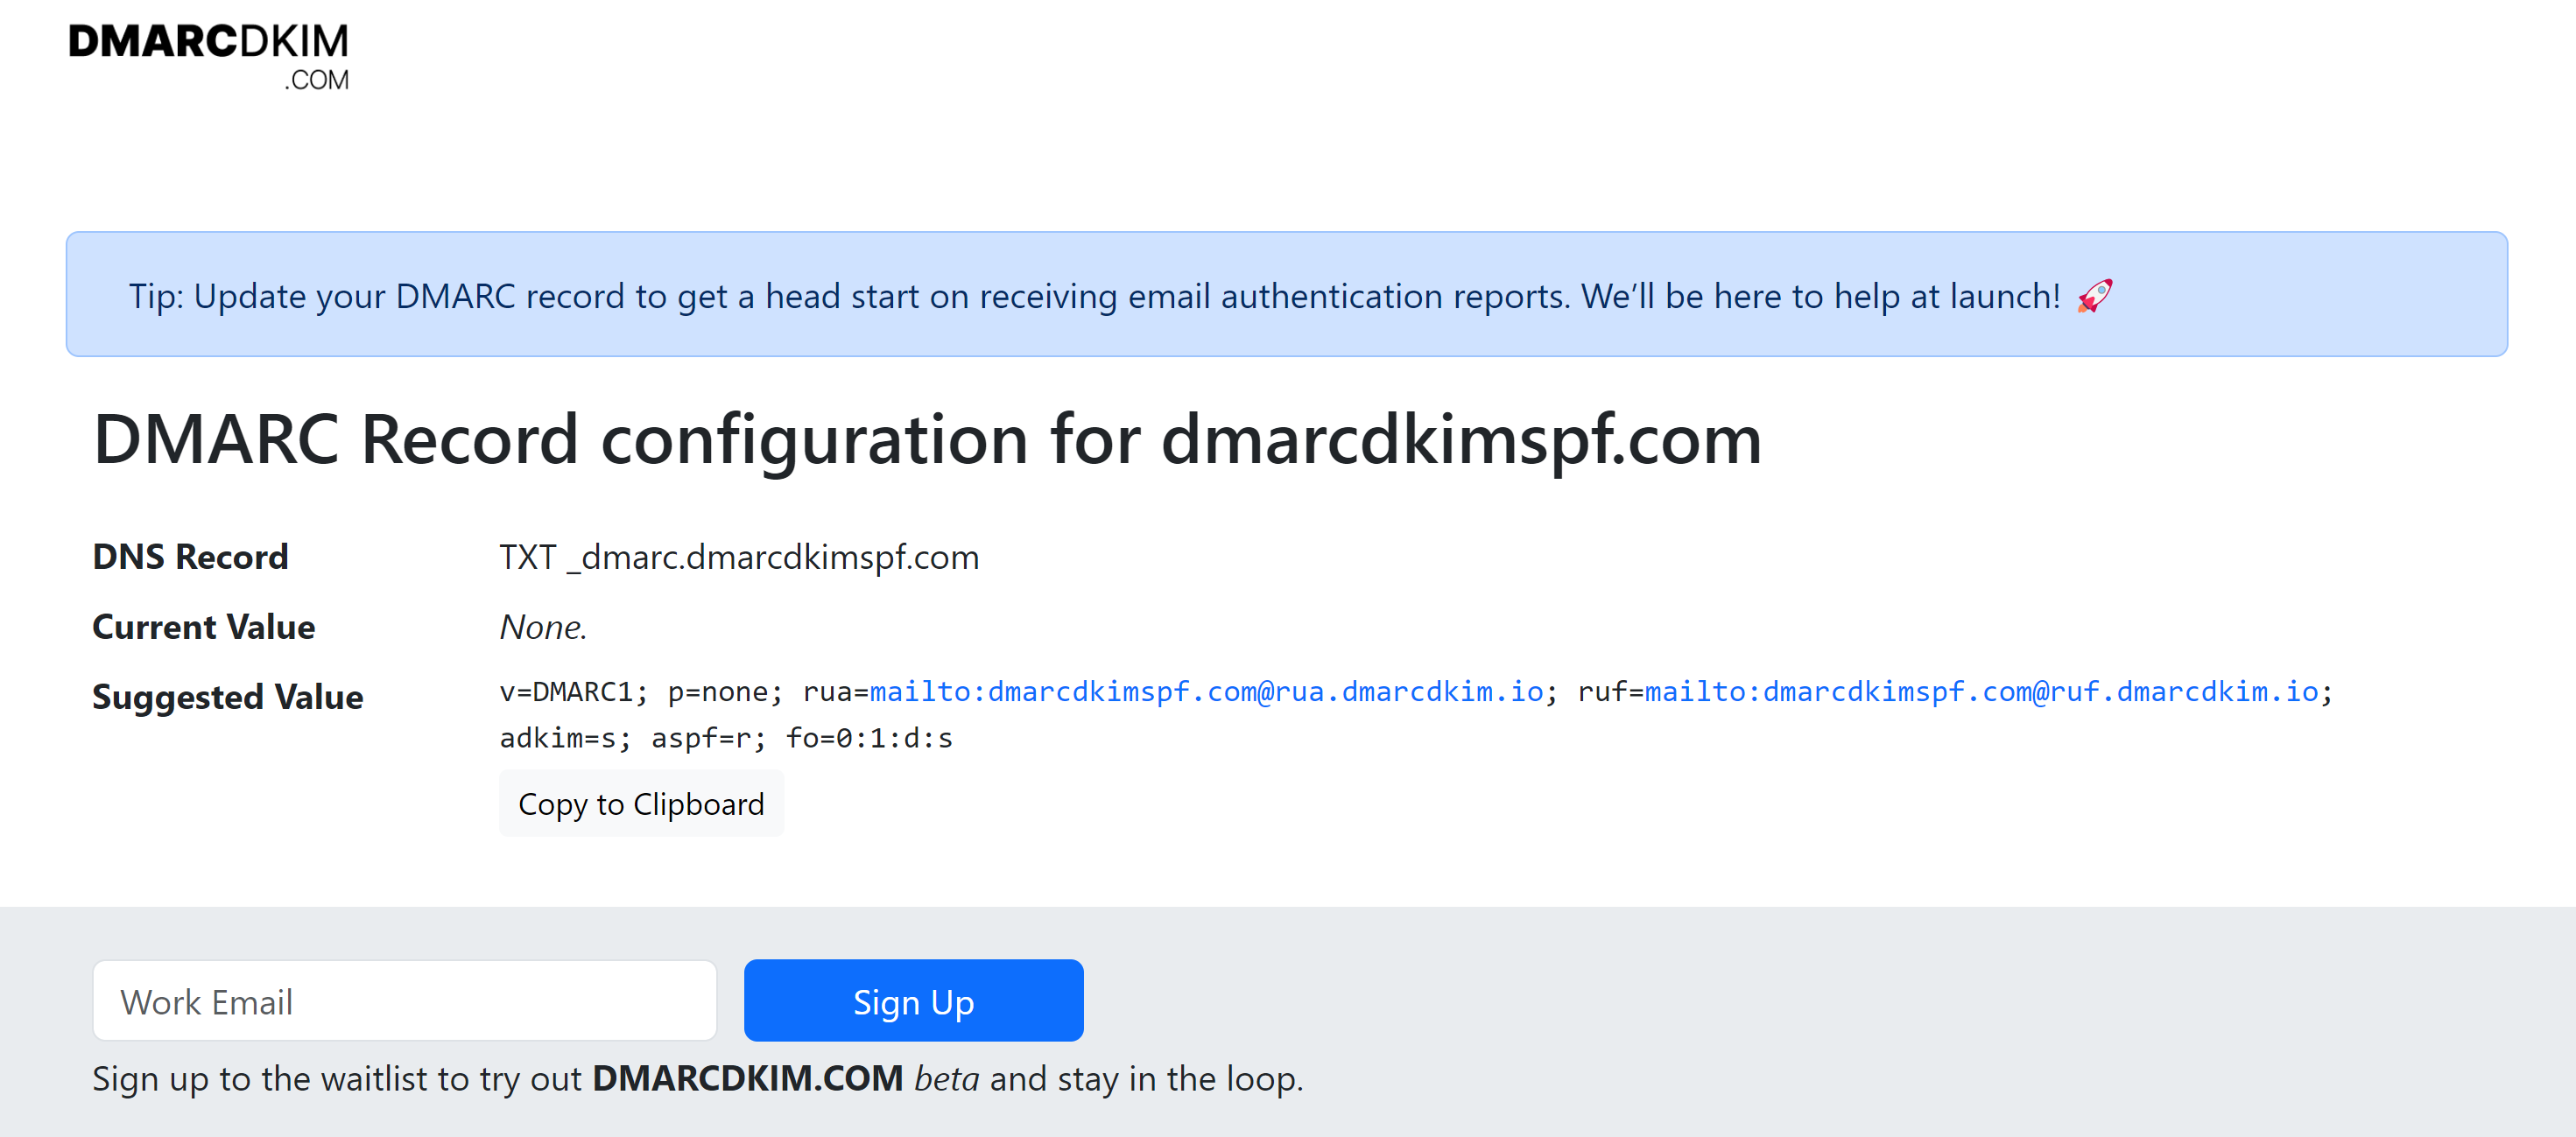
The tool gives you a suggested value. Copy the record name and value and paste them into the DNS provider.
Once records are added in DNS provider, go back to GetResponse and refresh the page.
Upon refreshing, you'll see DMARC and DKIM highlighted with green, which means records were added successfully.
NOTE: If you don't both records authenticated immediately, wait for 24 hours as it may take time for the server to apply changes.
Check domain and follow the instructions to nail down your DMARC configuration.
No expert knowledge needed!


