Squarespace DMARC, DKIM and SPF Domain Authentication - Step by Step DNS Configuration
Check your domain for DMARC, DKIM, SPF and MX records. Get a free report.
How to setup Squarespace DMARC, DKIM and SPF DNS records for domain authentication?
DMARC, DKIM, and SPF are commonly used email security standards required by inbox providers like Google and Yahoo. These DNS records prove that you are a legitimate source and that your emails are safe to open.
When your domain is authenticated, your emails won't be marked as spam. Squarespace provides you with the DKIM and DMARC records for sender domain authentication. However, SPF is not supported by this email service provider.
In this article, you will be guided step-by-step through the domain authentication process. So keep reading!
Configure Squarespace DKIM Record:
-
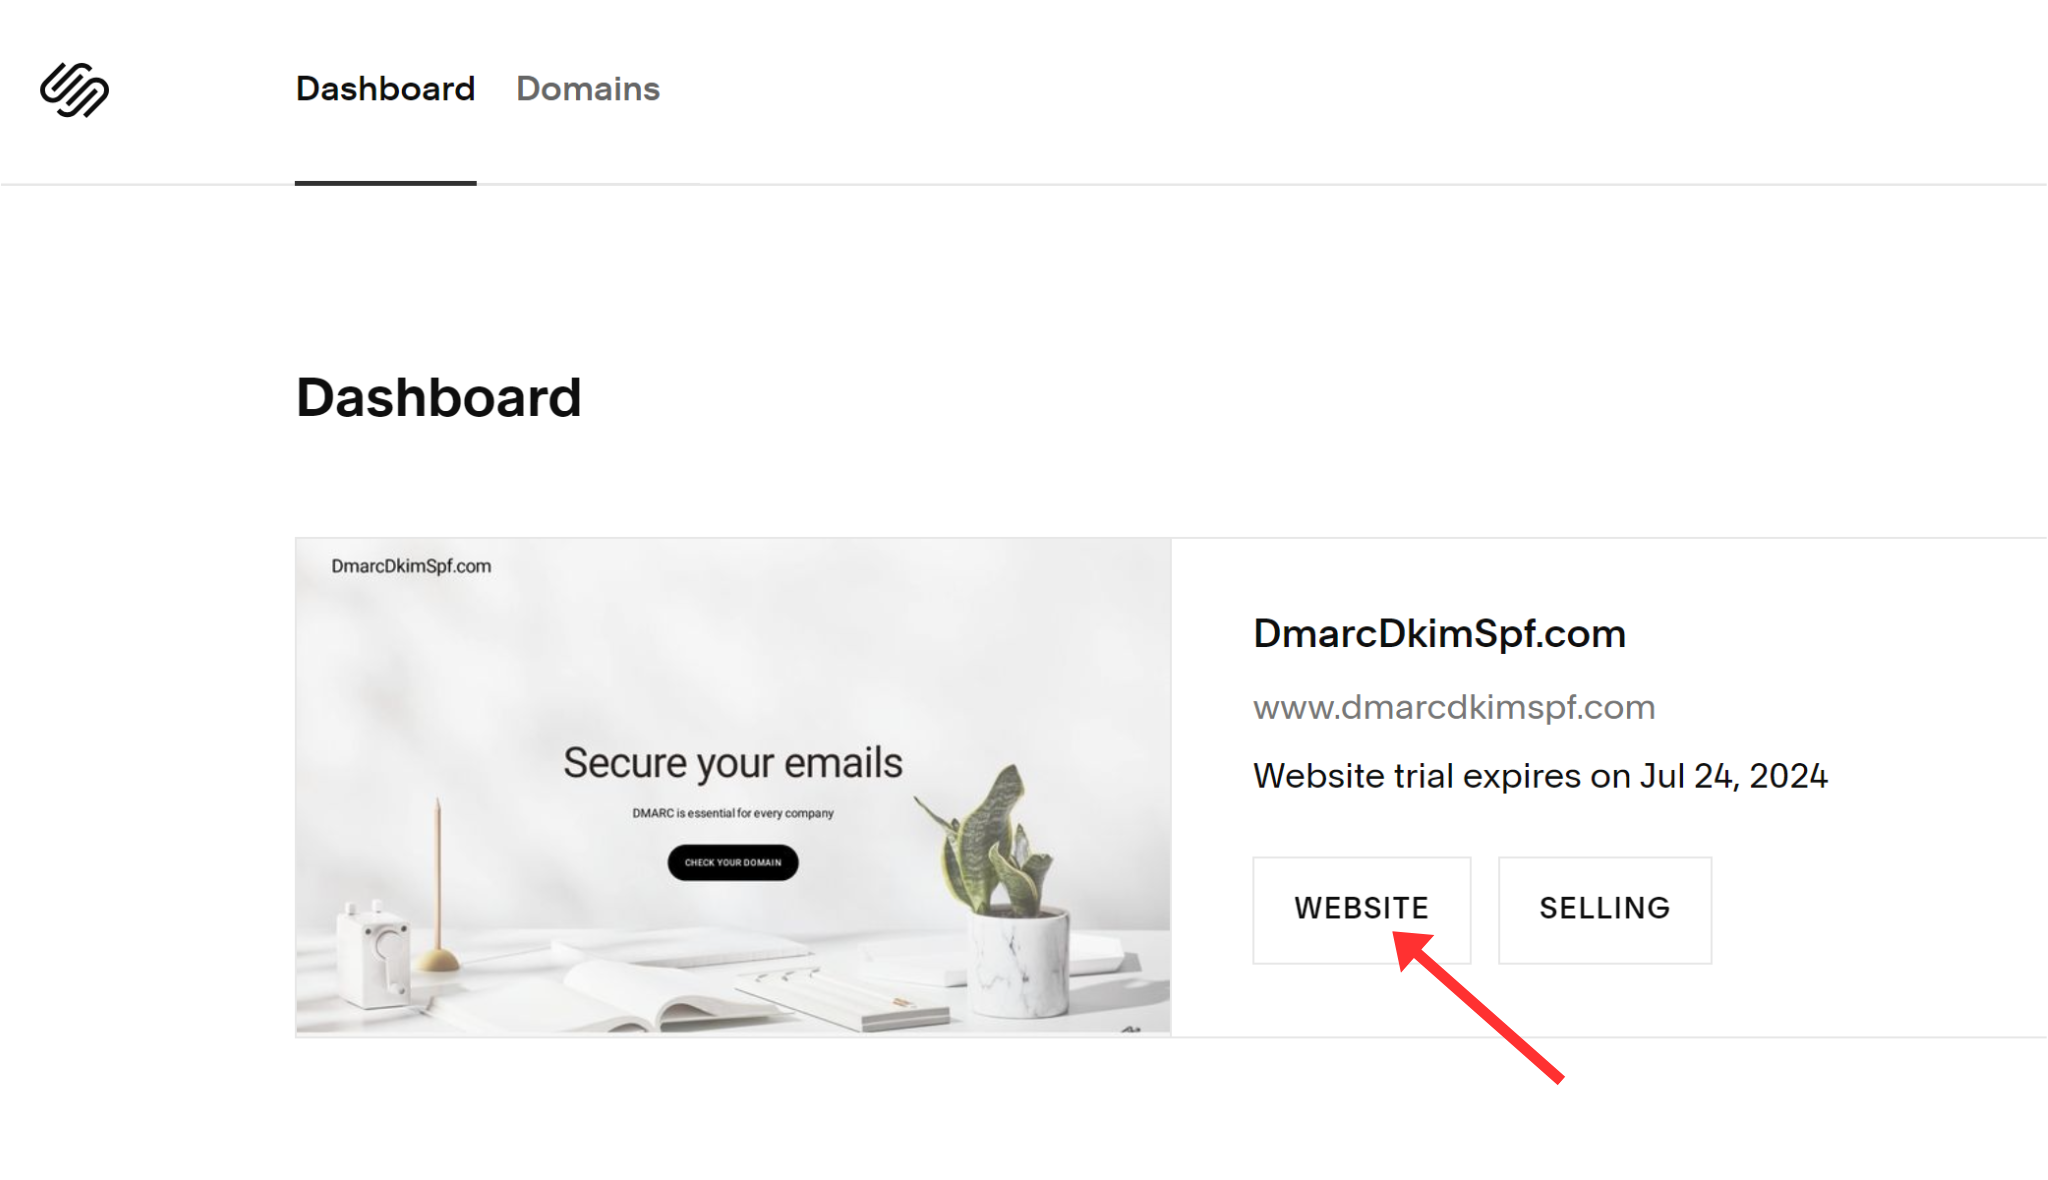
On the Squarespace dashboard, click Websites.
-
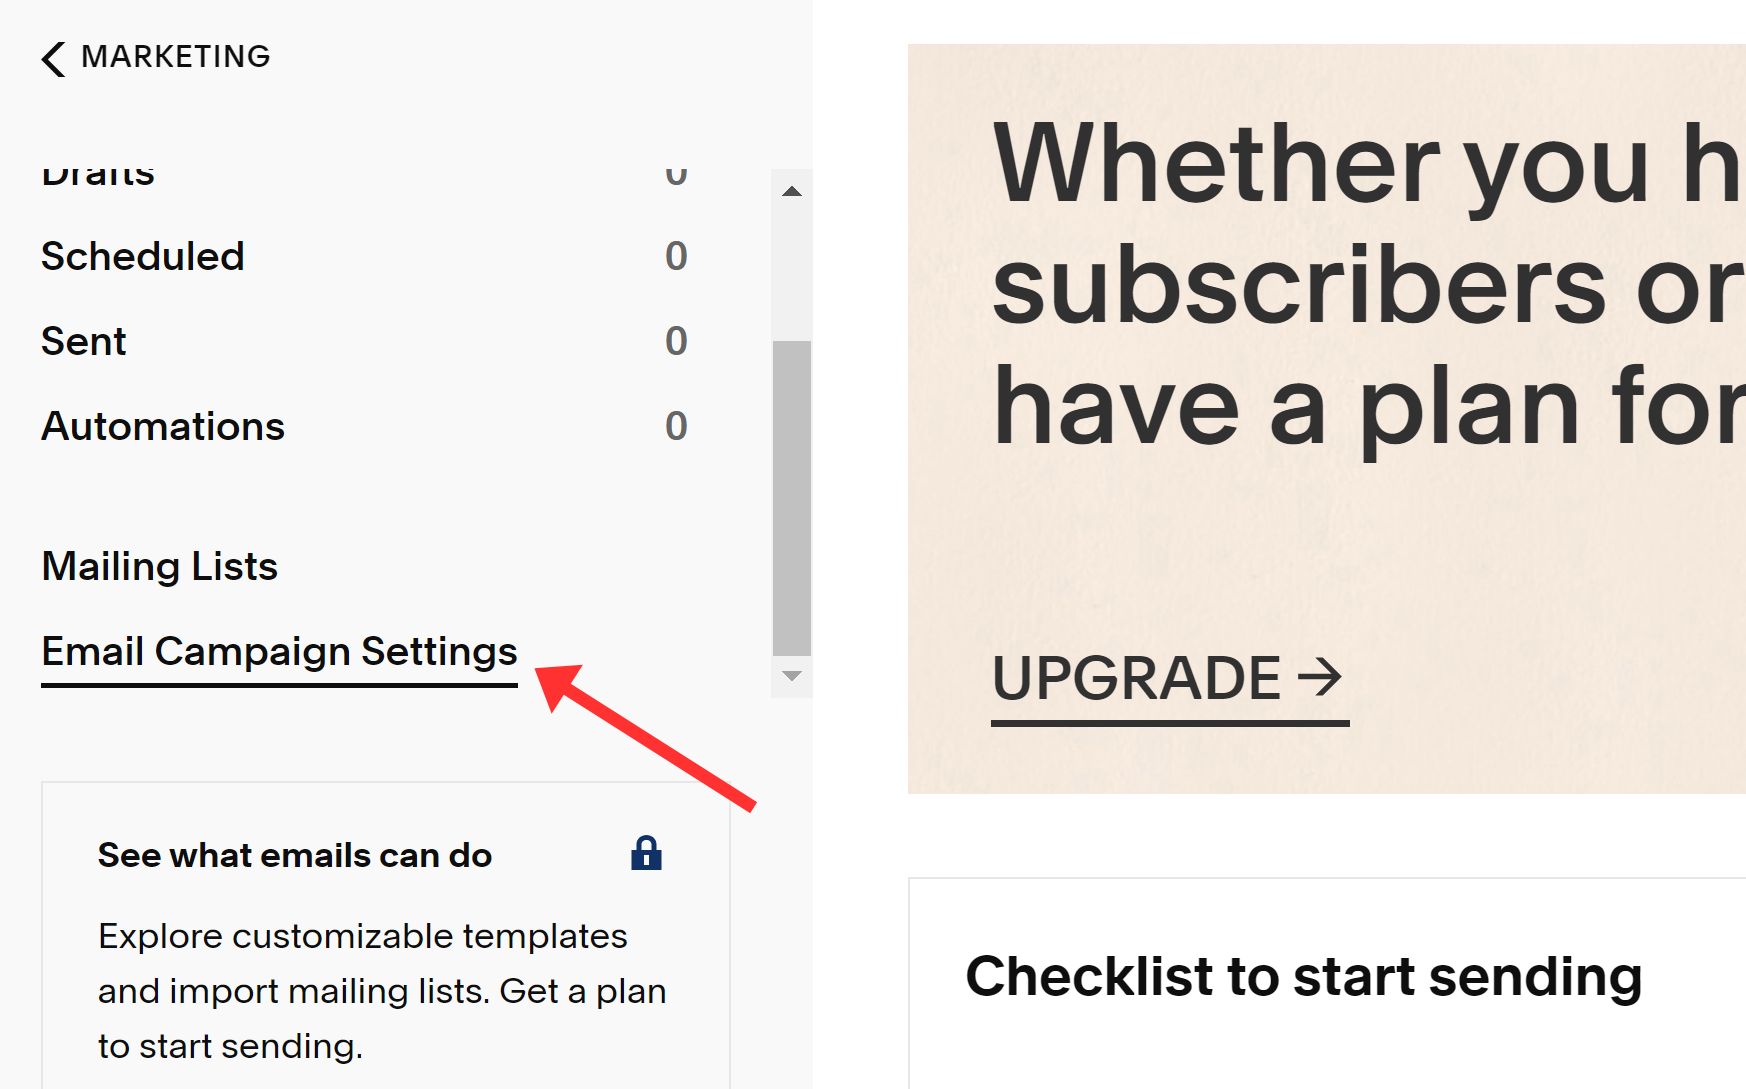
Click Marketing and go to the Email Campaigns option.

-
Open Email Campaign Settings.
-
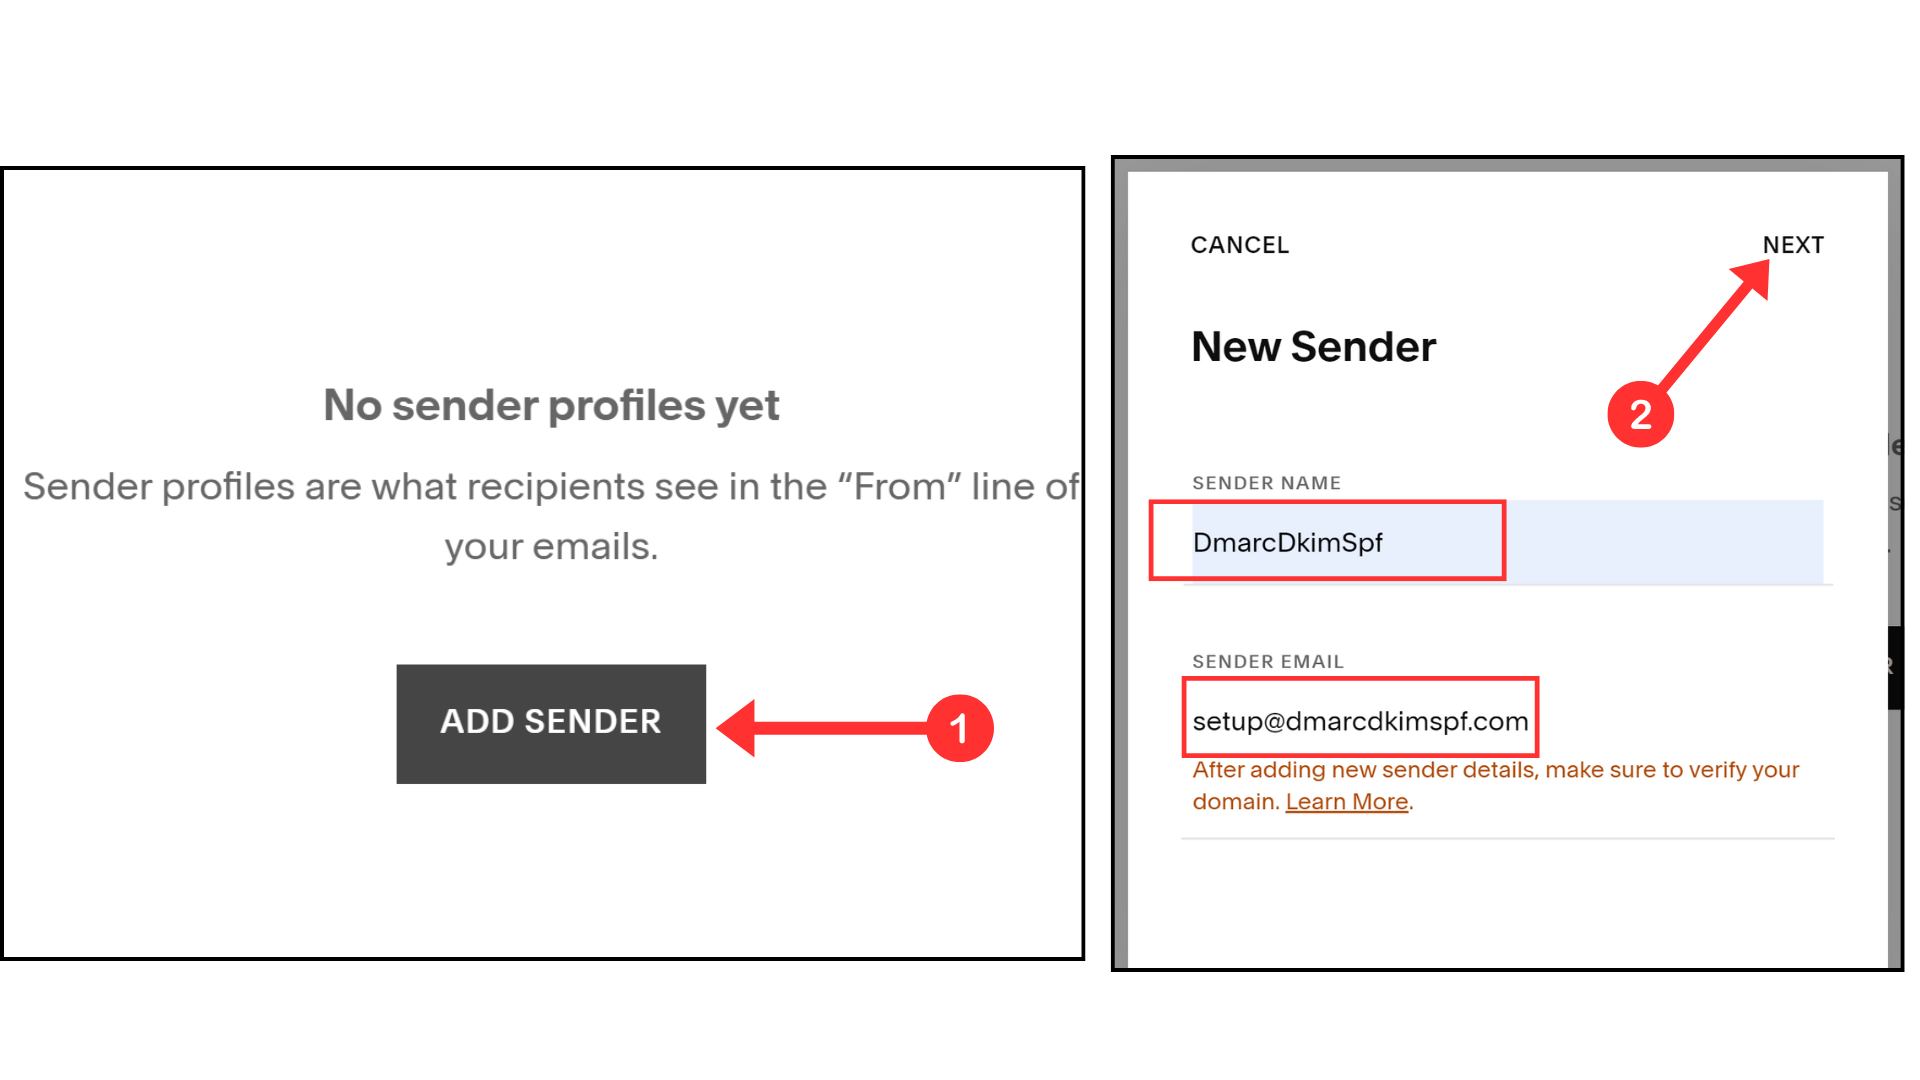
Click Add Sender and write down your Sender name and Email address.
-
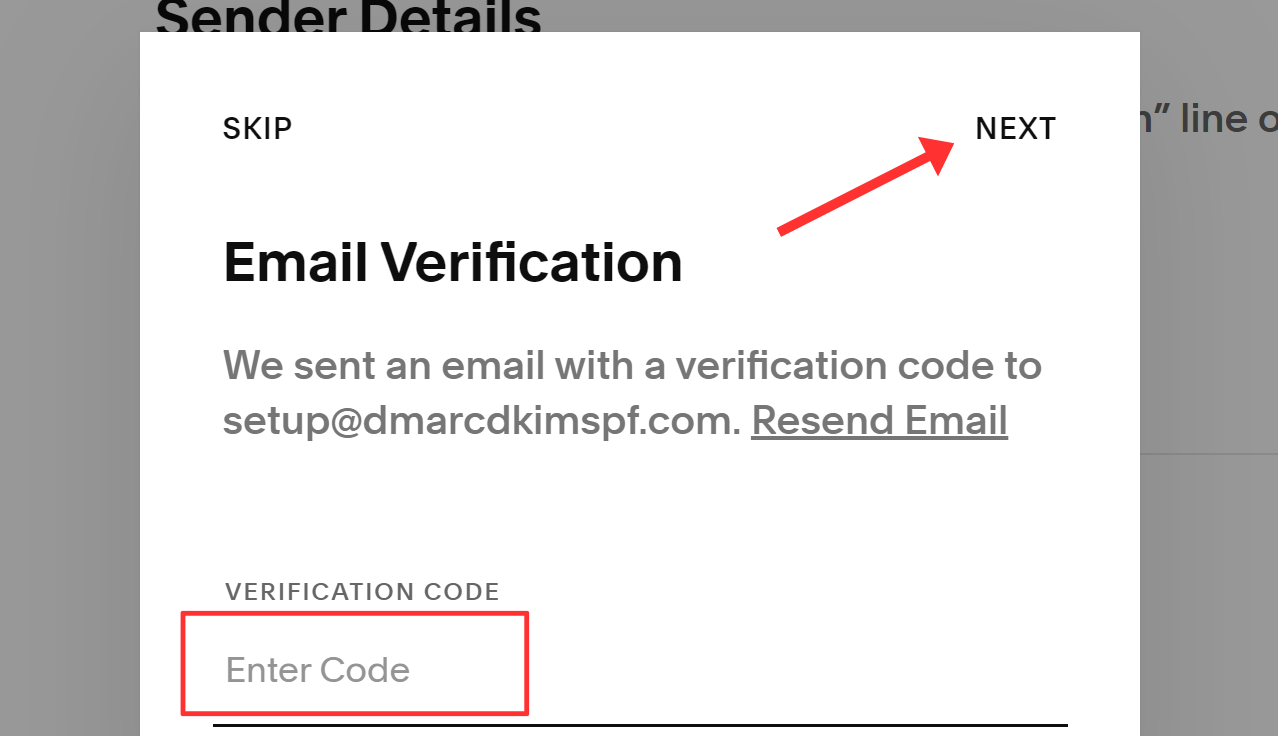
Check your email inbox for the domain verification code - add it in the Squarespace prompt and click Next.
-
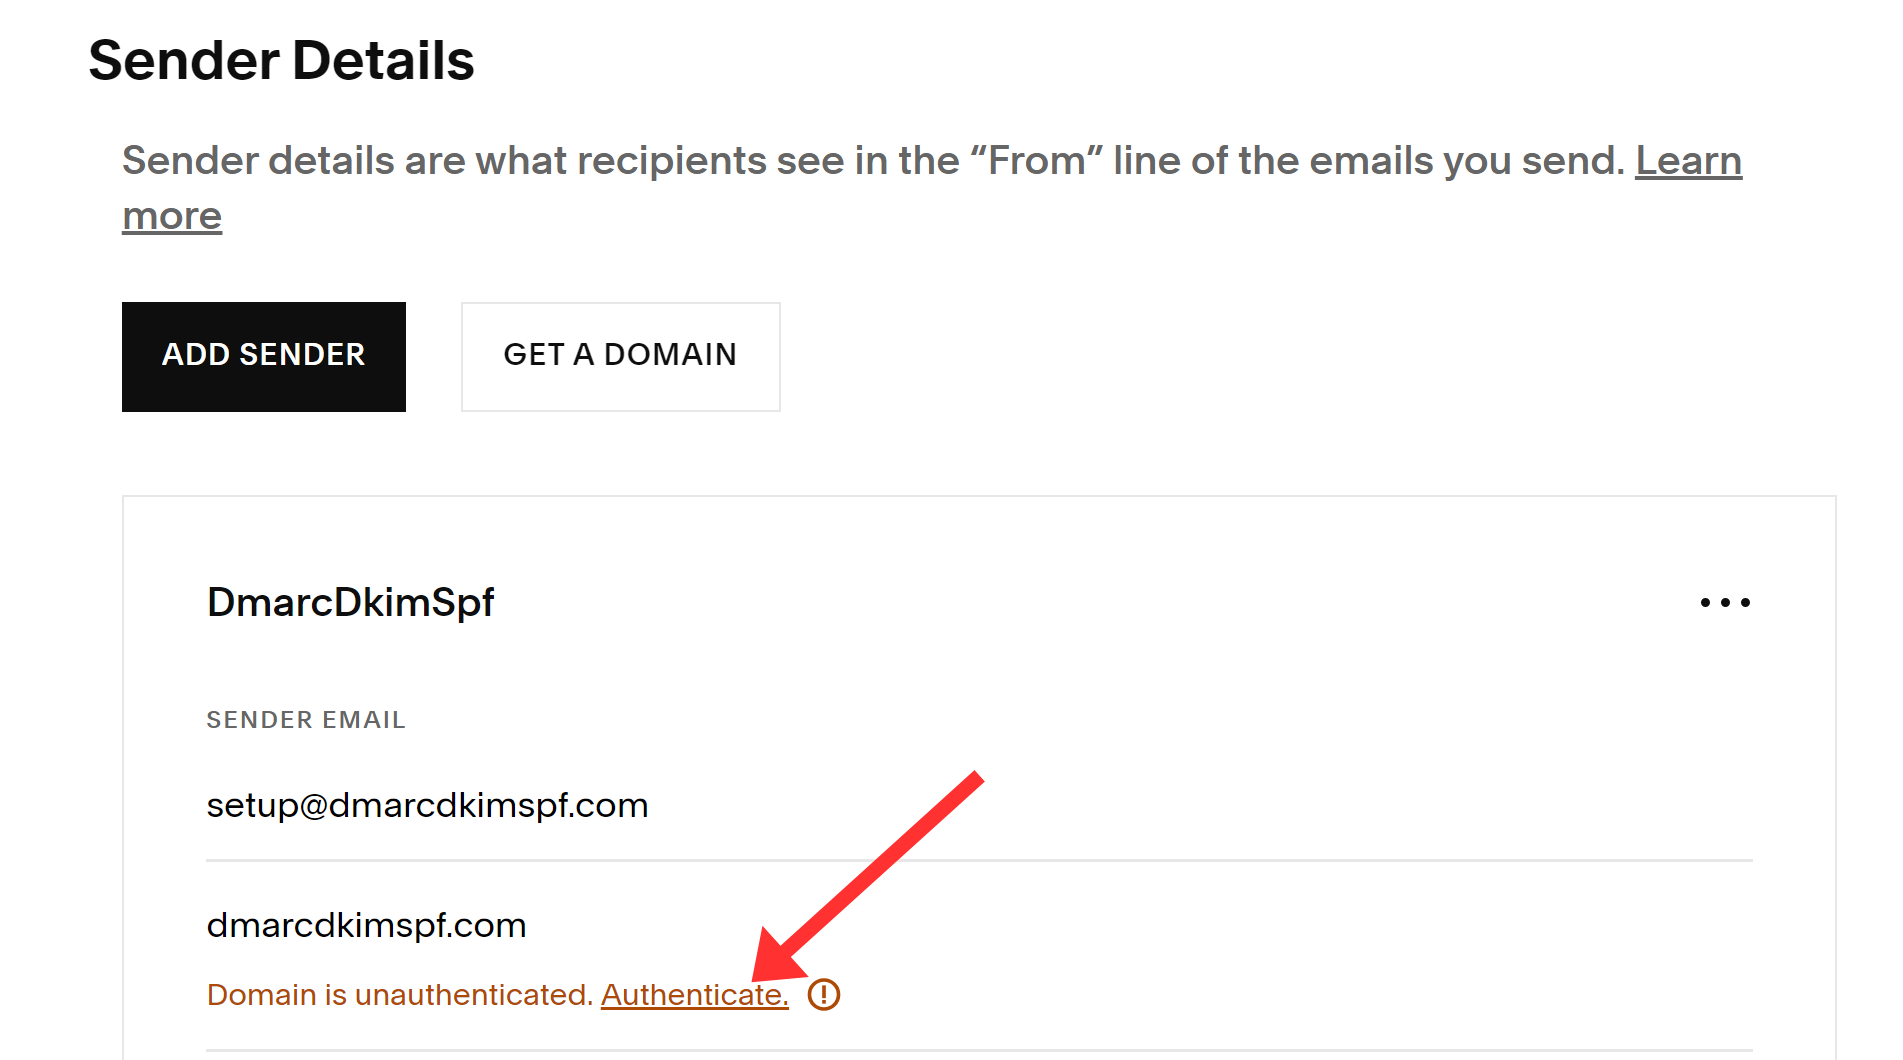
Under your domain name, click Authenticate.
-
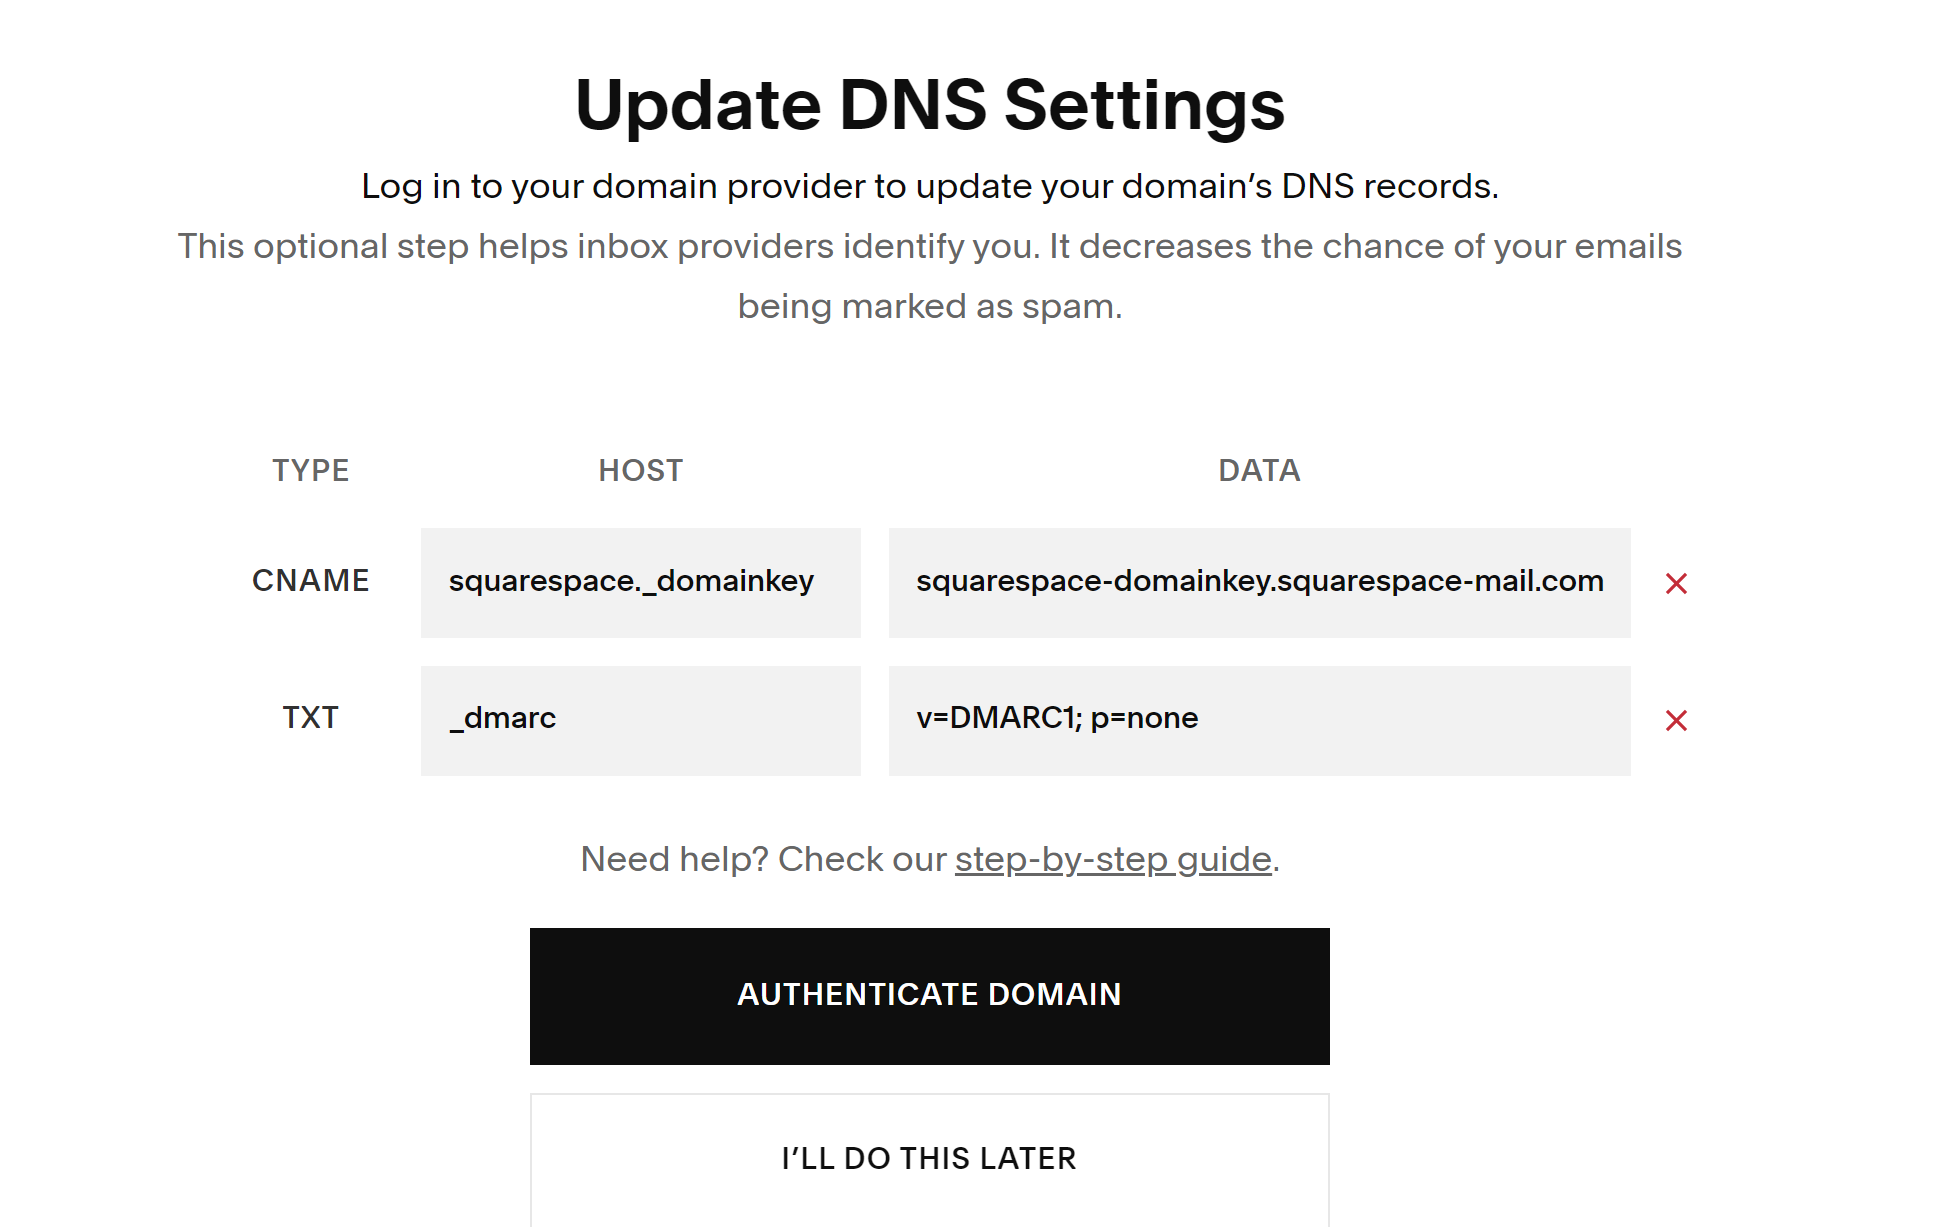
You'll see the Squarespace CNAME DKIM record on the next page - add it to the DNS provider.
Add Squarespace records to DNS provider:
Login to your DNS provider. We are using Cloudflare for this guide.
-
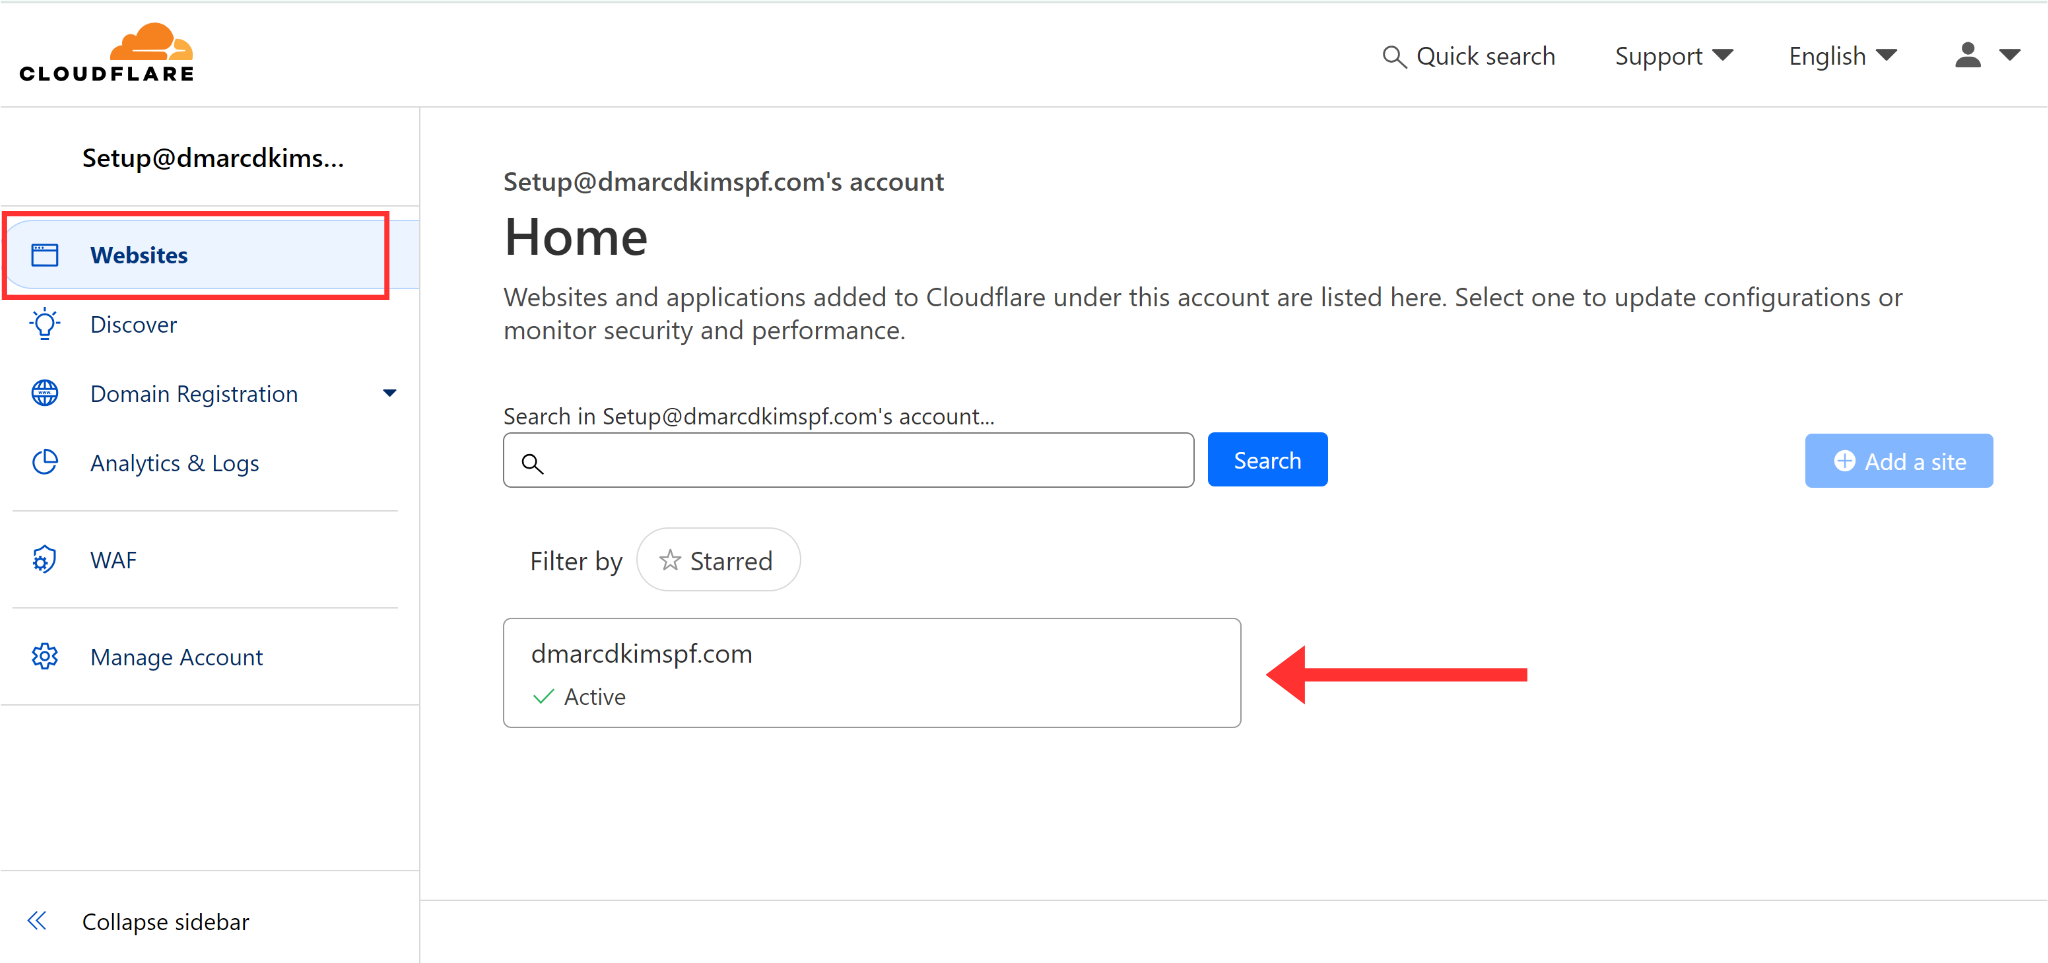
Click on your domain in the Websites tab.
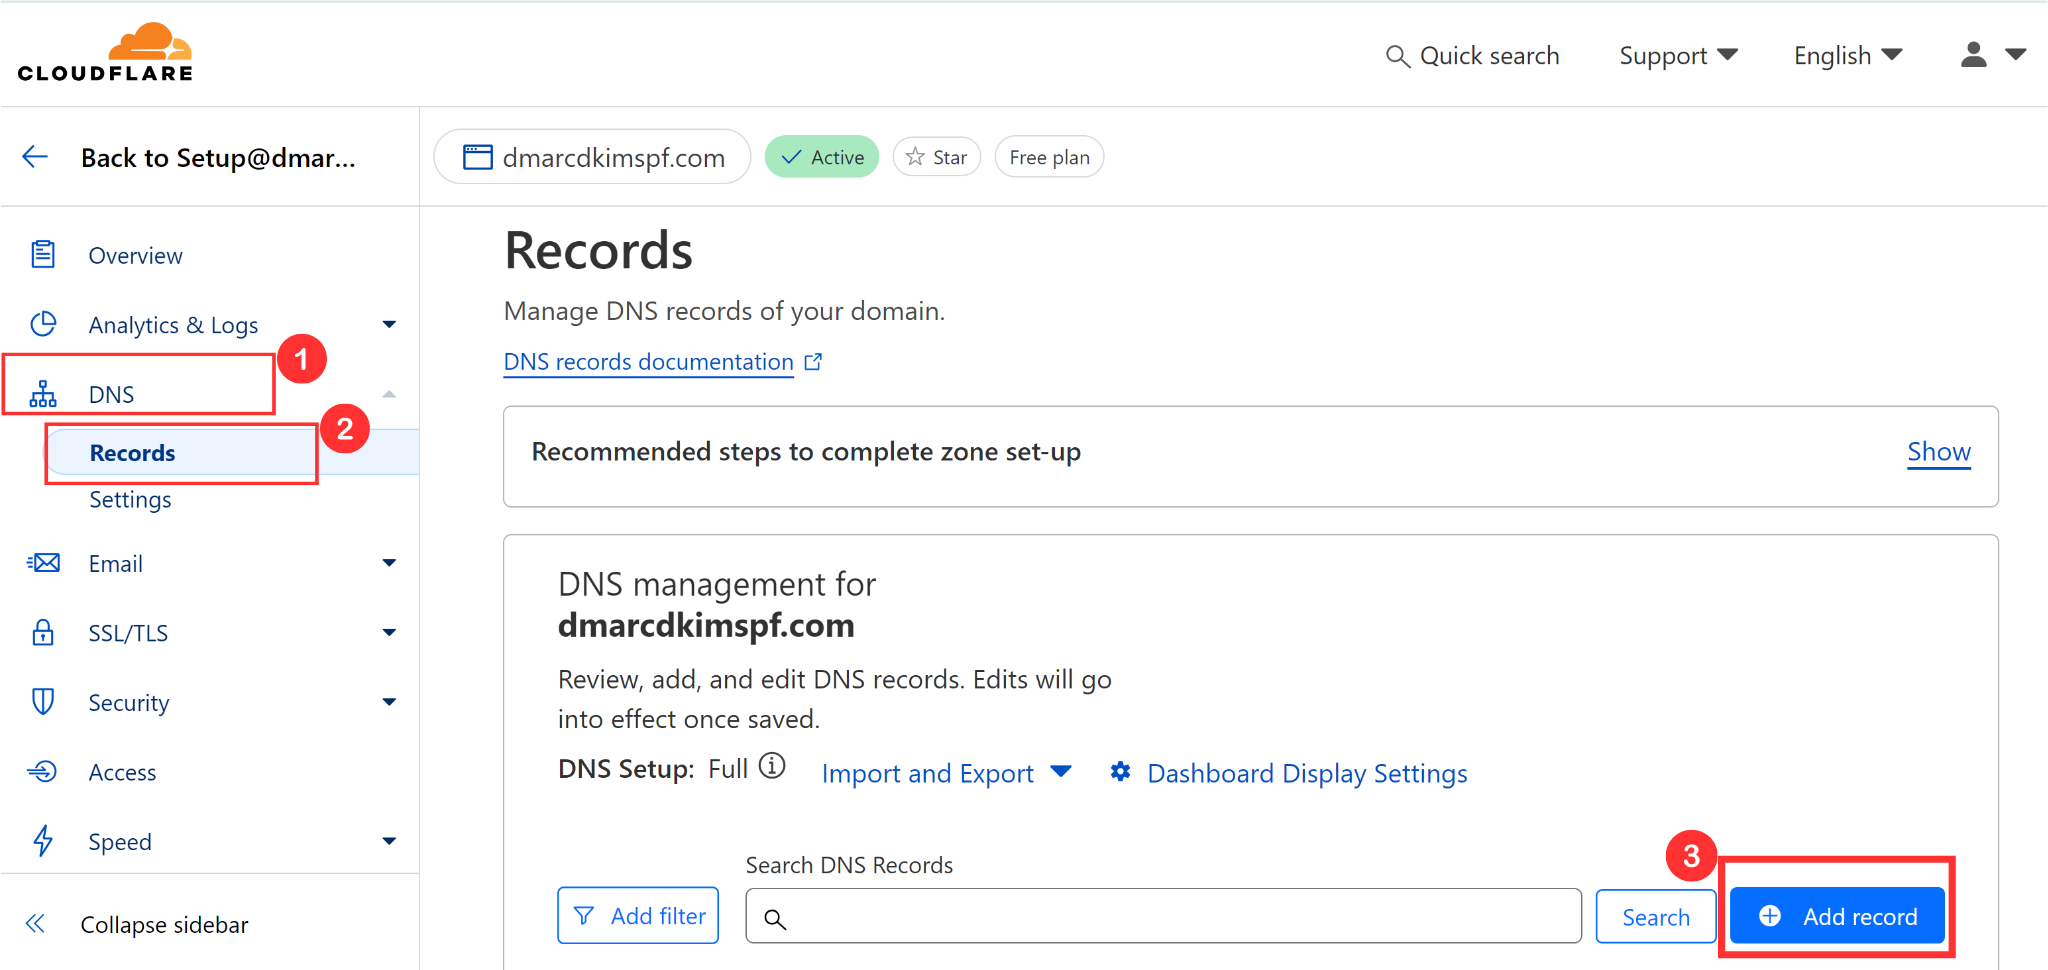
Click DNS and go to Records.
-
Hit the Add Record button to add a new DKIM record to the DNS dashboard.
Select the type CNAME.
Add the record name in the Name field.
Add the record value in the Target field.
-
Turn off the proxy and click Save.
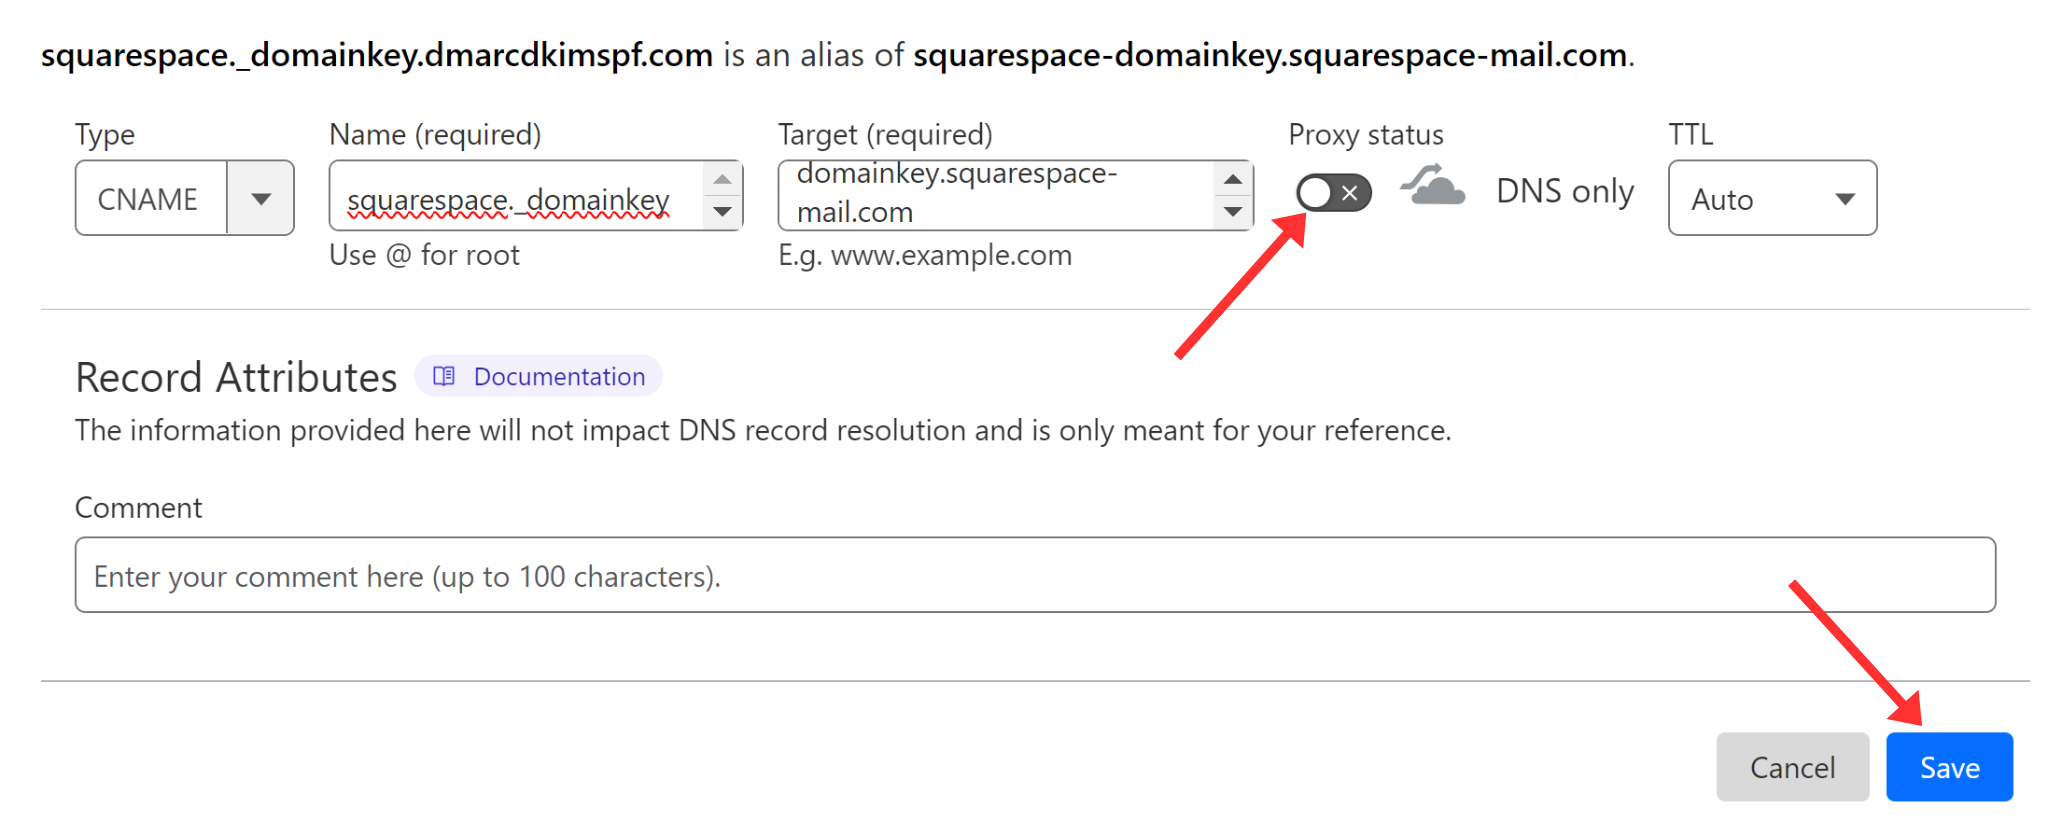
IMPORTANT: Always turn off proxy for every CNAME record. If enabled, it diverts the traffic to your DNS server instead of your email server.
Verify the Squarespace DKIM Record:
-
Return to the Squarespace DNS page and click Authenticate Domain.
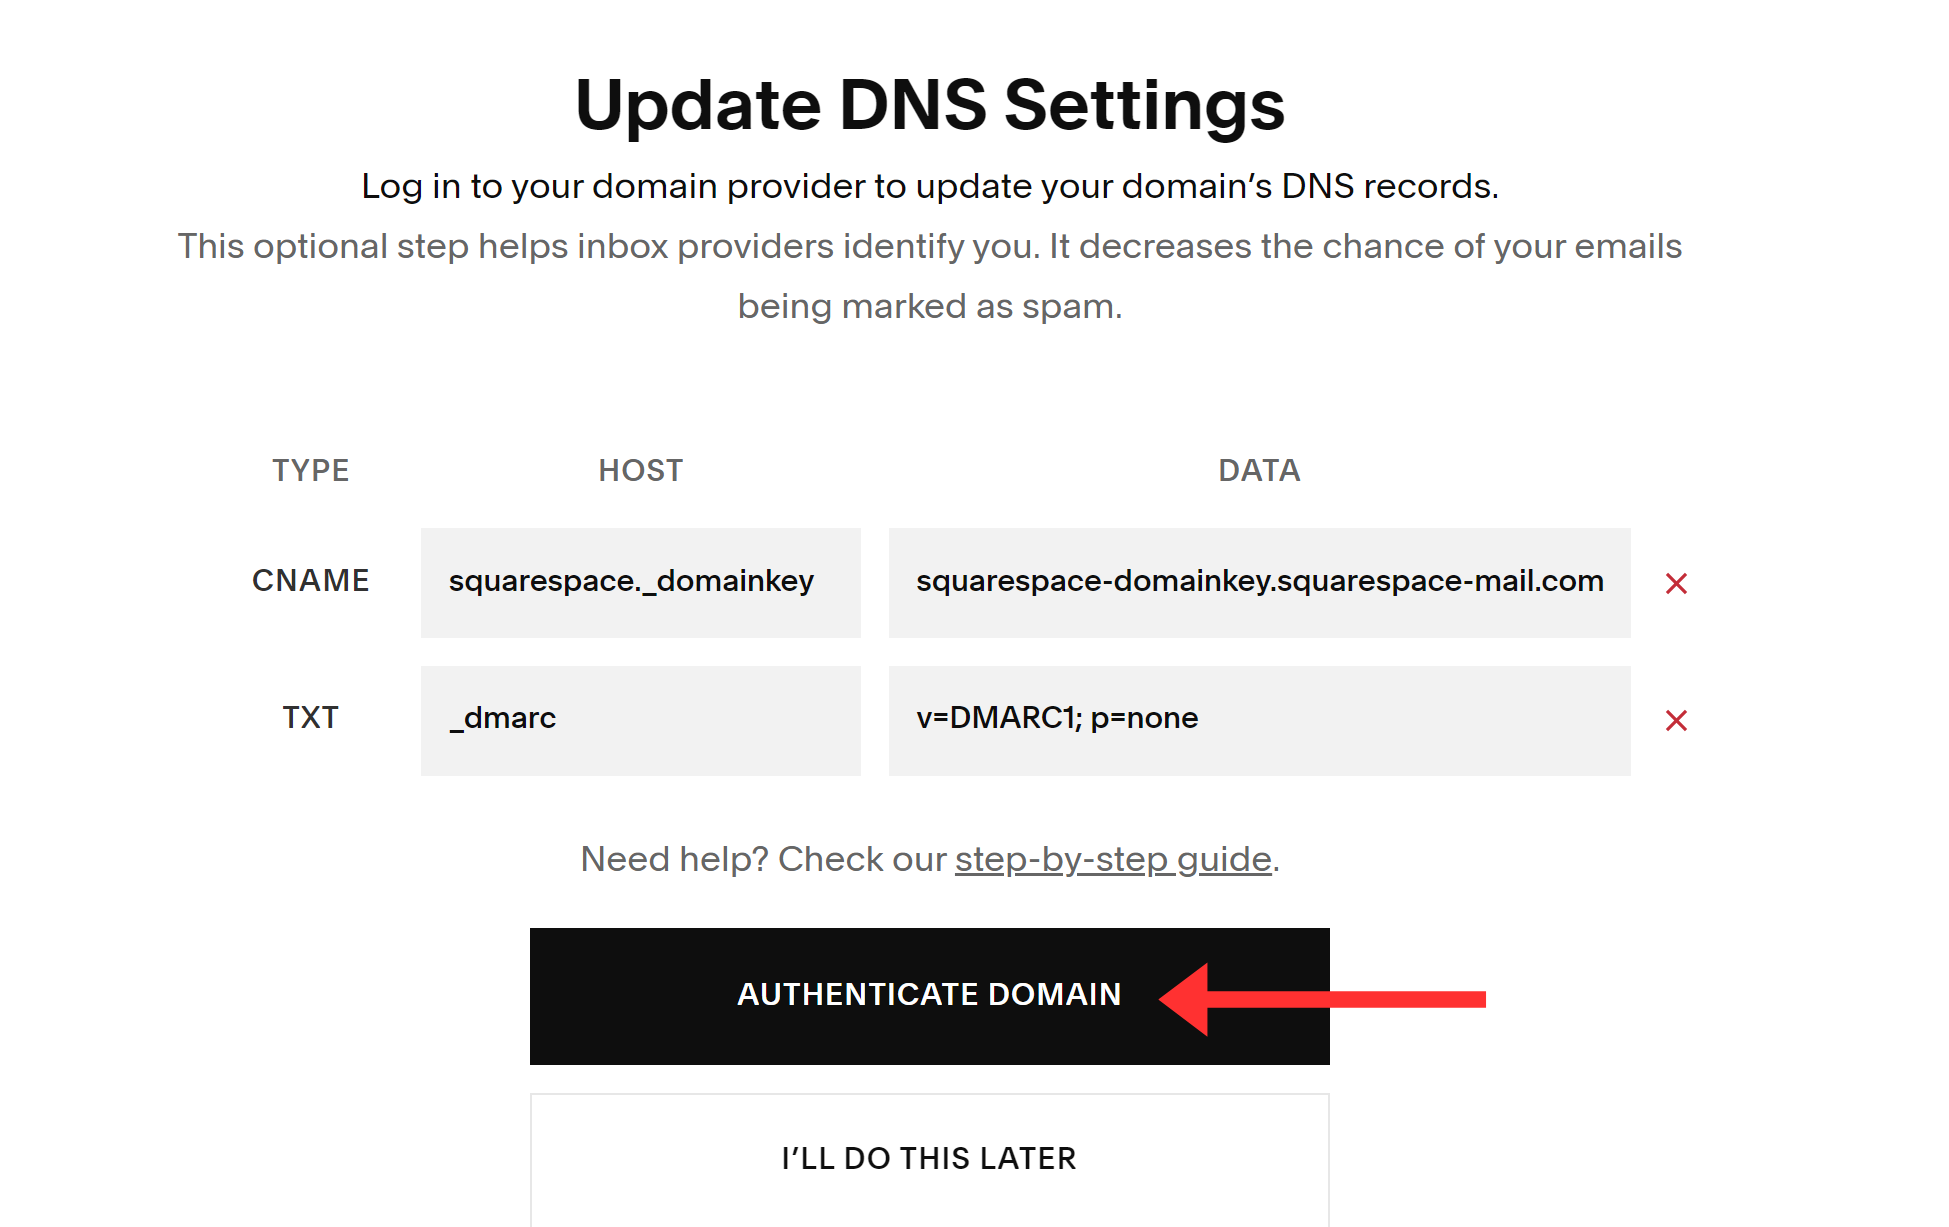
You should see a green tick mark with the DKIM record which indicates it is verified.
NOTE: If you do not see the green tick mark immediately after adding the record to the DNS provider, wait up to 48 hours and check again. The DNS server may take some time to update the changes.
Generate Squarespace DMARC Record:
The DMARC value provided by Squarespace (p=none) only provides initial monitoring which does not offer full email protection.
The value has no destinations where the unauthorized emails will be going. Without the insights about DMARC reports, your emails are still at risk.
DmarDkim.com has built a tool that gives you actionable insights about your DMARC reports and implements a strict policy accordingly.
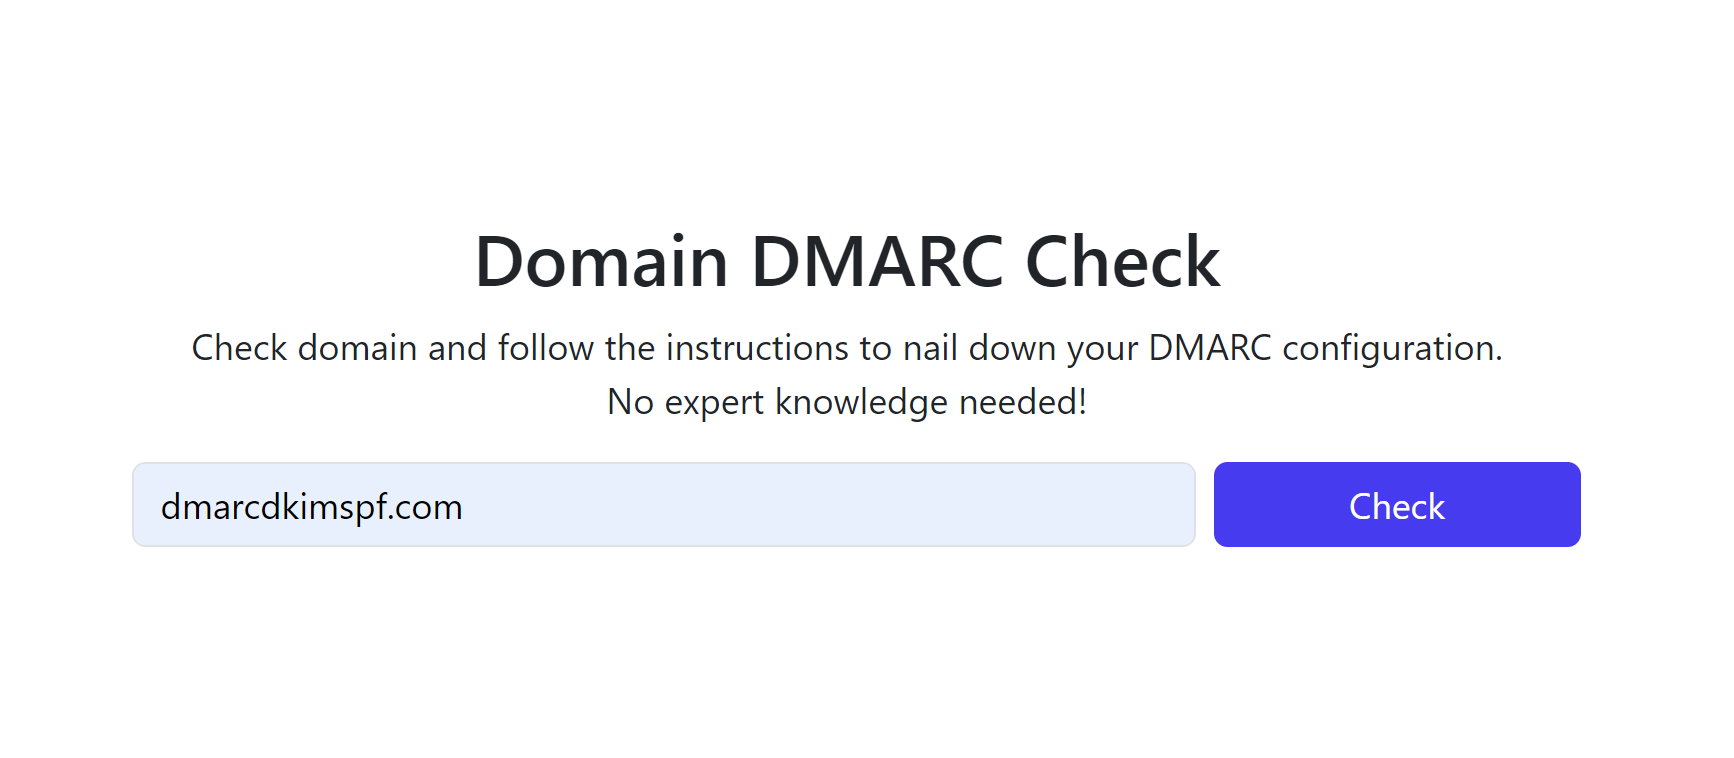
Go to DMARC Check Tool.
-
Write your domain name and click Check.
-
The tool gives you a Suggested value - add it to your DNS provider.
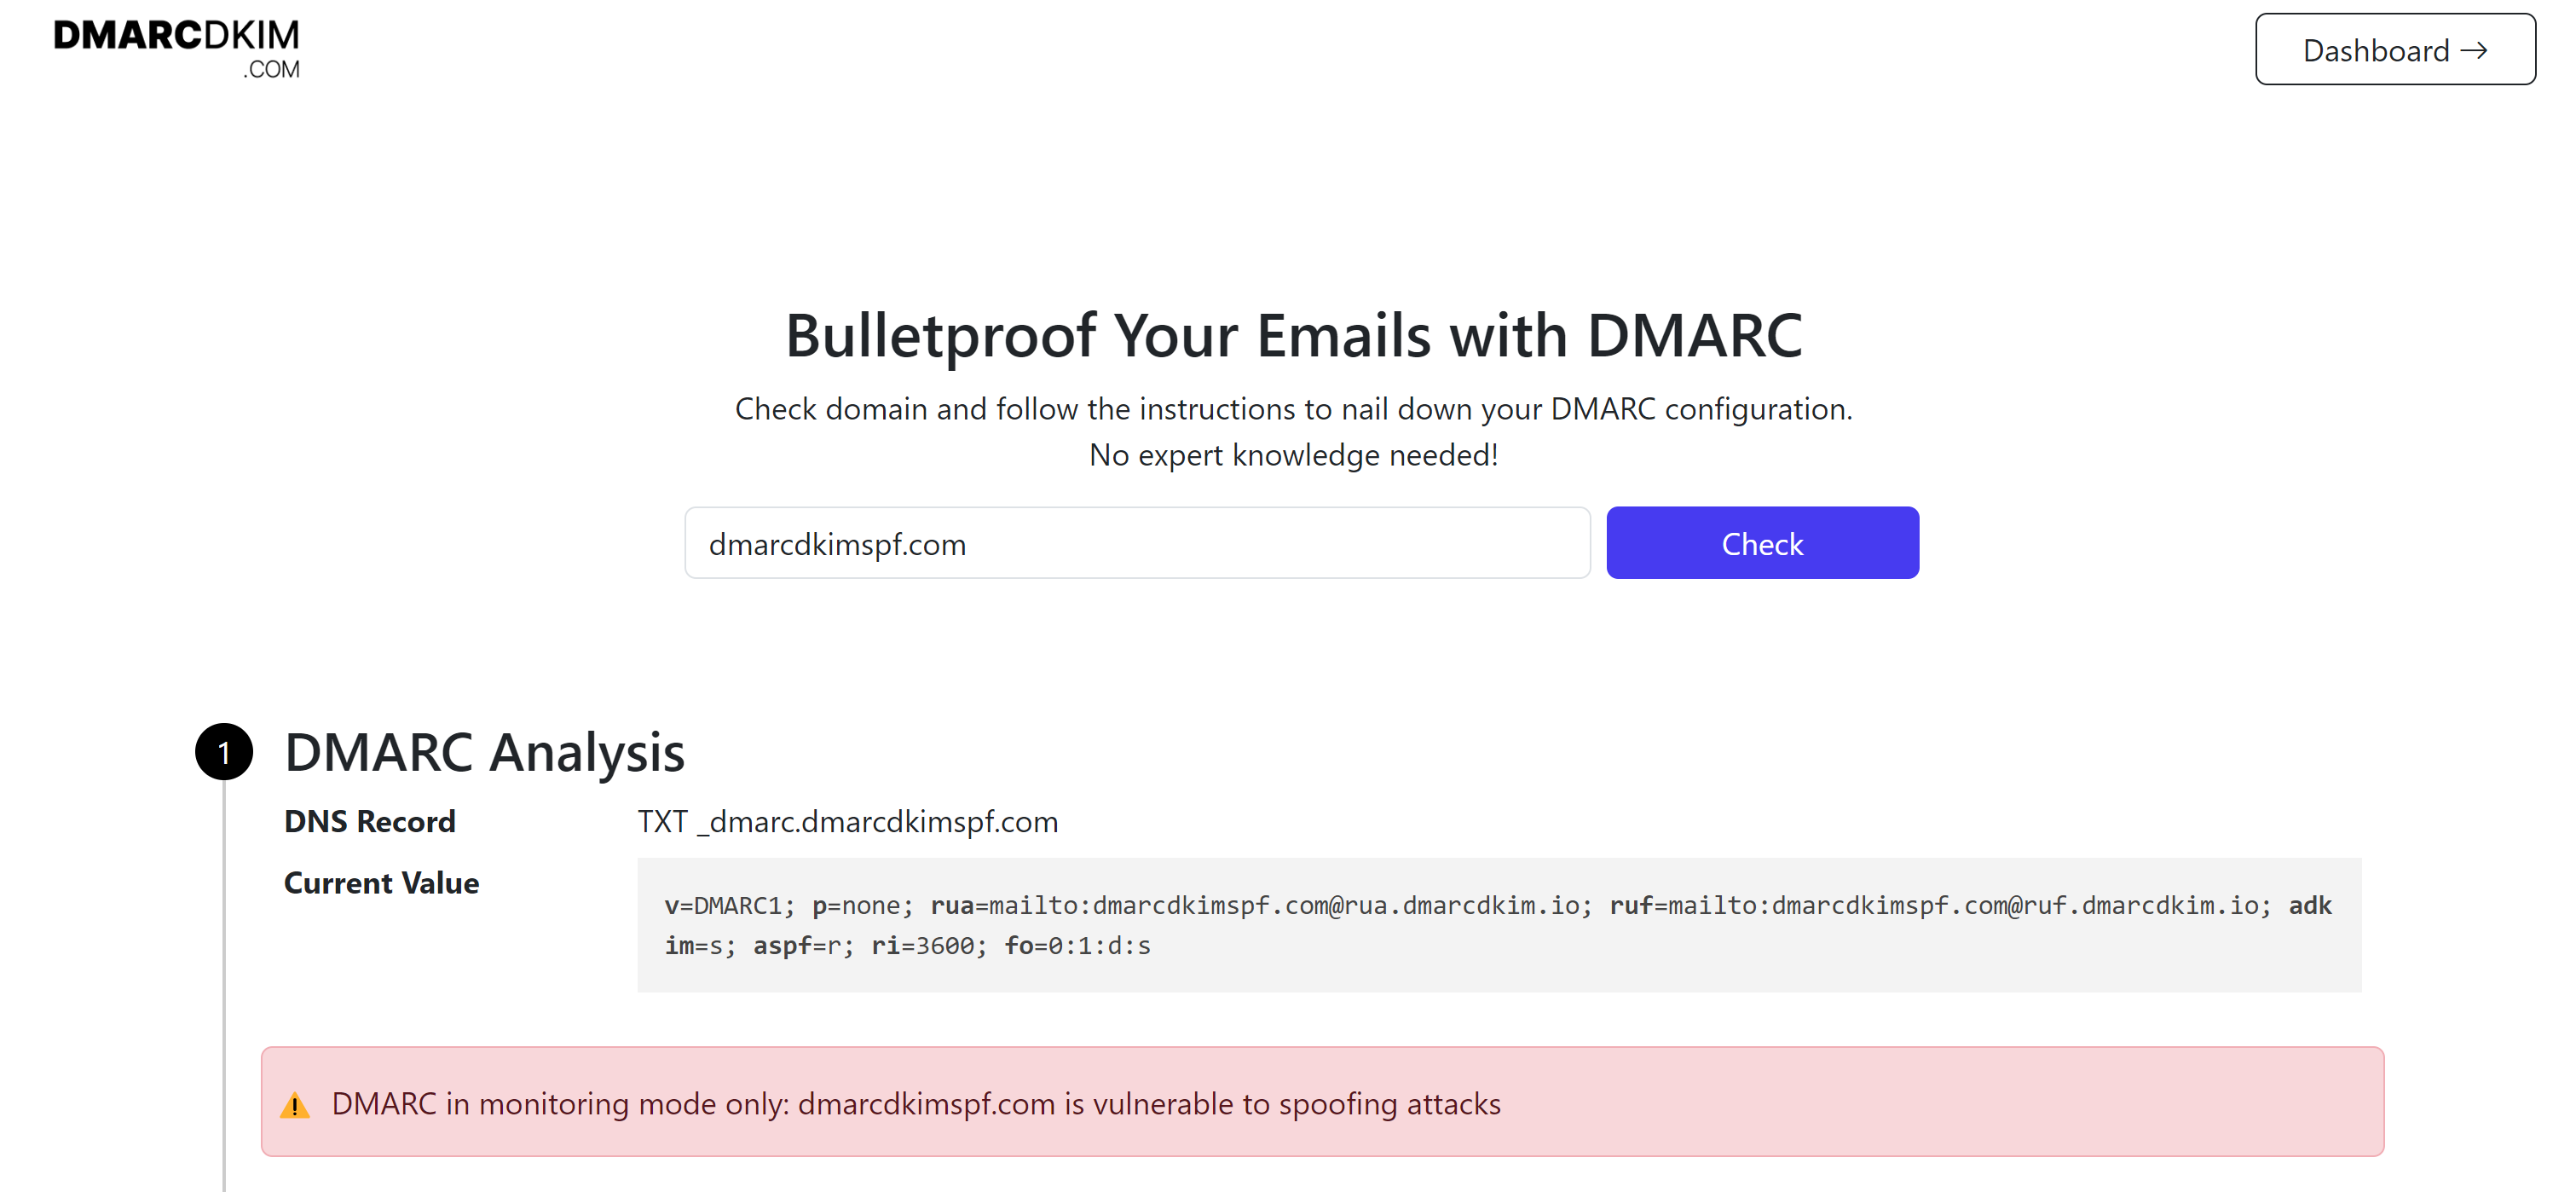
Sign up to get access to the Reports Dashboard.
If you are having any trouble authenticating your Squarespace DNS records, you can hire a DmarcDkim.com expert to manage your sender domain authentication for you.
Check domain and follow the instructions to nail down your DMARC configuration.
No expert knowledge needed!


