
Shopify DMARC, DKIM & SPF - DNS Records Setup
Articles
- DMARC for non sending domains
- Manual DMARC Monitoring vs Automated Monitoring
- Reverse Engineering Phishing
- ARC - Authenticated Received Chain
- Email impersonation scams explained
- Click/Link Tracking
- DMARC Enforcement in 2026
- Cyber Insurance and DMARC Enforcement
- TLS-RPT Record
- SMTP Smuggling
- DMARC record
- DNS and NS
- 🇩🇪 Welche Hosting Anbieter unterstützen DMARC
- MX records
- Domain Authentication
- The impact of Business Email Compromise
- CEO Scam
- DNS records
- Email Verification
- DMARC2 vs DMARC1
- DNS Leak
- DNS Check
- Return-path record
- CNAME record
- A quiet Google update just made SPF more forgiving
- DARA Records
- SOA records
- CNAME vs. A Records
- Cracking a 1024-bit DKIM Key
- Top 7 SPF Check Tools Compared 2026
- DNS Lookup
- Reverse DNS Lookup
- Der deutsche Bundestag hat ein Spoofing-Problem
How to setup DNS records for Shopify DMARC, DKIM and SPF to be spam proof?
Sender domain authentication is important to protect your emails against spoofing. Shopify provides you with the necessary CNAME DNS records that comply with email security standards.
First, you have to connect your third-party domain to Shopify and then authenticate it. This guide post will walk you through the step-by-step process of Shopify CNAME records configuration and verification.
IMPORTANT: Domain authentication feature is only available for the paid version.
Connecting Domain to Shopify:
-
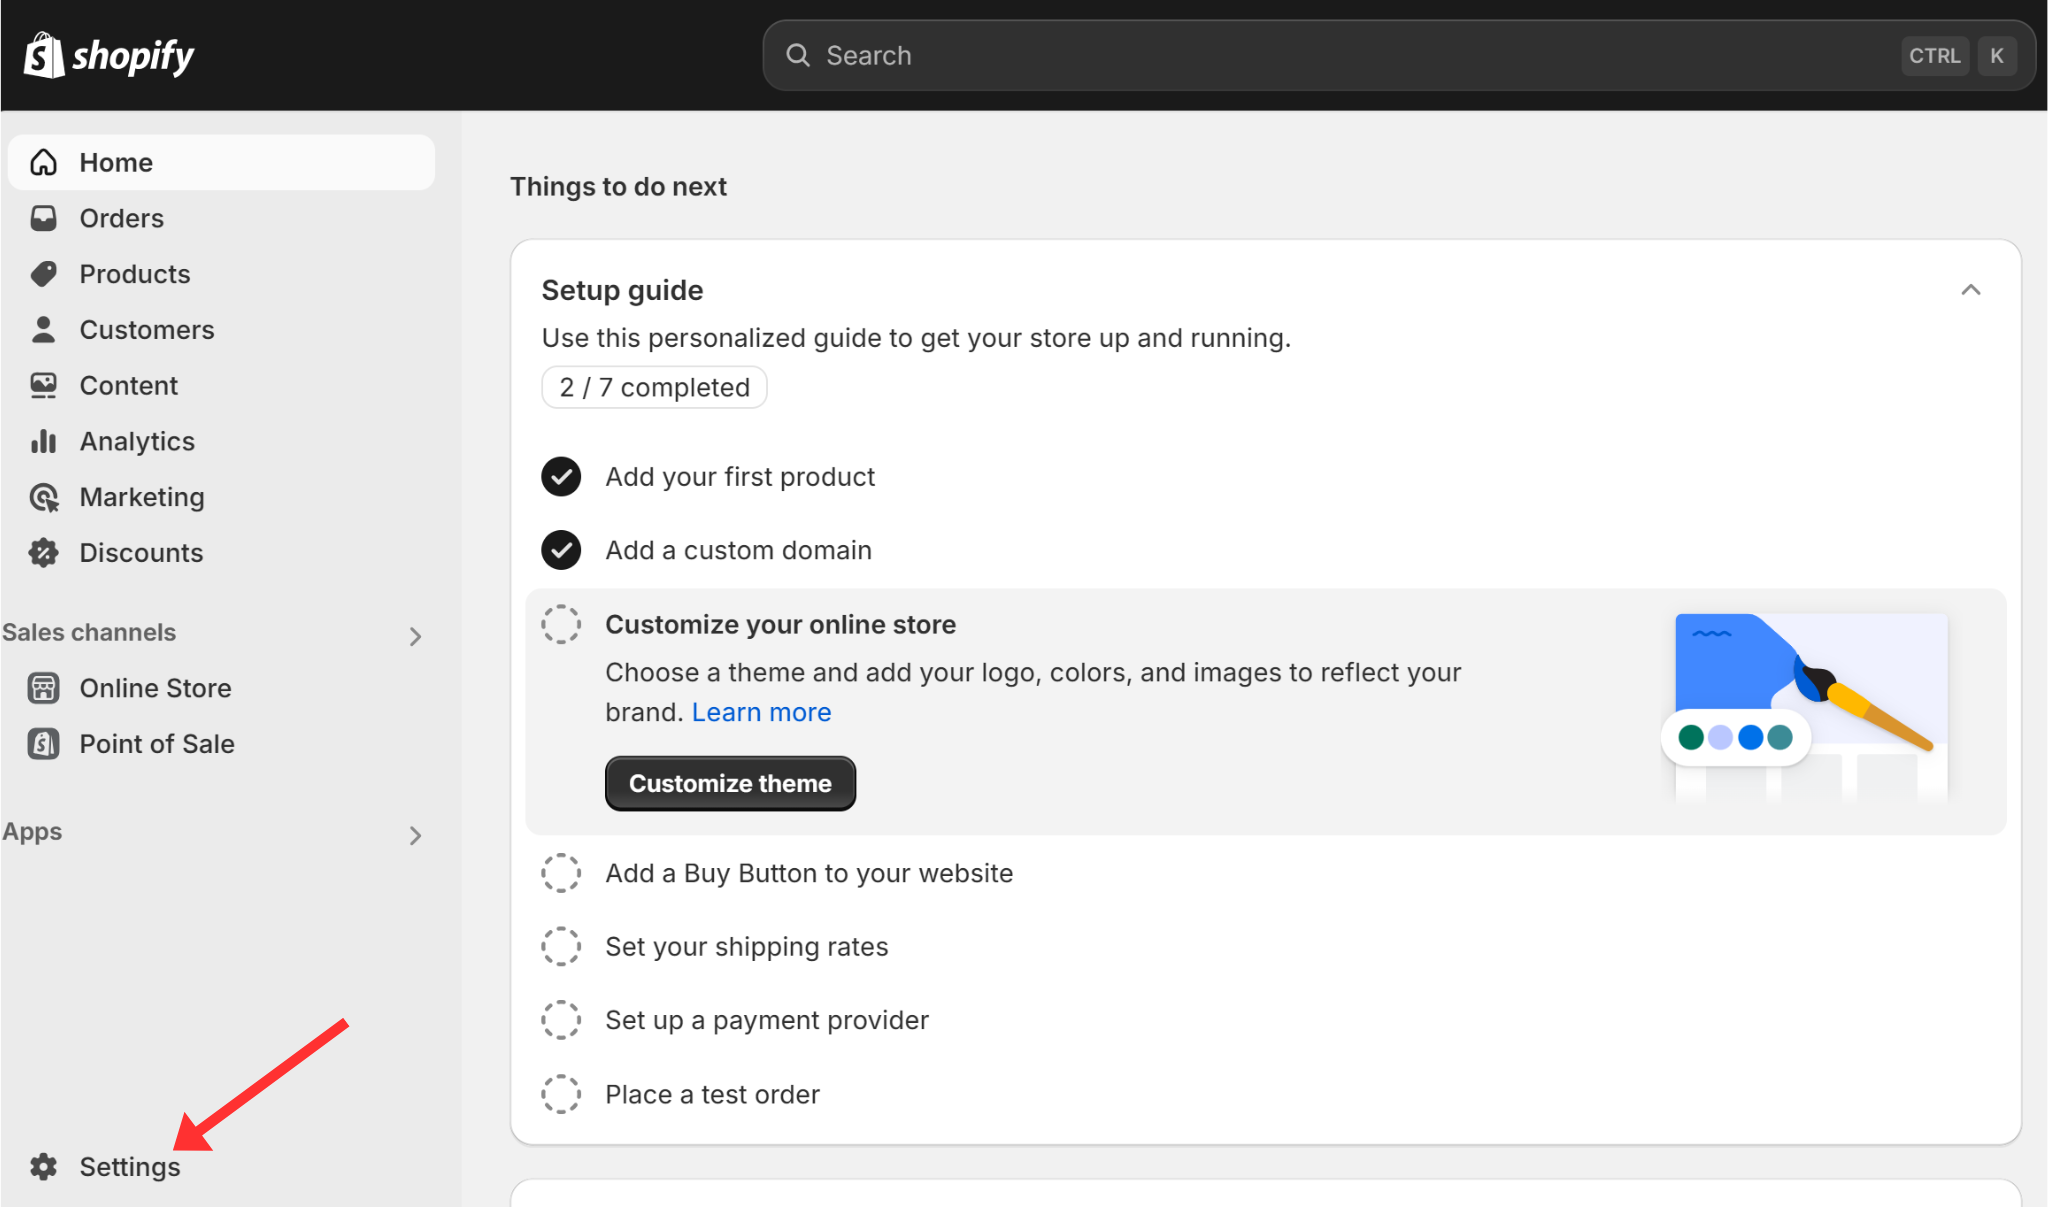
Open the Shopify Settings tab.
-
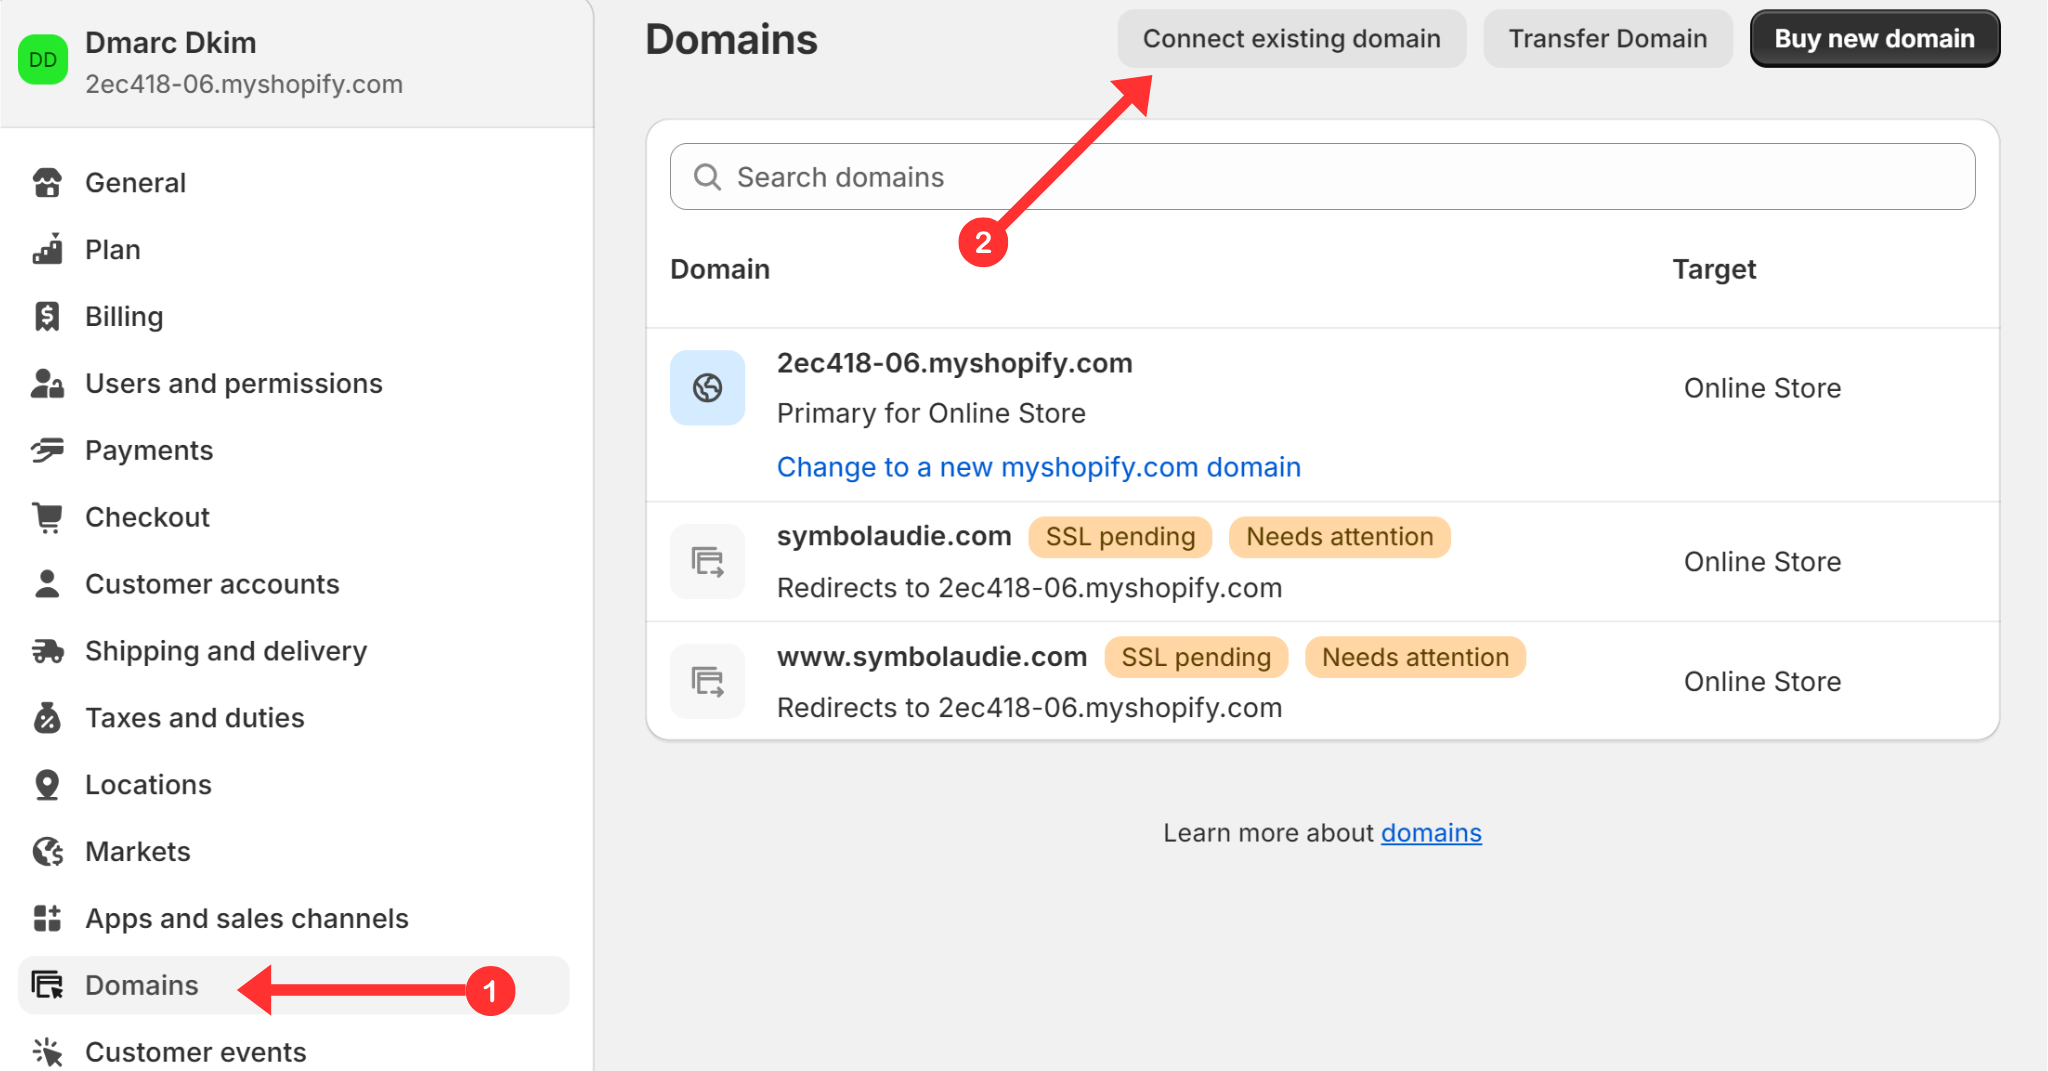
Go to the Domain tab in the left menu and click "Connect Existing Domain."
-
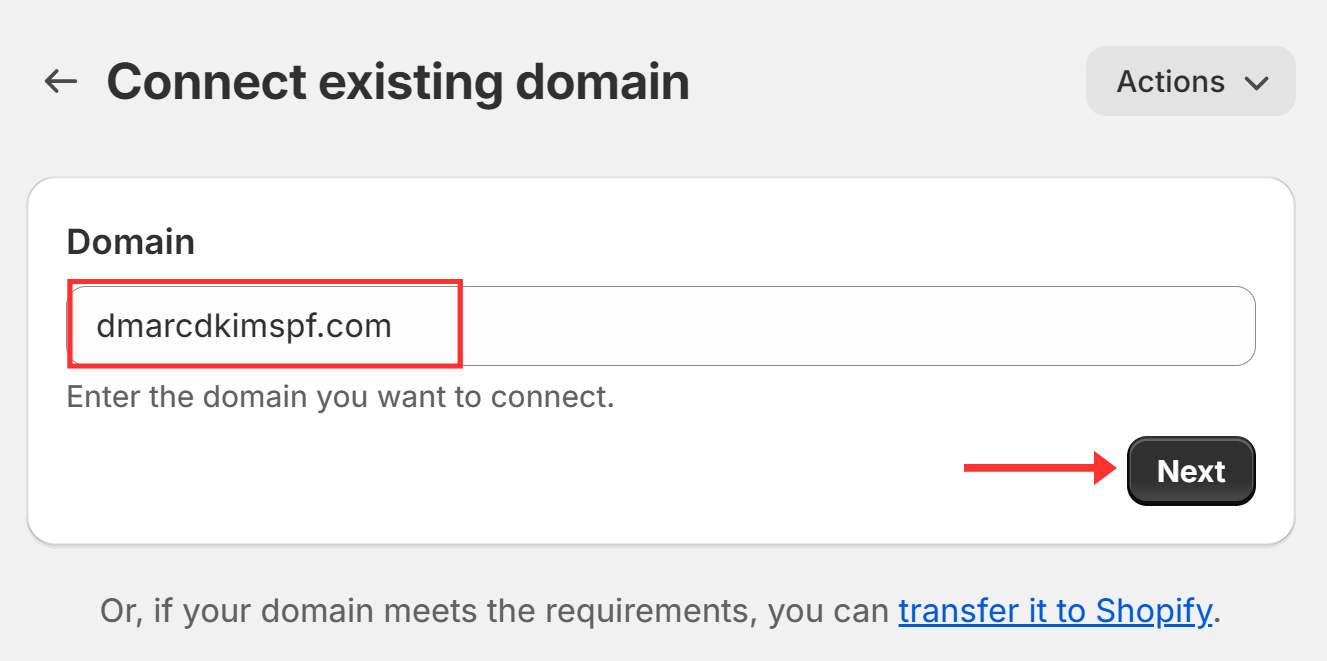
Write down your domain name and click Next.
-
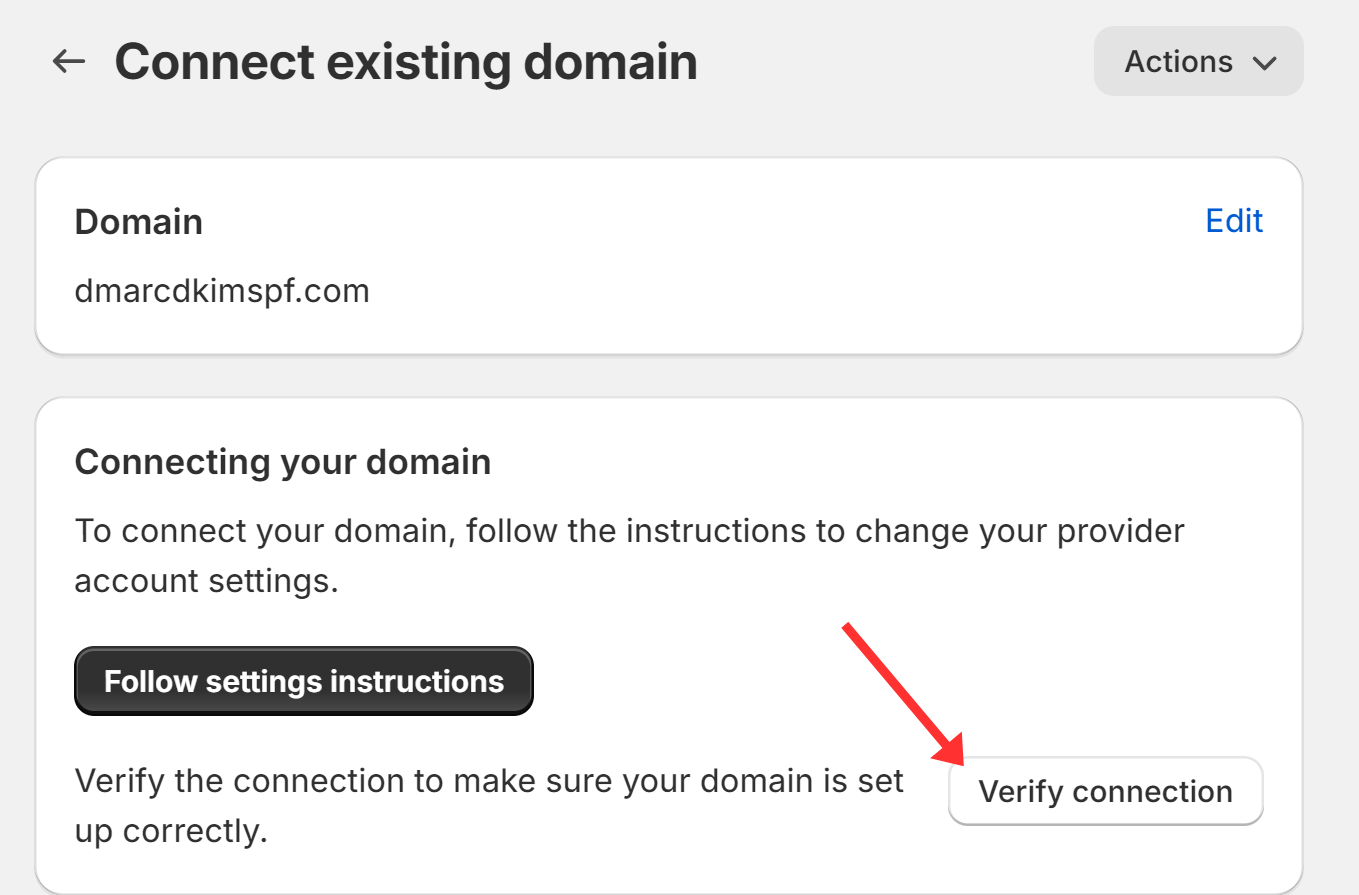
Click Verify Connection.
-
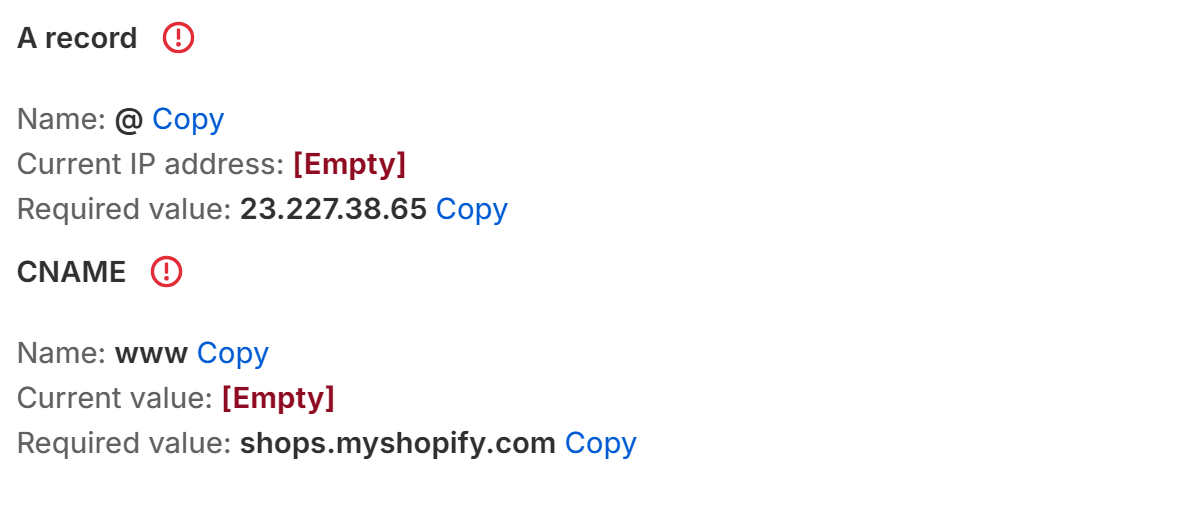
You'll see DNS records for connecting your domain to Shopify. Add these records to your DNS provider.
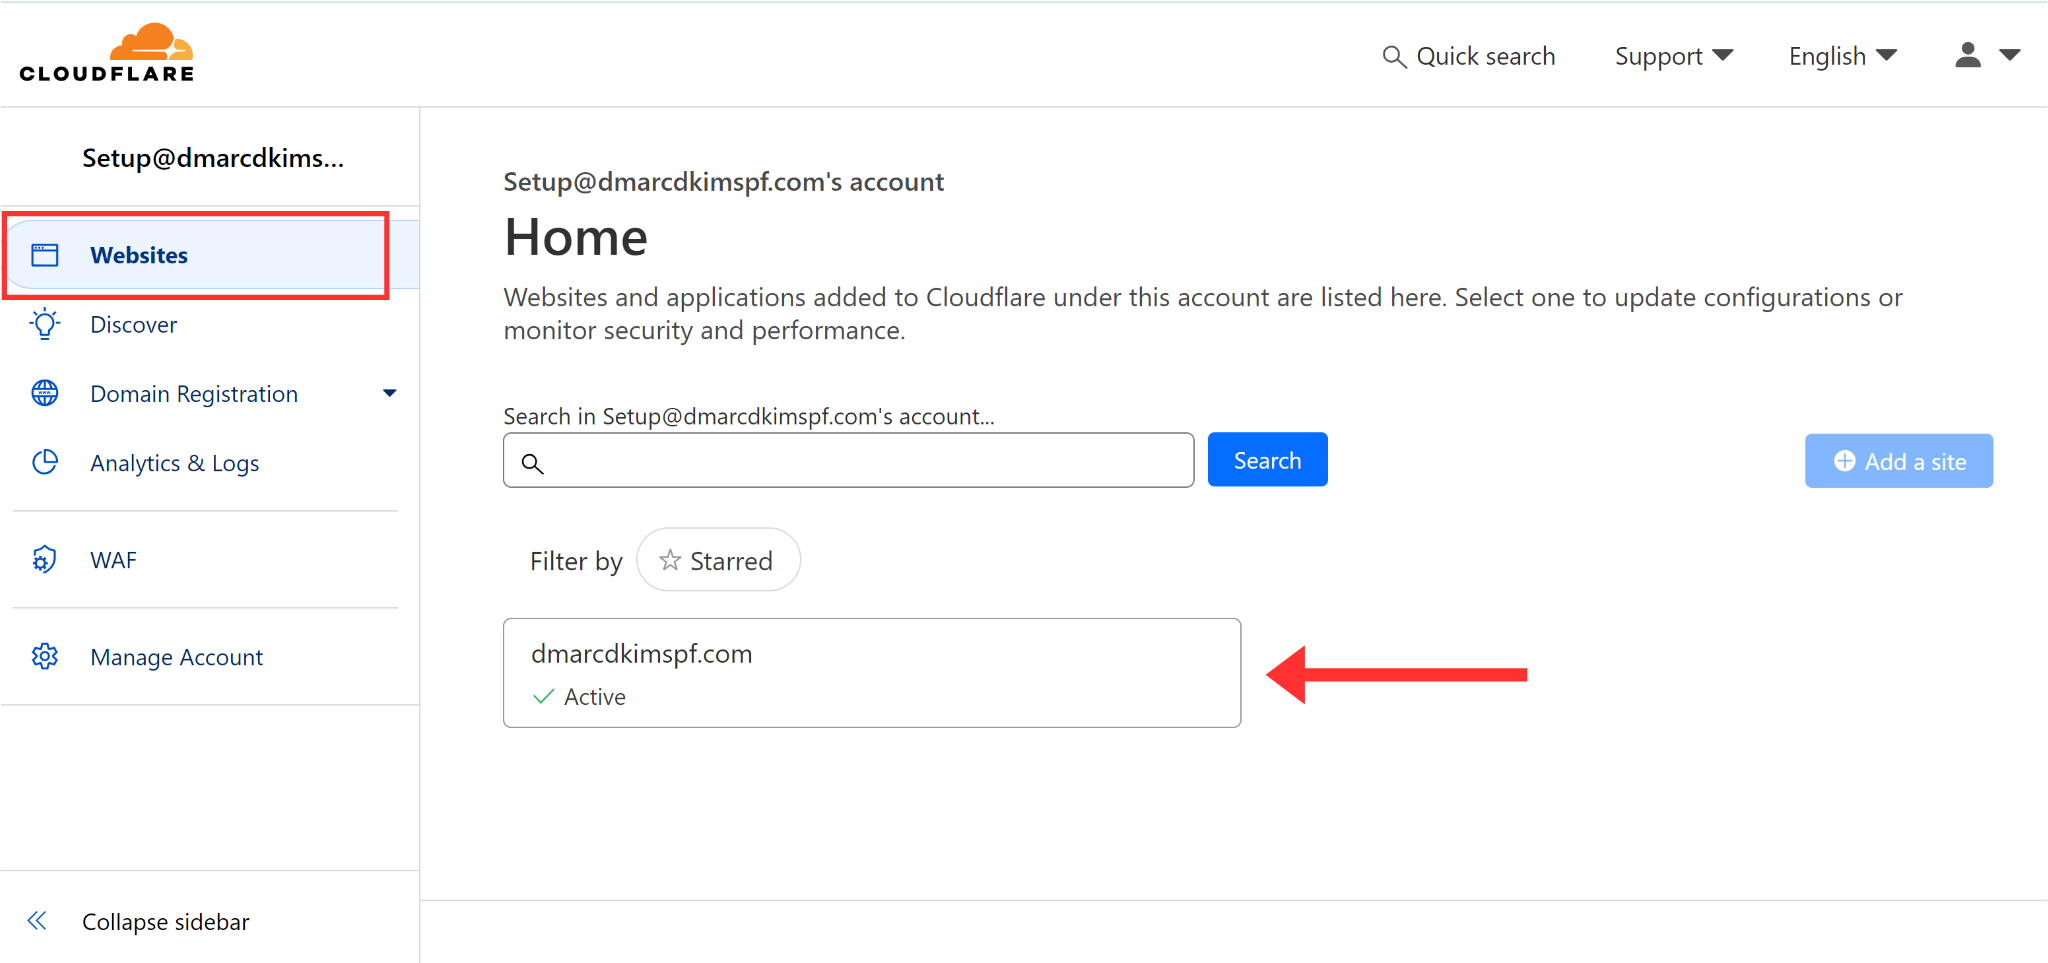
Log in to your DNS provider. We are using Cloudflare for this guide.
-
Go to the Websites tab and click your domain.
-
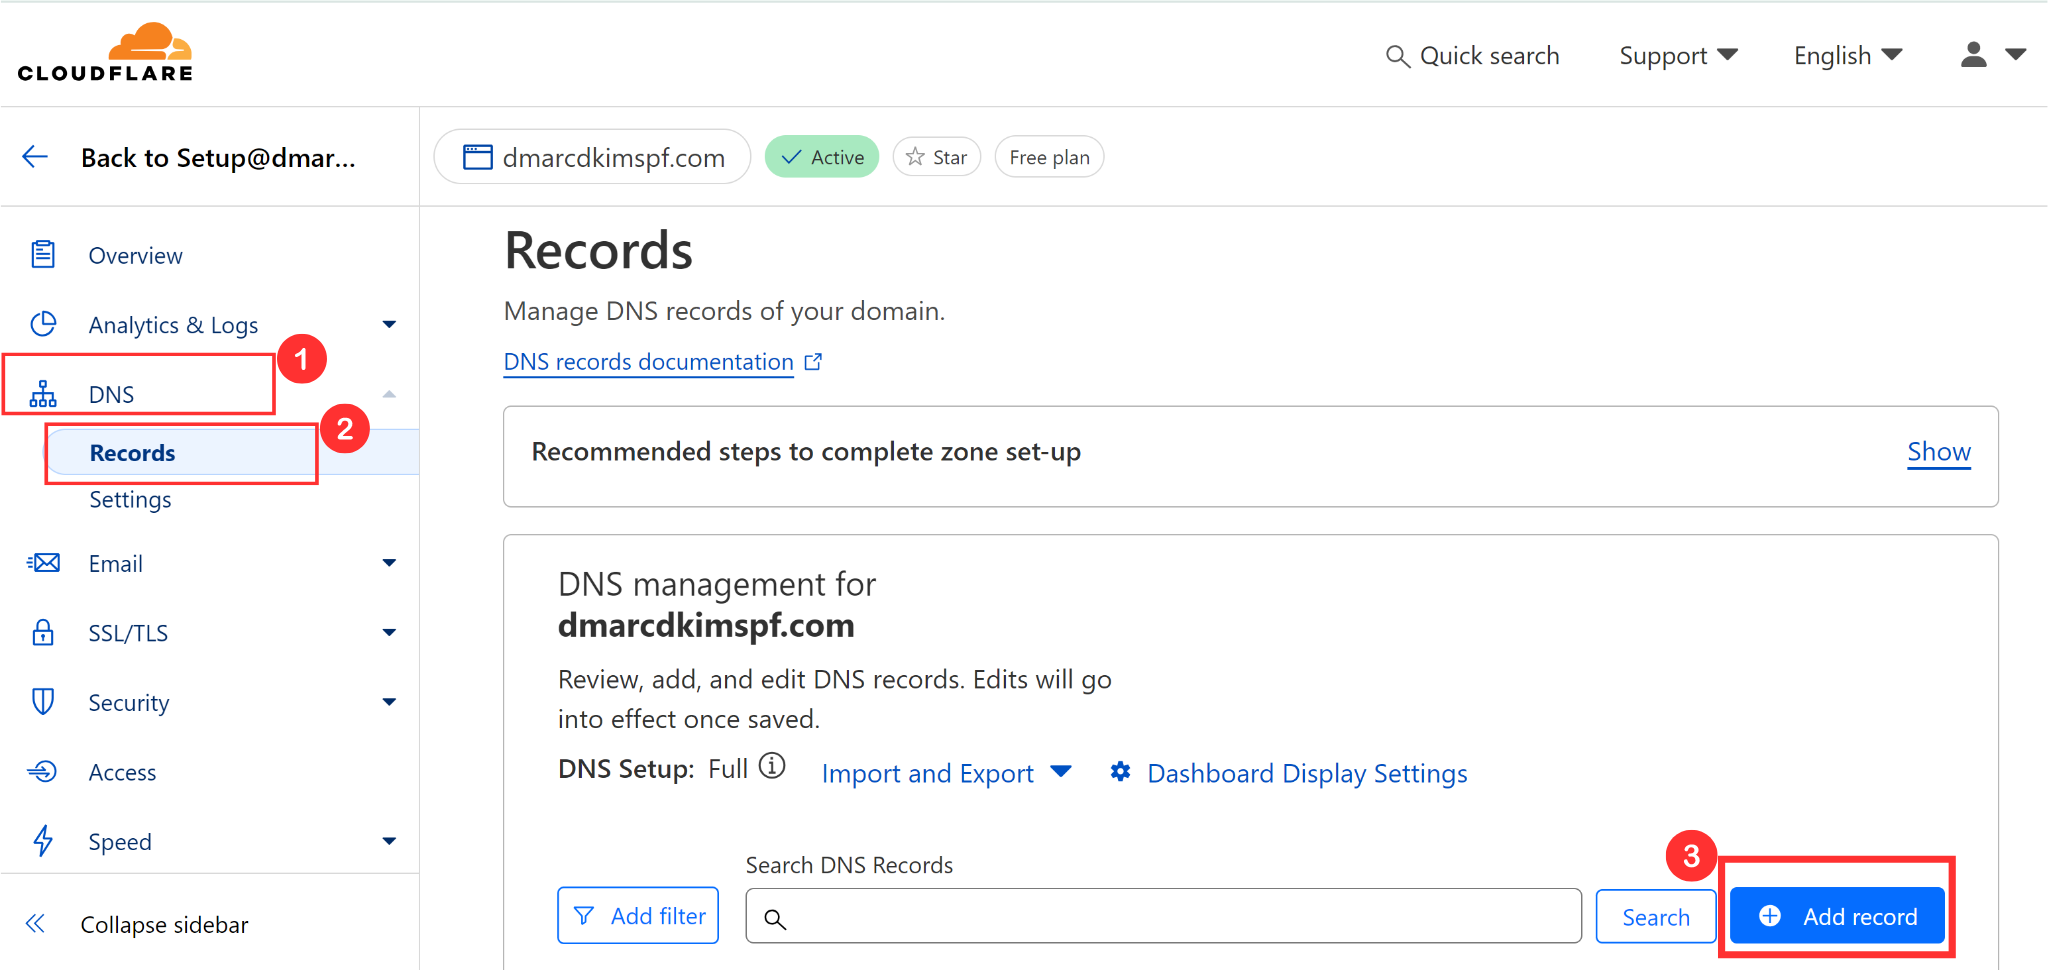
Click DNS, go to Records, and click the Add Record button.
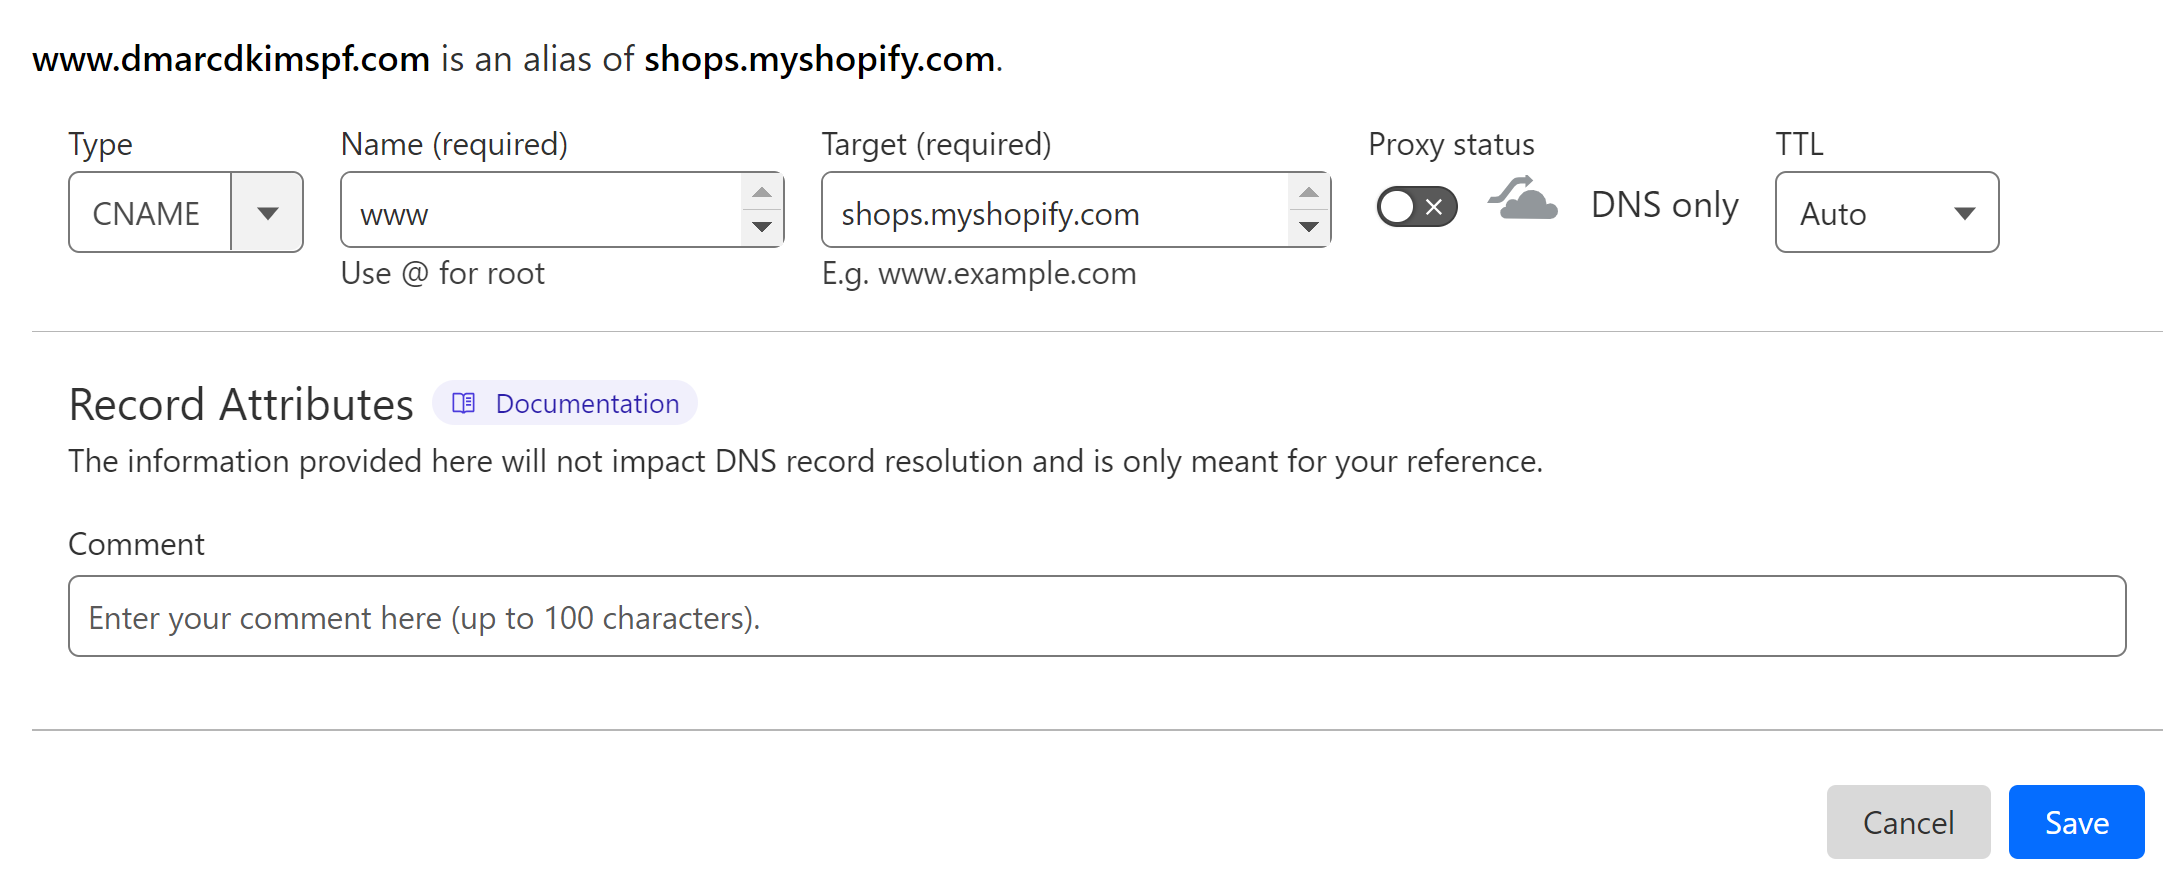
Select the record type A/CNAME.
Add the record name to the Name field.
Add the record value to the Target field.
-
Turn off the proxy status for both, A and CNAME records, and click Save.
After adding the DNS records, click Verify Connection.


Authenticate Domain DKIM and SPF with Shopify:
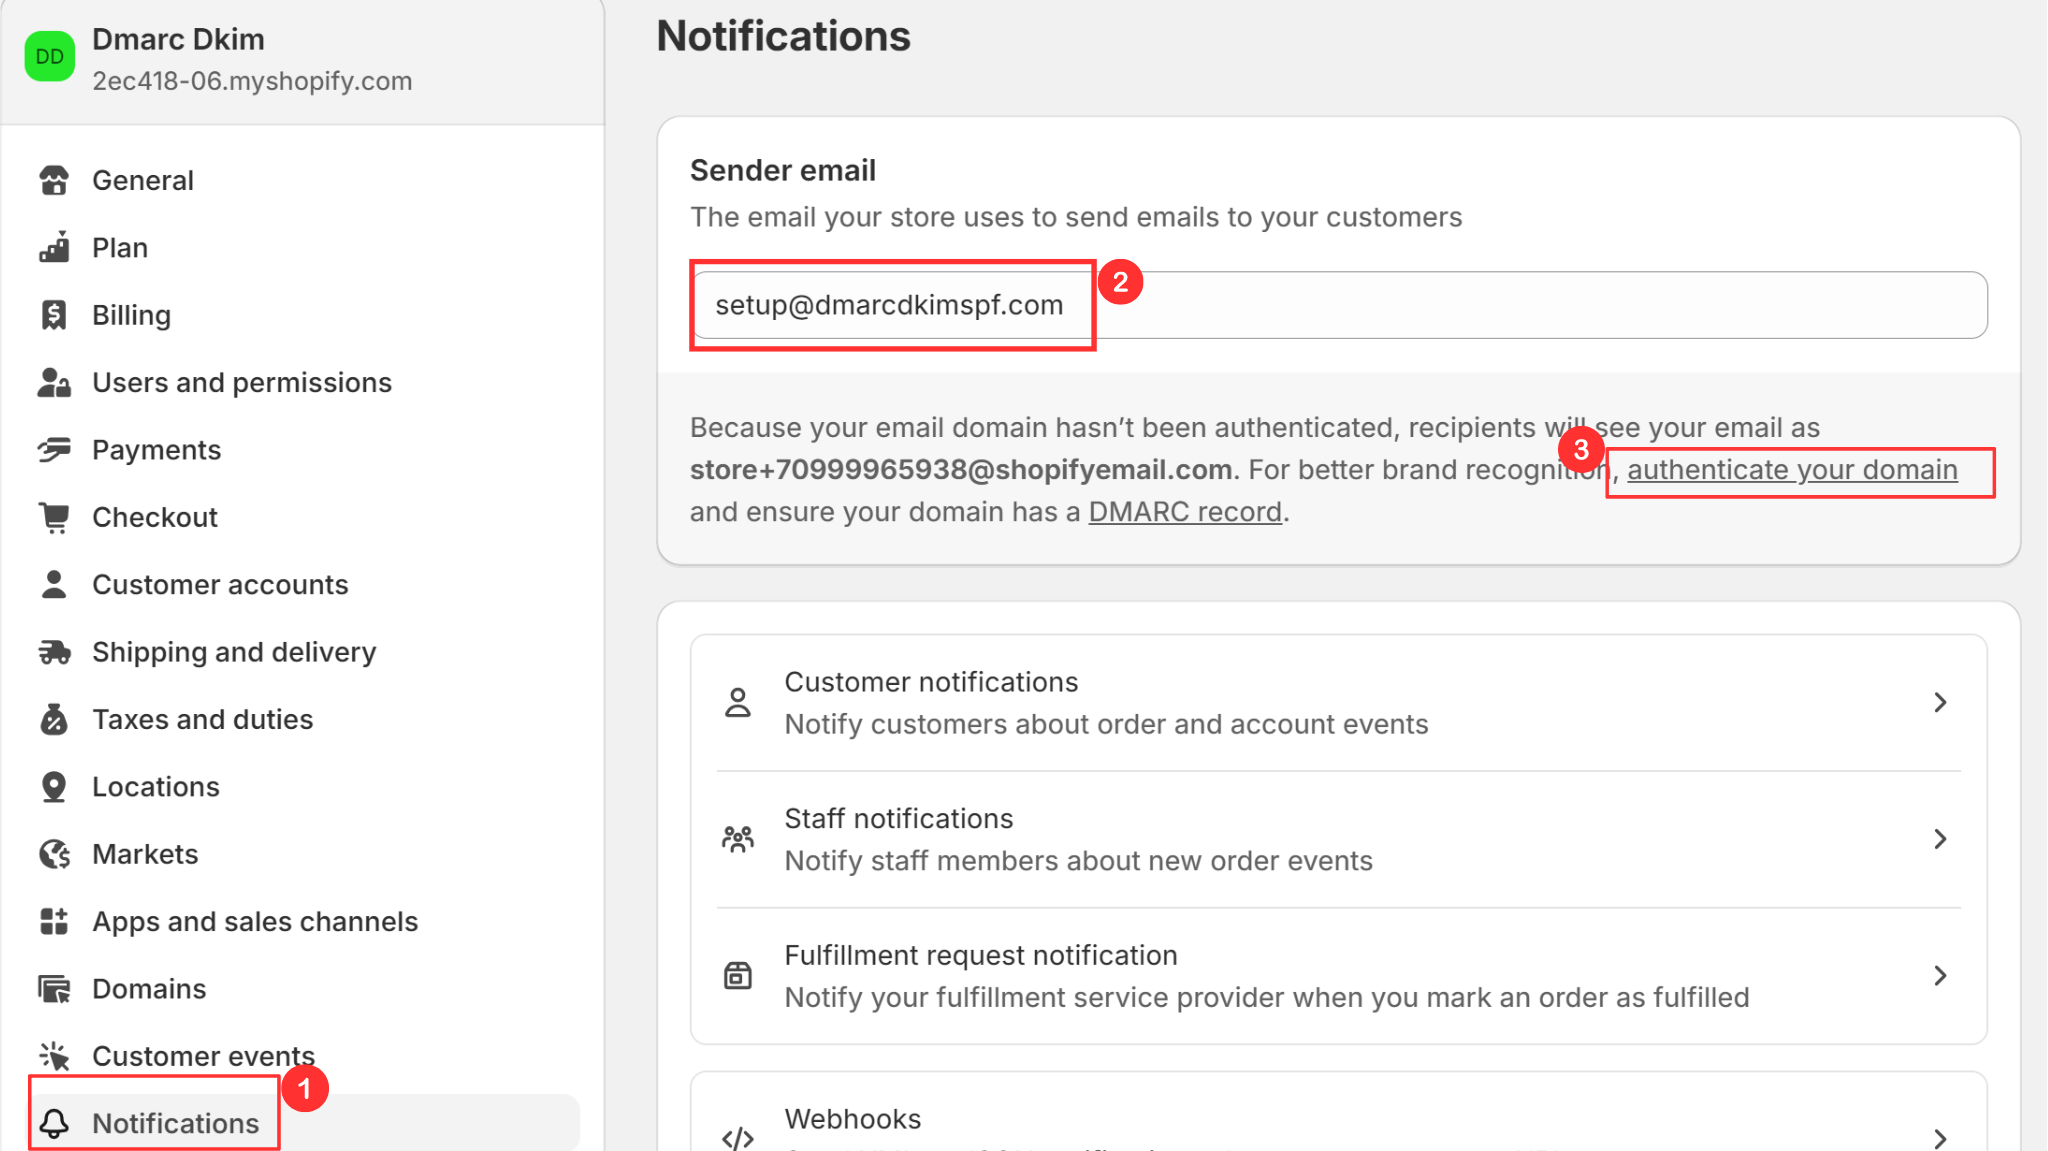
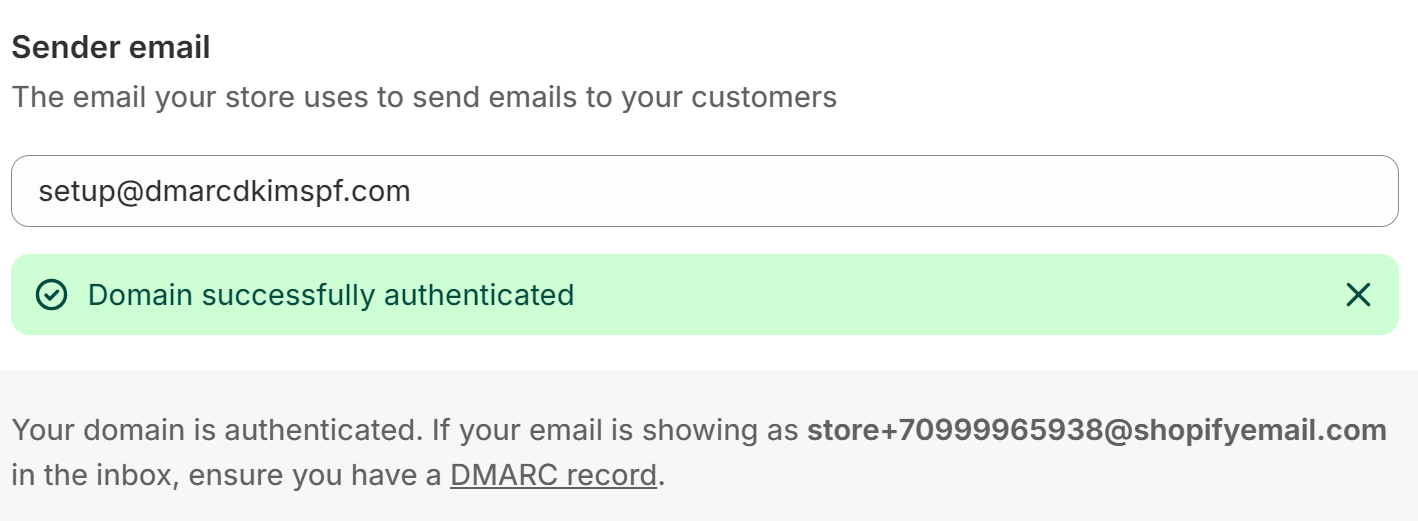
In the Settings, go to the Notifications tab and write your Sender Email Address.
Click "Verify" under the email address.
Open your email inbox and click the verification link.
-
Once verified, click the "Authenticate your domain" option.
-
It will redirect you to the Shopify DNS records page. Add these records to your DNS provider.
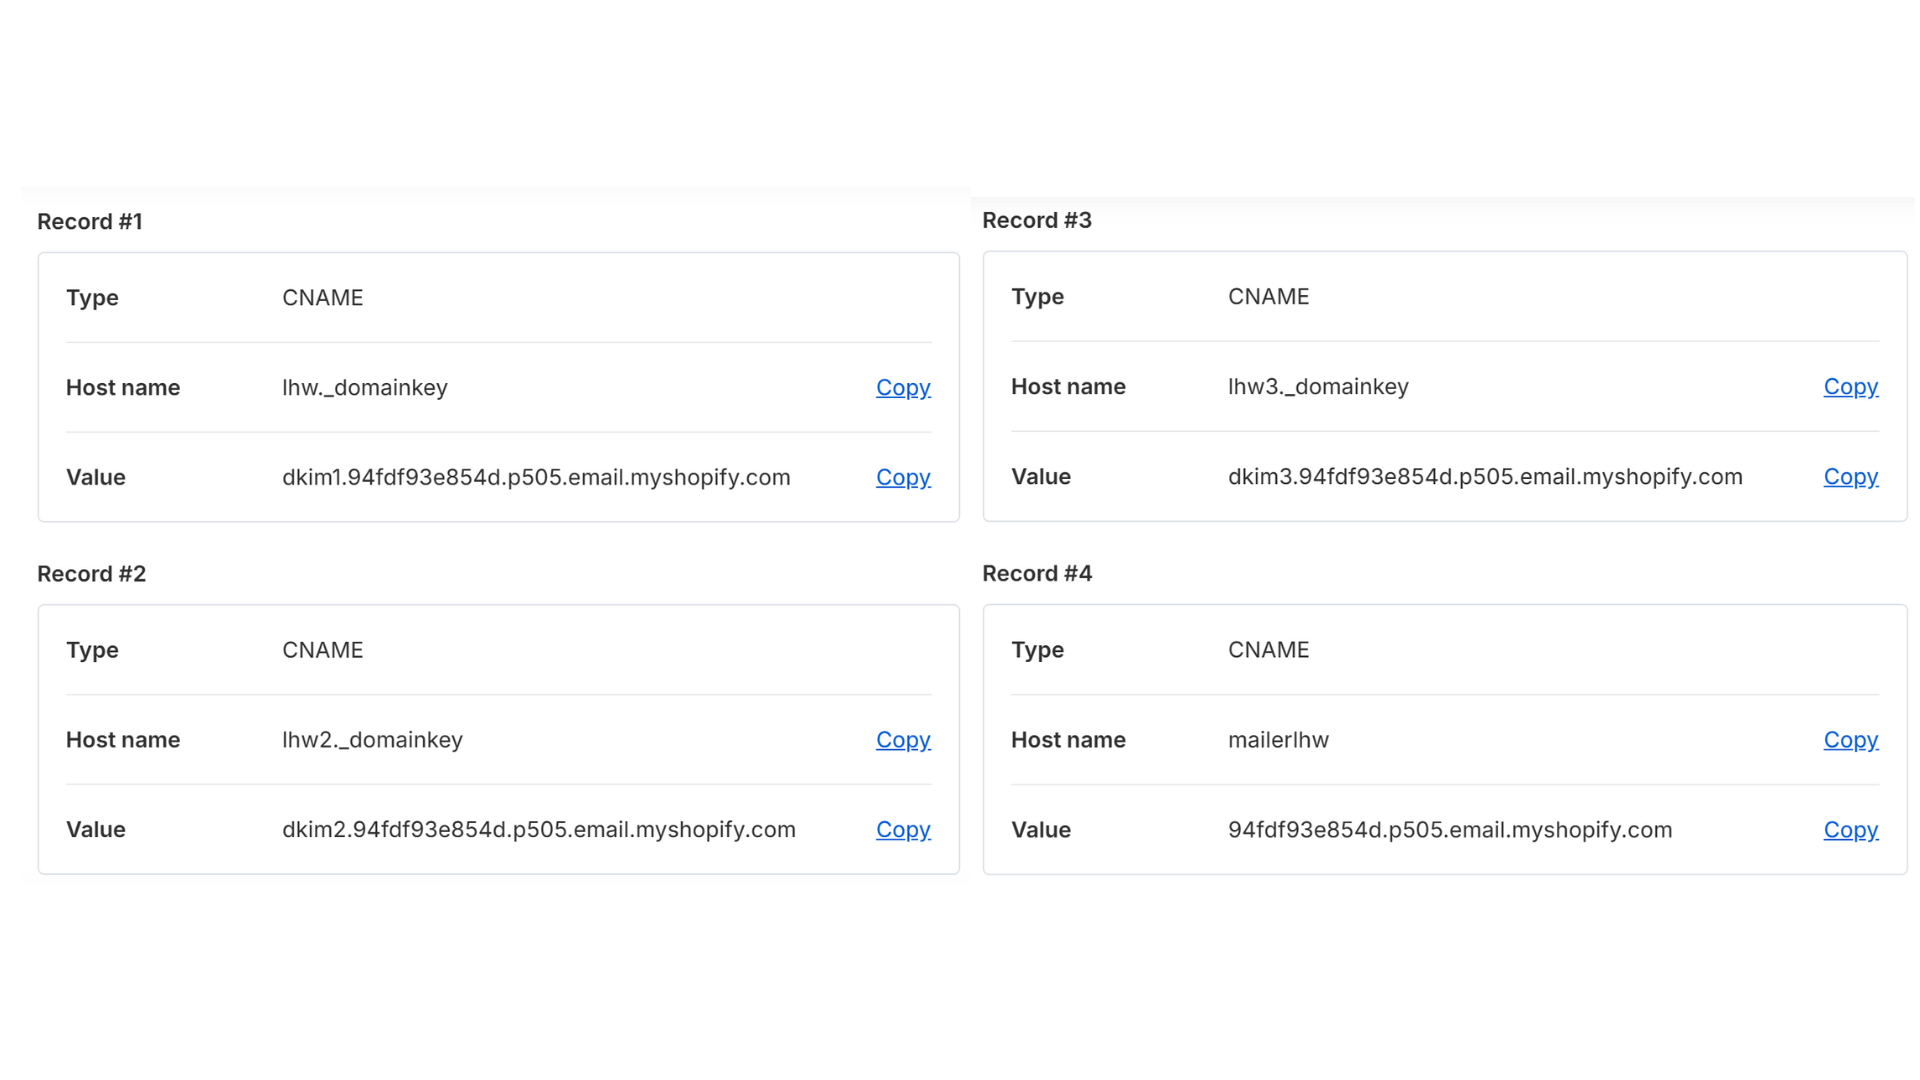
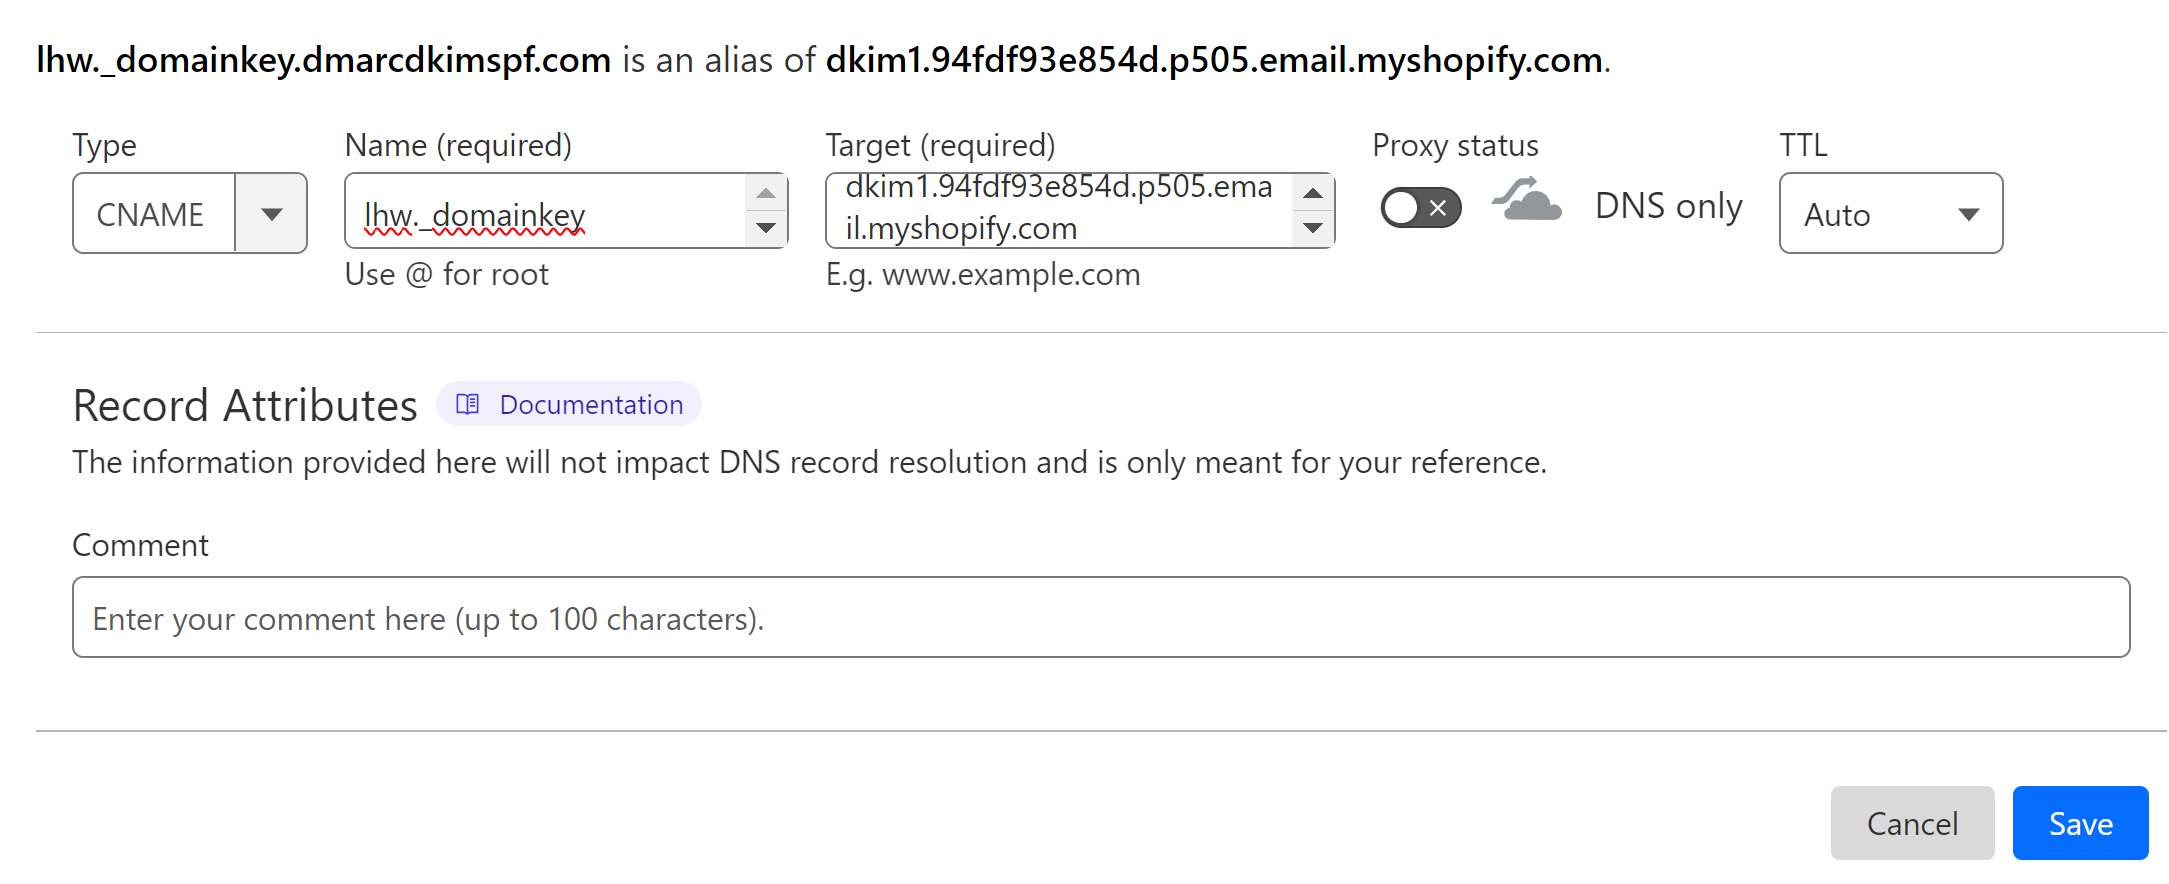
Select the record type CNAME.
Write the Host name in the Name field.
Add the Value in the Target field.
-
Turn off the Proxy status and click Save.
Repeat the same process to add all the CNAME records.


Verify Shopify DKIM and SPF DNS Records:
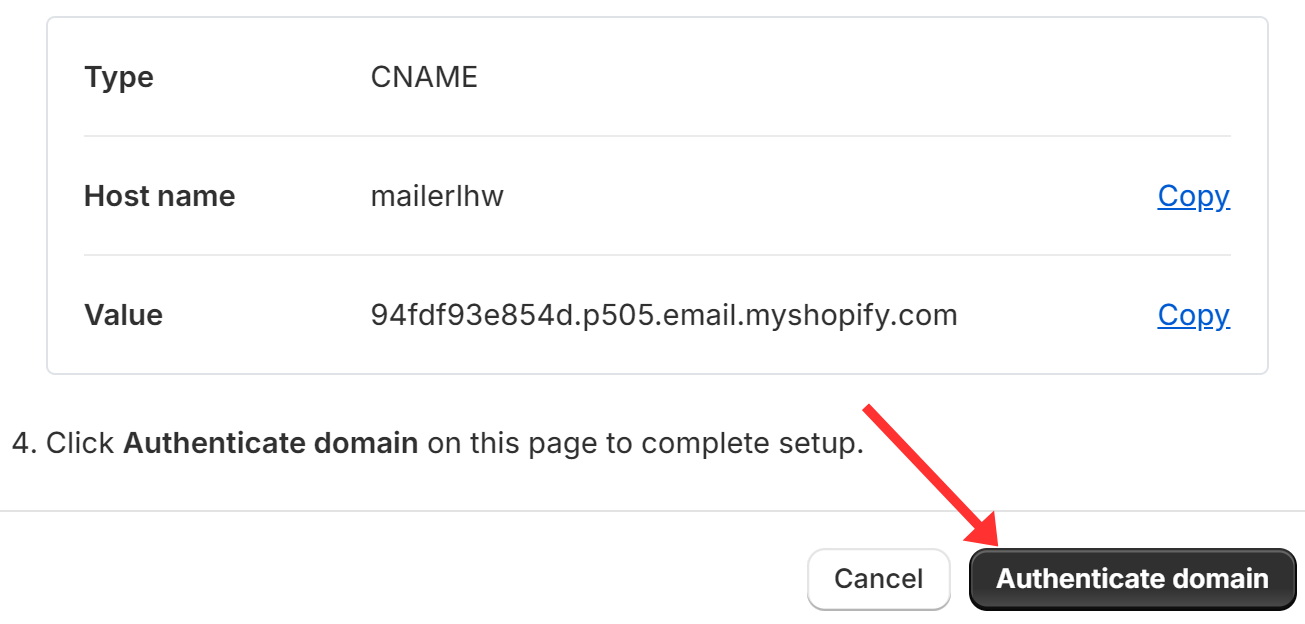
-
Once all records are added to the DNS provider, click the Authenticate Domain button.
-
If records are verified, you will see a green highlighted text "Domain Successfully Authenticated."


NOTE: The Shopify DNS records may take up to 24 hours to get verified.
If the domain doesn't authenticate after 24 hours, there might be a misconfiguration in your DNS setup. To troubleshoot the authentication issues, hire a DmarcDkim.com expert.
Setup Shopify DMARC Record:
To generate a DMARC record, use the DmacDkim.com tool. This tool not only allows you to set a strict policy for unauthorized emails but also gives you insights into your email performance so you can take action accordingly.
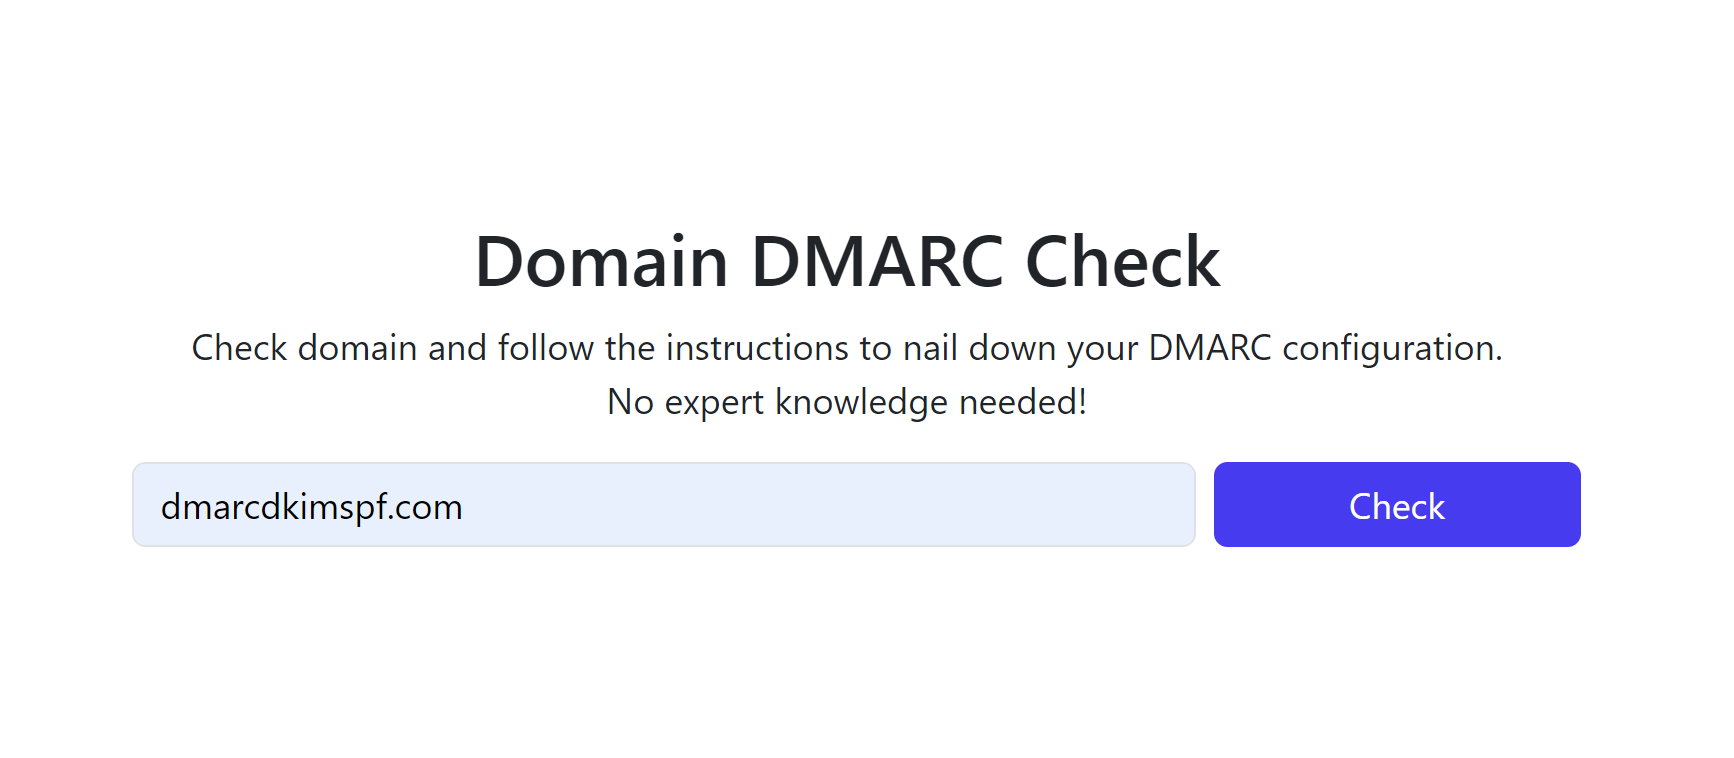
Go to the DMARC Checker.
-
Write down your domain name and click Check.
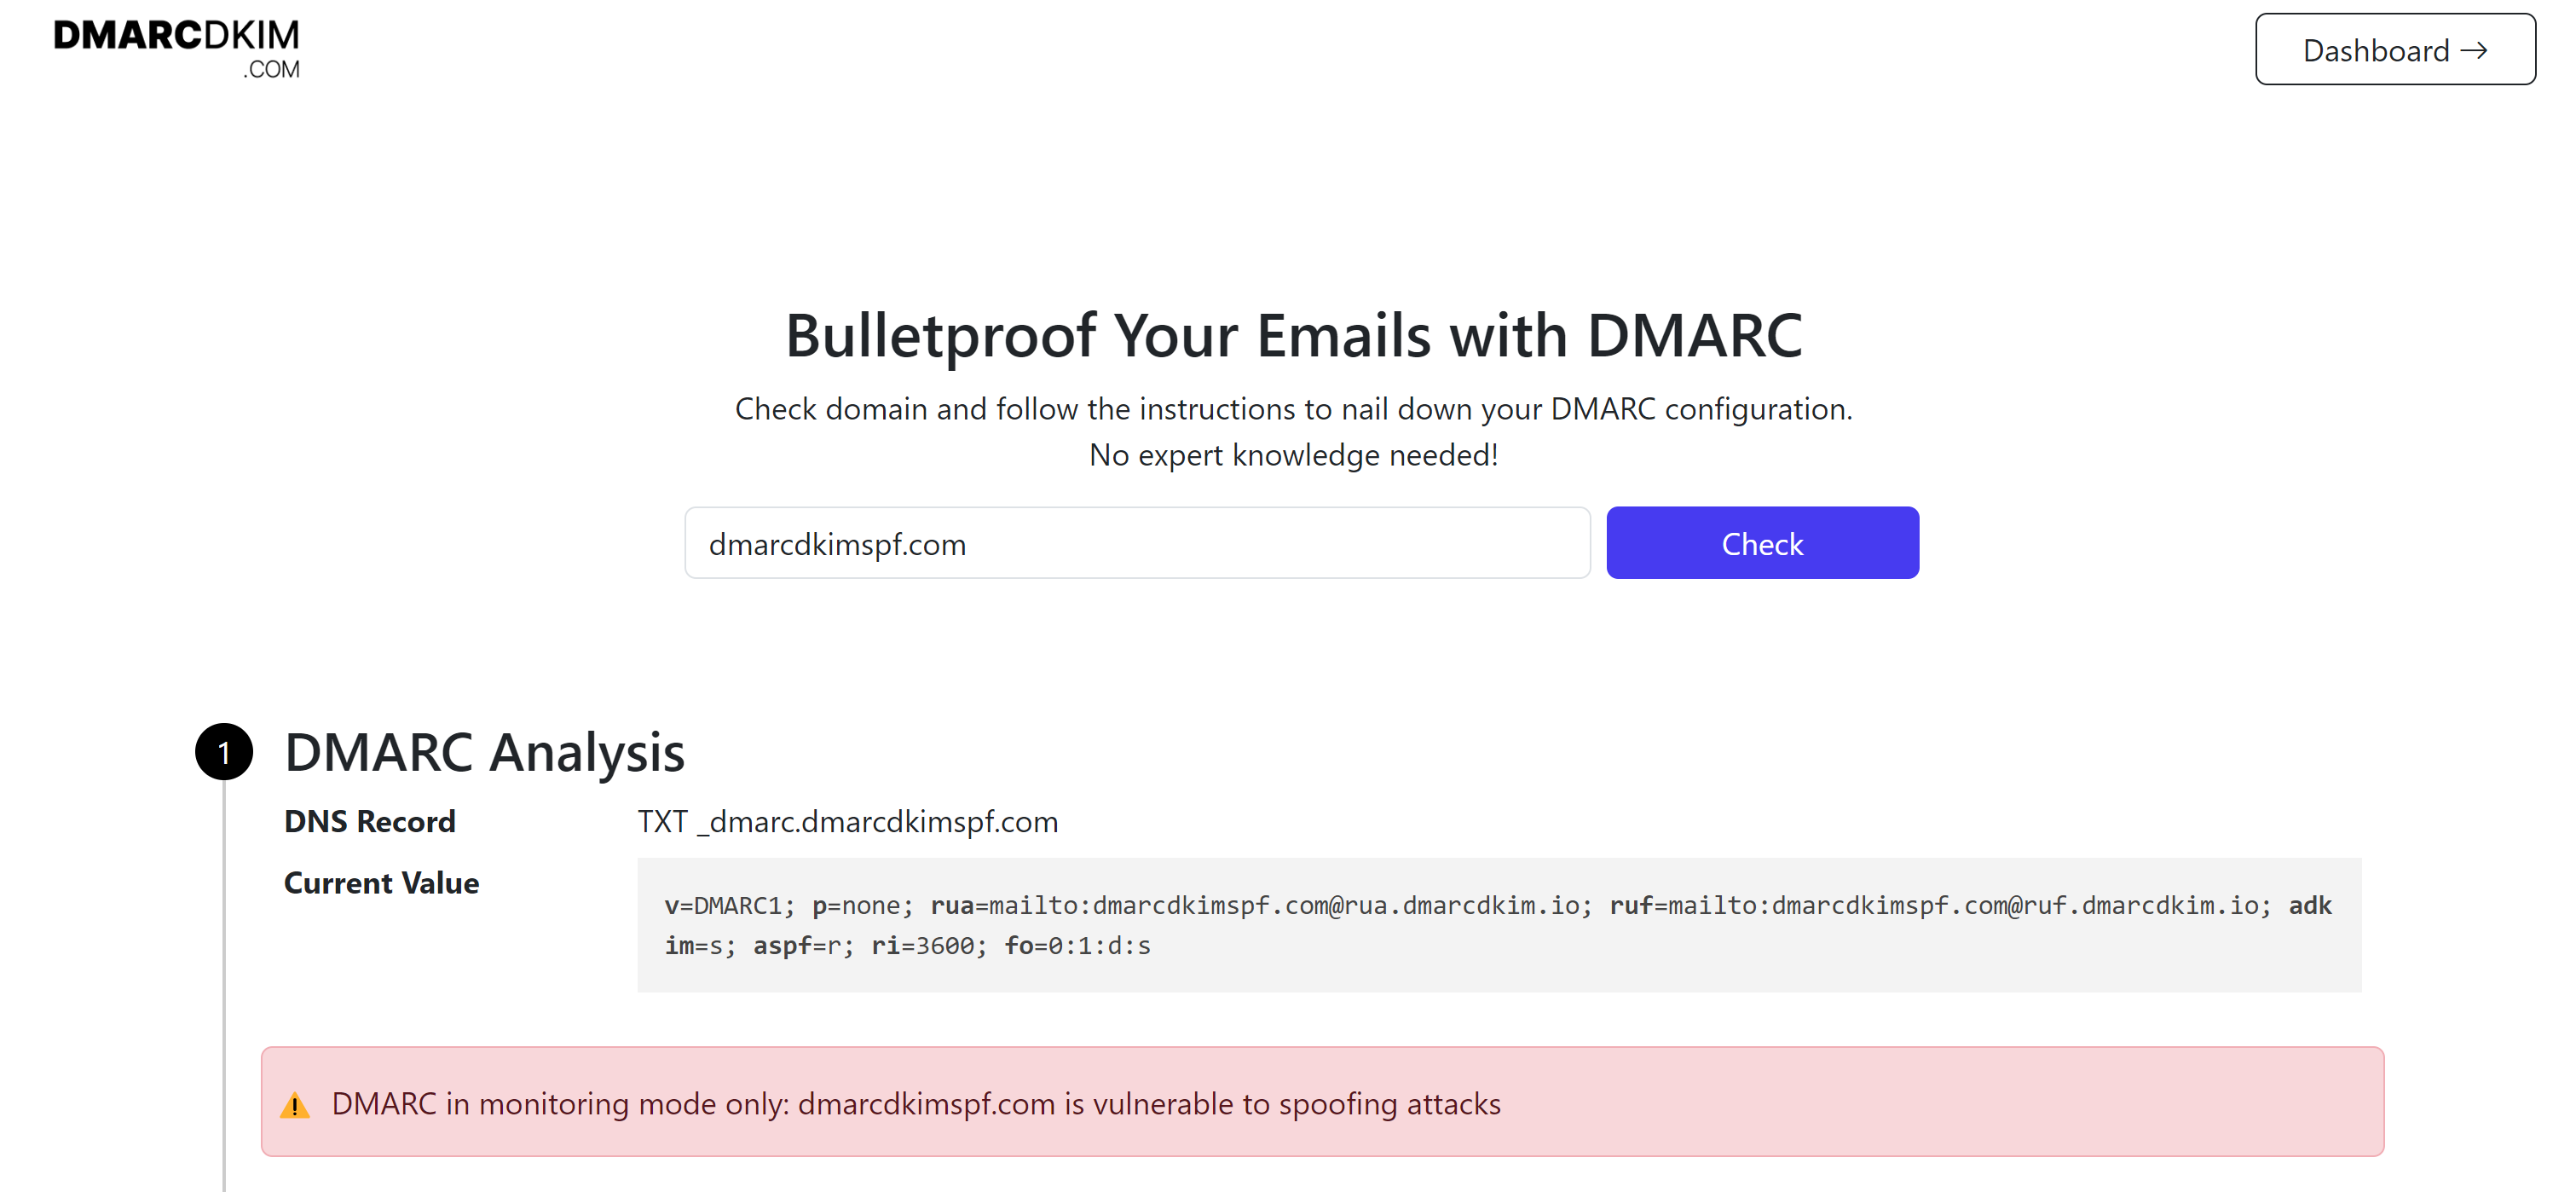
-
Copy the record name and suggested value and add them to your DNS provider.
After adding the DMARC record, sign it to the DMARC Dashboard to see reports.


Check domain and follow the instructions to nail down your DMARC configuration.
No expert knowledge needed!