How to authenticate domain with SendGrid DMARC, DKIM and SPF DNS records?
Check your domain for DMARC, DKIM, SPF and MX records. Get a free report.
Configure Domain Authentication - SendGrid DMARC, DKIM, SPF
Twilio SendGrid generates DNS records to authenticate your email domain for better and more secure email communication. Setting up domain authentication builds trust with email inbox services so that they know your emails come from a legitimate source. Without verification, inbox service providers like Gmail and Yahoo mark emails as spam.
Configuring DNS records in Twilio SendGrid may sound cumbersome but it's a crucial step for a successful email campaign. That's why, we are here to guide you through email verification and domain authentication.
In the left side panel, click Settings and go to Sender Authentication.
-
Click Authenticate Your Domain.

-
Click the drop-down arrow to choose your DNS provider (we are using Cloudflare for this tutorial), select "NO" for the branding links option, and click Next.

-
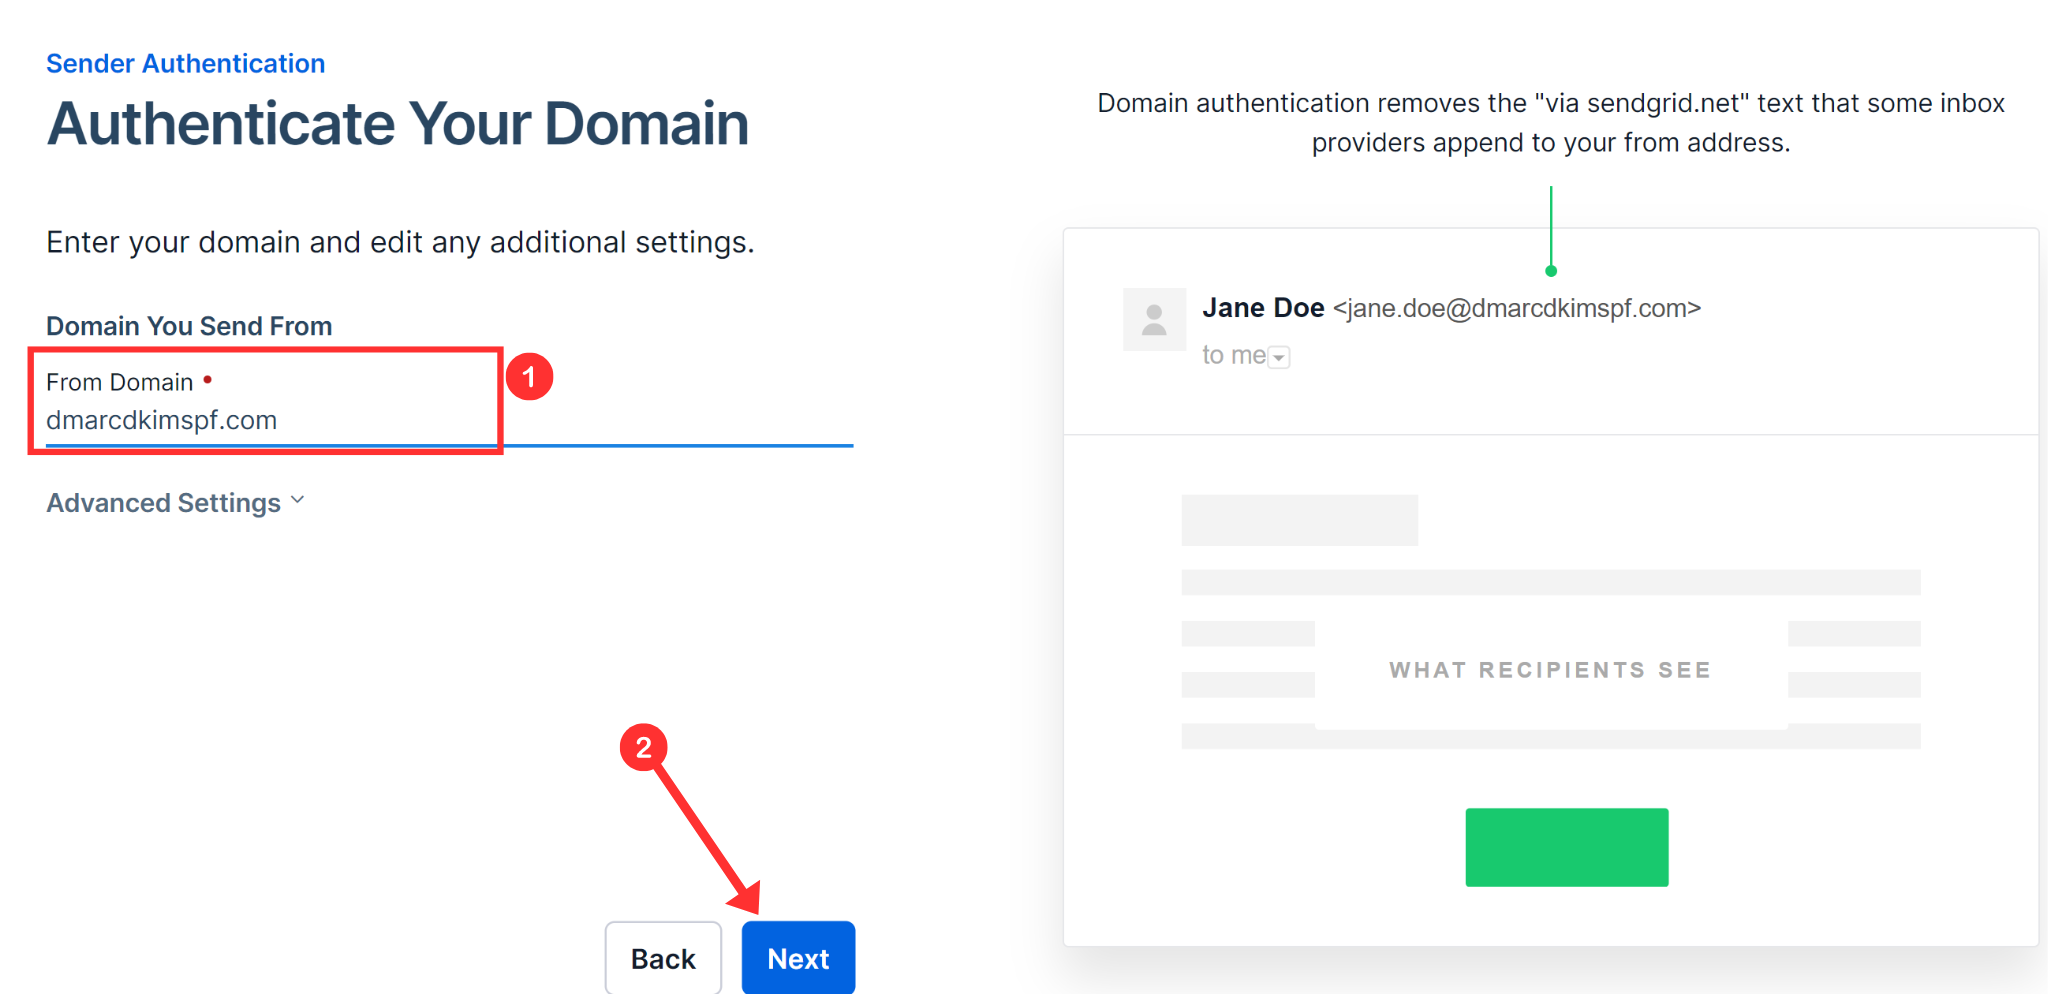
Write down your From Domain and click Next.

-
On the next screen, you'll see SendGrid CNAME, DKIM, and DMARC records. Copy each record and add it to your DNS dashboard.

Note: There is an option for automatic authentication, currently exclusive to GoDaddy. However, no instructions are provided for utilizing GoDaddy's automatic authentication feature.

-
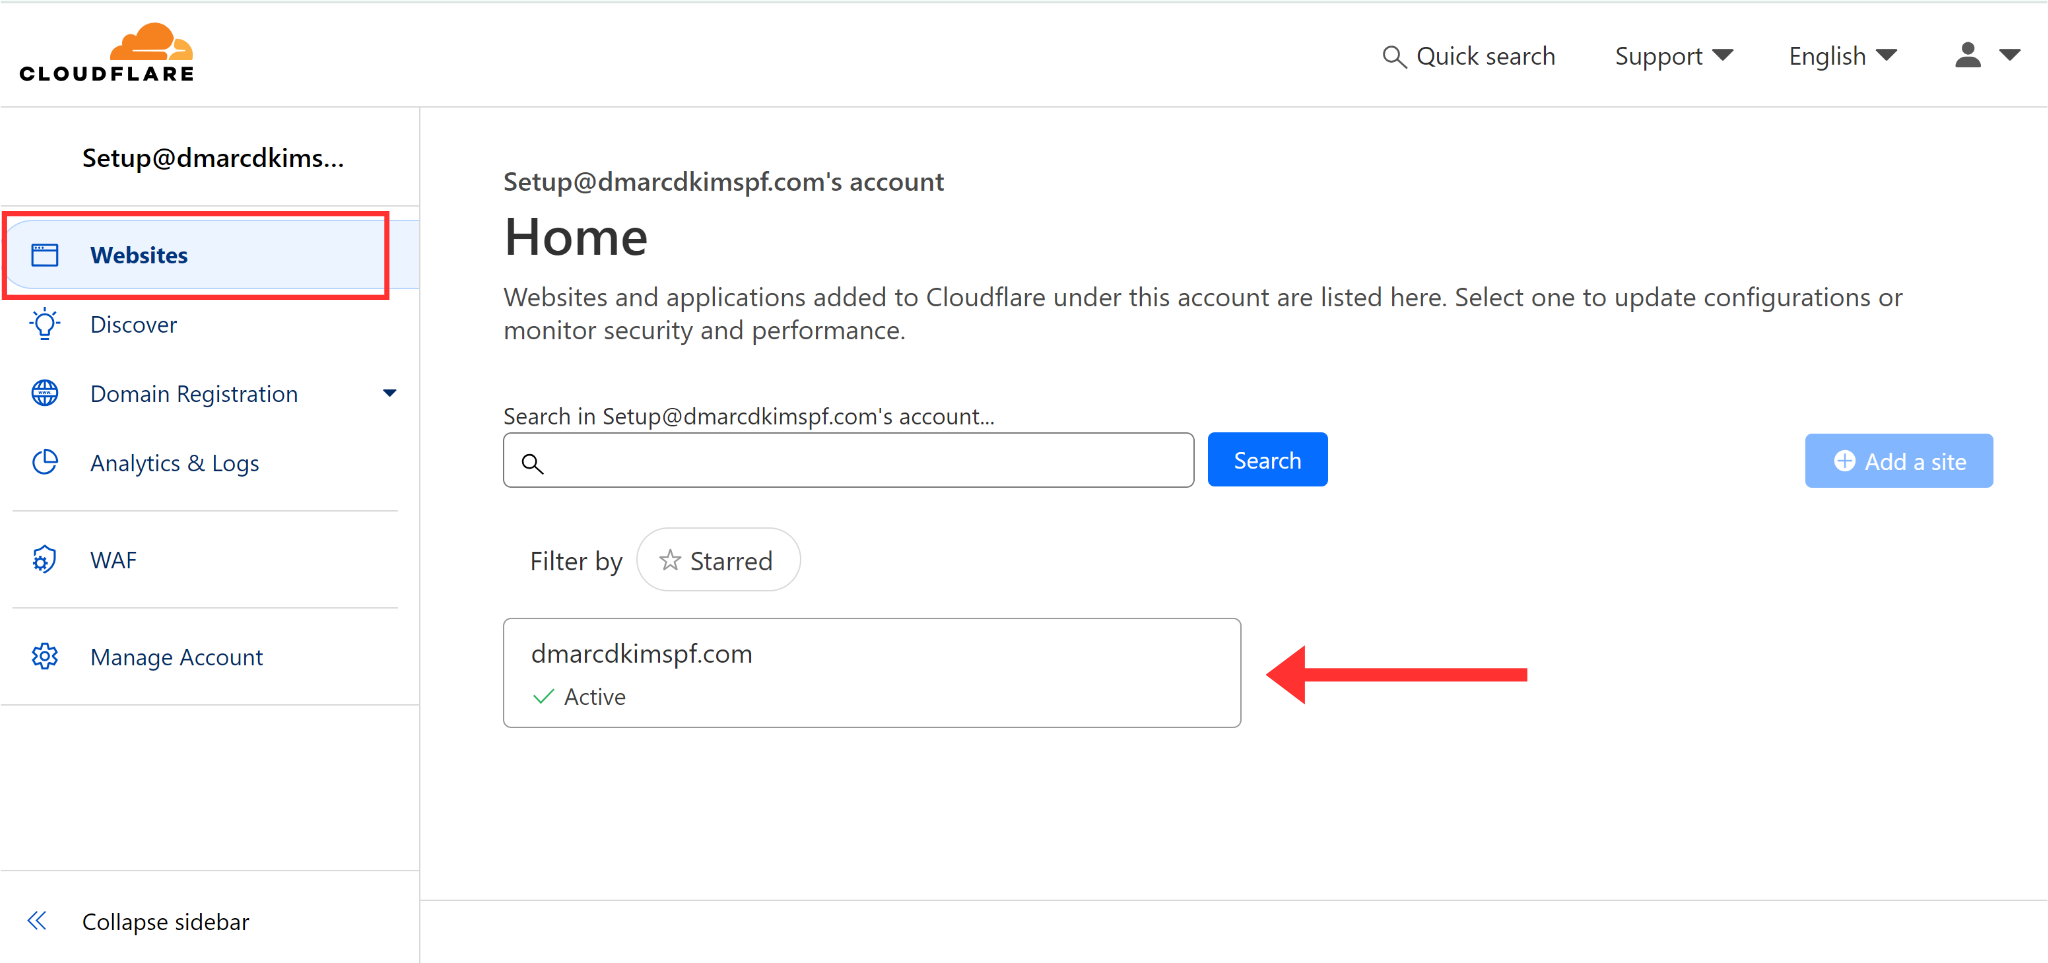
To add new records, open the DNS provider (Cloudflare) Home tab and click on your Website.

-
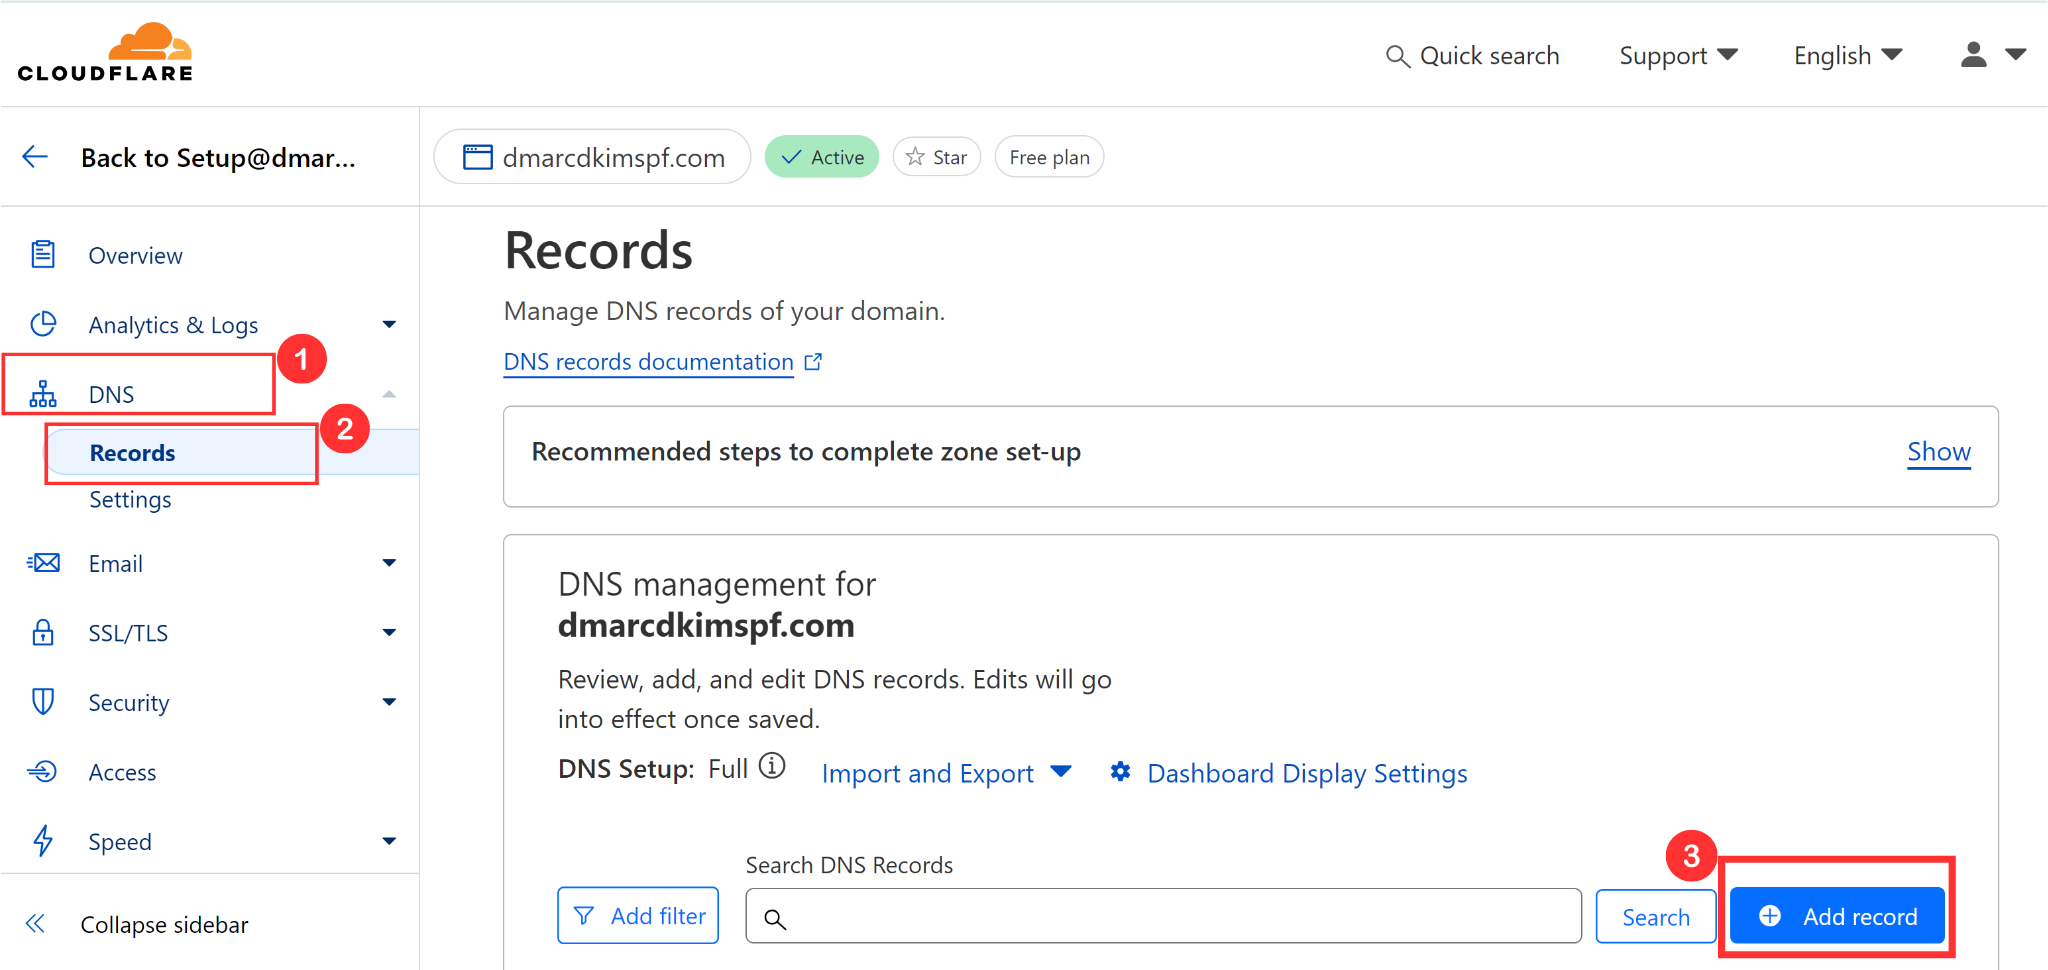
Open DNS, go to Records and click Add Record.

-
Write the record name and value in the designated fields and click Save. NOTE: Always turn off the proxy for CNAME records because when it is turned on, the traffic will go to the Cloudflare server instead of the email server.

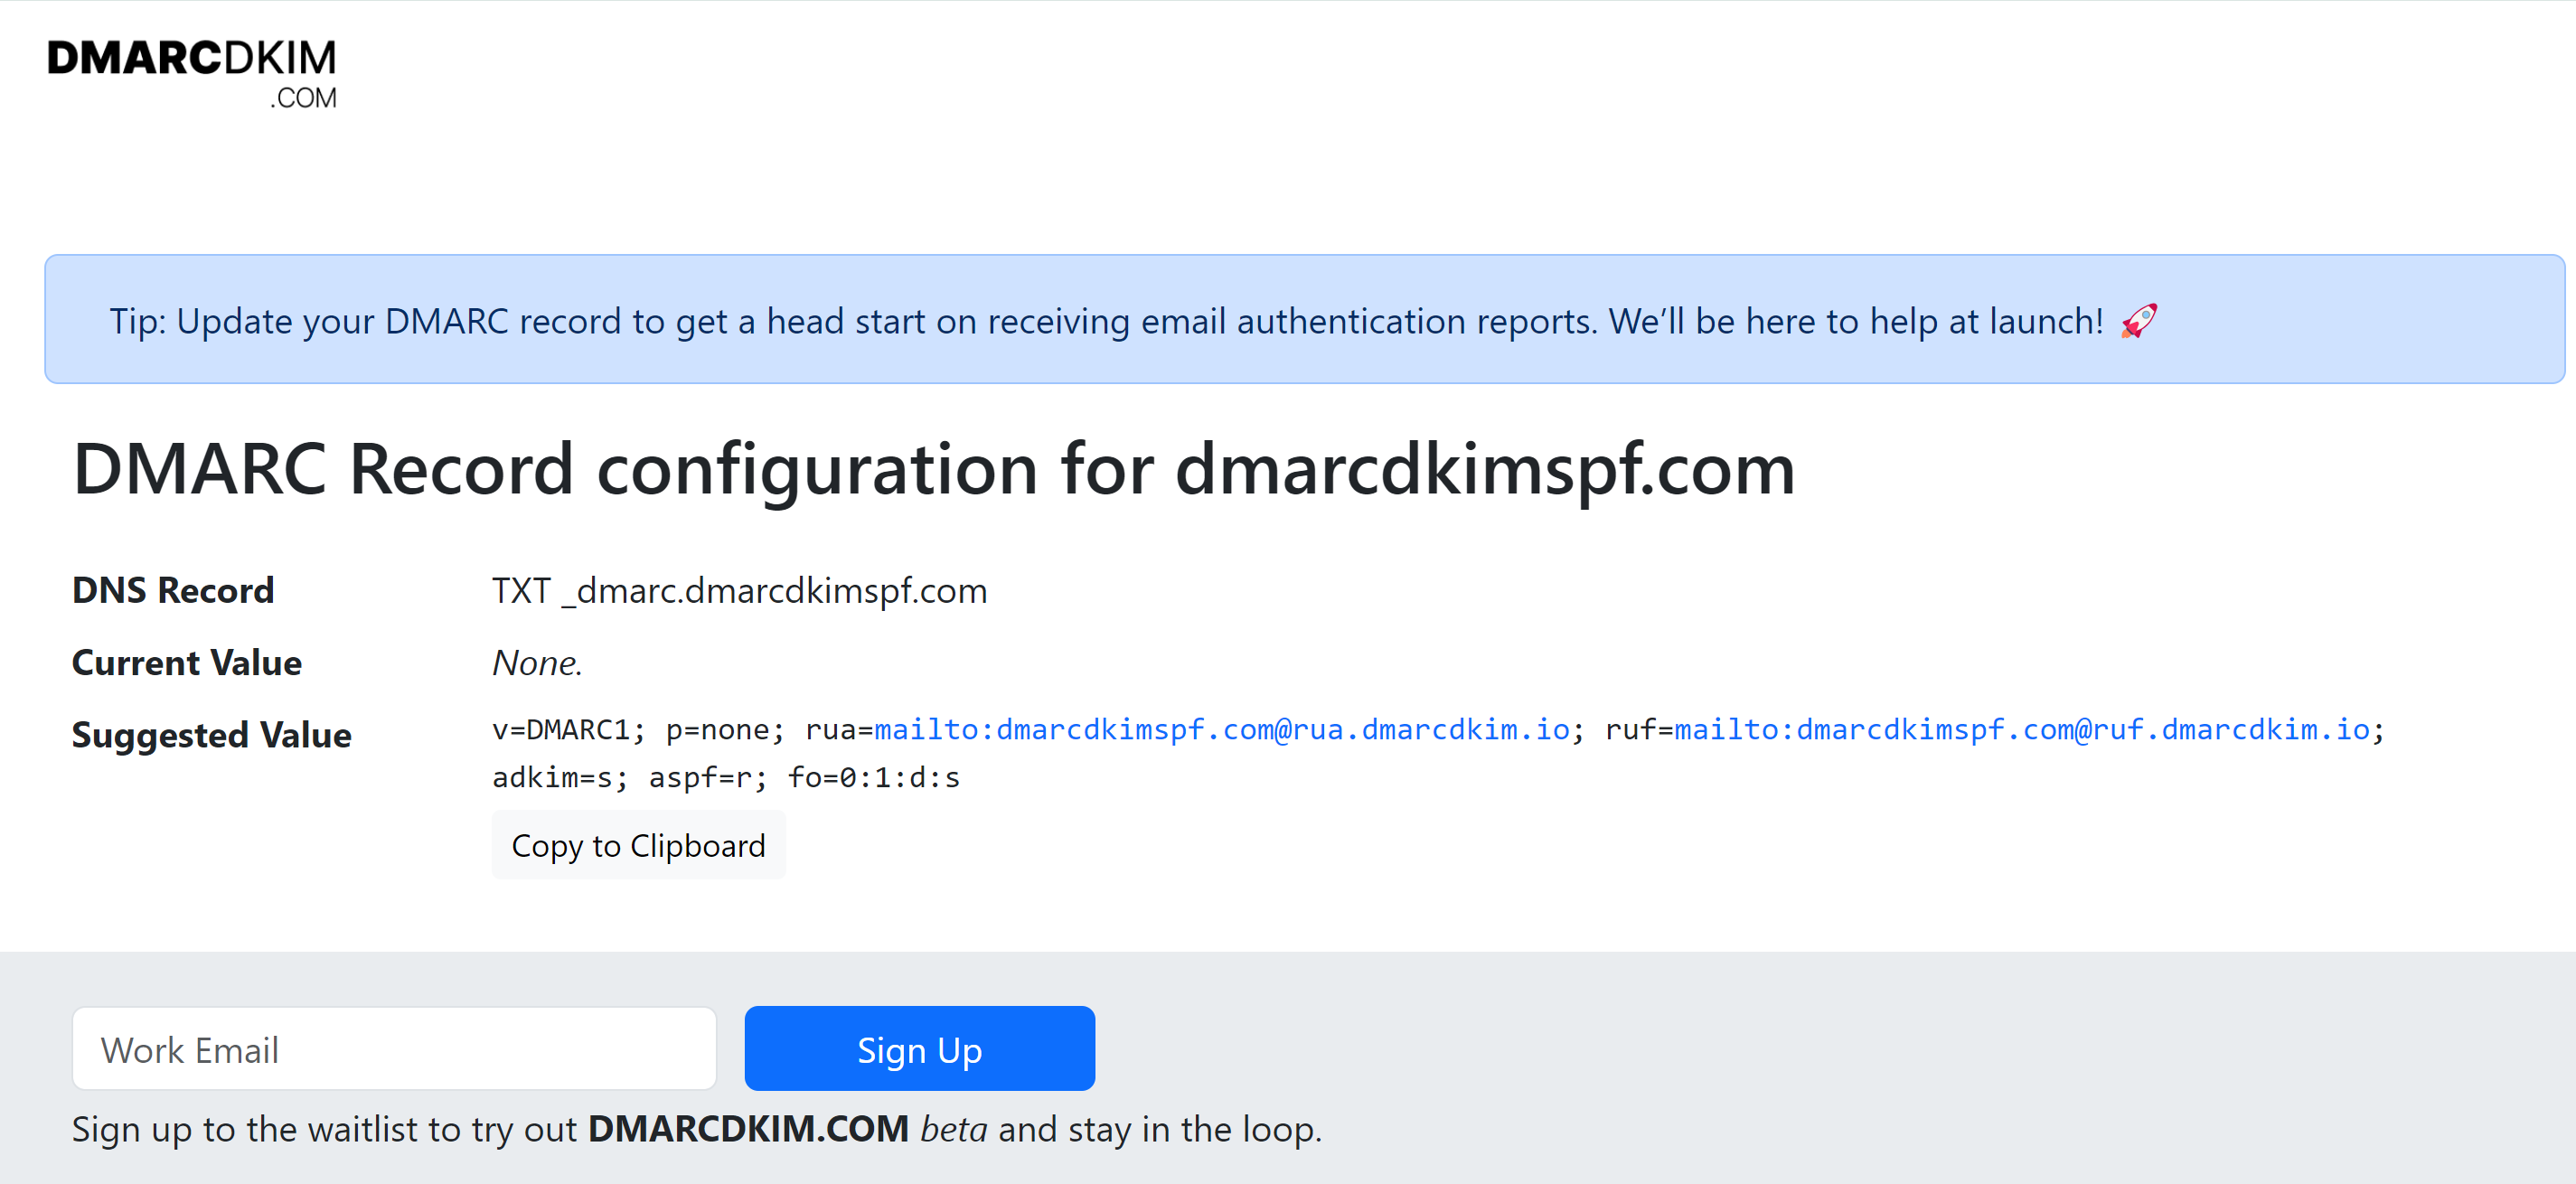
After adding all three CNAME records, set up the DMARC value. We recommend using the DMARC Tool to generate a strict DMARC policy for better deliverability and protection from email spoofing. Email marketing services do not provide the tools to leverage data from DMARC reports, hence, it is not as effective as tailored DMARC records.
To generate DMARC value, open the DMARC Check Tool.
Write your domain name and click Check.
-
The tool will give you a suggested DMARC value. Copy this value and record name, and paste it into the DNS provider.

-
Once the suggested DMARC value is added, return to SendGrid and click Verify.

-
If all records were added correctly, you should see a confirmation message on your screen and green tick marks with each record.

Sometimes the DNS records do not get authenticated immediately. This happens because the DNS provider or the email delivery services' server takes time to update the information.
According to SendGrid, 24 hours is the maximum waiting time for DNS records verification. You should receive the confirmation message within this time. However, if you don't get the authentication success message, contact the SendGrid support service for further assistance.
Check domain and follow the instructions to nail down your DMARC configuration.
No expert knowledge needed!


